Glen McGuire
-
Posts
1,984 -
Joined
-
Last visited
Content Type
Profiles
Forums
Gallery
Events
Everything posted by Glen McGuire
-
 Yes. he is now officially a steer and doing very well. At 7 months he's as big as his momma and still growing fast! Gonna be a large one.
- 134 replies
-
- 3
-

-
- Captain Kidd
- bottle
- (and 3 more)
-
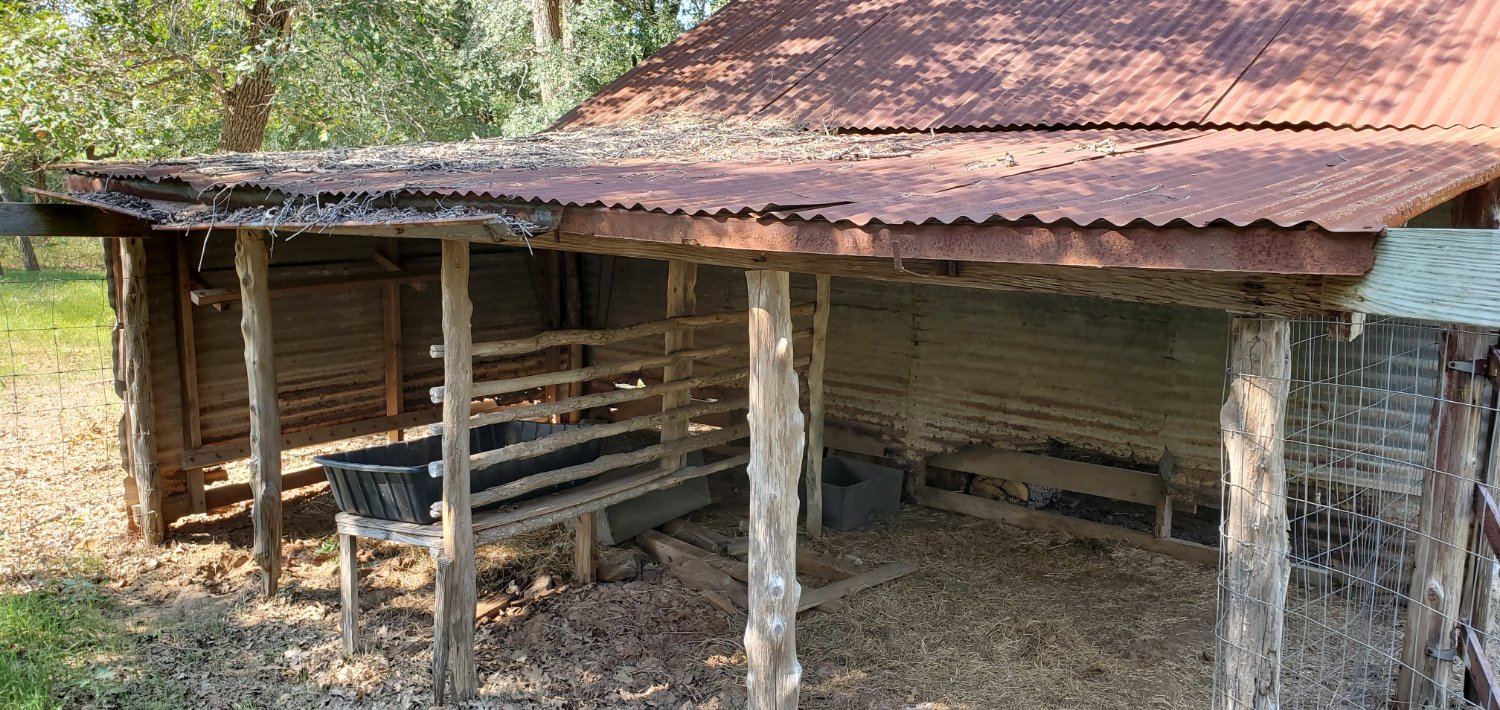
Speaking of cows, Keith. FYI, if you look at that picture of the old shed with the rusty awning and gutters above, the shallow bed of hay on the right is where I found Shiloh about an hour after he was born. It was a really cold day (cold for Austin anyway) and mama Dimples picked a good sheltered spot to have her baby.
- 134 replies
-
- 3
-
-
- Captain Kidd
- bottle
- (and 3 more)
-
Glad to have you aboard, Grant! The real celebrities never arrive at the start of the party, always fashionably late so they can make a grand entrance, right? 😃 I'll do some experimenting with your chalk and alcohol method and see what it looks like.
- 134 replies
-
- 4
-
-
- Captain Kidd
- bottle
- (and 3 more)
-
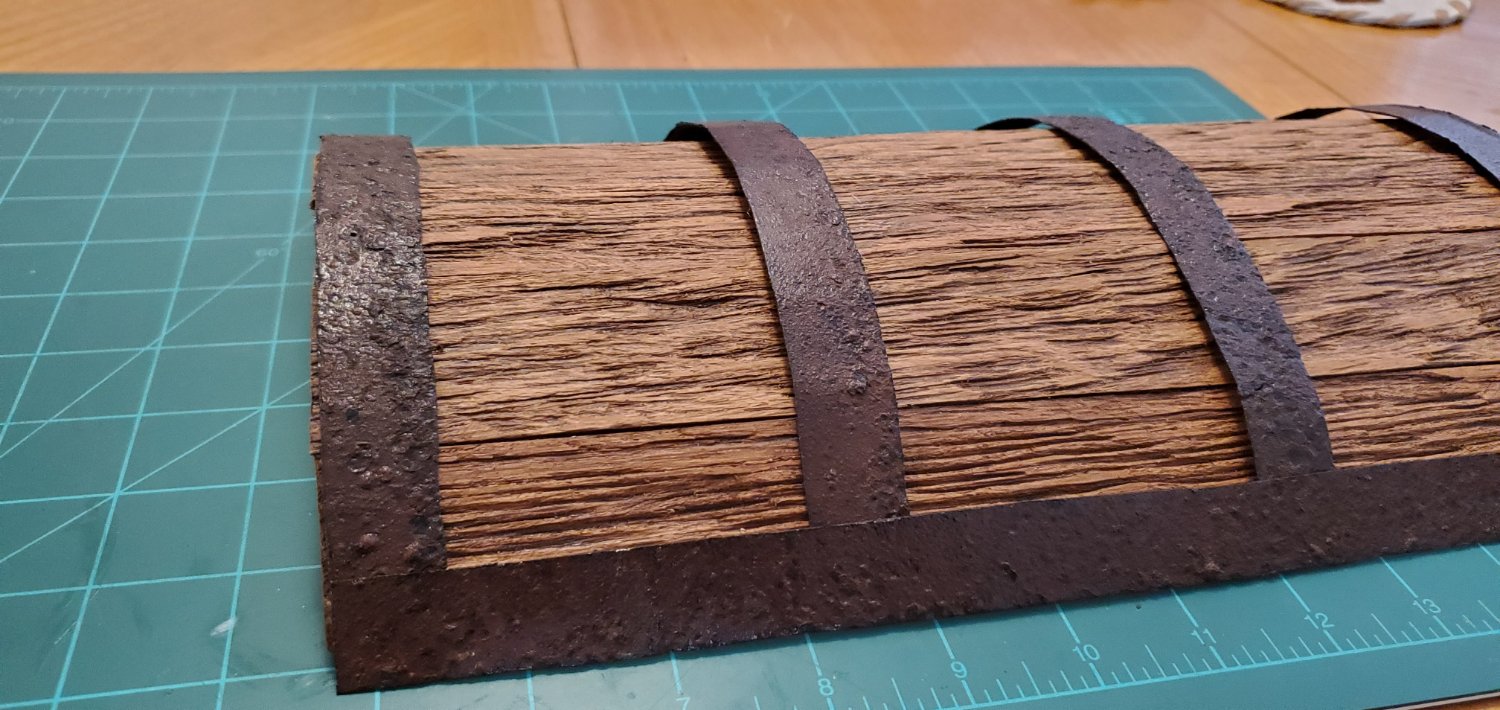
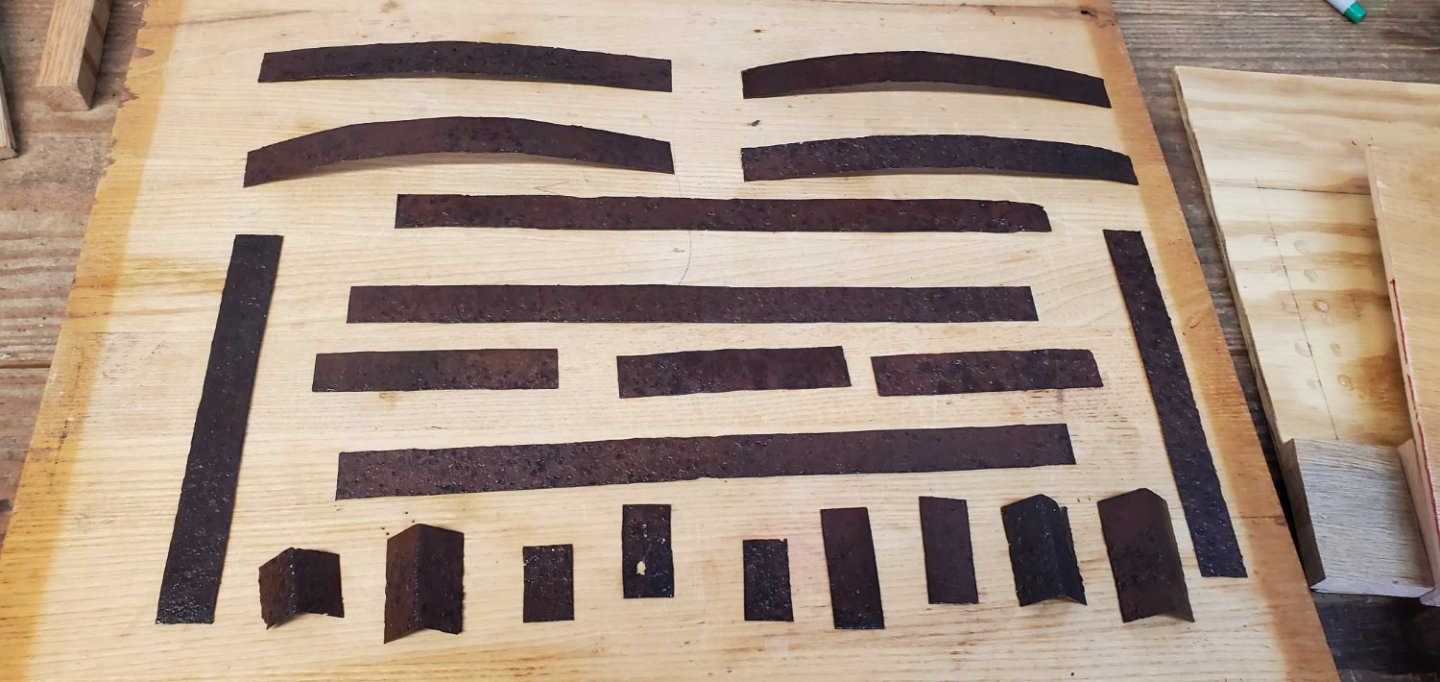
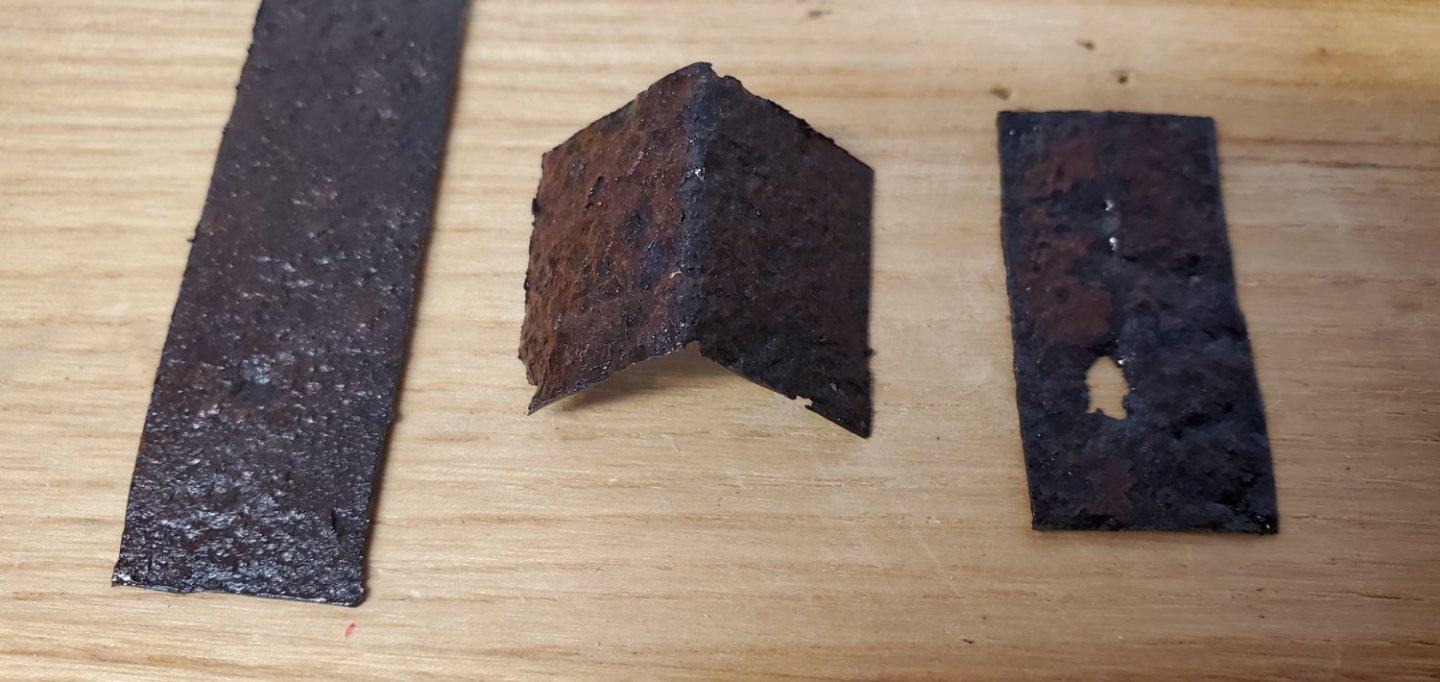
I cut the rusty gutter into strips and pieces using a dremel cutoff wheel. The first pic shows all the cut pieces; the 2nd is a closeup of a few; and the third is a dry-fit sneak peak at the lid. I think mother nature aged the metal to perfection for what I was looking for. I just painted the cut edges with a matching rust color and then sprayed everything with 2 layers of clear coat. I will probably use rusty nail heads to simulate the rivets since I've got an endless supply of them.

- 134 replies
-
- 9
-
-

-
- Captain Kidd
- bottle
- (and 3 more)
-
Next will be adding the metal straps and edge reinforcements that are typical for a pirate treasure chest. For those, I'm going to try cutting up a rusted gutter from that same old shed I mentioned above (2nd pic).

- 134 replies
-
- 5
-
-
- Captain Kidd
- bottle
- (and 3 more)
-
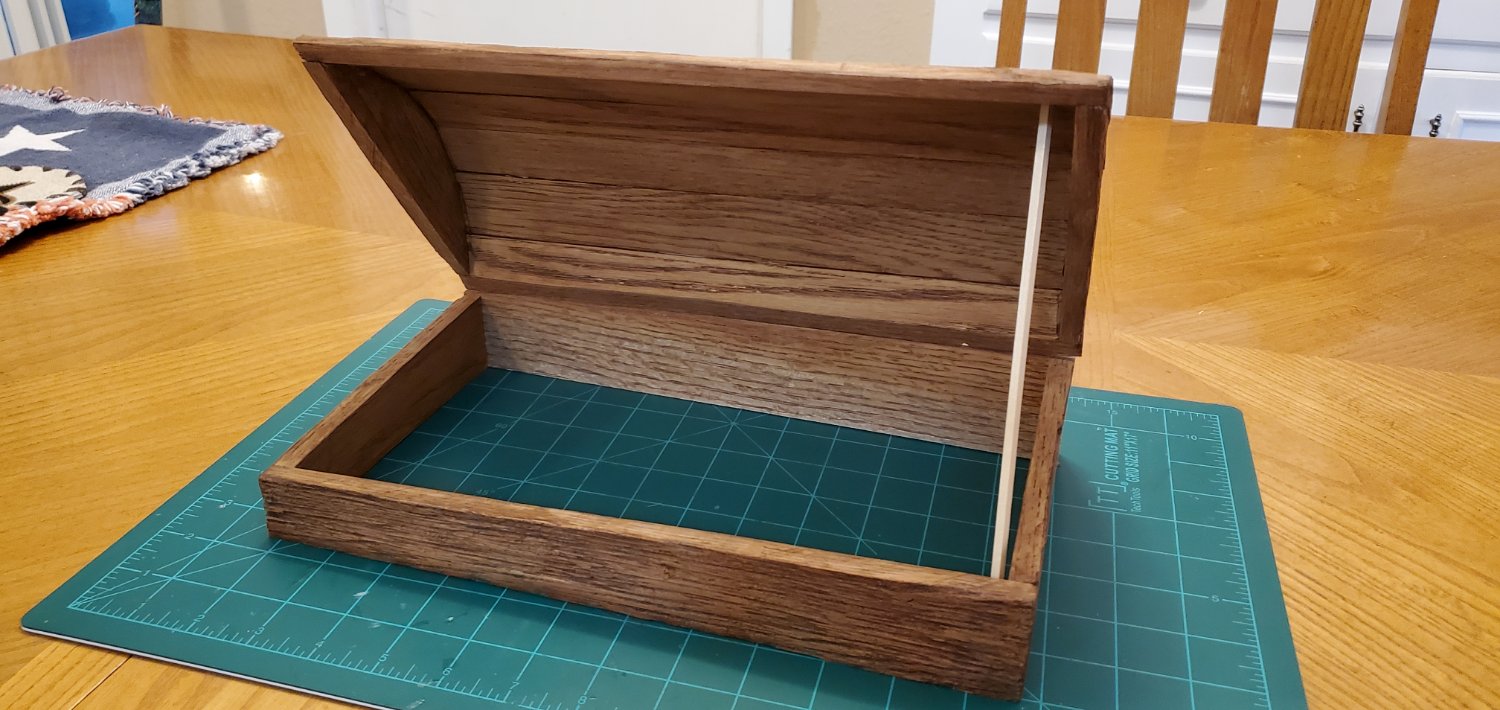
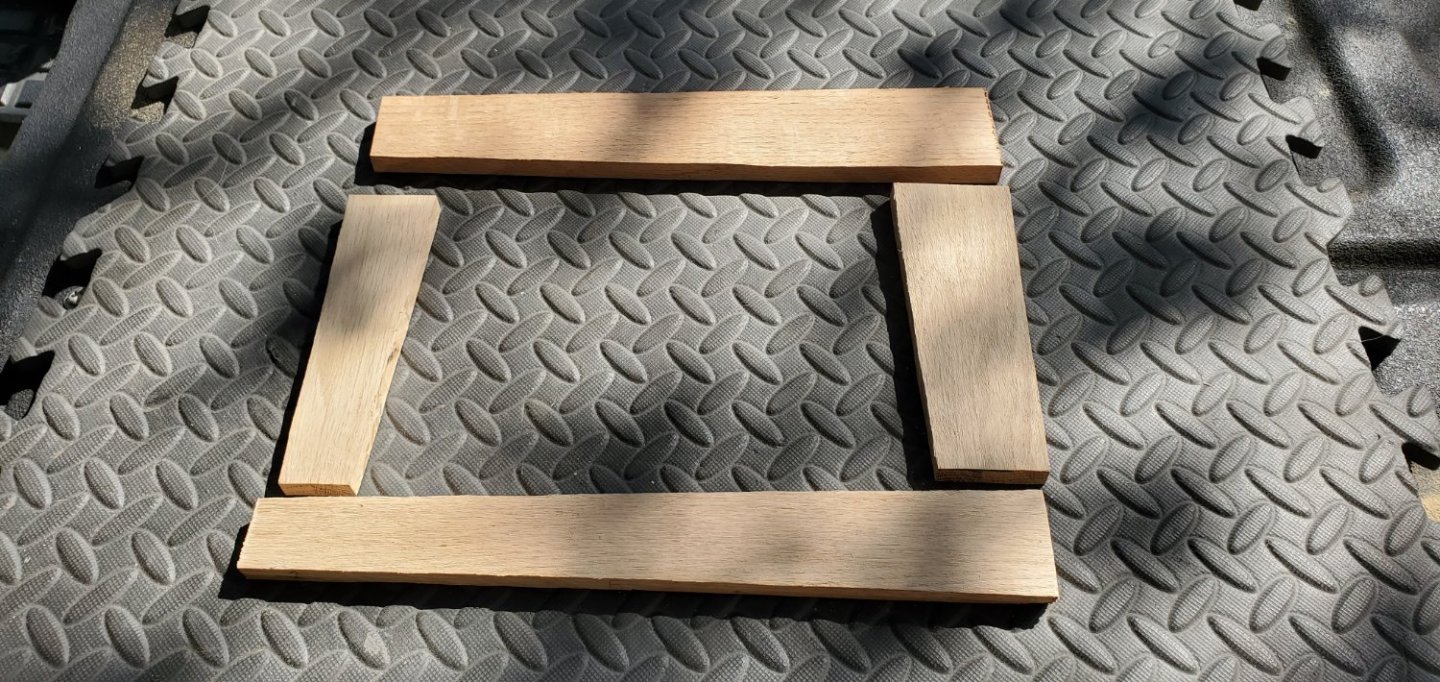
Thank you, Pat and Mike! I never know if these ideas are going to work or not, but thanks to the help from y'all and all the others here on MSW they have come out ok so far. I got all the pieces of the chest glued together and stained.


- 134 replies
-
- 4
-
-
- Captain Kidd
- bottle
- (and 3 more)
-
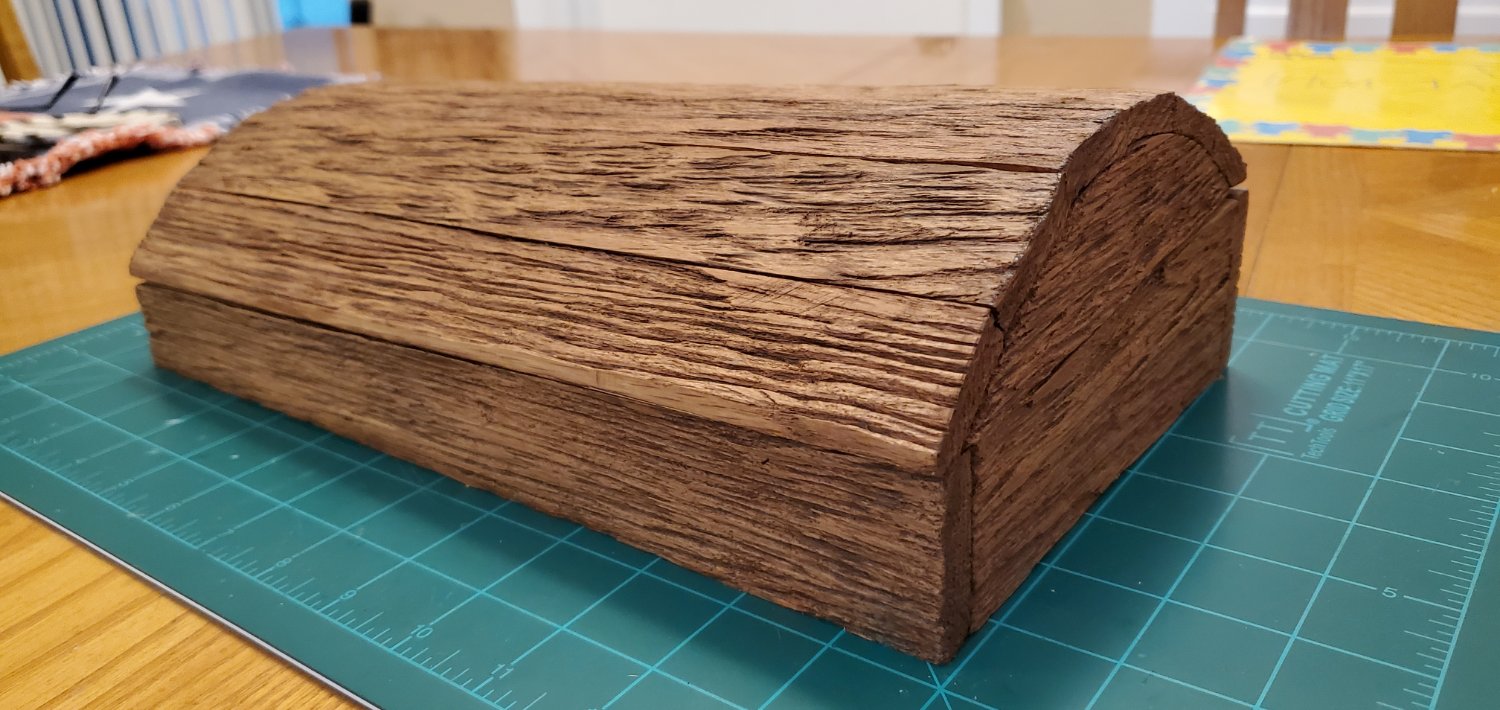
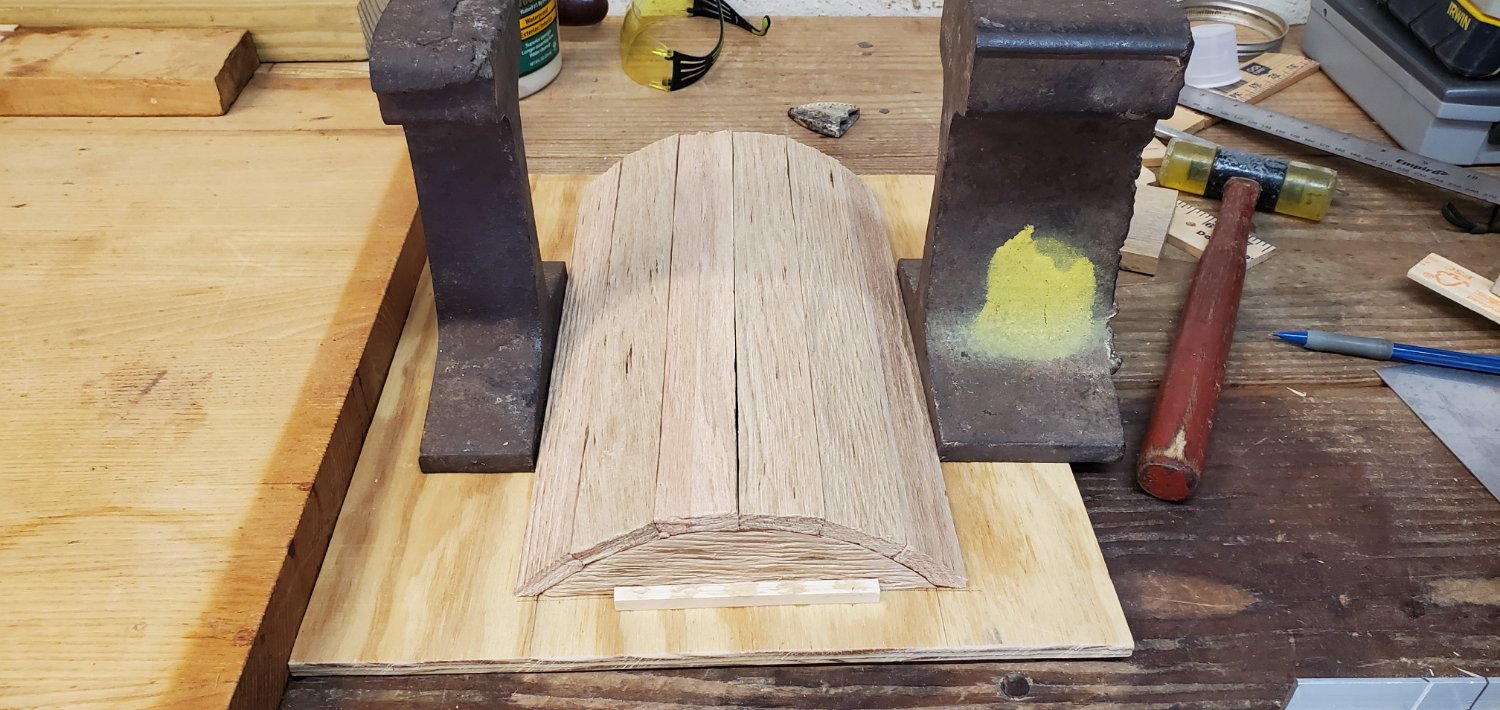
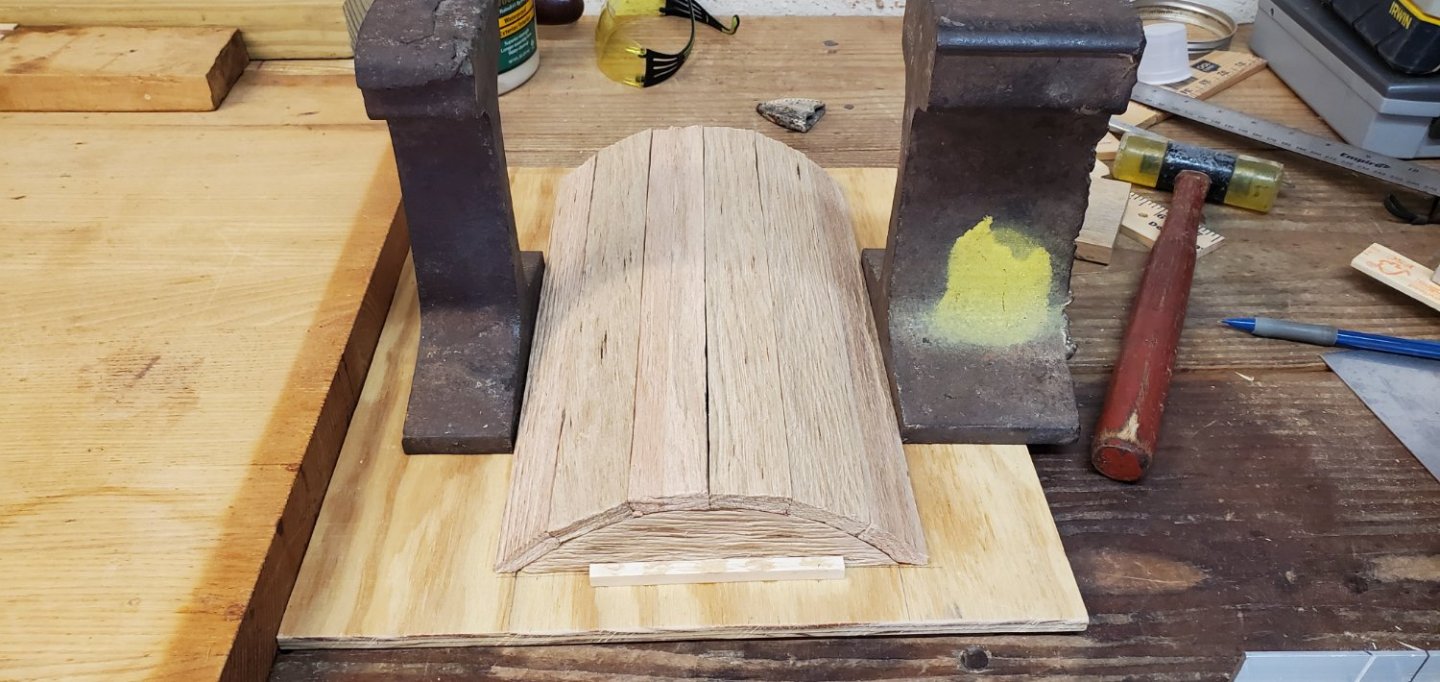
I used the same oak scraps for the lid and gave them the same angle grinder weathering treatment. The second pic is the makeshift gluing jig.
- 134 replies
-
- 8
-
-
- Captain Kidd
- bottle
- (and 3 more)
-
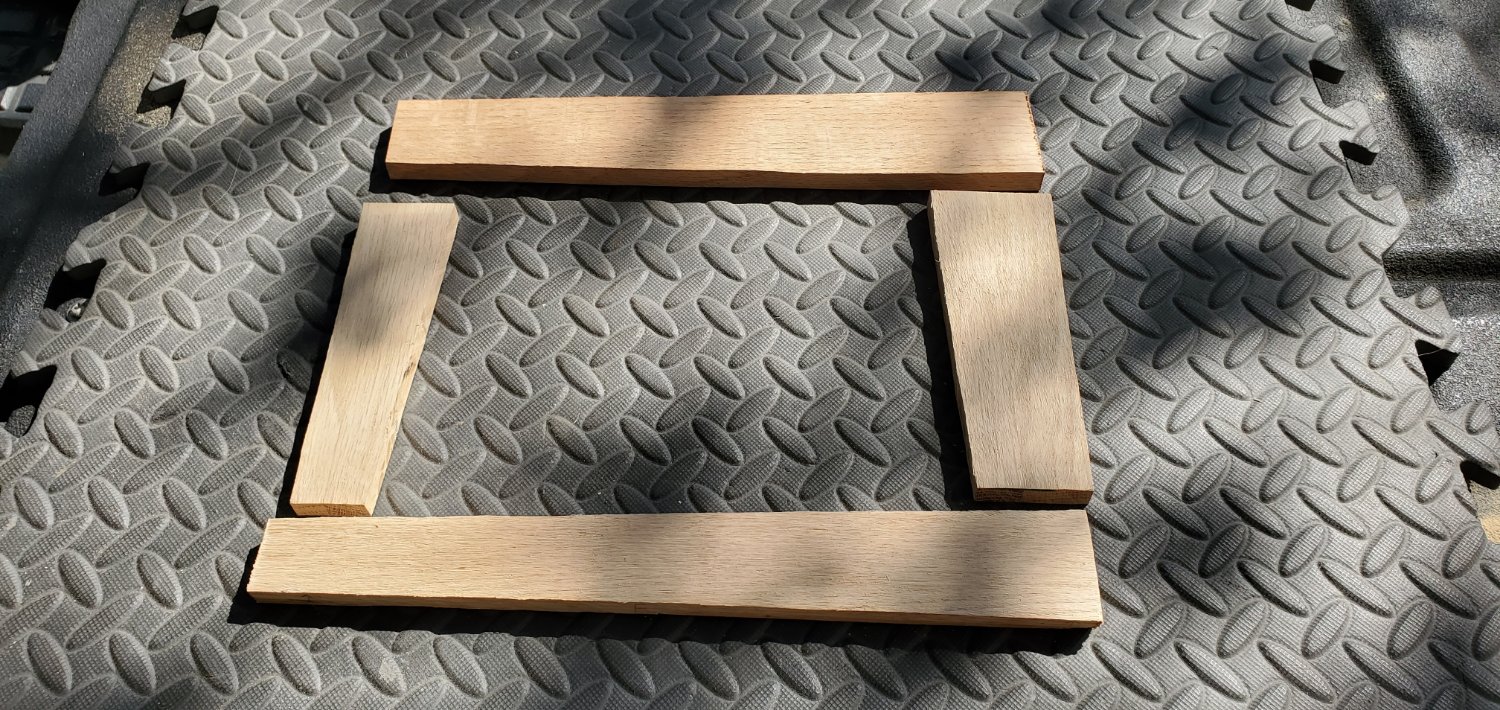
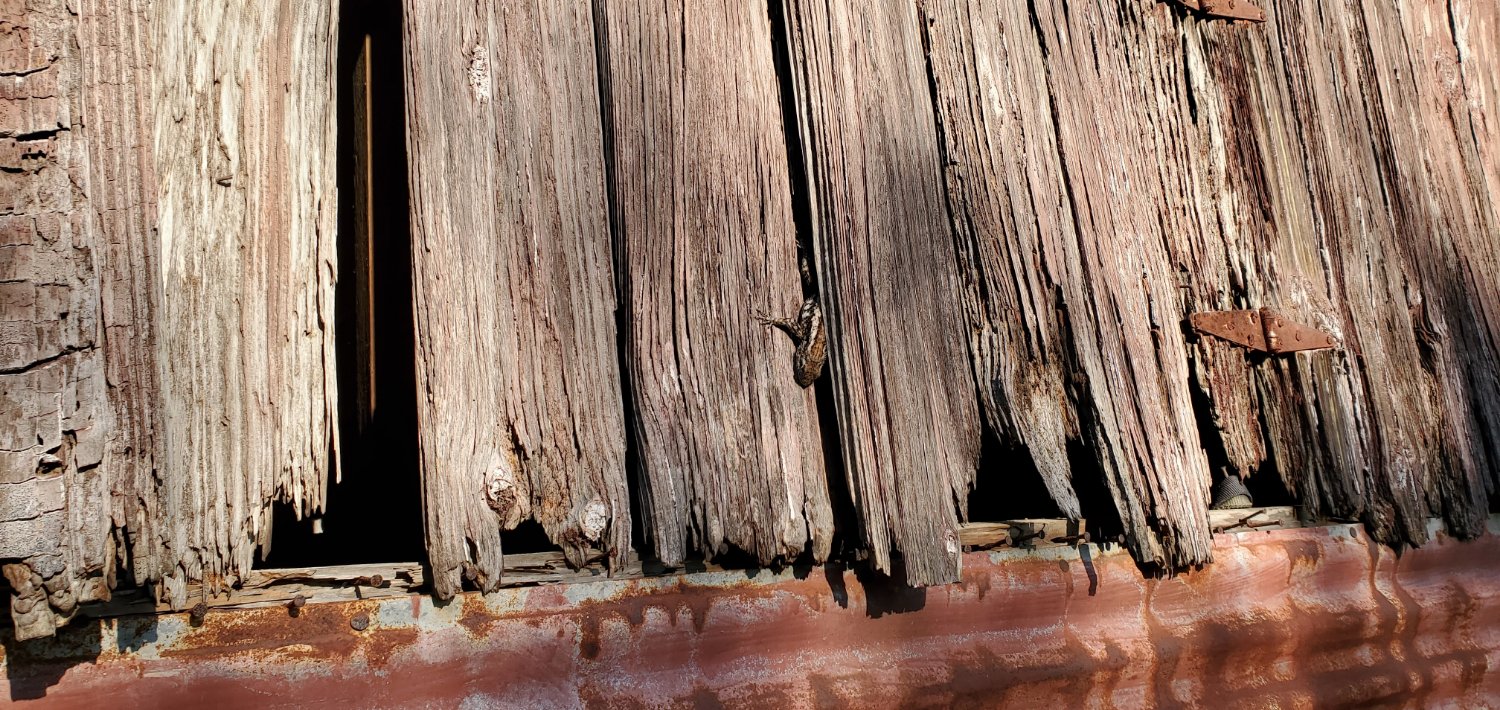
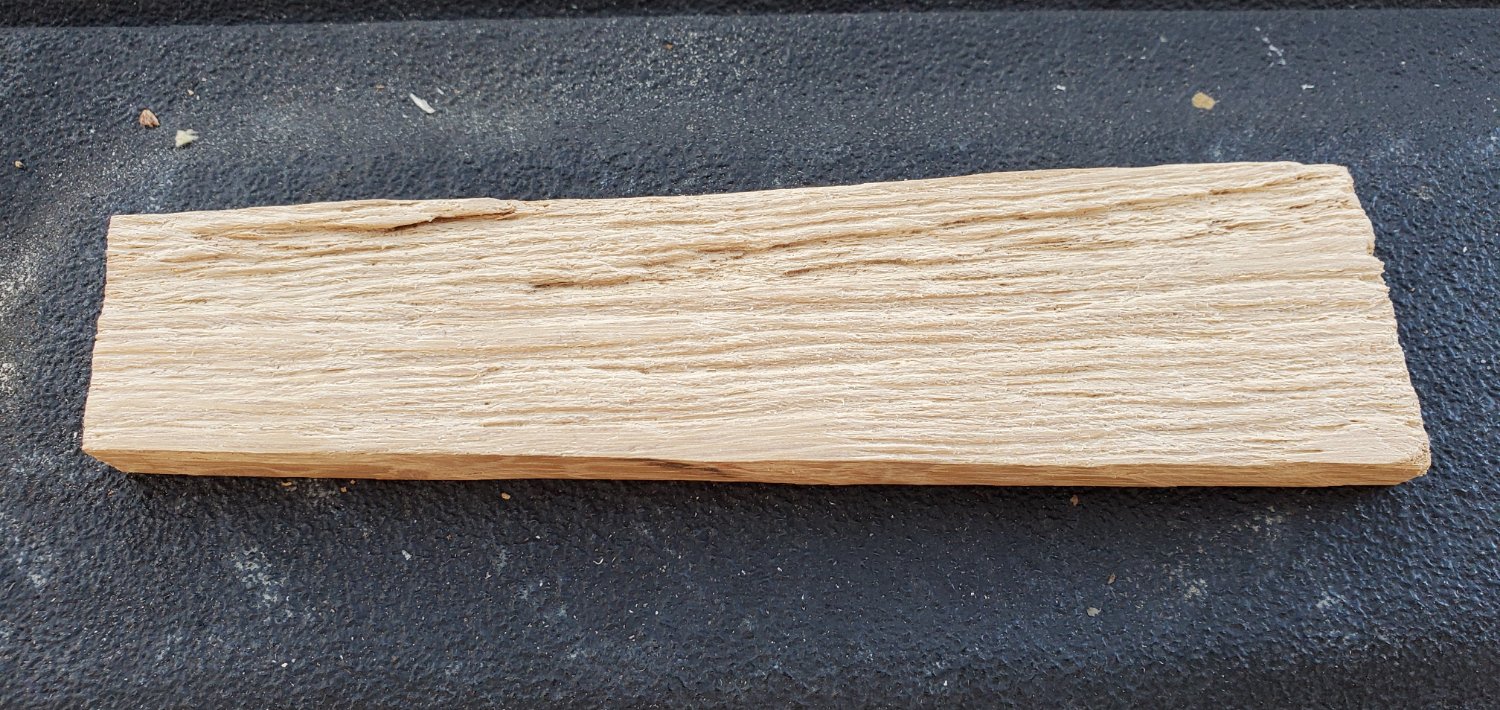
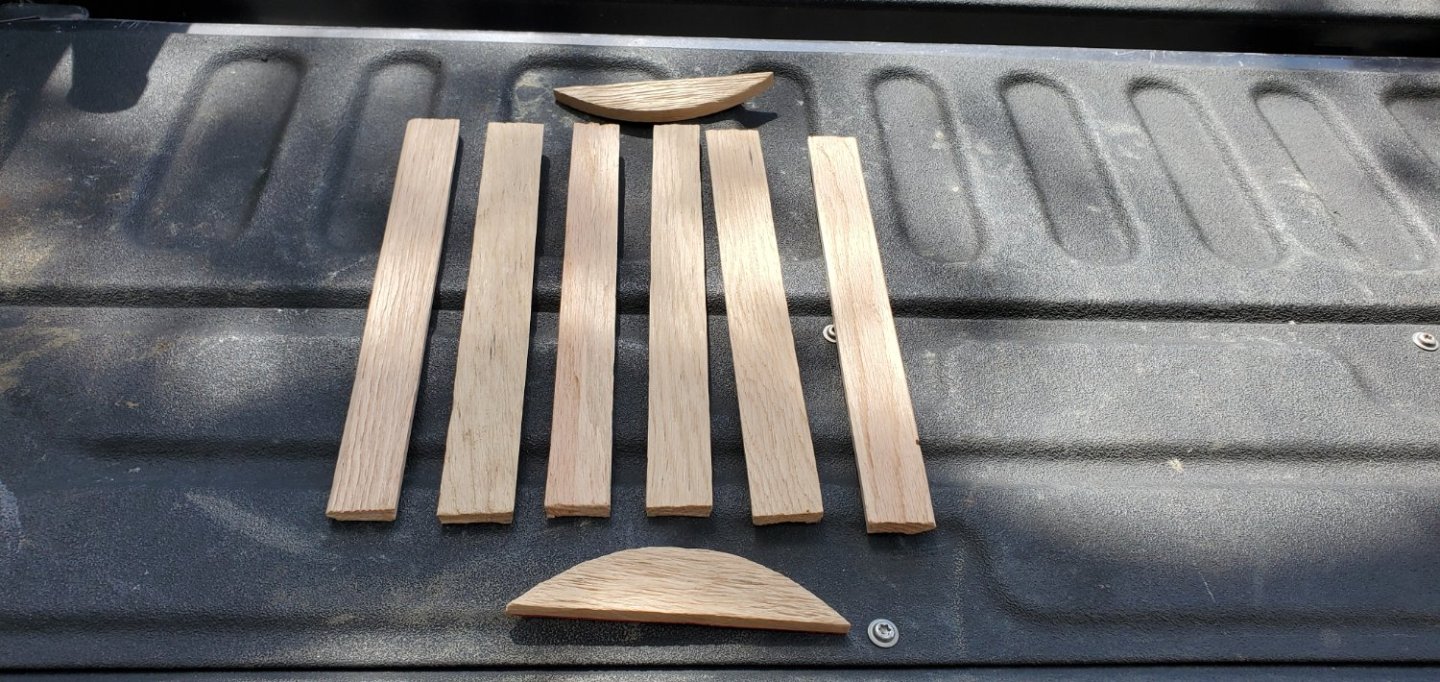
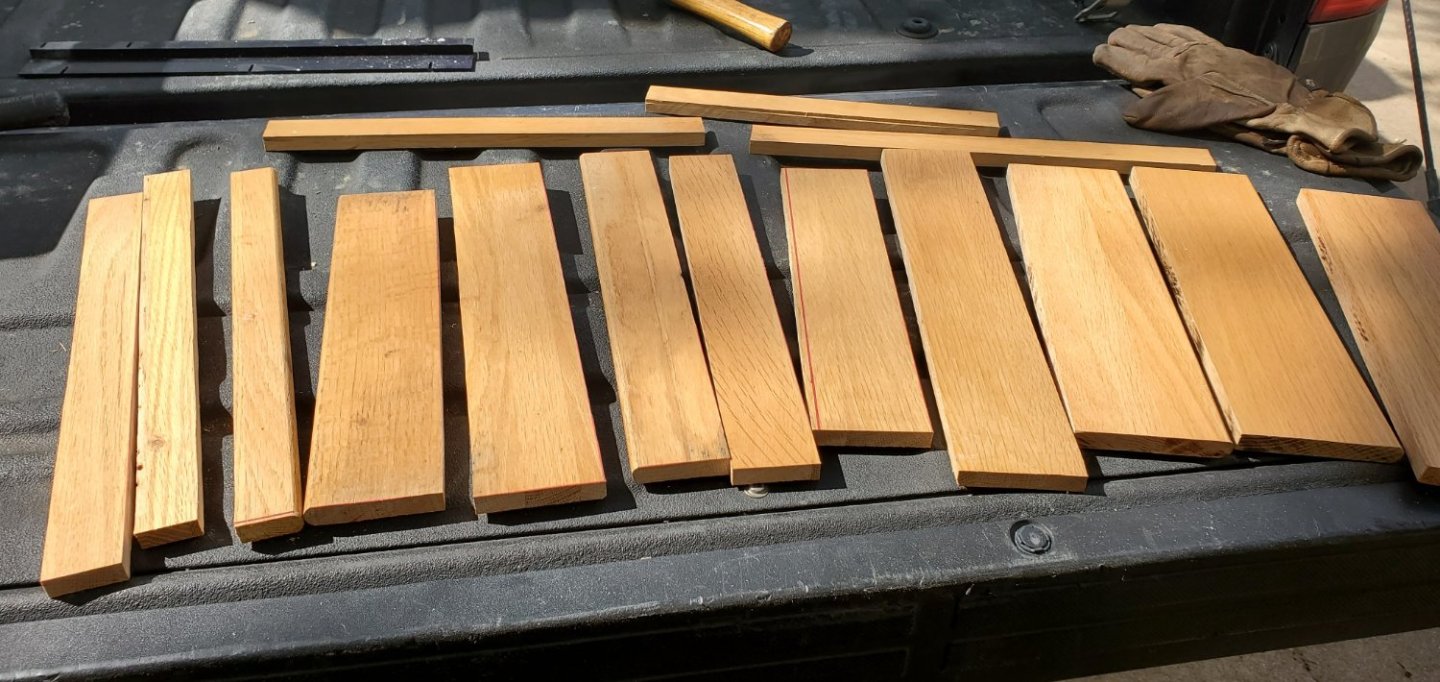
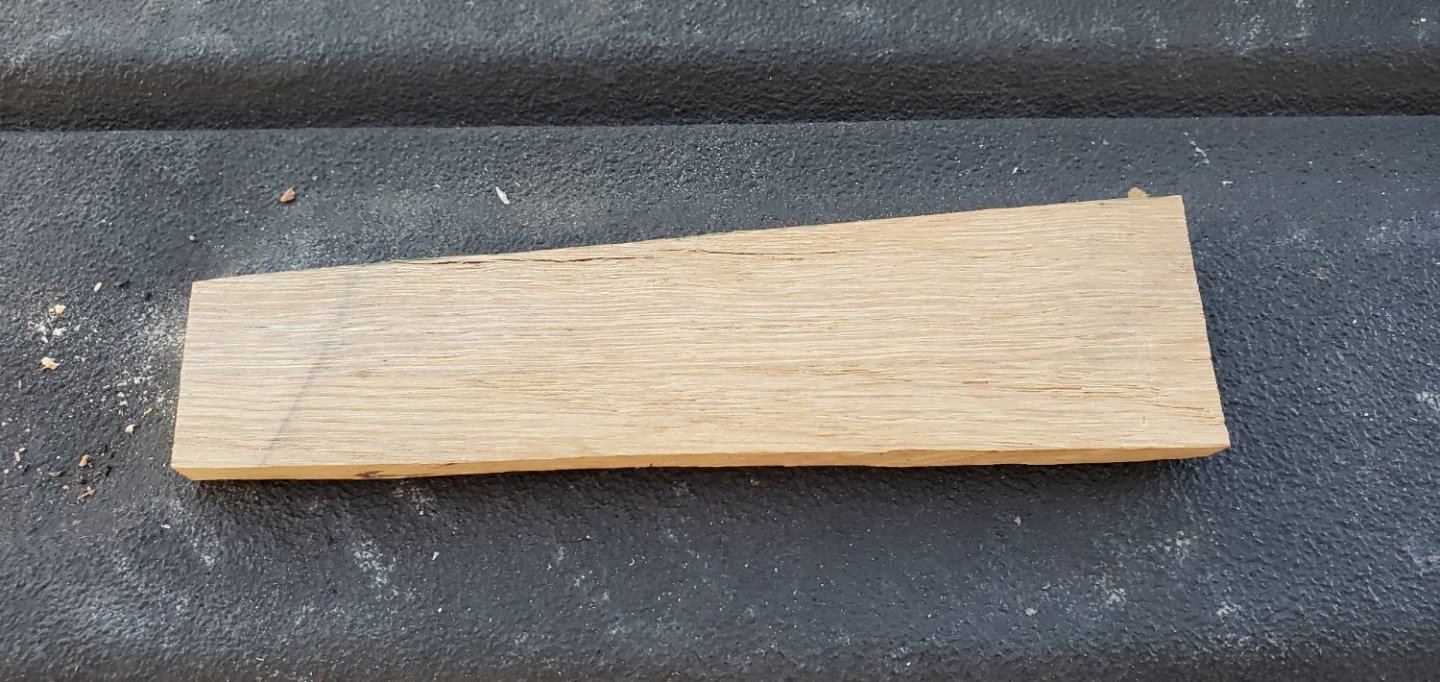
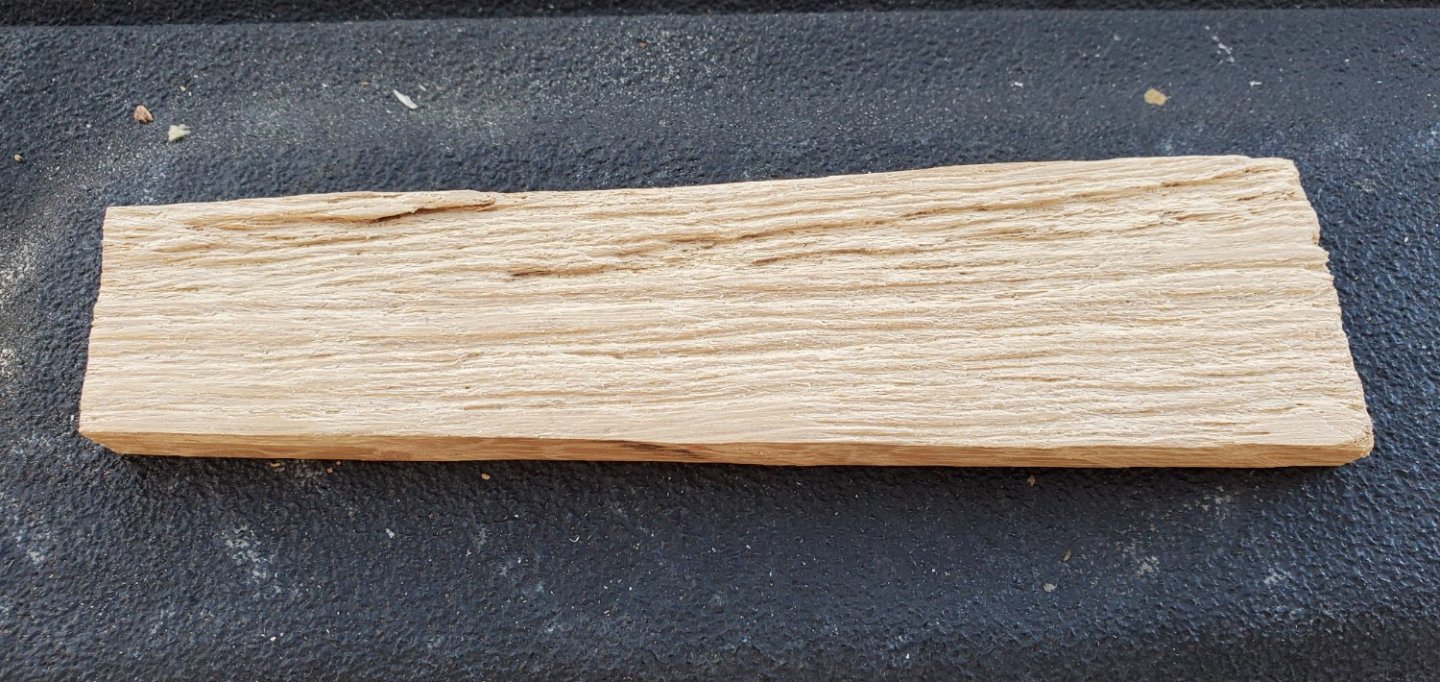
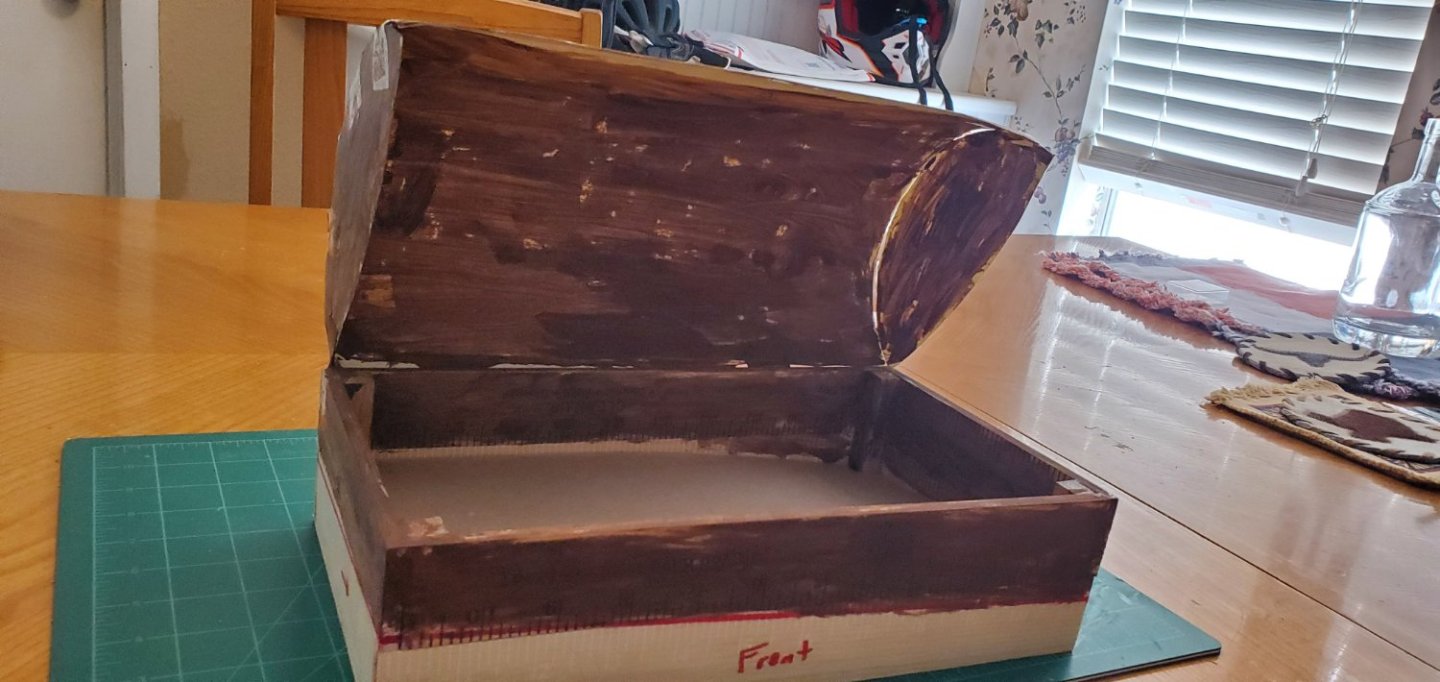
First up is the treasure chest. I’ll finish with the ship. A month ago I was getting rid of a cheap particle board/veneer desk when I noticed the sides of its drawers were actually made of oak. I cut them up into small planks knowing I’d eventually find a use for them. And now they will become the treasure chest for this project! Using the mockup pieces of yardstick as a template for the treasure chest sides, I cut four of the oak planks into their odd shapes to simulate the chest protruding from the sand at an off angle. Since the chest is supposedly 300+ years old, I wanted to weather the surface of the wood. For the inside of the chest, I wanted only mild surface aging since it would have been sealed shut and mostly protected from the elements. Borrowing some ideas from @gjdale and his amazing Shipyard at Foss’ Landing diorama, I used a stiff wire brush to give the wood a mildly roughened surface. For the outside surface, however, I wanted significant weathering with deep grooves. I’ve got an old shed on my ranch with wood planks that have the look I want. So I used my angle grinder with a wire brush attachment. Here’s the setup along with the before and after results.


- 134 replies
-
- 5
-
-
- Captain Kidd
- bottle
- (and 3 more)
-
I can breathe now!!! Whew!!! What an excellent job you did with the SHIPYARD streaking. That looks incredibly hard to do but your end result is very subtle and looks so realistic. Wow.
- 333 replies
-
- 11
-
-
Glad to have you on board, Mike. I always appreciate your help and insight!
- 134 replies
-
- 3
-
-
- Captain Kidd
- bottle
- (and 3 more)
-
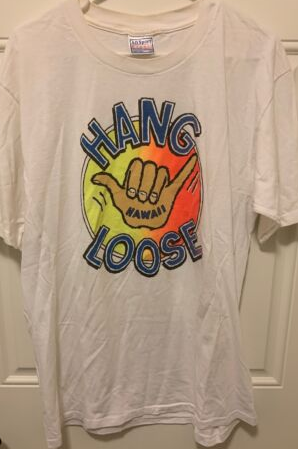
Thanks, Ian!! I've been on that Hana highway a few times. Gotta be one of the most scenic drives in the world, but also pretty nerve wracking when you're forced to play chicken with a semi on one of the countless one-lane bridges! Yikes!!! And I am also familiar with that hand sign. In fact, I used to have a t-shirt back in the 80s that looked just like this:
- 134 replies
-
- 3
-

-
-
- Captain Kidd
- bottle
- (and 3 more)
-
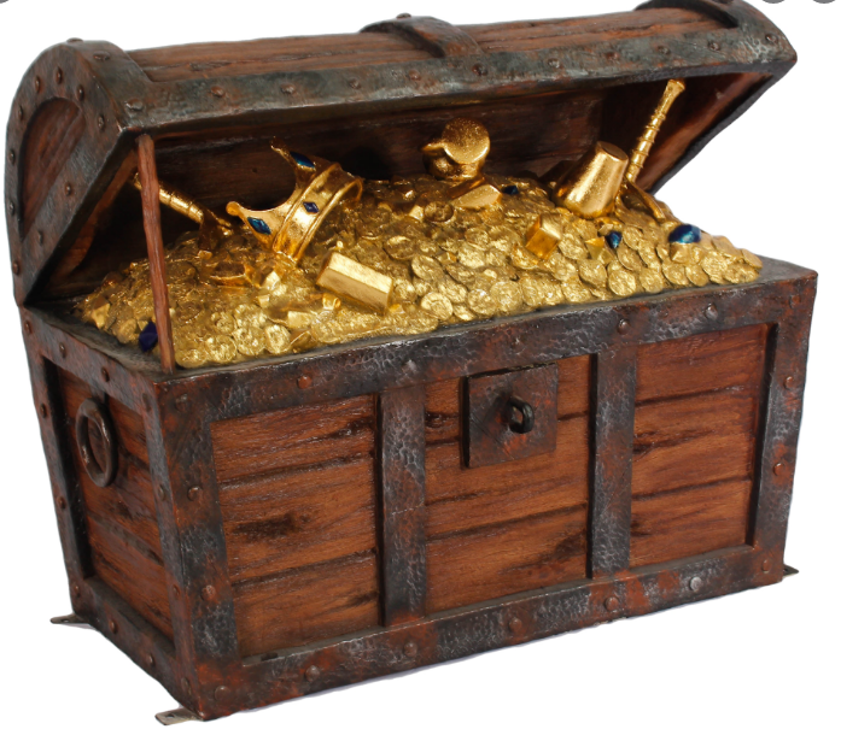
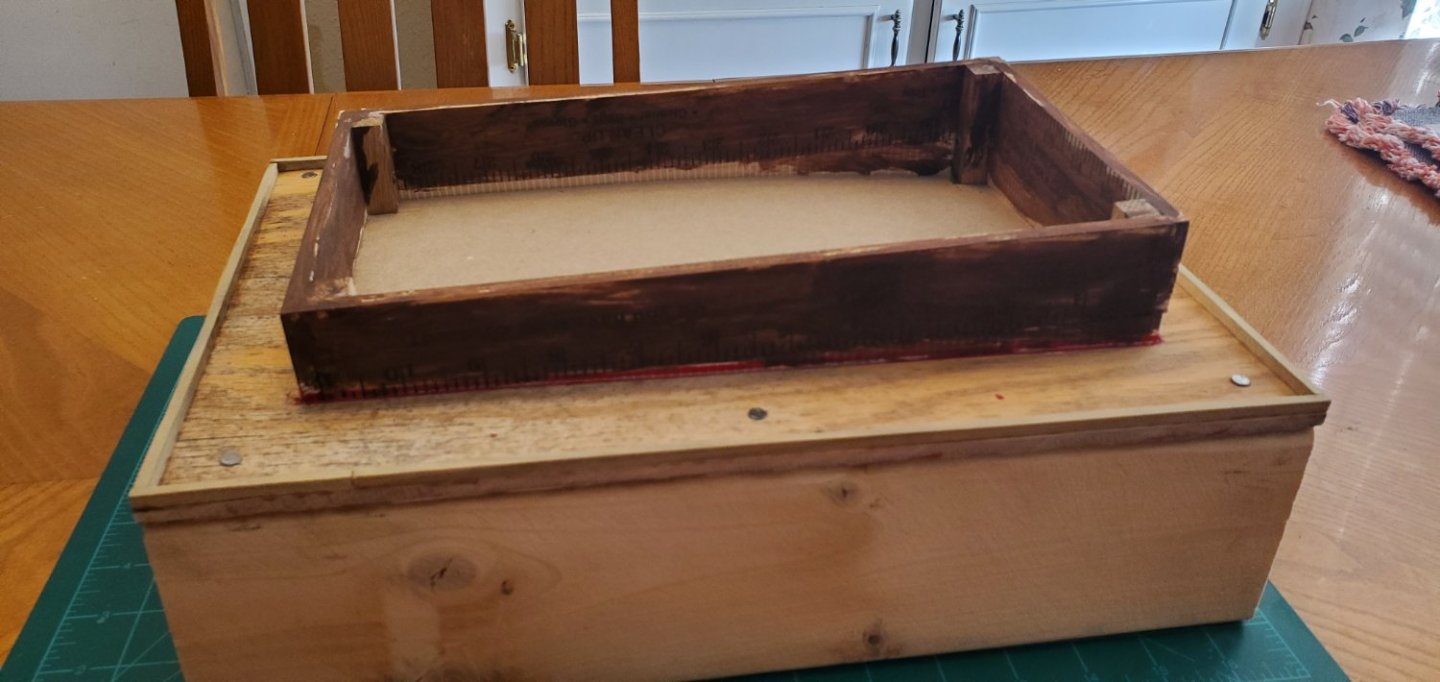
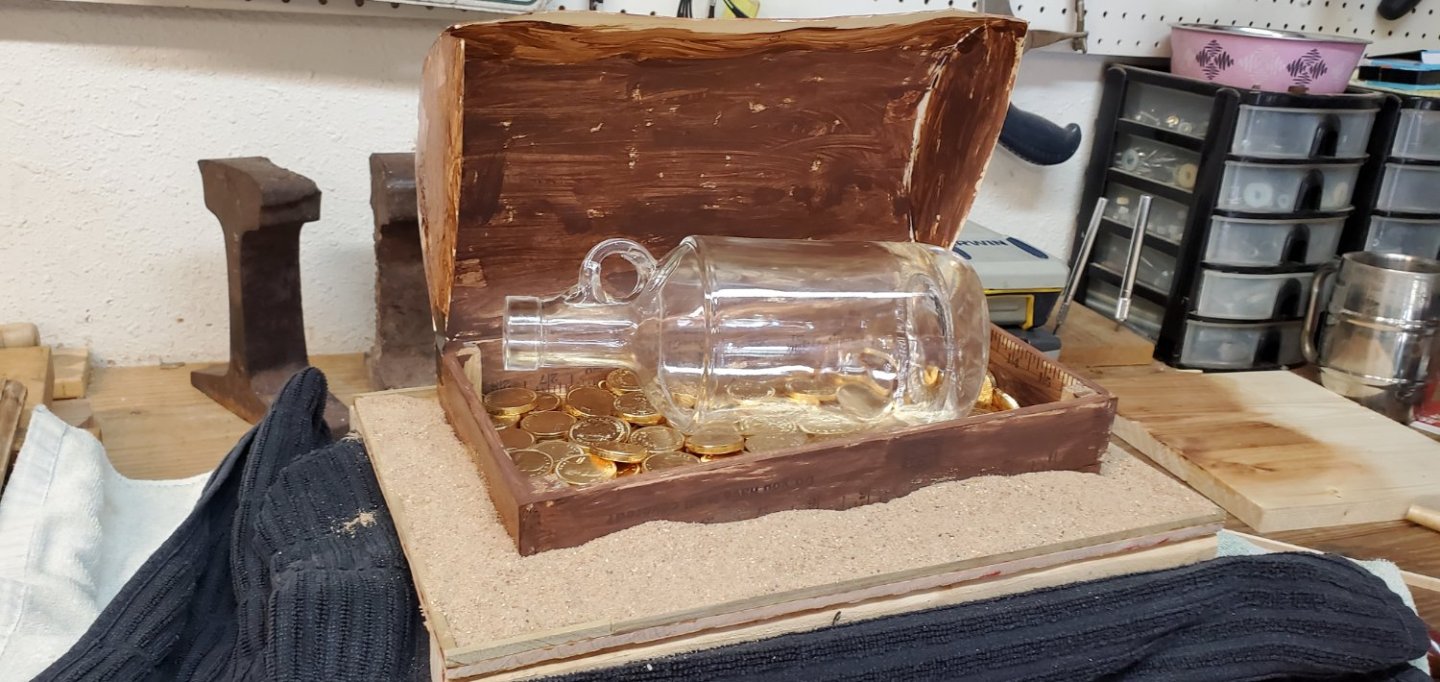
The SIB Concept: I know it’s more fake news than real history, but I always think of buried treasure when I think of pirates. In the case of Captain Kidd, he is one of the few pirates that actually did hide his treasure (or at least part of it). Some of his loot was found on Gardiner Island outside of New York before his hanging. But rumors that Kidd buried additional treasure at various points along the Jersey shore persist today. So with that as inspiration, I came up with the idea of putting the Adventure Galley in a bottle and the bottle resting inside an open treasure chest that is barely sticking out of the sand. See below for my crude powerpoint rendition of the concept. After looking at that picture, however, I wasn’t convinced the whole treasure chest scene was all that great of an idea. So I decided to do a mockup to see if it would look any better. I cut up a yardstick and made treasure chest sides. Then I made a base with a hole in it so I could adjust the angle of the chest. I figured it would look better if it was off kilter sticking out of the sand. Then I took a manila folder, shaped it into a lid, sloshed some brown paint on it, and taped to the chest in an open position. Next, I spread some sand around the base and I set my chosen bottle on a top of a bunch of chocolate gold coins. After looking at the completed mockup, I changed my mind and decided this could actually be a cool project - assuming of course that I can fashion a decent looking treasure chest peeking out from the sand. That remains to be seen. OK. That’s probably way more back story than anyone wanted to know. So without further ado, here we go!


- 134 replies
-
- 9
-
-
- Captain Kidd
- bottle
- (and 3 more)
-
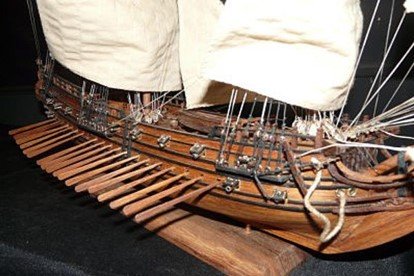
My original plan was to build a pirate ship after I finished the Independence, but then my son intervened with his junk ship request. So now it’s time to circle back and take on a pirate ship. I wanted a pirate with an interesting story as well as an interesting ship. After considerable research, I decided on Captain Kidd’s Adventure Galley. I was intrigued by his personal story of pirate hunter turned pirate. Plus, the Adventure Galley was quite a unique ship. Here’s some background on the pirate, his ship, and the SIB concept I have in mind. The Pirate: Captain Kidd’s story is fascinating, although the particular details differ depending on the source. Basically, he was a pirate hunter turned pirate. He began as privateer commissioned by several noble lords of England (including King William III) to hunt pirates. He weighed anchor in the fall of 1696 and over the course of the next couple of years, captured several ships. In 1698, he took his greatest prize, the 400-ton Quedah Merchant, which was an Indian ship hired by Armenian merchants and carried a large treasure of gold, silver, silks and other valuables. Shortly afterwards, Kidd was declared a pirate by the same English Government that had given him his commission. By some accounts, it was because the Government’s view of privateering had changed. Others blamed it on his poor treatment of captured crewmen. Still others insisted that the East India Company, which had ties to the Quedah Merchant, pressured the crown as retaliation for Kidd’s capture of their prized ship. Regardless, he was lured to Boston with a false promise of clemency, but not before he supposedly stashed much of his treasure near Long Island, NY. After surrender, Kidd was extradited to London in 1701 and hung for piracy and murder. The Ship: Captain Kidd’s main ship was called the Adventure Galley. It was launched in 1696 and purchased by Kidd a year later. It was a 284 ton, 3-masted frigate equipped with 34 cannons and designed for a crew of 150 men. After capturing the Quedah Merchant, Kidd scuttled the Adventure Galley and took over the Indian ship, renaming it the Adventure Prize. I found the Adventure Galley unique because it was a hybrid, similar in a way to the steam/sail ships of the mid and late 1800s. Kidd’s ship featured square sails AND two banks of oars. The oars gave it maneuverability in calm seas – theoretically a significant advantage in combat. There are a number of fully assembled Adventure Galley models for sale by various makers. I find it interesting that most do not show the oars or even have ports for them. However, a company in Madagascar called Le Village displays a model on their website that does include the bank of oars. See below for a picture of the Le Village version. I will base my Adventure Galley loosely on their version but likely add some elements from other models and illustrations.
- 134 replies
-
- 8
-
-
- Captain Kidd
- bottle
- (and 3 more)
-
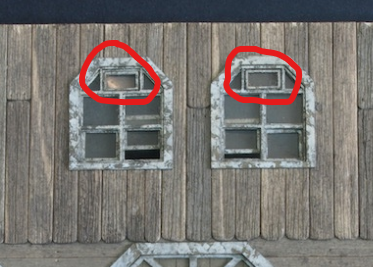
Out of curiosity, what are these 2 small windows with the frame inside a frame? At first I thought they might be window AC units but that didn't make sense to me. Are they hinged windows that would pivot up to partially open?
- 333 replies
-
- 10
-
-
Nice progress! And glad to see you back in the shipyard, Mike!
-
Mike, what a superb build and fantastic presentation! I love what you did with the water, in particular the froth at the bow. Very realistic! Congratulations on a beautiful work of art!!!
-
I agree with your choice of "less is more" with the nail holes. I also love the ragged edges of the board ends. So well done!!

- 333 replies
-
- 13
-
-
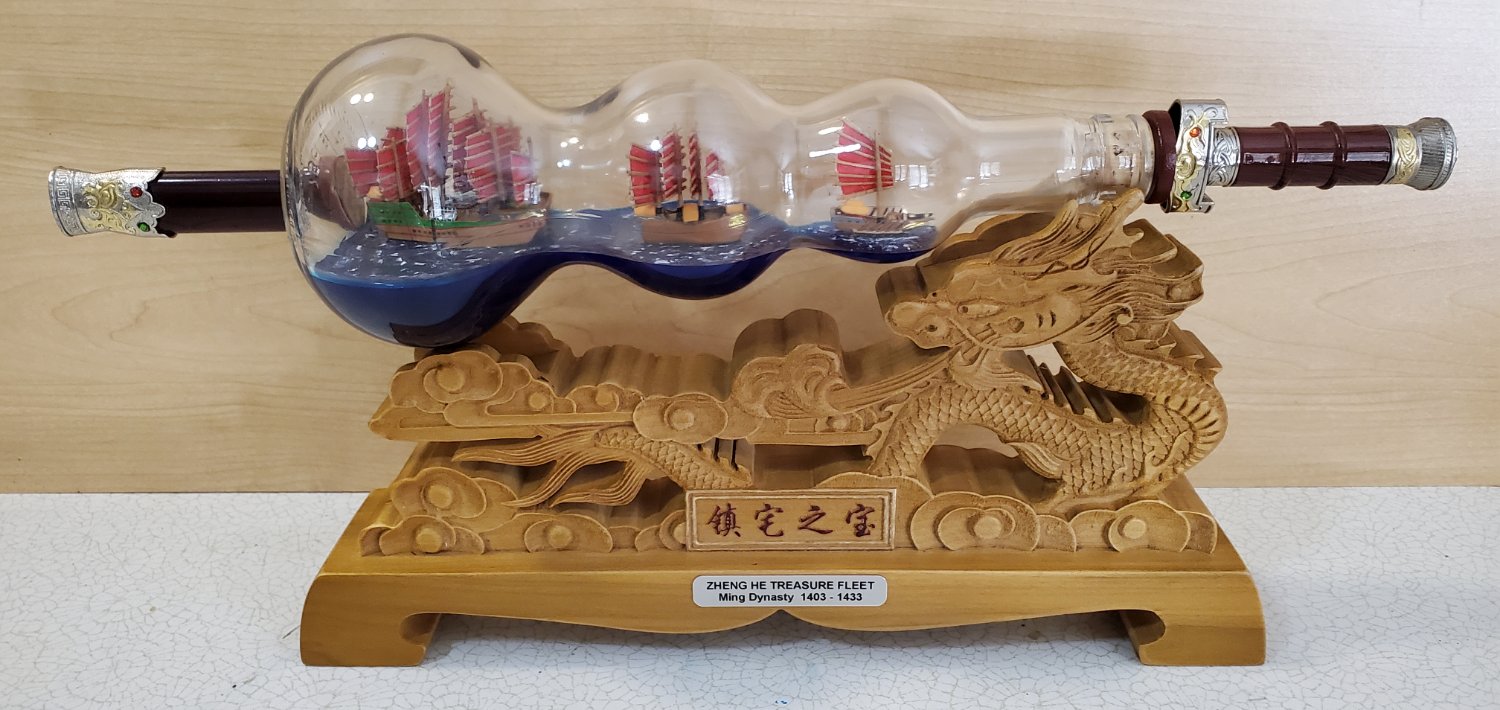
@Ian_Grant, @Alva004 Thank you for the kind words and thanks even more for following along. I fell like everyone here is a contributor to the project!
- 194 replies
-
- 3
-
-
- Bottle
- Treasure Fleet
- (and 3 more)
-
Hey Keith - Literally minutes after posting the finished pics of Zheng He to the gallery I took off to southern California for a quick dirt bike riding trip. Just got back last night. So I guess that was a small break, right? Actually, I've got an idea for the next SIB project but need to play around with some things to see if I think it will really work or if it's just a dumb idea.
- 194 replies
-
- 2
-
-
- Bottle
- Treasure Fleet
- (and 3 more)
-
Thank you Steven and Pat. It's great to have both of y'all from down under following along and providing your insight!!
- 194 replies
-
- 2
-
-
- Bottle
- Treasure Fleet
- (and 3 more)
-
Thank you, Mike and Phil. I really appreciate y'all following along.
- 194 replies
-
- 4
-
-
- Bottle
- Treasure Fleet
- (and 3 more)
-
Thank you Grant, Keith, and Mark for the kind words. It's been an interesting journey going from my son's innocuous comment last May of, "Hey dad, you should do a junk ship in a bottle" to this! Much appreciation to all the talented MSW people that followed along the way and offered likes, encouragement, comments, and suggestions - @Landlubber Mike, @John Fox III, @Ian_Grant, @BANYAN, @GrandpaPhil, @ccoyle, @Roger Pellett, @Snug Harbor Johnny, @Louie da fly, @Charter33, @Alva004, @Prowler901, @Knocklouder, @French Mr Bean, @Aoi, @shadowcaster, @Siggi52, @Baker, @Paul Le Wol, @Harvey Golden, @robdurant, @modeller_masa. Not only do you make the final product better, you also add to the enjoyment of the work.
- 194 replies
-
- 13
-

-
-
- Bottle
- Treasure Fleet
- (and 3 more)