-
Posts
1,957 -
Joined
-
Last visited
Content Type
Profiles
Forums
Gallery
Events
Everything posted by Glen McGuire
-
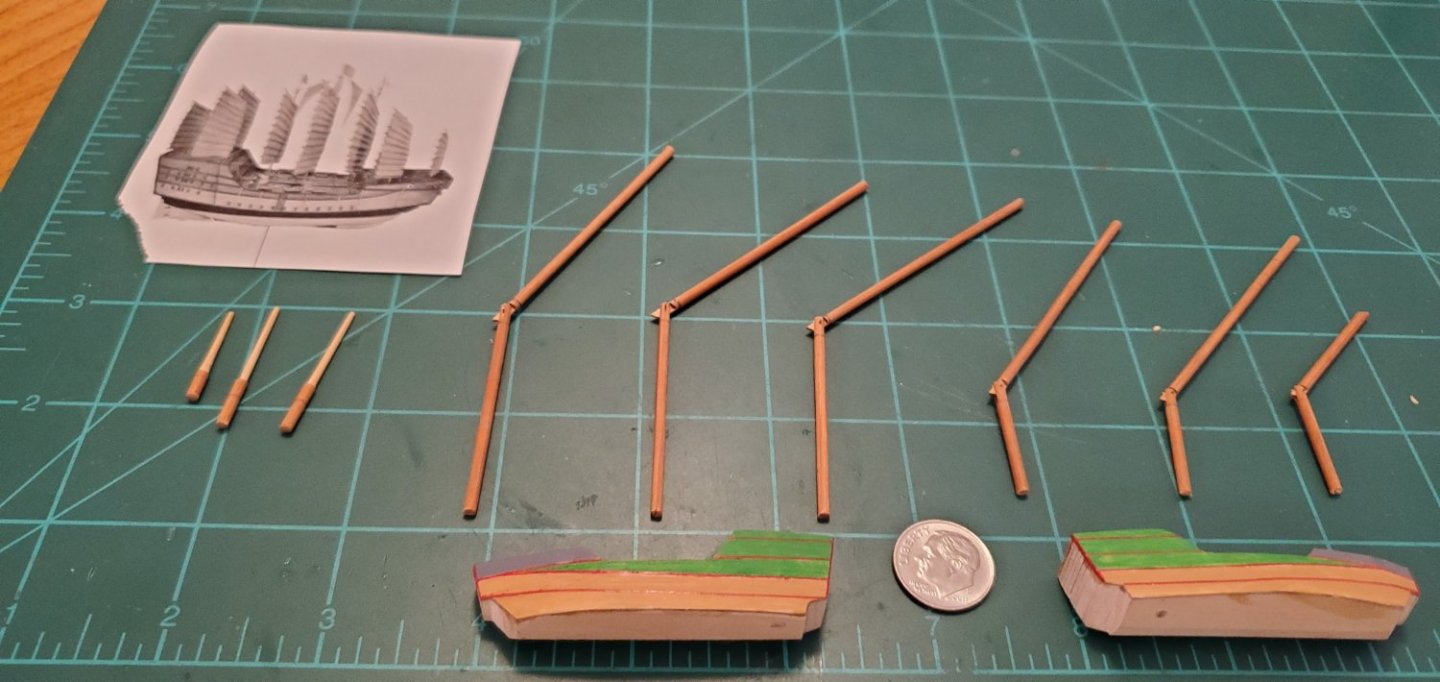
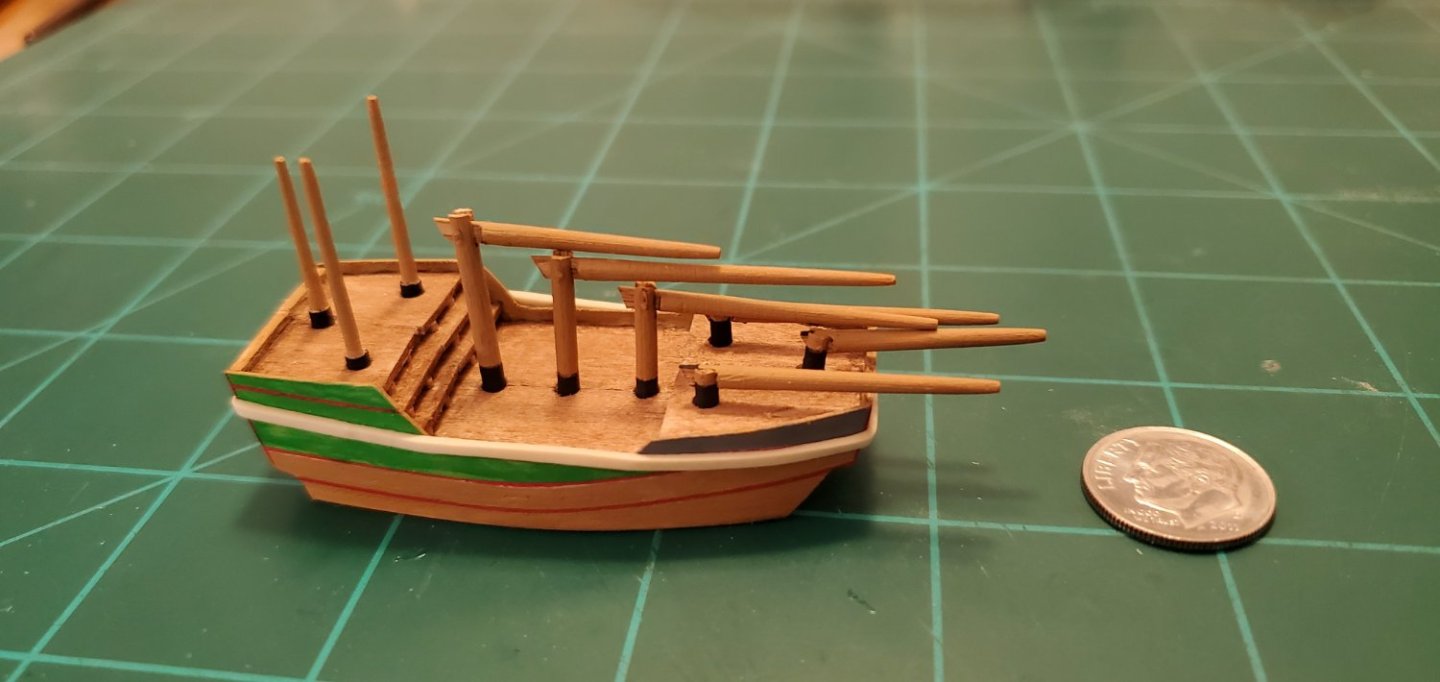
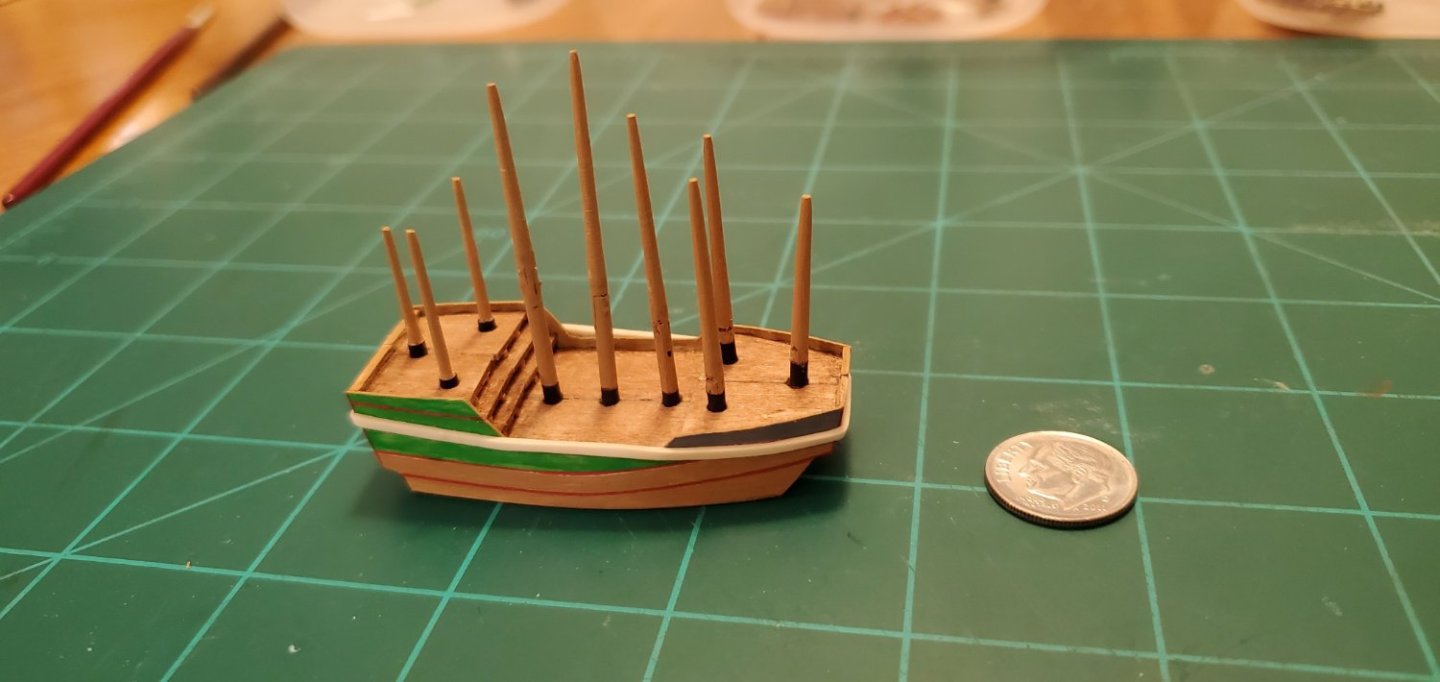
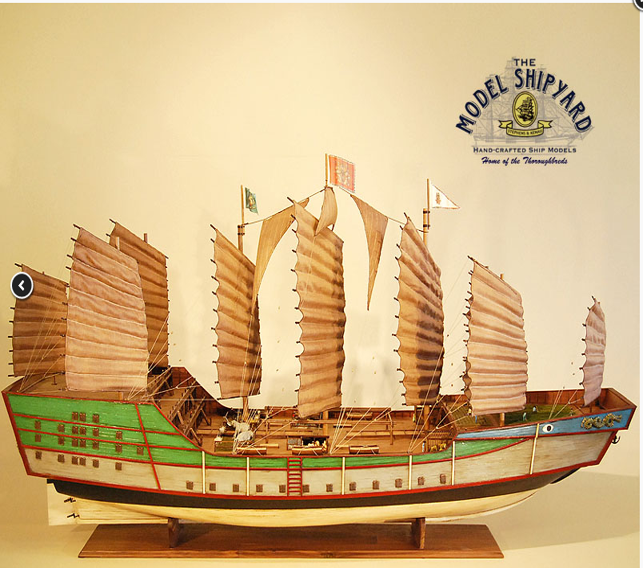
I got the hull painted, completed construction of the 9 masts, and dry-fitted them into the hull. The 2 pieces of the hull are held together by a small rubber band.
- 194 replies
-
- Bottle
- Treasure Fleet
-
(and 3 more)
Tagged with:
-
Thanks Grant and Keith regarding the ladder idea. Keith, you say a step ahead but I'm shaking my head saying, "why didn't I think of that sooner?" Like two builds ago on the Aurora when I struggled with the railings and never came up with a great answer. Ugh! Gotta get my brain in gear! I appreciate your optimism, Pat. I'll be on pins and needles and tweezers all the way up until every ship is fully assembled and afloat inside the bottle. But at least for the next week or two I can relax since I'll be doing things I know how to do - painting the hull and making the sails/masts.
- 194 replies
-
- Bottle
- Treasure Fleet
-
(and 3 more)
Tagged with:
-
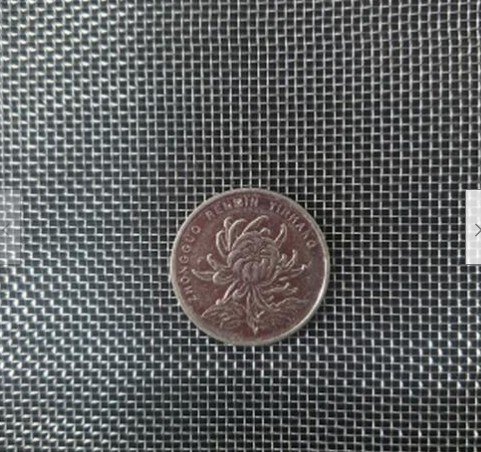
Thanks, Keith. BTW, I was thinking about all the teeny ladders I need to build for the quarterdeck and forecastle and a thought popped into my head. I remembered that fine stainless steel mesh you found on eBay that I used for hammock netting on the Independence. It occurred to me if I had a larger weave of that same stuff, I might be able to cut ladders out of it. That would be much easier than piecing together music wire and copper wire like I did for the 2nd boat here. So I found a batch on eBay that looks like it might work and ordered it. For future builds, it also might work for rails at this scale.
- 194 replies
-
- Bottle
- Treasure Fleet
-
(and 3 more)
Tagged with:
-
- 194 replies
-
- Bottle
- Treasure Fleet
-
(and 3 more)
Tagged with:
-
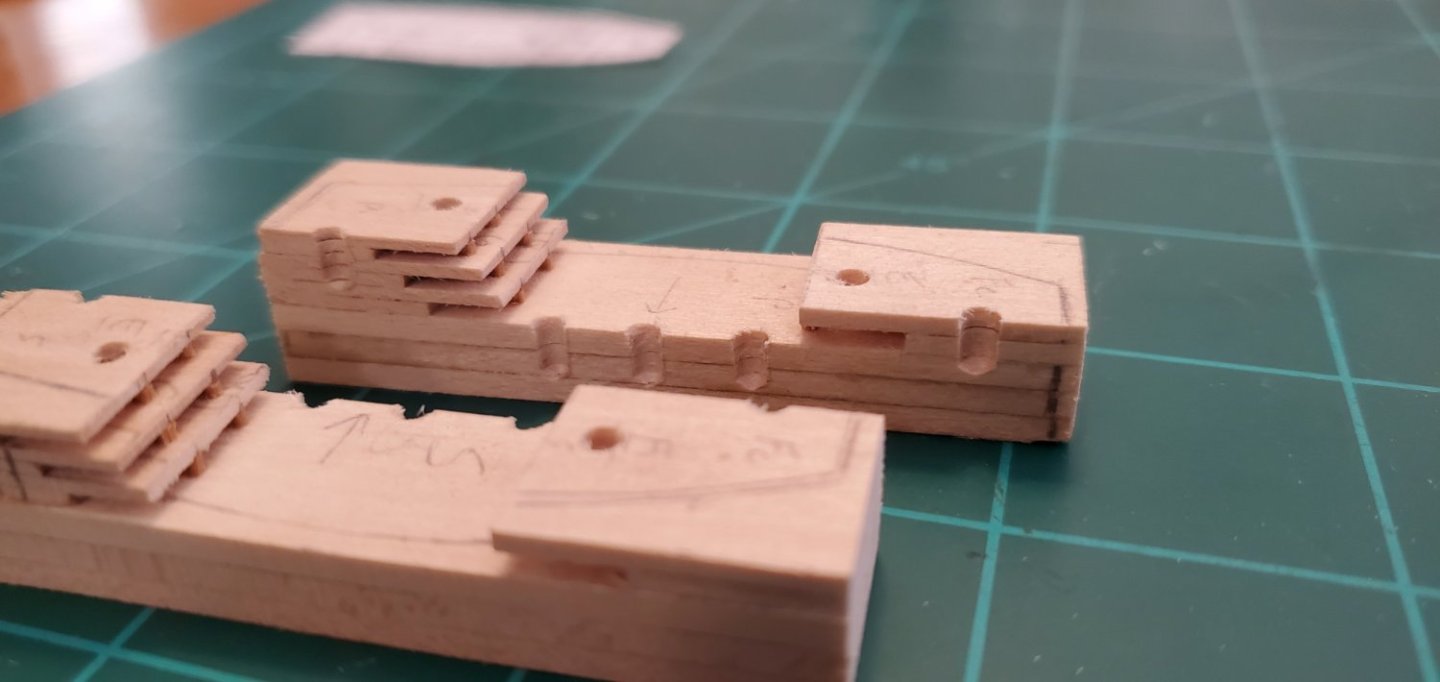
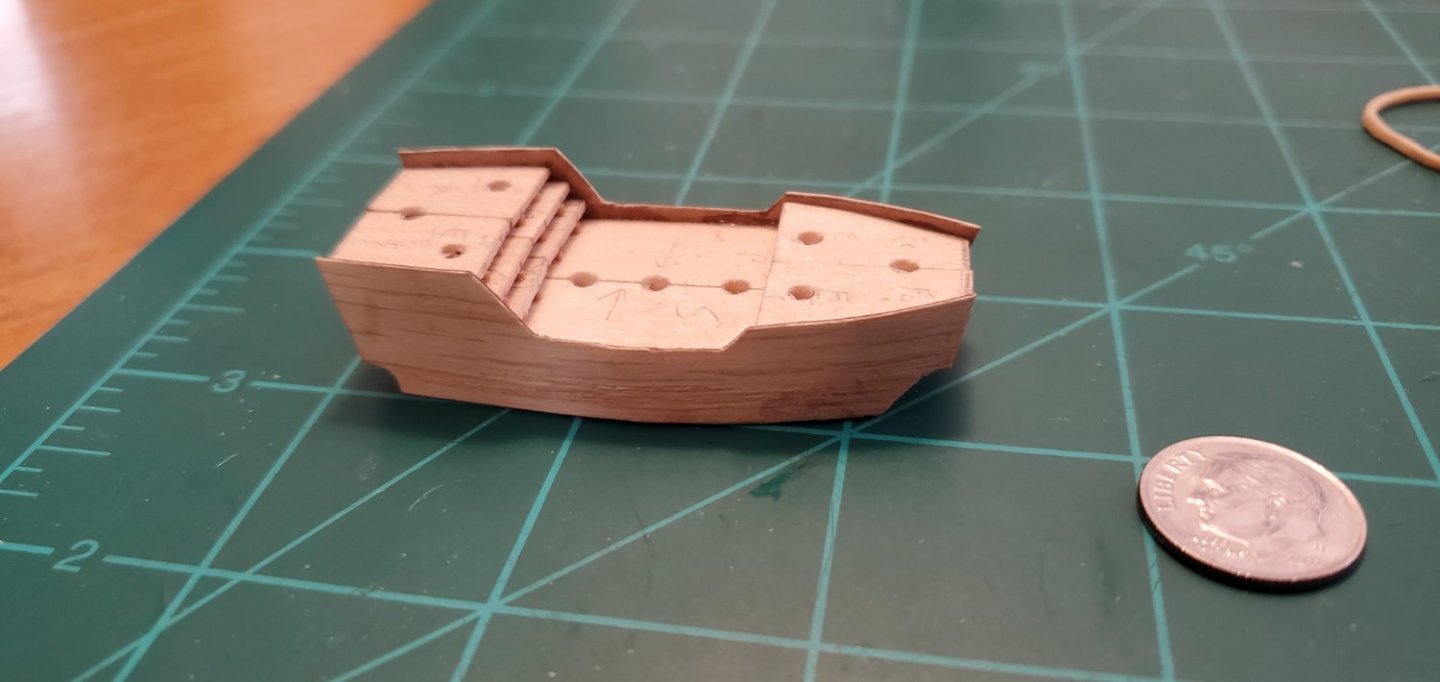
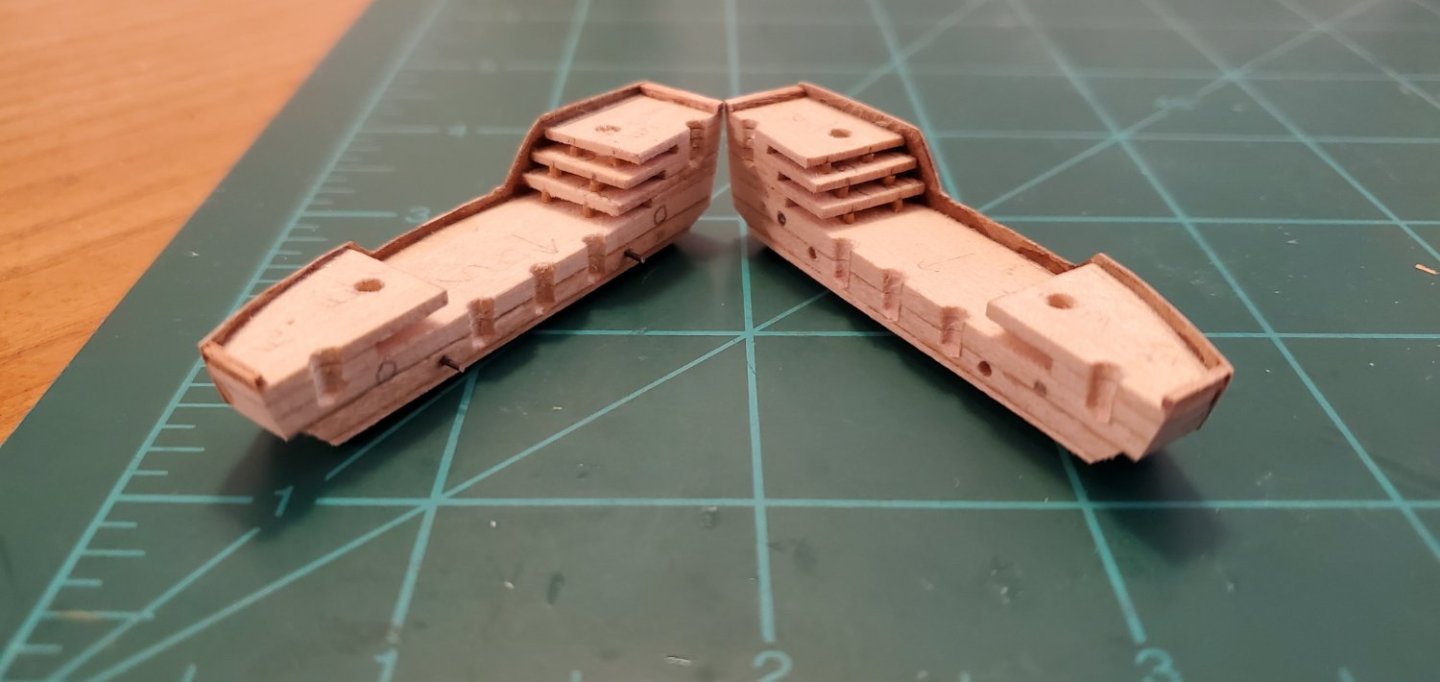
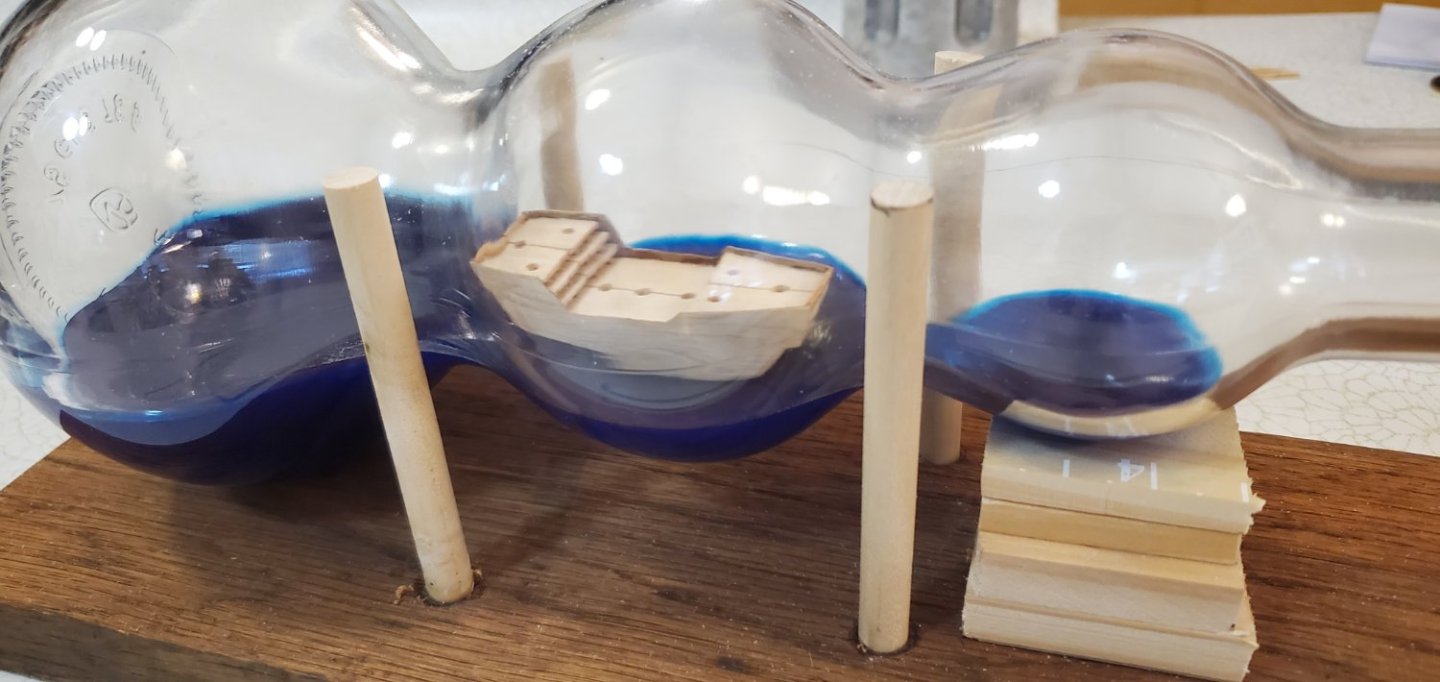
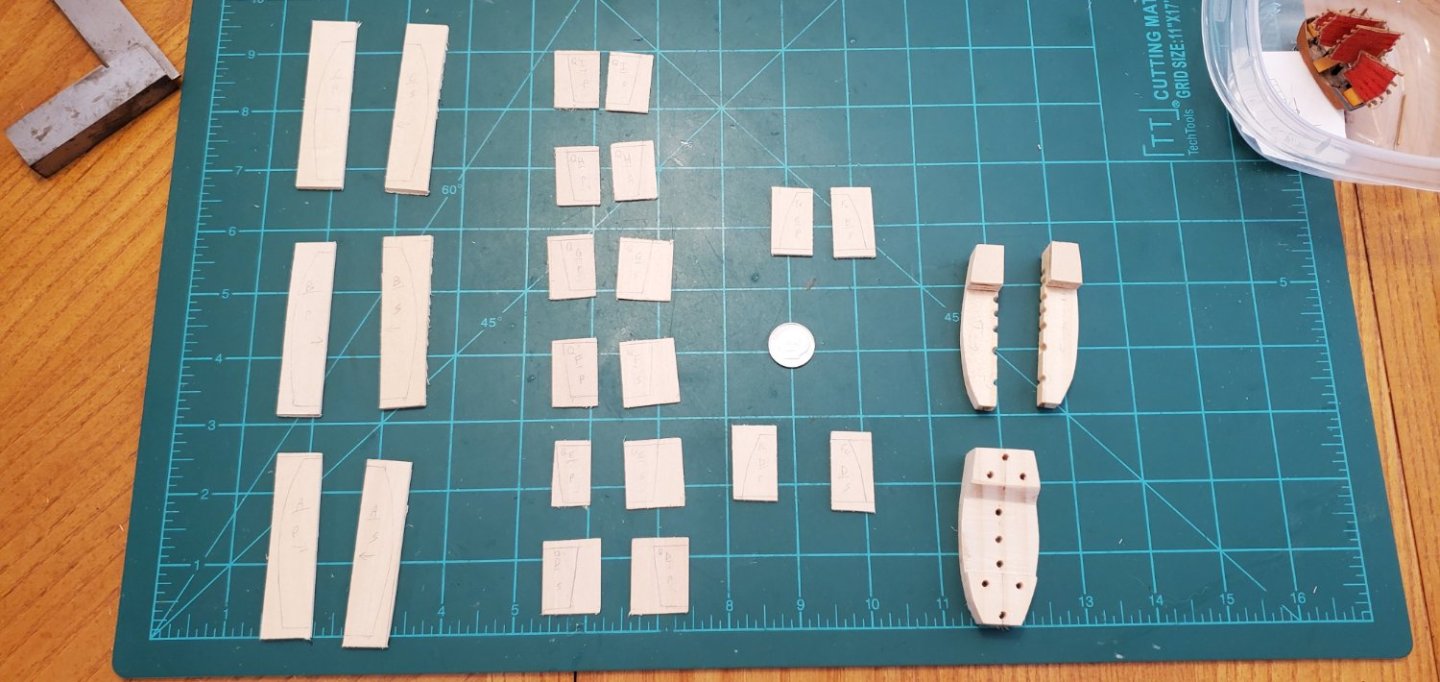
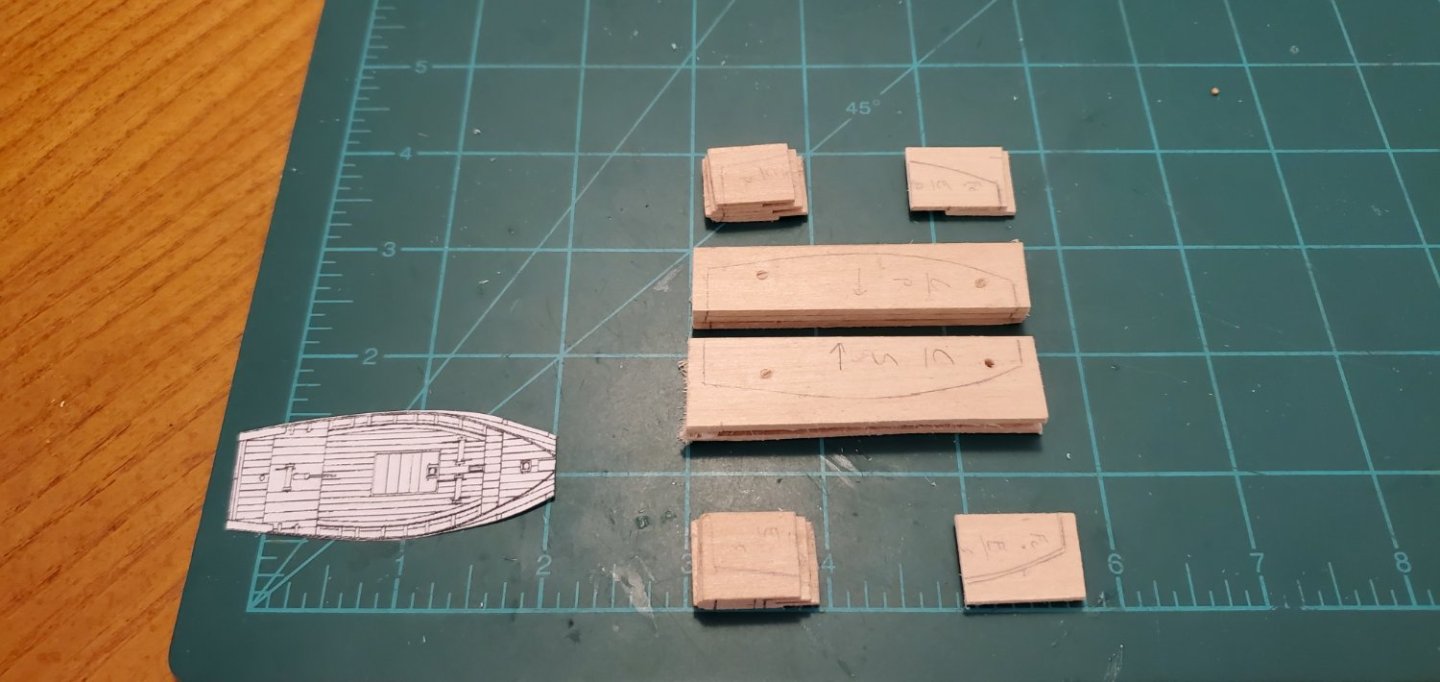
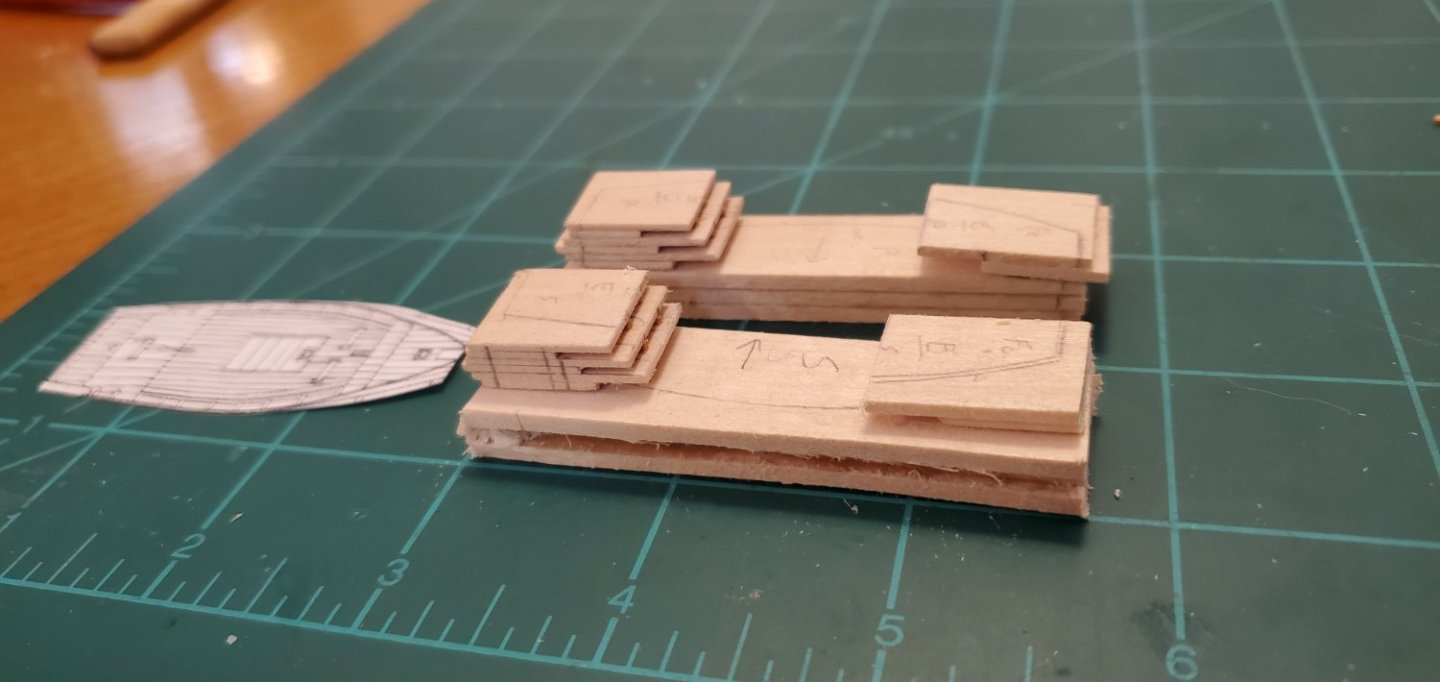
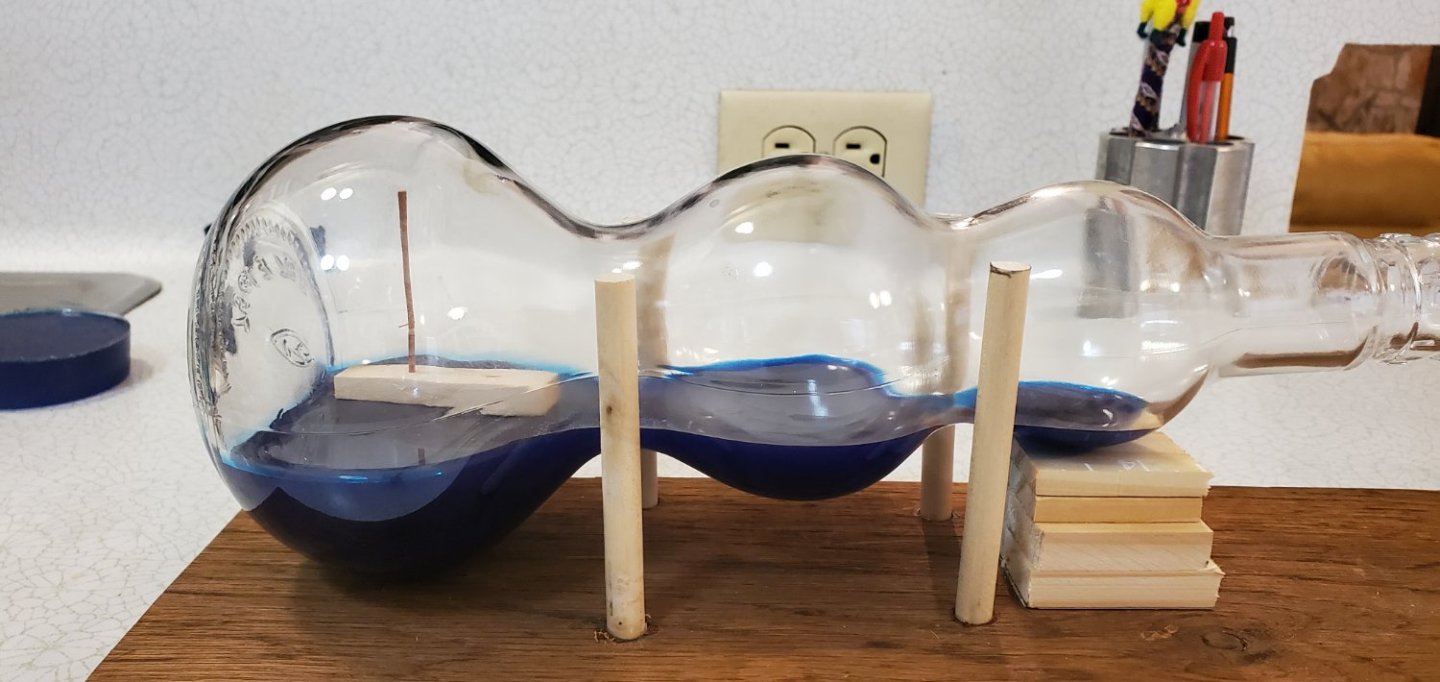
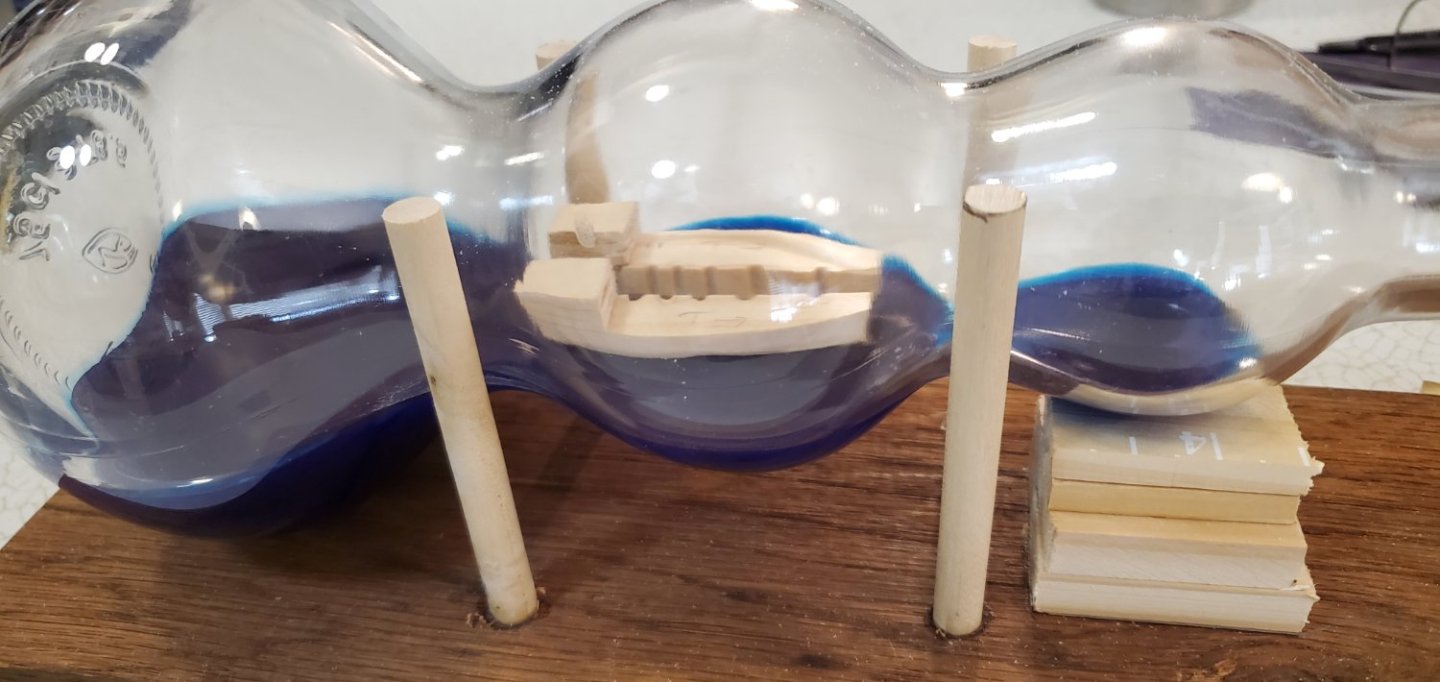
I did some tests and I am fairly confident my glue plan for the main treasure ship will work. So I moved forward with the hull build. This was an interesting exercise and quite different from my previous builds. Part of it was because of the split hull, but mainly it was because the quarterdeck and forecastle are not solid pieces. They are separate decks with open ends as you can see in the first pic. So that was what I attempted to replicate. The series of pics illustrates the build process. The last pic shows the 2 halves of the hull inside the middle bulb where I pressed them together. Each piece has to be pushed thru the bottle neck with a bit of force so I am confident they are as large as they could possibly be (which was my goal).
- 194 replies
-
- Bottle
- Treasure Fleet
-
(and 3 more)
Tagged with:
-
That is a beautiful "scrap" of wood!! And a very elegant presentation. Congratulations on a superb build, Grant!!!
-
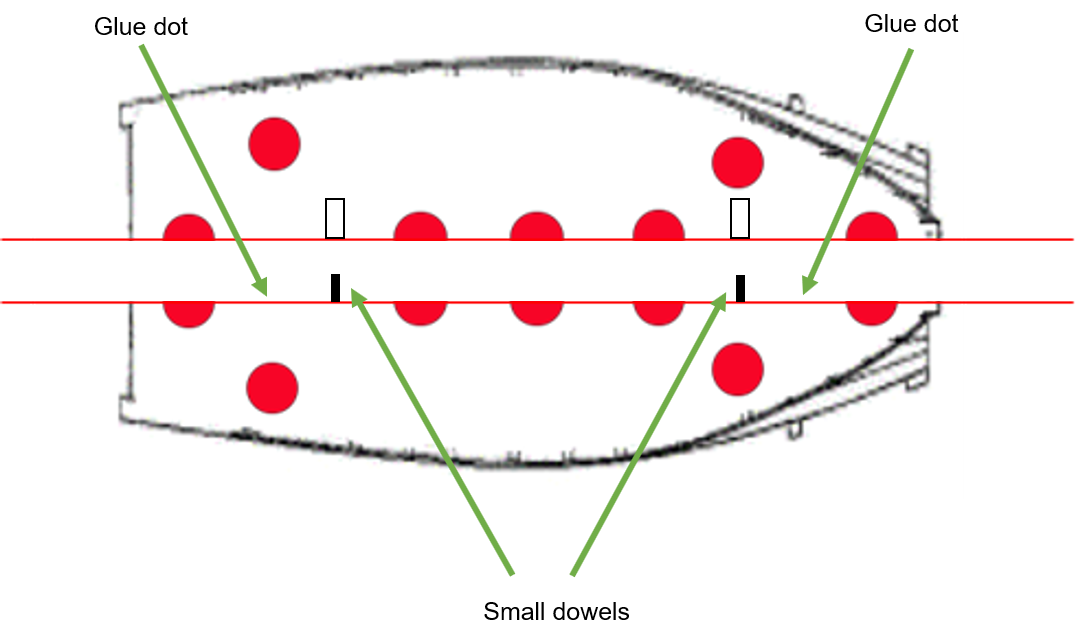
Hey Keith, I totally agree on less glue the better. There will be no outward stress on the glue joint so it should not take much glue at all to hold the 2 halves together. I'm thinking a 2 very small, carefully placed dots of glue. Plus, when the ship is later glued to the water in the 3rd bulb, that should add some additional strength to the joint. On your "crazy" suggestion, that's an interesting idea that I had not considered before. I think the downside would be that I'd have to cut the hull into 4 pieces based on the bottle opening size. One horizontal seam down the middle of the deck would not be very visible, maybe even lost under all the sails and masts (and Shiloh's corral 😃). Four vertical seams on the side would probably stand out too much. But I love the out-of-the-box thinking! Here's an illustration of glue plan:
- 194 replies
-
- Bottle
- Treasure Fleet
-
(and 3 more)
Tagged with:
-
Hey Ian, I thought of that as well but based on the width of the ship each half of the hull barely fits thru the opening when they are of equal size. So I'd have to reduce the size of the ship quite a bit to pull that off. To get the overall visual effect of the fleet, I need the main ship to be as much bigger than the other 2 as possible. So I'm kinda walking a tightrope here and pushing tolerances to the limit. We will see how the test glue goes. To your original point, if glue squeezes into the mast holes, then I won't be able to insert the masts nor will I be able to get the full hull back out of the bottle for repair. That would be game over!
- 194 replies
-
- Bottle
- Treasure Fleet
-
(and 3 more)
Tagged with:
-
That's a great comment!! I'm dying laughing!!!
- 194 replies
-
- Bottle
- Treasure Fleet
-
(and 3 more)
Tagged with:
-
That's a good question, Ian. Probably why a real engineer should be doing this instead of a Holiday Inn Express one like myself. 😃 Not only do I need to keep the glue from squeezing out into the mast holes like you mention, I also must prevent the glue from squeezing out underneath the hull. Otherwise, I'll glue the dang ship to the water in the wrong place! So my plan is to have a couple of small horizontal dowels coming out of 1 side of the hull with somewhat oversize receiving holes in the other side of the hull (oversize so I don't have to be too precise when I press the 2 halves together initially). I'll need to be very sparing with the glue application with a little bit in each receiving hole and then 2 or 3 dots on the hull mating surface. I definitely will do a test run on that.
- 194 replies
-
- Bottle
- Treasure Fleet
-
(and 3 more)
Tagged with:
-
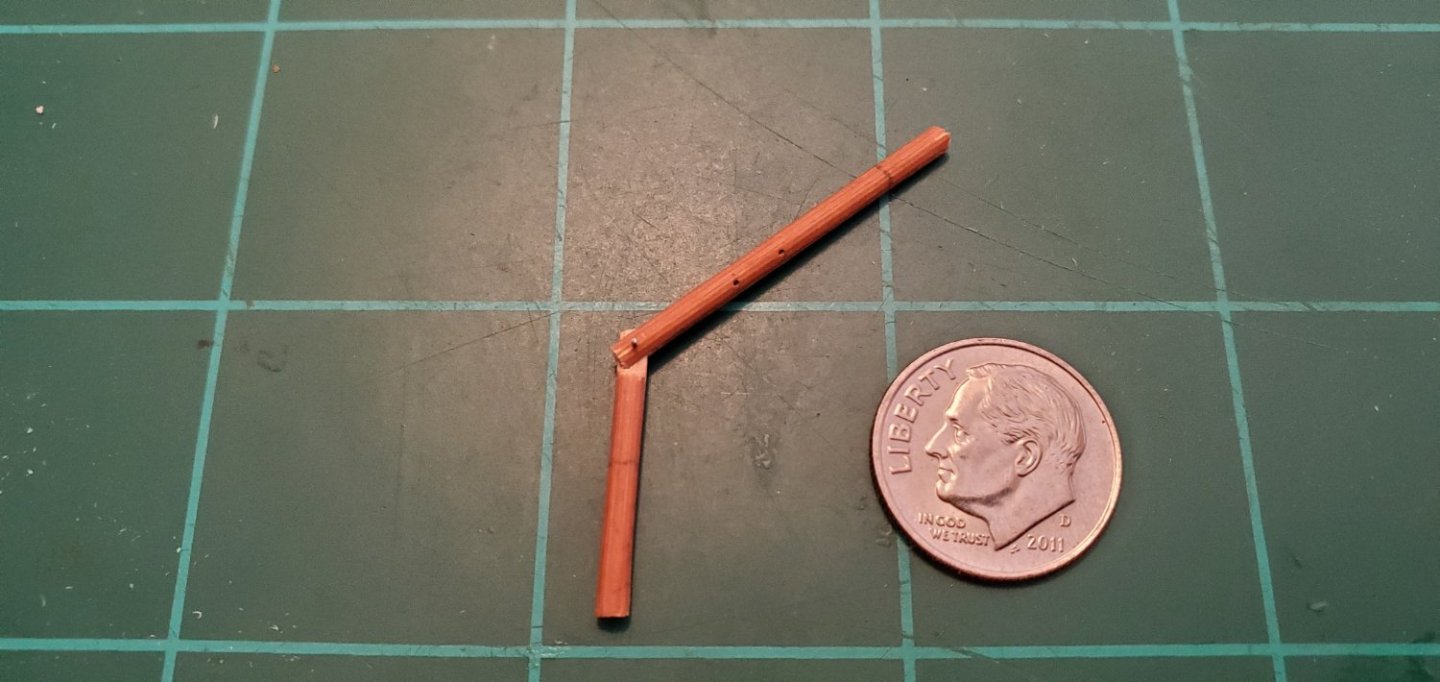
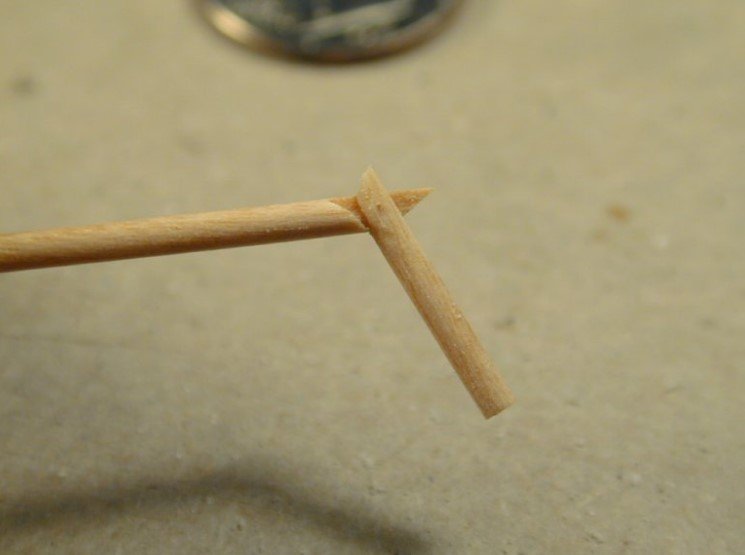
Before starting work on the main treasure ship, I decided to do a test run on a few of the things that were causing me concern. First, I made a crude version of the John Fox III hinge to see if I could pull that off. It came out ok for a rough draft. I'll take more time on the real ones, but at least I know I can do it now. Second, I wanted to see if I could install the hinged (and folded) mast into a practice hull in the 1st bulb and then raise it in the 3rd bulb. That went ok as well. Third, I wanted to get a feel for what it would be like trying to put the 2 halves of the hull together inside the bottle. Due to the hull's width and how narrow the waistline of the bottle is, I found I need to put the 2 pieces of the hull into the 2nd bulb, press them together, then pull it forward into the 1st bulb for mast insertion. The practice run also helped me determine final hull dimensions and mast heights that will work. So now, I at least know the concept works in practice. However, with 9 masts and full sails to deal with for the real ship, I think it's going to be quite the challenge. And oh by the way, I told my son he was no longer allowed to suggest new subjects for SIBs.
- 194 replies
-
- Bottle
- Treasure Fleet
-
(and 3 more)
Tagged with:
-

HMCSS Victoria 1855 by BANYAN - 1:72
Glen McGuire replied to BANYAN's topic in - Build logs for subjects built 1851 - 1900
Same here!- 1,006 replies
-
- gun dispatch vessel
- victoria
-
(and 2 more)
Tagged with:
-
You may have just written my epitaph for this project, Grant!! 😃
- 194 replies
-
- Bottle
- Treasure Fleet
-
(and 3 more)
Tagged with:
-
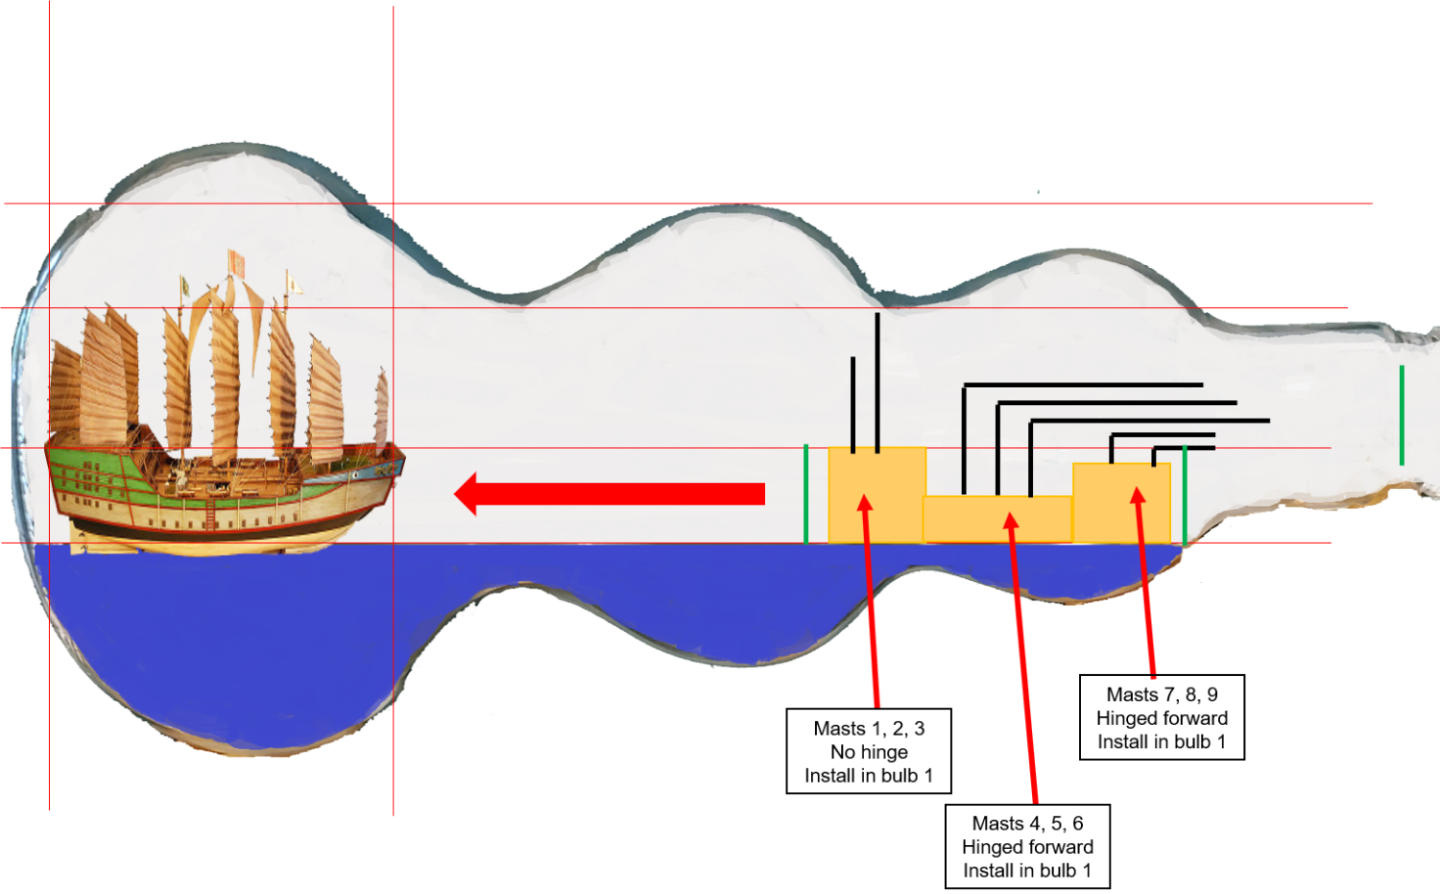
Hey Lou - good question. 8 and 9 will fit thru full upright, but unfortunately they will need to fold over so that there's room for 4, 5, and 6 to fold and lay on top of them. I'd prefer to try and make as few of those delicate hinges as possible but I could not think of any easier way to make it work.
- 194 replies
-
- Bottle
- Treasure Fleet
-
(and 3 more)
Tagged with:
-
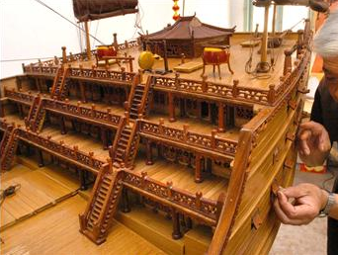
Hey Roger, you nailed it. I think the only way I can pull this thing off is to assemble the boats inside the bottle and slide them backwards to their spot. I'm going to try and do the assembly in the first bubble as I've learned that the further back I go in the bottle the less precise I am with the tweezers. The assembly will take some precision since I'll have to keep the hull still with one tool while I hold the mast with long tweezers and try to poke the bottom of it into its proper hole in the deck. Using my highly sophisticated CAD-like software (aka PowerPoint), I’ve sketched out the basic build plan for the main treasure ship along with the dimensions for each part. It’s going to require some unnatural acts on my part to make the ship as large as I think it needs to be and get it where it needs to be: 1. I’m going to do a split hull longitudinally so I can insert each side separately and then glue together inside the first bubble. Never tried this before. 2. With 9 masts, there will be a mix of hinged and non-hinged masts. Because of the hourglass shape, I will have to hinge the 3 main deck masts so they fit thru the narrow waistline. Even though the forward 3 masts are short enough to fit thru the waistline, they will need to fold down to make room for the folded main deck masts. 3. I’m going to try folding the masts forward and push them up with a tool rather than folding backwards and raising them with a pull string. 3. For the hinged masts, I’m going to try and replicate the amazing wireless hinge that @John Fox III did for his Endurance ex-Polaris build. I stole a picture from his build log and included below so you can see his incredible work. So for the first time ever, the moment of truth will not be squeezing the boat thru a tight bottle neck. Rather it will be the assembly process inside the bottle. Anxiety awaits!!
- 194 replies
-
- Bottle
- Treasure Fleet
-
(and 3 more)
Tagged with:
-
WOOHOO!!! She looks fantastic, Grant!!! The silkspan sails unfurled very nicely. Well done. Now I can't wait to see what you do for the display base!
-
I hear you, Ian. I bought one for my son when he was young, but once he got a Gameboy, the Erector set hit the back of the closet and never saw the light of day again! 😥
- 536 replies
-
- Quadrireme
- radio
-
(and 1 more)
Tagged with:
-
That is so cool. I bet you had an erector set when you were a kid, didn't you?
- 536 replies
-
- Quadrireme
- radio
-
(and 1 more)
Tagged with:
-
Thanks, Pat. I've still got a bunch of things to figure out with the main treasure ship, but so far so good. In fact, I'm a bit nervous about how well things have gone up to this point. Usually by now, I've screwed up royally a few times. So I'm past due for a major fiasco!
- 194 replies
-
- Bottle
- Treasure Fleet
-
(and 3 more)
Tagged with:
-
You are right, Grant! Kind of like a cat - easier climbing up a tree than coming back down! I got each mast/sail out of the hull without too much difficulty. But to get the mast/sails to fit back thru the neck of the bottle, I had to carefully scrunch up the sails and angle all the battens relative to the mast. Not easy to do inside the bottle. It took a while, but the whole test assembly was worth it for the peace of mind that I can pull it off when the time comes.
- 194 replies
-
- Bottle
- Treasure Fleet
-
(and 3 more)
Tagged with:
-
Excellent work recovering from that snag with the sails moving along the lines. The moment of truth is at hand! I can't wait for the next update!!!
-
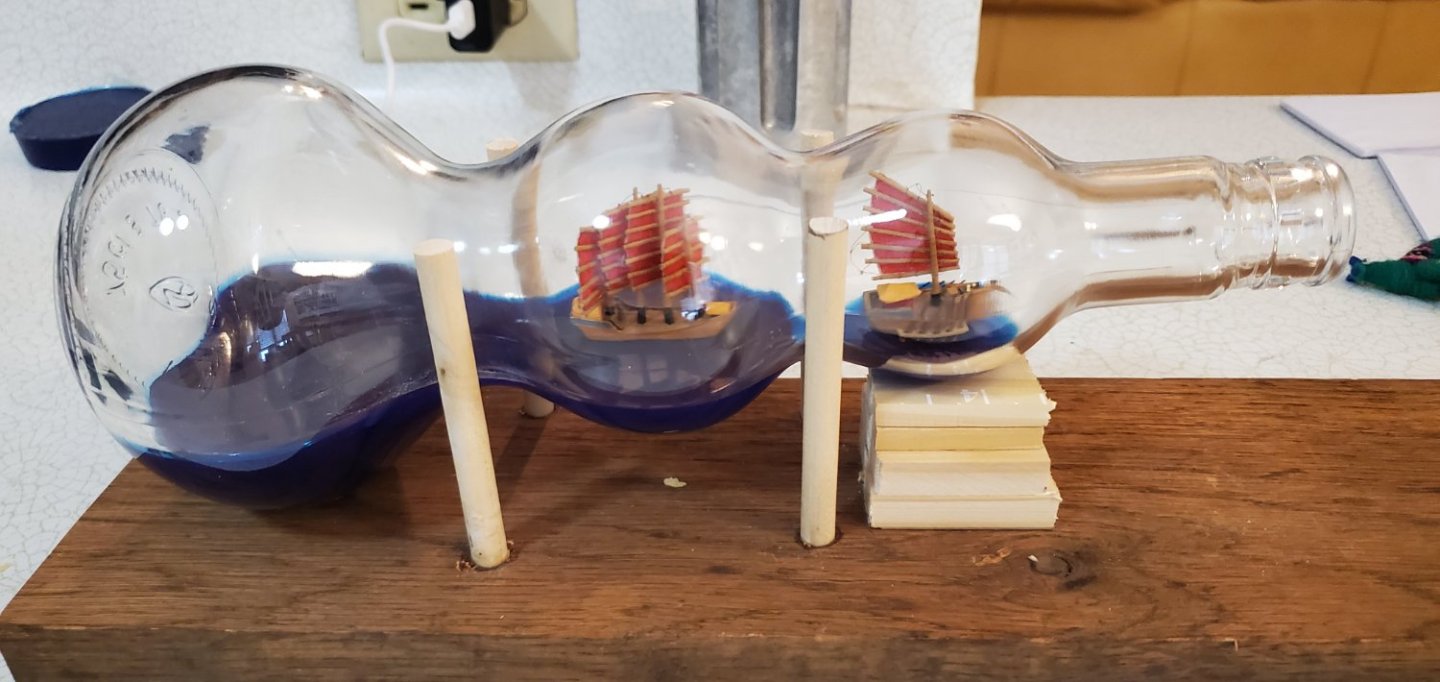
While I work thru my anxiety issues on how I’m going to tackle that main treasure ship, I decided to try and alleviate another big anxiety issue - installing the masts (with sails attached) into the hull while the hull is inside the bottle. That would be a first for me since all my previous builds used masts with hinges. So before starting on the big ship, I decided to take the first 2 ships and do a test run. I put ship #2 in the first bulb, added all the masts, and slid it into the middle bulb. Then I did the same with ship #1. I had to put a custom bend on the ends of one pair of tweezers to make things work, but after that it was not too difficult Whew! One less thing to keep me awake at night! Now back to the main ship and trying to figure out what the approach will be.
- 194 replies
-
- Bottle
- Treasure Fleet
-
(and 3 more)
Tagged with:
-
OK Keith, you got me on that one. Some how, some way, there's definitely gonna be a mini-Shiloh on the deck!
- 194 replies
-
- Bottle
- Treasure Fleet
-
(and 3 more)
Tagged with:
About us
Modelshipworld - Advancing Ship Modeling through Research
SSL Secured
Your security is important for us so this Website is SSL-Secured
NRG Mailing Address
Nautical Research Guild
237 South Lincoln Street
Westmont IL, 60559-1917
Model Ship World ® and the MSW logo are Registered Trademarks, and belong to the Nautical Research Guild (United States Patent and Trademark Office: No. 6,929,264 & No. 6,929,274, registered Dec. 20, 2022)
Helpful Links
About the NRG
If you enjoy building ship models that are historically accurate as well as beautiful, then The Nautical Research Guild (NRG) is just right for you.
The Guild is a non-profit educational organization whose mission is to “Advance Ship Modeling Through Research”. We provide support to our members in their efforts to raise the quality of their model ships.
The Nautical Research Guild has published our world-renowned quarterly magazine, The Nautical Research Journal, since 1955. The pages of the Journal are full of articles by accomplished ship modelers who show you how they create those exquisite details on their models, and by maritime historians who show you the correct details to build. The Journal is available in both print and digital editions. Go to the NRG web site (www.thenrg.org) to download a complimentary digital copy of the Journal. The NRG also publishes plan sets, books and compilations of back issues of the Journal and the former Ships in Scale and Model Ship Builder magazines.


