HOLIDAY DONATION DRIVE - SUPPORT MSW - DO YOUR PART TO KEEP THIS GREAT FORUM GOING! (Only 20 donations so far - C'mon guys!)
×


Glen McGuire
-
Posts
1,956 -
Joined
-
Last visited
Content Type
Profiles
Forums
Gallery
Events
Everything posted by Glen McGuire
-
 Rich - Thank you for sharing your manuscript in advance. It is very well written and provides a fascinating glimpse into the incredible depth of research that has gone into this build. I found the section about the Athena figurehead particularly interesting. So much investigative work just to confirm a small detail like Athena’s flowing drape actually forming an open loop! Remarkable. Congratulations on such fine work, Rich. I look forward to seeing the publication in its full printed "glory"!
- 3,560 replies
-
- 2
-

-
- clipper
- hull model
- (and 2 more)
-
Yes Mark, out on the ranch and thinking about ship modeling. Is that sad or what! Now if I could only find a use for barbed wire and cow patties...
- 194 replies
-
- 2
-

-
- Bottle
- Treasure Fleet
- (and 3 more)
-
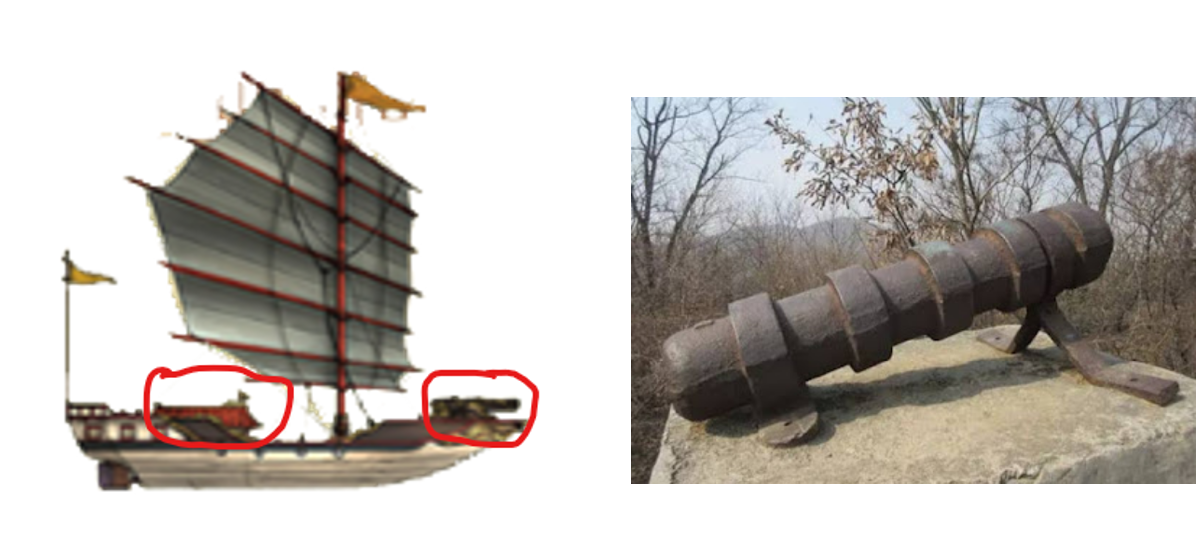
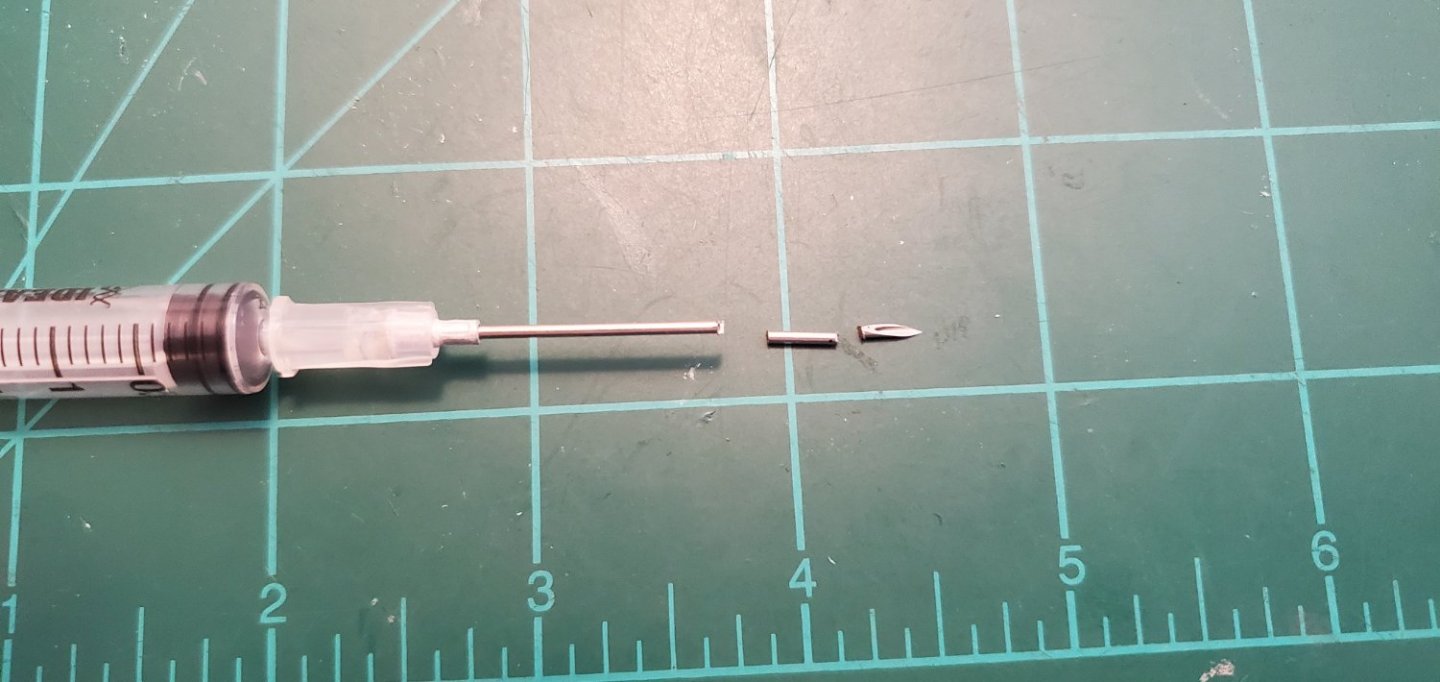
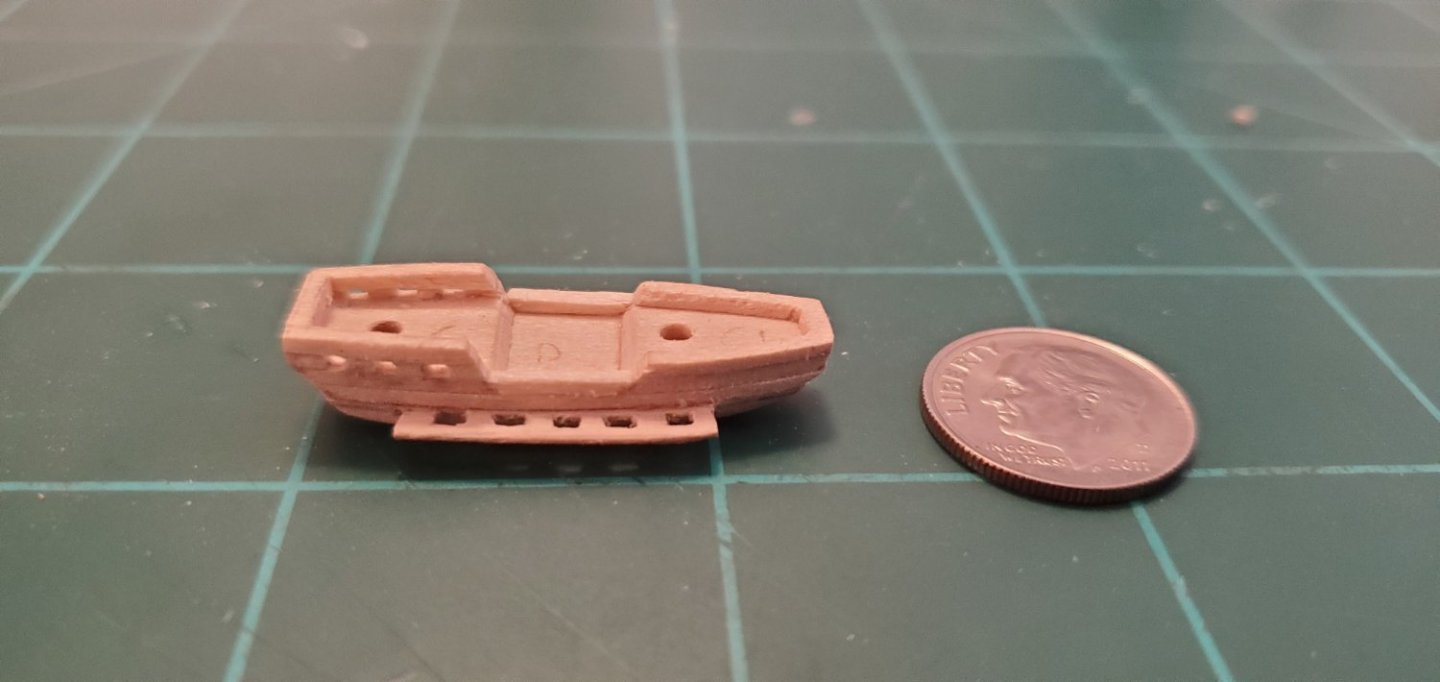
Referring back to my picture of the patrol boat, the deck fittings are pretty sparse. Looks to me like there’s a cannon mounted on the bow, some quarters rearward, and that’s about it. I did a bit of research on cannons of the early Ming dynasty. They used one called a “crouching tiger” which is shown below on the right (cool name for a cannon). When I was giving my longhorns their yearly vax a couple of weeks ago, I got the idea that the hollow needle (18 gauge) just might make a good cannon barrel. So I cut a piece out of the middle to give it a try. Then I used some photo etch sprues for straps and mounted it on the bow. For the quarters, I did my best to carve out a little shack with a traditional Chinese roof and its upswept corners. Crude but passable. I think.
- 194 replies
-
- 10
-
-

-
- Bottle
- Treasure Fleet
- (and 3 more)
-
Thanks, Keith! I wish I was better at wood carving. Then I could carve one of these out of a single piece. But I have much better luck with layers.
- 194 replies
-
- 3
-
-
- Bottle
- Treasure Fleet
- (and 3 more)
-
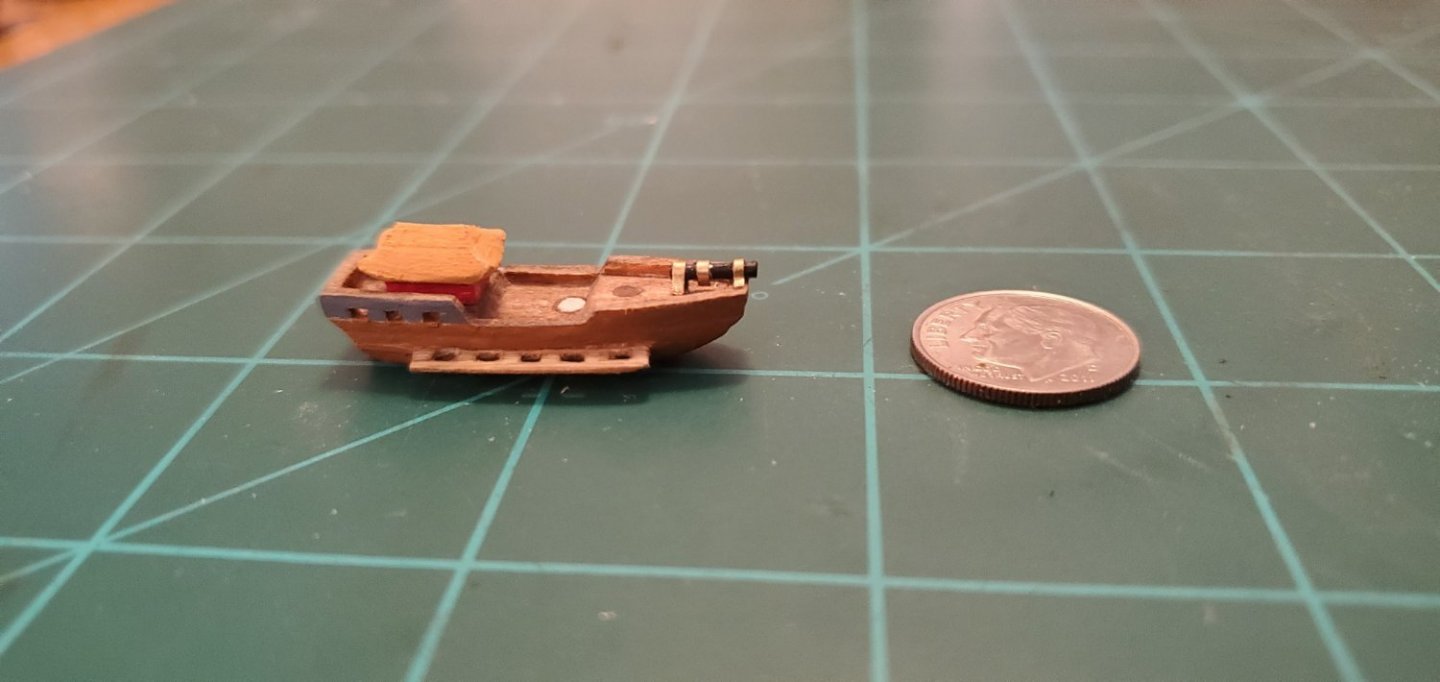
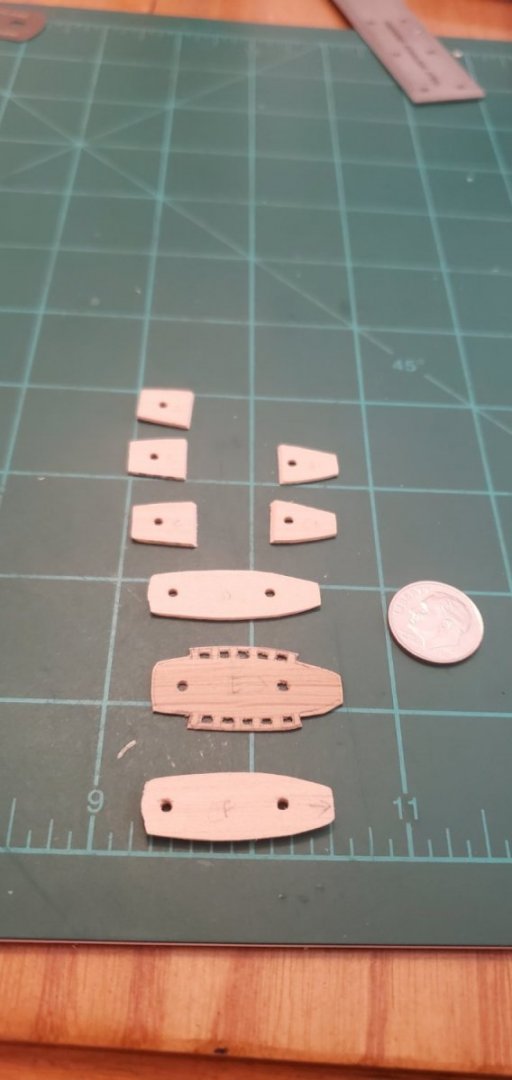
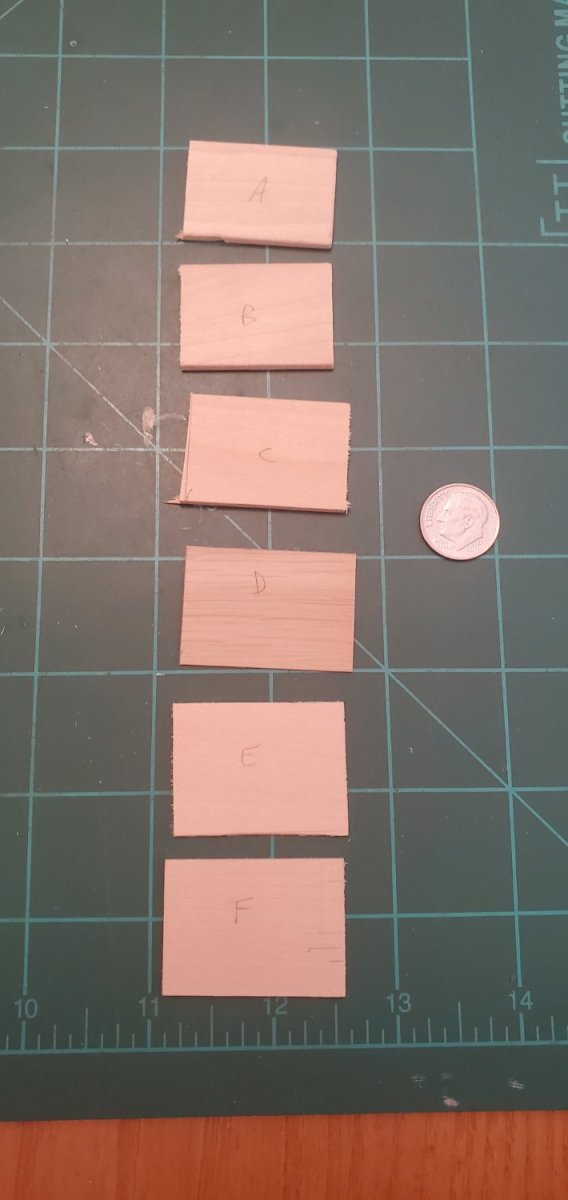
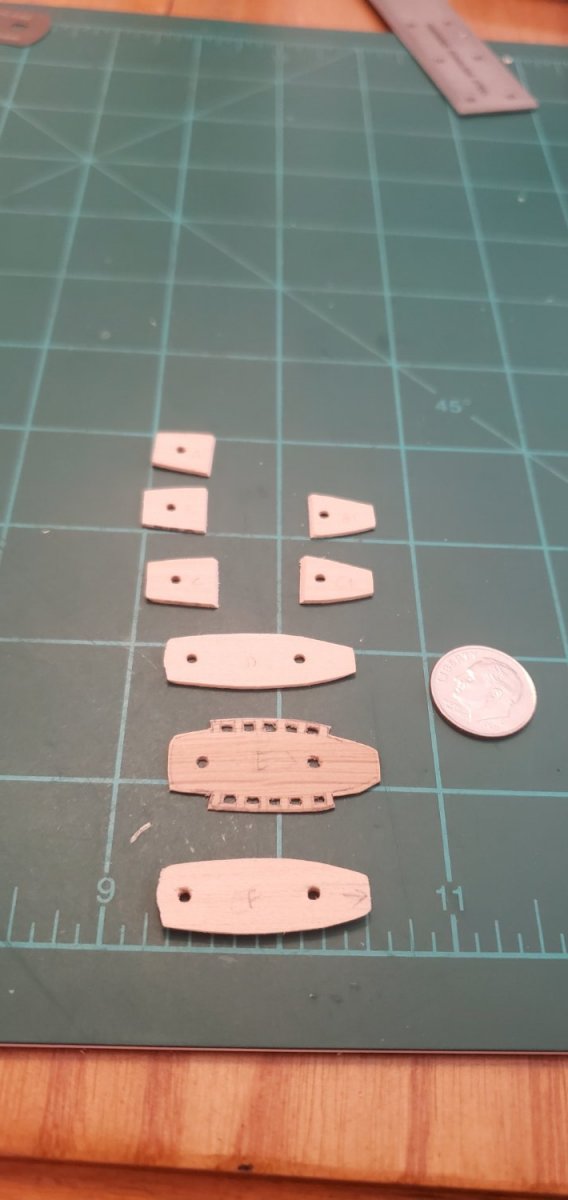
Here's where I'm at so far with the patrol boat build. I'm doing another laminated hull. All layers are basswood except the middle one for the rowing platforms. It's a piece of .015" thick oak veneer I got from a site called "Cards of Wood."

- 194 replies
-
- 9
-
-
-
- Bottle
- Treasure Fleet
- (and 3 more)
-
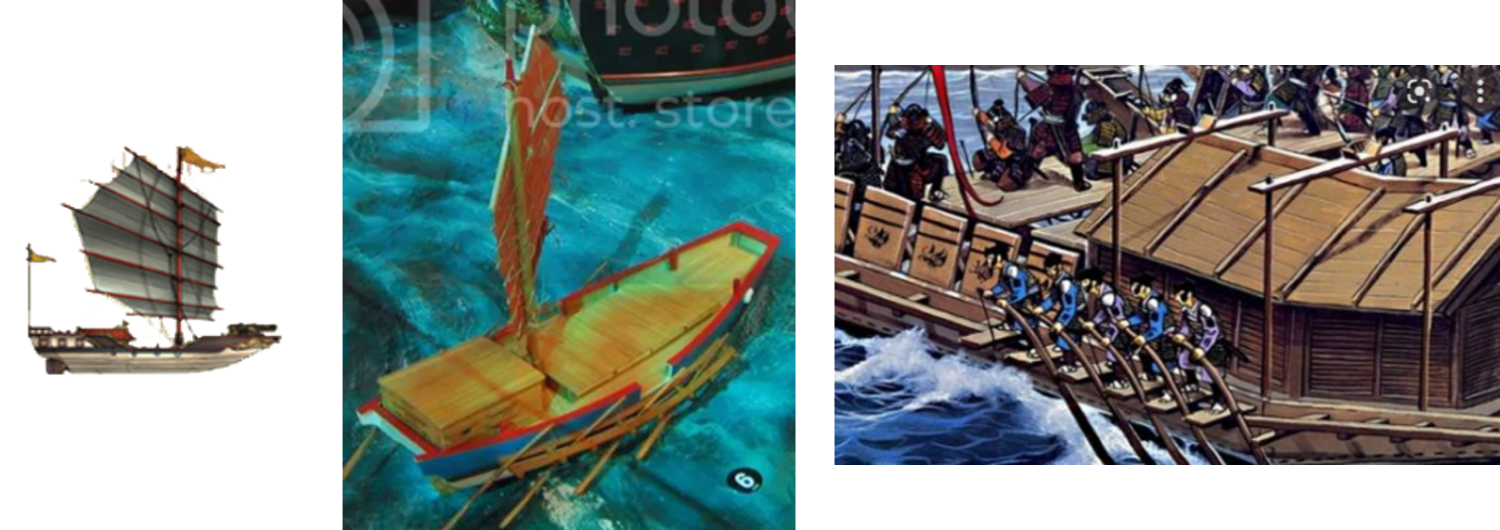
While waiting for the epoxy resin to fully cure, I started work on the ships. The smallest one, the patrol boat, is first. Not surprising, I’ve found a variety of illustrations of what it may have looked like. So with full artistic license, my patrol boat is going to combine a few things from different versions. The basic profile I want is the ship on the left in the pic below. However, it’s supposed to be an 8-oar boat so I’m going to add the rowing platforms from the middle image. Side note - I could not figure out how the rowing platforms worked until I found the image on the right. That must have been so much fun to stand out there and work those oars during rough seas!

- 194 replies
-
- 4
-
-
- Bottle
- Treasure Fleet
- (and 3 more)
-
Please educate this Texan that has never been up that way, what is a "scoff"?
- 536 replies
-
- 2
-
-
- Quadrireme
- radio
- (and 1 more)
-
Hey Roger, thank you for the suggestions. I agree with your Chicken Soup philosophy and will try all those ideas after full curing.
- 194 replies
-
- 2
-
-
- Bottle
- Treasure Fleet
- (and 3 more)
-
Little Shiloh is well on his way to becoming a steer as we put the band on him 2 Saturdays ago. He walked a little bow-legged at first but he's doing fine now. His momma and I gave him some TLC after the traumatic experience!
.thumb.jpg.34d4cd816dd054aa36a4638d303586f8.jpg)
- 194 replies
-
- 7
-
-
- Bottle
- Treasure Fleet
- (and 3 more)
-
I was thinking more of a "smoke from cannons" effect. NOT! The liqueur was $17 so not too bad. Not sure if it's any good or not but a friend promises there's a bunch of nice drinks you can make with it. The only problem with starting over is I'm not sure what I'd do different to keep it from fogging up again. I'm thinking that after the resin is fully hardened, I could just wash the bottle out? It appears firmly secured to the bottle and I wouldn't think soapy water would bother it.
- 194 replies
-
- 3
-
-
- Bottle
- Treasure Fleet
- (and 3 more)
-
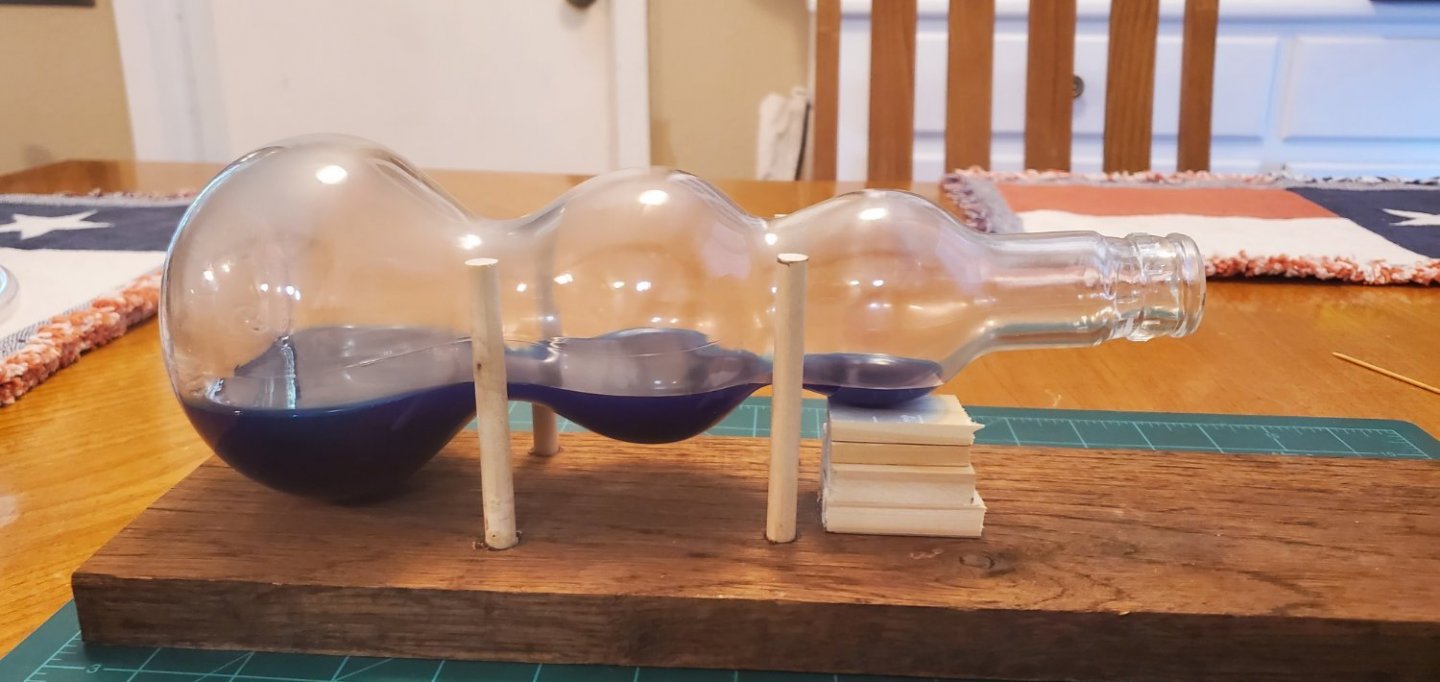
I decided to start with water in the bottle this time, using the same Easy Cast epoxy resin that I used for the Aurora and Independence builds. The shape of the bottle made it more of a challenge to get the resin in place evenly across the 3 bulbs without slopping it up the sides, but with a friend's help it worked out ok. For some reason, however, the bottle fogged up shortly after I got all of the epoxy resin inside the bottle. That did not happen the other 2 times. I used a small fan to provide ventilation, but after 2 days the bottle has not cleared up any. I don't know what caused the fogging since I did everything the same. Maybe it was the weird shape of the bottle? Regardless, now I've got to figure out how to clear it up.
- 194 replies
-
- 3
-

-
- Bottle
- Treasure Fleet
- (and 3 more)
-
I'm totally lost on this soup discussion. But hey, at least we're not talking about penguins for a change! 🙃
- 194 replies
-
- 4
-
-
- Bottle
- Treasure Fleet
- (and 3 more)
-
Landlubber from a landlocked country
Glen McGuire replied to UMH's topic in New member Introductions
Seriously? OMG that is gorgeous!!! Thanks for ruining my day while I look out my window at cow patties and fire ant mounds! 🤠 I gotta start planning my trip over there. -
Landlubber from a landlocked country
Glen McGuire replied to UMH's topic in New member Introductions
Welcome aboard, Daniel! Visiting the Swiss Alps in on my bucket list! -
I had not heard the term "Texas deck" before perusing your build log. Had to look that one up. Very interesting! And oh by the way, the detail and precision of your work on this project is incredible.
- 238 replies
-
- 1
-

-
- Robert E Lee
- steamboat
- (and 3 more)
-
And then the final piece of this project puzzle hit me. Instead of just putting Zheng He’s main ship in the bottle, how about using the 3 bulbs of the bottle to give a representation of his larger treasure fleet? So his main treasure ship would be on the far left, a guard ship in the middle and a small patrol boat on the right. Something like this: My son’s reaction to the concept was, “that’s pretty ambitious, dad!” I think he’s right, but what the heck! Here we go!

- 194 replies
-
- 13
-
-
-
- Bottle
- Treasure Fleet
- (and 3 more)
-
In the meantime, we were trying to figure out what the 4-character inscription on the front of the stand meant. We started by looking up a Chinese character chart but of course there were literally thousands of characters to wade thru. Forget that! But then I thought, “wait a minute, maybe the Amazon listing said something.” Sure enough, it was right there in the product description. Duh!! The inscription means, “A Great Treasure in Your House”. We thought that was pretty cool. So now it was time to decide on a ship. I started researching historical Chinese junk ships and ran across the name Zheng He (pronounced "Jung Huh"). He was an official in the Ming Dynasty and a famous mariner of the early 1400’s. He led a massive fleet of 250+ ships called Zheng He’s Treasure Fleet because they sailed to the east coast of Africa to trade things and bring back treasures. I thought “Treasure fleet? Great treasure in your house?” Whoa! This was almost too perfect! The main ships of Zheng He’s fleet were called “treasure ships” and they were massive – supposedly each one was nearly the size of a football field according to some accounts. Other (smaller) ships in the fleet included equine ships, supply ships, troop transports, guardships, patrol boats, and water tankers. Here’s one illustration of his treasure fleet:
.jpg.0ea1c832f651f42ae441dce096418453.jpg)

- 194 replies
-
- 7
-
-
- Bottle
- Treasure Fleet
- (and 3 more)
-
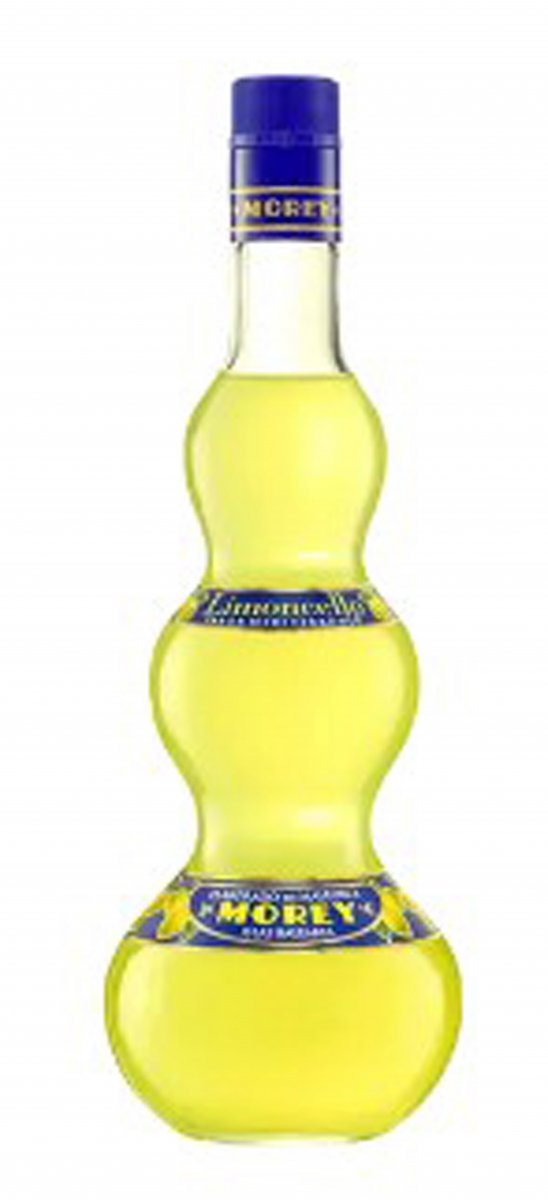
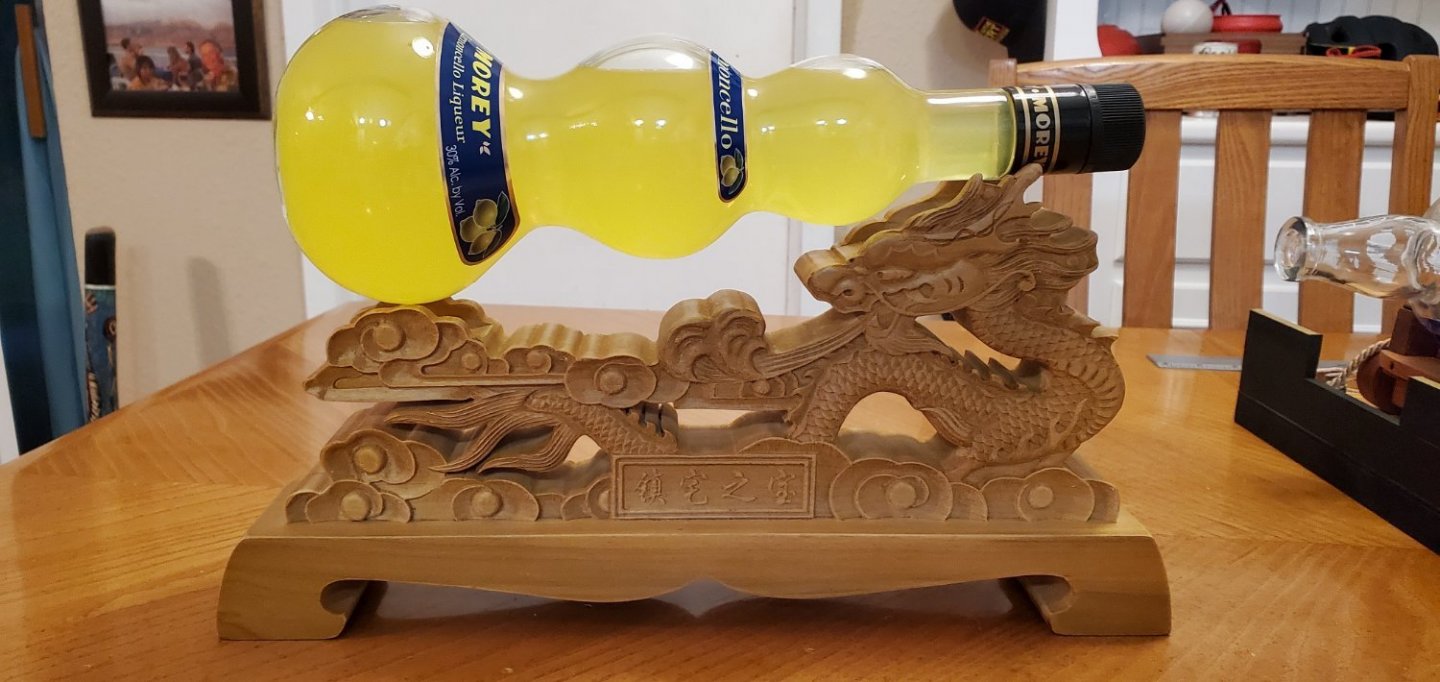
Next was choosing a suitable bottle. The base is just over 14” wide, so the bottle needed to be a couple of inches longer than normal. I went to Total Wine looking for bottles and an unusual one caught my eye. It was a bottle of Morey lemon liqueur that was the perfect length. I wasn’t sure if it would really work for an SIB project, but the shape was so intriguing I decided to grab it. I could always default back to a regular bottle if necessary. I put it on the stand and it was a perfect fit. Plus, I thought it looked really cool. So I decided I had to come up with a suitable ship that would pull it all together.

- 194 replies
-
- 8
-
-
-
- Bottle
- Treasure Fleet
- (and 3 more)
-
As I was finishing the Independence build, my son who is a student of Asian history suggested that I do a Chinese junk ship in a bottle next. So when the Independence was done, I started playing around with what to do for the project. I came up with a few ideas for the display base, one being a sword holder, which my son particularly liked. We found one on Amazon for a samurai sword with a Chinese dragon carving. He really liked the design and I thought the shape would work well with the profile of a bottle - the neck would rest on the dragon’s head with the end of the bottle resting on the dragon’s tail.

- 194 replies
-
- 7
-
-
- Bottle
- Treasure Fleet
- (and 3 more)
-
Just found this build log, Ian. Incredible work so far on a unique and fascinating project! Look forward to following the rest of the way on this.
- 536 replies
-
- 1
-
-
- Quadrireme
- radio
- (and 1 more)
-
SIB (Skier in Bottle) by Glen McGuire - 1/80
Glen McGuire replied to Glen McGuire's topic in Completed non-ship models
That sounds really good, Ian! Gonna have to try that out when camping season gets here in 6 months. -
SIB (Skier in Bottle) by Glen McGuire - 1/80
Glen McGuire replied to Glen McGuire's topic in Completed non-ship models
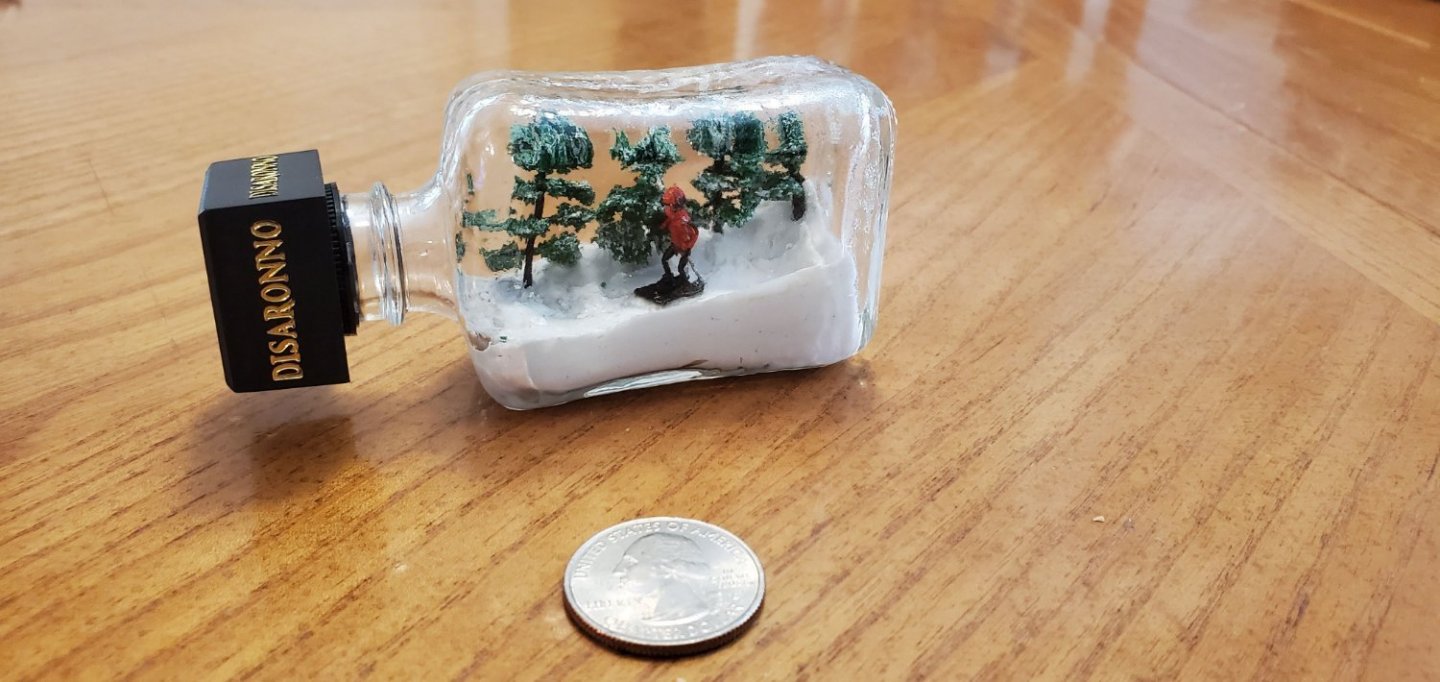
Even if you zoom in it's hard to see, but just on the other side of the trees you can see what happened to the penguin.
- 7 replies
-
- 11
-
-
Between SIB (ship in bottle) projects, I decided to try a different SIB project - a skier in bottle. I have a dear friend with a passion for snow skiing and also for Disaronno amaretto. On my last trip to Total Wine looking for ship in bottle bottles, I spotted a tiny glass bottle of Disaronno amaretto near the checkout line and an idea popped into my mind. Could I make a tiny ski scene inside that tiny bottle or has the Texas heat finally fried my brain beyond repair? Hmmmm. I figured it was worth a try. So I bought the little bottle of amaretto, got some mini trees off Amazon, stuck some white clay inside the bottle, made a little skier out of wire/clay, put her on brass skis, and stuffed everything inside. Here's the result. A bit crude, but my friend liked it. It’s the thought that counts, right?
- 7 replies
-
- 11
-
-


.jpg.bf7d5675dbb5641feafec99982695e19.jpg)