


Theodosius
-
Posts
322 -
Joined
-
Last visited
Content Type
Profiles
Forums
Gallery
Events
Posts posted by Theodosius
-
-
@SpyGlass, thank's a lot for your help! Yes, something on my ship is crooked, even if I don't know exactly what, lol 🙂
Yeah, of course only blame on me, the kit is phantastic! :). You are absolutly right with your hint for the sanding of the afterwards bulwarks...")
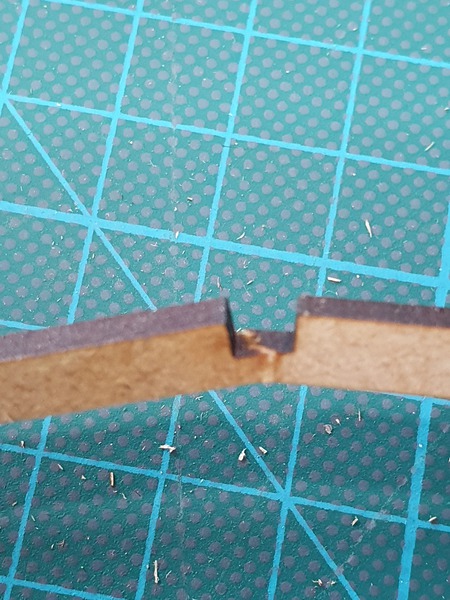
Glued the two-part-transom again to the ship: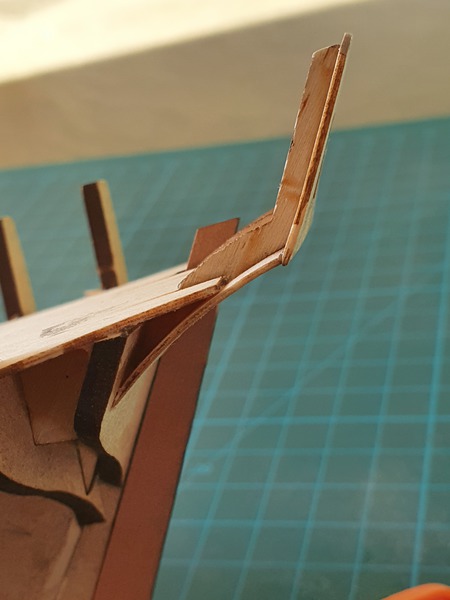
It is not 100% symetrical and I don't know why, but I have to live with that now. Lerning courve of a first time model, I think, äh, hope 🙂
Startet fairing(?) the hull:
Runt out of this cosmetic sanding stics. They work realy well for this, but they are used very fast.
So here is still plenty to do:
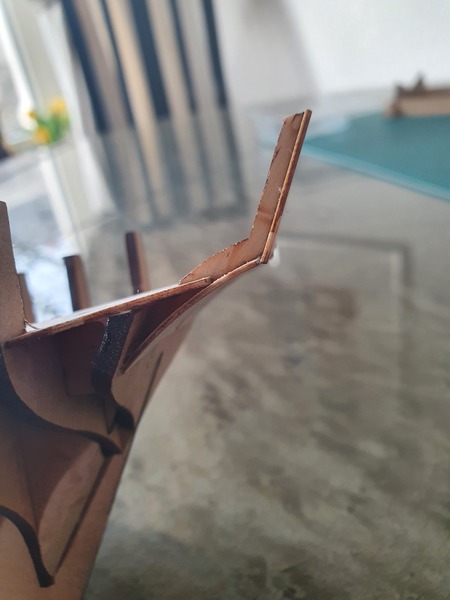
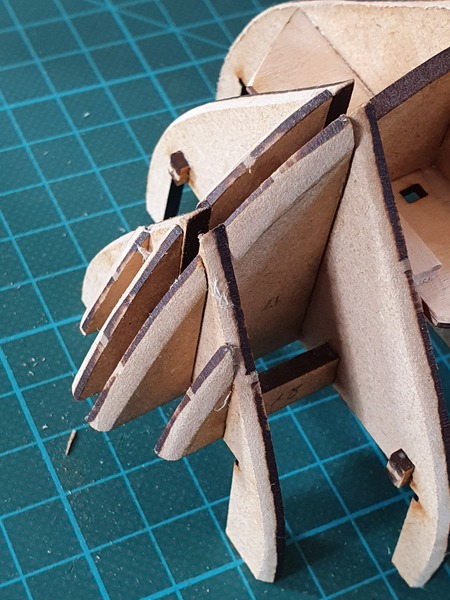
I wanted to check the upper part with the preformed bulwarks. To have some kind of a fix point to start with, I put the stem temporarily in place:

You see, that on the right side of the ship, I'm nearly at the rabbet with the bulwarks and fillers.
On the side I have sandet now, there is a bit more distance to the rabbet. Perhaps I have allready done to much with the sanding sticks?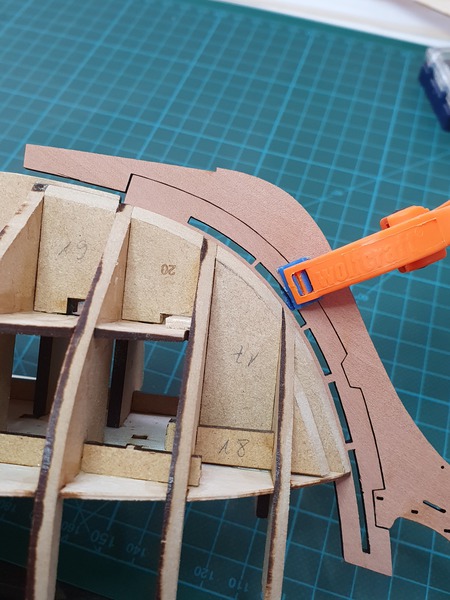
And this is the photo because I made this entry in my log, even though I wanted first to build more, to show more, but I'm not sure if this is right!?You see that big gap on the left side between the false keel and the upper stem part?
Can that be right that way? Is the 'air' just my rabbet, that I have to fill with planks?
Or does my inner stem peace (with the pre-cut rabbet) just doe's not fit right?
Thanks again for all your help!
Kind regards!
- KARAVOKIRIS and Katsumoto
-
 2
2
-
@SpyGlass: ok, thank's it is now on my 'to-buy-list' 🙂
Parts prepared for the next try: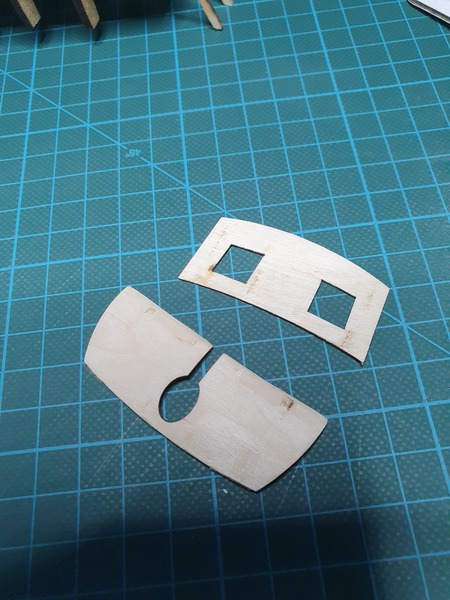
Glued the sternpost in place, with only two very small amounts of wood-glue. Used two strips of wood to secure it is parallel to the kiel:

But for what exactly? For some reasons, wich I don't know yet, I came out through the false deck not exactly in the middle:
In the end I could have called the first try a day and worked from there on, because I will not build up the frames again to search this IMO very small imperfektion.
Or do you think I need to search the reason for this imperfection? I'm sure they will add up, but, I don't think I would be able to build with more precission now, I need much more practice to became more familliar with wood, but even then I'm not sure if I will do this better in the future.
Thank you all for you help and kind regards!
- KARAVOKIRIS and Rik Thistle
-
2
-
-
Very clean and crisp work! This become a gem 🙂
-
@Rick Thistle: Hello Richard, thank's so much for your support! Yeah, as my old coach alsways sayed: make **** a hit :-).
I read the manual, a lot. In fact, both of them, as you suggested to do, but that's not enough. Experience is importend, to become a feeling, for what is better to fix, and what can be just made unseen with later steps :-). So I like all the advices from you all more experienced builders 🙂@SpyGlass: Thanks for your hints! And I just give it a try to redo it :-).
I wanted to try to rip it apart, and glue them again in a better position.
It's still early in the build, and I just wanted to know if it is possible to disconnect a glued joint.
You say it is possible, with Iso Propyl Alcohol. Well, I don't have any of this, but I thought I give it a try with white spirit.
And that worked too! I don't know if it work as good as the iso, but nevertheless, it worked.
Again, not that good I had wished, but I can only learn to improve my skills.
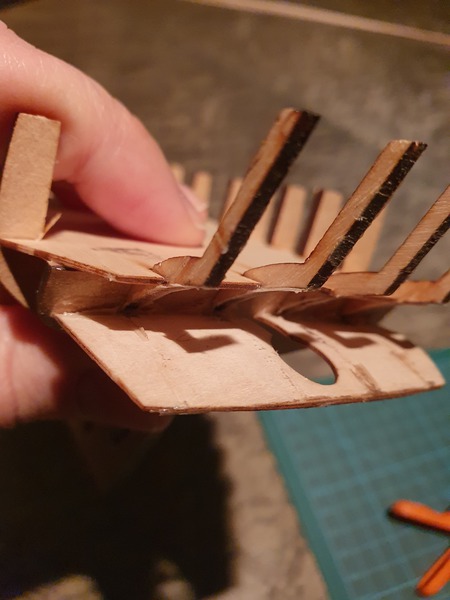
First, I tried to remove the upper transom. That worked quite well, I had good access to the glued areas.
The lower transom was challenging, because I can't reach the inner glued areas. Tryed my best, but managed to slightly damage the last bulkhead. But in this area, that should not be a problem.
As you can see in the pictures, I have more lessons to learn:
Use less glue!
Be more carefull!
Be more precise!
Check more before gluing anything!
Here are the pictures:
During the ripp-off-process:
Lower stearn, heavy cleaning required:
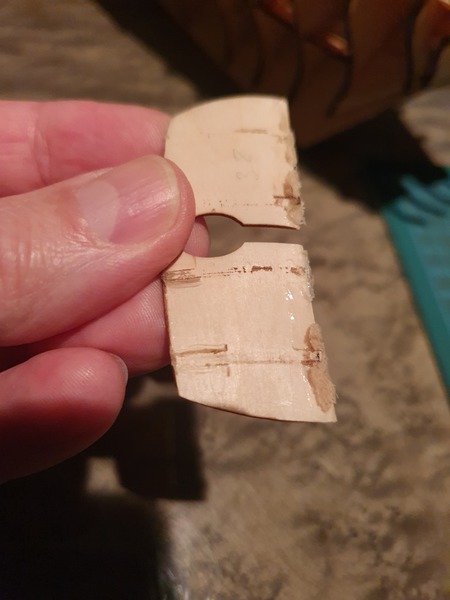
The small frames, also in need for cleaning and removal of to much uesd glue:
Perhaps it had worked better with Iso Propyl Alcohol. Will buy some of this for the future.
Next task will be to clean up the ripped of parts and glue them again to the ship. Perhaps this time then in the correct positions.Because the loosing of the parts with the white spirit worked good, I think about to glue the stern pice in place before I put on the two transom parts again. And afterthat de-join the sterm again.
Dunno at the moment.
Kind regards and agin thank you all very much for your help!
- ccoyle, Rik Thistle and bruce d
-
3
-
@SpyGlass: thank's for the hint about the transom frames. I was cearful enough to not break them :-).
And thank you for your planking-advices, they're much appreciated 🙂@Richard: thank you too so much for your very helpfull and informatife planking-tips! I'm sure, they will be of great help for me!
Yeah, it's not the easy way, but, atleast until now, very satisfactory :-). I don't know jet how to comment more to your great advices, because, I just have no idear, but time will tell, I'm sure of :).
Let the transom soak water for 30min, as by the instructions, and clamp it on a bottle of paint: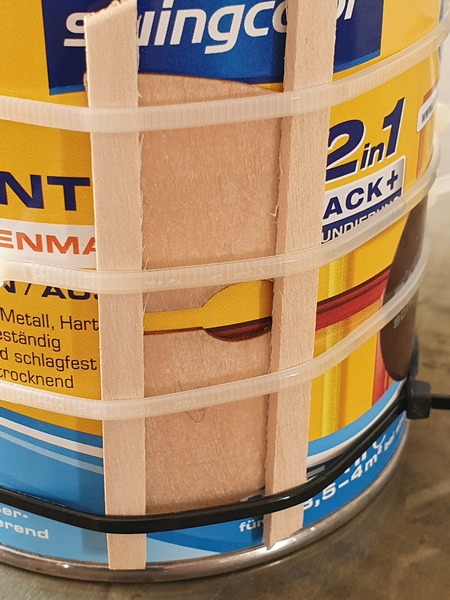
It could dry out for the night, but that was not sufficient.
Again, 30min hot water, and then it was again completly flat!?? Nevertheless, now I put it on a glass with smaller diameter:
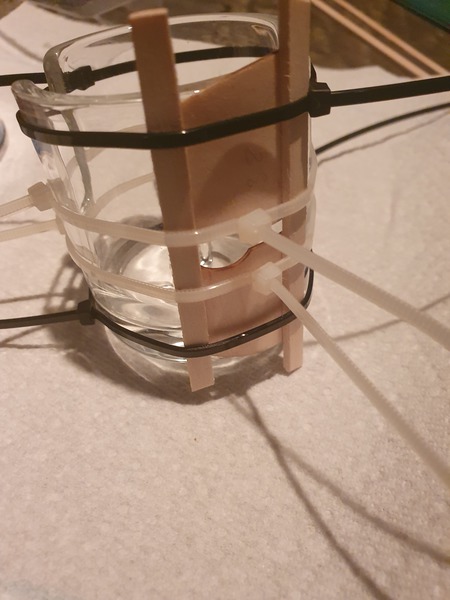
That worked better. Infact, it was slightly more bend now, than was needed:
I clamped the sternpost to the false keel and glue that pice in place:
PROBLEM: I realy managed to put it slightly out of its needed place. Perhapw 1/10 of an mm 😞
So the overall shape of the two-part-transom is not perfect, as is the hole for the sternpost and the rudder. I hope, that filing/sanding can solve this. I need to make the hole on side a little bit wider. Should not be a problem, because the planking is still left.
Can I fix it this way?
Thank you all for your great help!
Kind regards
- DelF, KARAVOKIRIS and bruce d
-
3
-
@Richard: you are right in every way! I read all the build-logs about Speedy and Flirt that I found, they are extremly usefull. But it is one thing to see something in a picture, and another to do it yourself. But I have to break some eggs, if I want some cookies 🙂
And what a phantastic idear to also look into the instructions of the sister-ship Flirt! The same build, but different pictures and explanations! Very helpfull! Thank's again for that very usefull hint!
@SpyGlass: Thank's for lookin in and leaving an comment! :). I read your log severly times, and it is for great help! Good idear with the black marker on the Bulkhead edges, I will do that before I start the final beleveling. Good tip with the blocks too! Need to get behind the 'Angst' and just do it 🙂
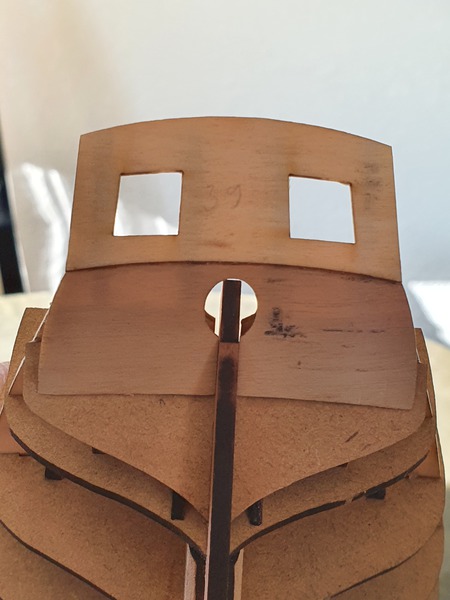
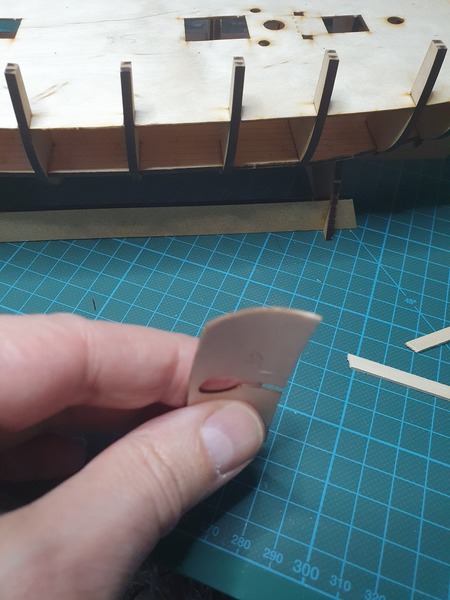
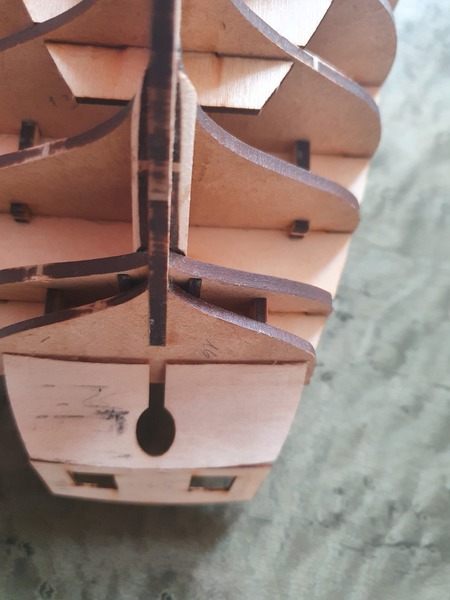
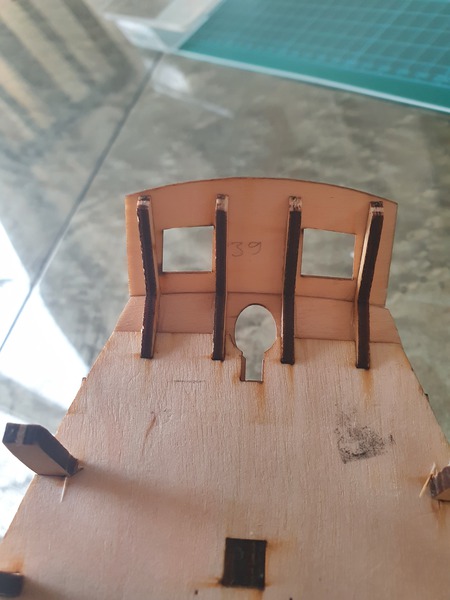
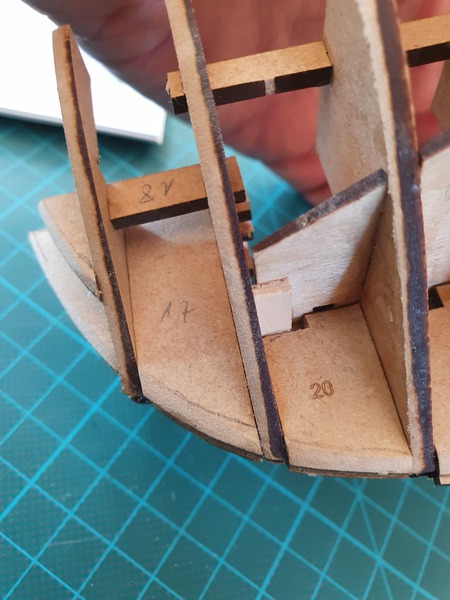
Build in the last bulkeads at the stern, sanding the top down, so that it is flush to the deck. Last, the four frames for the transom:
Pre-shaped ? between the last bulkeads. Dry fitted it and make some marks with a pencil:
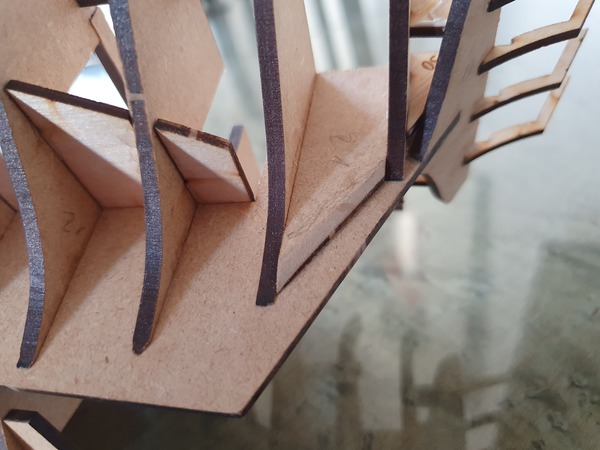
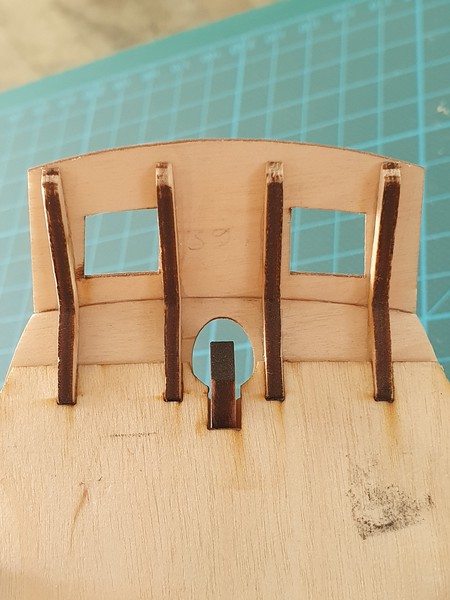
The same at the bow:
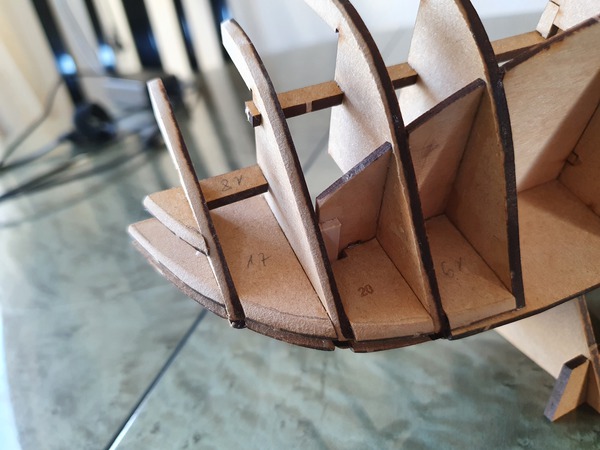
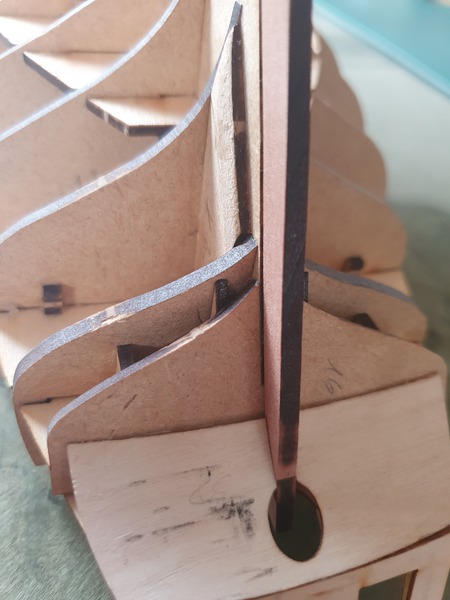
I had a gab between the lower deck and the bulkhead nr. three, so I cut a smal strip of wood to stiffen this out. I'm sure, this was not neccessary, but because I have to do the bulk of the beleveling later, I wanted all the strength that I can get.
Of course I had not think about this enough, because part nr. 20 did'nt fit anymore, so I had to cut out there an edge for my trip.
Last, I glued the main deck in. To provide power in the middle of it, as suggested by the instructions, I placed some larger strips on it and clamp them down. You can see, that they are in the air at the edges, and have contact/pressure in the middle. Don't wanted to put nails in there:
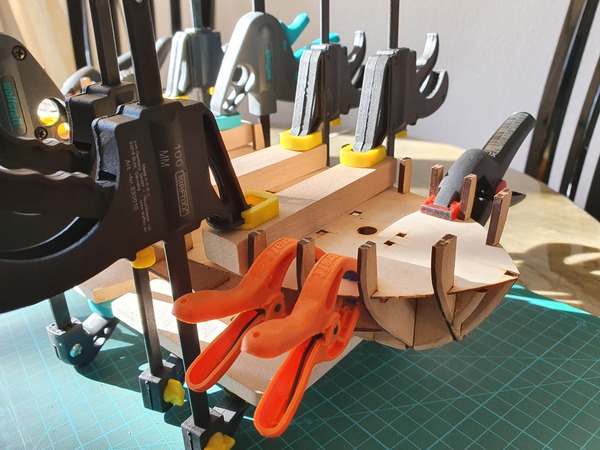
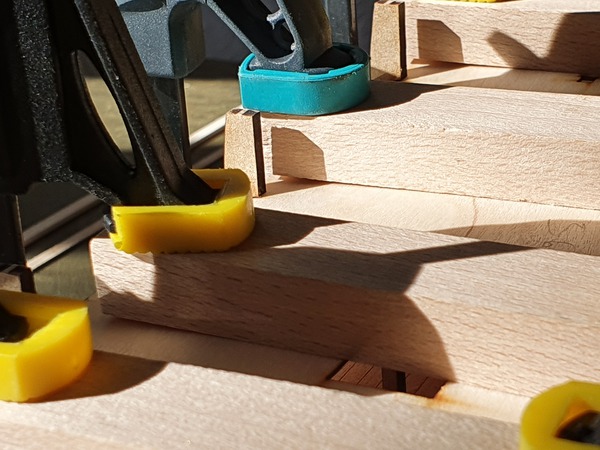
Run out of the larger clamps, so I need to use the smaller ones at the stem and stern, should be ok, I hope:
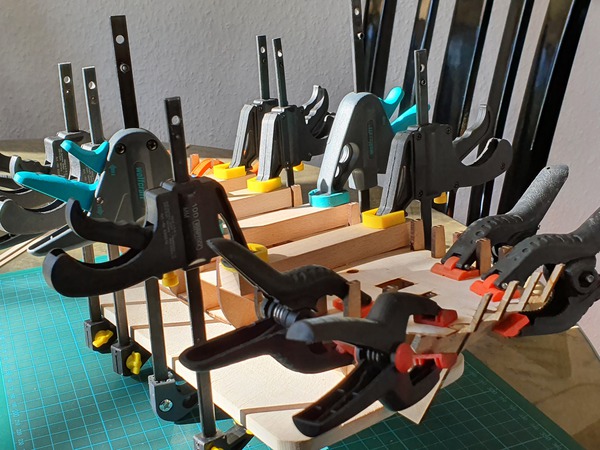
Now, at least 24h to dry, and then I have to belevell all the frames. The first task, I have a little bit respect for, because this defines how the planking will go, wich I'm most afraid of...
Kind regards.
-
@Rik Thistle: thank's for your nice words :-)! Yes, the kit is great to build! I'm realy happy to buy a Vanguard kit and nothing else for my first time build.
Unfortunatly, there are no marks on the frames, but they would be of great help for me :-).Parts fit realy well, so it is a lot of fun to build.
But I think I'm the first here to manage breaking on of the longitudinal stringers:
Dos'nt matter in the end.
What I realy struggle with is this: beveling of the first frames without any hint how far this has to got!
I realy would appreciate a kind of marking line on the frames or the planes! Ok, perhaps only for the first time builder I am, but nevertheless :-).
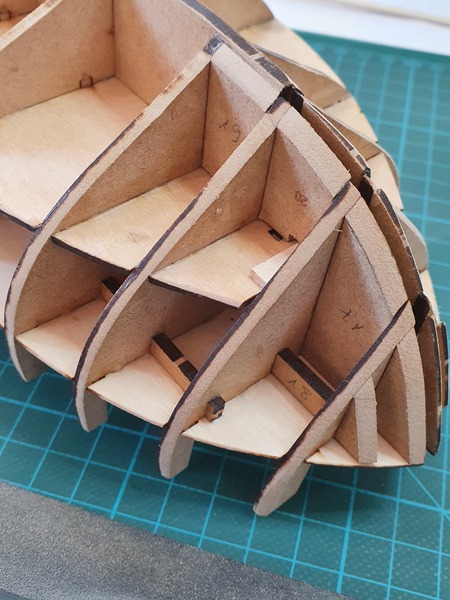
This is, what I have done so far, I hope, I did'nt overdo this allready...
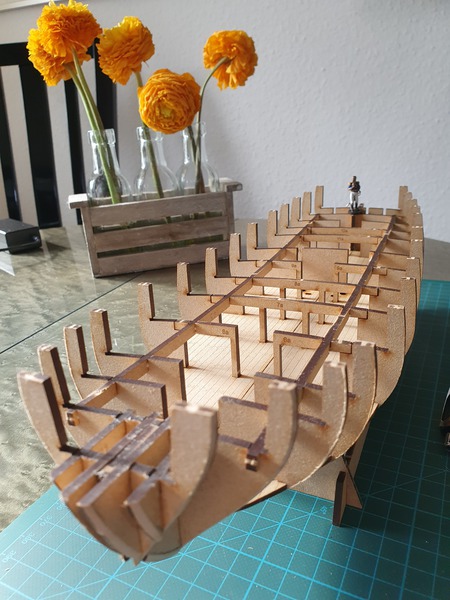
And an overwiev of the whole thing so far:
Thank's again for all your great support! 🙂
- chris watton, Cuda1949, KARAVOKIRIS and 1 other
-
4
-
-
@SpyGlass: thank you very much for leaving a comment here :-).
Well, I think this is nither a competition nor a race ;-), only importent thing can be the joy of the building process itself, as you say! 🙂
First parts glued together, the stand:
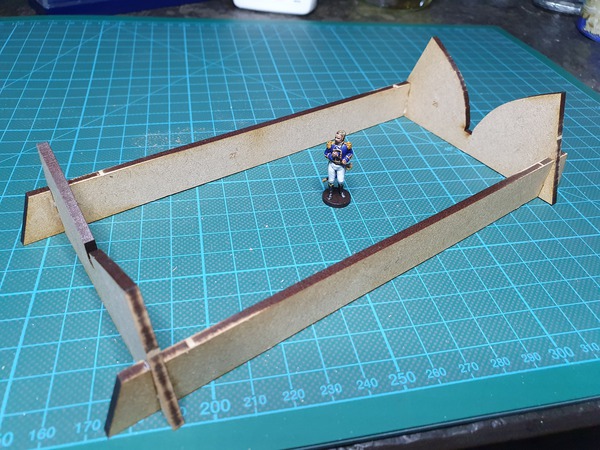
Bulkheads prepared and set together: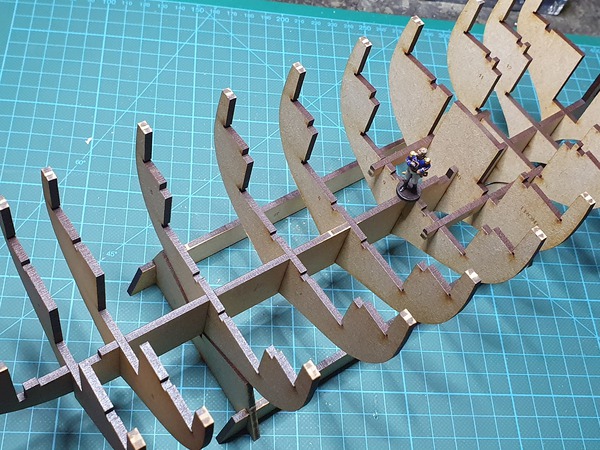
Together with the decks: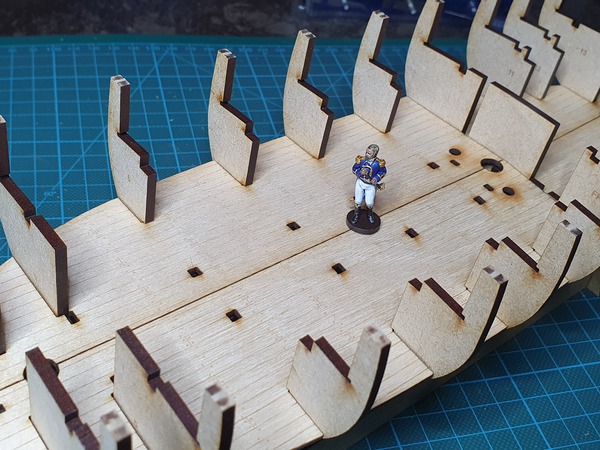
Panorama view: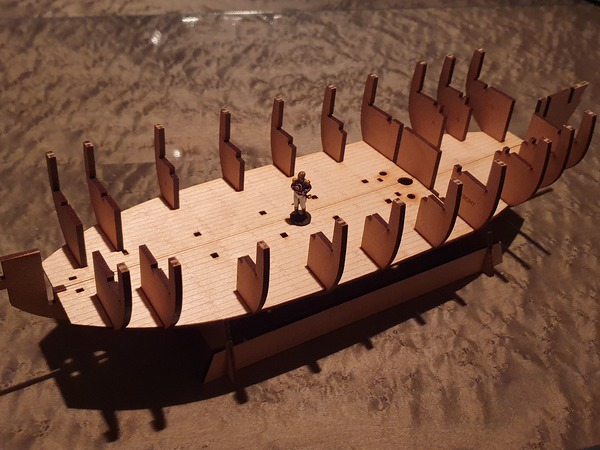
Funny to see, what skills I have to develop. I mean, it is not so easy to hold work the sanding tool of choice exactly square to the part. I see, I have a very long way to go...
So I'm still workin on the easy steps. Nothing glued jet, bar the stand, of course. Until here, it all fits nice together. The decks makes the bulkeads automatic square, but I will do some minir filing/sanding, so that the bulkeads are square to the keel even without the decks.
I read the whole instruction severel times now, and of course I have a question early in the modeling:
I understand why there nees to be a bevel on the bulkheads, and it also makes sense to me, that it is easier to get the bulk of it done before the first frames are includet, but how much?
In the other build-logs one can read: it's never enough, but be careful with the mdf.
When you are familar with this process, it is perhaps not difficult, and it is possible to repair everything, but the first time bilder I am, I'm afraid to damage something and do to much.
What would be great, would be a marking-line on the bulkheads, where it shows how far into the side one have to sand it down.
Perhaps that could be an idear for an beginner-improvement to the kit. I'm sure, the veterans are now loughing about me :-).
Thanks all for lookin in :-).
- chris watton, DelF, Rik Thistle and 3 others
-
6
-
Hello!
Well, what can I say more than this will be my first wooden ship model. So, I'm afraid, this will be more importend for me, to get any possible help, than for you with anything interesting new. Perhaps I can make some 'new' errors *g
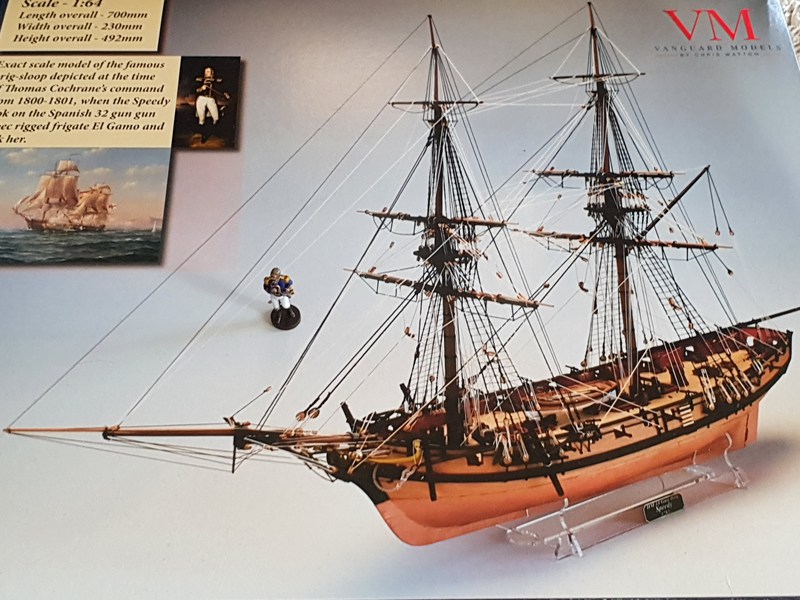
Why Speedy?
I have another kit, but never started do build it. It is a collectible kit, and the more I get, the more I was dissapointed about it's quality, so never started it. But it was not only the quality of the parts, the more time I spend with it, the less appealing it was for me, because it don't look 'right' to me any more. Spend lots of money for nothing. Lessen lerned: spend more time in research!
So I read more and more, and at last, I arrived at the Vanguard models. Not the cheapest, but I think here you become the most bang for the bugs, imo well worth every penny, even though I had to pay another 20% taxes for importing it.
Again, why Speedy? First, looking realy good. Then it's small, that is importend for a first timer, I think, to not run out of motivation when the problems accure, and I'm sure, they will come. And last, what I saw about this kit, it seems to me as it is well constructed, and that there is not a single place, where the 'red-pencil'(?) of saving many toked place. I like that, realy!
And then, here are a lot of stunning builds of this model, which provide a ton of additional information, that's why I created a new account here.
First: many thank's to Chris from Vanguard models for sending it so fast! I was very pleased about the speed, quality of the kit and the realy nice contact!
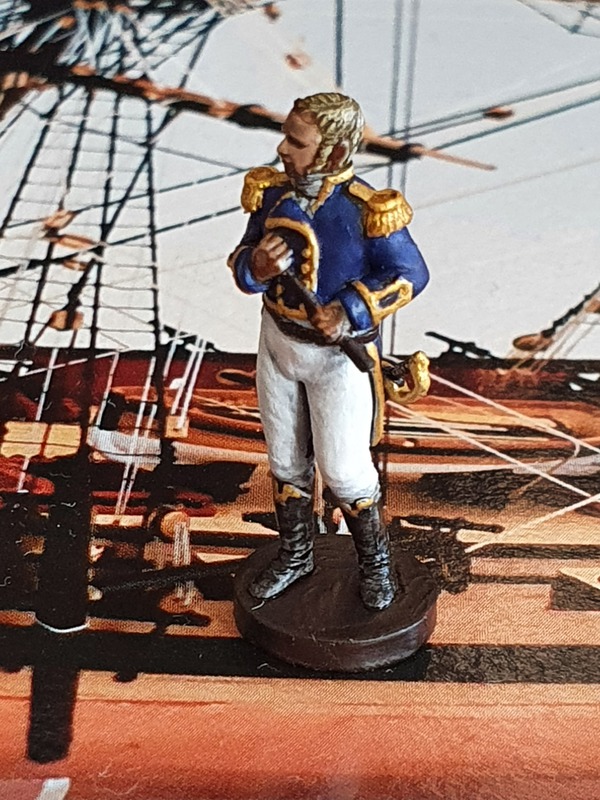
Started with Thomas Cochrane. Damn, this is a small boy! Reading about his life, I thought, he must be much bigger... 🙂My respect to everyone who has achieved a good painting job on him.
Here's what I had done on him so far:
- Jack-in-the-Blue, ccoyle, bruce d and 7 others
-
10

HMS Speedy by Theodosius - Vanguard Models - 1:64
in - Kit build logs for subjects built from 1751 - 1800
Posted
@SpyGlass: thanks for the pictures, and the link to your old log, that was of great help! 🙂
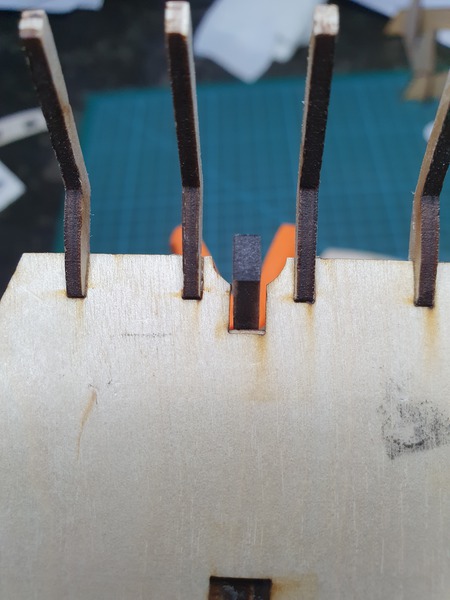
Stem-peace now fits as the instuctions. Problem I had: some bubbles of excess glue, where the stem should go in. That was great :).
Next, I sanded more, so that the planks will fit. Still dunno, if it is ok, but I will see I guess.
And here are the next problems:
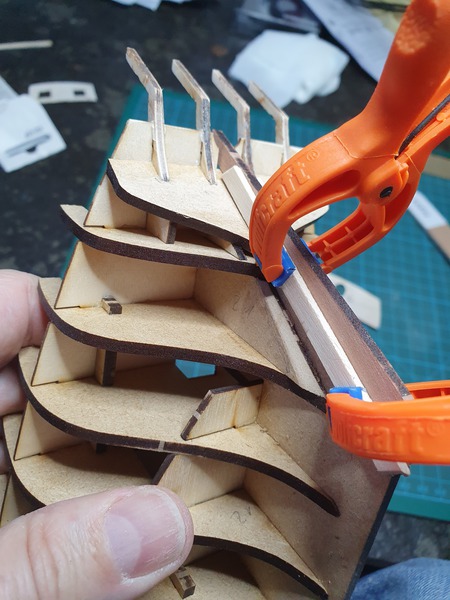
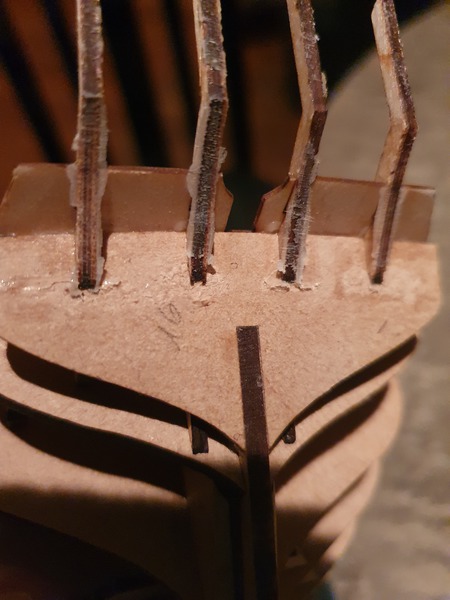
I managed to break the steam-peace the second time now. Allways, when I fit the bullwarks in and bend them further to the hull.
So I have pictures of the actual dry-fit, äh, wet-fit, because the bulwarks are soaked with hot Water.
I did this without the stem-peace, because it is broken at the moment, I still did not glue it for the second time.
Nevertheless, here is my problem and question:
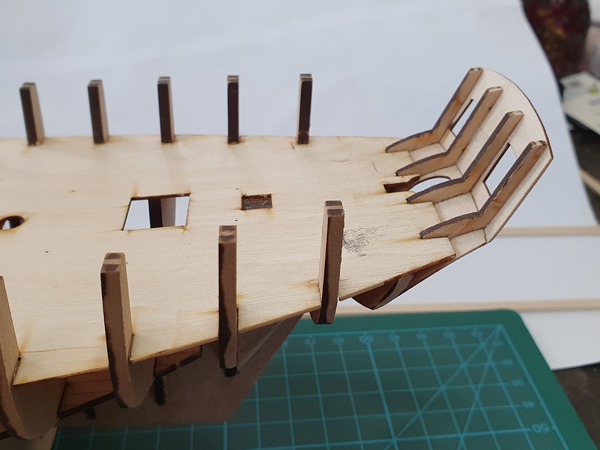
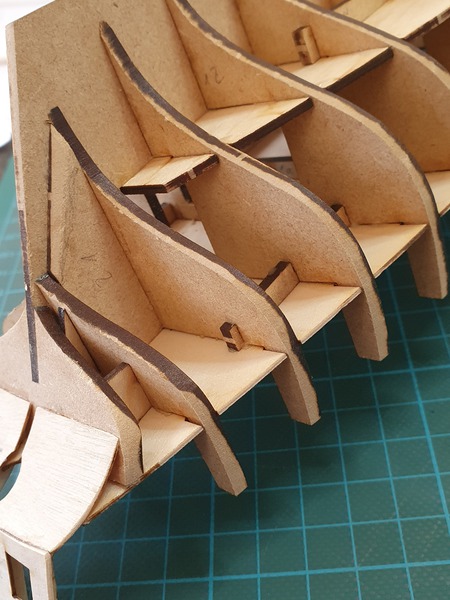
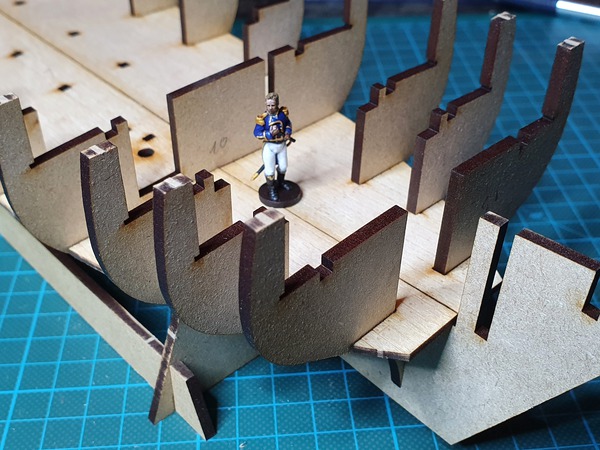
While I get a good fit at the hight of the deck, and on the upper-side of the bullwarks:
I have a gap at every of the first few bulwarks, when I look from the underside. Sure, they are curved, and the bulwark-ply is flat:
Buuut, when I simulate nails with my fingernails, I become waves:
What is wrong, what can I do?
Thanks for your help
and kind regards