


Theodosius
-
Posts
322 -
Joined
-
Last visited
Content Type
Profiles
Forums
Gallery
Events
Posts posted by Theodosius
-
-
-
For my eye, this looks very authentical! I like this! 🙂
- Dave_E, DavidEN and mort stoll
-
 3
3
-
-
I don't know why I do this, because I will not buy this kit, but as I already said, I like the Ship, and a new kit about it is interesting :-).
Abut the different guns. You are right, all the older kits have the same guns on every deck. Plain stupid. But not this one here! I downloaded the instruction manual, and for the third deck, forecastle and upper deck at the stern, they used three different sizes of gun barels. Thats's prety good, I think.
But what is not good at the same time: they seem to use the same size of gun-cars for this. But everybody who is realy interested in this kit should ckeck this for themselves.
Another pro: the first battery is cut out for 16 guns, that's the first SR doin this, and this is IMO also the actual state of research.
Another con: but I can not prove this, this is more a 'feeling': I'm not sold about the overall look/size/form/lines/hight/etc. if I compare this to the outstanding researched and developed builds of both NekO and michel saunier.
I believe NekO wrote in his build, that AL used some drawings from him without permission. That would be a pro for the kit, bat a realy realy BIG NO GO for the manufacturer and reason enough not to buy this until this is sorted out.
-
At some point in my life, I build the Heller Soleil Royal, so I have a weak spot on this object...
And, sure, I'm not an experienced modeller, not a good one, but I also want to share my opinion on this kit.
I'm full with Katsumoto: the selling point of this are the ornaments and the sculpures! I think they are very nice and well done.
Most of them are used in the Stem and the Stern assembly. I would say (but there are more pros about the french ships here in this forum than I am), both are more in line with the actual research. For example the six windows in the stern.
I would also point out, that the full guns are obviciously new for this kit, and they match the originals quite well. I can't say anything about the gun-cars.
I think, that are realy strong pro's for this kit. And perhaps the development of this alone eats the bulk of the costs of this.
Downsides: the sides of the ship are missing a lot of its decoration. Perhaps the most easy ones to create by yourself. They are only a view variations, cast the rest at will.
Another downside: the blocks for rigging. I mean, this kind of rig with sails will need severel hundrets, if not thousands of blocks. And in this kit are only blops of ply! You need to carve and drill them all before you can use them.
But, I think I can understand what was going on Artesanias mind, or, better: that's my explanation of the shortcommings: they wanted to stay under the magic 1.000.-€/ price tag at any cost (ok, bad joke)!
We all know what good blocks alone costs on the aftermarket.
In the end I have no idear, but I think, this would have cost at least 1.5 times or perhaps 2xtimes it actual price tag if they did all the things we don't like on that kit. I don't know how that would sell.
It should be possible do build a nice model out of it, if you are willing to add what is missing, but it will cost you some additional bucks.
-
@ccoyle: thank's a lot for your motivation! 🙂
Ok, now let's go to the more detailed explainations:First I thought I can easily lengthen the vertical rails.
I just went through my stocpile(?) of Evergreen strips:
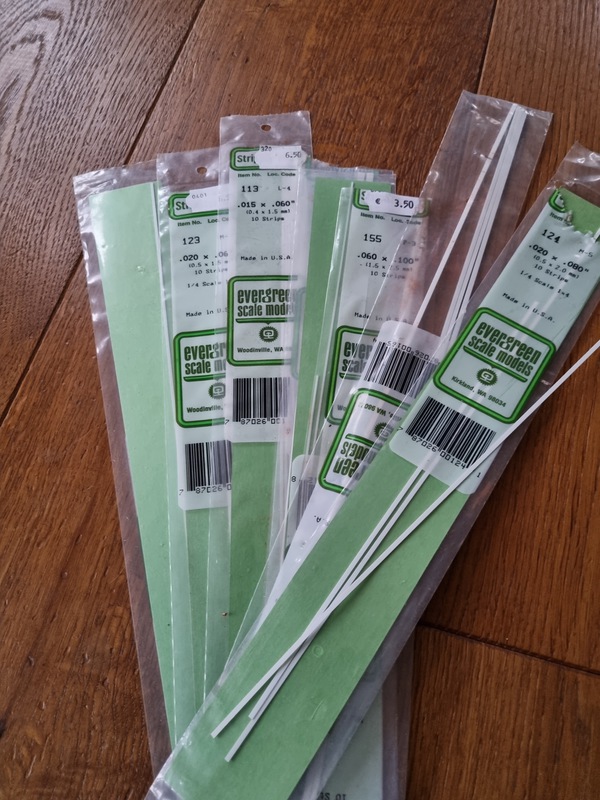
Found 0,4x1,5mm, that would do the trick:
And then I thought to myself: wow, this is a lot of work to cut and paint them exact enough to get a good look out of it.
Perhaps I just can repair it? And what the hell did I wrong? Carefull read the instructions again.
In the end a simple error, or perhaps the better term would be: added marginal gains...
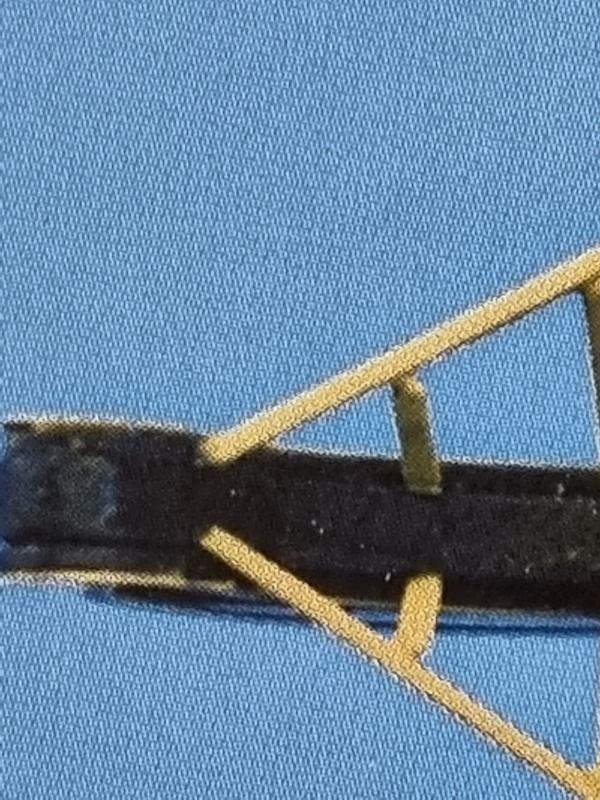
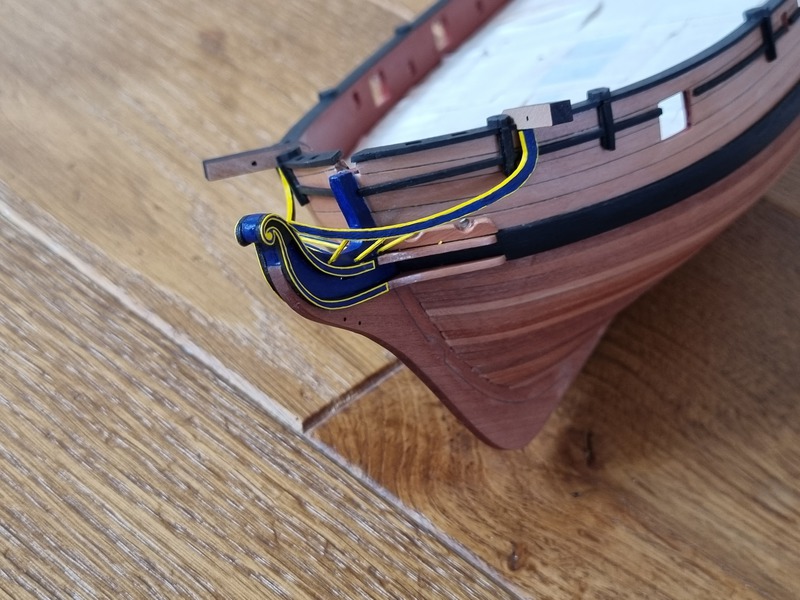
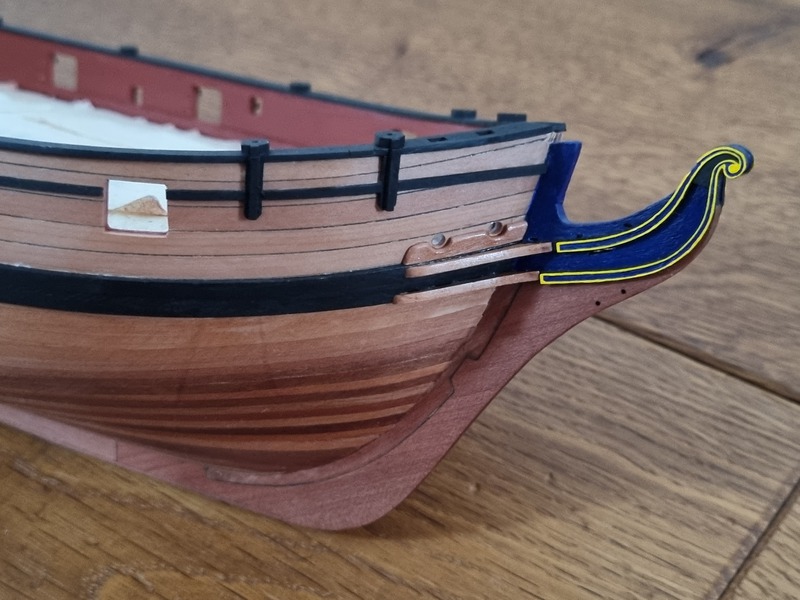
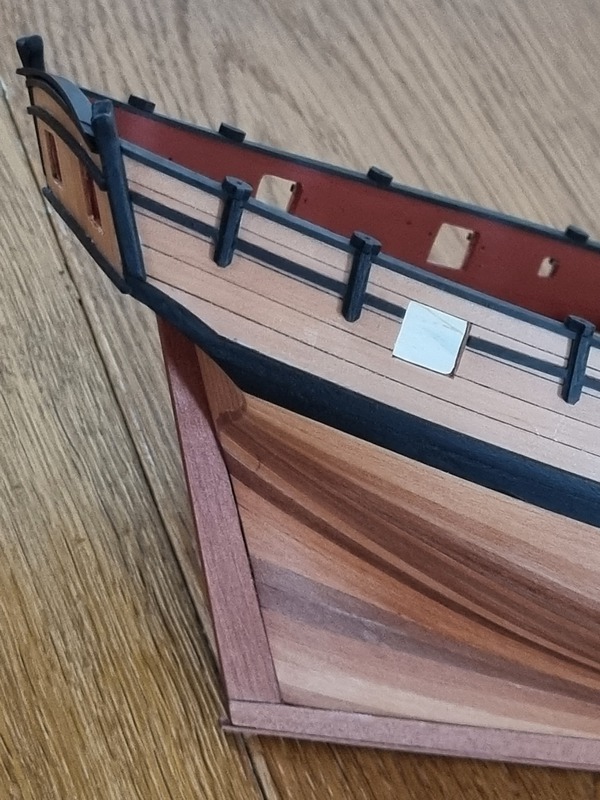
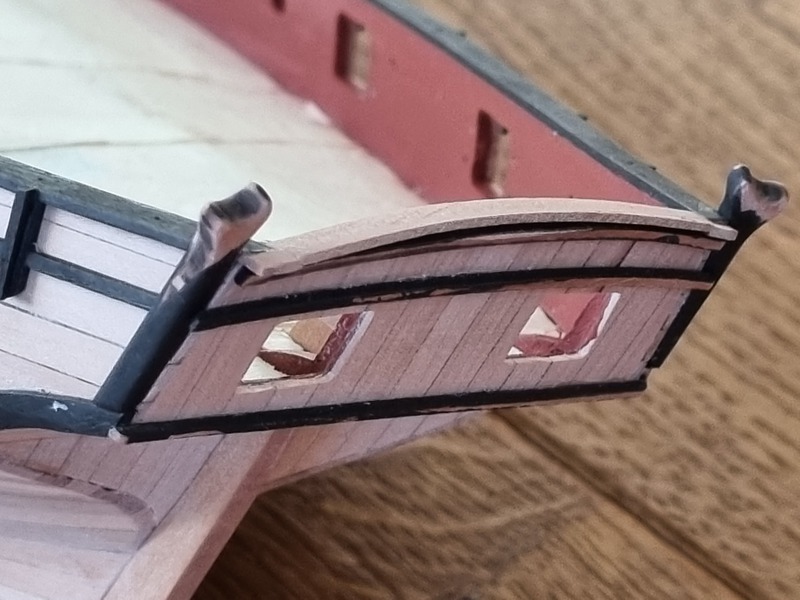
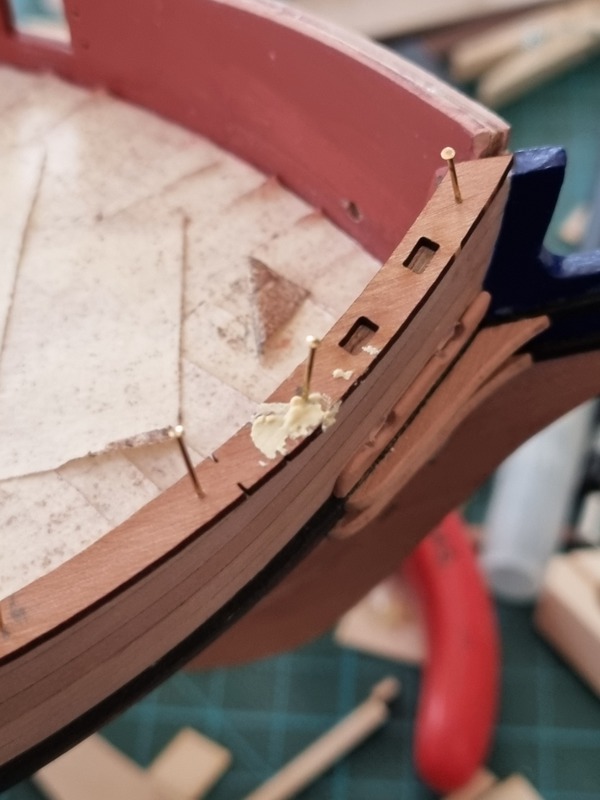
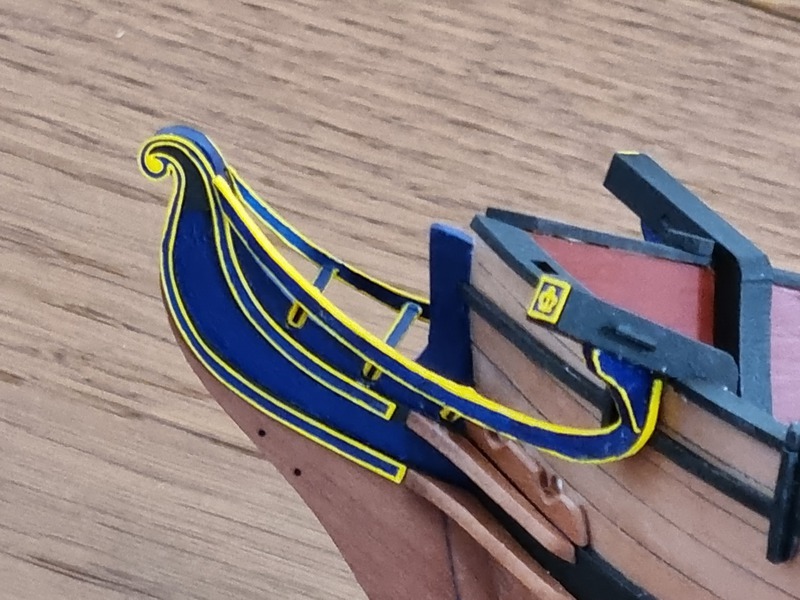
First, in the hair bracket decoration is a gap exactly where the bow main rails would fit it. This was my first and most important anker-point, where I start fastening it:
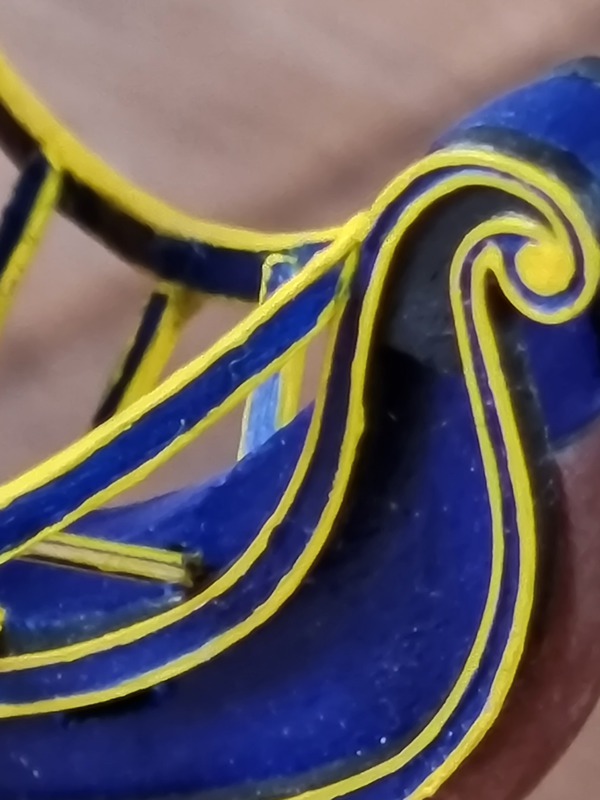
ok, this is not a perfect clean work from me, but this is a very strong magnification/macro-shot 🙂
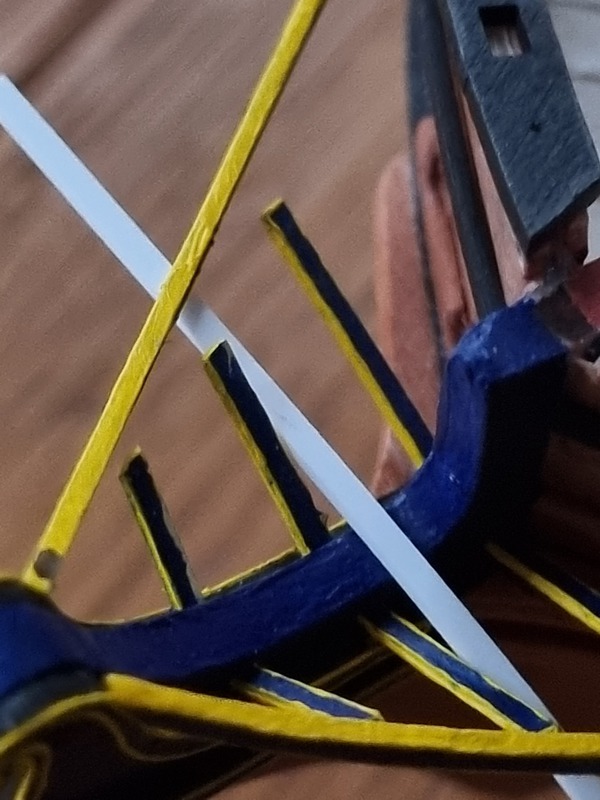
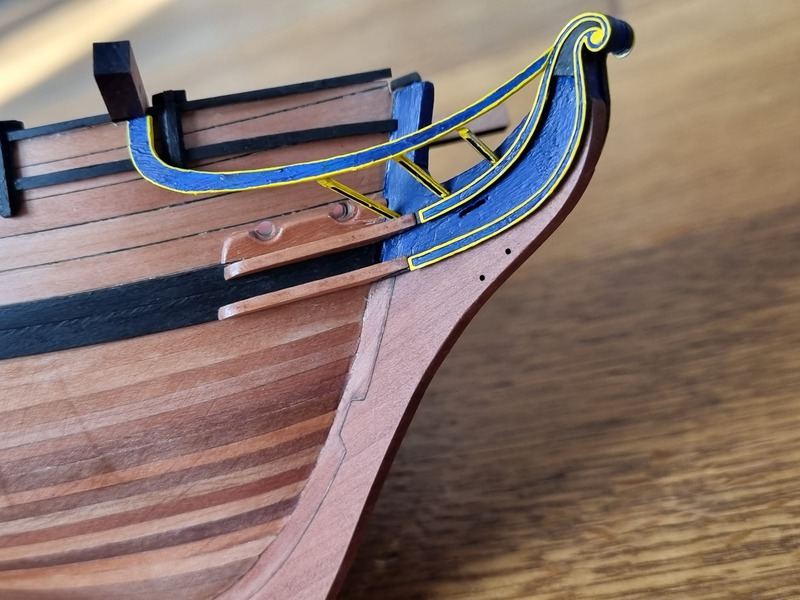
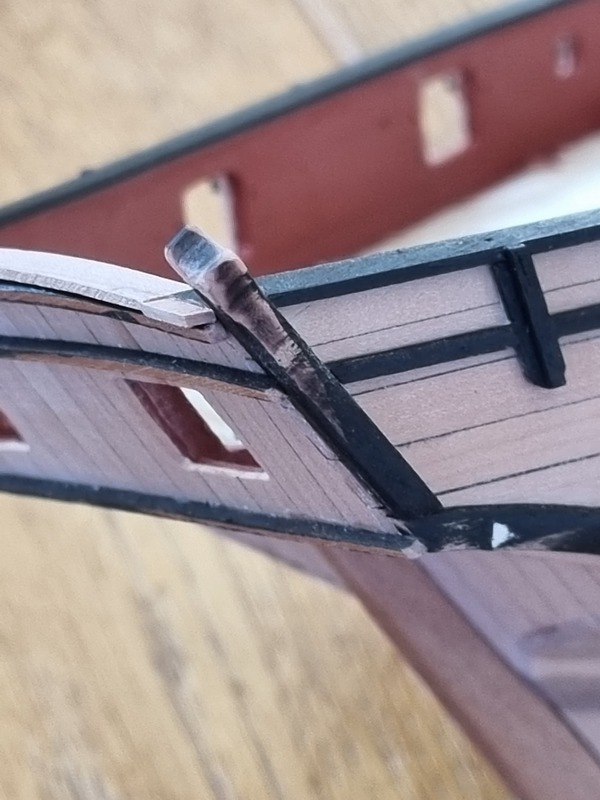
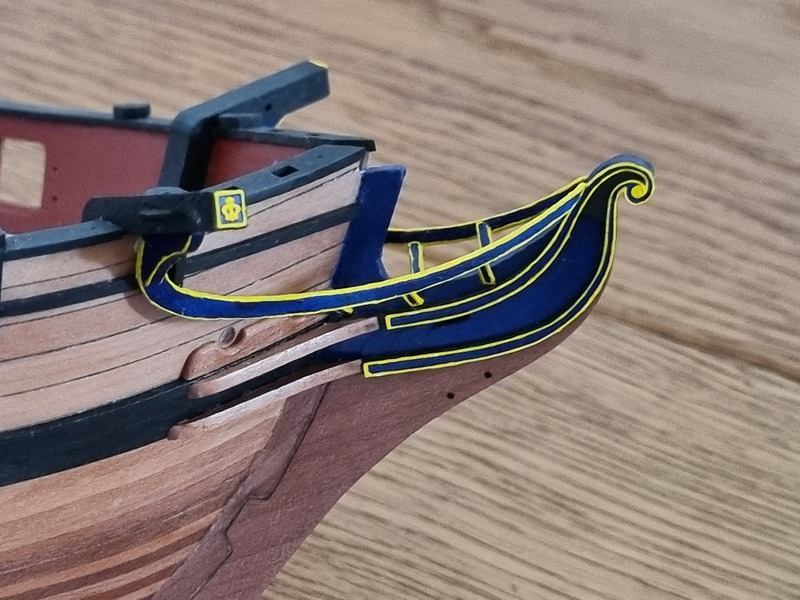
My second anker point was just the place, where the rail ran into the bulwark:
If I would have read the instruction manual and the plans more carefully, I would have come to this solution, and I must say, the plans and the parts are allways spot on! Realy a phantastic kit on this purpose!:
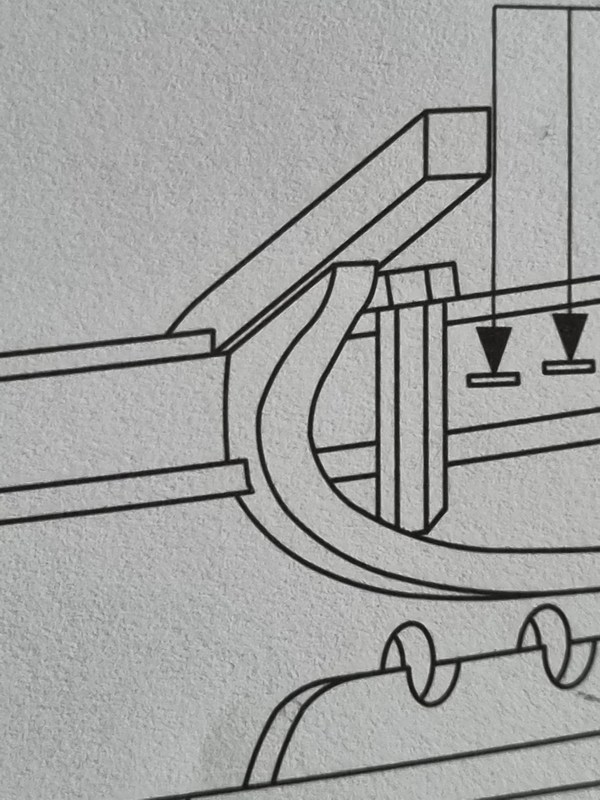
As you can see, the plan shows very clearly, that I should have cut out the upper rail where the rail ran into it. This would have bring it nearer to the hull, and therefore nearer to the vertical rails.
The second part, and this would shure have closed the gap, is, an excerpt from an picture of the instruction manual:
This picture says: just go as much inward as needet to touch the vertical rails.
Doh.
Break out the upper rail (my paintjob... lol) again?
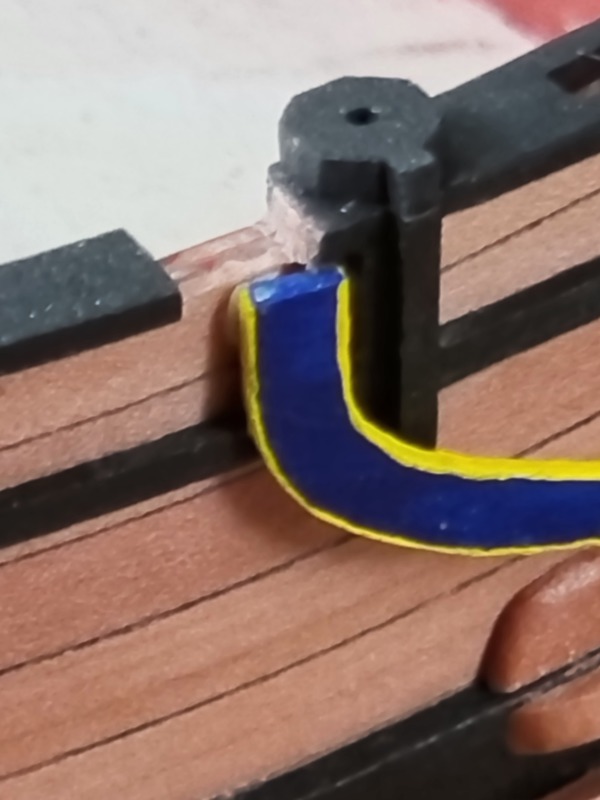
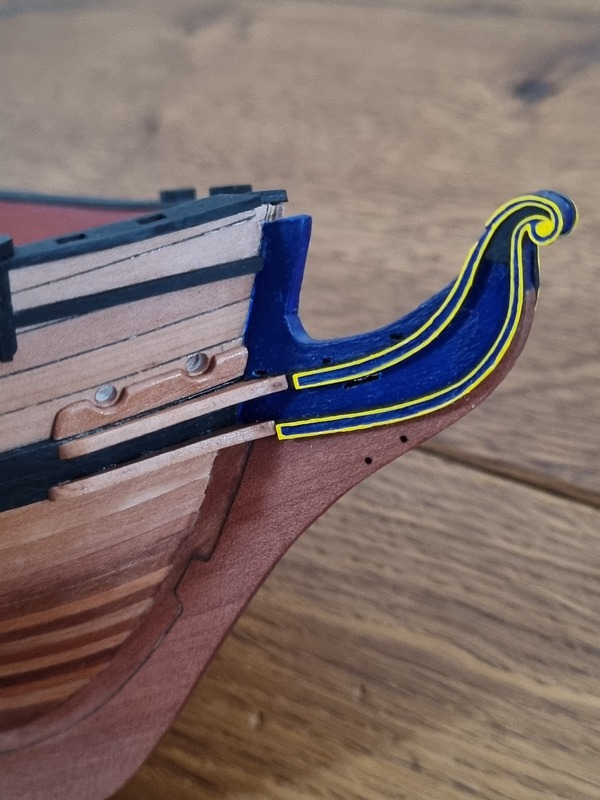
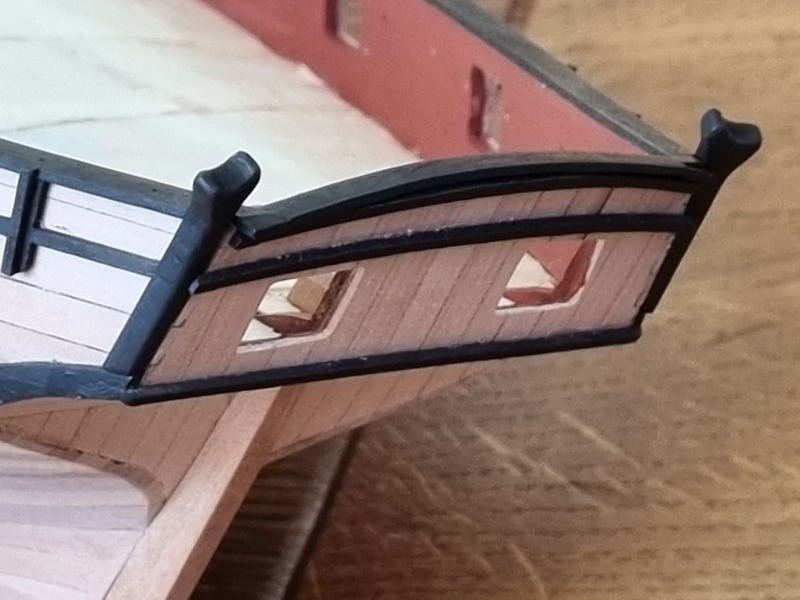
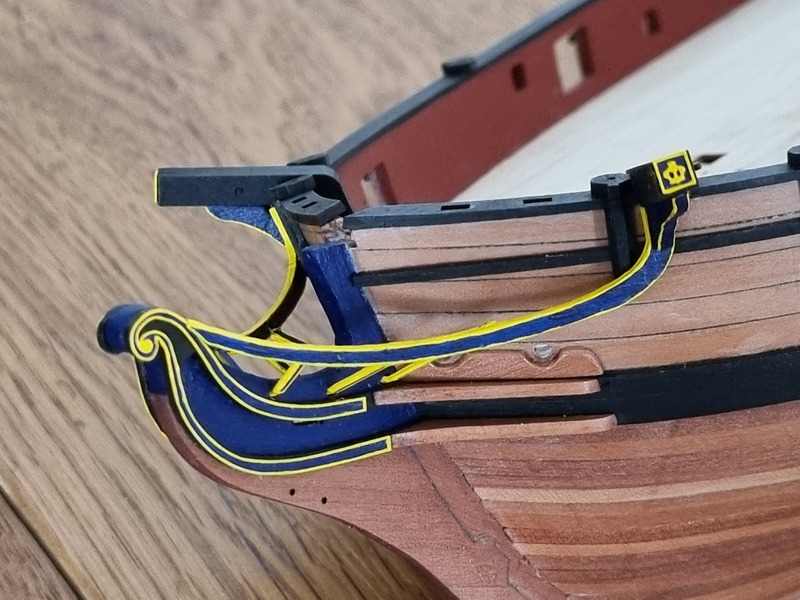
No, the very simple solution I choosed in the end:
Just squeeze the upper rail until they touch the vertical rails, apply a small amount of super glue, hold until dry, profit:
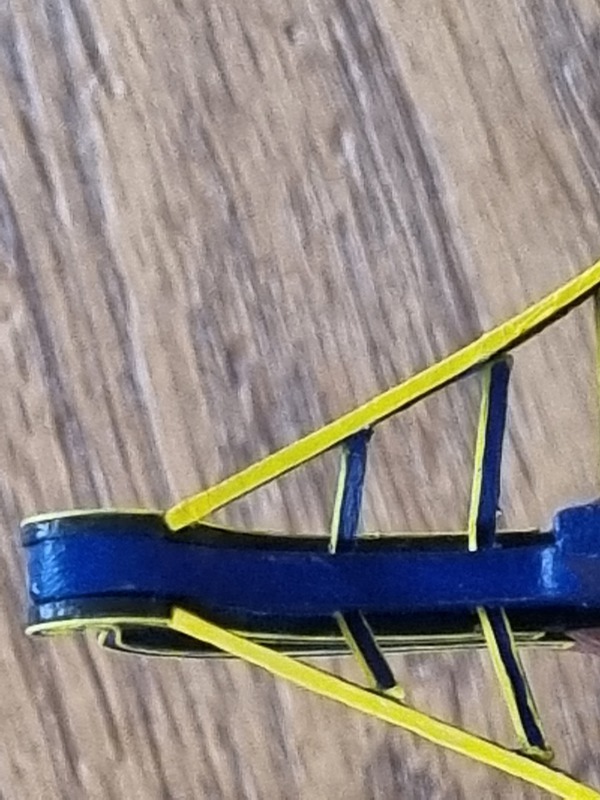

I also darned the paint job as good as I could. Ok, this solution is not perfect. Now I have a minor curve in the outer rails and the the inner rails ar not perfectly aligned. Nothing I can see with my bare eye, and, I'm very sure abaut this: no one exept for myself will ever notice this (ok, ok, I just write my errors nice...). And then there is the bowsprit with all it's additions to come, so in the future there is not that much visible as it is now.
What can I say? If you have an idear for your problem, it dissolves in air, lol. BUT: if you would just read the plans and the manual more carefuly, those problems would not arise :-).
Ticket to myself: more plan studys needet, it's all in there! 🙂
IMPORTAND QUESTION: please tell me if it is not allowed to show small snippets from the plan/instructions, and I will delete them right away!
Thank's for watching the noob doin' noob'ish stuff, *g
- Quimp Slattery, ccoyle, KARAVOKIRIS and 5 others
-
8
-
great mix of the ancient and rocket sience 🙂
- DavidEN and Beef Wellington
-
2
-
-
For now only the very short version:
Problem solved (what went wrong and my solution), so many thank's to everybody who might have thinked about an solution for me :-).
Explanation and pictures have to wait, will follow later...
-
@Thukydides: thank's a lot for your advice! You are right, it should'nt be to hard to improve the paint job.
My problem is, that the vertical bow frames are too short :-). Now I need a way to lenghtem them without changing all to a complete mess. And at the moment I have no idear, how to do this 🙂
-
-
Phantastic work on the, well, I would call this one the refference build 🙂
- Blue Ensign, Nipper, hollowneck and 1 other
-
3
-
 1
1
-
Wow, that look's very good with this paint job!
- Thukydides and Obormotov
-
2
-
@SpyGlass and @Dfell: thank you very much for your thumbs up! 🙂
I ran into a PROBLEM and yould need some help/advice! 🙂Things are comming together, or not, as you can see at the end of this episode.
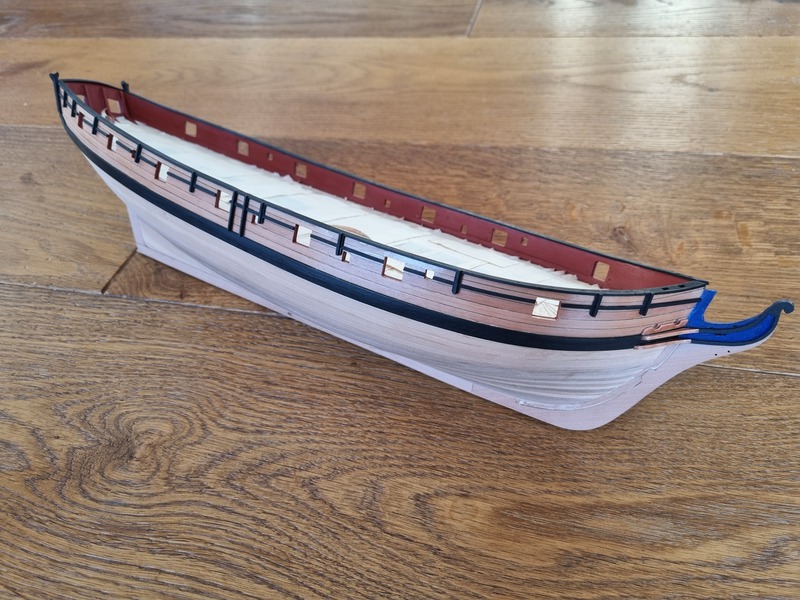
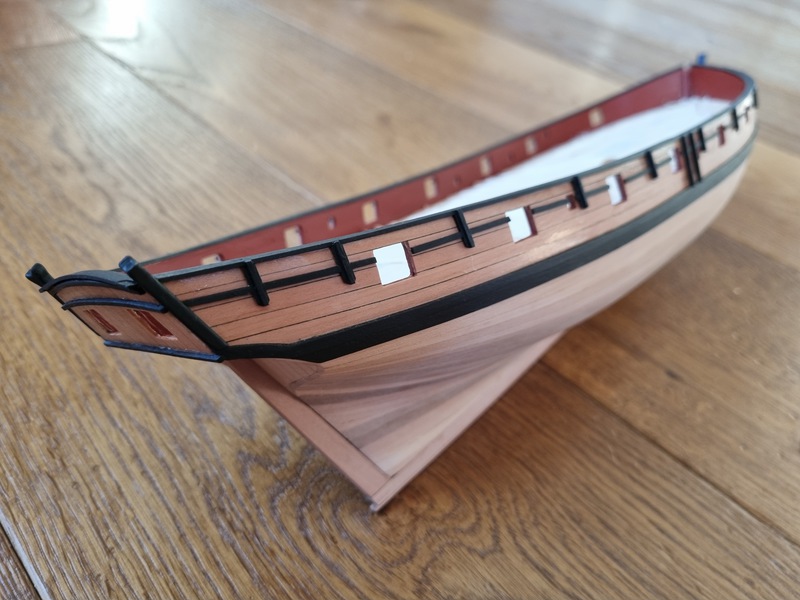
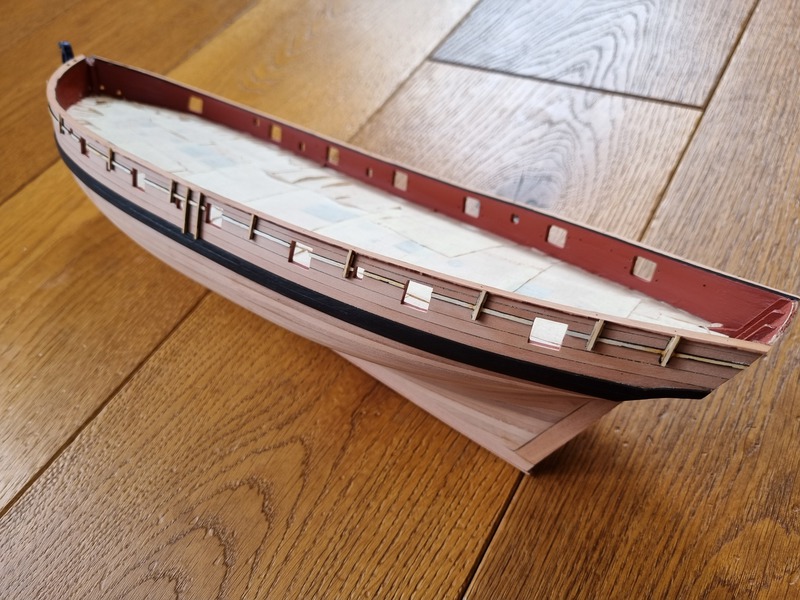
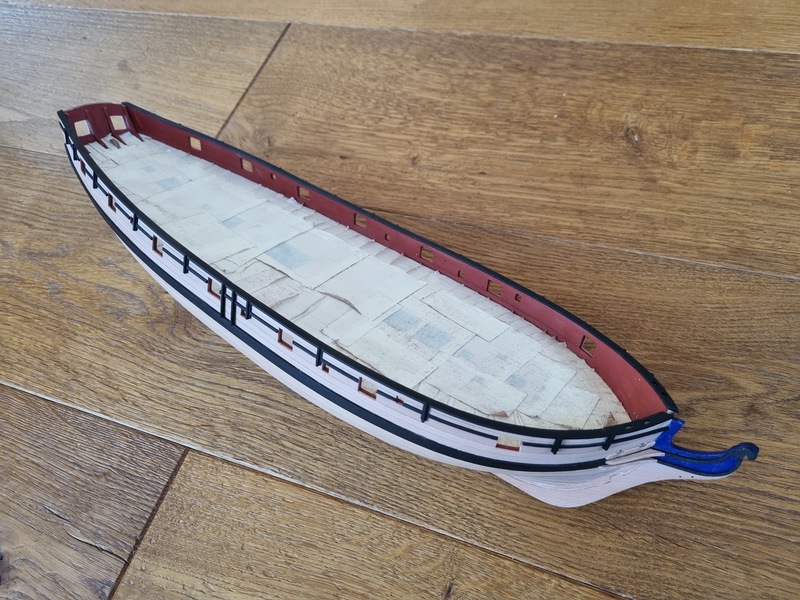
But first the 'good' pictures. Shure, there is some tuch up with paint to do, as I managed do damage the paint during the construction.
And, my freehand is not that good. Would be easyier and with a more cleare and sharp output, if I would had used just one colour and not two:

The other side, the colour here is too bright because of how the sunlight comes into my flat. The two pictures above match the real colour very well.
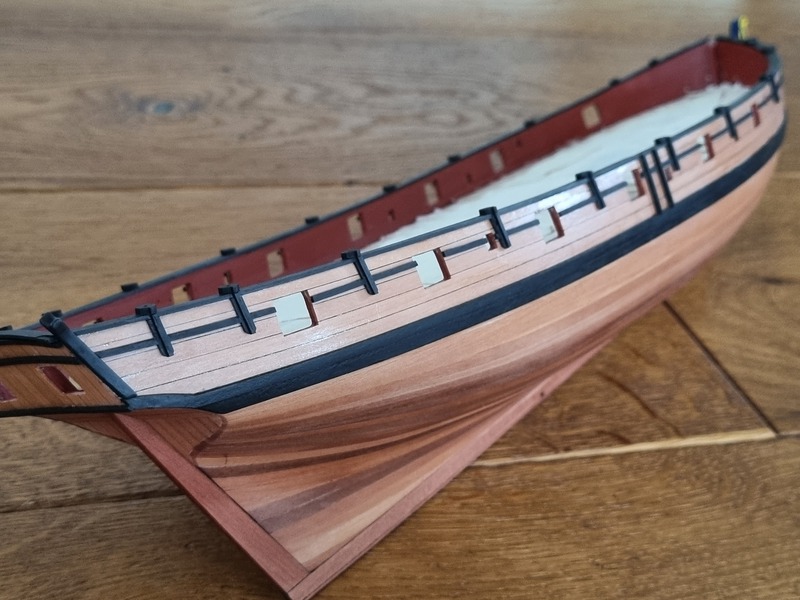
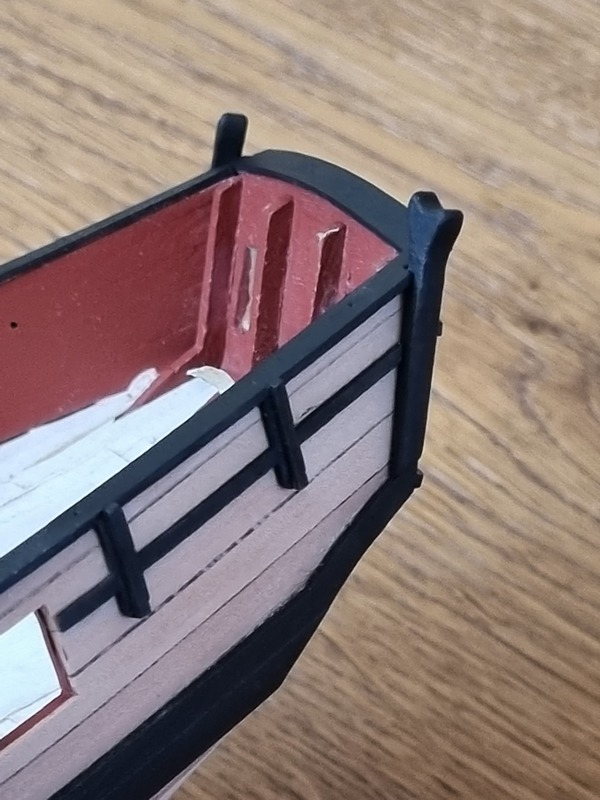
PROBLEM:
I don't know what exactly I did wrong, but the vertical bow frames are much too short 😞 :
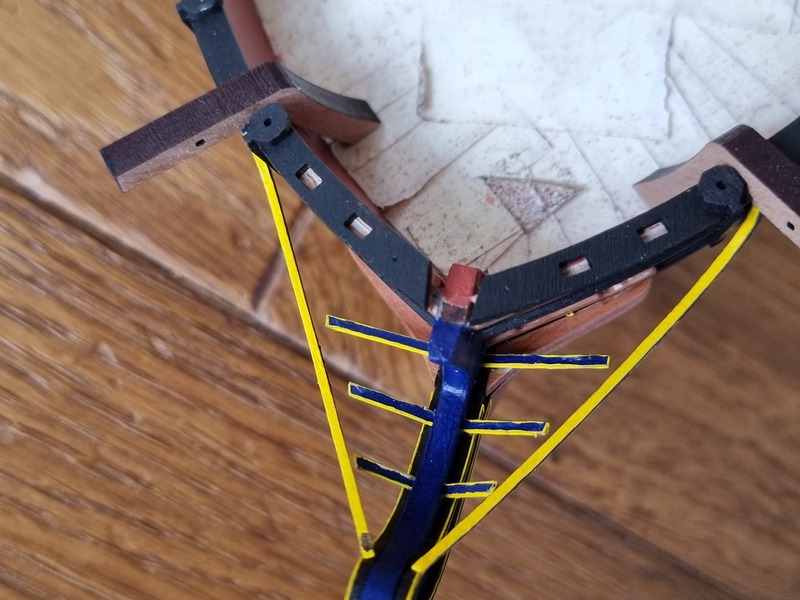
What can I do here? (of course, I need to repair the paint, looks horibly unclear on the picture above... 🙂 )
Thank you all for your help! 🙂
-
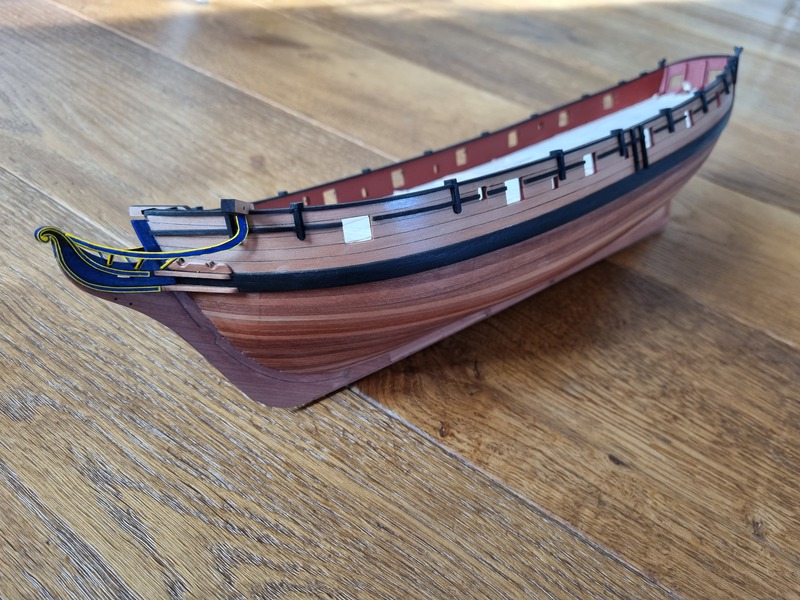
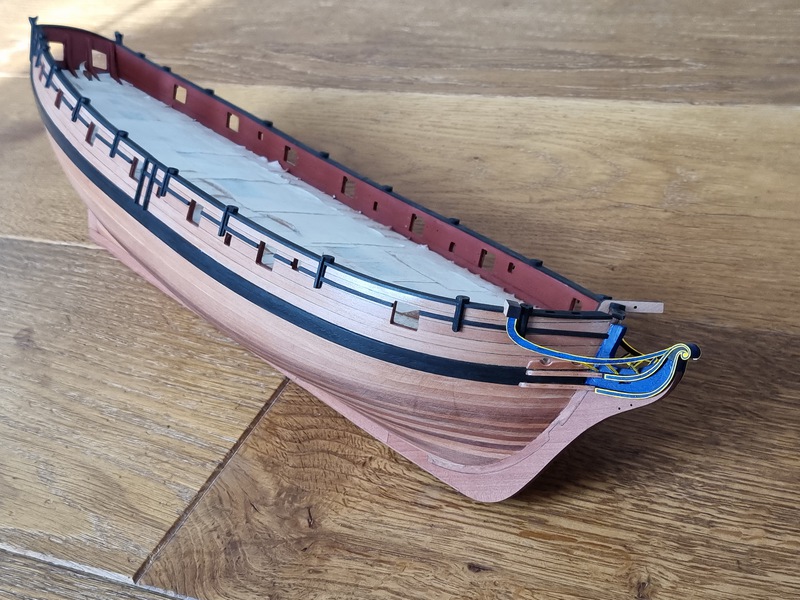
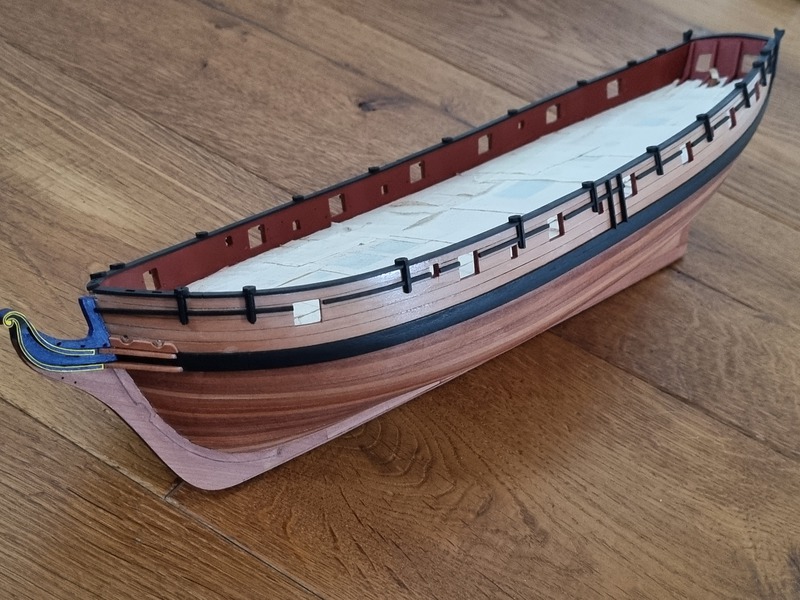
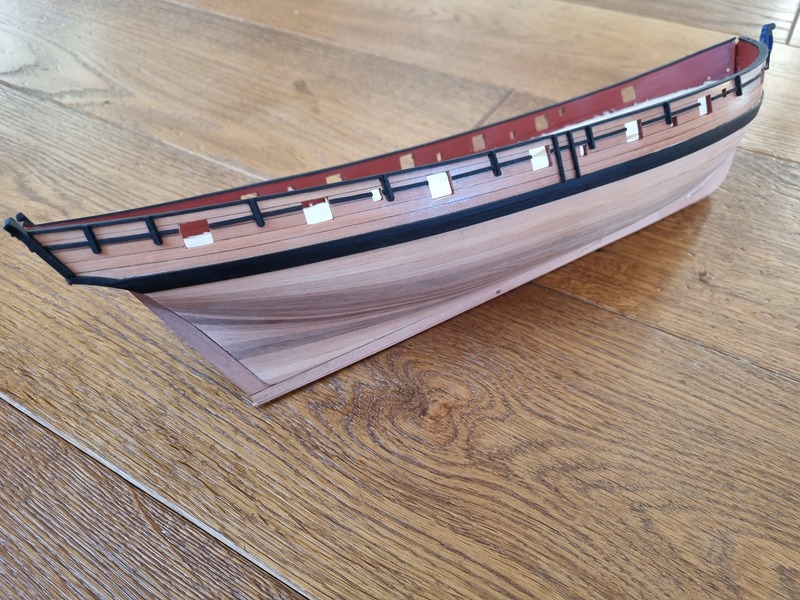
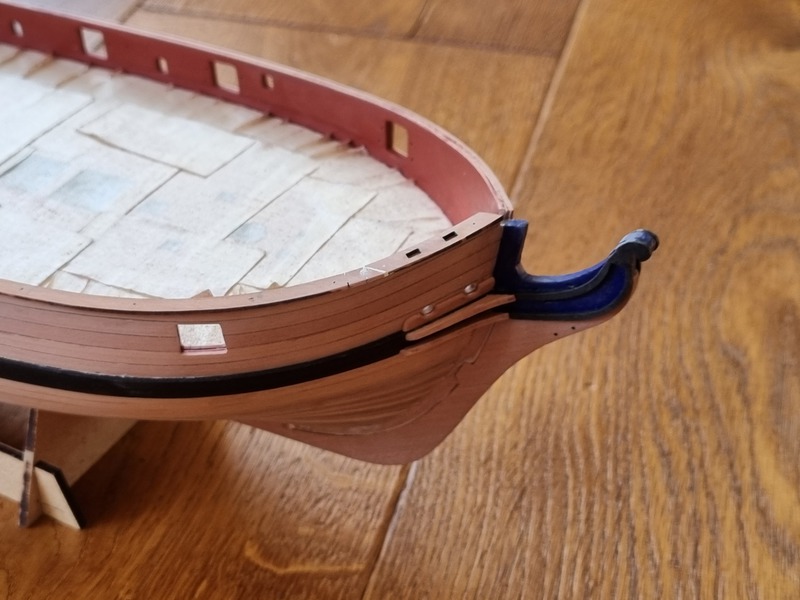
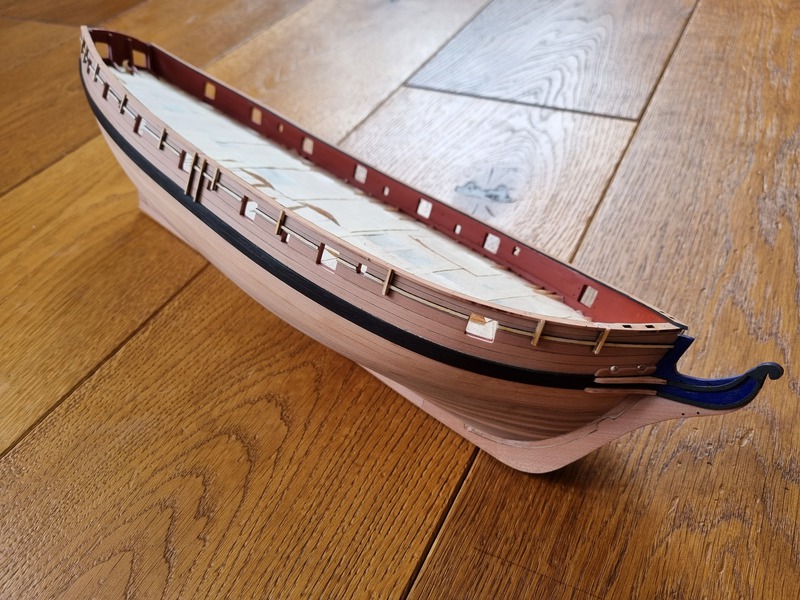
@BobG, @KARAVOKIRIS, @BranPie, @PhillH, @Ryland Craze, @SpyGlass: thank you all so much for your thumbs up, much appreciated! 🙂This update, I can show some things at once. I added the svivel gun bases and painted them all black. The hull also gets his paint. And last, I installed the hair bracket decoration. Not as good as intended, but other than in the macros, on normal viewing it is ok:

- PhillH, KARAVOKIRIS, Knocklouder and 1 other
-
3
-
 1
1
-
@BobG, @PhillH, @Thukydides: thank you all for your thumbs up! 🙂
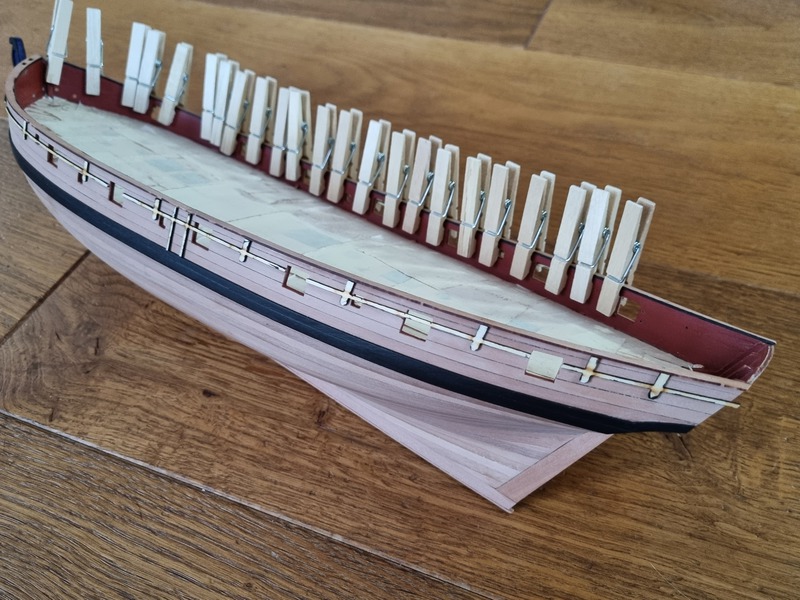
not completly dry jet, but this is the way, I think: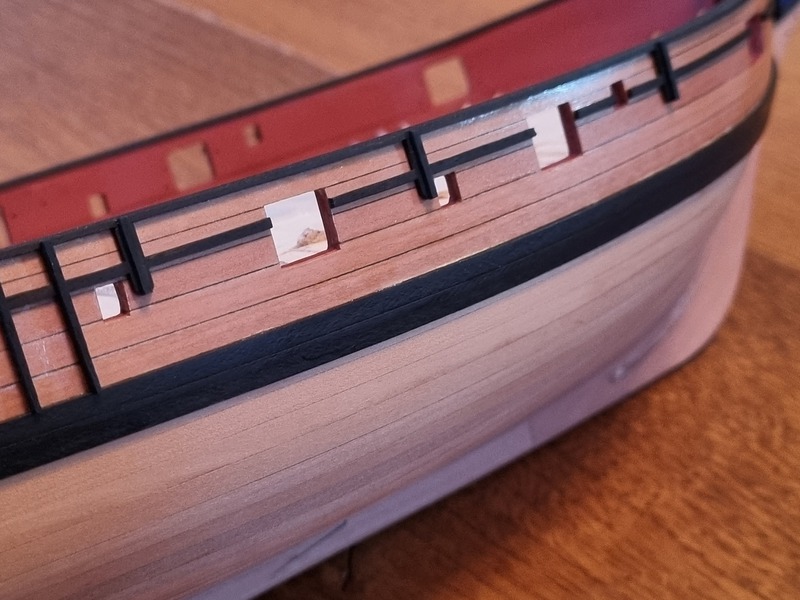
- DelF, BobG, Knocklouder and 5 others
-
8
-
-
@Dfell, @BranPie, @glennard2523, @David Lester, @Thukydides: thank you all very much for your thumbs up! 🙂
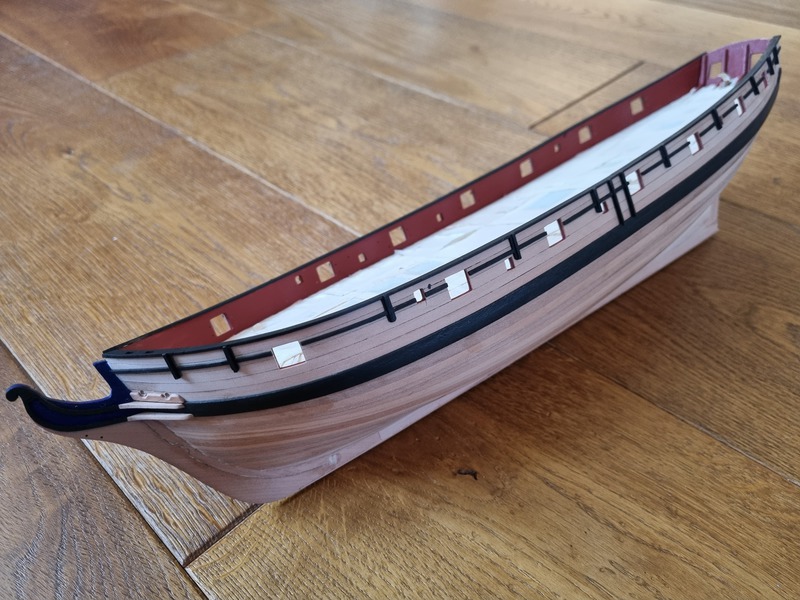
I could finish the stern.First, some inbetweens. Clearly to see, that I messed it up with the curvature of the most upper strip, and, as an older error: I cut to much of the aft capping rail, so I had to add some filler pieces. The macro shows they're imperfections, but with colour and behind the boom crutches, there is not much to see of them:
All painted black (with a lot of dust, lol):

I swear, in real life there is that dust on the stern board rails barly to see 🙂
And I see now on the pictures, that the two gun ports in the stern need some attention. And I still have to do some tuch ups with the red. I will do that before I paint/seal the hull itself.
- Mr Whippy, KARAVOKIRIS, Thukydides and 3 others
-
5
-
 1
1
-
The paintwork is phantastic! And the idear of the time capsuls is freaking cool 🙂
- Blue Ensign and mtaylor
-
1
-
1
-
-
very well execuded! And for the wrong waterline, I secunde glbarlow - check with the masts. Perhaps it is enough to just fit the lower parts of the two masts into the holes and see how this comes out. Decide from there on. Or perhaps show us (not me, more the more experienced builders here) how it looks and perhaps you can get some good advice with that too! 🙂
-
I realy like the look of the unpainted gun-cars! Perhaps I will also go this way and paint much less on the deck furniture, but undecidet jet. Your build is a great inspiration for such things! 🙂
-
@PHillH, @Thukydides, @DelF, @drjeckl, @BobG, @David Lester: thank you all for your thumbs up, much appreciated! 🙂
@Thukydides: thank you very much! I also enjoy your log! And, as you can see in this post, I also made same tests with PU 🙂
Perhaps I will build more ship models, so can also now spend the time and effort to find the colours that I like best 🙂I buyed a water based satin PU varnish and treated one of my test pieces with it (first, I sandet the old coat down):
I like the colour, that the PU gives to the wood, but it did not overblend the dust-filler well. So this is only good for 'good' surfaces.
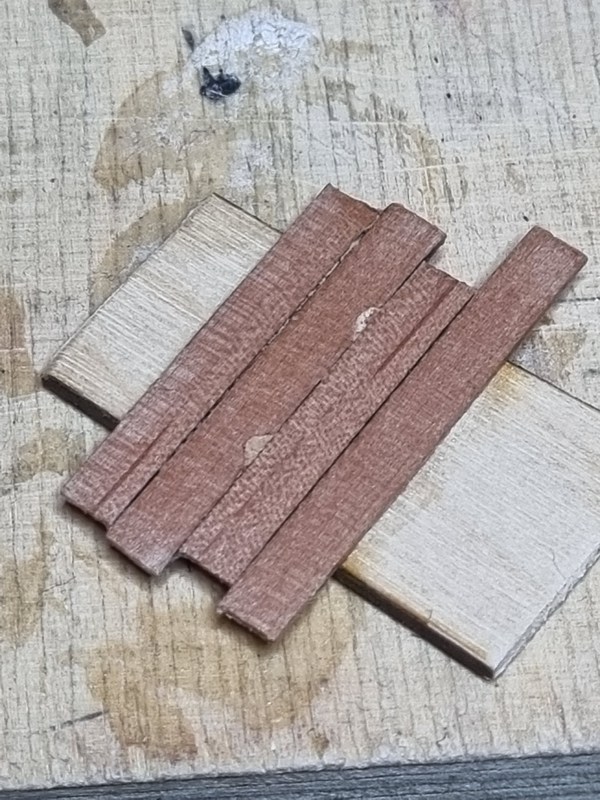
Than uses the PU on a part of the oild wood. I also buyed another shellack. As I know now, there is not 'the' shellack. Nowadays there are different colours and so on, so I buyed an trayed a more light one:
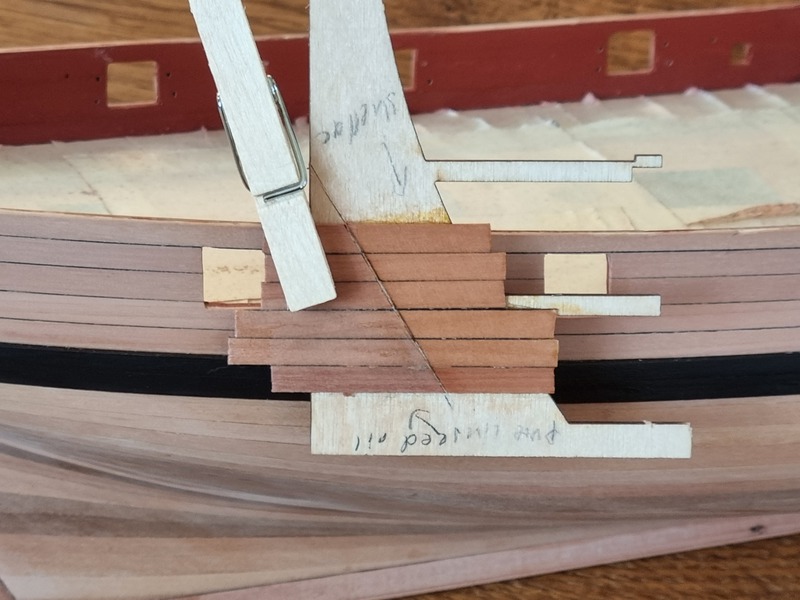
On the left side, the lower three planks are also with the satin-pu-varnish, and the right is my other brand of shellack. Now, this shellack grows heavyly on me 🙂
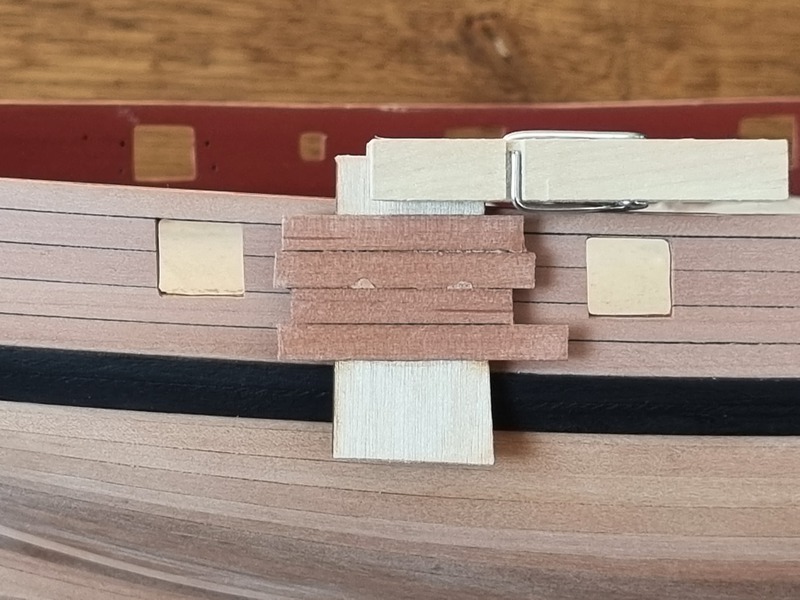
Between all my trials with the different varnish's I also added some more parts. Because I have the bana-warped hull, I need some curves that the parts don't like, so I brake them, unfortunatly. But, need some paint anyway, so I use some filler:

First I thought about to let the parts on the side of the bulwarks (stringer?) in natural wood, but they are made out of ply, that don't look good without paint, so I painted the sides black and installed them all:
Had a run, so just added the reinforcements for the swivel-guns:
Painted it all black:
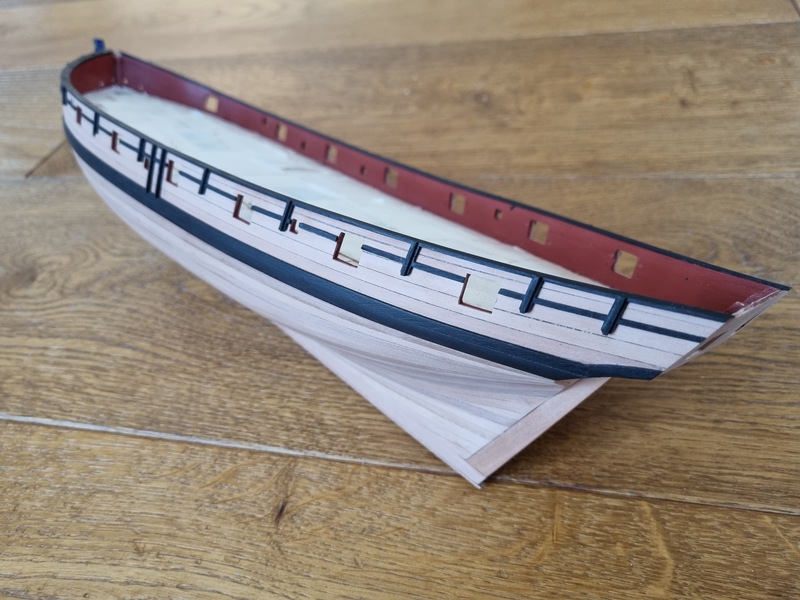
Need some tuch-ups, especialy on the red (sandet a little bit there too!), but that has to wait until the stern-parts are finised, which are next, I think :-). And I have to remove that black block, very prominent on the last picture. At the end I become unconcentrated...
-
A hell of a great model! 🙂
- Blue Ensign and mtaylor
-
1
-
1


HMS Sphinx 1775 by Hollowneck - FINISHED - Vanguard Models - 1:64
in - Kit build logs for subjects built from 1751 - 1800
Posted
wow...