Tim Holt
-
Posts
196 -
Joined
-
Last visited
1 Follower

-
 Obormotov reacted to a post in a topic:
Harold Hahn method
Obormotov reacted to a post in a topic:
Harold Hahn method
-
 Obormotov reacted to a post in a topic:
Harold Hahn method
Obormotov reacted to a post in a topic:
Harold Hahn method
-
Obormotov reacted to a post in a topic:
Harold Hahn method
-
 Obormotov reacted to a post in a topic:
Harold Hahn method
Obormotov reacted to a post in a topic:
Harold Hahn method
-
CDR_Ret reacted to a post in a topic:
Laser cut single piece hatch grating - pattern and method
-
Gabek reacted to a post in a topic:
Laser cut single piece hatch grating - pattern and method
-
GioMun reacted to a post in a topic:
Swift 1805 by Tim Holt - Artesania Latina - 1:50 - first build
-
Scotty W reacted to a post in a topic:
Swift 1805 by Tim Holt - Artesania Latina - 1:50 - first build
-
Scotty W reacted to a post in a topic:
Swift 1805 by Tim Holt - Artesania Latina - 1:50 - first build
-
Scotty W reacted to a post in a topic:
Swift 1805 by Tim Holt - Artesania Latina - 1:50 - first build
-
Tim Holt reacted to a post in a topic:
Topsail schooner sail plans and rigging
-

Looks like an informative place. Great Just Great
Tim Holt replied to rudybob's topic in New member Introductions
> Looks like an informative place Yes, yes it is! -
MAKING EYE'S AND HOOKS
Tim Holt replied to Peter6172's topic in Modeling tools and Workshop Equipment
I have a pair of these which I quite like. They let me do pretty fine loops. Forewarned they aren’t cheap… Lindstrom RX7590 - RX Series Ergonomic Pliers - Round Nose - Fine Jaw - 4.72" L https://www.amazon.com/dp/B002LNHMRS -
Love y'all's jokes, but I wish I could mute a few of the more popular off topic threads from the Latest Posts list. Any way to do that?
-
Tim Holt reacted to a post in a topic:
Glory of the Seas 1869 by Vladimir_Wairoa - FINISHED - 1:72 - medium clipper
-
I had thought of posting yesterday a link to one of @LFNokia's videos. He uses this same technique as @Thanasis showed with 2 loops in a figure 8 and mid seizing. It works well for a lot of variants on stropping a block, whether to an eye, a hook, to a yard, etc. Here's one of his videos where he goes over the approach...
-
Tim Holt reacted to a post in a topic:
Santisima Trinidad by LFNokia - FINISHED - OcCre - 1:90 - Cross-Section
-
Tim Holt reacted to a post in a topic:
Clipper d'Argenteuil by G.L. - POF - scale 1/15 - SMALL
-
Tim Holt reacted to a post in a topic:
HMS Winchelsea 1764 - Kurt Bainum - 1:48 in cherry
-
Interesting discussion about the types and sources of the wood used in the ship. Here's the link... https://theconversation.com/we-studied-the-tree-rings-of-the-batavia-shipwreck-timbers-they-told-us-much-about-global-seafaring-history-171495 The scholarly article goes into a lot more depth. It is at https://journals.plos.org/plosone/article?id=10.1371/journal.pone.0259391 Here's one little quote that's intriguing...
-
Harold Hahn method
Tim Holt replied to Essayons's topic in Building, Framing, Planking and plating a ships hull and deck
Thanks for the video Mark - quite nice to watch. Helps me with the "so what is the Hahn method?" question. -
Tim Holt reacted to a post in a topic:
Harold Hahn method
-
Hi @algonzales94 I also have a lot of those kinds of planes and have used them quite a bit to make molding for hand-done furniture. I think from my perspective as a user of them who uses them for their purpose, fixing and correcting issues like worn down or missing boxwood sections is OK. It's like making a new blade for one that's been badly treated over the years. Restoring these planes to their ability to once again create unique and definitely not machine made moldings is a good thing. Better they be used and appreciated for their original purpose than tossed in a bin with missing parts and no sense of value in some antique store.
-
Hey welcome and good to see another post of this model. If you follow this link -> https://modelshipworld.com/tags/Swift/ you will get a list of all the builds tagged for this kit. Lots of people have built it, some by the book (er kit), others with changes.
- 8 replies
-
- 3
-
-
- first build
- Artesania Latina
- (and 1 more)
-
Keith, try logging in from a different browser - e.g., if you use Firefox, open the site with Chrome, Edge/IE, or Safari. That helps determine if it's something on your side. You can also switch to "private window" mode as well since that mode shouldn't share much with the regular use mode. If it does work correctly on a different browser or in private mode, it doesn't necessarily mean it's an issue on your side but it does help track it down. It would very much be worth it for the site runners to contact Invision Community (the forum technology provider) for support on this, as well as the 200 response code issue. You've presumably paid for the forum so worth getting your money's worth perhaps.
-
Ouch. That just gave me the chills to read it. Thanks for posting just the glove picture and glad it was manageable. I lost about 1/8” off the pad (print) of my thumb by a similar move. No gloves and was using a push stick, but I reached over the cut to stabilize the wood past the cut and brushed my thumb against the blade. At least like thumbprints, fingernails grow back. I also have stopped using gloves around any power tool after I got my glove caught in a drill press, which rapidly wrapped around the bit. I got to the power switch fast enough. But I did also get a foot switch after that.
-
Error code 200
Tim Holt replied to Blue Ensign's topic in How to use the MSW forum - **NO MODELING CONTENT**
So you know how sometimes someone uses a ship term that's wrong, and the experts chime in to tell them, "Well actually..." Finally I get to do one of those. Hey we all get to be pedantic in some areas 200 response code is not an error. It is simply indicating the request was handled without issue, and the server has answered back "OK" to the request. Technically, it is defined as a "success status response indicating that the request has succeeded". In fact all response codes in the 200-299 range indicate success in the request (i.e, not error). Failures would normally return something from 400-499 (Client error response), or 500-599 (Server error response). Of course that doesn't mean the server didn't encounter an error and returned the OK response in error. That's my guess as a bona fide professional of what's happening. See the link below for a list of all response codes and how they are categorized. https://developer.mozilla.org/en-US/docs/Web/HTTP/Status -
Tim Holt reacted to a post in a topic:
HMS Thorn by Kevin Kenny - Swan class 1:48 scale - David Antscherl practium
-
Coming right along. They sure start to click when the rigging starts going up.
-
Tim Holt reacted to a post in a topic:
Bluenose II by Dsmith20639 - FINISHED - Artesania Latina - 1:75
-
Thanks. This is definitely my kit for experimenting and just trying things out. Hopefully methods a bit more refined or at least consistent for the next few.
-
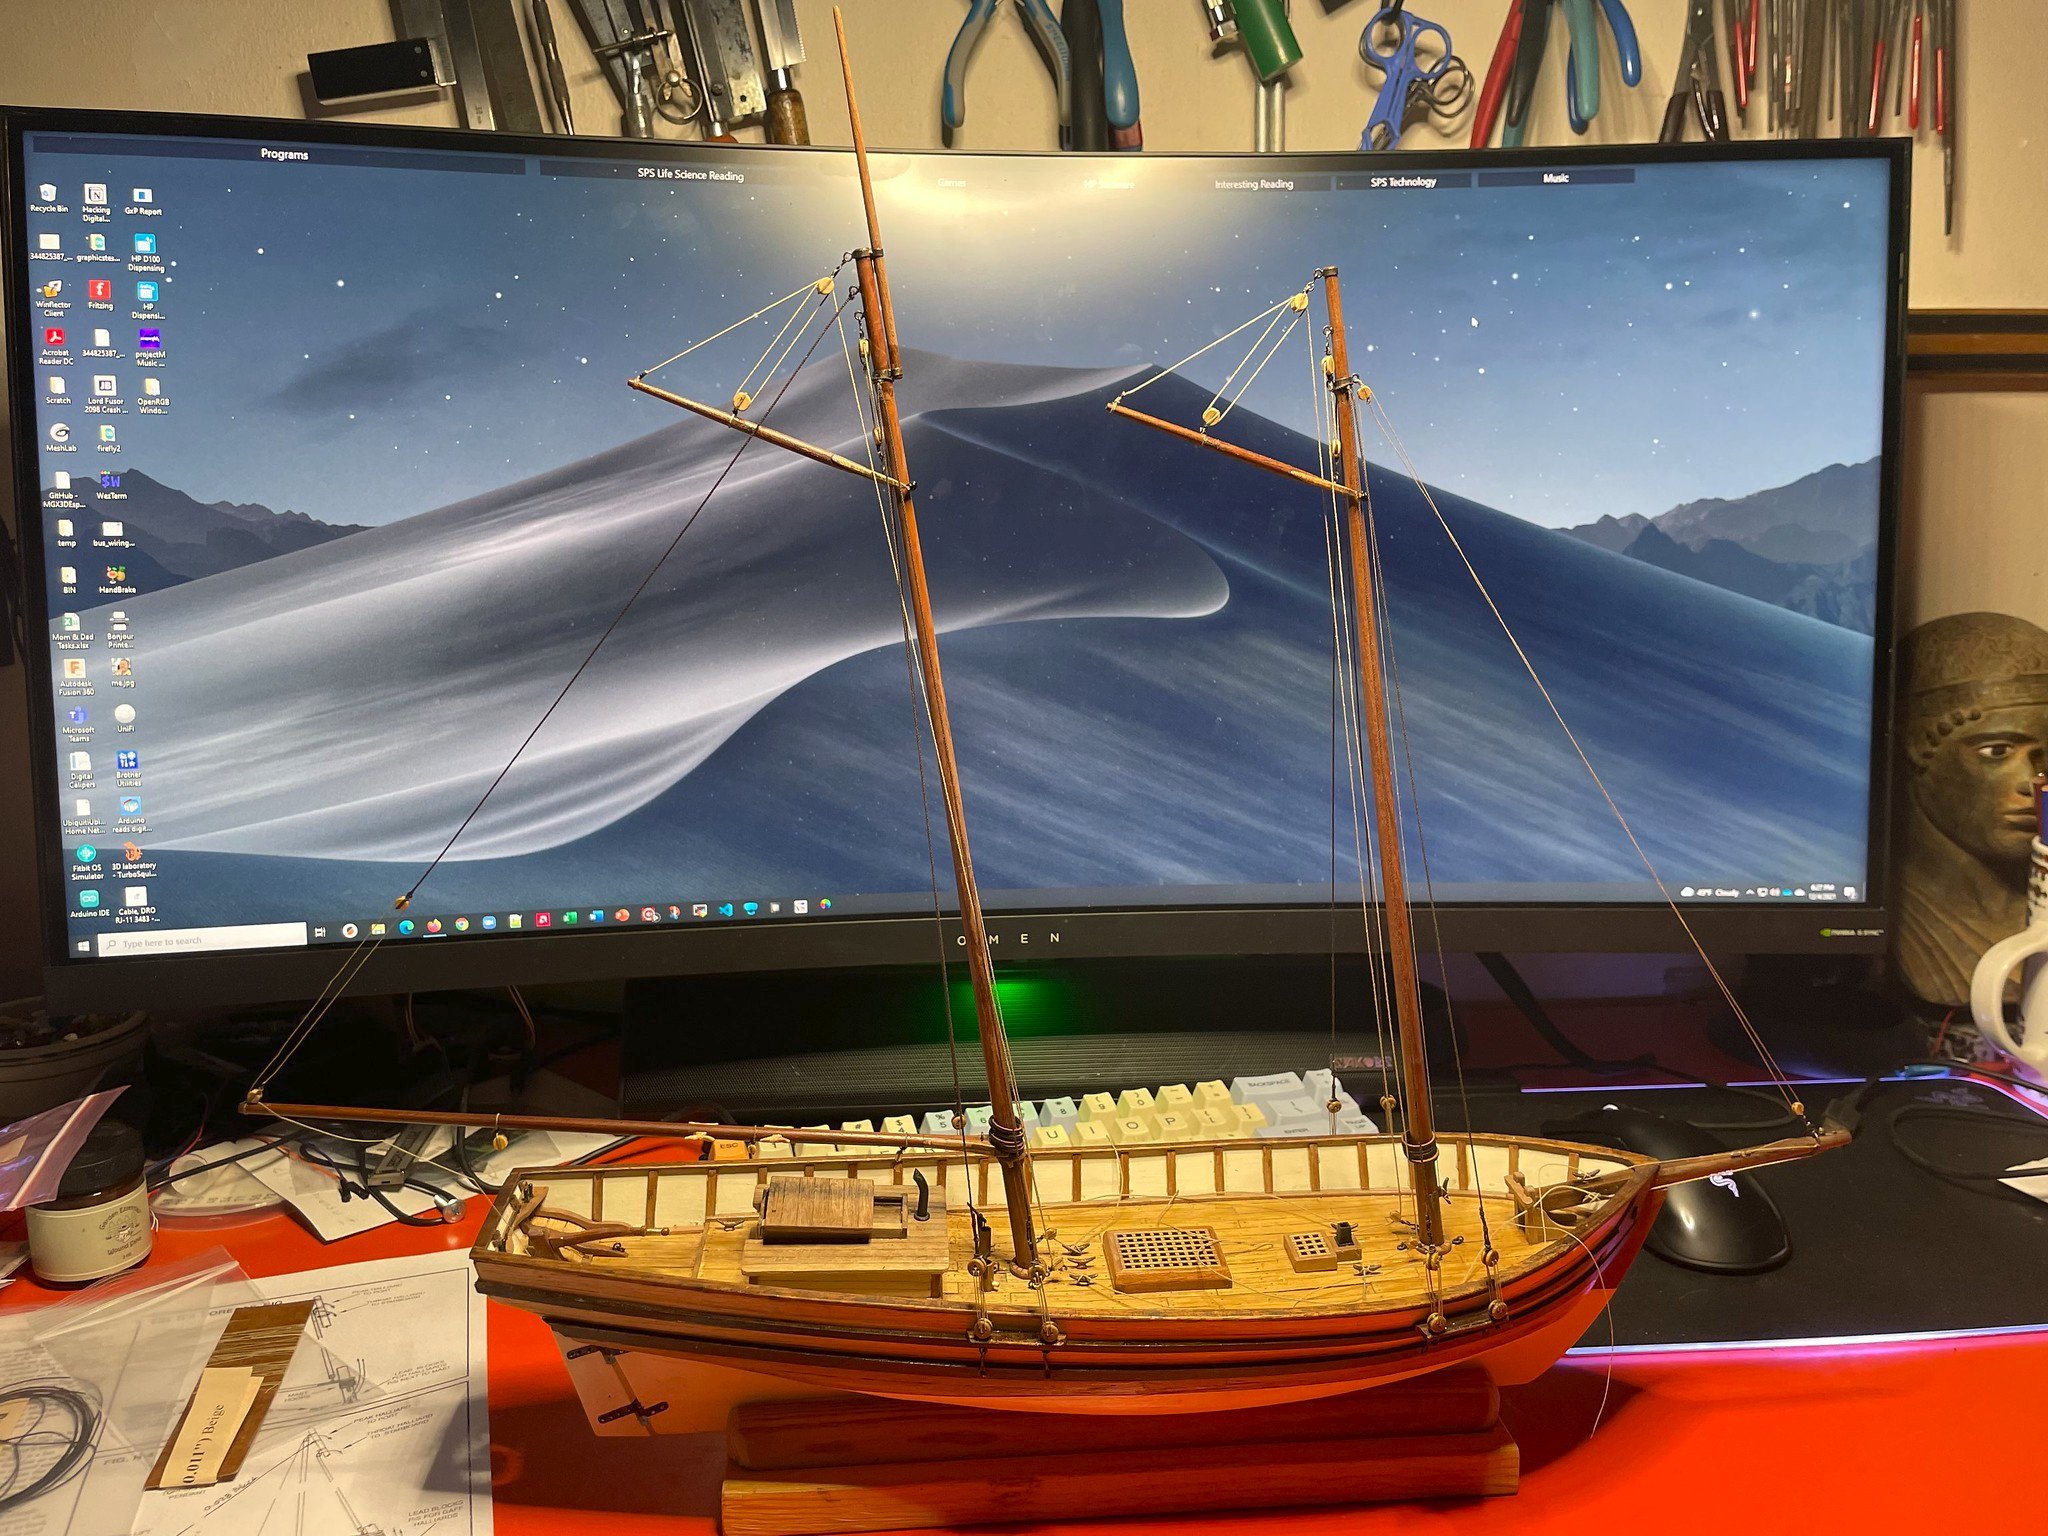
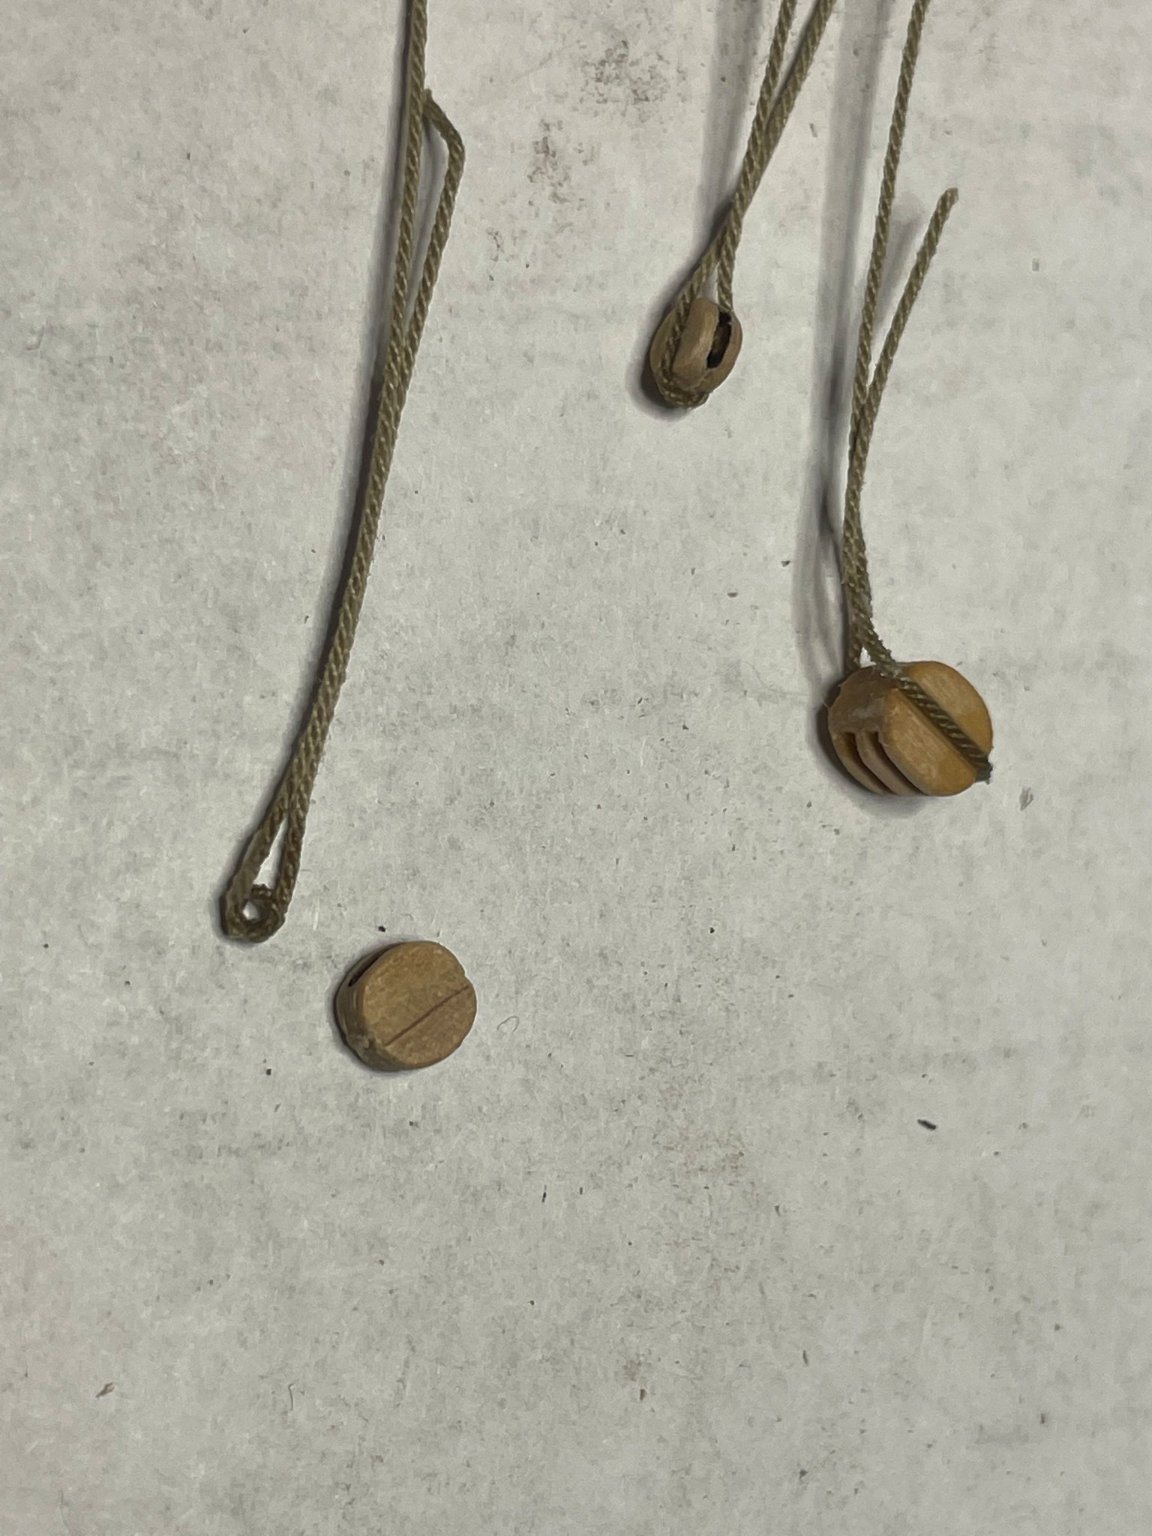
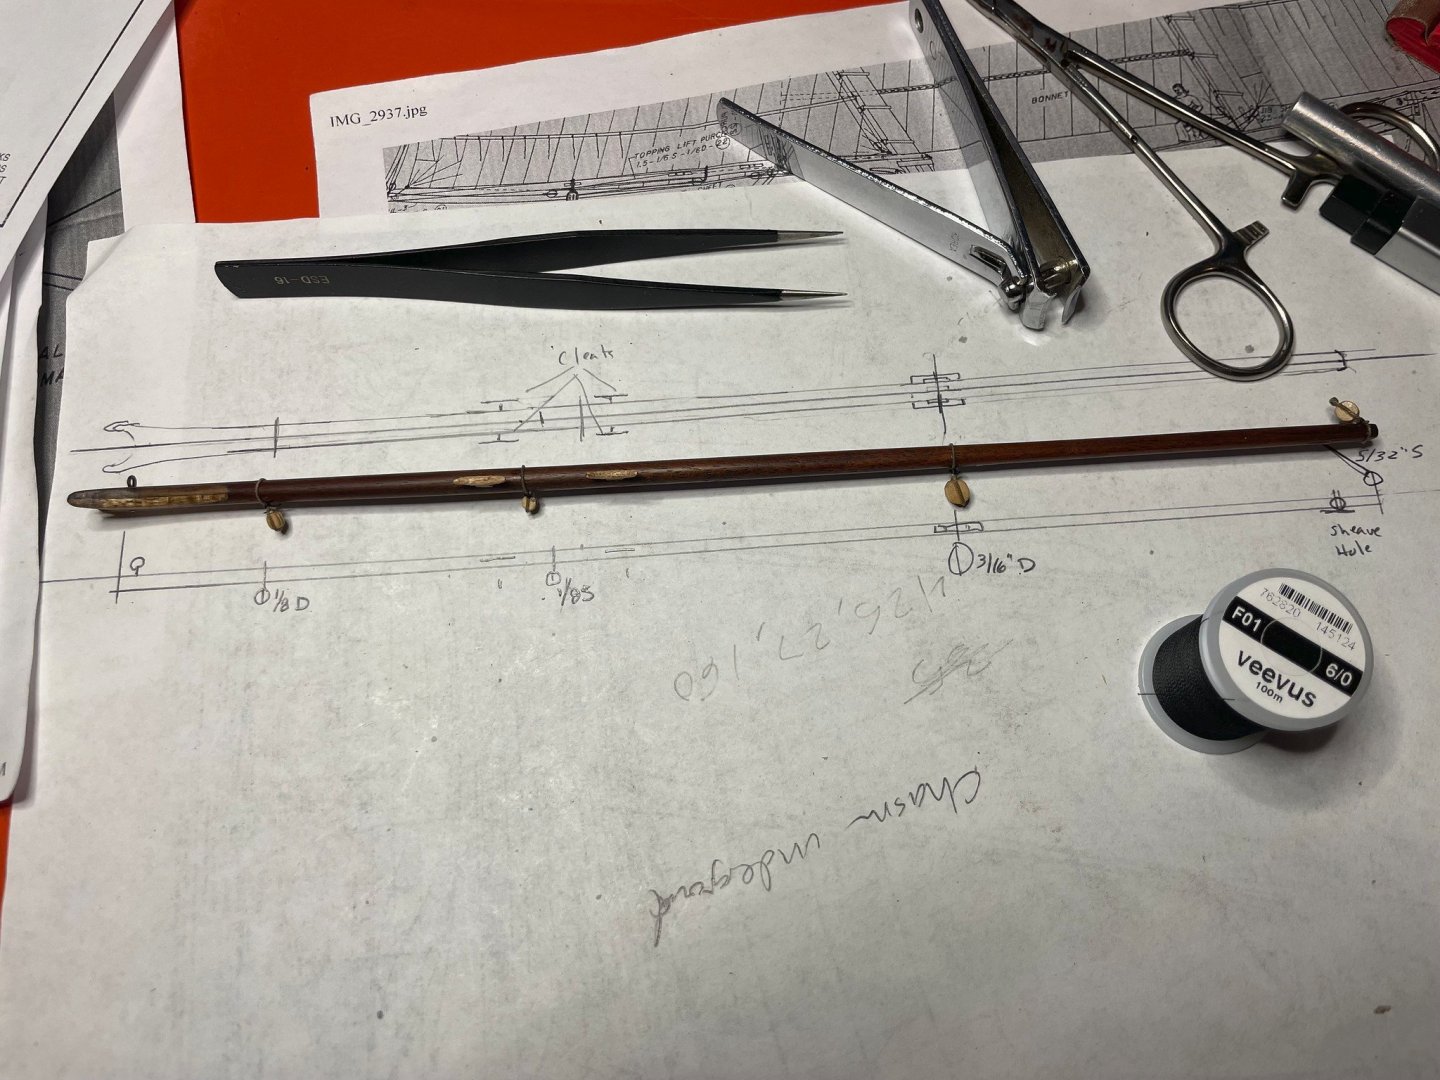
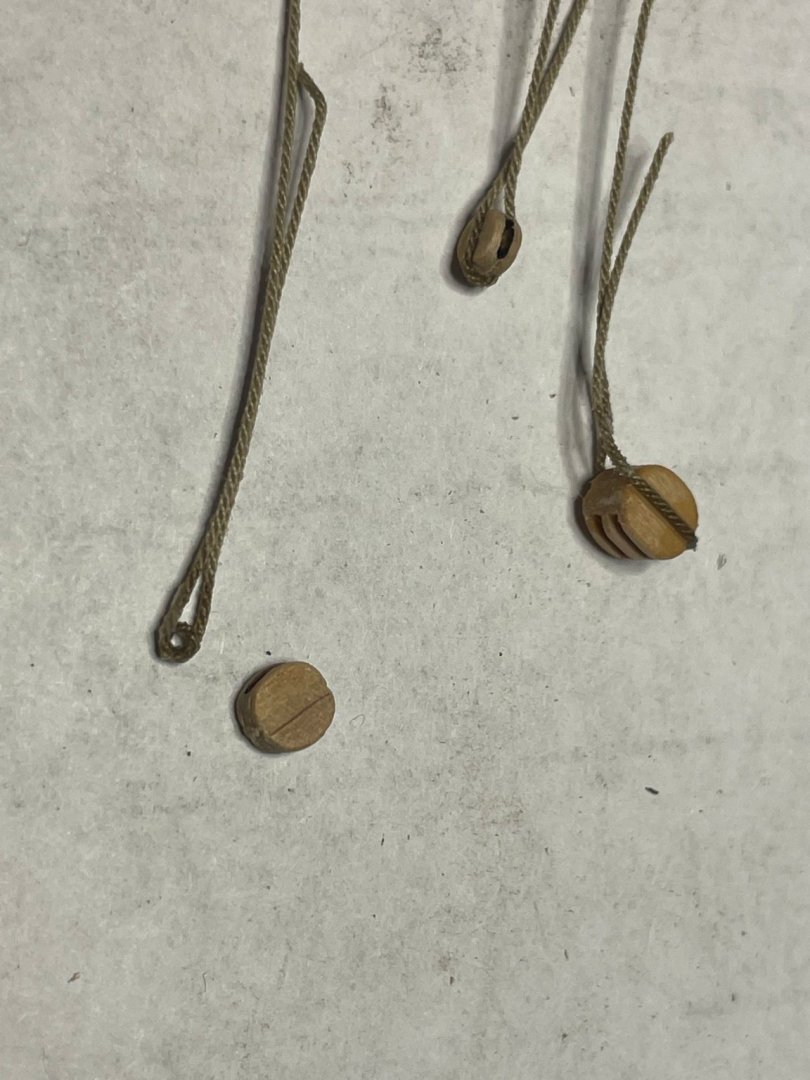
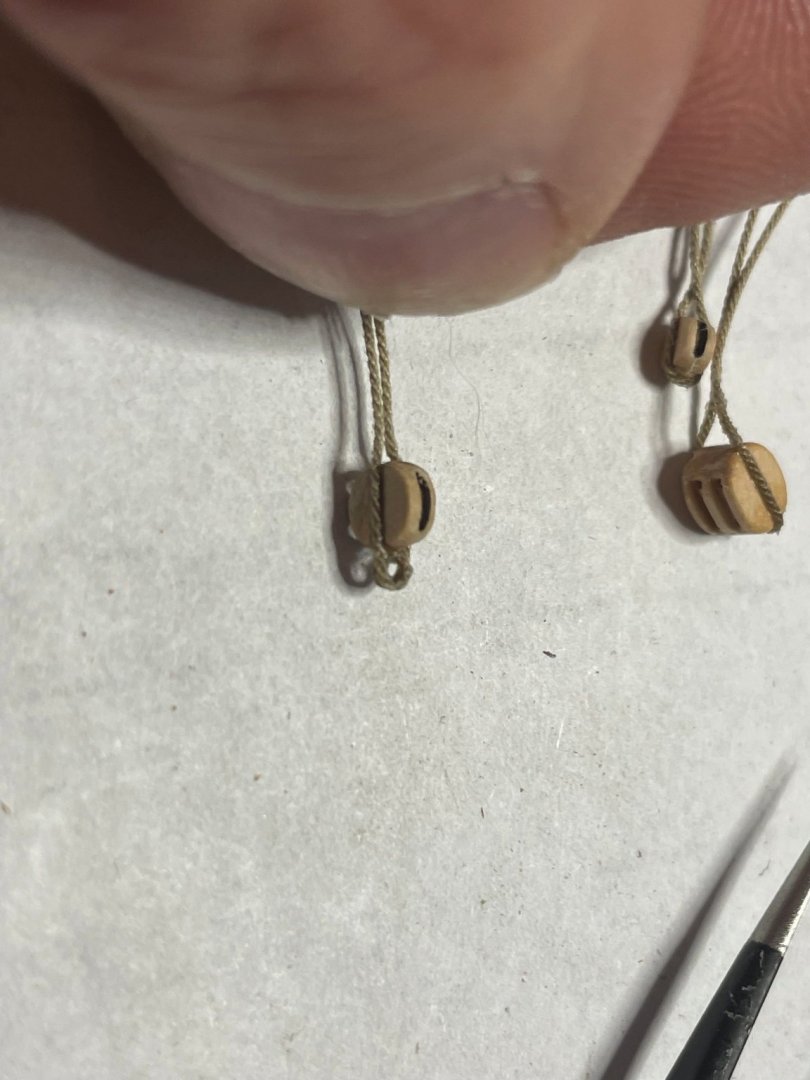
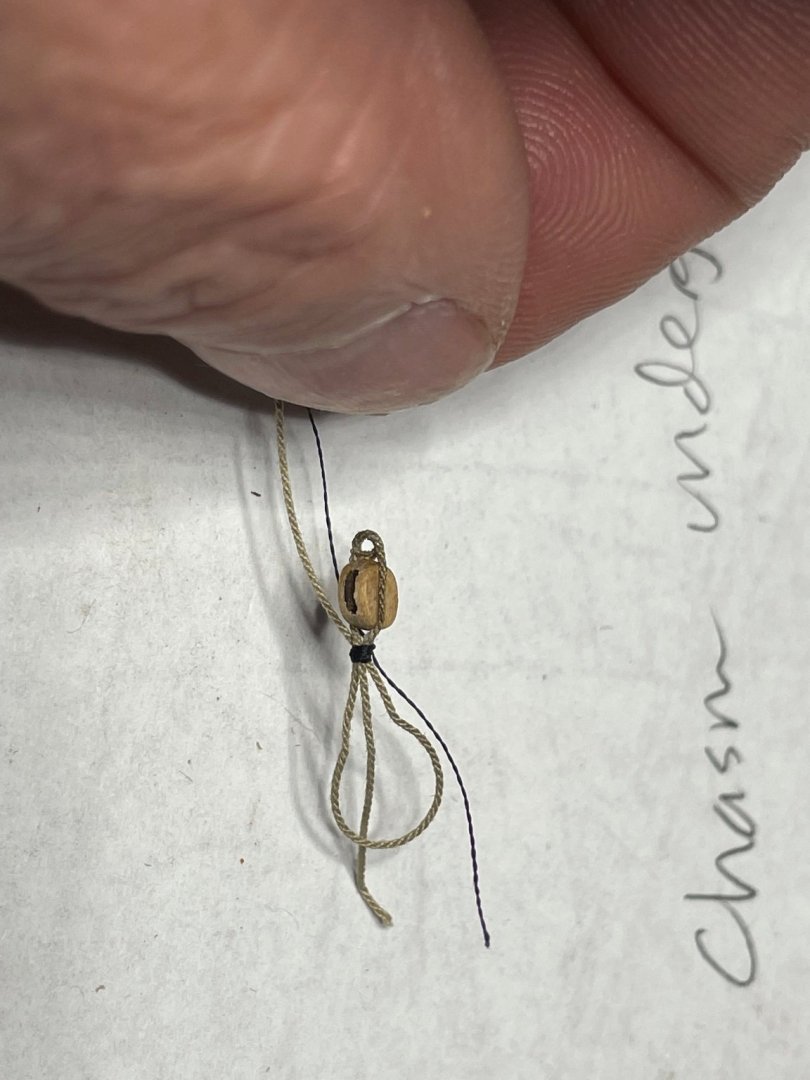
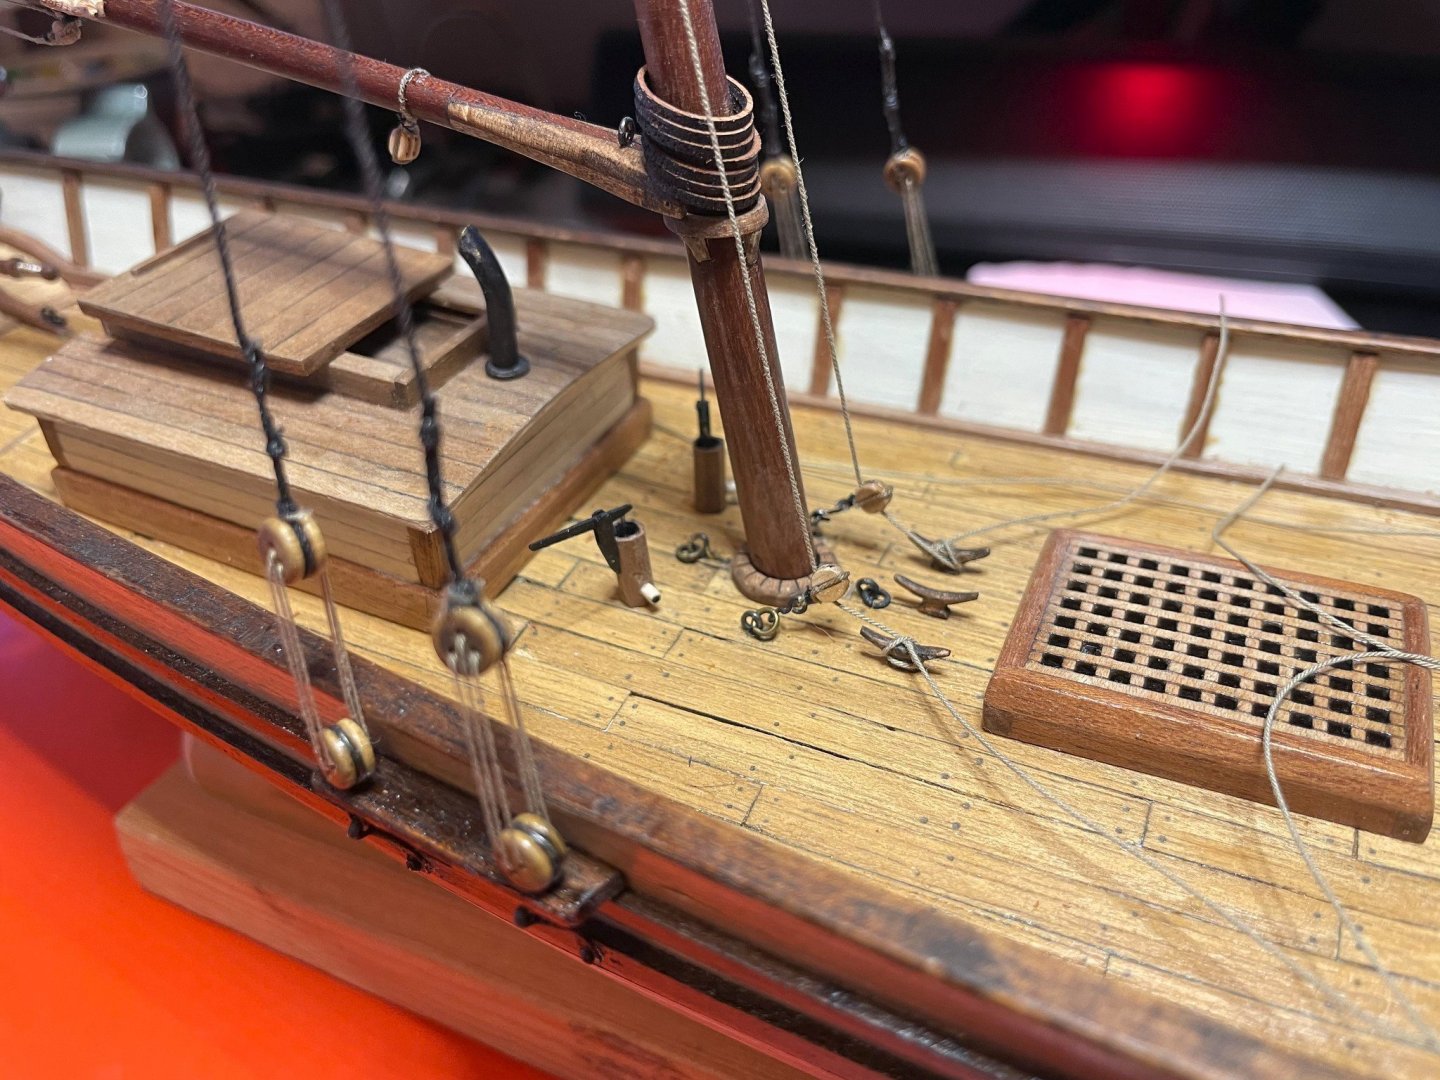
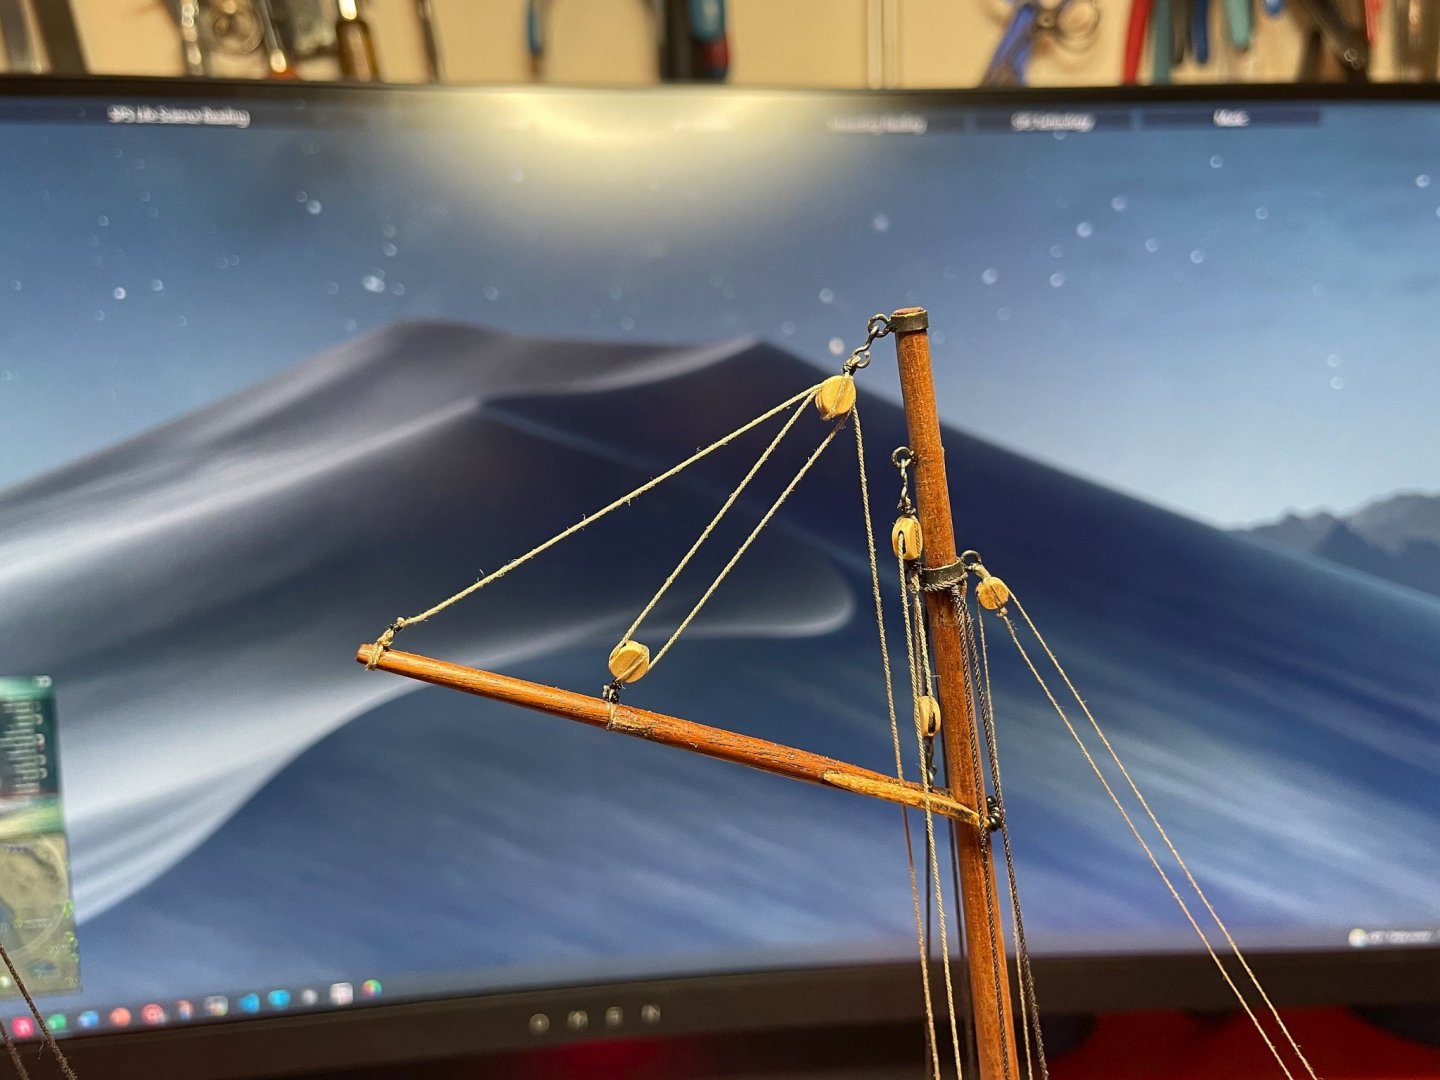
More rigging over the last week putting the gaffs and booms in place. It's really starting to look "shippy" indeed, and the end is in sight perhaps. A few pictures here of creating some blocks to attach to the main boom. I tried a little experiment with one by looping rope over a copper wire, then soaking it in CA glue. That created a nice little thimble-like loop for later attachment. The blocks by the way are from Syren Ship Model Company, the rope is from Ropes of Scale, and the seizing thread is very fine Veevus 6/0 fly tying thread. As I think I have mentioned before, I am not following the rigging plan as the original Artesania Latina kit specifies, but instead essentially following the Model Shipways Katy of Norfolk plans, as they seem much more realistic without the unrealistic shortcuts the AL model takes. Here's an overview of the model with gaffs and boom in place... And a closeup of the gaff halyards and mast base where the halyards are tied off... I went with hooks for most all the gaff rigging which makes installation and removal for convenience quite easy. For now none of the lines on cleats are glued - only tied down in proper cleat fashion. One other thing I did (which you can't see) is I put a short piece of wire into the jaw end of the gaffs and boom, which then goes into a hole screwed into the mast. That way the gaffs and boom will stay in place, and I am able to tighten the halyards without having the jaws just slide up the mast. It also lets me ensure the gaffs and boom align along the fore and aft line.

- 44 replies
-
- 5
-
-
- first build
- Artesian Latina
- (and 1 more)
-
This is wonderful simplicity! I'm eager to see how this project goes.