


mrangus
-
Posts
232 -
Joined
-
Last visited
Content Type
Profiles
Forums
Gallery
Events
Posts posted by mrangus
-
-
Fantastic detail Matt - I love the small brass gears, looks really good.
- mattsayers148, GLakie and thomaslambo
-
 3
3
-
-
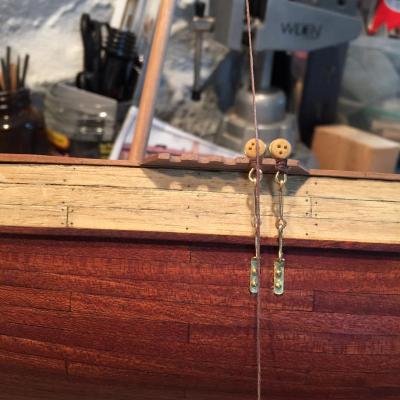
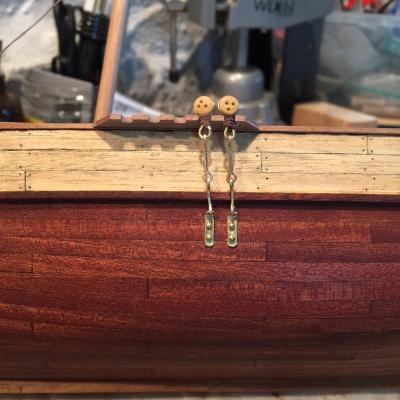
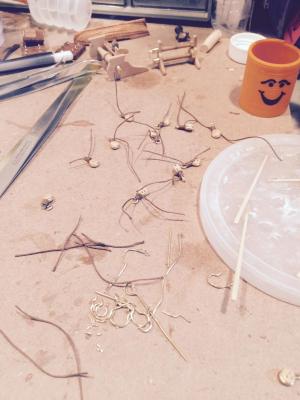
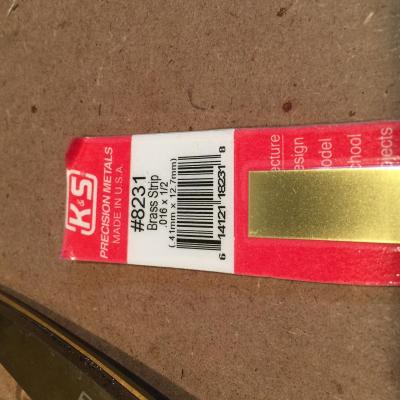
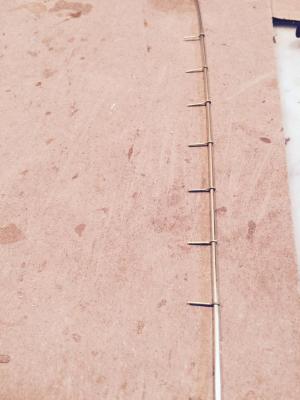
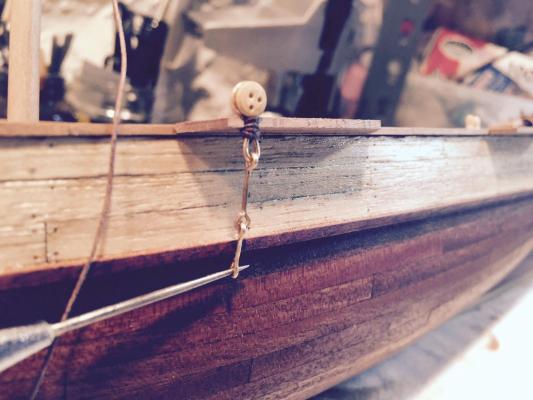
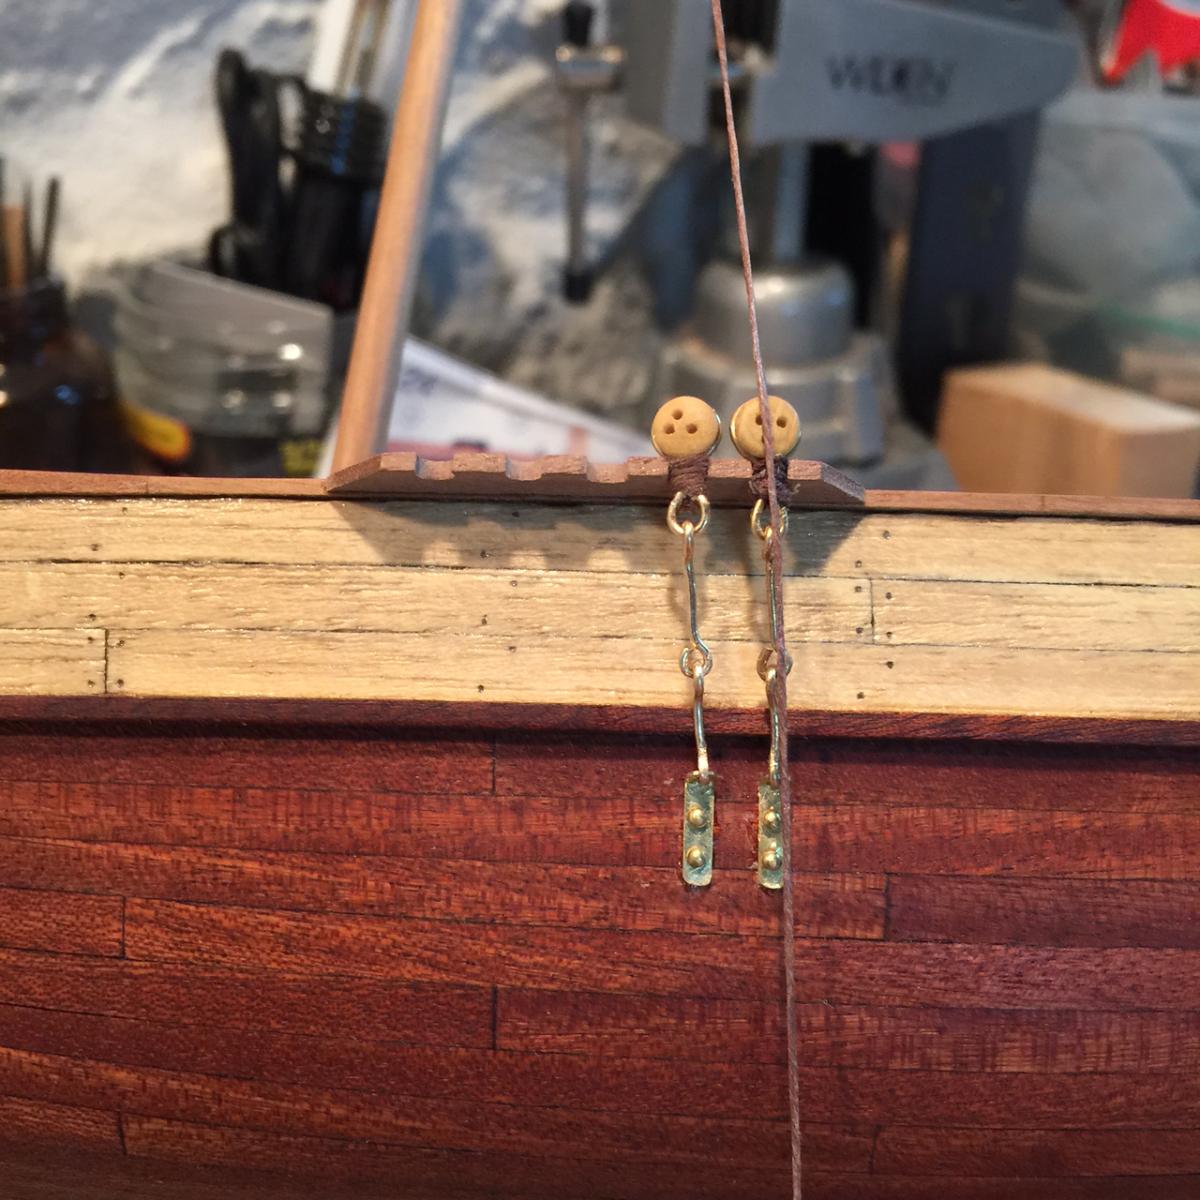
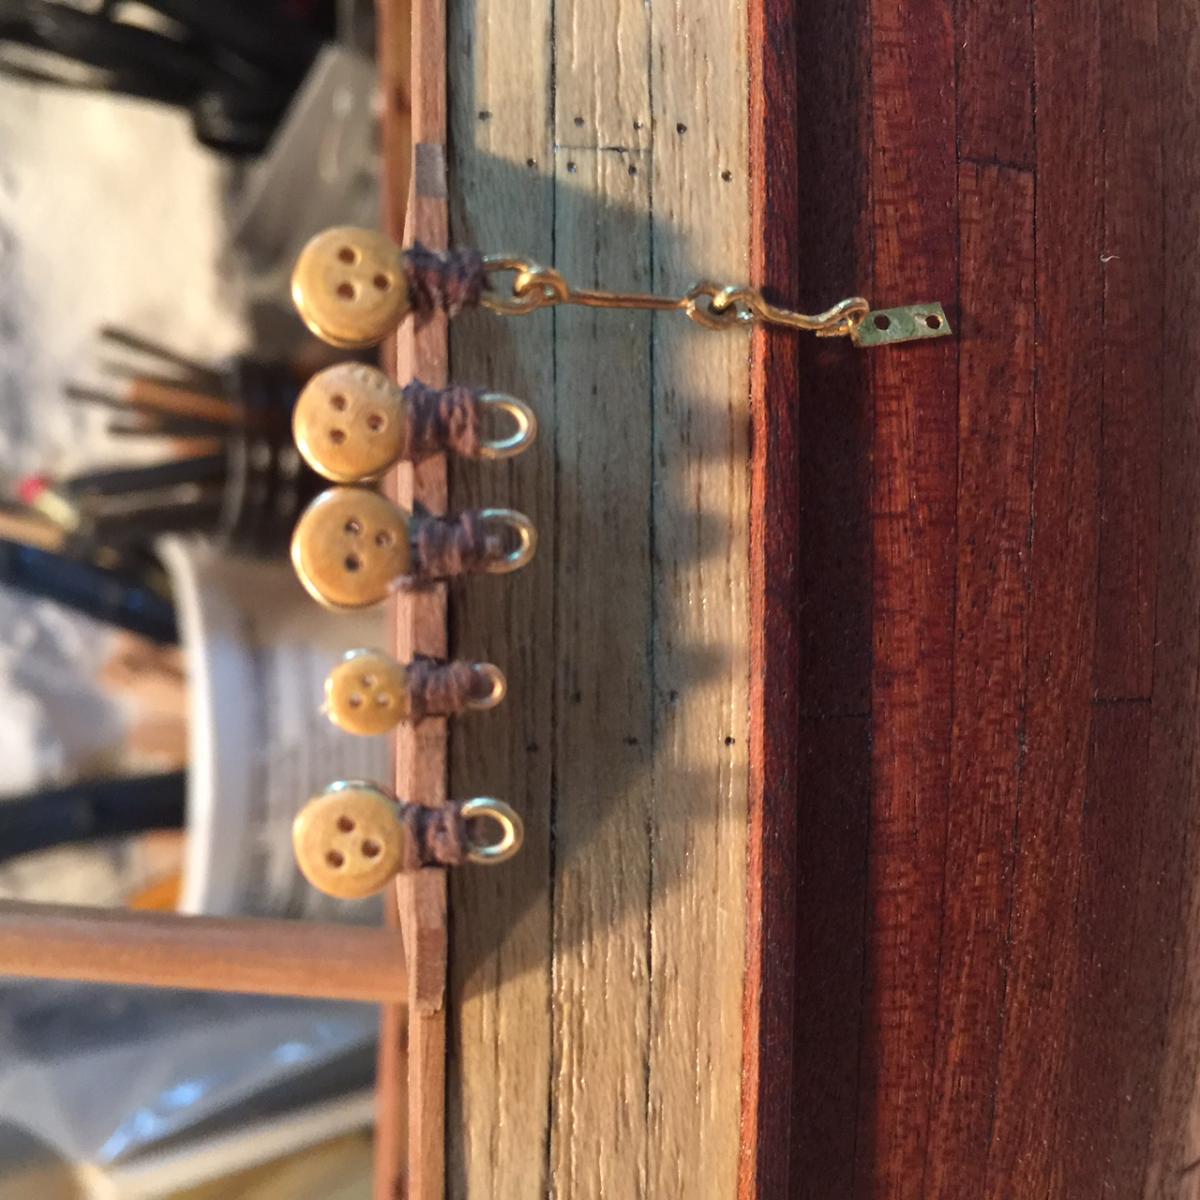
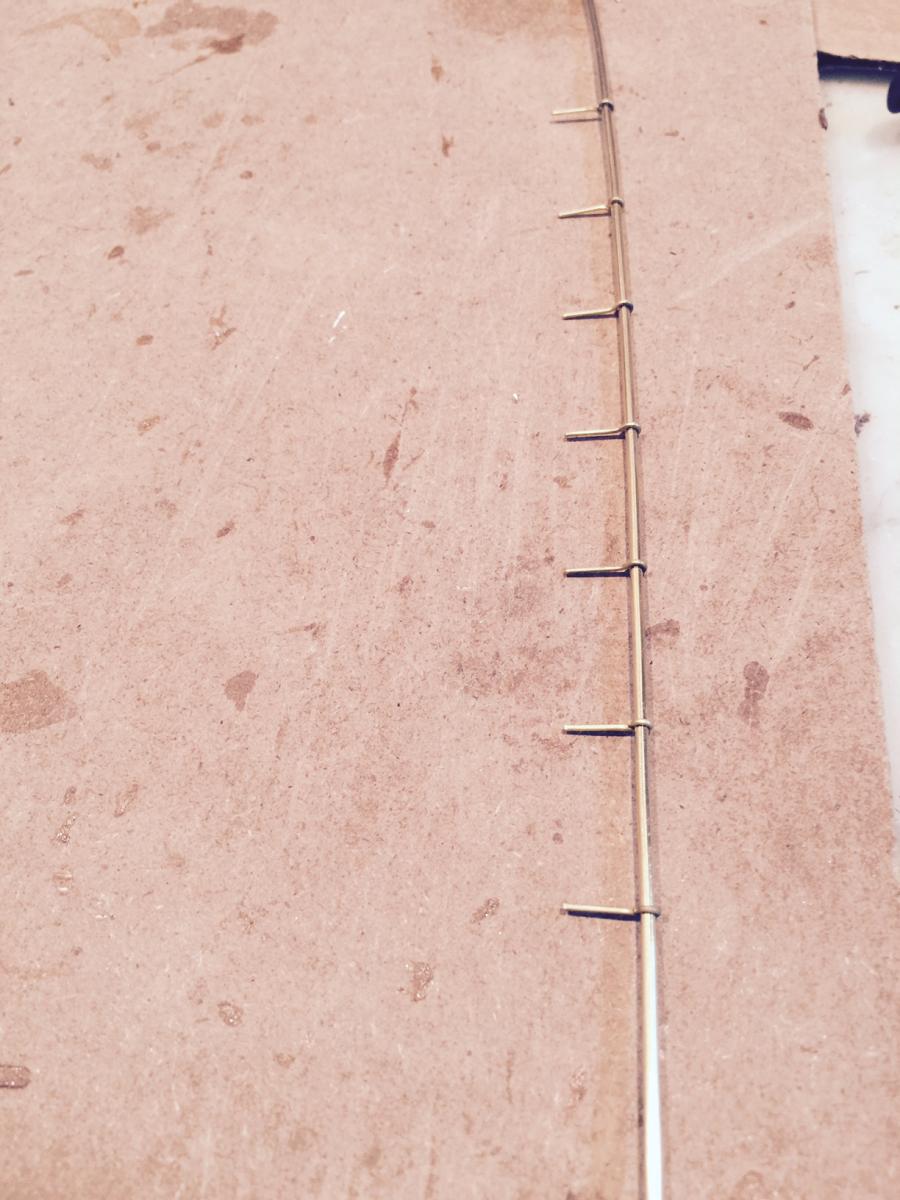
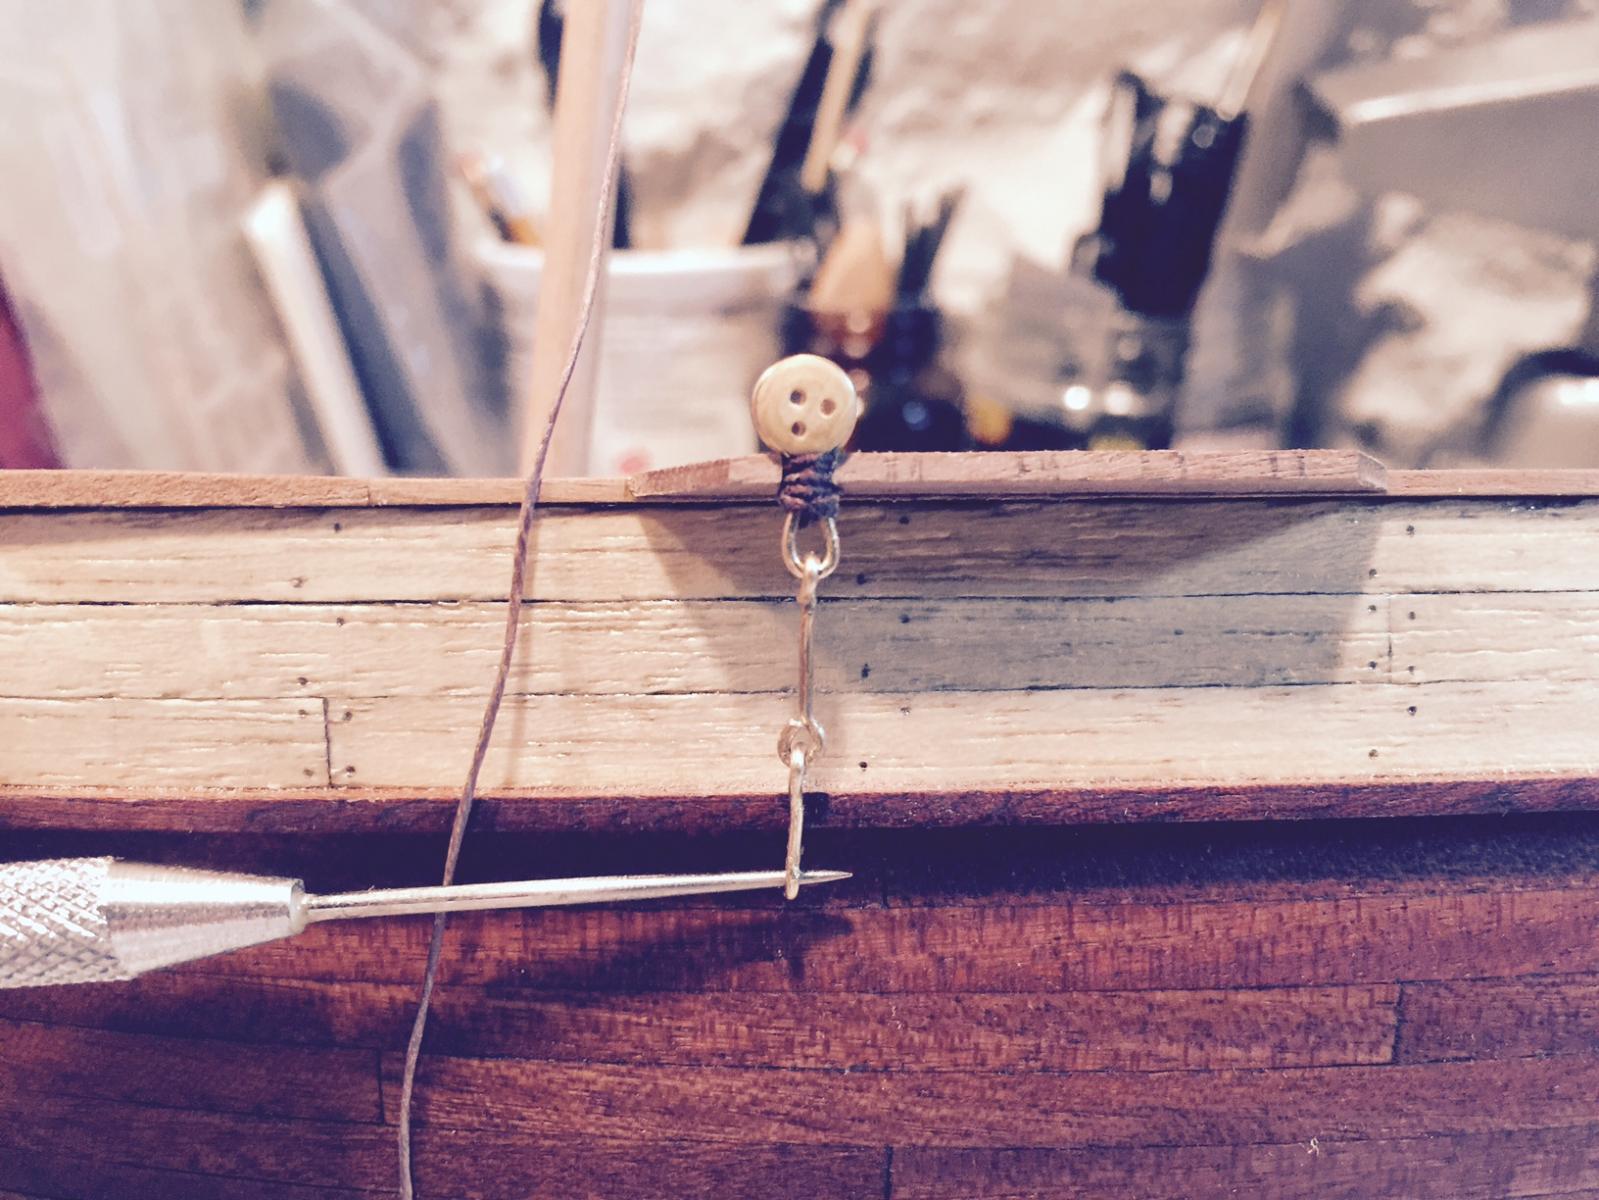
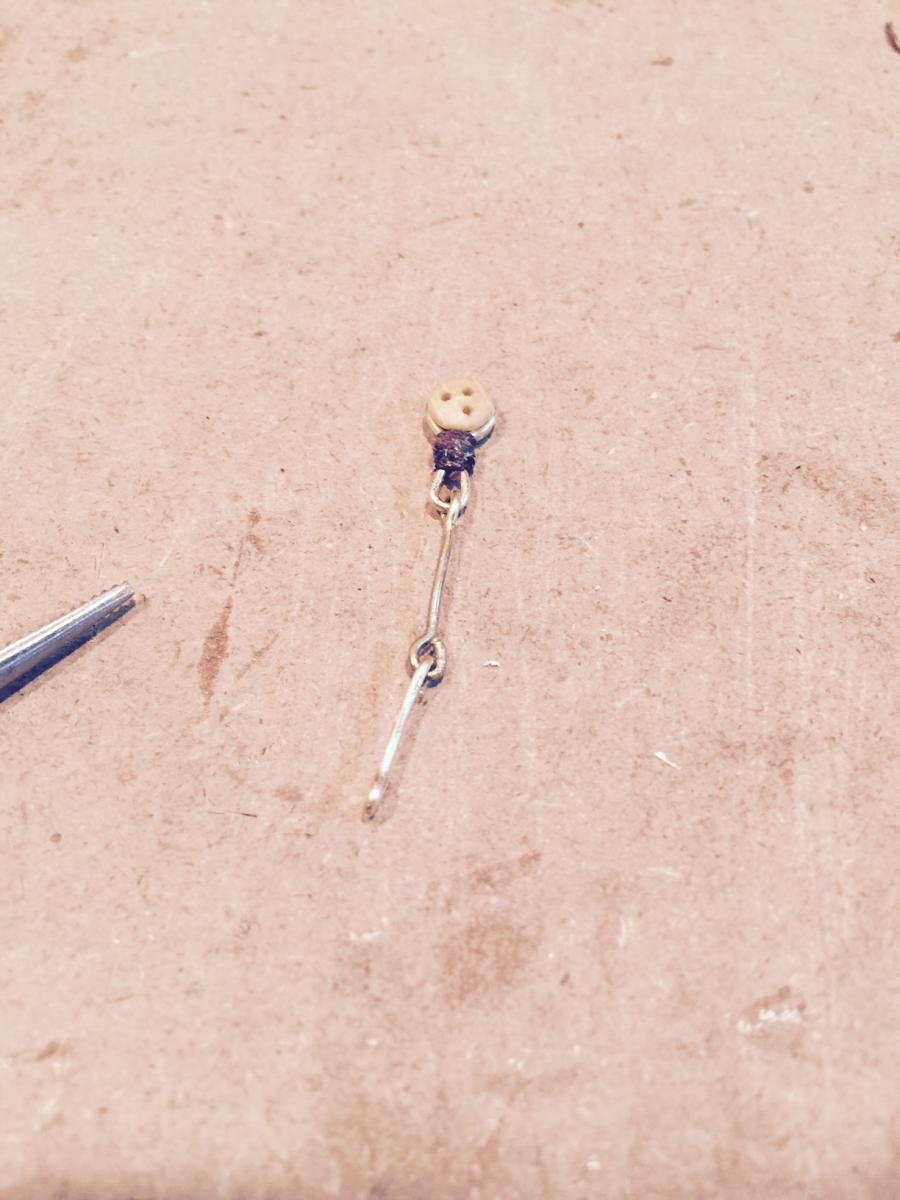
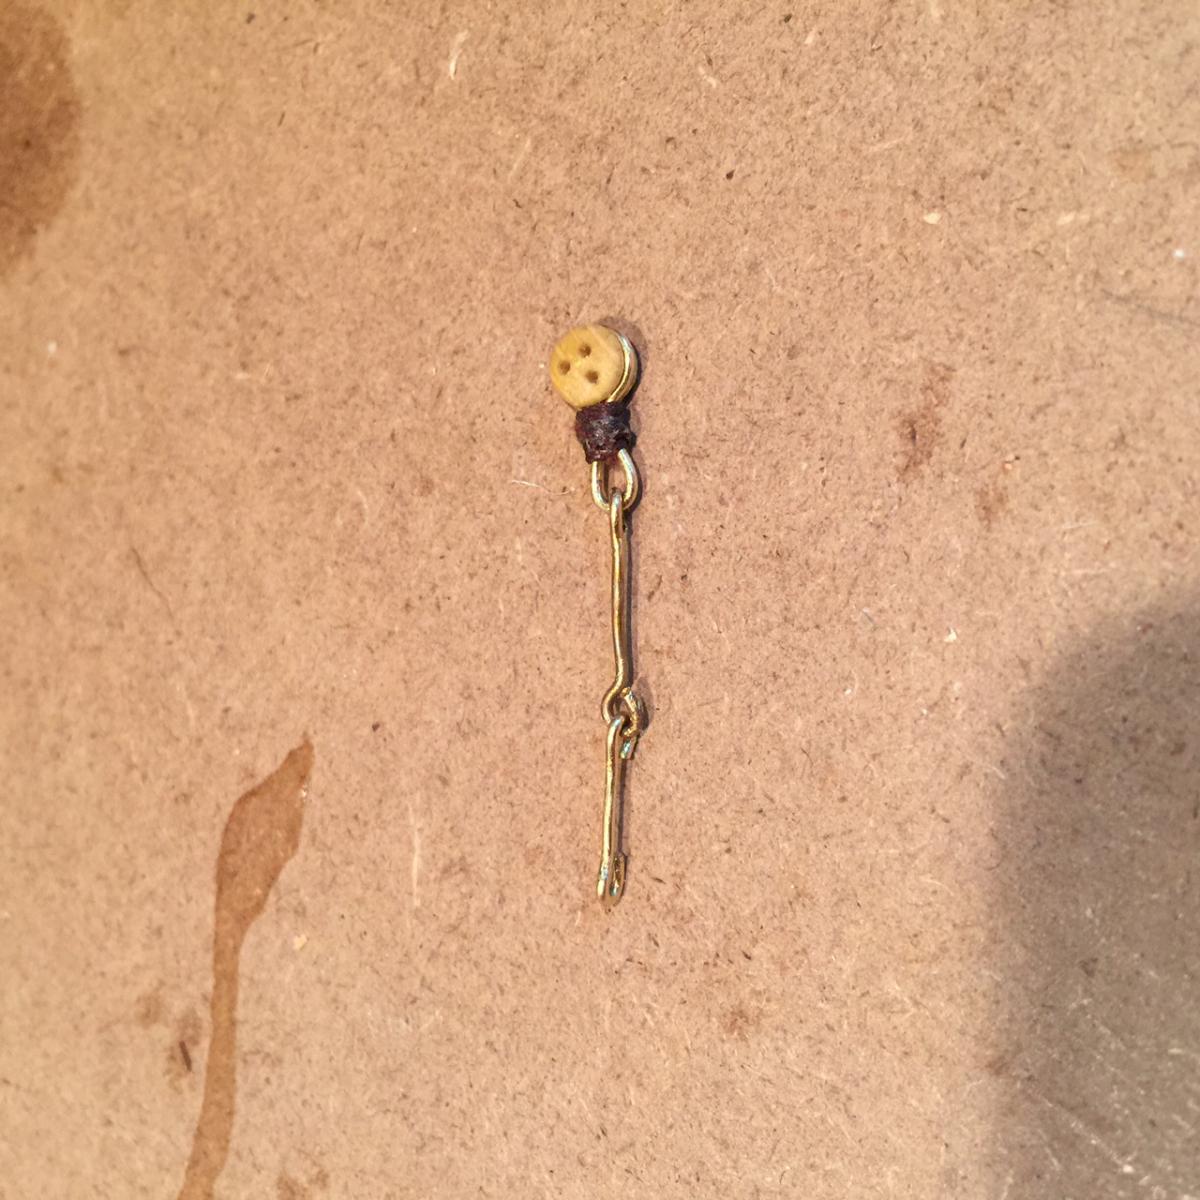
I came back to the deadeyes and chainplates on my latest. I fashioned a better anchor for the boat out of the brass strip I purchased and it works quite well. The brass plating is a little bit thicker than what came in the kit, and I can alter the width of the anchor easily. I'm making the anchors 3mm, the kit supplied brass strips were only 2mm across. Looked a little small with the wire I'm using for the chain links.
I've been going back and forth on whether I create a "manufacturing line" of the chain links, because they vary in length ever so slightly and may require individual sizing. One way around this is to change the angle of the anchor attachment to adjust for the differing lengths. I am, however, going to try to manufacture all the anchors as those will look better if they are about the same size and it's harder to duplicate when all the others are already on the ship (I found that out when I put on #2).
Process is pretty easy once the chain and anchors are created. I drill two holes into the ancho that just fit the pins that come with the kit, then measure where the holes need to be drilled into the ship by placing the deadeye into the slot and pulling the anchor down with my needle punch tool in one of the drilled holes. I poke the boat with another needle in the second drilled hole, and drill away. It has worked pretty good.
I may have to fix the second chain (the one to the left) the anchor hole on the anchor was not centered and now that the chain is on the boat, it's pretty evident. I will see how it looks when the third one is on....

-
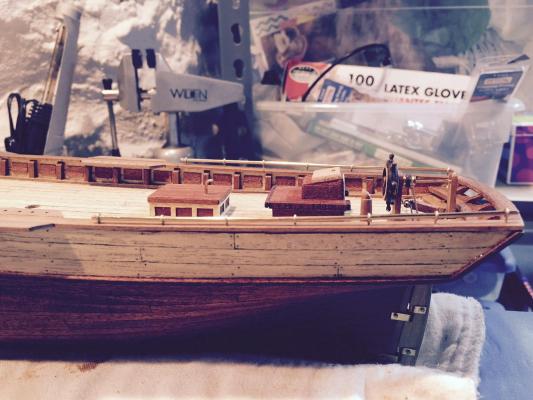
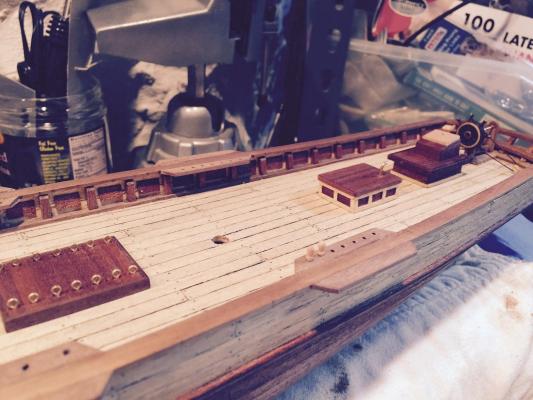
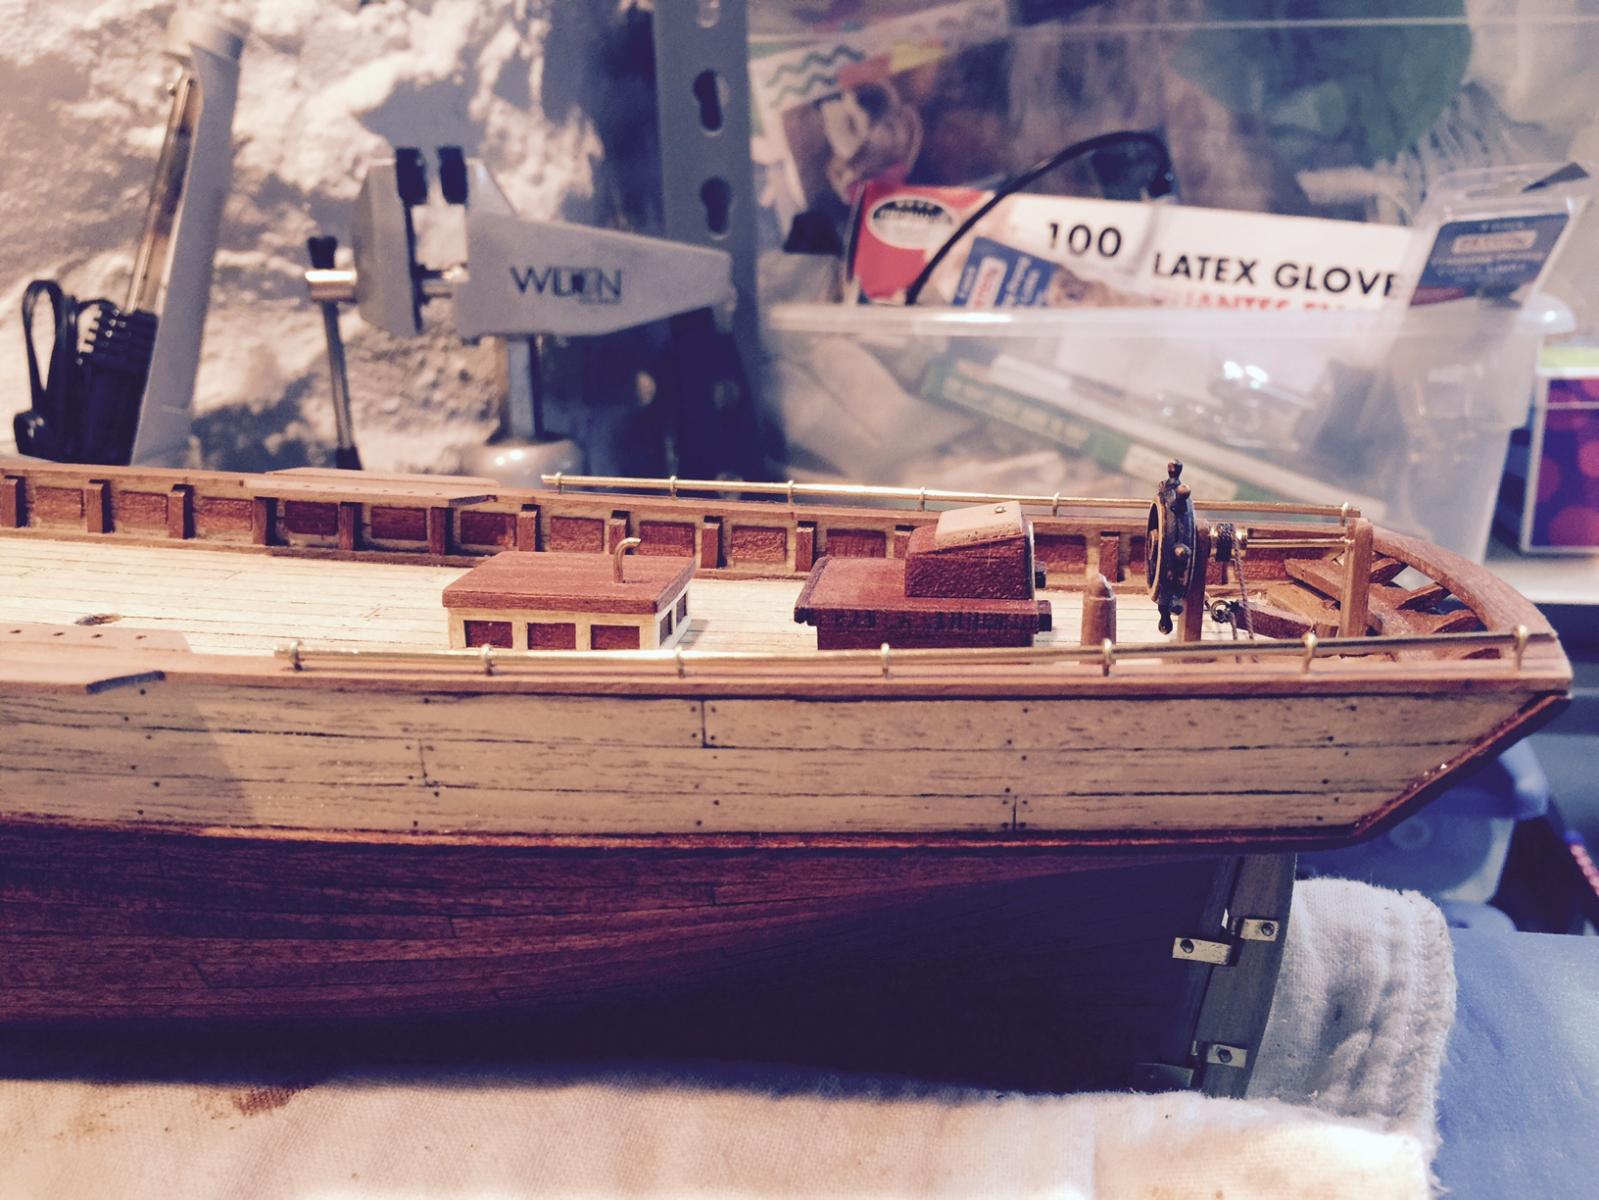
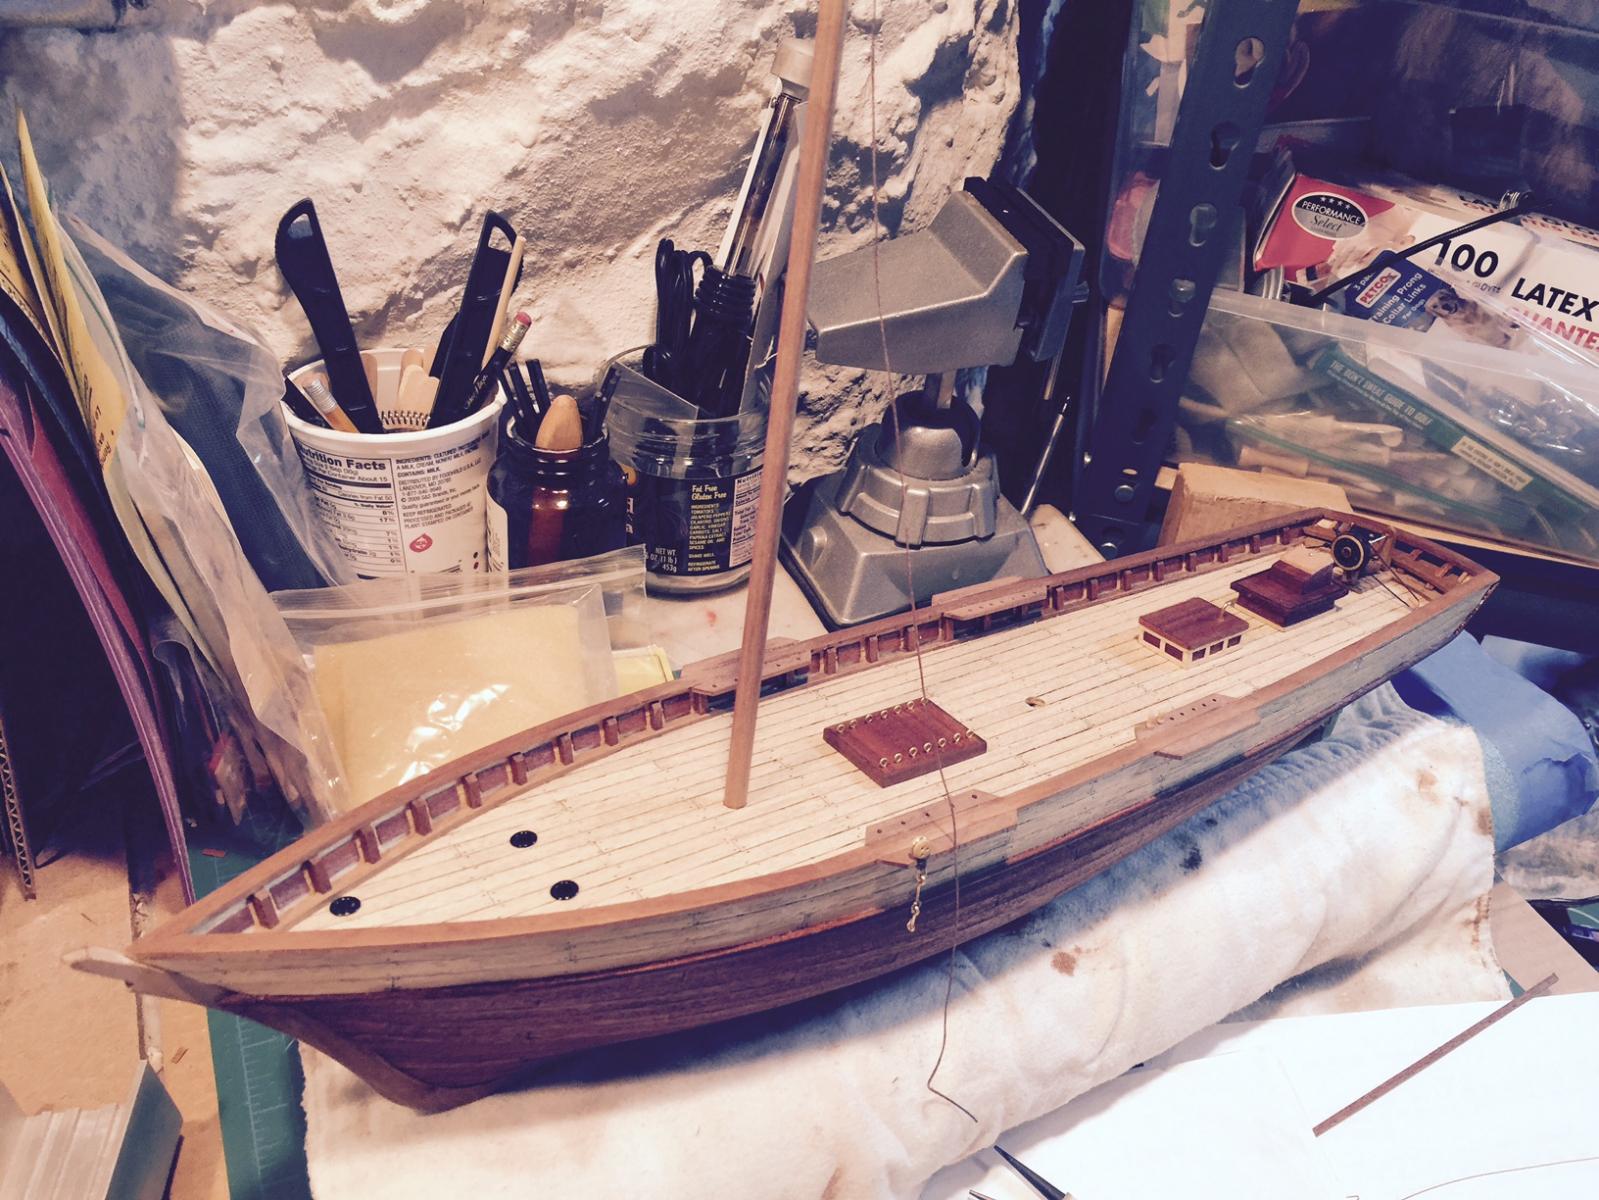
Completed a few more things.
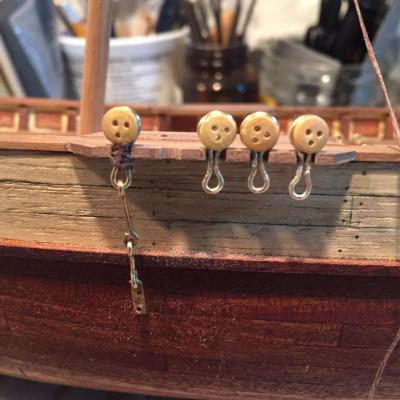
Got the railing on, the pics in the instructions showed there were 4 railing loops, I thought it looked sparse so I ended up adding a few more to have seven. I used 14 gauge wire (much thicker than what came in the model) which worked well, the wire juuust fit into the eyes. I had to put each of the rail posts on the wire before putting on the boat, which made the final installation a test of patience. I haven't glued yet as I wanted to see how it looks. I like one side, the other needs to come off to adjust the wire bend. Then glue.
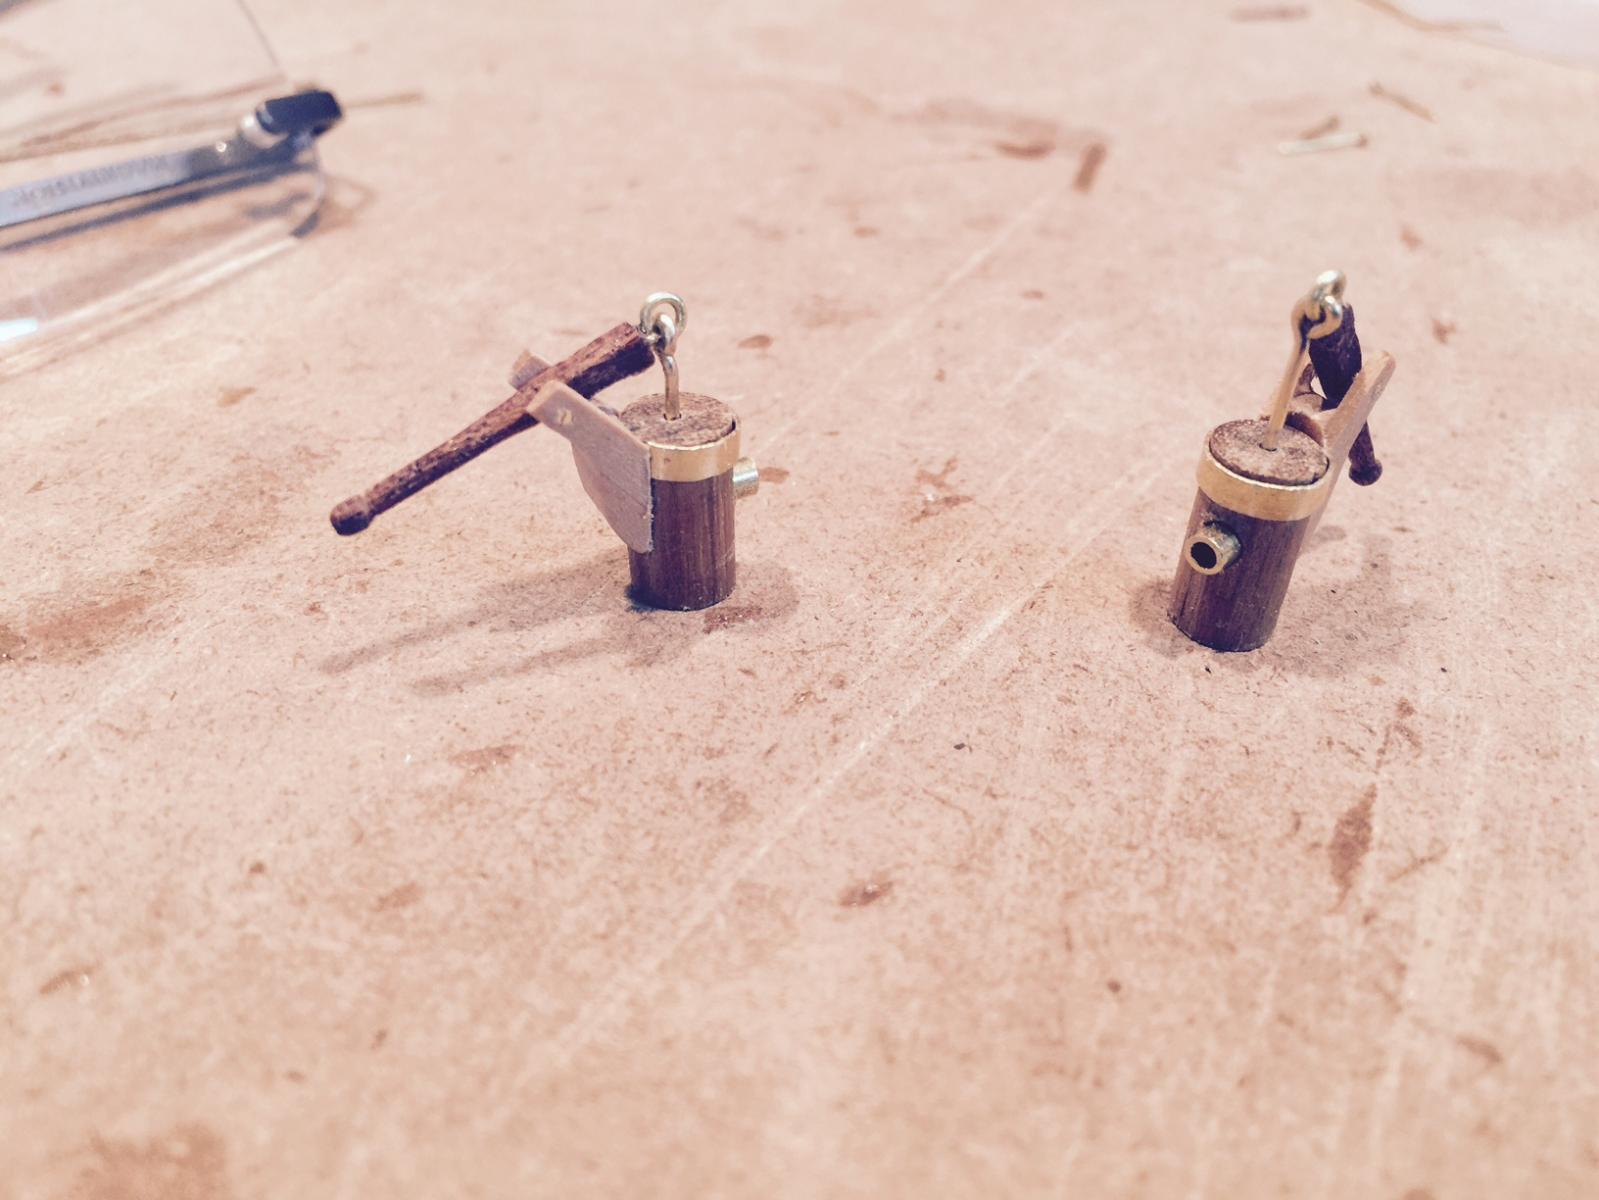
Bilge pumps almost complete. I want to add one more copper band on each, and stain/paint a little. I've been avoiding painting as I have no experience working with paints other than on the walls of my house. But I want the tops of the pumps a dark (black) color to give some contrast.
I also started shaping the chain plate anchors. slow work but easy, hand shaping with a metal file. I'm thinking of having curves on both ends. The square end looks incomplete.
Happy 4th of July everyone!!!

- Jack12477, UpstateNY, mattsayers148 and 4 others
-
7
-
Hey Matt - great build. Love the deck, very interesting and unique. Also fine handiwork with the metal. I failed miserable on my first (and maybe last) attempt at soldering, your work is very impressive Will look forward to watching this evolve
All the best
Robb
- GLakie and mattsayers148
-
2
-
Updates...
@Jesse - thanks for the ideas. I ended up borrowing Brian's design for bilge pumps although they will end up looking a bit different. I'm putting more copper (bling!) but basic design is identical. It took me an hour just to get the handles done - not easy! For the hinge, I glued two pieces of pear of different lengths and sanded down the shorter corner to get that angle. Lots of sanding tonight. I plan on using 20 gauge brass wire for the hinge, and either 20 or 18 for the pump. will also put copper bands around the bilge pump.
@matt.s.s. - thanks! Please use anything you find helpful - I am humbled by your request! I feel like I'm a shadow of some of the talent that is seen on this forum, your comment is very motivating. Thank you.
I feel like I have boat ADD. I have several items on my bench that are in various stages of completion. And I keep starting new projects. In no particular order, my TODO is:
- finish fixing the lifeboat.
- create chain plate anchors
- create chain plates and attach to deadeyes
- attach deadeye/chain plate assembly to boat
- finish winch (paint top and attach, paint handle)
- put together bilge pumps
- put on railing
- put on deck stuff
Then I have to think about the bowsprit. Already thinking about following your idea Jesse in opening up the deck so the bowsprit won't be flush to the deck. How hard was that?
- JesseLee, mattsayers148, UpstateNY and 1 other
-
4
-
More accomplished this evening...
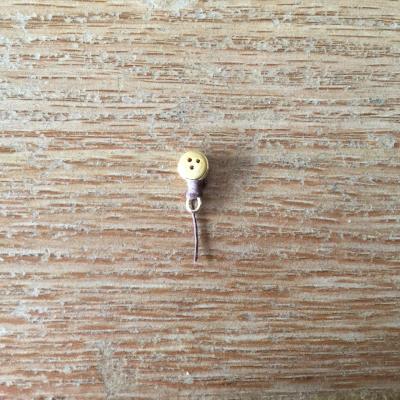
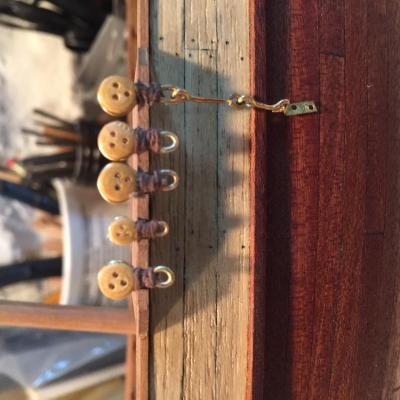
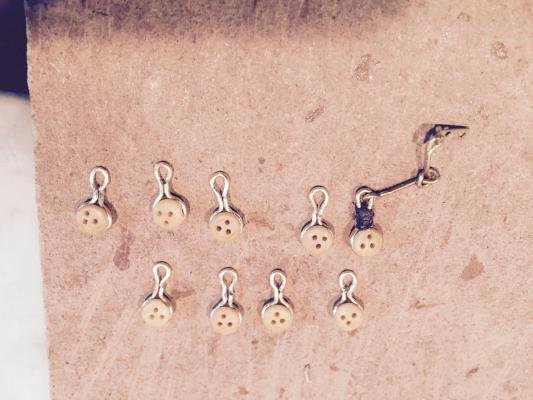
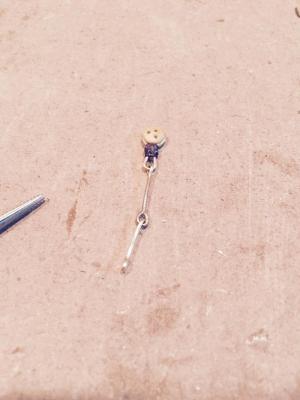
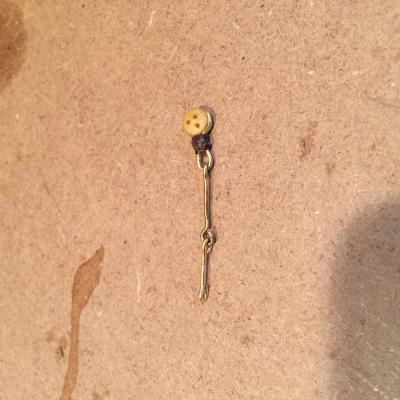
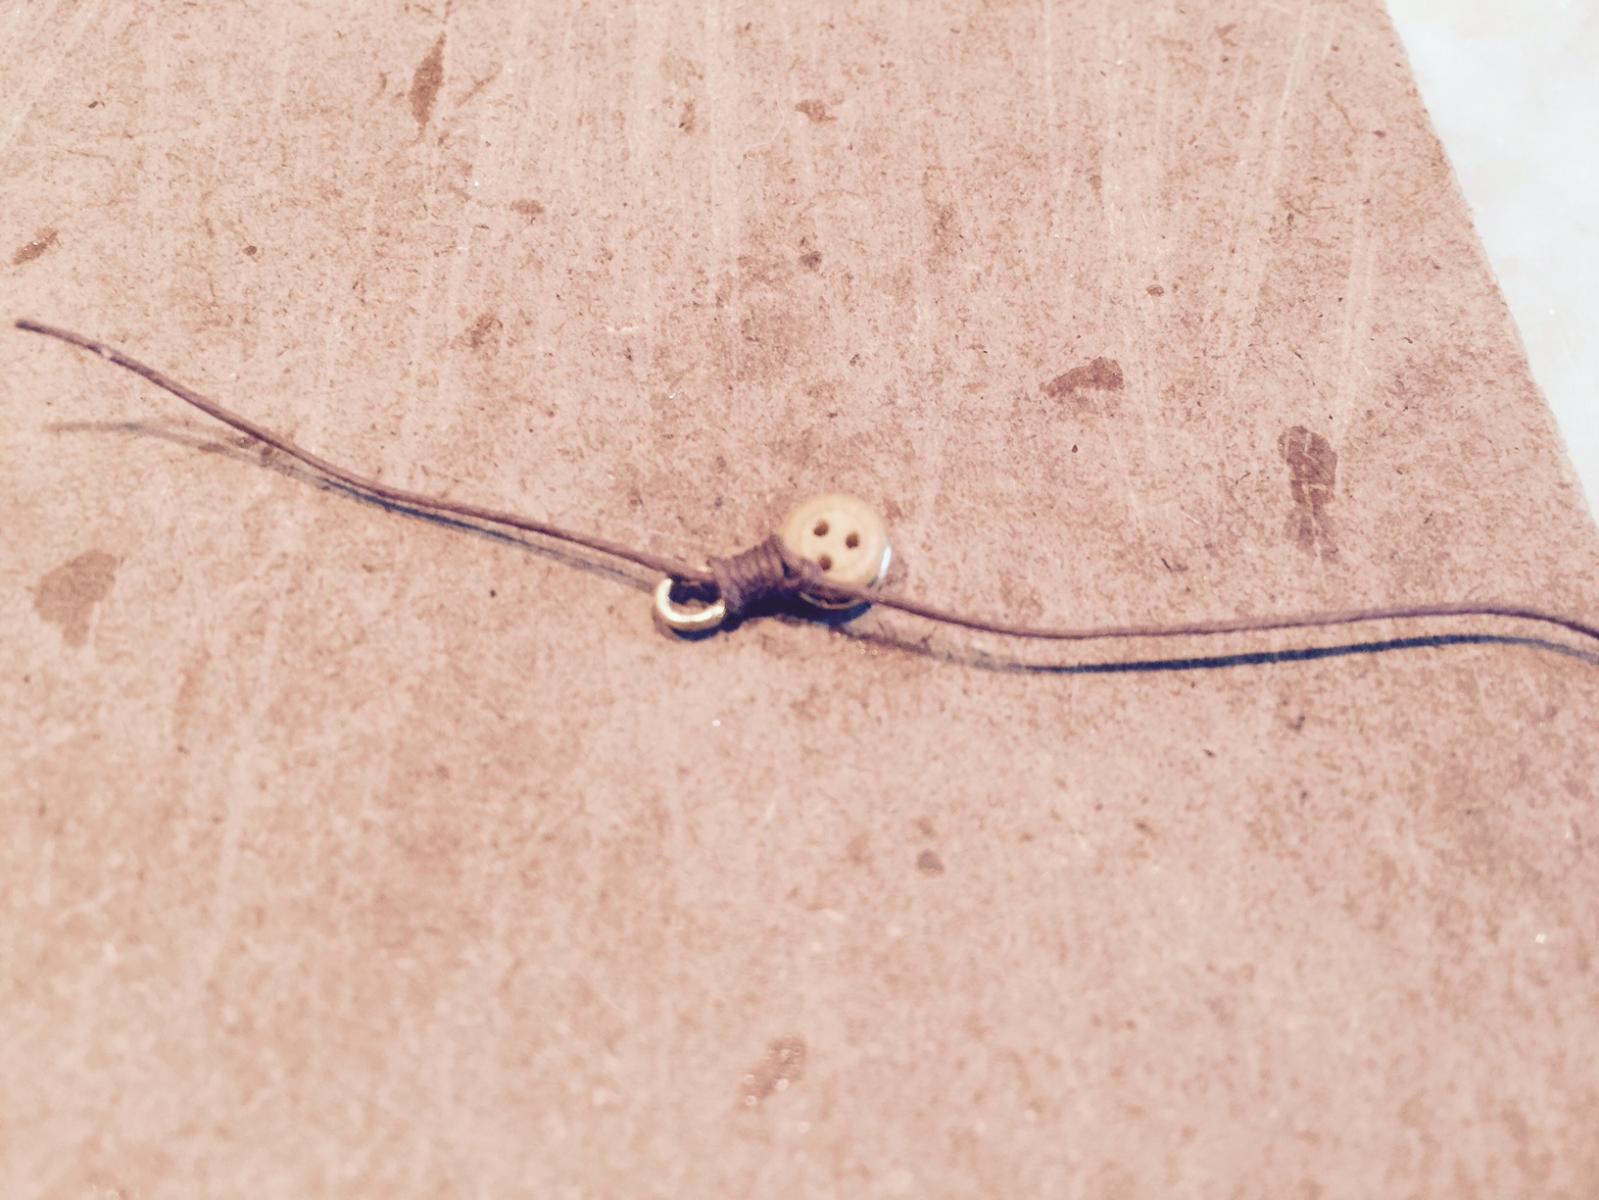
I finished wrapping rope around the deadeye strops, I ended up using the kit's brown rope, it worked ok with some beeswax applied. A few pics below show the progress. I missed snipping the rope on one of the deadeyes and had to rebuild. I think they will look good once on the boat.
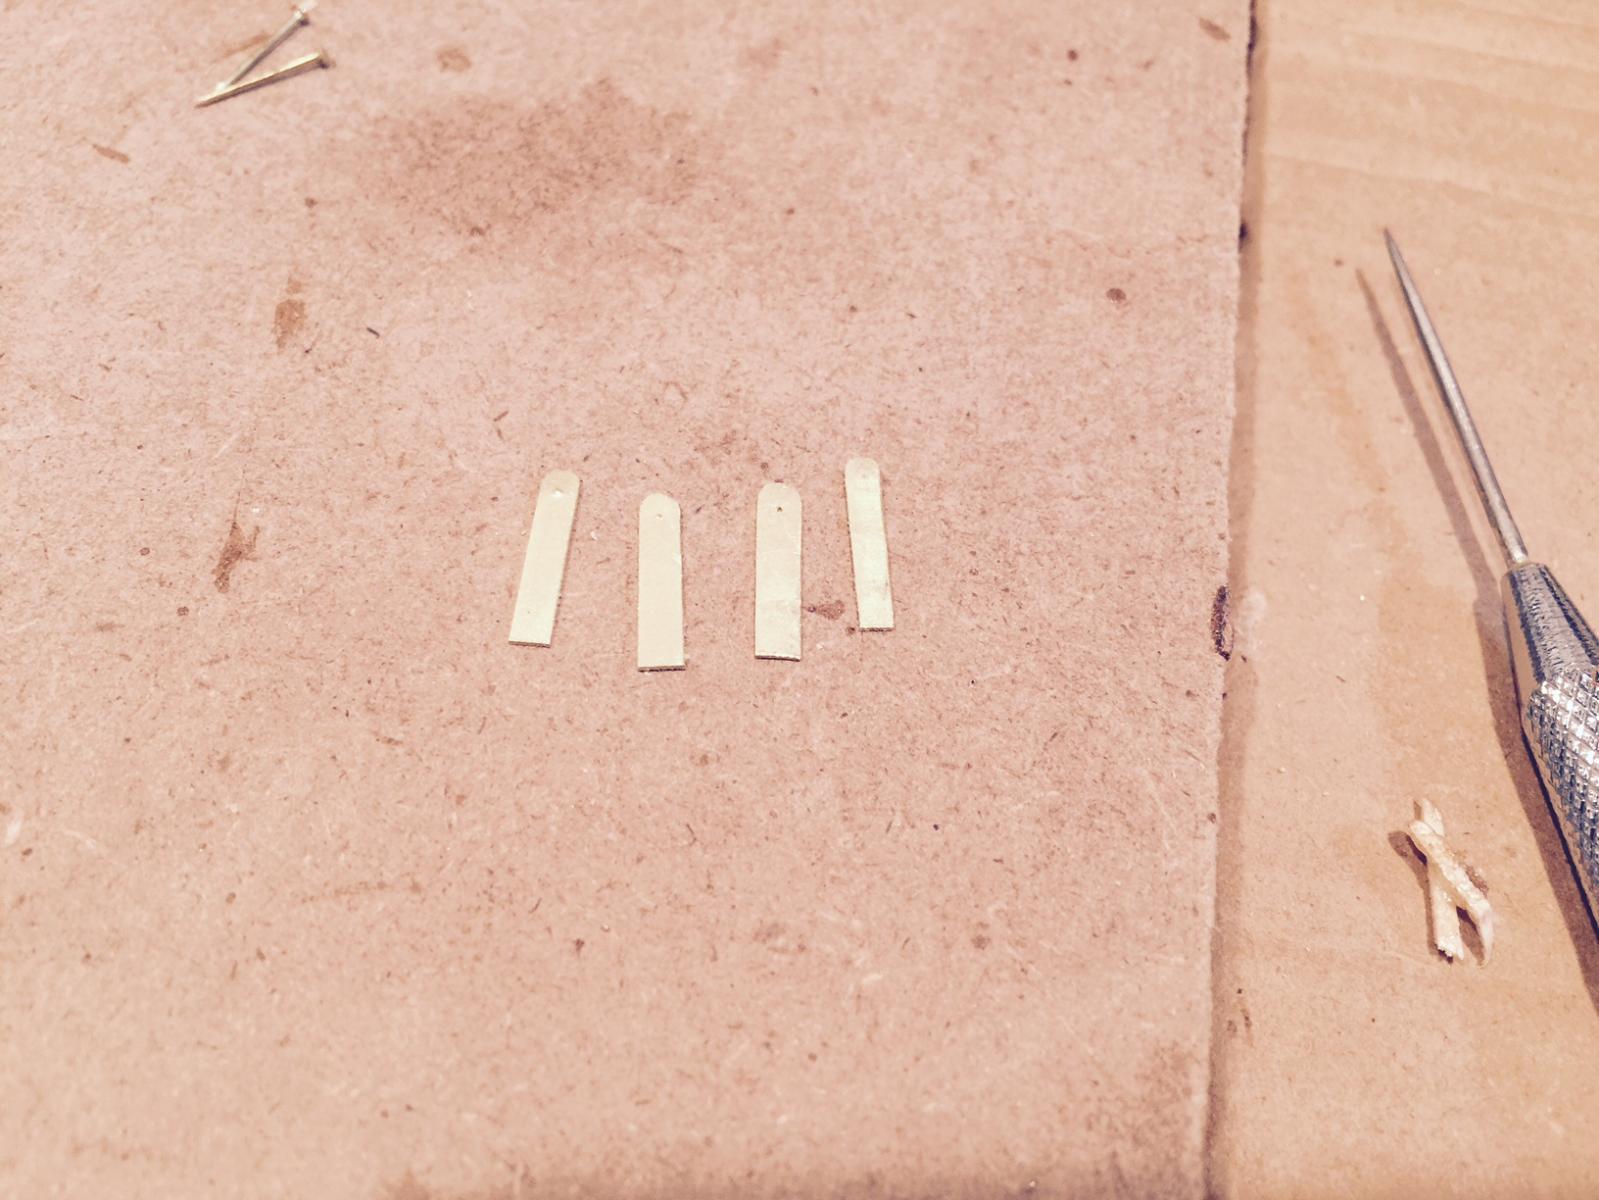
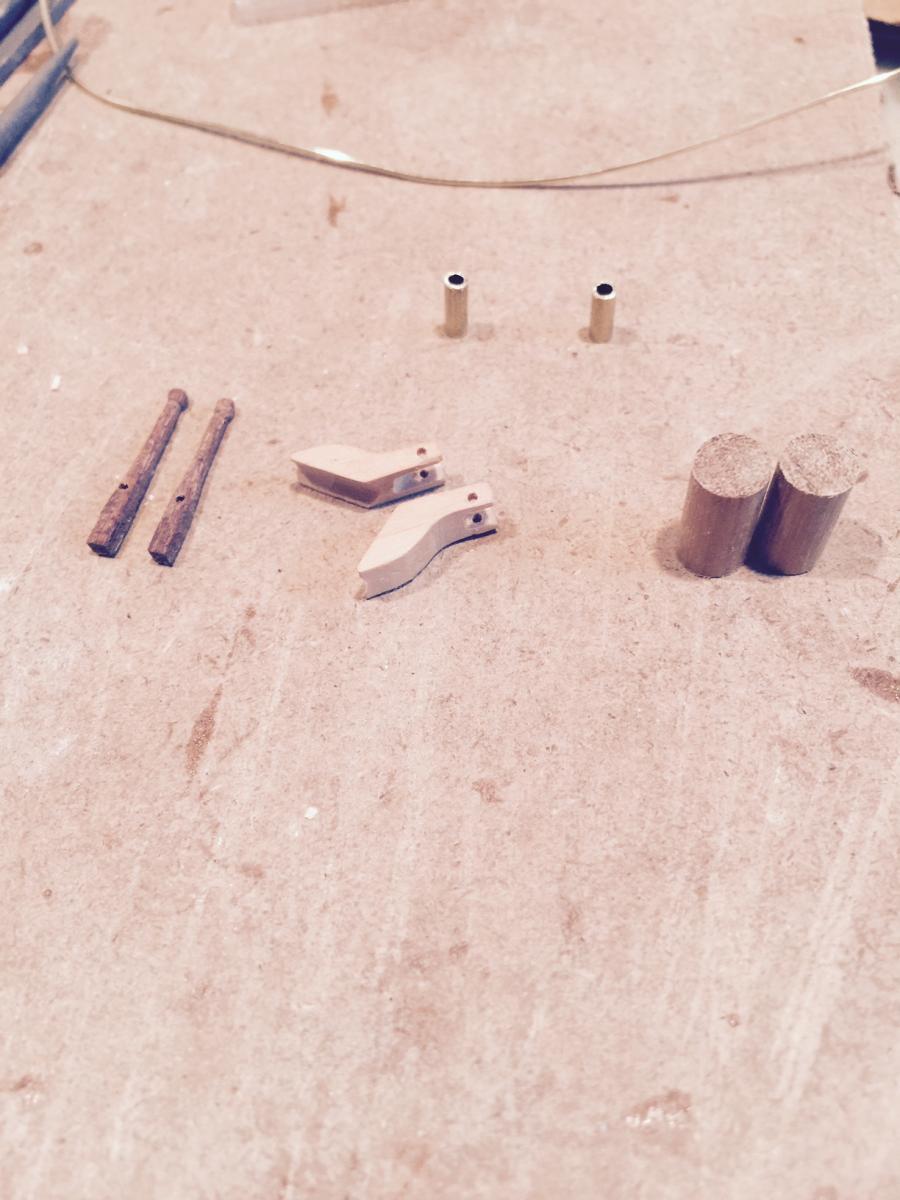
The brass strips arrived today. I can use the thinnest strip, should hold up fine. Started cutting individual strips 3mm to use as the chain plate anchors. I anticipate lots of filing to get this right. Some new tools arrived today as well including a small hammer, which works great to flatten out the brass plates once cut.
Last, I fitted the anchors onto the railing. What's in the picture is 14 gauge brass wire that I ordered, which is MUCH better than the 20 gauge wire that was provided for the railing. Will stand out nice and it fits the anchors perfectly.
I have tons of deck stuff strewn over my workbench now. Need to get the deadeyes on the boat so I can wrap up the decking. One last thing I want to try is to make a better bilge pump. I found one image while perusing another build and will attempt.
On to the pics:


-
Brian, I am going to unabashedly plagiarize your design of the pumps for my SM b/c I love how they came out. Hope you don't mind!

- GuntherMT, Salty Sea Dog and GLakie
-
3
-
-
-
It looks so easy until you try...
I built the winch, had to manufacture the prefab pieces similar to the windlass. Looks ok, need to add the cap and paint. will probably darken the wood as well will try tung oil on this wood and see what it looks like.
I started on the deadeyes. Boy this is not easy! I thought I'd get through this with a breeze but working with the wire has it's own challenges. Perhaps I'm not using the right tools, I'm getting by with a wire bender and needlenose pliers. Doing it all by eye too, not sure how to get measurements on something like this. My goal is to get good enough so that when I tie the rope around the neck of the collar, it will hide most of the scarring left by my crude manipulations.
Also cut grooves into one of the channels, concerned that the deadeyes are too close. Do I need to re-do?


-
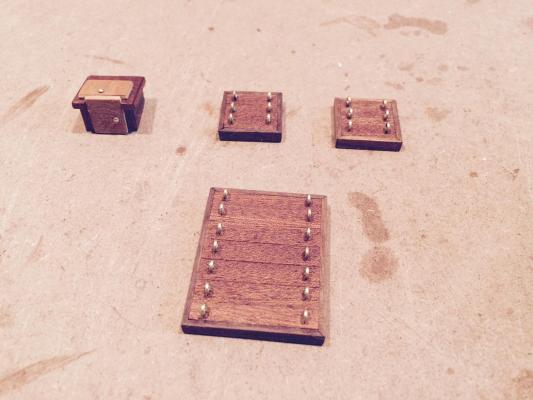
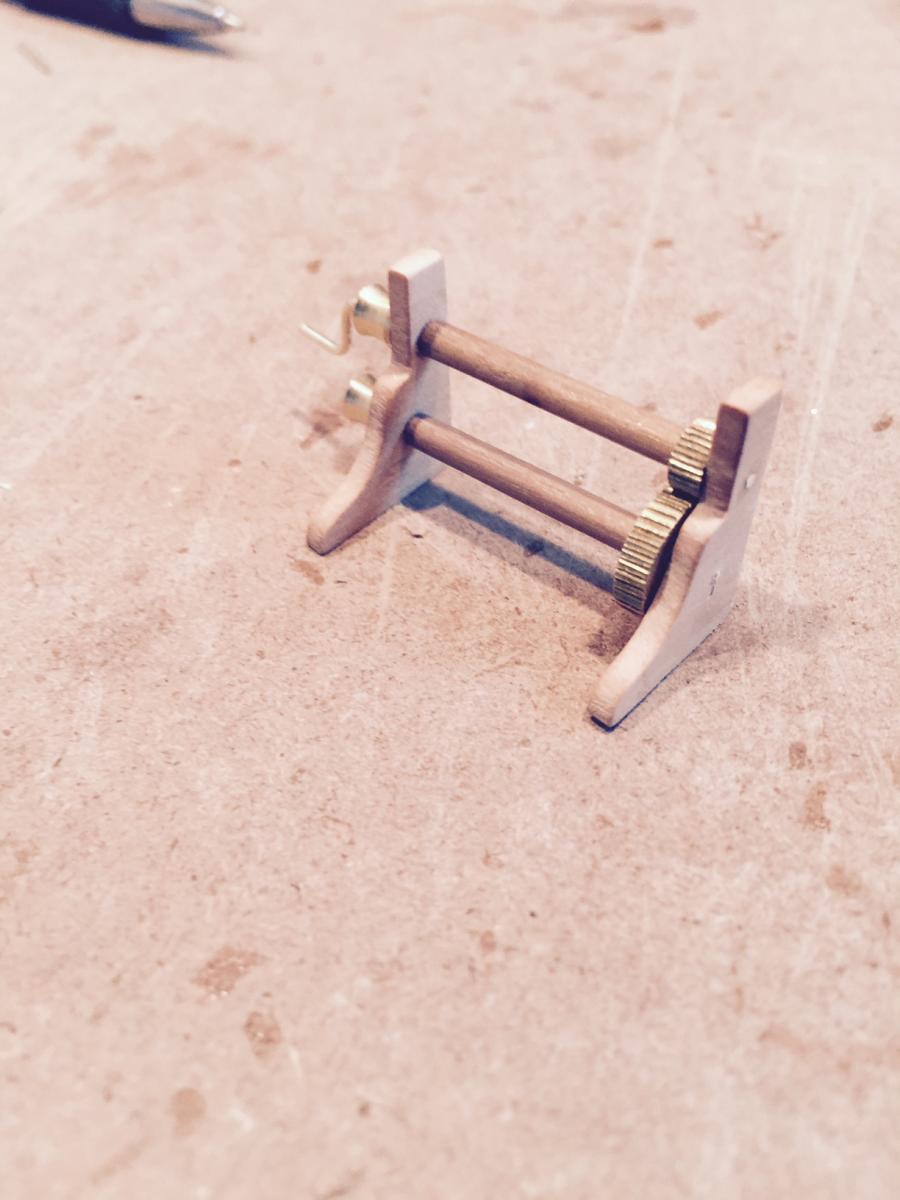
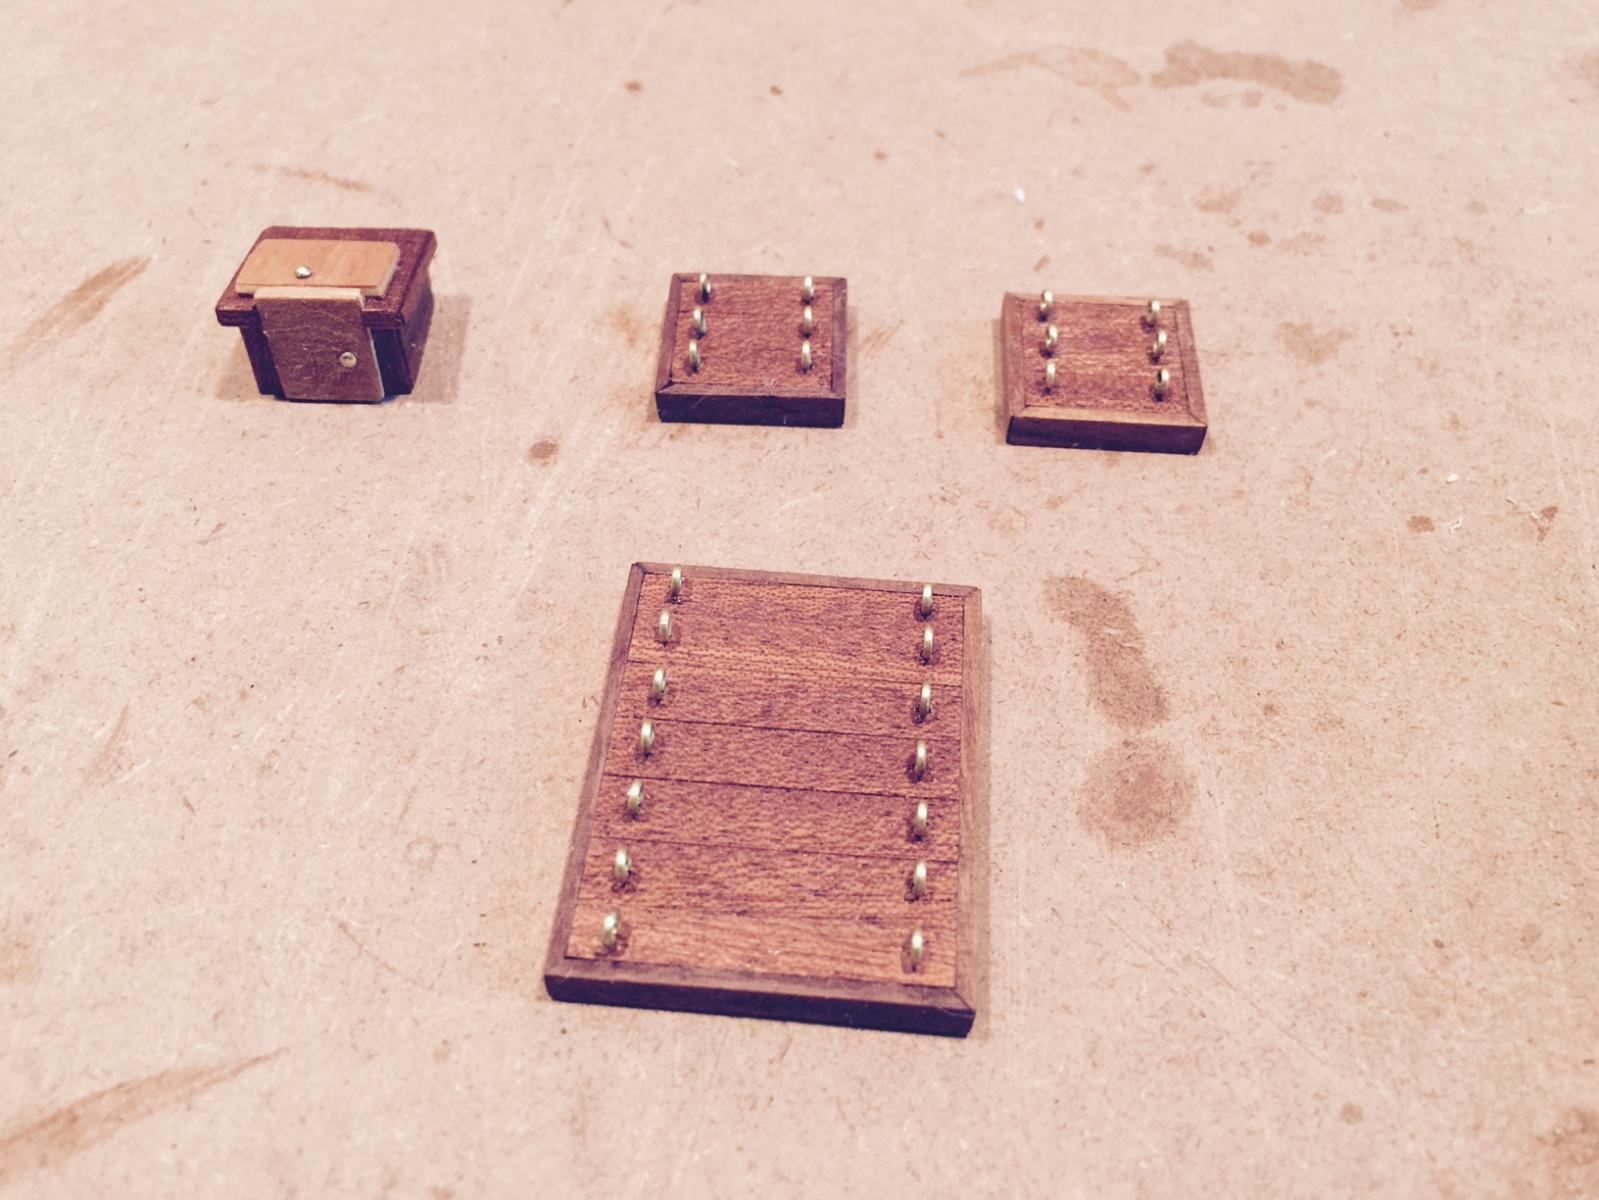
I received my pear wood planks for building some of the components that have precut pieces I seem to have misplaced over the years. So I worked on the windlass over the weekend with some pretty good results. getting the belay pin board drilled was a task, I split two boards before getting it right. I also received my brass wire so I'll begin my lower deadeye chain plates. 16 of them so not too bad, but probably will take a few sittings.
I also ordered some brass strips of a few different sizes. The strips that came with the ship look a little to small/fragile to fasten the chainplates to the hull, so I'm going to try to make something a little more sturdy. I hope I'm not going overboard with the brass, but in keeping the wood natural color and not painting, I'm hoping it will give the ship some color.
-
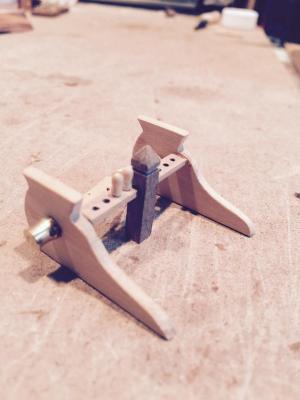
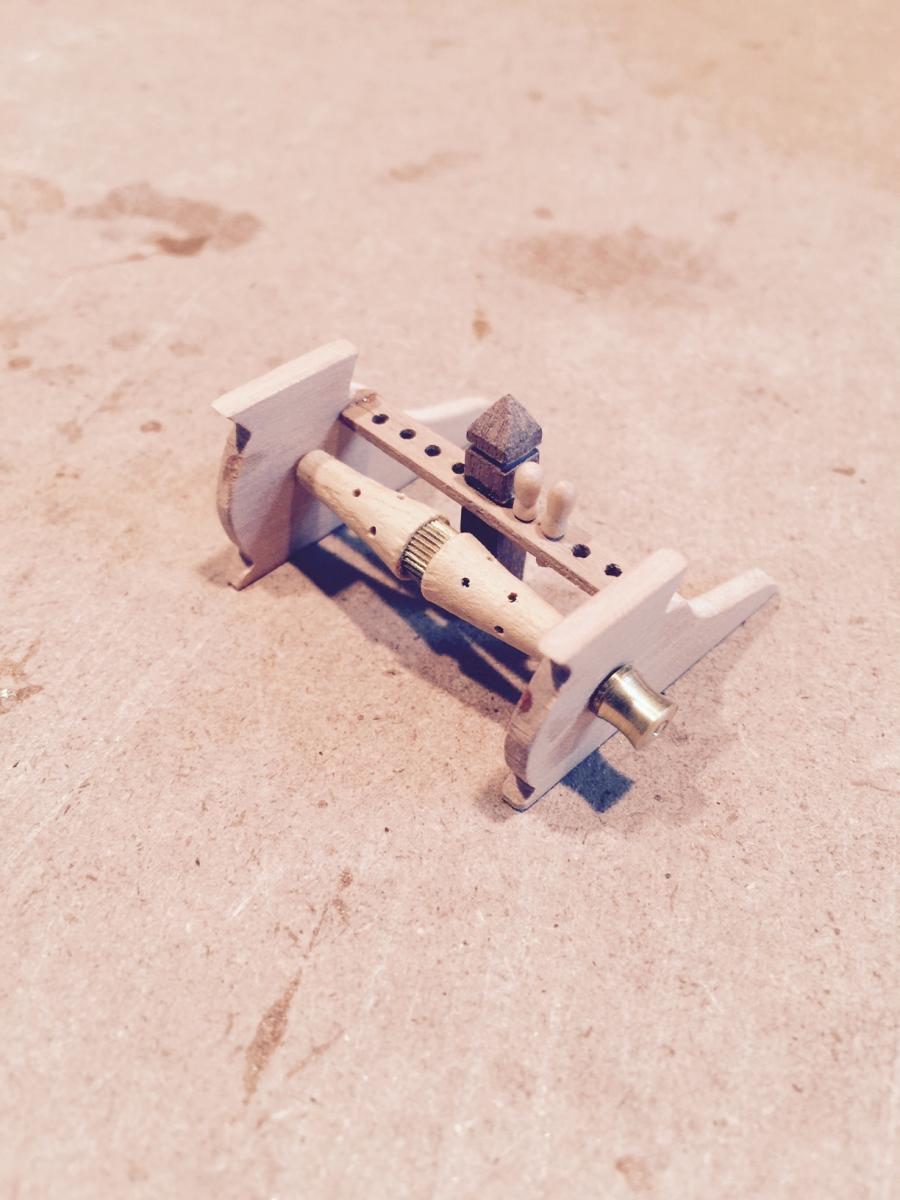
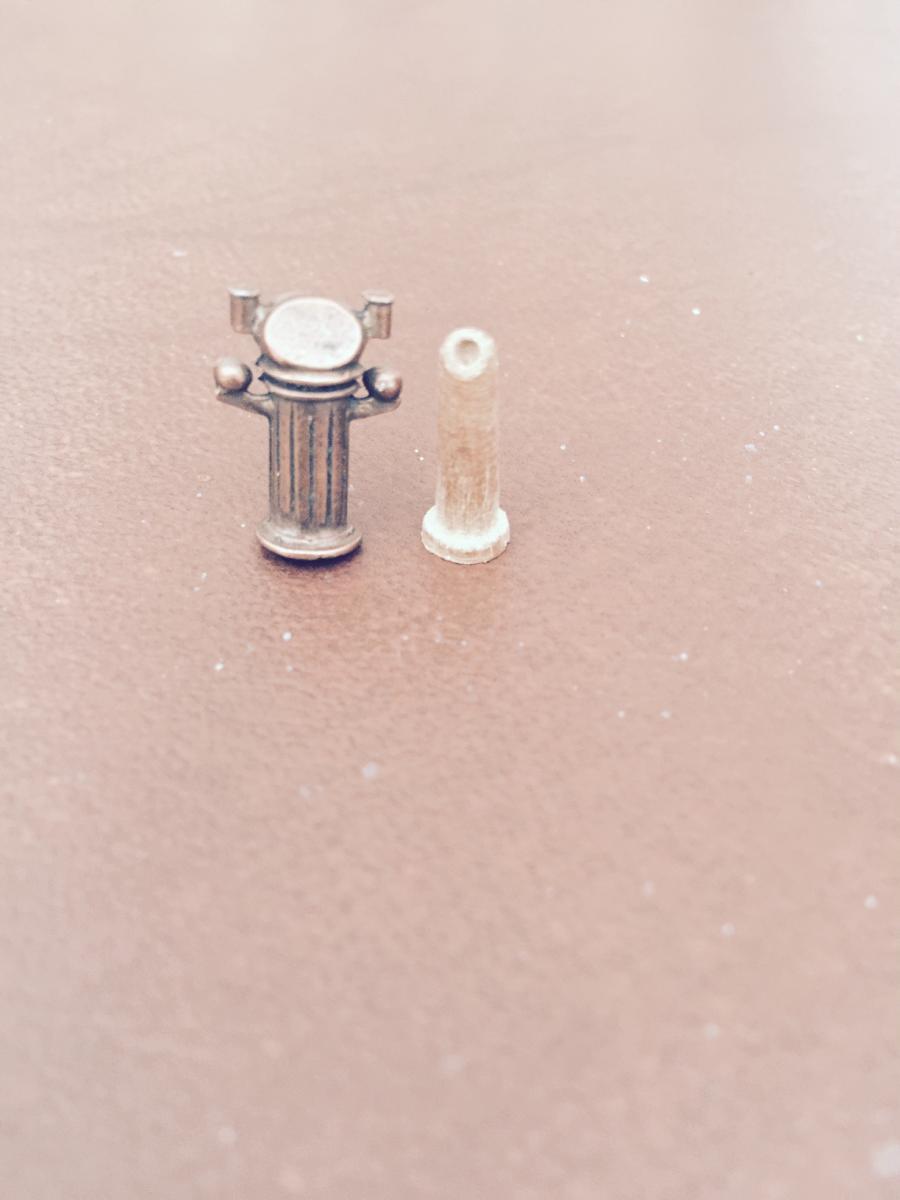
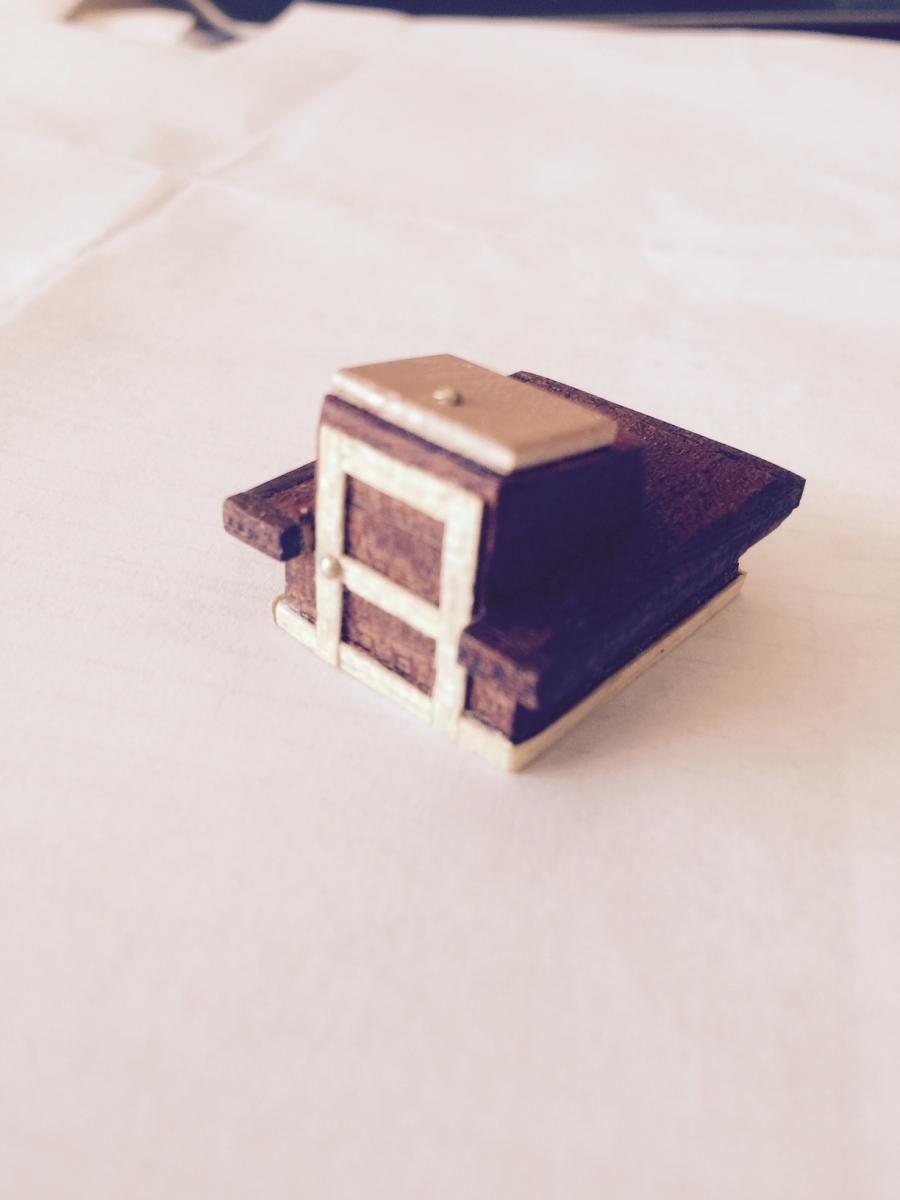
I have read about binnacles and the one provided with the ship seems to be out of line from a time perspective with the rest of the ship. The two balls on either side of the compass were magnets to counter all the iron that was used in later ships - this was invented in the 1850s and then patented sometime in 1870. Evidently they are quite valuable these days. The earlier ones were much simpler from what I gather. I found a whole book on binnacles but spending $65 seems a bit overkill.
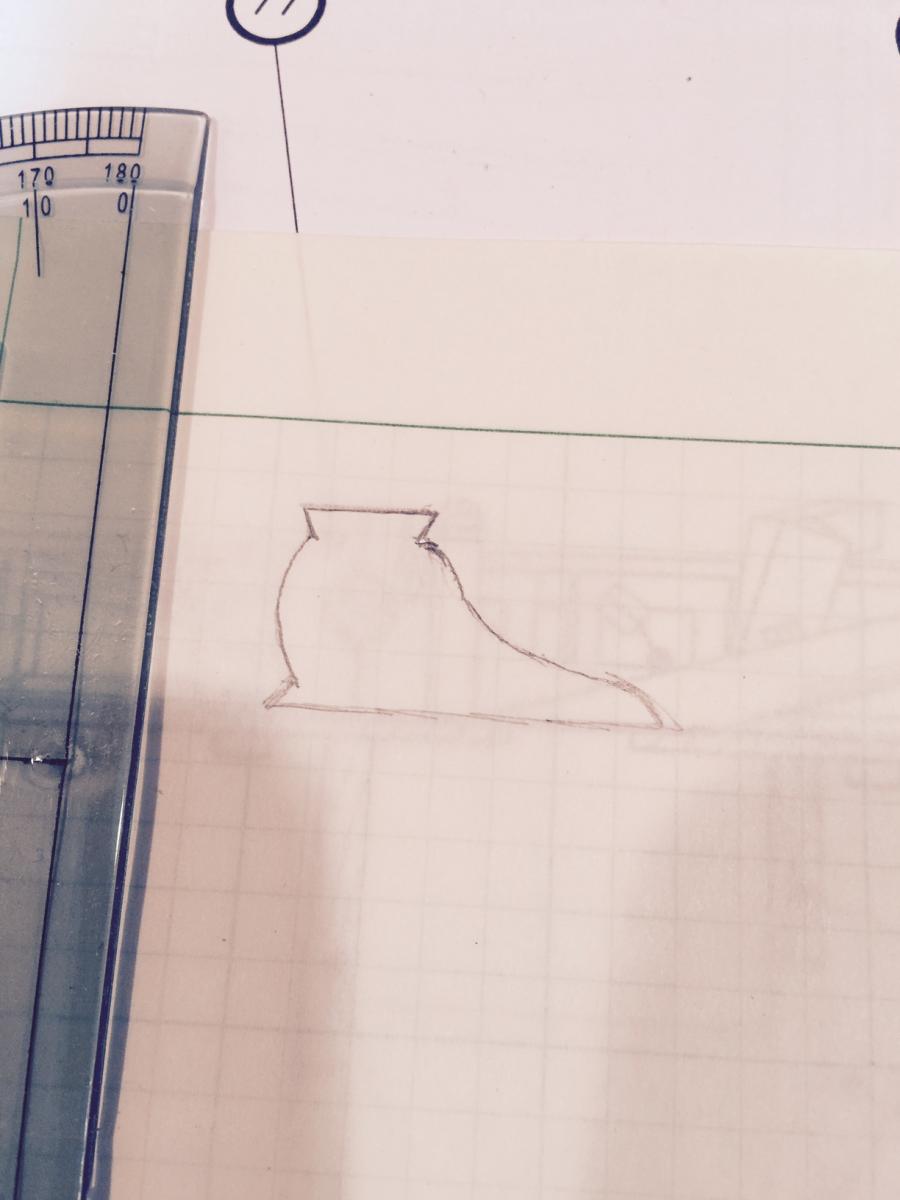
Here's my first attempt at the new 'old' binnacle. Much simpler than what was provided but more in line with everything else on the boat. Trying to figure out how to add some detail to the top. Any ideas?
-
Thanks guys. You got my curiosity up and it is apparently the binnacle. I really don't think they'd put it right in front of the door like they suggest in the model. Perhaps to one side (right) for the captain. I've been researching binnacles for the past hour now and I think I'm going to try to build my own. The older ones look a lot simpler than what is provided in the kit. I will carve something, and see if it makes sense to cap or create something else.
-
A few more updates. I fitted some of the deck items to their location, they give the boat the start of a completed look. Motivating. I also fitted the lower deadeye and chain link to use as a template. Trying to figure out how to create en-masse without scratching up the brass too much. Maybe use nails as a template?
I marked out the location of the deadeyes on the channel, I assume equidistant, even for the smaller deadeye?
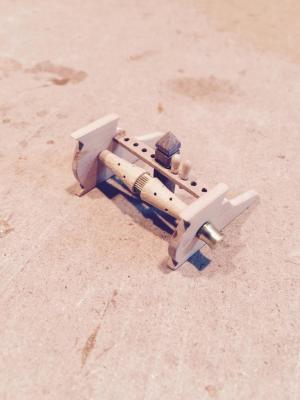
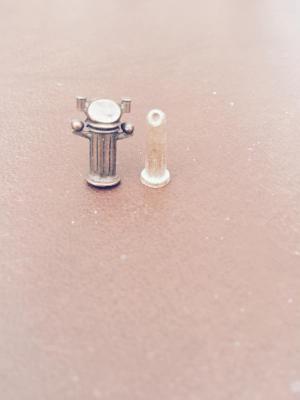
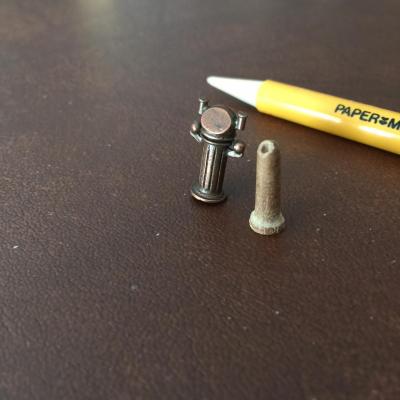
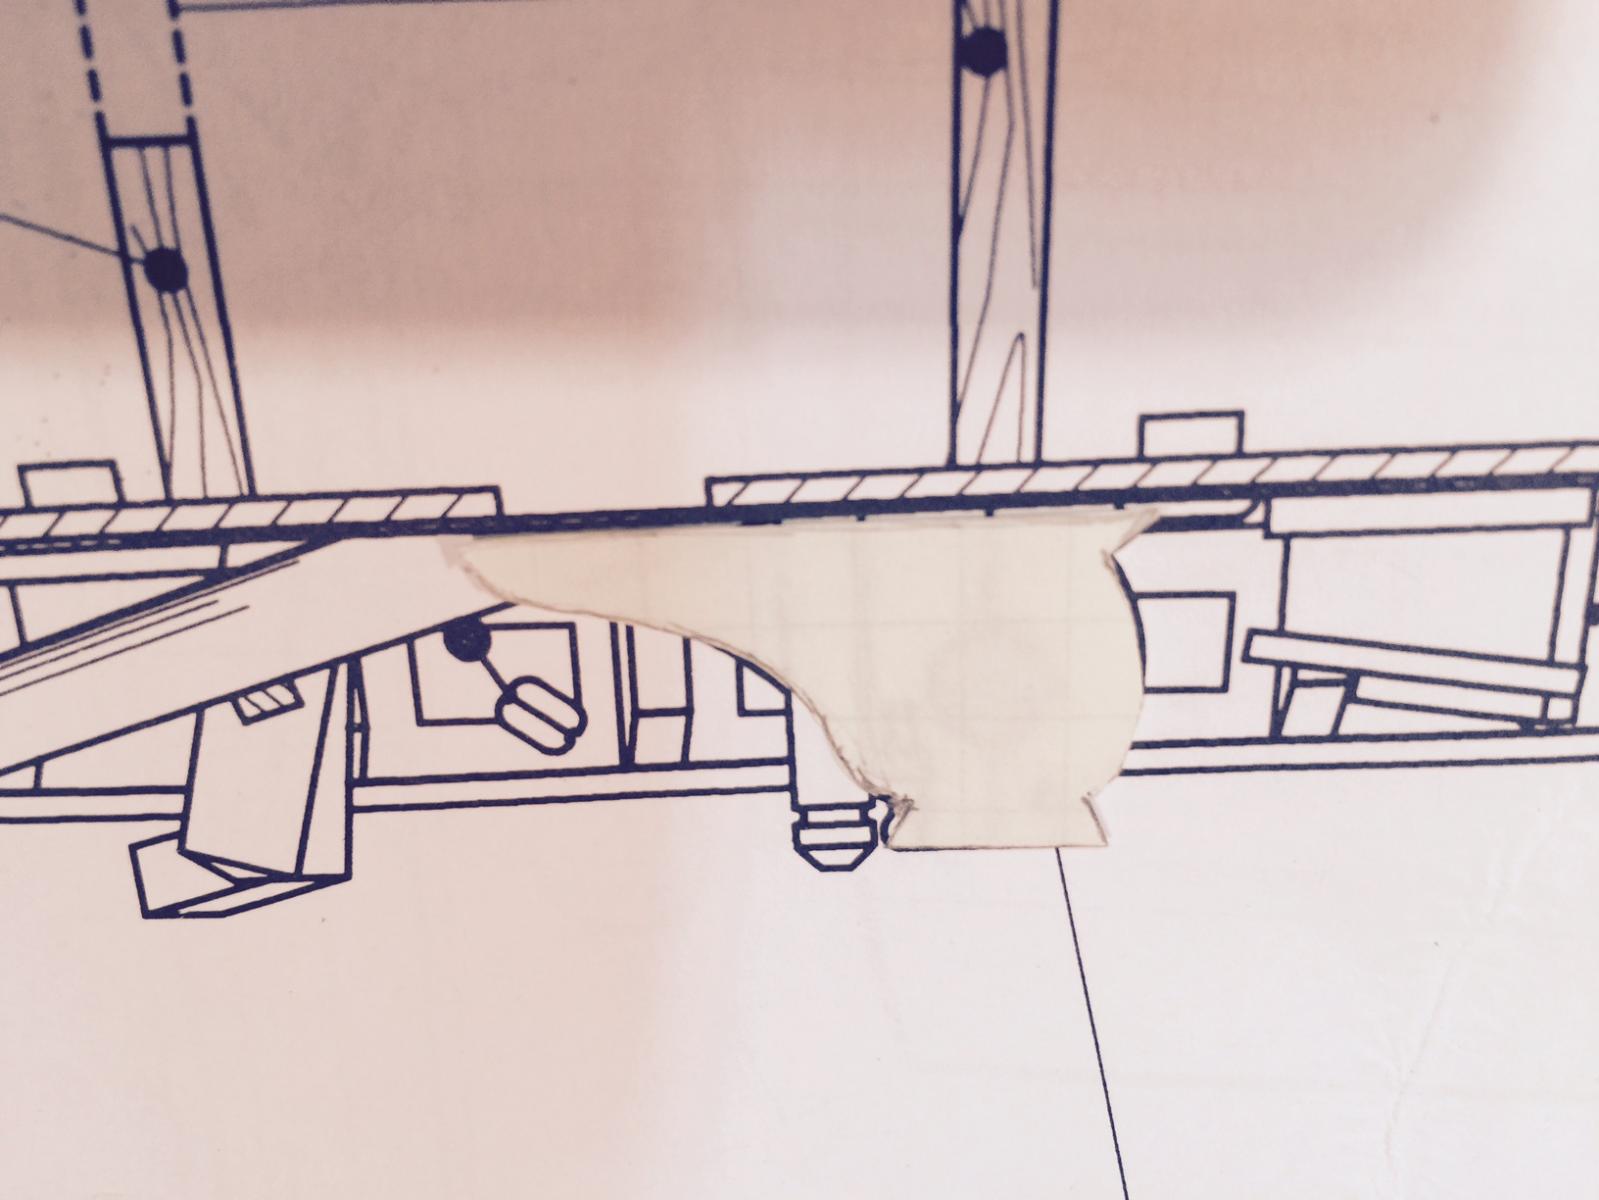
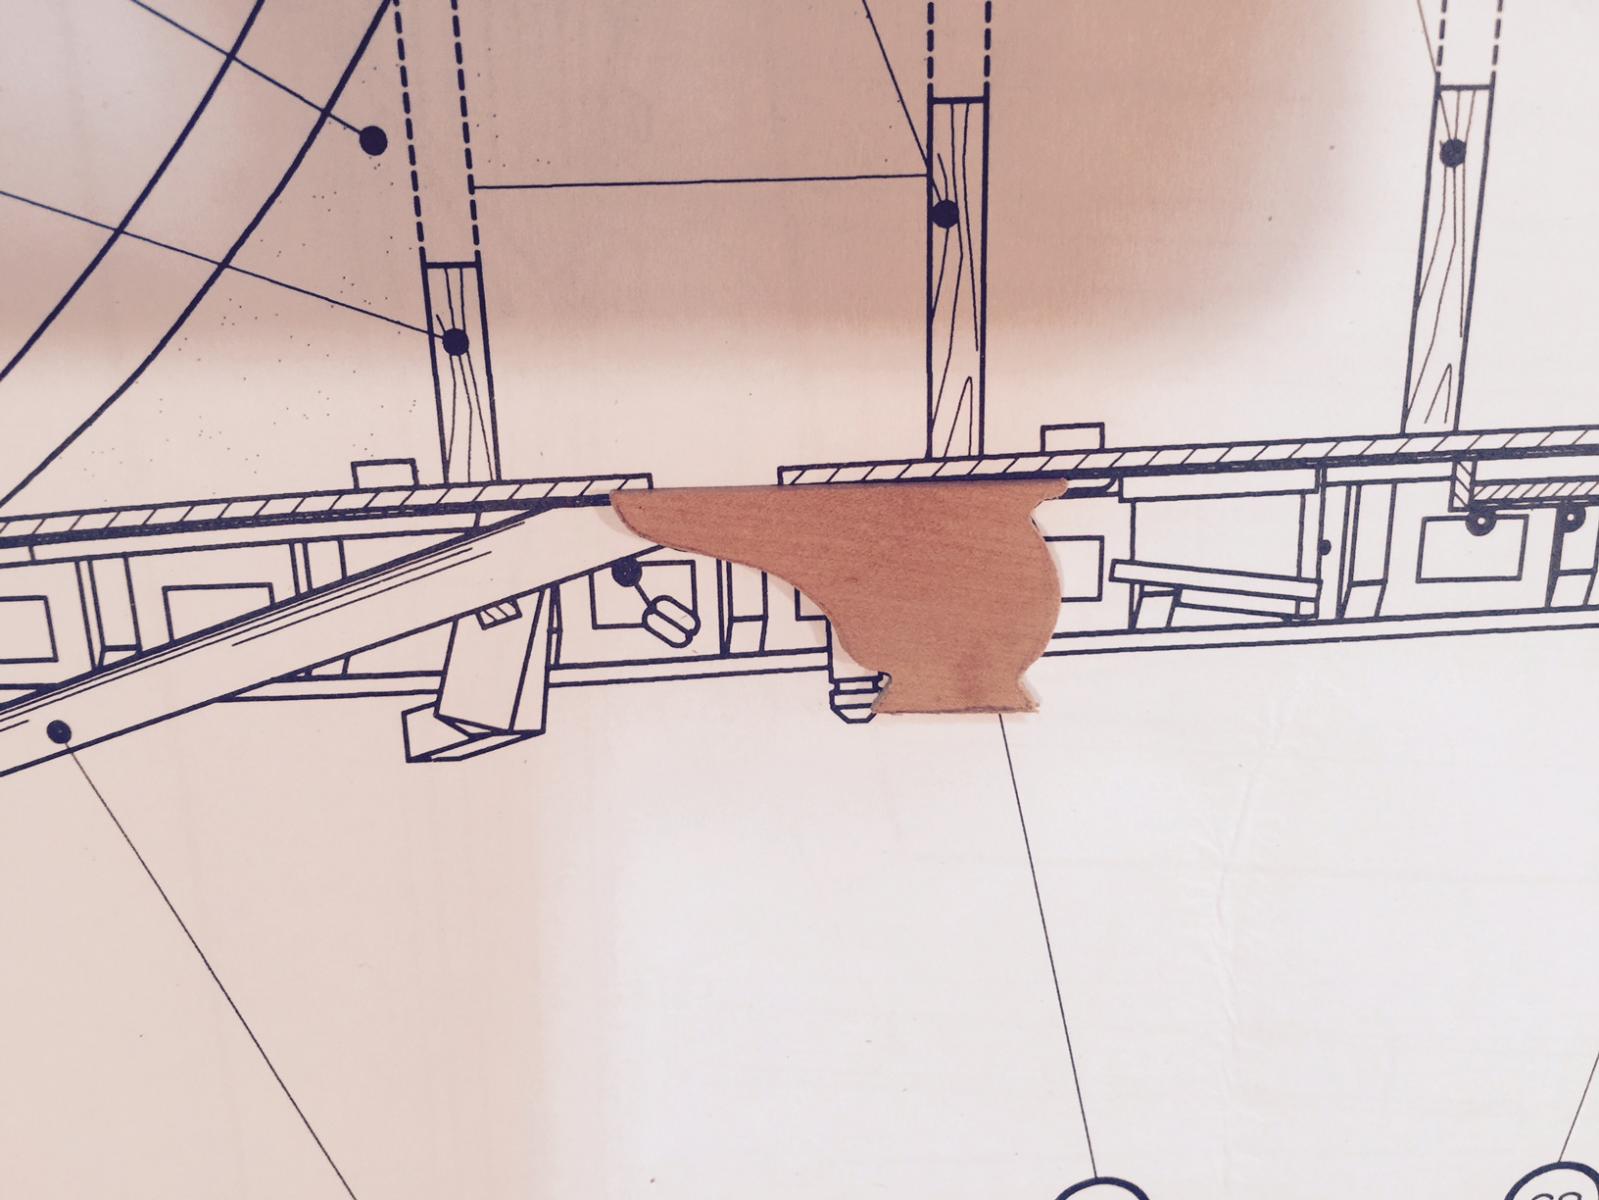
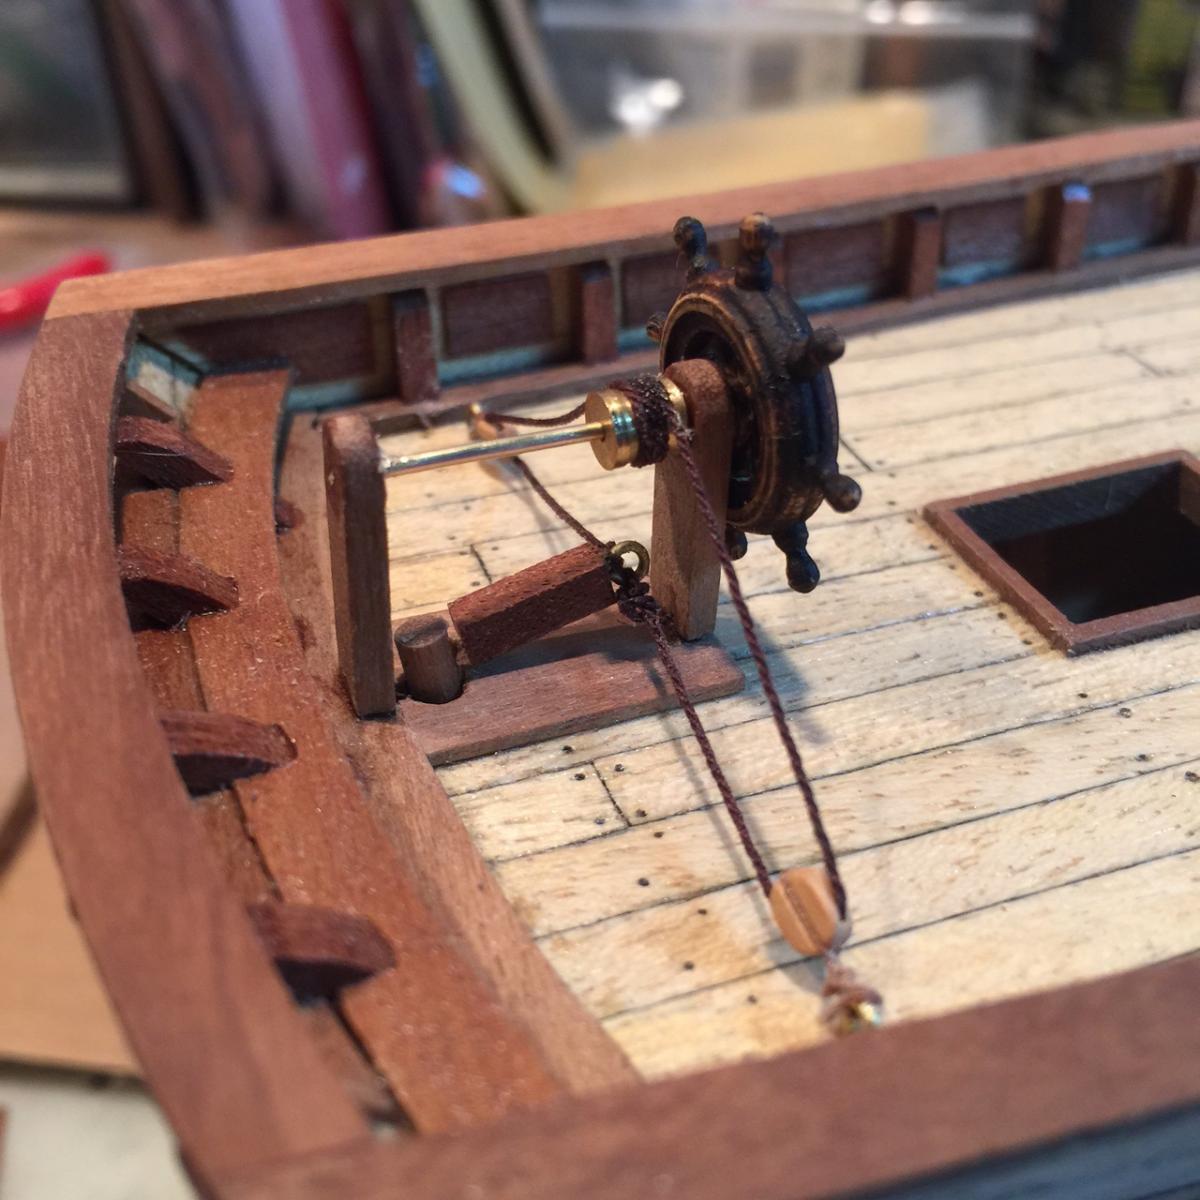
What the heck is that big brass thing that goes in front of the steering wheel? It doesn't really fit into the space and not sure what it's purpose is. Looks like an oversized fire hydrant....


-
-
Awesome George, thanks for the input! Funny you mentioned Jason's store, I searched online for walnut planks for ship modeling and voila his site came up. If/when I go down this path again I think I'll use his wood - looks to be way better than the kit supplied materials.
I feel like all I'm doing is plagiarizing Jesse's build. Every time I look into options I can see how he came to his decisions. Hope you don't mind Jesse!
-
Figuring Some Things Out
Thanks Nigel and George, appreciate the opinion and compliments. We are our own worst critics.
I'm moving along on some of the items. In the end I've decided to create the chain plates in a manner quite similar to Jesse's build. It's simple, doesn't require soldering (which I tried over the weekend and failed miserably) and I think will look pretty nice with the brass wire. I will need to order some more. I'm thinking of making a template on a large piece of wood using nails so I can bend the wire quickly and (hopefully) easily. Anyone try doing that? I have a sample of what I hope it looks like, though in measuring the chain plate is too long and will be shortened slightly.
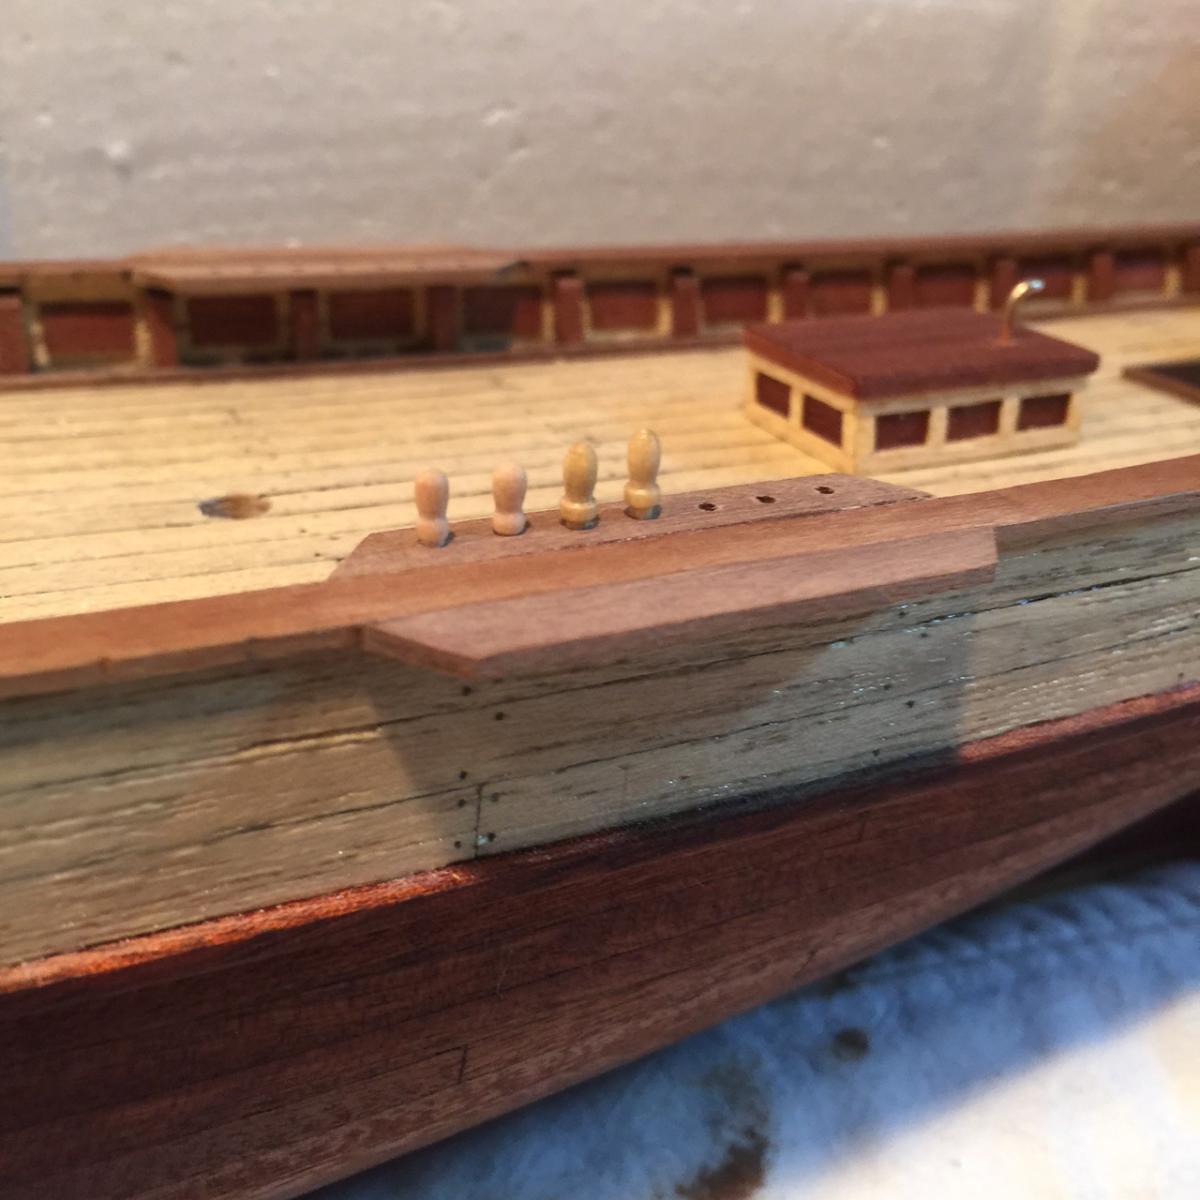
I also received 8mm belay pins today. I'm comparing to the 10mm pins I received a few weeks back. What do you think? 8 or 10?
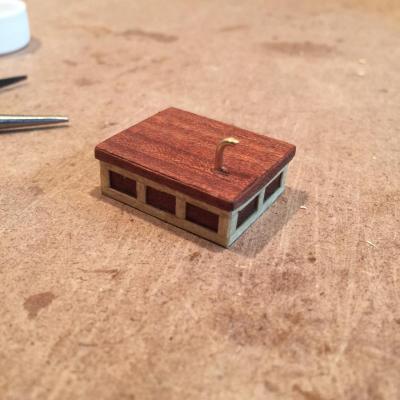
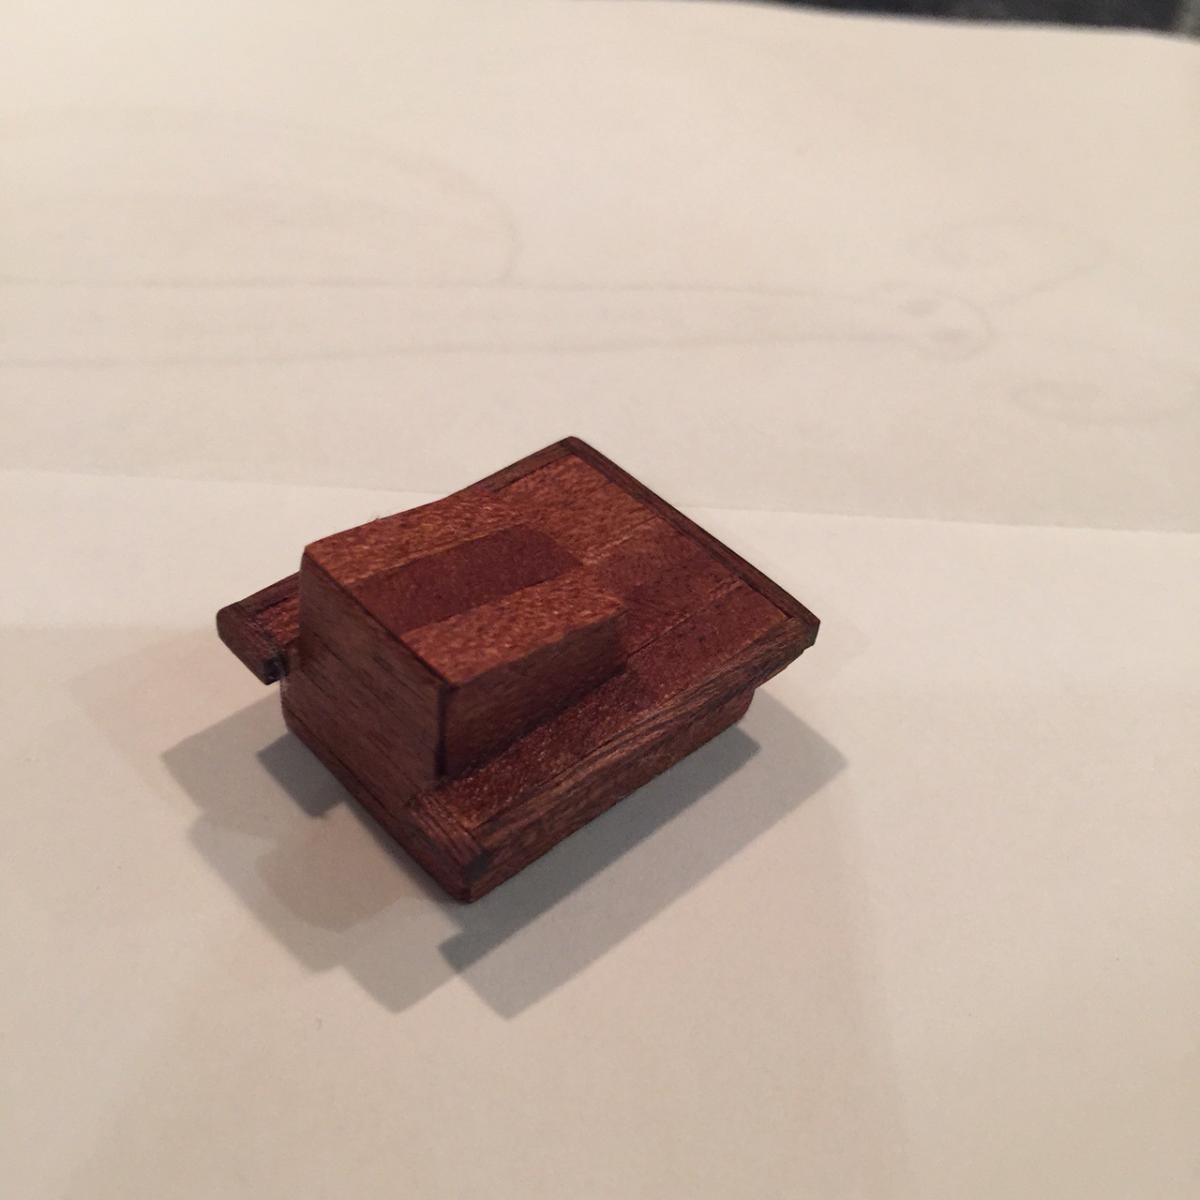
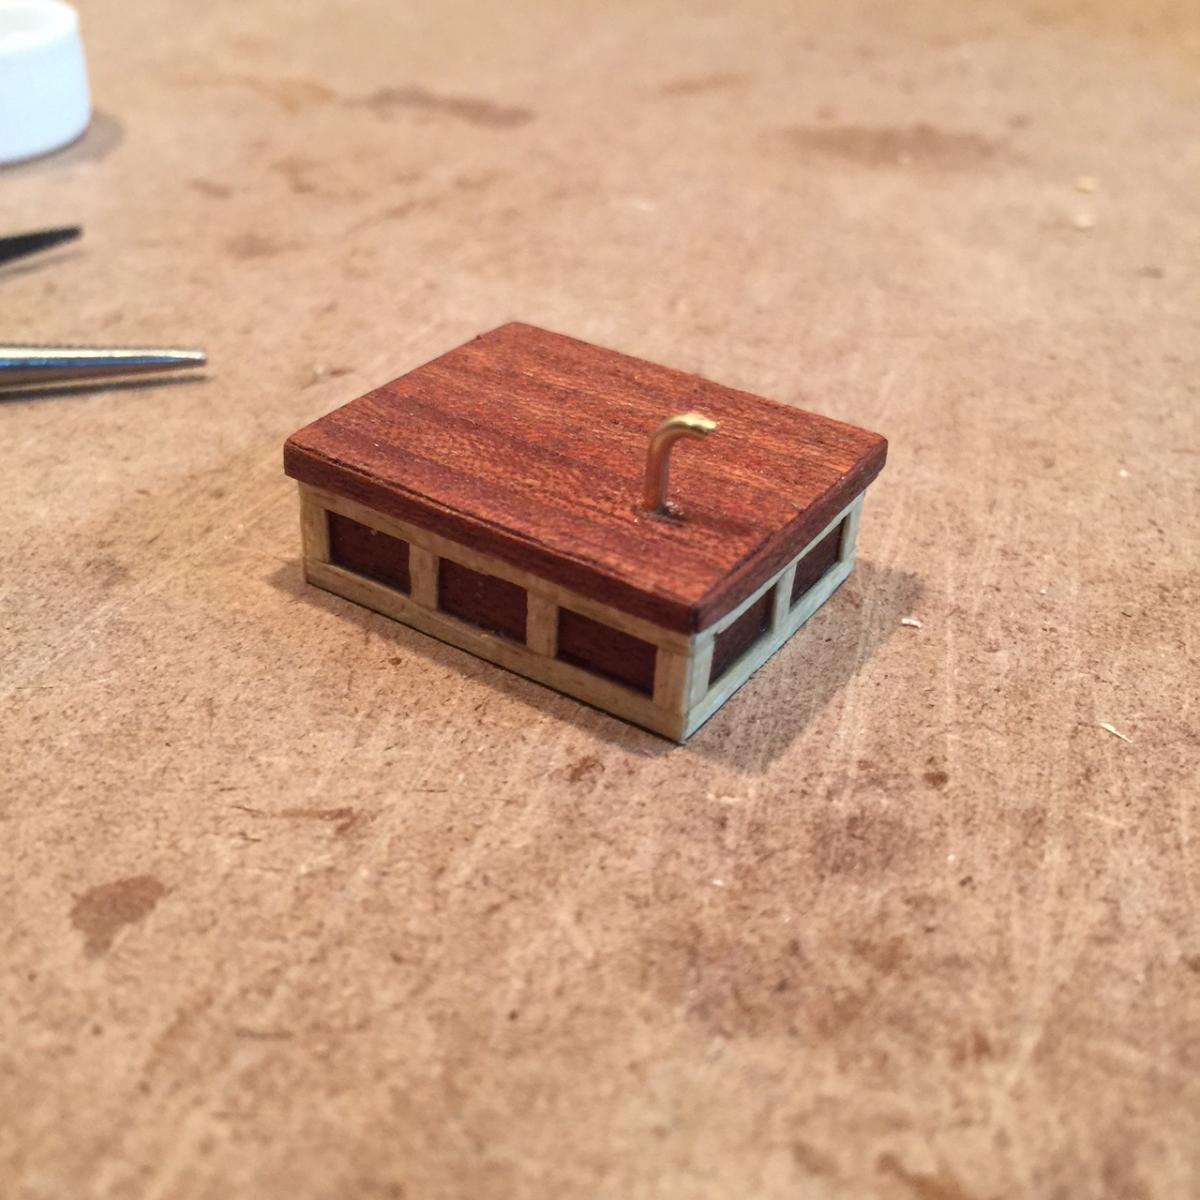
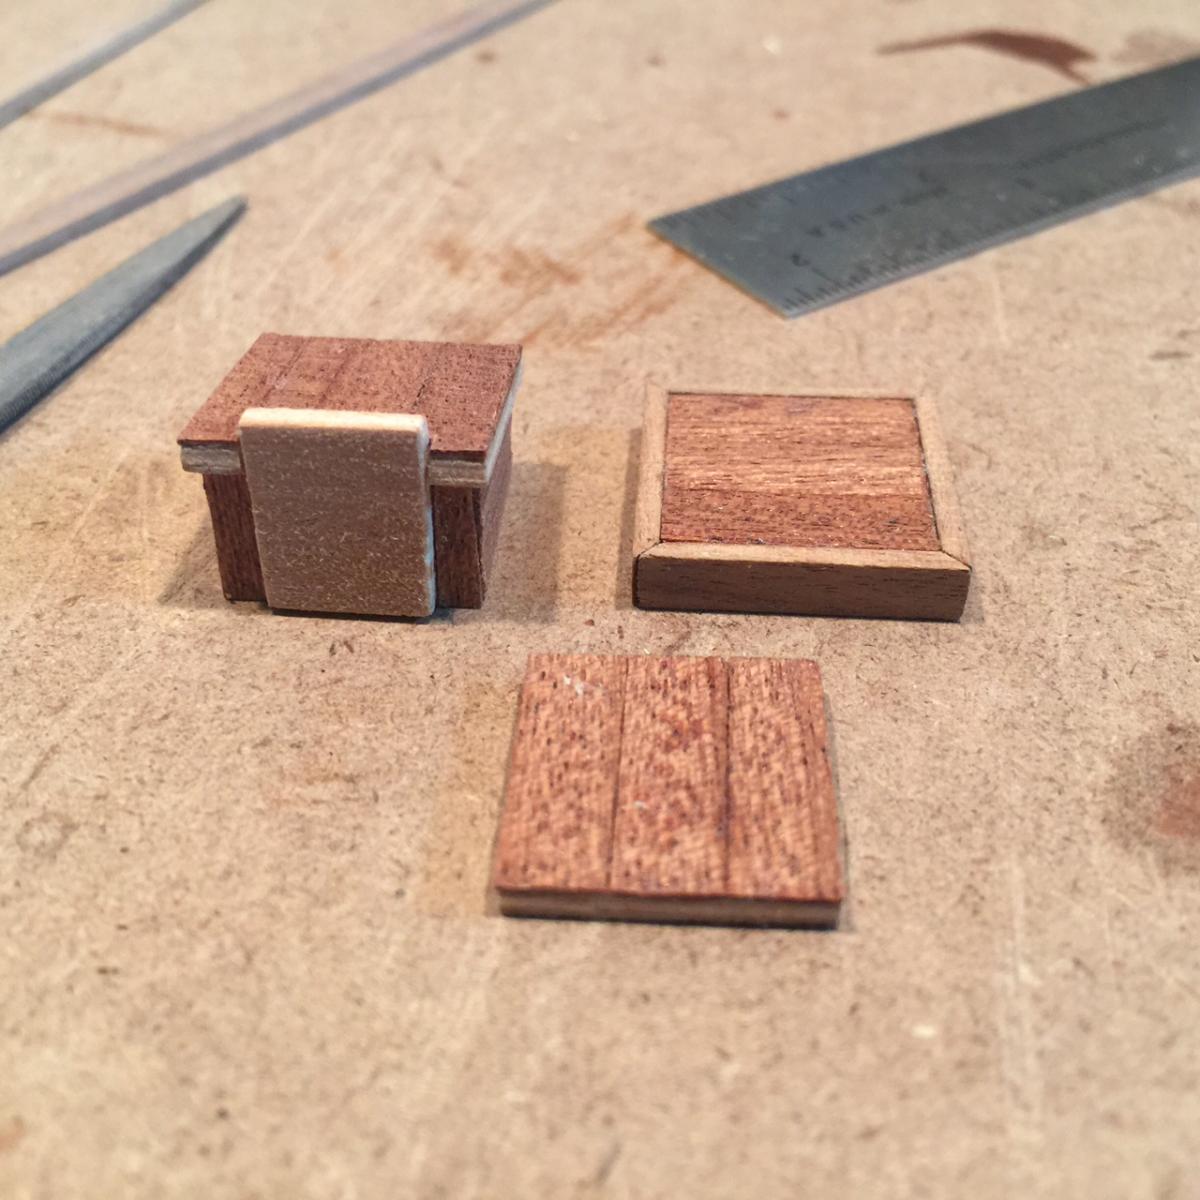
I also build the deck house tonight. I like it... took a while, used tung oil on dark wood, then acrylic on light wood.
Lastly... ModelExpo let me know that they cancelled the backorder of my walnut sheet, which I need badly to build the remaining deck items. Anywhere else that can get 3/32 or 1/16?
Thanks

-
-
Another typical Saturday night down in the basement working late into the evening. I got a lot accomplished even though there's not much to show.
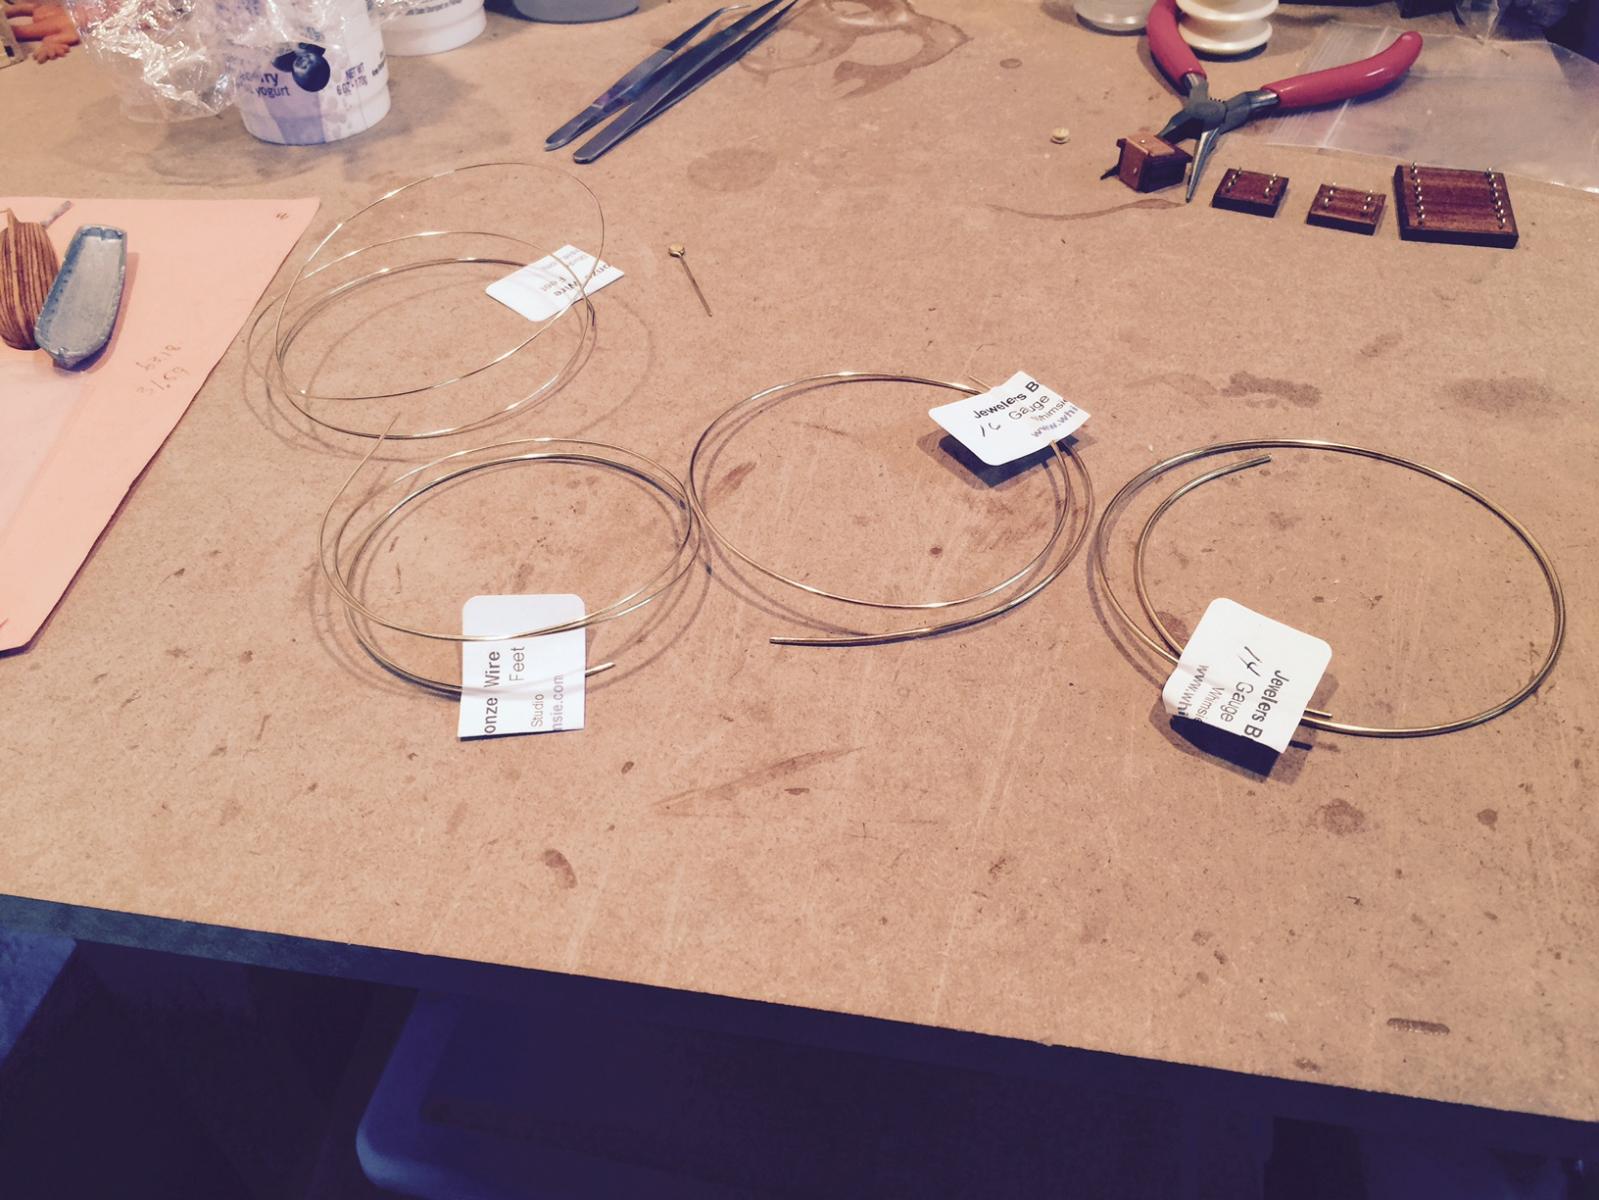
My new brass wire came in. I ordered samples from a place that sells jewelry brass wire, and it's perfect. I was looking at the different sizes and seeing what would work for the various items (railing, chain plates, winch handle, stove pipe, et. al.) One conclusion I came up with and wanted to get folks' opinion. I was thinking of using a thinner (#20) wire for wrapping the deadeyes, and a thicker wire (#18) for the actual chainplates. it would be easier because the thinner wire is much easier to work with. Then I can also solder the larger wire, and tie the thinner wire to the chainplate with rope. Thoughts?
I used some of the new brass to replace the steering rod. it wasn't very straight, and a little thinner than I liked. The 16 gauge was perfect. Everything much sturdier now as well. All glued down now.
I also got a few more deck items done. Still waiting on my walnut sheet to scratch build the pieces that I'm missing.
A few pics:


-
Slow progress, working on deck items.
Regarding the todo:
- I ordered some brass wire of different sizes. I've seen some chain plates done in brass and they look pretty snazzy so I'll give it a shot.
- Contacted AL to inquire about replacement parts. Haven't heard a thing, so I ordered a walnut sheet to build myself.
- Played around with the boat, tried Jesse's suggestion of wiping down, but still not right. I'm going to have to fiddle with it some more.
the deck items, while easy, take quite a bit of time. At least for me

-
Feeling a little frustrated...
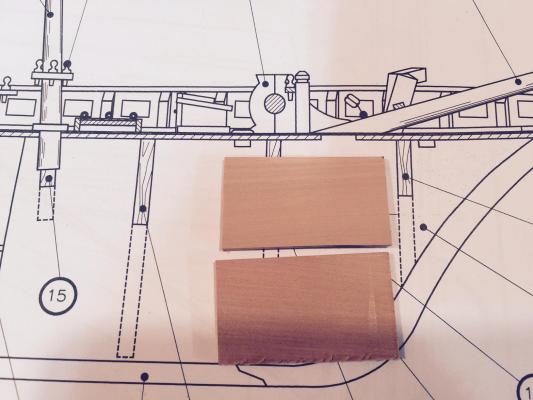
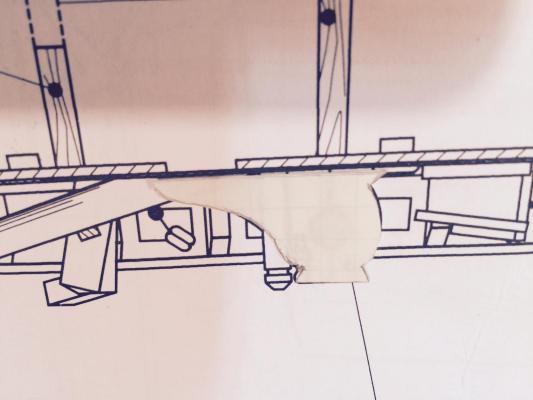
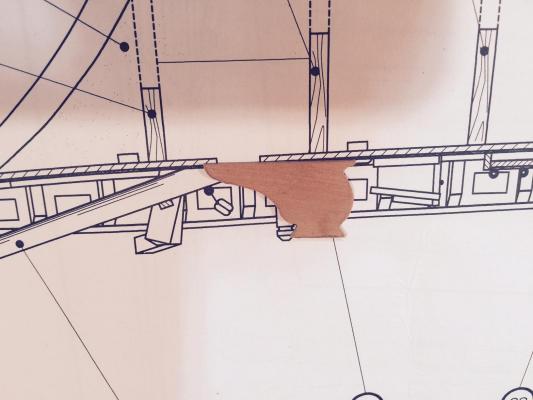
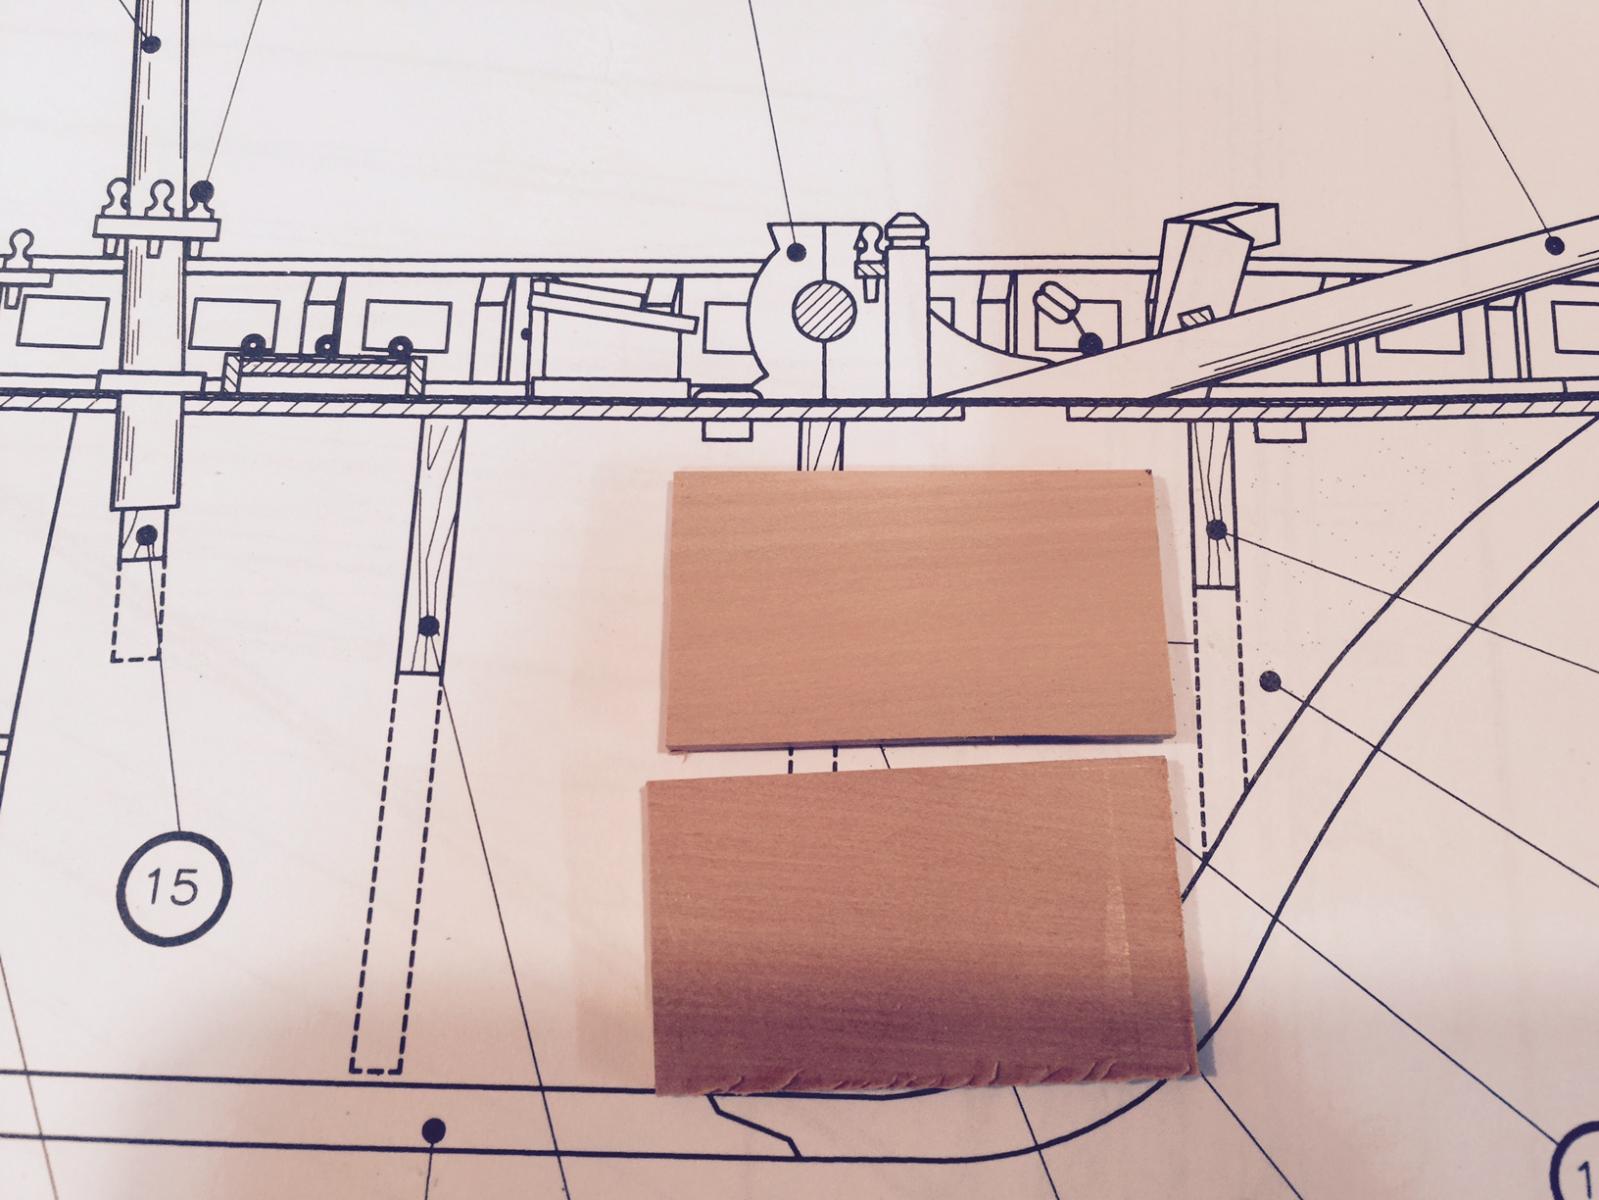
I have come to realize that some of the pre-cut walnut sheets are missing in my kit. The windlass and winch pieces are both missing. The curved piece on the winch also missing which looks like a custom piece. (The stantions for the steering were also missing but I made my own.) I've used most of my scrap for various things so I'm low on options here. I may need to either find how I can buy a walnut sheet, or try to see if I can order from AL replacement pieces (which will take a while I would think.) Ugh.
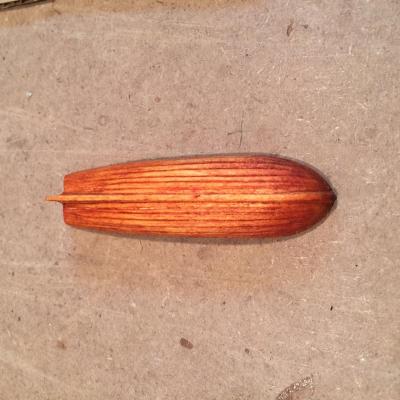
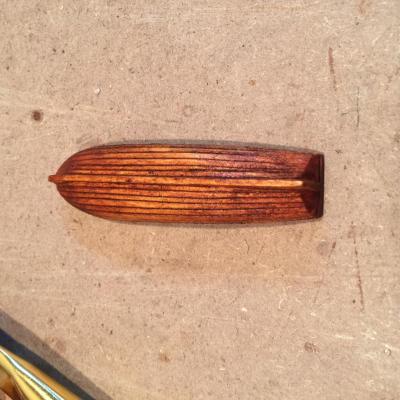
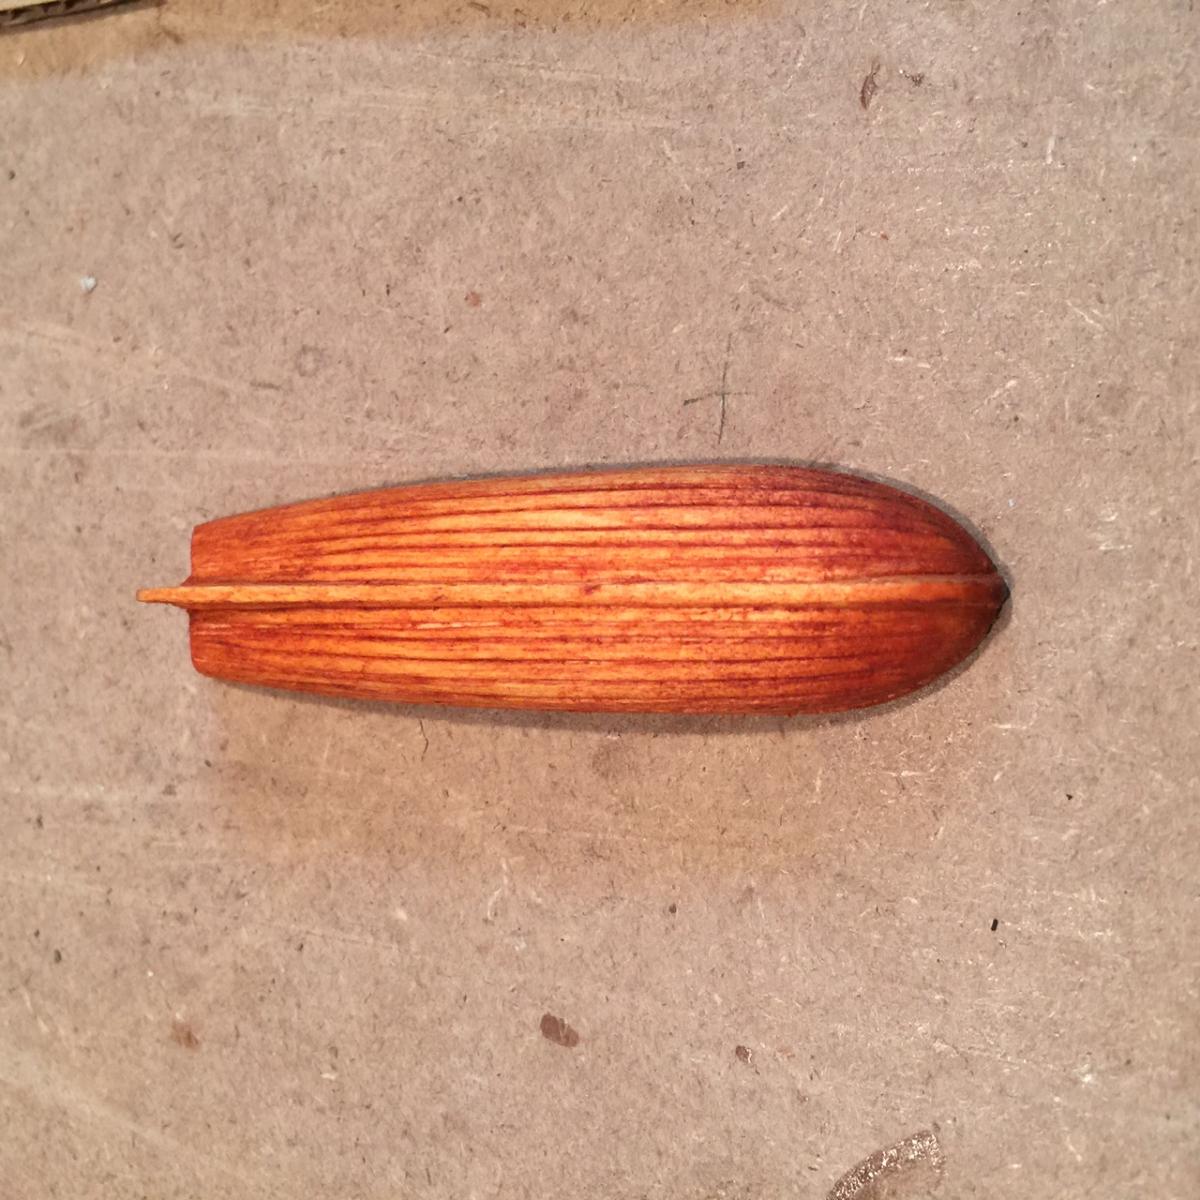
I added color to my carved rowboat - not thrilled with how it came out. I liked the practice run....
maybe have to figure out how to tone it down - it just looks dirty now.Also I've been looking at the chain plates and want to try to make real chain plates (not the black thread that the model instructions suggest). But I'm stumped on the size and type of wire I should use. Brass would look nice.... but what size for the ship and where might I get this?
current todo:
Figure out how to do chain plates for lower deadeyes
Figure out what to do with the rowboat
Figure out how to build deck items that don't have parts
Build rest of deck items
-
Hey Jesse, I like the makeup kit approach to caulking. I went to an art store and bought an artists graphite pencil. the lead is really soft and I didn't have indent problems near what you can have with regular #2 or such. The smudge from the light graphite, especially when sanding, gave the wood a little bit of a weathered look. Anyways you've seen what I did, that was my secret. I also found that creating tree nails was pretty easy with a hard lead pencil - because they do indent well. Trick was to always keep sharp.
Looks awesome.
-


Scottish Maid by mrangus - Artesania Latina - first build
in - Kit build logs for subjects built from 1801 - 1850
Posted
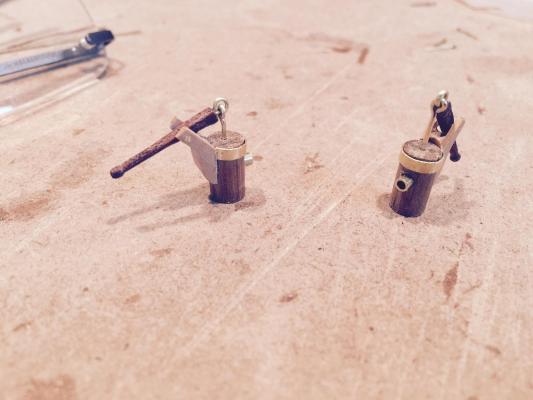
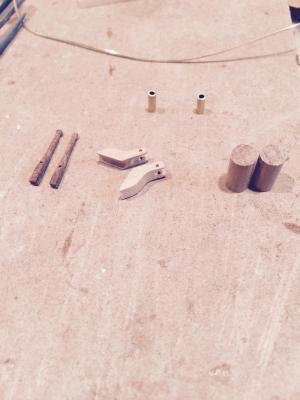
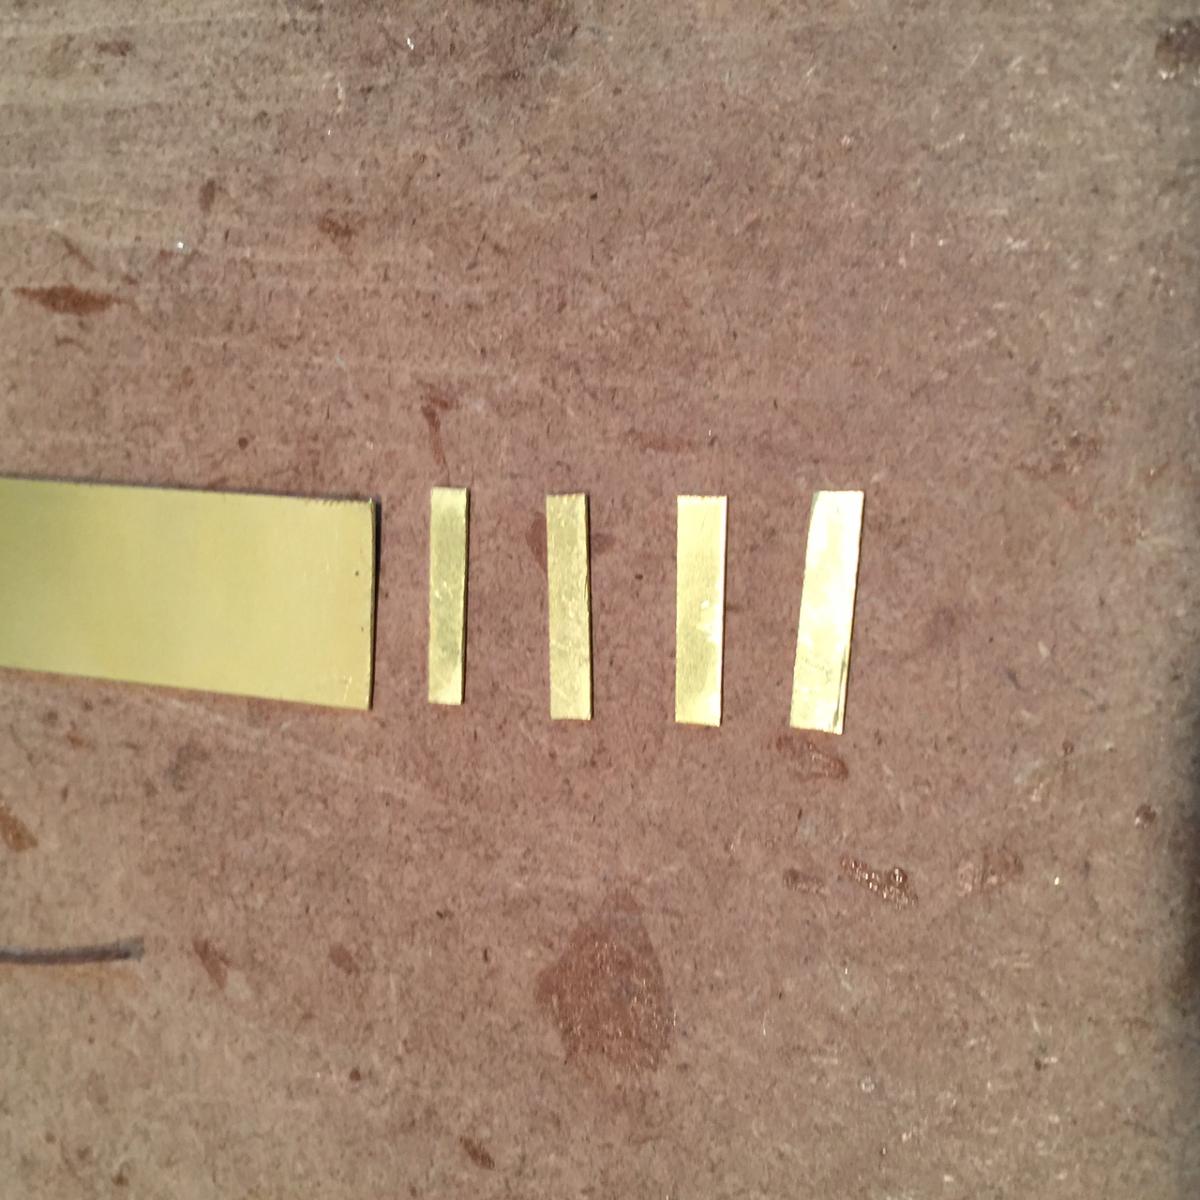
I decided to make all the chain plate anchors at once so I took the brass strip I purchased and marked with lines where I wanted to drill the holes. I then segmented out the anchors into three mm strips by marking with a line perpendicular to the drill holes, and then drilled all the holes. (I should've taken a picture of this, but I didn't) Once completed, I cut the individual strips and hammered each out to be flat. Lots of filing to get the curves on the ends, and then attached to the chain. Worked pretty good!
btw, does anyone know how to intersperse text with images? I tried on the full editor to use the 'image' button, but it just freezes me up....