HOLIDAY DONATION DRIVE - SUPPORT MSW - DO YOUR PART TO KEEP THIS GREAT FORUM GOING! (Only 20 donations so far - C'mon guys!)
×


Paul Le Wol
-
Posts
1,016 -
Joined
-
Last visited
Content Type
Profiles
Forums
Gallery
Events
Everything posted by Paul Le Wol
-
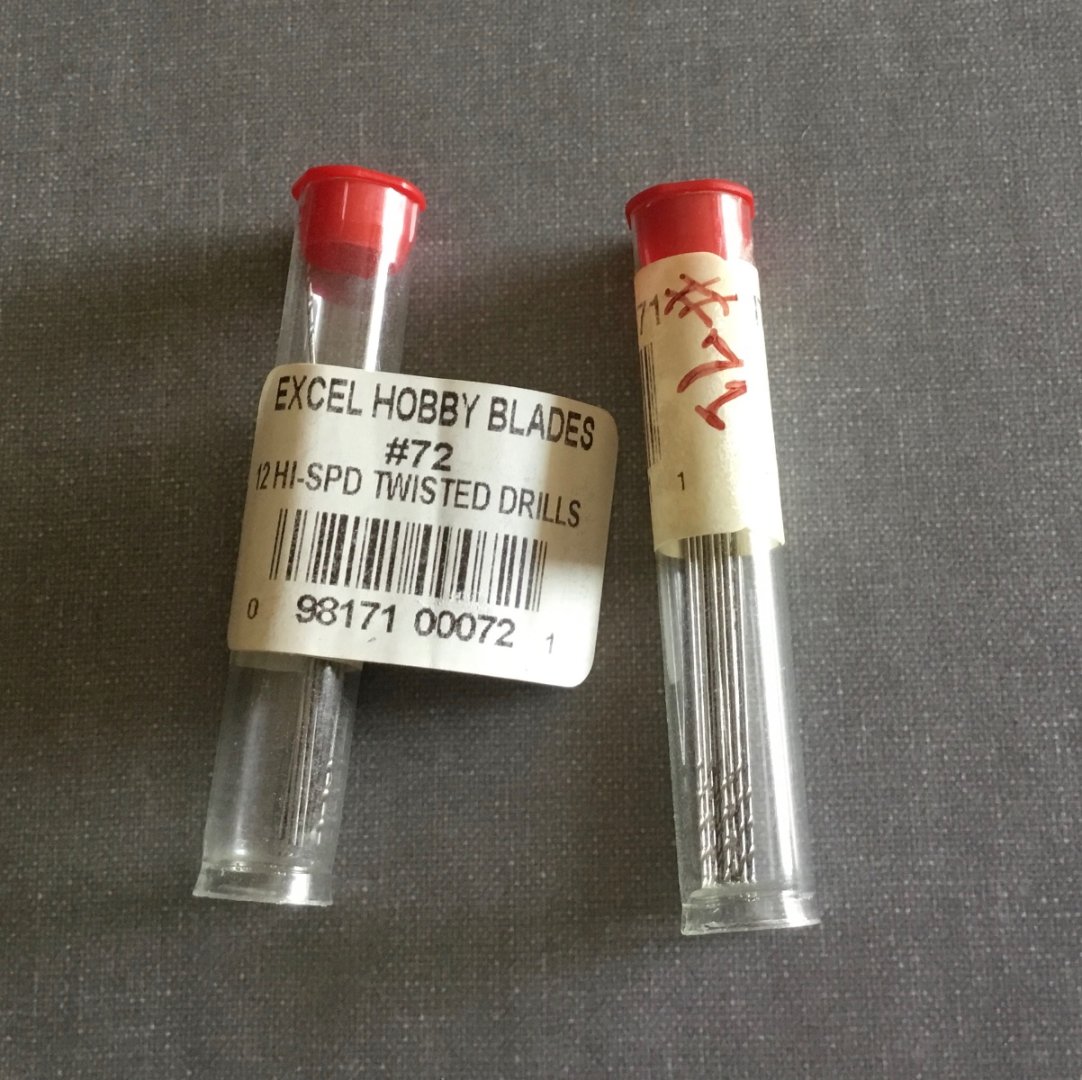
Hi Mark, your question got me curious so I measured some drill bits that were bought online from a Canadian hobby shop. They are made by Excel. I used digital calipers. #71 measured to be .64mm/ .025”. Charts indicate they should be .66mm/ .026” #72 measured to be .61mm/ .024”. Charts indicate they should be. .635mm/ .025” So I guess we have to measure them no matter who makes them
-
Jonathon, congratulations on finishing your Nisha. It looks fantastic.
- 38 replies
-
- 1
-

-
- Nisha
- Vanguard Models
- (and 1 more)
-
Hi Rod, great job on the planking. I have the feeling that there’ll be a few more Seguin builds coming up after people see how you accomplished this. Very nice.
-
Frank, your Armed Longboat is coming along great. Looking forward to seeing your progress.
-
Beginner looking to start building, In the USA
Paul Le Wol replied to lstmysock11's topic in Wood ship model kits
Hi Andrew, the PT 109 is $165 on the Dumas website. -
Nils, congratulations on finishing your #5 Elbe. She is beautiful!
- 180 replies
-
- 3
-
-
- pilot boat
- Elbe 5
- (and 3 more)
-
Beginner looking to start building, In the USA
Paul Le Wol replied to lstmysock11's topic in Wood ship model kits
They had a big sale recently. There’ll be more. Just have to keep an eye out. Good luck with your search -
Beginner looking to start building, In the USA
Paul Le Wol replied to lstmysock11's topic in Wood ship model kits
Hi Andrew, further to what Roger suggested with the PT Boat, Dumas makes a nice looking PT109. There is a build log by “popeye the sailor “ on this site. It looks really nice. Probably get it for under 200USD if Model Expo has a sale -
Hi Nils, all of the action onboard makes your #5 Elbe even more beautiful. Glad you are feeling better.
- 180 replies
-
- 2
-
-
- pilot boat
- Elbe 5
- (and 3 more)
-
Fred, your Cheerful is looking great. It will look really nice in boxwood.
-
Thank you Ian, Baker, and Bob for your comments. And thanks to everyone who Liked. Your support makes a huge difference in whether or not a project gets completed. This is such a great community!
- 55 replies
-
- 3
-
-
- Nordlandsbaaden
- Billing Boats
- (and 1 more)
-
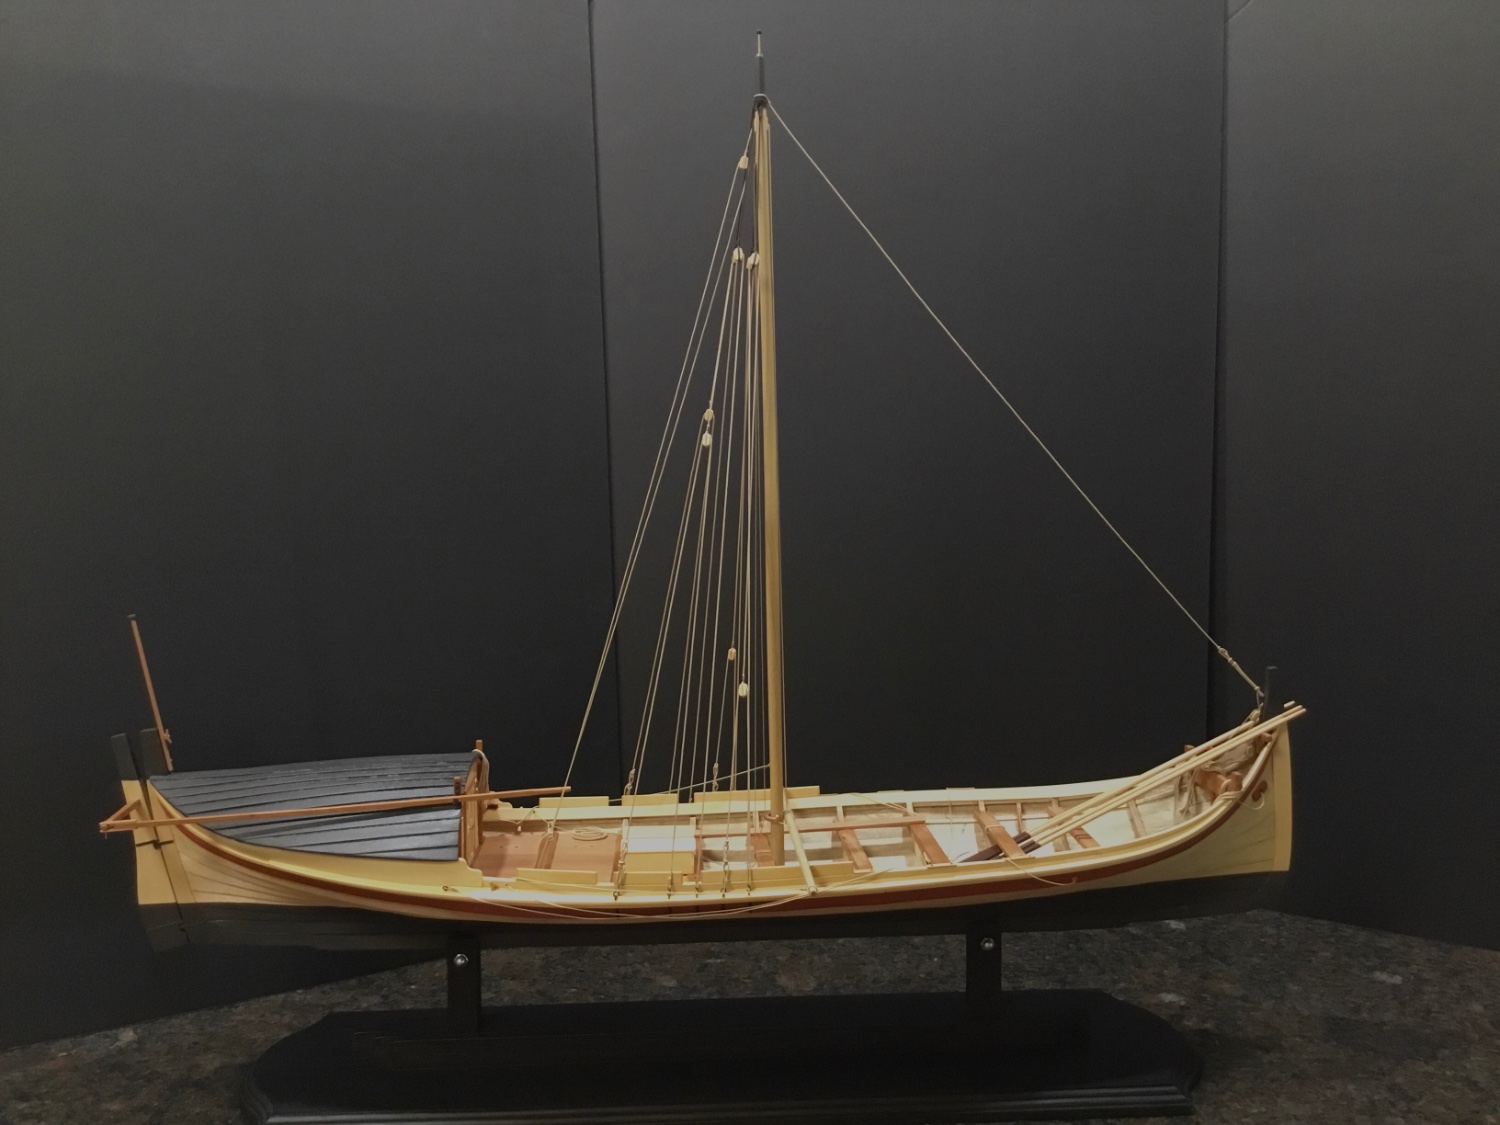
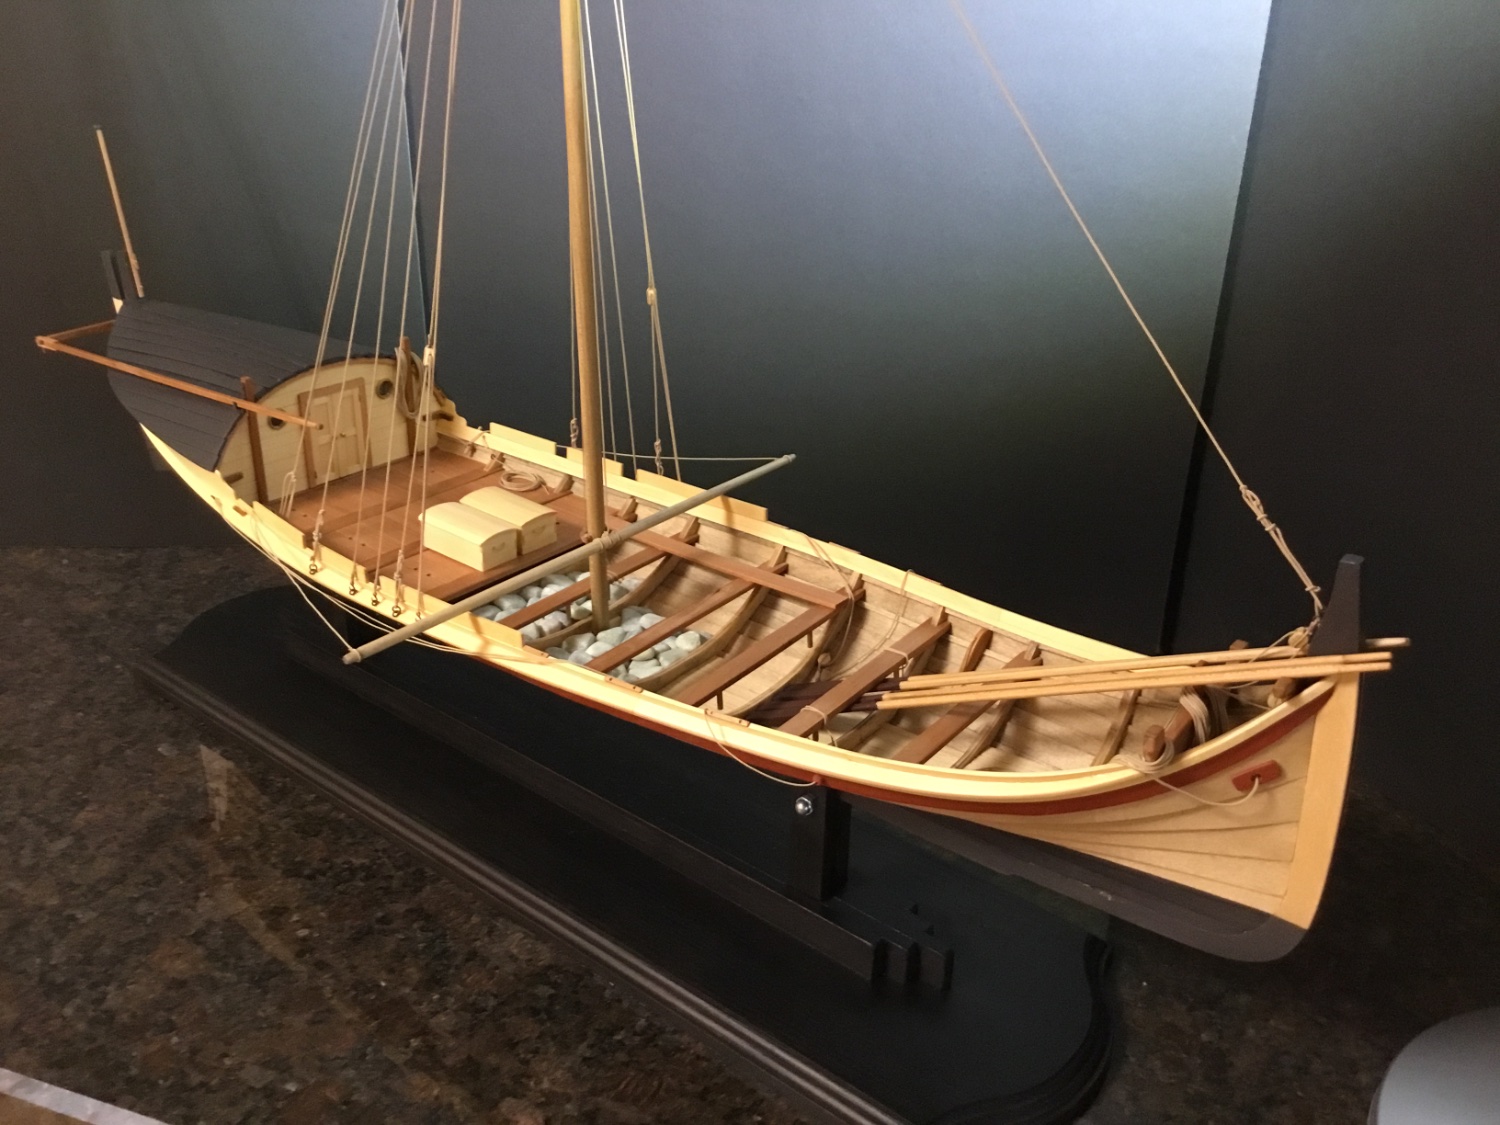
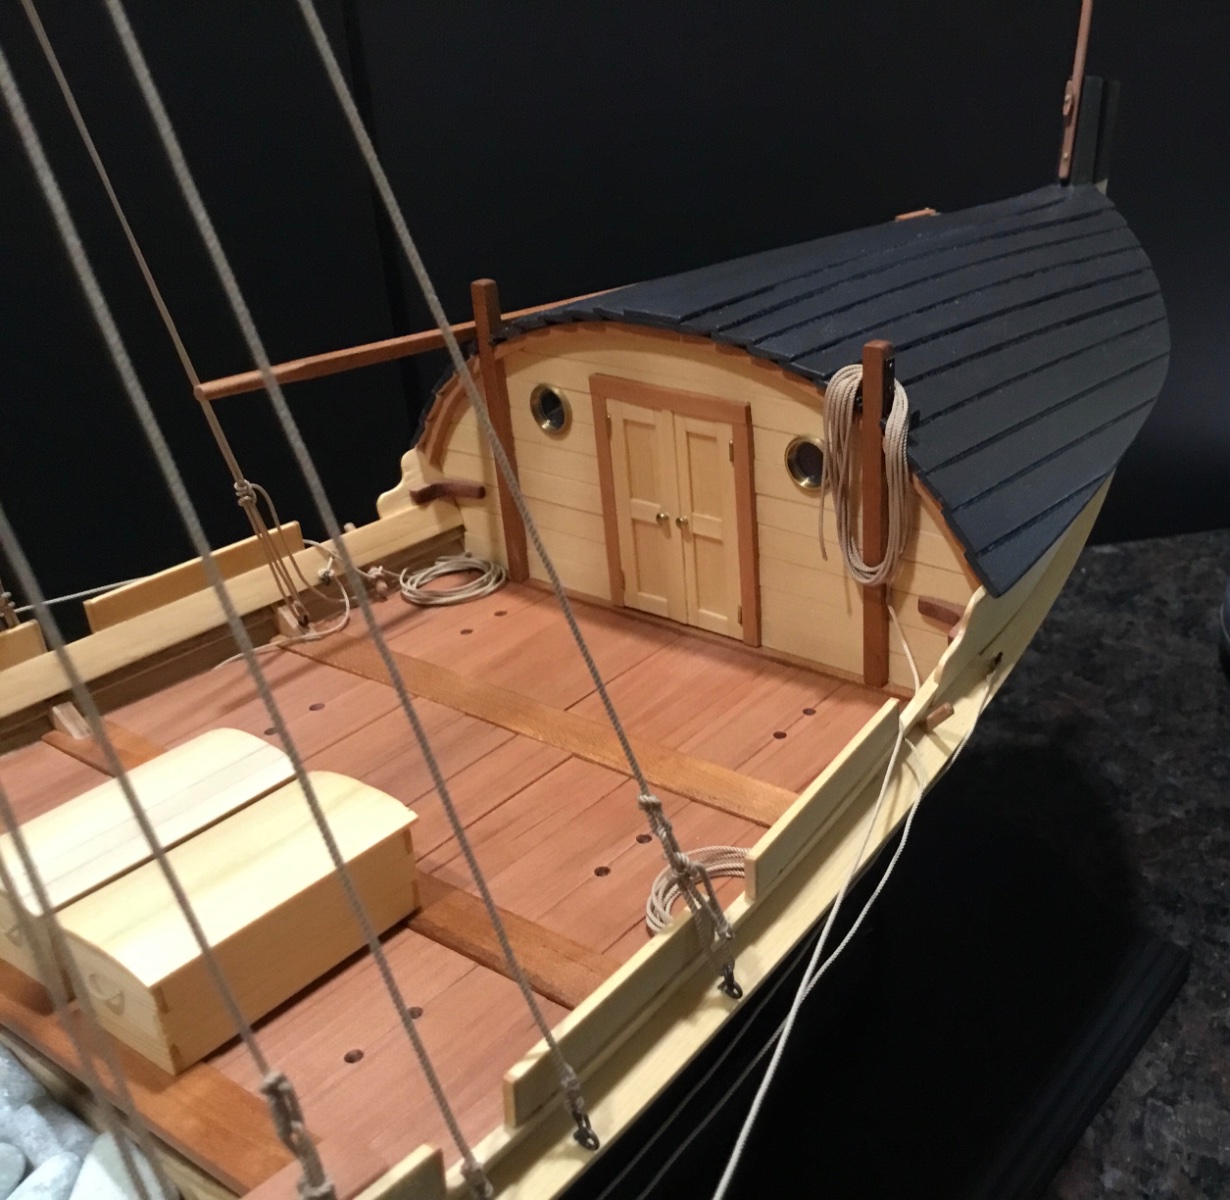
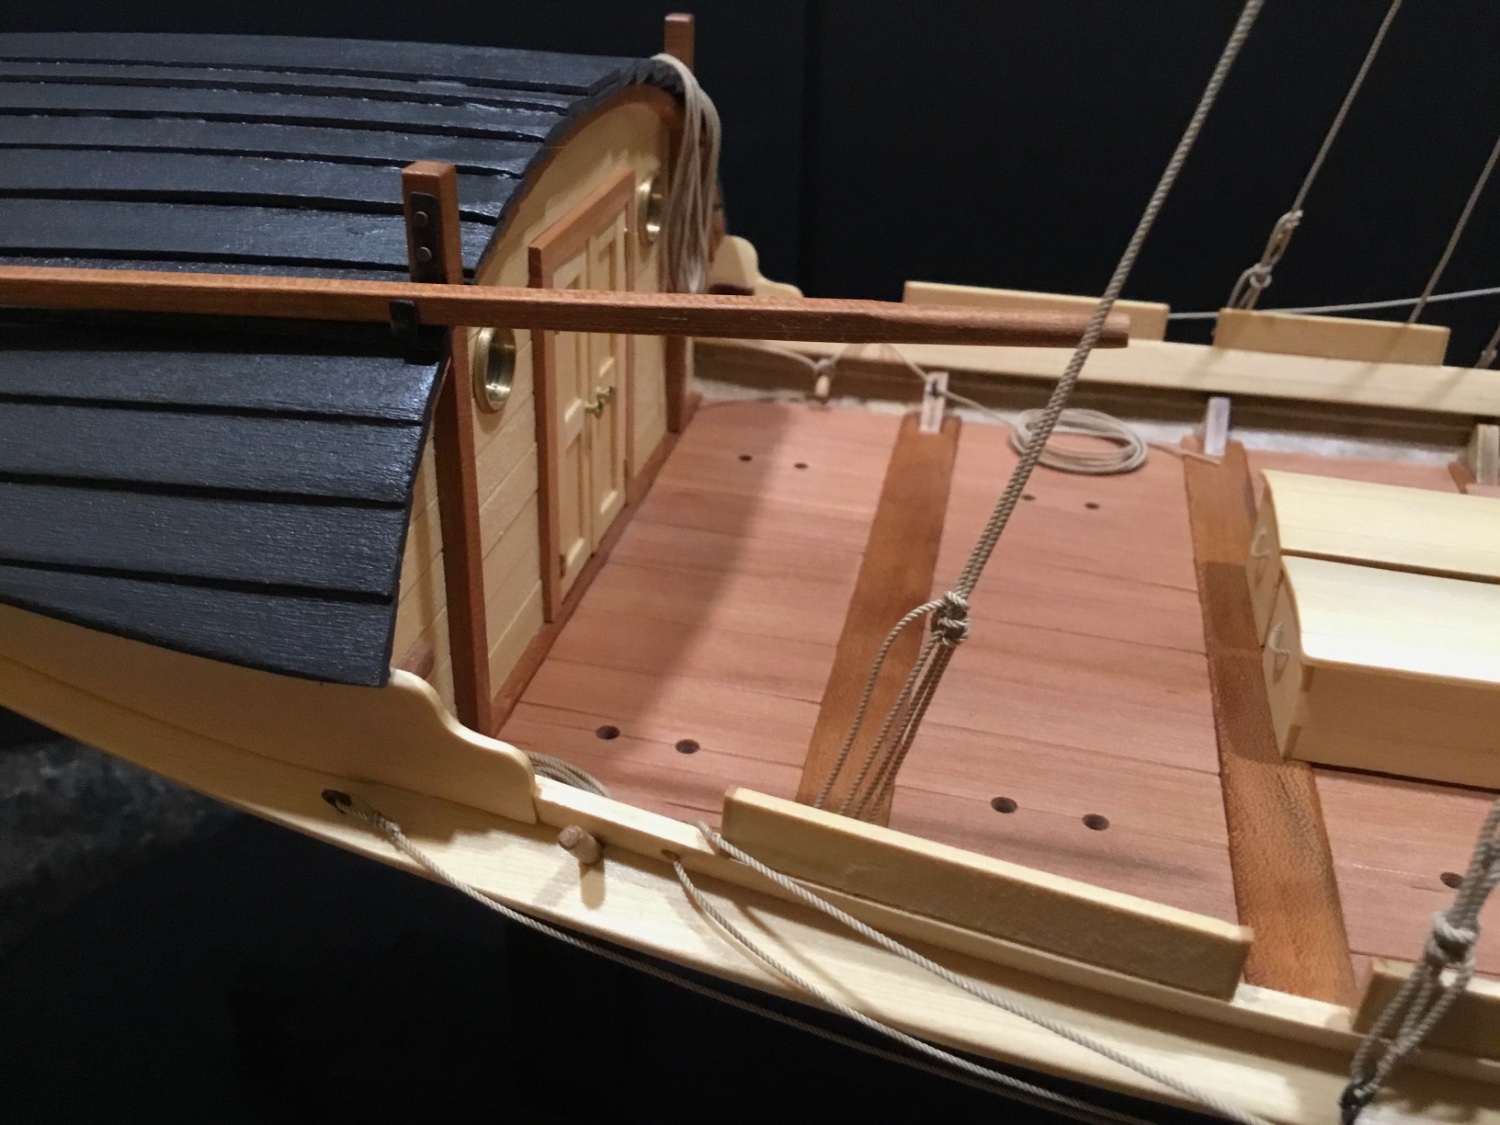
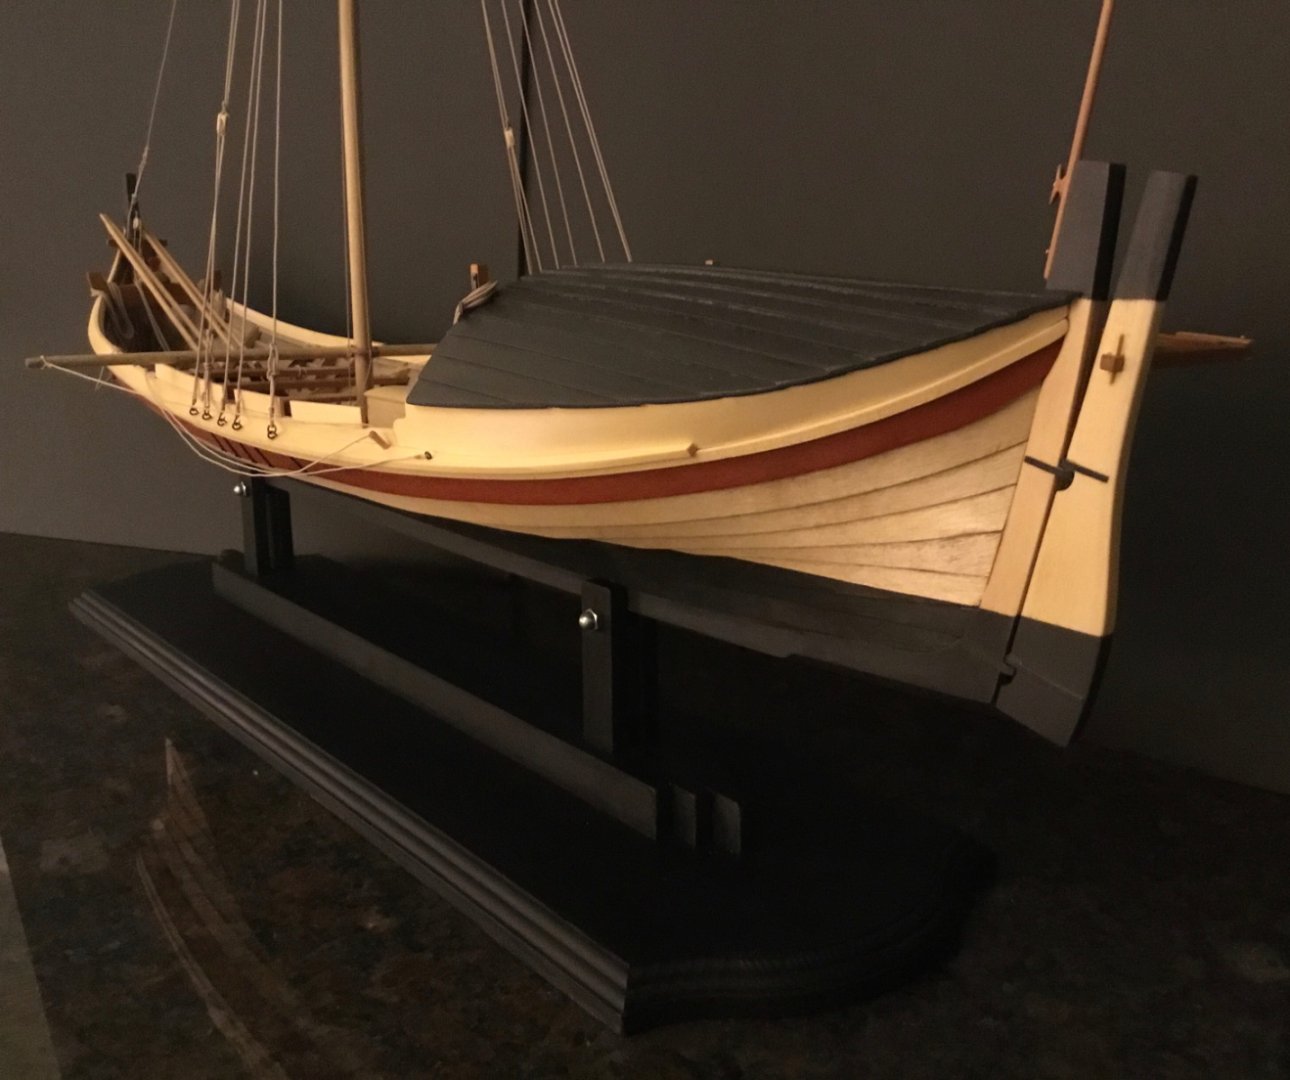
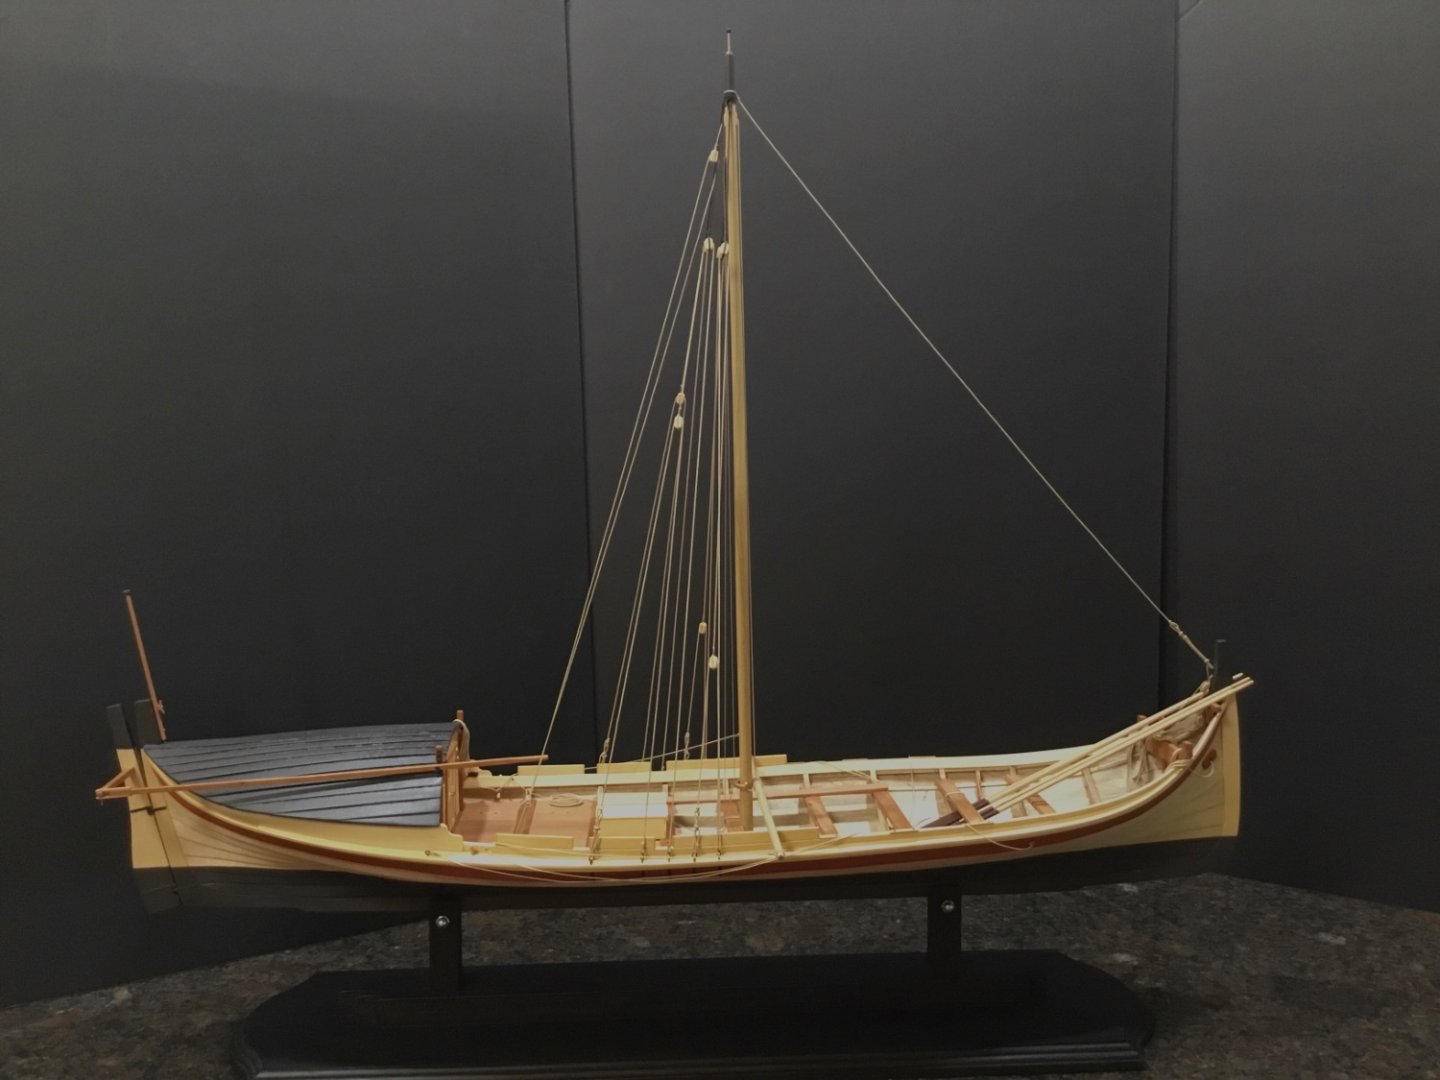
Thank you Todd, Dave, and Chris for your Comments. Thank you baskerbosse and Ryland for your Likes. Everyone’s support has been great to have. Took some more pictures trying to get some different angles for the Gallery.

- 55 replies
-
- 9
-
-

-
- Nordlandsbaaden
- Billing Boats
- (and 1 more)
-
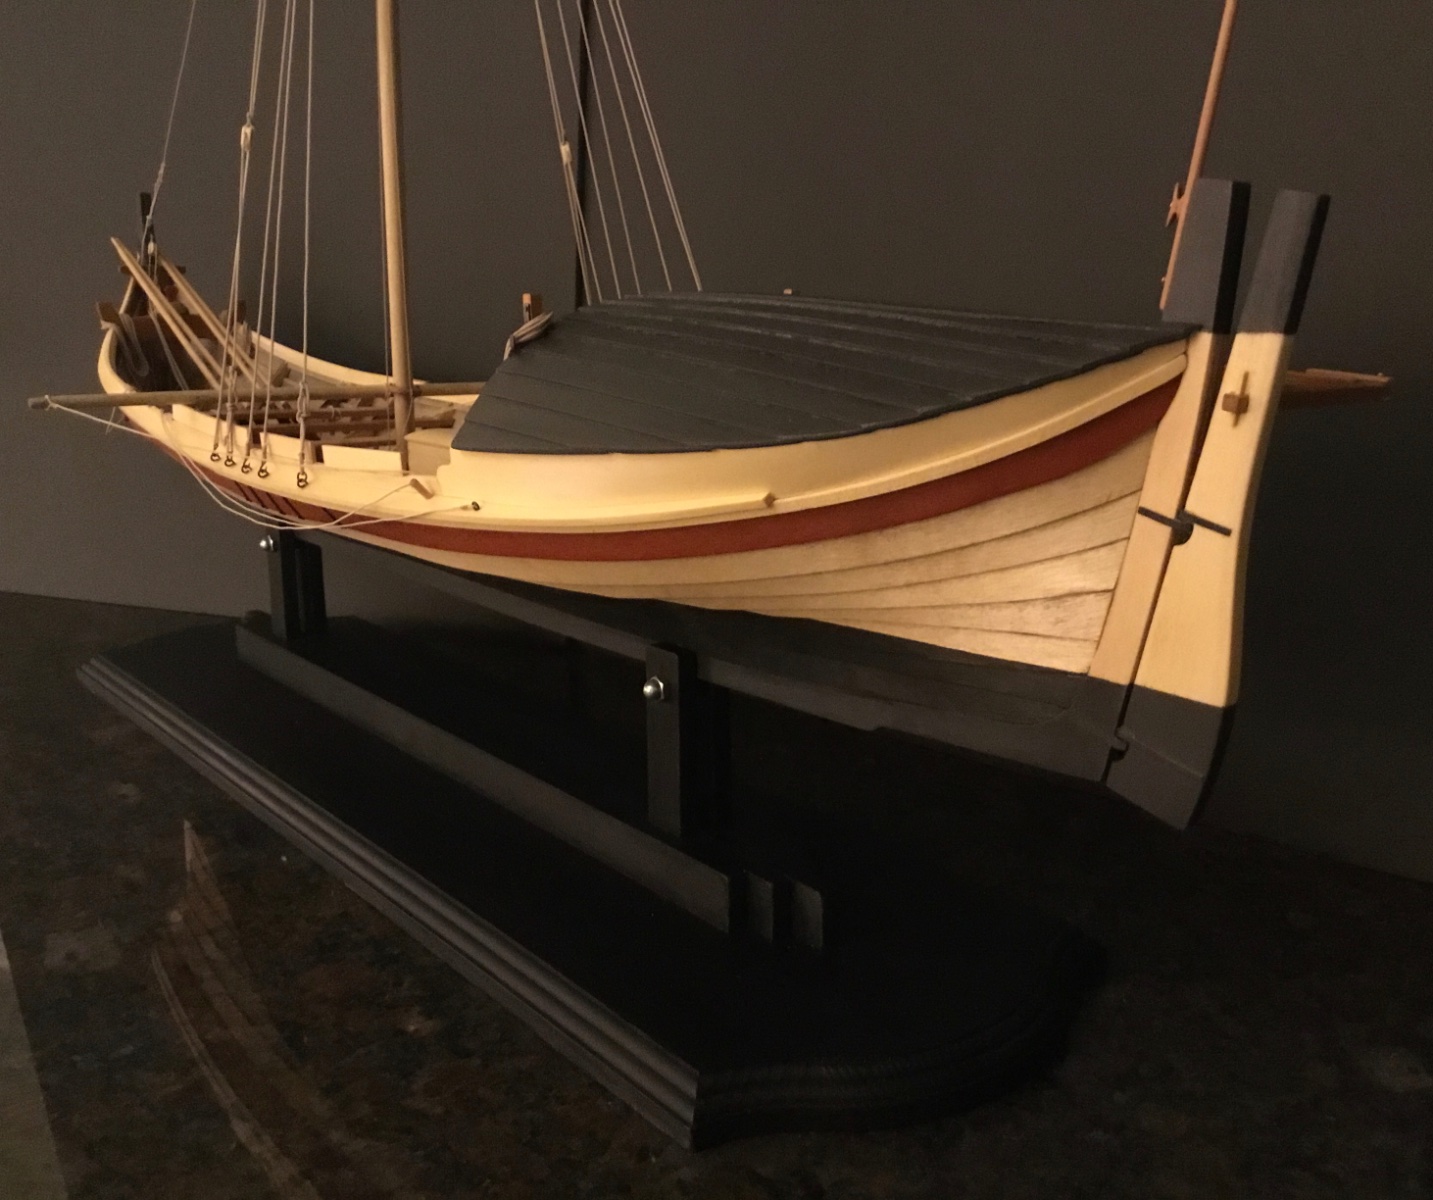
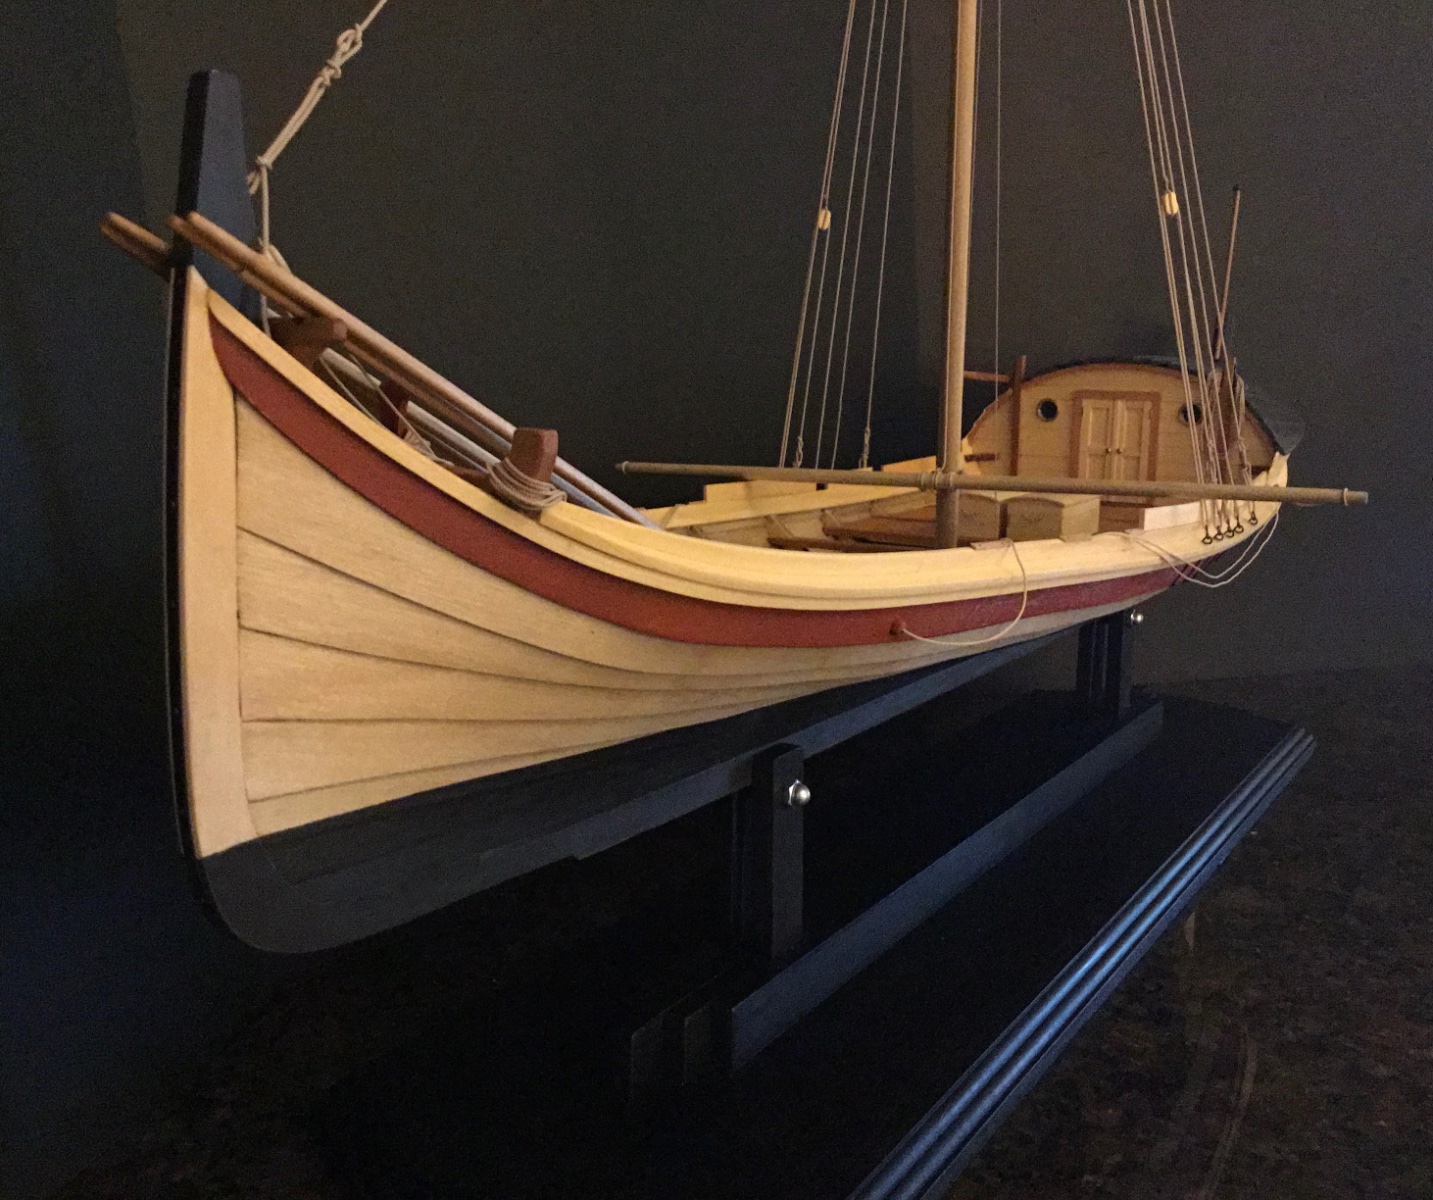
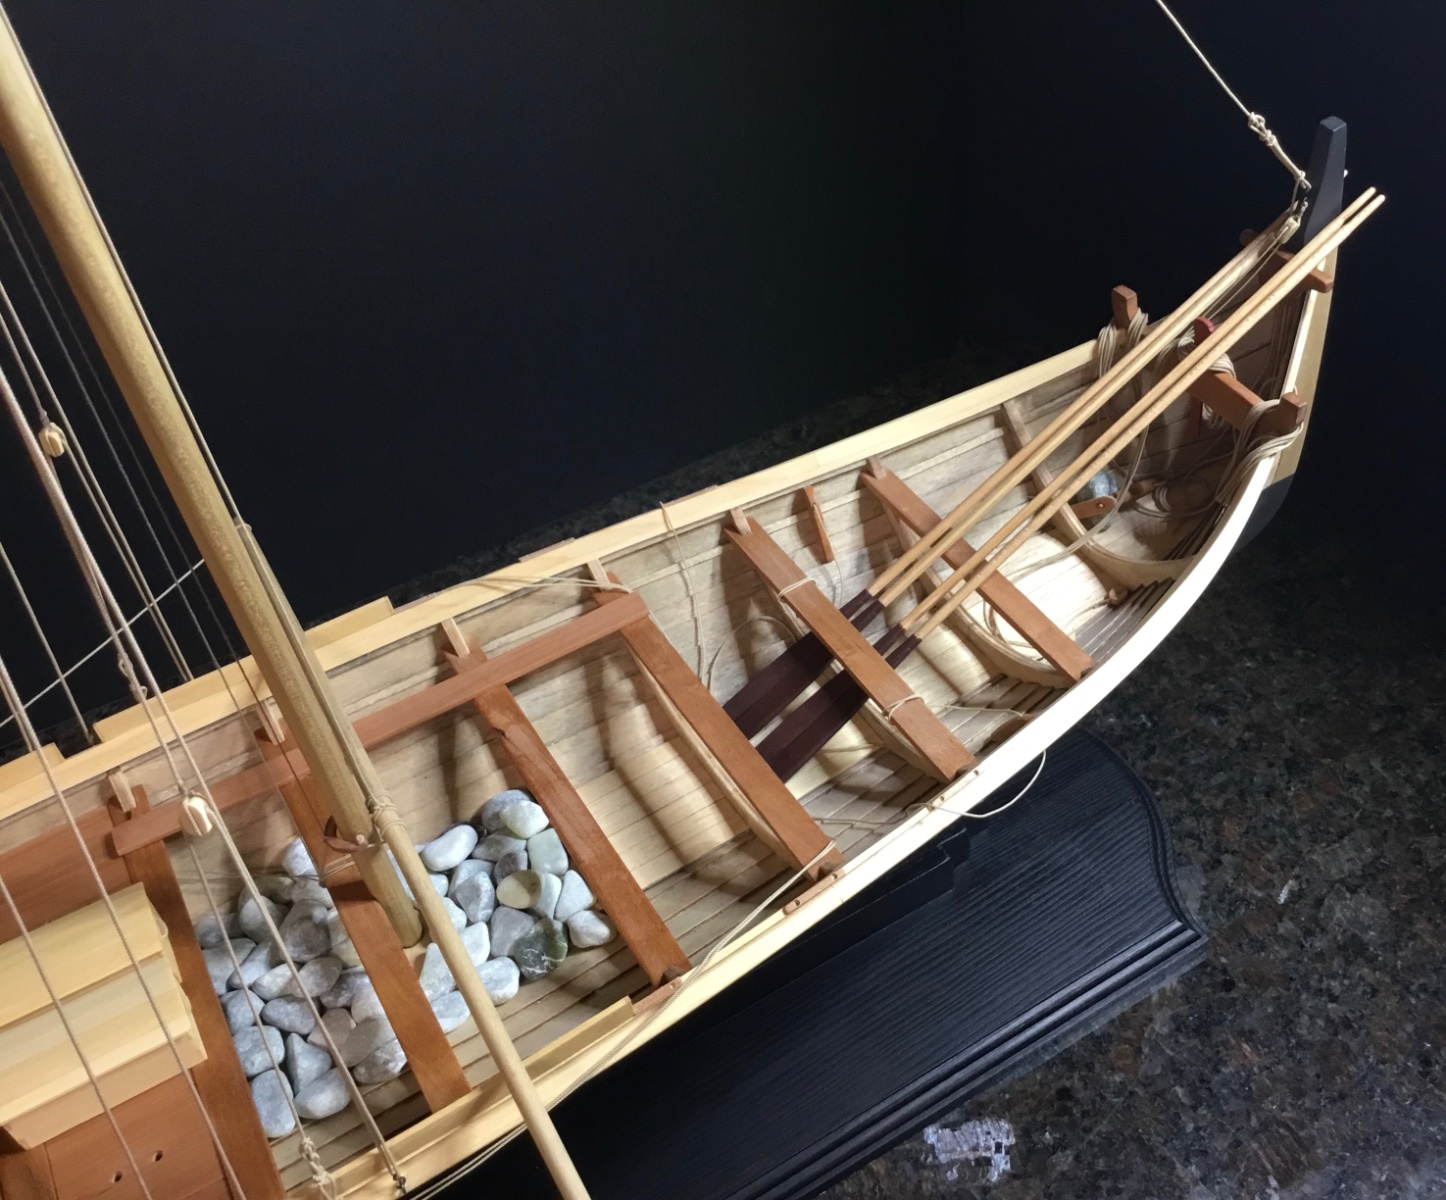
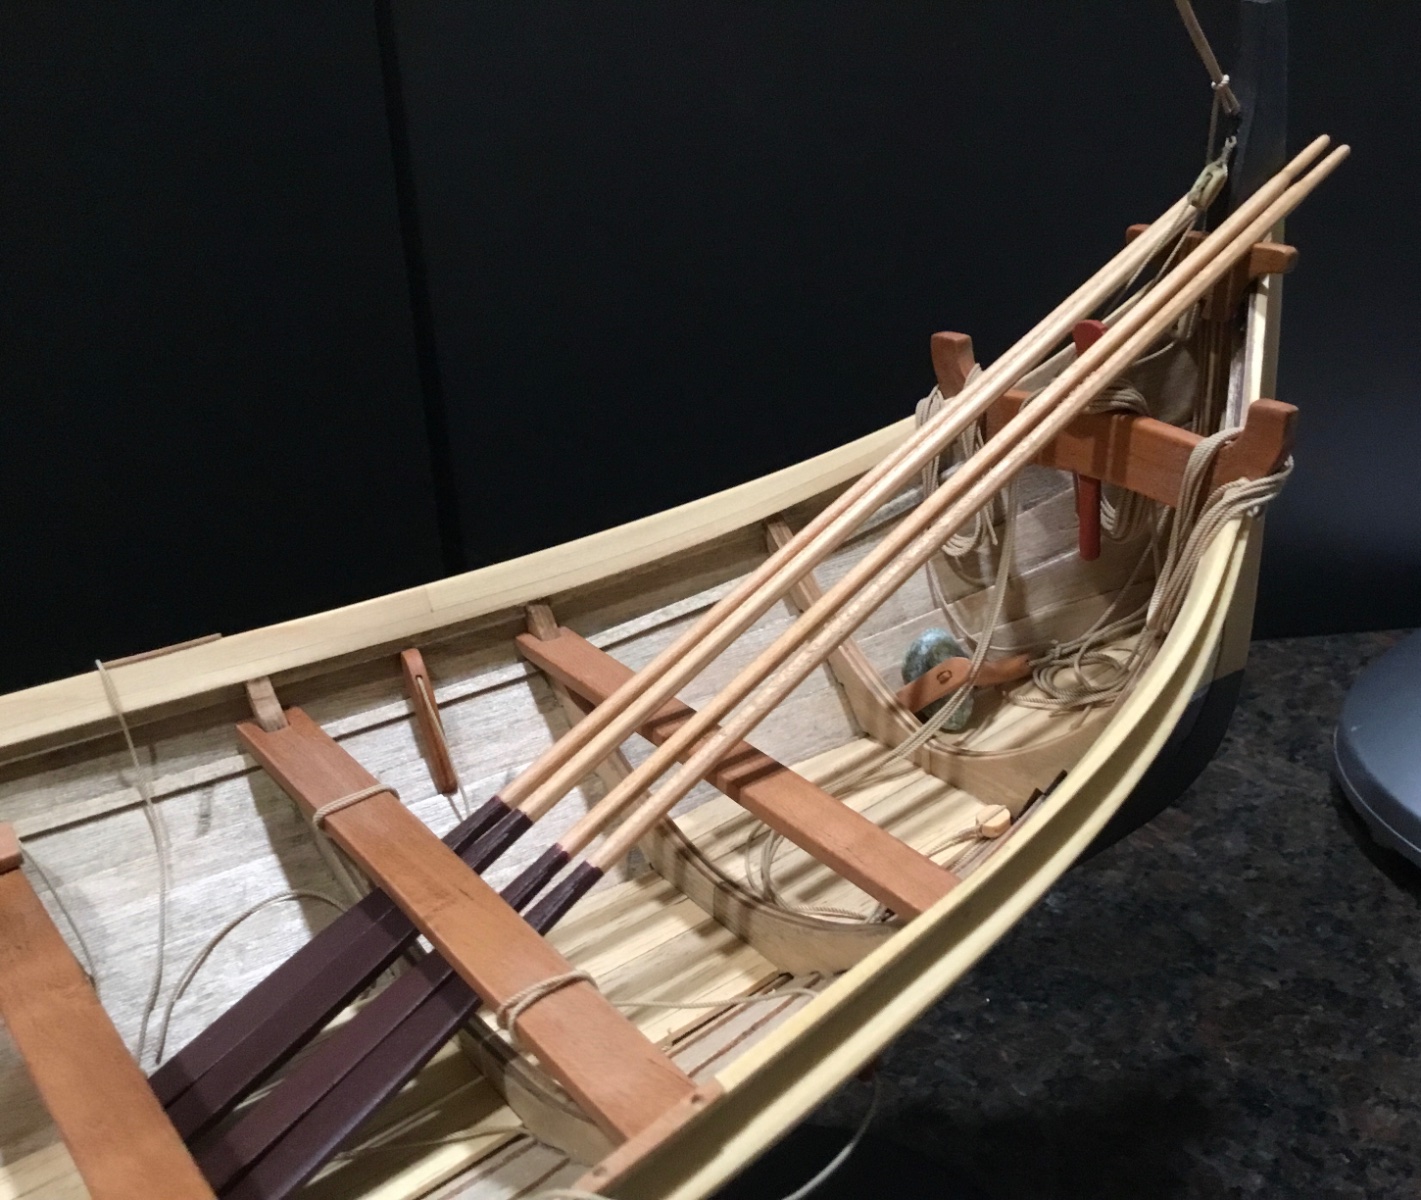
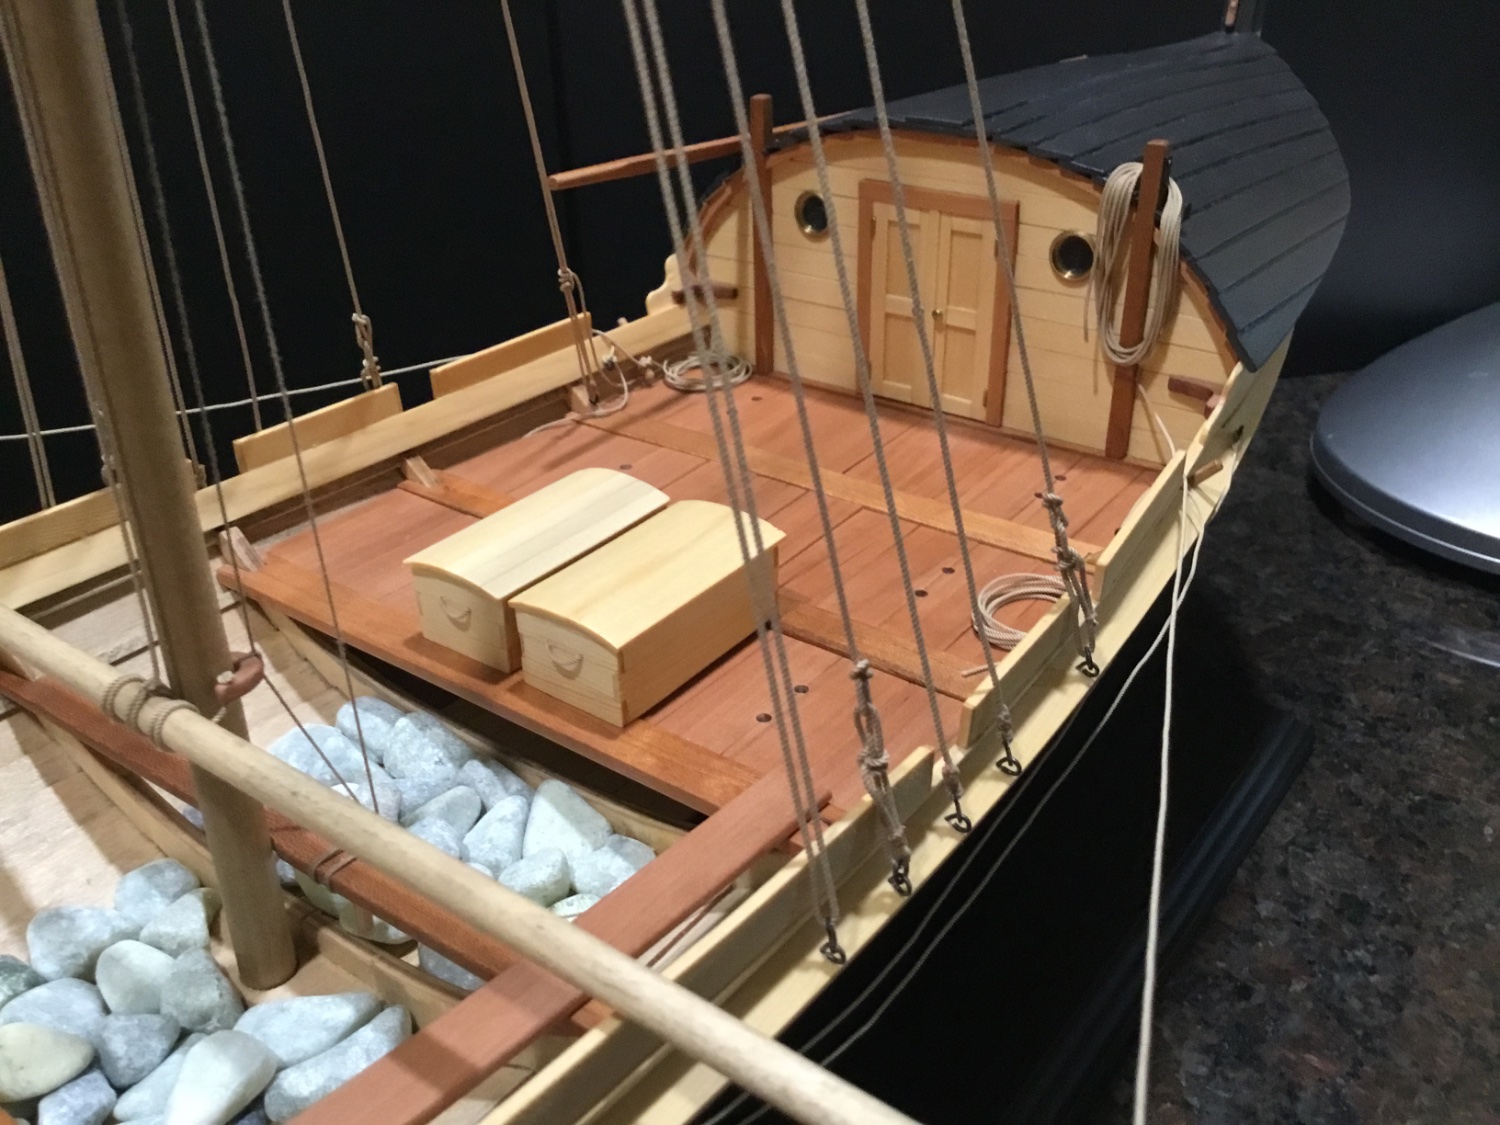
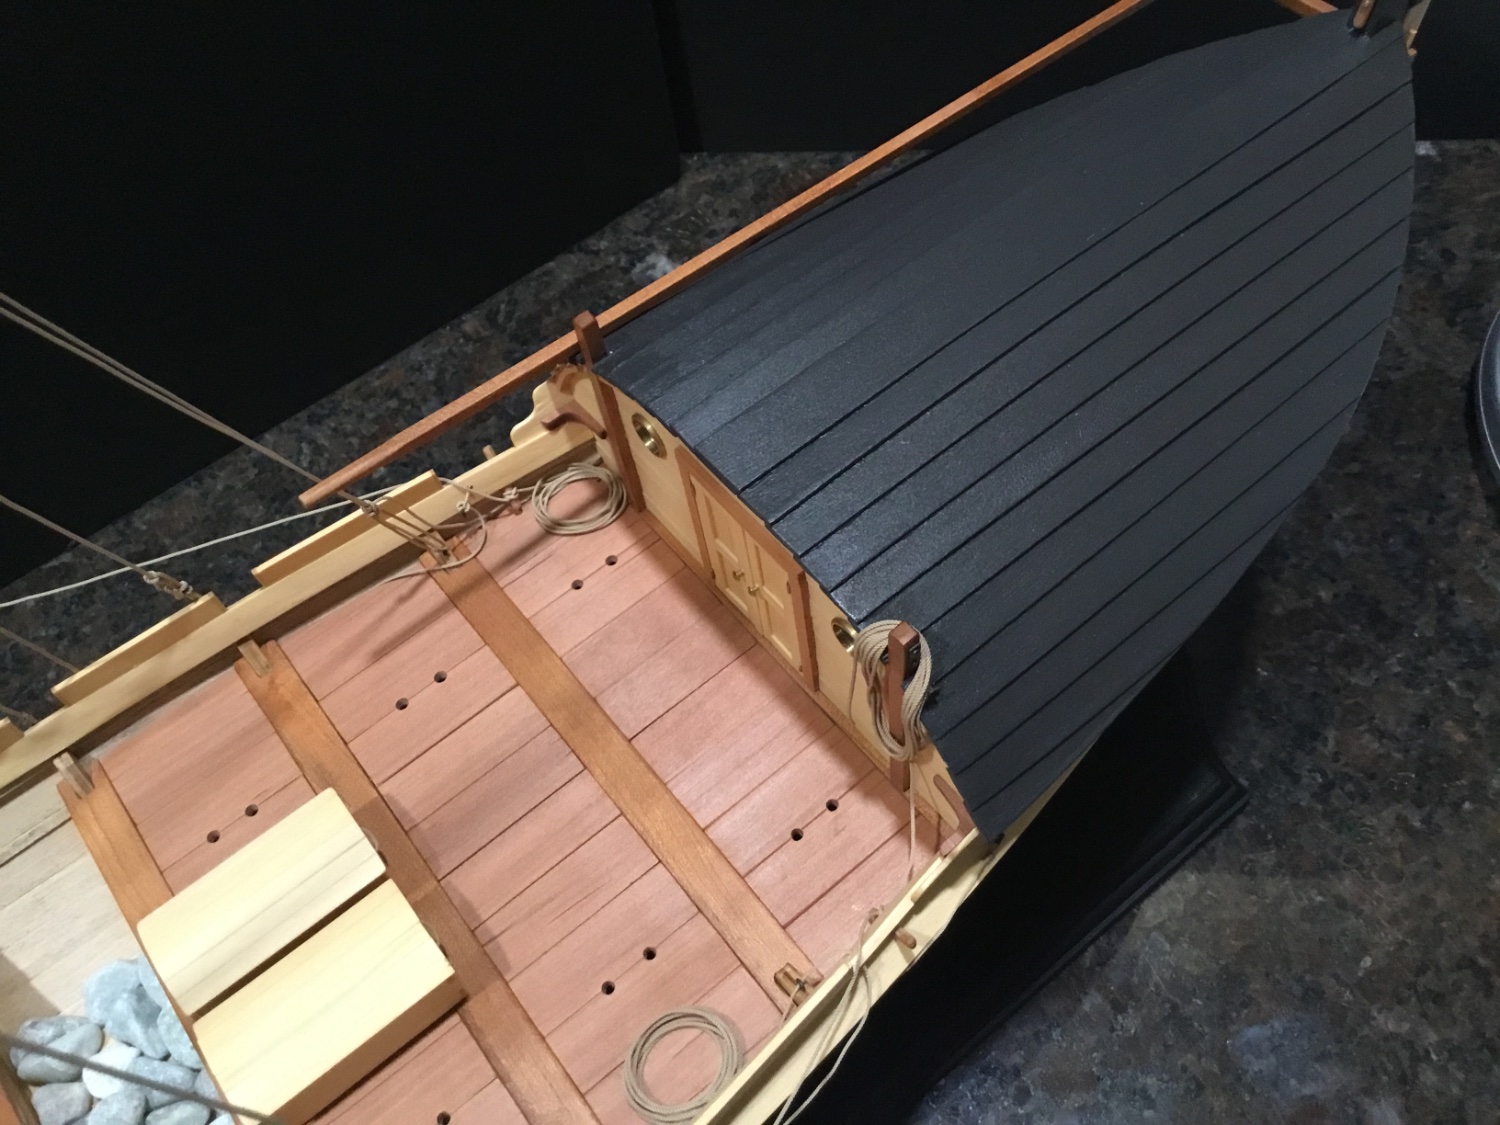
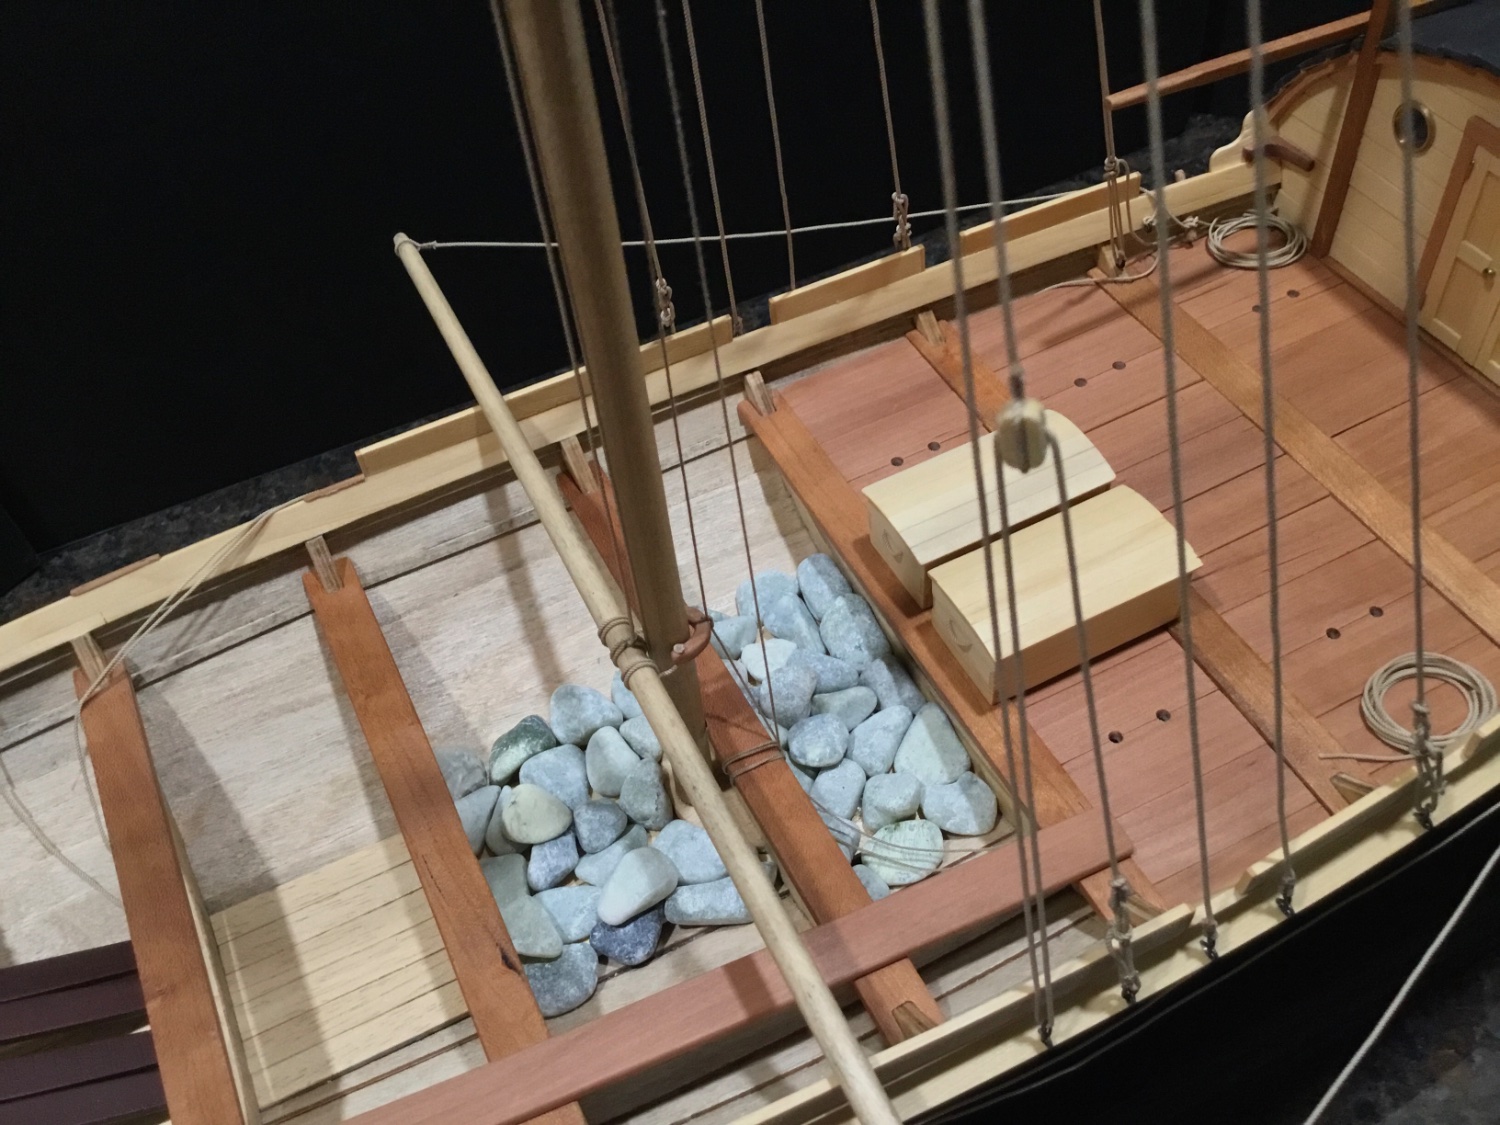
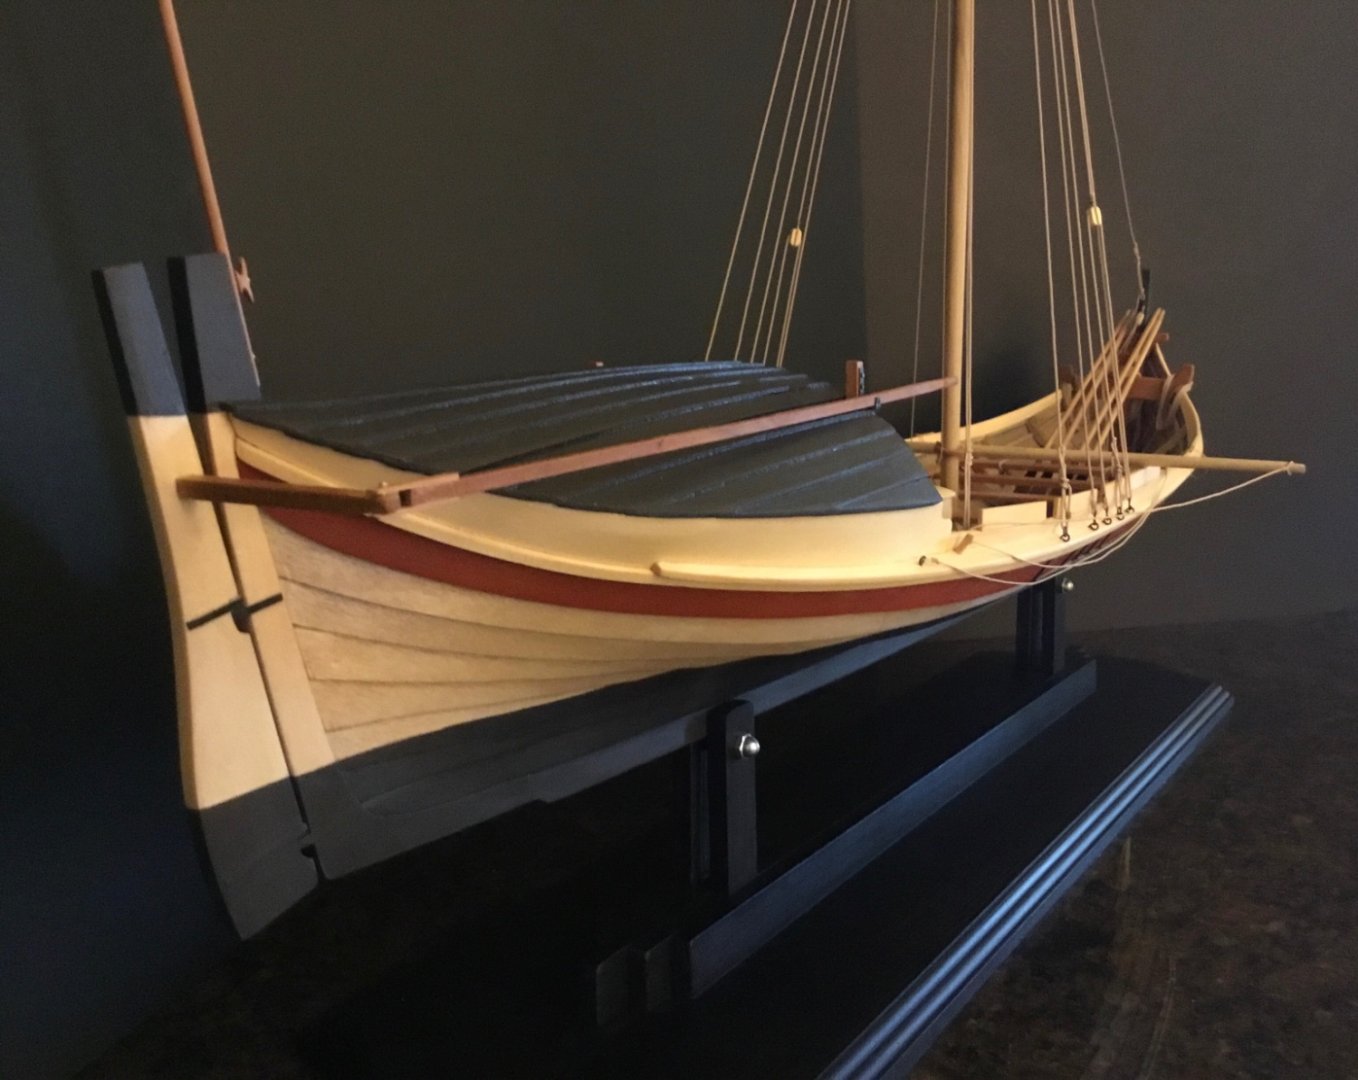
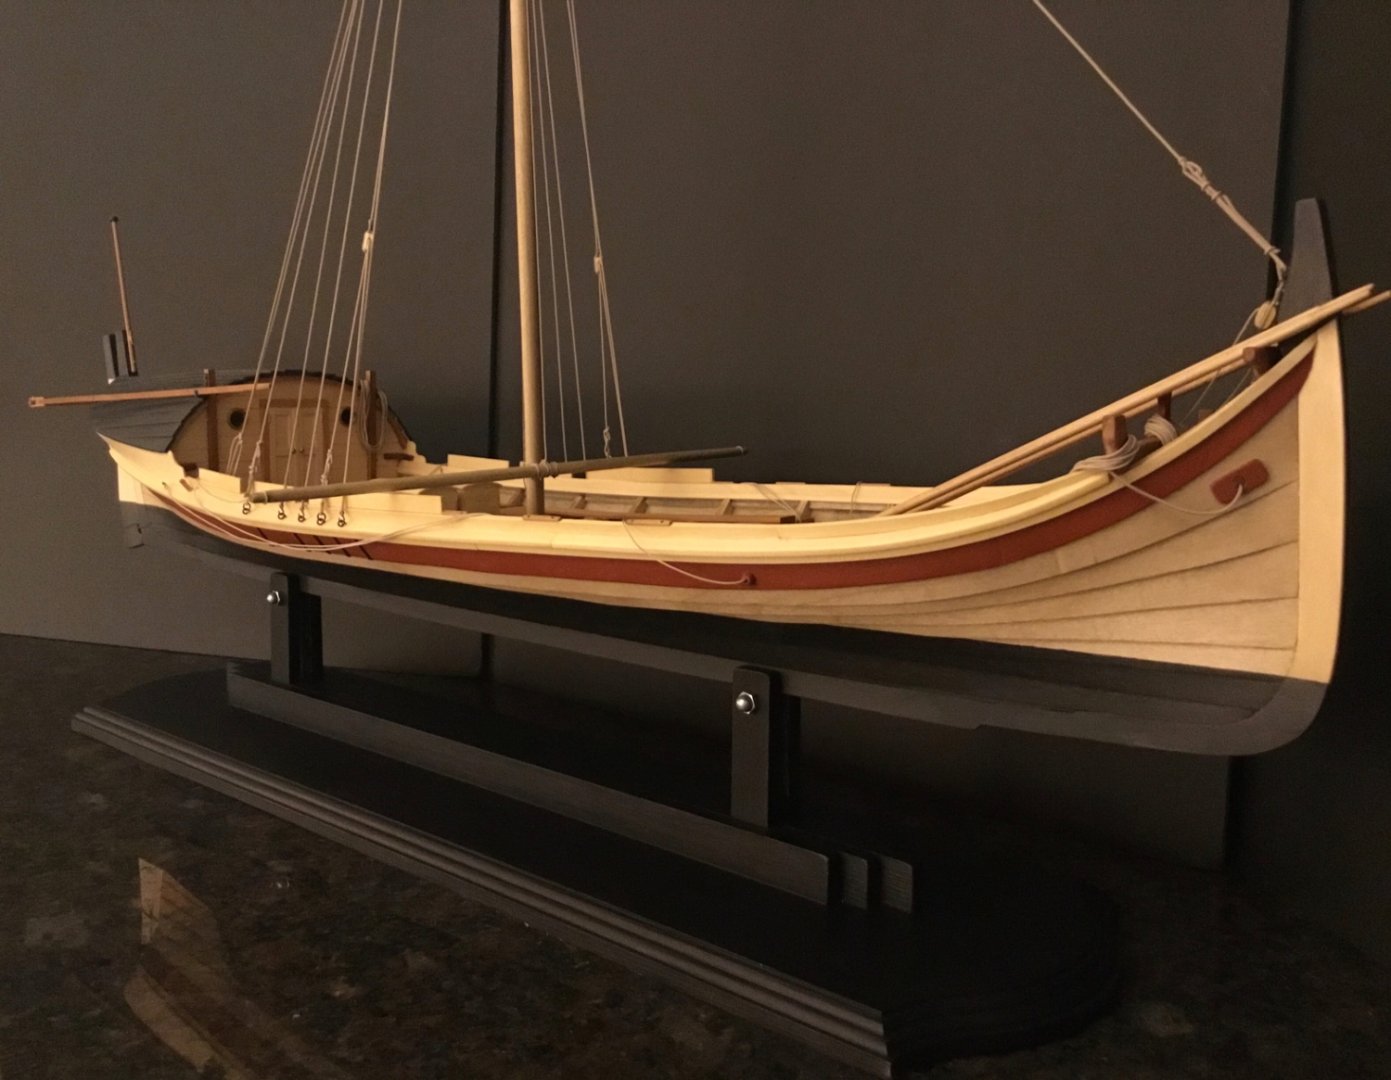
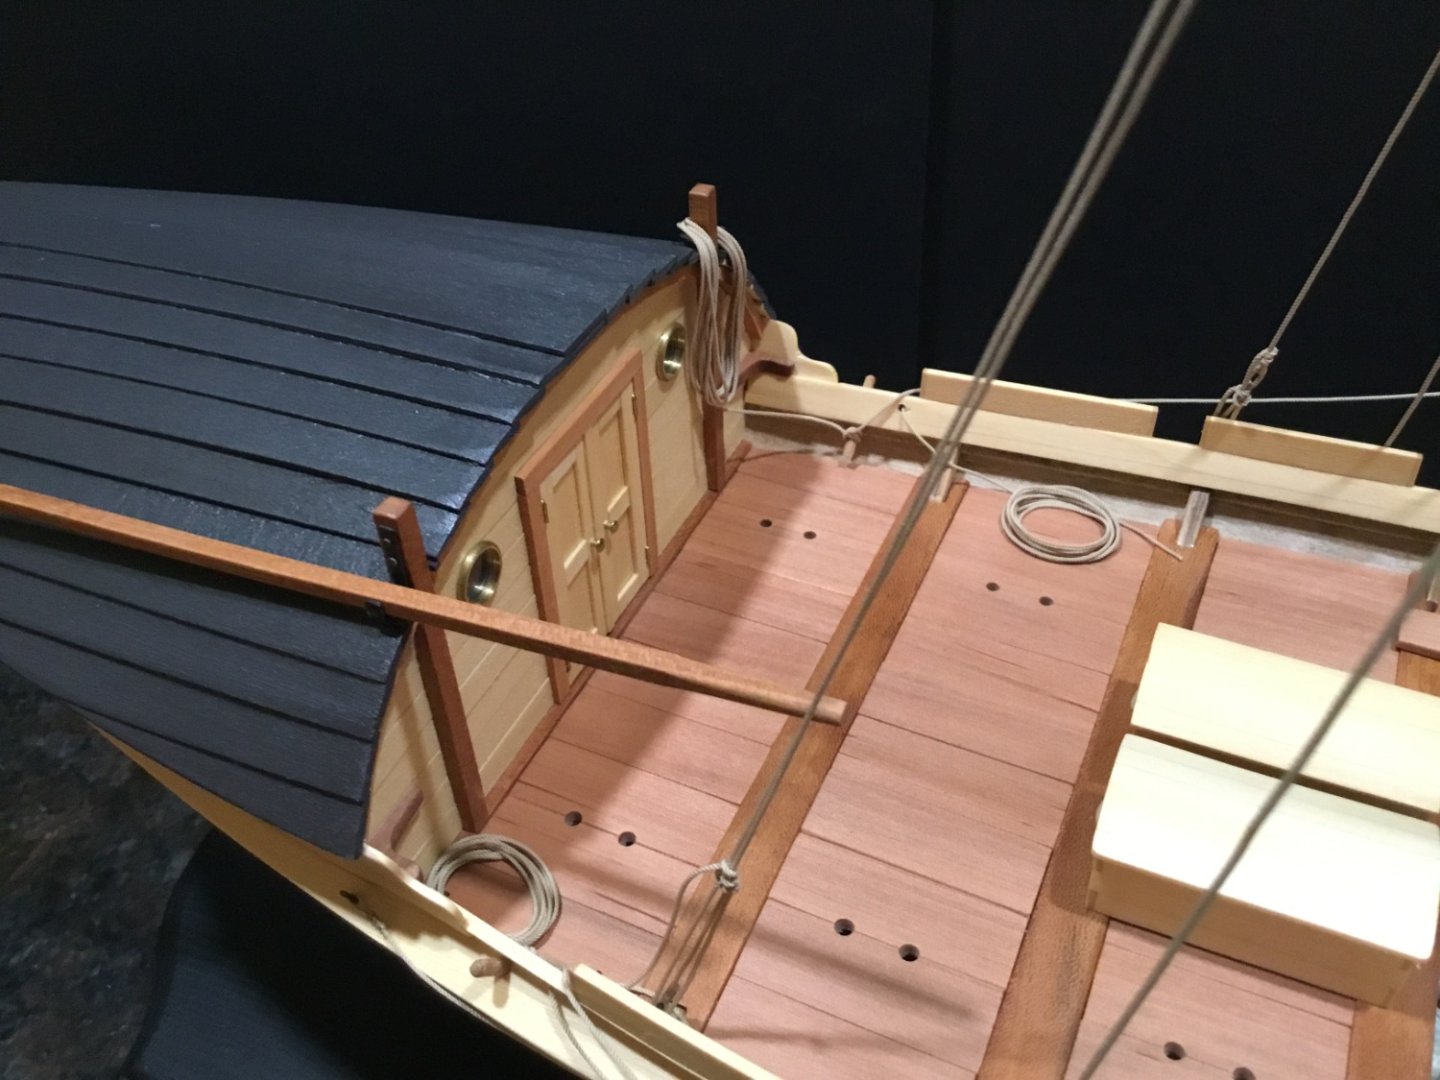
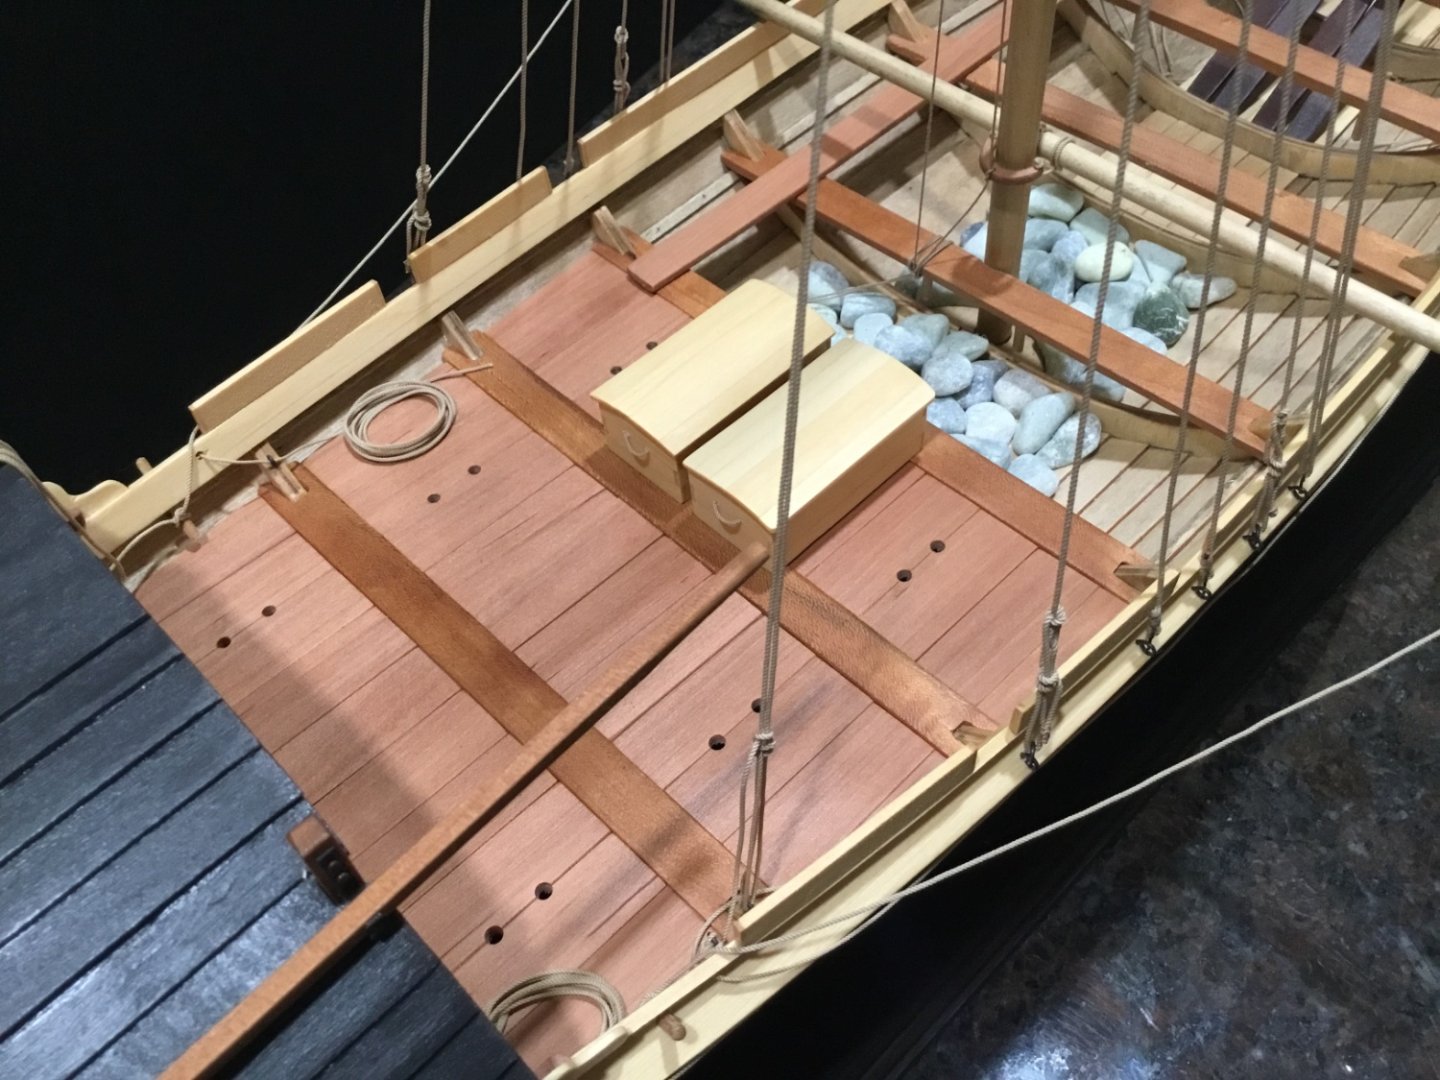
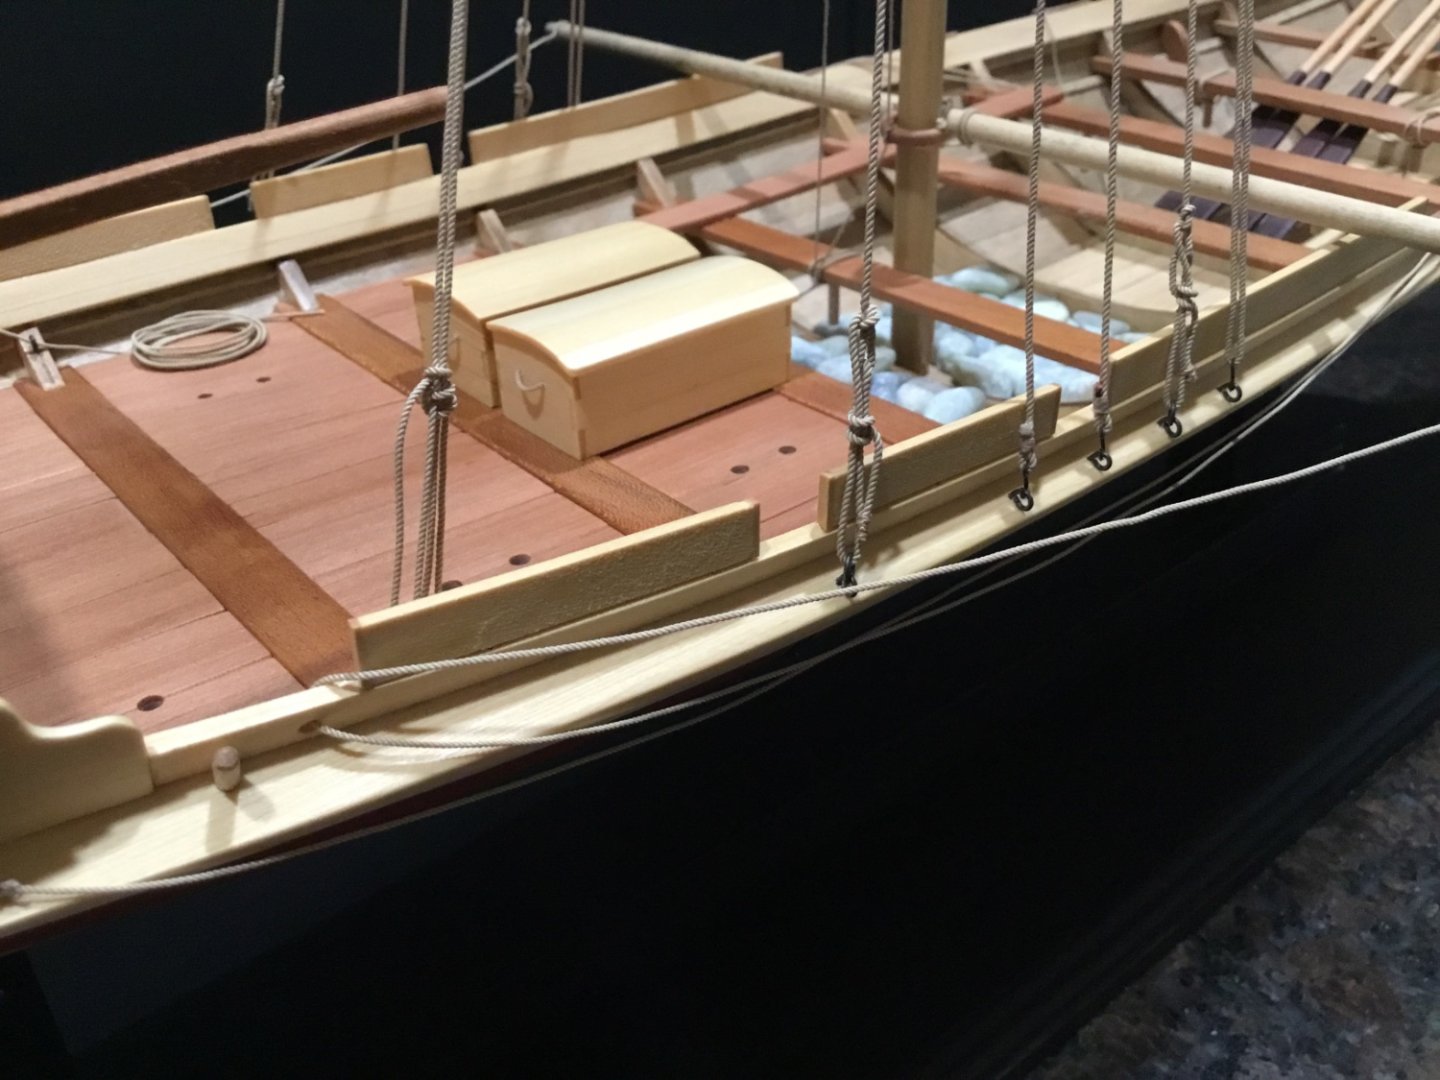
Hello Everyone, thank you all for the Comments, Likes, and for dropping by. The rigging didn’t take as long as I thought it would. Basically it’s mostly a bunch of rope laying around waiting for the sail to get back from the cleaners. I am declaring that the Nordland Boat is finished. Here are some photos. Thanks to everyone for their support and for joining me with this build. It was a lot of fun. See you on the next one.


- 55 replies
-
- 12
-
-
-
- Nordlandsbaaden
- Billing Boats
- (and 1 more)
-
Thank you so much Bob and and thanks to everyone for their likes
- 55 replies
-
- 1
-
-
- Nordlandsbaaden
- Billing Boats
- (and 1 more)
-
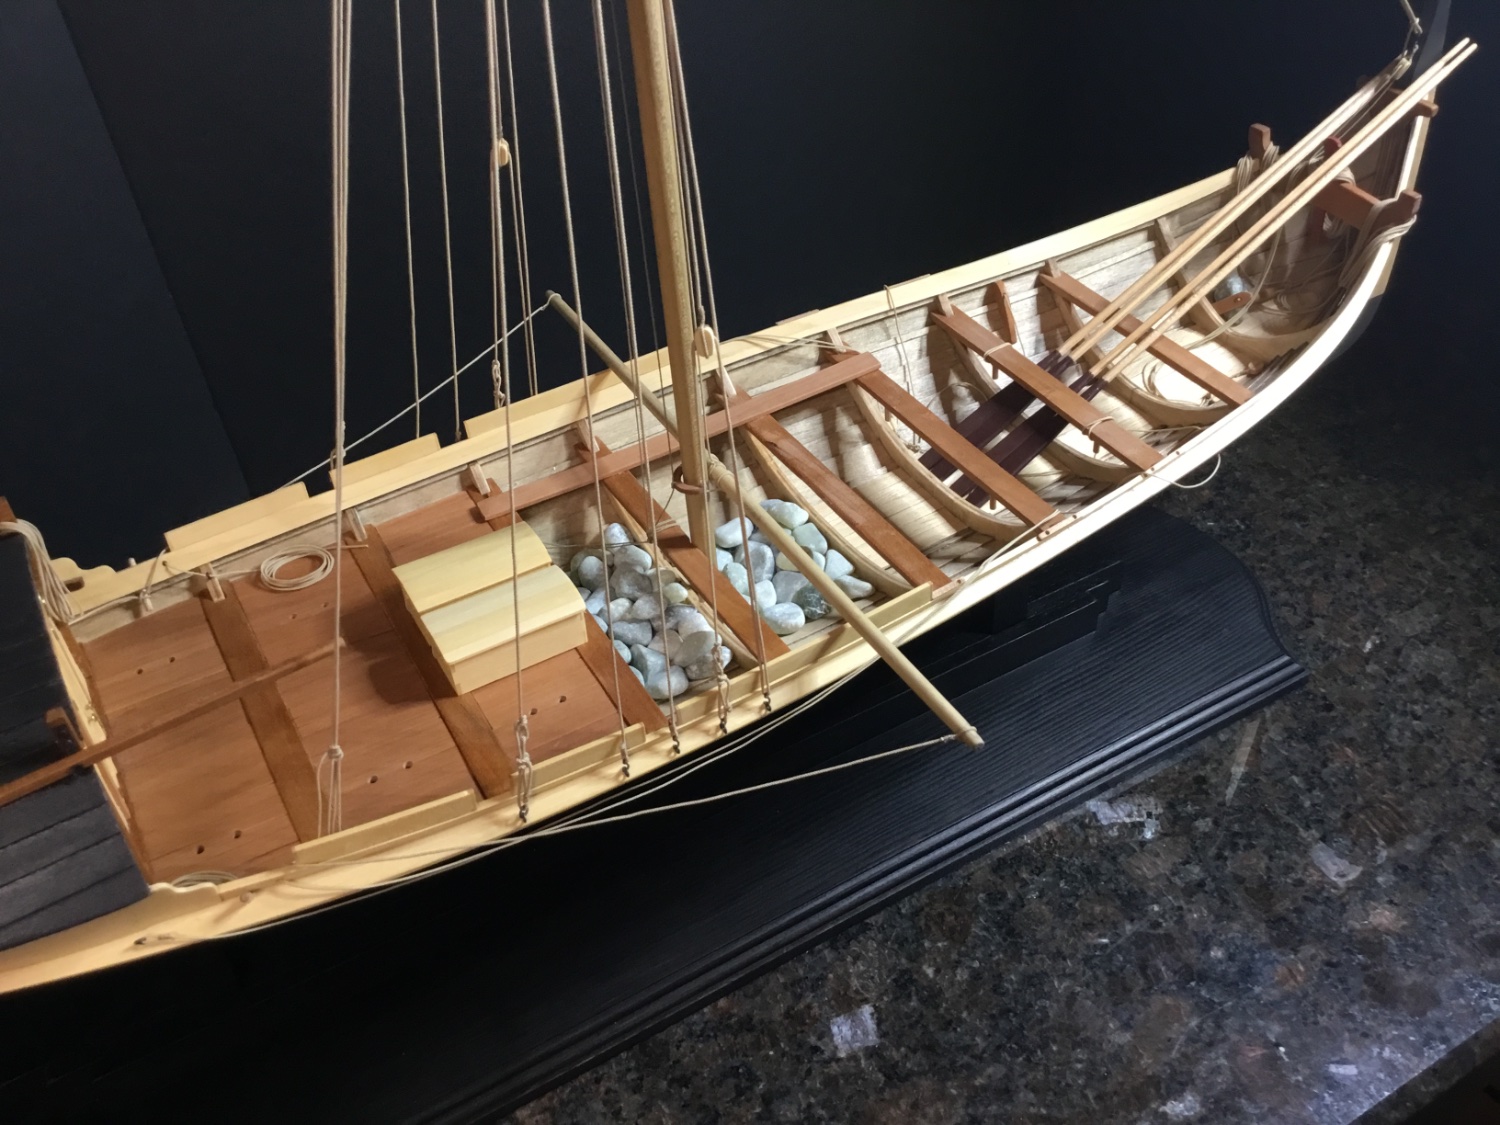
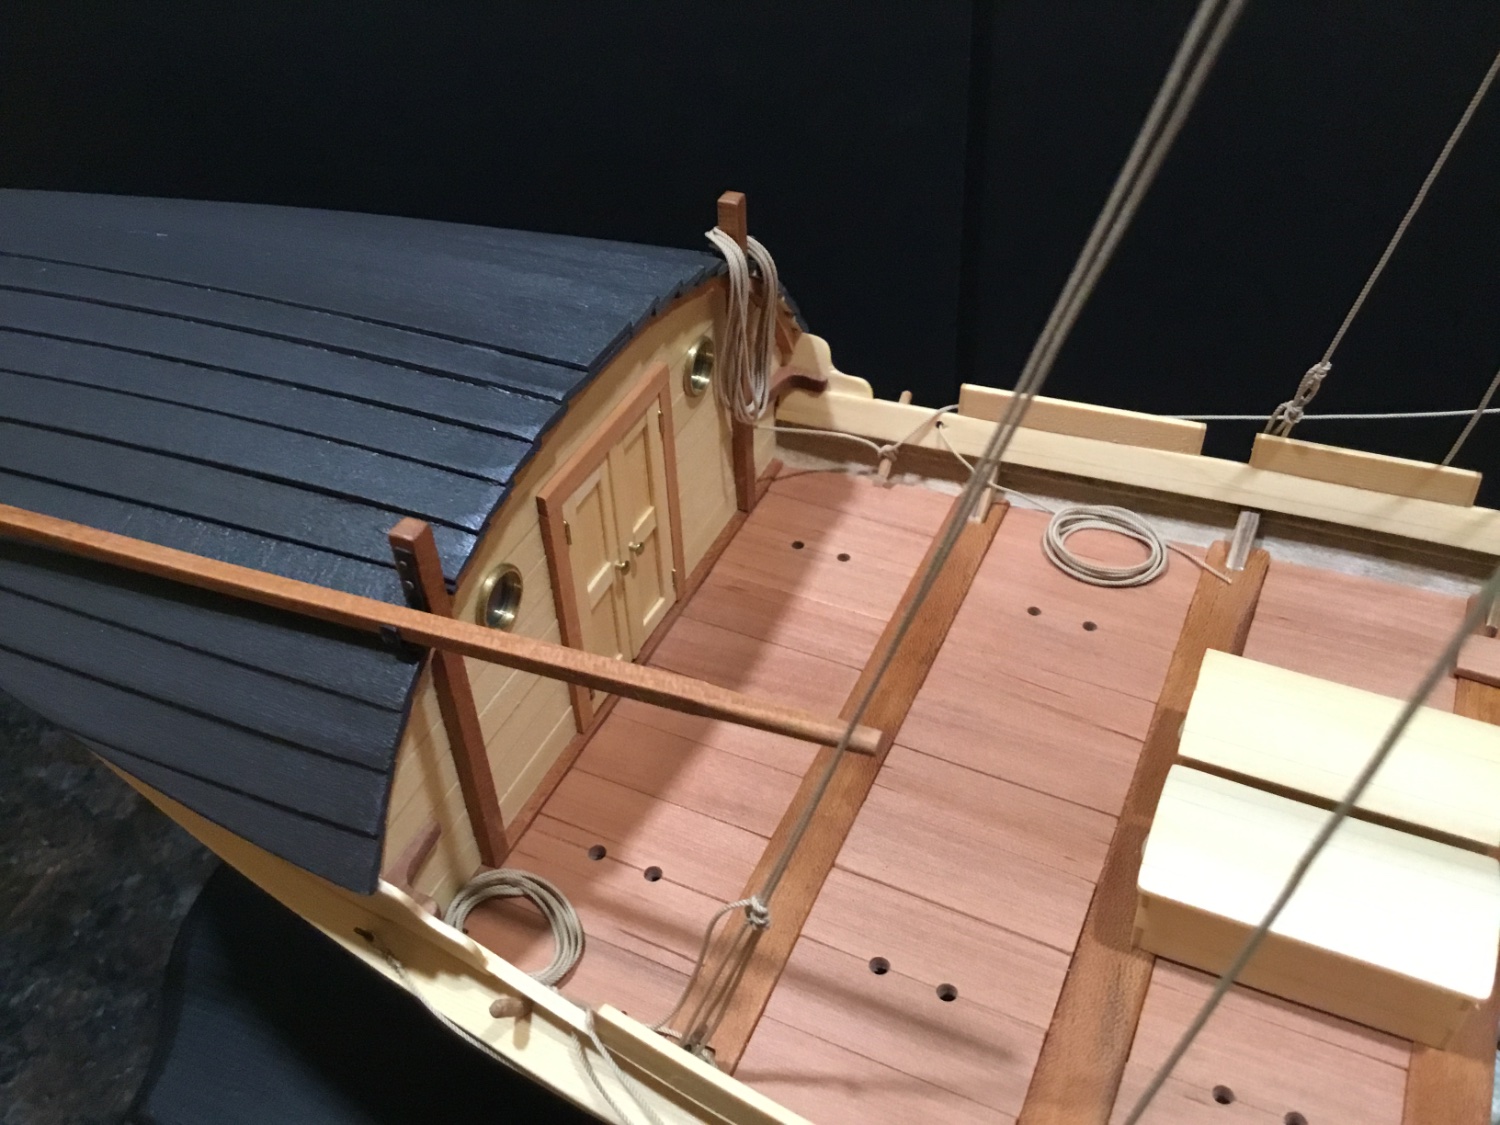
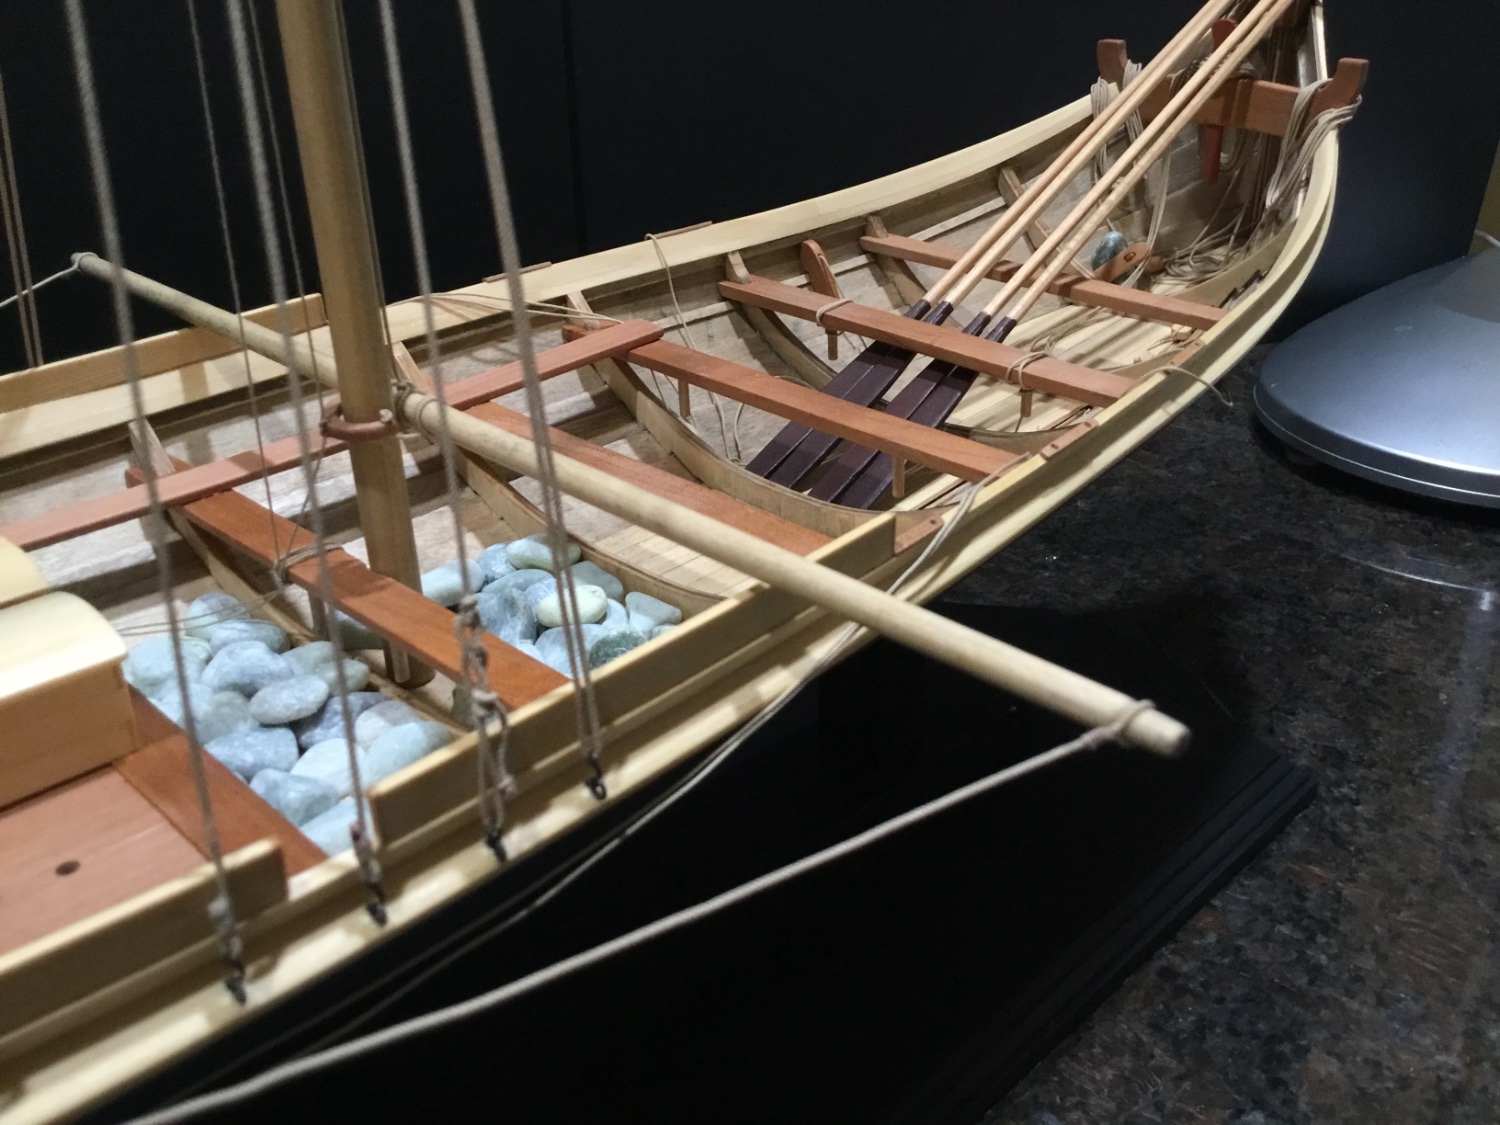
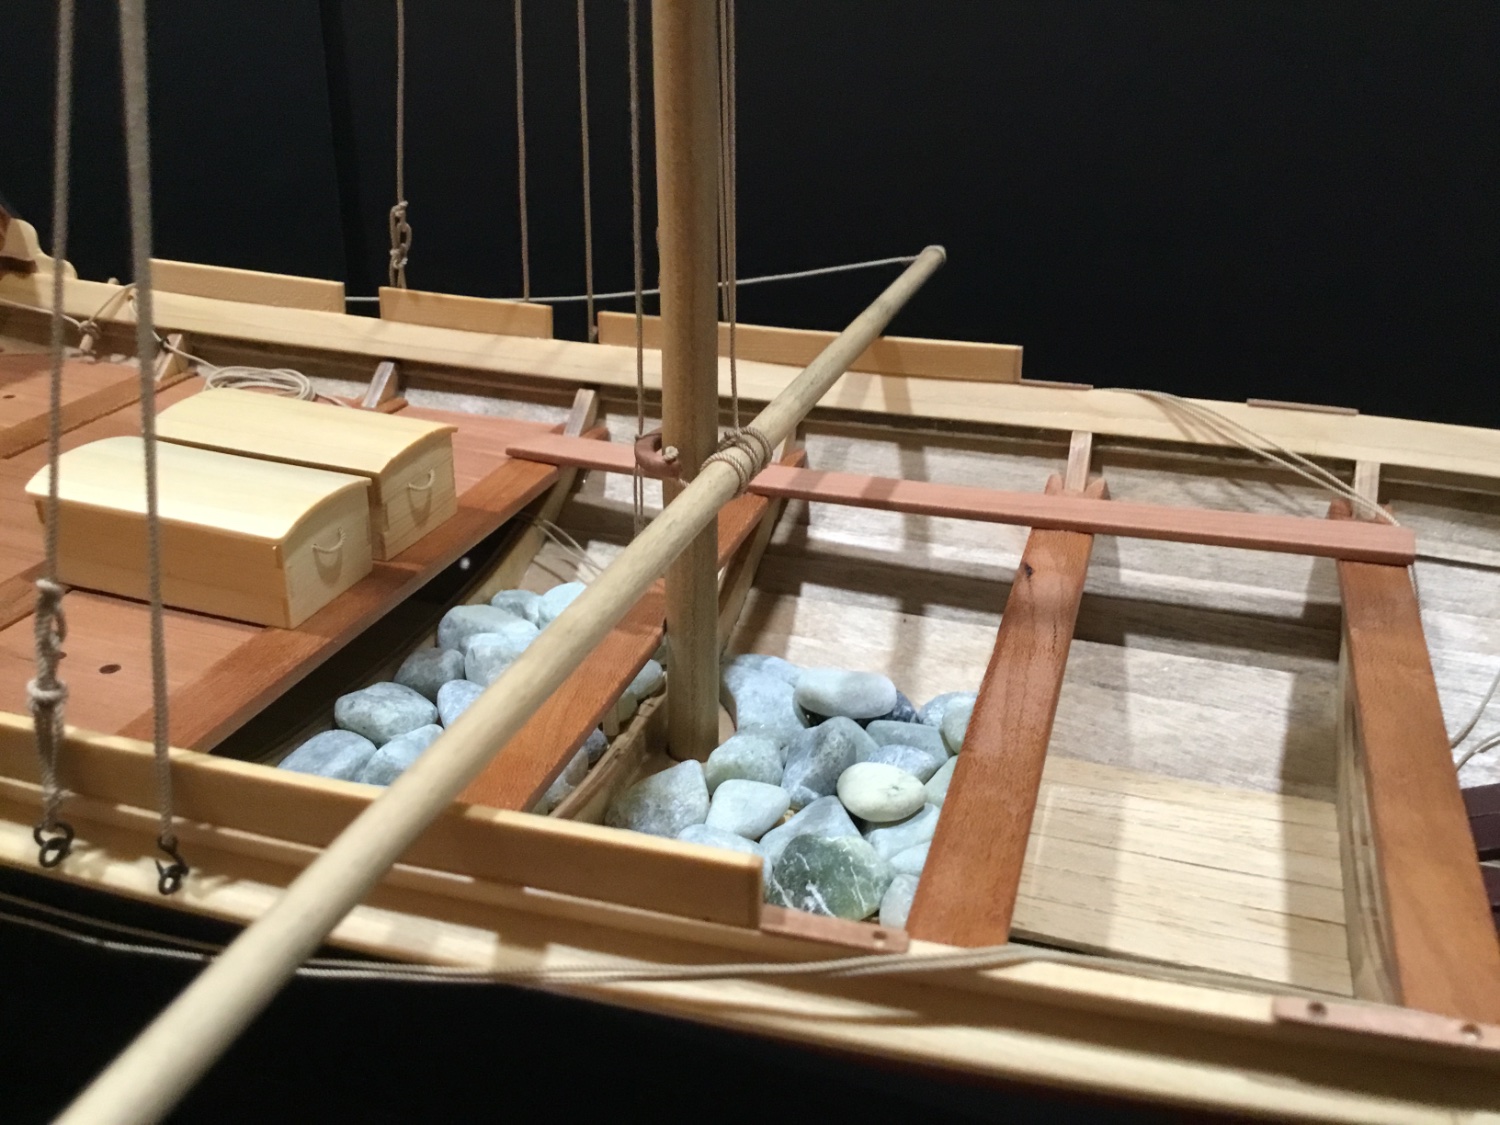
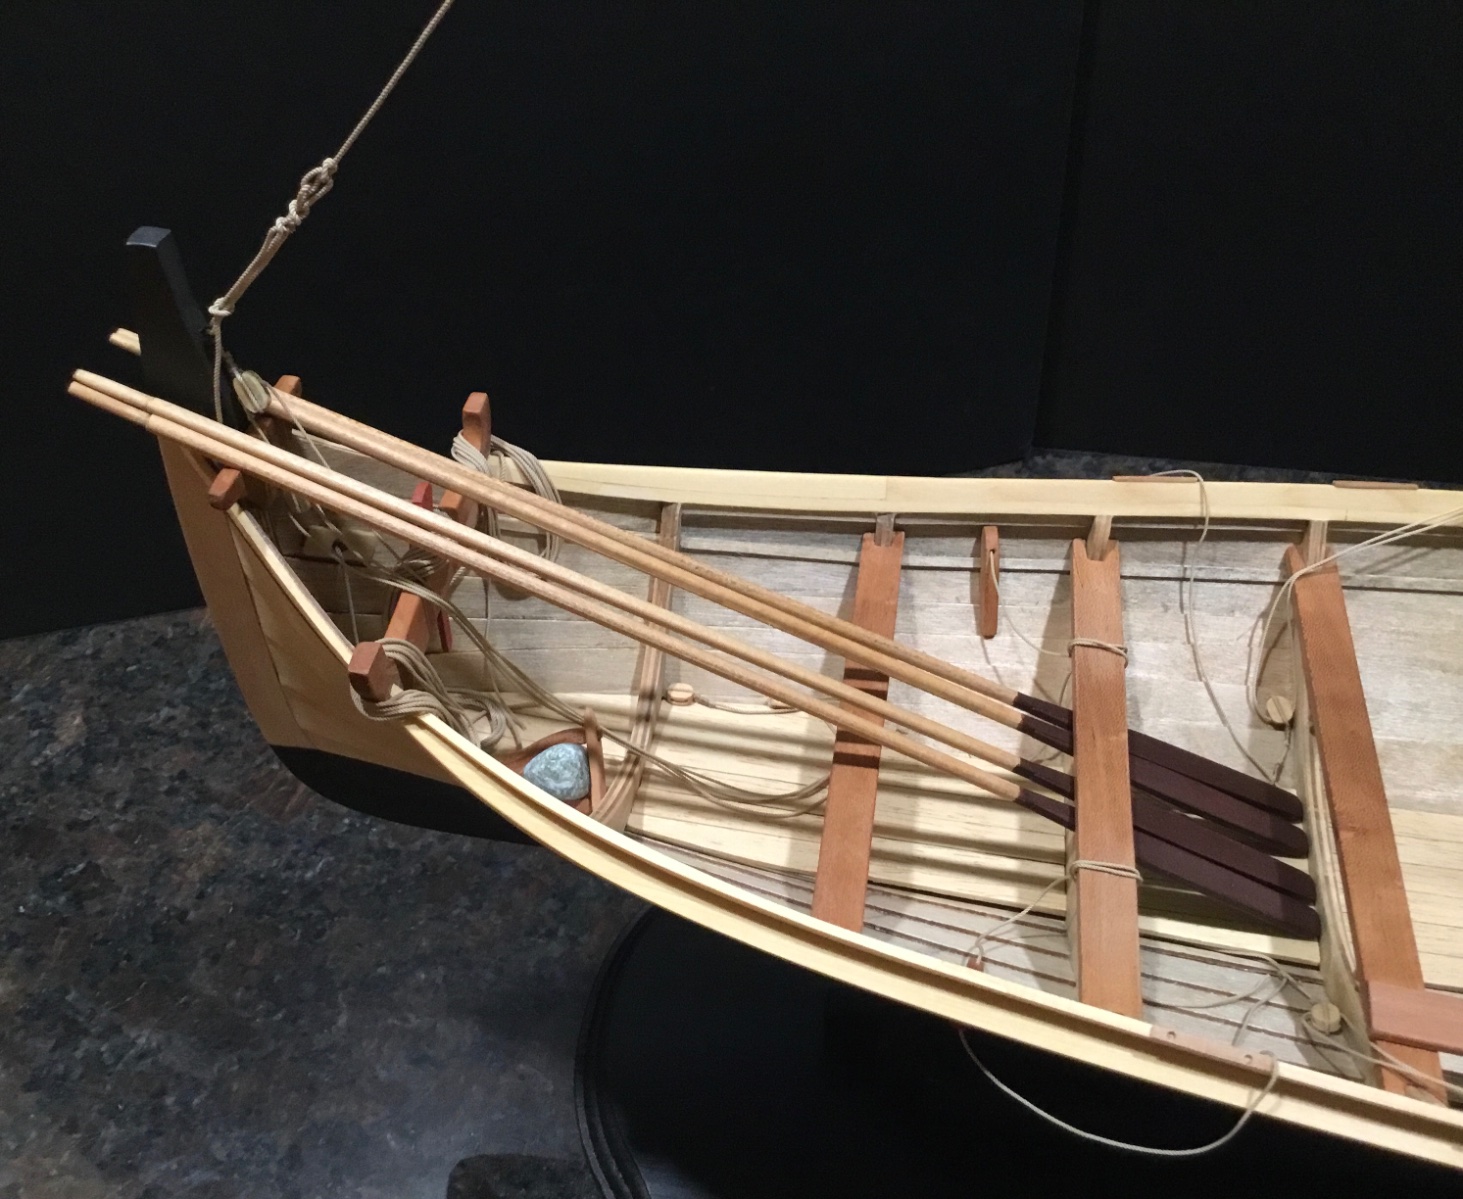
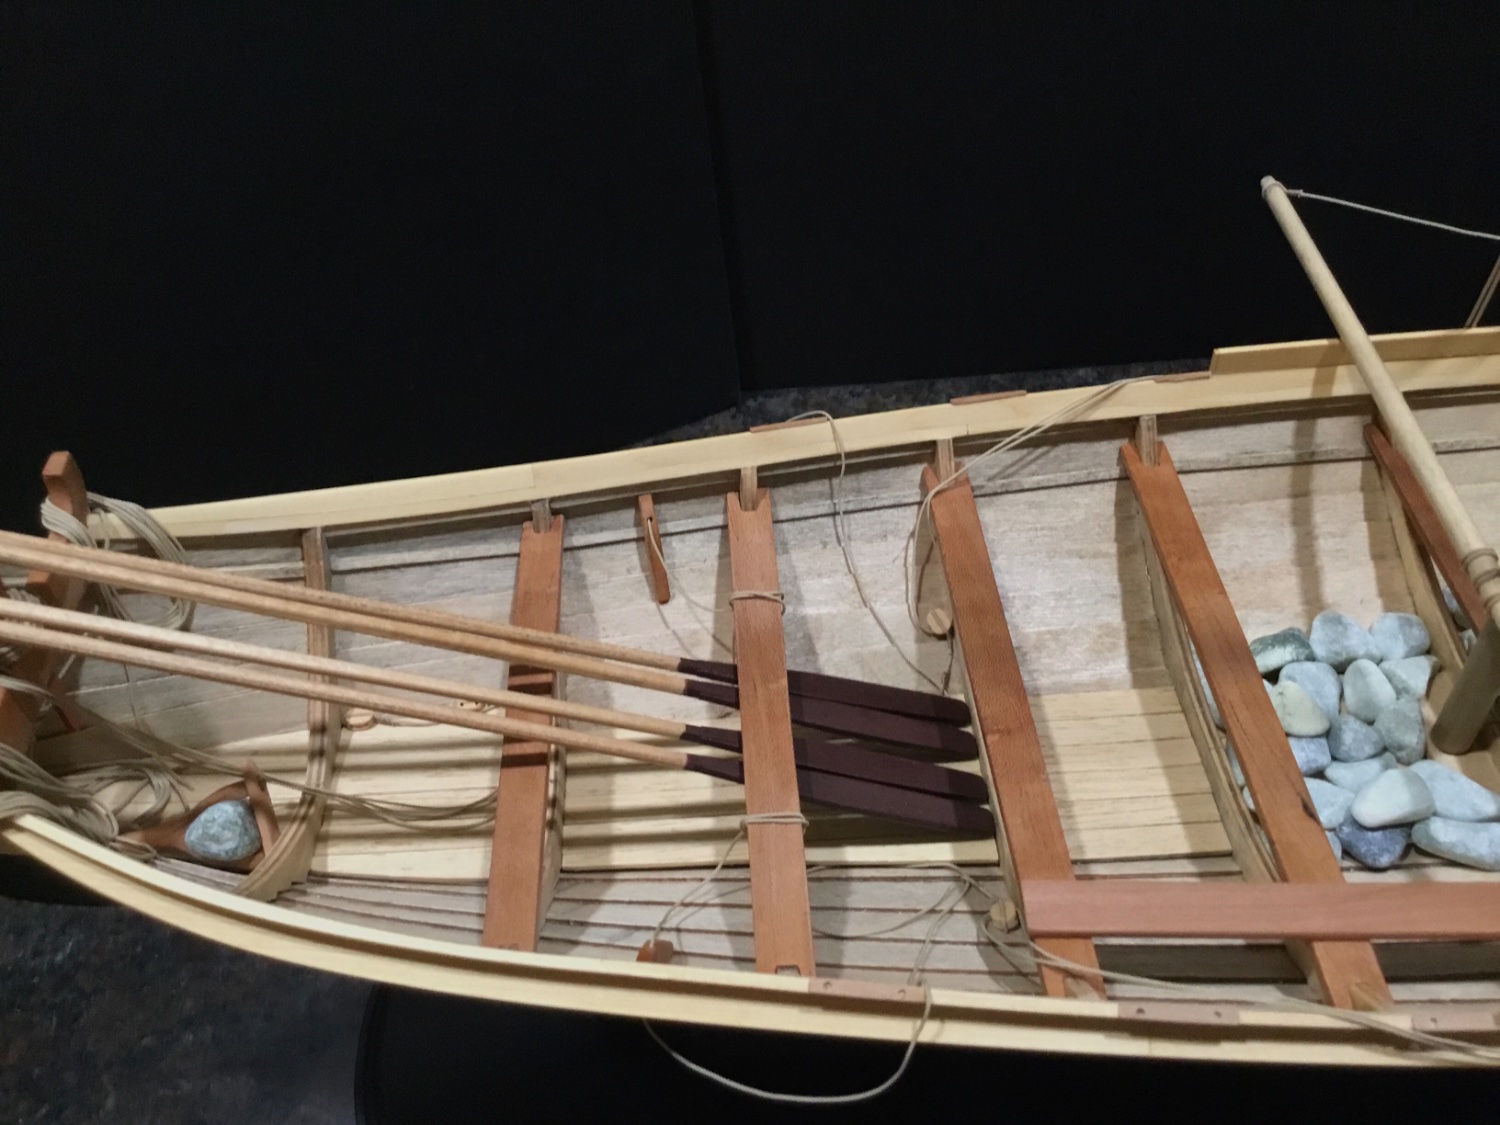
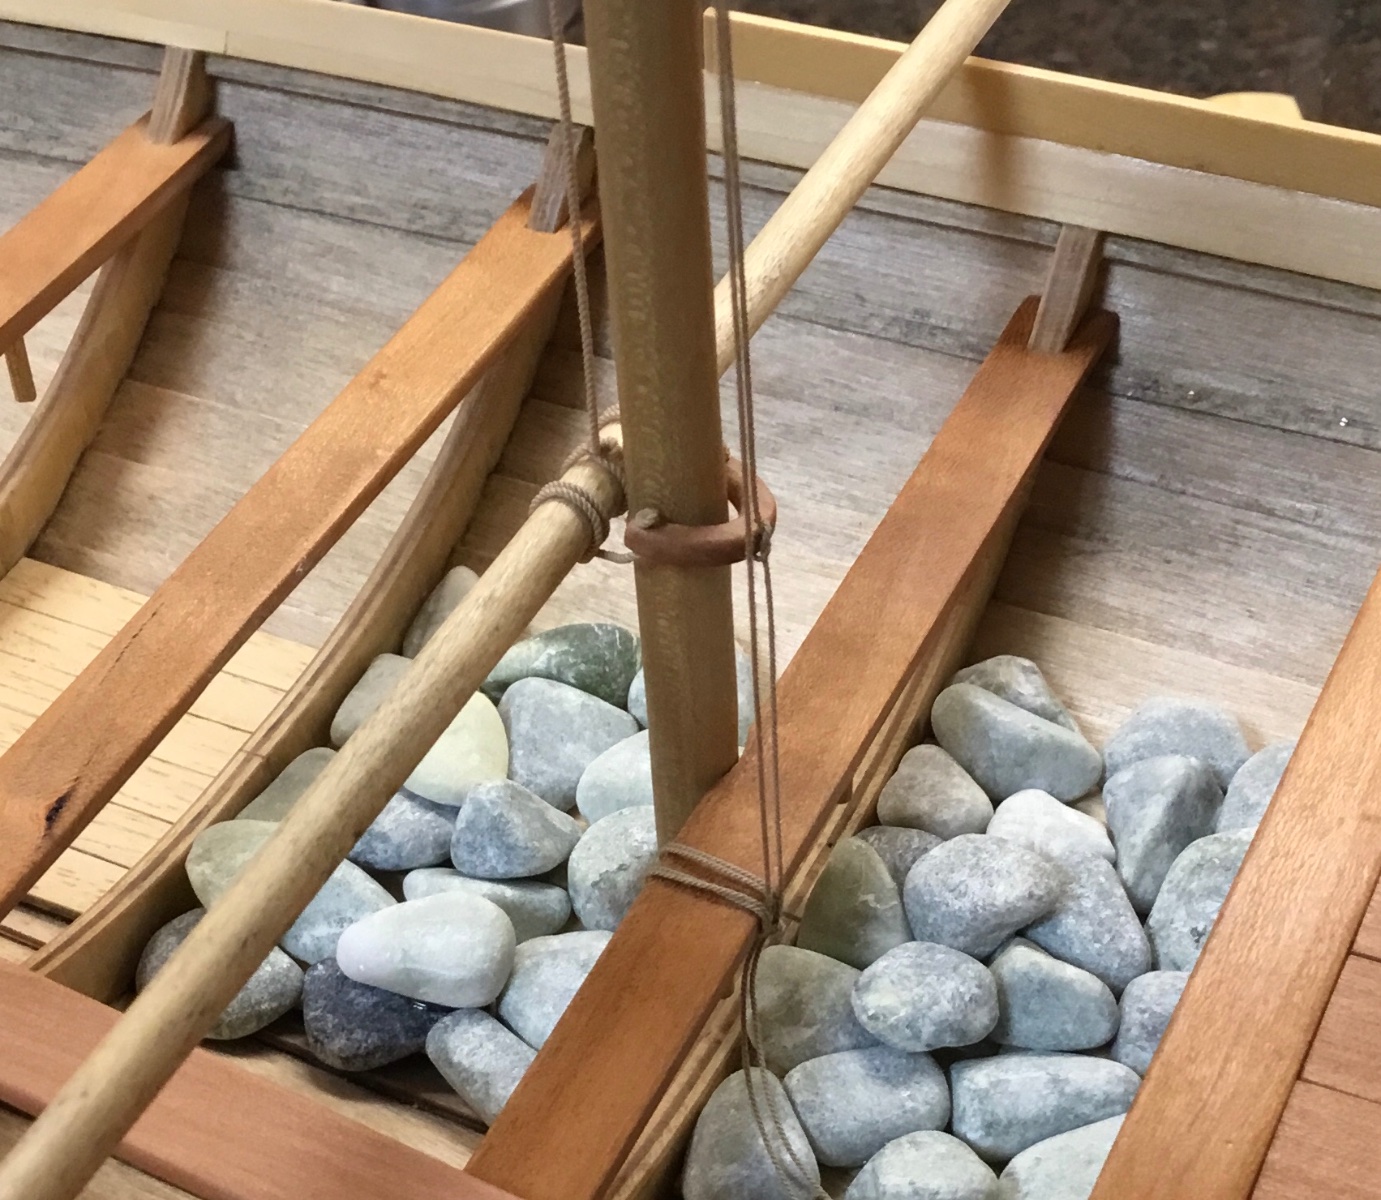
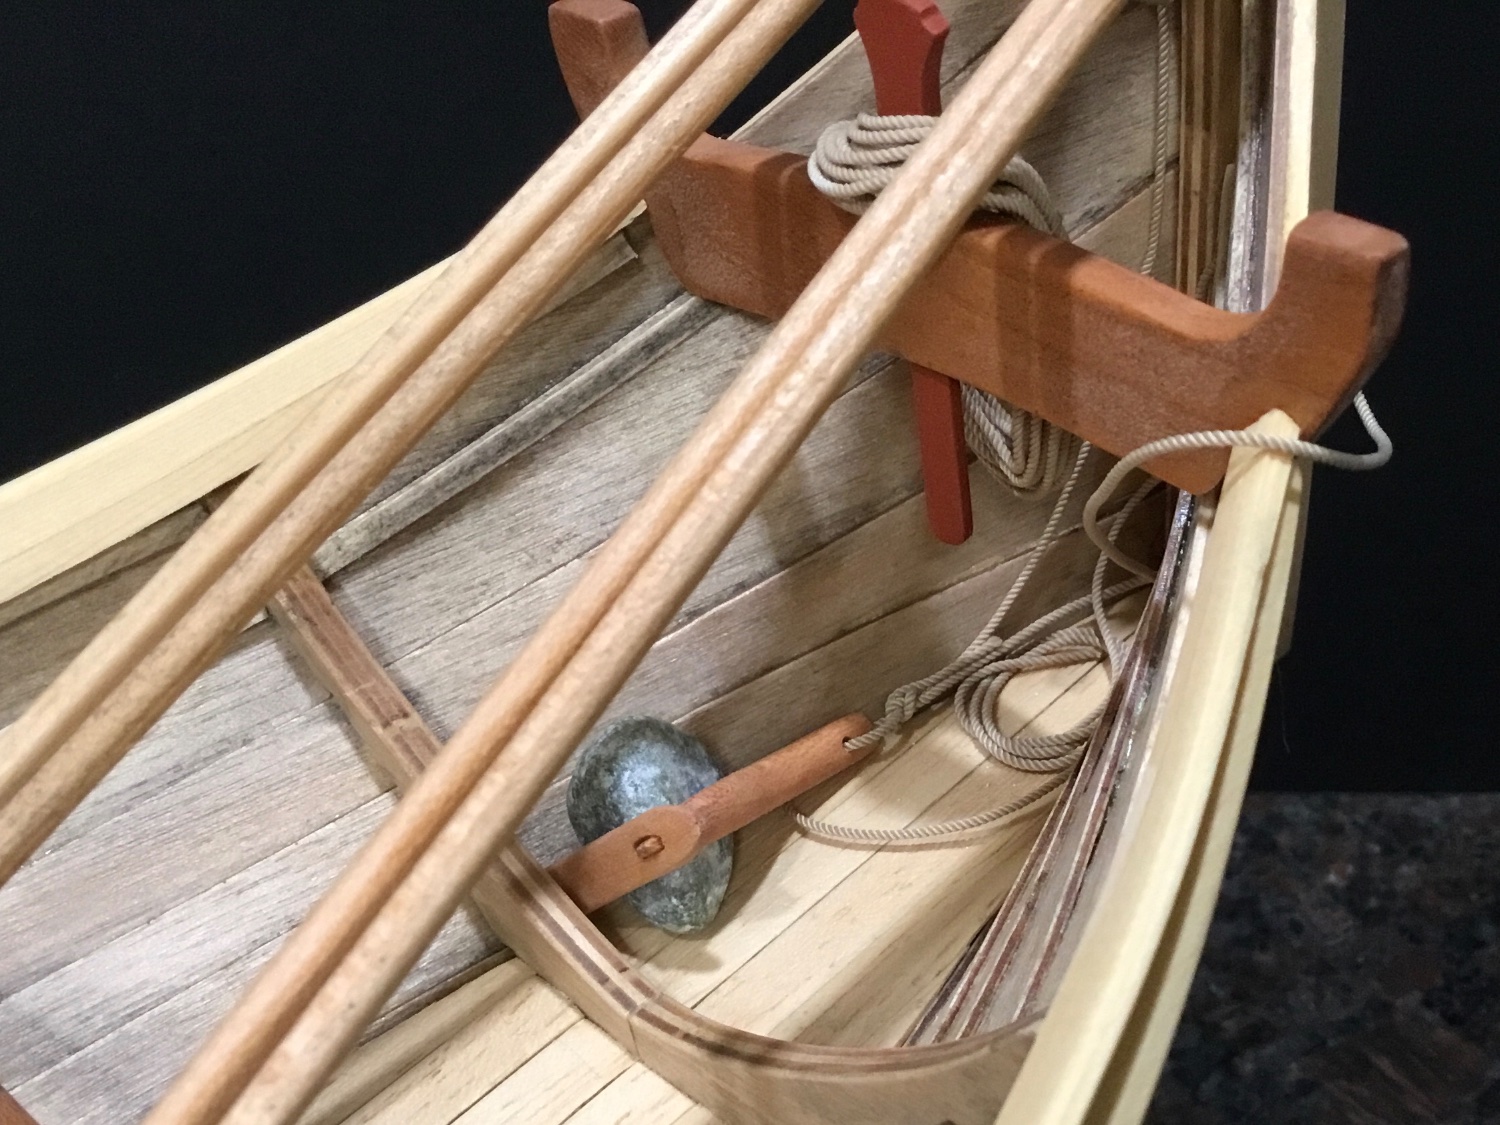
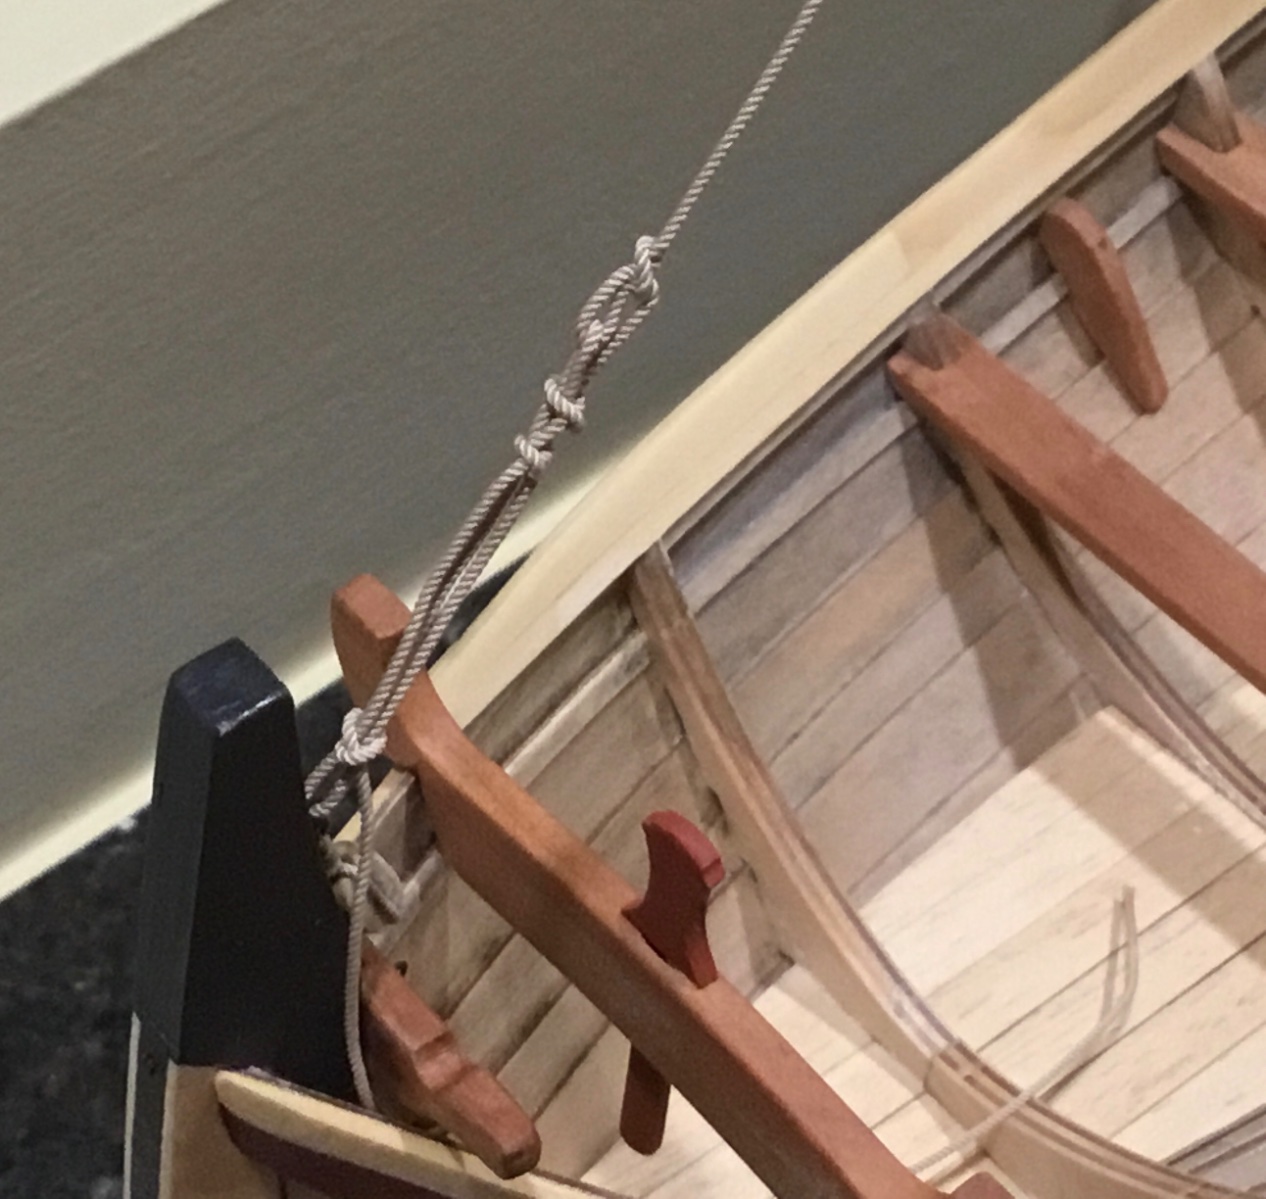
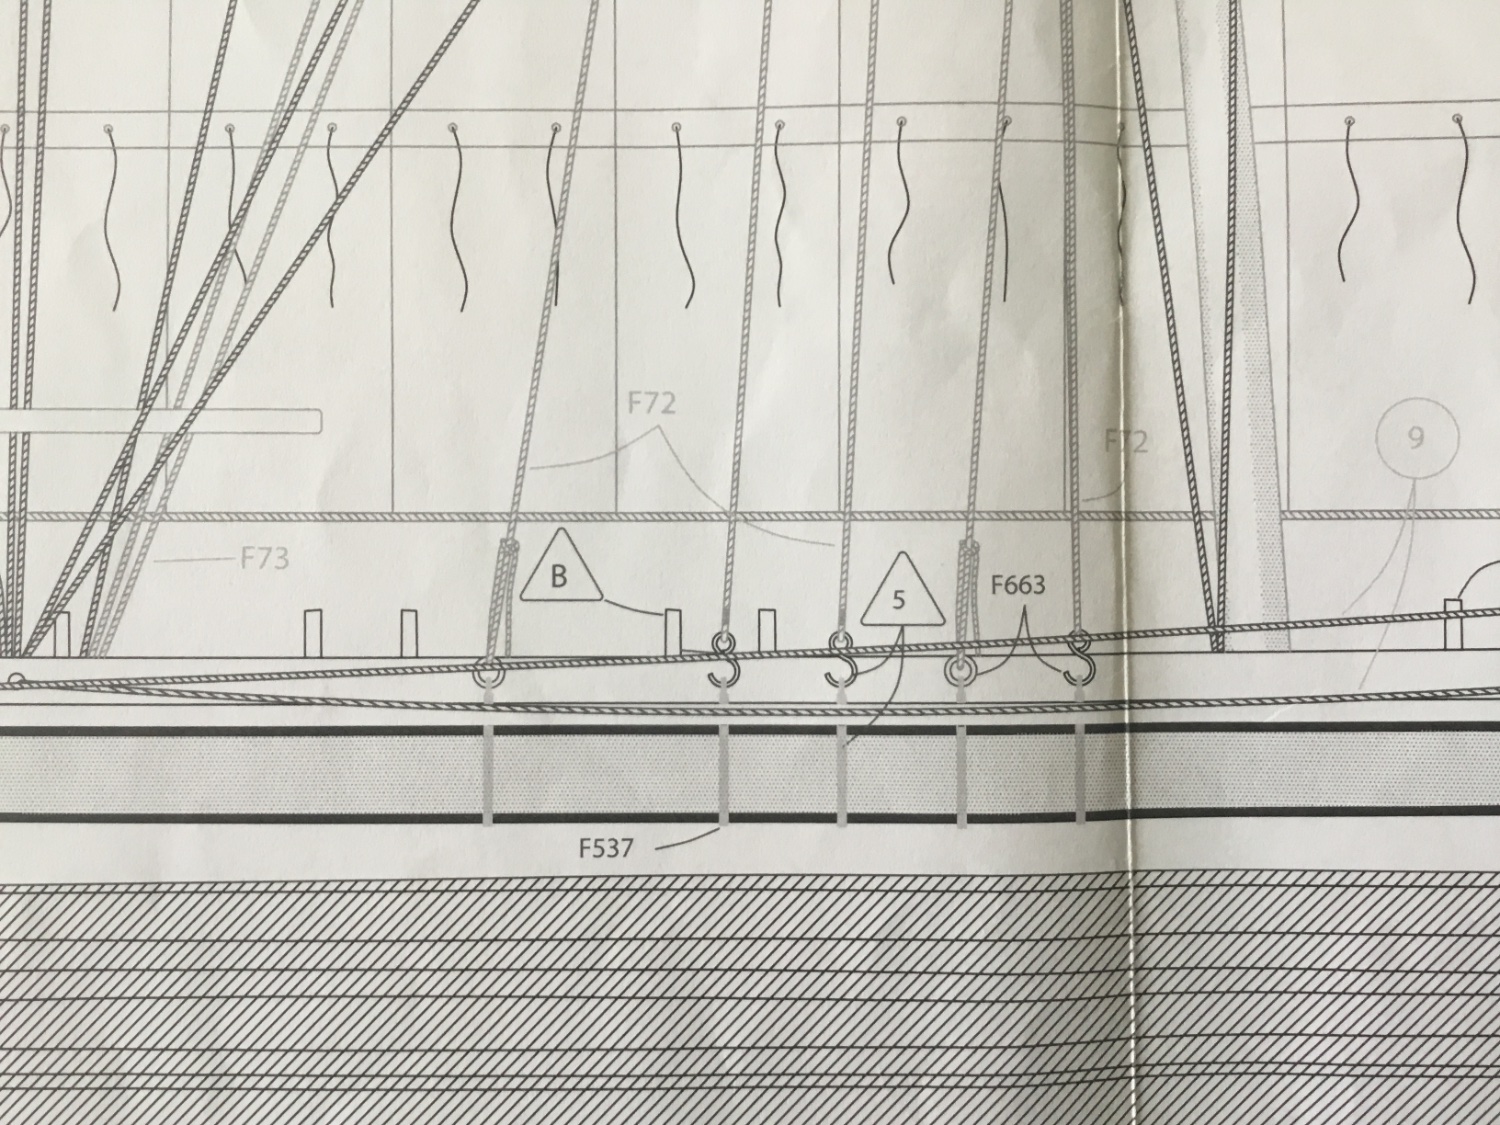
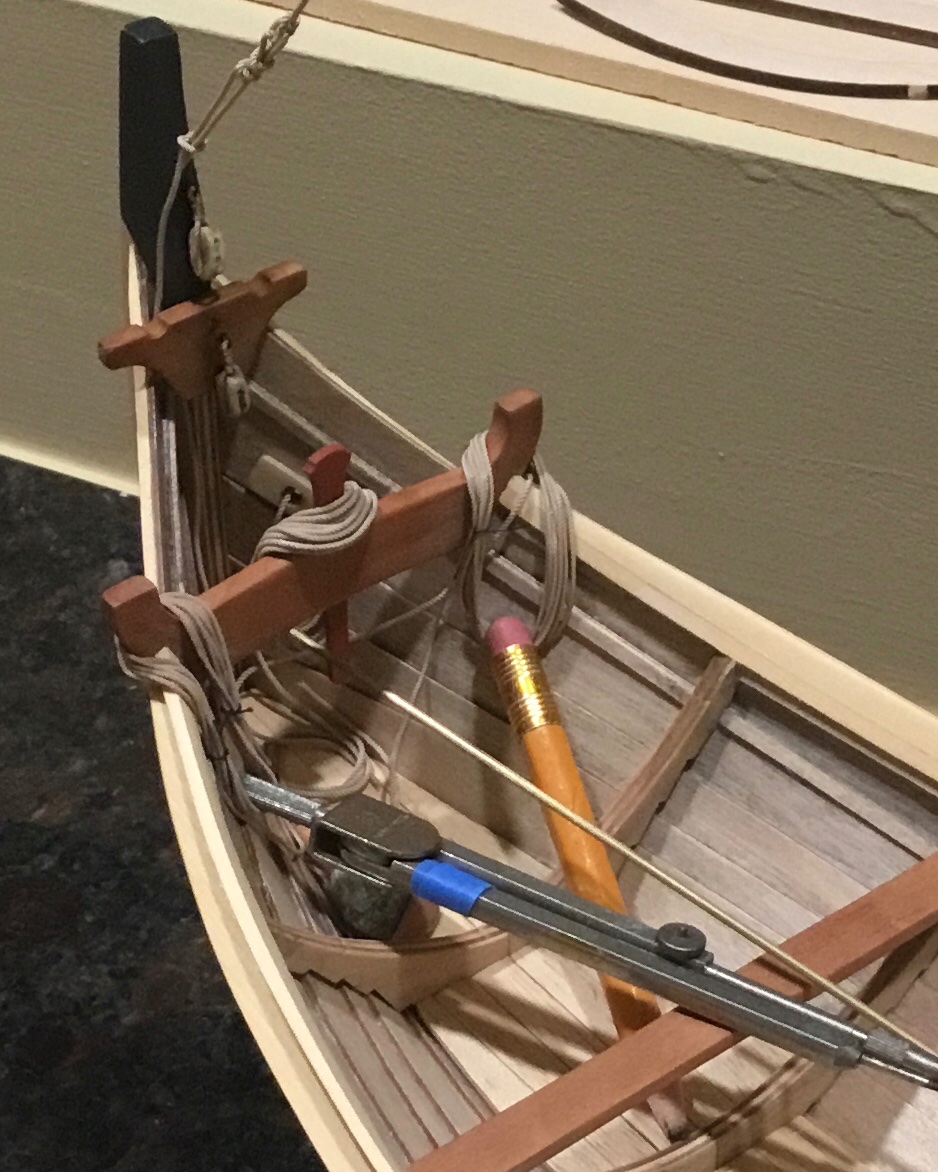
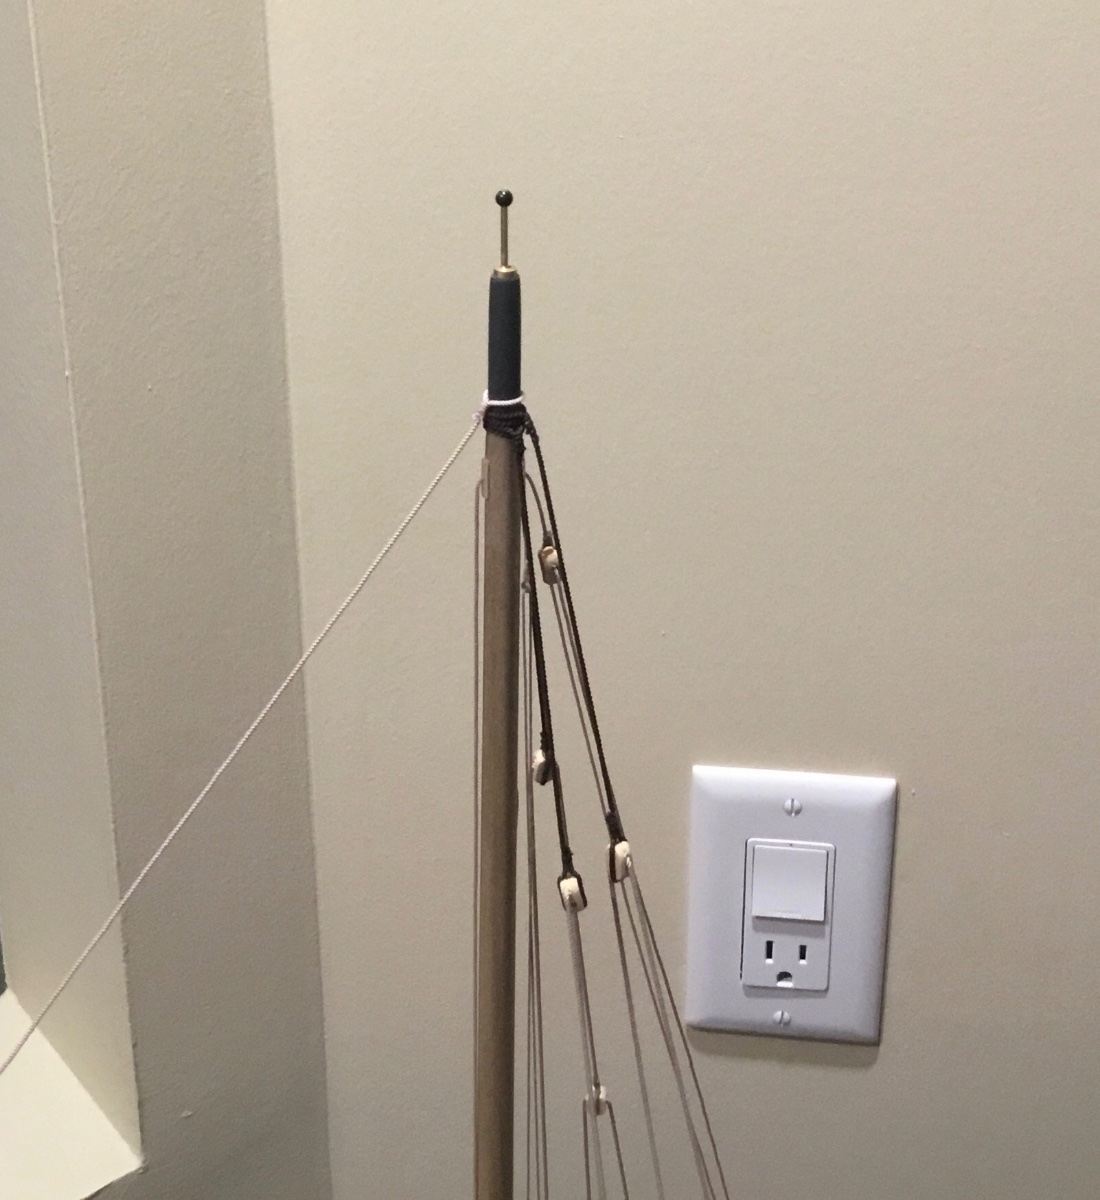
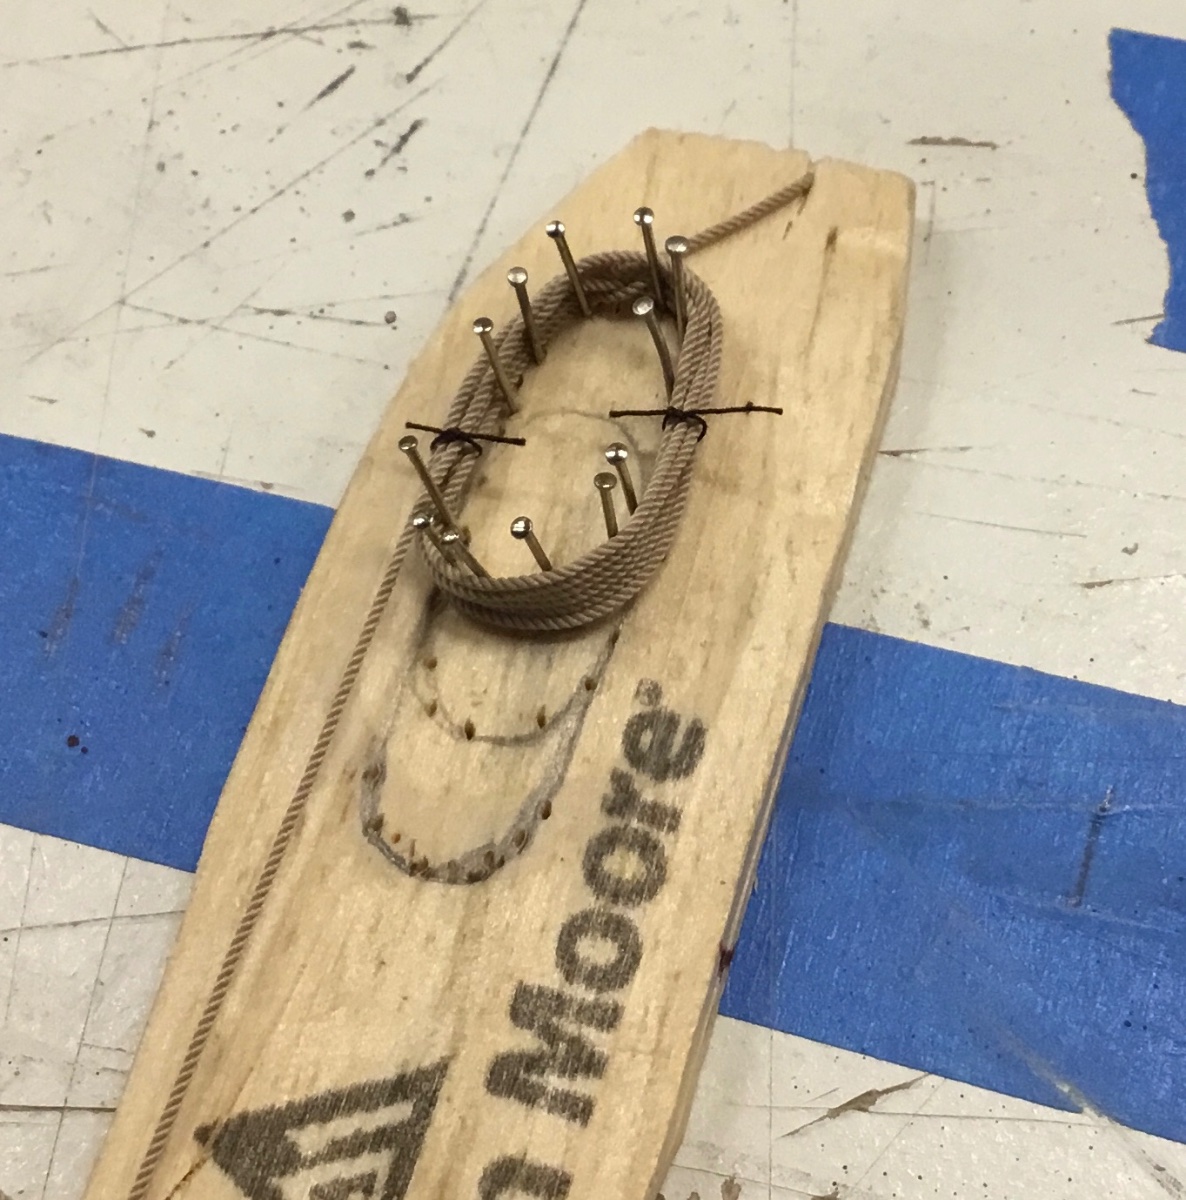
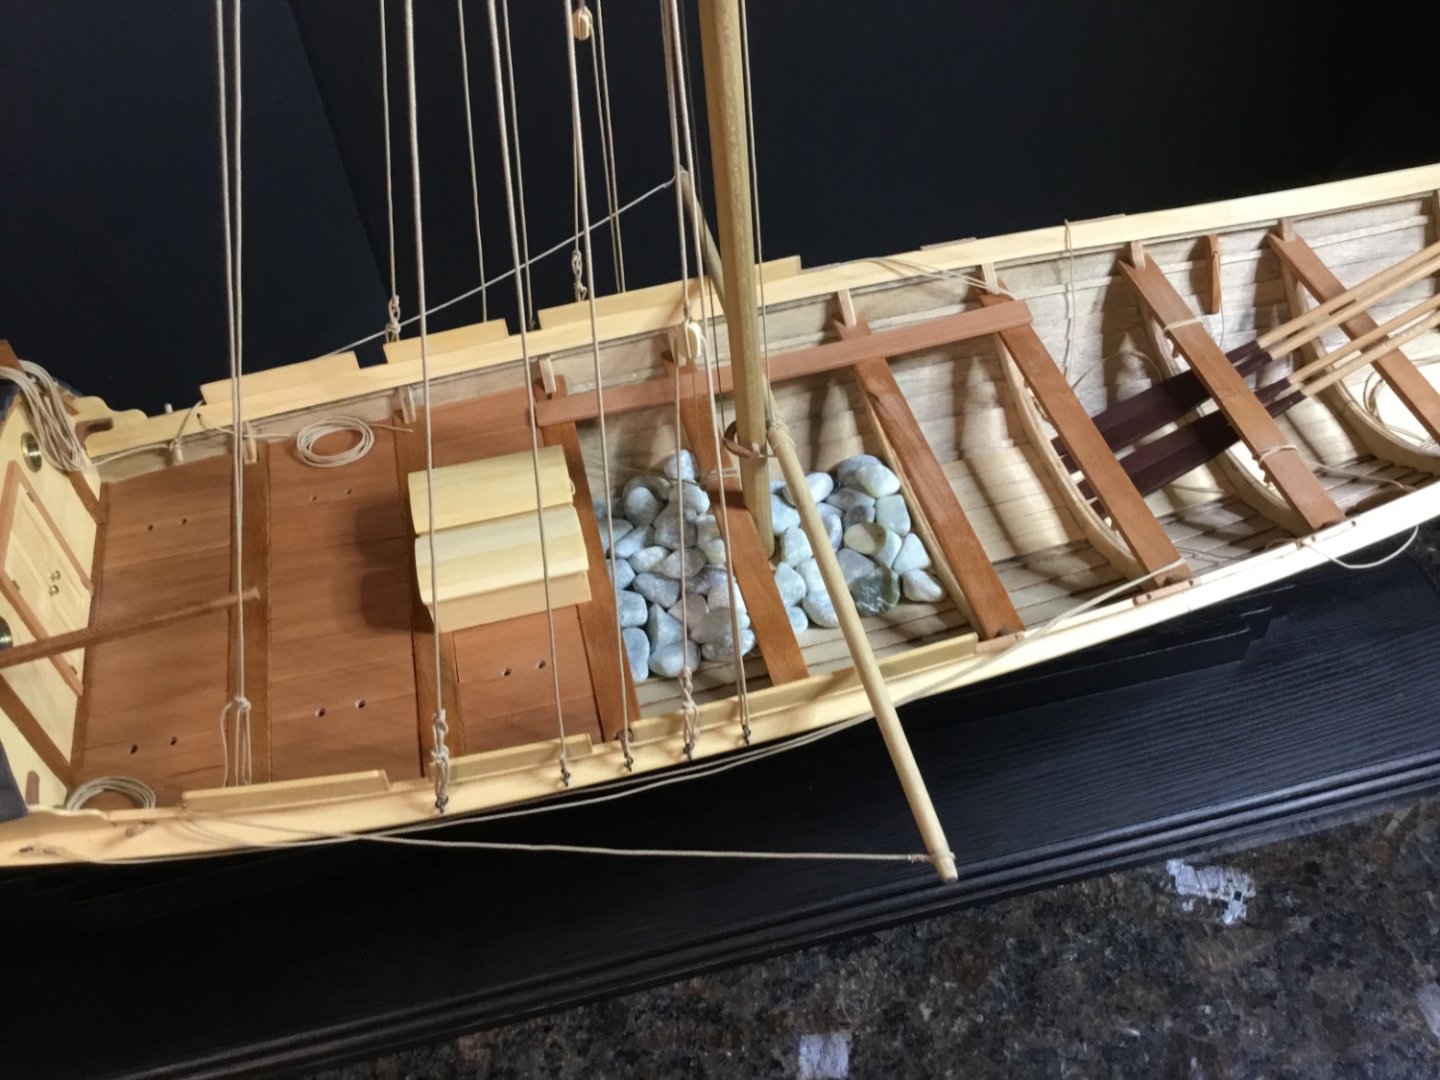
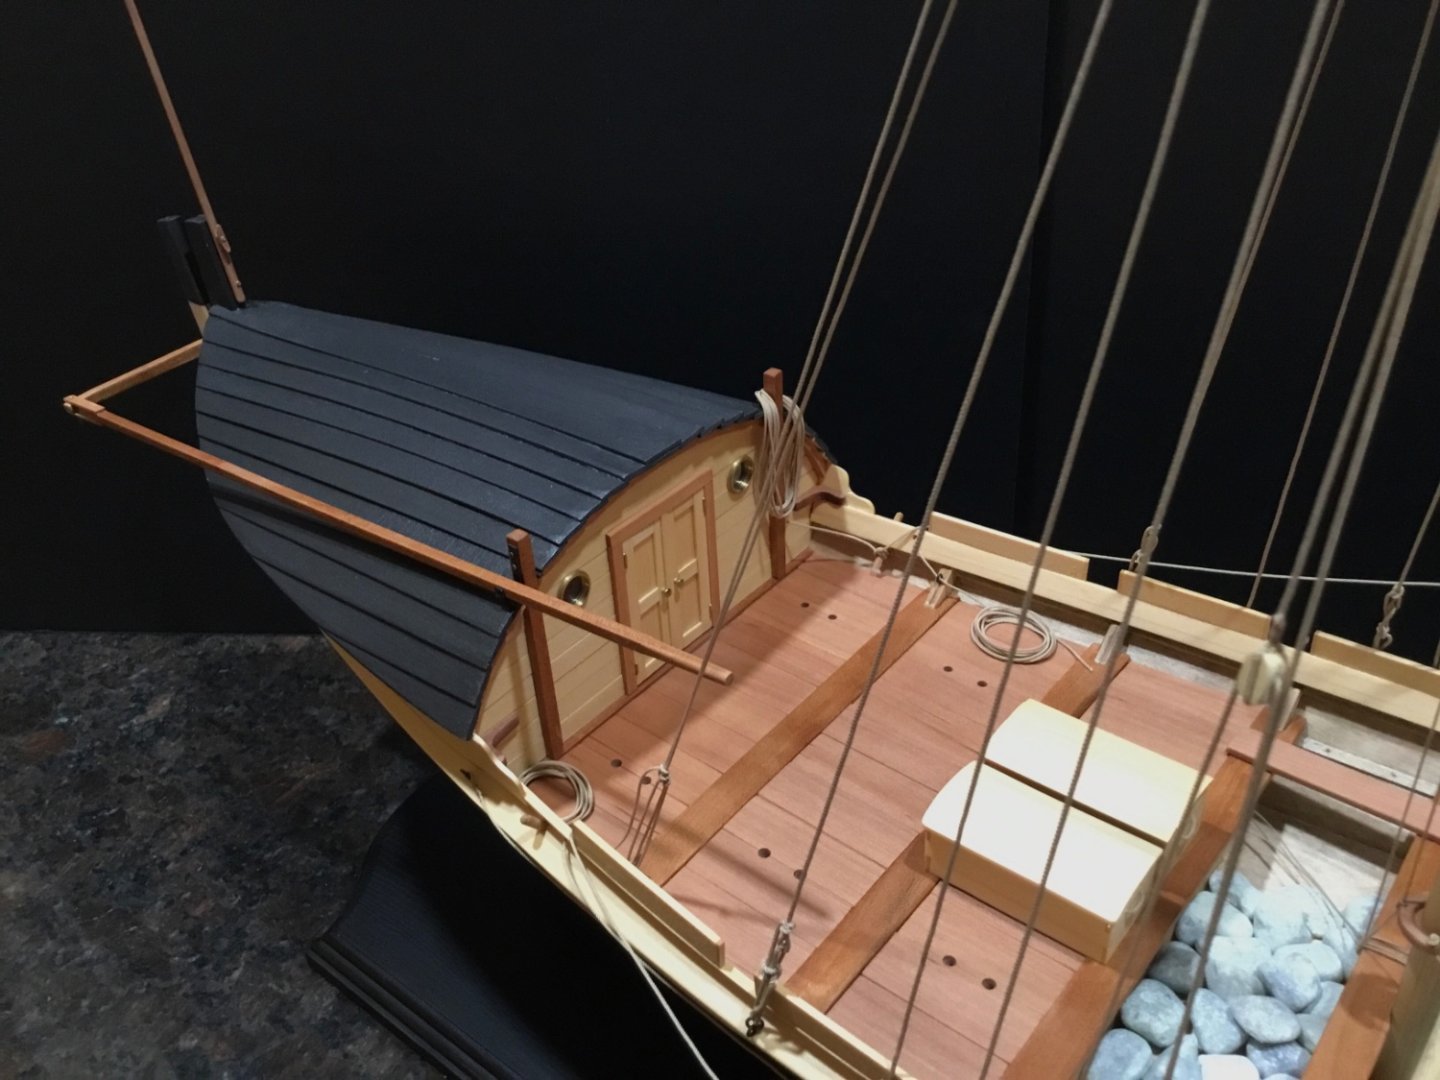
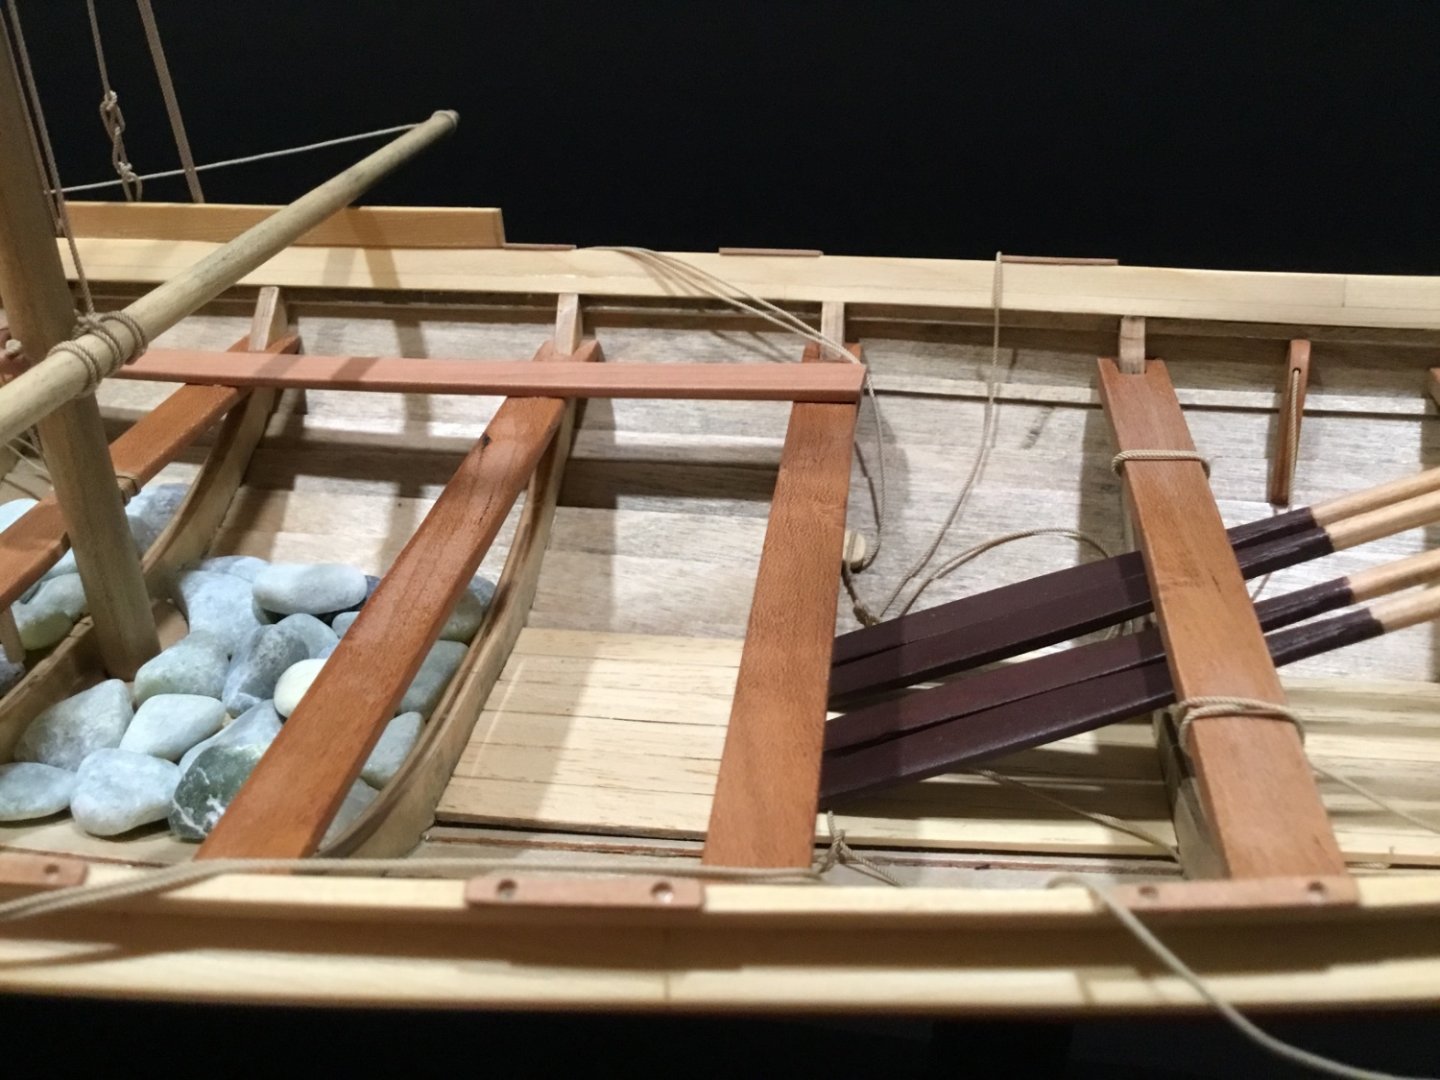
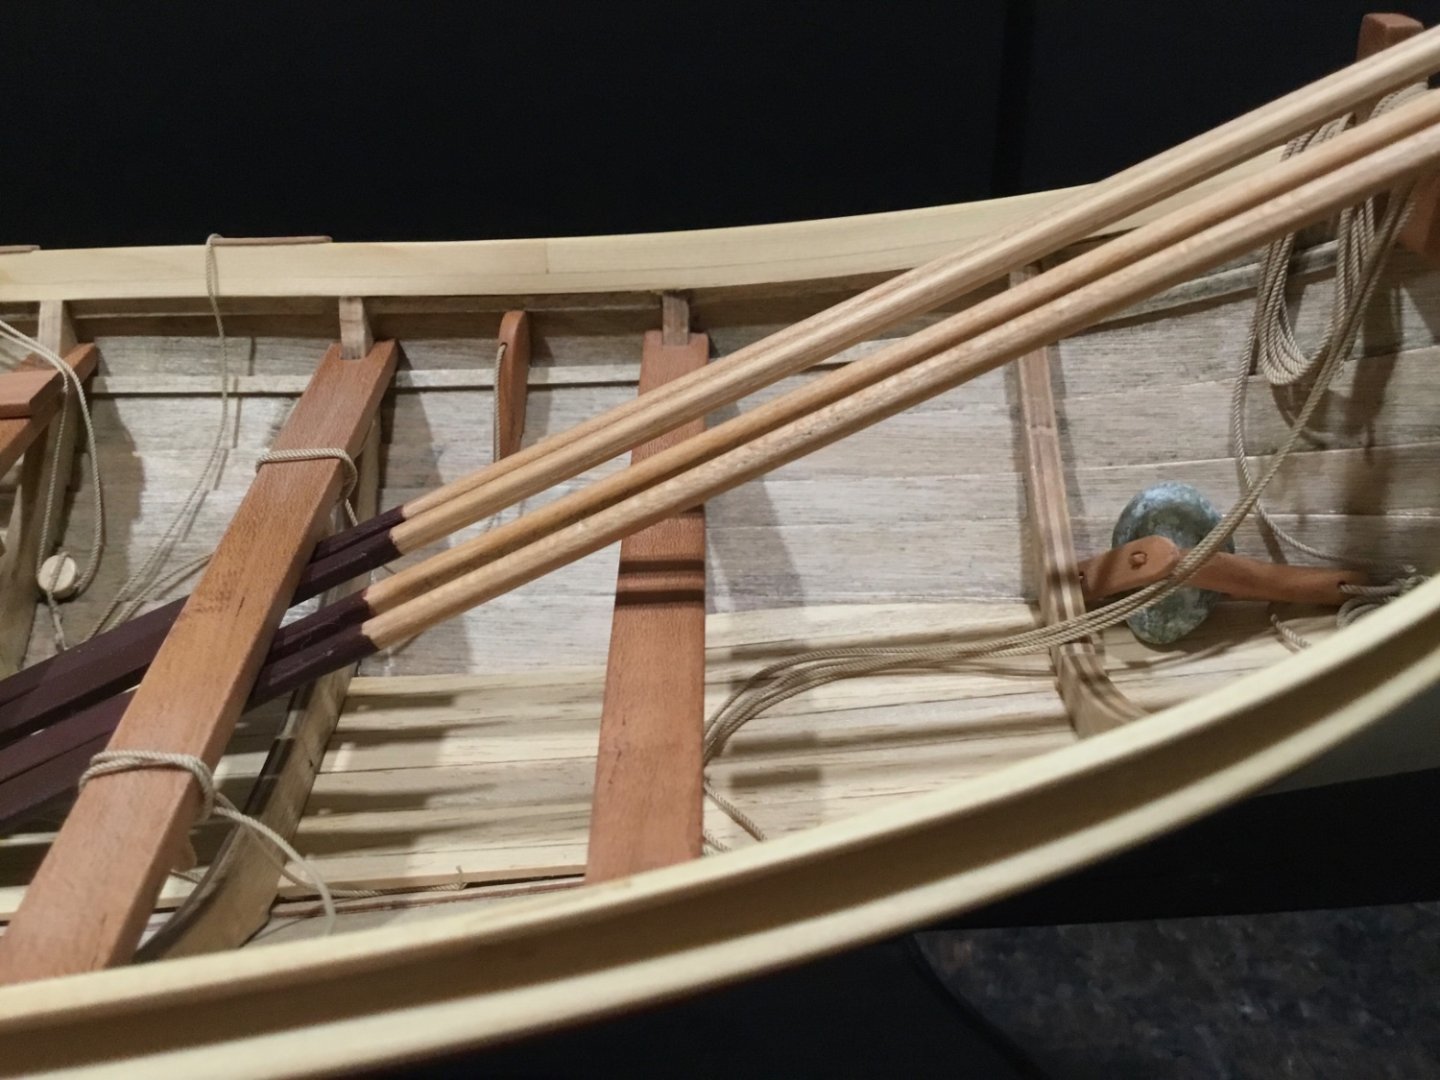
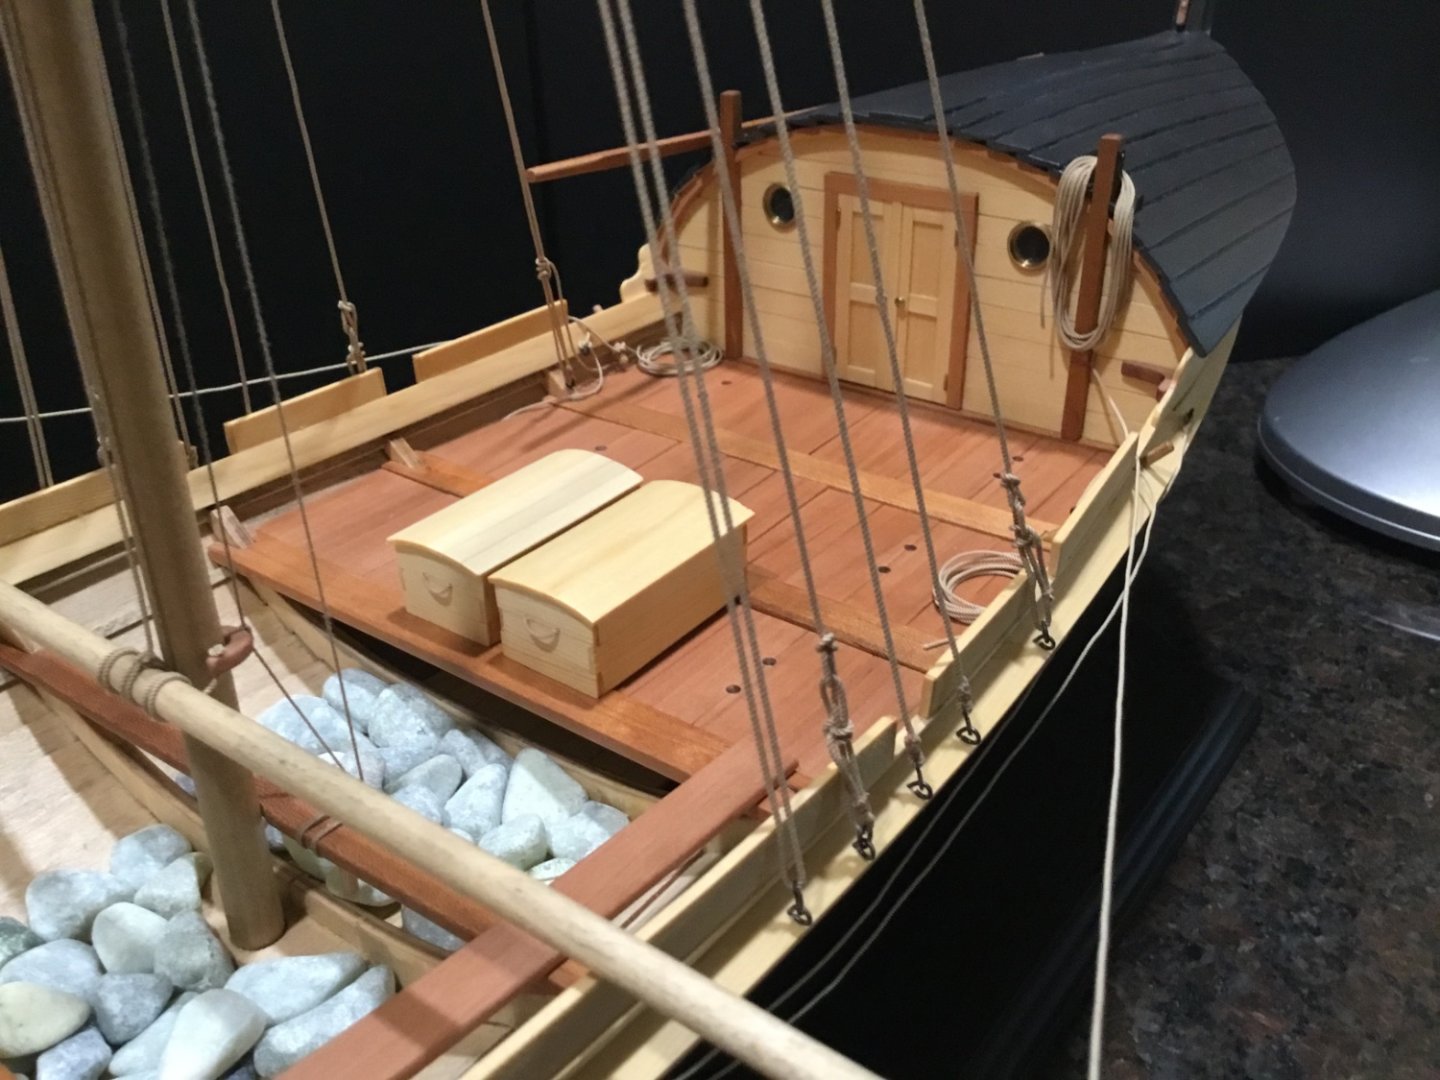
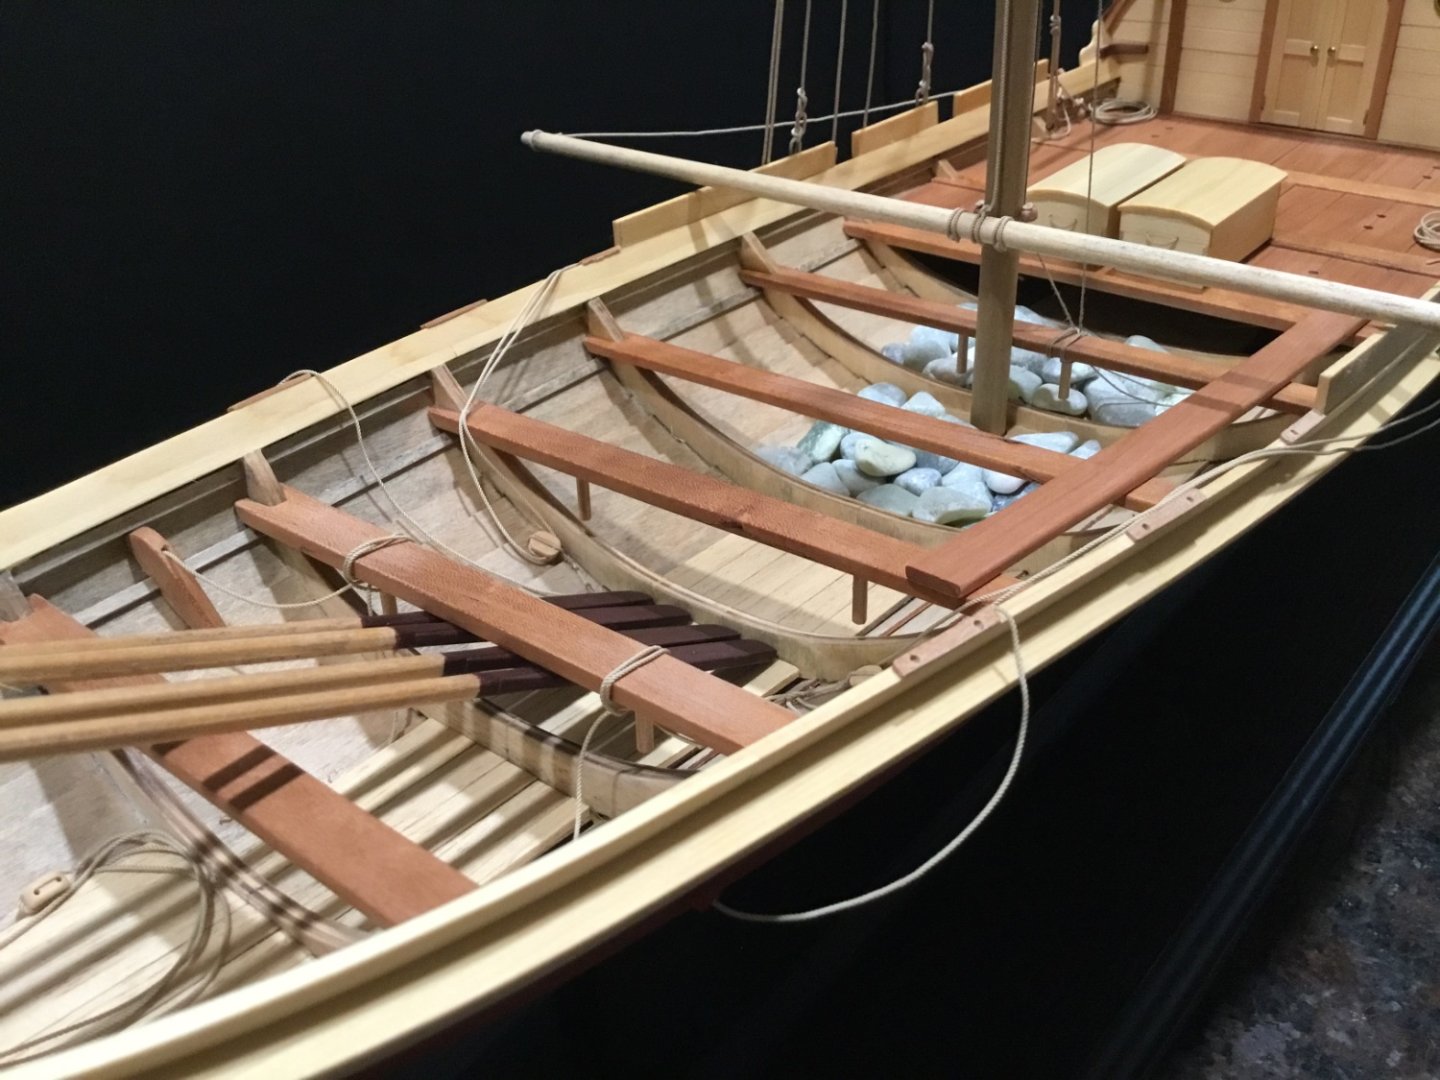
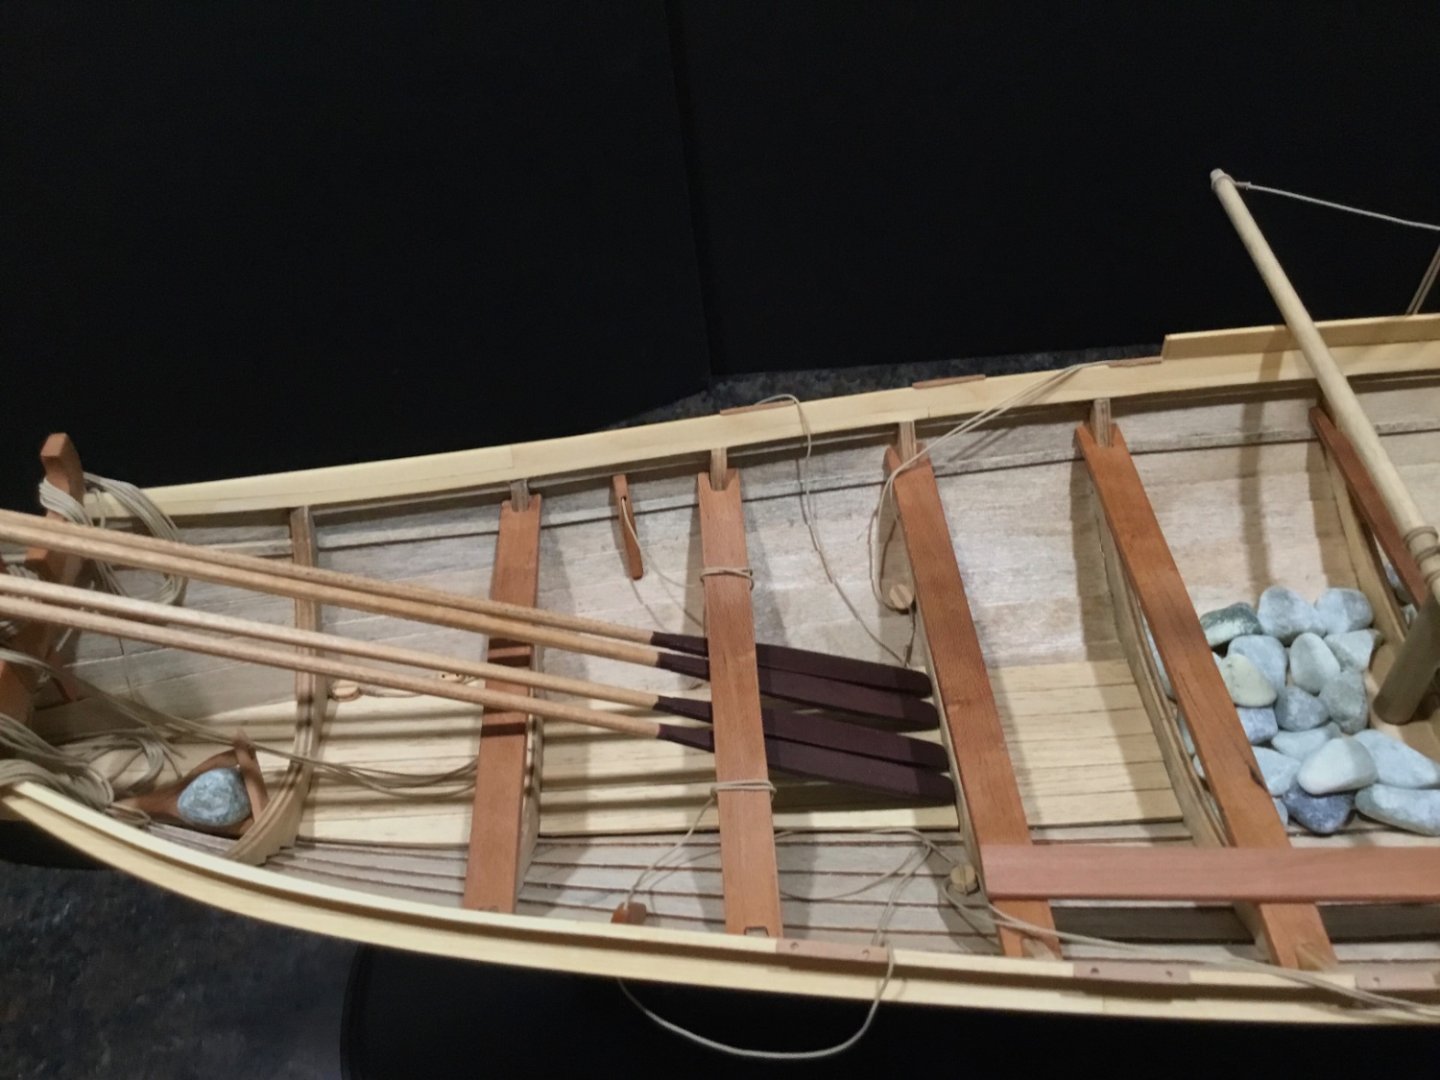
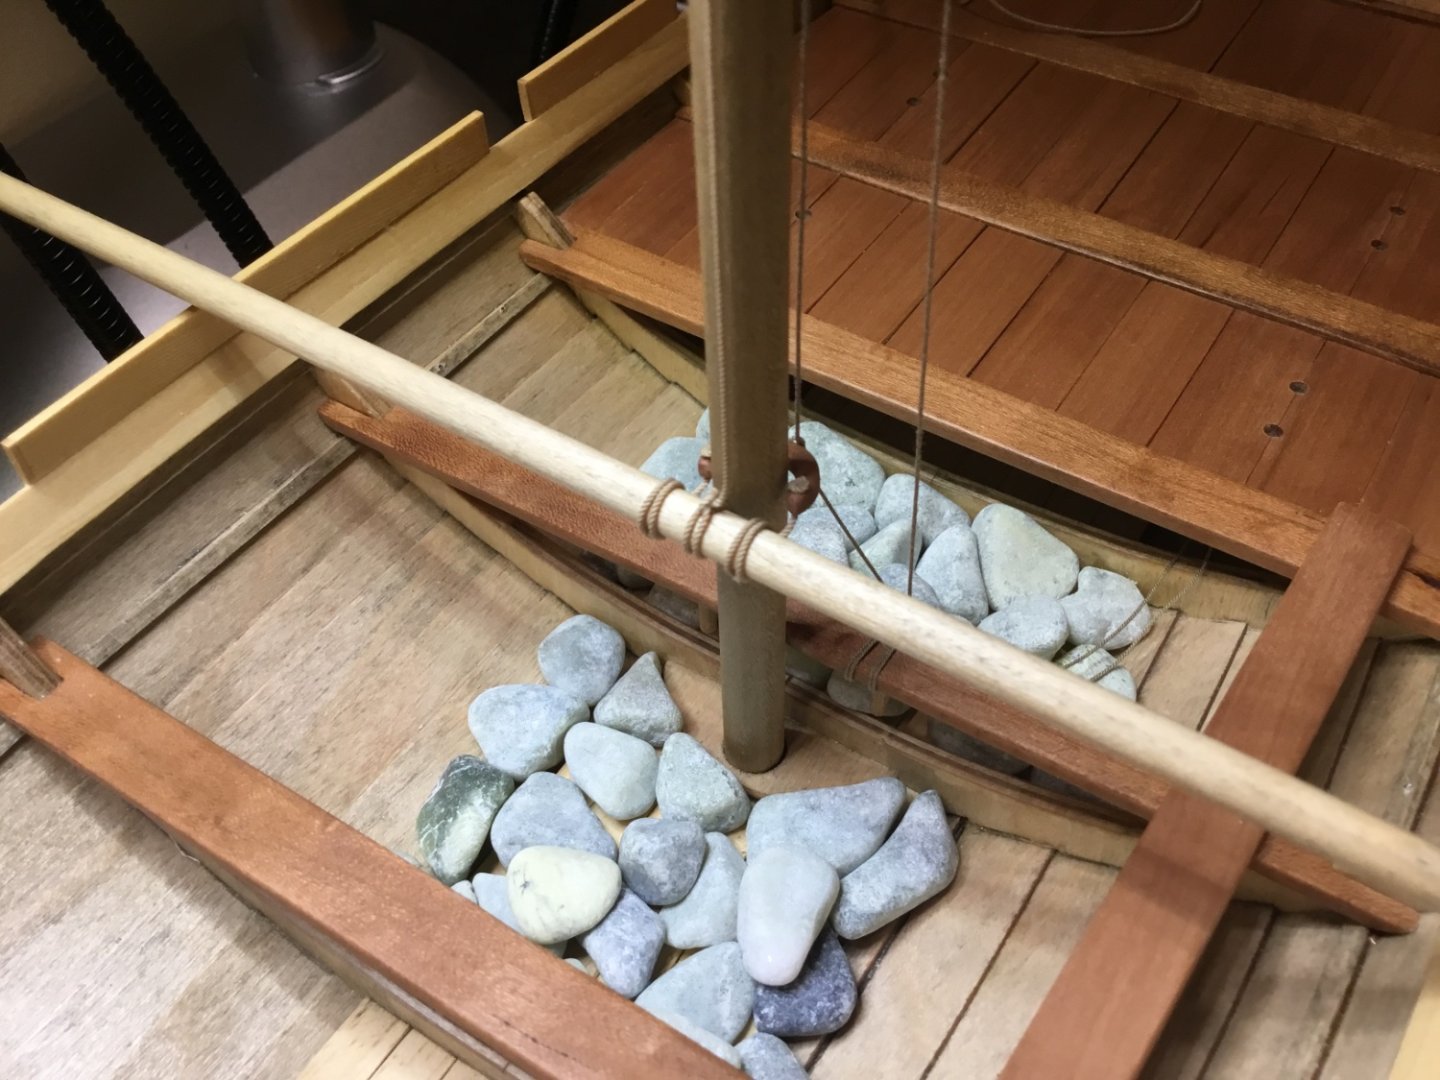
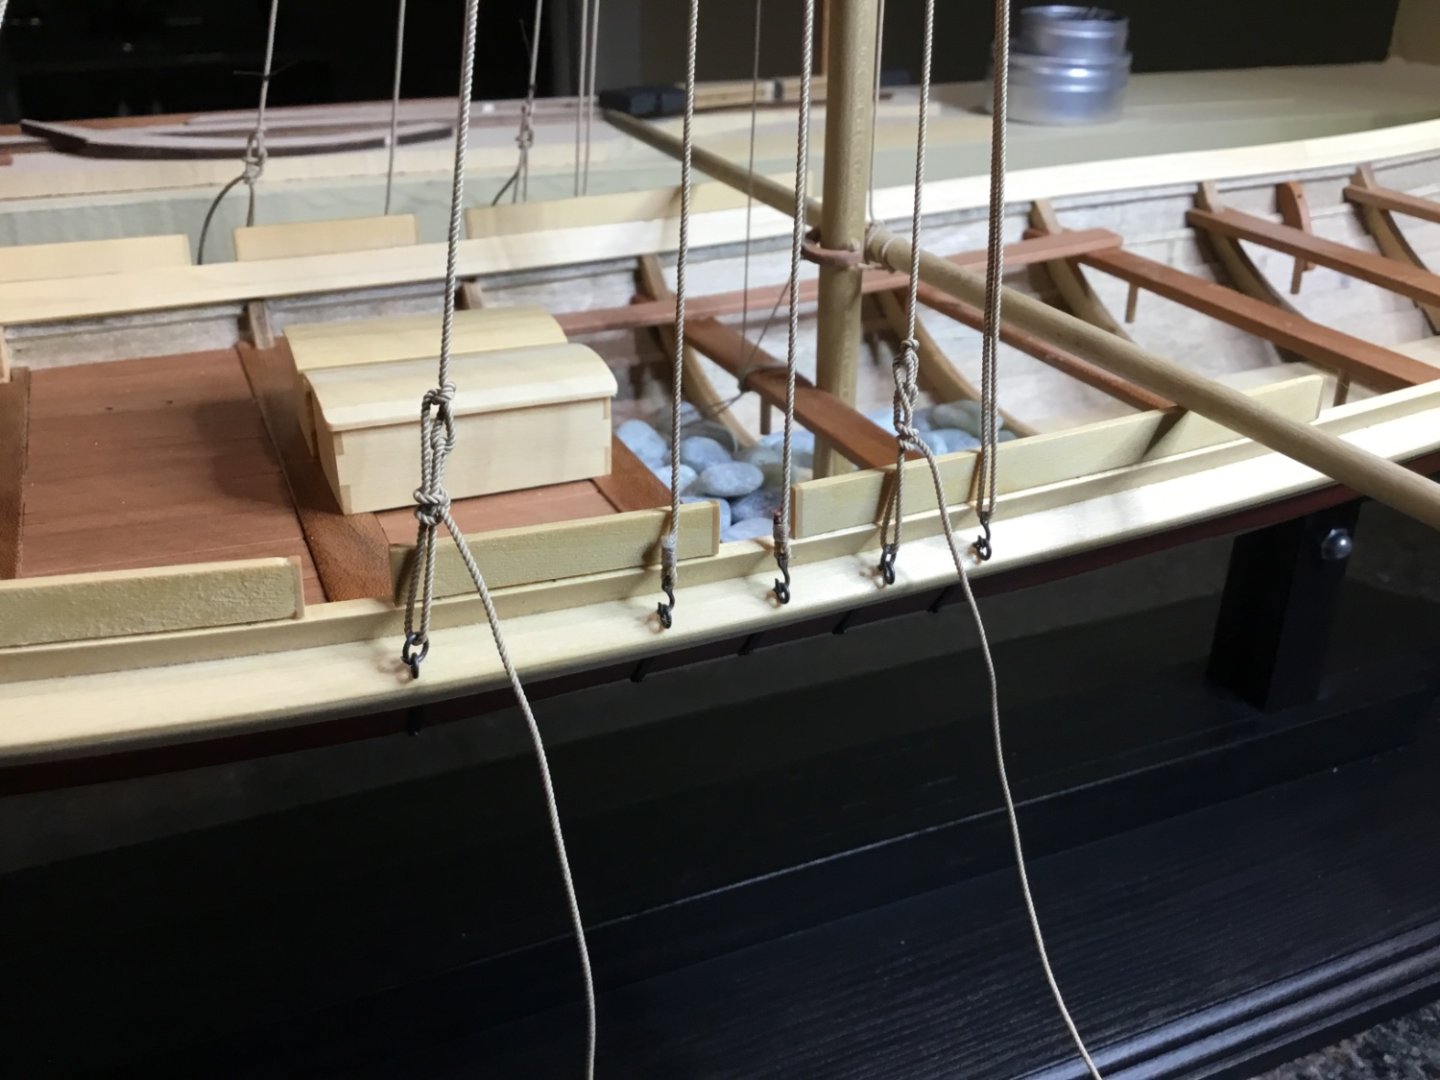
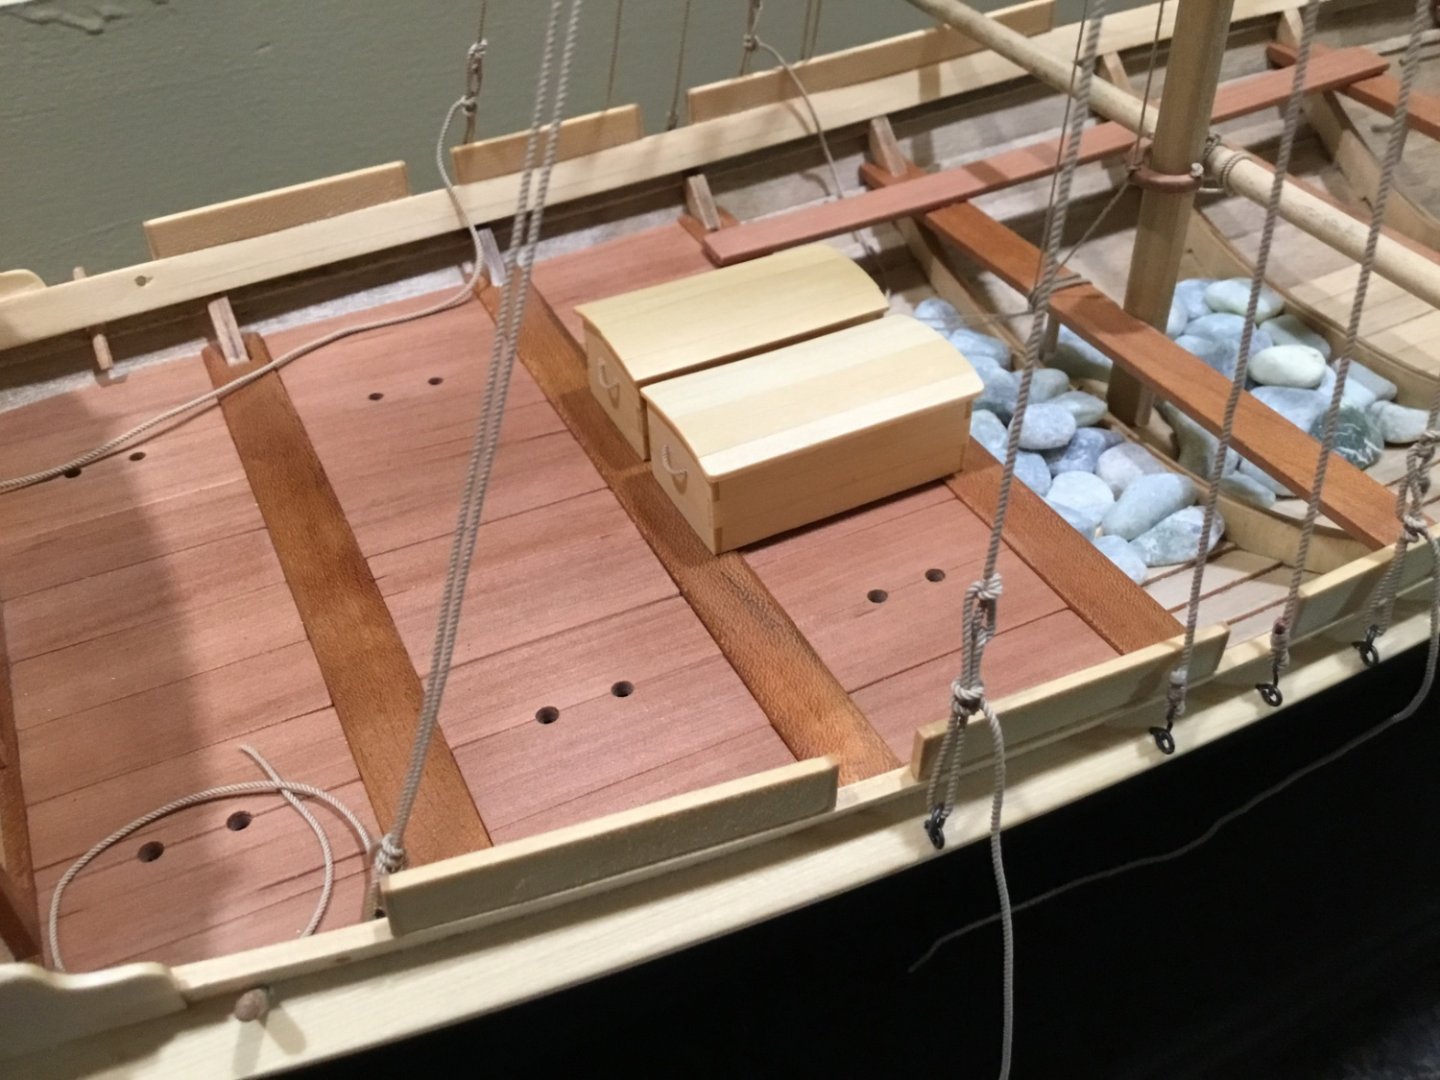
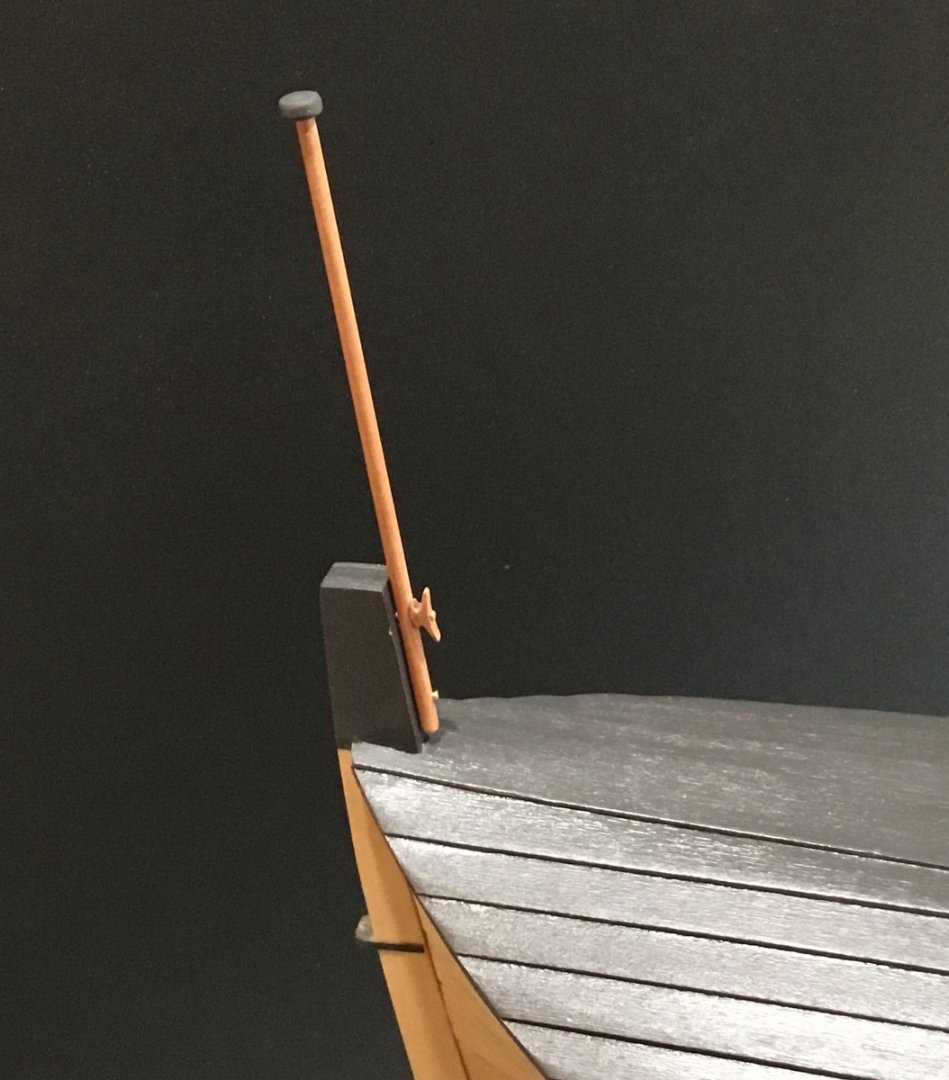
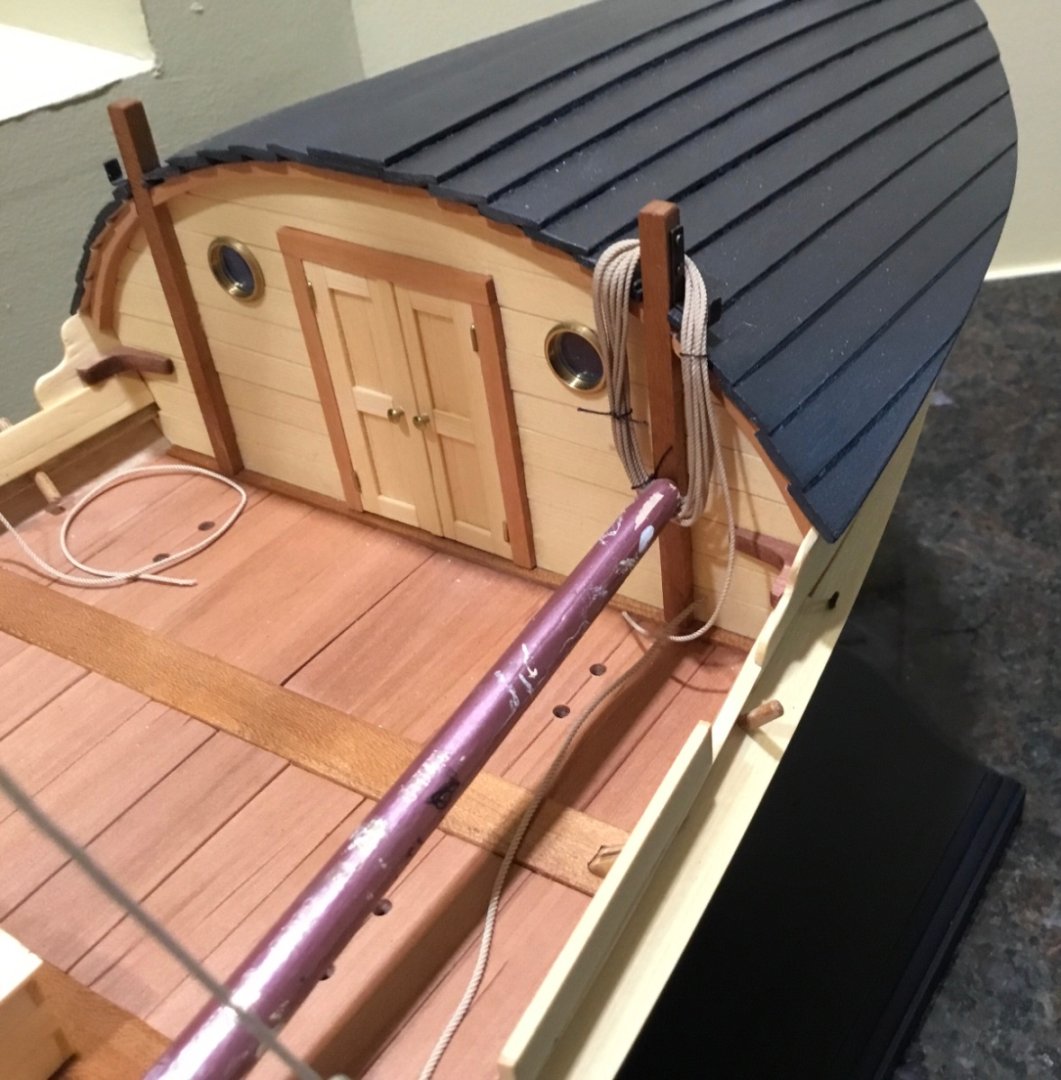
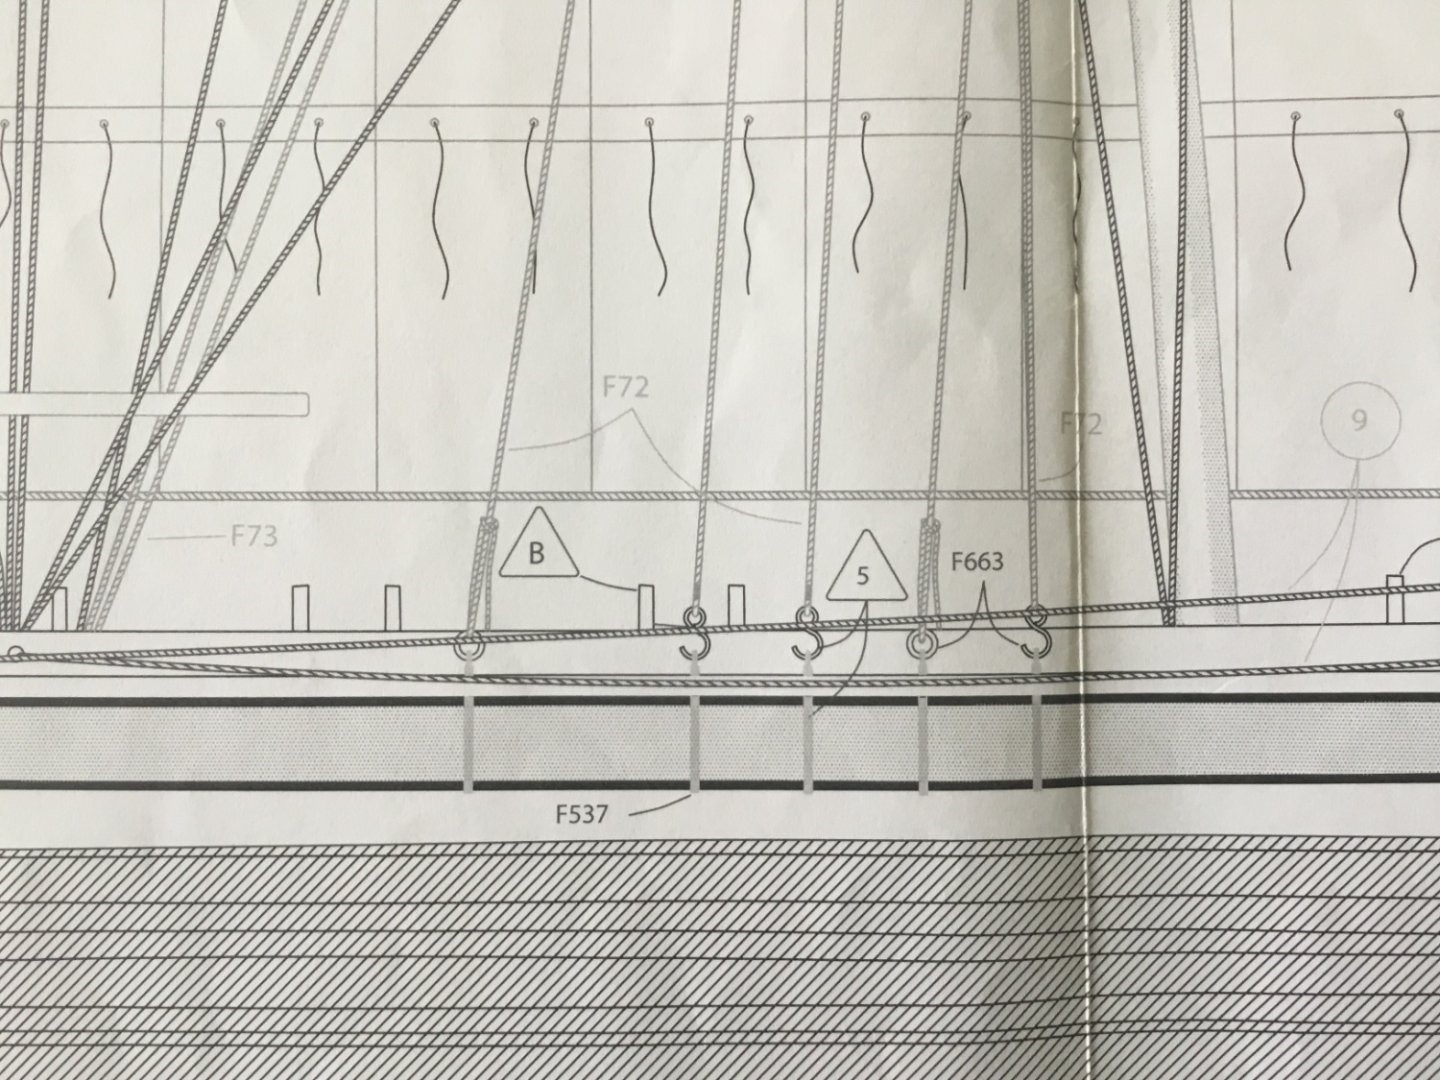
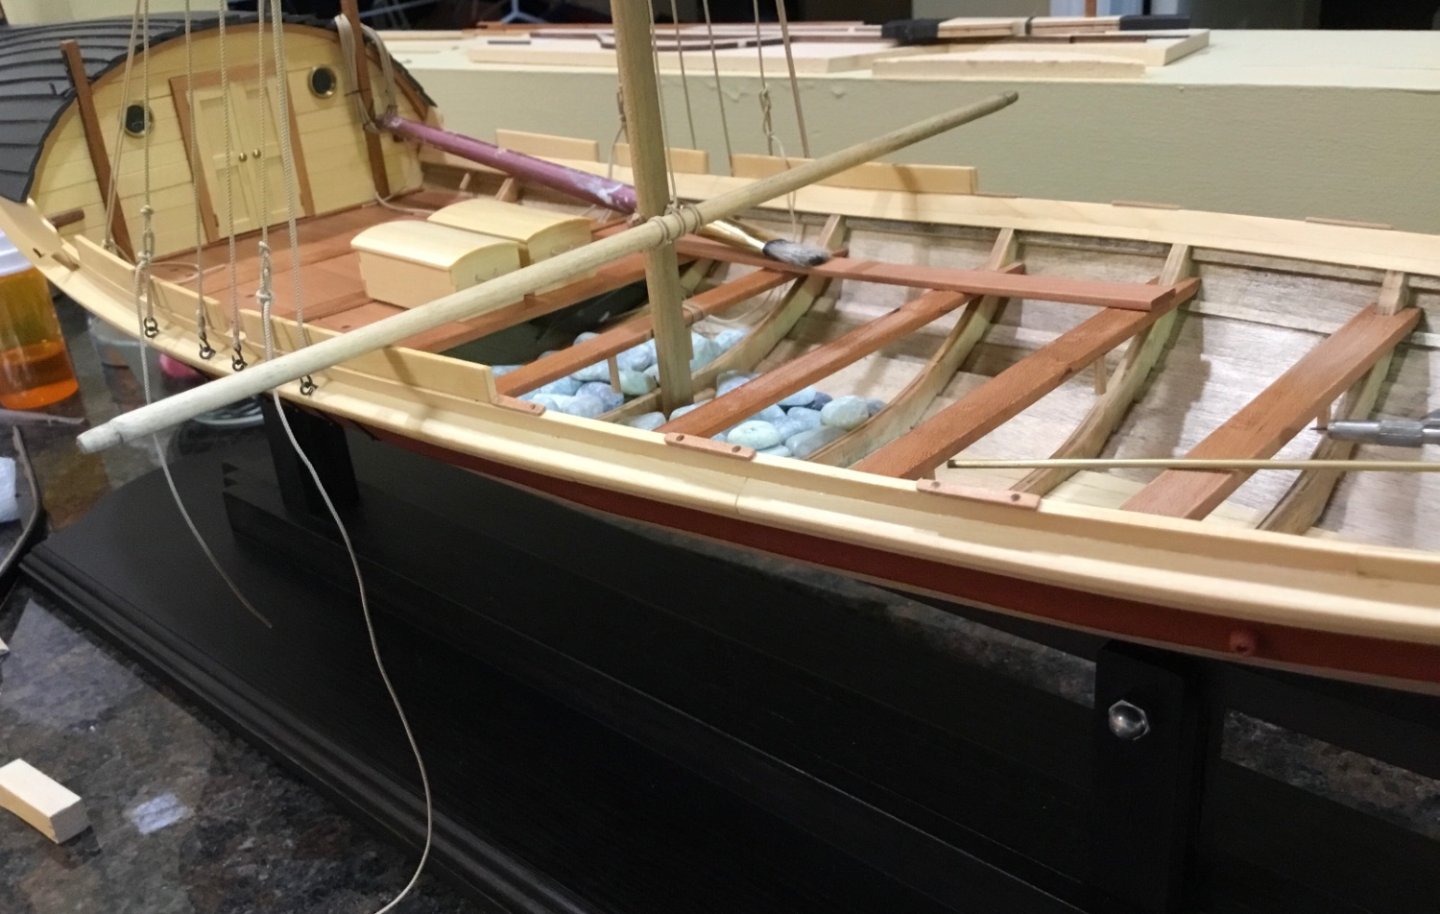
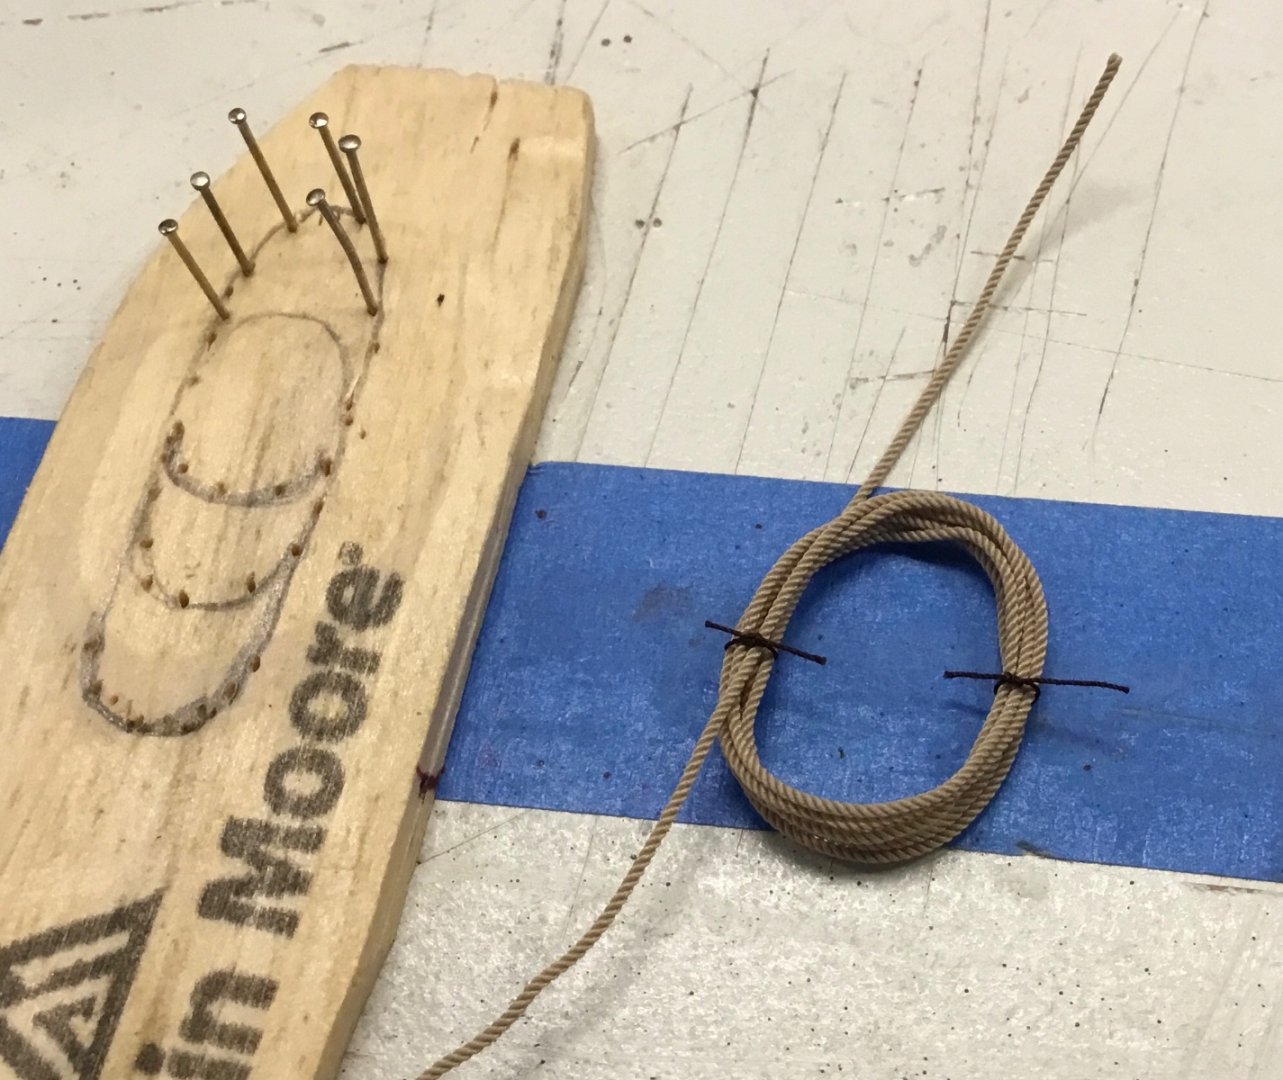
Hi Everyone, thank you very much for your comments and Likes. I have started the rigging process after determining that there would be no sails. Don’t have the wherewithal for making them. Because there will be no sails I am shortening the mast to make it a Nordland boat with just a main sail. This will also save 6 or so inches in height. The yard will be presented in the lowered state. Some of my Nordic rigging terminology may not be correct so bear with me. Four tackle pendants were made and hung from the mast. This is a shot of the drawings. I’m not sure of what kind of knot is being depicted to secure the tackle but there doesn’t look like there’s anything to keep it from slipping. After looking at hundreds of photos and countless hours of videos I’m still no further ahead. So I’m using a truckers hitch. The same went for the main stay. The parrel was made of pear. I just think the wooden ones look neat. The rope attached to the back of the parrel is, I’m assuming used to keep it from jamming on the way up and down. It runs up through a thimble in a sling at the top of the mast. It probably would have looked better if a wooden bull’s eye was used. The storage boxes were moved to the center of the deck and given rope handles. A jig was used to make the various rope coils. Cotton thread was loosely tied around the coil before removing them from the jig. They are placed and gradually shaped using diluted white pva. The Tamiya clear acrylic was leaving white residue so I switched to the pva. The tread is removed or moved as the pva is applied. Usually a small section of each coil is done every day, shaping as needed. The flagpole was mounted and sockets for the oar locks were glued to the rail. I was looking through @killickthere’s amazing Oseberg Viking Ship build log when I saw the stone anchor that he made. I figured that if I was building a real Nordland boat it would have a stone anchor so this model gets one too. Thank you to killickthere for the inspiration. Not far to go now. See you soon.


- 55 replies
-
- 10
-
-
-
- Nordlandsbaaden
- Billing Boats
- (and 1 more)
-
Ken, congratulations on the completion of your ship. She looks great.
-
Review: Worx WX106L cordless Rotary tool
Paul Le Wol replied to mtdoramike's topic in Modeling tools and Workshop Equipment
That’s good to know. I bought a dremel chuck last year for my old dremel 380. The threaded shaft on the 380 isn’t long enough to contact the jaws to make them close. The worx would be a nice upgrade for me. Thanks -
Review: Worx WX106L cordless Rotary tool
Paul Le Wol replied to mtdoramike's topic in Modeling tools and Workshop Equipment
Hi mtdoramike, thank you for the review. In one of your photos you have a chuck mounted on the device. Is this a dremel chuck or does worx have their own? -
Hi Dan, I’ve never tried using a plane for tapering planks but it’s certainly worth trying. A plane is good tool to have handy no matter what.
-
Hi DB, your Saucy Jack is looking great. When I planked my Cheerful using Chuck’s tutorial I would lay out the taper on the plank using the tick strips and then sand to the line. ( leaving the line) Then it was a matter of laying it up against the previous plank to check the fit. After that came the sanding and checking, sanding and checking. I never got along very well with cutting the planks. Sanding gives you more time to see where you are going and make the tiny adjustments you are inevitably going to have to make.
- 59 replies
-
- 3
-
-
- saucy jack
- fishing smack
- (and 2 more)
-
Hi Mango,welcome to the forum. If you introduce yourself in the New Members section you may be able to get some response from members that have built this model. Since this is a common procedure for most models I’m going to suggest that you could try drilling and pinning a strip of 1.5mm basswood down the center of the false keel leaving .75mm on each side. Then sand to the strip of wood. After you are finished you can remove the wood strip. Some directions will have you do this before installing the bulkheads but your still good
- 22 replies
-
- 1
-
-
- first build
- Lady Nelson
- (and 2 more)
-
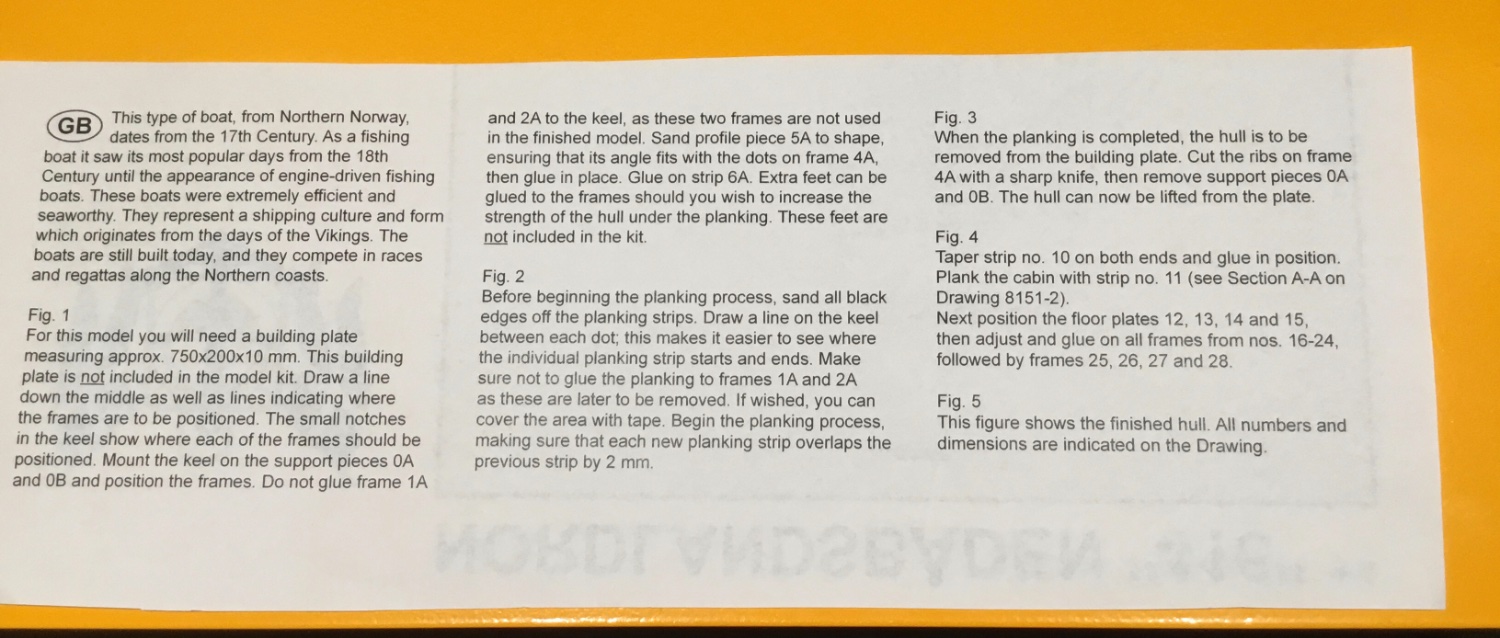
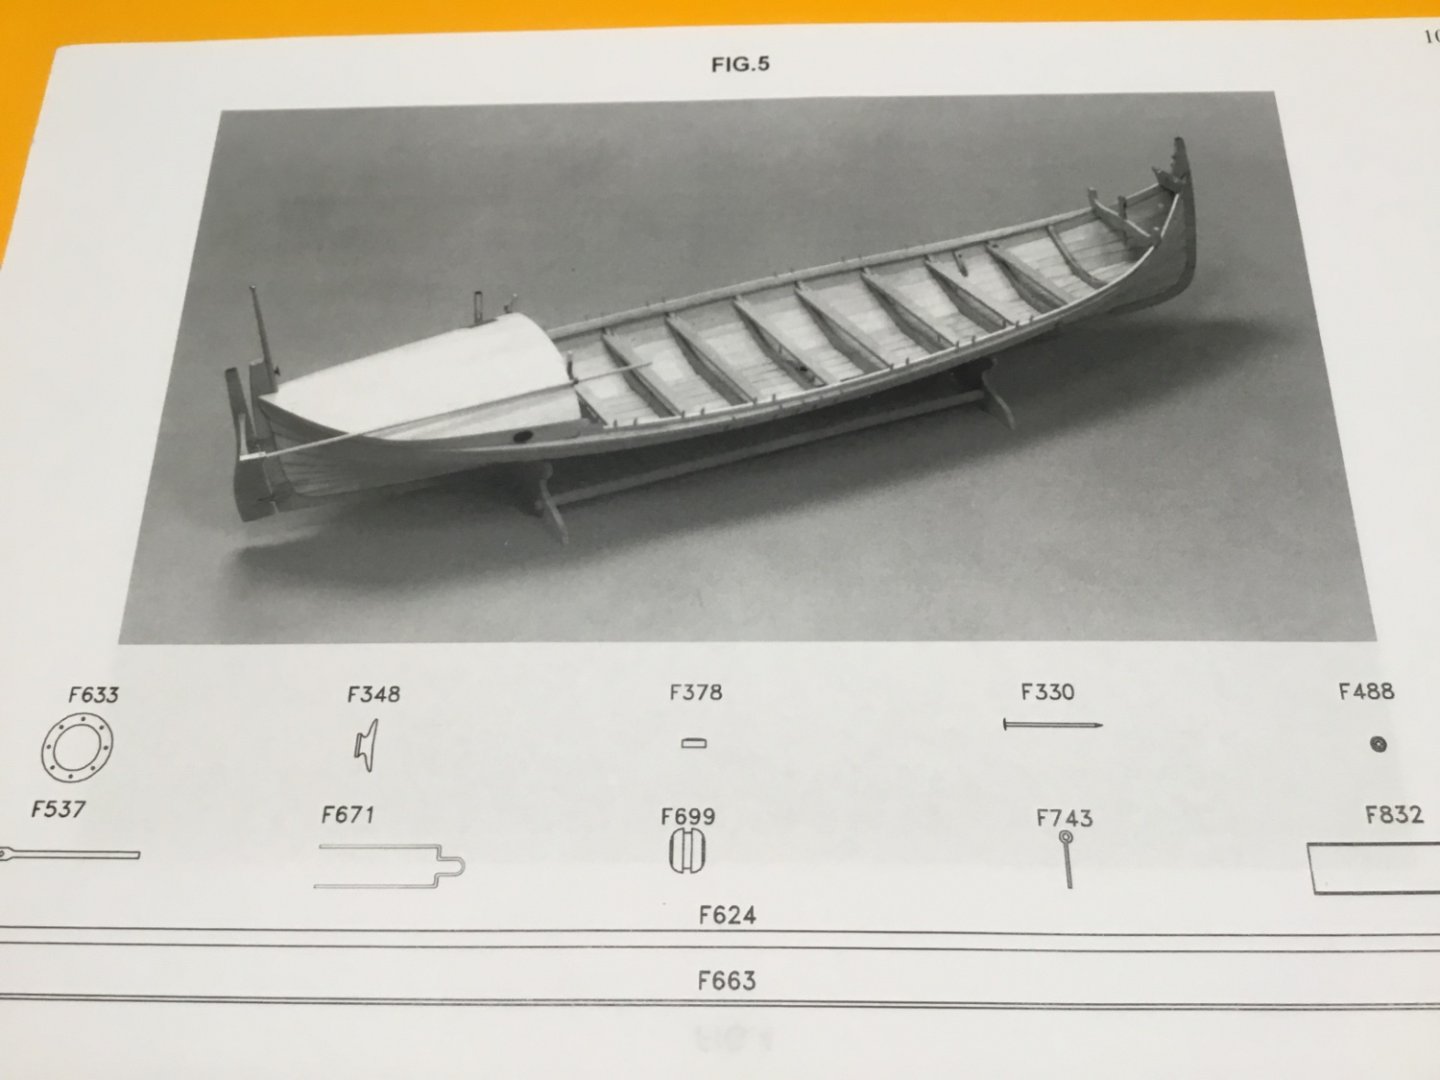
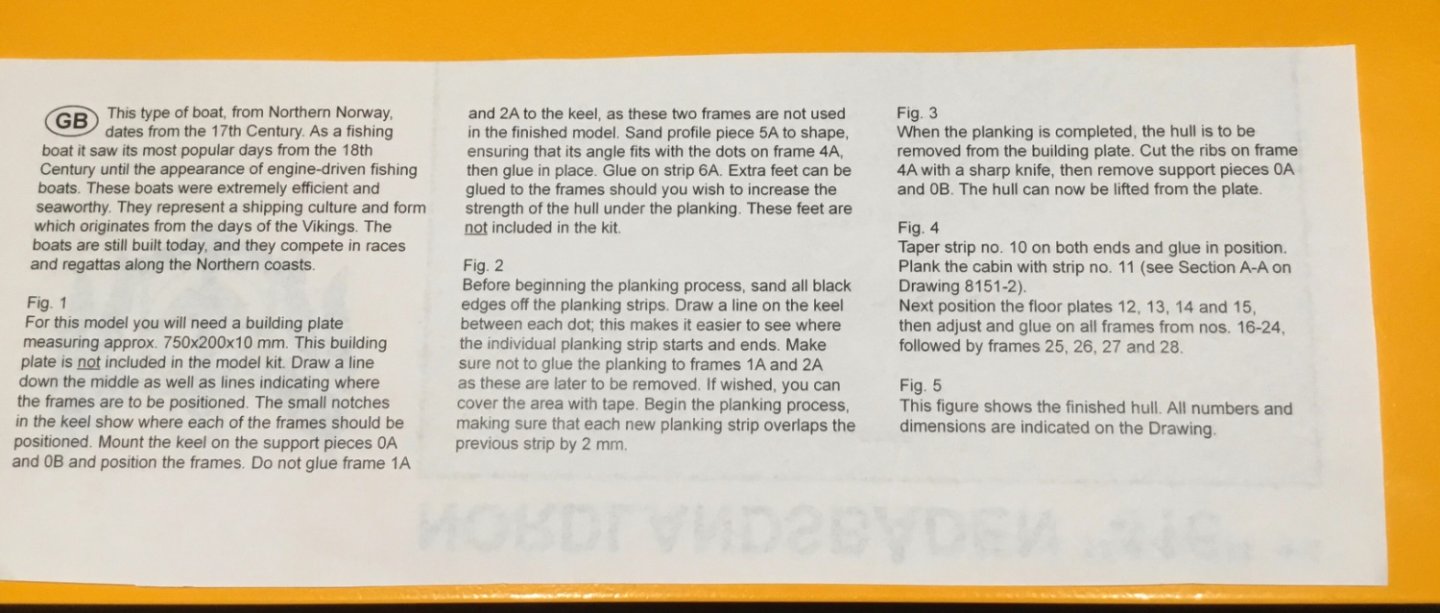
Hey Bob, here are the directions and one of the photos mentioned in them (figure 5). The biggest challenge for me was getting the planks to overlap correctly. They say to overlap them 2mm. If you stray too far from that measurement then you start having issues getting the planks to sit right. That’s why I had to remove the hull from the build board after half of the planking was done. I kind of lost my way and the only way I could get back on track was to flip it over and see what was happening on the inside of the hull. Attaching the ribs before finishing the rest of the planking made it easier for me because I could see where the planks needed to go. I’m sure that if you keep the overlap correct you won’t have the same problem that I had and could leave it on the build board until the planking is completed. I didn’t wet any of the planks to try and shape them. Maybe I should have. Another thing that was a bit confusing was that some of the planks needed their length adjusted. In hindsight I should probably have trimmed a bit off each end but I didn’t. Just trimming one end might have thrown things off a bit because some of these planks have some pretty wild shapes.
- 55 replies
-
- 4
-
-
- Nordlandsbaaden
- Billing Boats
- (and 1 more)
-
Thank you so much Bob. This boat has had its challenging moments but overall it’s been a lot of fun. Now that I think about it all boats have their moments
- 55 replies
-
- 2
-
-
- Nordlandsbaaden
- Billing Boats
- (and 1 more)
-
Thank you Waldemar, you are very kind. I also like this style of working. Paint is not a friend of mine.
- 55 replies
-
- 1
-
-
- Nordlandsbaaden
- Billing Boats
- (and 1 more)