HOLIDAY DONATION DRIVE - SUPPORT MSW - DO YOUR PART TO KEEP THIS GREAT FORUM GOING! (89 donations so far out of 49,000 members - C'mon guys!)
×

DB789
-
Posts
428 -
Joined
-
Last visited
Content Type
Profiles
Forums
Gallery
Events
Everything posted by DB789
-
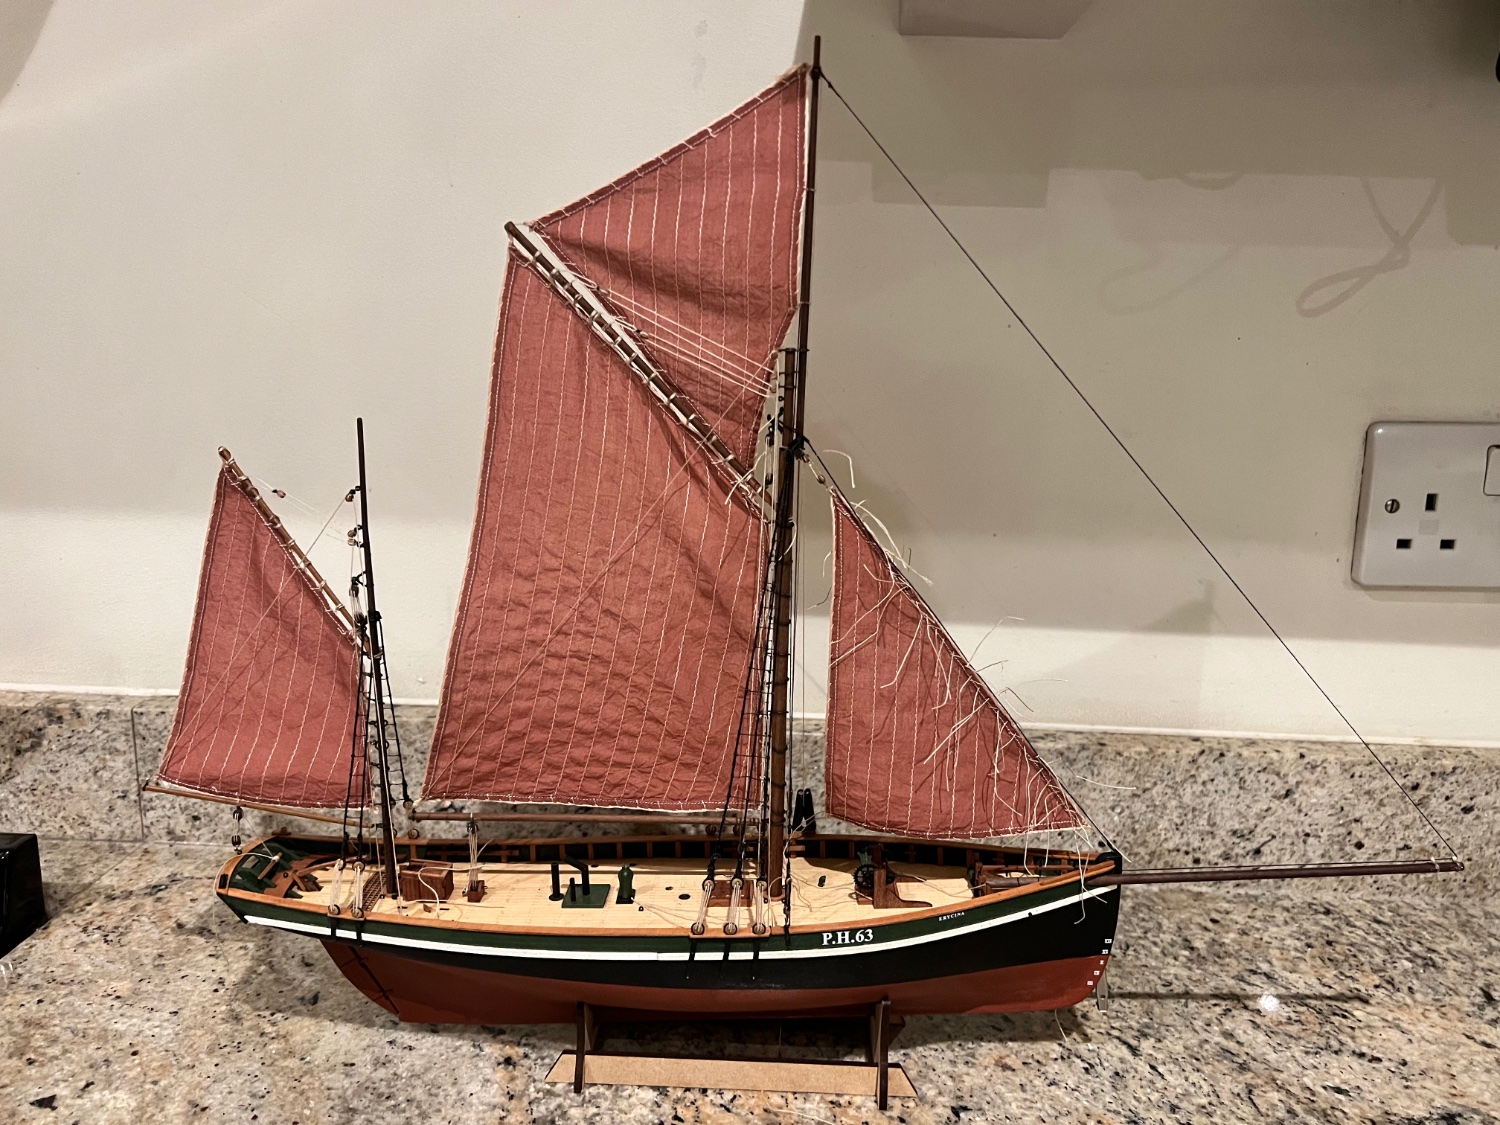
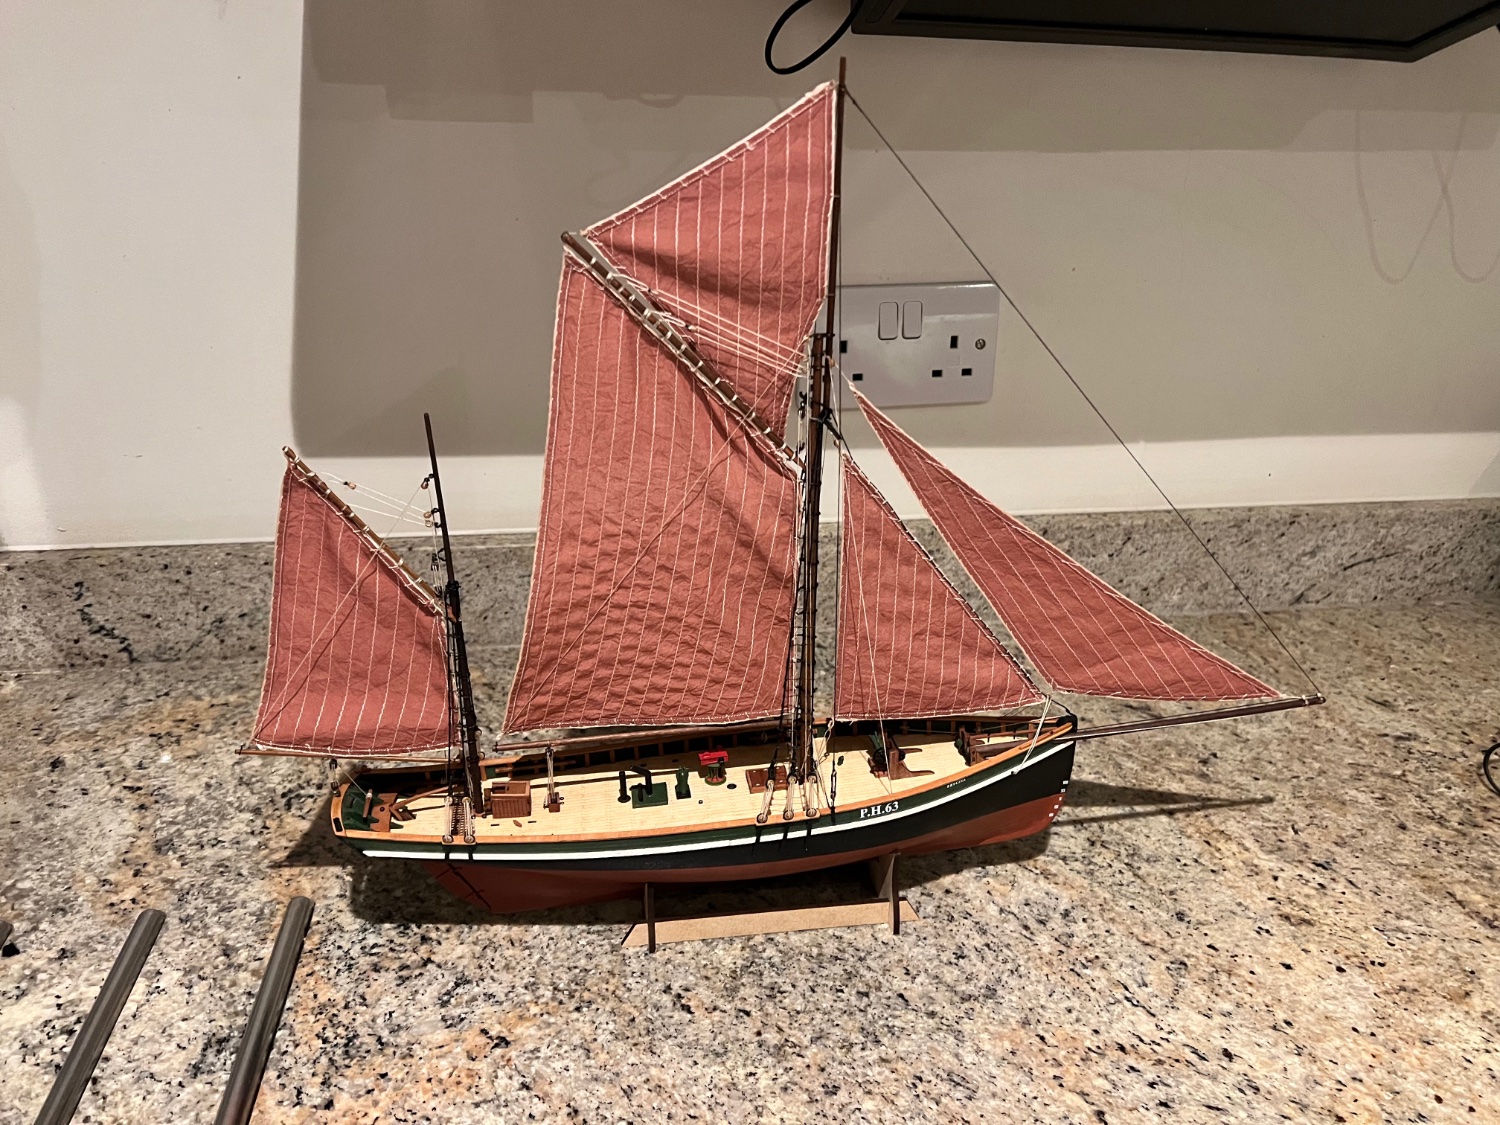
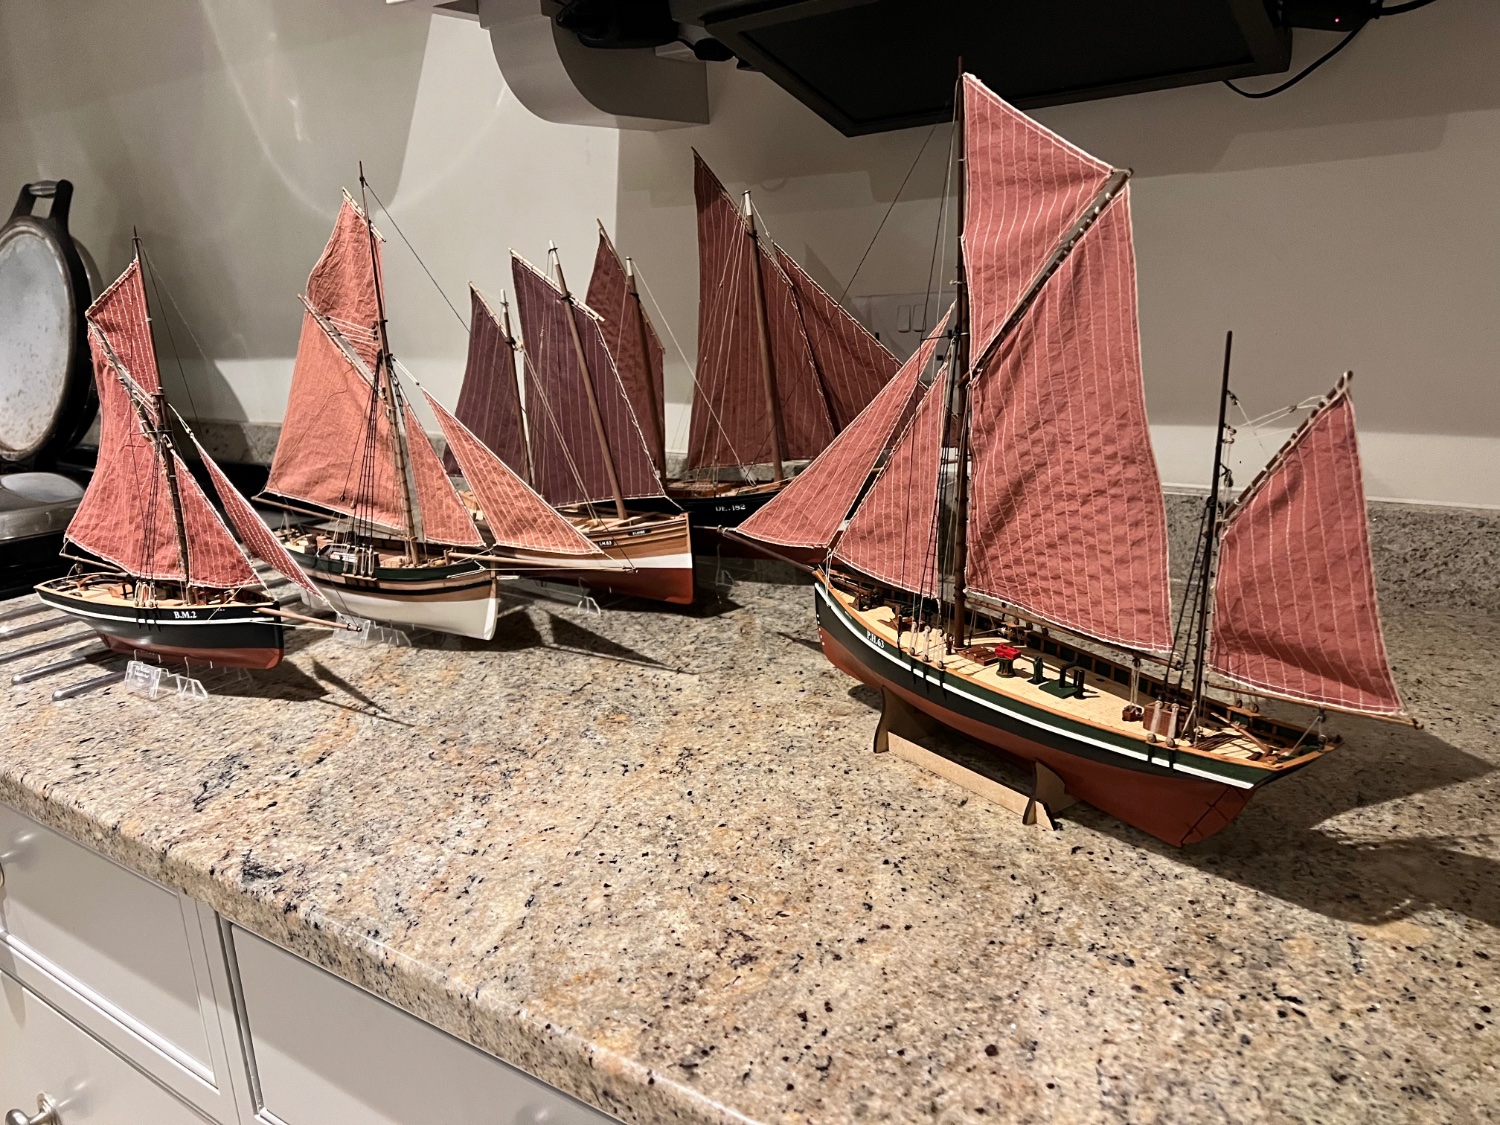
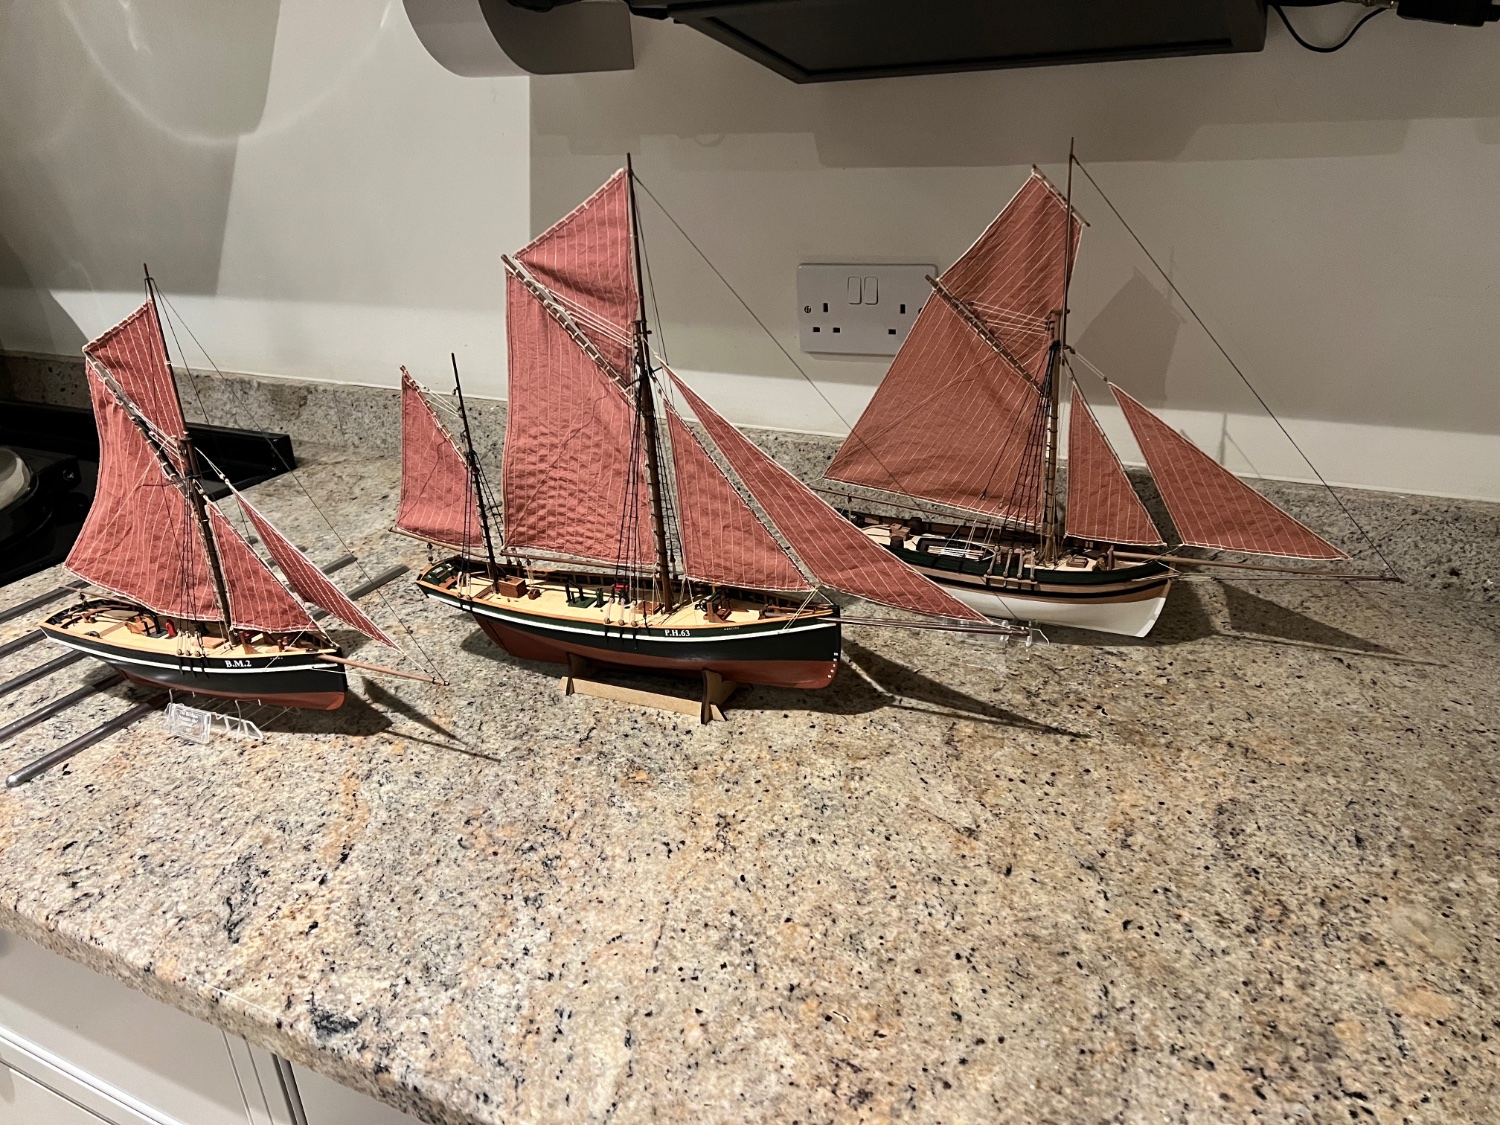
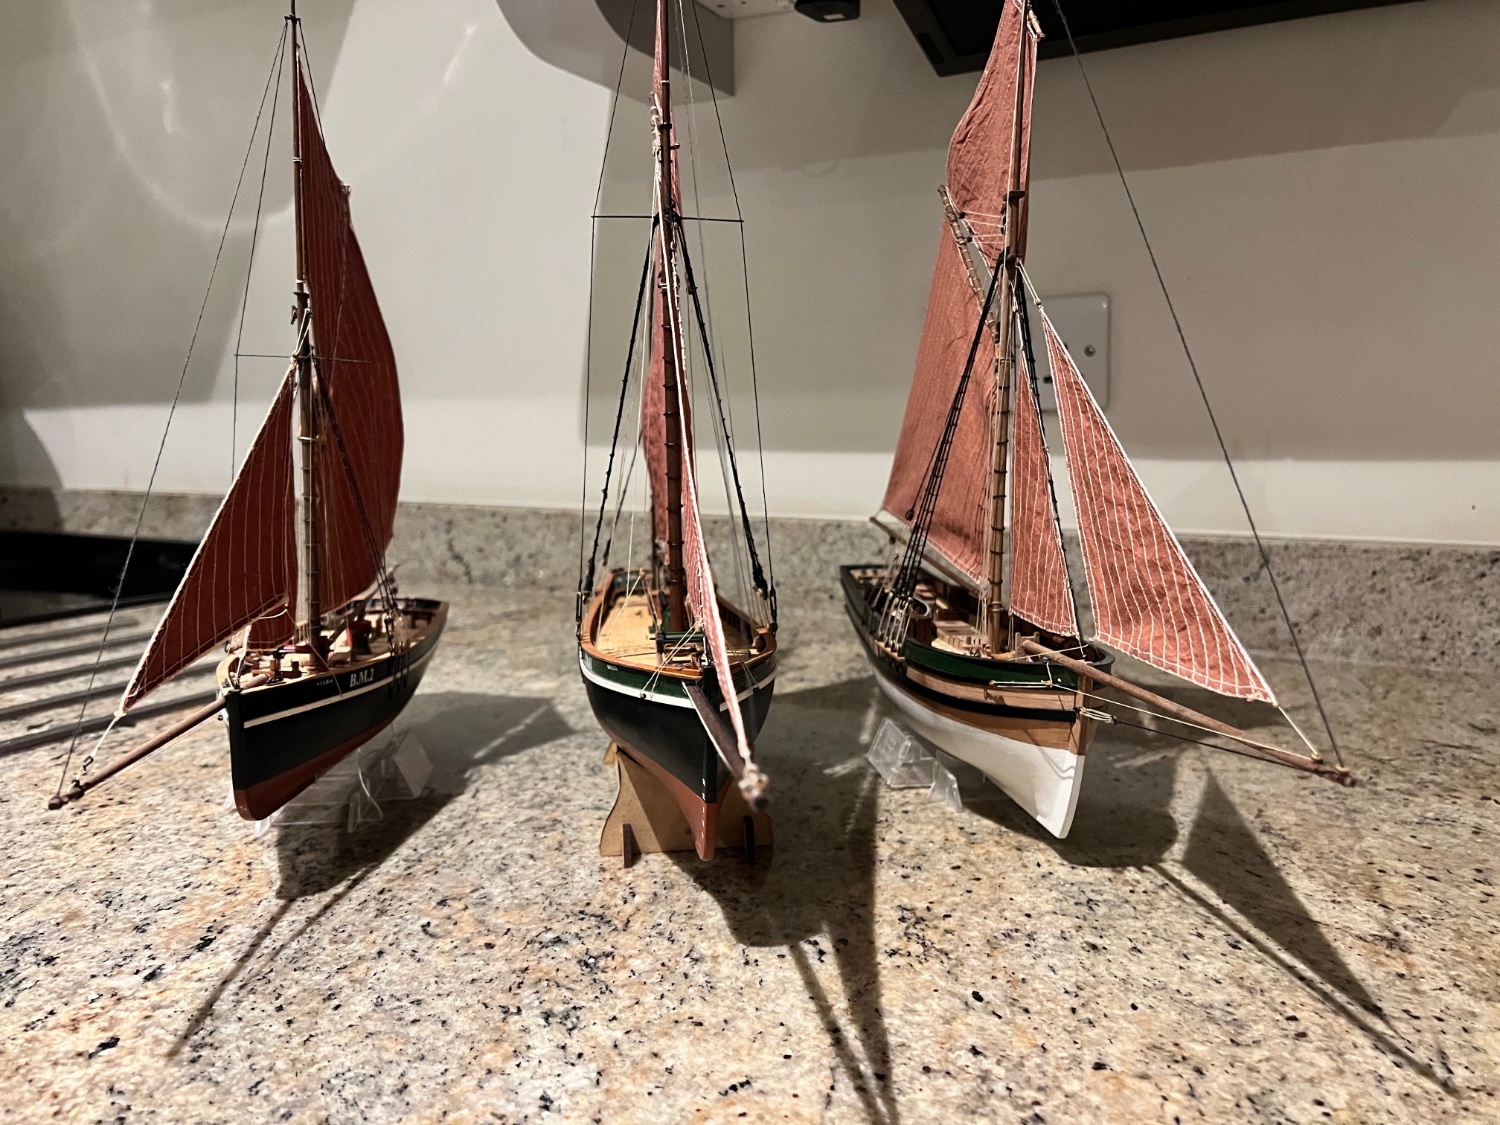
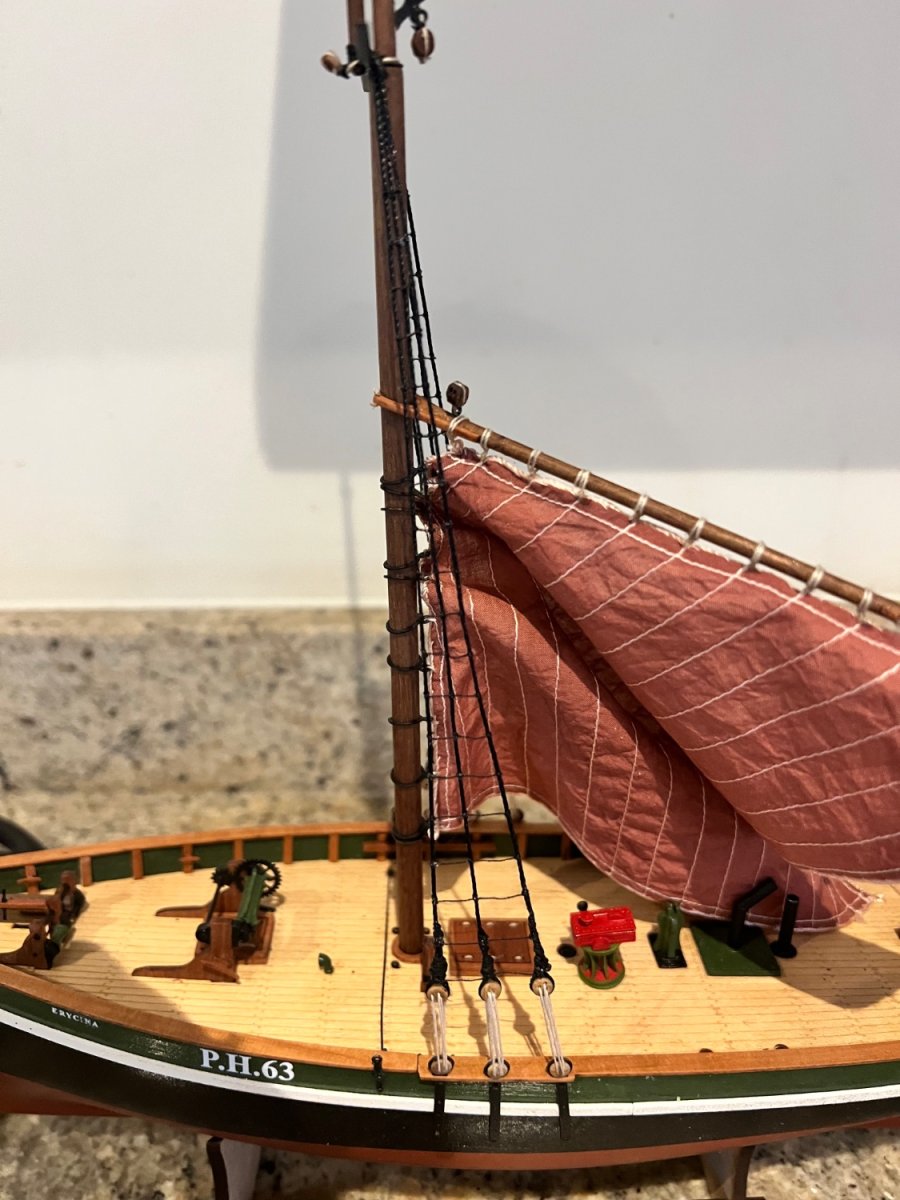
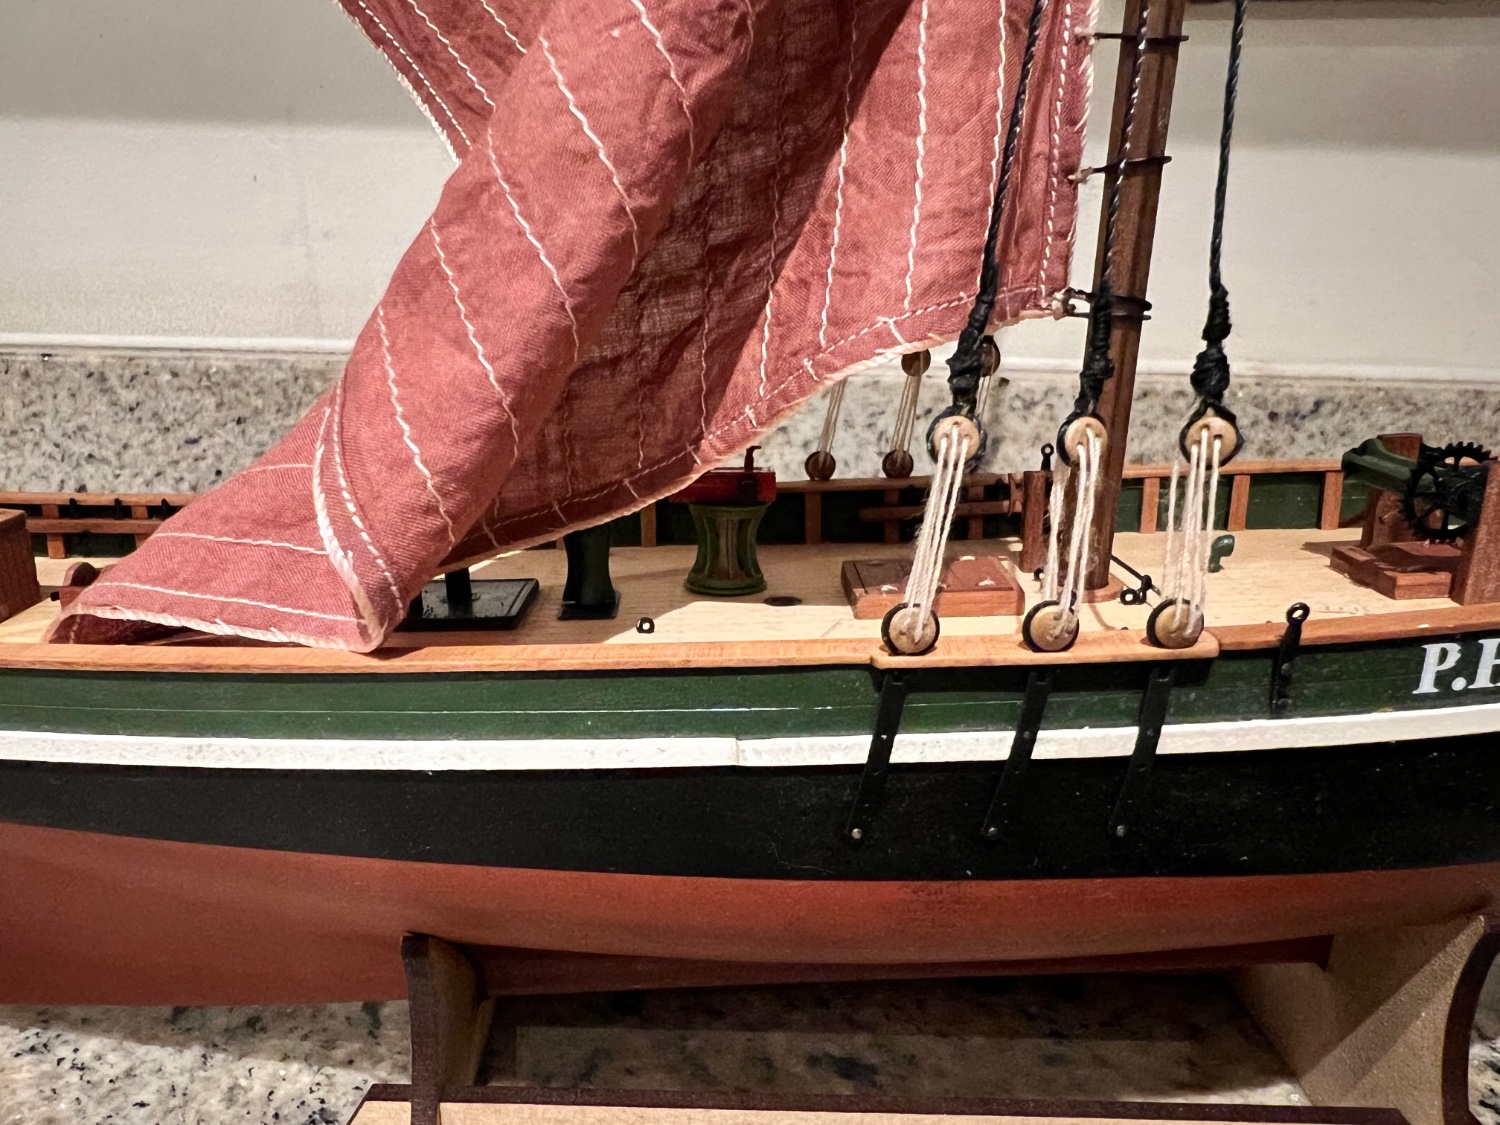
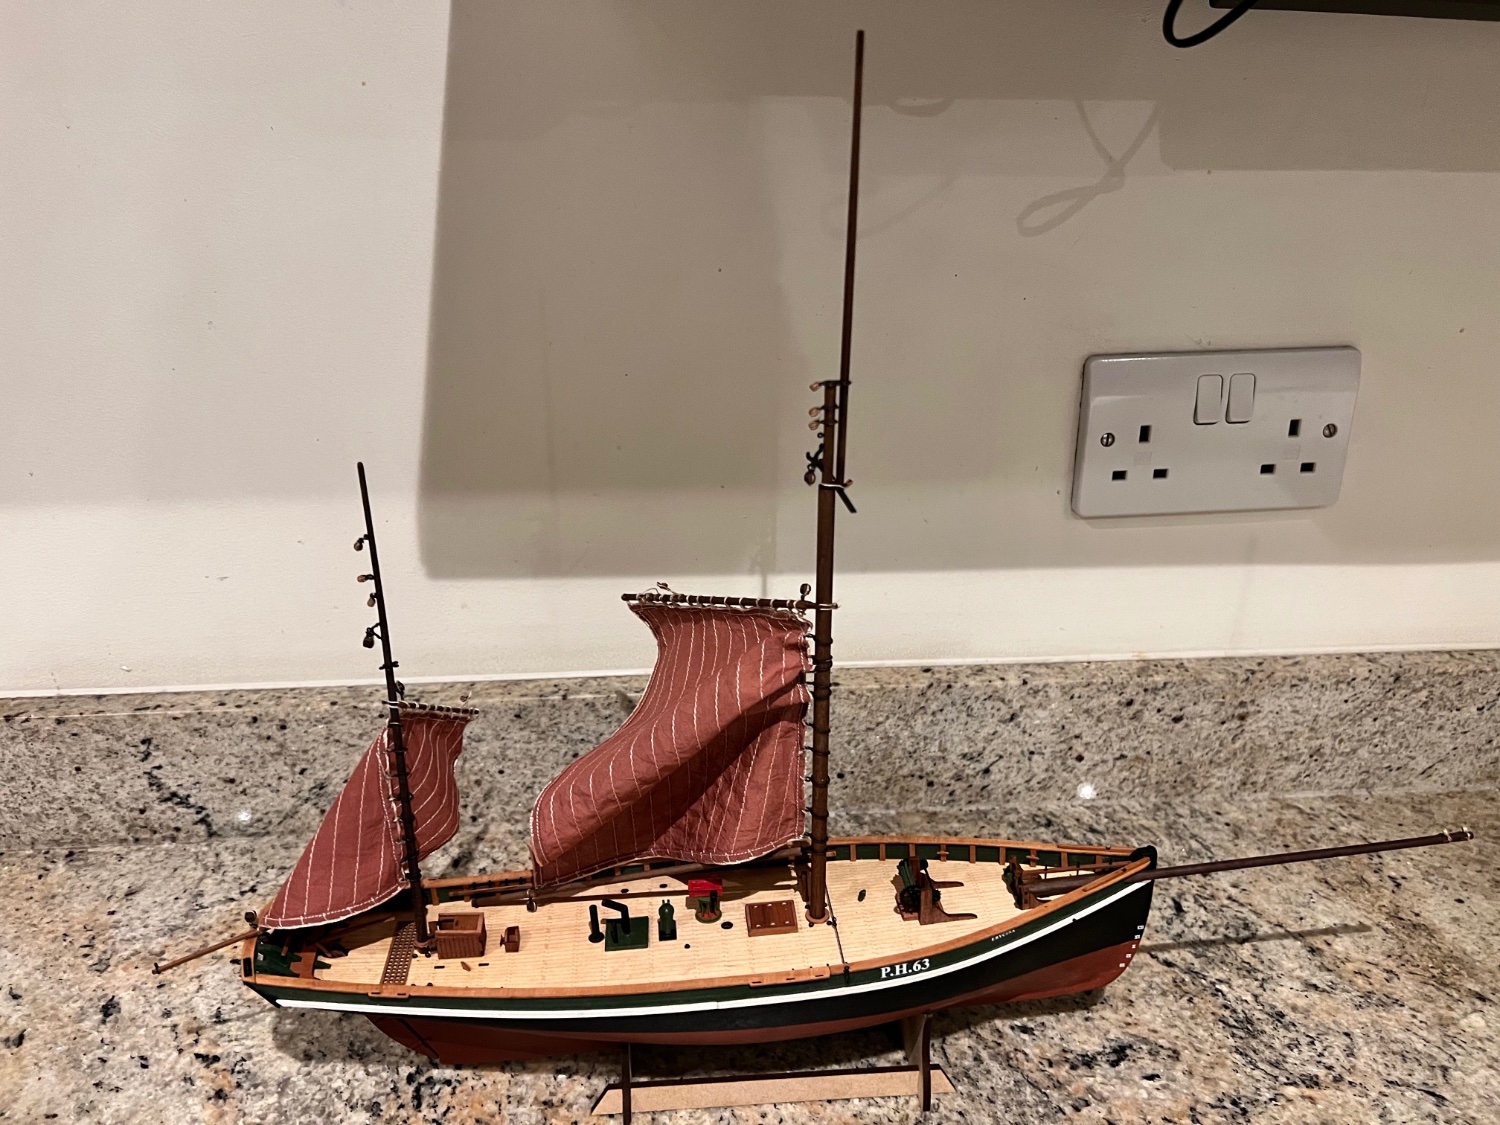
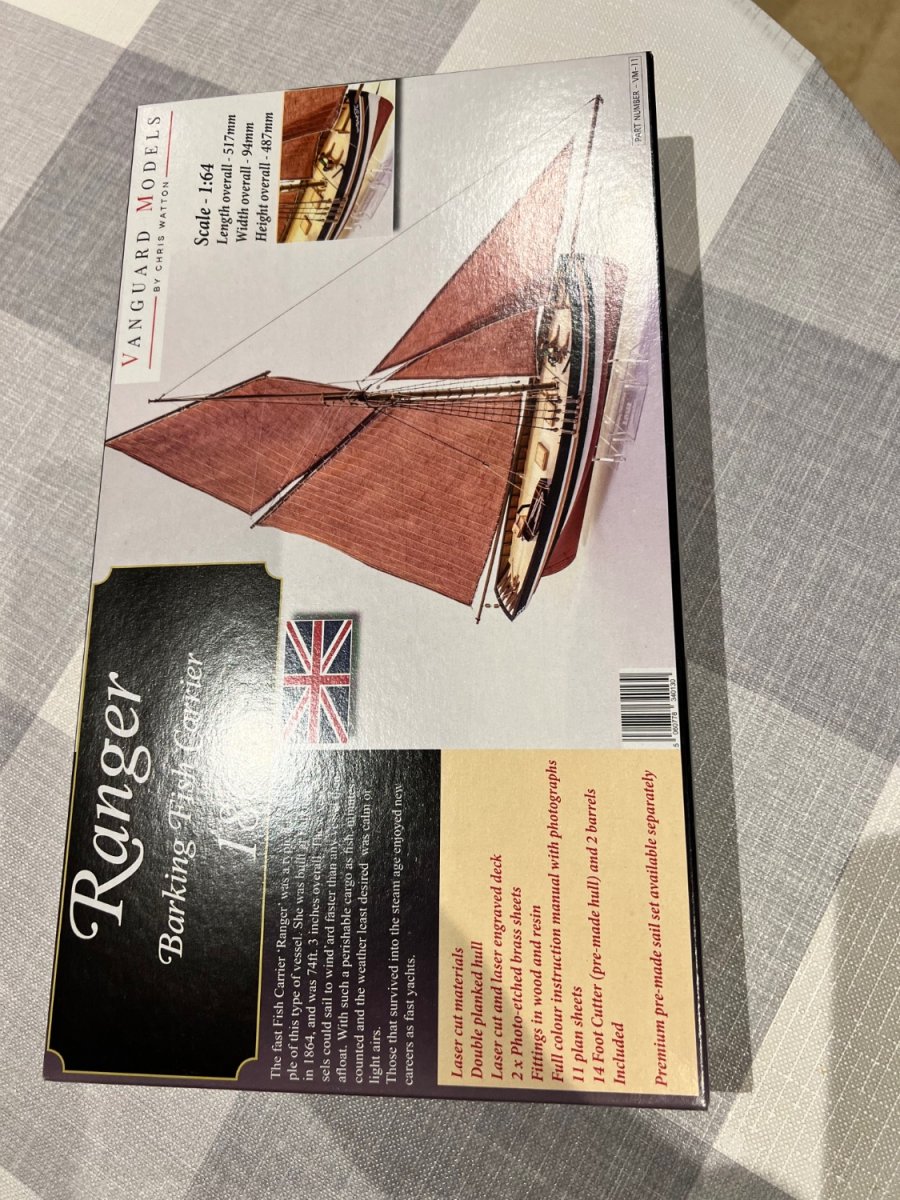
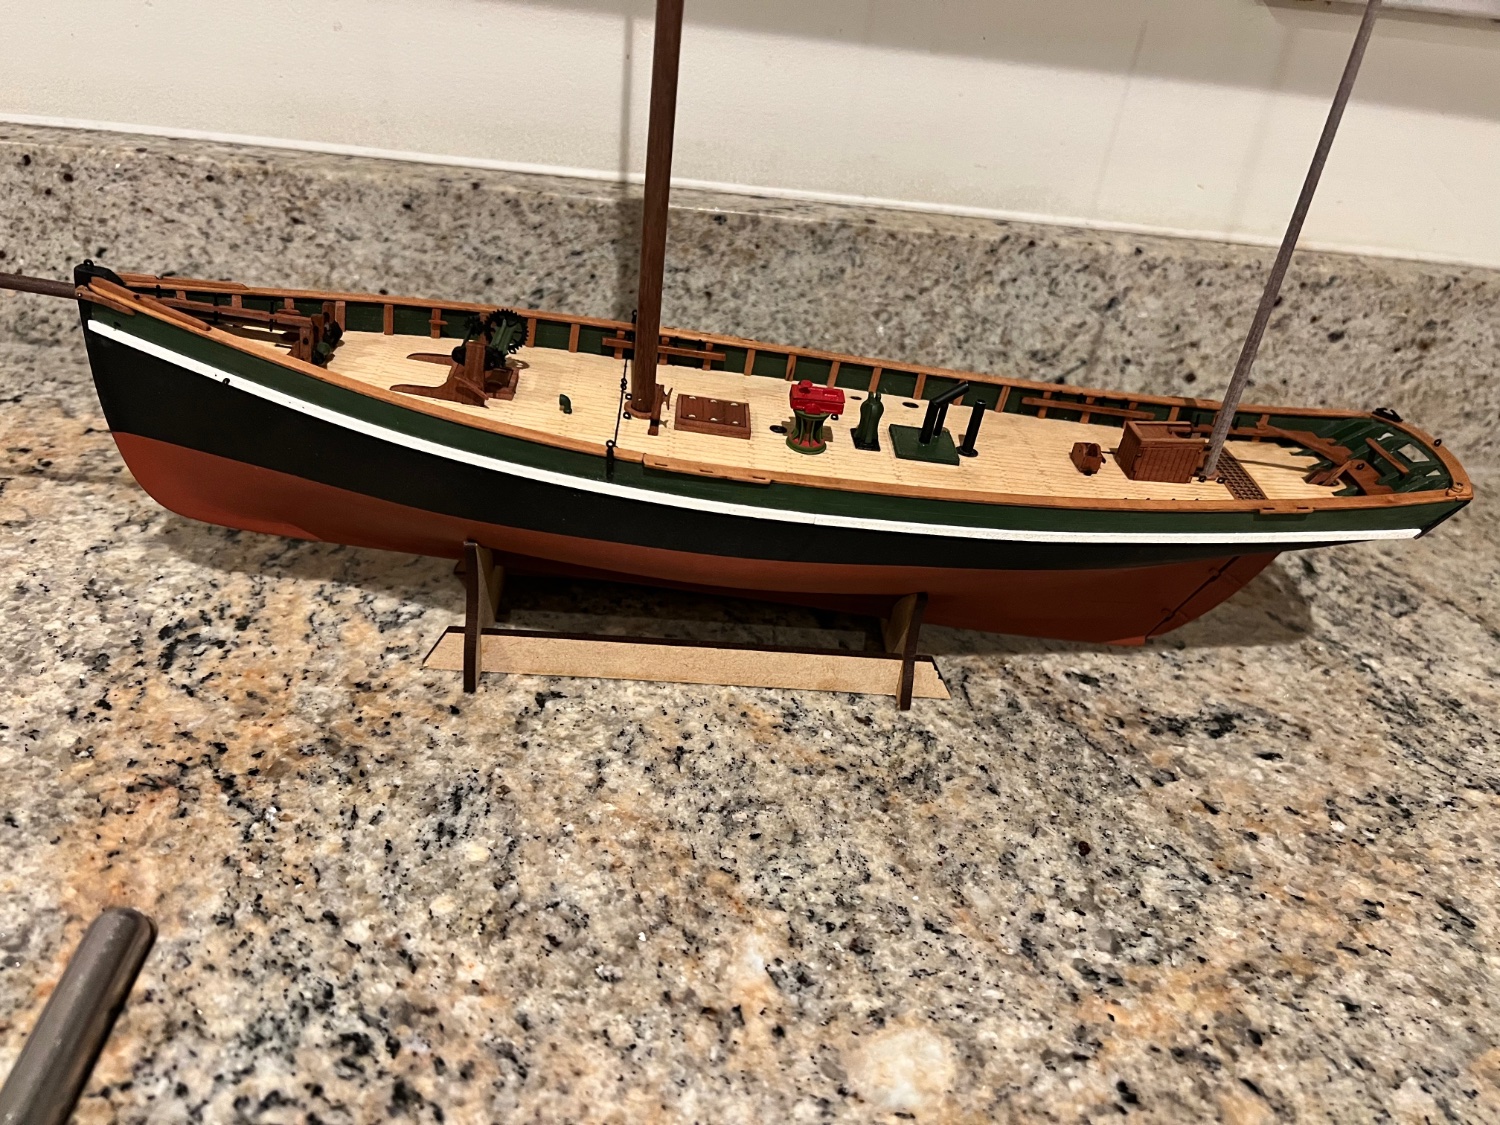
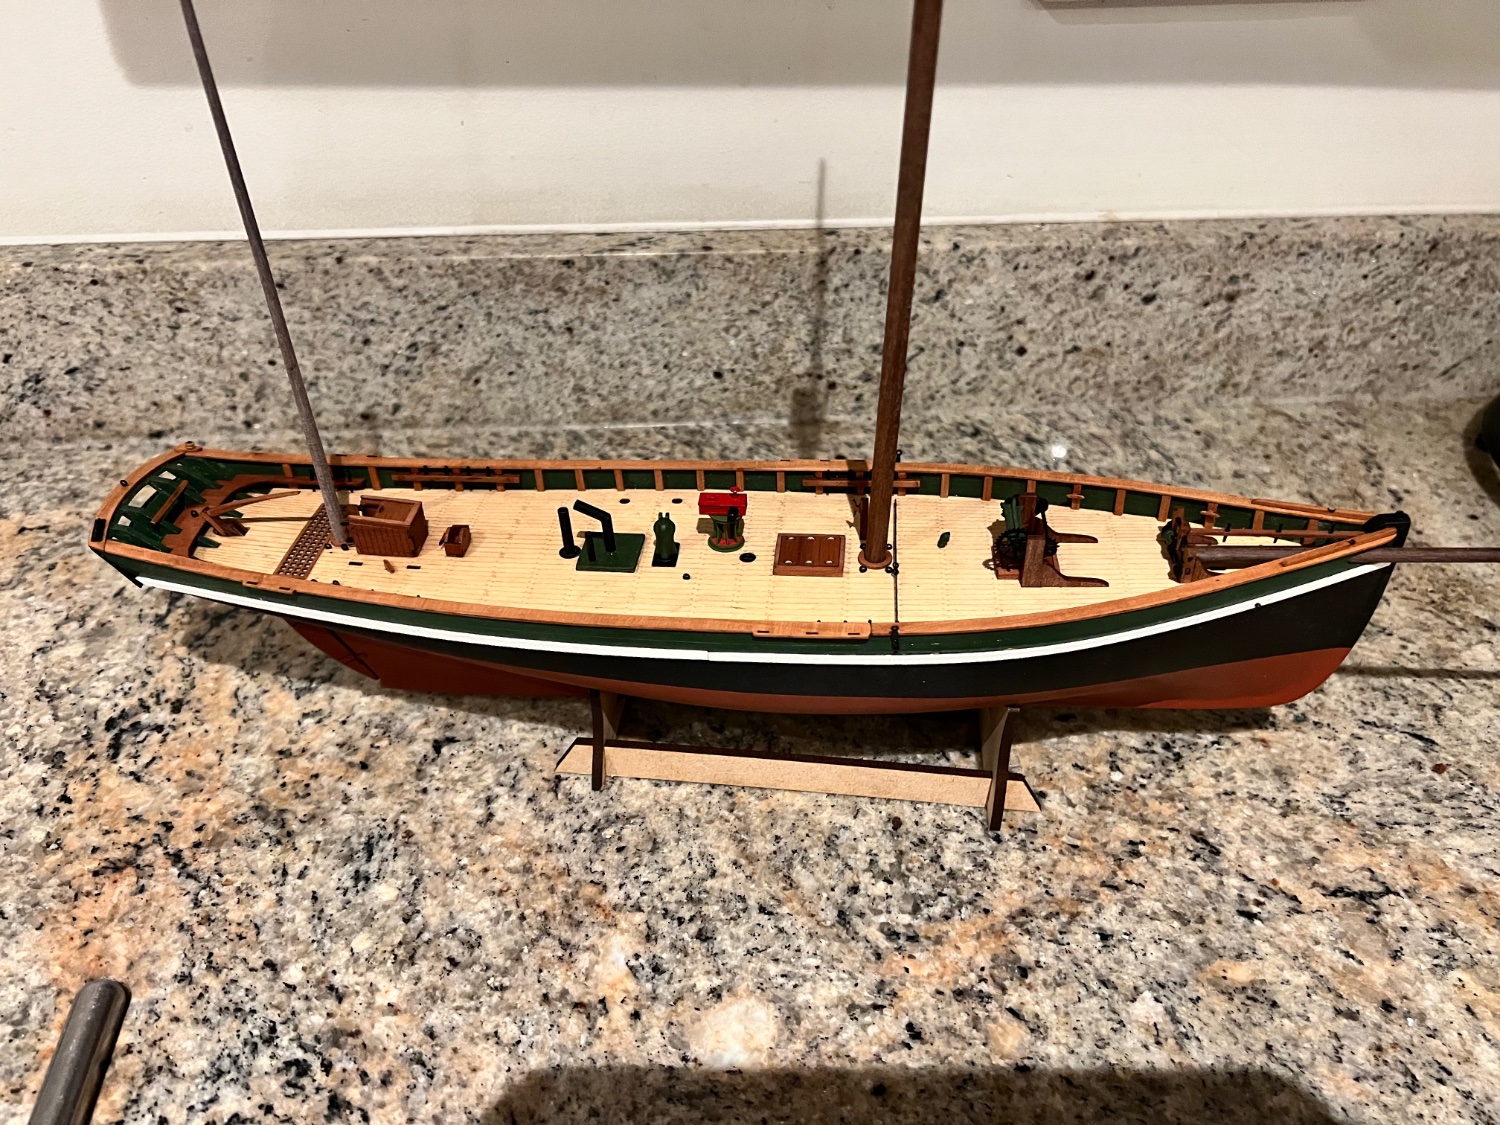
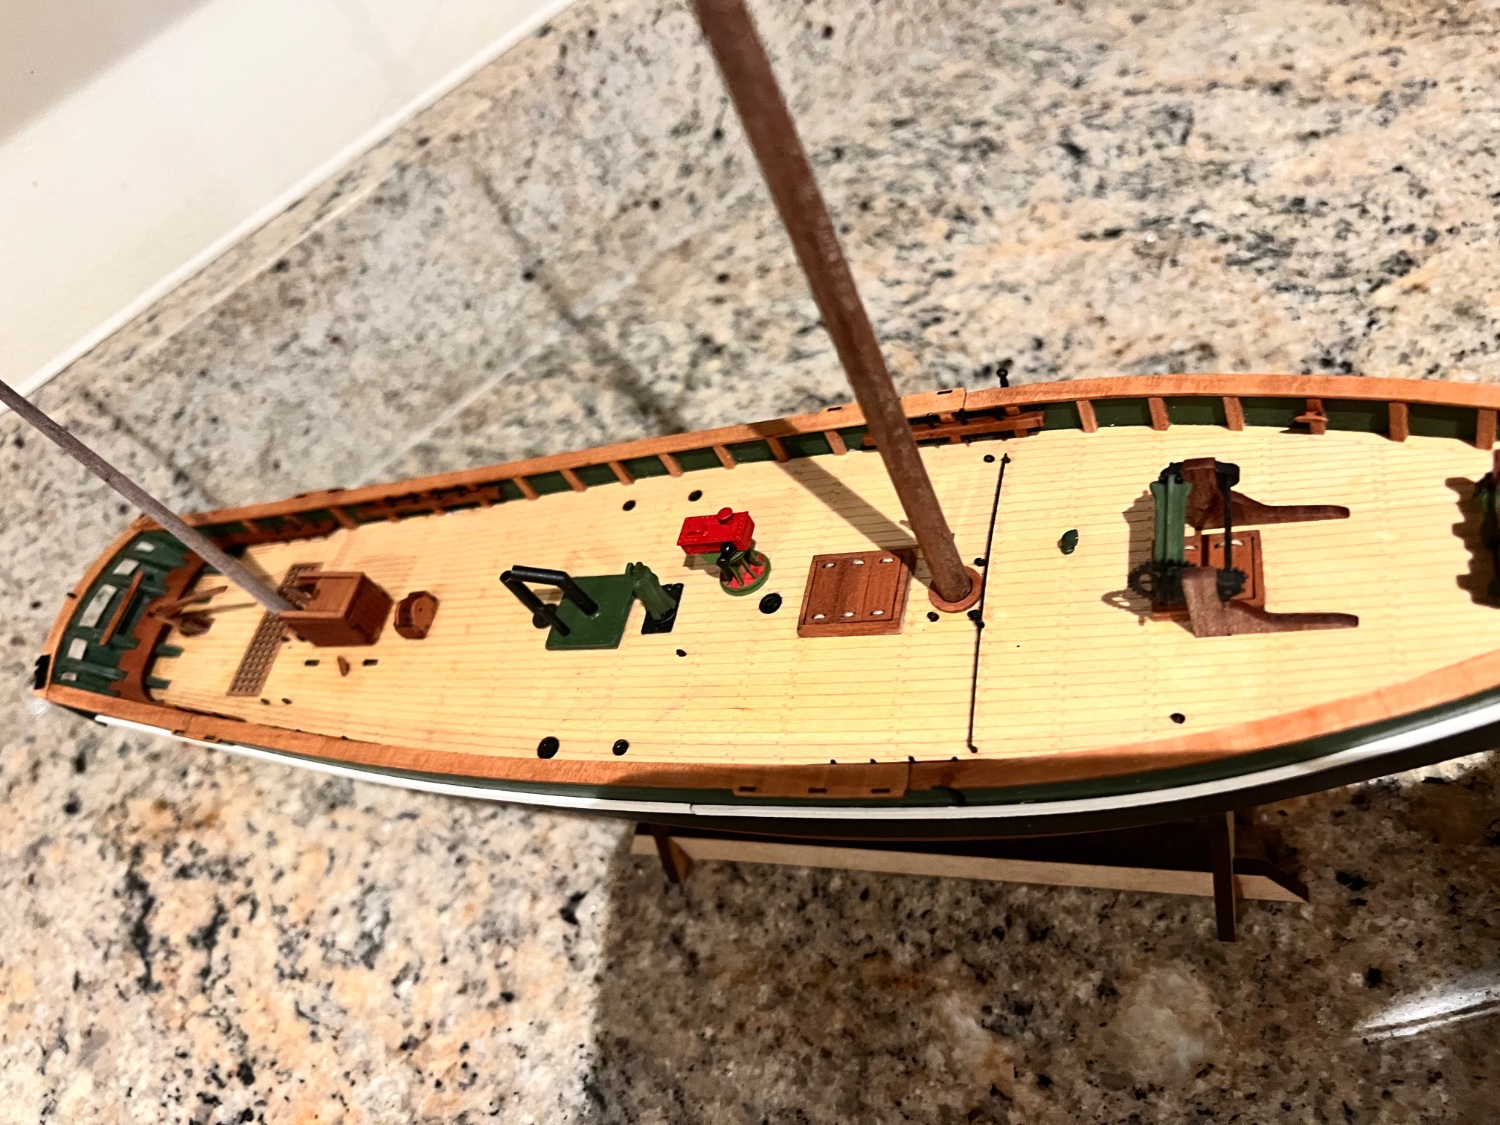
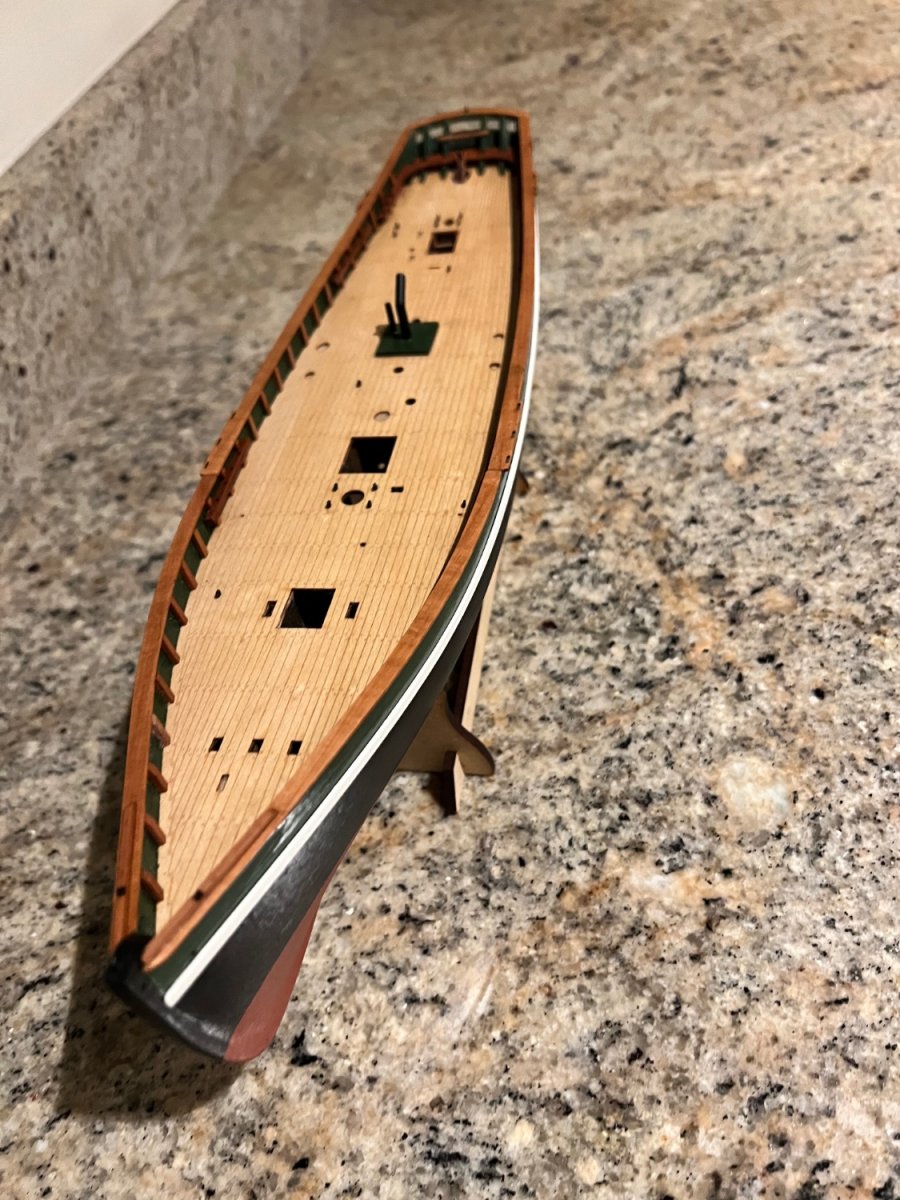
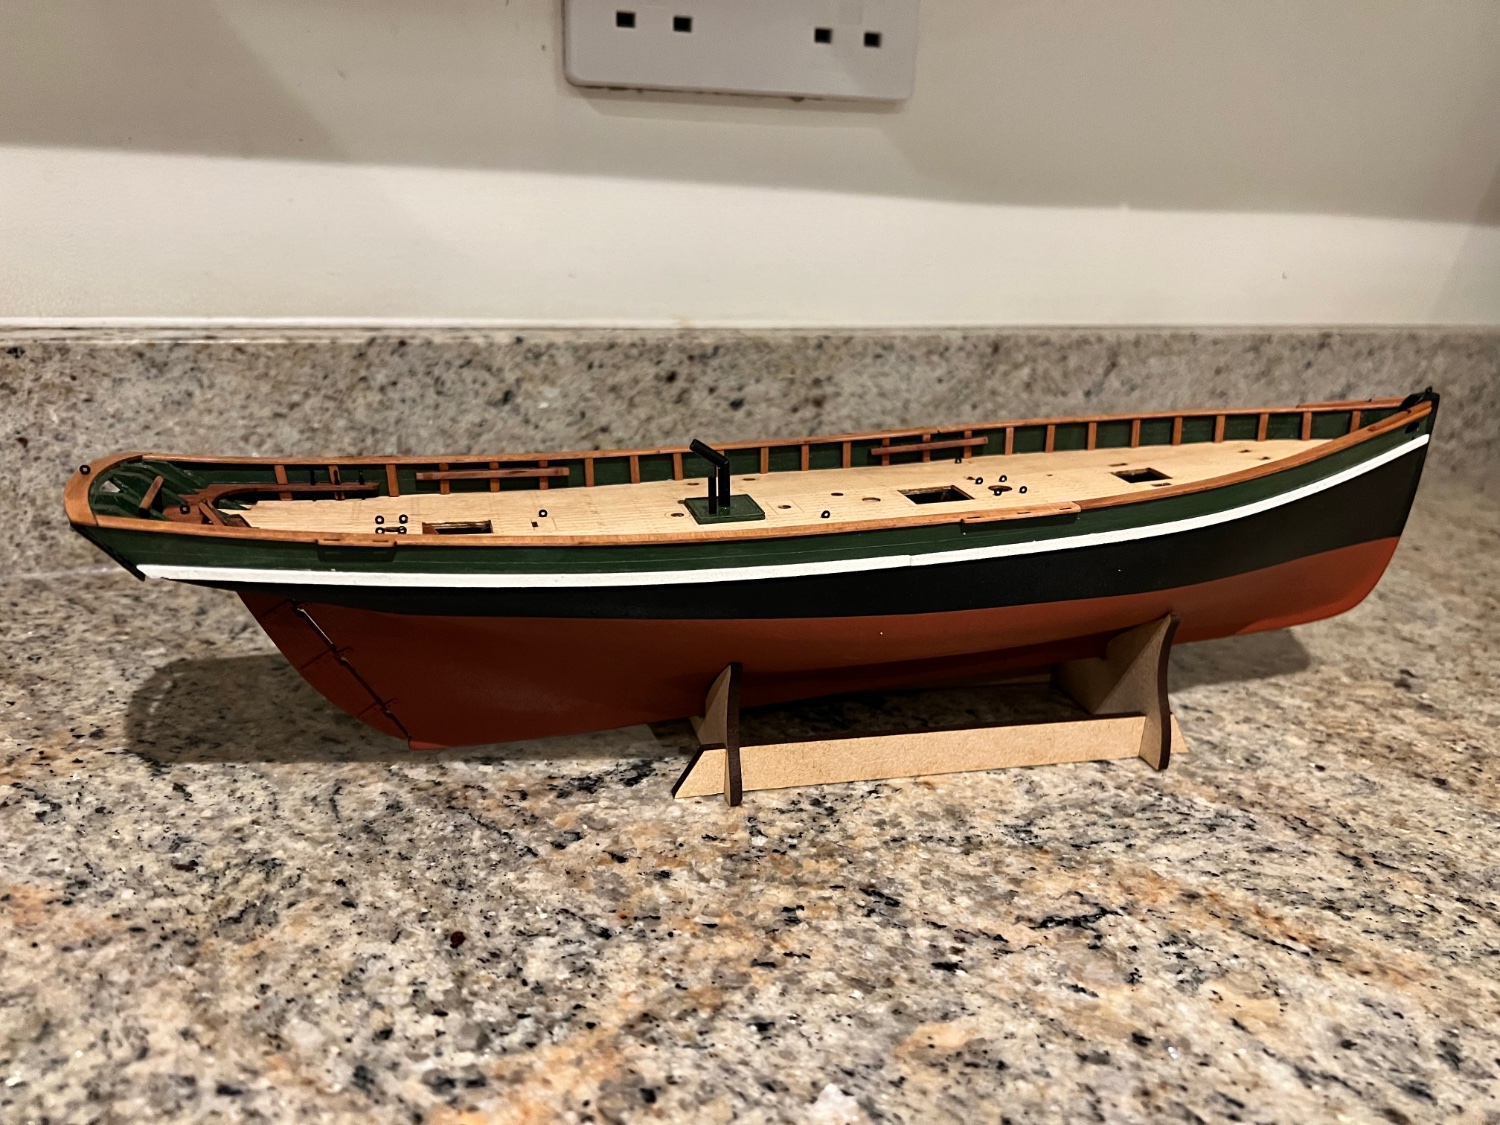
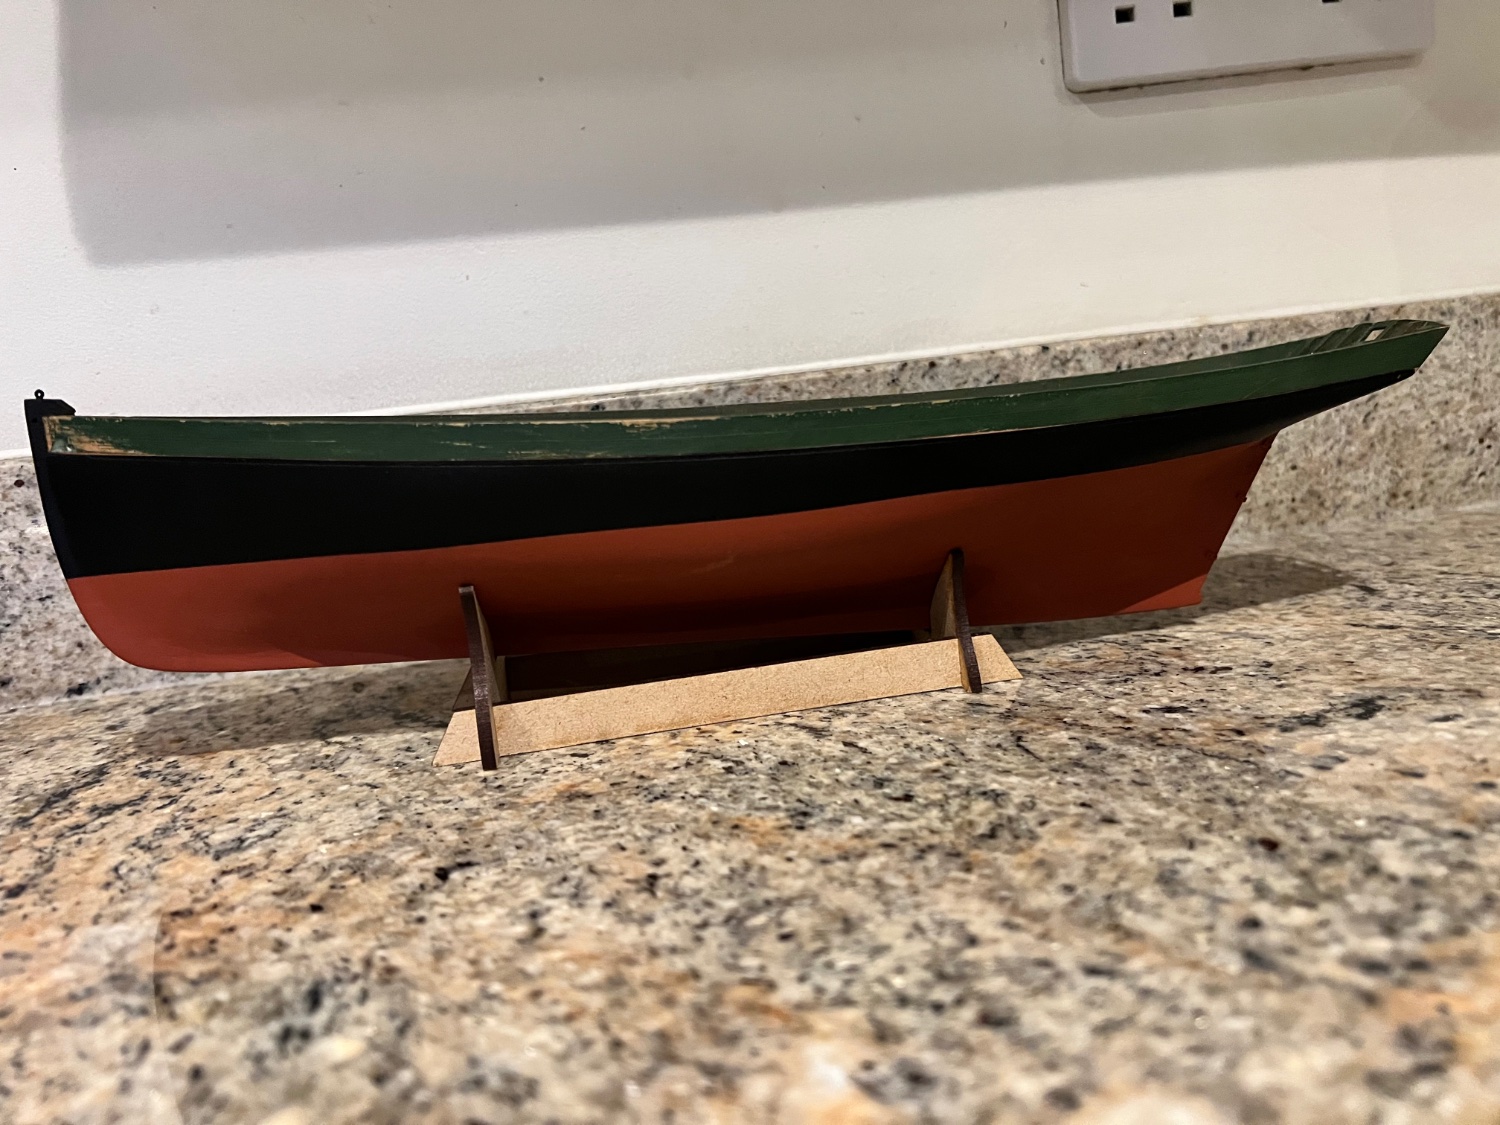
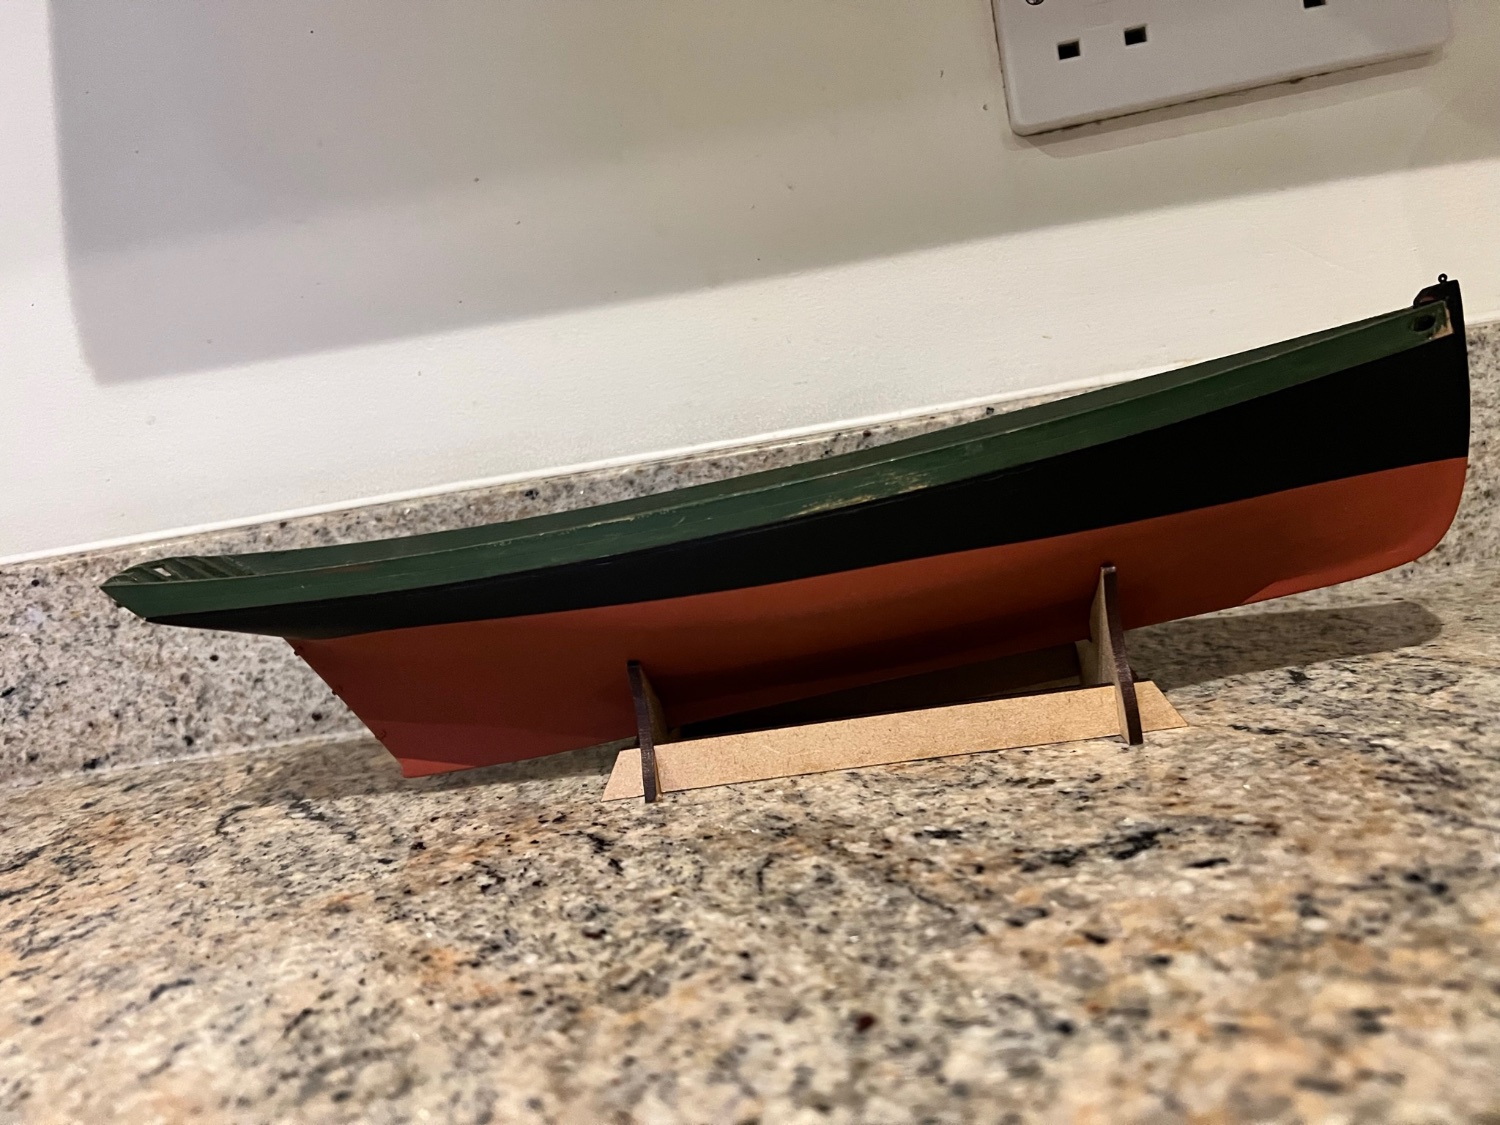
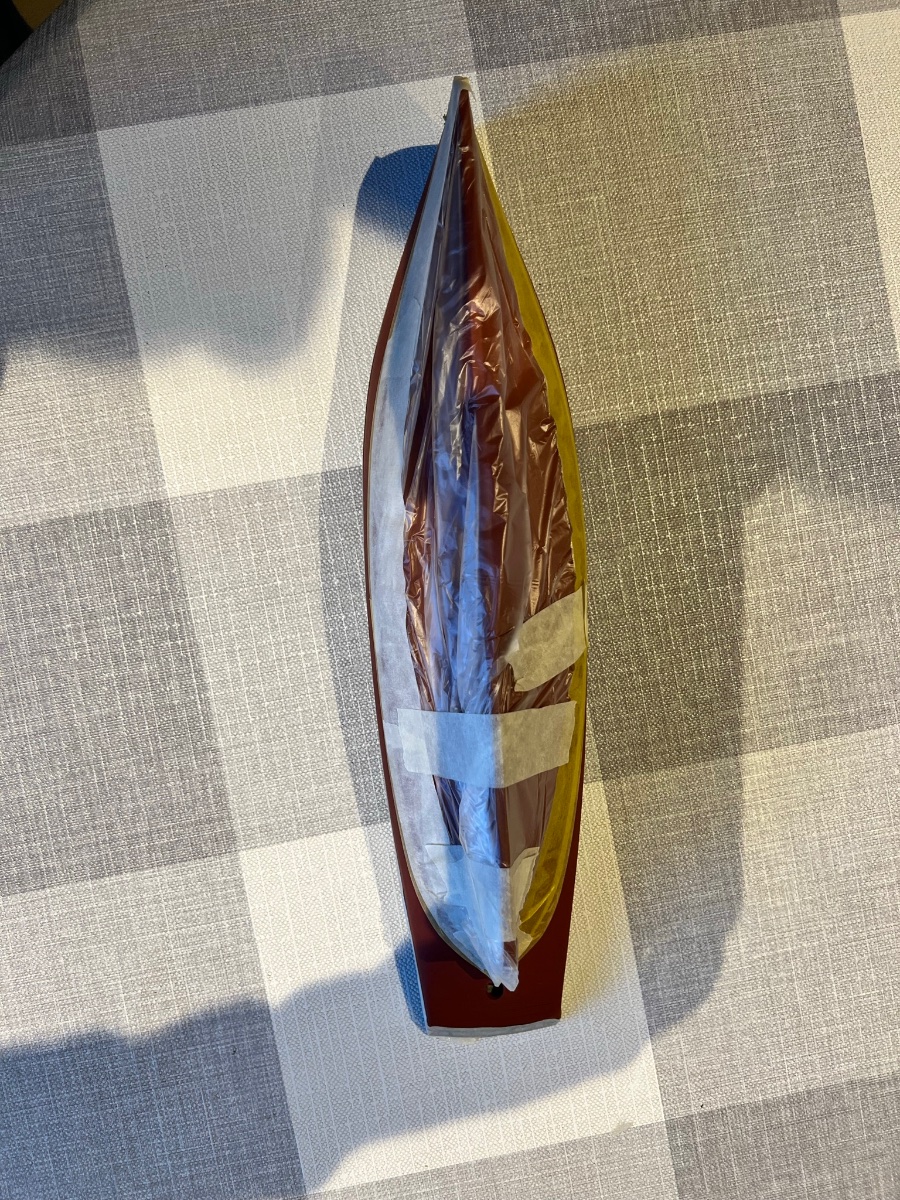
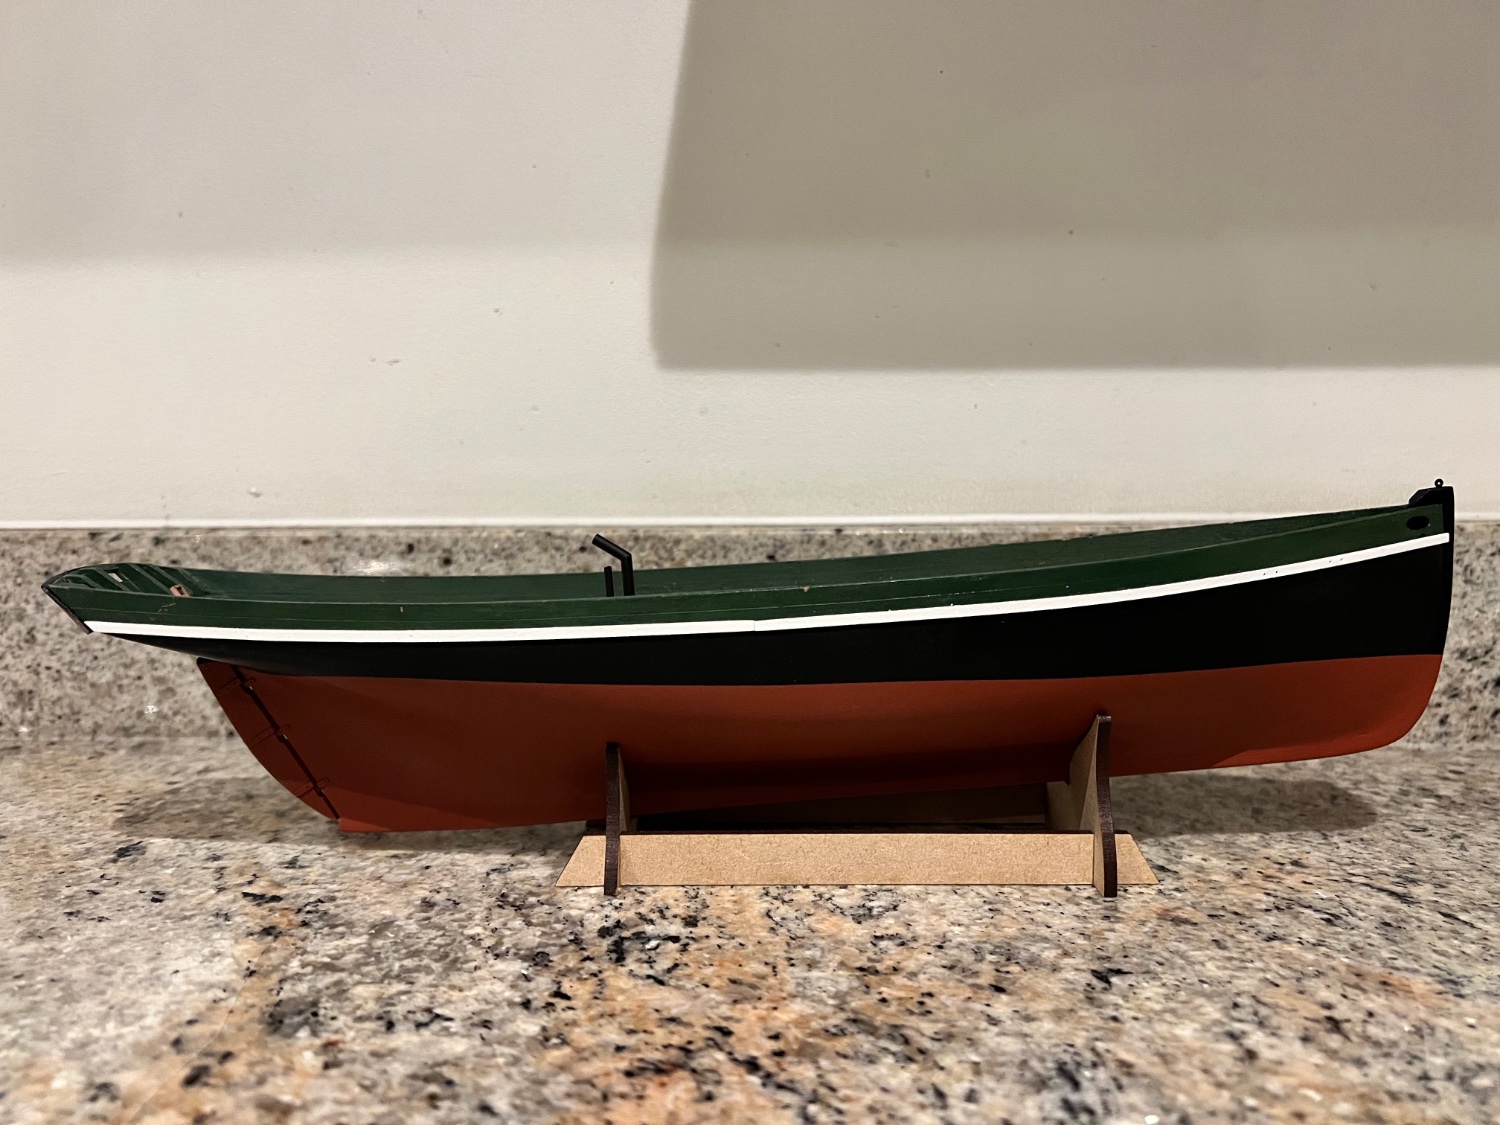
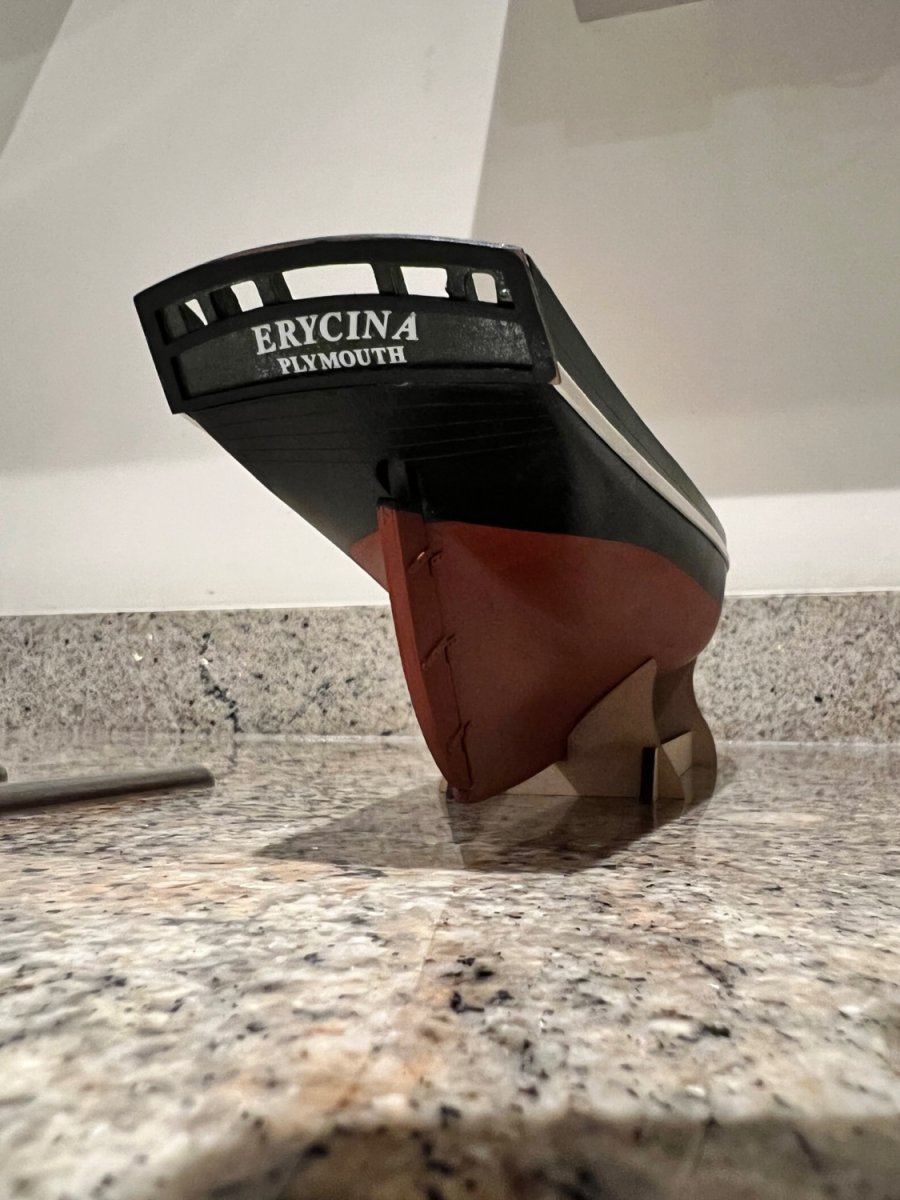
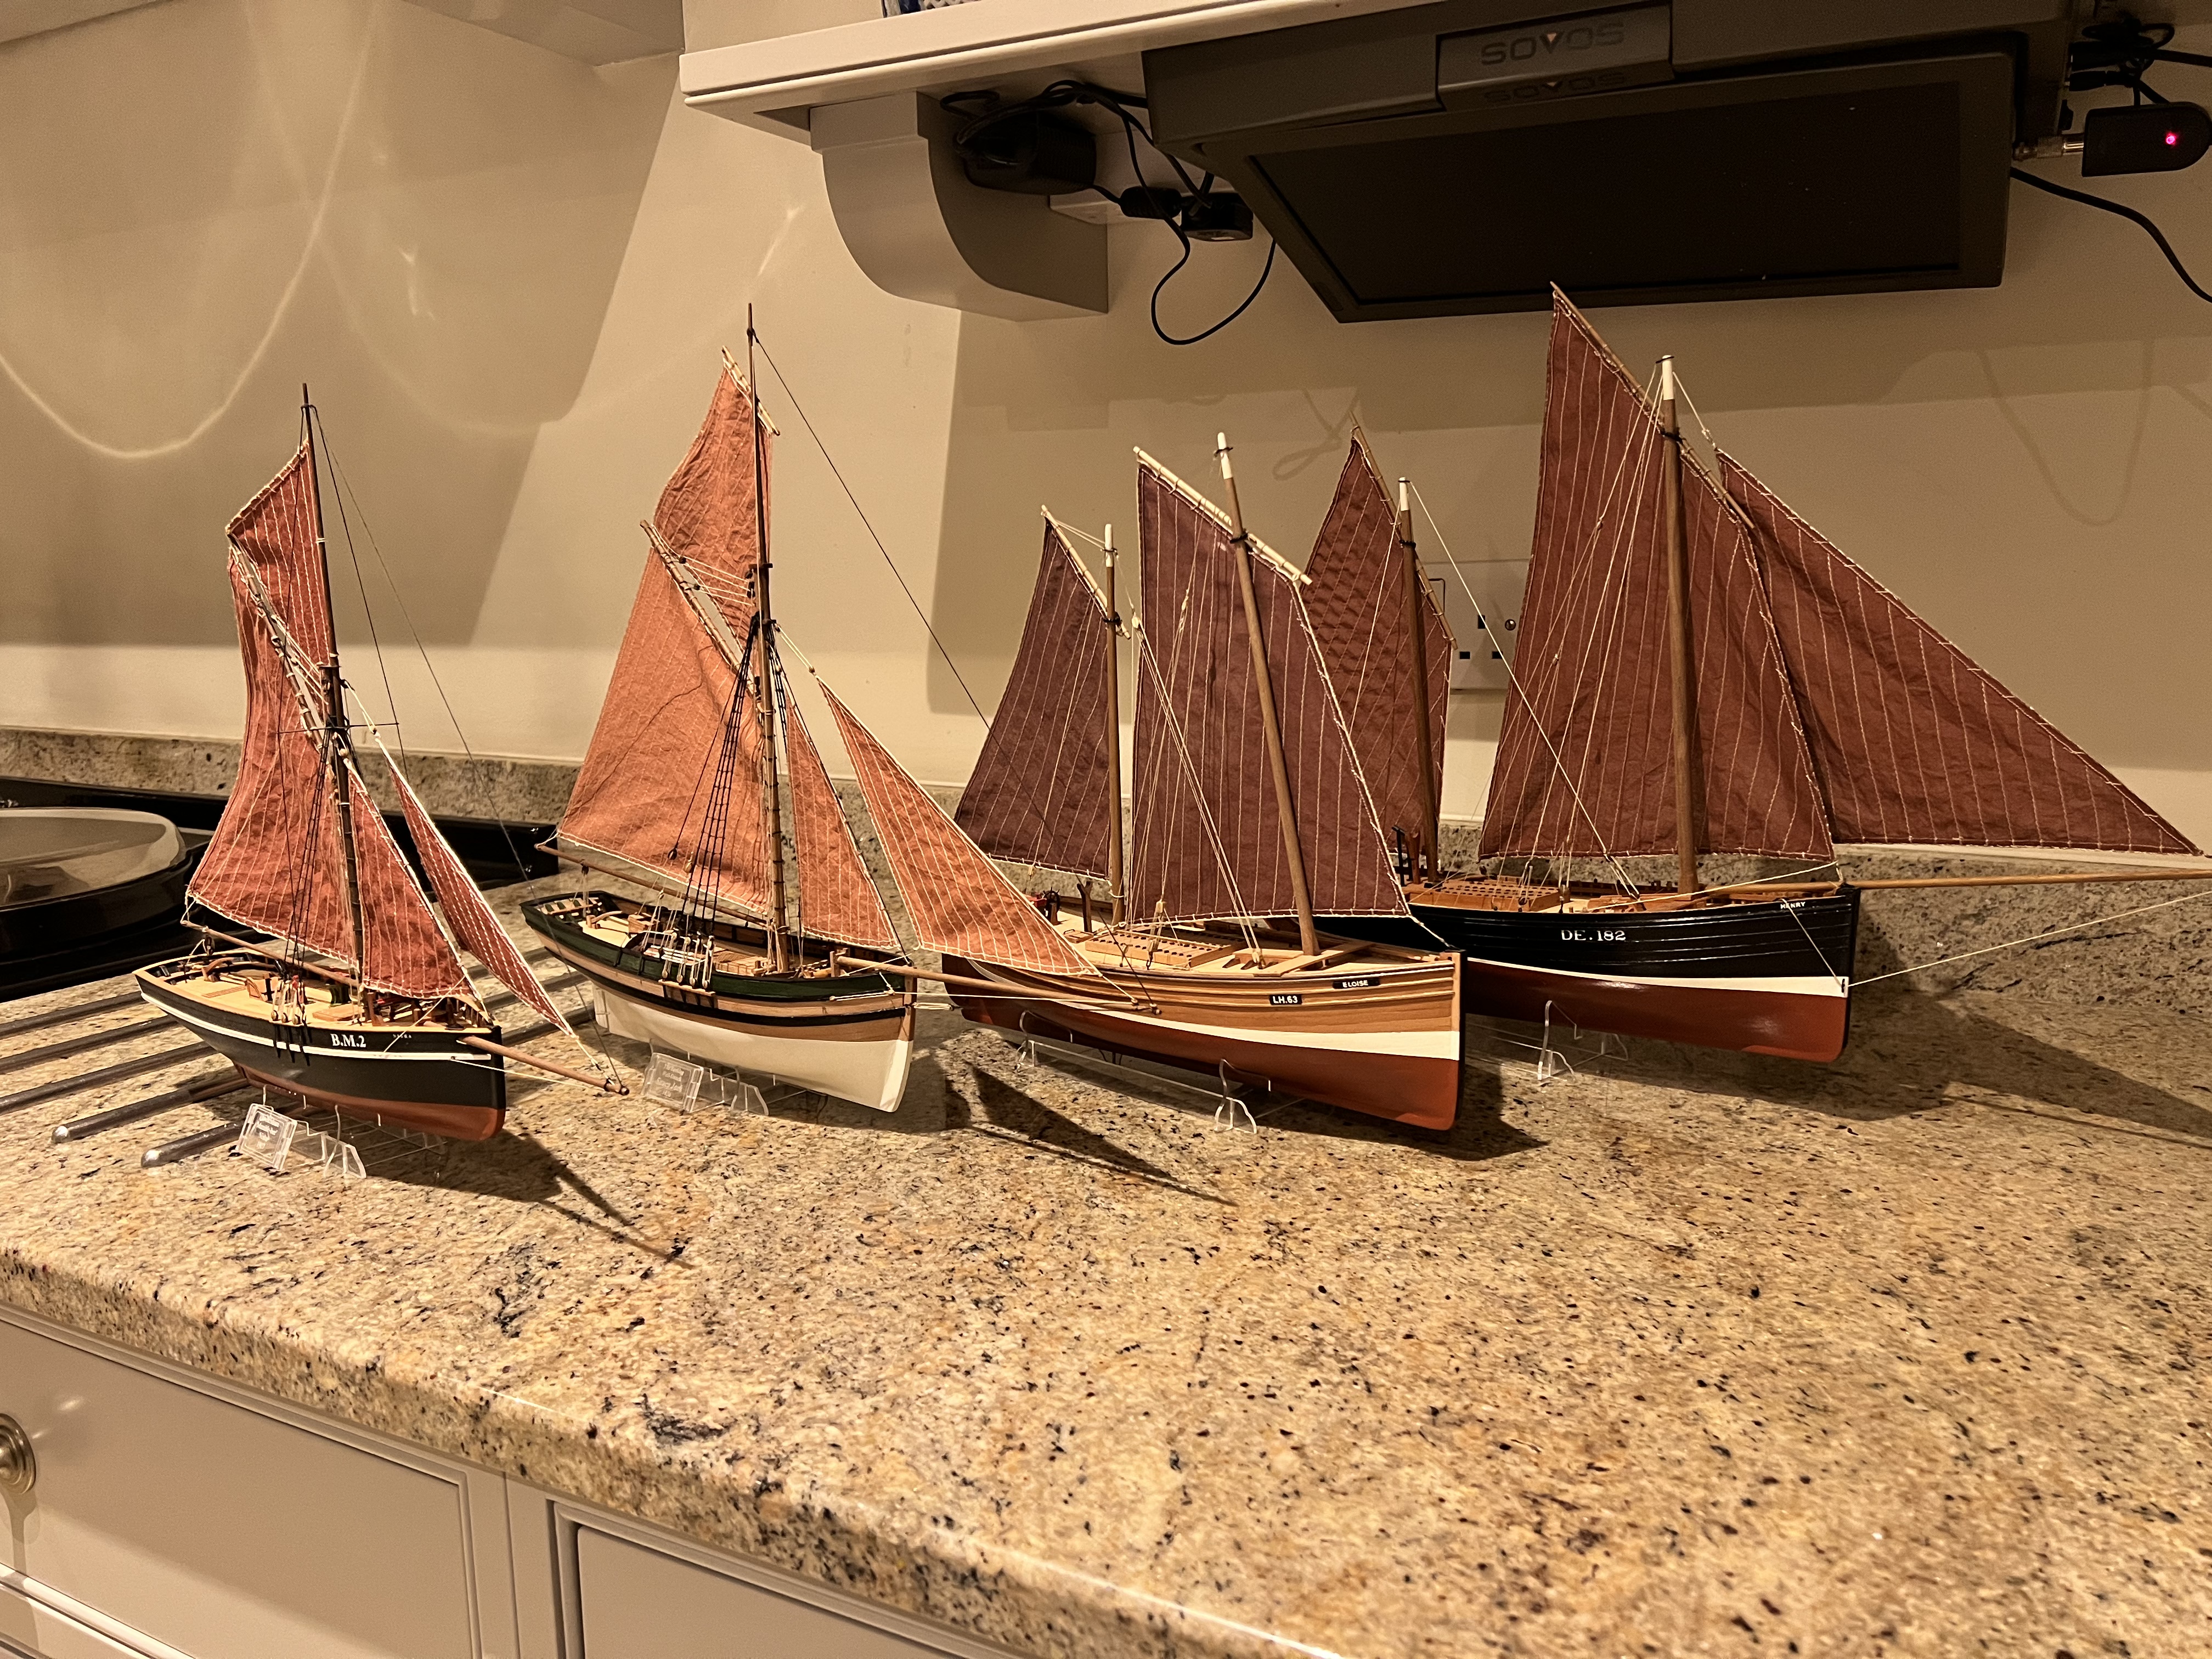
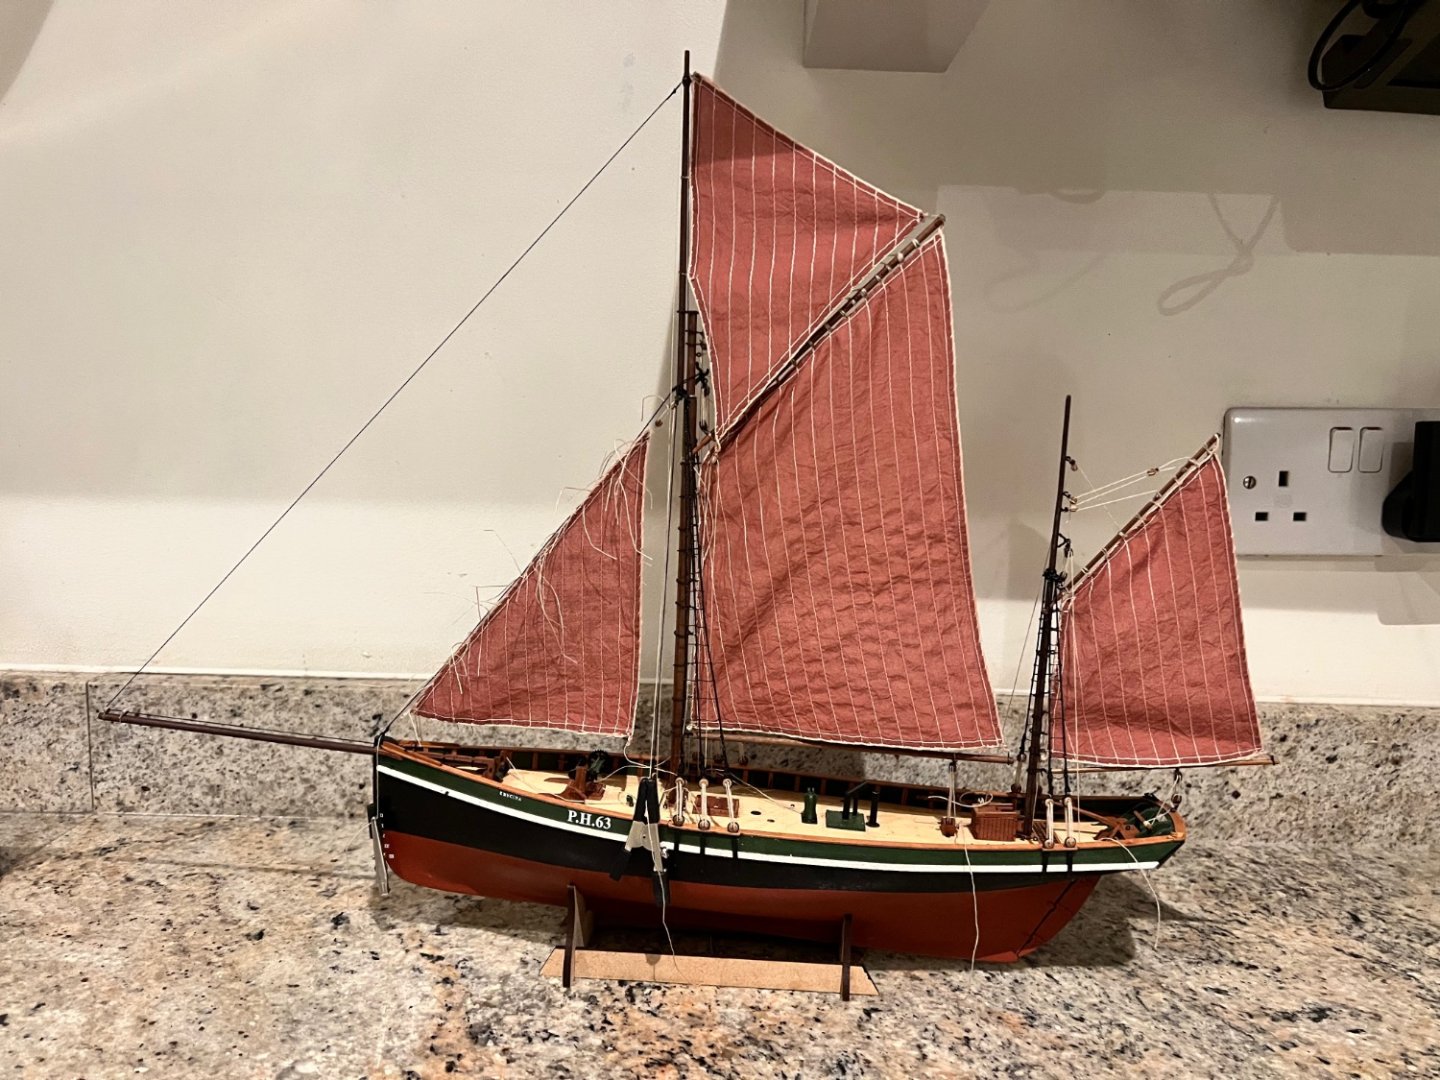
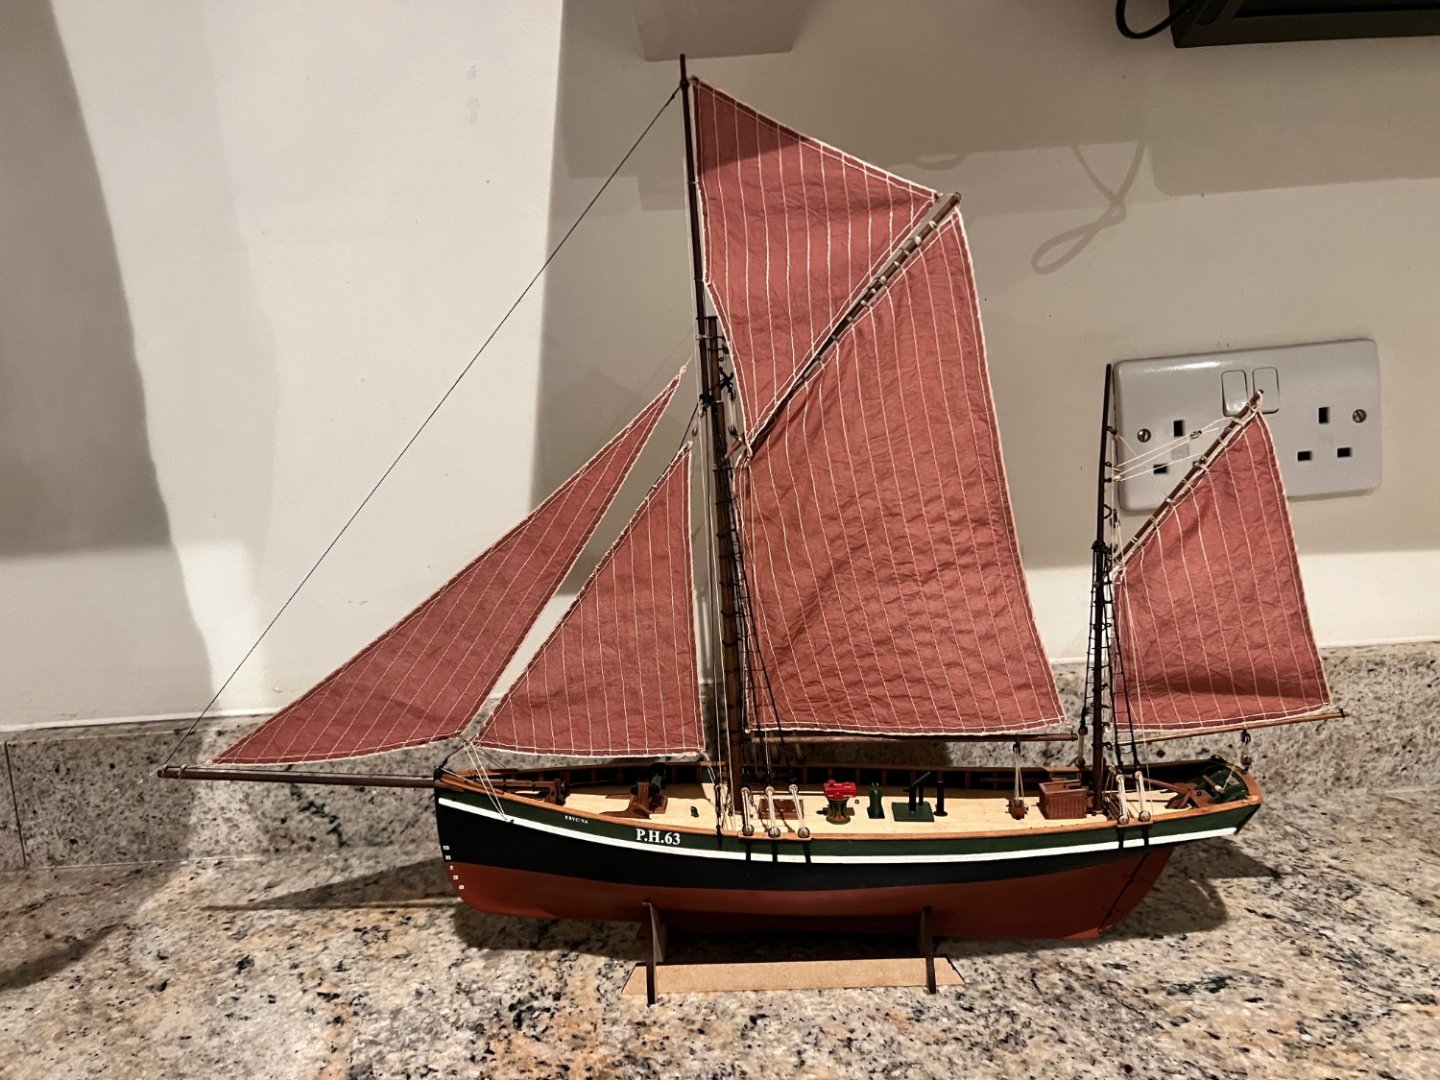
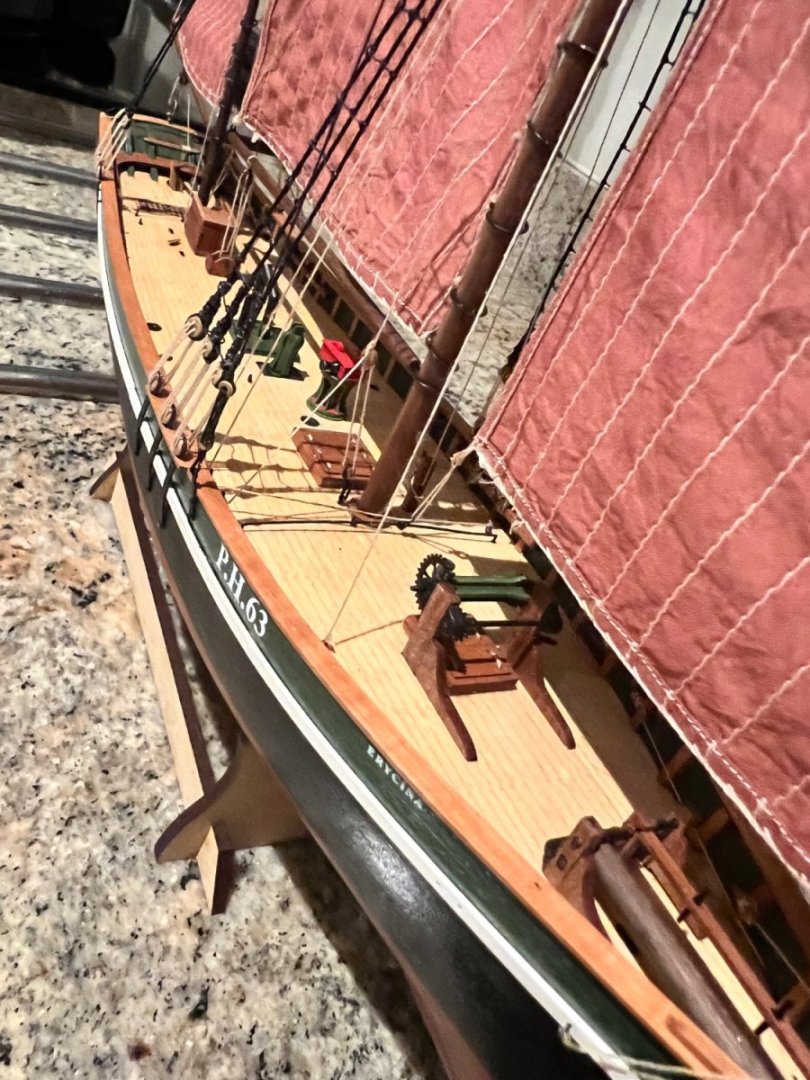
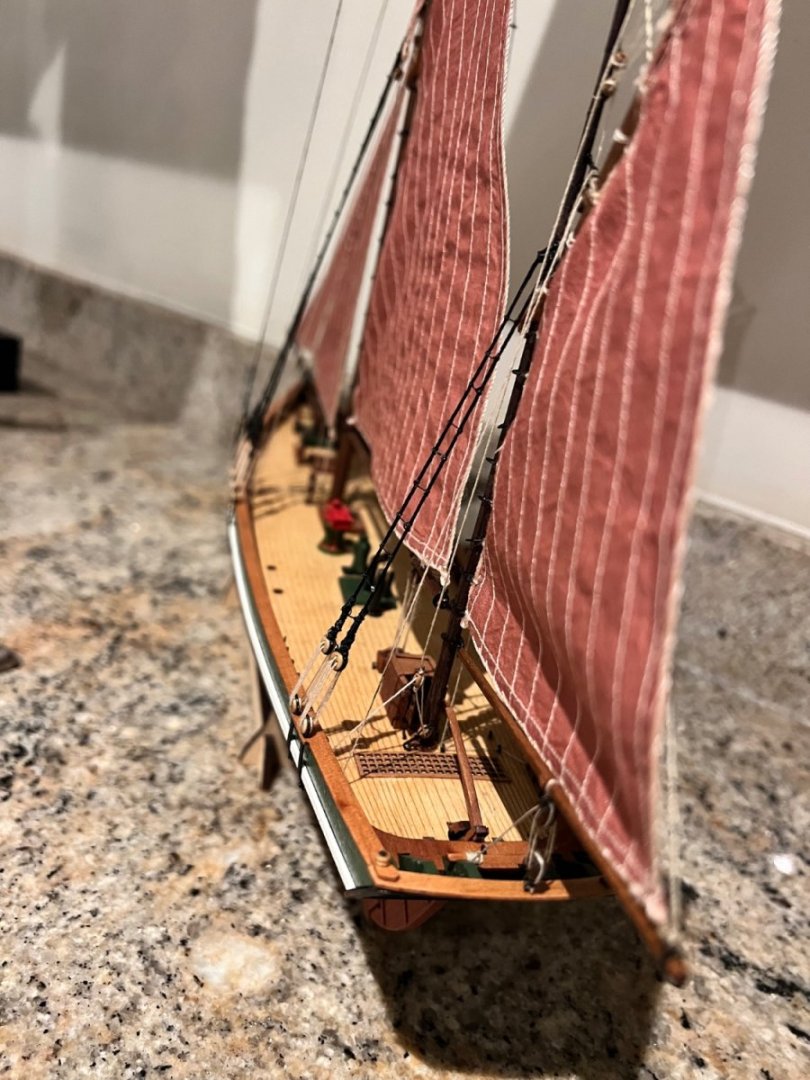
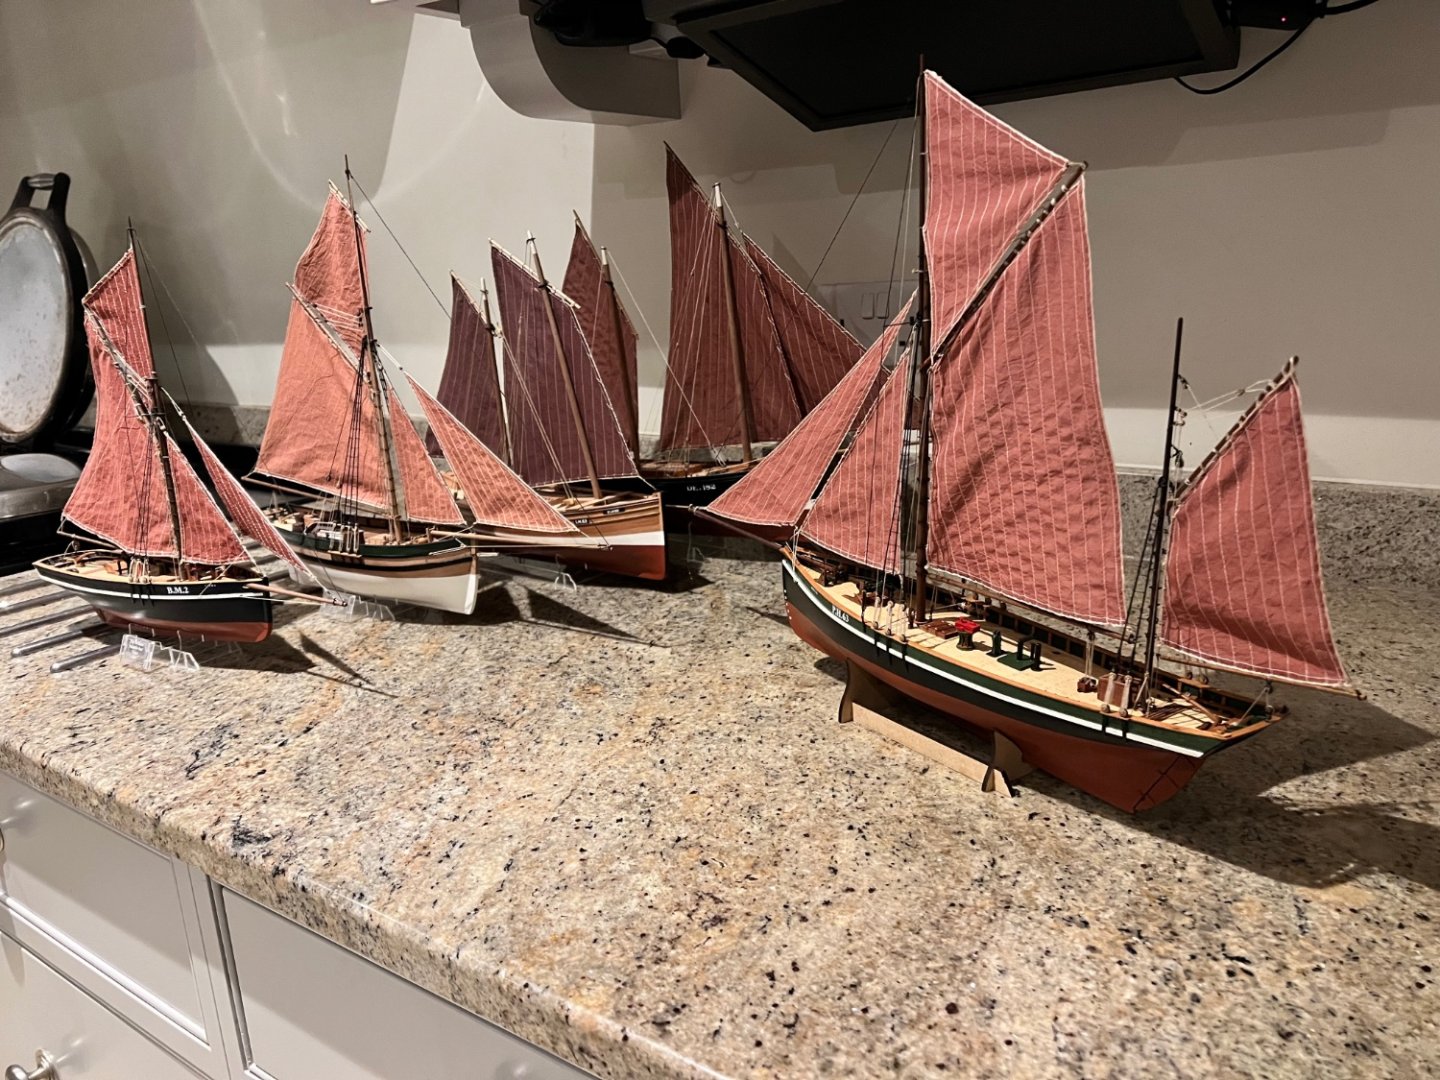
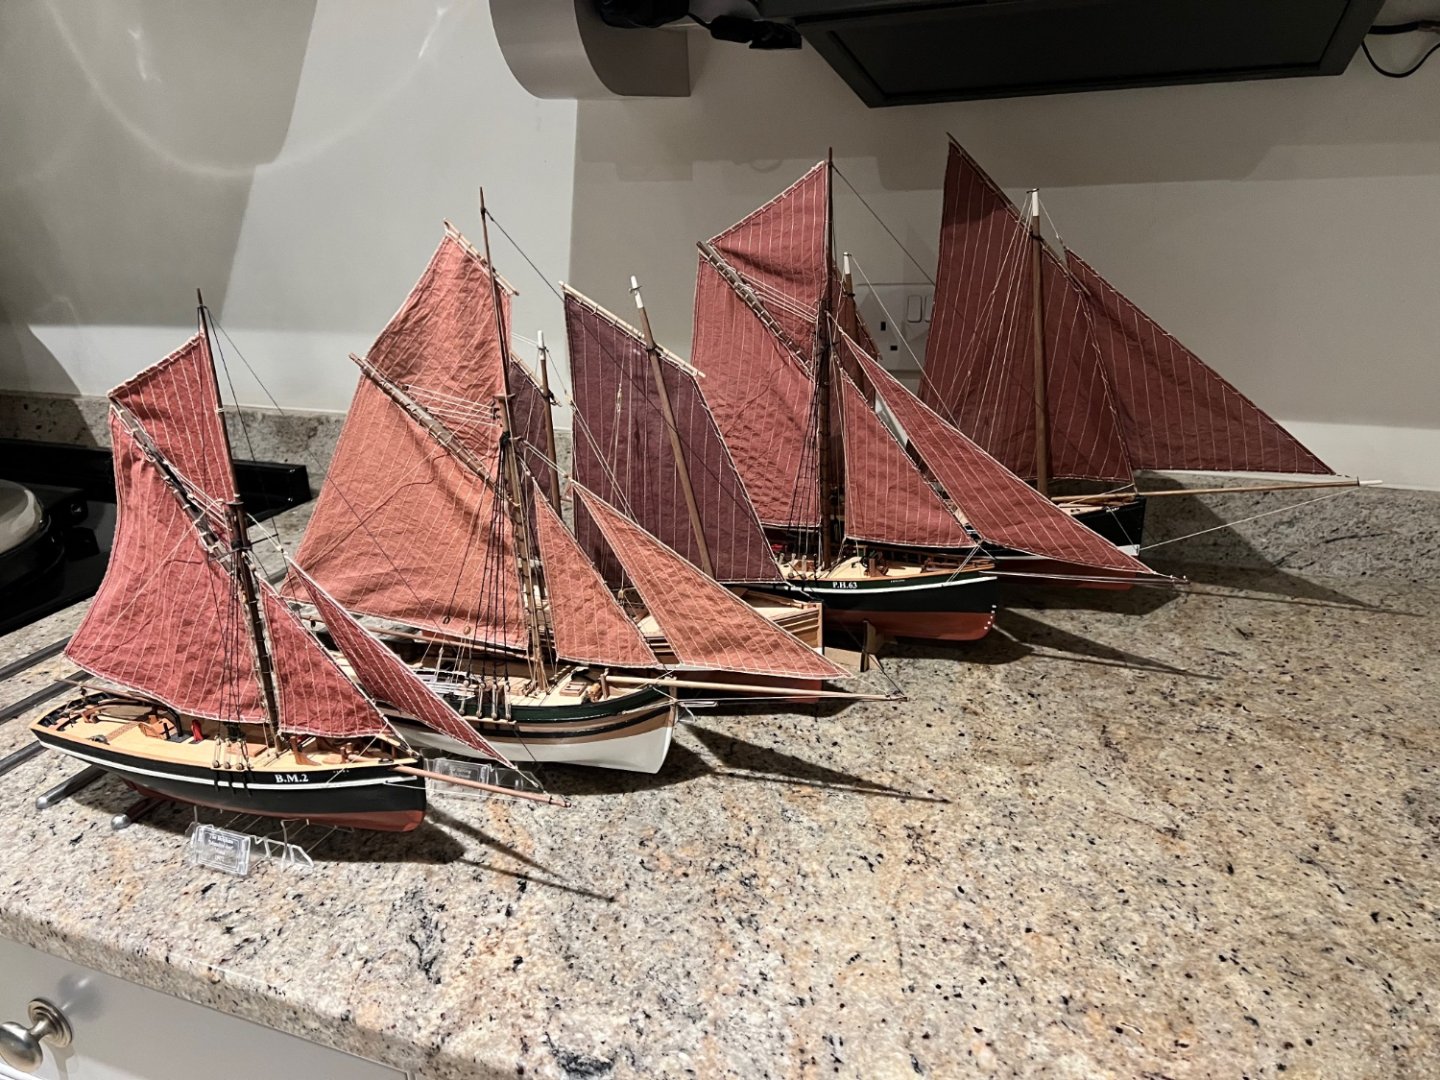
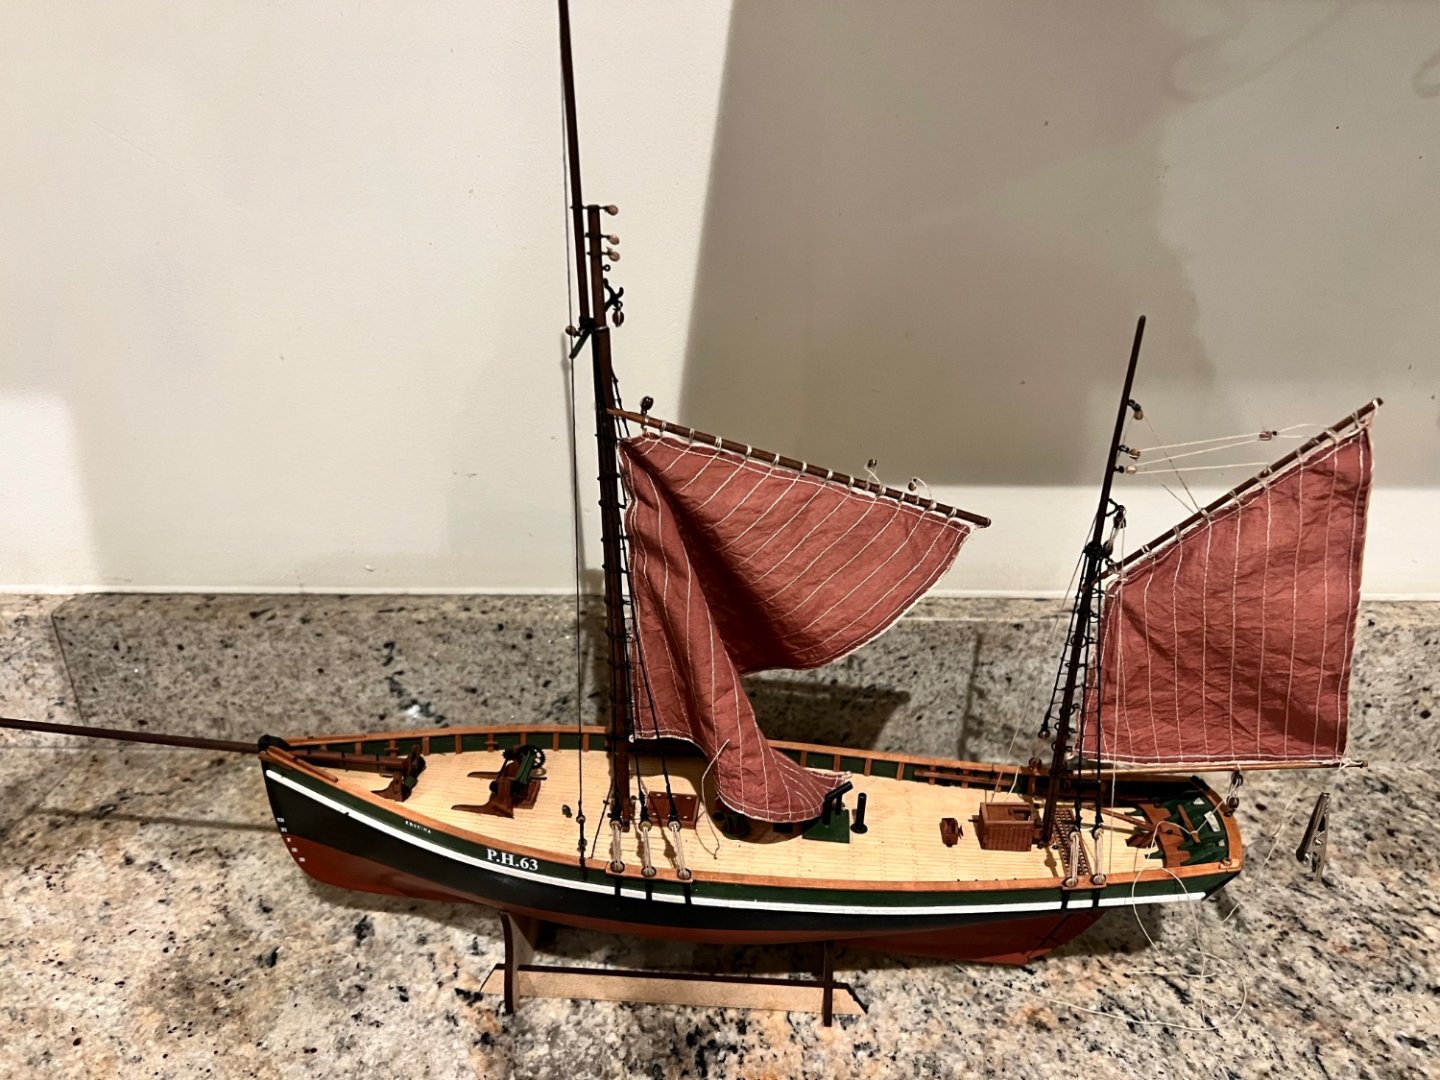
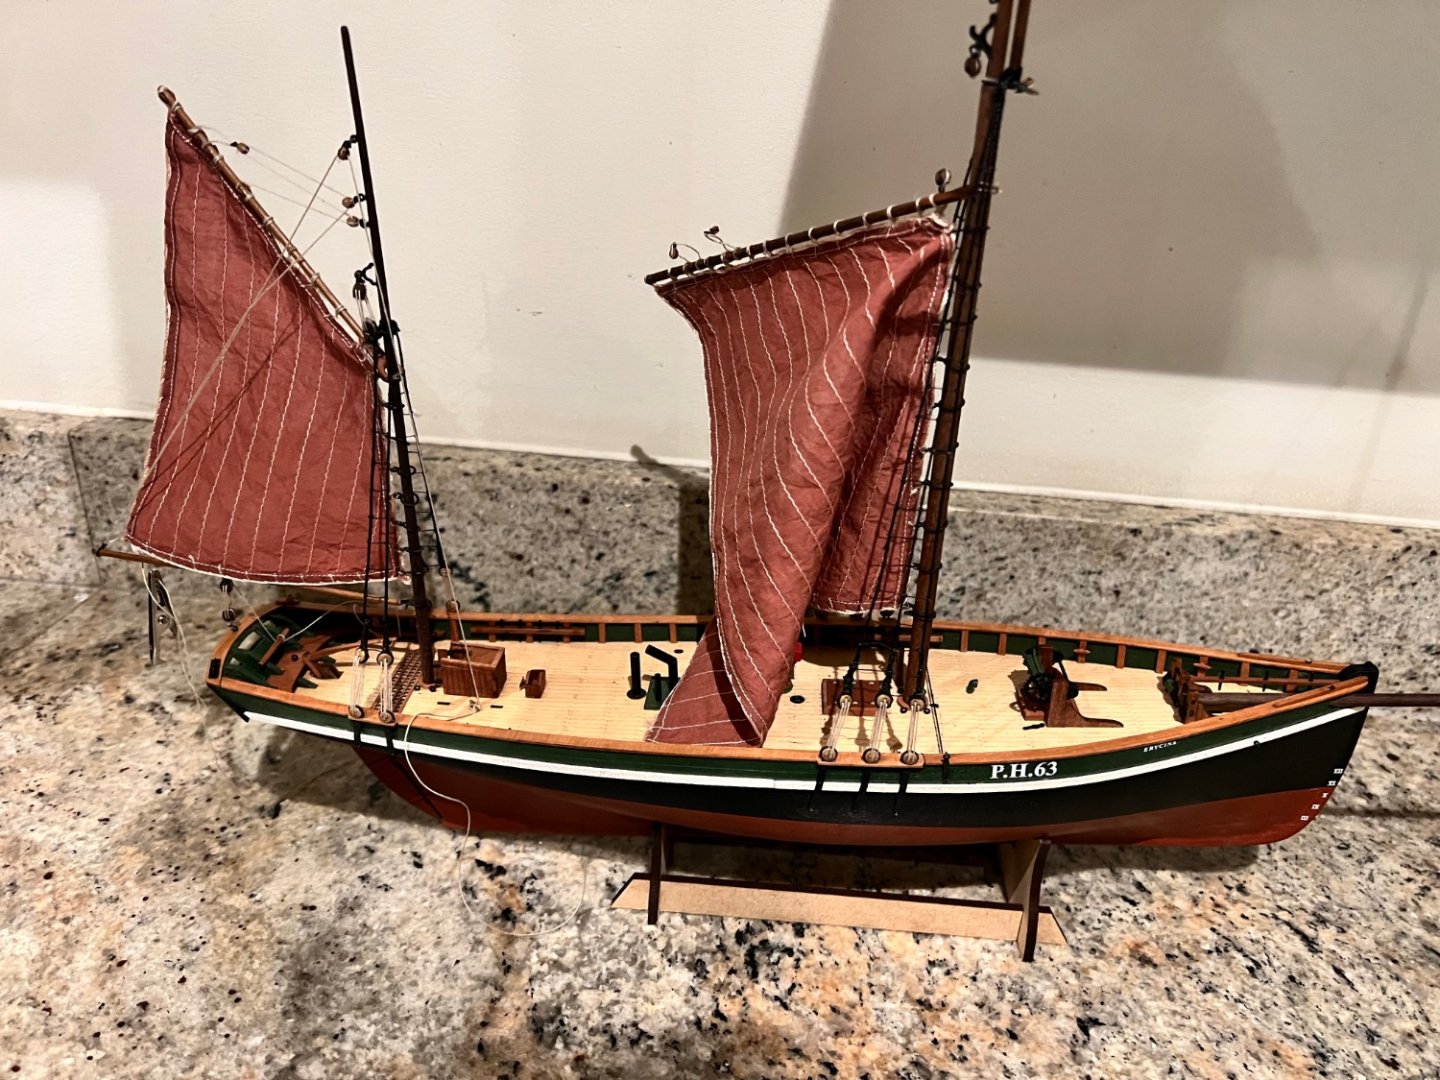
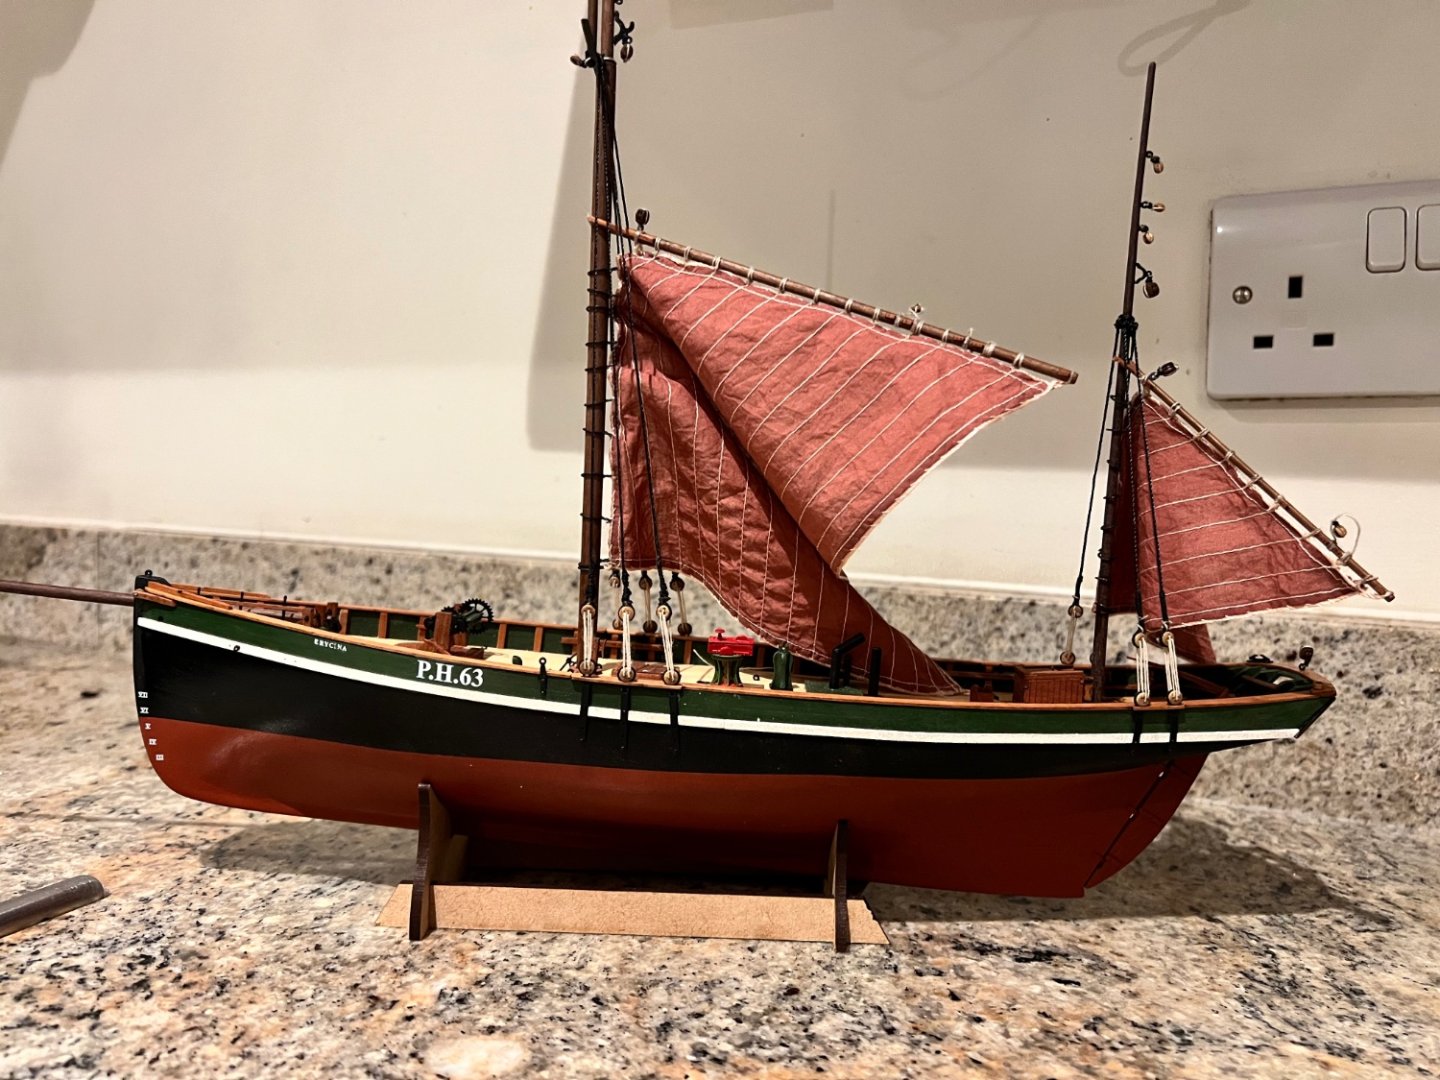
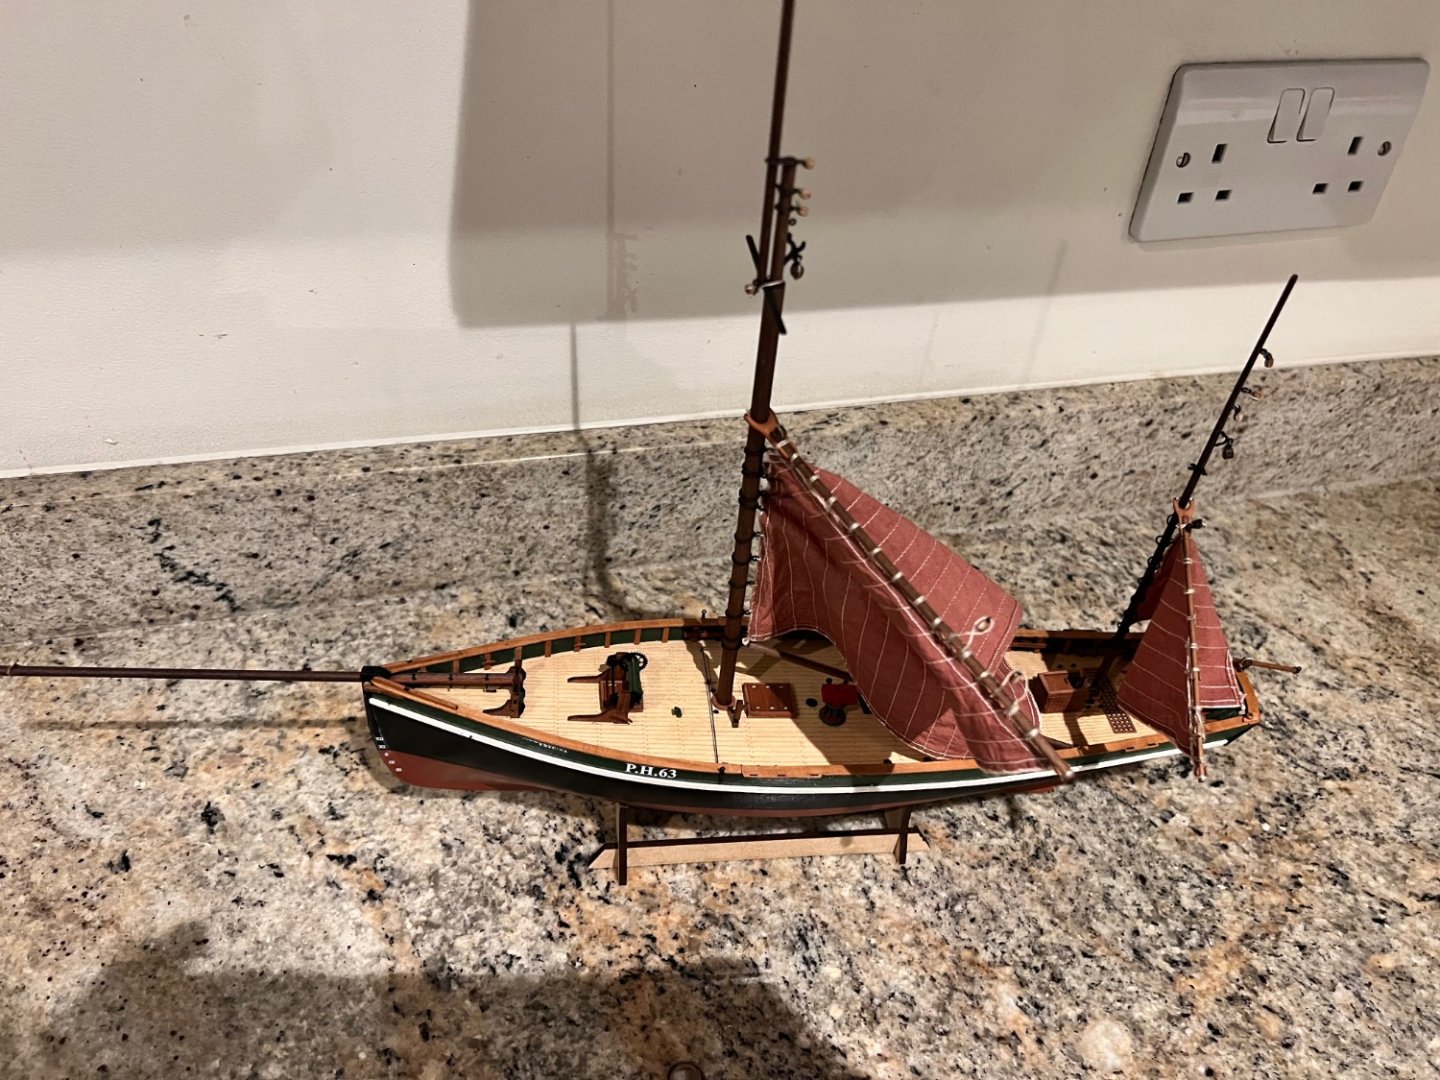
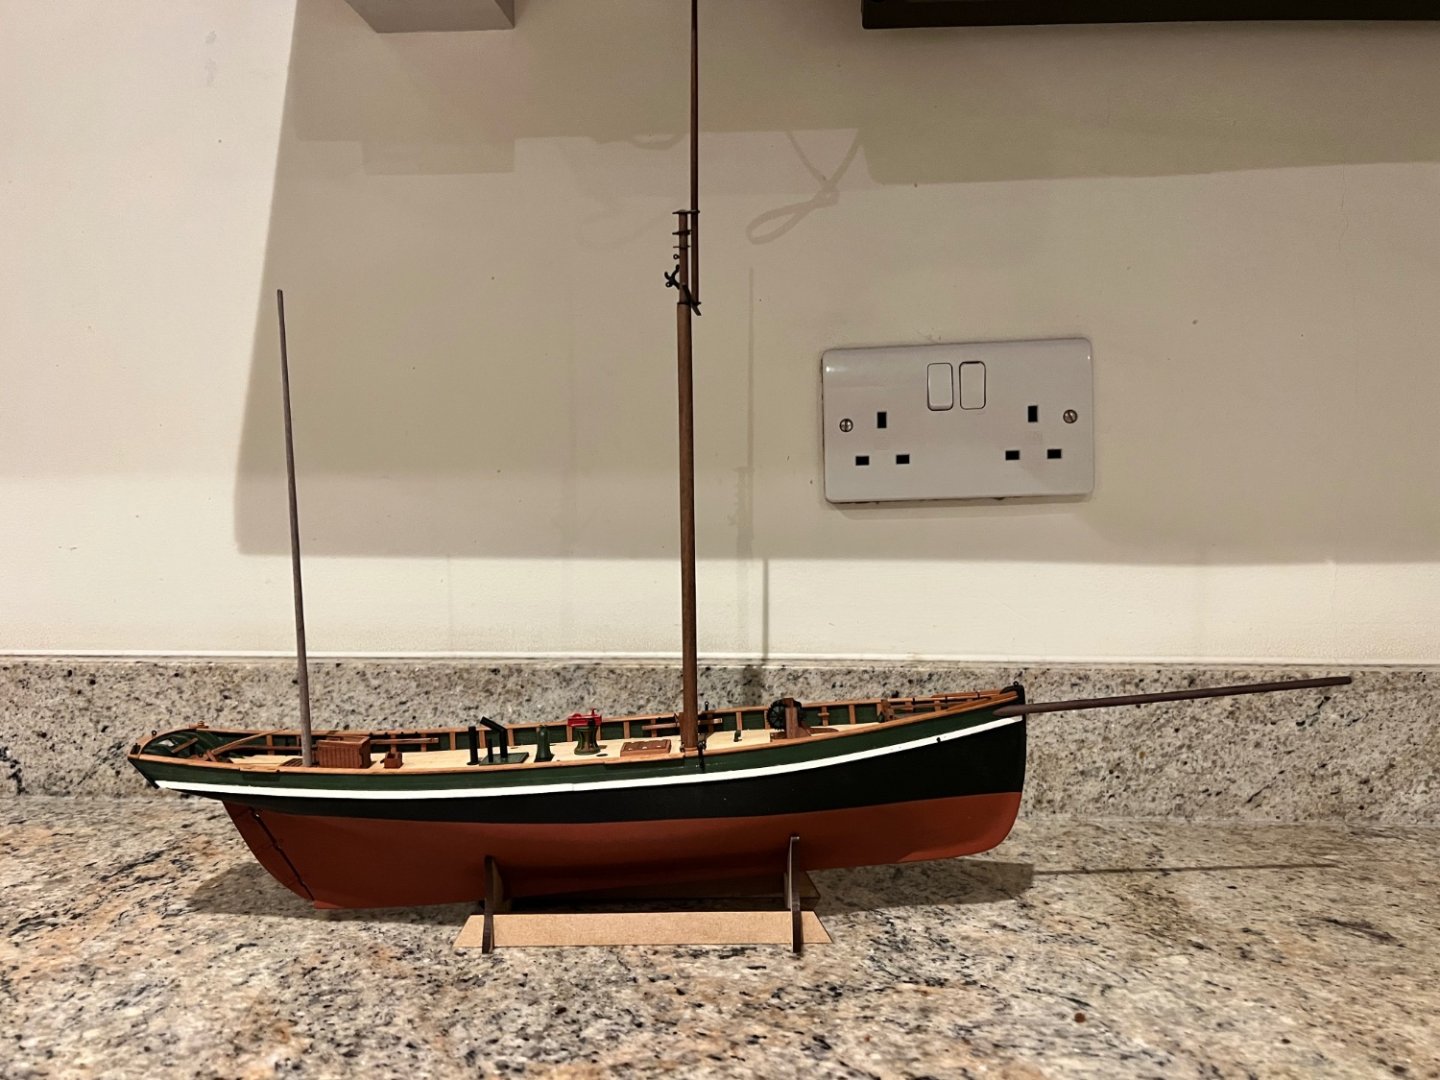
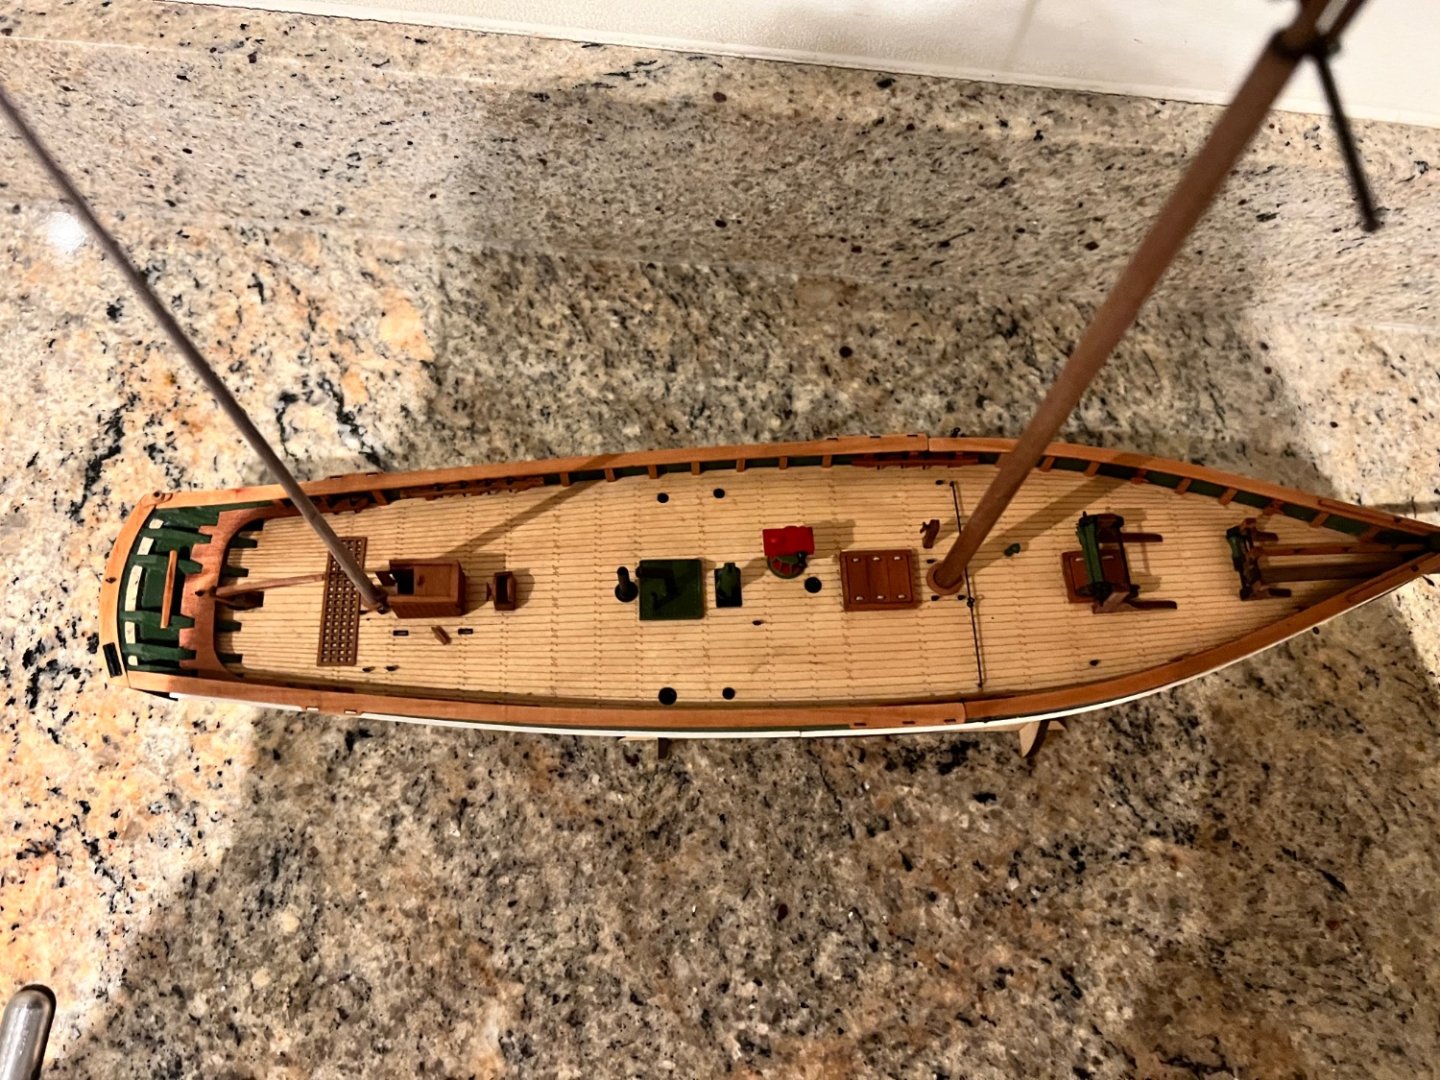
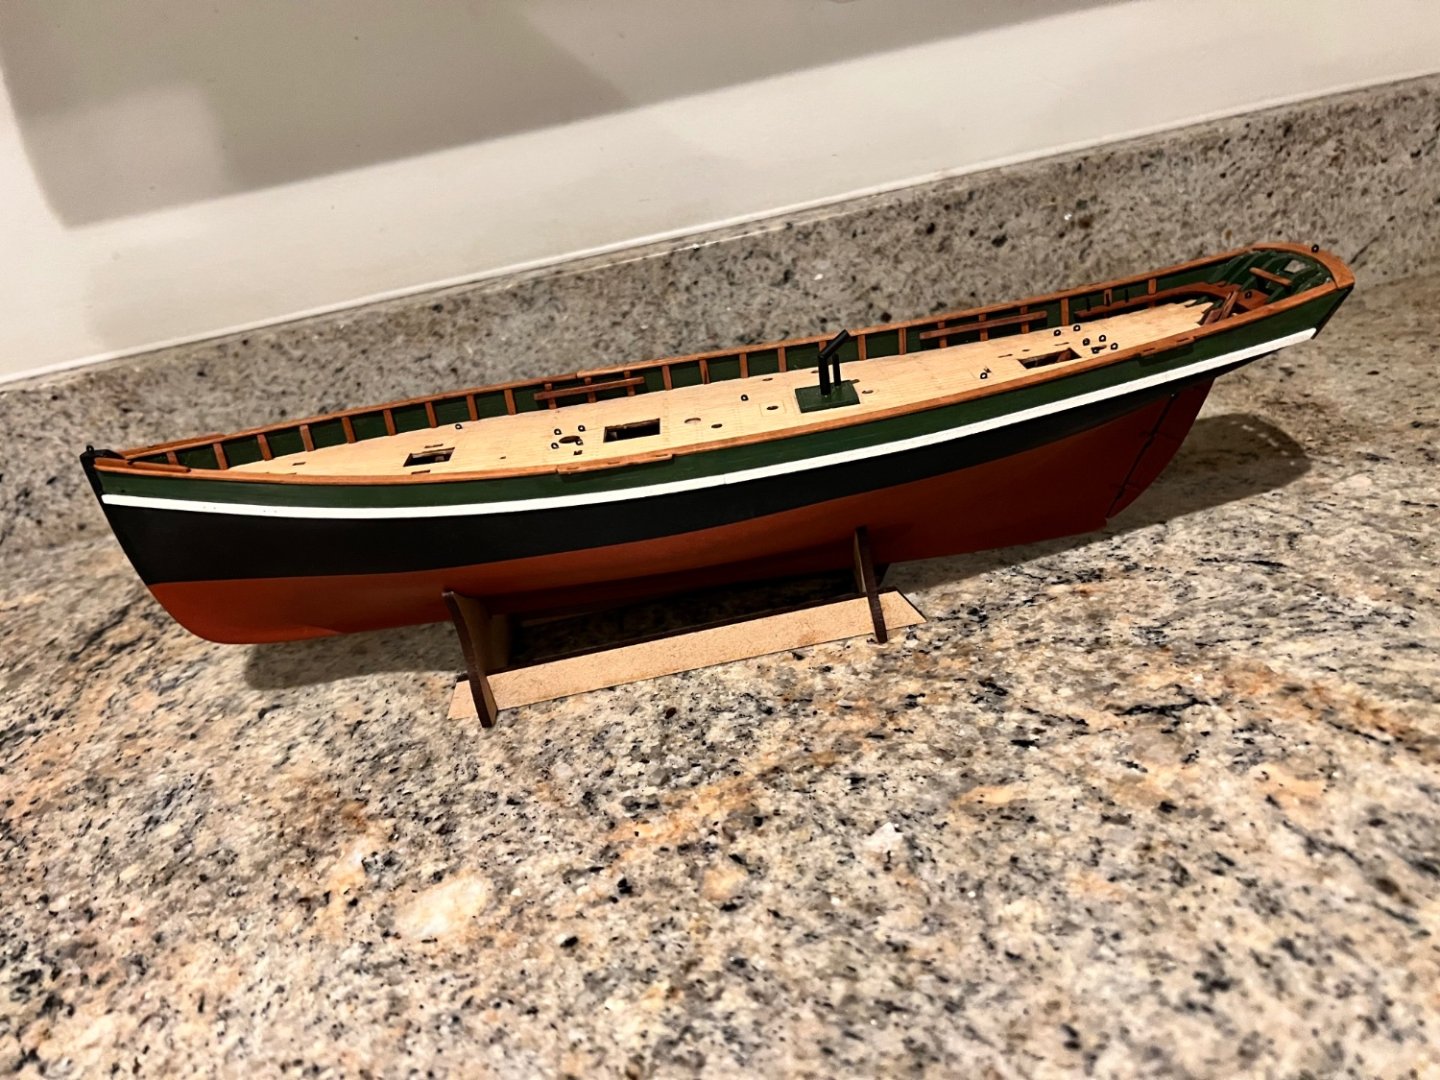
 So, Erycina is almost finished. Main, mizzen and topsail added. Inner jib in the process of being tied on. Sails and rigging all added. Almost finished except for the stand and adding a few coils of rope next weekend. Erycina is welcomed to the fishing fleet. Only Ranger still to join. The fleet, Erycina is the second largest after the Zulu. With the two smaller trawlers. Erycina like the rest of the Vanguard fishing fleet was a great pleasure to build and her hull has some of the most pleasing lines of the fleet. Thanks Chris for another superb kit and James H for another excellent set of instructions and build log. Thanks also to the other Erycina build logs: Glennard, Niwotwill, Bowline and Craigie - a hugely valuable resource. How did Erycina stack up compared to the rest of the fishing fleet? Under Chris’s new difficulty classification she’s rated “Amateur” which is the second level of difficulty above “Novice”. I think that he’s right. Her hull was straightforward to build despite the lovely curved shape. But her rigging was a little trickier that the other builds. Part of it was just two masts, sets of shrouds, ratlines, running rigging, etc. This added complexity meant that for each piece of rigging you might need to refer to two or three plans not just one sheet to ensure that rigging was routed correctly and tied off at the right points. All the info is there on the plans, but on this build you had to look a little for it. For example, I missed the set of blocks at the bottom of the top halyards on both masts and only added them later. This was a great learning curve for me as I head onto my first more complex build. The other added complexity is that, like Nisha, the plans are not full size and all measurements need to be scaled up. I can’t recommend these little Vanguard boats strongly enough for someone new to the hobby, as I am, and with limited modelling skills. Next I’ll be sticking with Vanguard but need to decide whether to build Ranger and complete the fishing fleet or challenge myself more and build a warship, Alert. I’m erring towards having a change and building Alert.


- 46 replies
-
- 8
-

-

-
- vanguard models
- Erycina
- (and 3 more)
-
Thanks Craigie, you’re entirely right an off-white would be better - but I won’t be able to repaint it nearly so neatly now it’s attached to the model and has chainplates crossing the rubbing strake - I think I’ll leave rather than risk making a mess.
- 46 replies
-
- 1
-
-
- vanguard models
- Erycina
- (and 3 more)
-
She looks amazing Kevin, congratulations. I look forward to following your next build.
- 38 replies
-
- 2
-
-
- Lady Eleanor
- Vanguard Models
- (and 1 more)
-
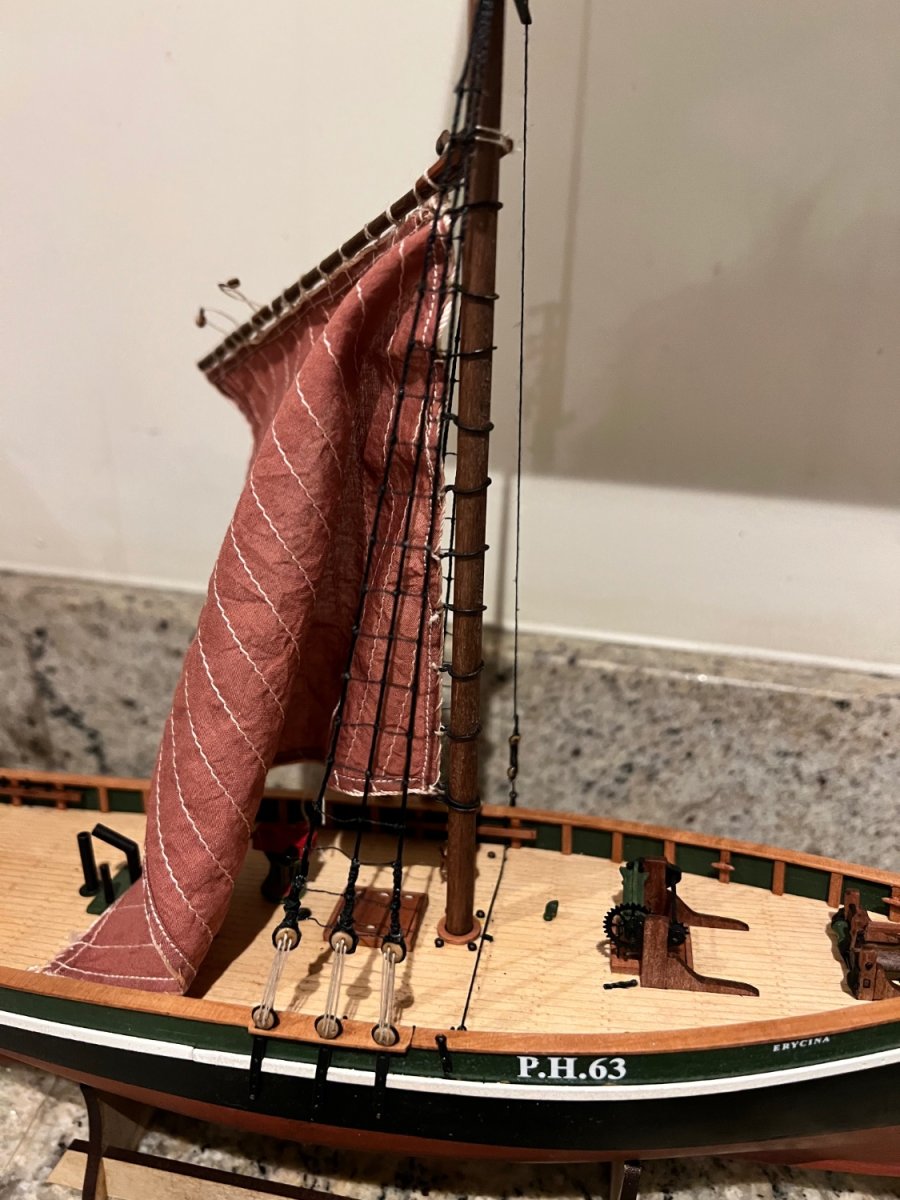
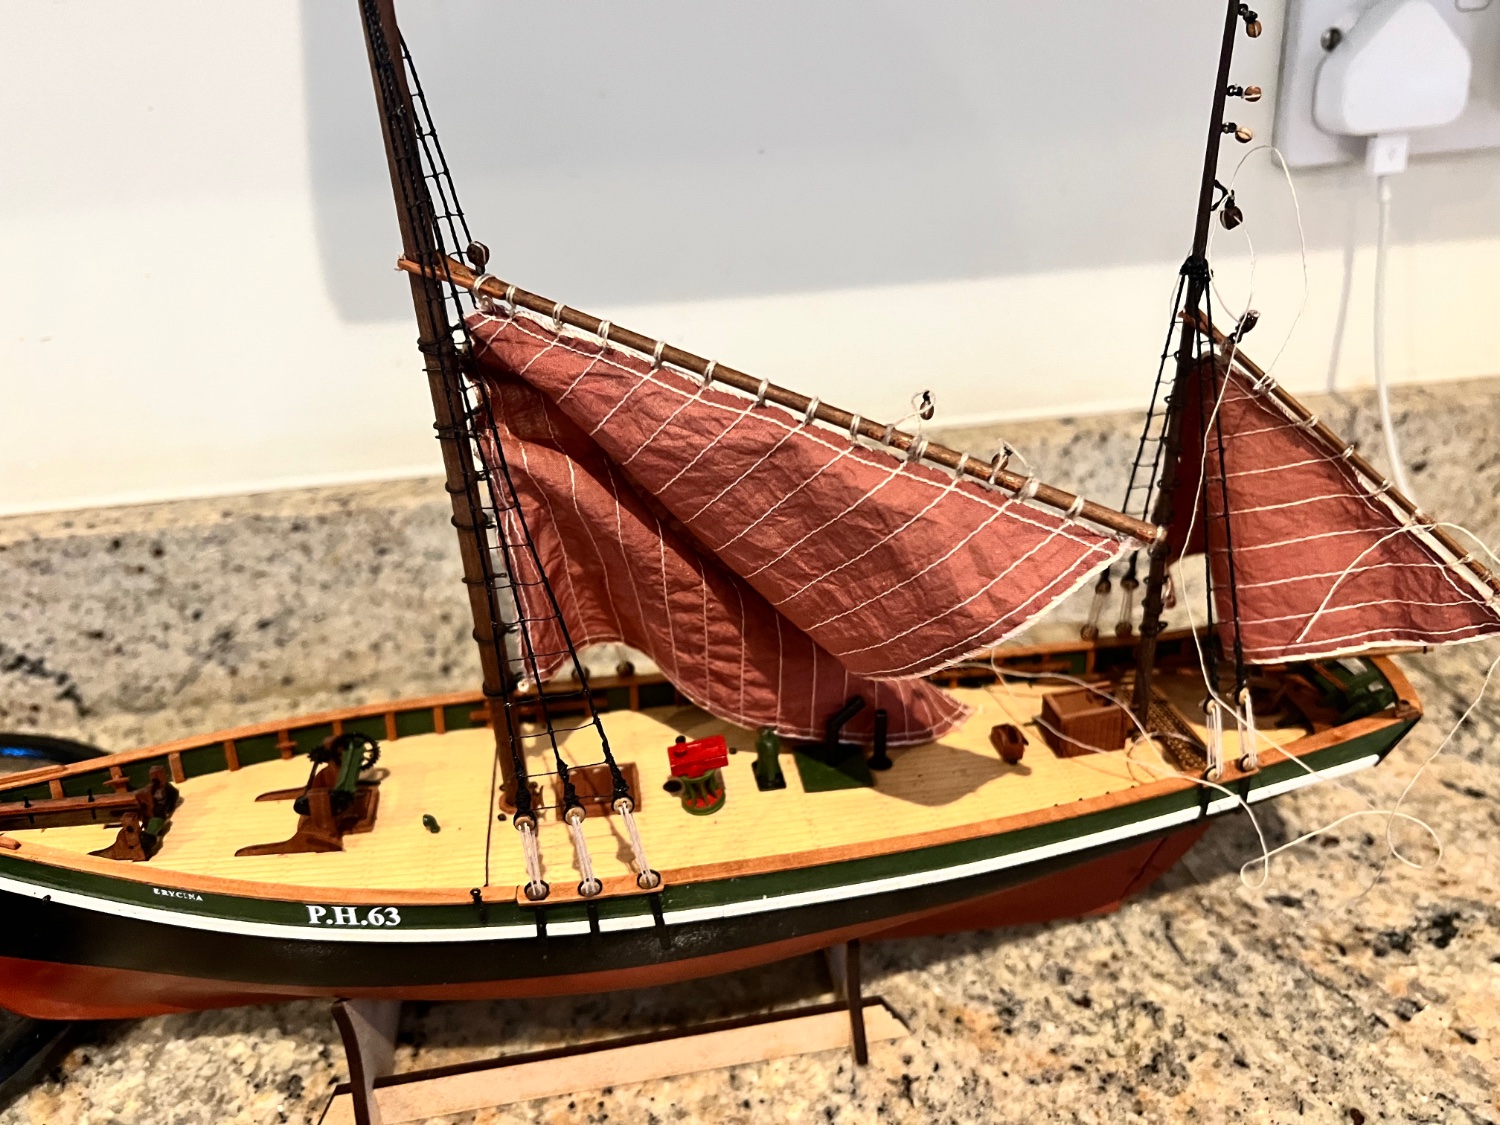
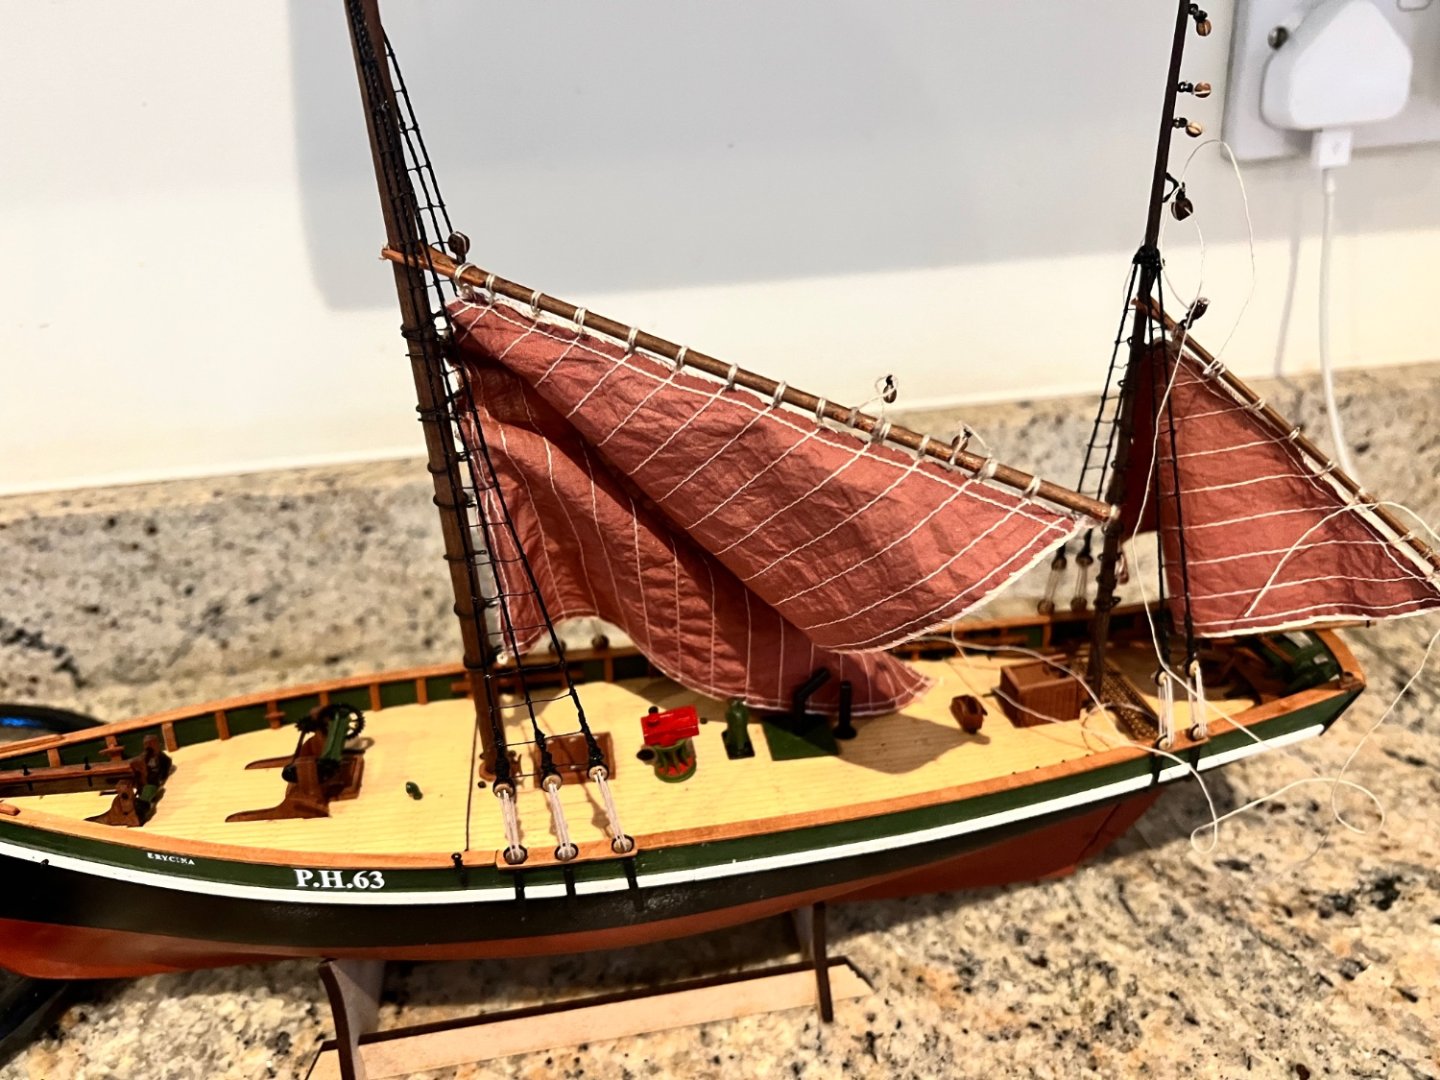
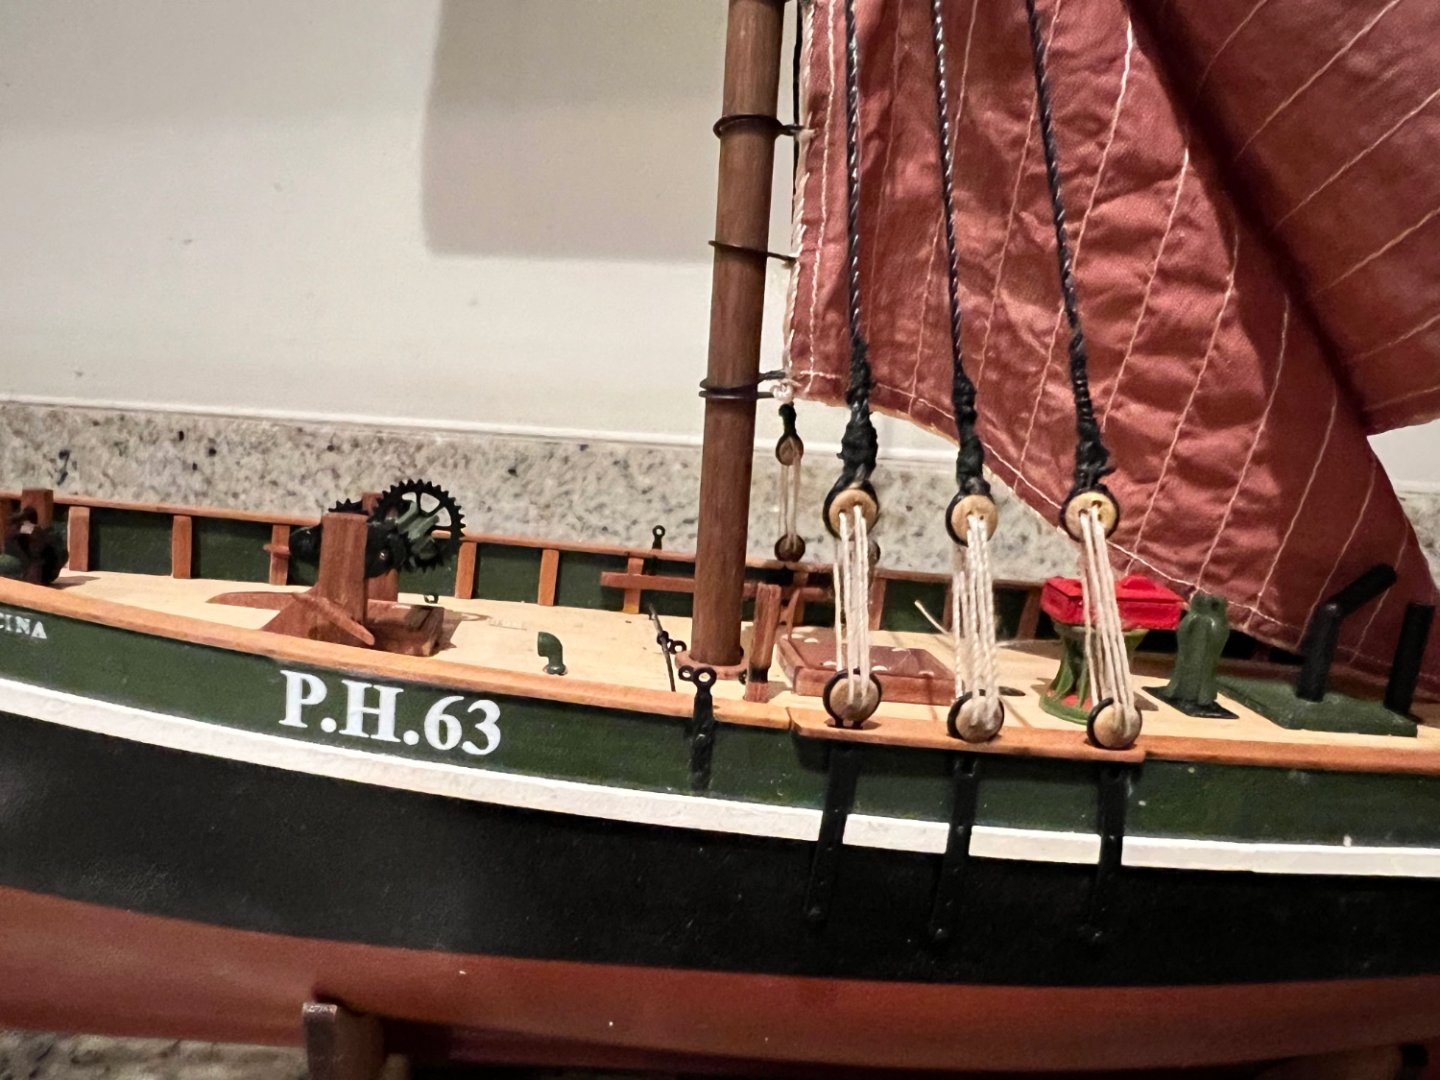
I’ve followed your advice Glenn. Thank you very much. The two damaged shrouds have been cut away and replaced. I’ve redone all the ratlines too. It’s not noticeable that the damage happened, although I think I need to tighten up or replace that bottom ratline. To alleviate the boredom of ratlines, I’ve set up the running rigging for the mizzen sail and also fitted the port stay for the main mast. The mizzen rigging may need some tweaking and isn’t tied off yet.

- 46 replies
-
- 4
-
-
- vanguard models
- Erycina
- (and 3 more)
-
Thanks Glenn, I’ll try that.
-
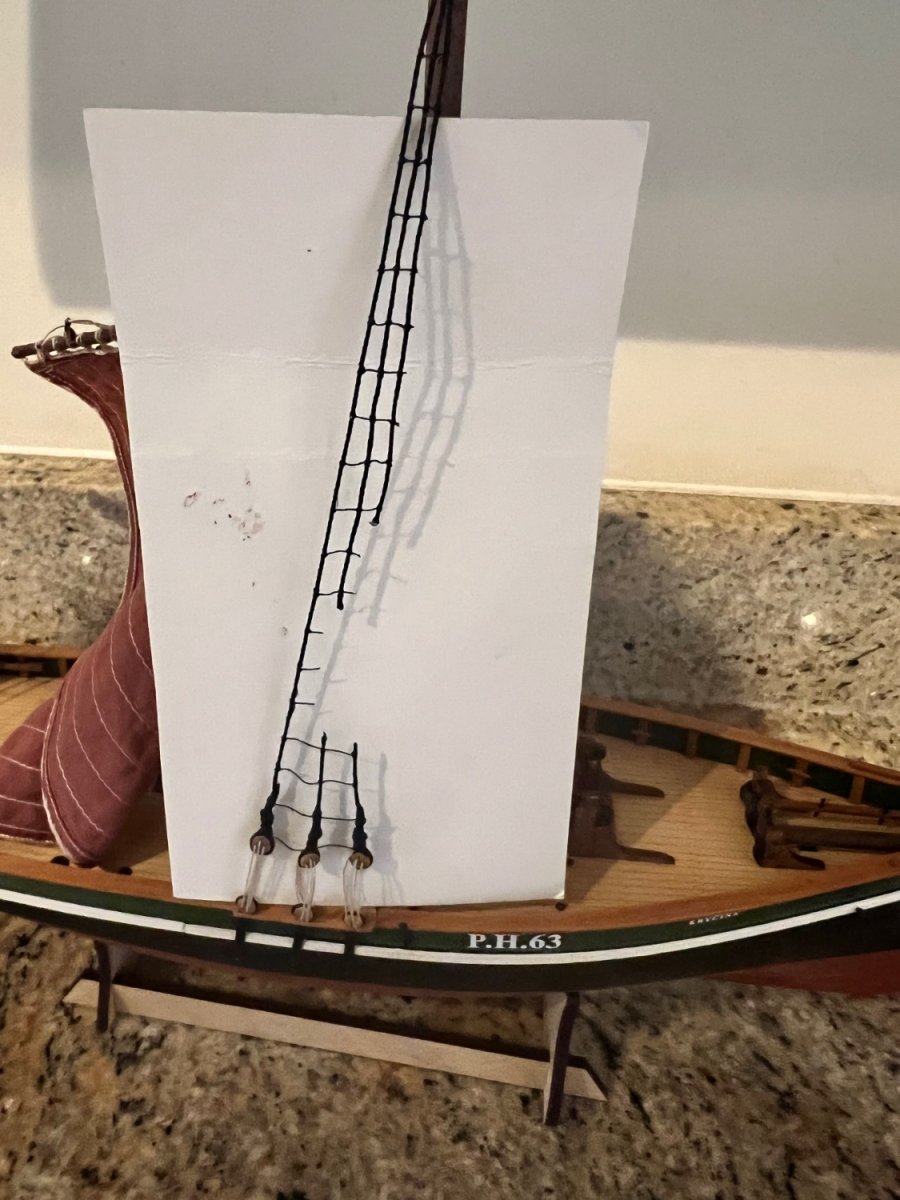
OK - a bit of a disaster. I’d just finished all the shrouds and ratlines on both masts. I decided to use a match that I thought was out but still hot to remove the excess fluff on the edge of the shrouds. The idea being not to touch the ratlines but just to melt the fluff. A technique I’d used on other builds -but not a technique I’d seen on MSW for reasons that will become apparent. The match can’t have been completely out and must have touched a ratline as it flared up and burnt through two of the starboard shrouds and some of the ratlines. Damaged starboard shrouds and ratlines below. The port shrouds and ratlines below are still intact. I think that I’ll need to strip off all the main mast shrouds, deadeyes and ratlines to fix this though as the forward two port shrouds are on the same piece of thread / shroud as the damaged starboard ones and the rear shroud on each side is tied on top of the forward shrouds. Shrouds and ratlines to me is one of the more tedious parts of the build - so is there any way I can keep the intact port shrouds and ratlines and just replace the starboard ones with it still good. I guess I could tie off each of the port shrouds at the top individually and then just cut away the starboard shrouds? That would leave more knots / loops around the cross trees of the mast than it should have (I think I tied off each individual shroud on Nisha as she was my first build with shrouds and ratlines and she looks fine). Any ideas and advice welcome! Many thanks.


- 46 replies
-
- 3
-

-
- vanguard models
- Erycina
- (and 3 more)
-
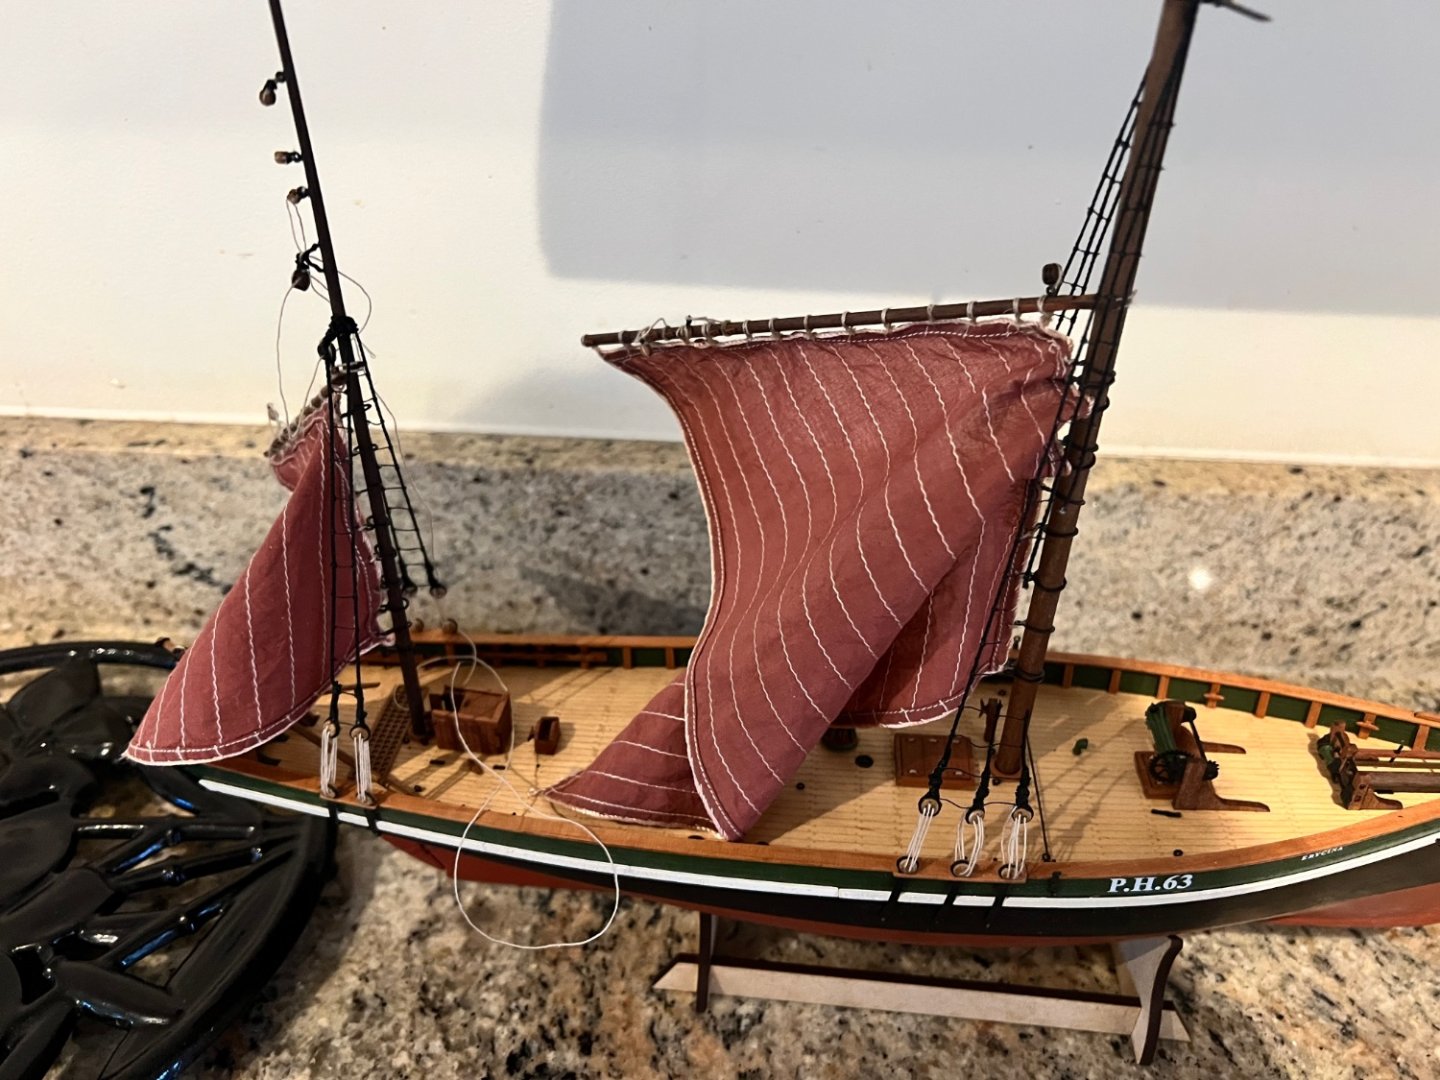
Shrouds fitted on main and mizzen masts. For some reason I struggled to make the main shrouds on both sides tidy above the deadeyes. I should really redo these, but I don’t have the patience (or enough suitable thread) to do so! Did a much better job on the mizzen shrouds. I’m painting black where the natural thread ties onto the black thread above the deadeye as my CA soaked knots look messy. On the mizzen mast I couldn’t get the thick 0.7mm black thread for the shrouds through the holes on the mast ring so I tied them around the last and over the ring in a similar manner to the main mast. Ratlines next.


- 46 replies
-
- 9
-
-
- vanguard models
- Erycina
- (and 3 more)
-
Thanks Chris!
-
Continued slow progress - life very busy, especially kids been at home all day during the school holidays limiting time available for boat building. Masts stepped - only main mast glued at this point. Main and mizzen sails added. Shrouds and deadeyes to add next, hopefully get the main shrouds rigged this evening. Nice present from my wife for Christmas! Ranger, the sixth and last of the Vanguard fishers. I look forward to building her. She looks to be just as excellent and high quality a kit as the other fishing boats. I am undecided whether to build Ranger or Vanguard’s Alert next. I have both kits. Part of me wants to complete the fishing boat fleet, on the other hand, I’ve built five fishers in ten months and maybe a change would be fun - Alert would certainly be more challenging.


- 46 replies
-
- 6
-
-
- vanguard models
- Erycina
- (and 3 more)
-
She looks super Glenn - I like the colour scheme. Nisha won’t take you long - another fun build.
- 62 replies
-
- 2
-

-
-
- Saucy Jack
- vanguard models
- (and 3 more)
-
Craigie, I’ll get some of those too. Glenn, I have reverse action tweezers too and like you struggled with the rigging to the belaying pins on this boat. Glad to know that this one’s rigging is actually a little tricky and that the rigging of bigger models is not necessarily harder. Thank you both.
-
Hi Craigie, sorry to hijack the thread, but I don’t have rigging tools. I’ve had a quick look on CMB - please could you let me know what set you went for as I’ll get the same. Just about to rig Erycina, sails dyed, spars ready, rigging next. Many thanks Dan
-
Looking great Glenn. I had exactly the same difficulties belaying some of the rigging to the belaying pins just behind the mast and below the shrouds. I didn’t mention it as it seemed a bit feeble compared the the intricacies of rigging on most of the models on MSW! It’s one of the reasons I found this one a little harder than any others in Vanguard’s excellent fishing boat range.
-
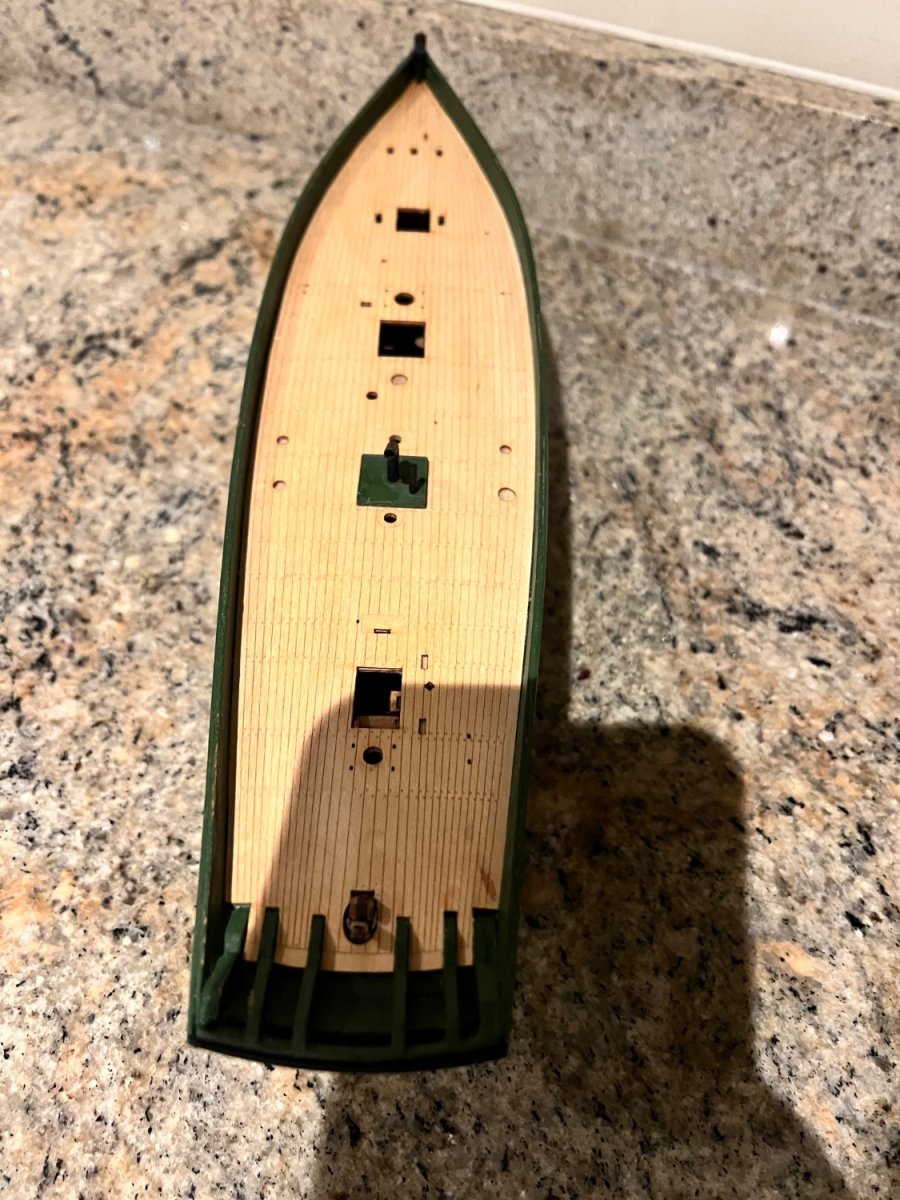
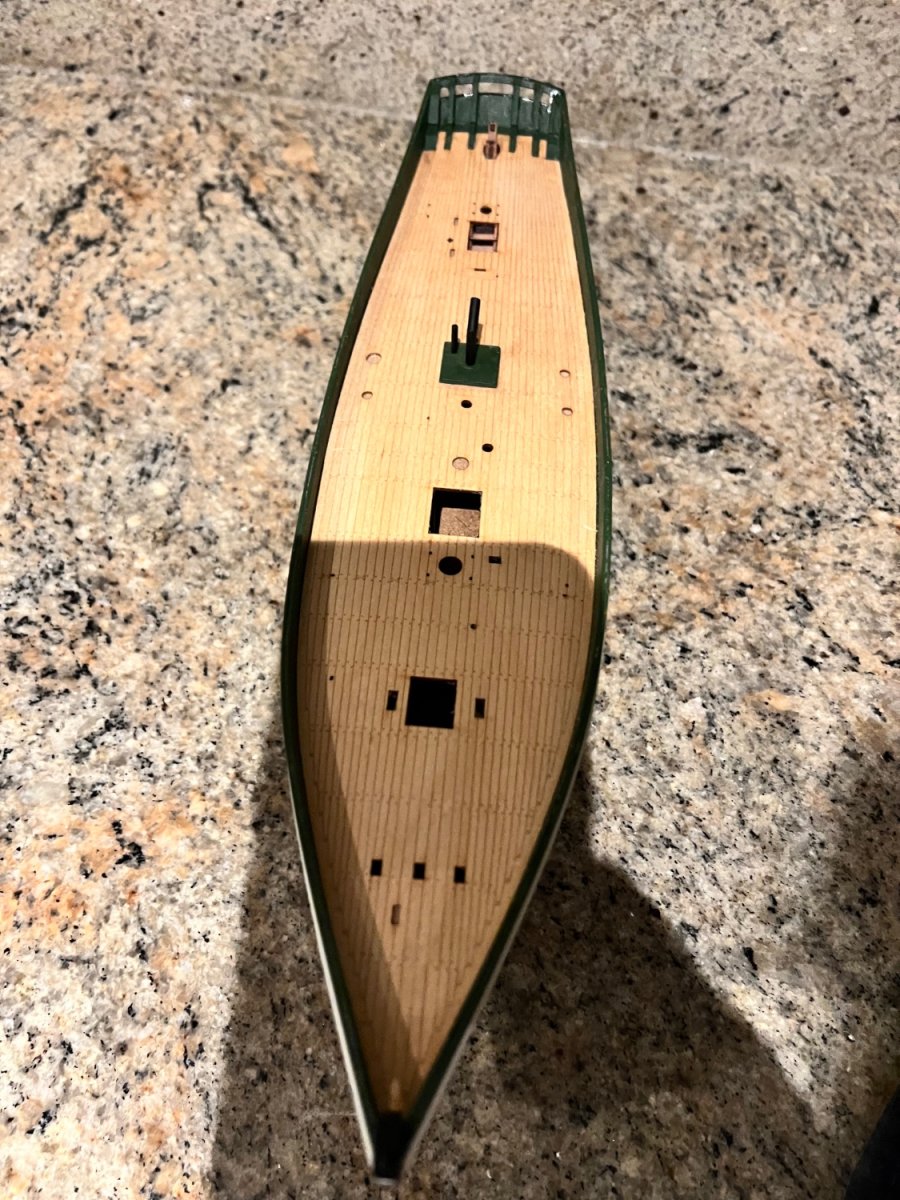
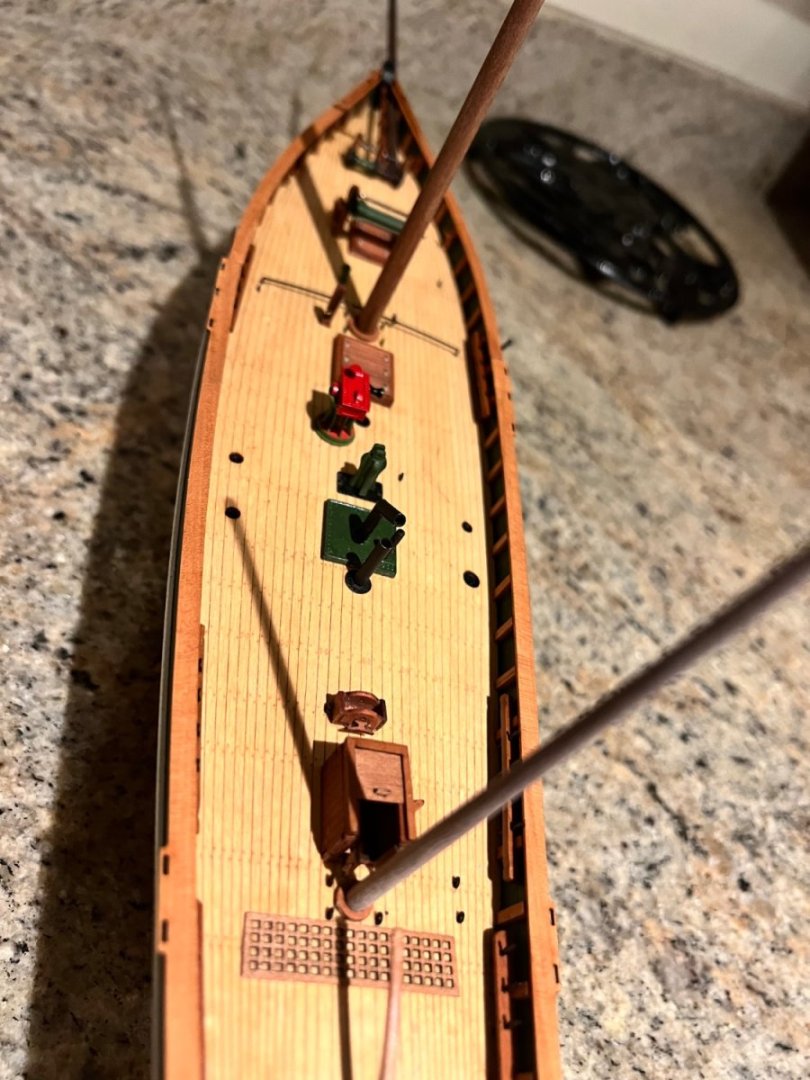
Life has been busy, so slow progress on Erycina. I’m also deliberately spinning this build out so I have something to build over Christmas, with the in-laws staying, and not a brand new project. The deck furniture is now complete and the masts in position but not glued. Bowsprit is glued. The lines of this fishing trawler are rather lovely. Onto the rest of the spars next. Plus I still need to add the decals on the sides tomorrow.


- 46 replies
-
- 7
-
-
-
- vanguard models
- Erycina
- (and 3 more)
-
She’s looking great Glenn. I found the planking on this boat harder than all the other Vanguard fishing boats, except the Zulu with her raked stern post (and I’ve yet to build Ranger). Luckily I think I just about got away with the bare wood above the waterline without filling (although plenty below). Probably wouldn’t have met the exacting standards of the more experienced builders on here, but I was happy. I really look forward to seeing the colour scheme - she’ll look very different. How will you paint the etched lettering on the stern? I struggled with that.
- 62 replies
-
- 2
-
-
-
- Saucy Jack
- vanguard models
- (and 3 more)
-
Jonathan, That is impressively organised. I wish I had the patience to be so thorough… I’m hooked on the Vanguard fishers too, my fifth, Erycina, is mostly built now and nearly ready to be masted and rigged. Fifie, Nisha and Zulu were also my first three fishers (and builds). I thought Zulu was a really enjoyable build and fairly straightforward, biggest challenges I had as a near beginner were planking to that raked sternpost and getting a suitable waterline on her. Enjoy! Dan
- 8 replies
-
- 1
-
-
- Vanguard Models
- Lady Isabella
- (and 1 more)
-
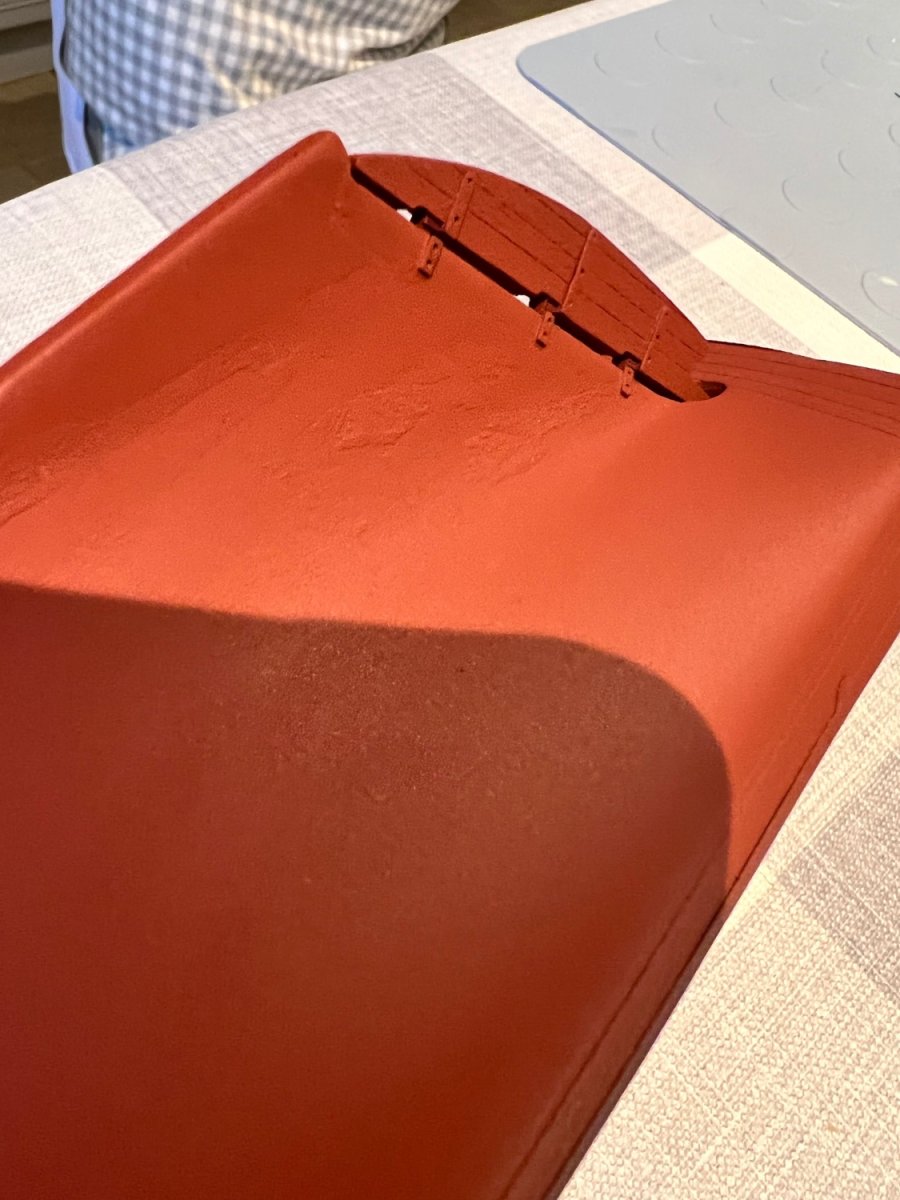
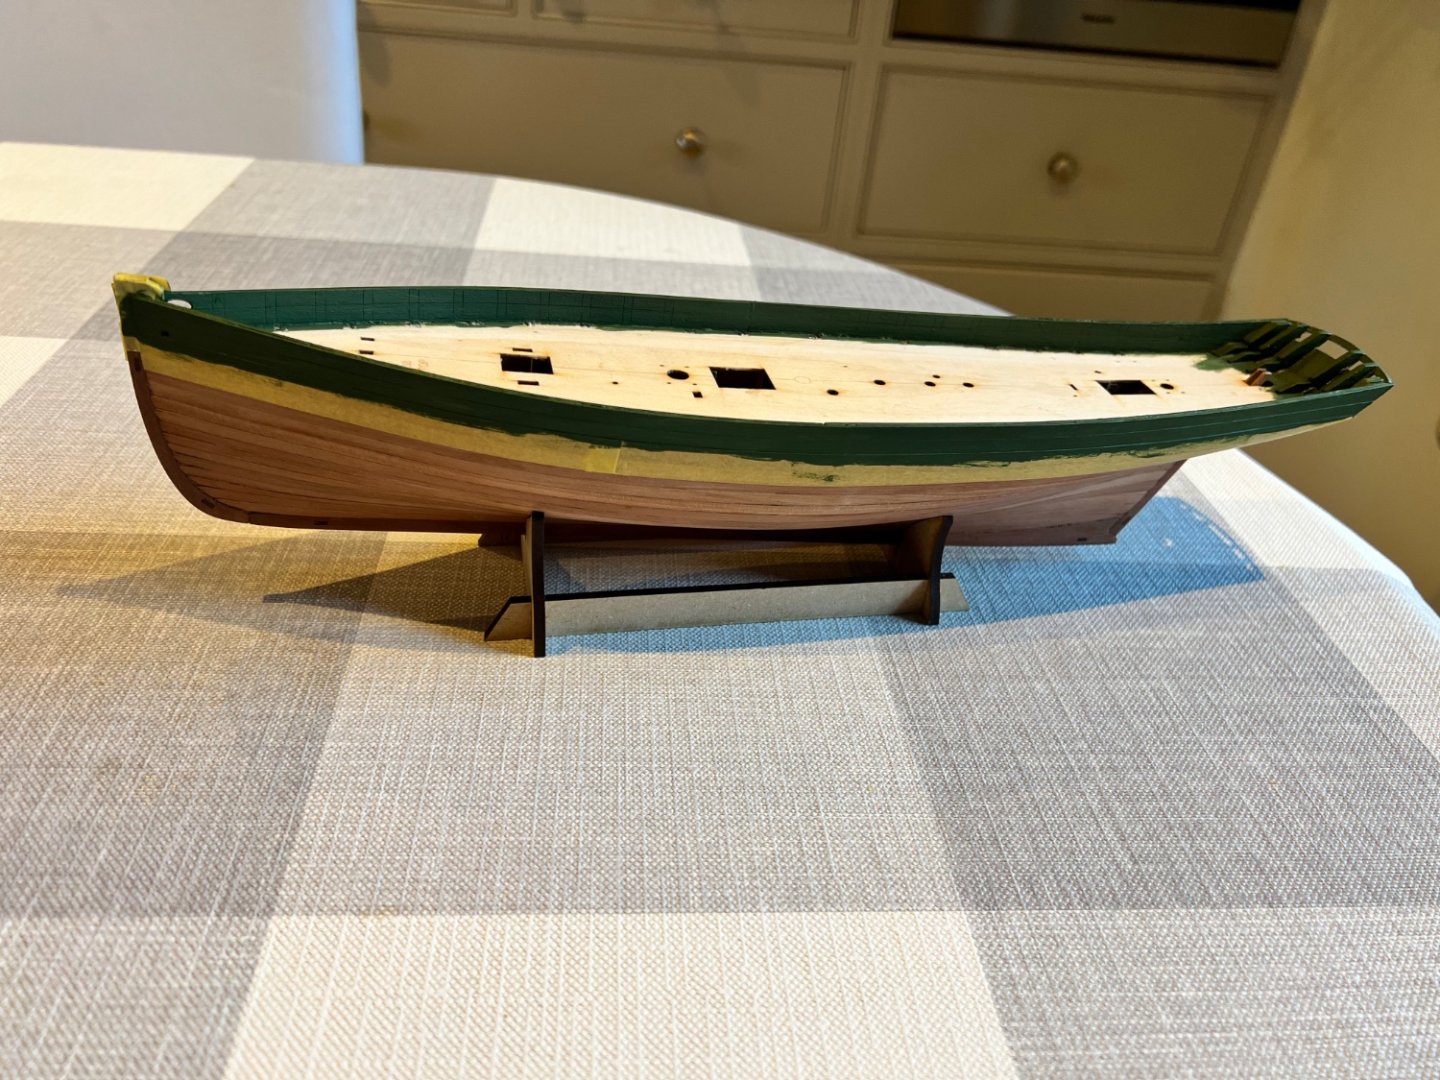
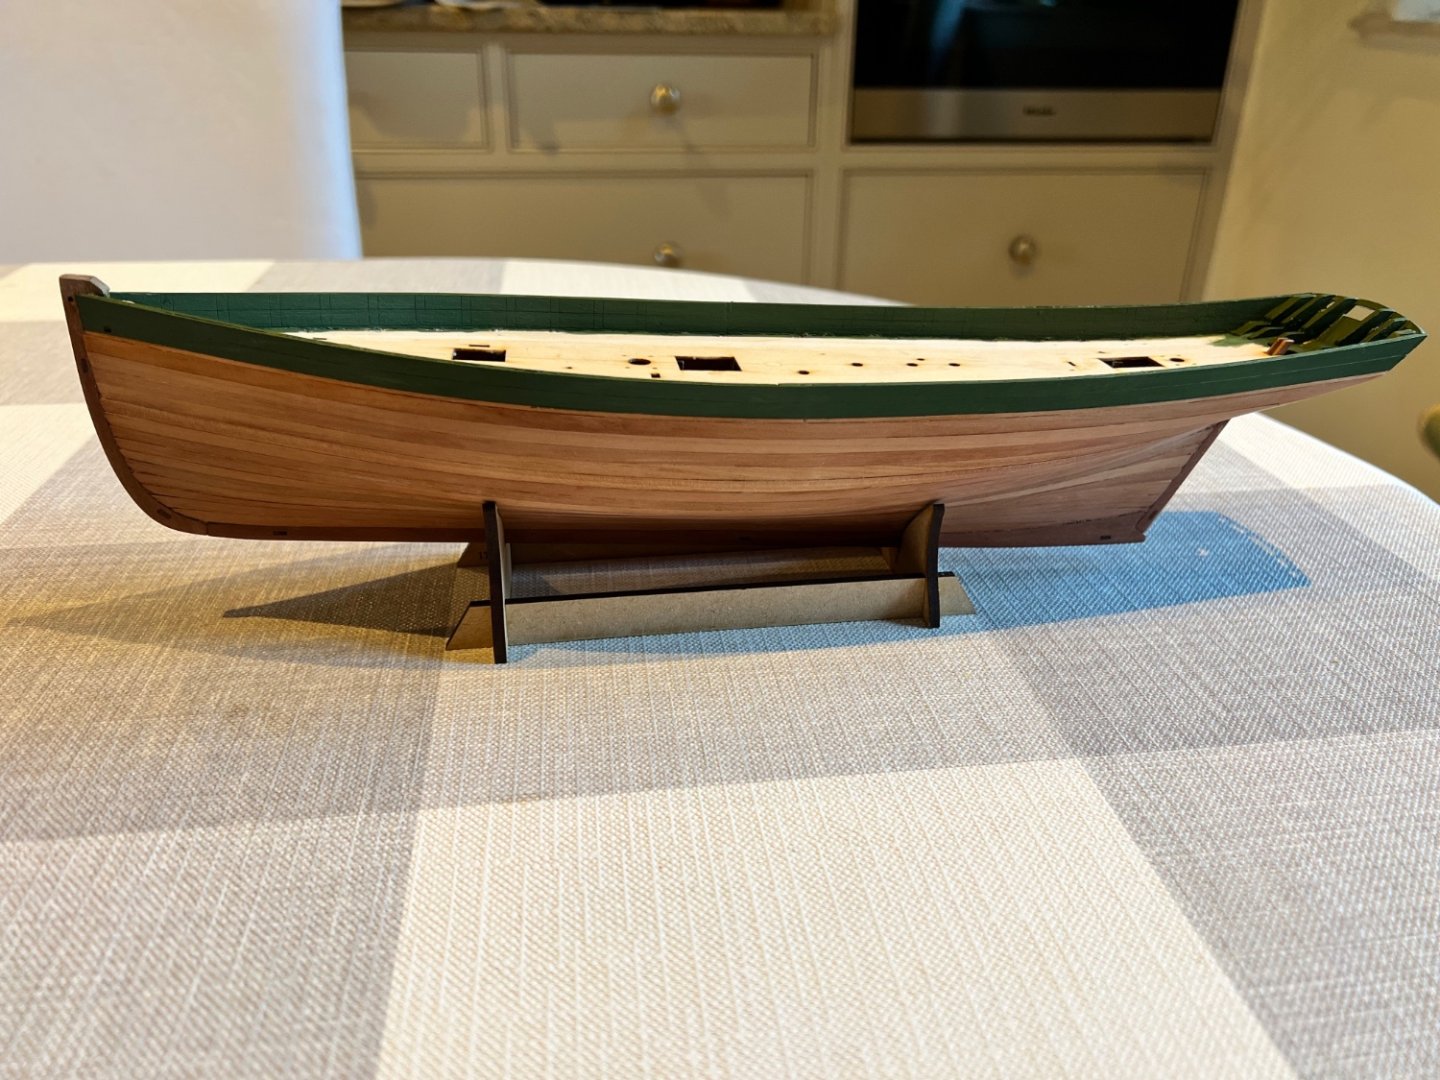
Timberheads being added. I’ve decided to go for the contrast look with wood timberheads against a green bulwark. It looked good on Nisha so I’ve duplicated the look! Then railings added. The side railings are too long and needed to be sanded shorter to get the transom railing in the right place. Also added some PE eyelets, lots more fittings to follow tomorrow, waiting for the black paint to dry on the PE. The wood, including deck have been liberally treated with Danish oil to make them a bit darker. It’s still a little wet here in the photos so may lighten as it dries.


- 46 replies
-
- 4
-
-
-
- vanguard models
- Erycina
- (and 3 more)
-
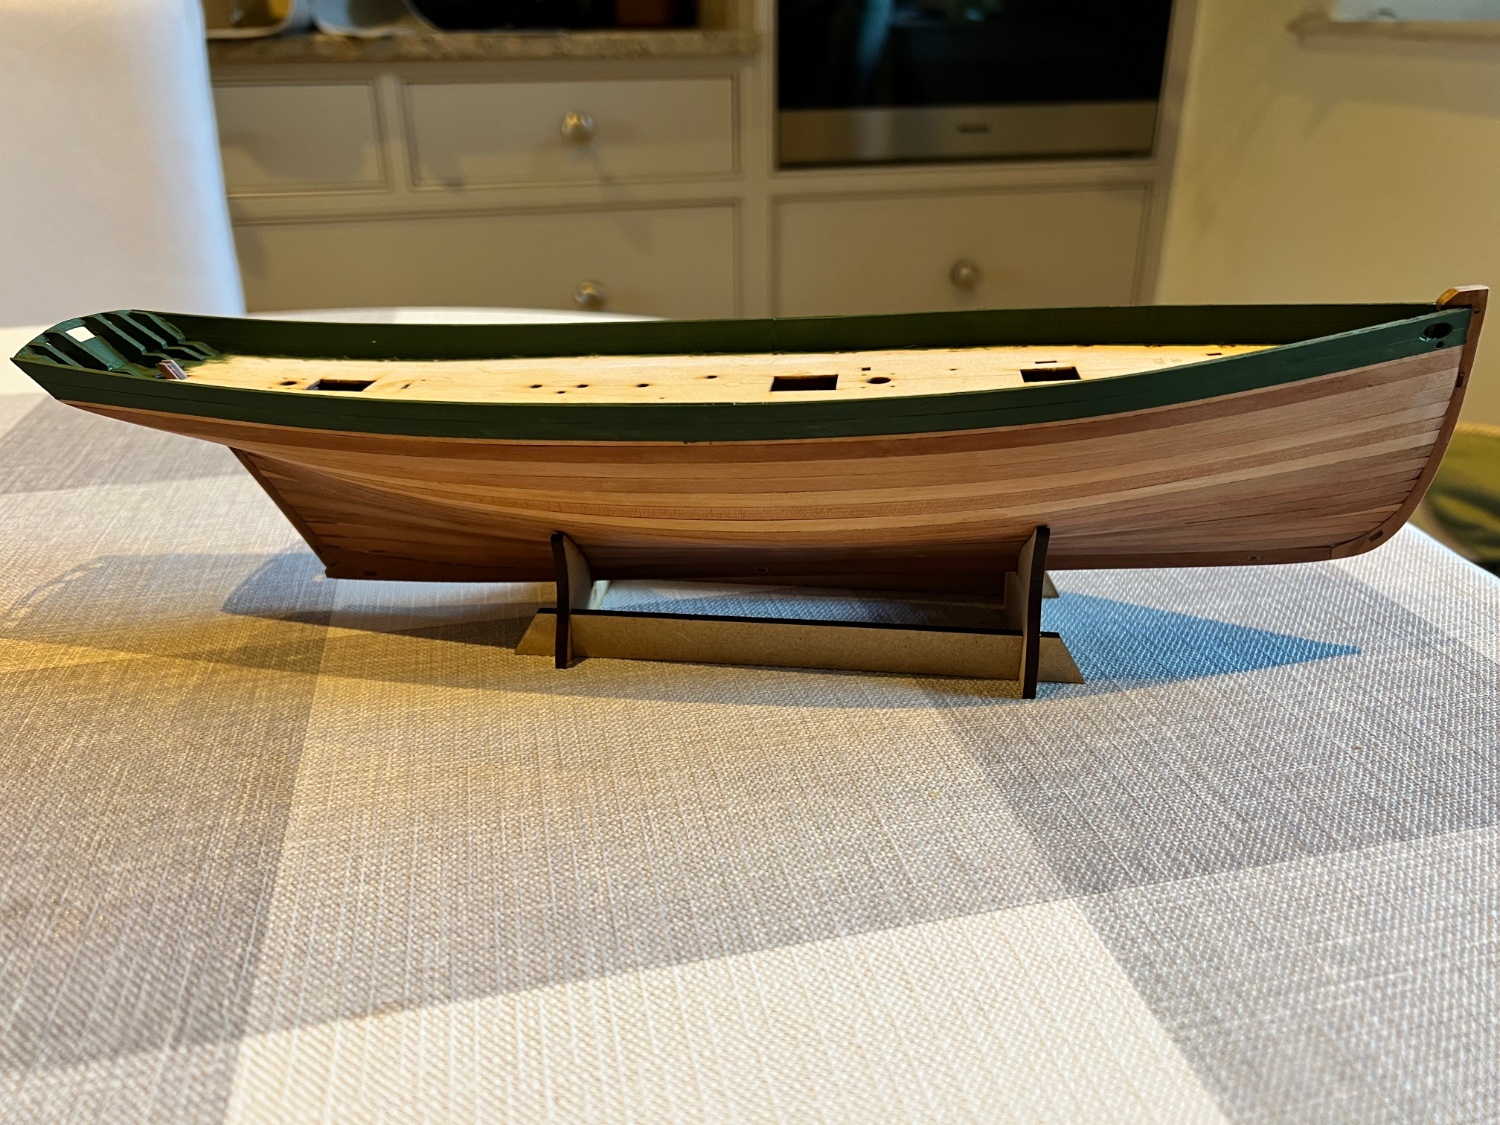
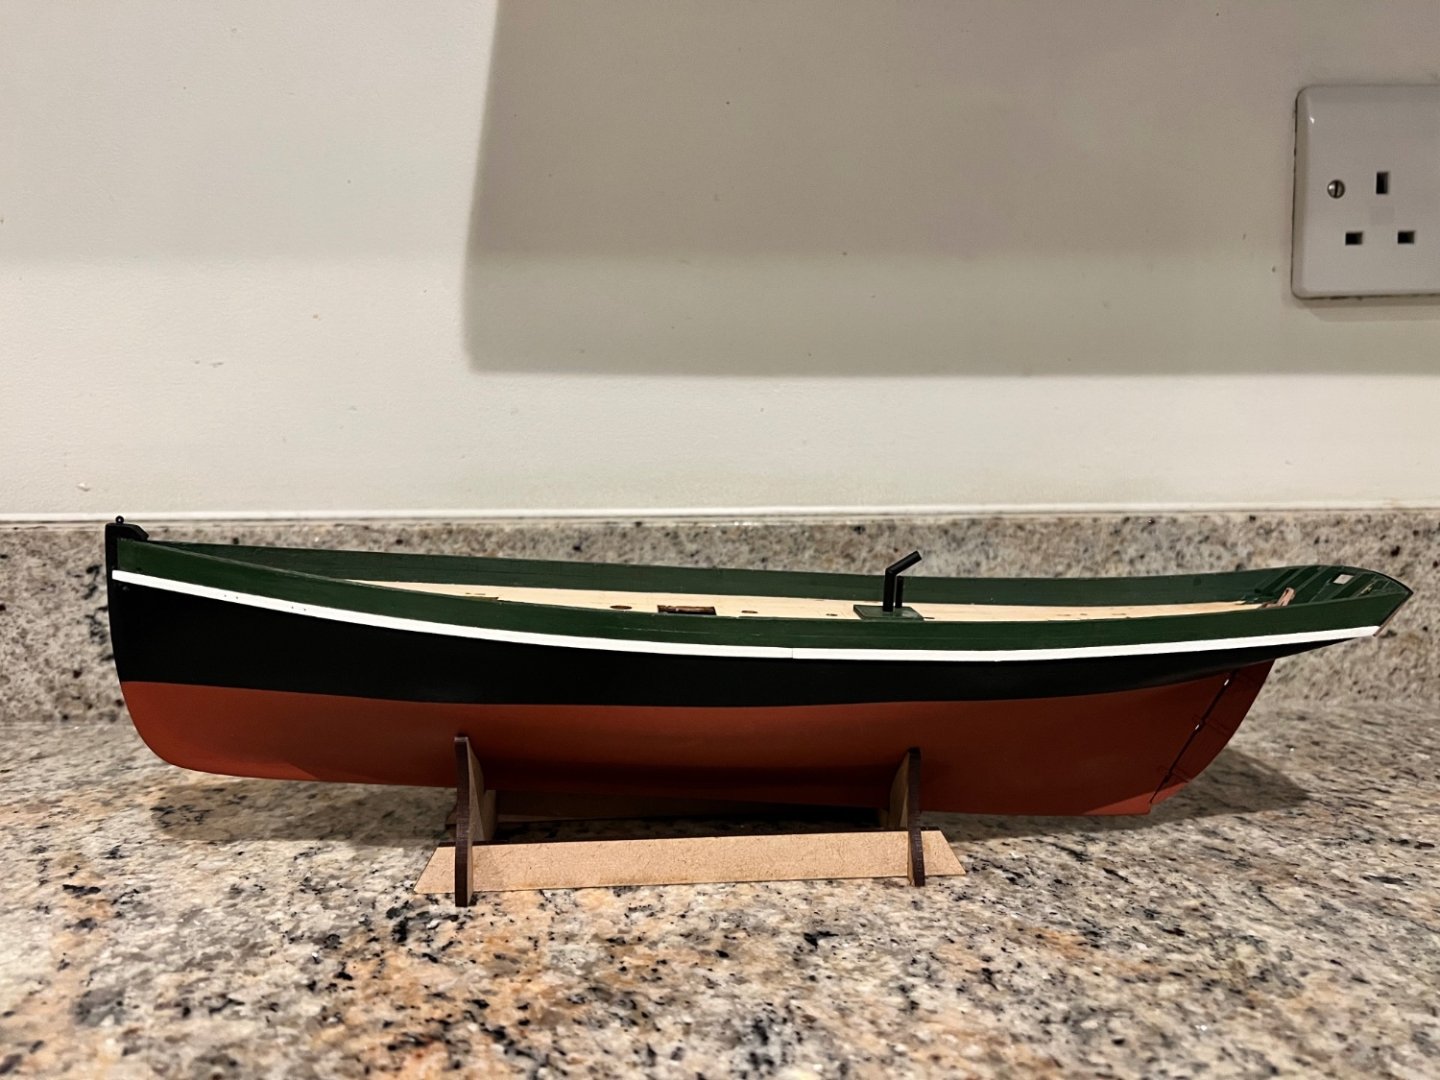
Next apply masking tape ready for the black hull. I’m using Chaos Black for the hull, same as I used on Nisha and the Zulu. This is a lovely paint that sits really well on the hull. But it does chip easily as I experienced on those two builds. The black goes on beautifully, but the green bulwark has already got tatty from extra sanding, paint leakage and the masking tape. Easily touched up. Then the deck, aft companionway steps and two of the three chimneys are fitted. All are straightforward. Next apply some gloss varnish to where decals will go and once dry apply the stern decal. Then fit the outer stern counter. Then the rubbing strakes / go faster stripe are fitted. I’ve painted these white and they are a little more prominent than I expected. I’ve been using Tamiya Flat black acrylic to tidy up chips in the black paint, but it’s not a good match so I l’ll redo with the Humbrol enamel black tomorrow instead.


- 46 replies
-
- 3
-
-
- vanguard models
- Erycina
- (and 3 more)
-
She looks super Glenn. Thanks for the detailed log. I’m following with my Erycina build a bit behind and this is really useful.
- 106 replies
-
- 1
-
-
- Erycina
- Plymouth Trawler
- (and 3 more)
-
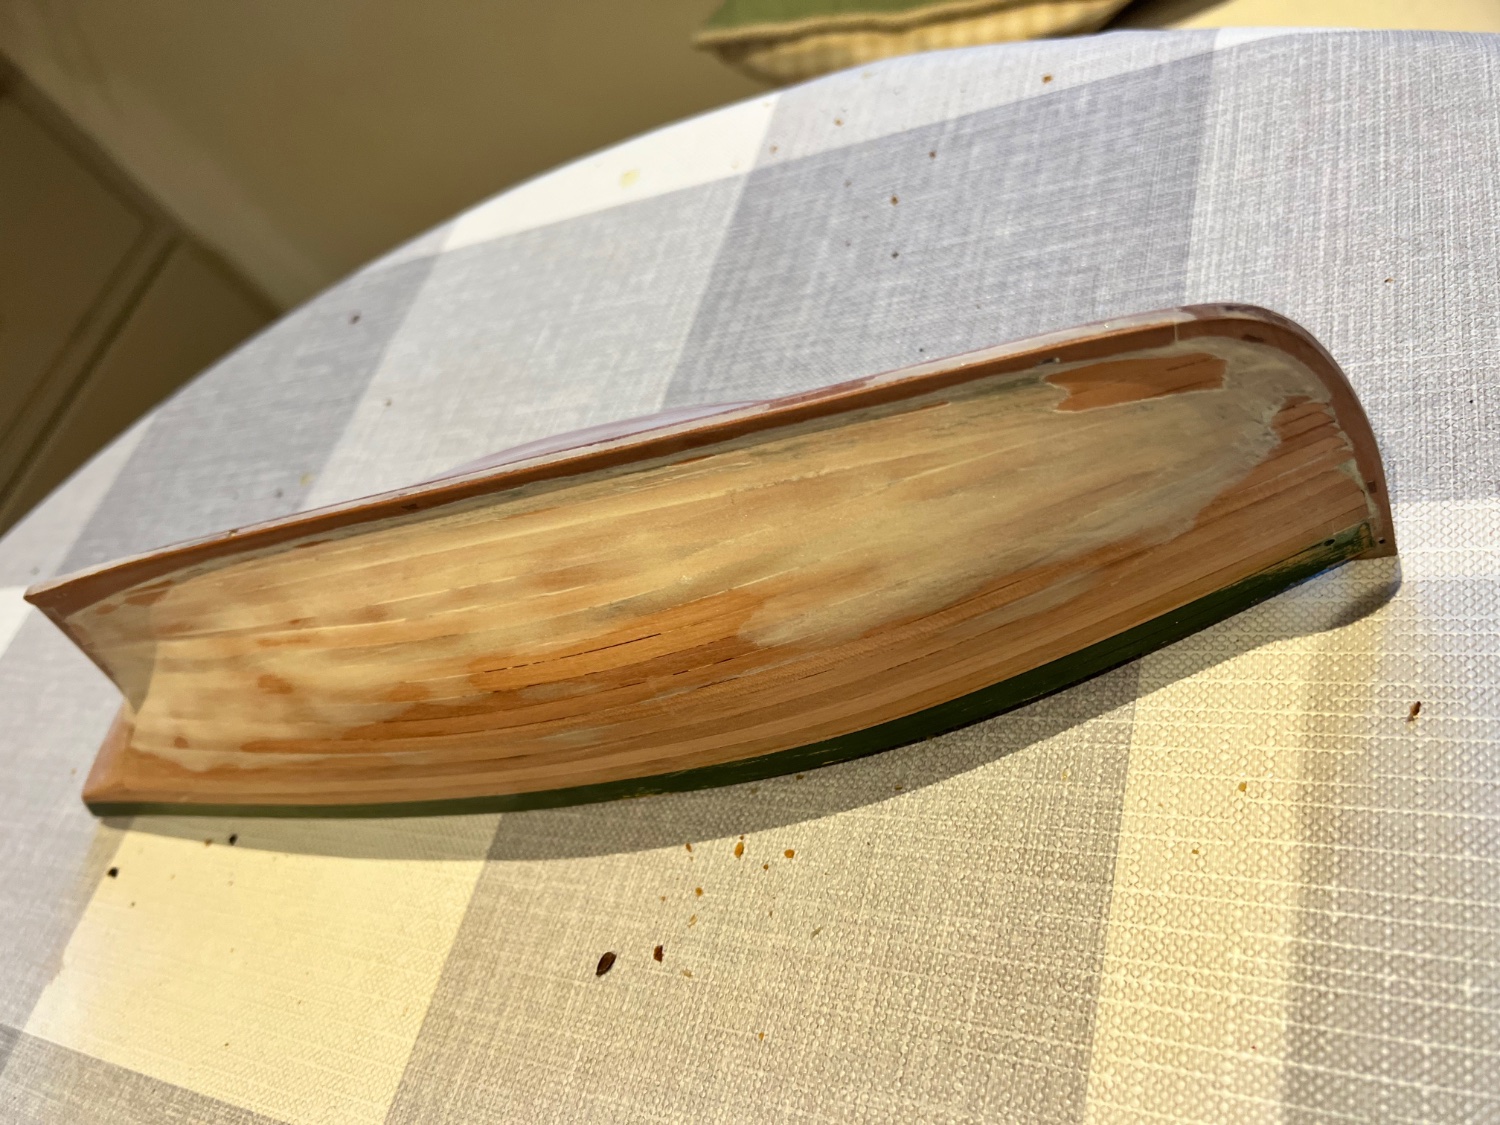
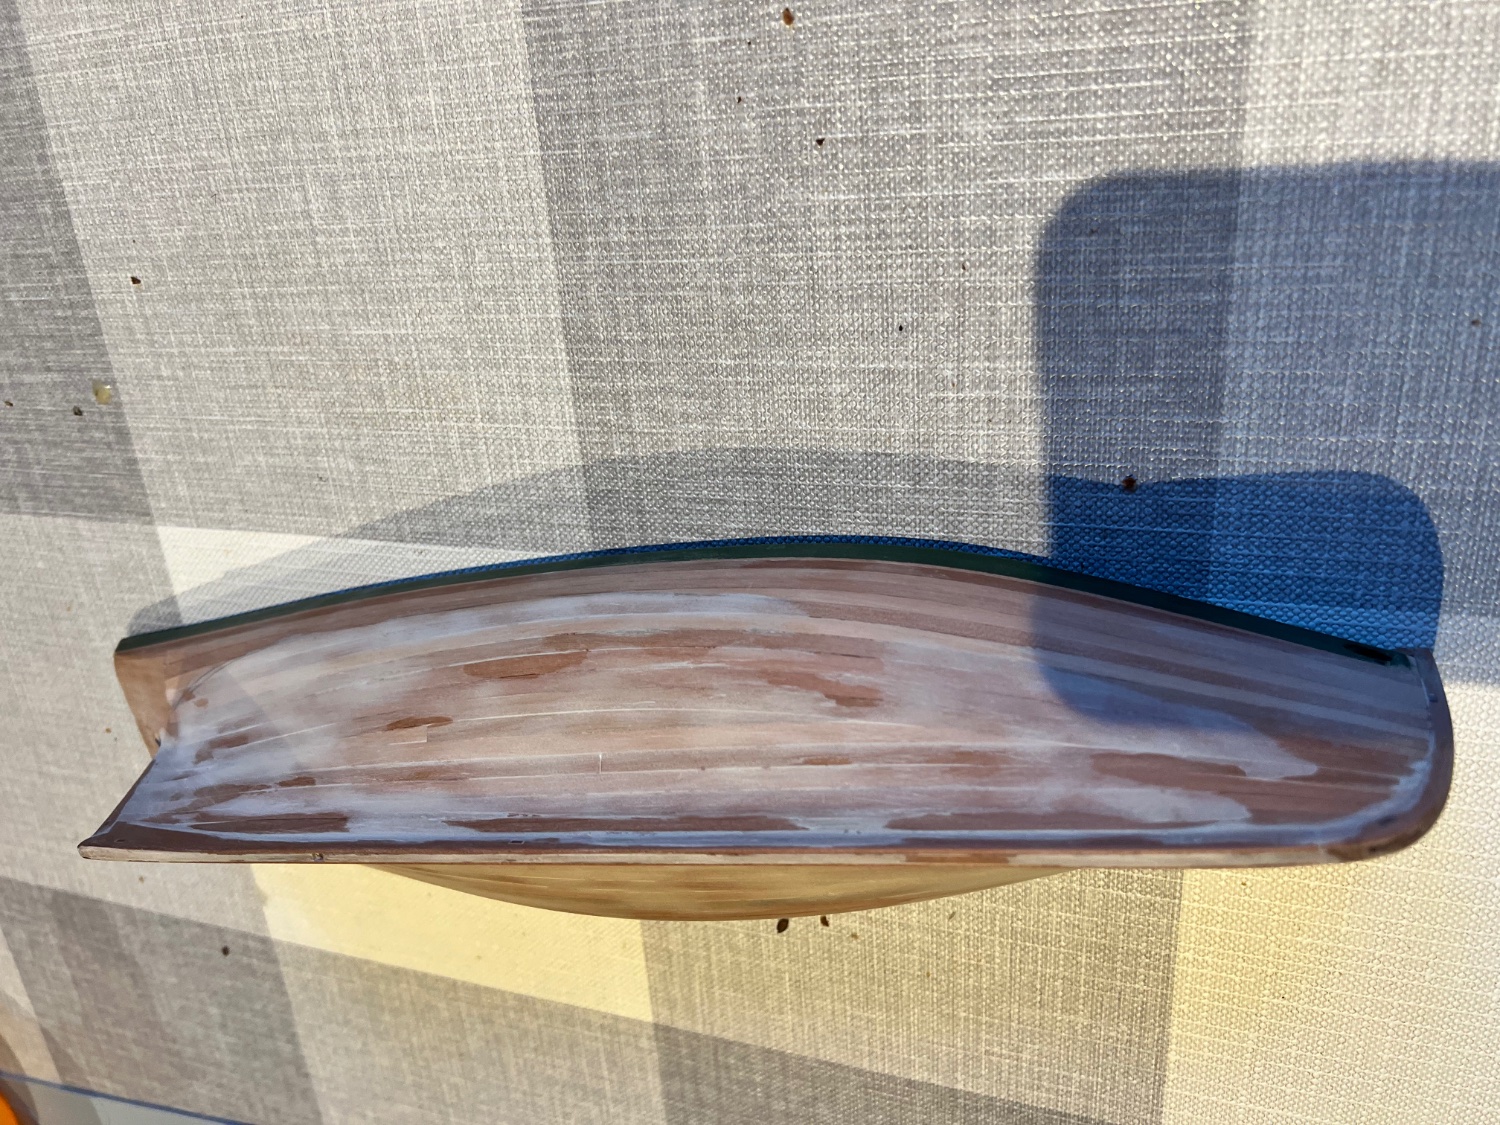
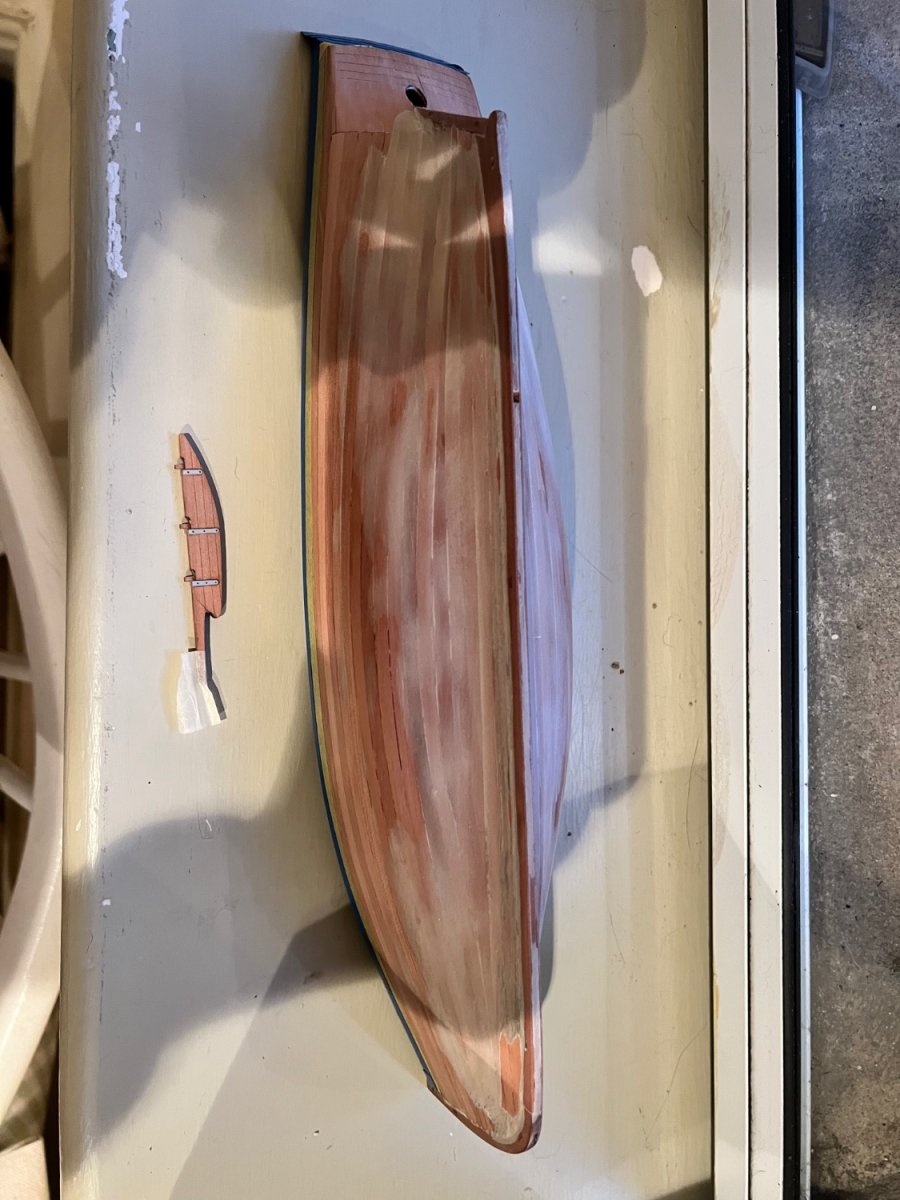
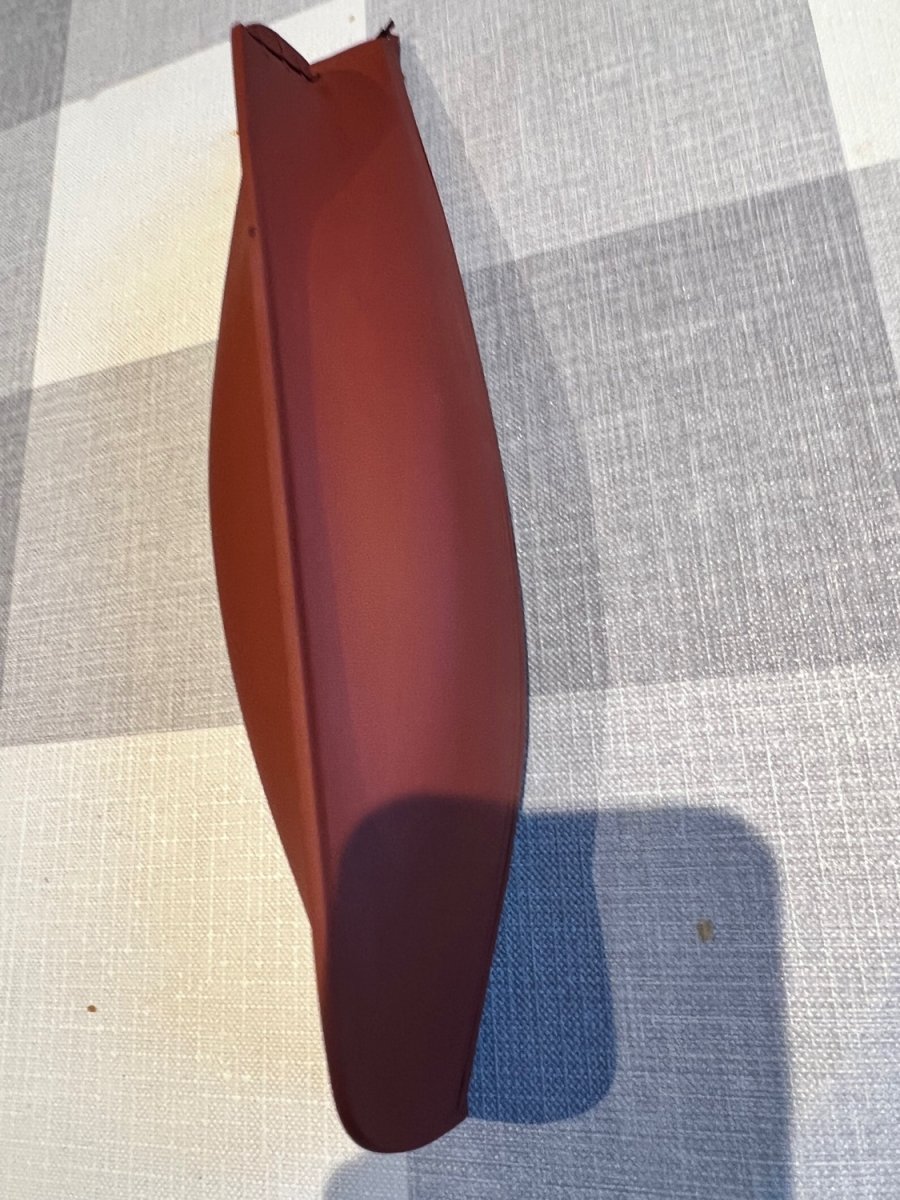
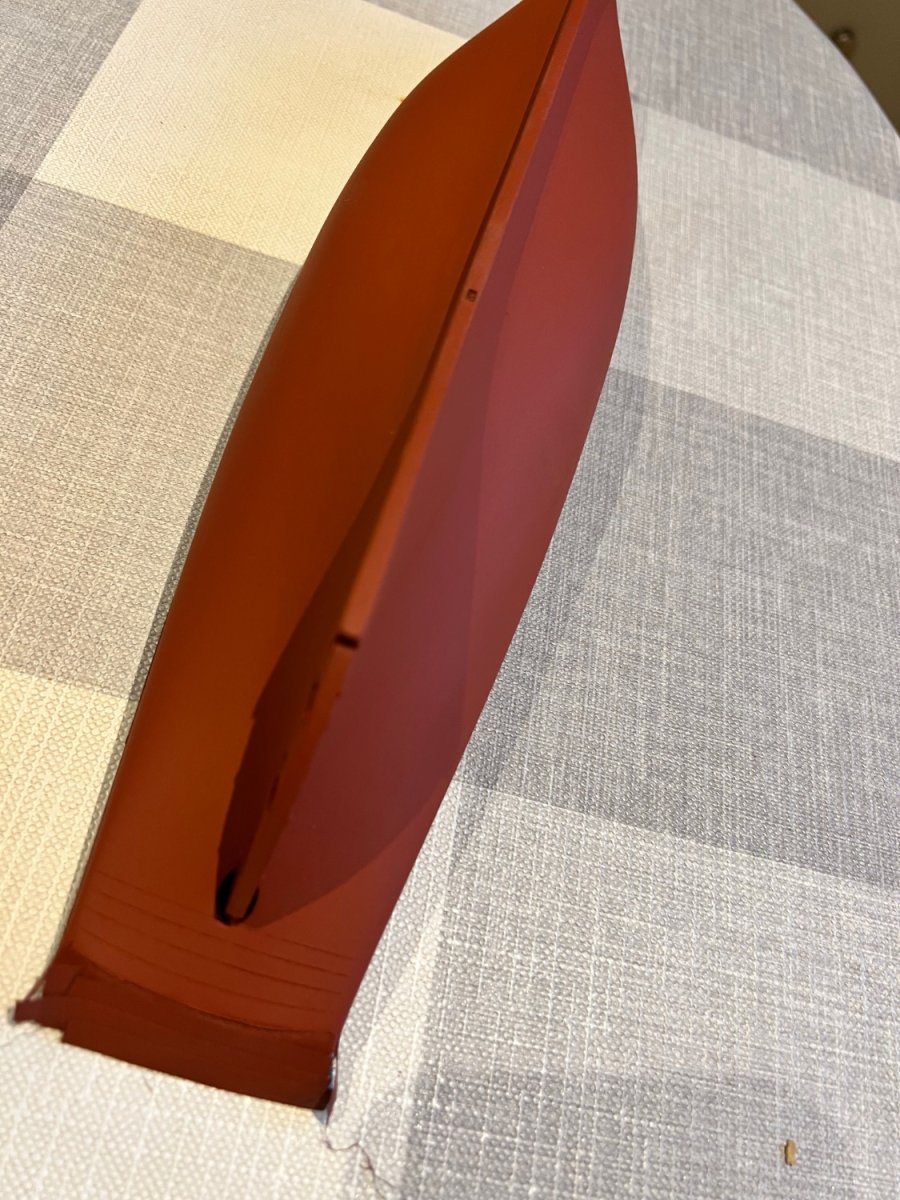
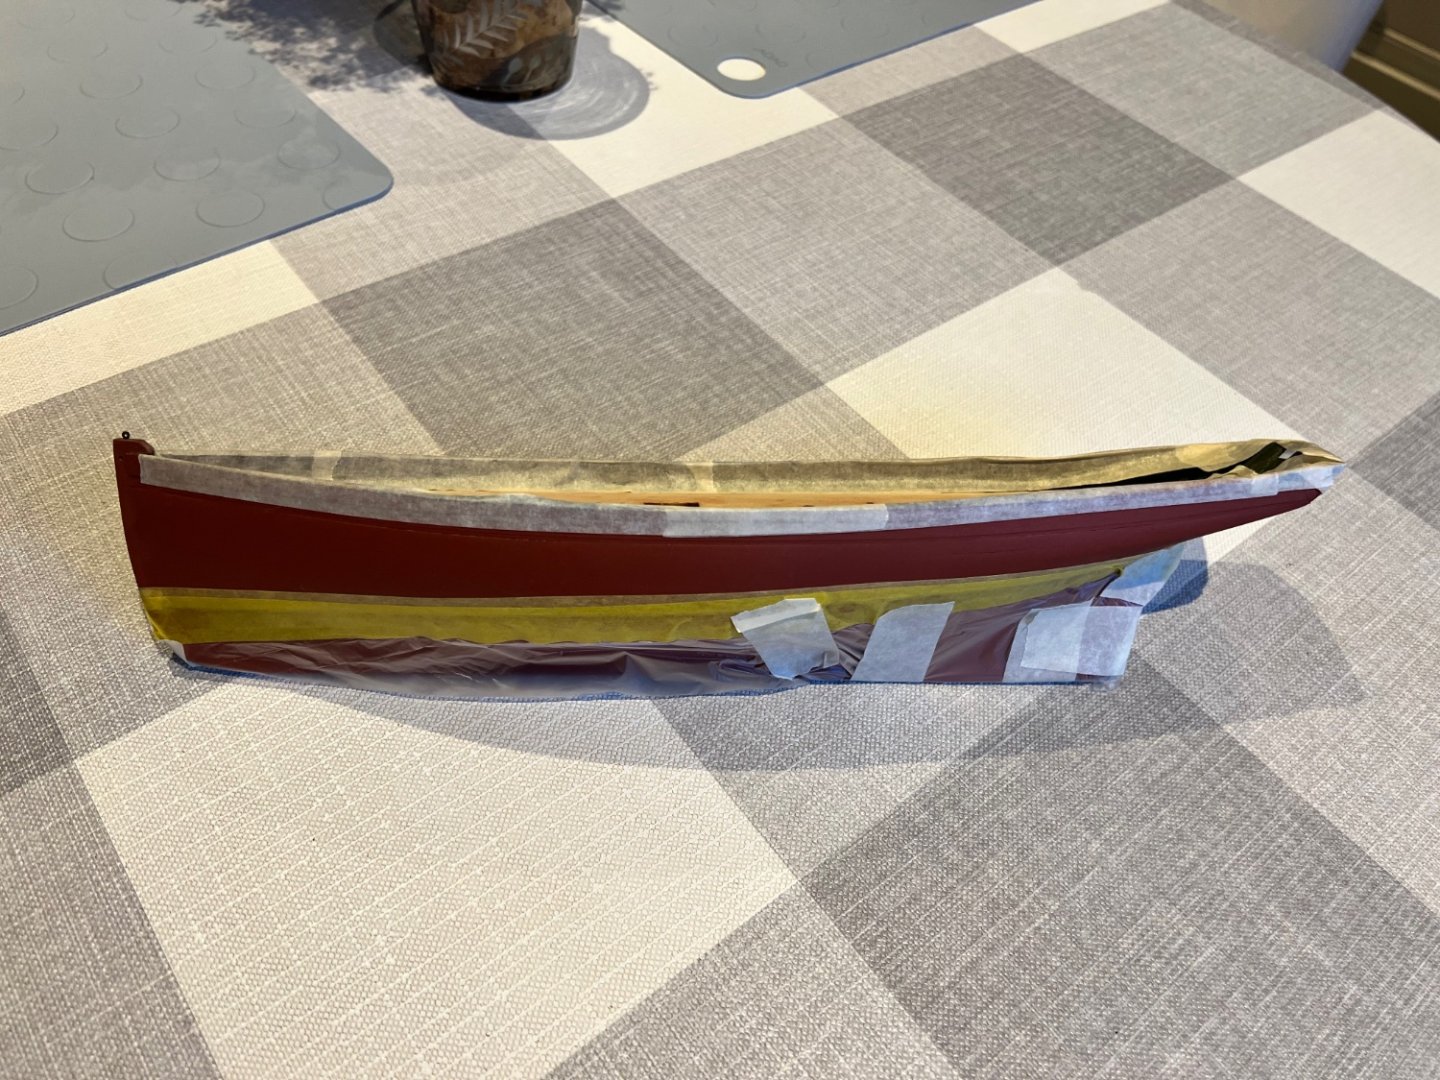
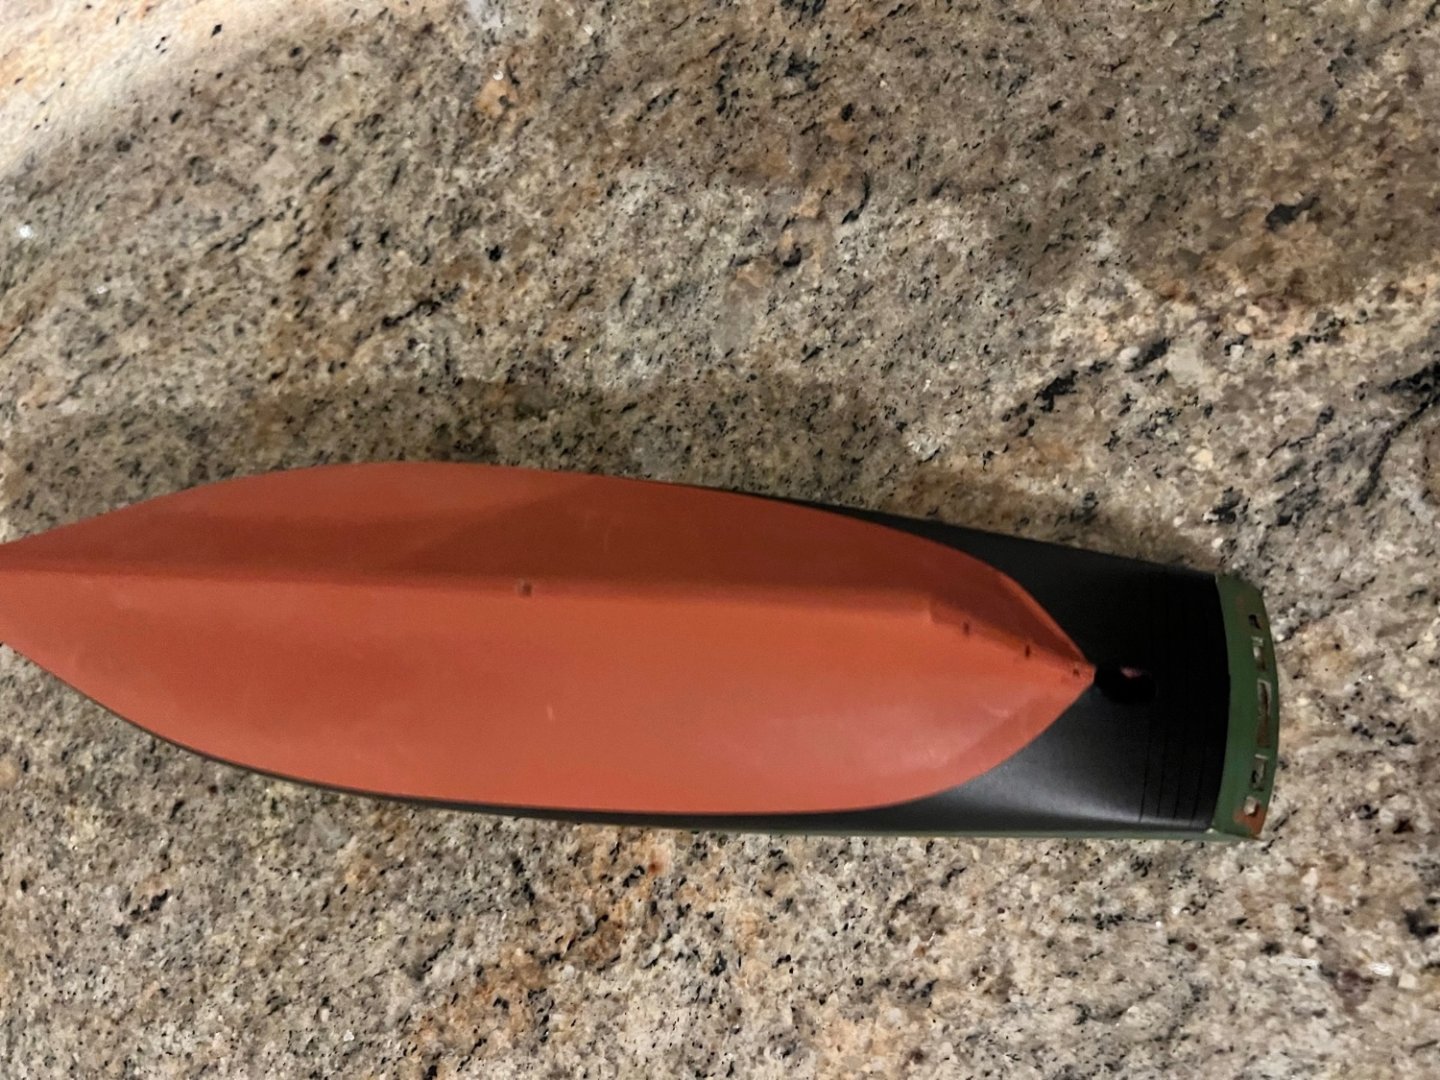
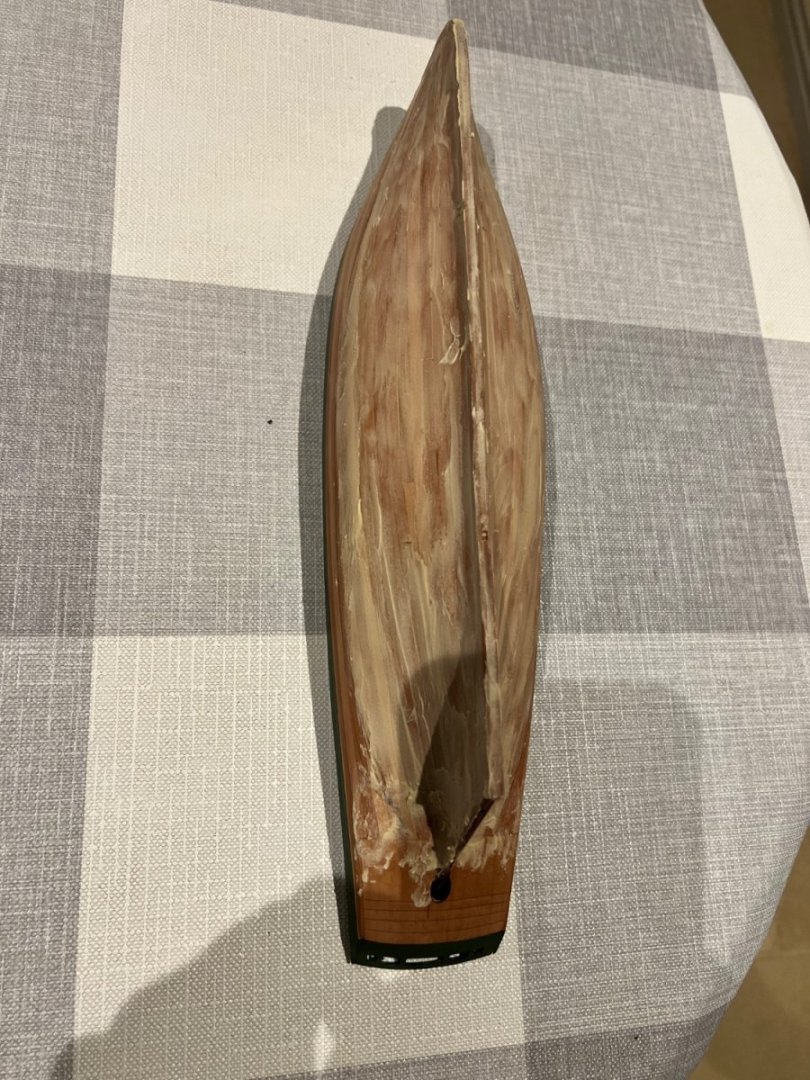
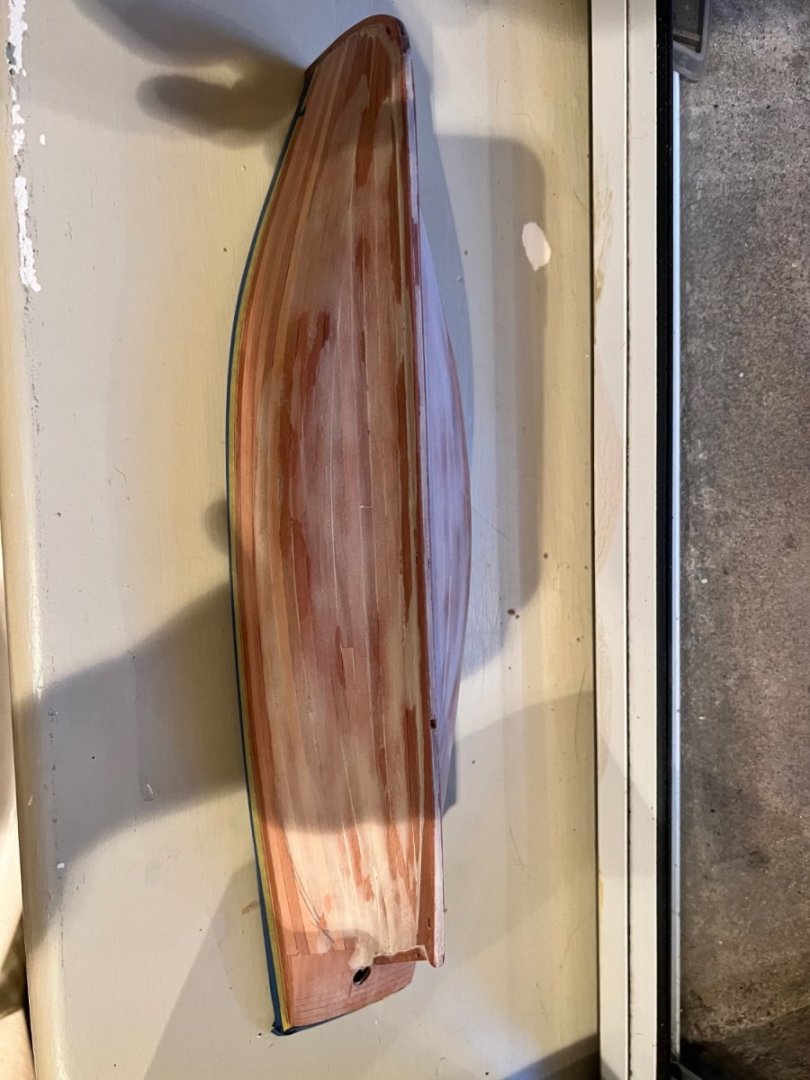
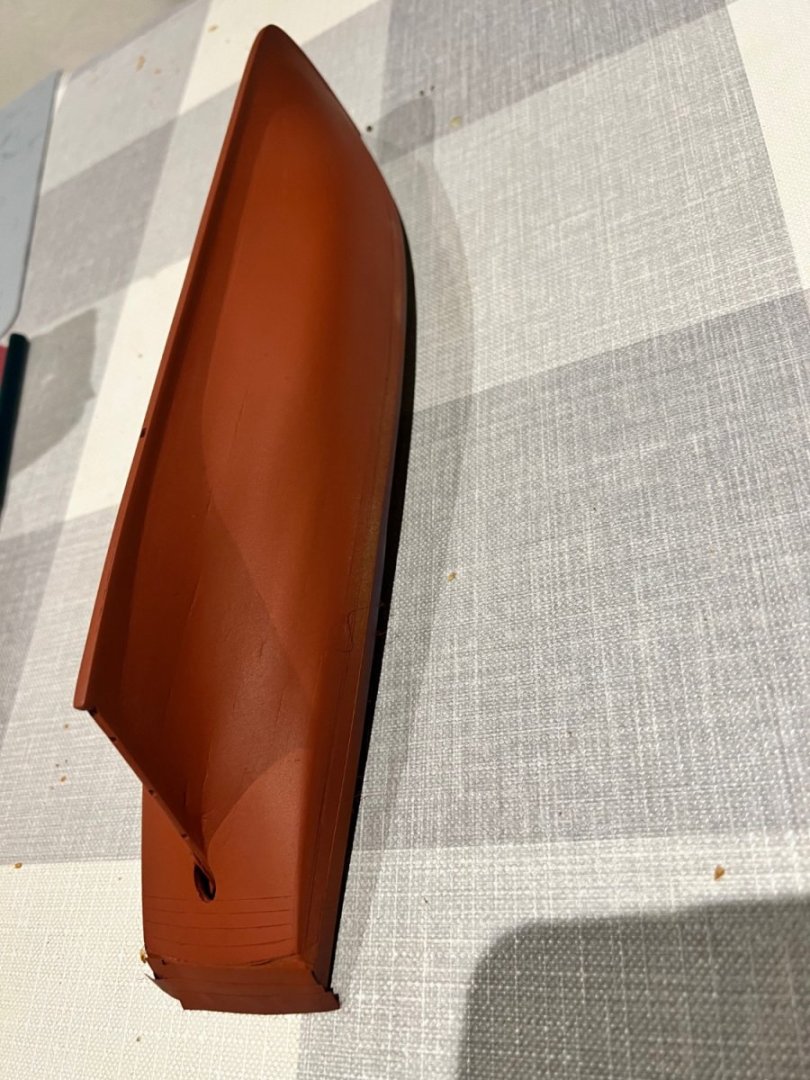
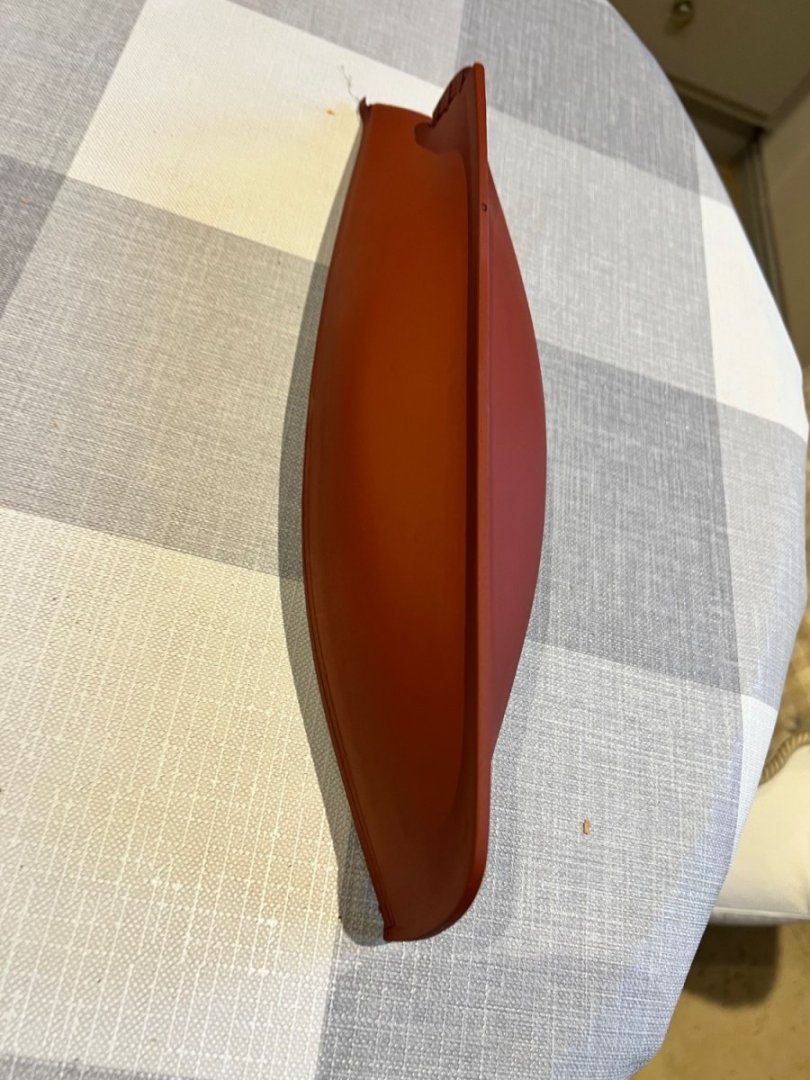
Settled for a fully painted hull. Red oxide below the waterline, black above with the green bulwark. So smothered the hull with filler to fill any small gaps and even out any low spots. For this I used a mixture of Ronseal filler and titebond glue. I usually use a white plastic based filler which is quite soft and is sub-optimal often sanding out of the cracks again when you later sand the hull. This new filler is very strong and hard and applying it everywhere was a huge mistake. It set rock hard and I’ve been sanding like crazy to remove it. It is much harder than the wood so it’s quite hard to sand in raised bits of filler without eroding all the wood! Eventually I got close to a smooth finish and applied masking tape to the green bulwarks and painted all the hull below the bulwarks with the red oxide primer (it’s the undercoat for the black above the waterline too). Then filled any remaining small gaps and sanded hard again to improve the finish. I assembled the rudder and painted this too. That’s enough sanding. Added the rudder hinges / pintles to the hull then a final coat of paint. Rudder attached but not glued. The end finish is OK with a few small line showing faintly - which I want to show this is planked not pre-formed. In a few spots the filler is still raised and just visible on very close inspection (see above) through the paint. I’m going to leave these as the wood around them is likely quite thin now and I don’t want to sand through. Need to add the waterline and mask for the black paint next. Not sure I’ll use that filler combination again except very sparingly - it’s a much better filler but poses additional challenges!


- 46 replies
-
- 3
-
-
- vanguard models
- Erycina
- (and 3 more)
-
Thanks Todd!
-
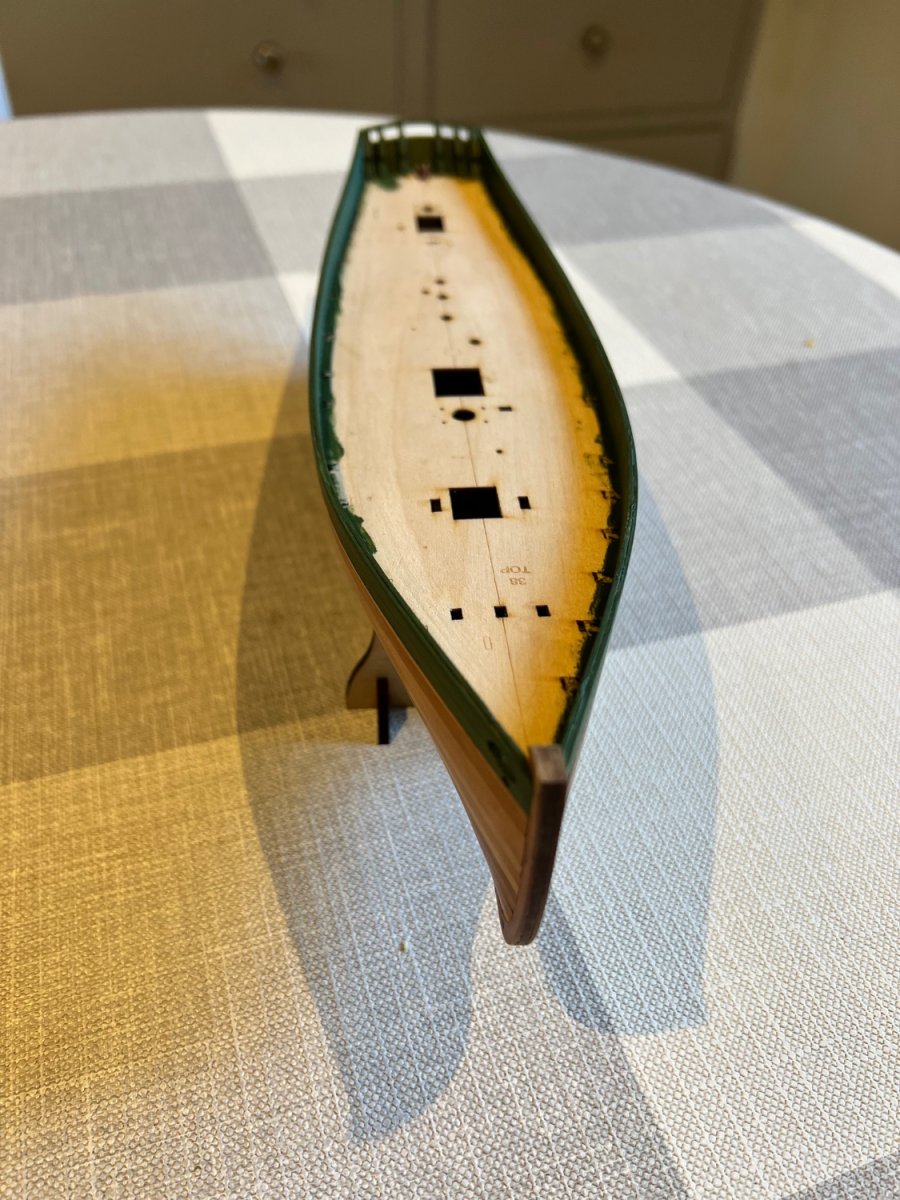
Bulwarks painted matt green (Tamiya XF-5) inside and out. Needed a couple of coats. The etching for timberhead positions is still clearly visible through the paint. Tamiya masking tape is very good and delivers a clean line. Tiny bit of paint bleeding on the port side, but can easily be cleaned up and will be hidden by the rubbing strake. Once the paint is dry I can make a start on the timberheads.


- 46 replies
-
- 3
-
-
-
- vanguard models
- Erycina
- (and 3 more)