Ferrus Manus
-
Posts
1,407 -
Joined
-
Last visited
Content Type
Profiles
Forums
Gallery
Events
Everything posted by Ferrus Manus
-
 I always wanted to see you get back to this build. Awesome!
 -
Why wouldn't the oarsmen and cox'n just hop in before the boat went down? Perhaps to ease the weight on the crew hauling the tackles?
-
By the way, i'm not a person with freakishly large hands. In fact, my hands are relatively small and thin.
-
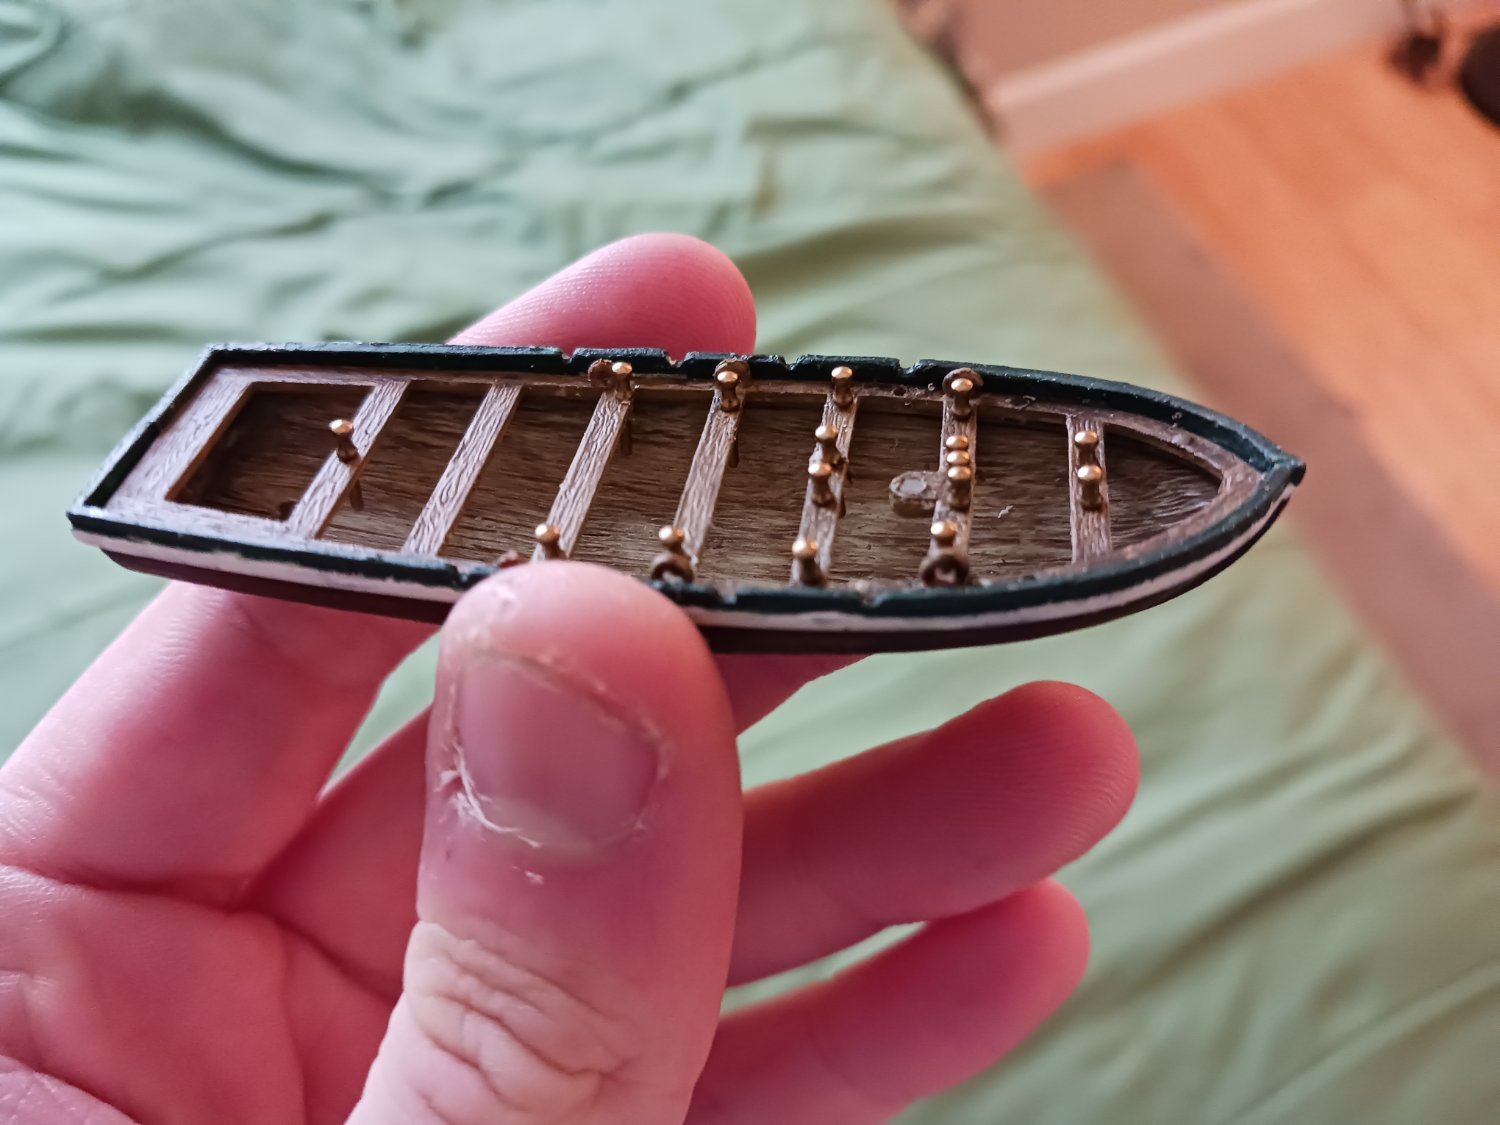
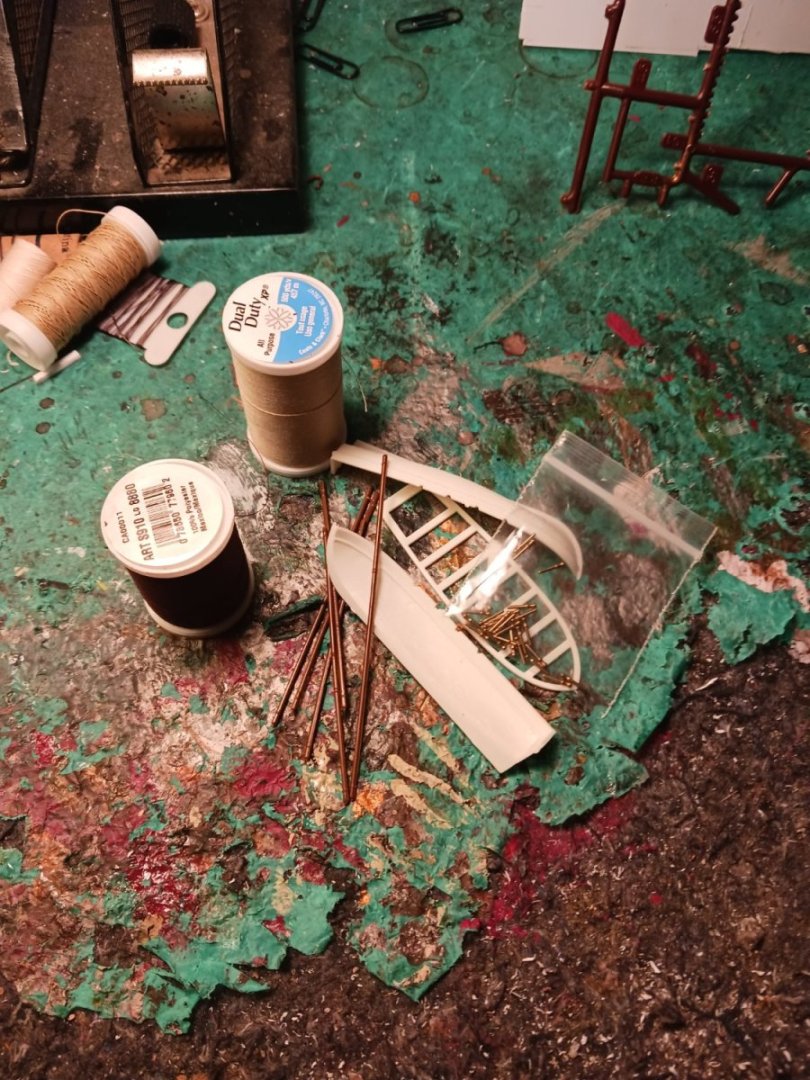
The boat's frame is painted and fitted into the hull. I changed a few of the pin locations, added a few more eyebolts, nothing major.

-
I have never heard of any of them. Can you navigate me to their logs?
-
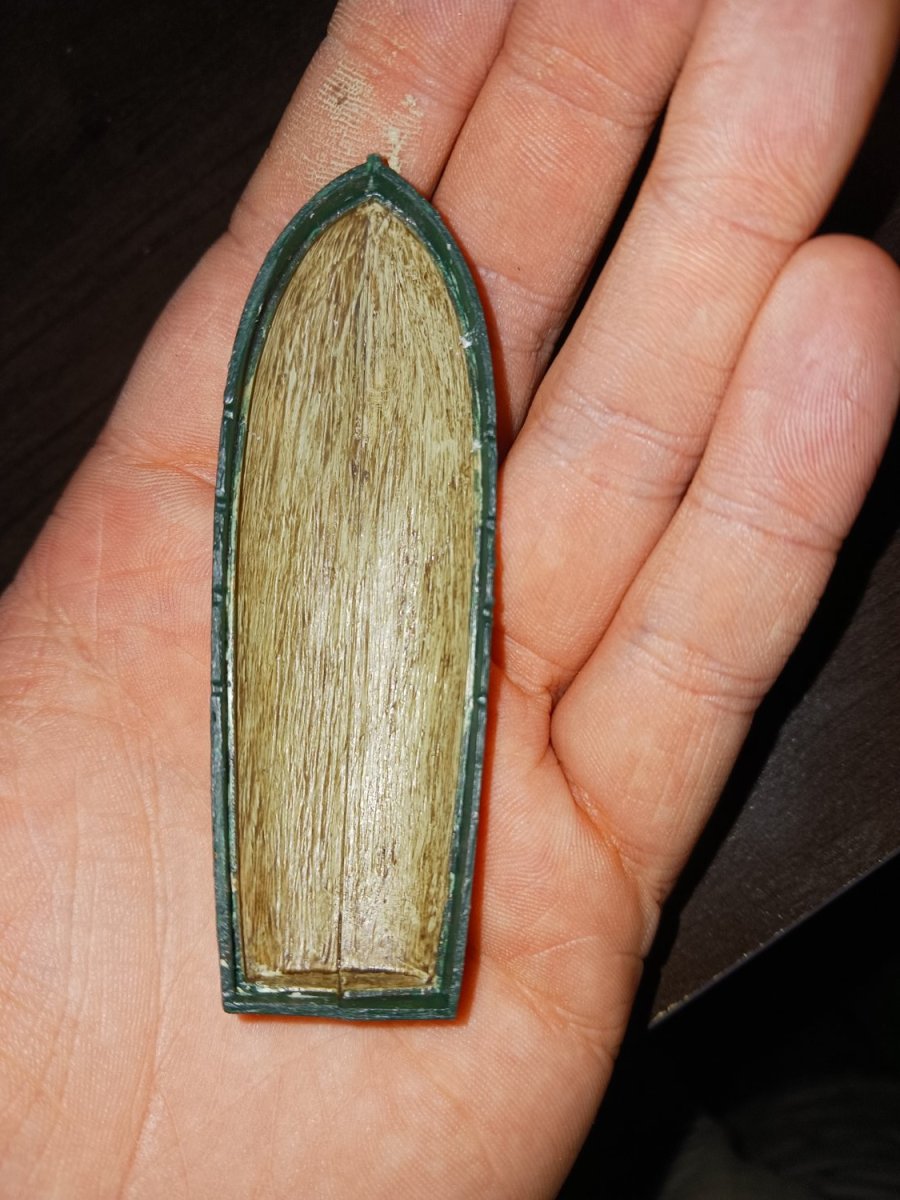
I have done up the interior paint job. It's okay, but i readily admit it would be better if i had some better brushes. Luckily, this isn't the point. This is mostly an exercise in rigging at a nearly-microscopic scale.

-
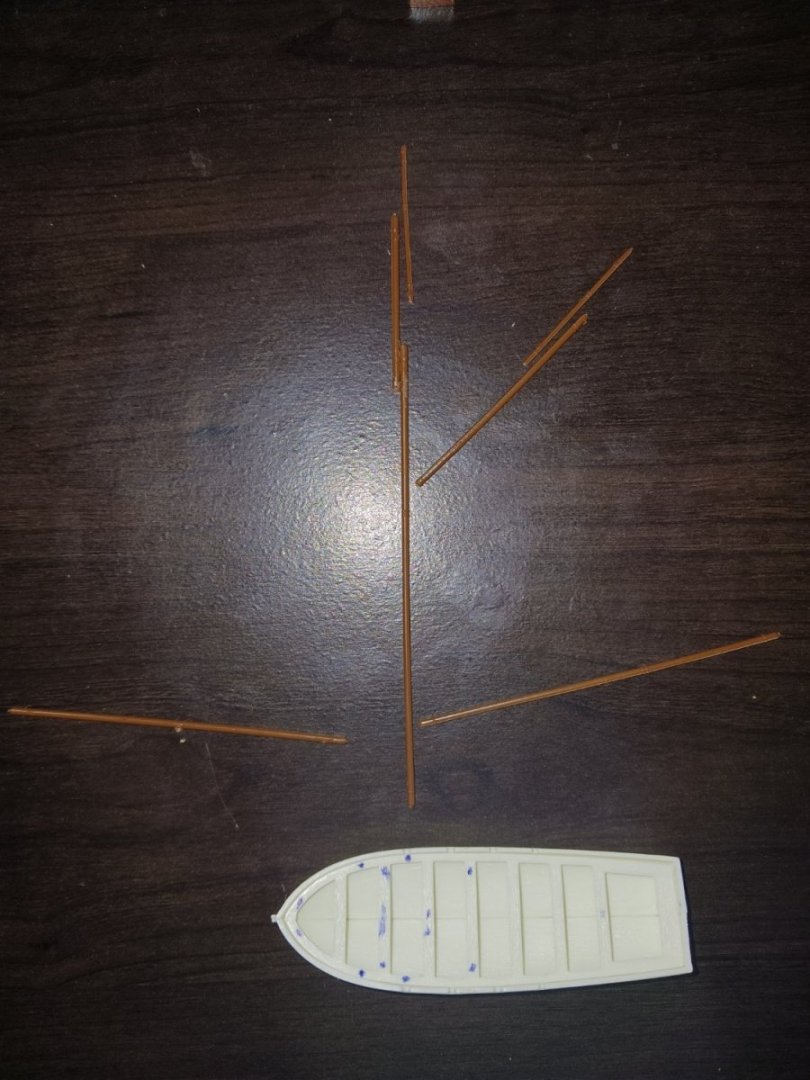
I cut and laid out all the spars, and where they will go.
-
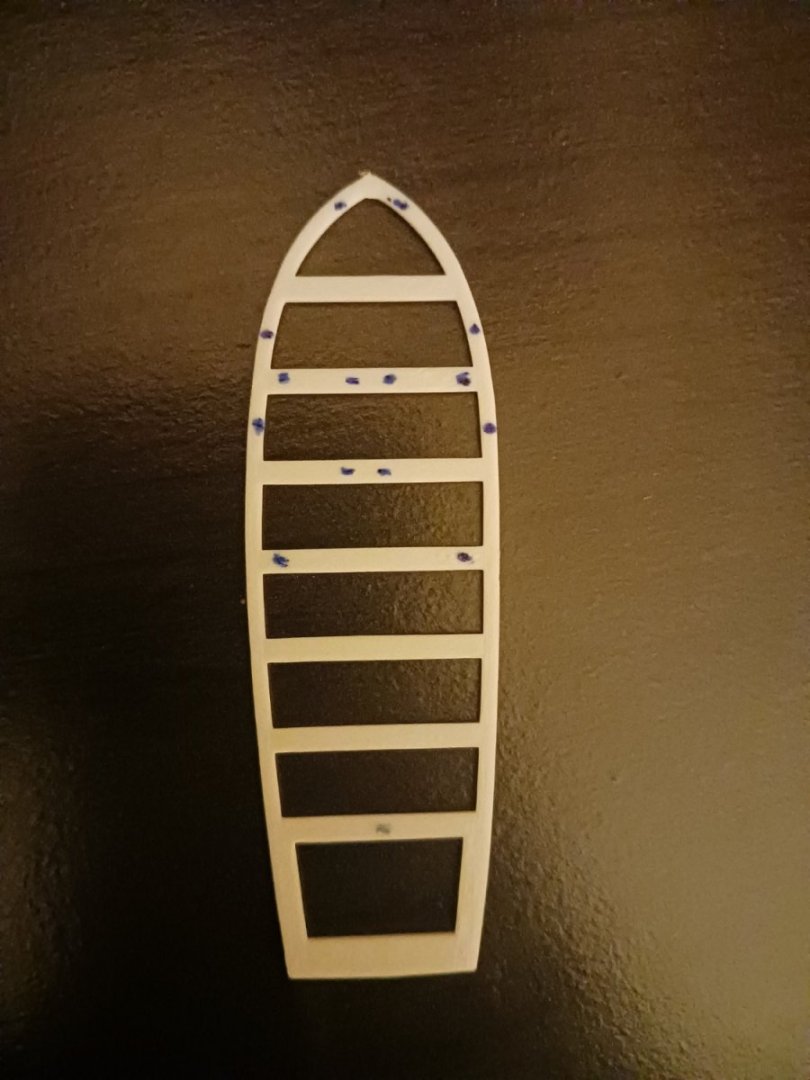
I marked out all of the holes i will have to drill in the frame of the boat. All of these will be for belaying pins. There will be eleven eyebolts, all of which will just be glued on.
-
If you were here for my Spanish Galleon build, you know that I built a scratch boat for the ship. This will be about the same, but it will have sails, more rigging, and be a more accurate interpretation of a boat of its day. We begin immediately (for my sake). Stick around!
-
Bluejacket Shipcrafters Grand Banks Dory: https://www.bluejacketinc.com/shop/model-ships/kits-model-ships/sailing-vessels-and-work-boats/grand-banks-dory/ Model Shipways Skipjack: https://modelexpo-online.com/Model-Shipways-WILLIE-BENNETT-SKIPJACK-132-SCALE_p_1015.html
-
Plus, we are all here to hold your hands and walk you down the road to becoming a master shipwright. You will get better with time, even a short time. You would be truly horrified by my first paint job. I've only been doing this for 5 years, and look at me now! People think my plastic ships are made of wood! Surely if i can do it, you could do it too, perhaps even better than i can. While you might not have decades to perfect the craft, you don't need decades. All you need is enthusiasm, patience, and a steady supply of model ship kits.
-
No one's too old for a second boat. You could live to be 100! The only thing you need is some skill and experience, something in no short supply here on MSW. If i were you, i would get a large-scale model of a small boat, like the Bluejacket Shipcrafters Grand Banks Dory or the Skipjack. Both small, uncomplicated models fit for 89-year-old eyes.
-
It also might be possible to excise the offending pair of shrouds from the main mast, and do some surgery on the channel. MAYBE. It might simply be impossible or too much effort and risk to be worth it.
-
Ian and Marc are definitely the ones you need to be listening to, here. However, I do have a not-insignificant amount of experience with galleons and their rigging. If you need any help, let me know. If you properly execute my technique, you can probably get the yards as much as 45 degrees off of true. You're essentially pivoting the yard around the lee shroud instead of the mast.
- 1,508 replies
-
- 1
-

-
- Le Soleil Royal
- Heller
- (and 1 more)
-
What they would do is loosen the parrel if they wanted to brace the sails around the mast, so the center of the yard could leave the mast, solving the shroud issue. I would rig the braces first, right after you rig the lifts, and then do the parrel after that. That's what i did.
- 1,508 replies
-
- 1
-
-
- Le Soleil Royal
- Heller
- (and 1 more)
-
You need to use your own parrels, Bill. This is a Hellerism I can't stand. Definitely use an adjustable parrel design so you can at least partially jam the sails around the mast. If you want, you can check out what I did on my galleon.
- 1,508 replies
-
- 1
-
-
- Le Soleil Royal
- Heller
- (and 1 more)
-
You can never expect a first-time build to be half as good as people who have 10+ years under their belt. Your Mayflower looks many orders of magnitude better than my first build. If you want a similar build to try, I would buy Revell's 1/96 Golden Hind. I built the kit, and if you want a general idea of what it should look like in a perfect world, check out my build log thereof. I would purchase rigging blocks from your local model shop, or better yet, order them online. These include single blocks of various sizes, double blocks, deadeyes, hooks, et cetera. I would also replace the rigging lines they give you. Revell's older kits are notorious for having inadequate rigging lines. I would order various sizes, in both black and tan, of rigging thread. As per the painting, there are many paints that are significantly higher quality than Revell's paints. Citadel, Vallejo, Army Painter, etc. If you want to give your model a weathered look, buy some Plaid Folk Arts Antiquing Medium. Other natural oils will work for other elements of the build. Also, you will need tools, and lots of them. Multiple sets of clamps, rubber bands, tweezers, an Xacto knife, a pin vise with multiple bits, and that doesn't even include things like paint brushes. These are things that i would never expect a first-time model shipwright to know, and neither would anyone else. For a first model, you absolutely did amazing.
-
89 years old! Wow. Your Mayflower is looking amazing. However, if you want to add a special touch to your model, I would deviate from the instructions and rig the ship based on academic reconstructions, and replace some of the rigging elements with aftermarket items.
-
Ah, probably not. Next is probably either a redux of the 1/96 American cup racer, or HMS Botany Bay. This stuff keeps me sane and away from all the garbage on the internet. It's not good for me to not have a project.
-
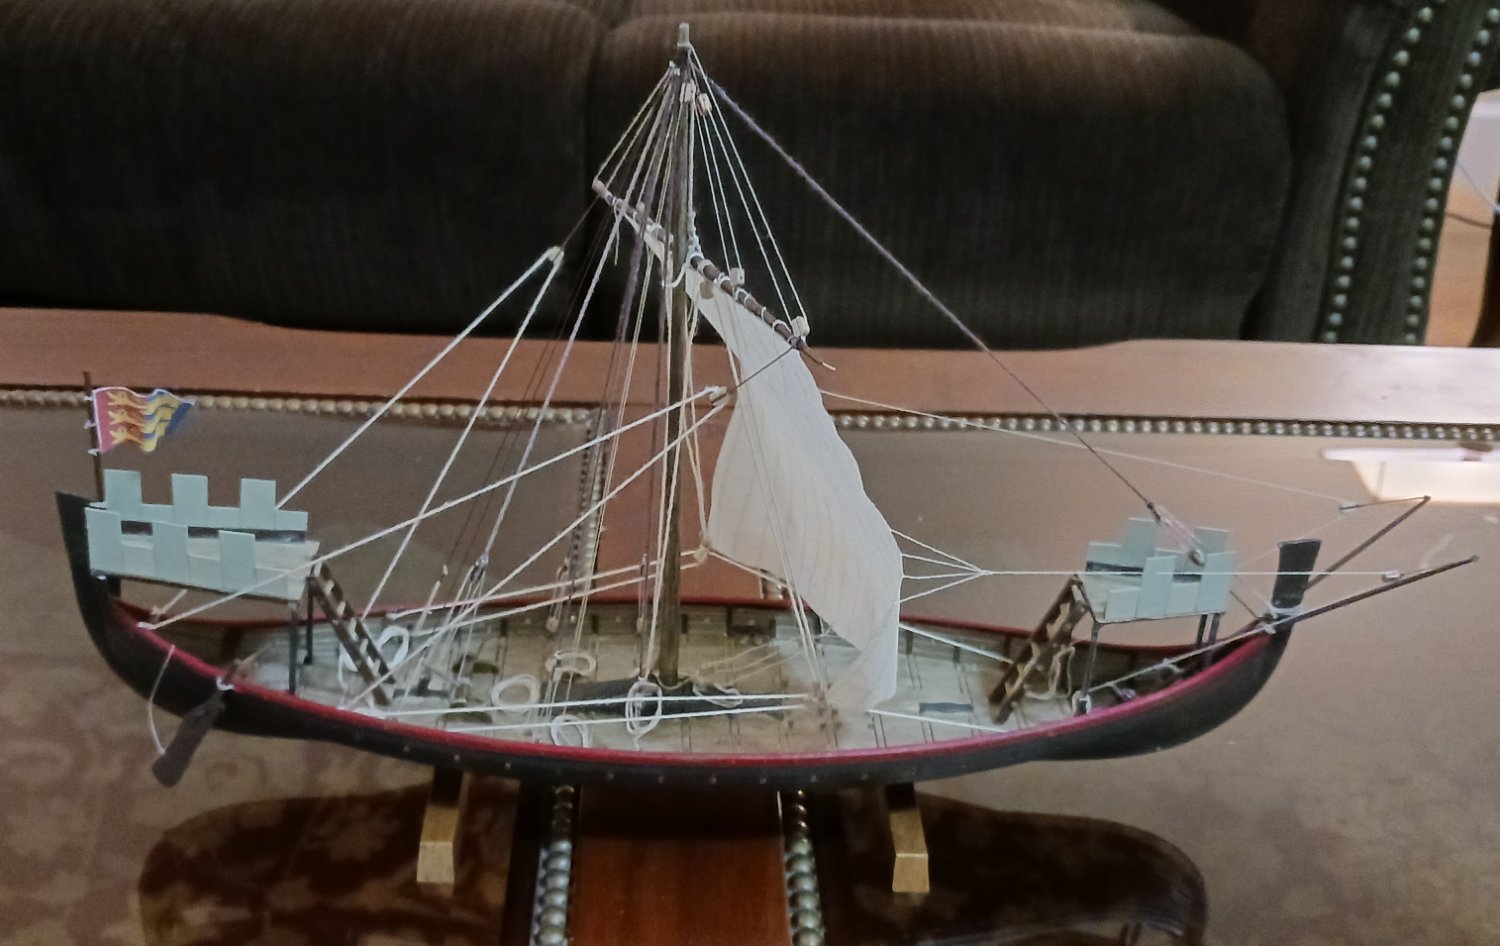
You know what that means? It's DONE!! This is an interesting time, because this is the first time in quite a while (Over a year??) that I haven't had a new project that i have already started or am about to start. Nothing on the modelling bench, nothing in a stash somewhere, nothing in the mail. I guess i will have to adjust to taking a (probably short) break, at least for a while. Thank you to all (especially Steven) who watched me take a significant first step into the realm of scratchbuilding. Until next time, fair winds and calm seas.

-
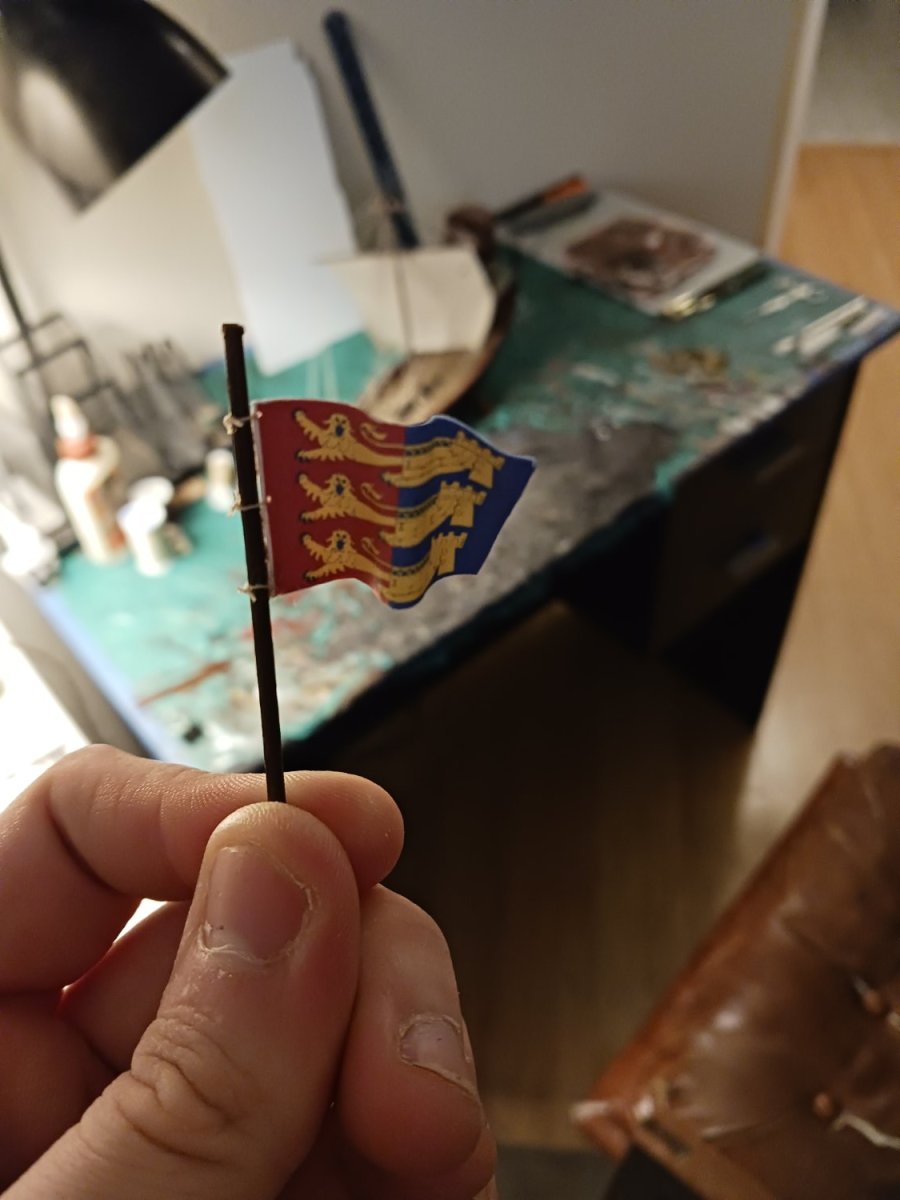
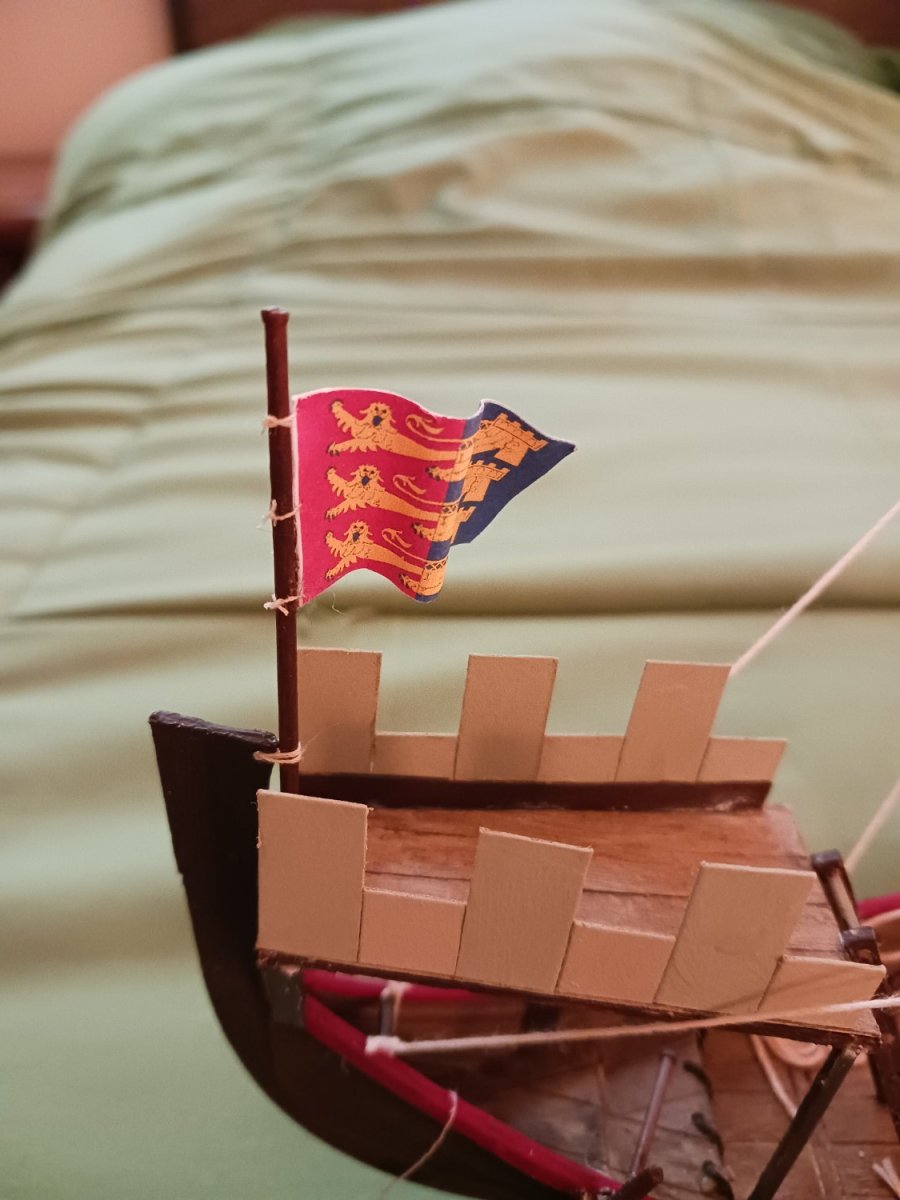
Alright guys. The flag was printed and made in the usual fashion. The difference between this and other flags i have made is in how it was attached to the flag stick. Instead of using a halyard, i simply tied the flag at several points to the stick. The flagpole on the ship:


-
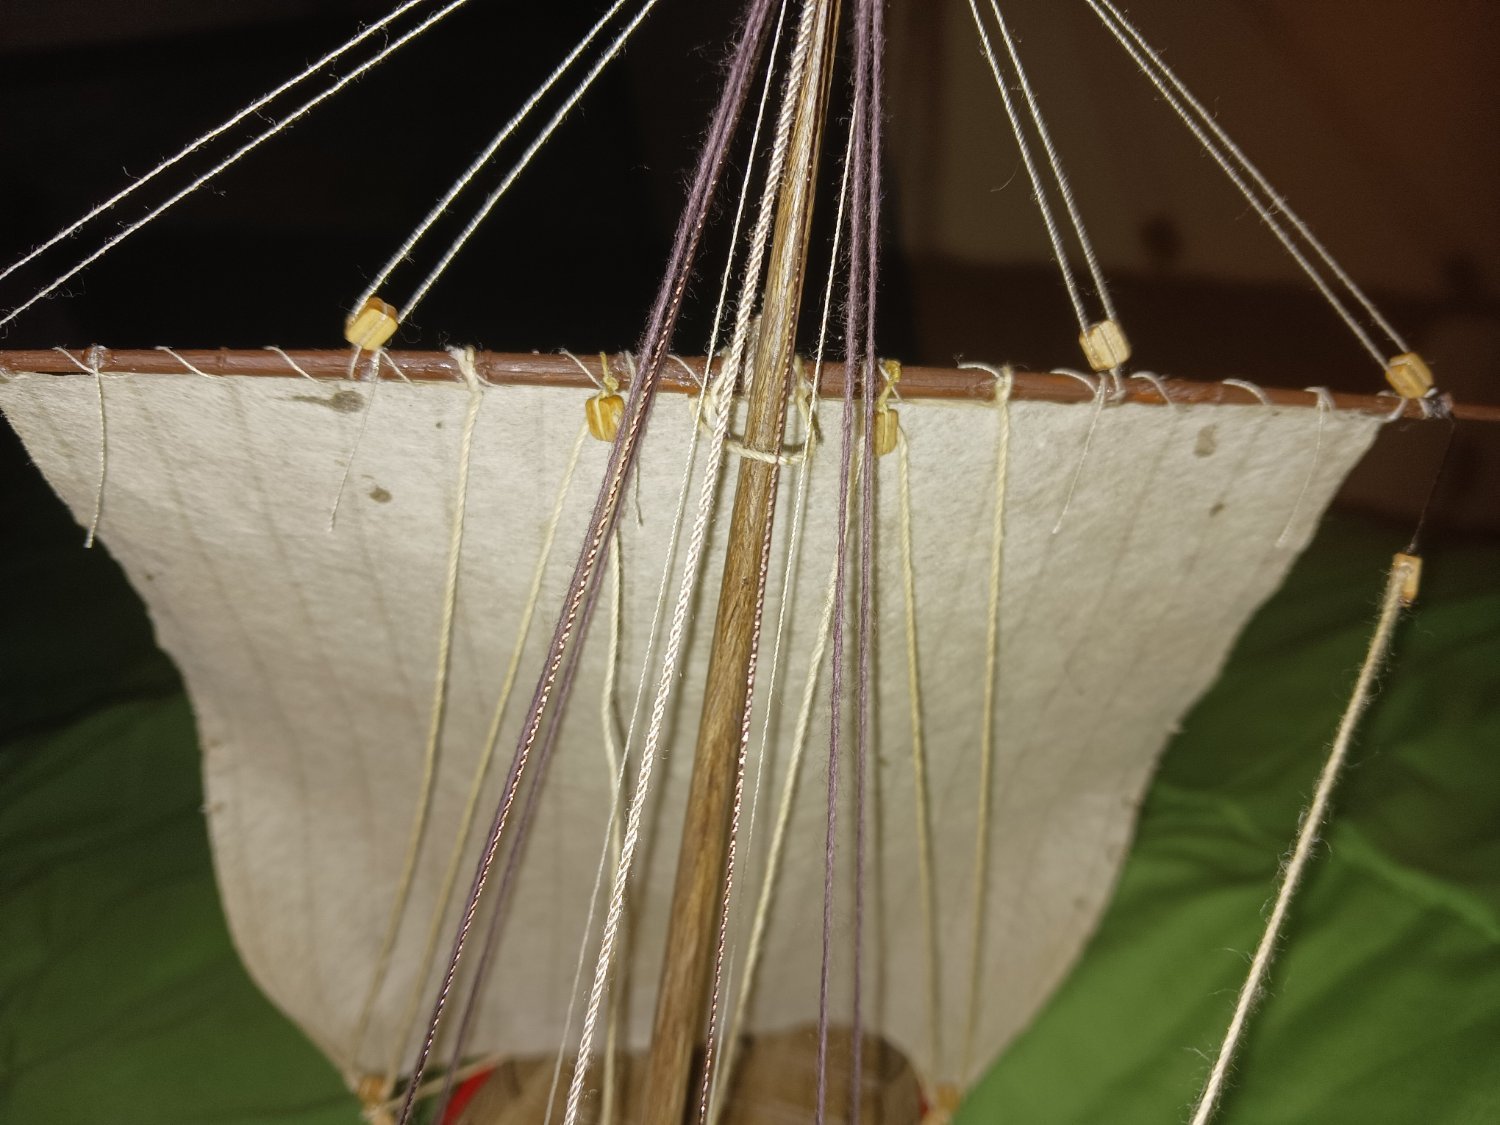
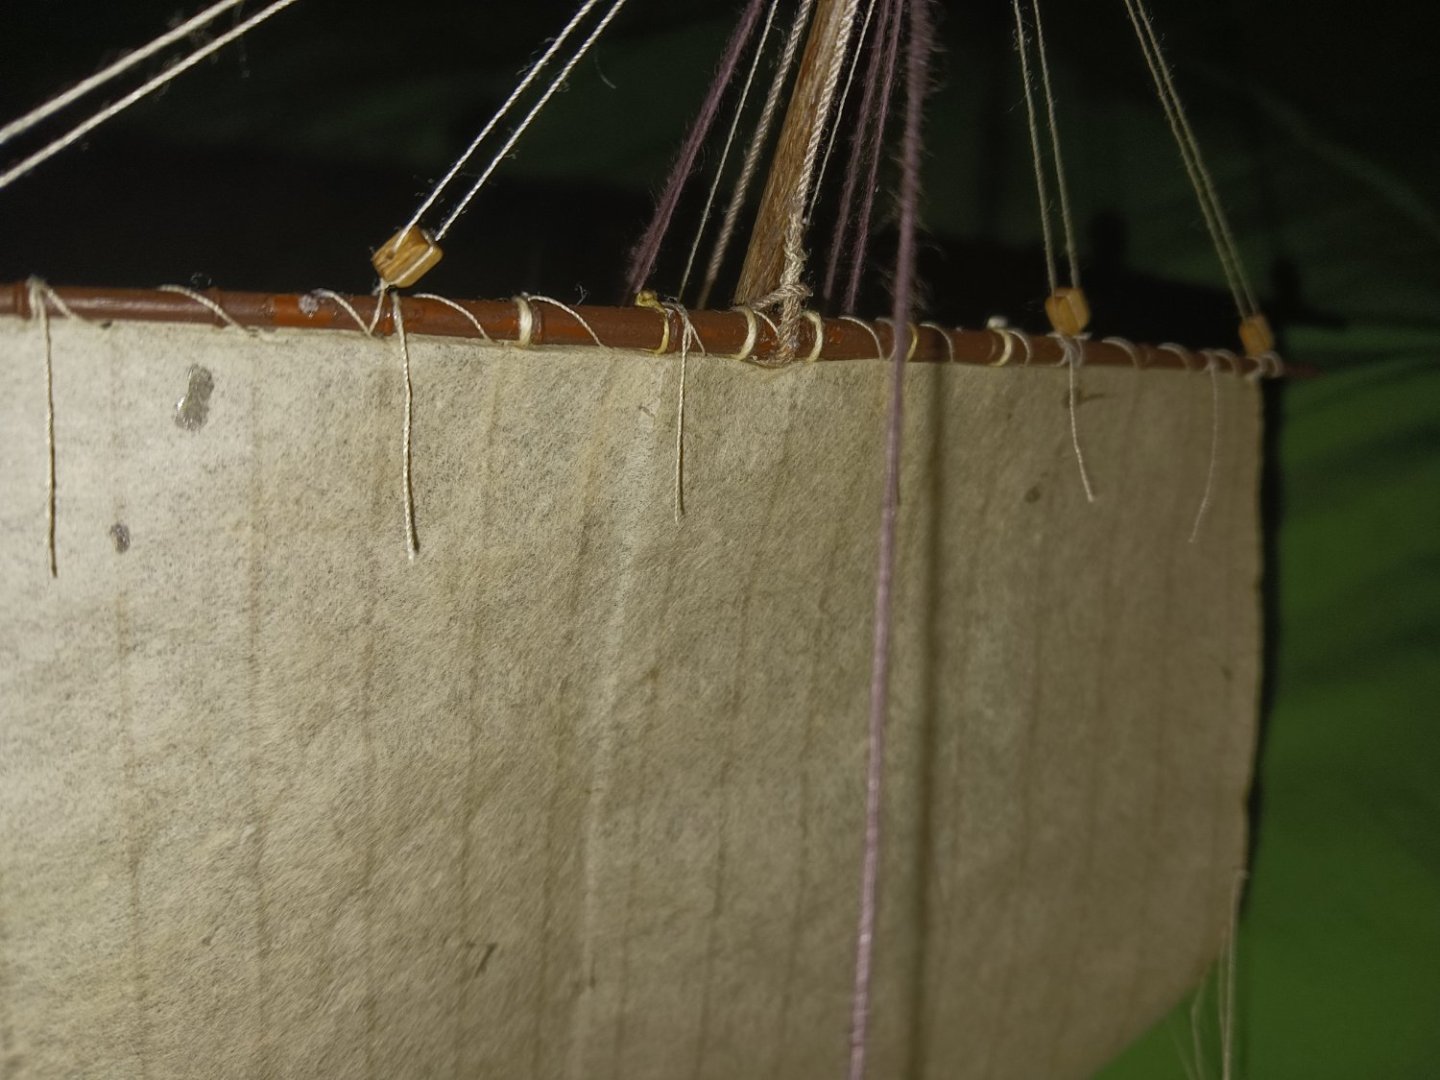
I did the little ropes on the yard which allow the sail to be properly taken in and furled.

-
Yes, i am well aware that the flag pictured here is an updated version, and that is evidenced by the fact that the ships have rudders instead of steering oars. I am not sure when this update occurred, but the original version was not available as a drawing such as this.
-
Only the flag is left to go!!