HOLIDAY DONATION DRIVE - SUPPORT MSW - DO YOUR PART TO KEEP THIS GREAT FORUM GOING! (Only 20 donations so far - C'mon guys!)
×


Ferrus Manus
-
Posts
1,391 -
Joined
-
Last visited
Content Type
Profiles
Forums
Gallery
Events
Everything posted by Ferrus Manus
-
 So you paint with vodka?? So basically i need to use powdered pastel paints mixed with water or spirits, with a drop of dish soap as well. how many parts water/spirit to how many parts pastel powder? I could probably order myself some Revell powdered pastels.
 -
Thank you! You have easily the best Golden Hinde model i have ever seen, and someday i would like to hold a candle to what you do. I have extensively studied your model in preparation for the rigging.
- 137 replies
-
- 1
-

-
- Golden Hinde
- Revell
- (and 2 more)
-
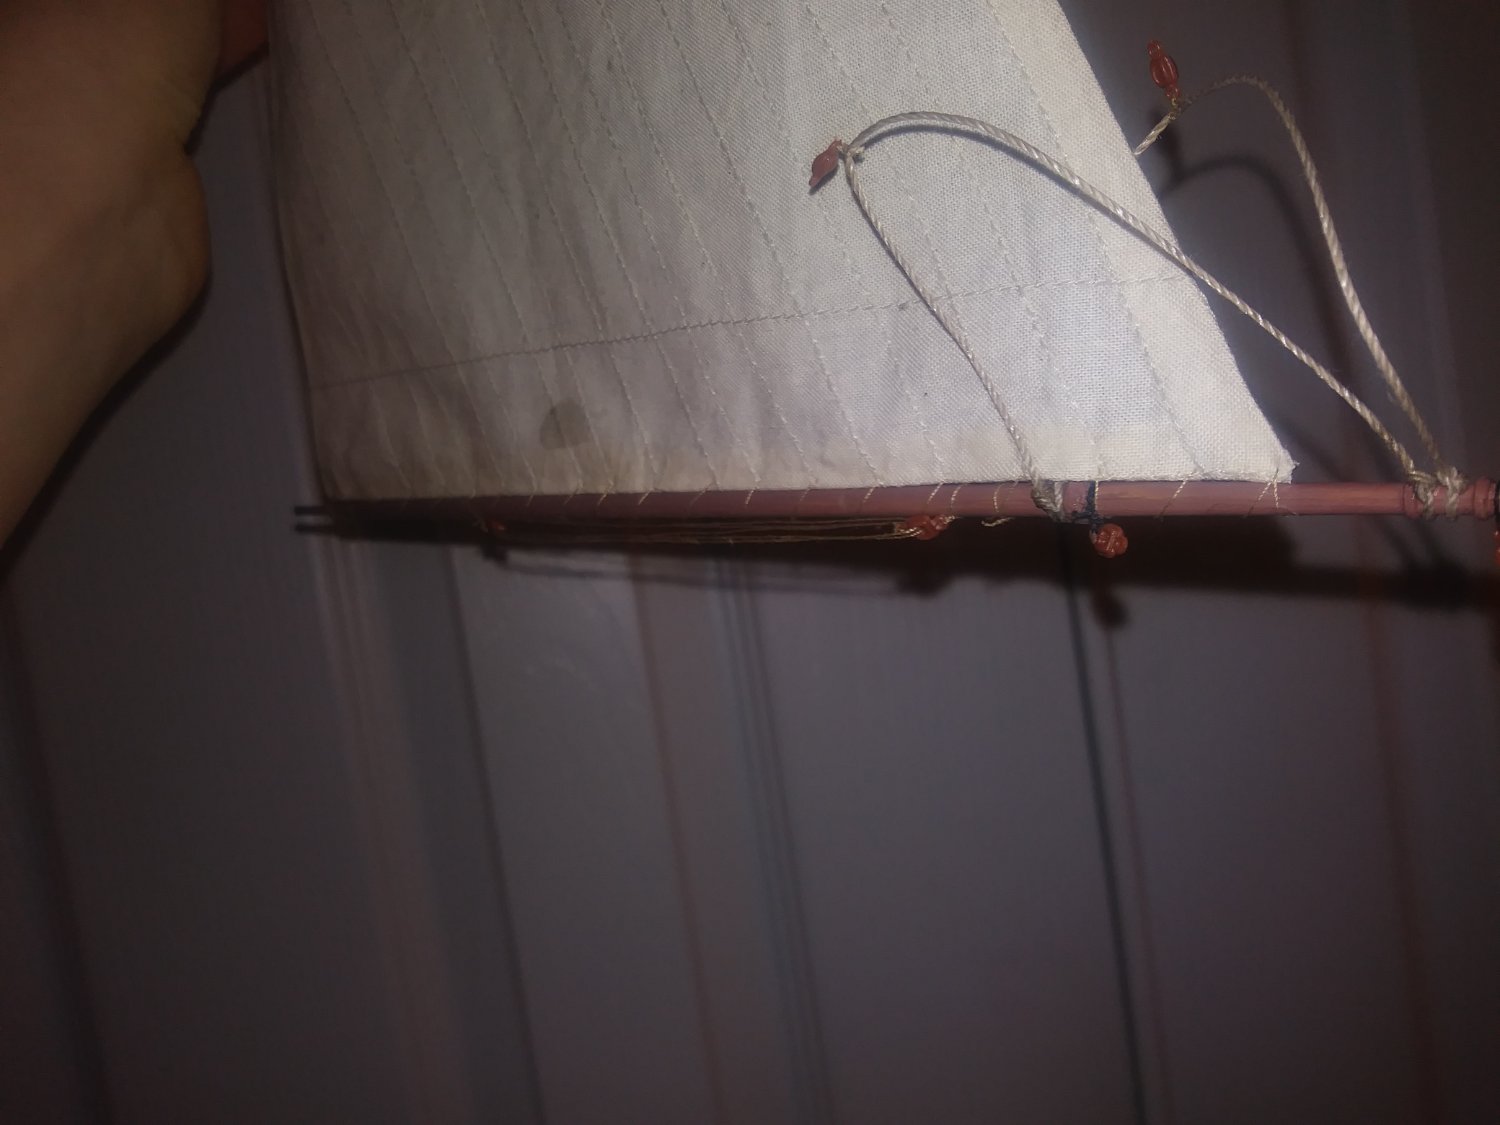
To be honest i don't know yet, Woodrat. However, i guarantee i will at some point. Best to have the most skilled people on site to help out the amateur (me). Also, i have a question about your carrack. How did you get the billowing sail not to fall back down to the mast via force of gravity? I did not (as i recall) see any tack lines or bowlines.
-
What oils should i use to make a "wood" effect on plastic going forward? I read and studied your galleon build log immensely. What paints should i use, and how should i apply them? Thank you for your presence on my build log. I guarantee you will be getting a lot more questions. You are easily the best model ship painter i know, and i would like to learn your technique.
-
I am using Citadel paints. The paintwork on the model meant a lot to me. I am putting all my effort into this model. I specifically wanted a model that would be a challenge to paint, and that i got. Thank you for the congratulations, it means a great deal to see people swoon over my work. Stay around! I brought popcorn and chairs.
-
Lucky you! I actually brought the popcorn machine, some fine kernels, and chairs for everyone. I would like an audience willing to critique my every move, telling me what i am doing right and wrong, and willing to provide advice on how to move forward. Unlike the last build, this one is going on my shelf. I love galleons, and i bought this kit looking for a painting challenge. I will likely use the HiSModel rigging plans.
-
I use the messaging feature frequently. Also, i am aware that the voyage was sponsored by English nobles. The box of the kit tells a very detailed description of the story.
- 137 replies
-
- 1
-

-
- Golden Hinde
- Revell
- (and 2 more)
-
Yes, the voyage was royally approved and used ships in the English Navy. Drake was also in the navy as well. This model is of the ship right after she was rechristened and her figurehead remade, but before Drake had her painted in Spanish colors. Thank you for your presence!! I missed you on my last build.
- 137 replies
-
- 1
-
-
- Golden Hinde
- Revell
- (and 2 more)
-
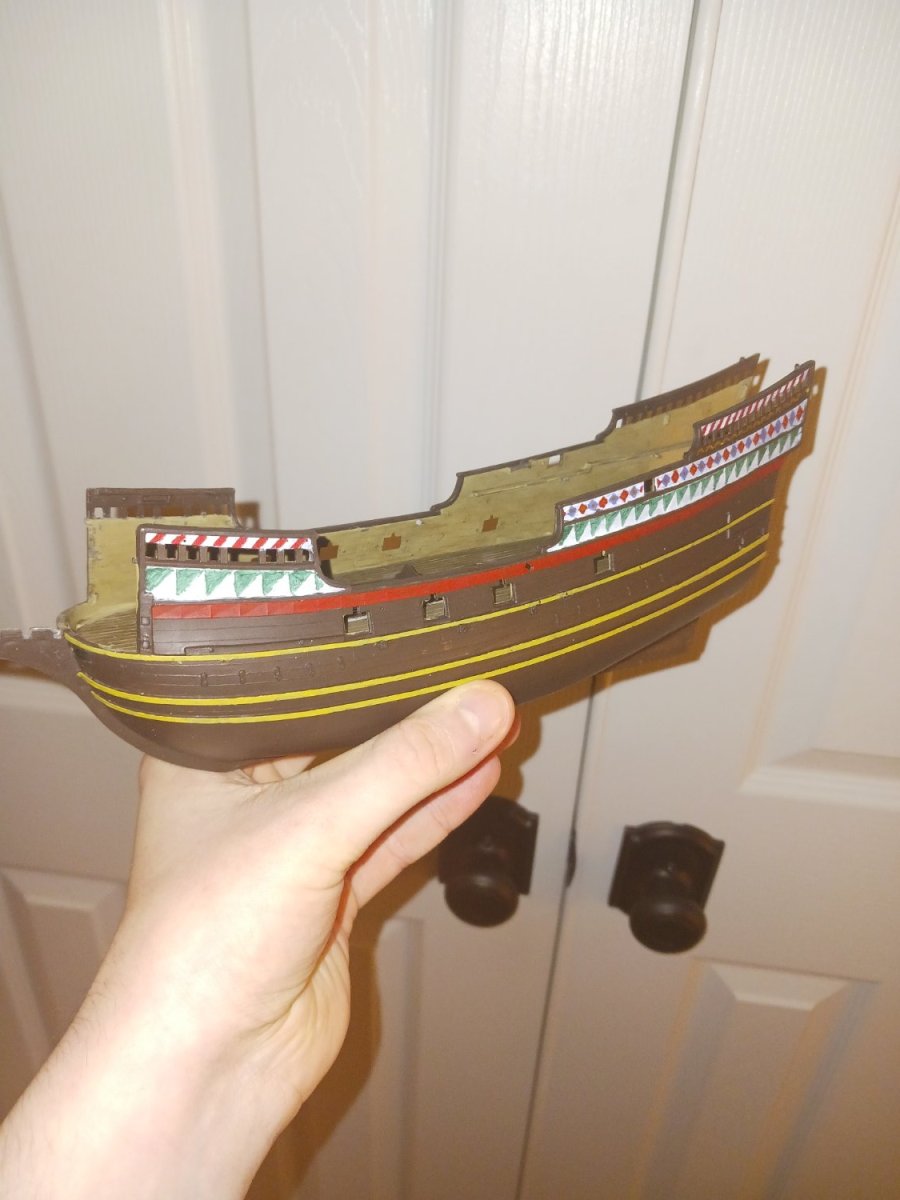
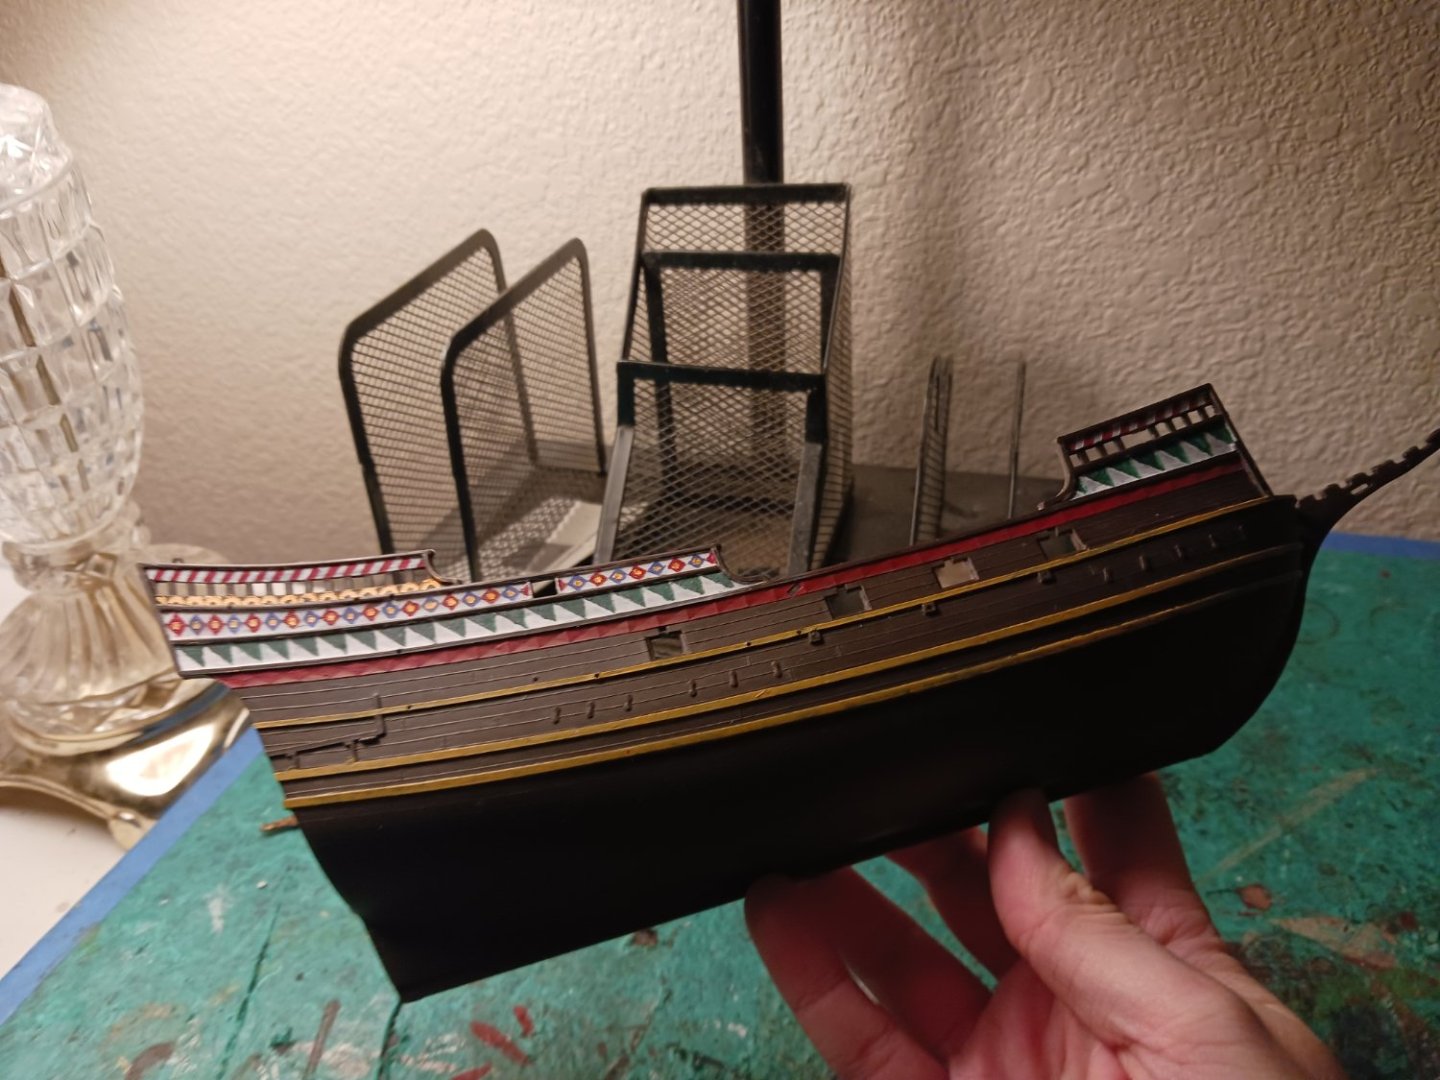
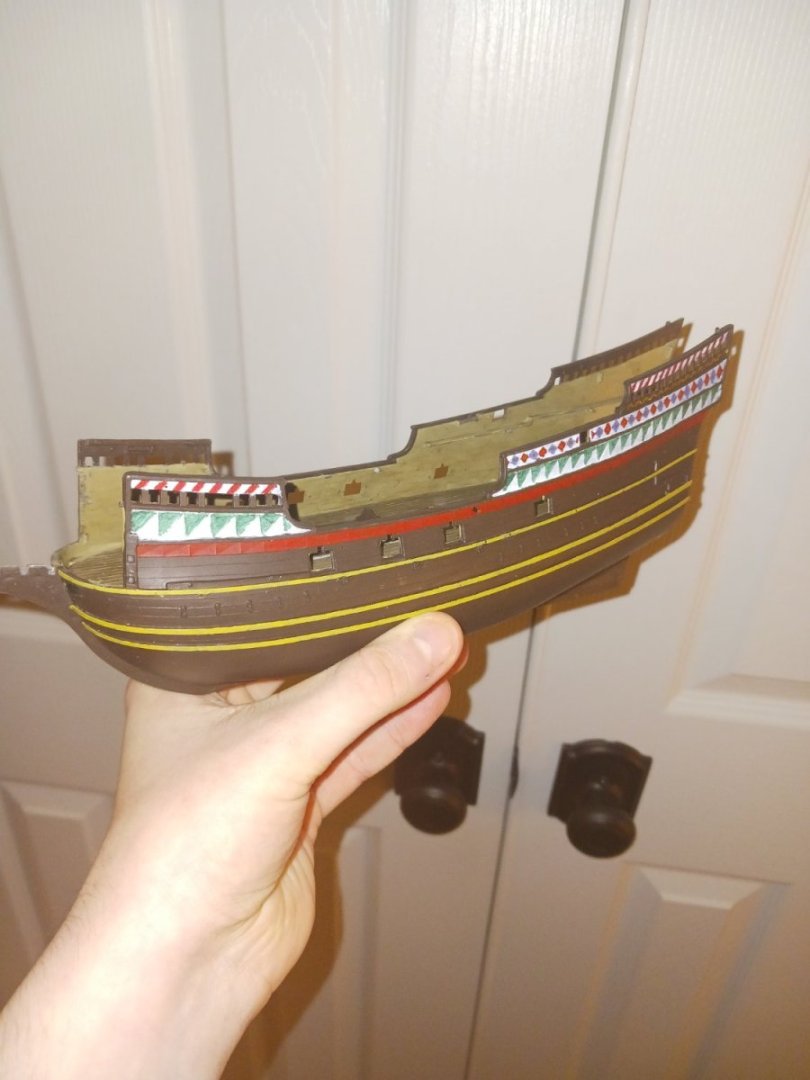
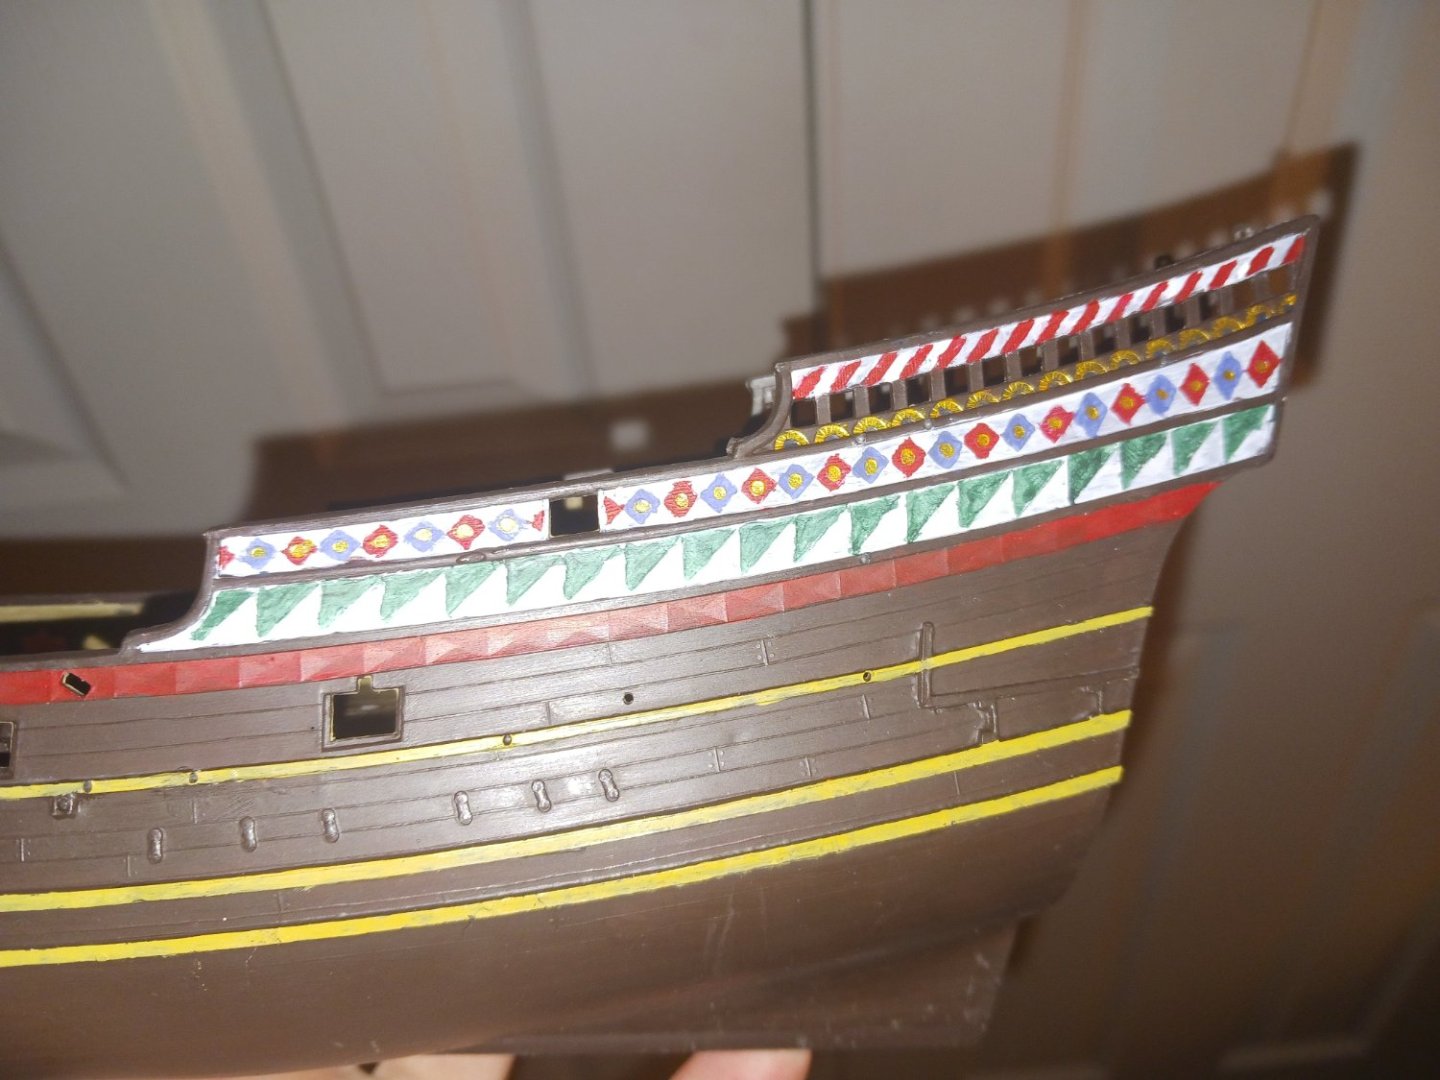
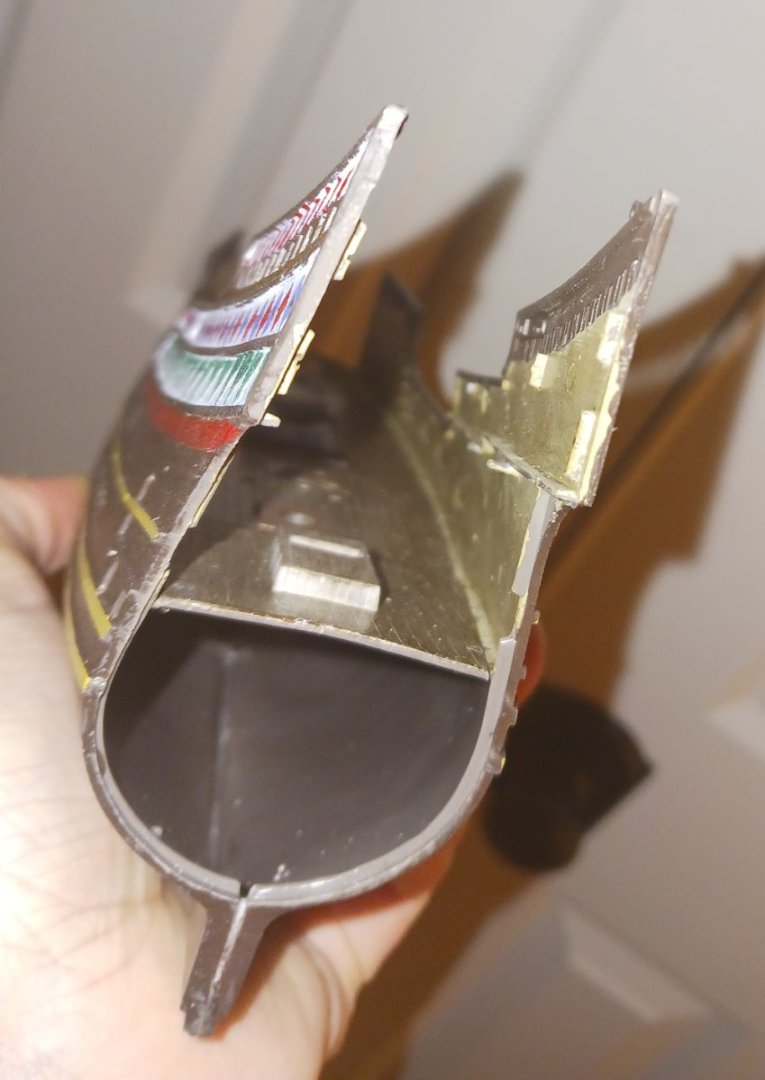
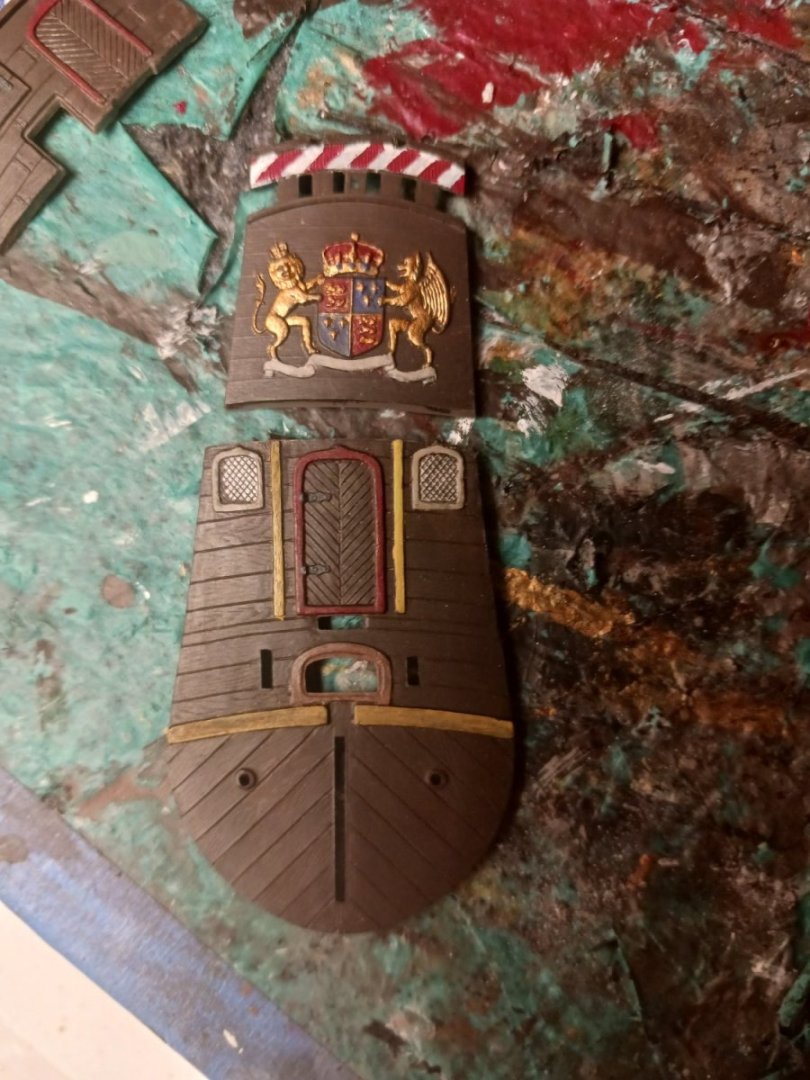
I failed to post this earlier out of sheer laziness. I am still, to this day, less than halfway done with the hull. I wanted this to be mostly a "chill out" build after all the effort i put into the racing yacht. And that it has been, so far. Lots of people have built models of this subject, but surprisingly, no one has built this kit on this forum. I checked, and i am the first one. Earlier in December of last year, i began painting the hull, as shown: Later in December, i dry-fitted, then glued, the two hull halves and main deck together. This was a challenging deck to install, especially for a ship this small. Because of how the ship is designed, one must first glue the deck to one half of the hull, then glue the second half to the first half and the hull. I did a modification of this. I glued the hull halves together as well as put glue on the places where the deck was to go, and put the whole thing together at once. The considerable tumblehome characteristic of all galleons makes it nearly impossible to install the main deck the normal way. My progress: Afterwards, i started painting and dry-fitting parts. For a kit made in the early 60's, this kit has incredibly detailed molding. What's more, the molding has held together exceptionally well. Warping and flash is almost nonexistent. What the Golden Hinde looked like is almost entirely up to the conjecture of nautical historians. While some kits include ornamentation of a deer and the coats of arms of Drake and his sponsors, this kit instead shows the English coat of arms. With the Golden Hinde entirely lost to history, we will never truly know. I painted the other hull pieces and the front bulkhead as well. The only fitting problem is going to be getting the foreward grating to fit properly onto the beakhead. However, that is a problem or another day. Would someone please direct Woodrat and Kirill4 to this log? their help would be immensely valuable.
- 137 replies
-
- 1
-
-
- Golden Hinde
- Revell
- (and 2 more)
-
Very nice USS New Mexico build.
-
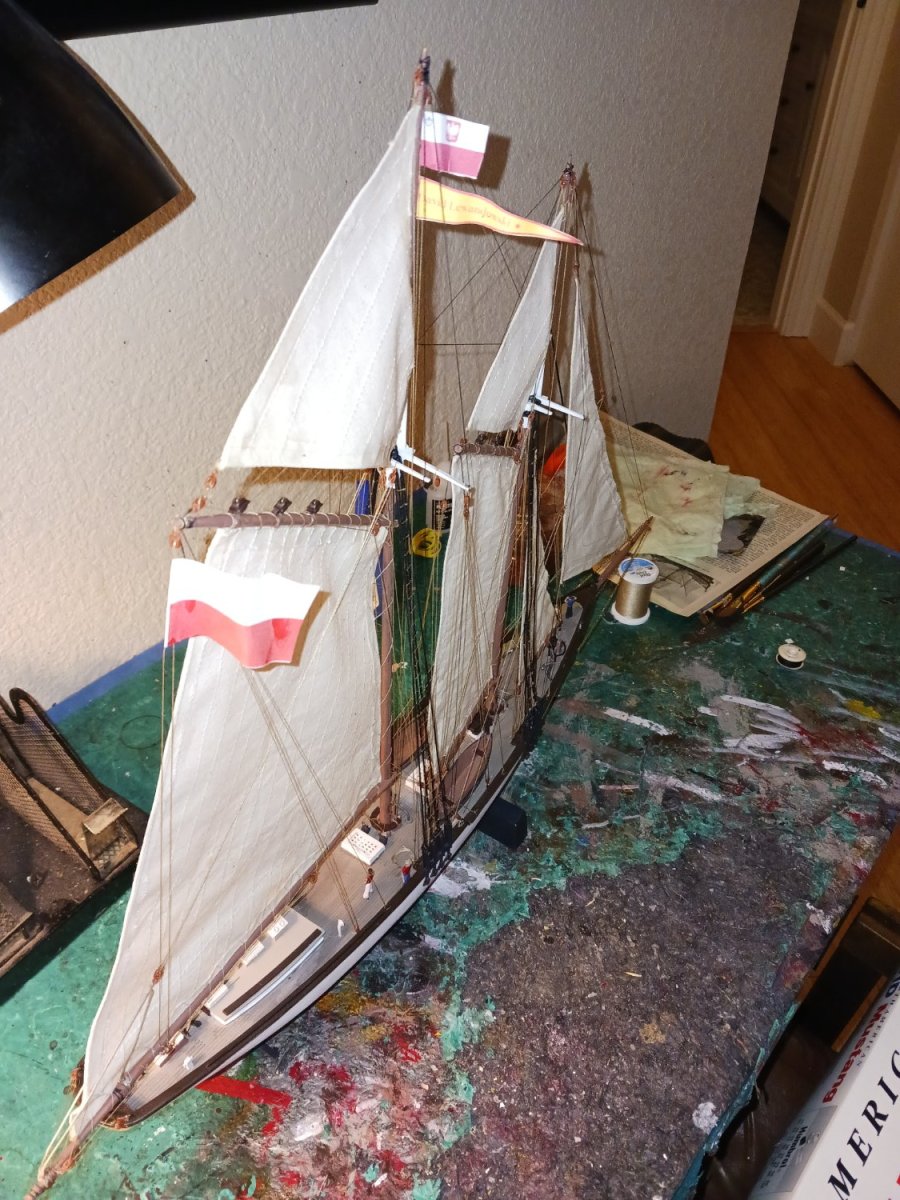
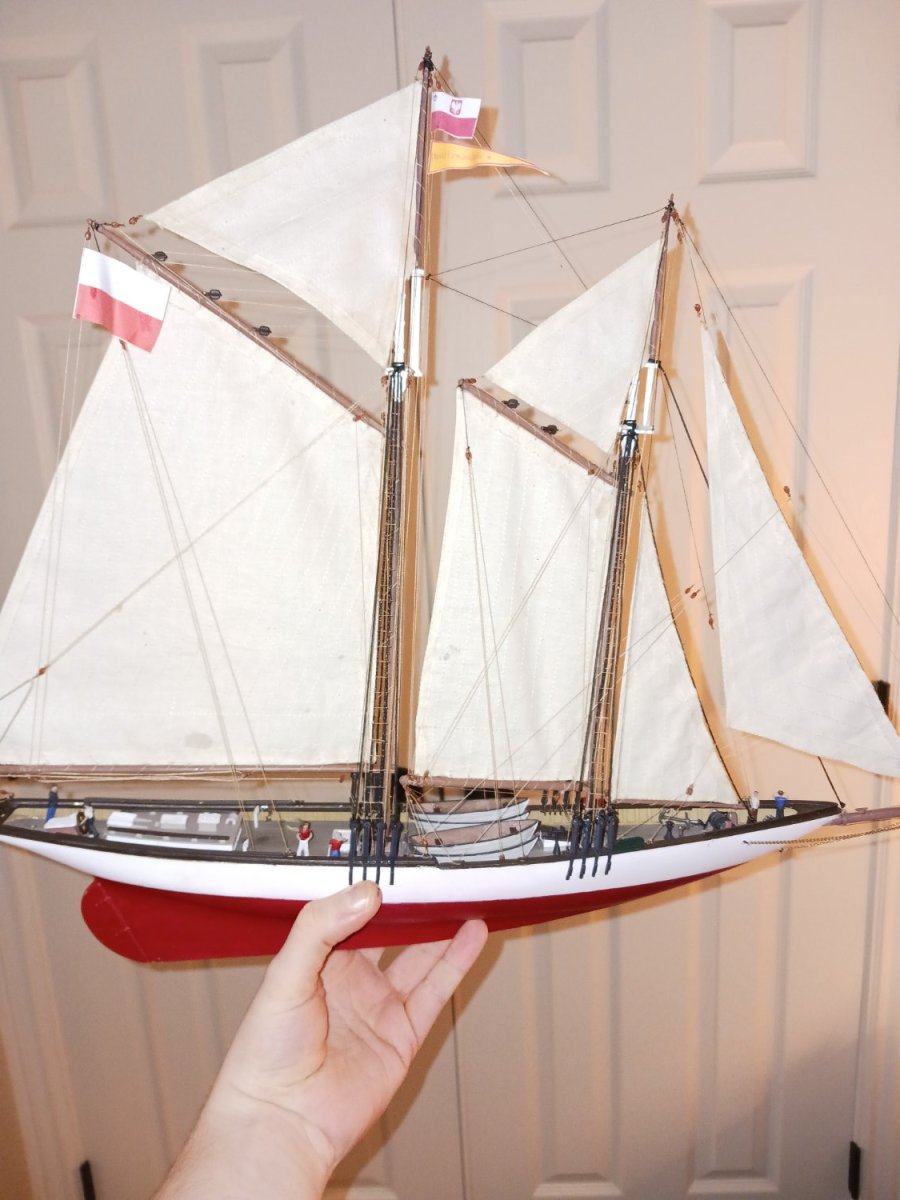
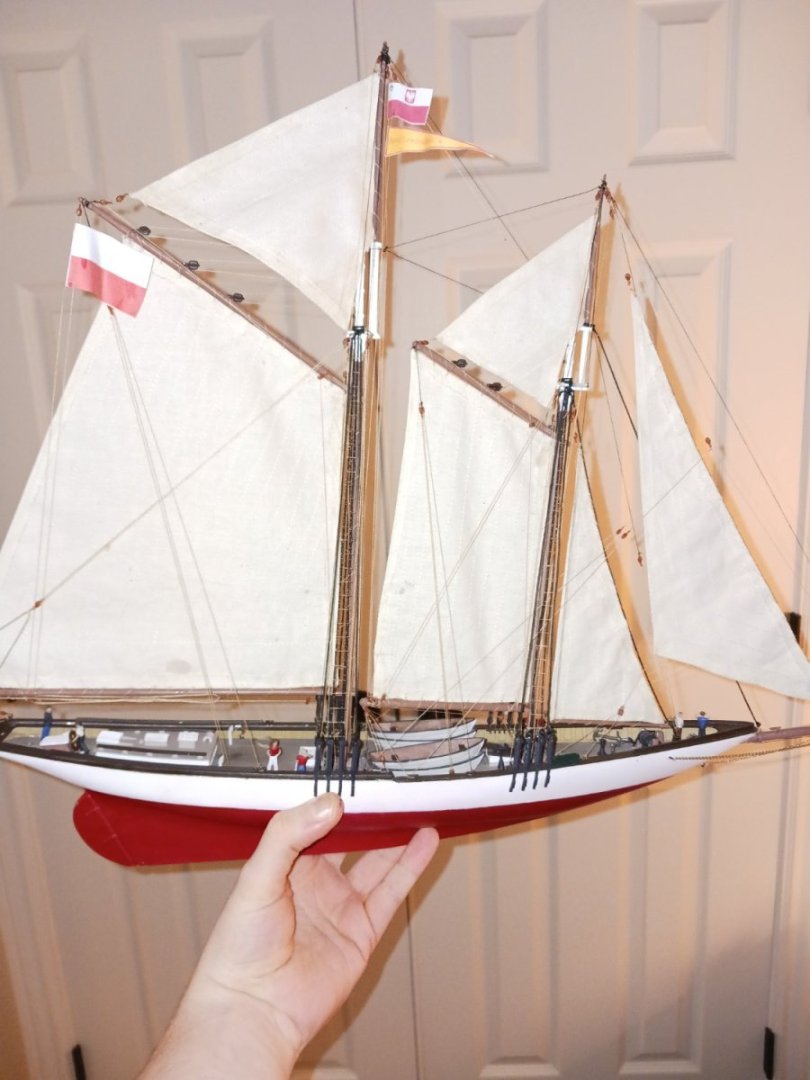
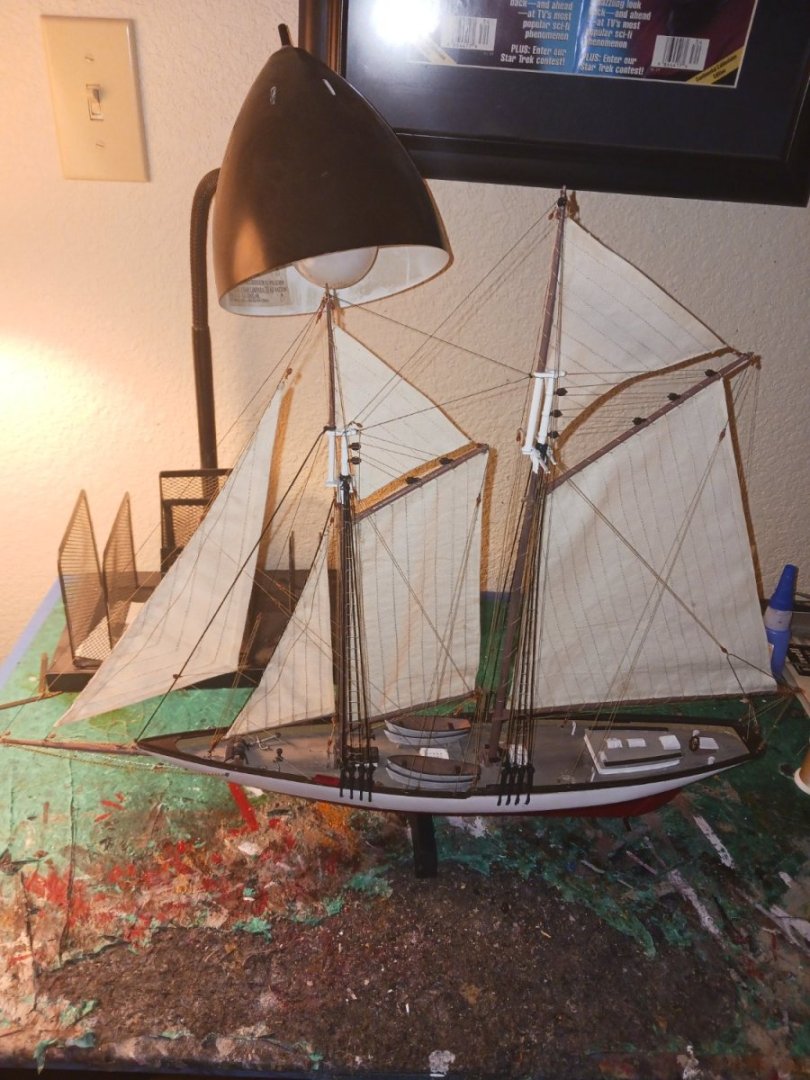
Hello all. We are done. The work is finished, and the David Lewandowski sails. This is the finished vessel: The vessel flies the flags of a nation rising from the ashes like a phoenix reborn. She cuts through the sea like a swordfish on the hunt, bringing glory to her nation. All in all, Polish nautical history is a sorely overlooked subject, even in this forum. Polish history is often forgotten by all but the Poles themselves, which is not as it should be. In fact, the Polish know much more than those in more Western nations about the dangers of ideologies that infect our world today. This is a ship that might have sailed. While this type of vessel is relatively common in the States, historical vessels are unfortunately very rare in Poland. This ship would have been built in the 1920's, meaning it would have to have survived both World War Two and the Soviet occupation of Poland, while also enduring the icy temperatures of the Baltic Sea. While this ship did not exist, others like it certainly did. However, most of them are forever gone. All in all, Polish nautical history deserves the resurrection that the nation itself has undergone in the past two decades. As much as the Poles have been through in the past century, their nation shines as a beacon of light to all or Eastern Europe. Their persecution at the hands of evil dictators has only strengthened their resolve to survive, and this ship is, as much as it is a gift to someone dear to me, a testament to the glories of the Polish at sea. I implore you fellow shipwrights to discover the world of the history of Polish ships. Today, the David Lewandowski, and thus this build log, are finished. I hope this journey was as enlightening for you as it was for me. From the bottom of my heart, i thank you for sticking around and seeing me through this wonderful project. I am not going away, however. Don't you worry. I will be starting a new build log soon, of a ship i have already started: the Golden Hinde. I hope to see you all, and more, there. Cheers, and Merry Christmas to you and yours.


- 27 replies
-
- 3
-
-
- David Lewandowski
- Pyro
- (and 1 more)
-
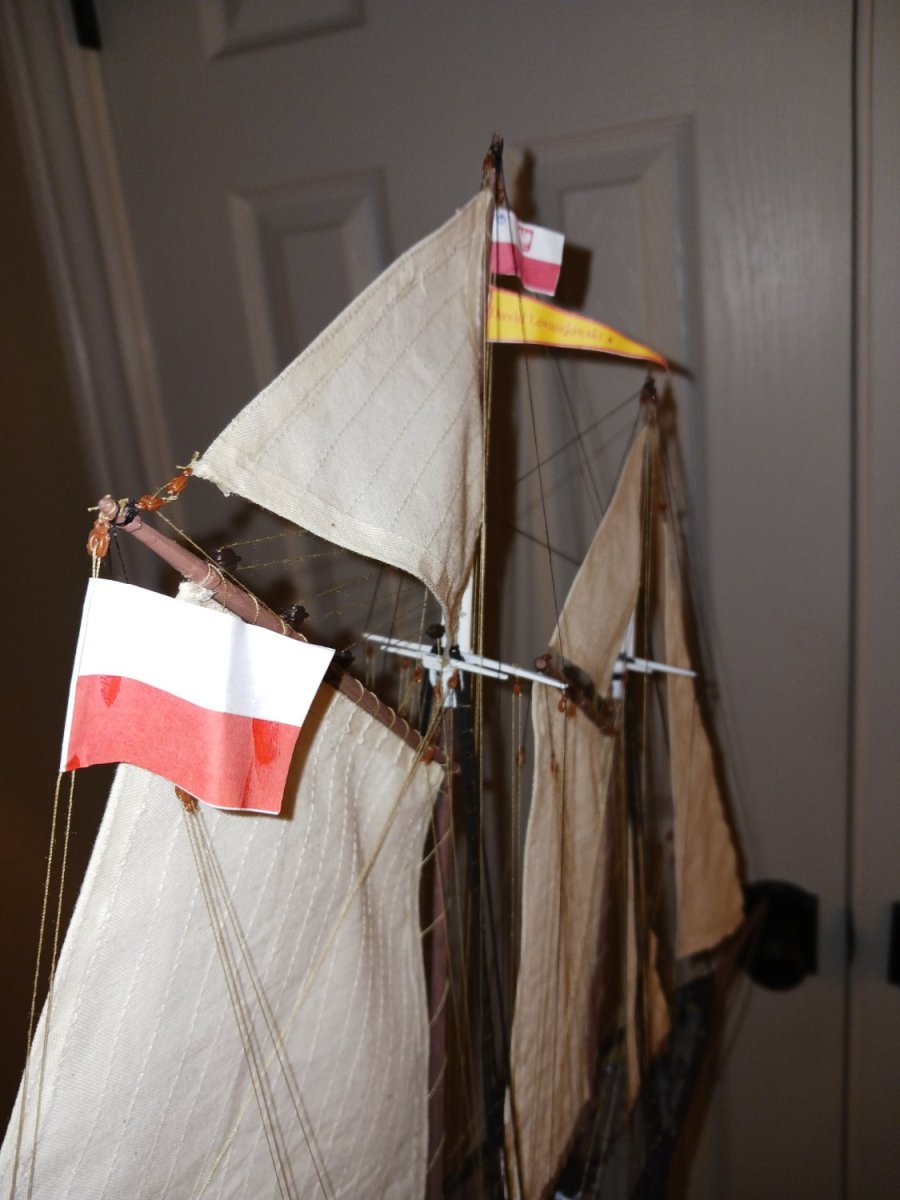
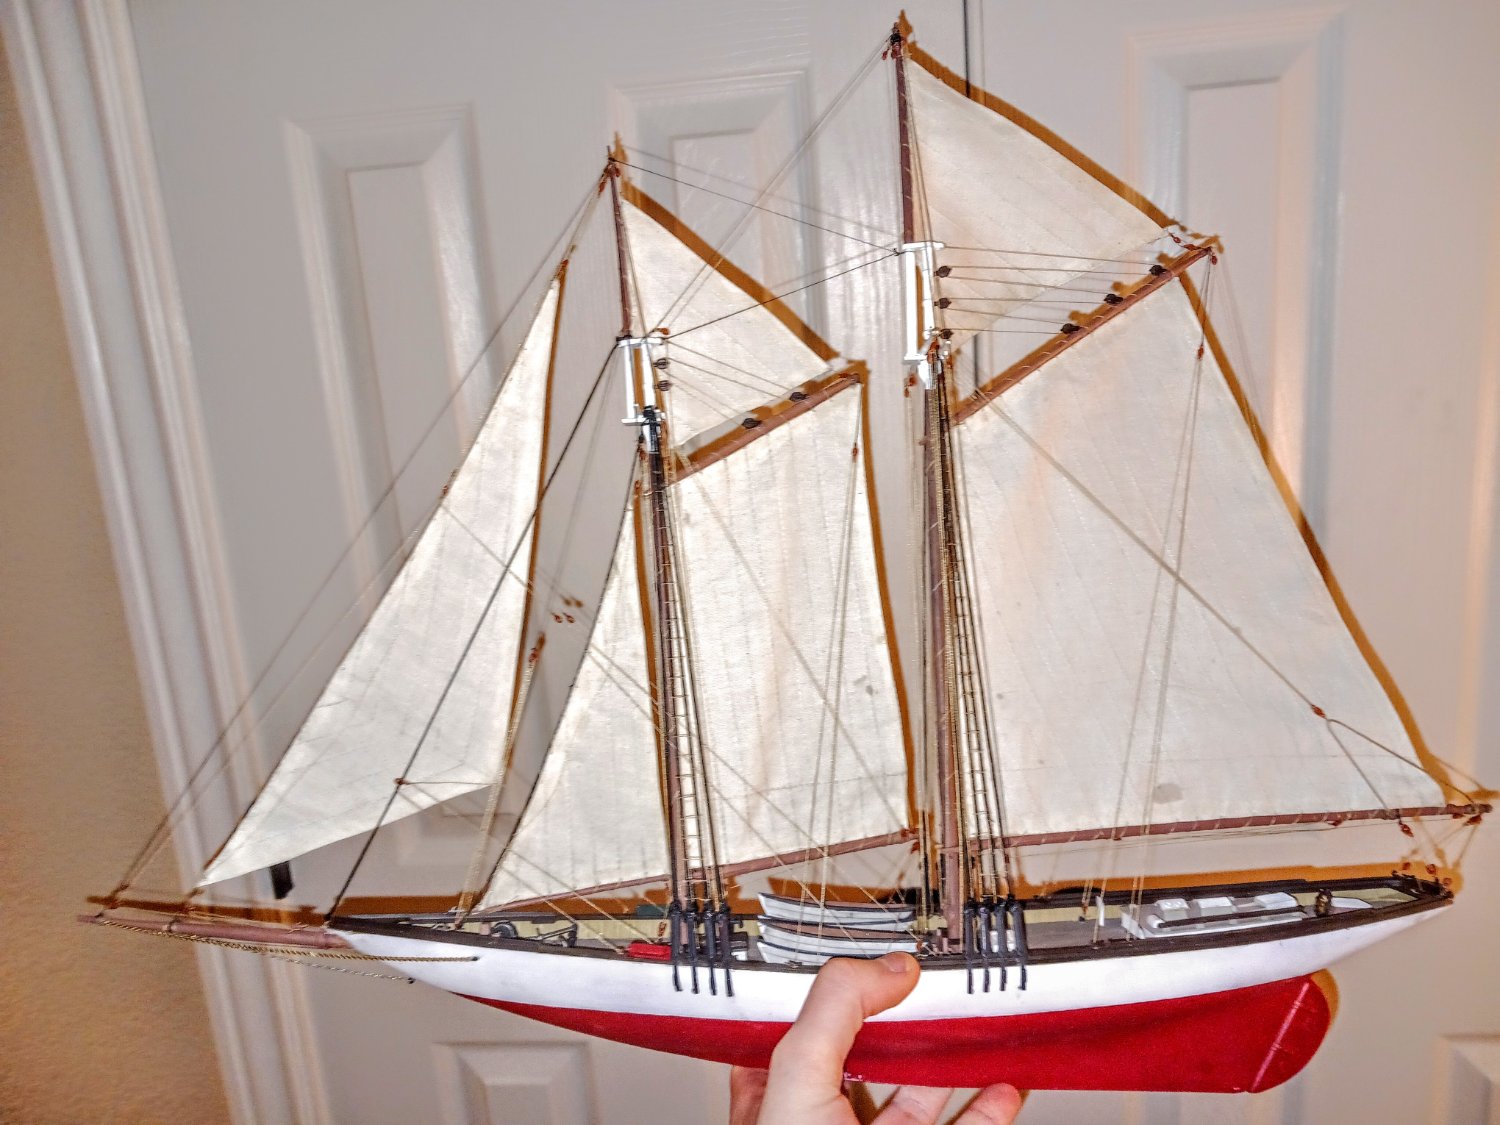
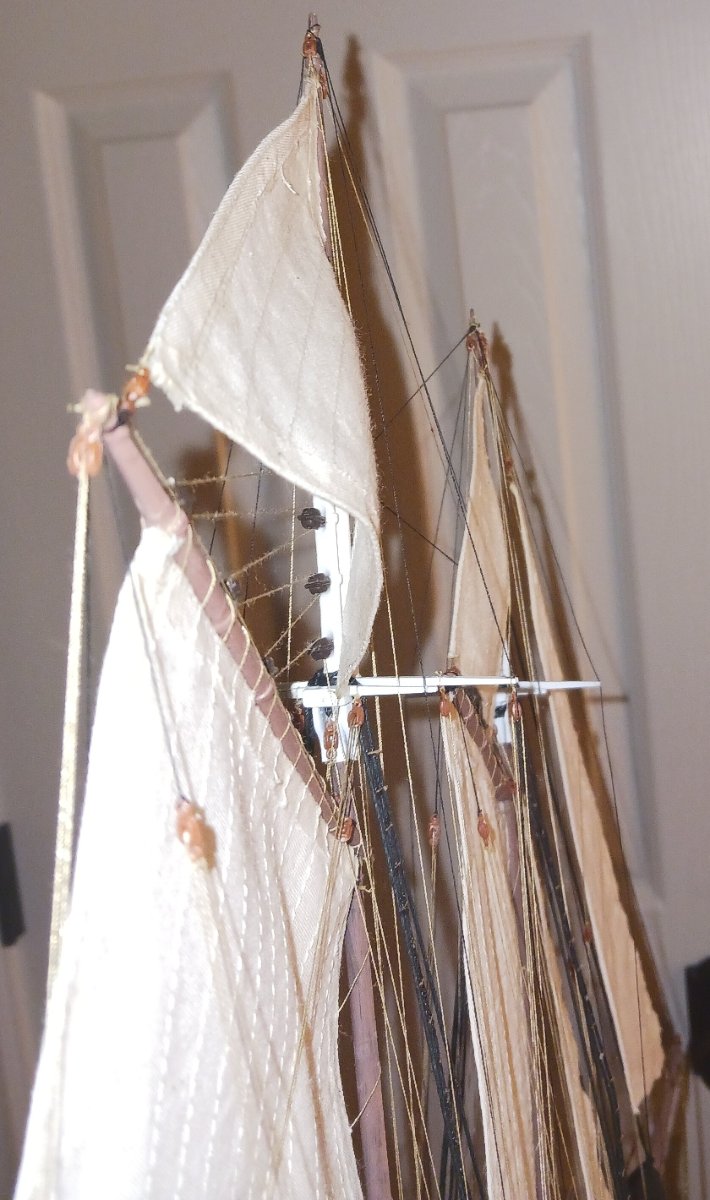
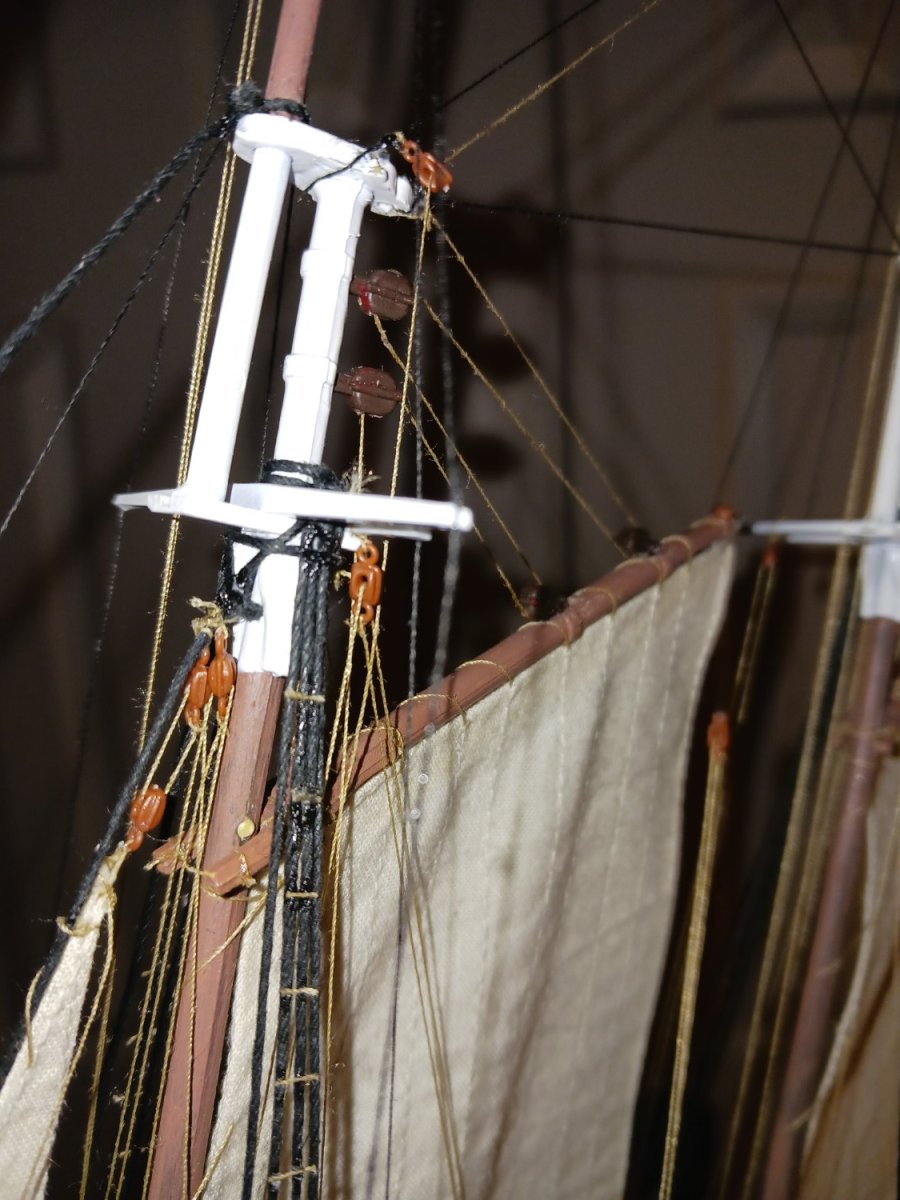
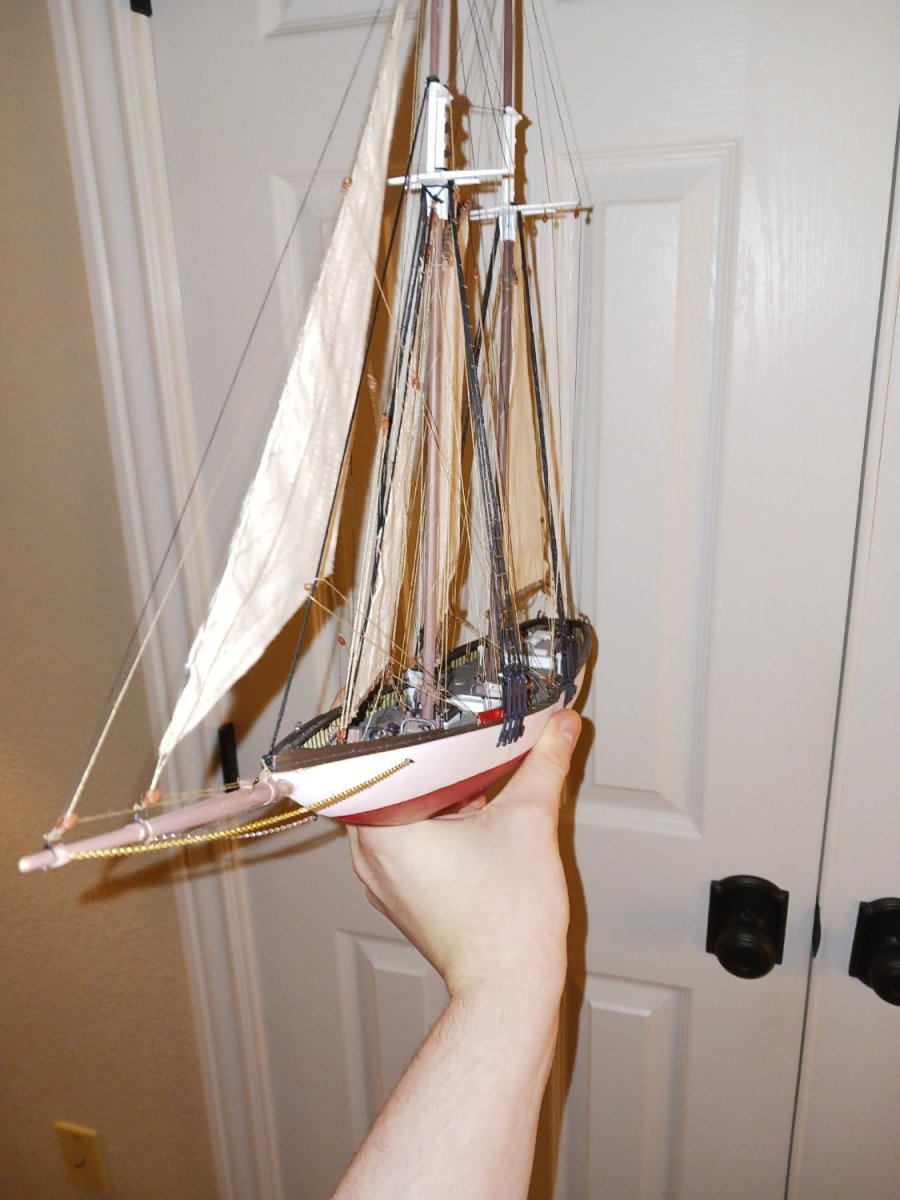
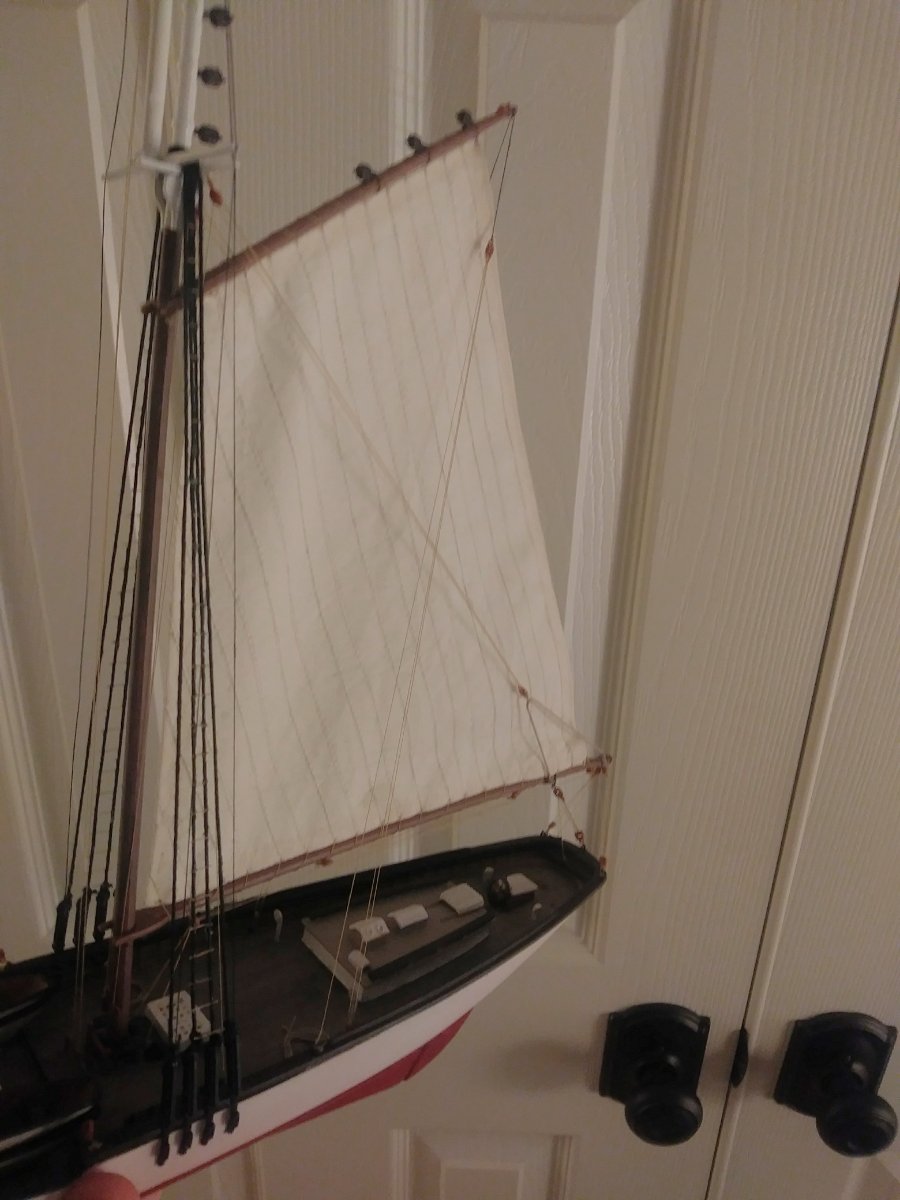
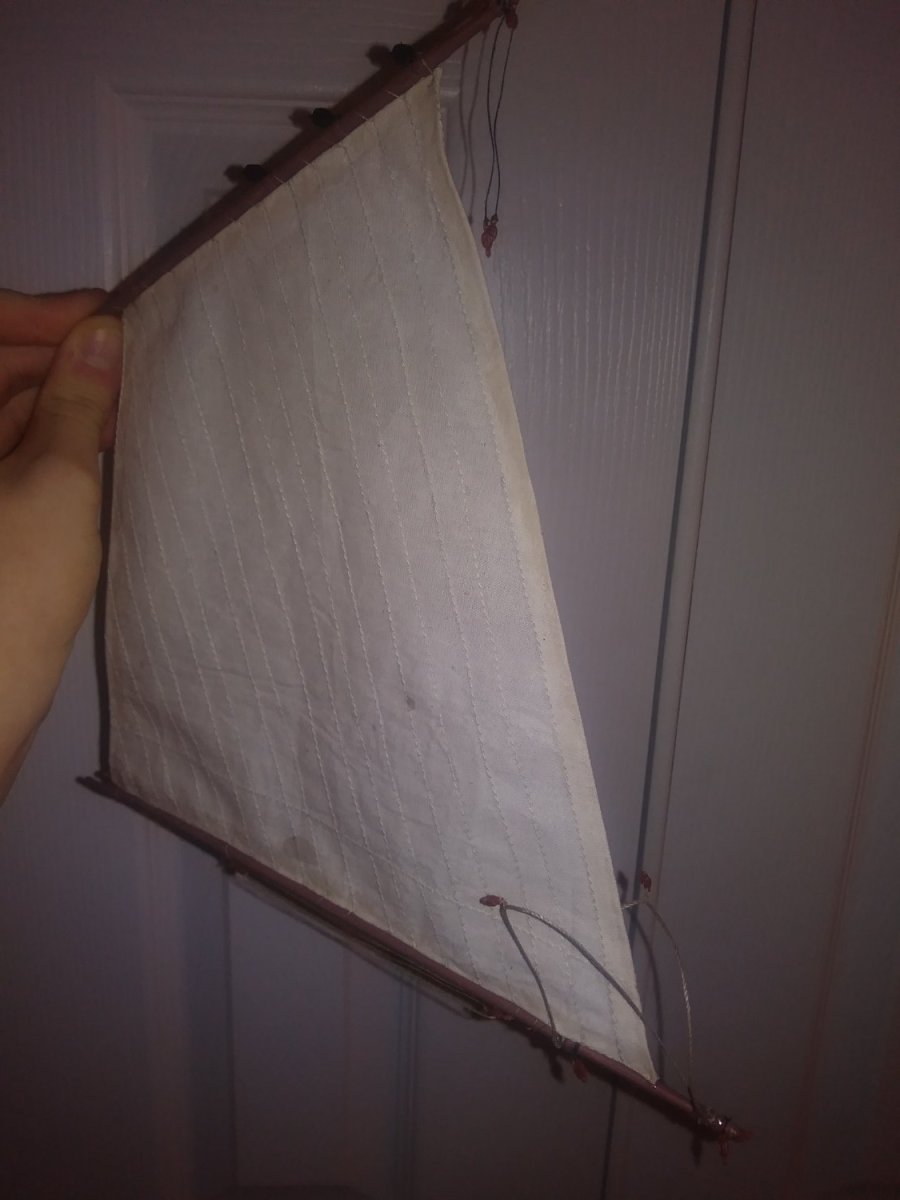
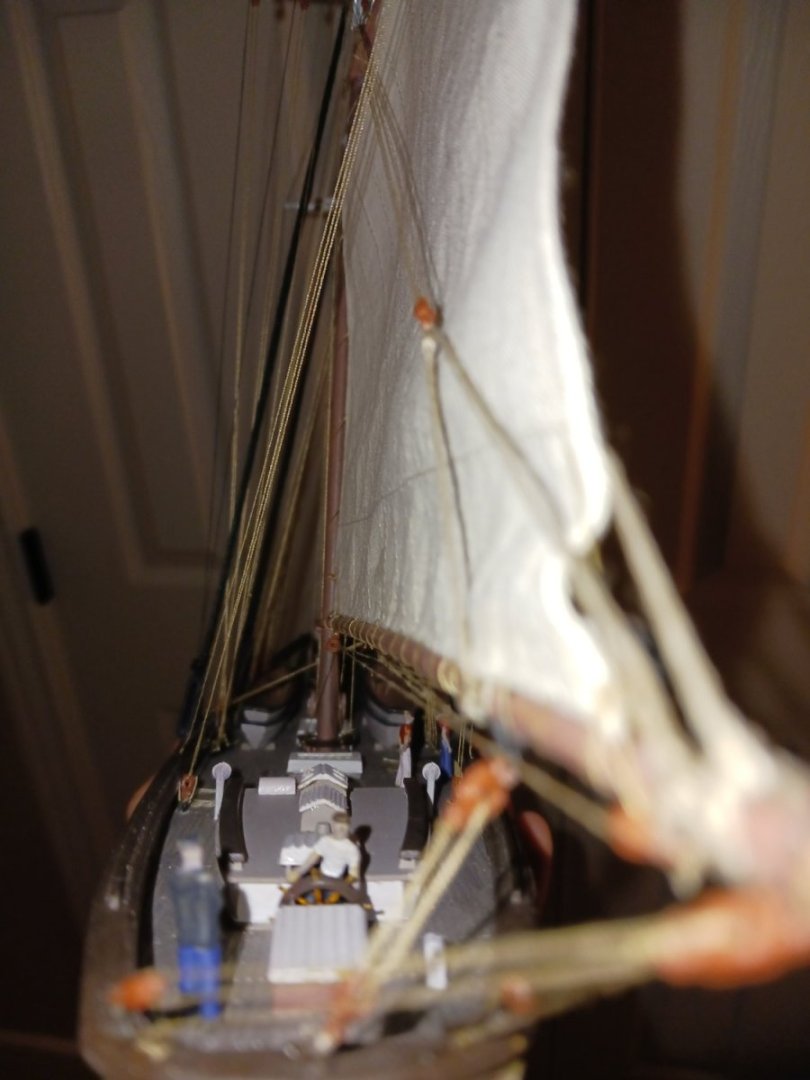
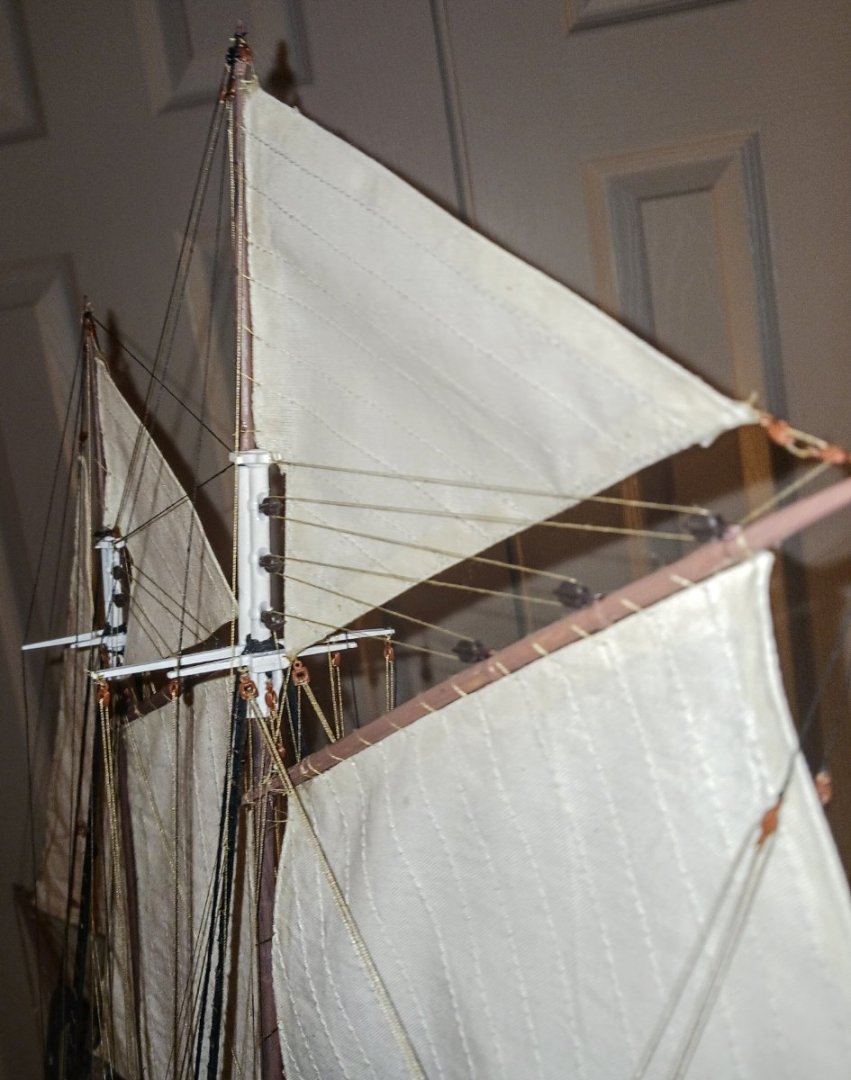
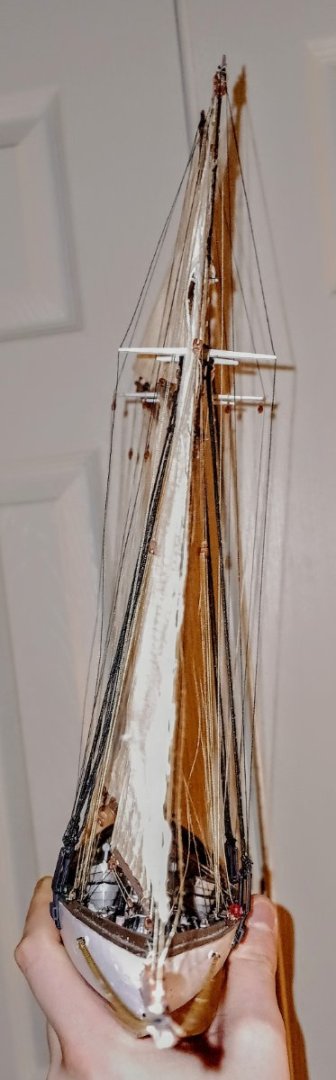
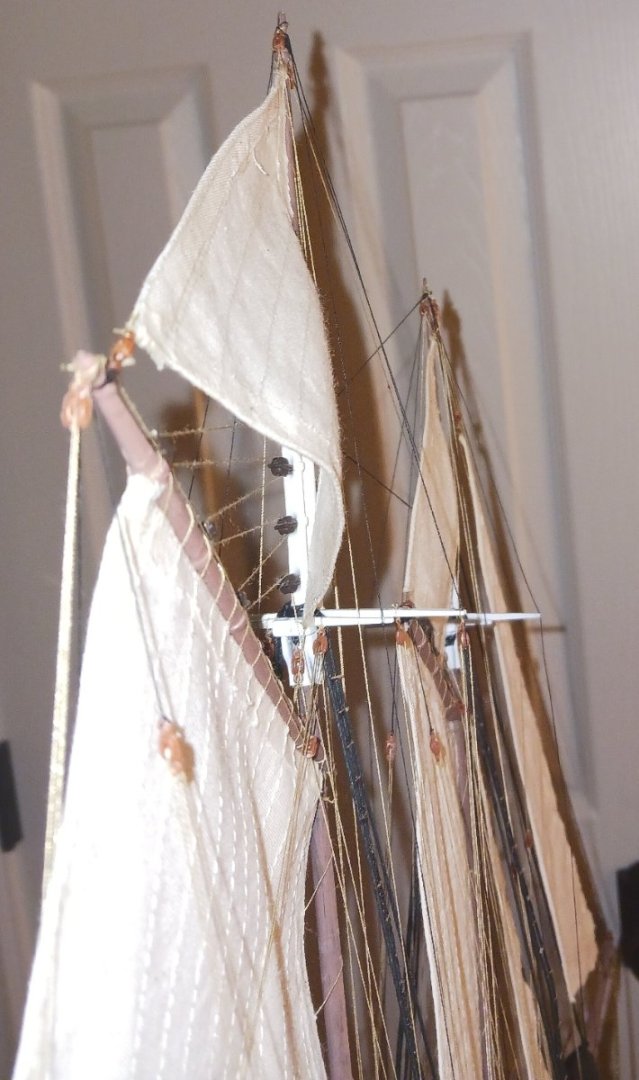
This is not the end of the journey, sailors, but we are getting close. Today, i set the topsails, on the fore and on the main. The sails were easy to rig, as i expected. My father is quite impressed at the attention to detail i have put into this kit, as am i. He says that even though he cannot see much room for improvement, every ship is slightly better than the last. I would agree with him if i had not seen the work of actual professional model shipwrights (Woodrat, Kirill4, and more) The attention to detail i paid in this kit surpassed every other i have made- never before did i think i would spend five months on such a small ship. Maybe that is because i did the rigging from scratch. I don't think anything can ruin this model, even as bad as my luck sometimes is. We are officially out of the woods, and i can finally decompress. This is the David Lewandowski as it stands right now, proudly flying full sail. I had the bright idea to crop and adjust some of the images to enhance the detail and make it more visible. One thing i sometimes like to do along the way is look at the ship bow-to-stern or vice versa, just so i can look at my handiwork all at once and take in all that glorious detail. 😉 This is the first time in a long while that i have felt legitimately proud of myself. The moment where a model just comes together, and all you have left to do is the finishing touches, is a moment and a feeling that only a fellow model shipwright can truly appreciate. This is not the end, however. The most important parts of the ship have yet to appear. I went to the local craft store for decal paper, which, thank God, they had. However, no ship is truly complete without an identity, a nationality, and a crew... so stick around!

- 27 replies
-
- 2
-
-

-
- David Lewandowski
- Pyro
- (and 1 more)
-
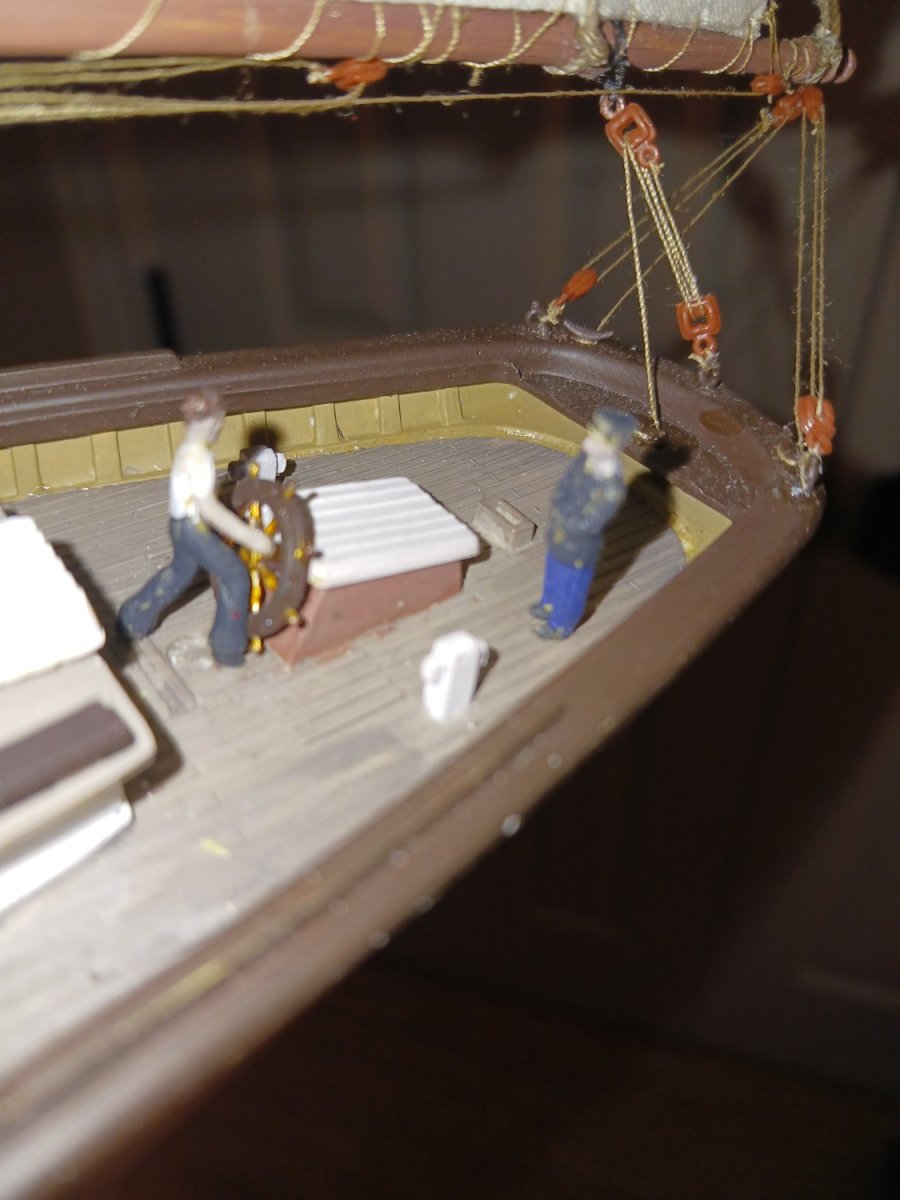
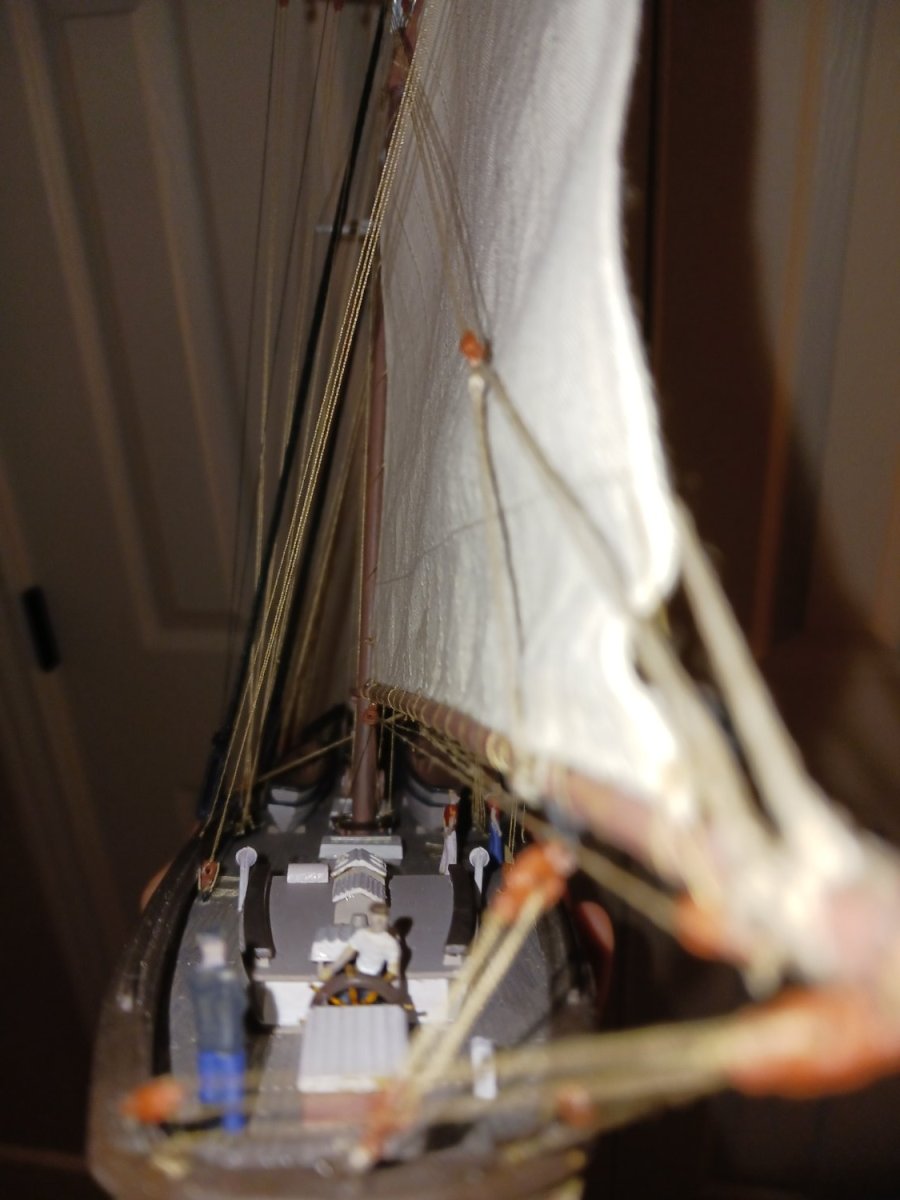
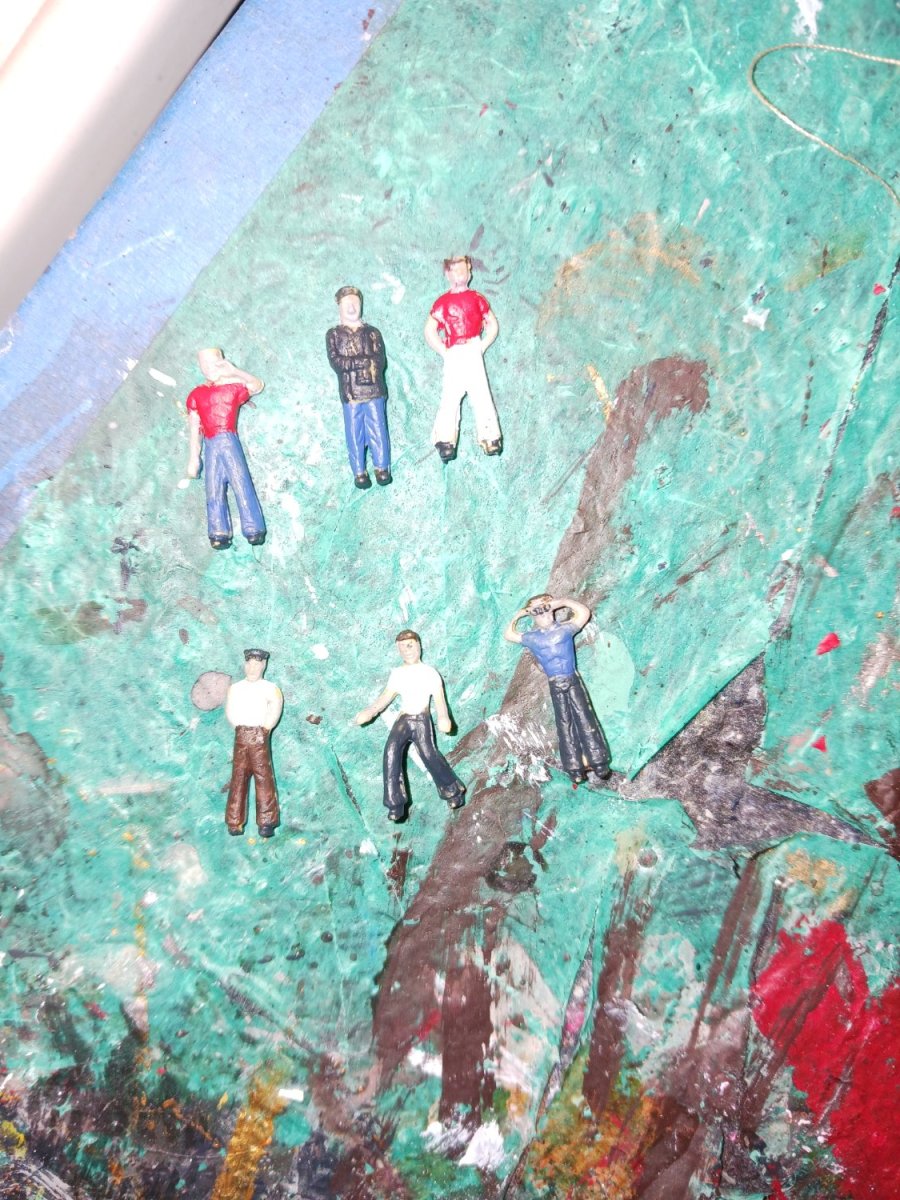
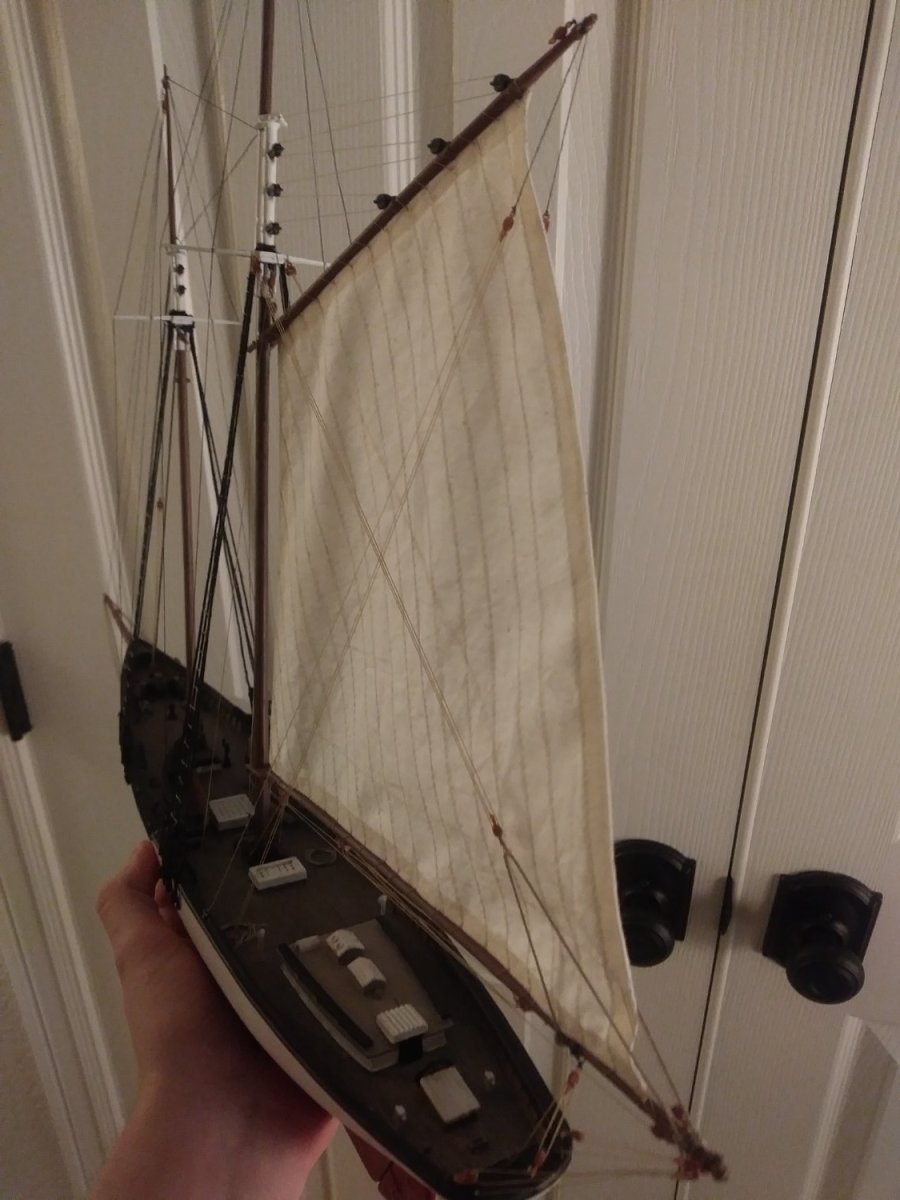
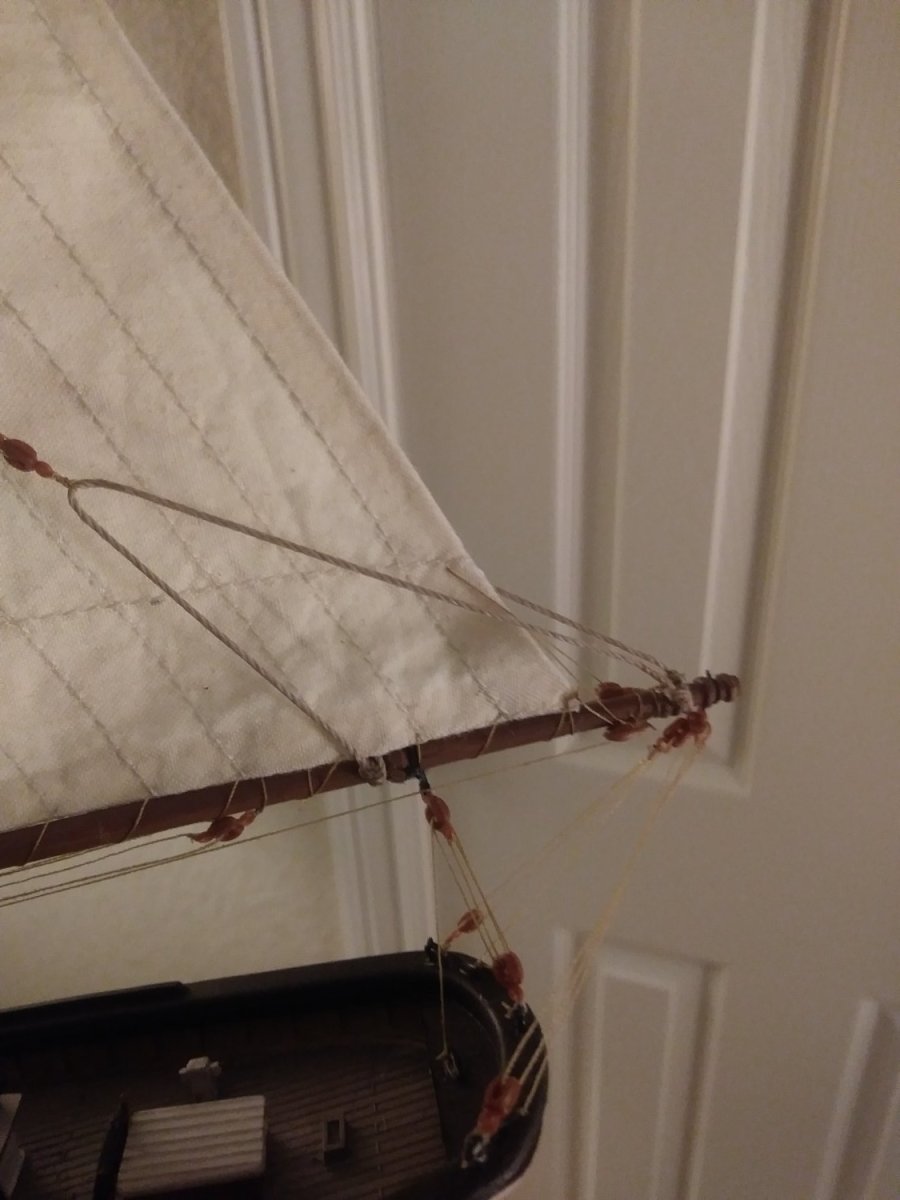
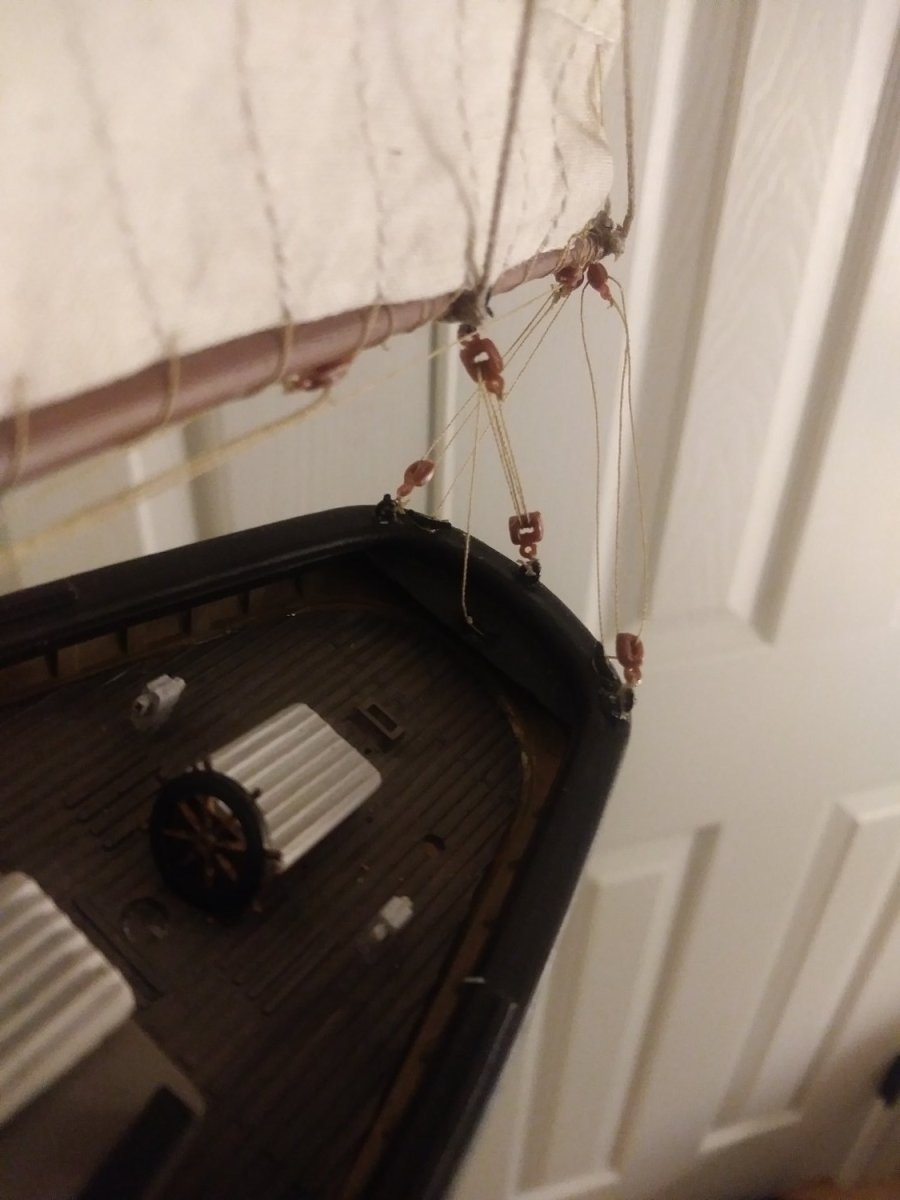
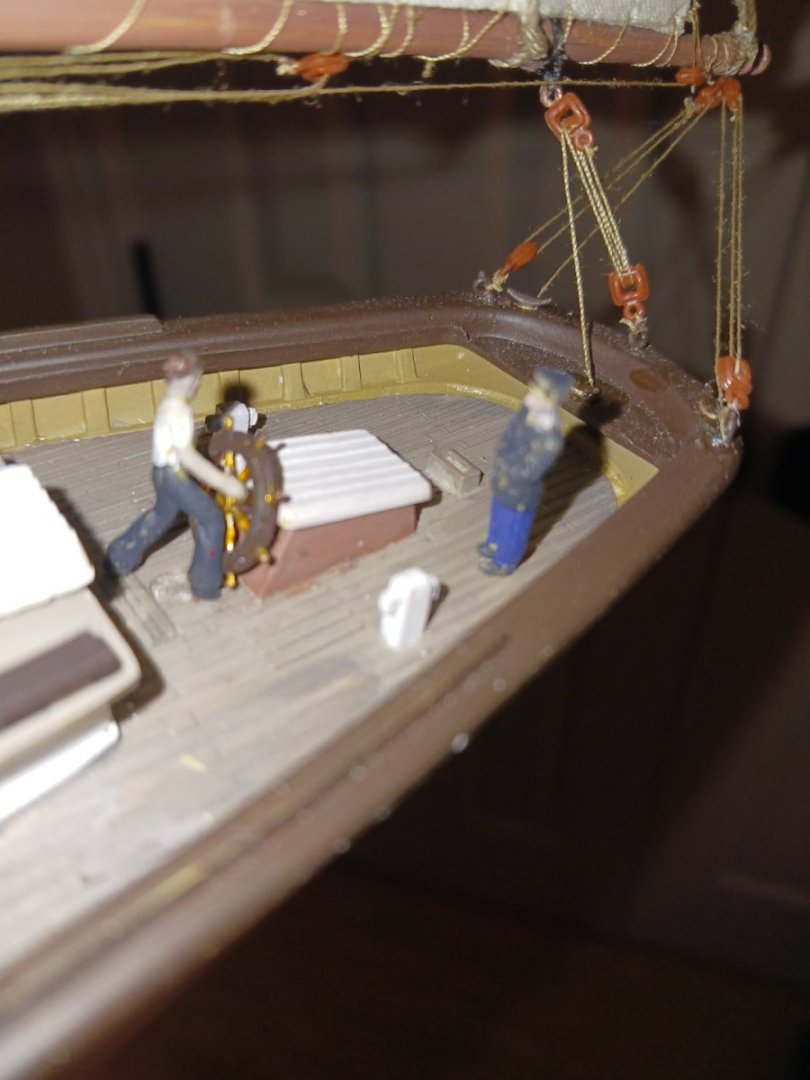
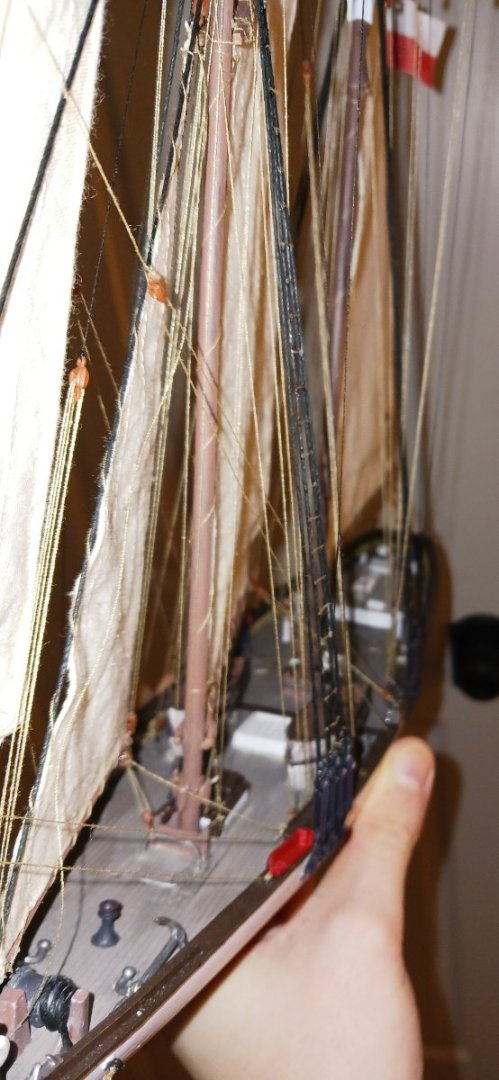
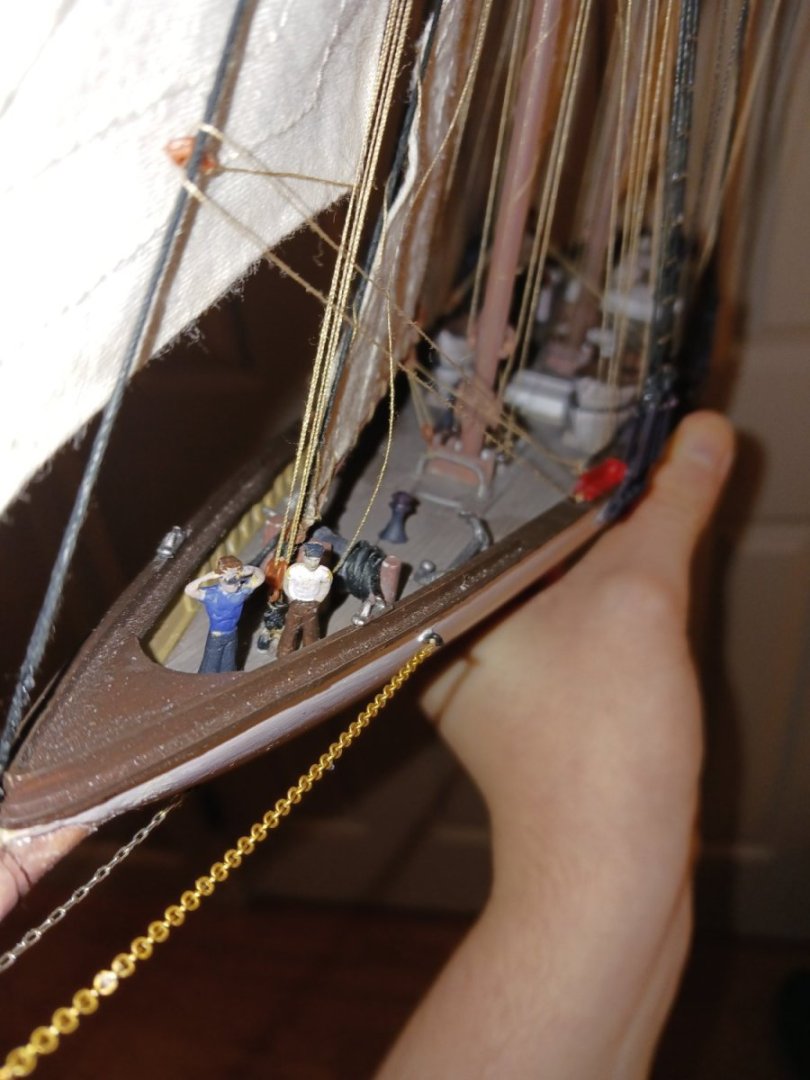
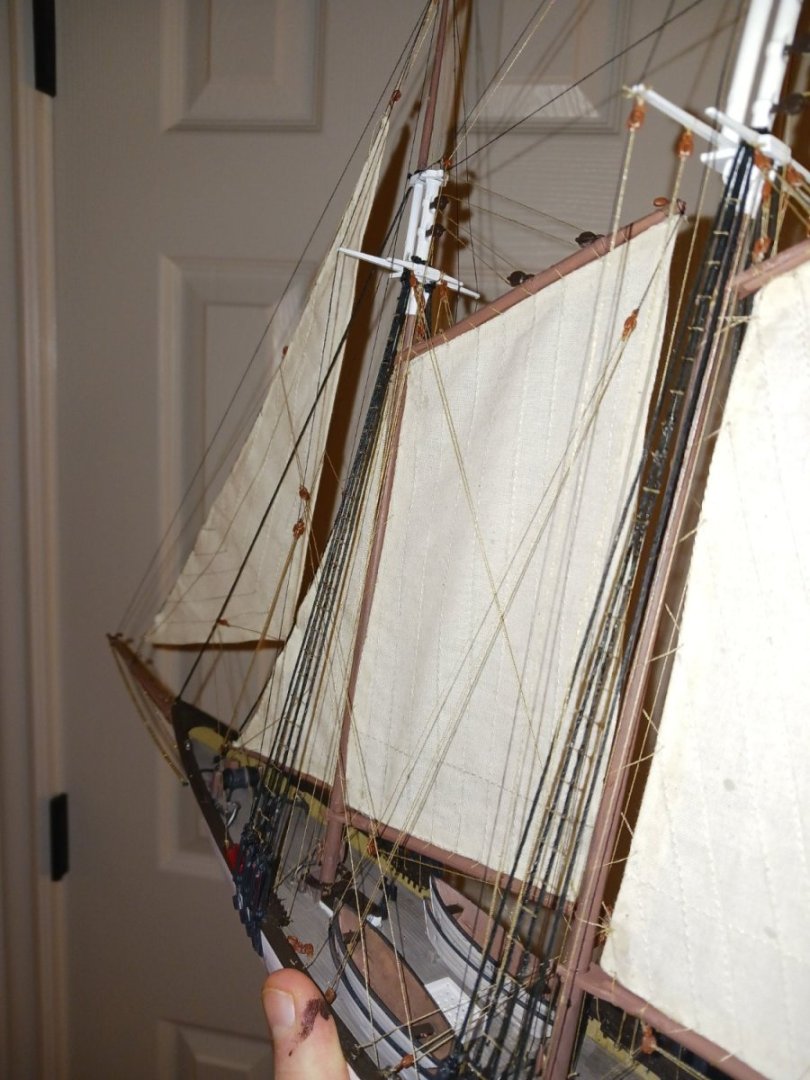
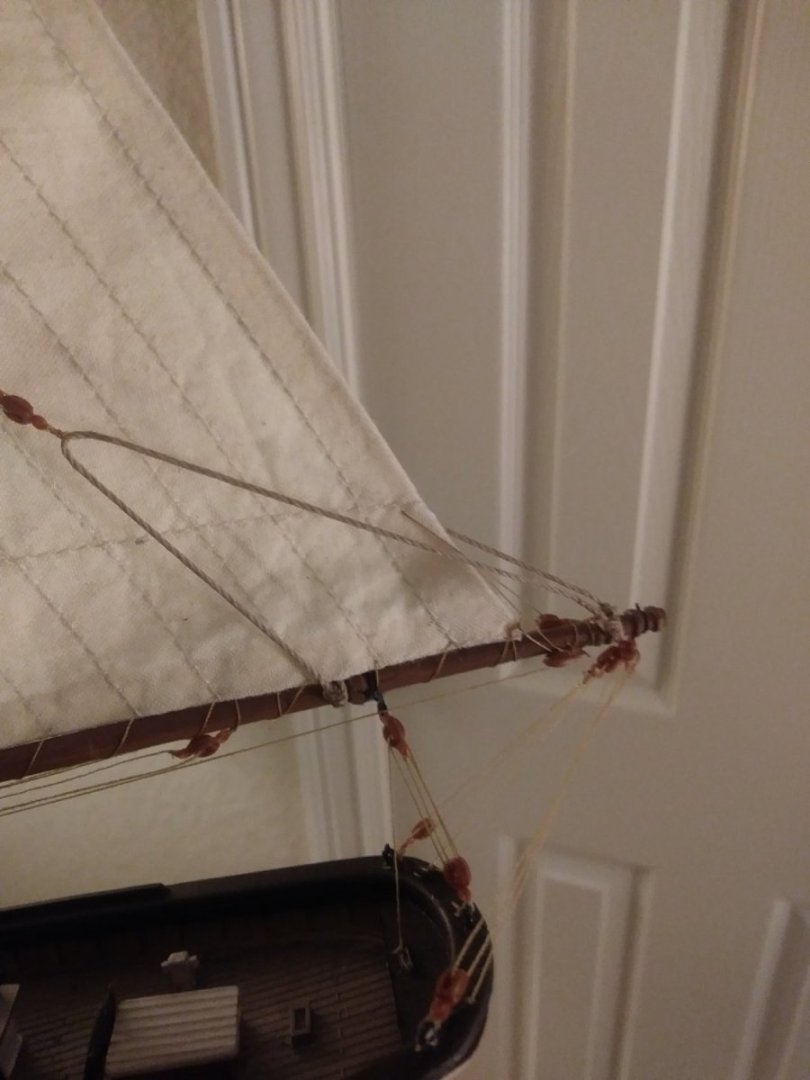
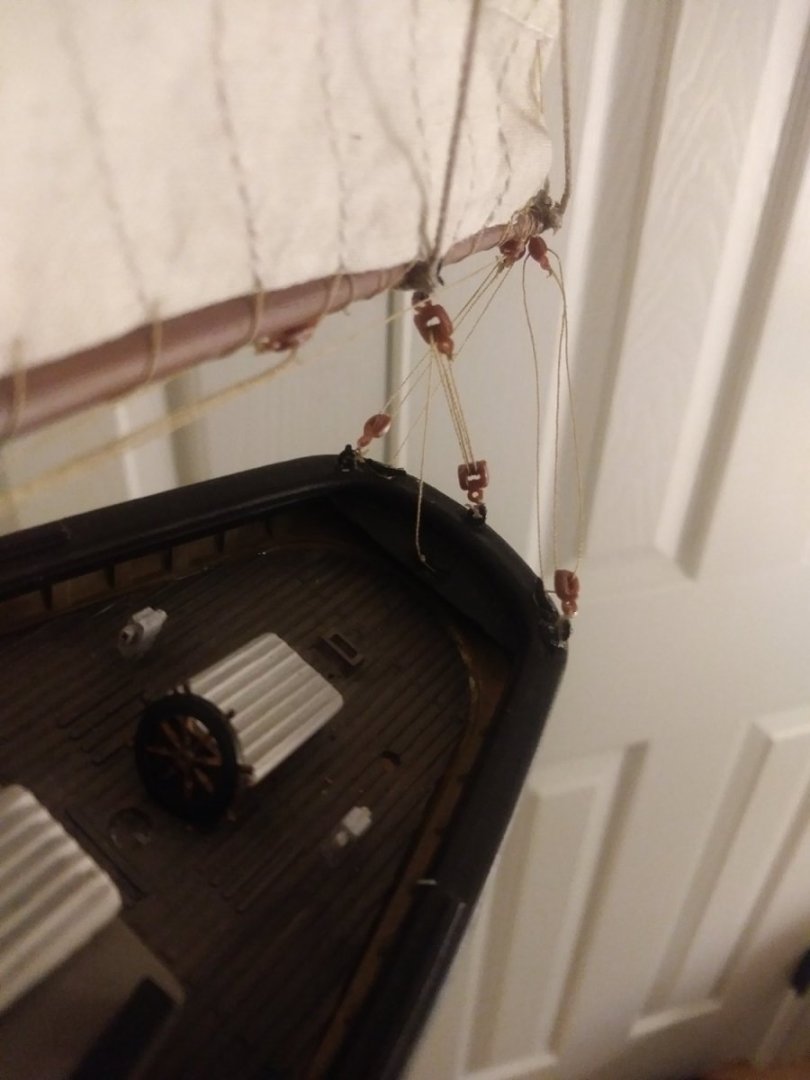
Apologies for being AWOL for a month. I was working on the ship and finishing my schoolwork for the semester. As much as i love my ships and you guys, school comes first. However, i got a lot done while i was away. I got the foresail and the headsails installed, and quite a few other things done. This is the David Lewandowski as per tonight: I bet you all wish you had doors like mine. 😉 Another thing i have done is install the rigging for the fisherman sail and outer jib, which i did not think i would see myself installing. I also had a fairly substantial issue where the main gaff throat halyard would keep snapping close to the belaying pin, but i got that issue fixed. I have done several other things that i did not foresee myself doing, like getting the tertiary flag halyards installed. Don't be fooled. I thought they would be some of the easiest lines on the ship. I am really hauling ropes here, because i want to present the vessel to it's namesake on Christmas Day. It will be his Christmas present, and i will have to find time in his schedule to do so- he is the pastor of my church, and thus a busy man. I also asked his opinion of the crewmen and if they should be added, and he said it would be nice to have them on the ship, if i was up to it. Long story short, here are the painted crew figures: These are 1/96 scale figures, so they are all less than an inch in height. The family printer was finally reloaded yesterday, so tonight i finally got the flags printed. There will be a Polish flag flying from the peak of the main gaff, and a Polish yachting association ensign flying from the main truck, as per international flag etiquette. I have elected to fly the topsails. I have them sitting on my desk right now. I will likely install them tomorrow. Tomorrow night, i am going out to obtain water-slide decal paper, which will be used for the nameplates. You guys should expect a post tomorrow with an update on the ship's rig, and on friday i will fly the flags, install the nameplates, and put the men at their posts. Cheers and goodnight (at least to those of you on the American west coast)


- 27 replies
-
- 2
-
-
- David Lewandowski
- Pyro
- (and 1 more)
-
I think you have done a marvelous job on the Golden Hinde. I am currently painting the hull on mine right now. I am likely to come back to your log when i really get into the finer details of the kit. I am building the 1/96 version by Revell. I might even use it as an excuse to buy a book on the rigging of renaissance and early modern ships. The color scheme is different on your Golden Hinde, yours seems to be the paint job Drake settled on when attempting to disguise his ship as a Spanish vessel. Eventually i will attempt wood ships, and maybe even a scratch build or two. But for now, i am working on a small, relaxing model. I will be following this log closely and see all the progress on the rigging. I am hoping to learn a thing or two from seeing it happen.
-
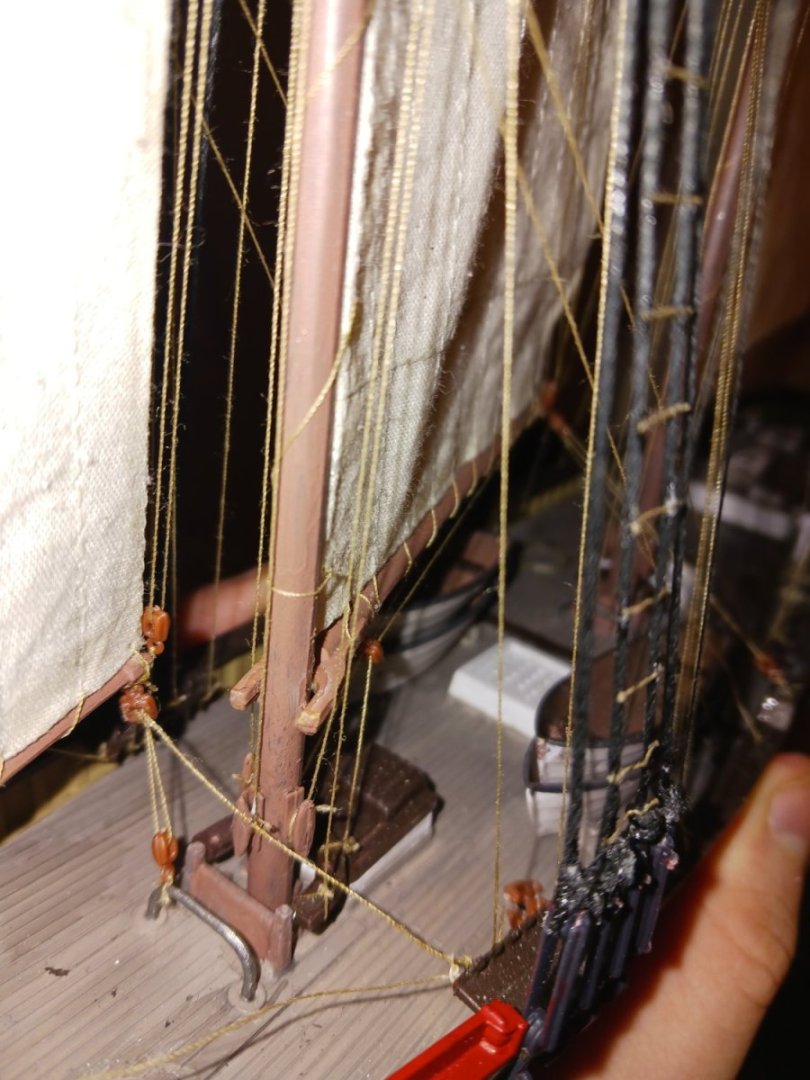
Today, i rigged the mainsail and its gear to the ship. Amazingly, i was able to completely avoid gluing the gaff to the mast. I ended up adding two lines to the sail, that i saw on the Altair- an outhaul, and a reef line. How often these were used, i do not know. But given the relatively small number of sails on these given ships, the ability to reef sail would prove immensely valuable. I did not include standing boom lifts, opting for running ones. Also, i have not added the flag halyard to the gaff peak yet. It will belay to the boom. I quite like the fact that i opted to make all of the guys separate lines, instead of one super complex one. As per the quality of my work, that is for you to decide.


- 27 replies
-
- 4
-
-
- David Lewandowski
- Pyro
- (and 1 more)
-
There are no gaff topsails on the schooner Altair in this image, neither furled nor unfurled. They were not set. The Altair is very similar to what i am constructing now. There are pictures of the Altair flying topsails as well.
- 27 replies
-
- 1
-
-
- David Lewandowski
- Pyro
- (and 1 more)
-
Personally, i like obscure models that i have never seen built before. The previous two small kits i built were the 1/100 San Gabriel, and the 1/100 English Brigantine, originally revell and heller kits, respectively. I quite liked building both. I have never seen either one constructed on this build log, however. My next project will be the second or third time in MSW history that the revell 1/96 Golden Hind will be built.
- 27 replies
-
- 1
-
-
- David Lewandowski
- Pyro
- (and 1 more)
-
There is a rope at the bottom corner of the gaff topsail that falls down to the deck.
-
Thank you. I will likely end up rigging the topsails. Yes, this is a one-of-a-kind build from a kit that not many people have modeled. I know how to rig a gaff topsail, my question about how to not rig the sail is no longer valid. I am currently haggling an eBay model seller for a good deal on a revell 1/96 Golden Hinde. Stay tuned for my next build log, lol!! I am happy with how this ship is turning out.
- 27 replies
-
- 2
-
-
- David Lewandowski
- Pyro
- (and 1 more)
-
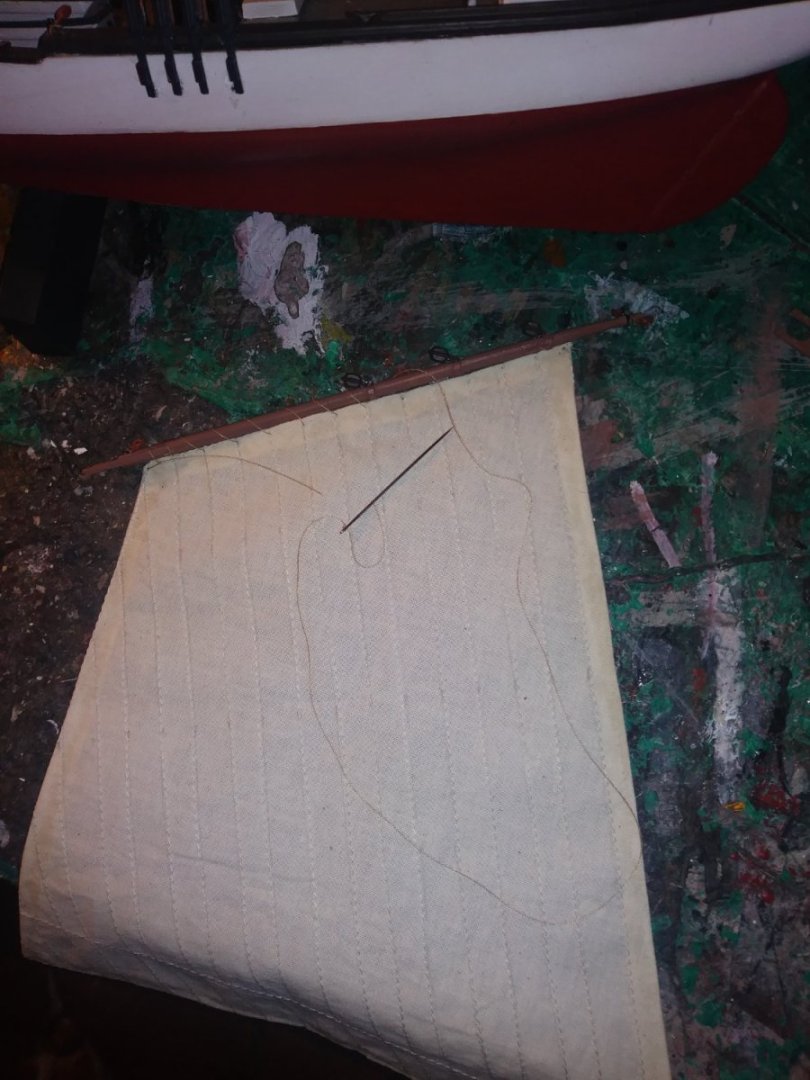
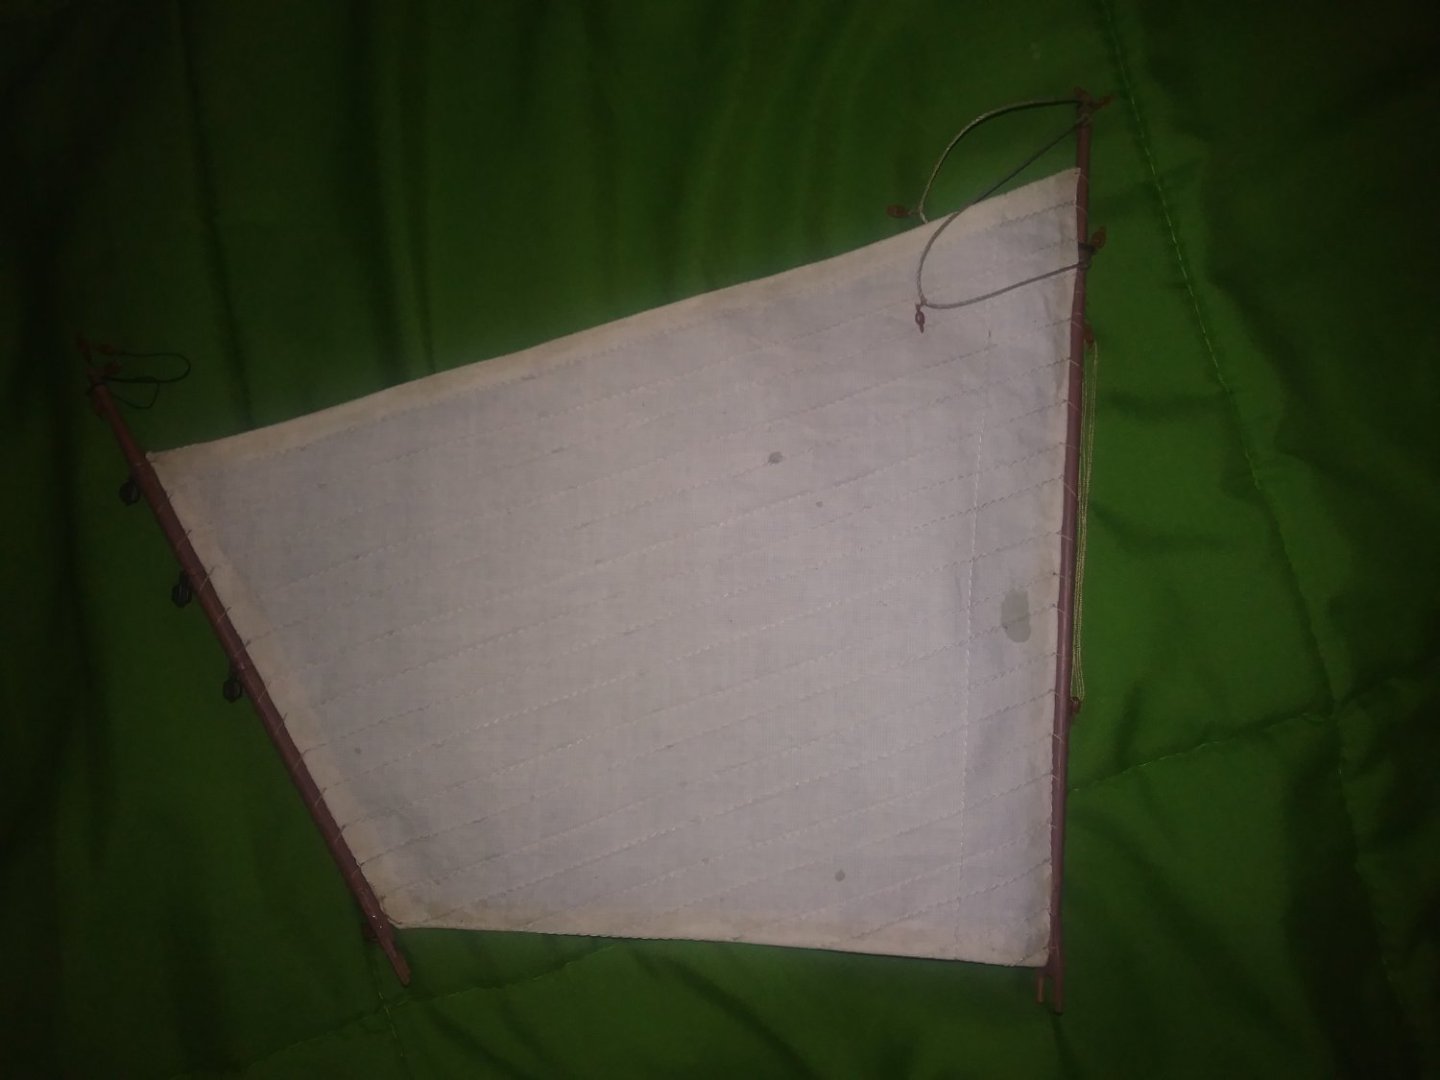
The first sail is here! Aren't you all excited? Is anybody here? it's getting lonely. Anyhow, with much fiddling, i began lashing the mainsail to the spanker gaff, and then the boom. I ended up going with the normal, everyday spiral lashing. After i finished with that, i made up the gaff and boom tackle, which included the standing part of the vangs, the standing element of the boom outer lifts, (whose blocks can actually slide on the rope, to ease setting up the lifts), as well as the auxiliary boom guy. How the hell do i rotate an image!? That does it for this post, shortly i will attach the whole rig to the mainmast, and set up all the rigging, at which point i will post again.


- 27 replies
-
- 4
-
-
- David Lewandowski
- Pyro
- (and 1 more)
-
I have a question for the 3 or 4 of you here: Should i set topsails or not? I think that either would look pretty cool. If not, i am at a loss as to how to rig the lines. I am assuming it would be done rather similarly to how jib lines are rigged without the sail itself there. However, gaff topsails on modern racing yachts have several methods of rigging. This, being a ship that flies standing gaff topsails, could have them rigged in any number of ways. The sails themselves would not be there at all should we decide they should not be added, i.e. they will not be furled. If anyone could find me a useful diagram of how a standing gaff topsail works and how it is rigged, that would be awesome. I know the basics, but i want to know more than just the basics.
- 27 replies
-
- 1
-
-
- David Lewandowski
- Pyro
- (and 1 more)
-
Billing Boats Zwarte Zee - rare find
Ferrus Manus replied to popeye the sailor's topic in Wood ship model kits
"not an expert" - An expert -
Billing Boats Zwarte Zee - rare find
Ferrus Manus replied to popeye the sailor's topic in Wood ship model kits
I think i speak for all of us when i say that mtaylor's work is outstanding. His ships do not look like models, but rather scaled-down versions of the real thing, which is what i constantly strive for. -
Billing Boats Zwarte Zee - rare find
Ferrus Manus replied to popeye the sailor's topic in Wood ship model kits
GrandpaPhil, i do not know if you were talking to me or someone with more experience. 🤣 My next build will be the Revell 1/96 scale Golden Hinde, and i would certainly like an audience of experts. I plan on getting Kirill4 (the Galleon expert) and Woodrat (the Carrack expert) on the case. EDIT: I now realize you were talking to Popeye. Yes, his work is extremely professional, and i personally hold him in high regard as one of the most senior and experienced members here. I actually ended up choosing him as a mentor, and we talk regularly.