


Ferrus Manus
-
Posts
1,349 -
Joined
-
Last visited
Content Type
Profiles
Forums
Gallery
Events
Posts posted by Ferrus Manus
-
-
The general consensus tends to be that you should use a single block instead of a double block.
-
17 hours ago, Isaiah said:
Going to need a lot of advice because I don’t know what the heck I’m doing.
No one does. At least, not when they start. It takes quite a while, but just study as much as you can. Buy some books on the rigging of ships in that general time period. C. Nepean Longridge's book "The Anatomy of Nelson's Ships" is the Holy Bible of the constructions and rigging of ships in the 1700's and early 1800's. Here's a link to where you can get a copy:
-
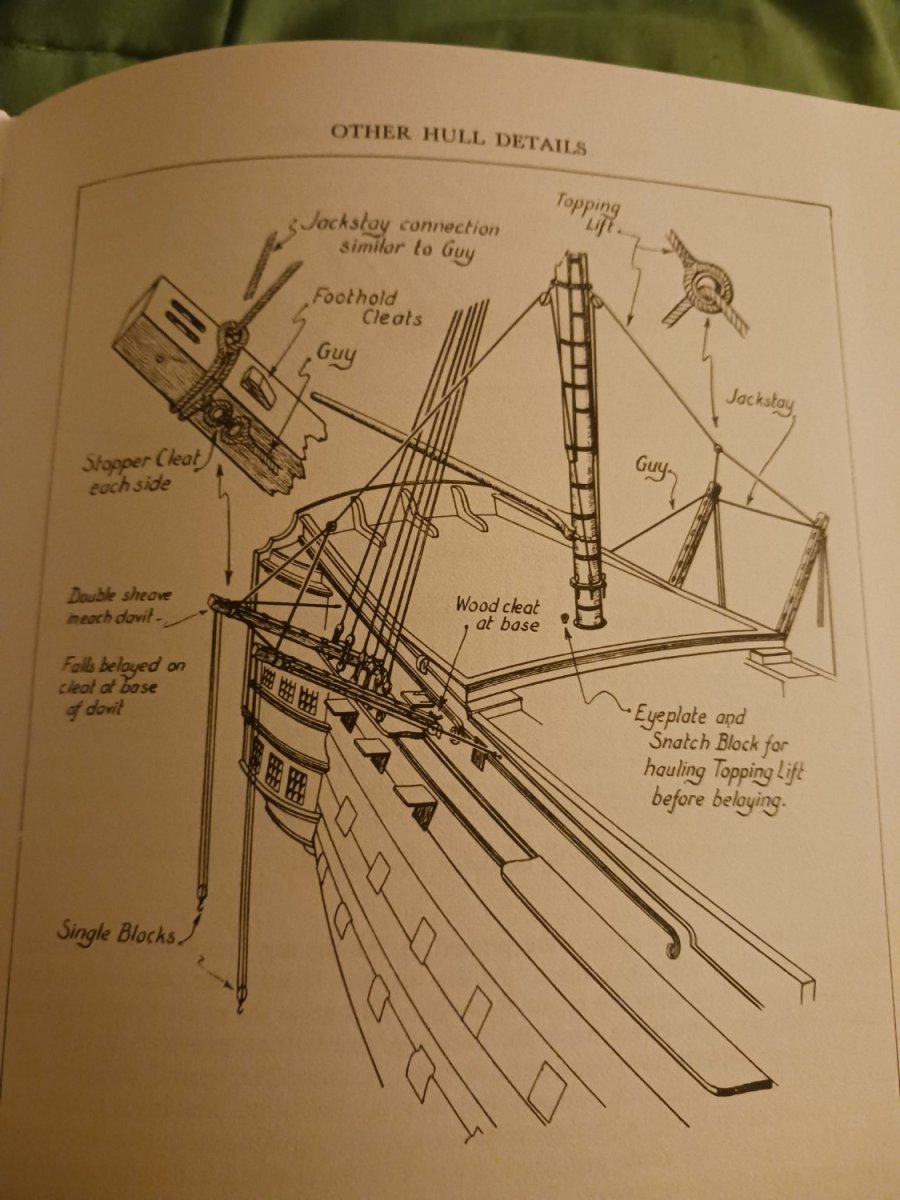
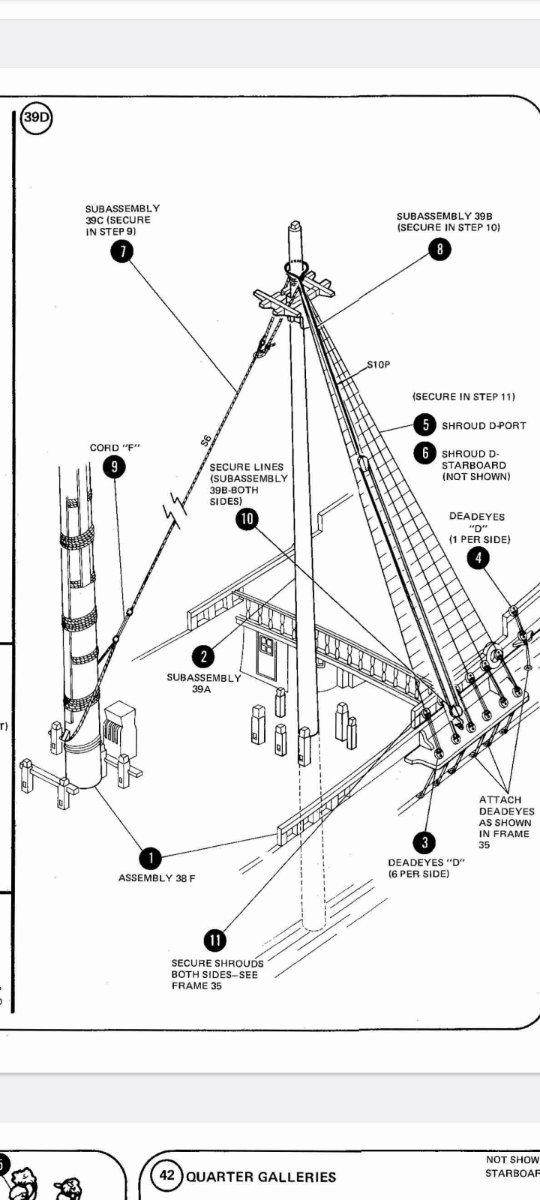
The core tenets of davit rigging, as per the Revell USS Constitution instructions:
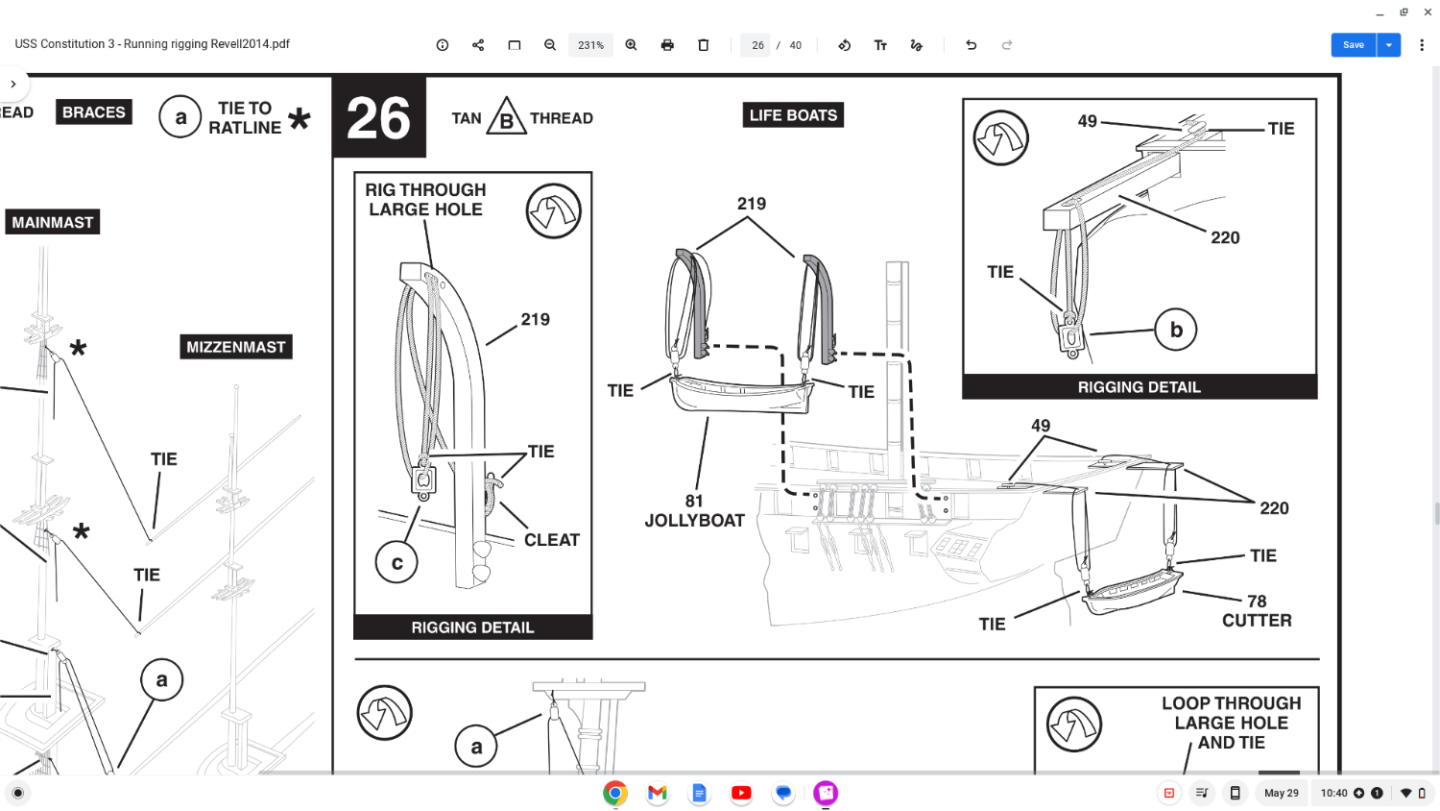
And as per Longridge's book:

-
Yes. Add the hook to the block and put the hook in the eyebolt. Tie the beginning of the line to the end of the davits. The eyebolt on the davit is in a really horrible location, by the way. It should be at the very end of the davit, and a cleat should be where it currently is.
-
@Isaiah build logs like this one here will help you immensely in your Perseverance build. I would recommend asking more questions than comments. Everyone here would be more than willing to provide help, and most would be better at synthesizing information than i am.
-
Looks like it's almost time to start on the masts! I have no idea, but i would assume those pieces would be painted blue on the back, or whatever the interior wall color is. At least that's what i would personally do with them.
- Bill97 and Hubac's Historian
-
 1
1
-
 1
1
-
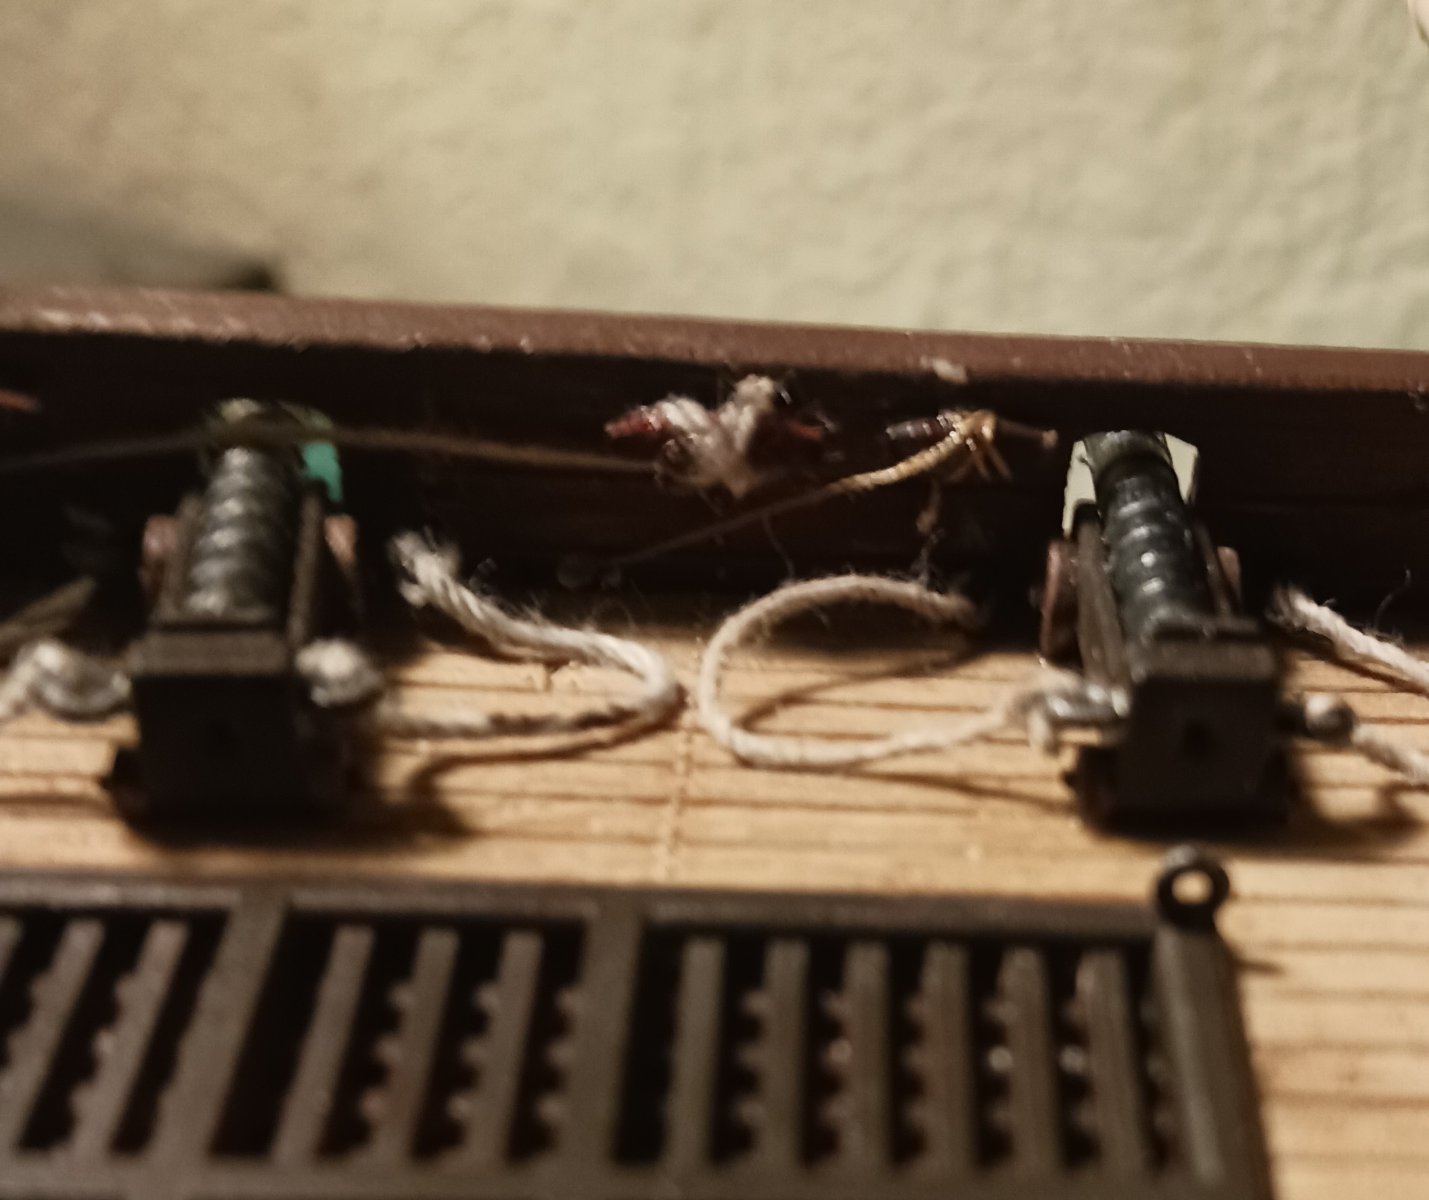
Alright. Wonderful job on the boats. However, we need to go back and redo the rigging of the one on the aft. The rigging blocks (those wooden things with holes) should be tied to the brass eyebolts. Tie a thin line around the block, letting it sit in the groove that runs round the block. Make sure that the knot is on the top of the block, the face closest to where the holes are. Then, thread the line that holds the boat up through the holes in the block. This line should not go through the brass eyebolts. It's okay if you don't understand what's going on here. I will provide diagrams of rigging concepts.
-
-
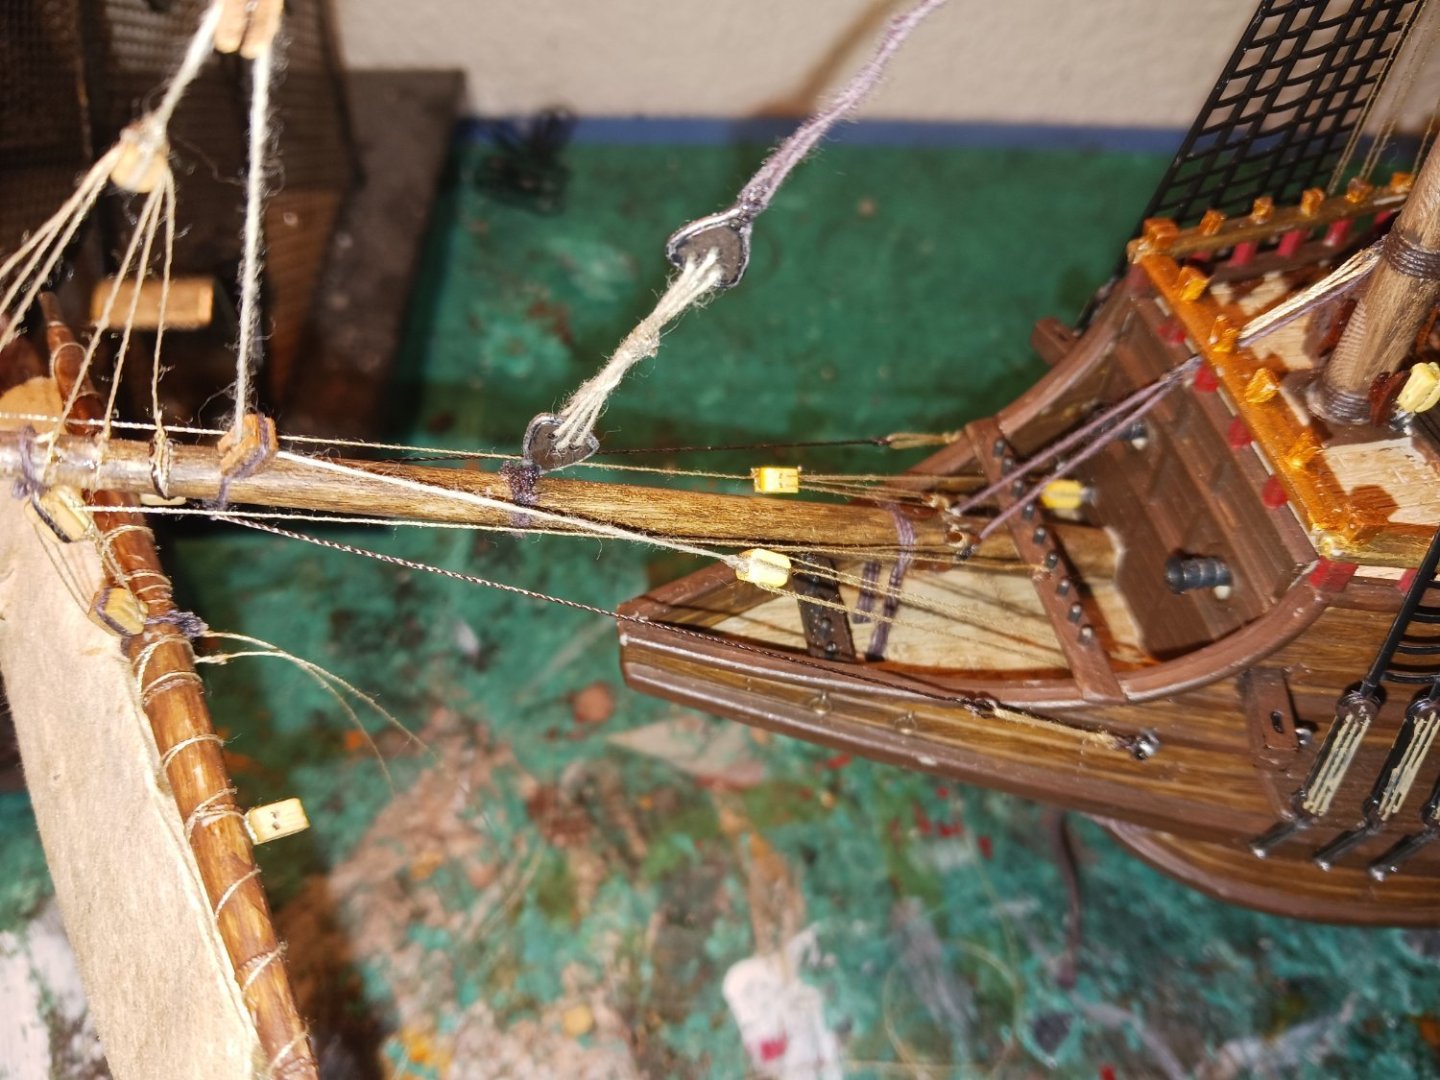
Today, i did the sheets, clews, and buntlines for the spritsail. The only issue was, of course, with the line not wanting to hang loose correctly. First, i did the sheets, as those were the most complex lines.
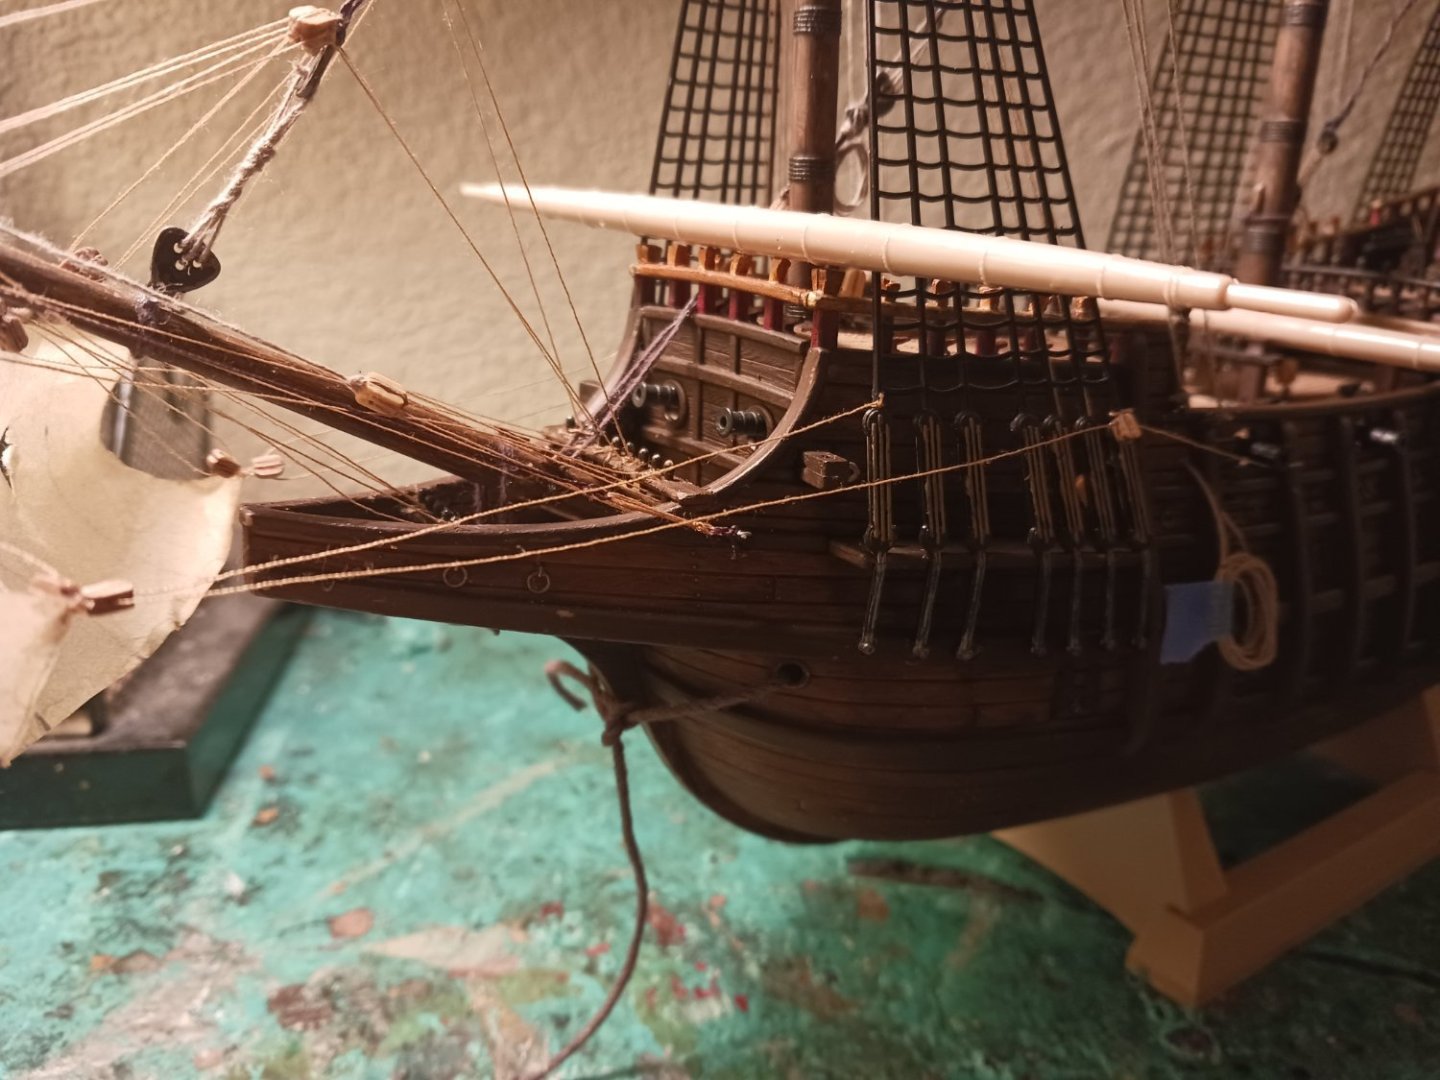
The falls are belayed to the interior, on a smaller cleat behind the main tacks.

Then came the clews. They were relatively simple, other than the aforementioned issue with the line.
The buntlines were by far the easiest lines involved.
- Baker, Archi, Knocklouder and 3 others
-
6
-
-
-
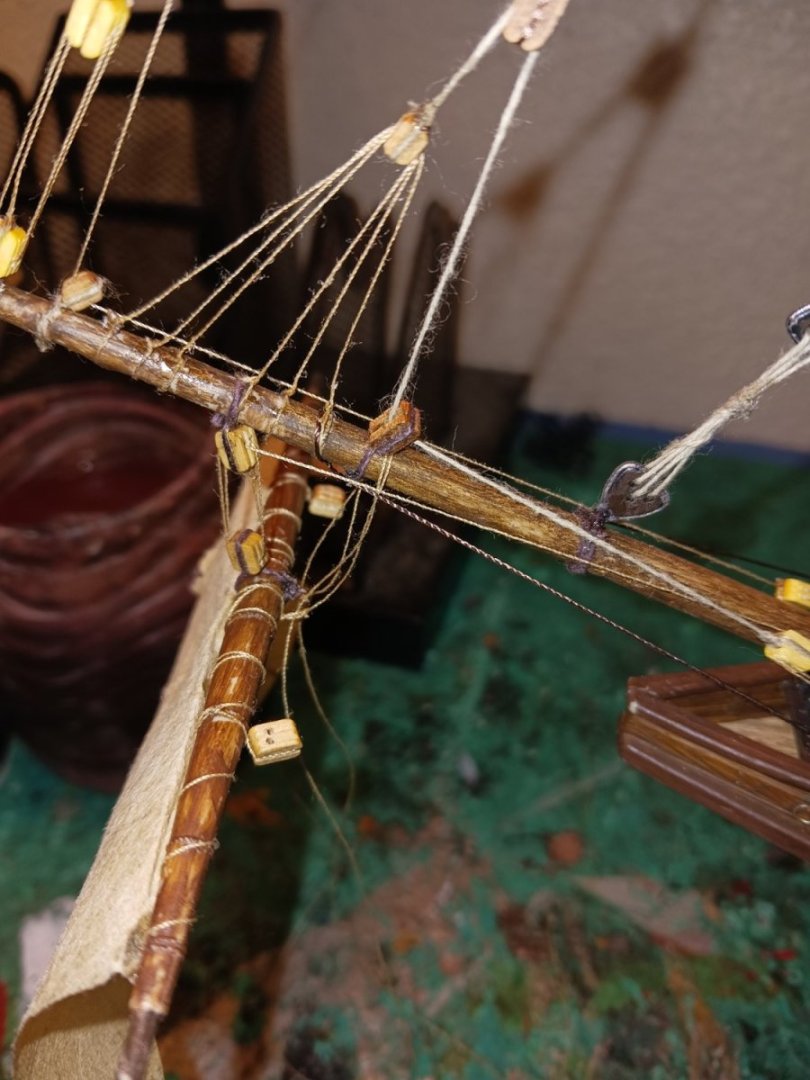
I did the braces and peak halyards for the spritsail. I don't know why they thought the second set of braces was necessary.

- Archi, Louie da fly, Jeff T and 2 others
-
5
-
-
-
-
Sorry to rain on your parade, here, but i think you have to move the main knighthead as well (to the other side). The instructions show a singular stay on the mizzen top that goes down to the main base. Henry didn't even do this. However, we have the same issue on the main.
-
The instructions clearly show the mainstay attaching to the collar around the foremast, which is just large enough to encompass the mast, then continuing down to the bowsprit. At least, that's what the older instructions show. There is no mention whatsoever of the stay splitting far enough away to allow for the halyard as well. Plus, off-center knightheads are the norm for this very reason.
-
This is the Golden Hinde under full sail, doing the same thing.

And the Susan Constant
- Archi, Jeff T and GrandpaPhil
-
3
-
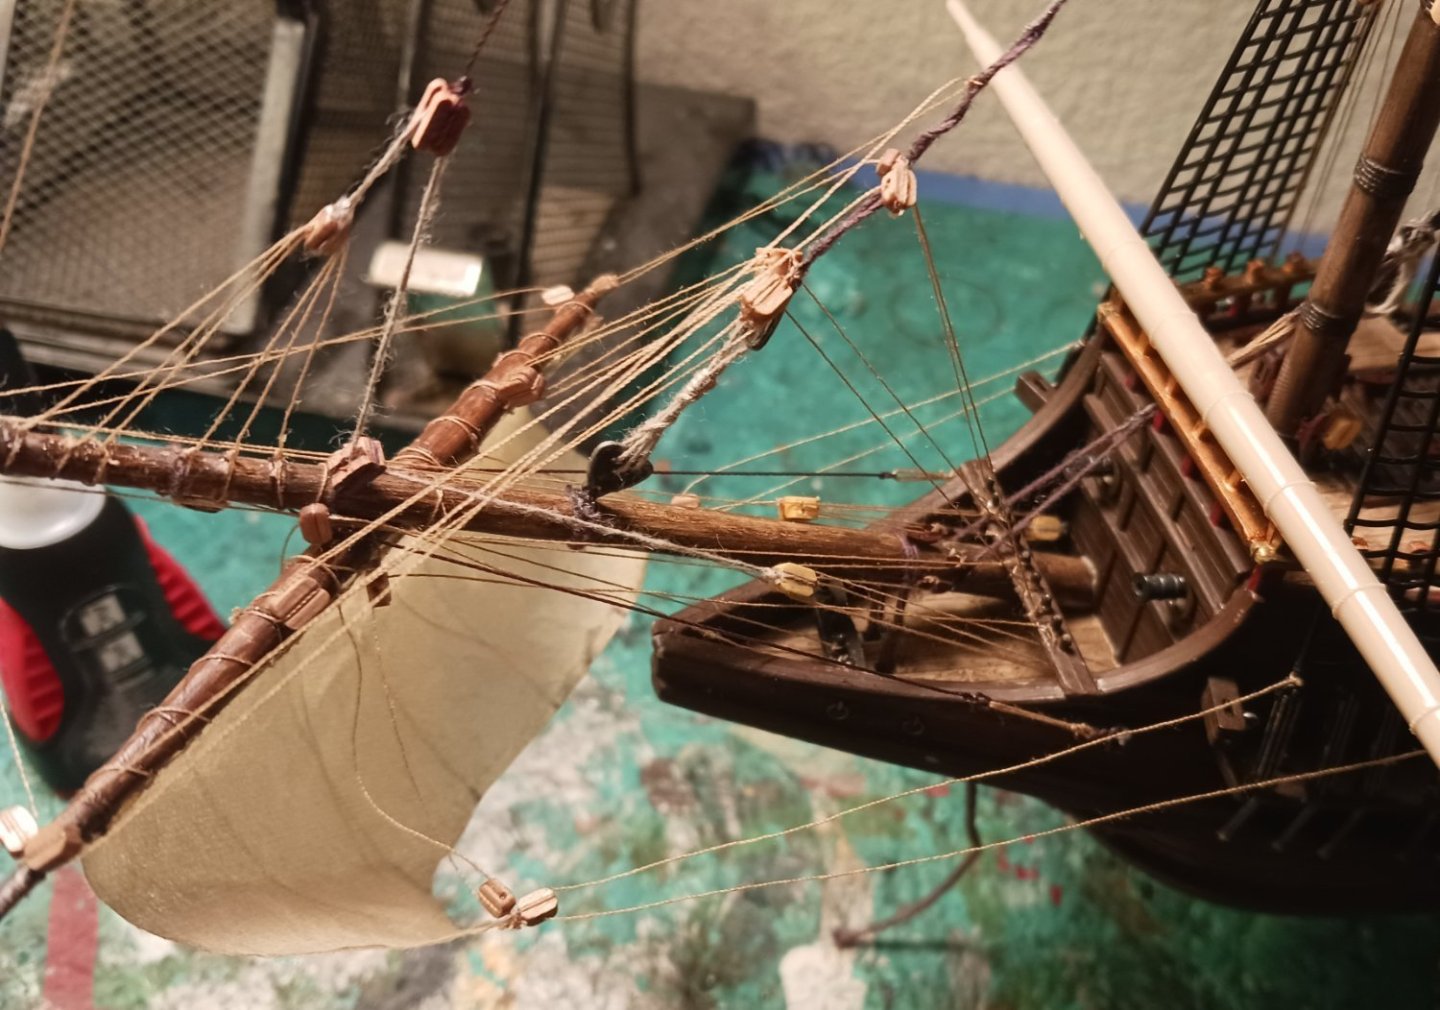
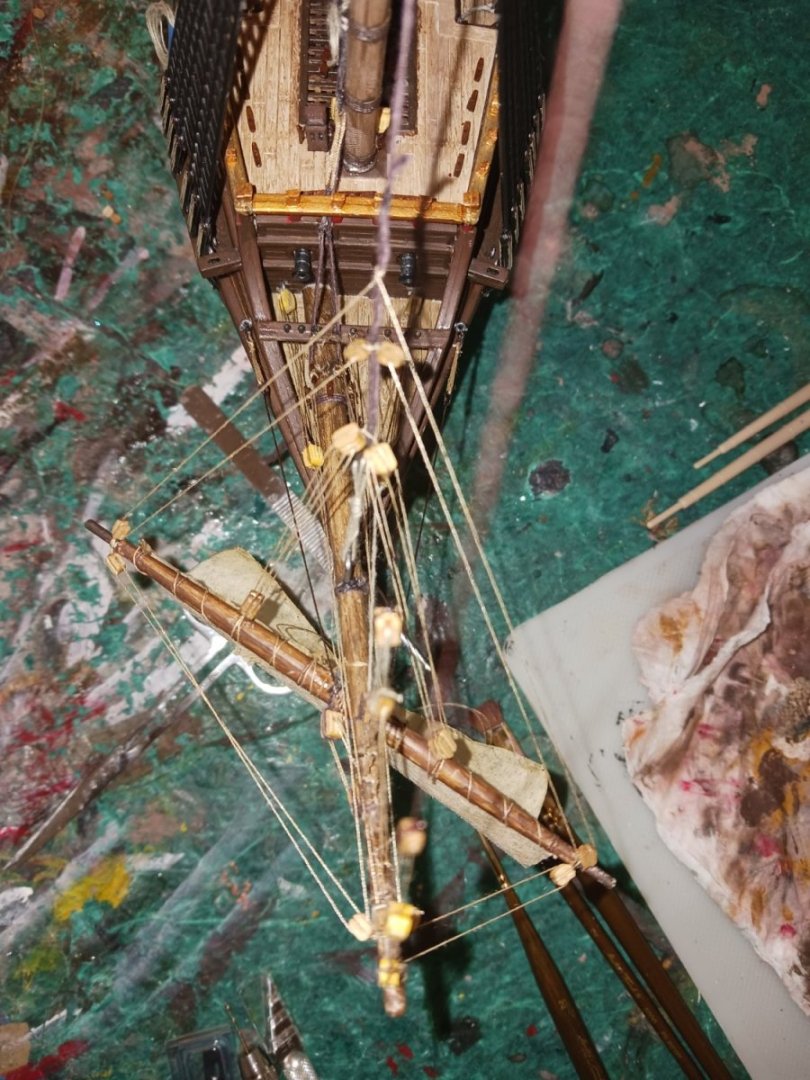
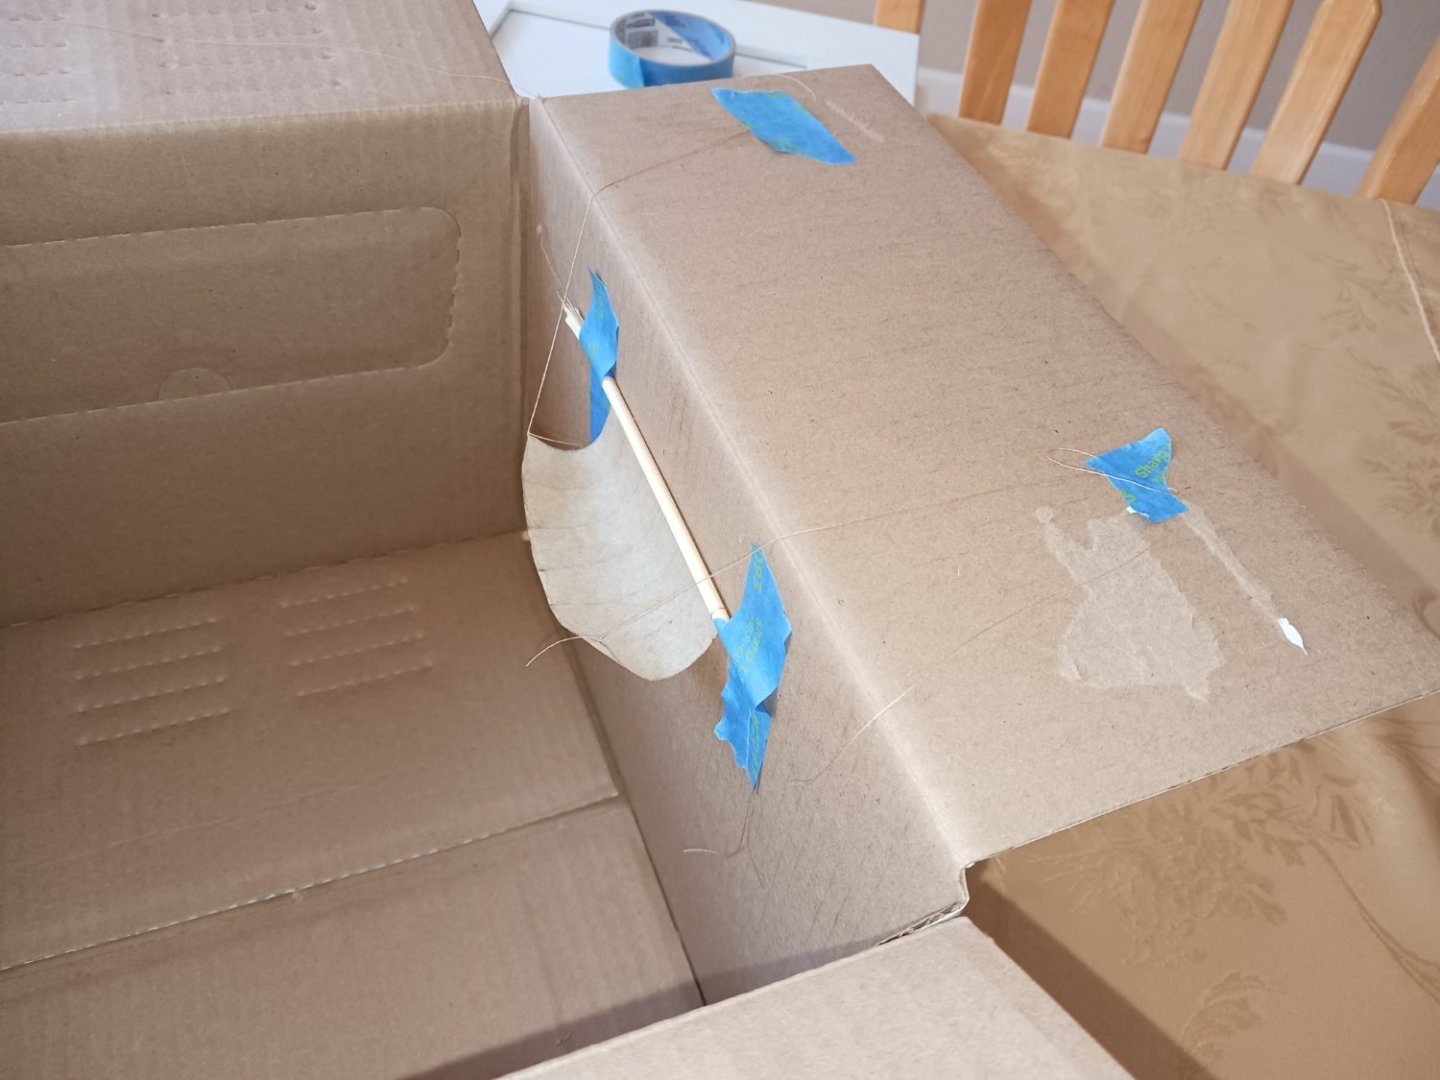
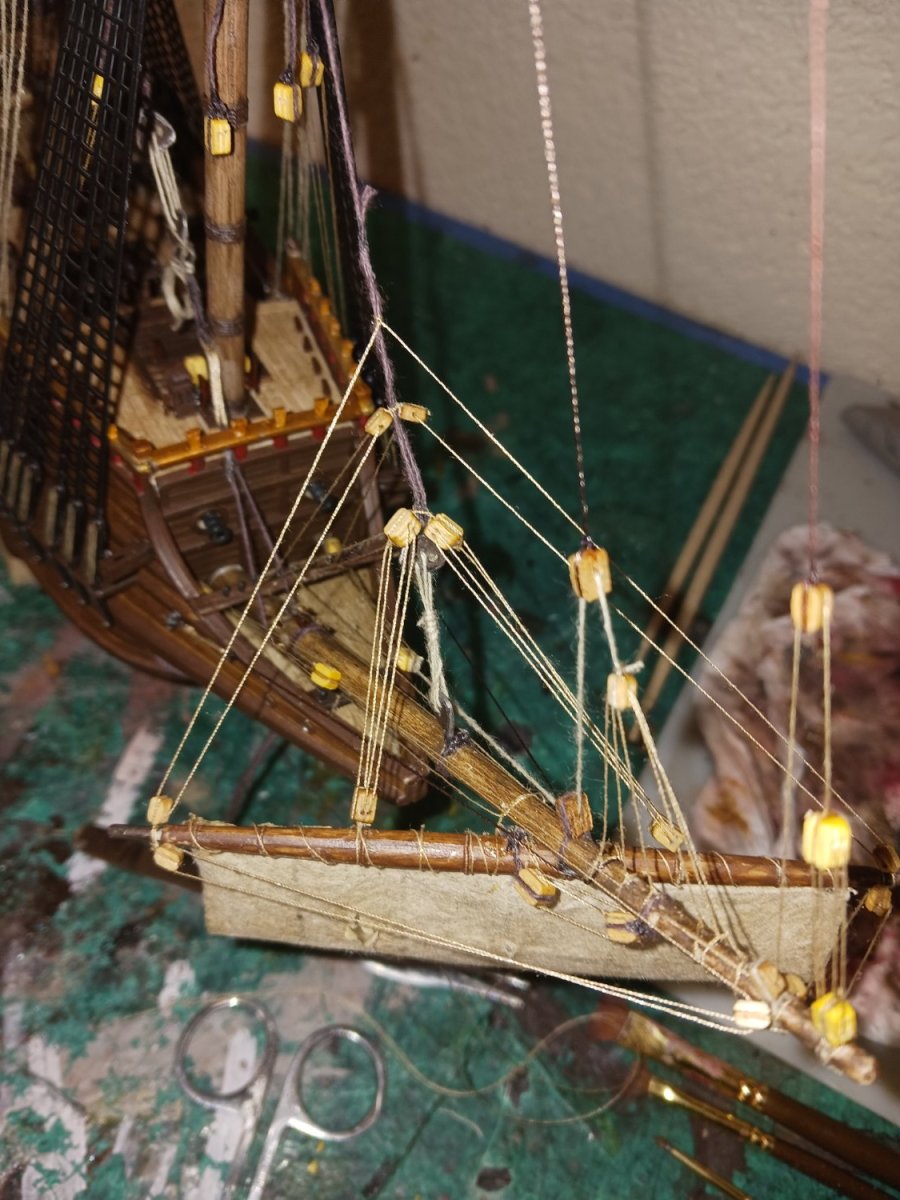
Today, it was time to rig the spritsail yard. First, i rigged the double block lift mechanism, leaving the yard hanging in place.
Then, i wrapped the parrel around the bowsprit and through the thimbles to which they were attached.
I then tightened the parrel system and belayed it, which pulled the yard back and up to the bowsprit.
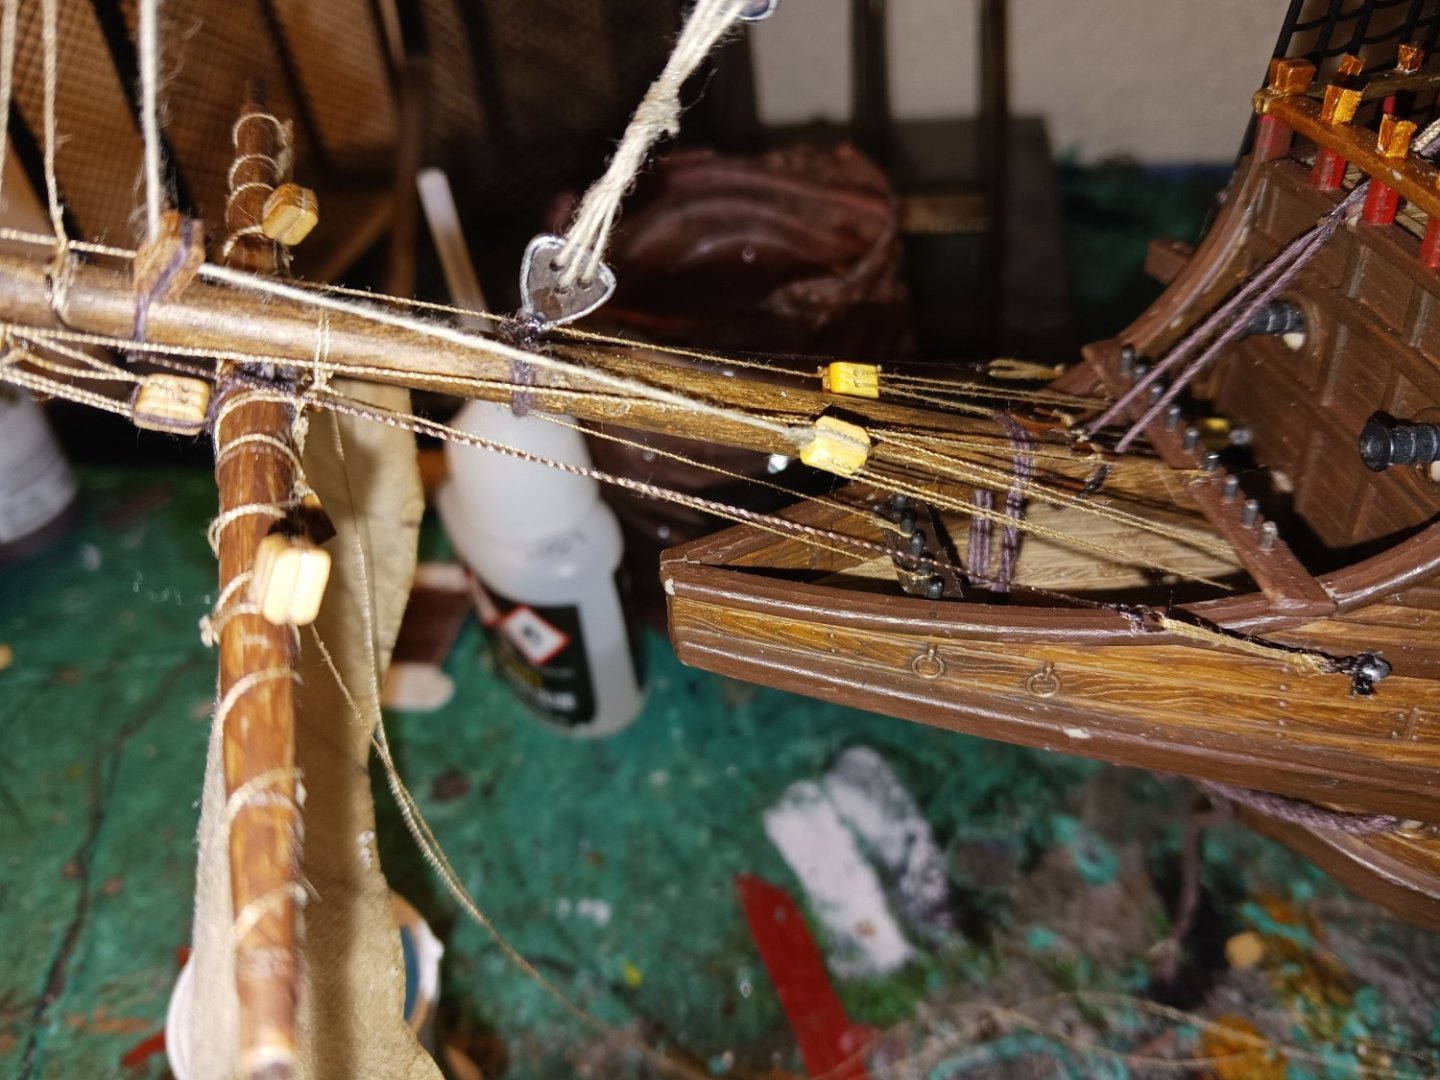
The next step is to rig the topping lifts and braces, which will determine the tack of the sail.
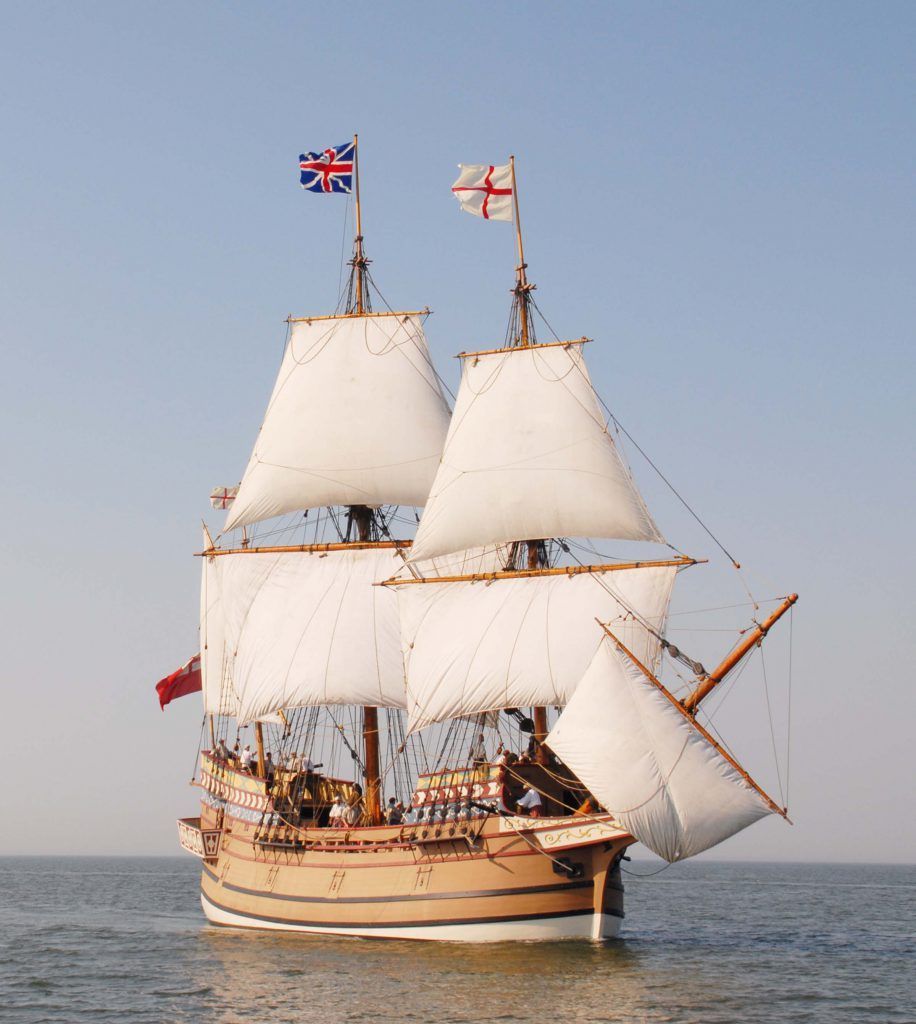
However, as always, there is a bit of historical evidence that will make the decision for me. As of 1607, only the English had developed the technique of doing this:
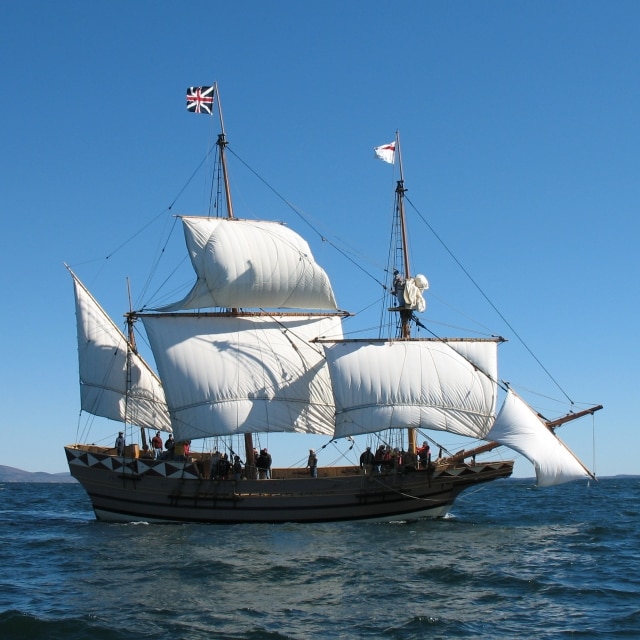
This is the barque Godspeed, circa 1607. The English did this with their spritsails to catch better wind and improve sailing characteristics. No depictions of either Spanish or Dutch galleons ever show them tilting the spritsail in any way. So, the sail will remain level, albeit having a starboard tack.
- Jeff T, GrandpaPhil and Archi
-
3
-
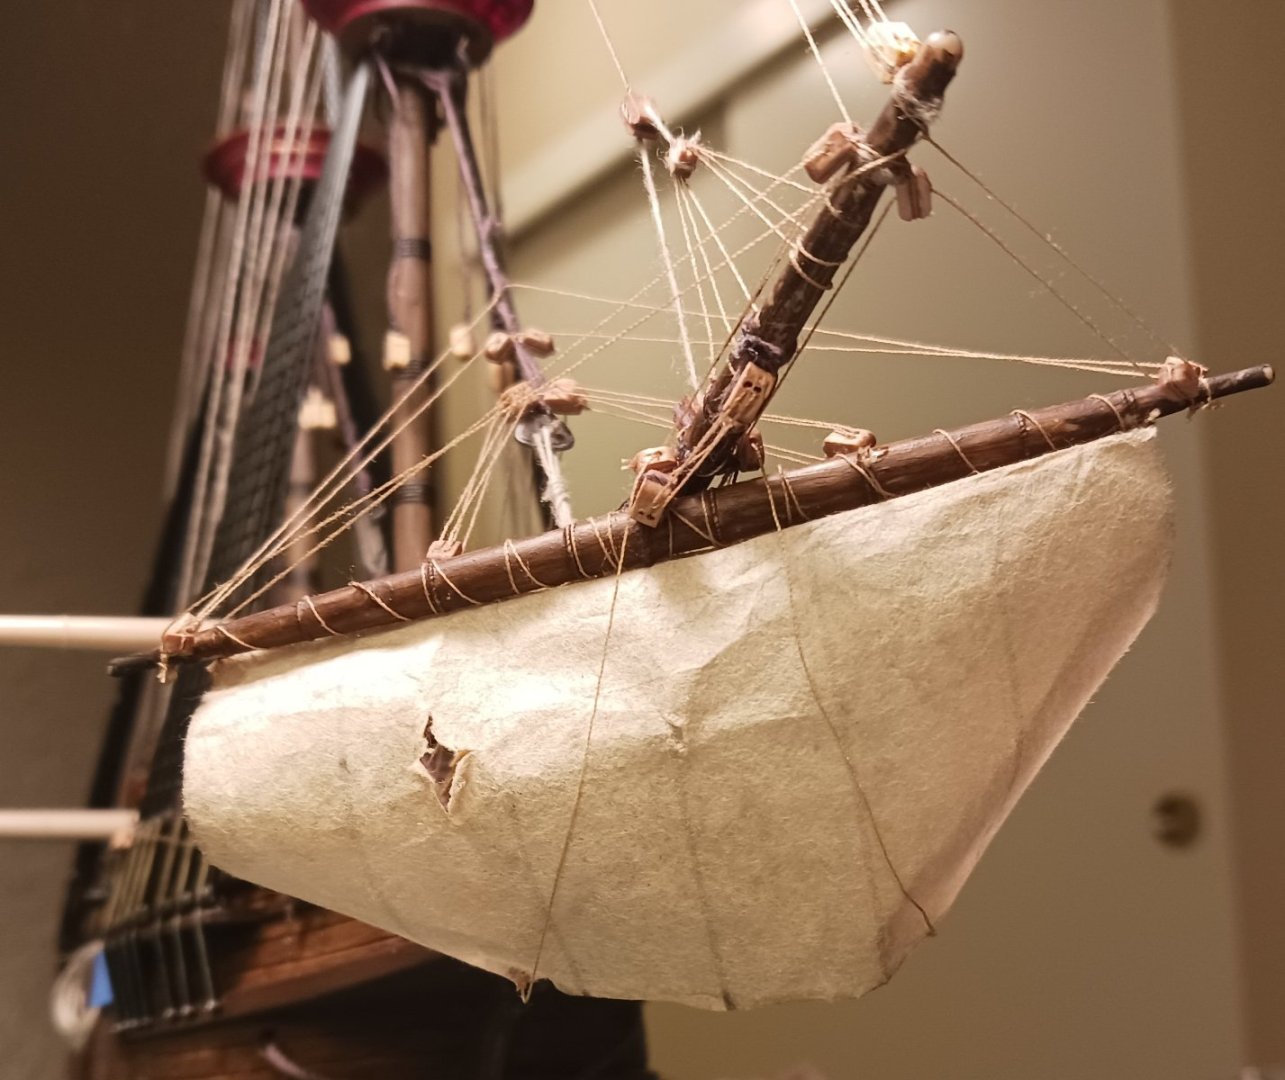
Here is the (near) finished spritsail yard, ready to go on the ship.

- Archi, Jeff T and GrandpaPhil
-
3
-
Dude, that's almost perfect. I had the idea to "swap" the deck piece and knighthead, and you executed it perfectly.
-
That's how i see it. We don't really know much about what the Soleil Royal looked like, so there is a lot of room for creative expression. I may attempt to paint every figure realistically, instead of gold, for example.
-
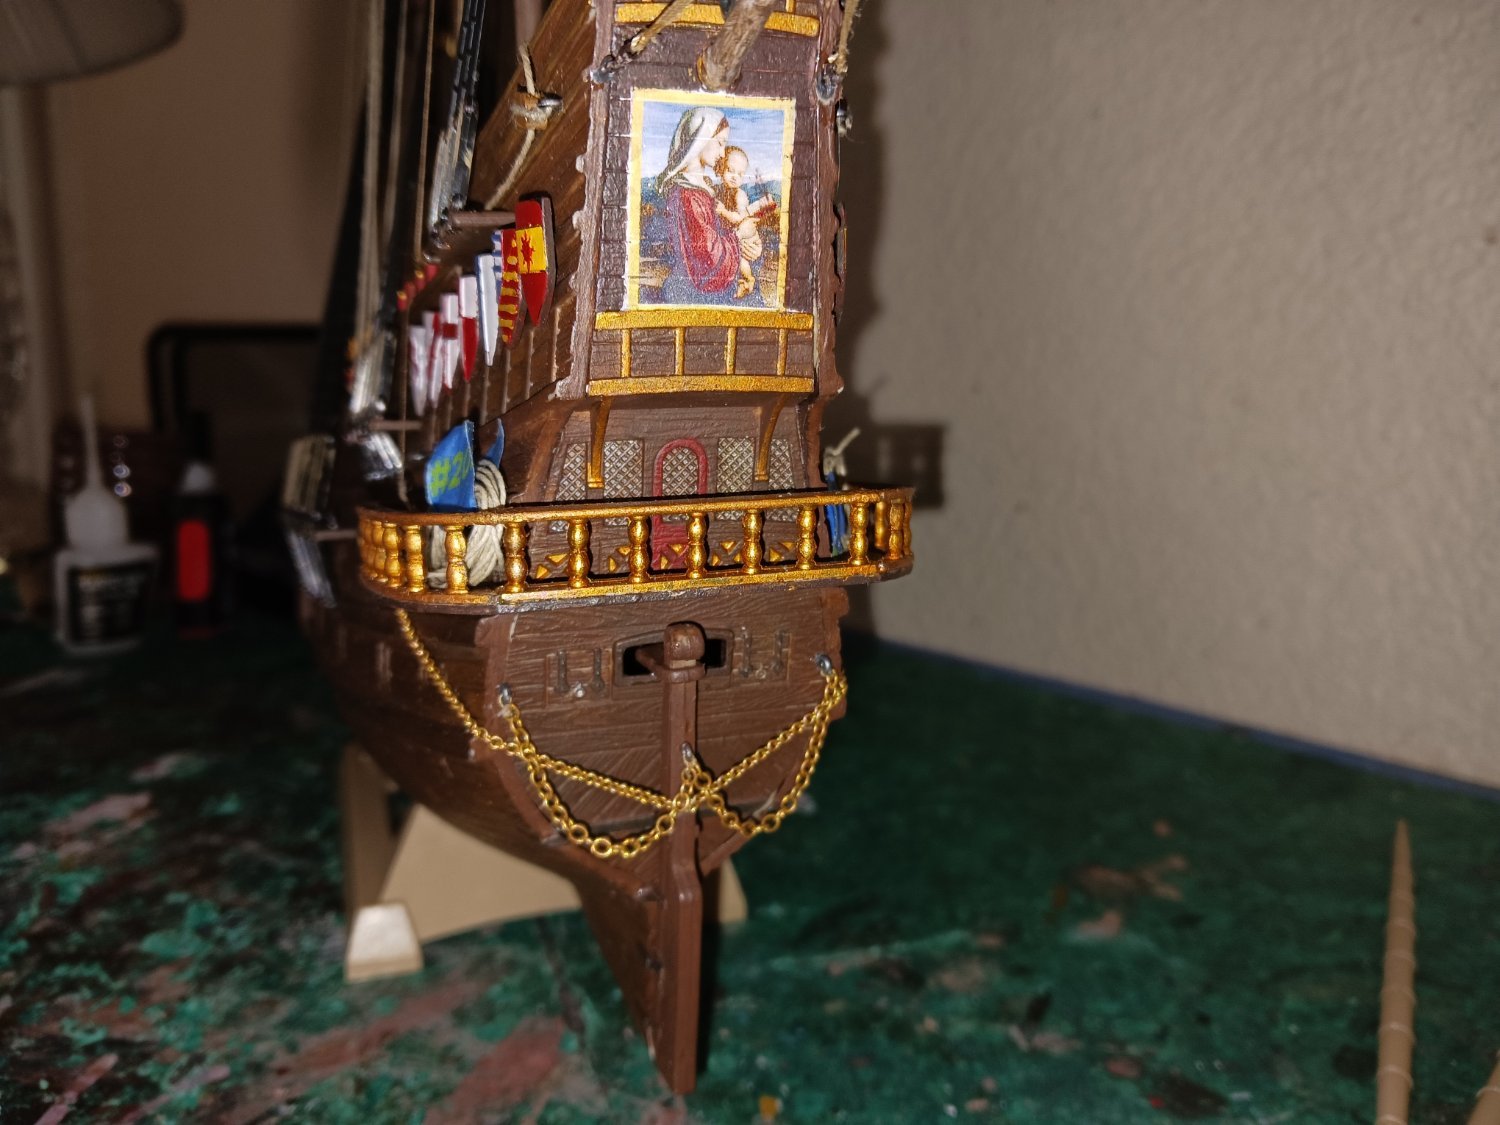
The only reference for this is a model of the William Rex.
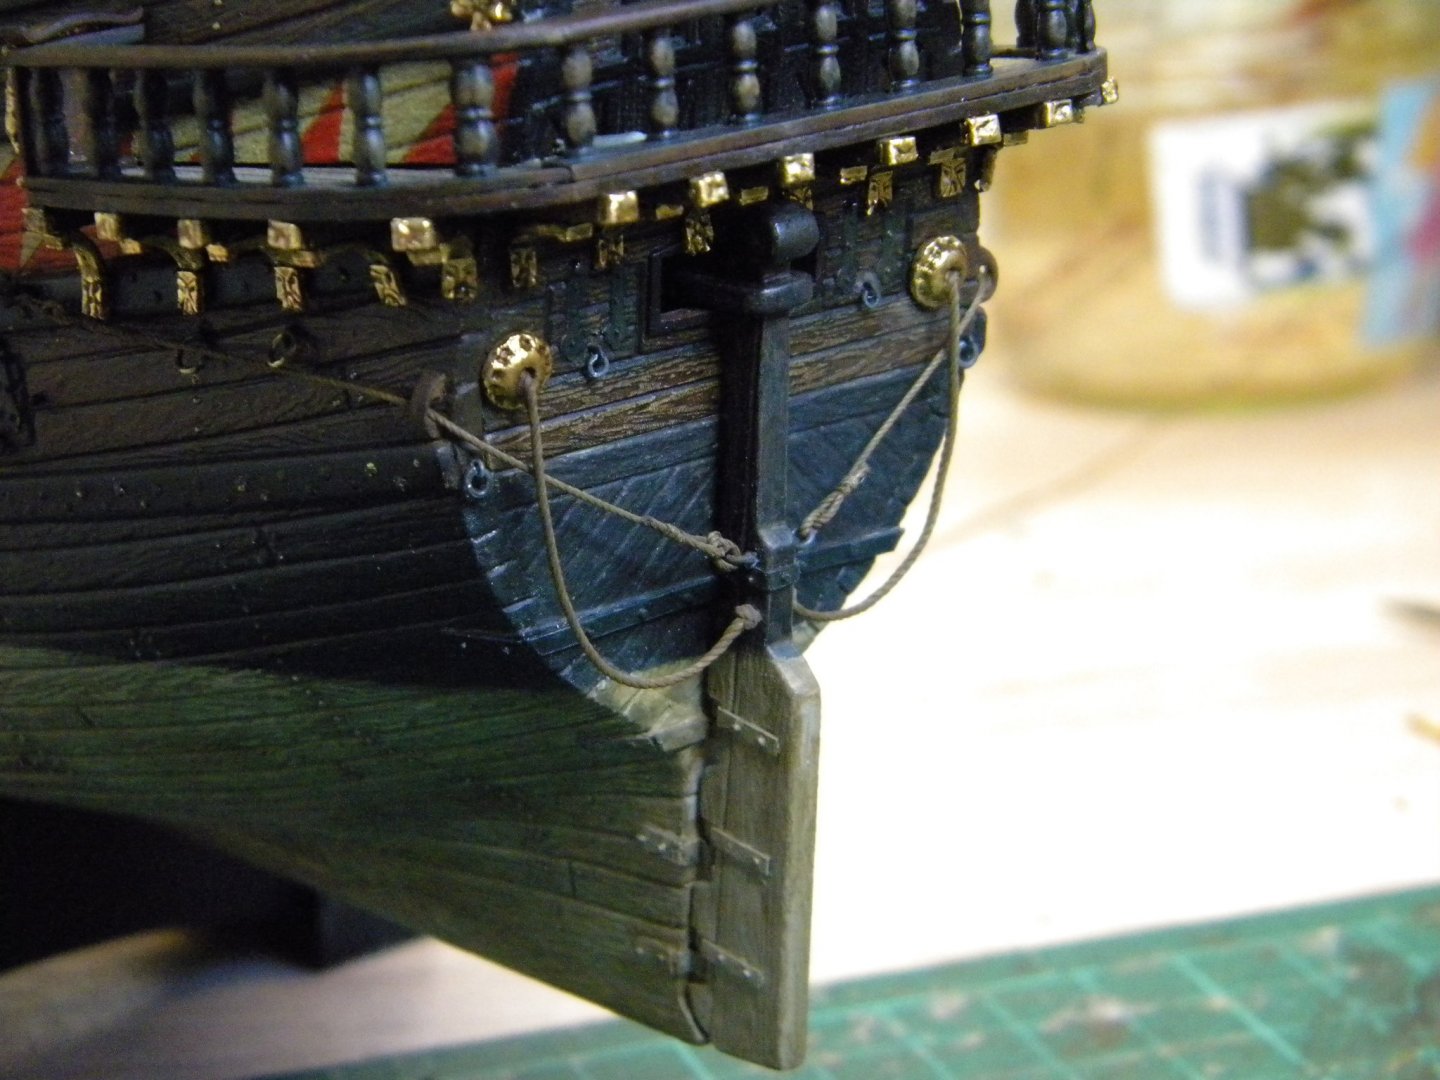
So, i figured i would do the same thing, but with chain.

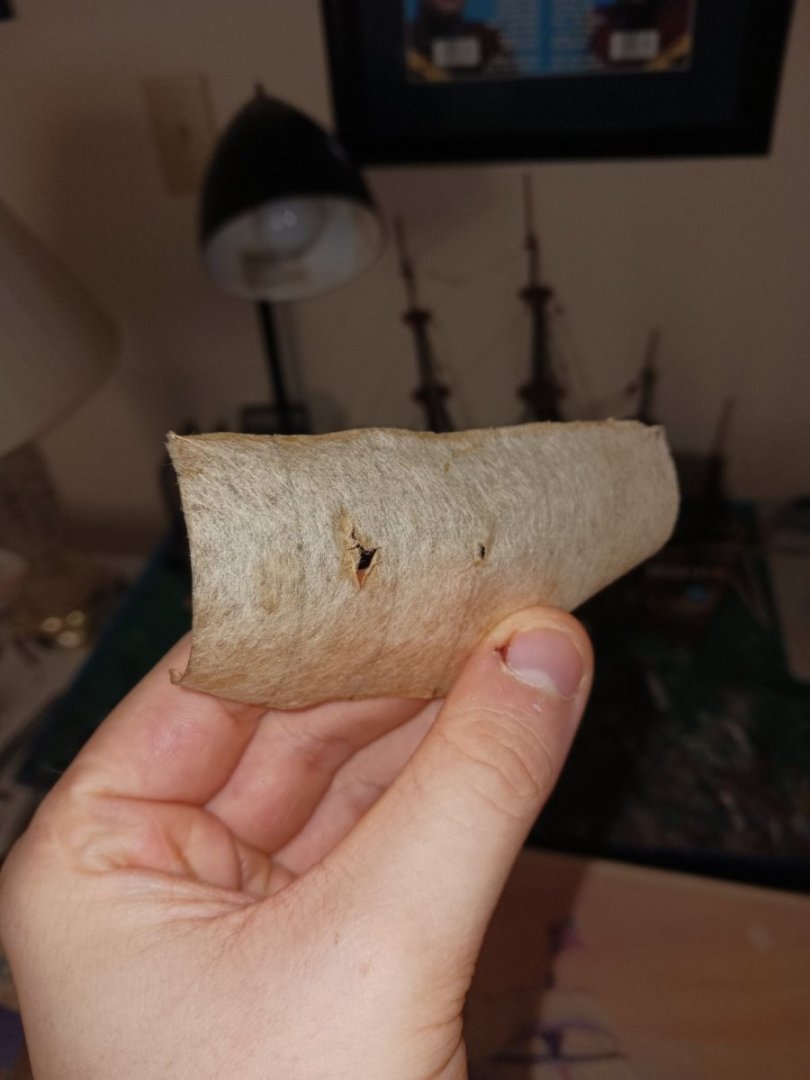
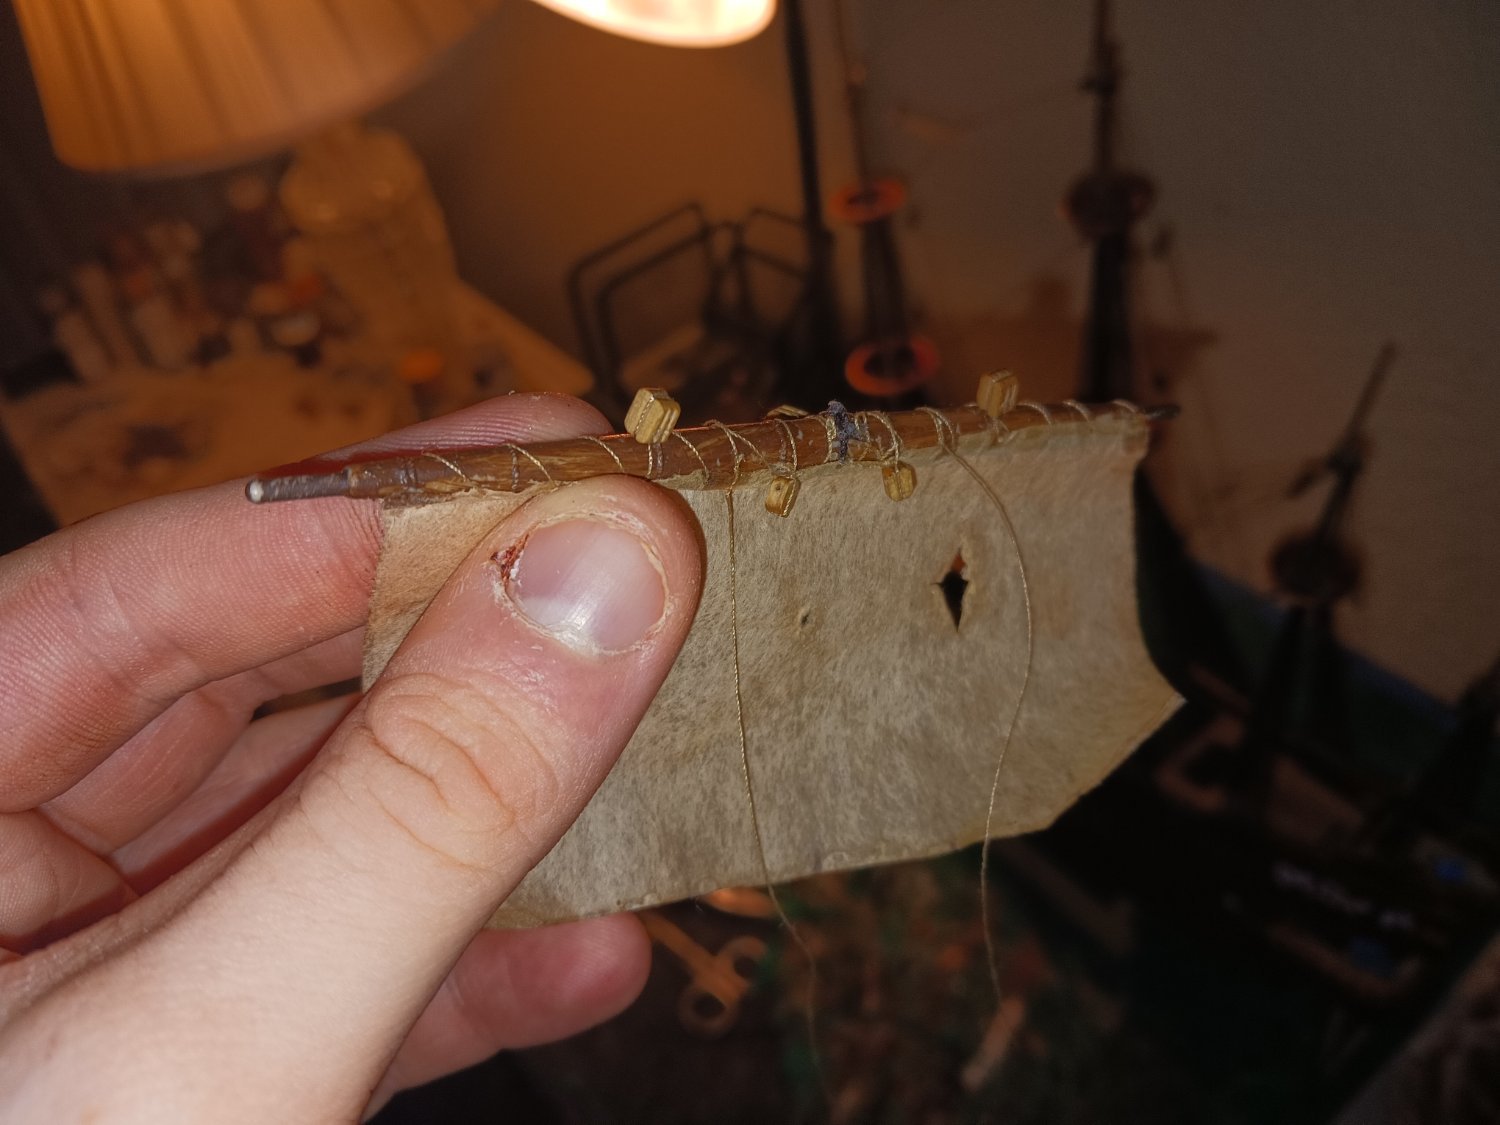
I also went and got some silkspan, and began with the spritsail.
I was a stupid idiot, and touched it right after eating pizza. So, i tried to hide it by feigning battle damage on the spritsail (common in Hendrick Cornelisz Vroom's paintings)
- GrandpaPhil, modeller_masa and Archi
-
2
-
 1
1
-
I would add as many oars as is realistic, if i were you. It's up to you, and i think any number of oars would look perfect.


Perseverance 1807 by Isaiah - FINISHED - Modellers Shipyard - Colonial Brig
in - Kit build logs for subjects built from 1801 - 1850
Posted
(Audible clapping)