HOLIDAY DONATION DRIVE - SUPPORT MSW - DO YOUR PART TO KEEP THIS GREAT FORUM GOING! (Only 20 donations so far - C'mon guys!)
×


HIPEXEC
-
Posts
2,698 -
Joined
-
Last visited
Content Type
Profiles
Forums
Gallery
Events
Everything posted by HIPEXEC
-
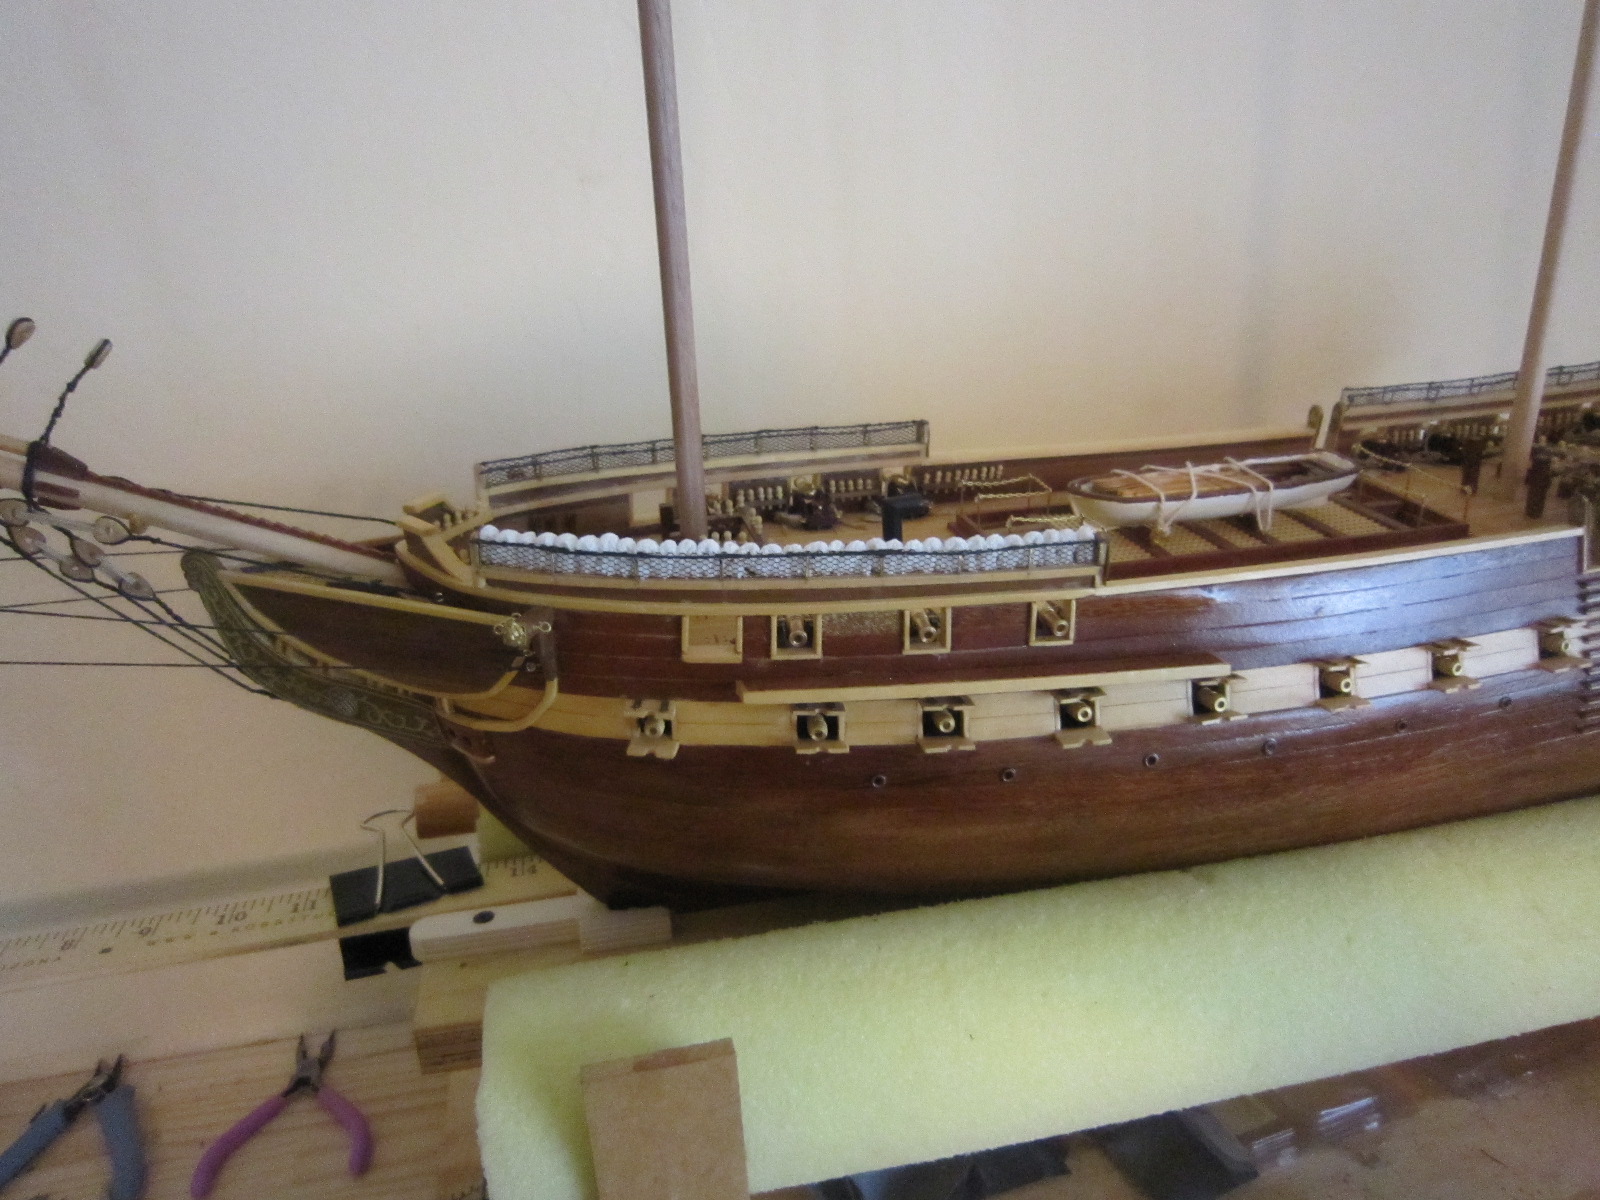
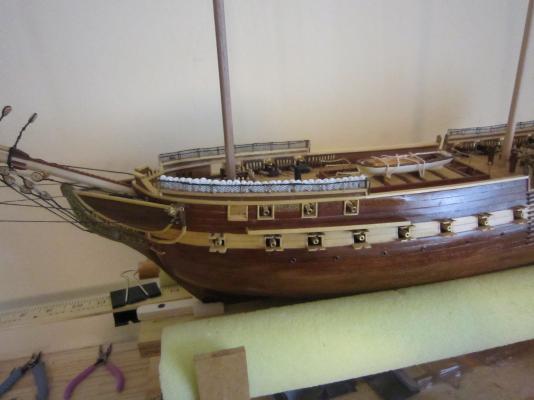
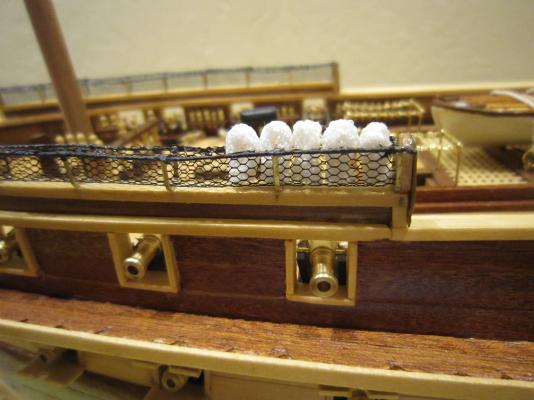
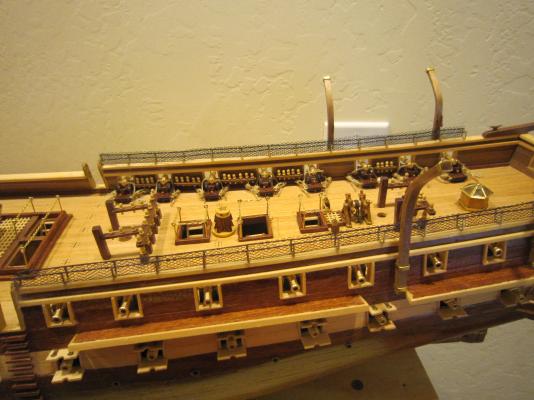
 Now my Admiral says I should fill all the hammock nets with folded hammocks. What do you all think?
 -
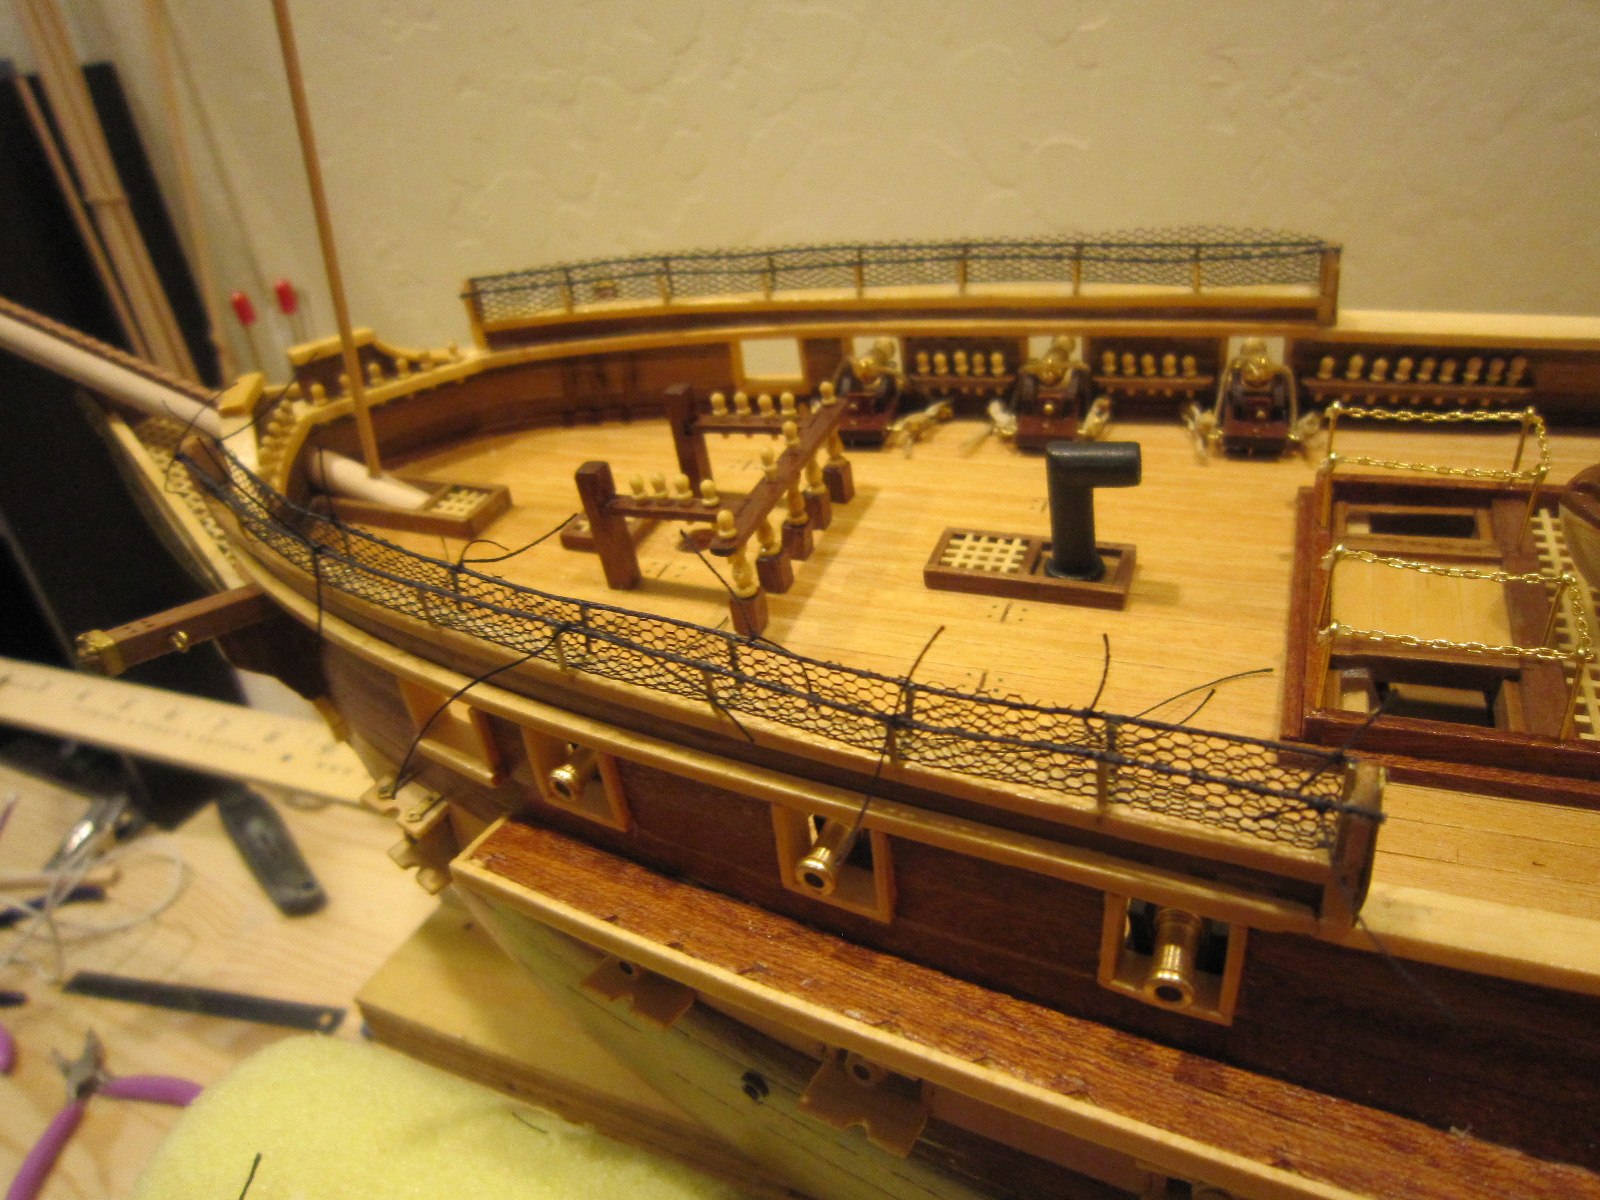
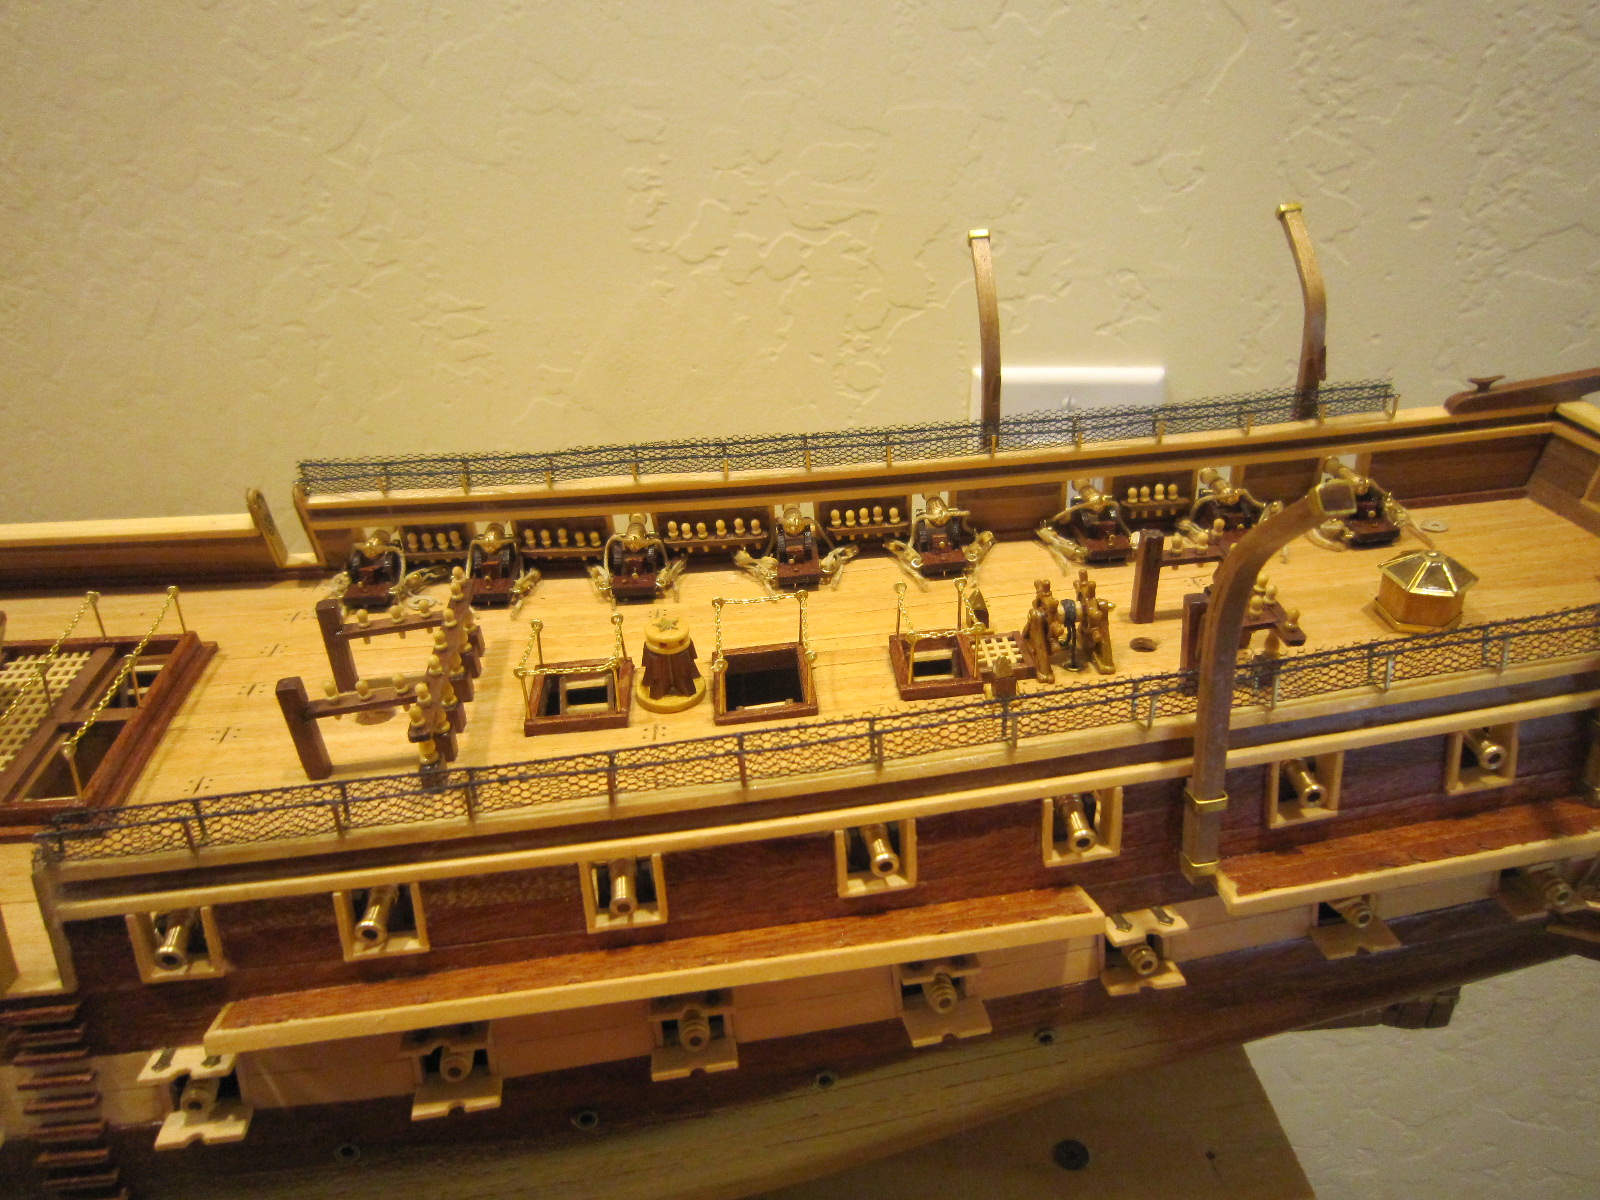
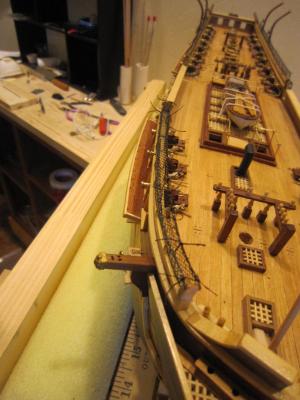
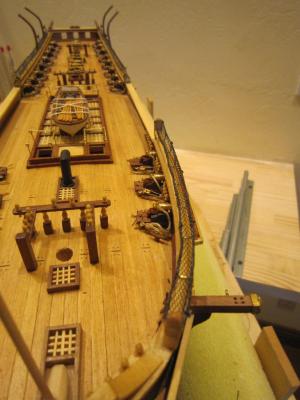
I finished a section of hammock nets. I roiled, folded and tied each hammock just like they showed the sailors of old did it. Now I'll "tweak" them to get them to look good. I think I'm only doing one of the four hammock stanchion sections just to show how the ship was rigged when it went into combat. I think if I stuff all the stanchions with hammocks it will block some viewing of the deck.
- 1,756 replies
-
- 6
-

-
- constitution
- constructo
- (and 1 more)
-
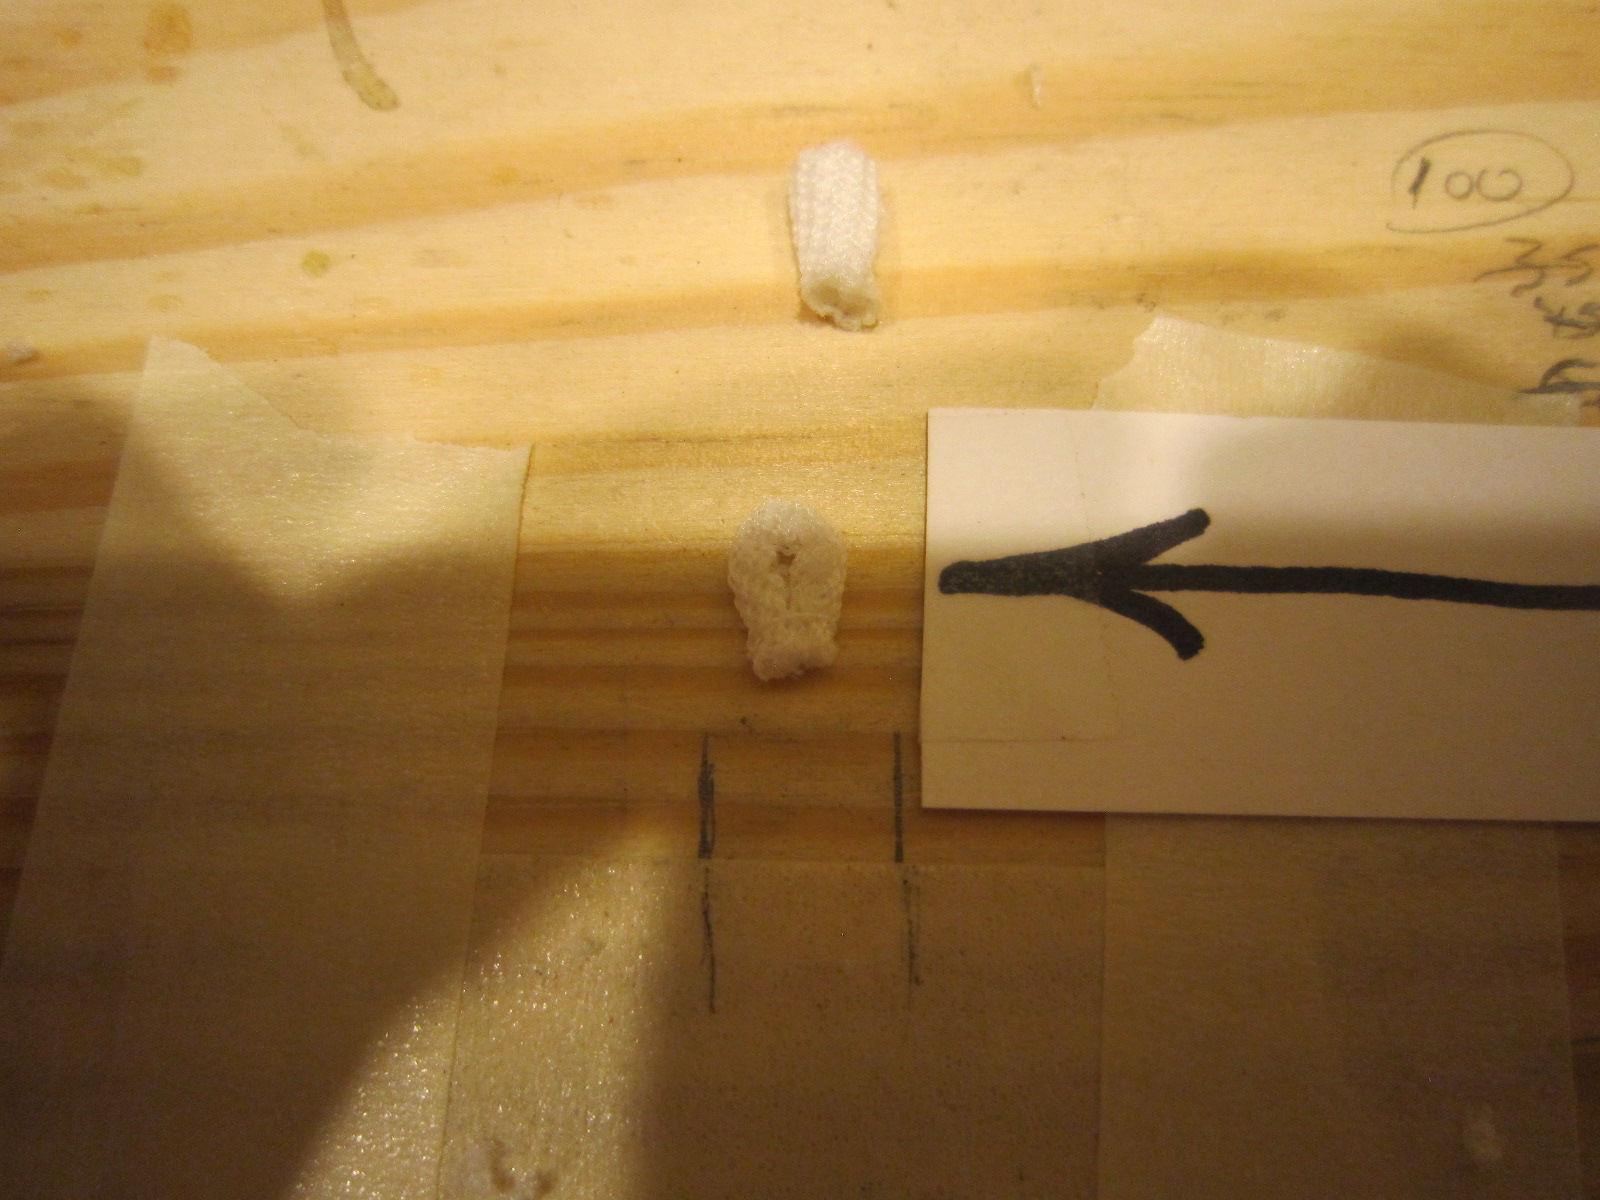
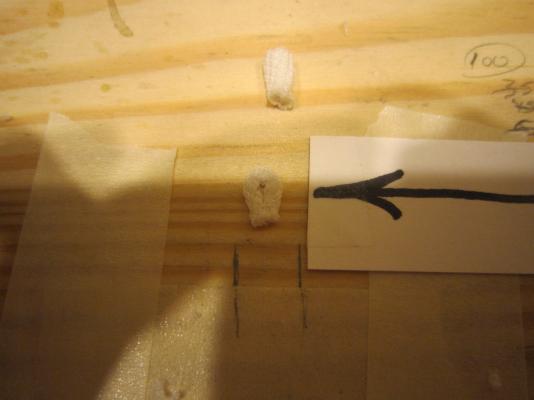
I've been experimenting how to make the rolled hammocks to fill the hammock nets. Four different attempts proved awful. This one has some promise. I rolled tightly some soil cloth taken from my garden supplies and bent it in two and tied it with some white thread. They might be a bit too tall but I think I'm in the ballpark. What do you all think. Also, I'll take any and all suggestions.
- 1,756 replies
-
- 4
-
-
- constitution
- constructo
- (and 1 more)
-
I've been experimenting how to make the rolled hammocks to fill the hammock nets. Four different attempts proved awful. This one has some promise. I rolled tightly some soil cloth taken from my garden supplies and bent it in two and tied it with some white thread. They might be a bit too tall but I think I'm in the ballpark. What do you all think. Also, I'll take any and all suggestions.
-
I researched that very issue when installing the rudder on my USS Constituion. What I found was the chains ran through the hull into the gundeck for emegency steering.
-
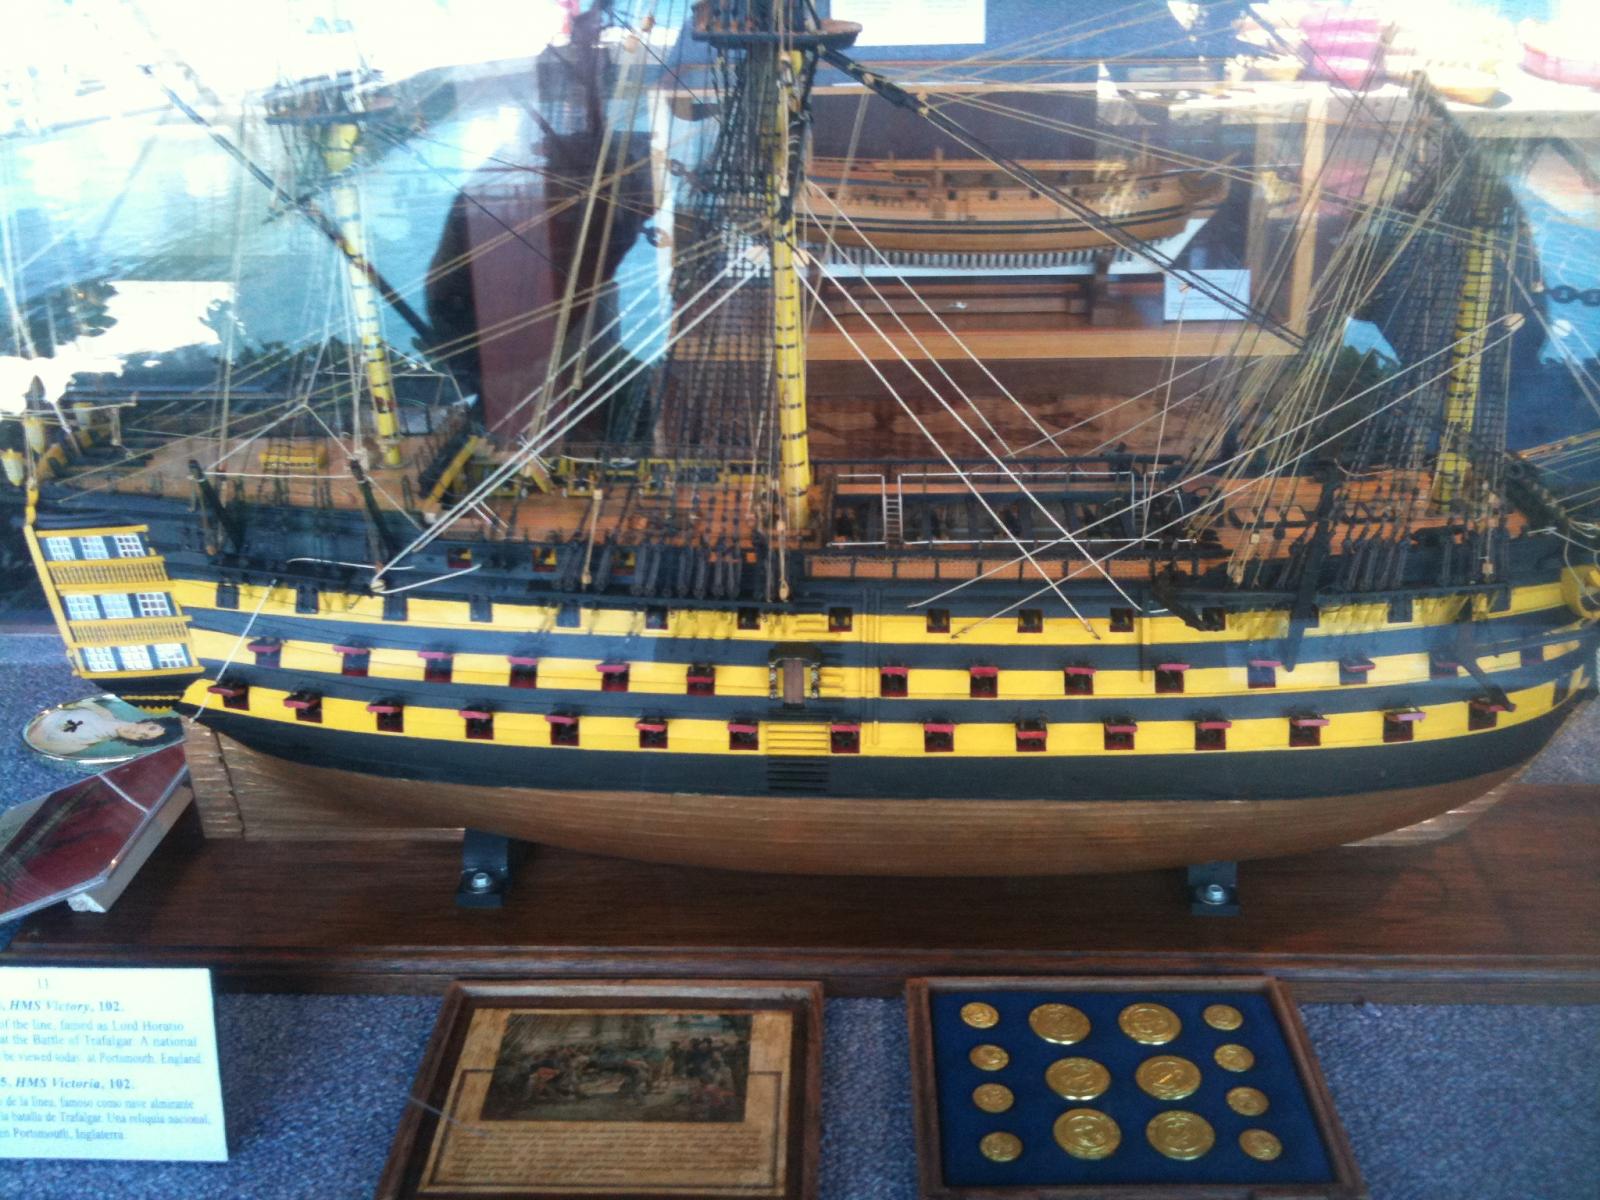
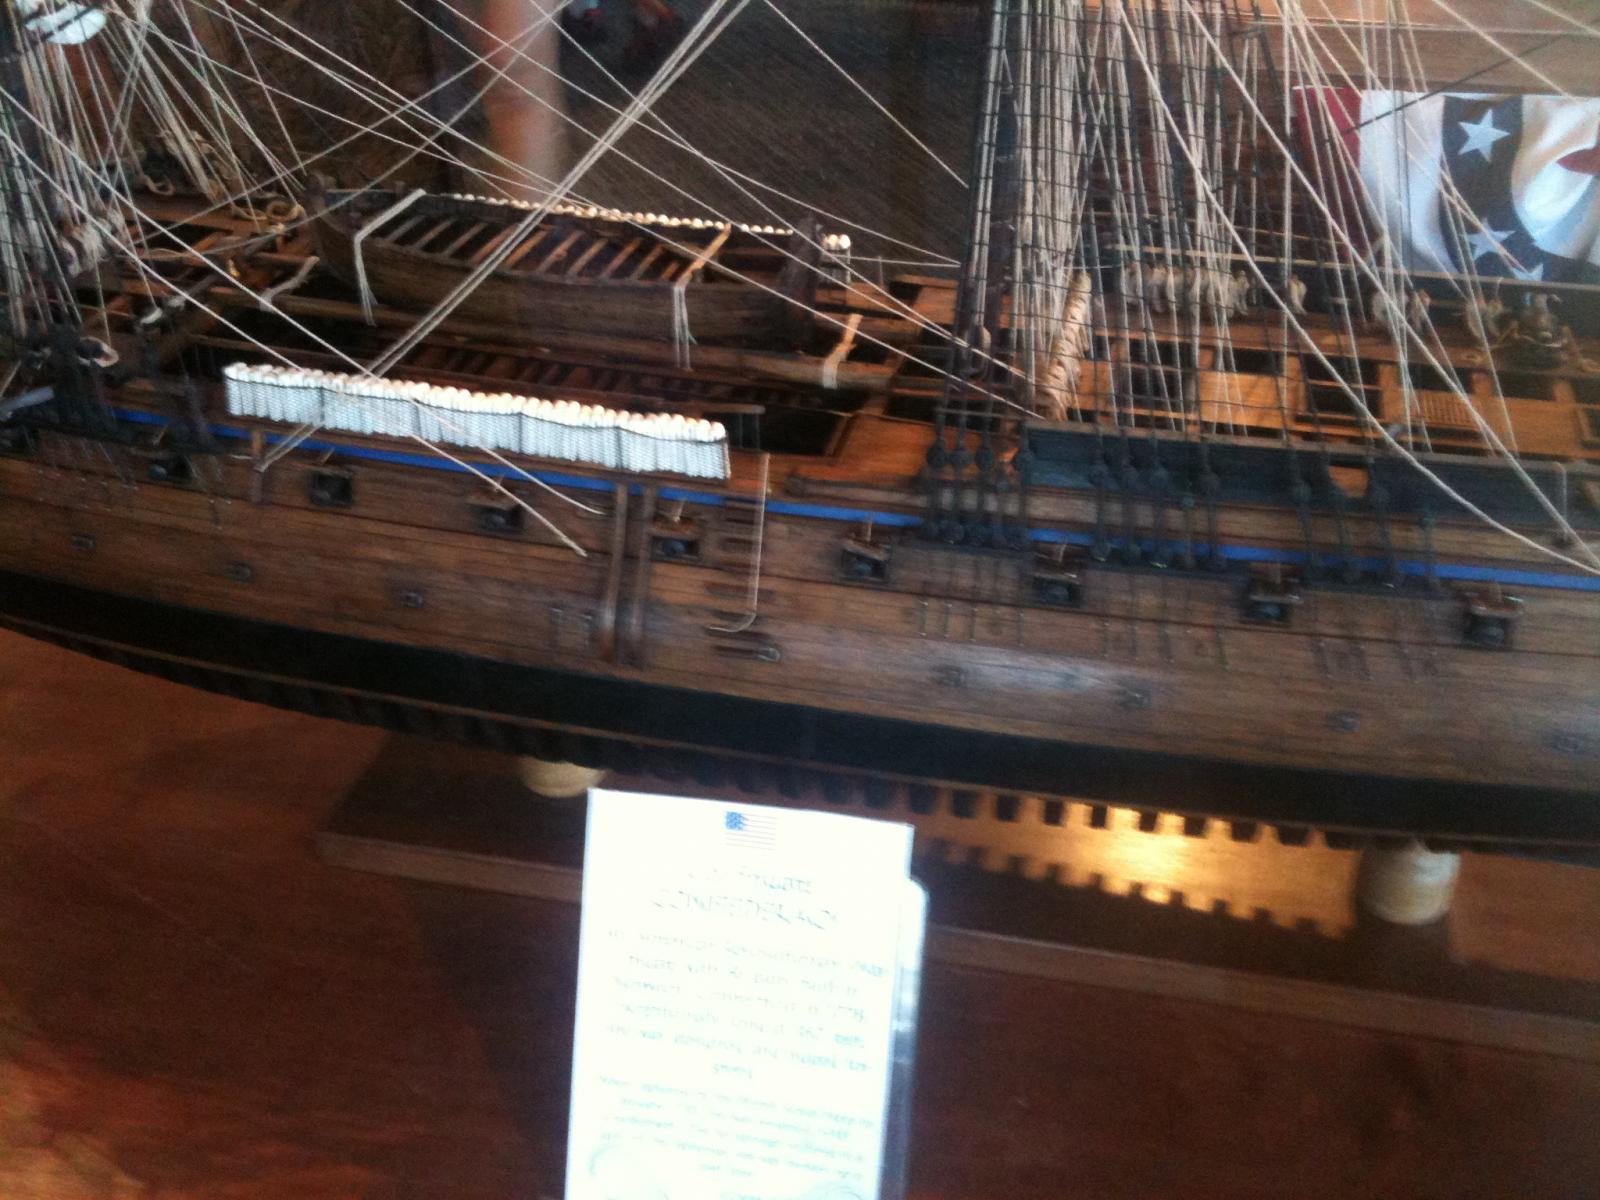
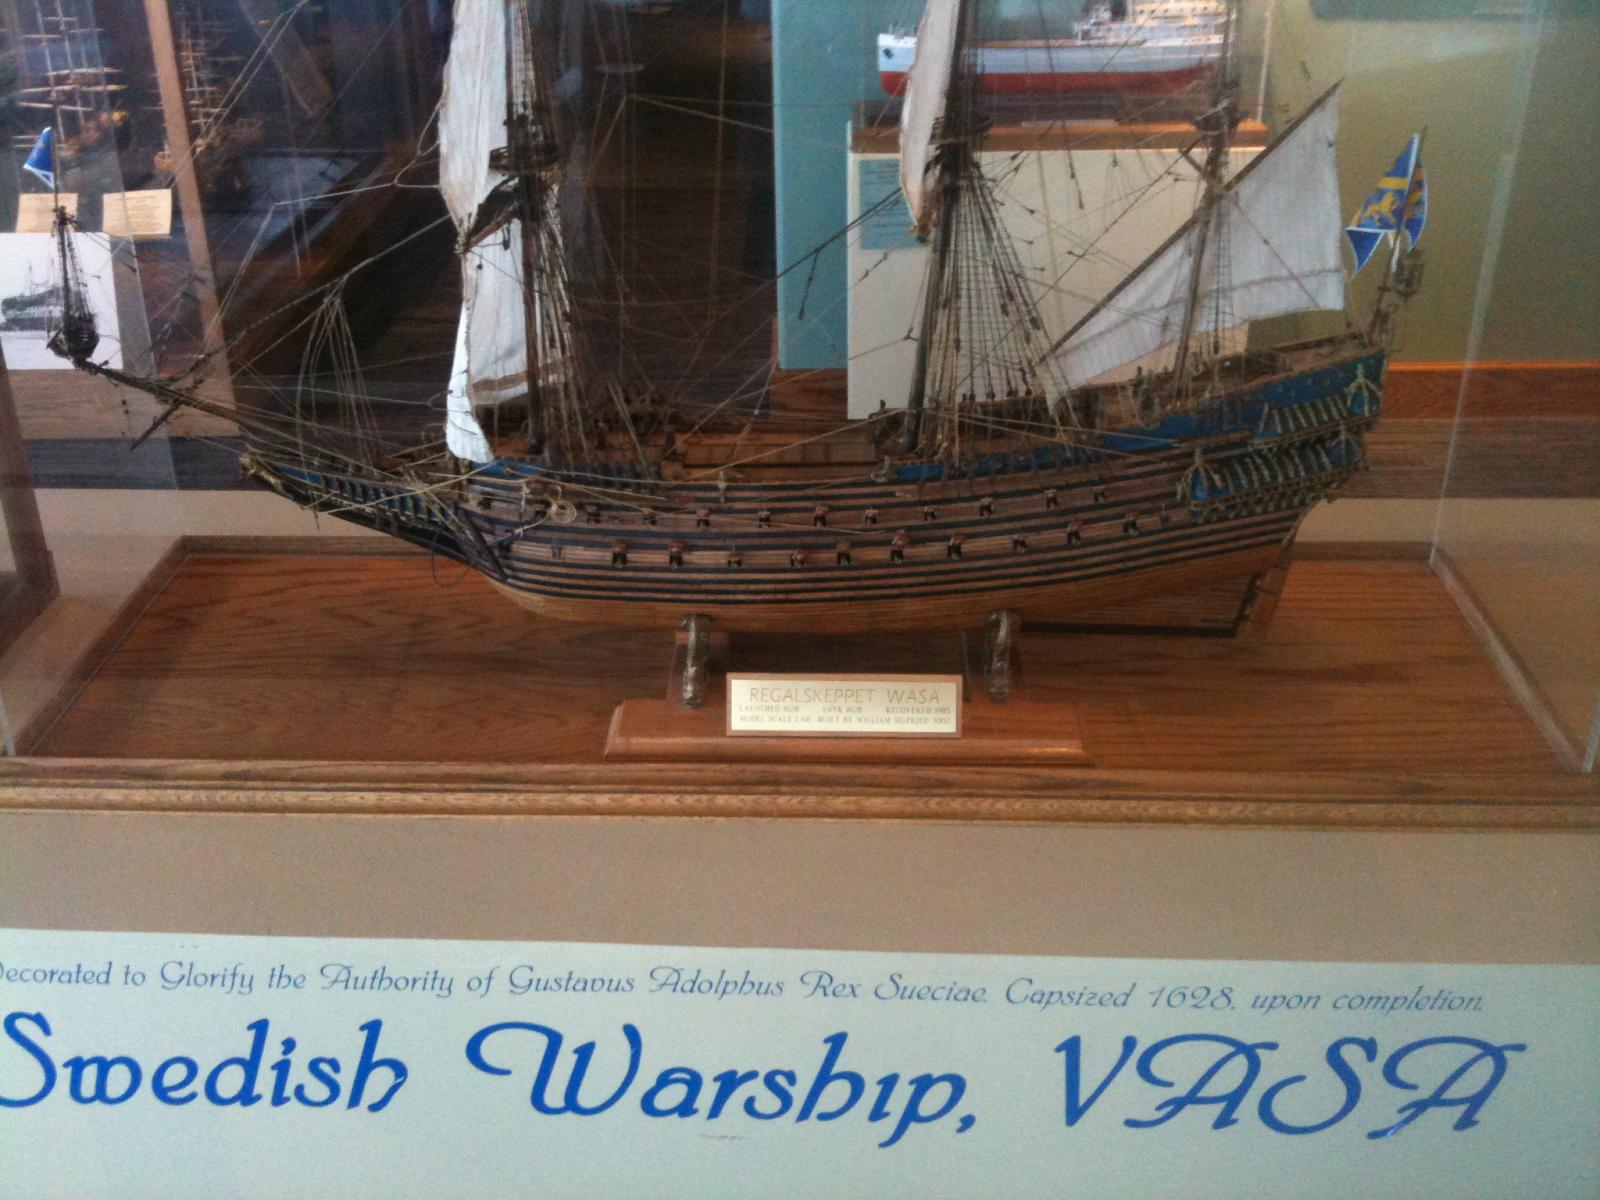
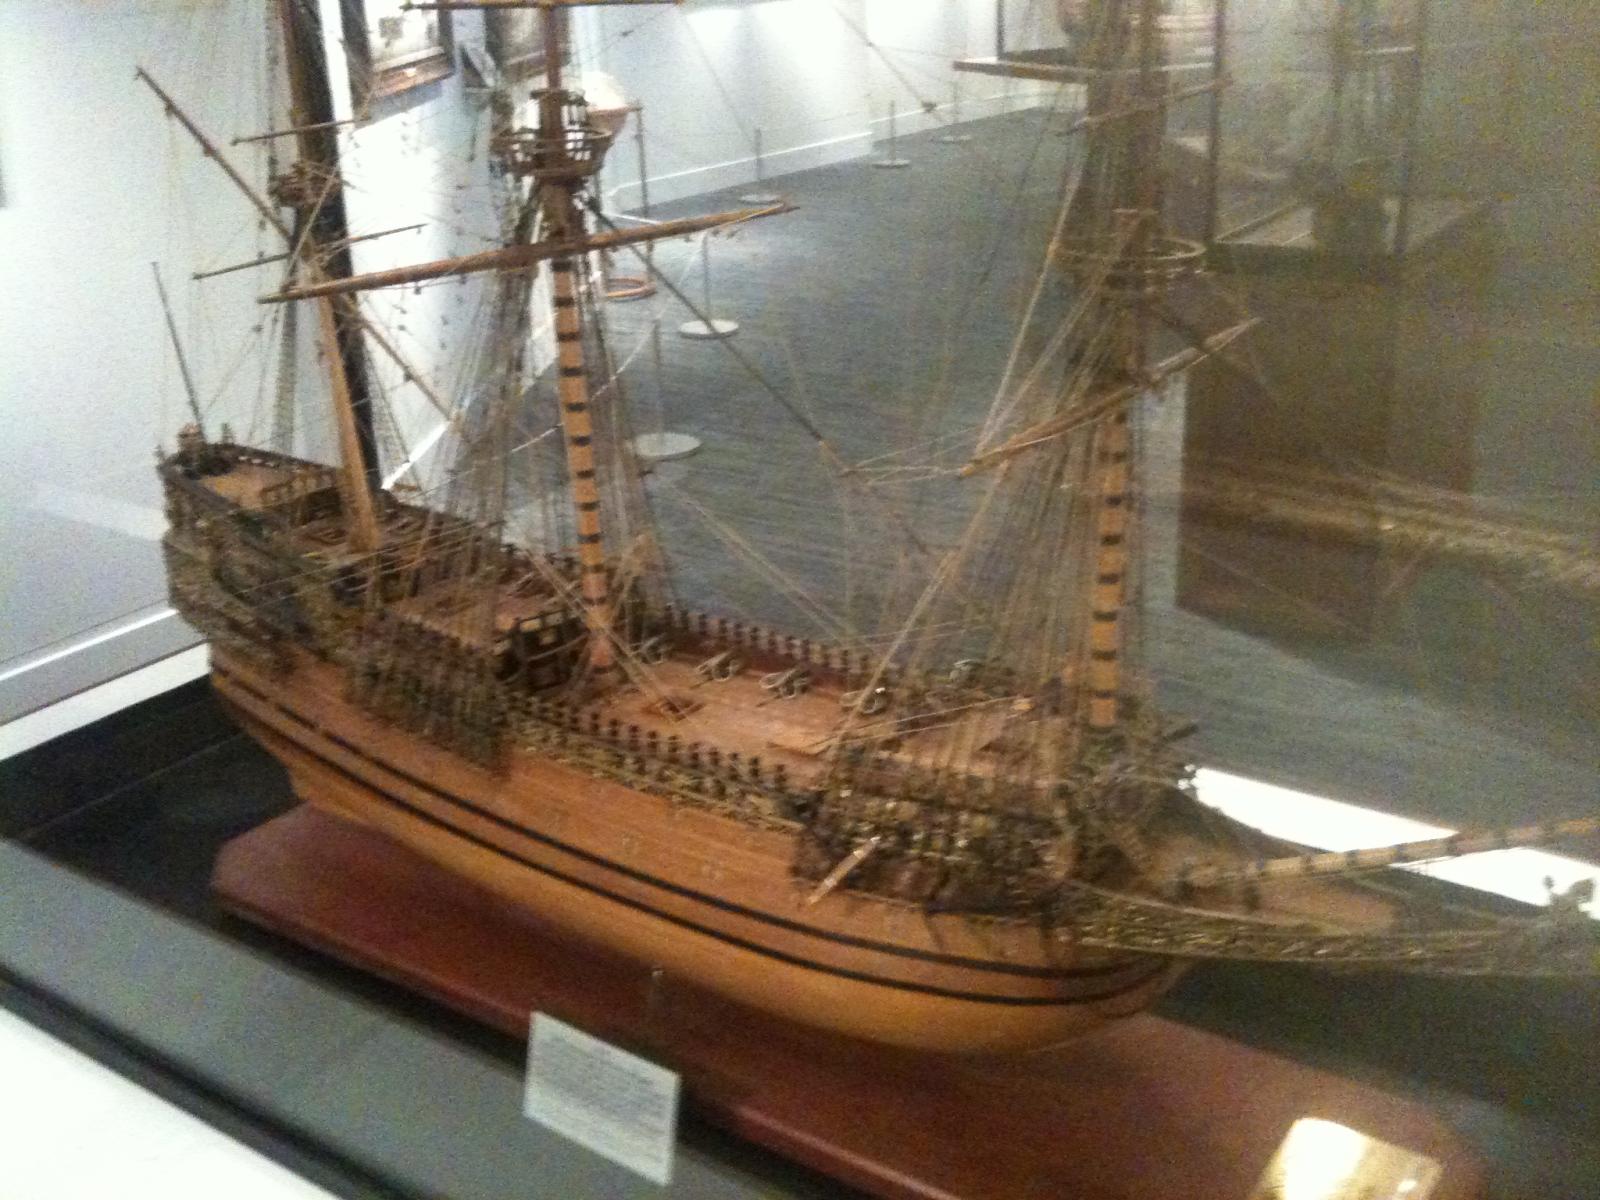
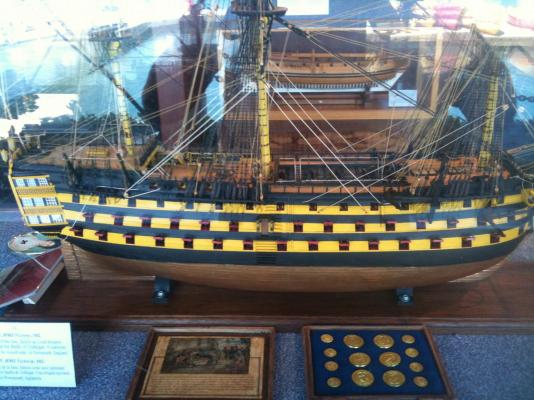
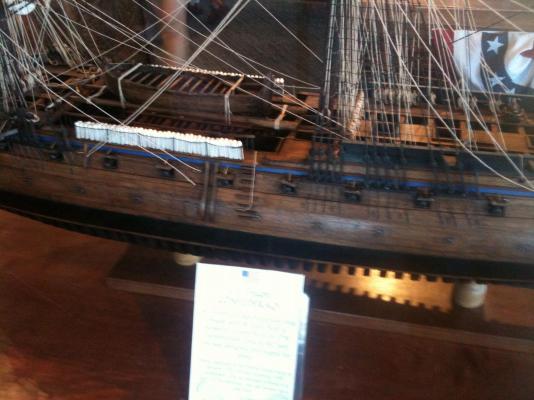
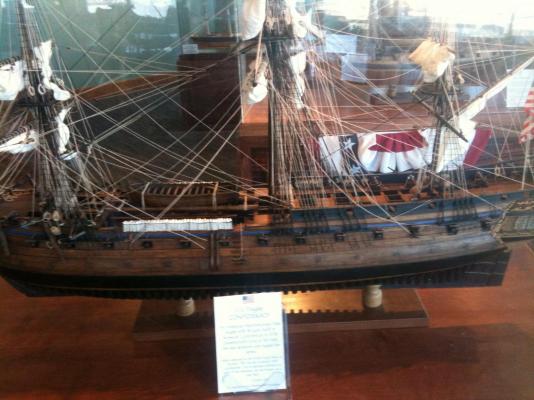
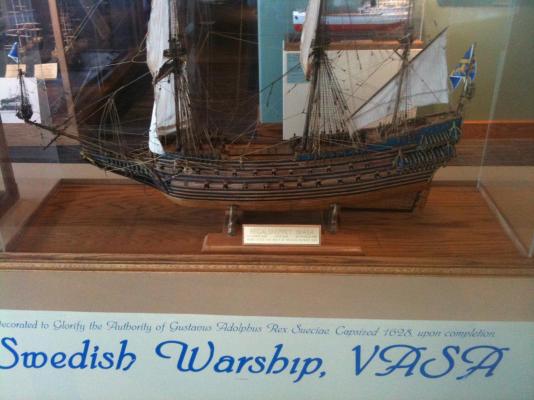
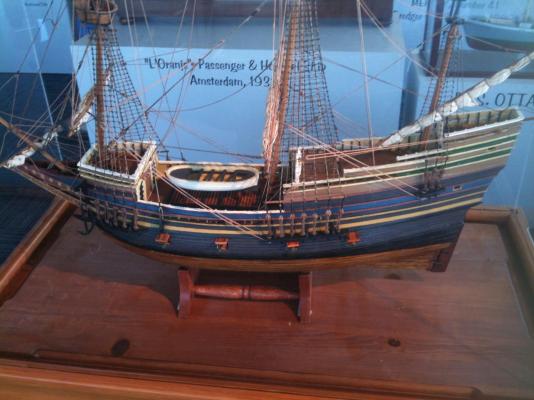
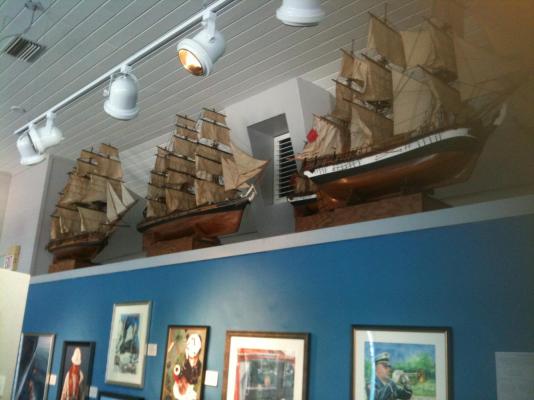
At the museum, most of the model you are all building were there. most looked scratch built and old. Some were very big like 7 feet long. One exhibit was the prison ship models made of carved bone scraps by the prisoners on the infamous British prison ship during the American Revoltuion. They were astonishing! It was dificult to take photos because of the lighting so I show a few where the lighting was okay.


- 1,756 replies
-
- 5
-
-
- constitution
- constructo
- (and 1 more)
-
Back from California. Shipyard will reopen soon. After visiting the Channel Islands Maritime Museum and viewing over 60 shipmodels, I'm going to spend some time cleaning up a lot of little mistakes and omissions on my Constitution. Pictures to follow.
- 1,756 replies
-
- 1
-
-
- constitution
- constructo
- (and 1 more)
-
I just saw some 6 to 7 footers in the Maritime Museum in Oxnard CA. They had to be scratch built.
-
Coastie 96, Somehow those pictures got lost when they re-worked the website? I can help you if you ask specific questions. I do not have copies of those lost pics.
-
My shipyard will be closed for a week while I visit friends in California. Might visit the Maritime Museum near Oxnard to see their collection of model ships. ,
- 1,756 replies
-
- 2
-
-
- constitution
- constructo
- (and 1 more)
-
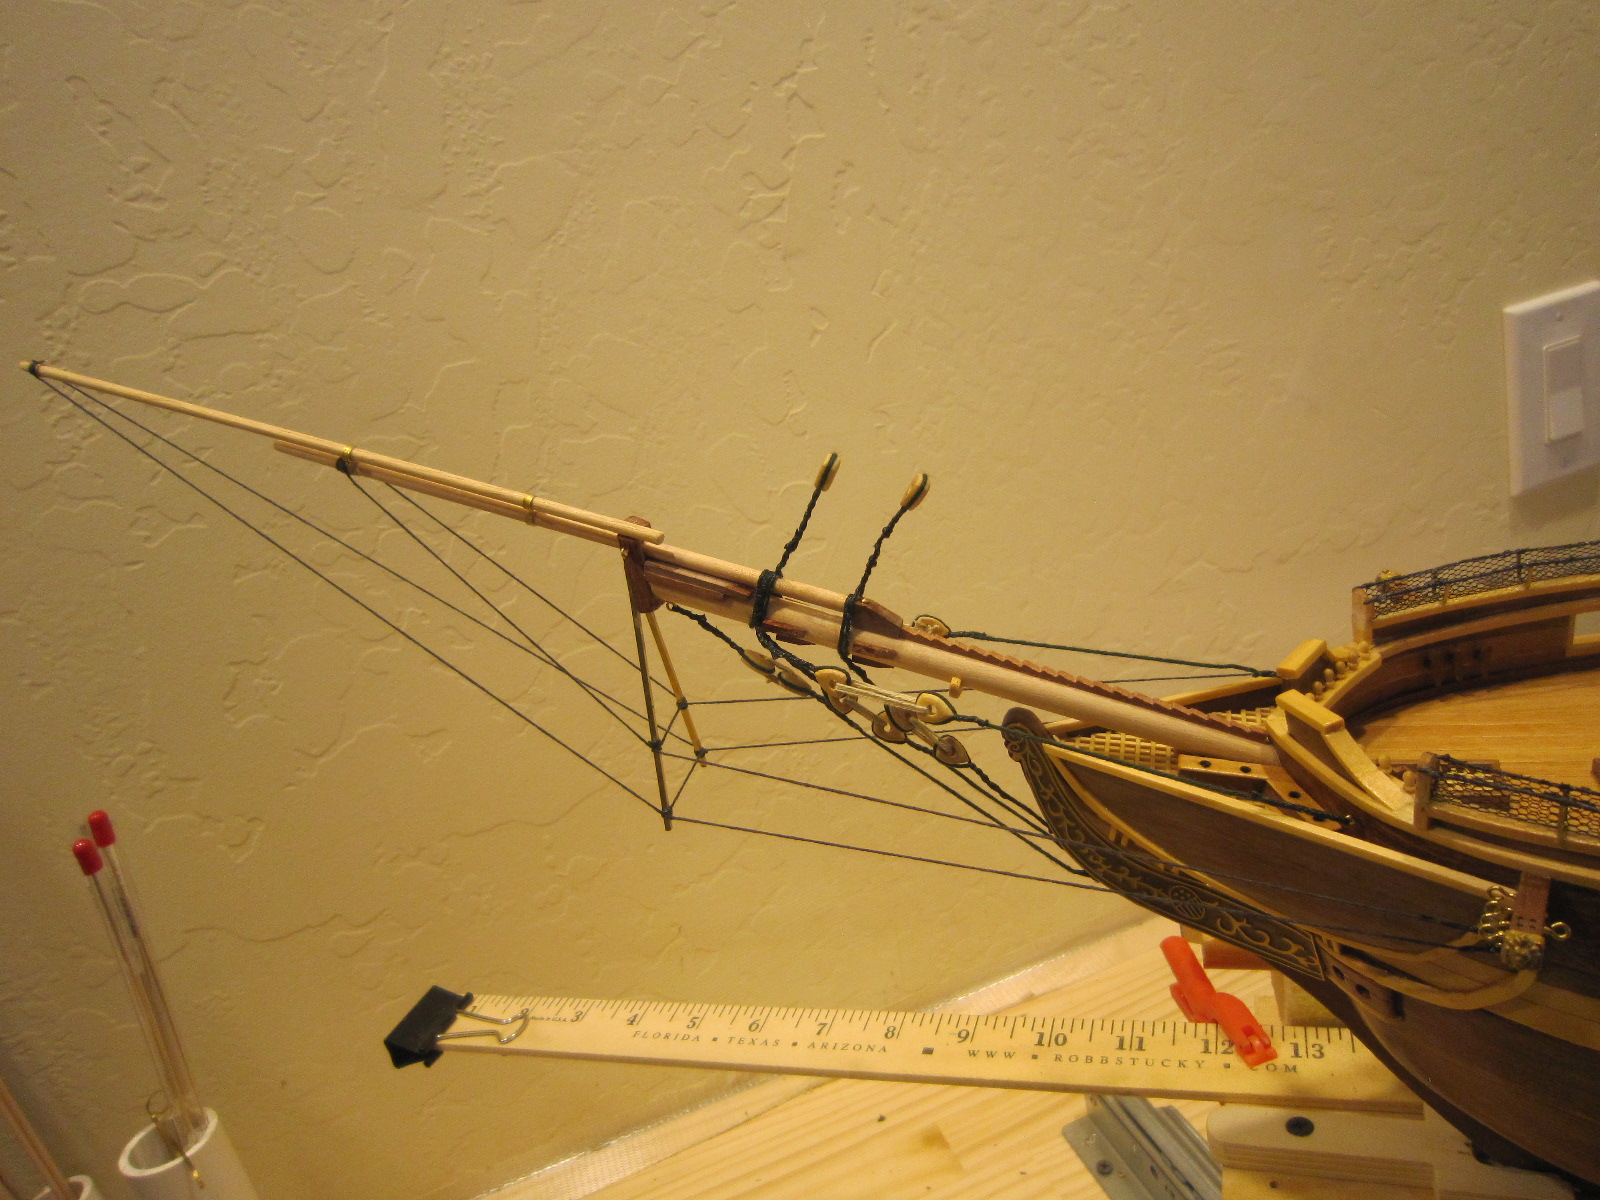
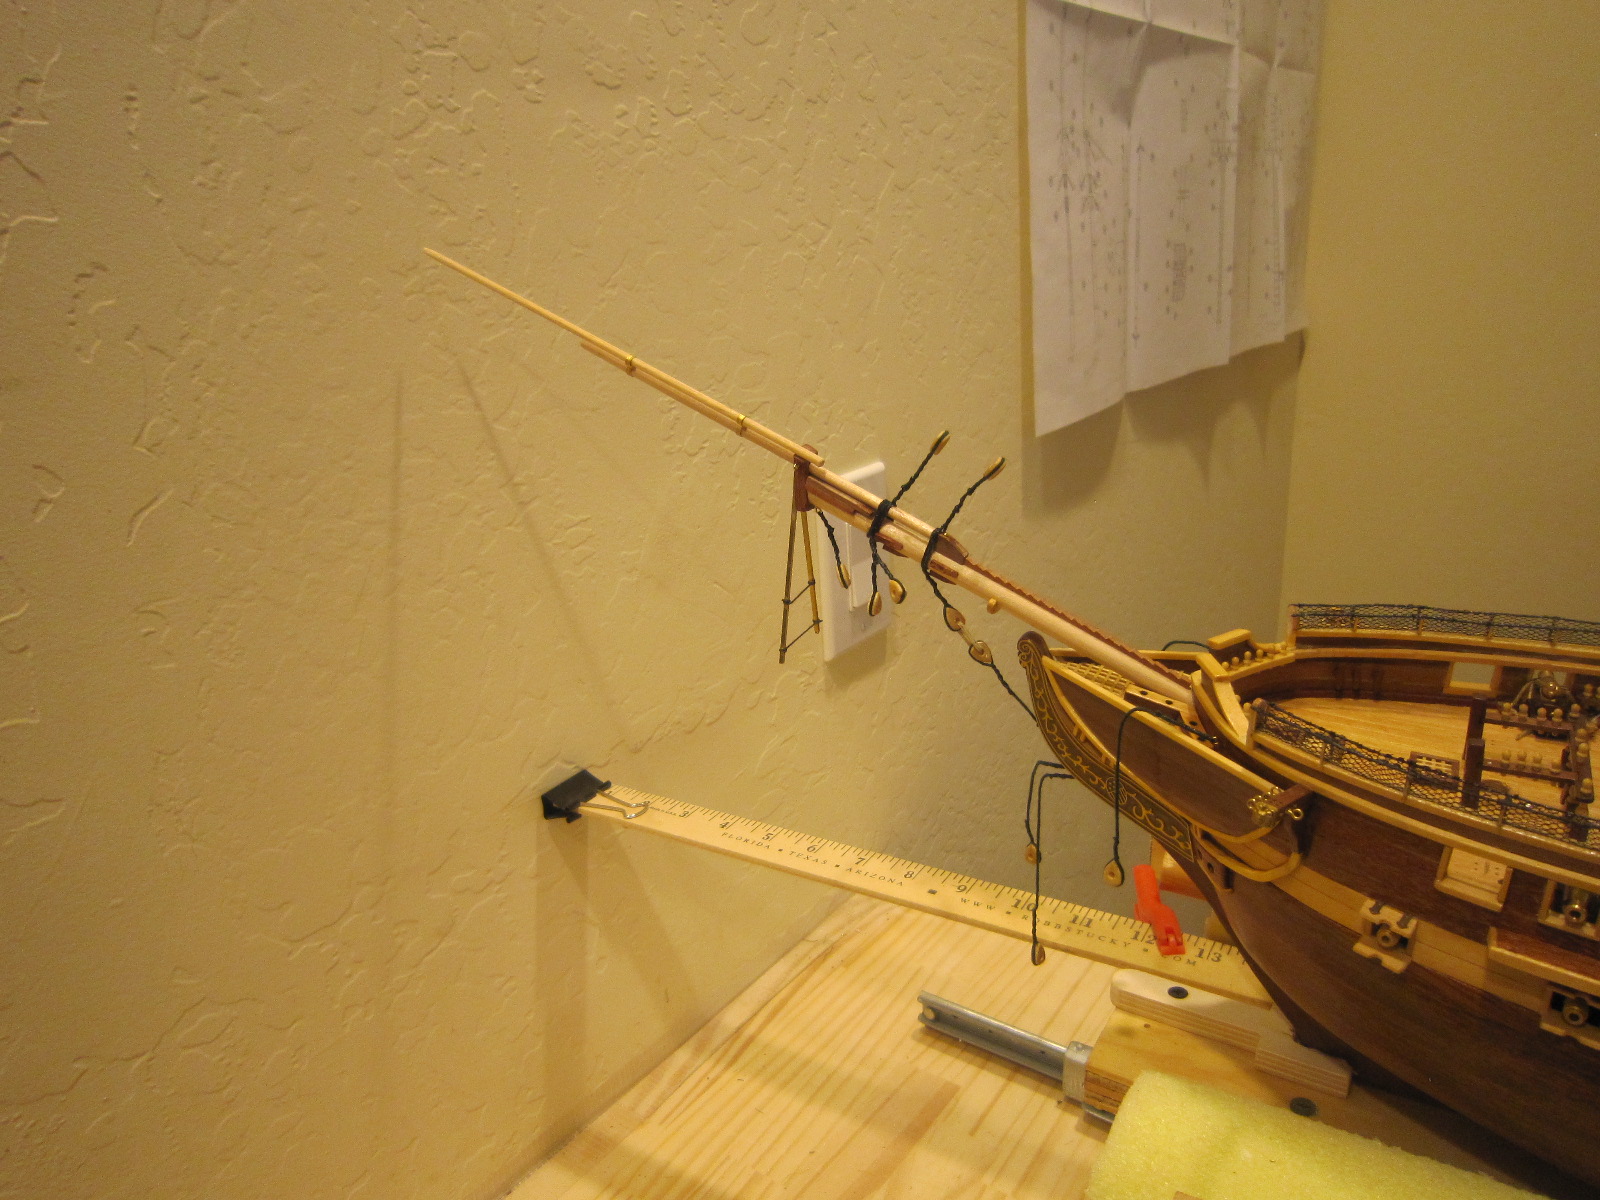
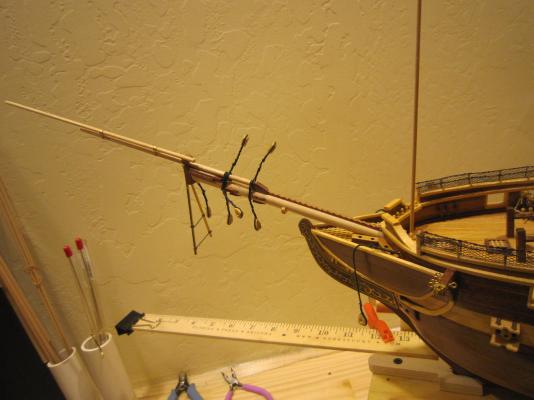
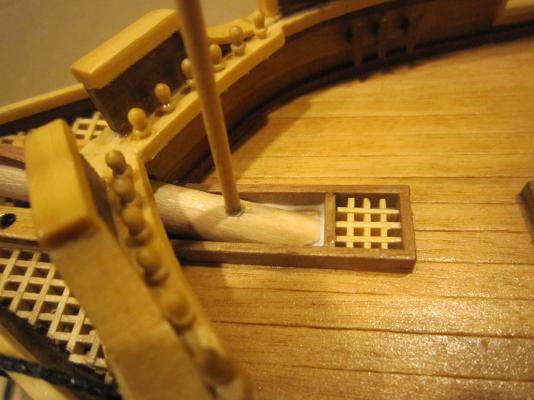
For all you eagle eyes....I'm still trying to make the bowsprit steps right without ripping them off and starting over. Believe it or not, I made them just like Constructo depicted them..which was wrong!
-
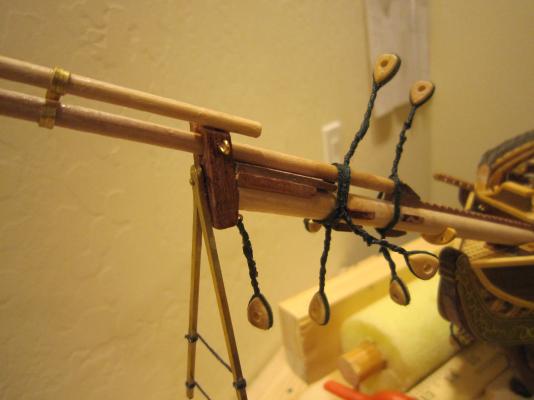
Let the rigging begin. My thick fingers have strung the first of many yards of line. Constructo doesn't make it easy. I have to look in numerous places to figure out where and how each line goes. I have to refer to the outside websites all if you have provided me, also. I even had to cut and paste several of Constructo's drawings since one half of the bowsprit was on one sheet and the other half on another drawing! Who says model ship building was easy? I feel like a detective.

- 1,756 replies
-
- 6
-
-
- constitution
- constructo
- (and 1 more)
-
Here's the bowsprit guard I installed way back when I installed my rotating work table. Something told me way back I would eventually knock off the bowsprit with one.

- 1,756 replies
-
- 7
-
-
- constitution
- constructo
- (and 1 more)
-
I installed a guard on my work stand to prevent me hitting the bowsprit when I rotate my model to work. Thanks for the heads up.
-
Augie, That's a great tutorial....thank you very much!
- 1,756 replies
-
- 1
-
-
- constitution
- constructo
- (and 1 more)
-
Does anybody have some photos of a rigged bowsprit? Constucto's instructions are awful.
-
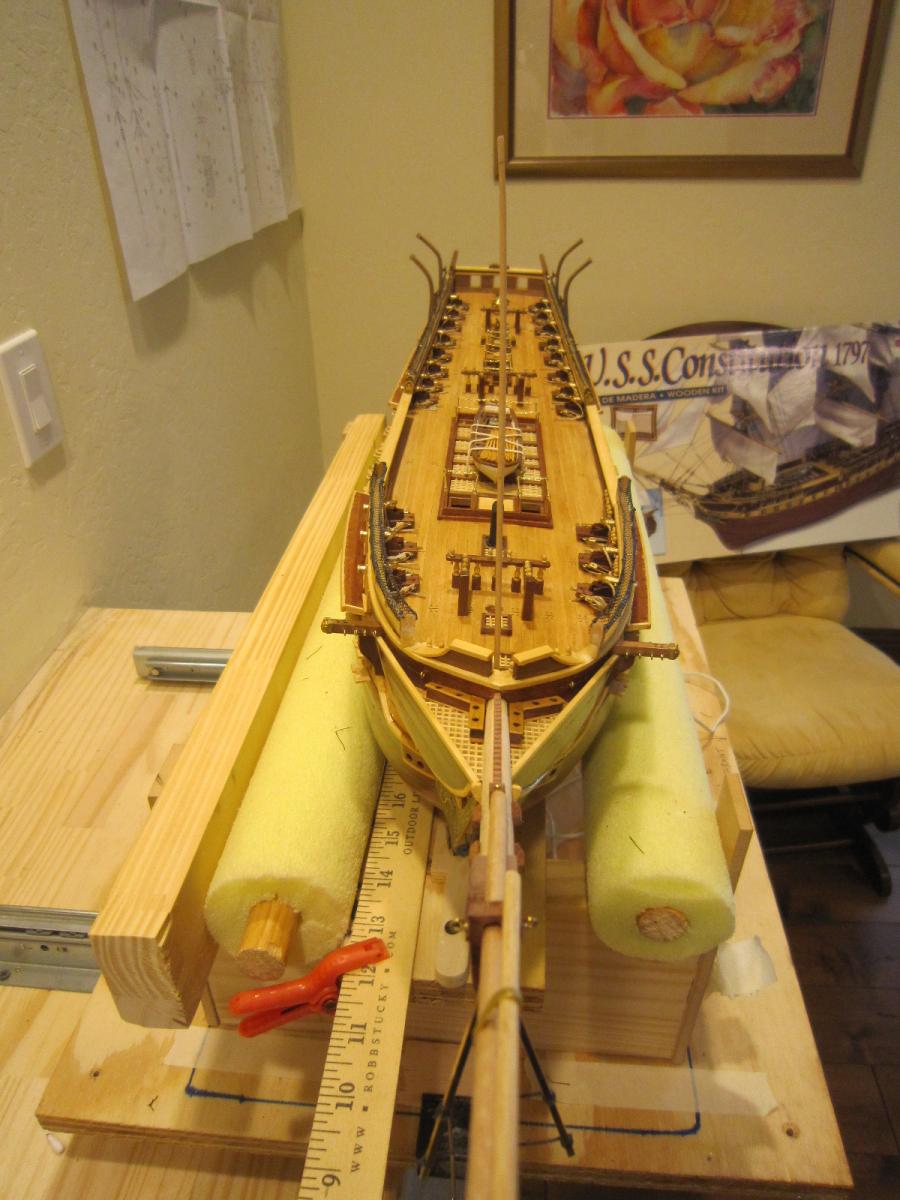
The bowsprit is now doweled and glued in place in the hull. The dowel is 3mm and in to the hull about 4mm. I also glued a wedge unseen behind the heads. It fits very sturdy even before the glue sets. I used PVA. Most of the rigging is now on the bowsprit an I have 3 more lines to add to the bow of the ship before I tie it all together rigging the bowsprit to the hull. I'll trim the dowel after the glue sets.

- 1,756 replies
-
- 9
-
-
- constitution
- constructo
- (and 1 more)
-
As I look down at my CA splattered fingers, I say, oh well, it'll eventually come off.
-
I'm starting to rig the bowsprit. Not the sport of thick fingered, shaky old men. I keep dry installing and removing the pre-built bowsprit to constantly check alignments and to give my self room to screw in the many eyebolts on the hull and the bowsprit. I couldn't do it if I permanently glued the bowsprit in.

- 1,756 replies
-
- 1
-
-
- constitution
- constructo
- (and 1 more)
-
Tom, I got the tip from Bill and it works. Othwise it's like trying to put toothpaste back in the tube.
-
Great book! I learned a lot.
-
Here's a "sutured" set and then a finished set. I feel like a doctor in the ER after a crash through plate glass.
- 1,756 replies
-
- 9
-
-
- constitution
- constructo
- (and 1 more)
-
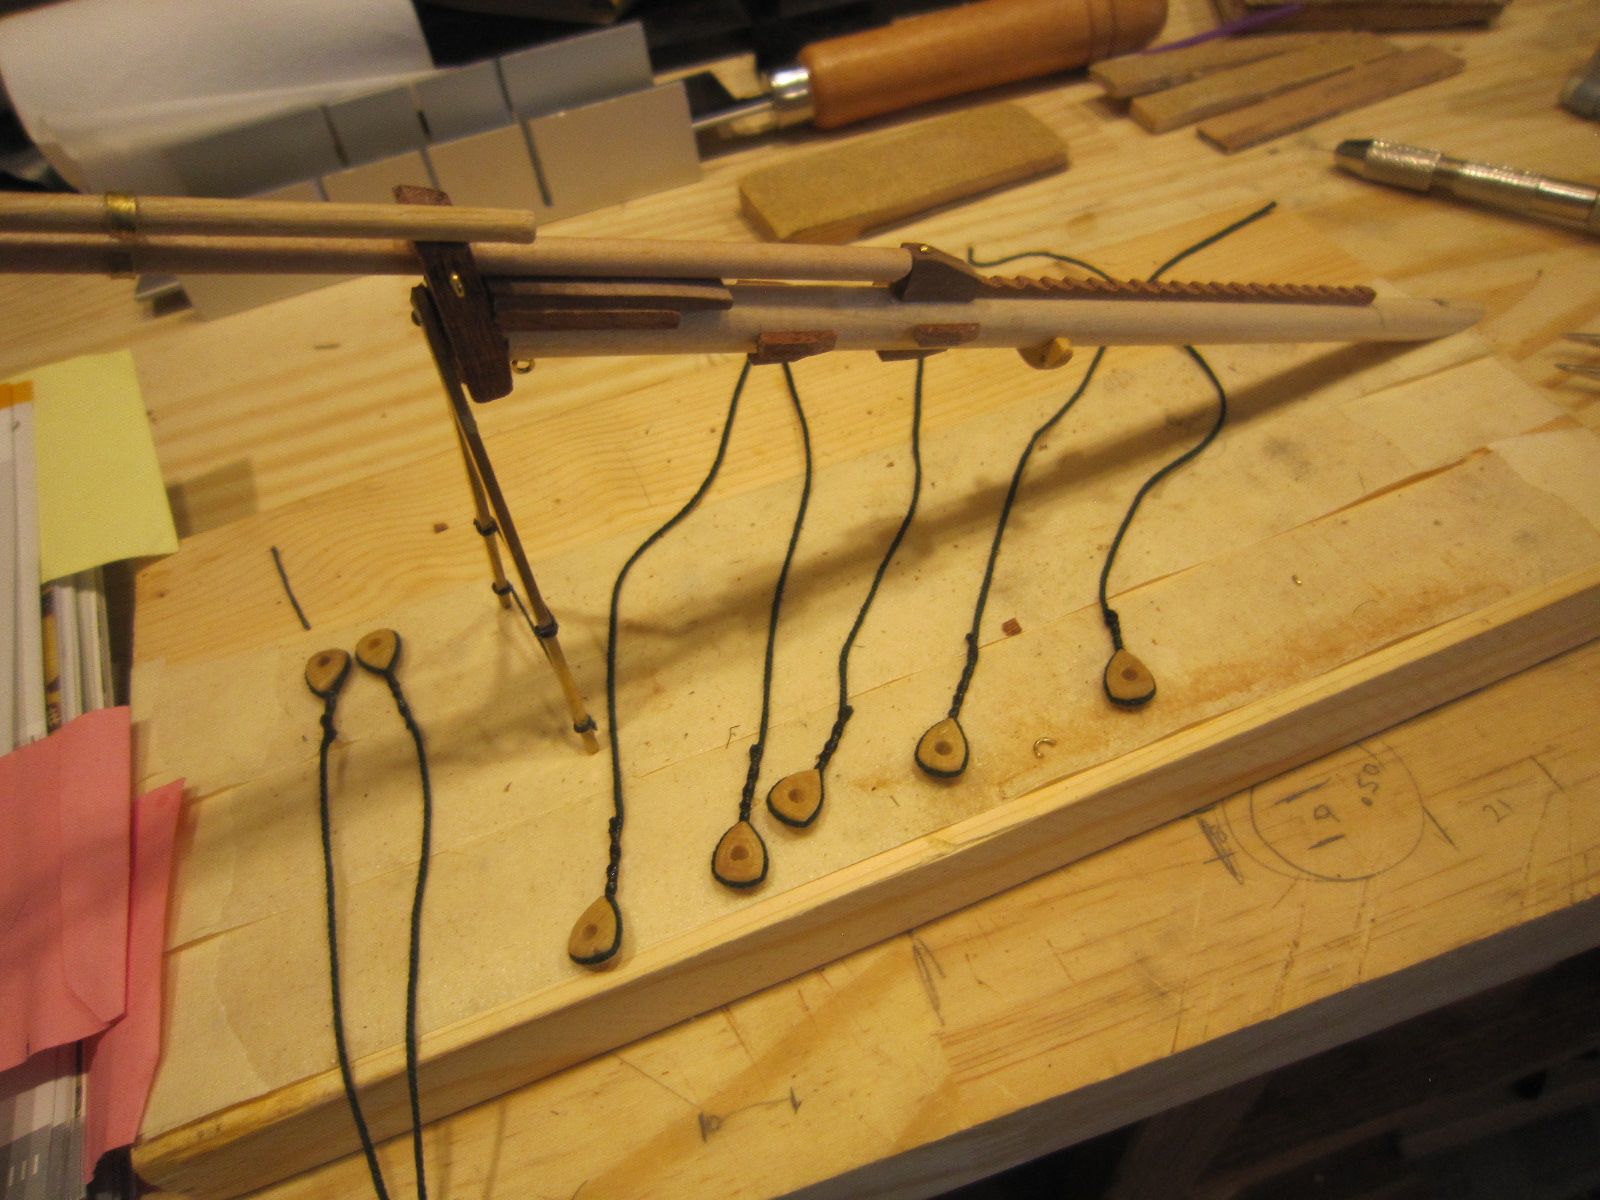
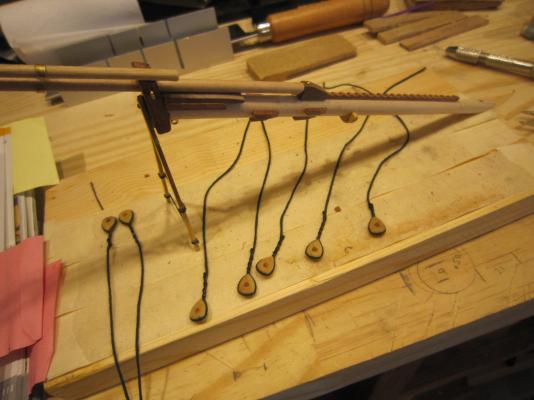
Thanks to Bill, I'm taking a break from bowsprits and returning to hammock nets. Bill suggested tieing the nets in startegic places before gluing. I precision cut the four sets of nets after folding them to fit with clamps overnight. I inserted all four into the stanchions and I just finished sewing the first set. I'll trim and glue it next. Thanks to Bill, I think this will works.

- 1,756 replies
-
- 10
-
-
- constitution
- constructo
- (and 1 more)
-
You're right, Bill. I'll get my handy file out and try to correct that set of steps.