


Stockholm tar
-
Posts
866 -
Joined
-
Last visited
Content Type
Profiles
Forums
Gallery
Events
Posts posted by Stockholm tar
-
-
-
Hi Eamonn,
Ok, the measurements are (as near as I could gauge it, carefully avoiding other bits in the way and using pieces of paper, pencil and a ruler
 ): 6mm long; 5mm wide; 8mm high. The chimney tapers from half-way up, to about 1mm less all round, at the top.
Hope that's ok. (I also managed to get some soot on my hands, and the captain was watching me rather strangely...
 )
) -
-
Did you carve your chimney Kester or build it up from spare timber?
Eamonn,
All made from the one piece of wood, tapered towards the top, and with a hollow where the smoke comes out. I had an idea about the latter and might still try it...
Anyway, here's the photo:
-
Eamonn,
Yes, good idea to change the 'rings' – or mast coat
 . I probably would have done that on the Sherbourne, but I didn't think of it at the time and it's a bit late now! (I'd have to de-rig her, and then take the mast out – which I think you'll agree would take longer than one afternoon!) In any case, it's not that easy to see now, being surrounded by bitts, rigging, etc.
As for the galley chimney, I'm flattered that you'd want to copy mine!
The idea for it came from Goodwin's 'Sailing Man Of War', where he says the earlier ones were square. This changed to a round shape on large ships, but I get the impression that those on small vessels stayed largely the same. Ballahoo is rather later, but it may well be she had a square one too. I think I might have a photo of mine somewhere, should you want it.In passing, would the 'wee galley chimney' be the gaelic version?
-
-
Mrangus,
Good for you, that you have begun again on your Scottish Maid, and she looks a competent build so far. However, according to the MSW 'rules', the gallery is reserved for completed models only. I see this is your first post, so you may not have realised.
A good idea is to start a build log, under kit built models (yes, you can do this even though the build is started) which you can add to whilst still working on her. You are likely to receive comments from other members, which are always constructive and helpful. In that way not only can others see your progress, but can also offer advice.
I hope you don't mind me mentioning it. Good luck with your Scottish Maid.
-
'there is a new pennant to add (I will give her a tricolour pennant to match my own streak of independence)'
Gregor,
Tricolour pennant, independant commission, ok, I'll give you that!

'In spring, everything will be ready for the Schooner La Jacinthe...'
SPRING! Can't come too soon for me... nice schooner by the way.
-
Gregor,
So your Sherbourne is finished, and very beautiful she looks too! Very well done!
I'm sure the fish davit is possible, although I have not seen any examples on cutters, but I query the white pennant at the masthead. Since she has a red ensign, I think the pennant would have been red too. (Btw, I intend using a red ensign as well, red pendant and possibly a jack.)
Just a little niggle though, on what is a lovely model. As Kurt said, what's next?
-
Wally,
A good idea is to drill a small hole in both mast and yard, about half way through on each, and glue in an invisible metal pin between them. This should provide an additional secure fixing, besides the other rigging. A extra 'rope' shouldn't be necessary, but very likely there is a 'parrel' of beads, or beads with wooden 'ribs' between.
Of course on the real ship there would be no pin, and the parrels would keep the yard to the mast.
-
Just one or two other off hand observations to make in the minefield of flags:
1) There have I believe only been about eight changes to the Royal Standard, and I think I'm correct in saying that it has remained unchanged since the reign of Queen Victoria.
2) The Georgian period Standard had a small shield bearing the arms of Hanover superimposed on it (indicating their Germanic origins) and which can be seen today on the figurehead of the Victory; It was removed when Victoria ascended the throne in 1837.
3) Jacks and ensigns previous to 1801 would not have had the diagonal St Patrick's cross. This was only added when Ireland became part of the United Kingdom.
4) The stern ensign at a ship launch was most likely to have been the red, this being the senior ensign (and as is normally shown in various paintings). The particular squadron that a ship was attached to was probably not decided until somewhat later, and of course this frequently changed.
I hope this helps.
-
Len,
I also have had this book for a number of years and whilst interesting, I have to agree with Michael, when he says that it tries to be all things to all men. Attempting to condense the whole period of sail, which covers many different changes in practice and technology, into one volume would be difficult in the best of circumstances, and impossible at worst. This book seems to fall somewhere in between. I suppose what it boils down to is: what do you put in such a book, and what do you leave out? I also tend not to use this book that often.
As a dictionary, I believe the Oxford Companion to Ships and the Sea (the older version) is superior. However, a more in-depth practical book is 'Seamanship in the Age of Sail' by John Harland, which largely confines itself to the eighteenth century (which I guess for most of us is 'our' period) and also illustrates the practices of other nations.
Btw, Michael, nice to have you back!
-
Tony,
Normally the cable would run over the top of the windlass barrel from the hawsehole, and pass around it about three times from the centre outwards, before running aft along the deck to the main hatch. If you think about how it operates, it would have to go over the top. When not in use, the cable would probably lie on the deck, but when being hauled in it would run in a straight line from the windlass to the hawsehole, ie. a few feet off the deck – which is when it would come into contact with the coiled lines on your rail. (It looks like Gregor has found the ultimate test!)
Anyway, I'm off to pat myself on the back. Now, how do you do that...?
-
Tony,
I agree, there's a lot to take in there, and you have certainly taken a lot of trouble to get it looking right.
Gregor perhaps has a point regarding the anchor cable, but generally it's all looking good.
-
Gregor,
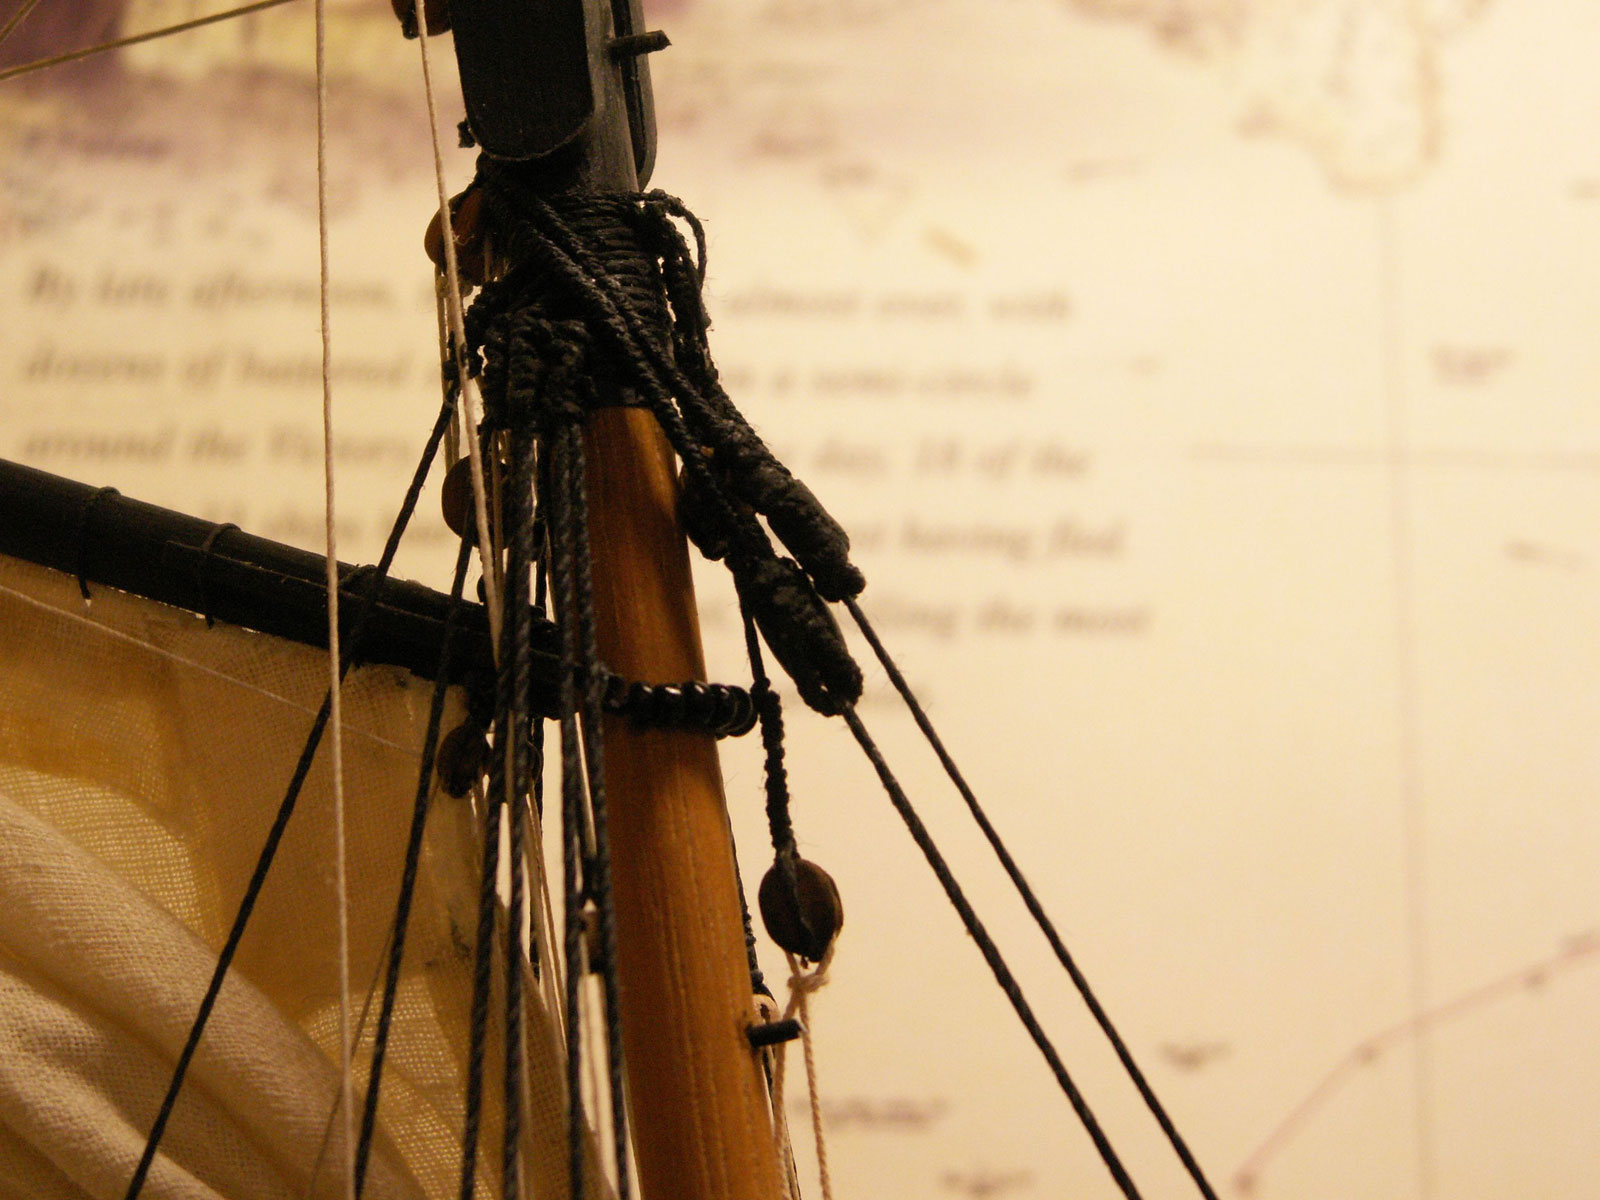
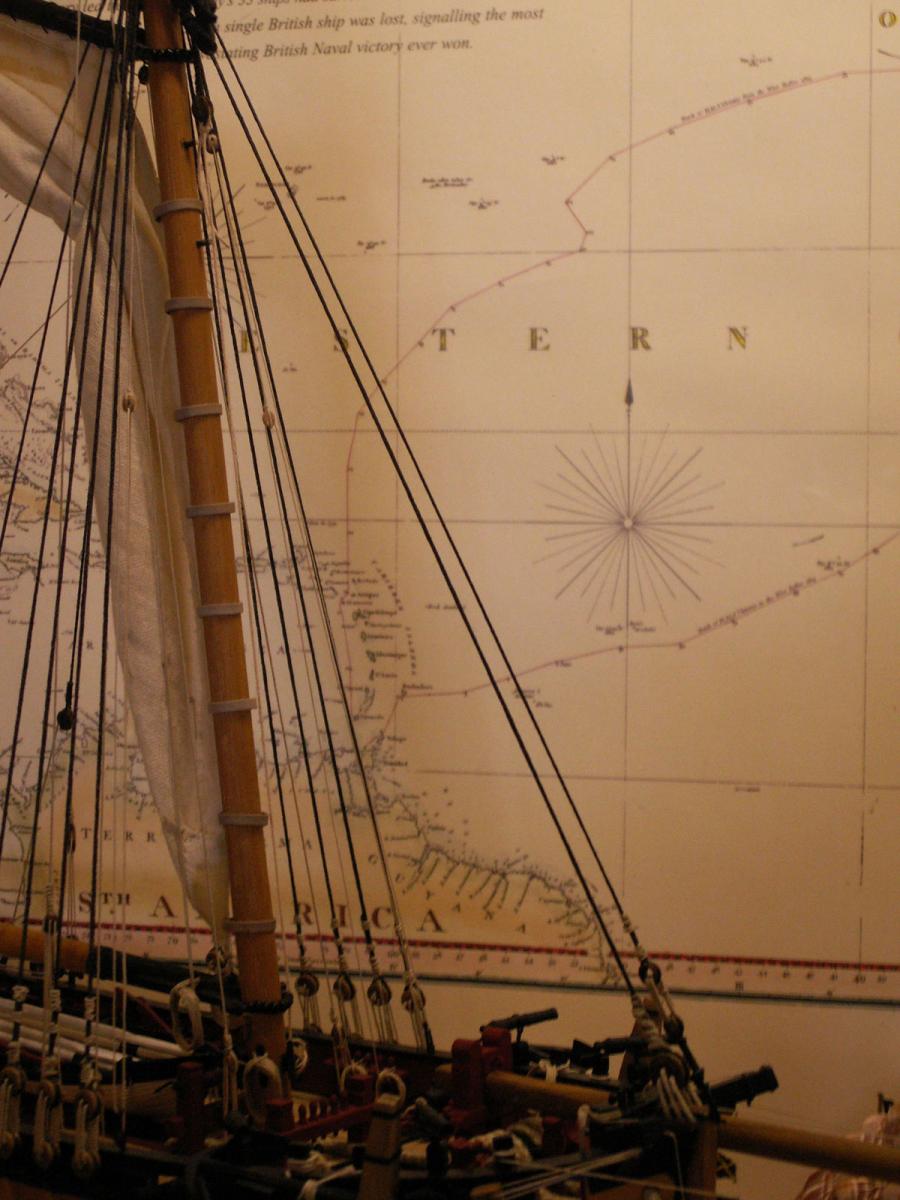
Now that is one great looking Sherbourne. Very well done!
I particularly like the shot of the complex rigging at the crosstrees. You have reminded me of the 'joys' of the ratlines to come – and no, I won't be doing them all at the same time! I think they'll be one of the last jobs to be done, when most of the running rigging is finished off.
-
Popeye, Tony,
Thank you. Thanks also for the 'likes'.
Yes, I'm sure all will be resolved by the time of my next posting (or at least that's the intention!)
Tony,
The lower mast is the only spar from the kit. The topmast I made, along with the crosstrees, as were the gaff, boom and bowsprit. Thankfully, all the spars took the stain well, without any of the blotches you mention. I'm not quite sure how the latter happens, but perhaps is something to do with the grain, or some residue on the wood.
The stain that I used is a light red/brown colour, came in powder form in a packet, and was bought locally. It was then mixed with water, and I remember experimenting when I first used it. I found that it was better to make the stain quite dilute and lightly brush it on in several coats (I think three), giving the spar a light sand between coats. Each successive coat made it a progressively darker, which meant that I could end up with the colour I wanted. The ends of the spars were then painted black, which was quite usual for the period.
I'm sure the pear will look great for your spars and I look forward to seeing it.
-
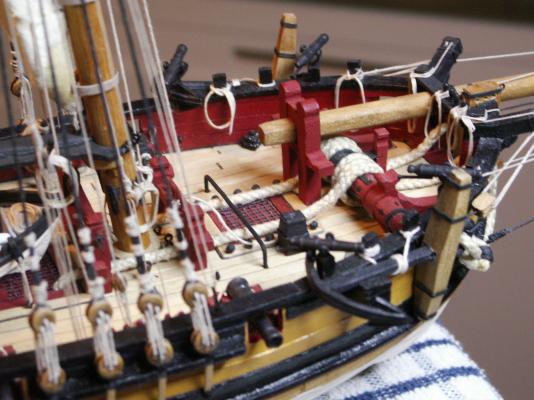
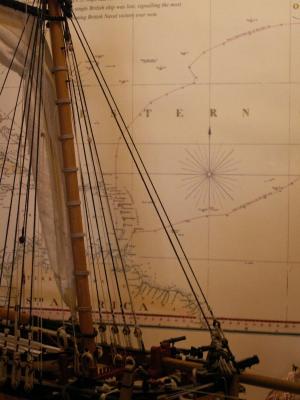
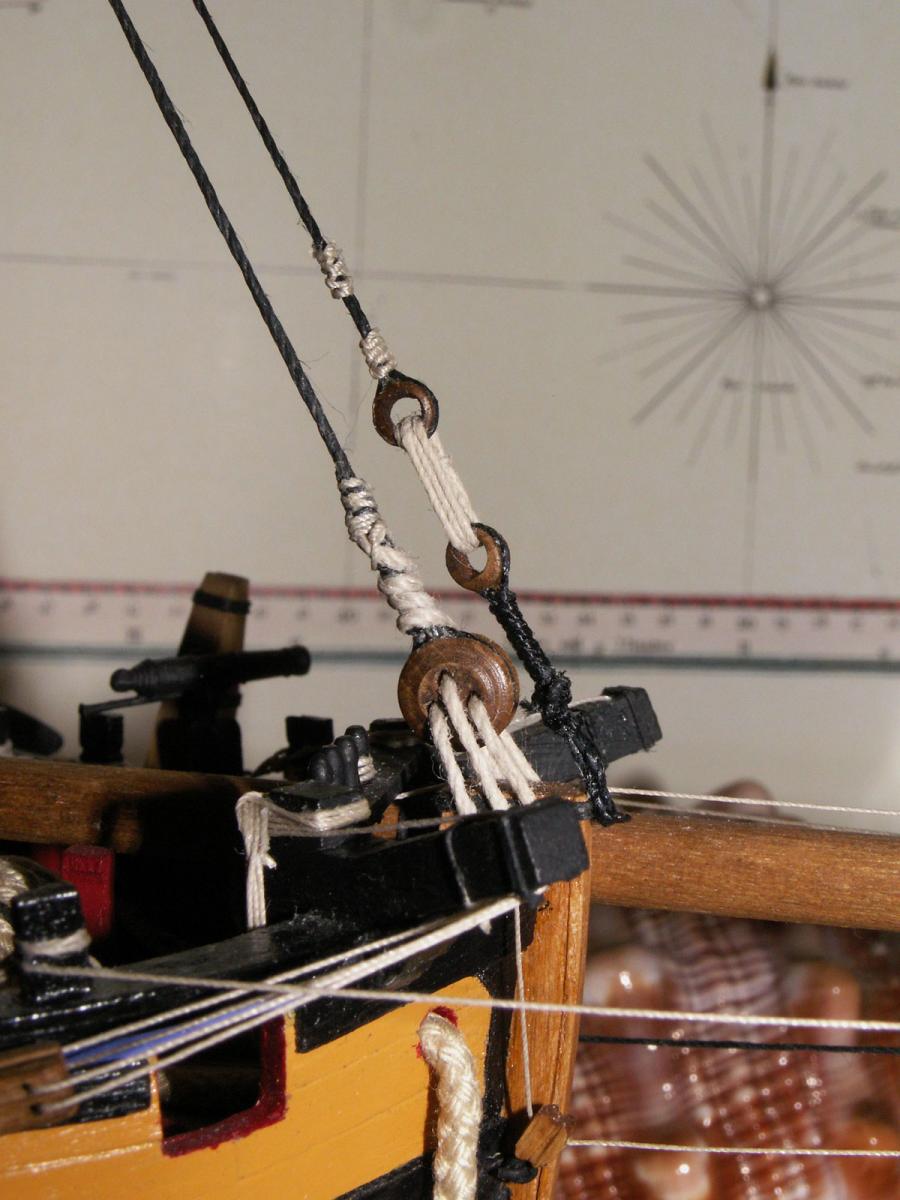
The preventer stay was made in a similar way to the fore stay, except that it is of smaller circumference and employs a pair of hearts at its lower end. I used 0.7 black thread for the stay, and 0.25 black thread for the serving. As with the forestay, the stay was served above the mouse (a smaller piece of wood than that for the forestay, and painted black) where it passes around the mast. The measurements were again fairly critical to get all parts of it in the correct position, with the mouse sitting just above the larger one on the forestay.
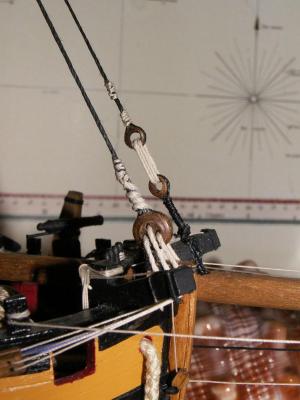
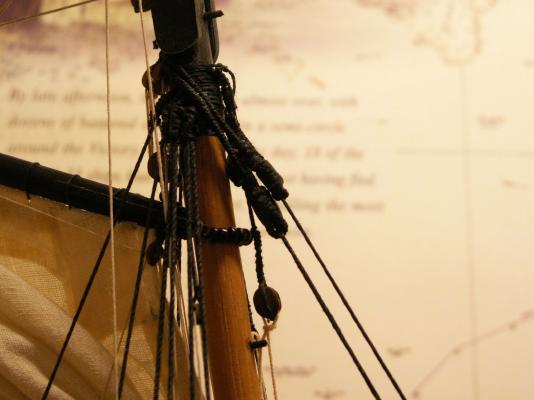
I was unable to find hearts of the right size – or at least what I thought looked right to the eye, and according to the AOTS Alert book. The smallest I could find were 7mm, which were to my mind too large. I then thought to drill out two of the 3mm deadeyes that I had, which looked to be about right for the job, and stained them. I think they look acceptable. The lower of them was seized to a strop attached to an eyebolt on the stemhead, whilst the other was seized into the lower end of the preventer stay. The lower of the two hearts just clears the large deadeye on the lower stay.
There is no ‘snaking’ line between the forestay and preventer stay, as this would have prevented the staysail from being hoisted and lowered on the former.
I had hoped to include the rigging of the topgallant stay with this posting, but one or two problems have arisen which will be explained next time.
- Chasseur, ianmajor, fnkershner and 10 others
-
 13
13
-
Monkeyman,
Looks an interesting project.
I think what you are talking about looks to uniform in shape for a sail and in any case it would seem a rather strange place to stow it. My guess its a fender, to protect the boat's side when alongside the ship or a quay. There would be one on the other side.
-
Kurt,
I seem to have missed your post, having had a cold, and then there was something else...
Anyway, yes, you're right, the Sherbourne would have had an earlier rig, which Gregor has brilliantly explained, and I am indeed following the AOTS Alert book.
Gregor,
Thanks for stepping in, and no, I don't mind at all. Some of the details you have given for the Sherbourne are interesting. I take it these figures are from the NMM, although I note Druxey's comment? Indeed as you say – a flying jib boom? I also wonder about the crossjack yard.
I hope to be posting an update to my log soon, when Christmas and New Year is behind us – and I can concentrate on more important things!
In the meanwhile a Prosperous New Year to you both, and indeed all here.
-
Hi Kevin,
Wishing you a Very Prosperous 2015. Your Victory is looking superb!
I would suggest that why your main topgallant mast looks 'wonky' (especially for Sjörs: Collins English Dictionary – unsteady, askew, liable to break down) is because there is something wrong at the doubling. It looks to me as if two sections of the mast (topmast and topgallant) are not quite in line, causing the upper mast to be out of true.
I am sure you could correct it before you continue.
-
-
I agree largely with BE here, in that the series has its faults, but I think they are worth having for what they are. At the moment I have five in the series, the Royal Yacht Caroline, Bounty, Alert, Victory, and my latest aquisition Granado. Each volume contains a short history of the ship concerned and has photos and paintings of the ship, including photos of replicas where appropriate, together with detailed drawings, details of fittings, tables of rigging sizes, etc.
I think that on the Victory is probably the best of the five, which I bought for use with my bow section build. It has a most useful table at the back of the book, which besides giving various rigging line circumferences, also includes vital information on block and heart sizes. Not all of the books seem to include the latter, which I think is unfortunate. I think my main gripe is that the books are not consistent in giving important information that the modeller needs to know, which I suppose stems from them having been written by various authors. However, perhaps the publishers should have given them rather stricter guide lines on what to include, since these are primarily aimed at ship modellers.
I have noticed, and it has been mentioned on this site, that some of the drawings are inaccurate (I can remember there was a discussion on how the gun rigging was drawn in one of the books) and wouldn't be practical in reality. Ok, these were probably a slip by the artist, but it would be nice to get it right.
Of the five, that on the Caroline and the Bounty have white dust jackets. These two are dated 1989 and do not have plans on the inside of the cover. The later three books, dated 2000 – 2005, are reprints from earlier versions, and all have drawings included on the reverse of the silver covers. The five were produced by Conway.
All in all though they are worth having, if only for having all this information in one place.
- Landlubber Mike, Canute and mtaylor
-
3
-
Nils,
Looks all ship-shape now!
-
Nils,
Yes, I rather meant the forward one. Everything should be then be fine.
Regarding the space on board you could always remove the rudder and tiller from the gig, and stow in in the sternsheets which was often the practice.

HM Schooner Ballahoo by egkb - FINISHED - Caldercraft - 1:64 Scale - First Proper Wood Build
in - Kit build logs for subjects built from 1801 - 1850
Posted
Eamonn,
Very professional! I bet they'll look good when fitted.
Btw, does your rudder have cut outs slots, so that the pintles are within the leading edge of it, rather than outside? The slots of course make it possible for the rudder to sit closer to the stern post.