HOLIDAY DONATION DRIVE - SUPPORT MSW - DO YOUR PART TO KEEP THIS GREAT FORUM GOING! (Only 20 donations so far - C'mon guys!)
×
Coyote_6
-
Posts
512 -
Joined
-
Last visited
Content Type
Profiles
Forums
Gallery
Events
Everything posted by Coyote_6
-
 You have great processes Phil. Glad to see her back in ship shape.
 -
Wow Phil. "Albatros" looks splendid! Good luck on that rats nest repair. Last week I dropped the PdN and made a quick grab, and my first ever rigging is now my most recent rigging. It was vexxing but accessible at least. It'll be interesting to see your approach to the tight repair, as I am sure Murphy has more in store for all of us and you always take a well thought out approach. Finally, how many more plastic hooks does "Albatros" have? That has been a tough lesson! I hope to make a bunch of brass hooks today, but not as pretty as yours! Good luck pushing her across the line Phil.
-
Just beautiful!! Congrats to your whole crew! She looks fast on that stand. The new NRG "Ship Modeler's Handbook" says to bias your build on the stand like you have to imply speed, and by jove does she look fast. Glad you went full sails - awesome build and details.
-
@Dr PR Beautiful hooks Phil. Look pretty consistant to me! I definitely think brass is the way to go - I hope Murphy doesn't catch on to my unsoldered eyes!! Also I am running out of eyepins and see manufacturing those going forward as well. I like the performance of the solid brass in these applications.
-
@vossiewulf That is awesome!! Thank you!
-
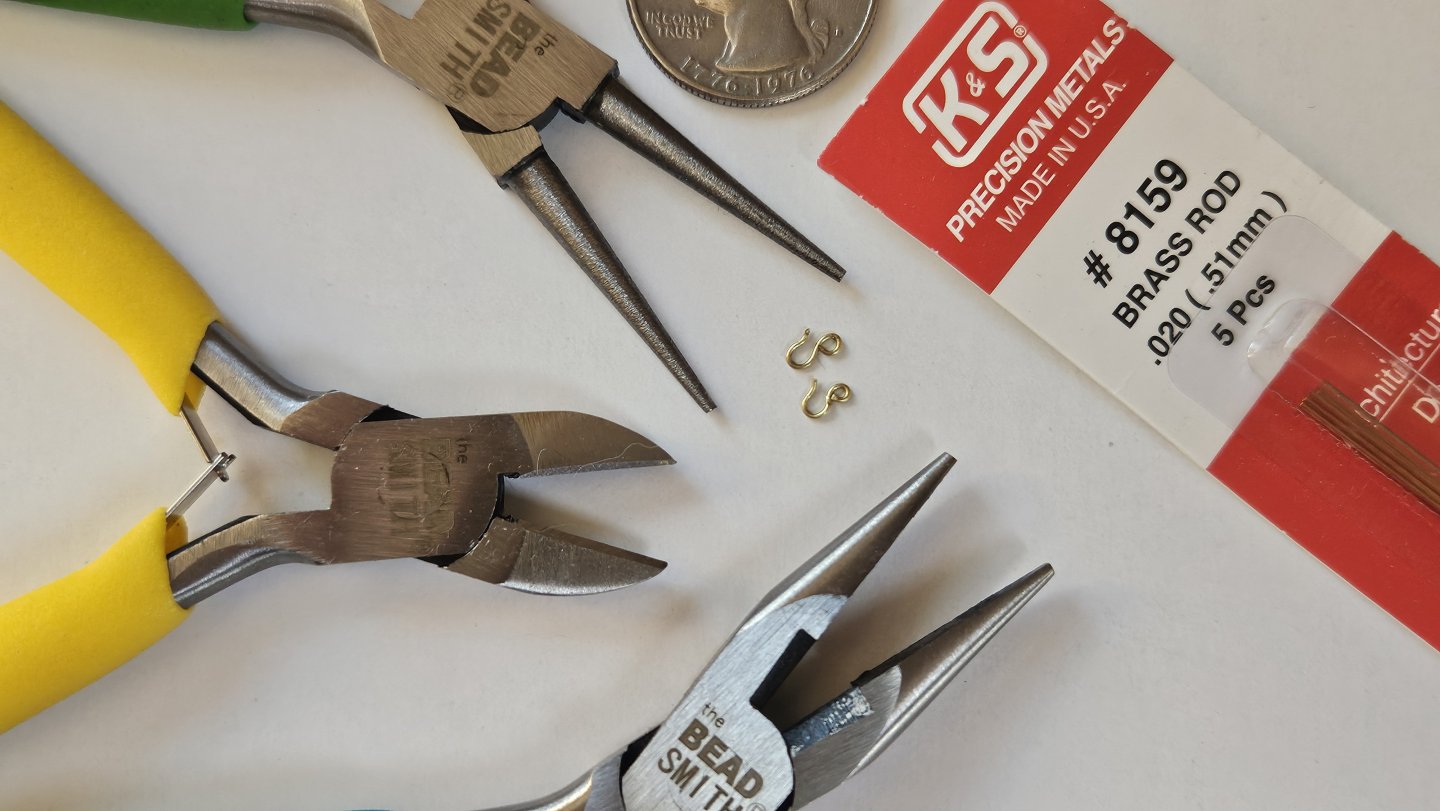
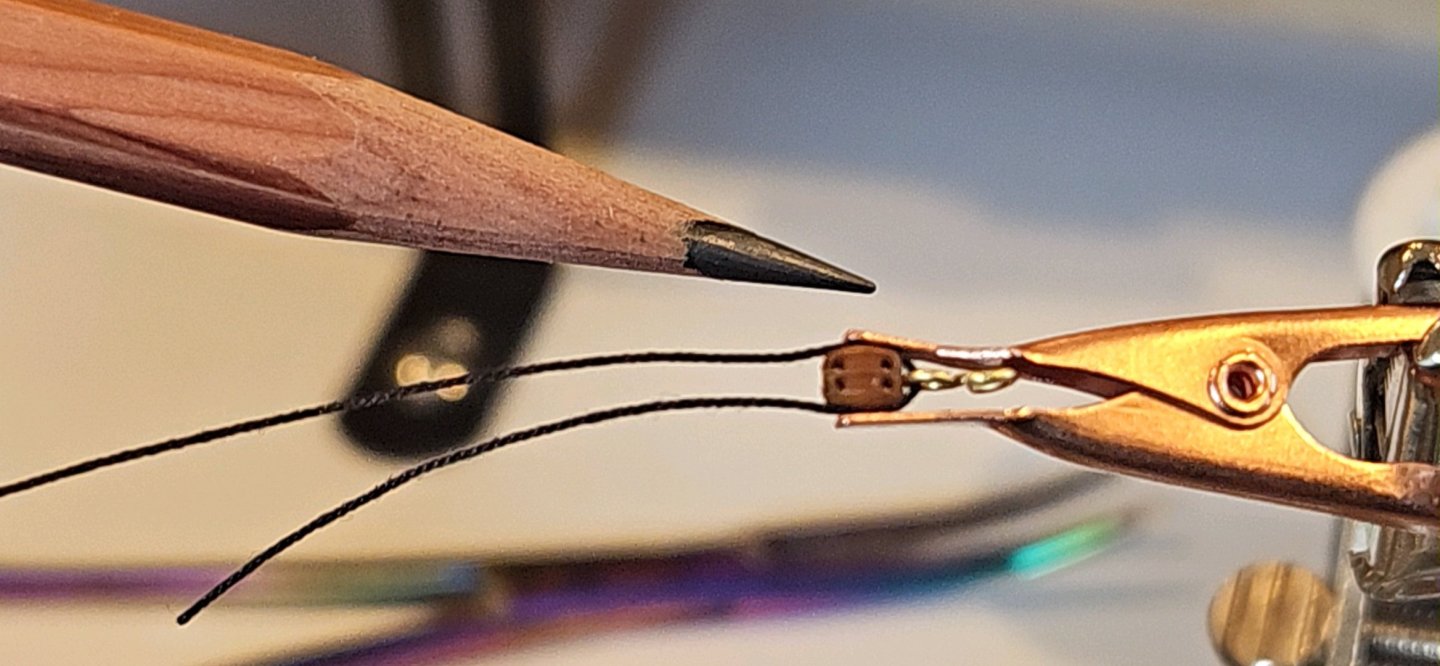
@Dr PR Hey Phil! Yeah, the hooks are homemade. K&S brass 8159 0.020" diameter. Used a Beadsmith round nose pliers. I want to get a different round nose to make smaller hooks. Got any tips for me? Here's a couple prototype hooks. I am getting better at it. Forming. Knowing where to cut and pinch.
-
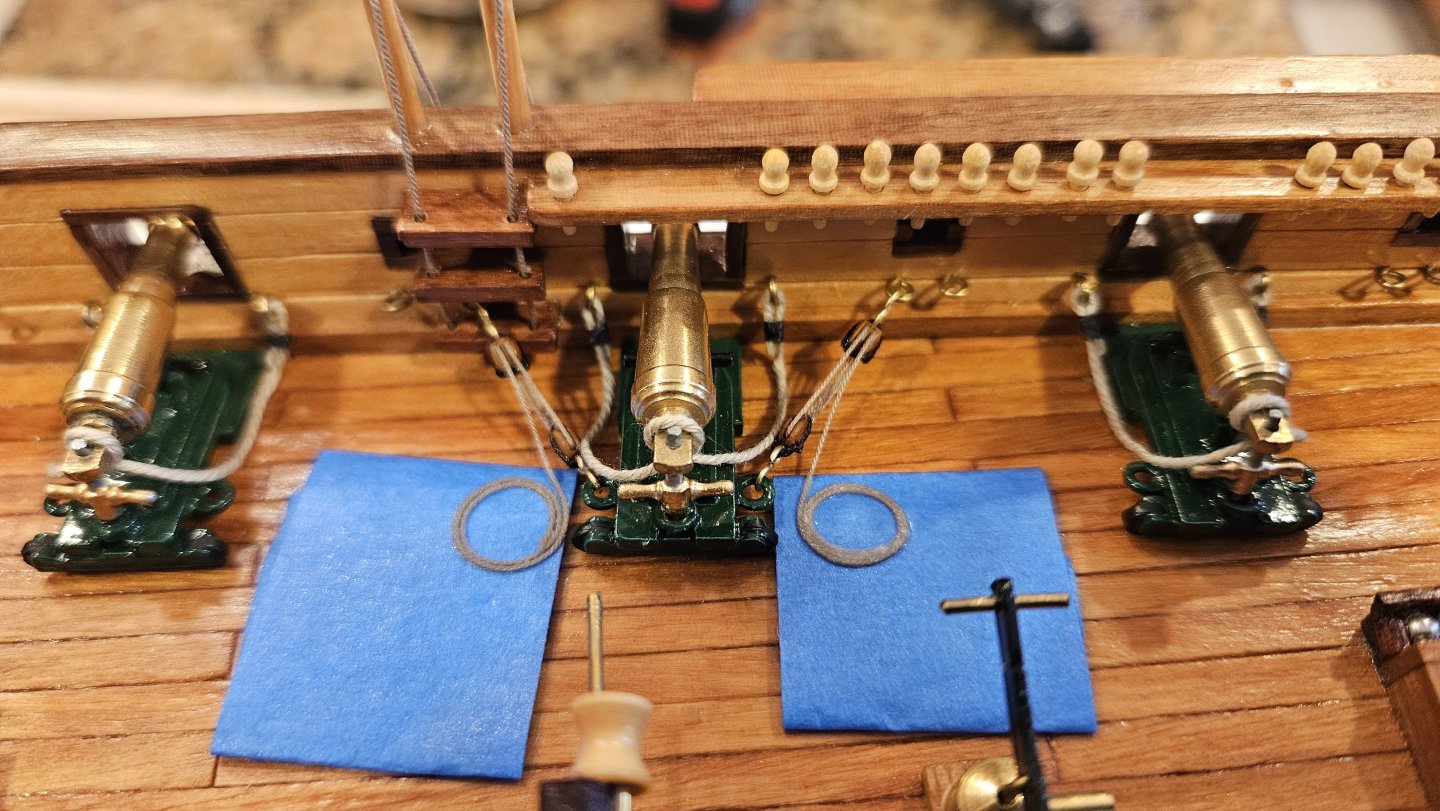
Coils dried so now they are glued to the deck. One down, 17 to go!

-
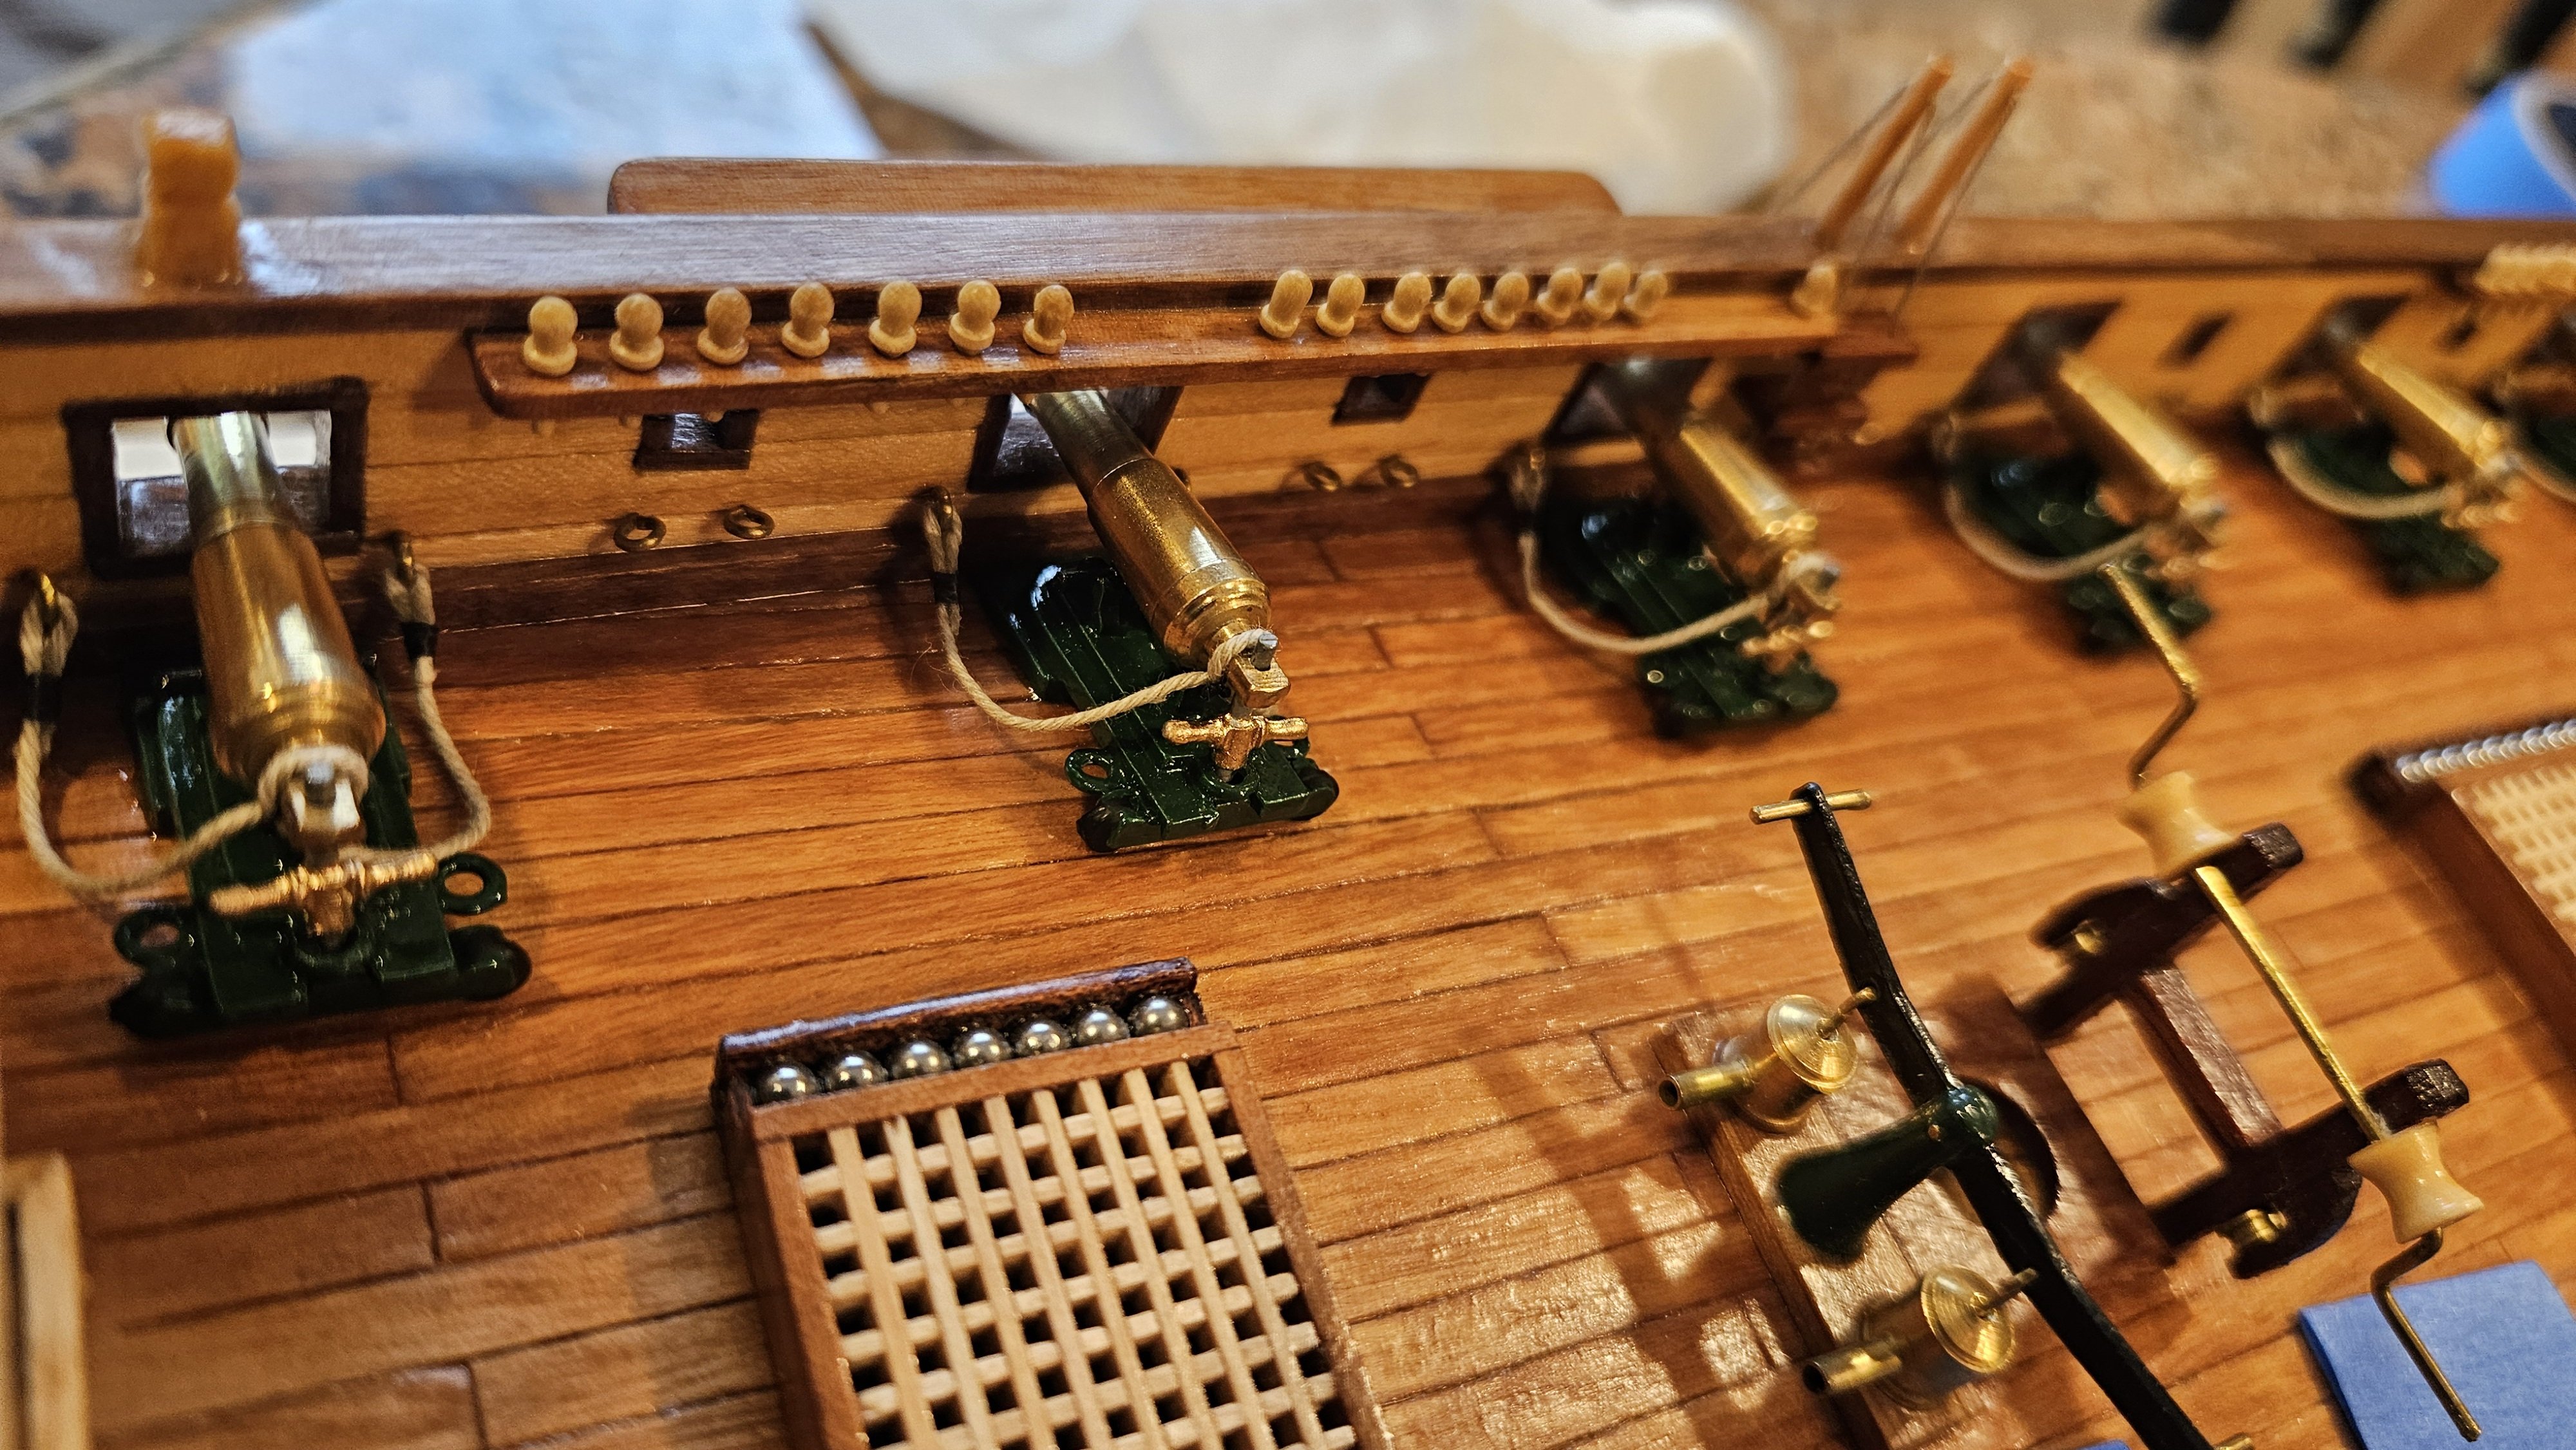
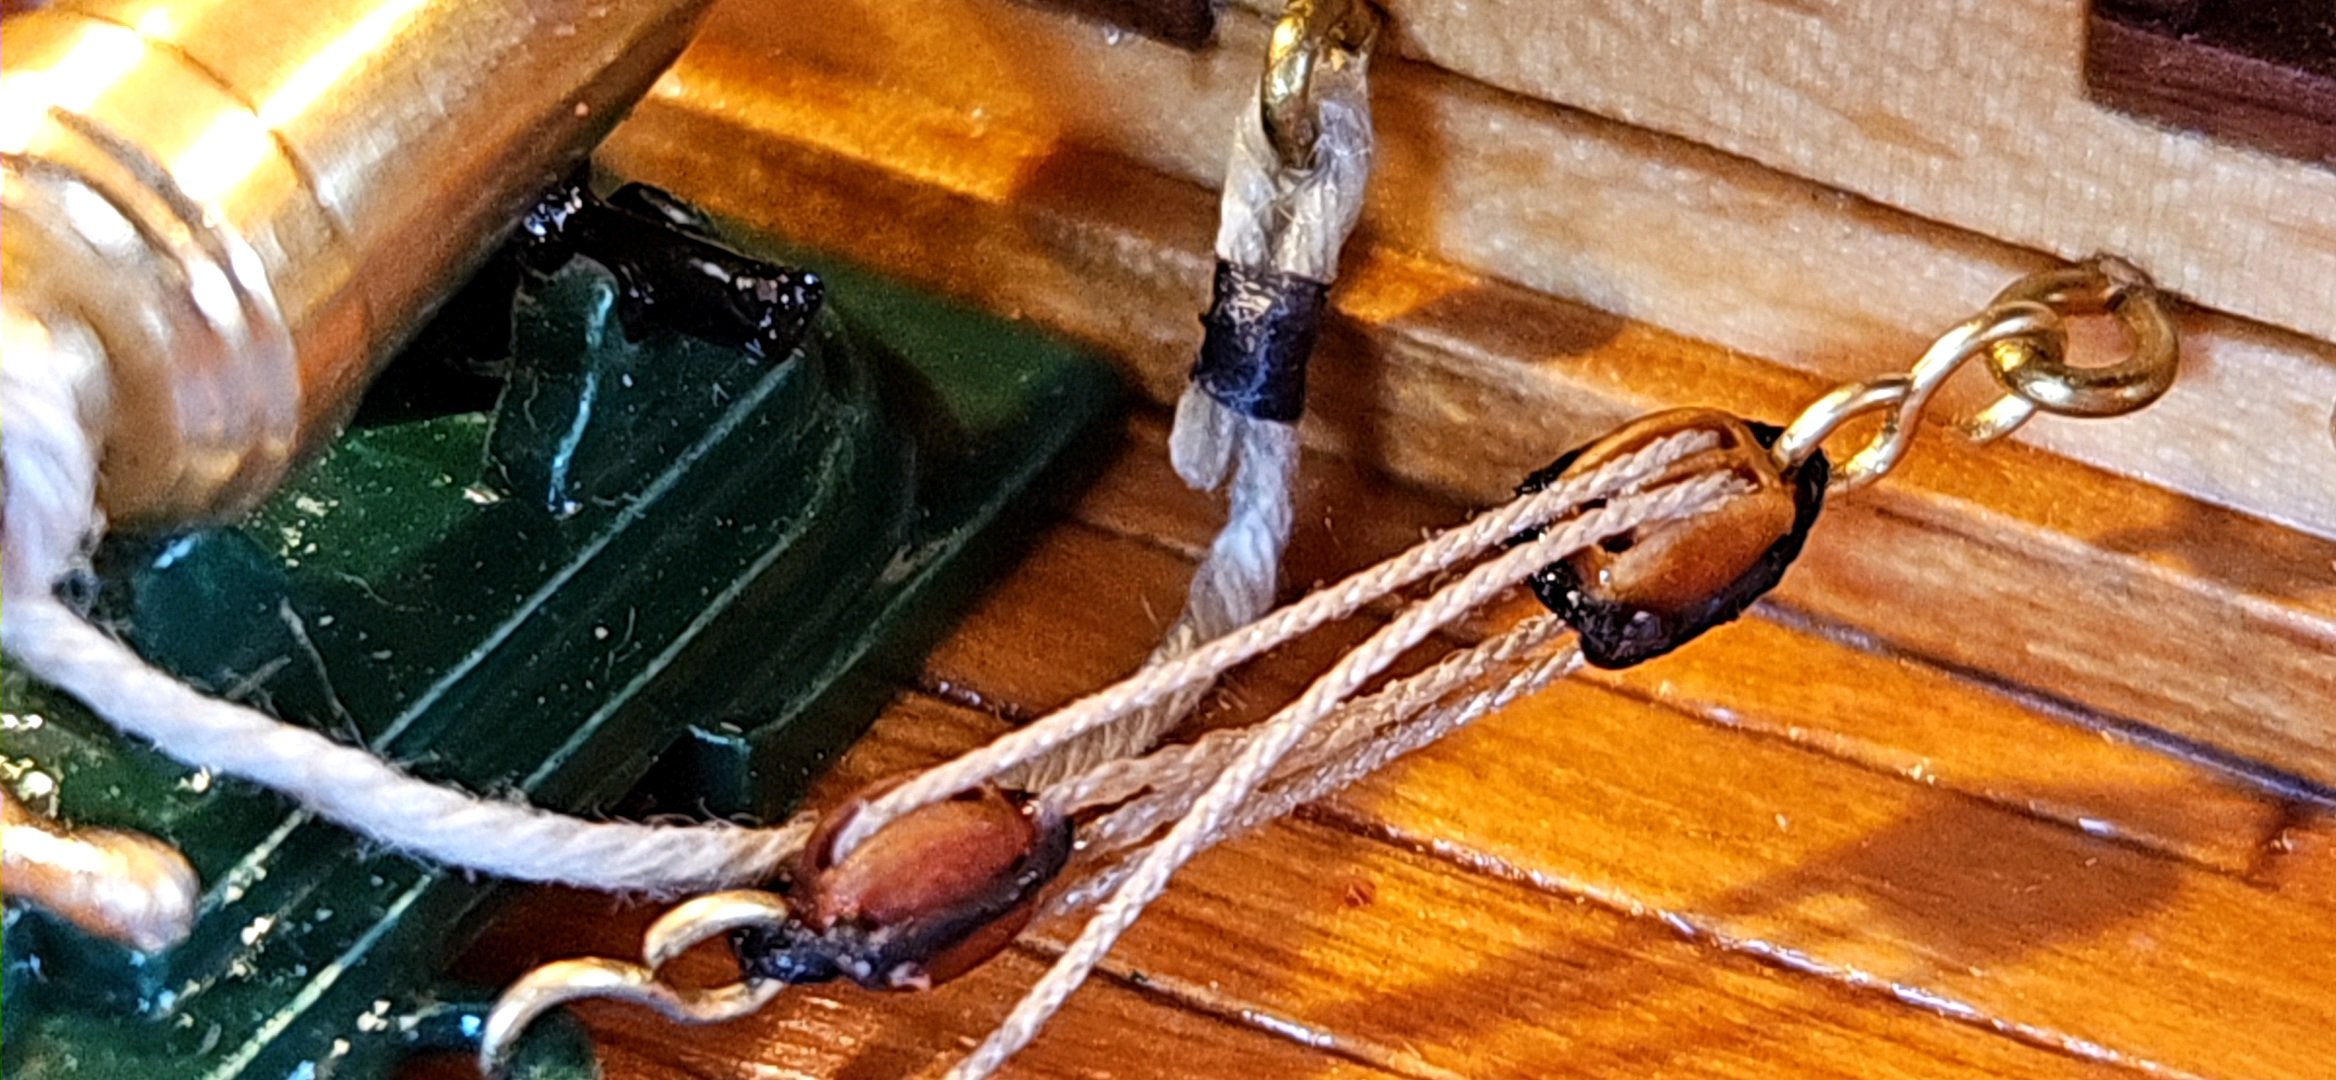
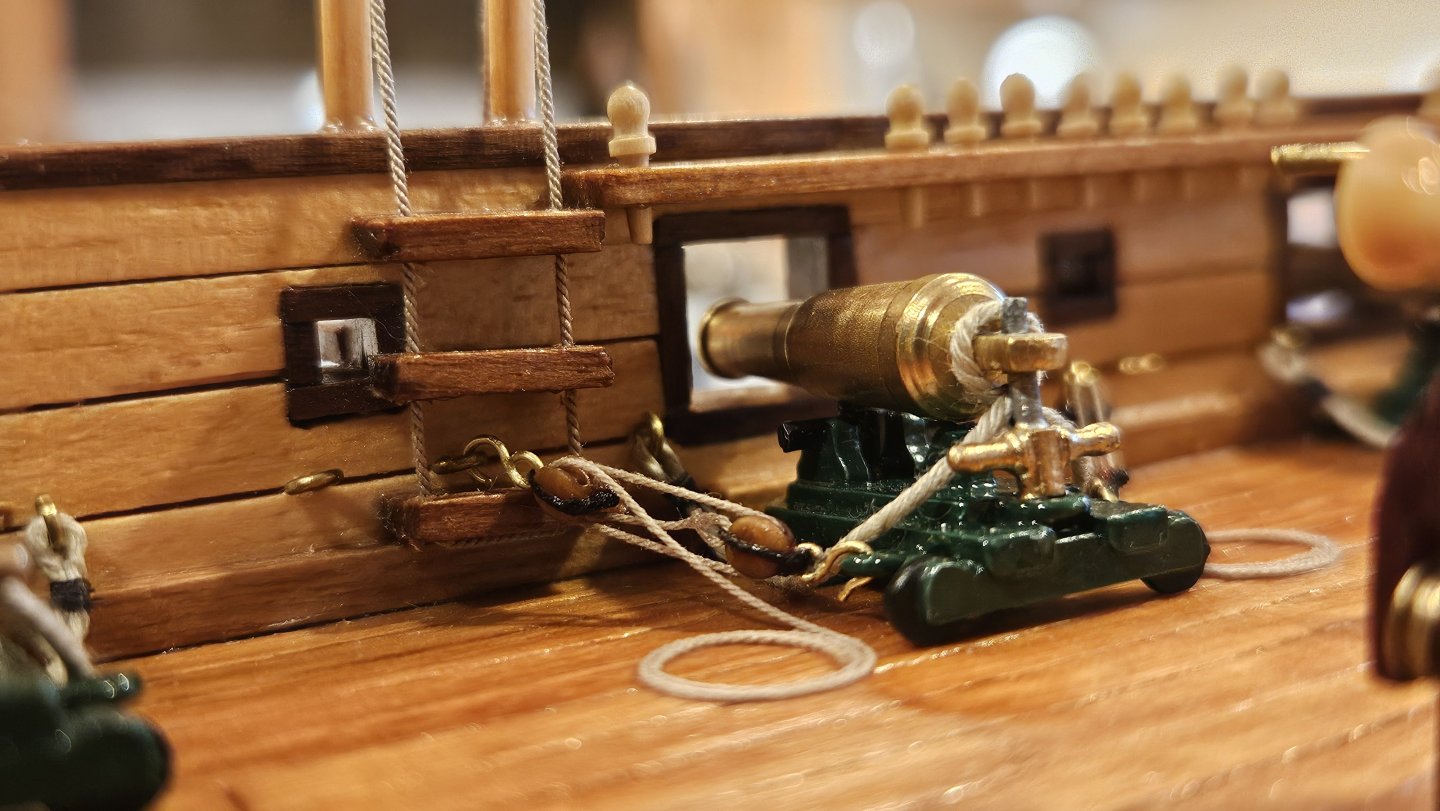
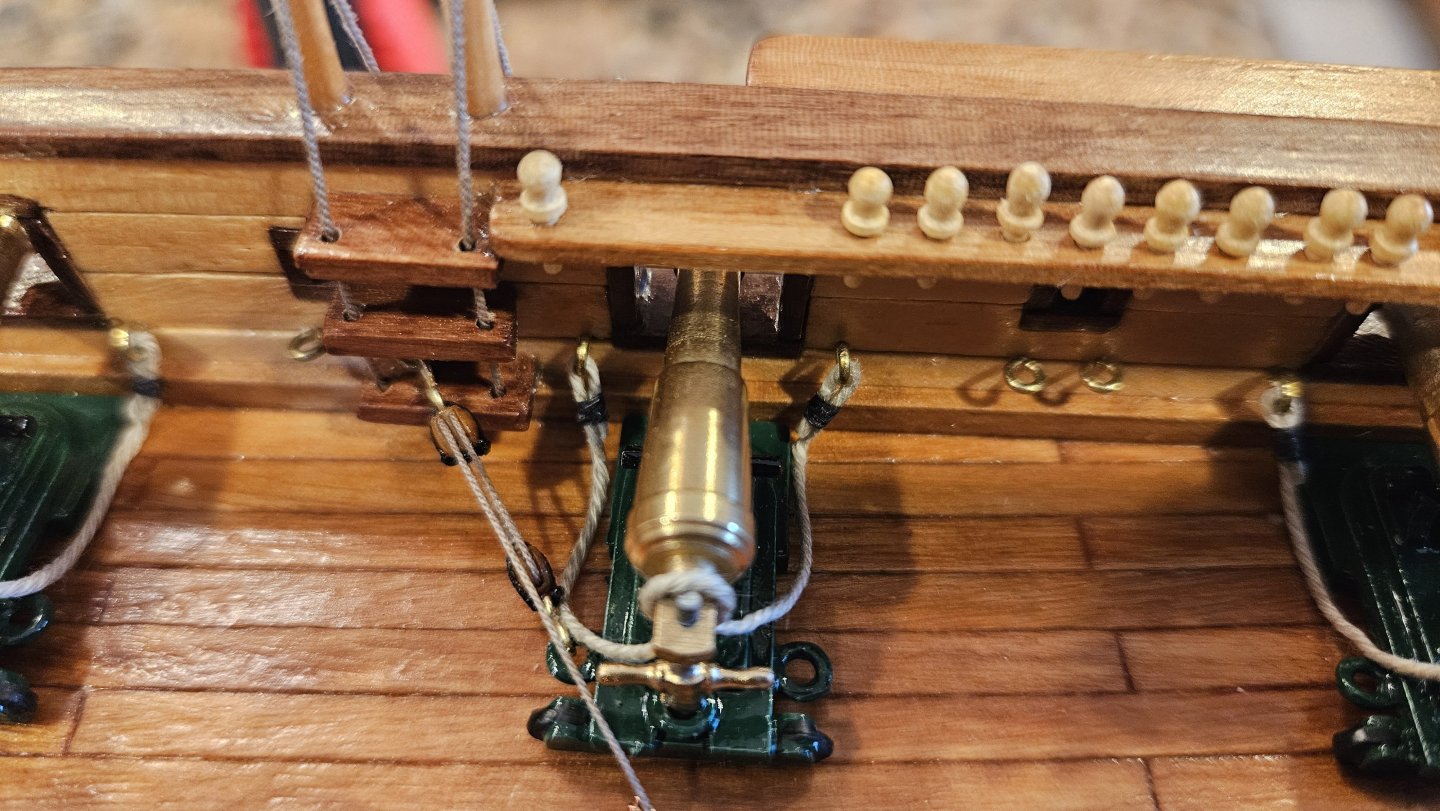
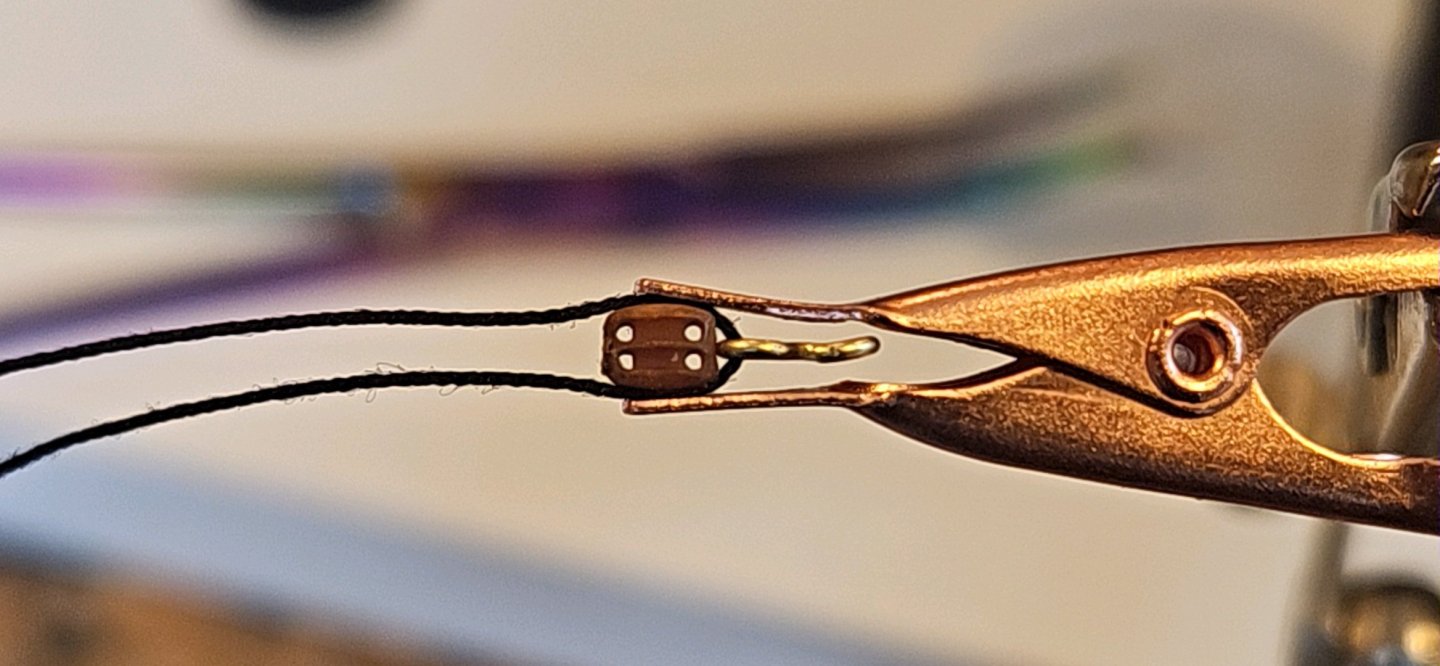
Learning the ropes so to speak. Finished all the carronade breaching lines. Working on my first gun train tackles, I am truly questioning the sanity of people who build model ships. 0.125" blocks?? Pencil for reference... But we persevered. My first ever gun train tackle! And then the second. Now trying to coil the ropes, Olha Batchvarov style. She does hers off the ship. My work is not that precise, to say the least. Waiting on the glue to dry. (Story of my life...) Closeup for details: All comments, tips and constructive criticism welcome!


-
Thanks Phil. I am very thankful to have your Albatros build log as reference for the Prince. The Albatros looks great and is just well thought out.
-
Wow Phil!! That is impressive. You have done your fellow modelers a profound service with keen findings. Thank you very much. I had procured Duco on previous recommendation from you. I have used diluted white glue previously and liked how it soaked in and dried with little indication - so the million dollar question: Does Duco soak in and cure to a nice flat sheen, or do you find we will need to use Duco sparingly and possibly dullcoat afterwards? Your tests are compelling! Edit - I see my million dollar question was asked and answered above - "Duco Cement and the Super Glue did not leave a noticeable residue on the ropes and both were better than white glue." The Duco soaks in nicely then?
-
Thank you for sharing this! What wonderful access you have given us!!
- 301 replies
-
- 5
-

-
- Constitution
- Bluejacket Shipcrafters
- (and 1 more)
-
Really makes me want to experiment more with shellac as it seems to penetrate really well compared to other options. I would guess the tensile strength is nothing compared to super glue though. 🤔 Glad you're sharing your experiences Phil. Thanks as always.
-
Very interesting report Phil. I too had similar issues with the plastic hooks, and this was with them just out of the package. Concern for performance over time forced me to switch to handmade brass. I was hoping to avoid the CA for the majority of my rigging. It looks like that may not work as I have been enjoying the look of Syren's poly-cotton rope. Thanks for the tips. I have been using superglue to make eyes on my breeching lines and then seizing per Ashley's. I coat the seizings with diluted white glue and have been fine. But breeching lines are unstressed. I was gonna switch to white glue only after the guns, but now we know. Ugh. Glad to see things getting straightened out.
-
Wow - the trucks and ribs look just perfect on the model. Very nice!
- 301 replies
-
- 4
-

-
-
- Constitution
- Bluejacket Shipcrafters
- (and 1 more)
-
Very pretty. Very clean. Wow!
-
Love the family aspect of this build Mark! Just a fabulous project. (I was gonna say "fabulous endeavor", but, well - you know...) 😉
-
That pump looks really good. I couldn't identify what the body was until I read the description. Very nice work!
-
Mark - if you do decide to make sails the Sig Aircraft Silkspan techniques look good - that is what I am going to try. I bought the thinnest of I think three thicknesses direct from Sig for 1:58 scale. I think there was a recent NRG presentation on the subject as well. (Full disclosure - never made sails, haven't even mounted my masts - I guess my advice is worth what you're paying for it 🤣.)
-
Good to see you at it Bob. Can't wait to see her finished. "I love it when a plan comes together!" Happy building sir.
-
My condolences sir. I am sorry to hear of your friend's passing. I am glad to see you honoring his work with yours. He was a genuine craftsman based on the work you've shown us.
-
As an example, I have actually used the following books for my current Prince de Neufchatel build - they have been invaluable: Mastini's Ship Modeling Simplified: Fitting deck structures to the curved deck. (Maybe not invaluable, but a darn good trick.) Chapelle's Search for Speed Under Sail: Bowsprit angle. Rudder fittings. Transom stern shape. Rigging and sail plans. Chapelle's History of American Sailing Ships: Tiller configuration. Bowsprit angle. Confirmed deck layout. The Ashley Book of Knots: Rigging blocks. Seizing lines. Harland's Seamanship in the Age of Sail: Steering gear rigging. How to hoist out a boat that's amidship. Marquardt's The Global Schooner: All things rudder related. Anchor planning (next for me after the guns). And the best part - plans only tell you how to do something. Books tell you why. Great topic!!
-
(and note I was typing book recommendations WHILE you guys were discussing book recommendations so I think we're all on the same track here!!)
-
No problem from my end gents. I love the discussion. But I guess now I'll have to actually get something done on the Prince so we can get back to our regularly scheduled program. Baltimore Clippers/Schooners are an addiction methinks.