Rustyj
-
Posts
2,535 -
Joined
-
Last visited
Content Type
Profiles
Forums
Gallery
Events
Everything posted by Rustyj
-
 Thank you Ian, and for all the likes too.
 -
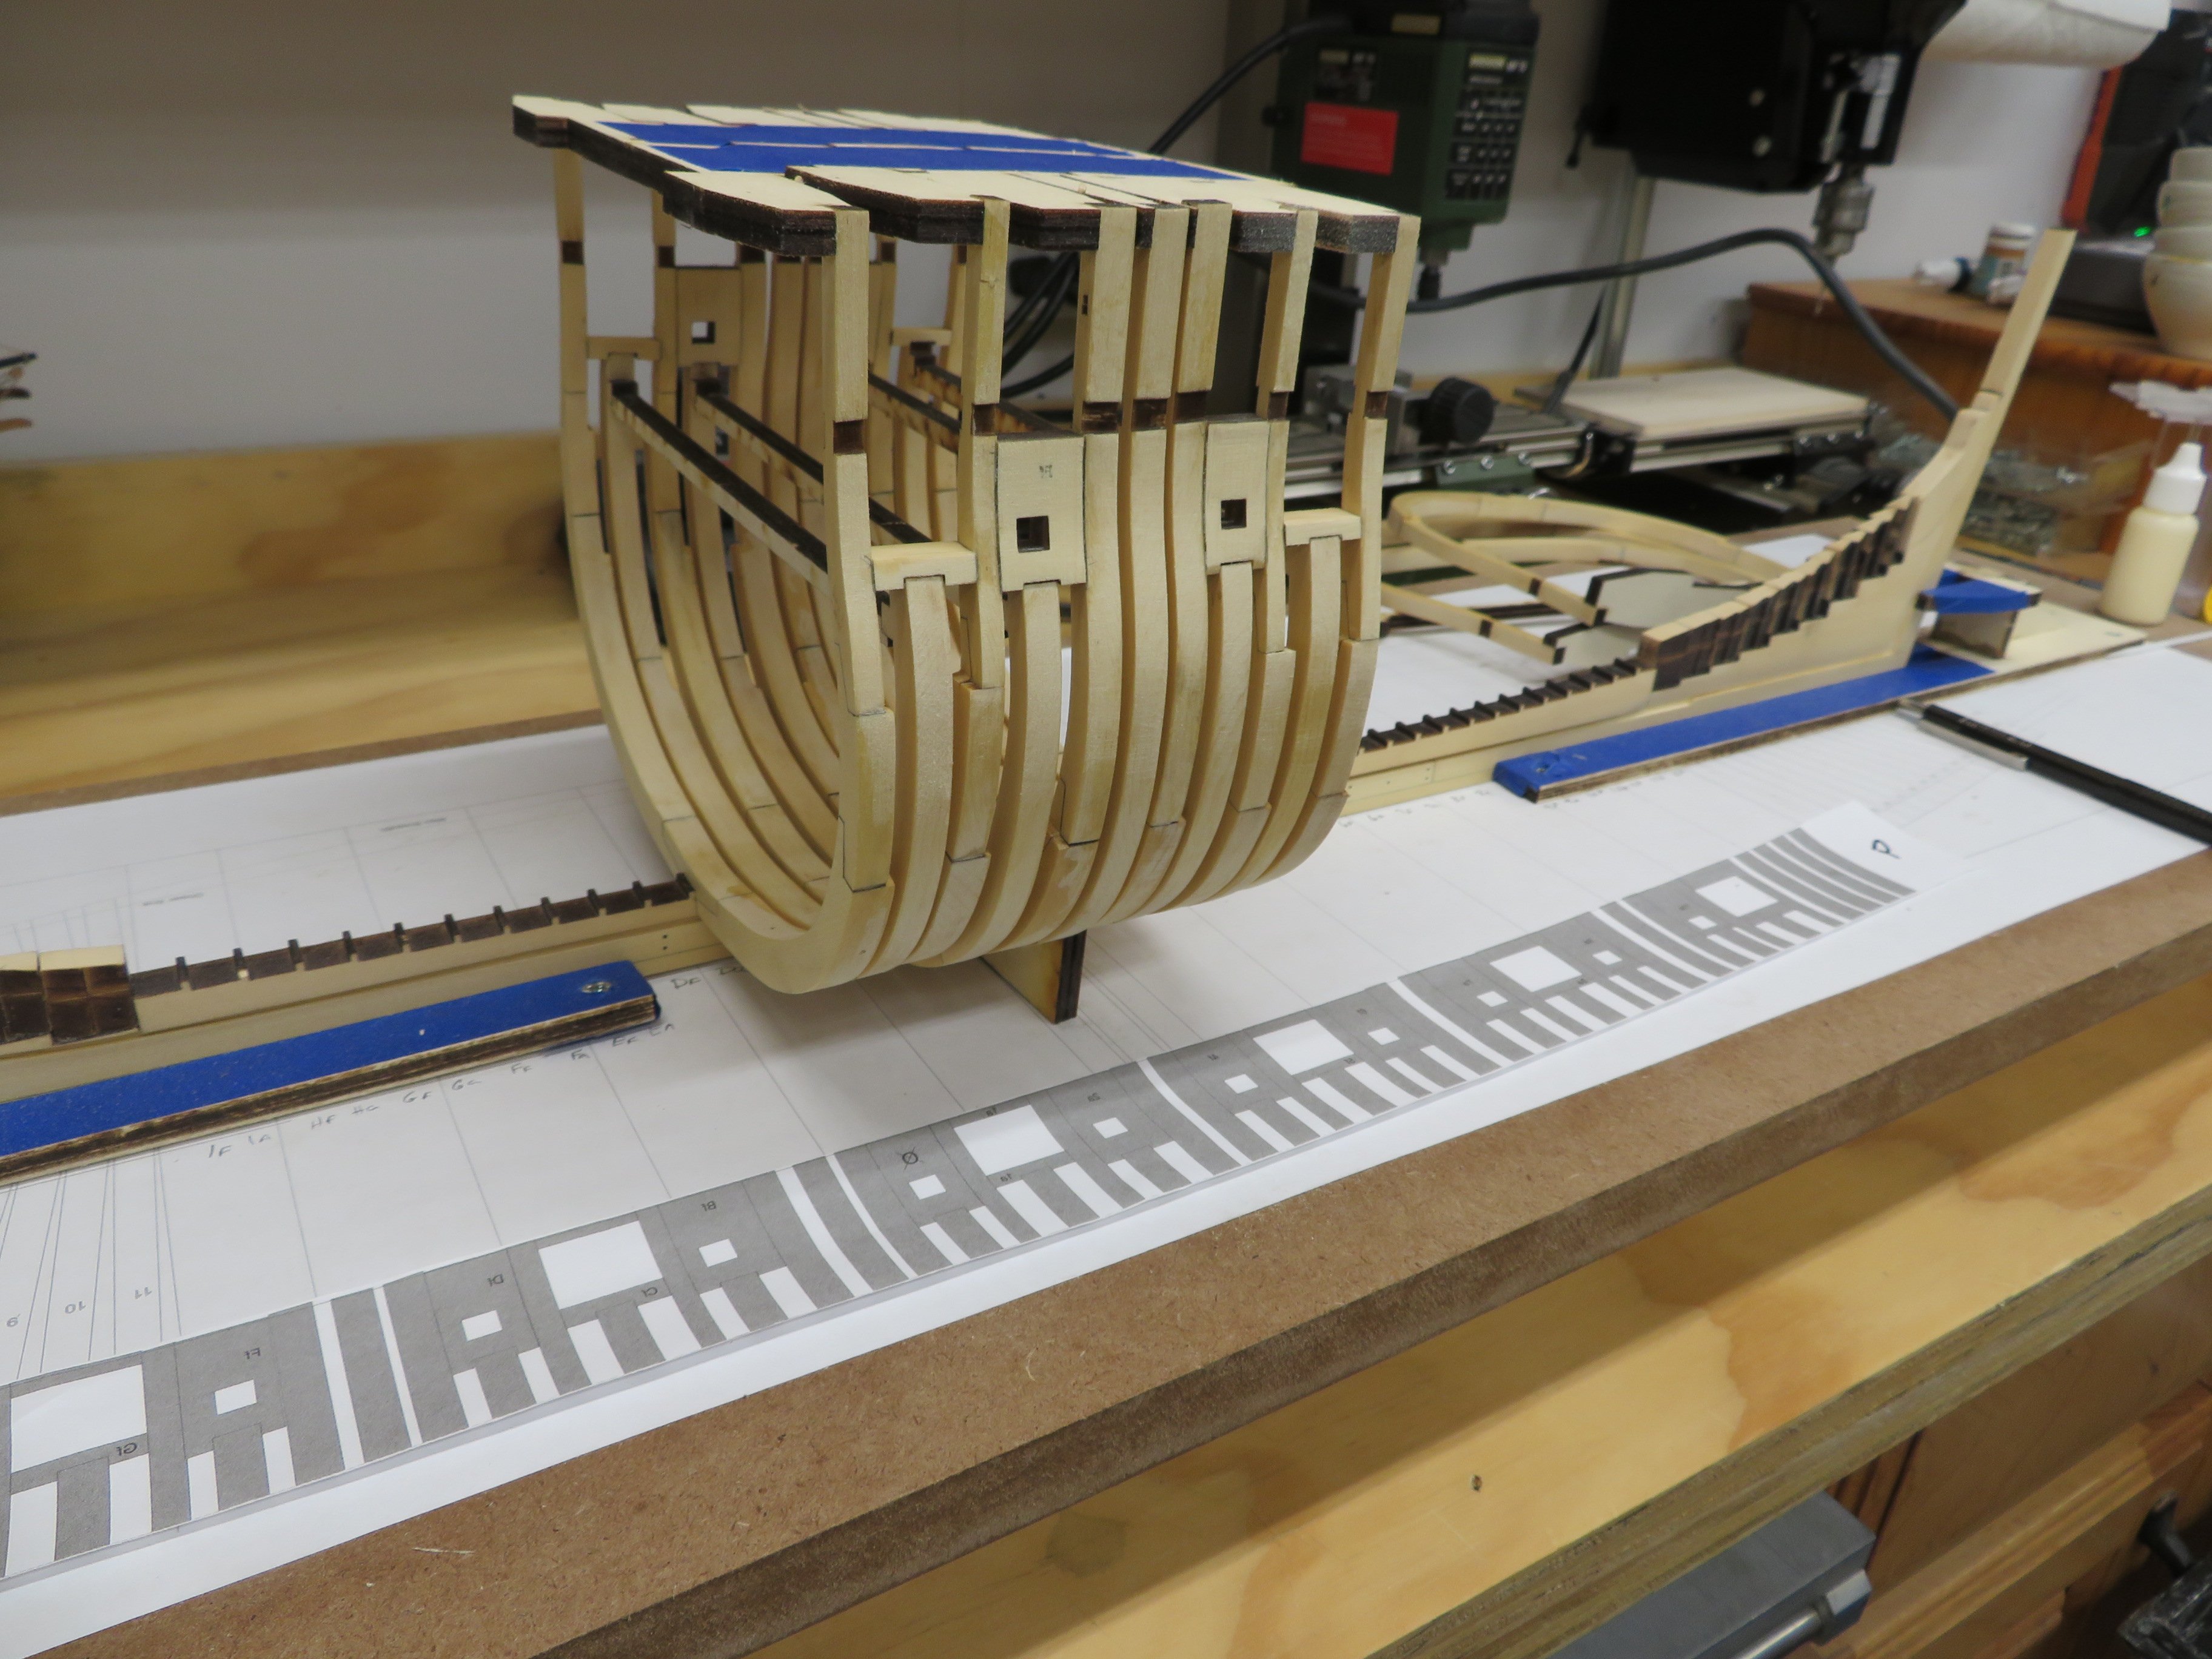
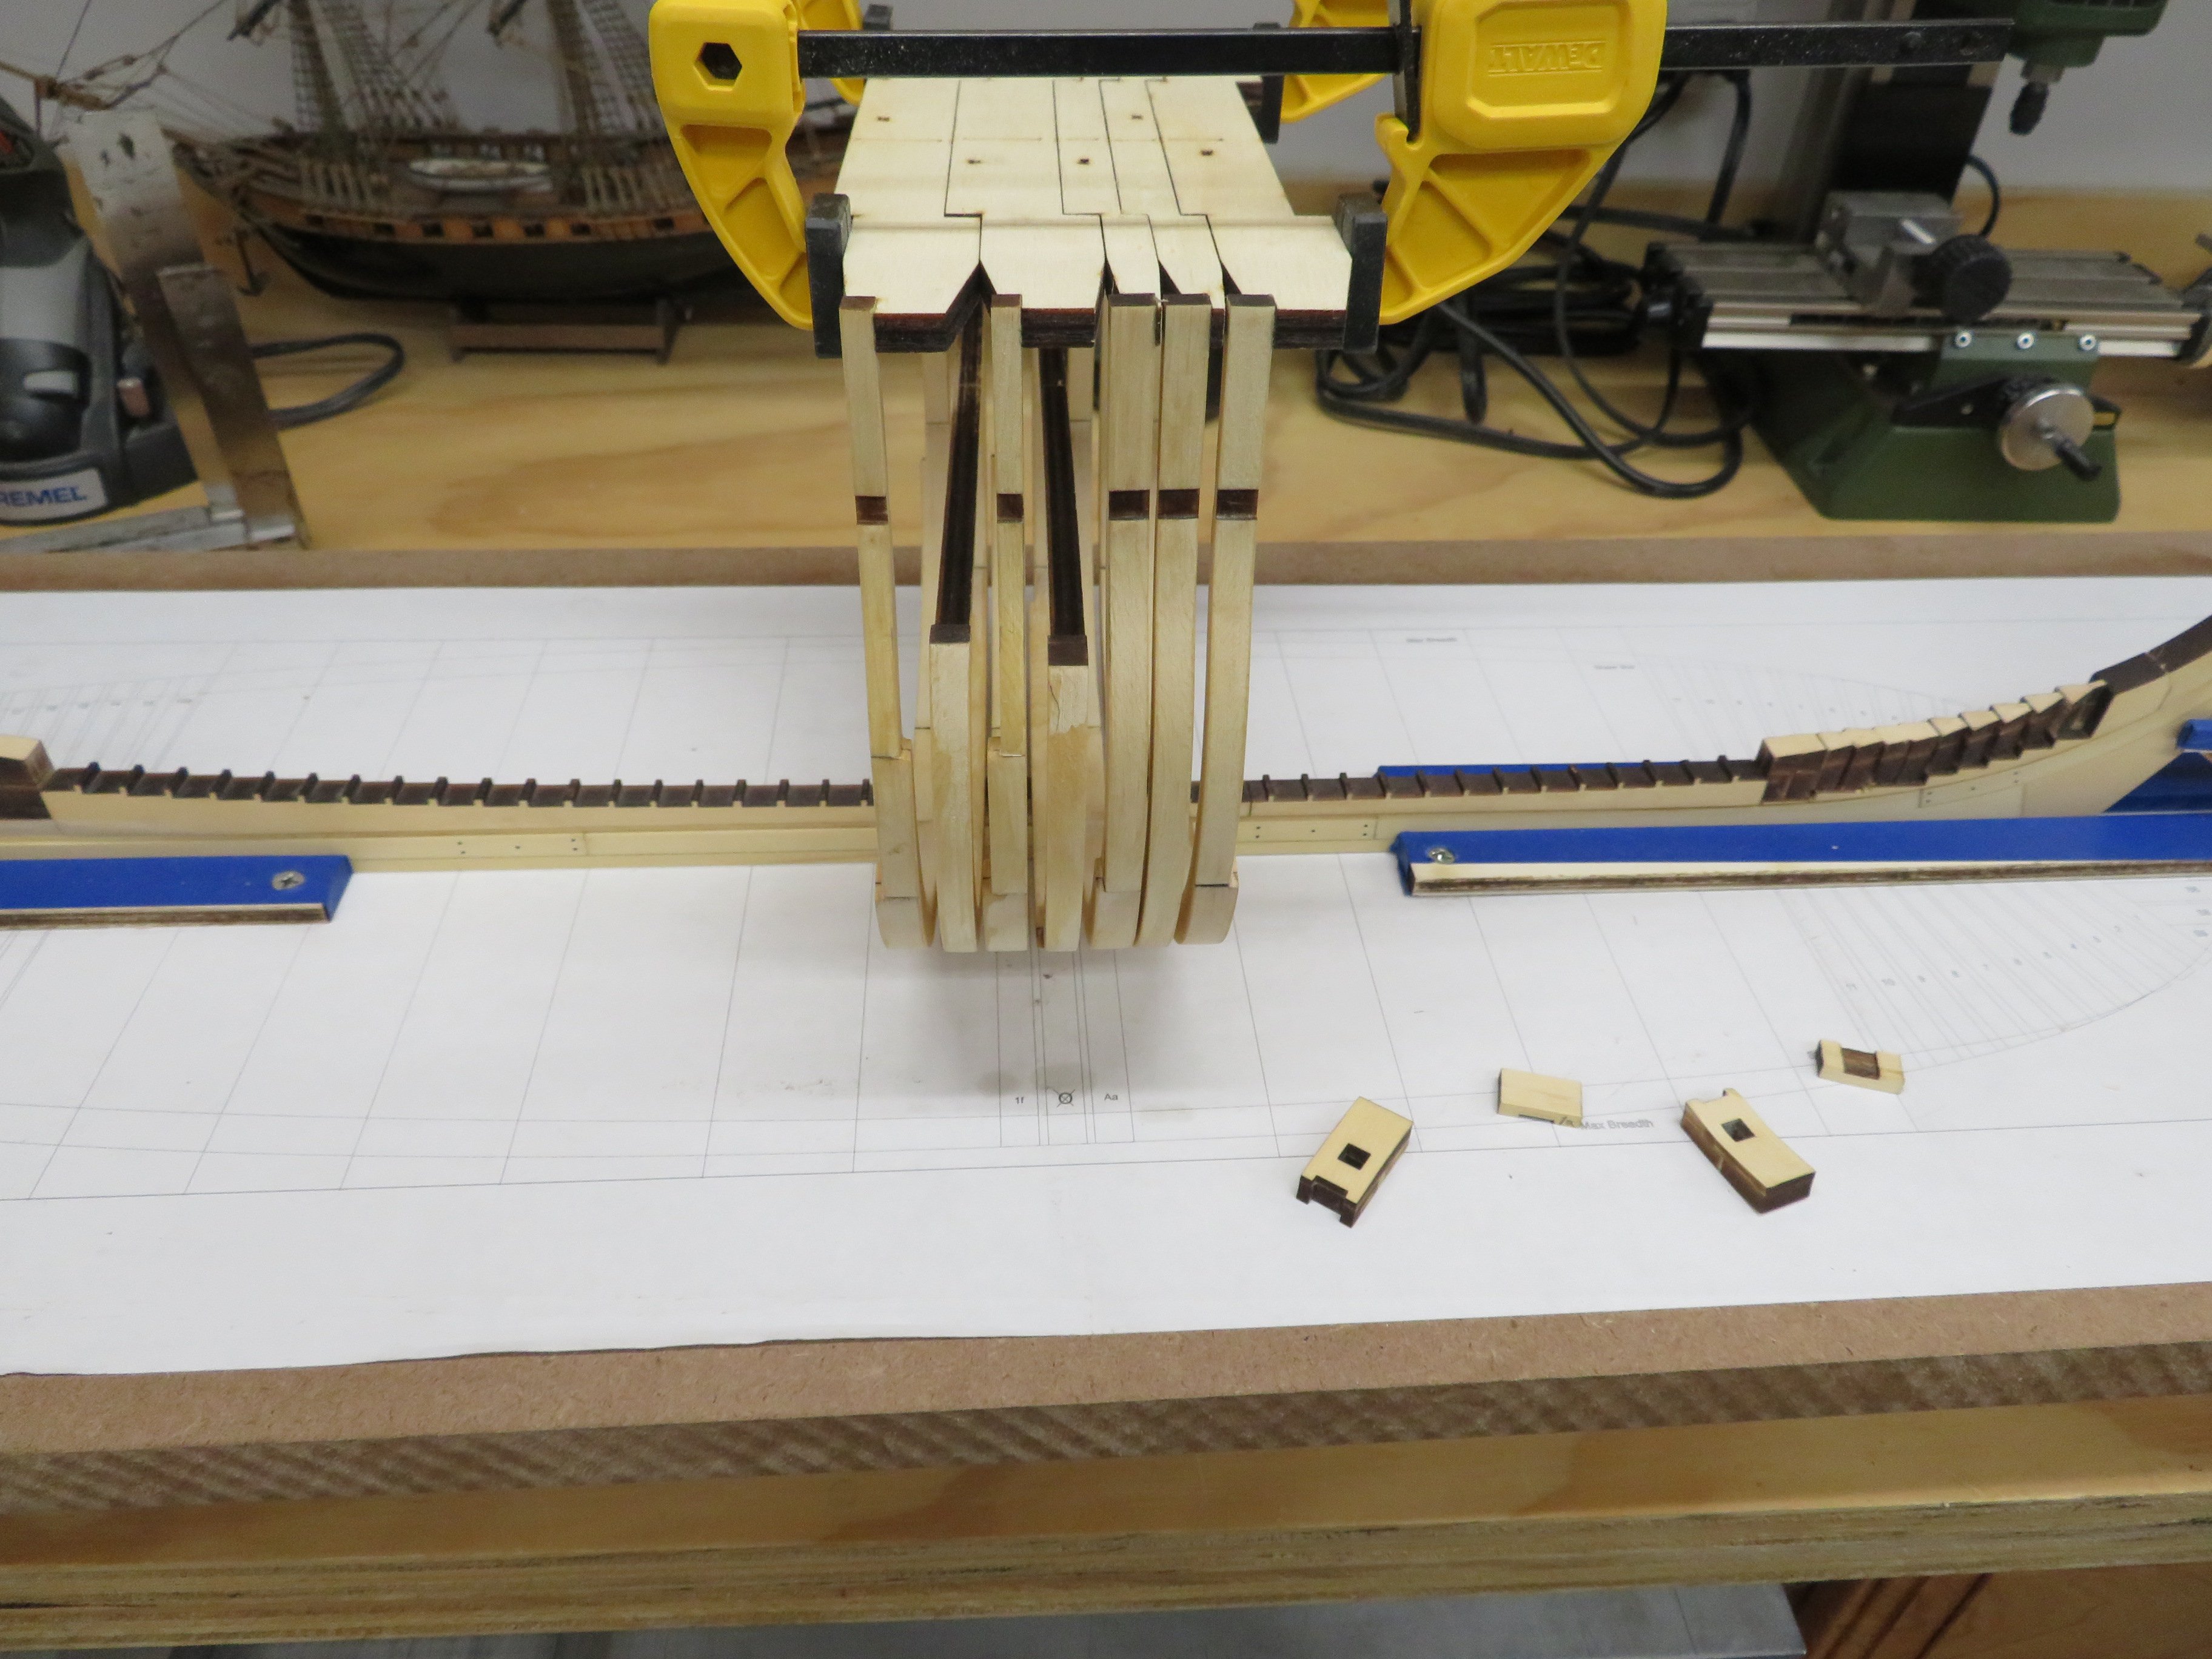
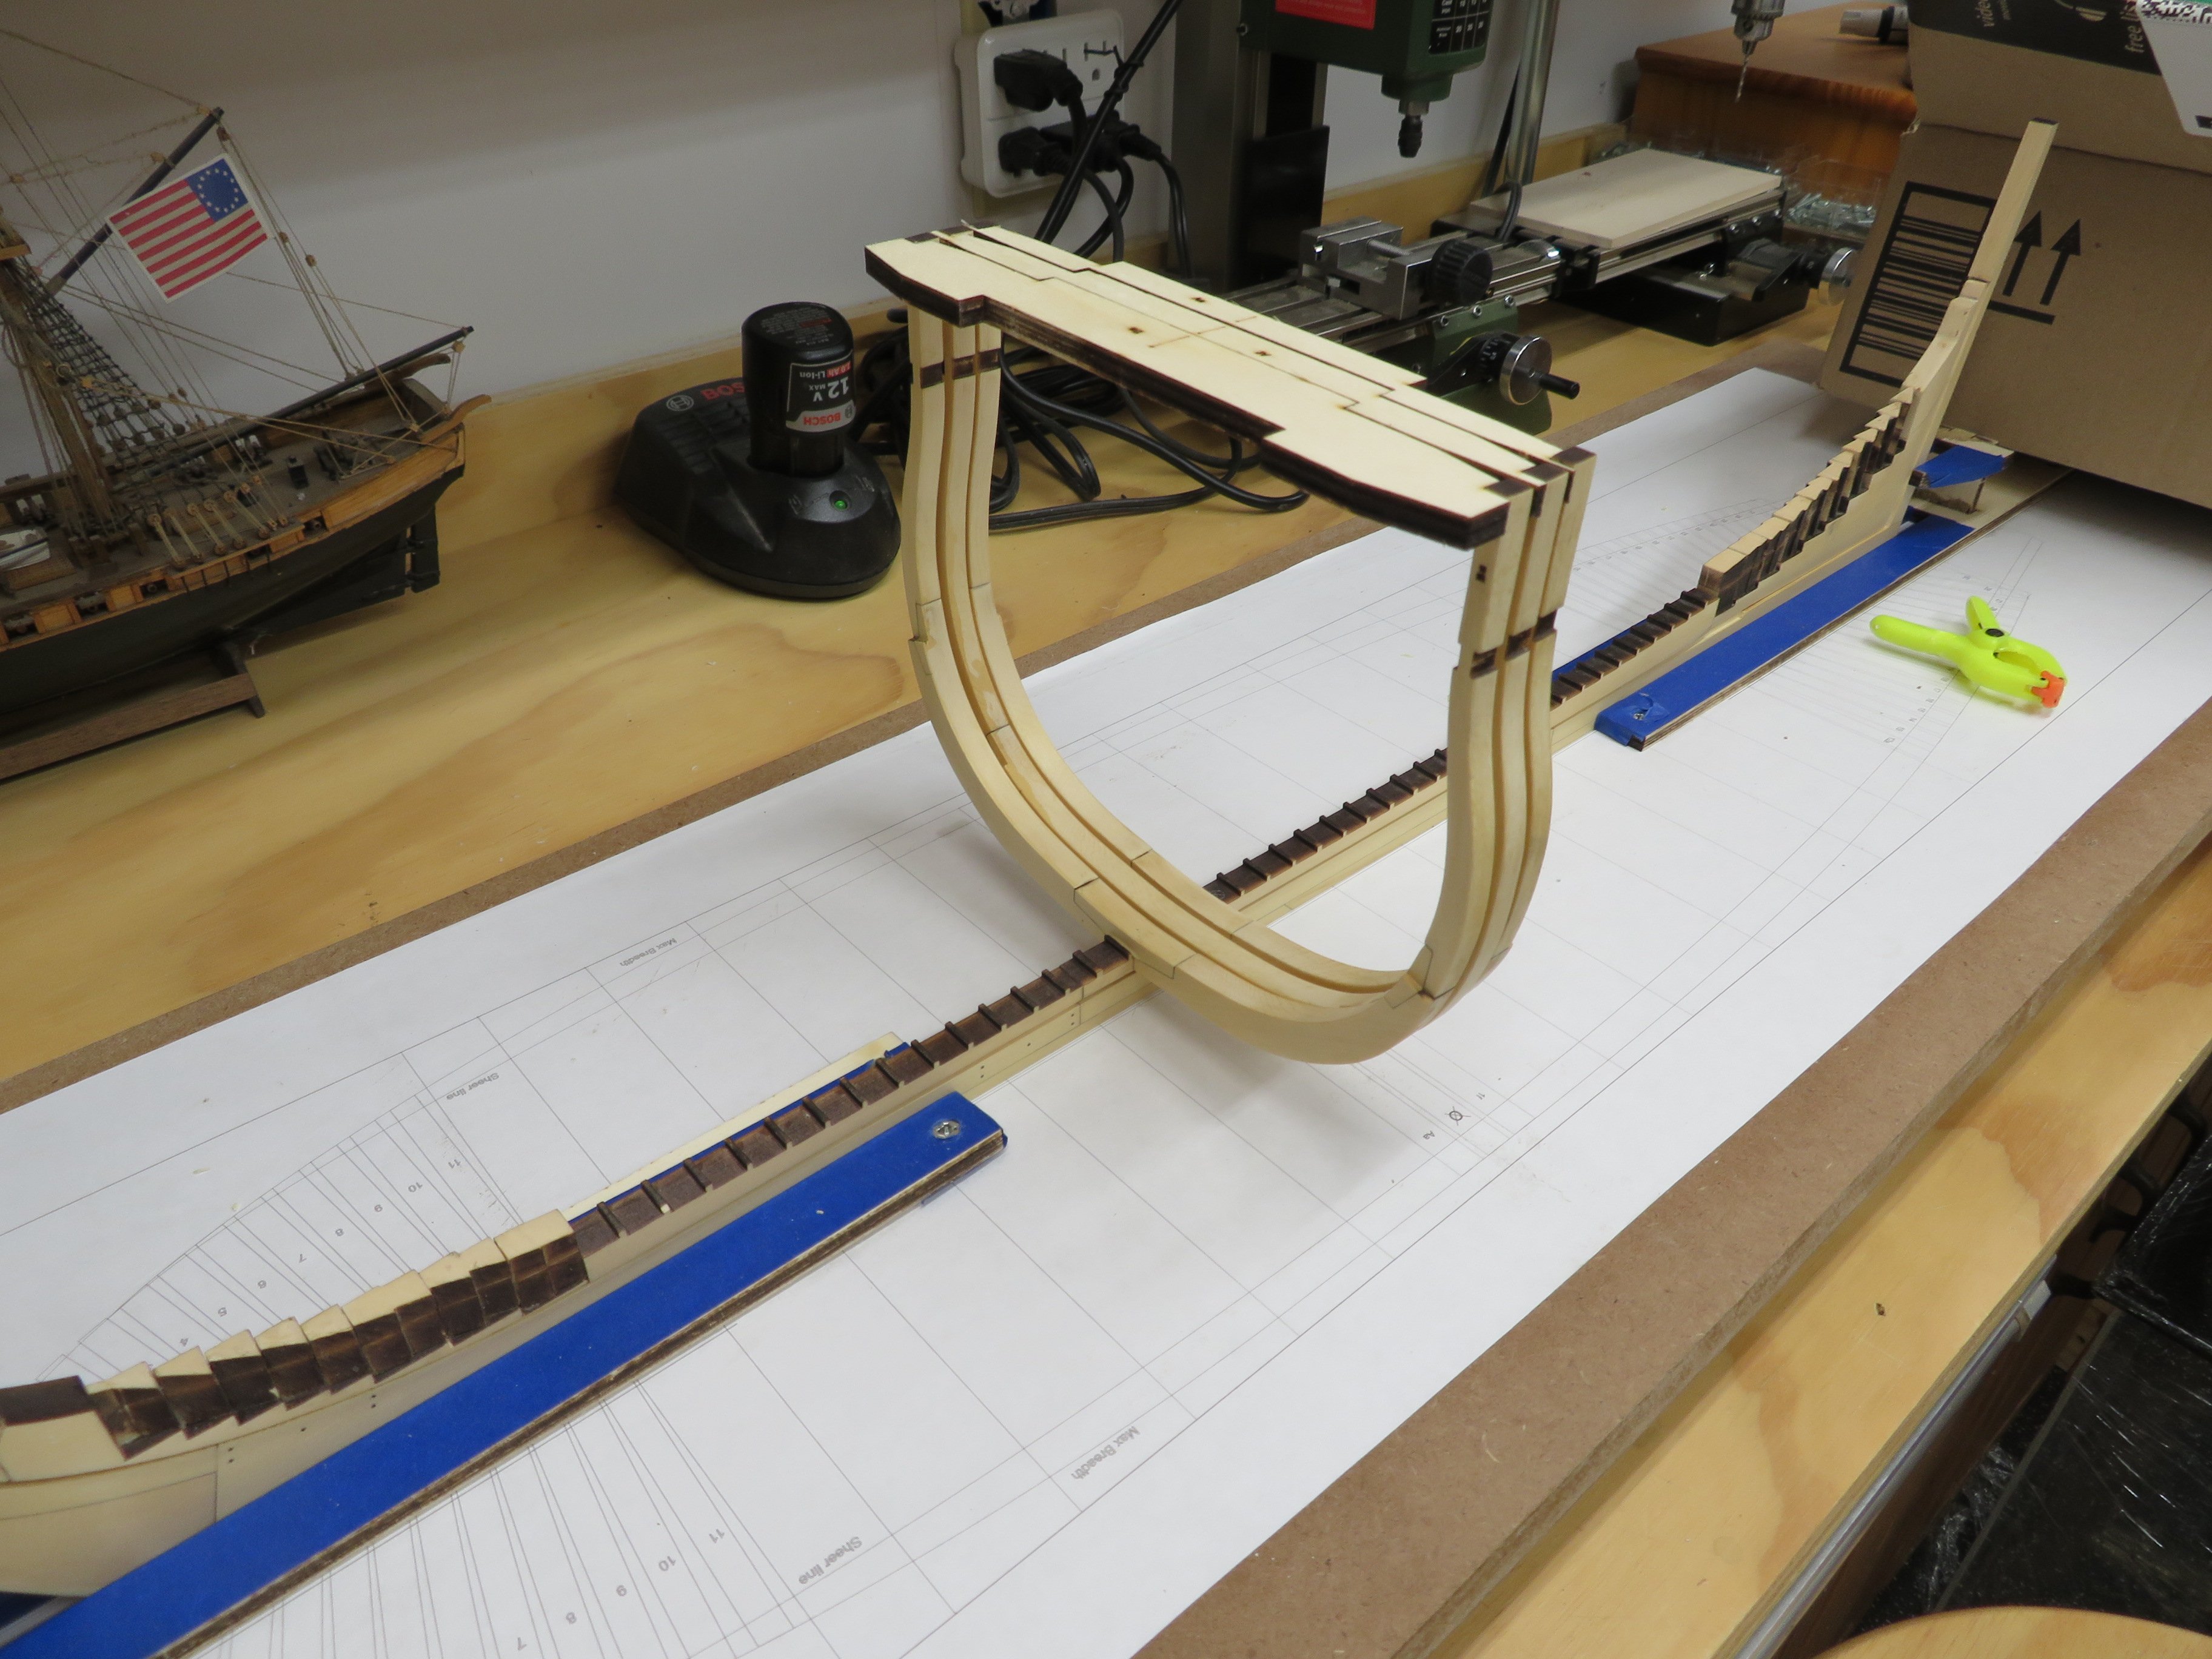
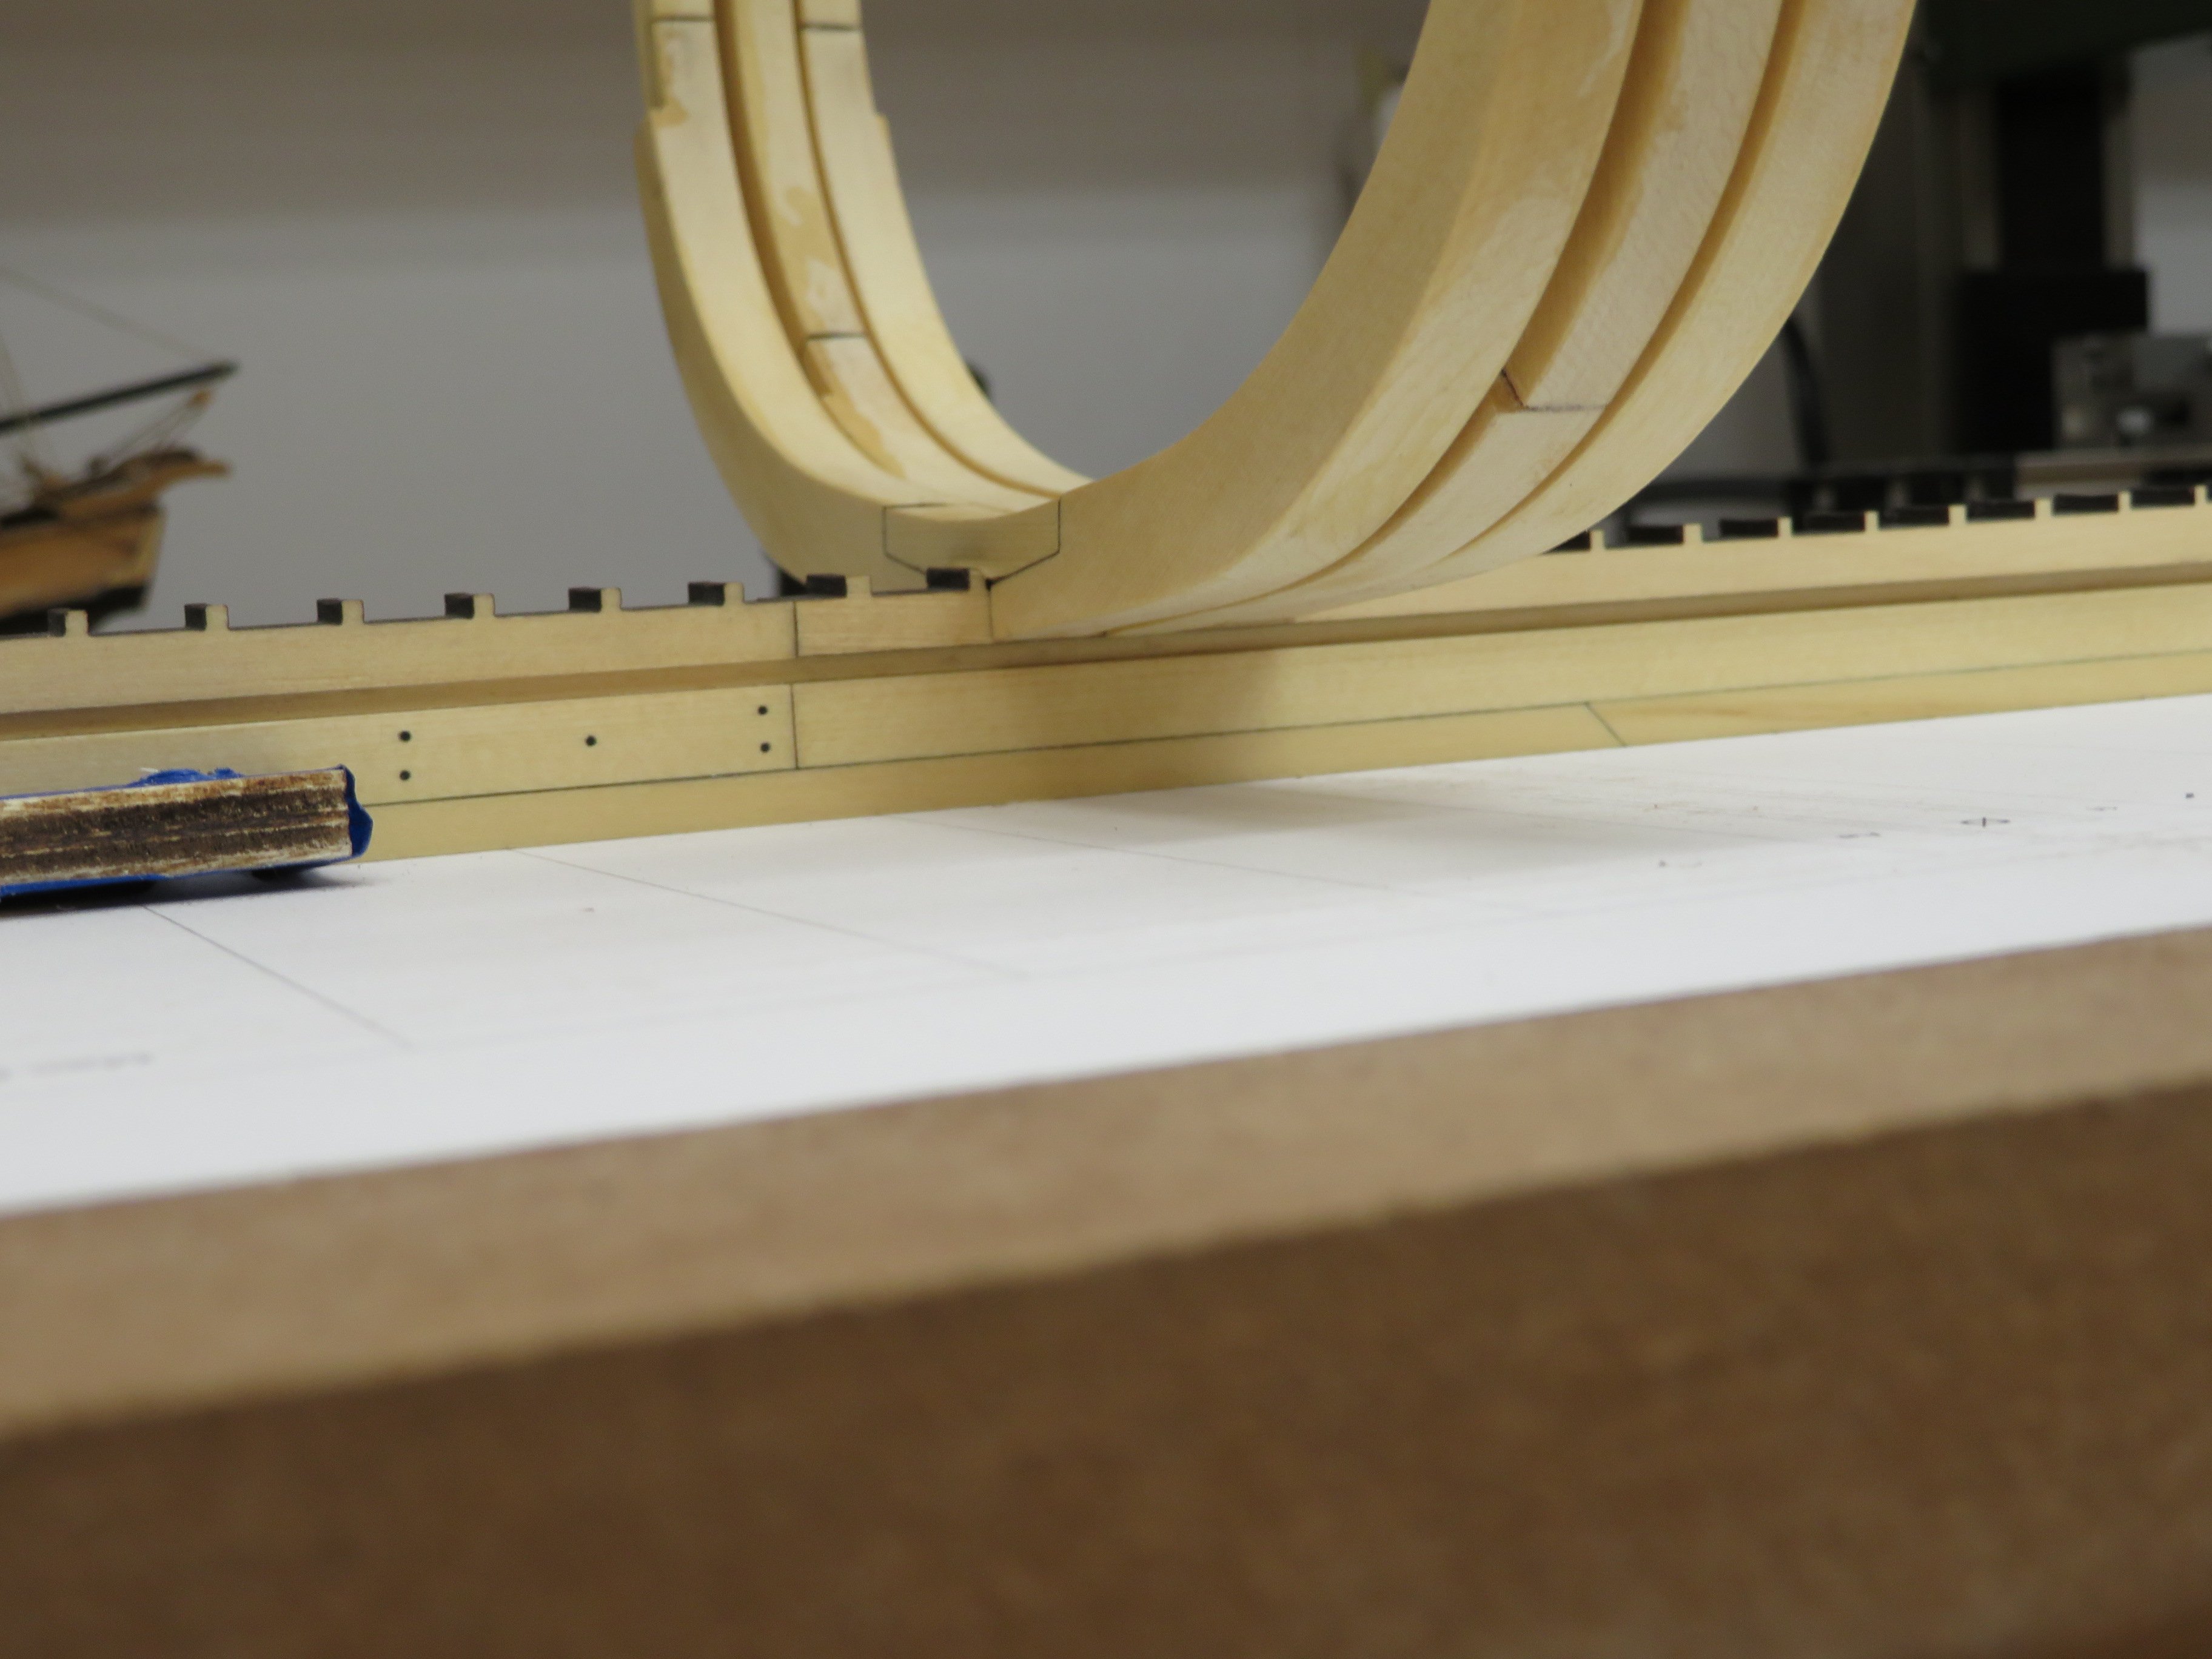
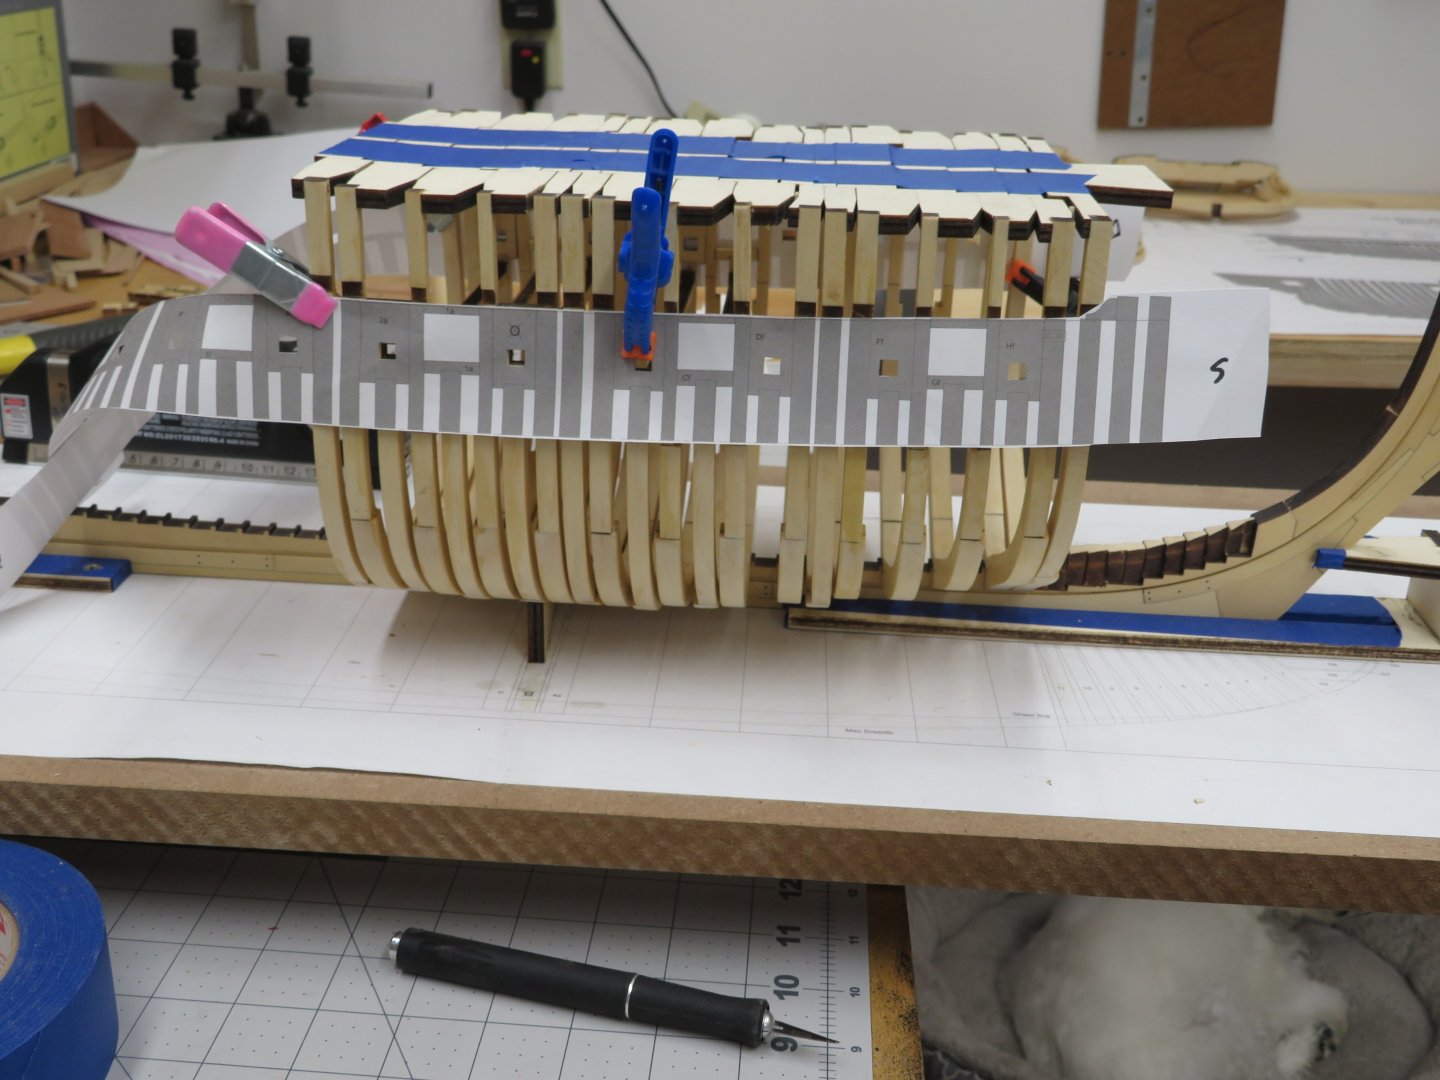
I've now added the four short frames, gun port and sweep port pieces. I haven't done any fairing of the hull yet. Just some minor sanding to blend the gun port and sweep port area. Moving slow and steady and trying to stay as close as possible (for me) to the template. Thanks for stopping by, the likes and comments.

-
Wonderful work and pictures!
-
Great pictures Frank. I never got a chance to stop there last year on our vacation. Thanks for sharing!
-
Thanks Shawn and Rick. I hope you're both having as much fun as I am.
-
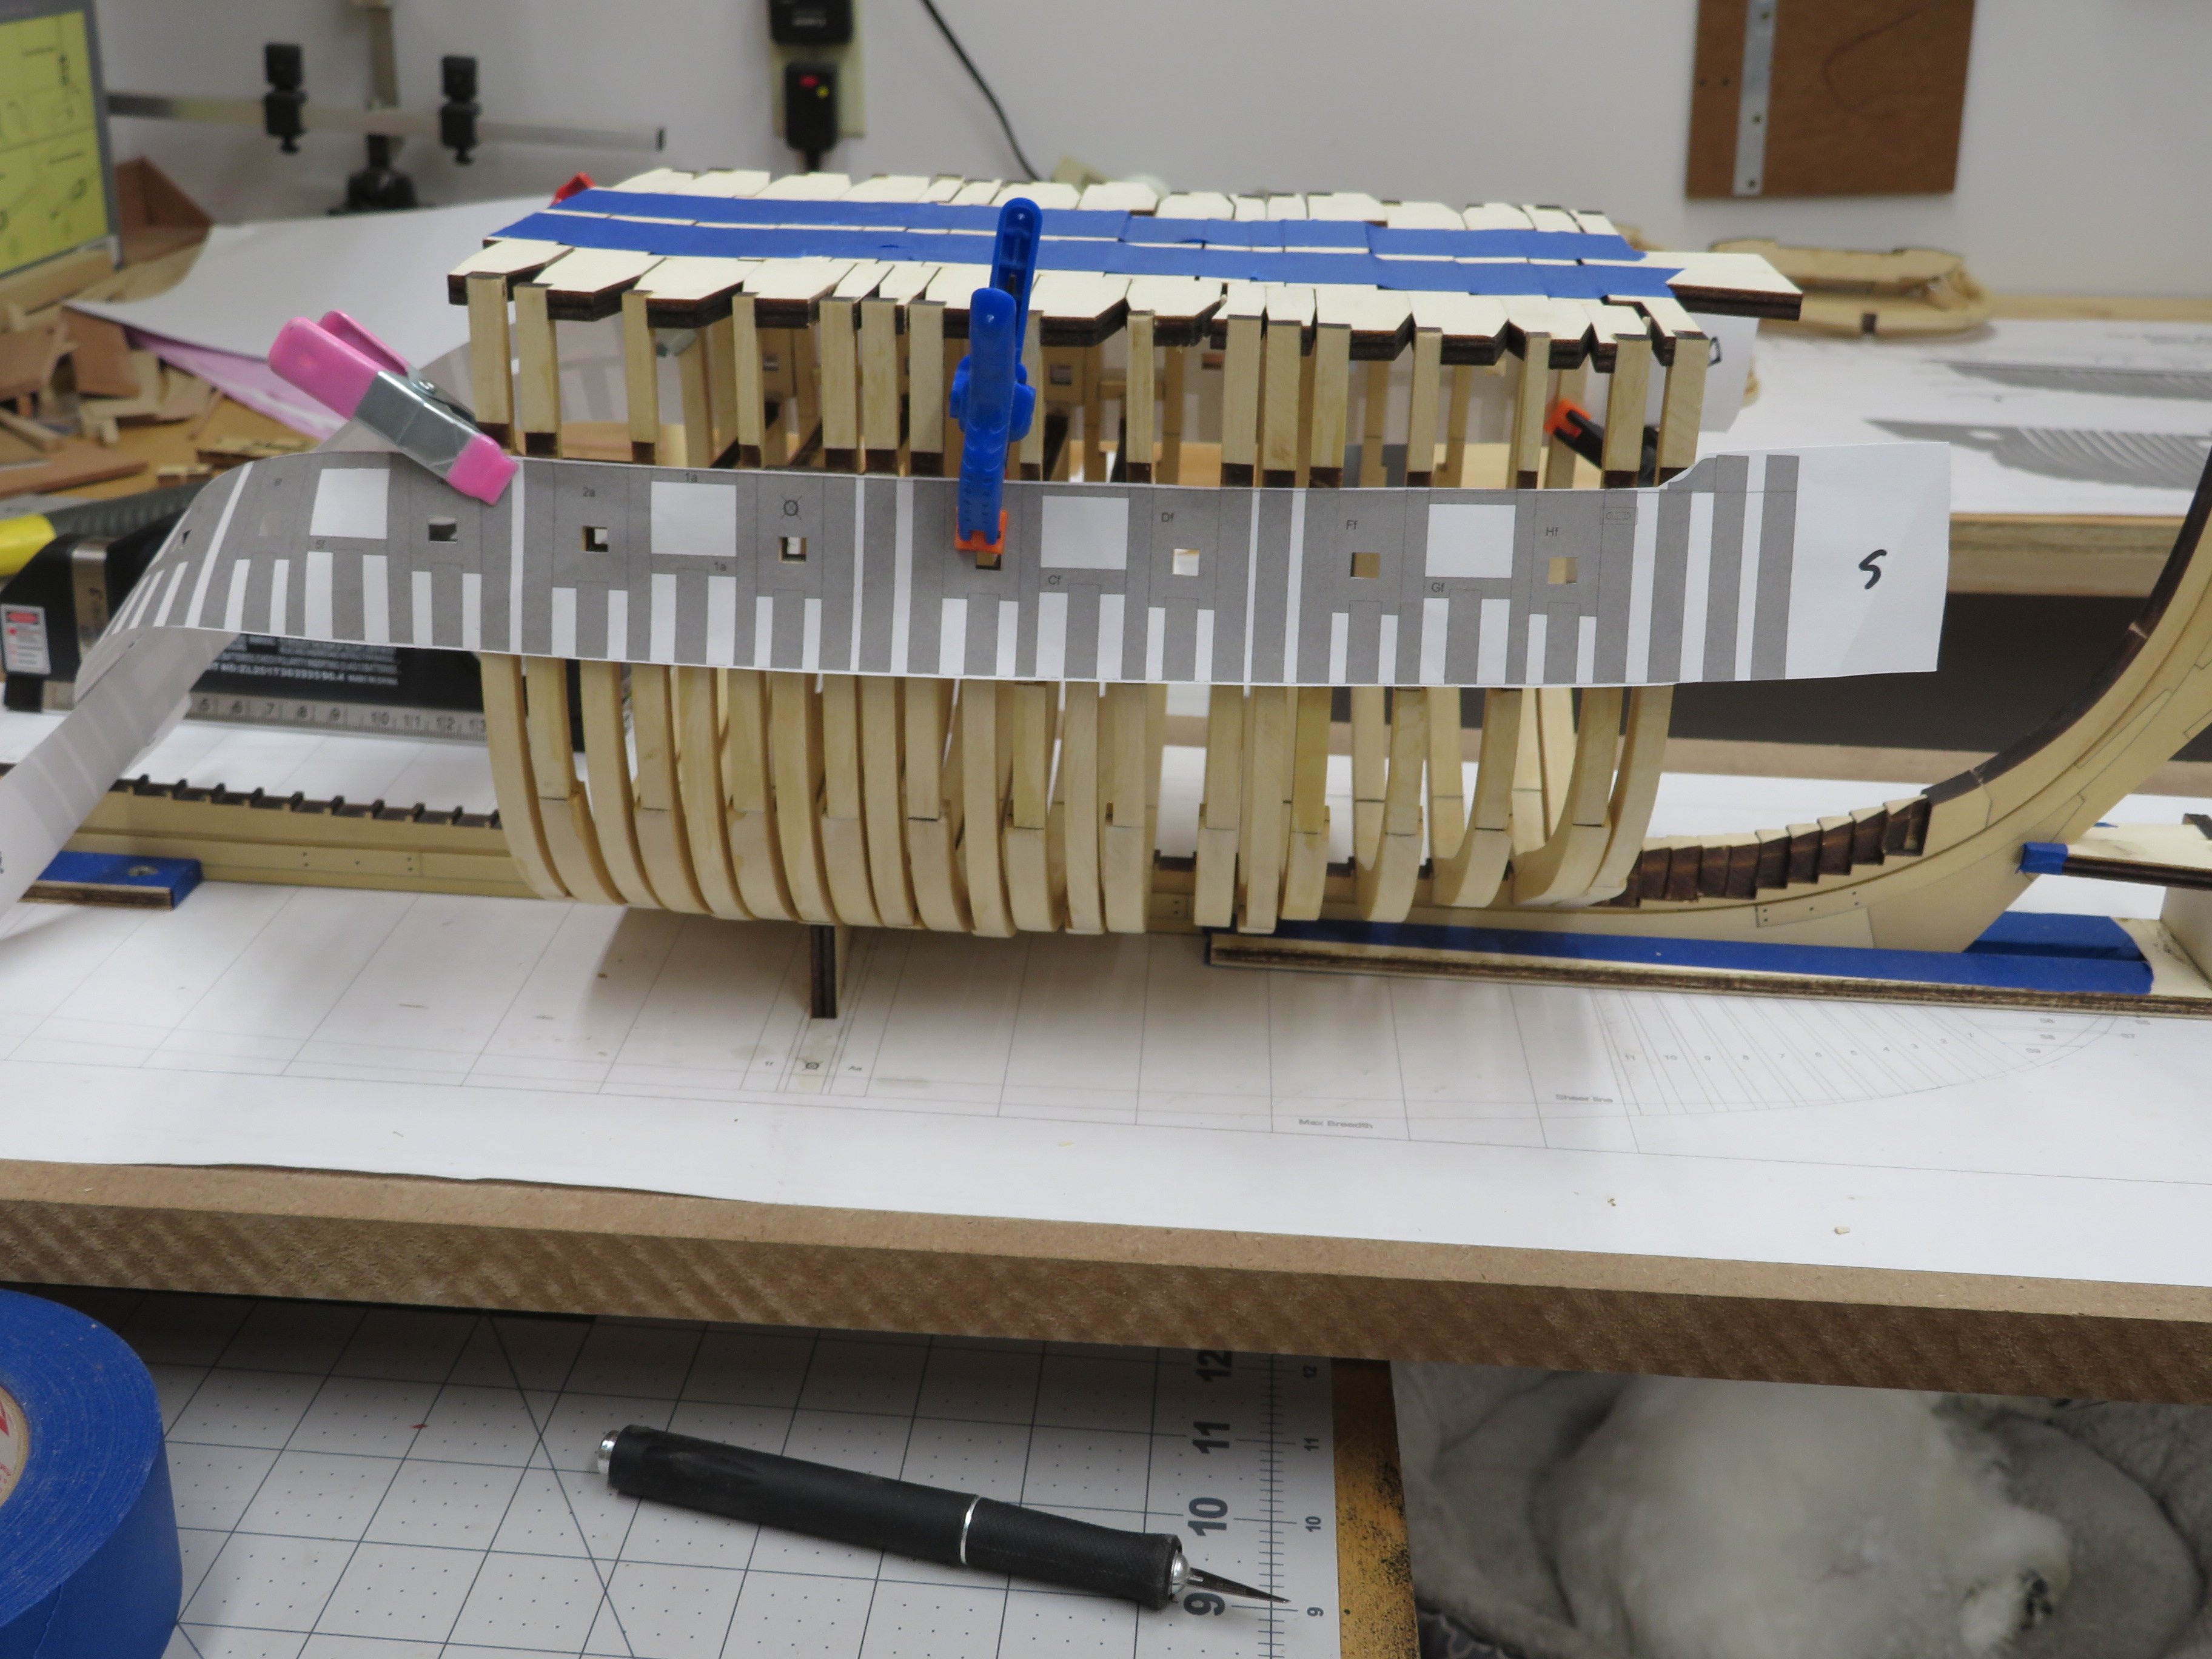
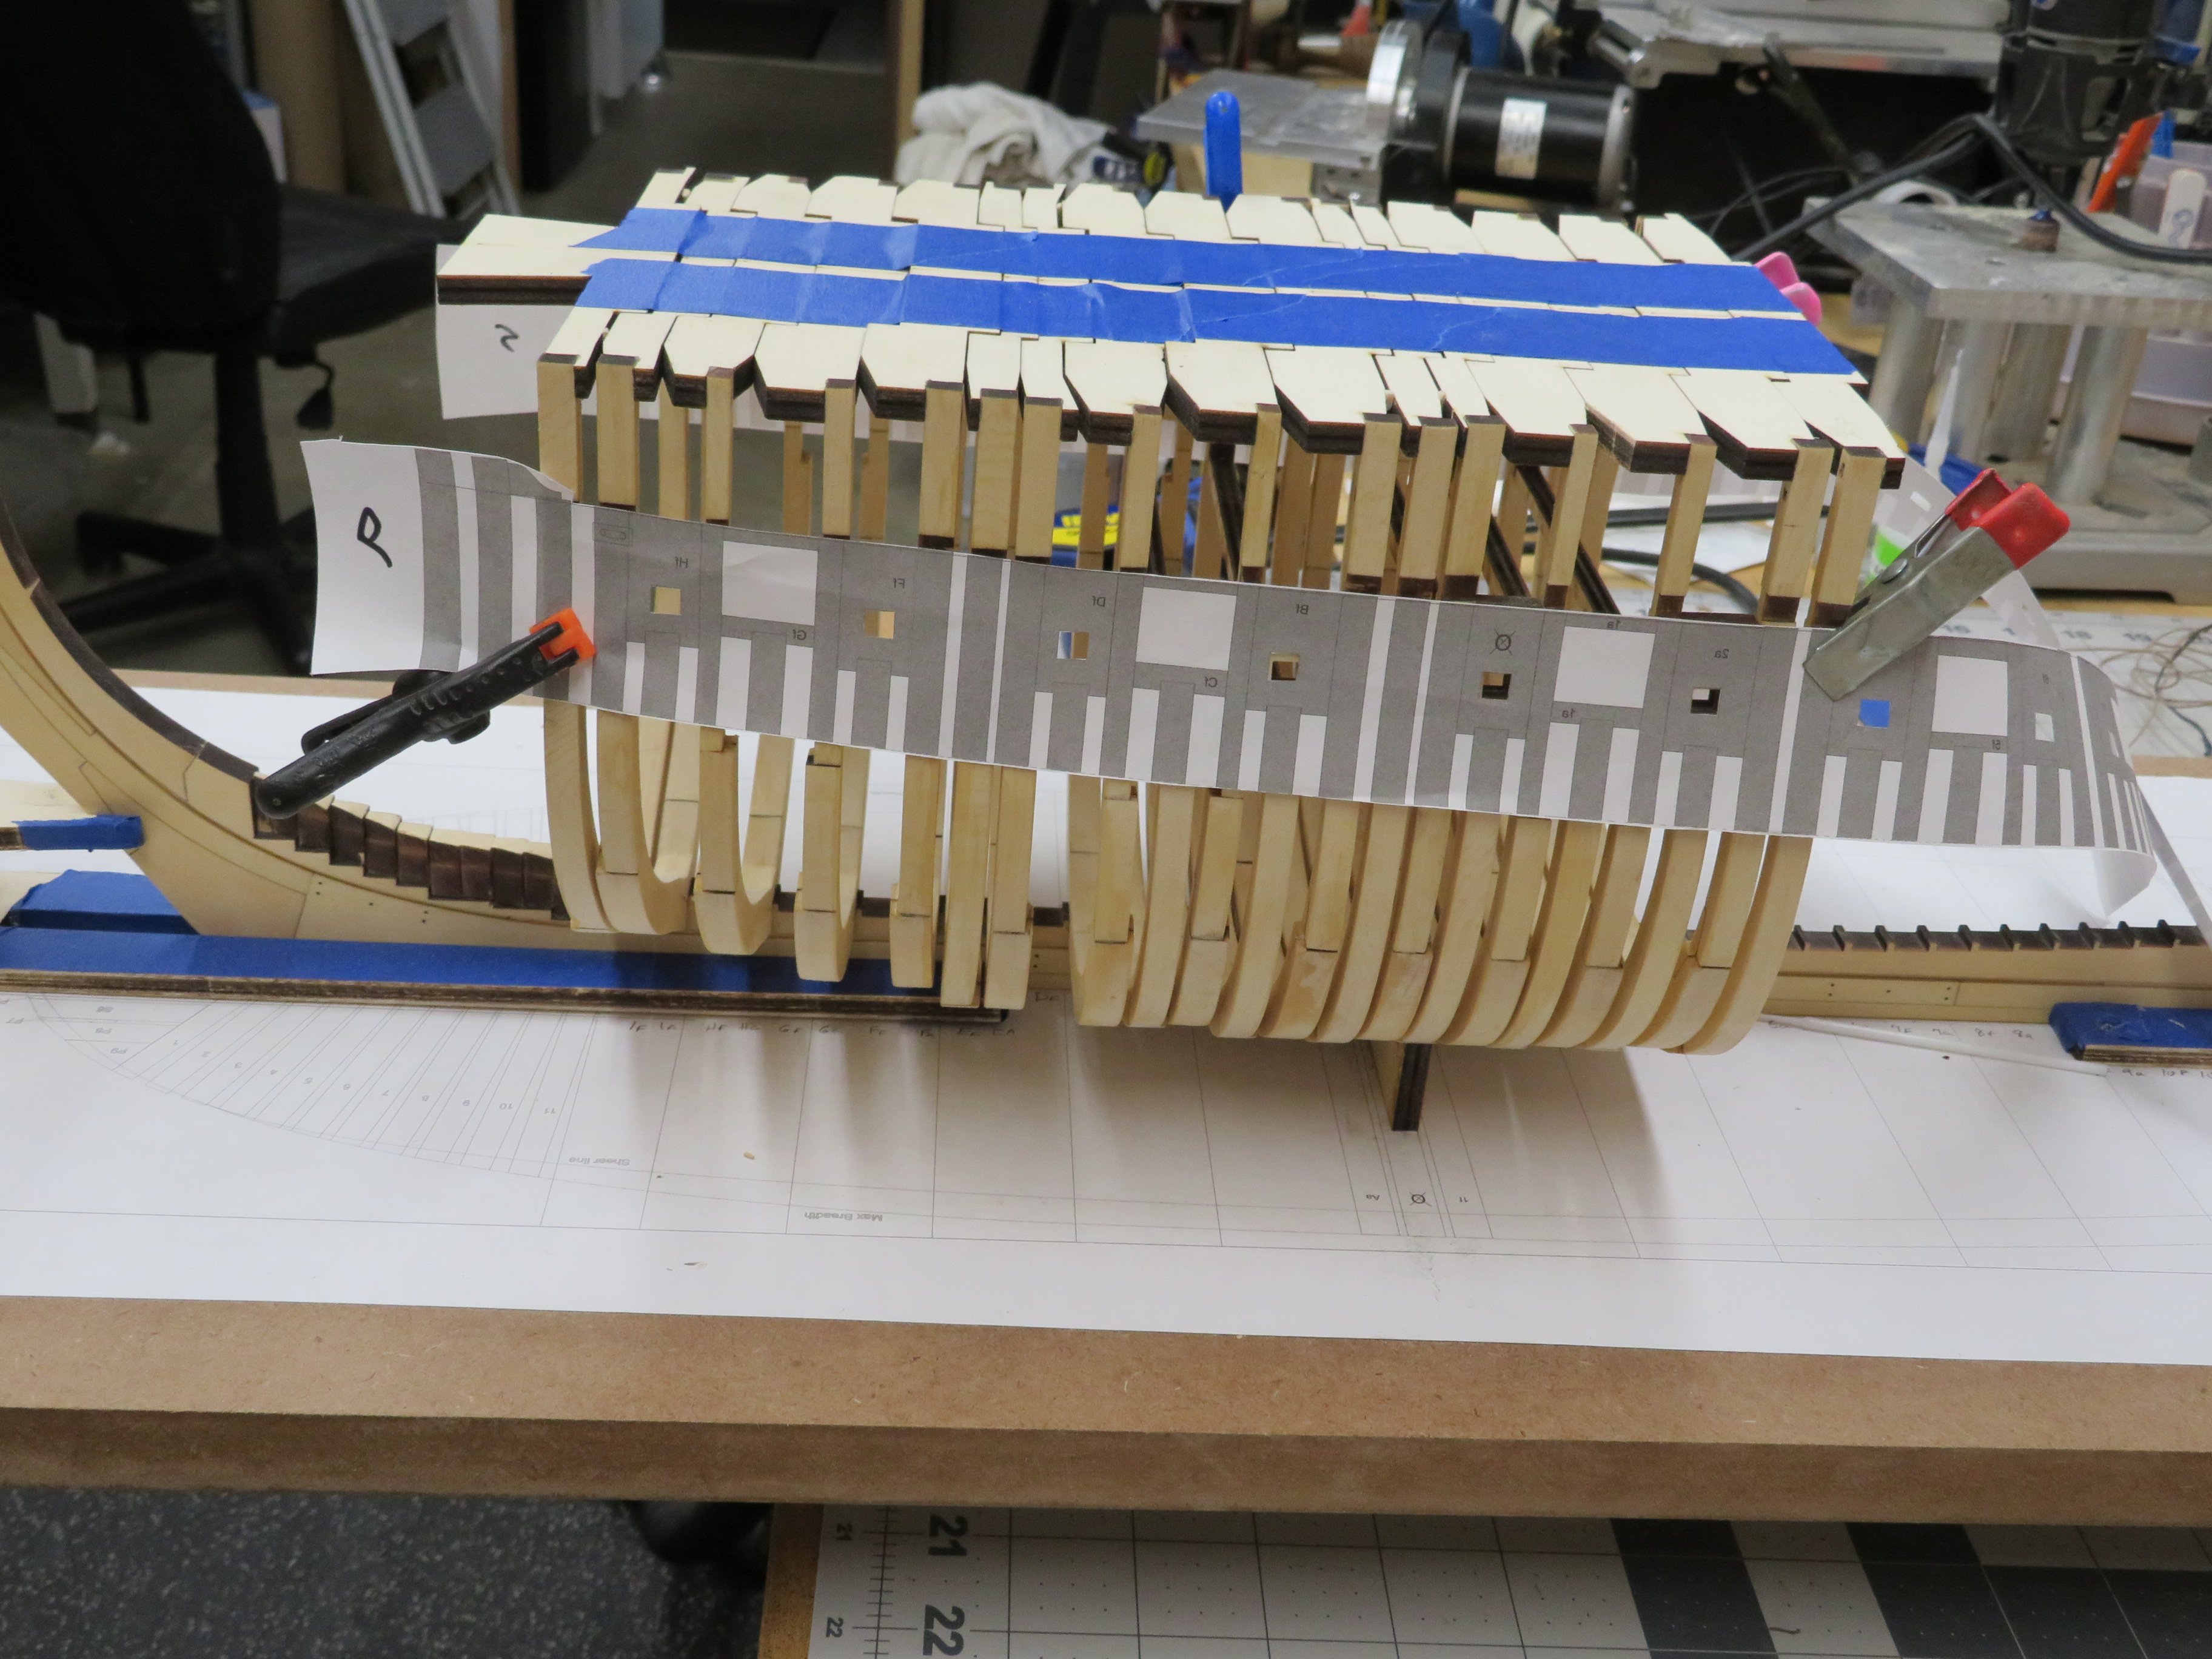
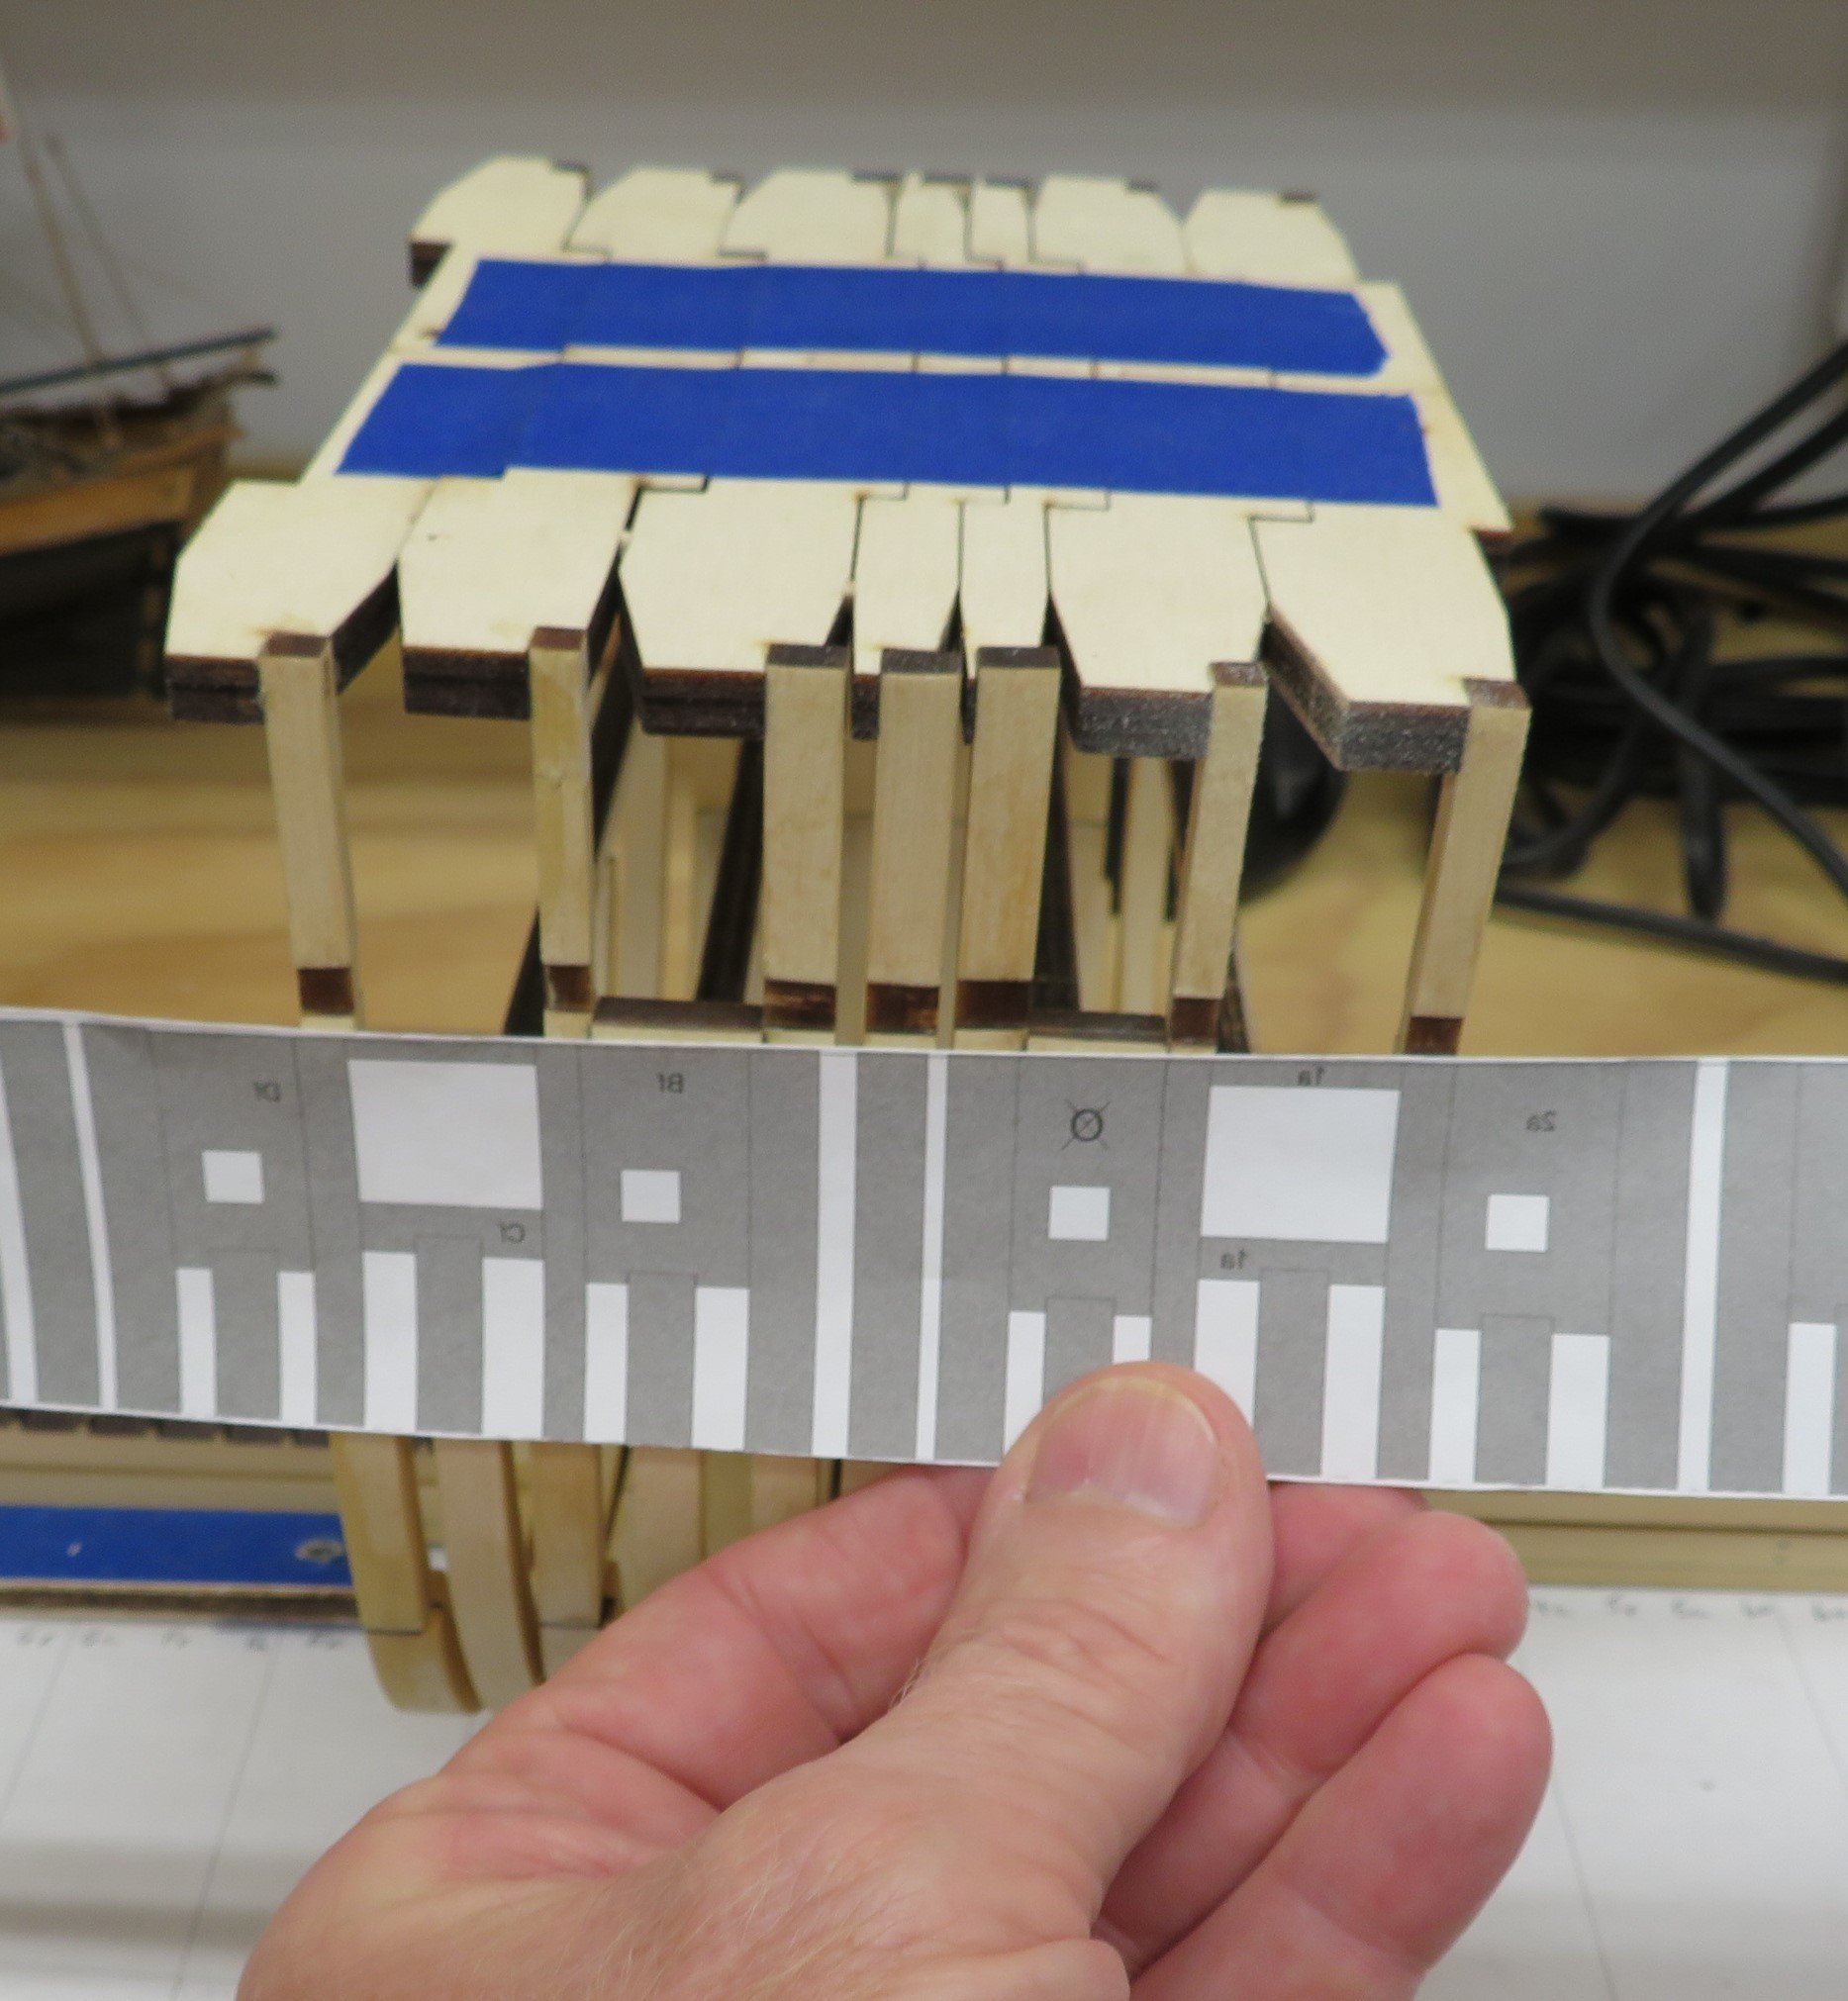
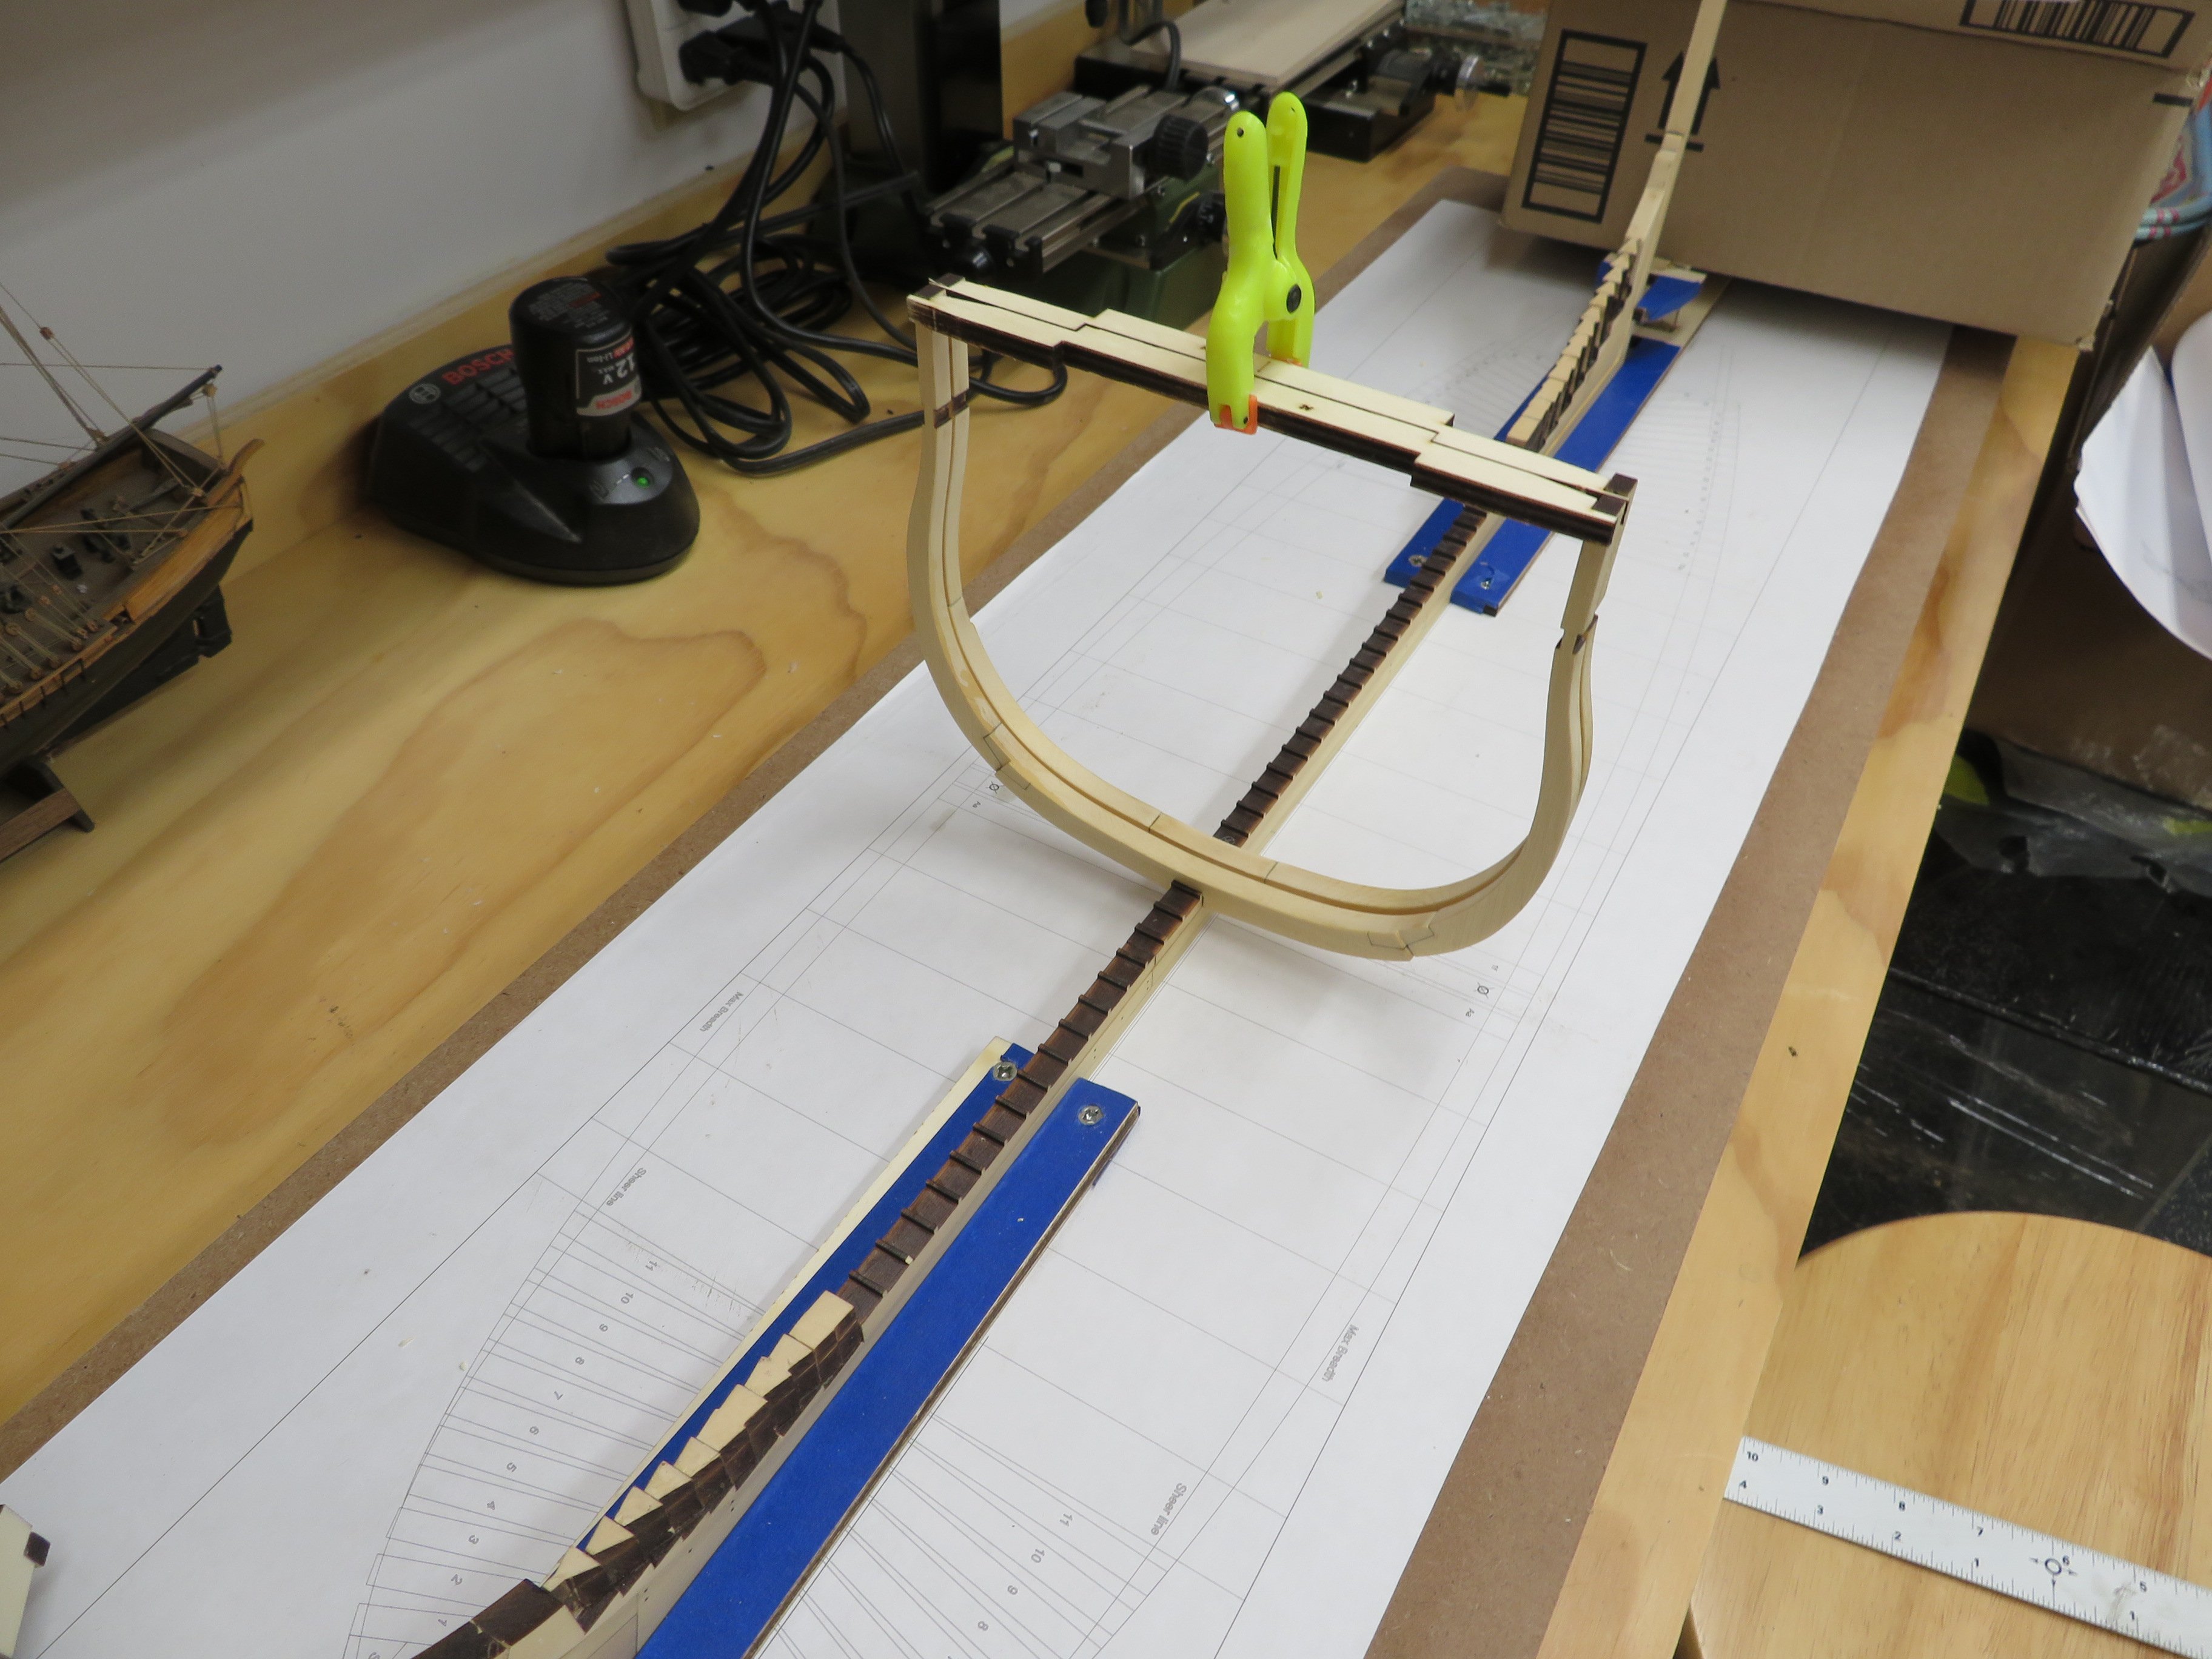
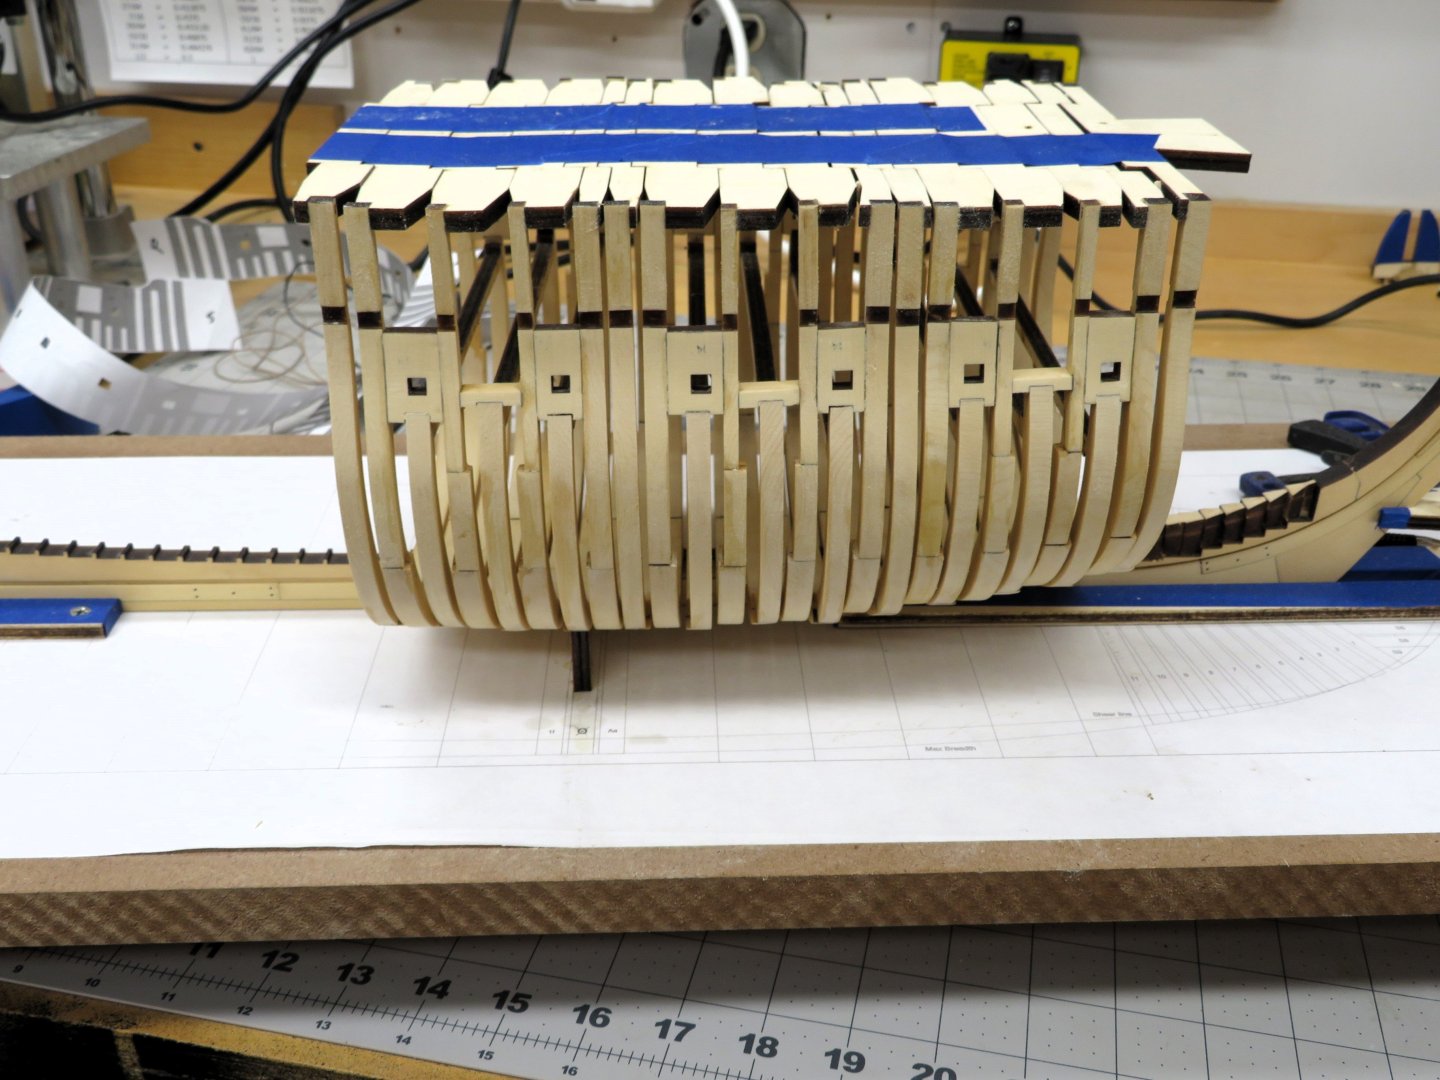
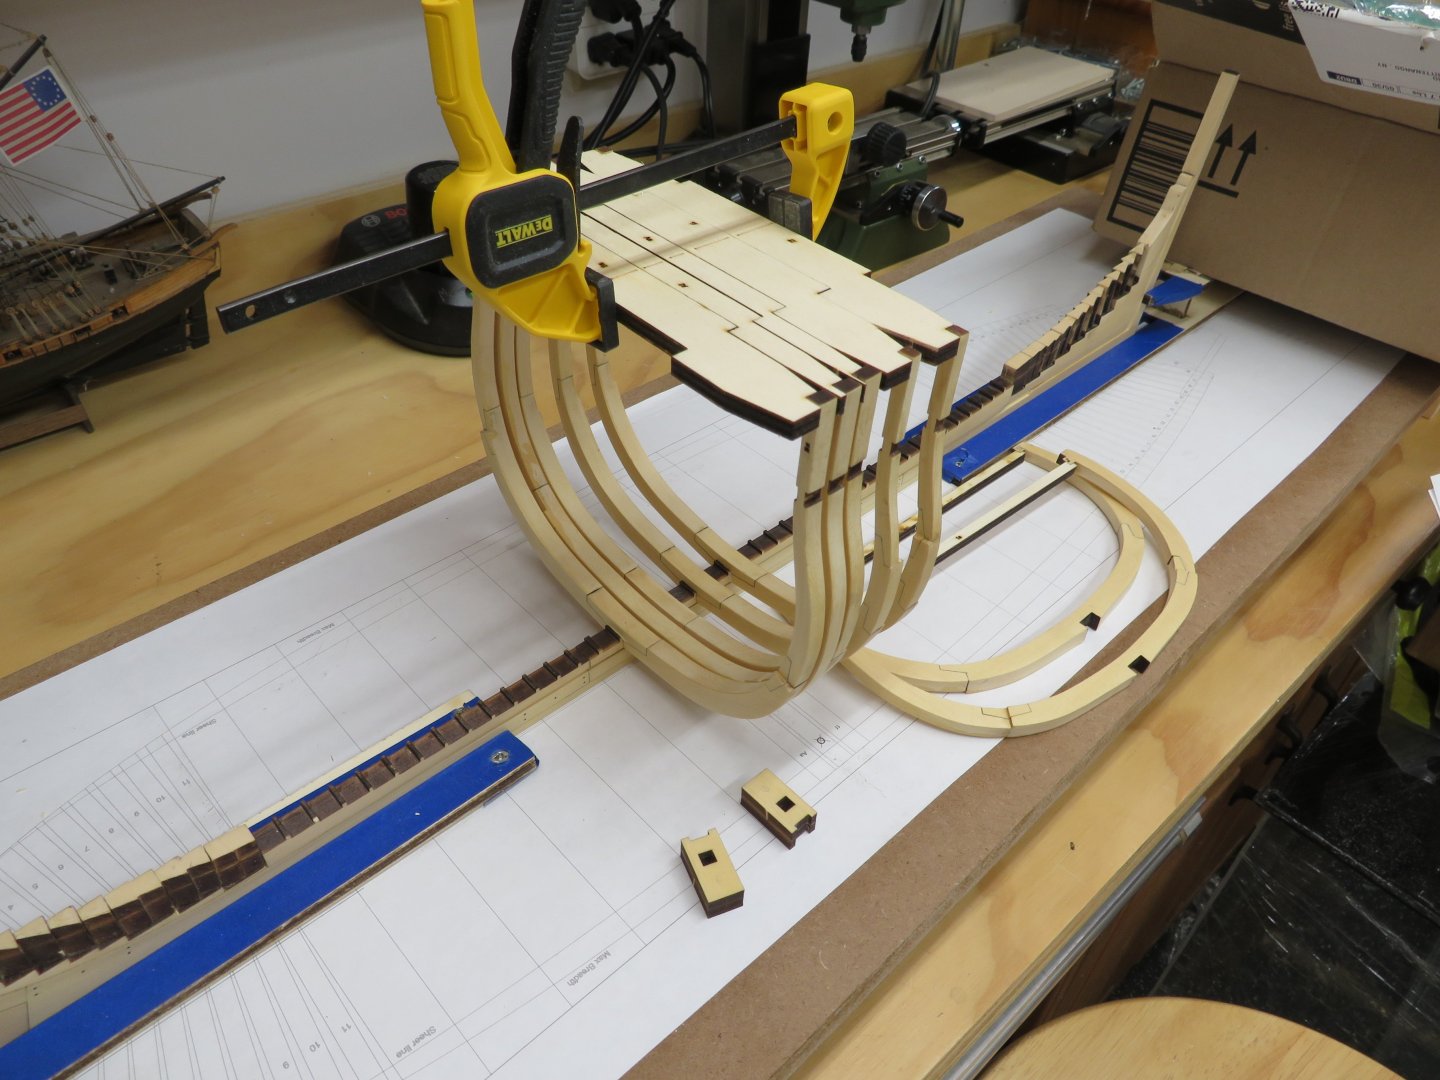
I've continued to install the frames. So far, I have placed all the tall frames from 3a to Hf. There are still 4 short frames to go. I clipped the template used to align the frames just so you can get the idea of how it's used. Once the 4 remaining short frames are placed, I will start adding the rest of the sweep port and gun port pieces. I'll continue to use the template to keep everything where it is supposed to be. Hopefully I'm not jinxing myself, but the design, instructions and quality of the cutting has made everything go together very well.

-
Very nice workmanship Jean-Marc.
-
Thanks Rick. Time is always a commodity in short supply.
-
That looks really good!
-
Thanks Glenn, Yes Chuck has created an exceptional way of doing the framing. Just trying hard not to mess it up. Thanks JJ. Forced is a good way of saying it.
-
My feelings exactly! 😂
-
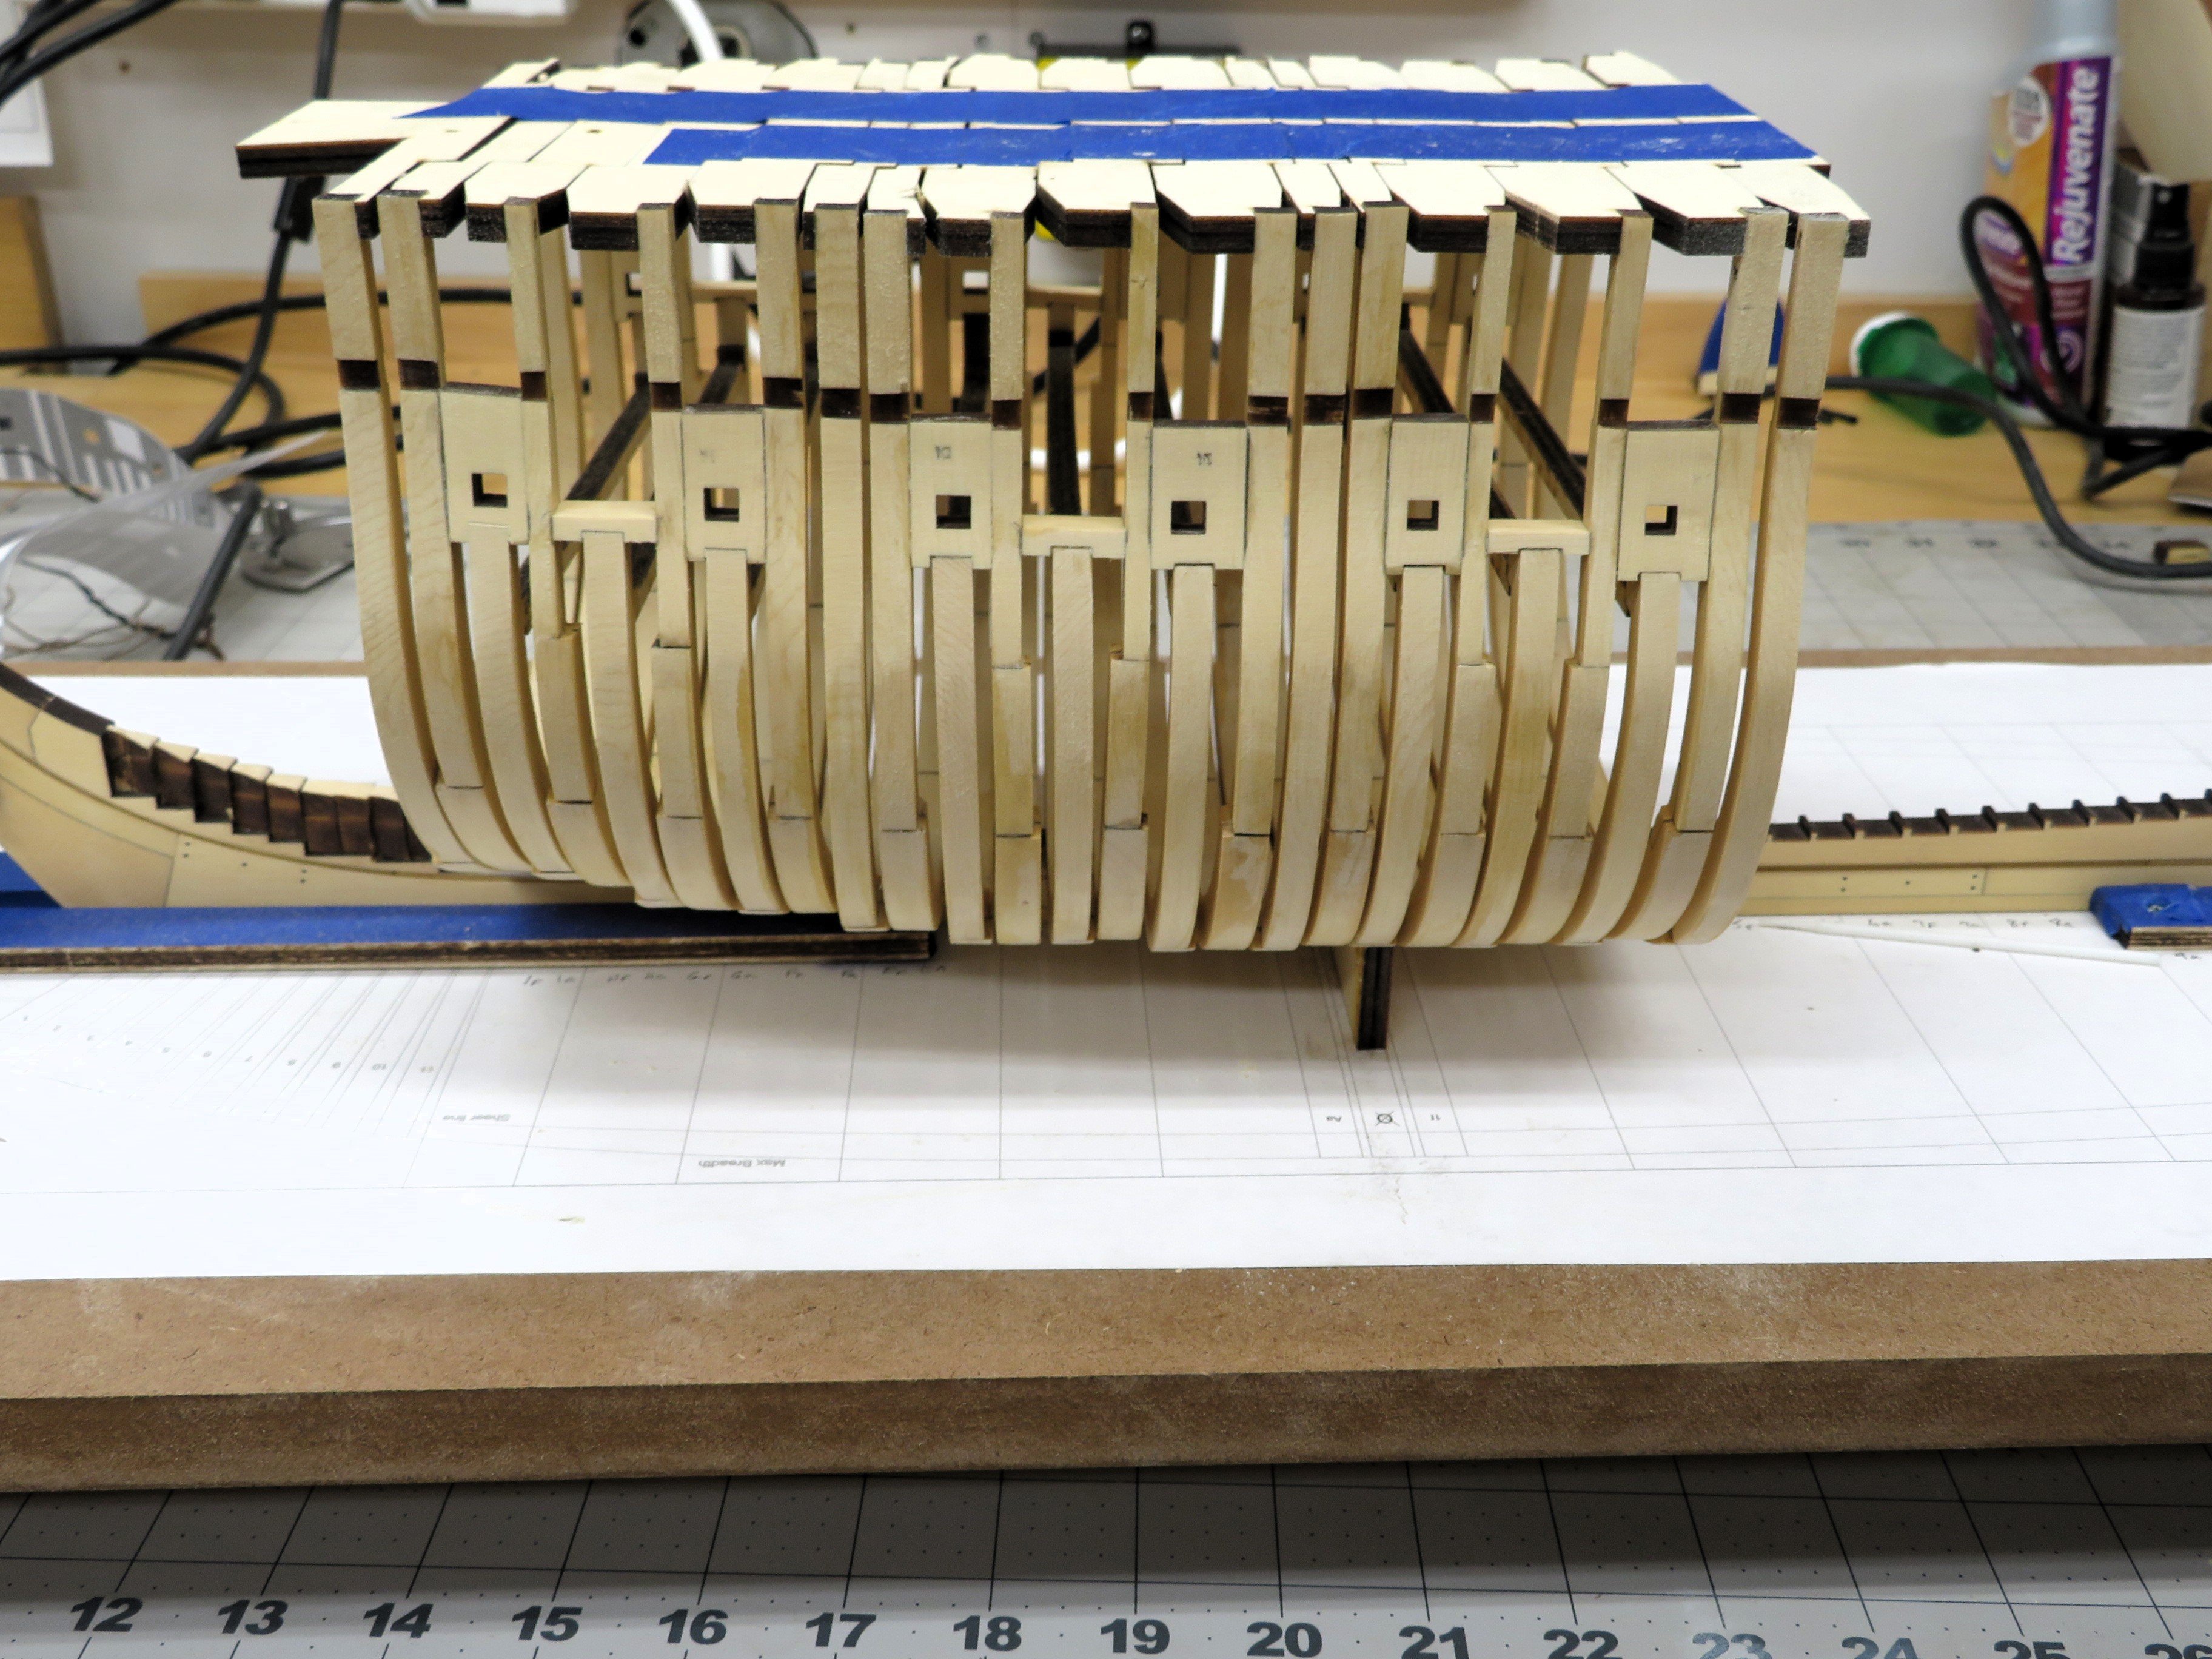
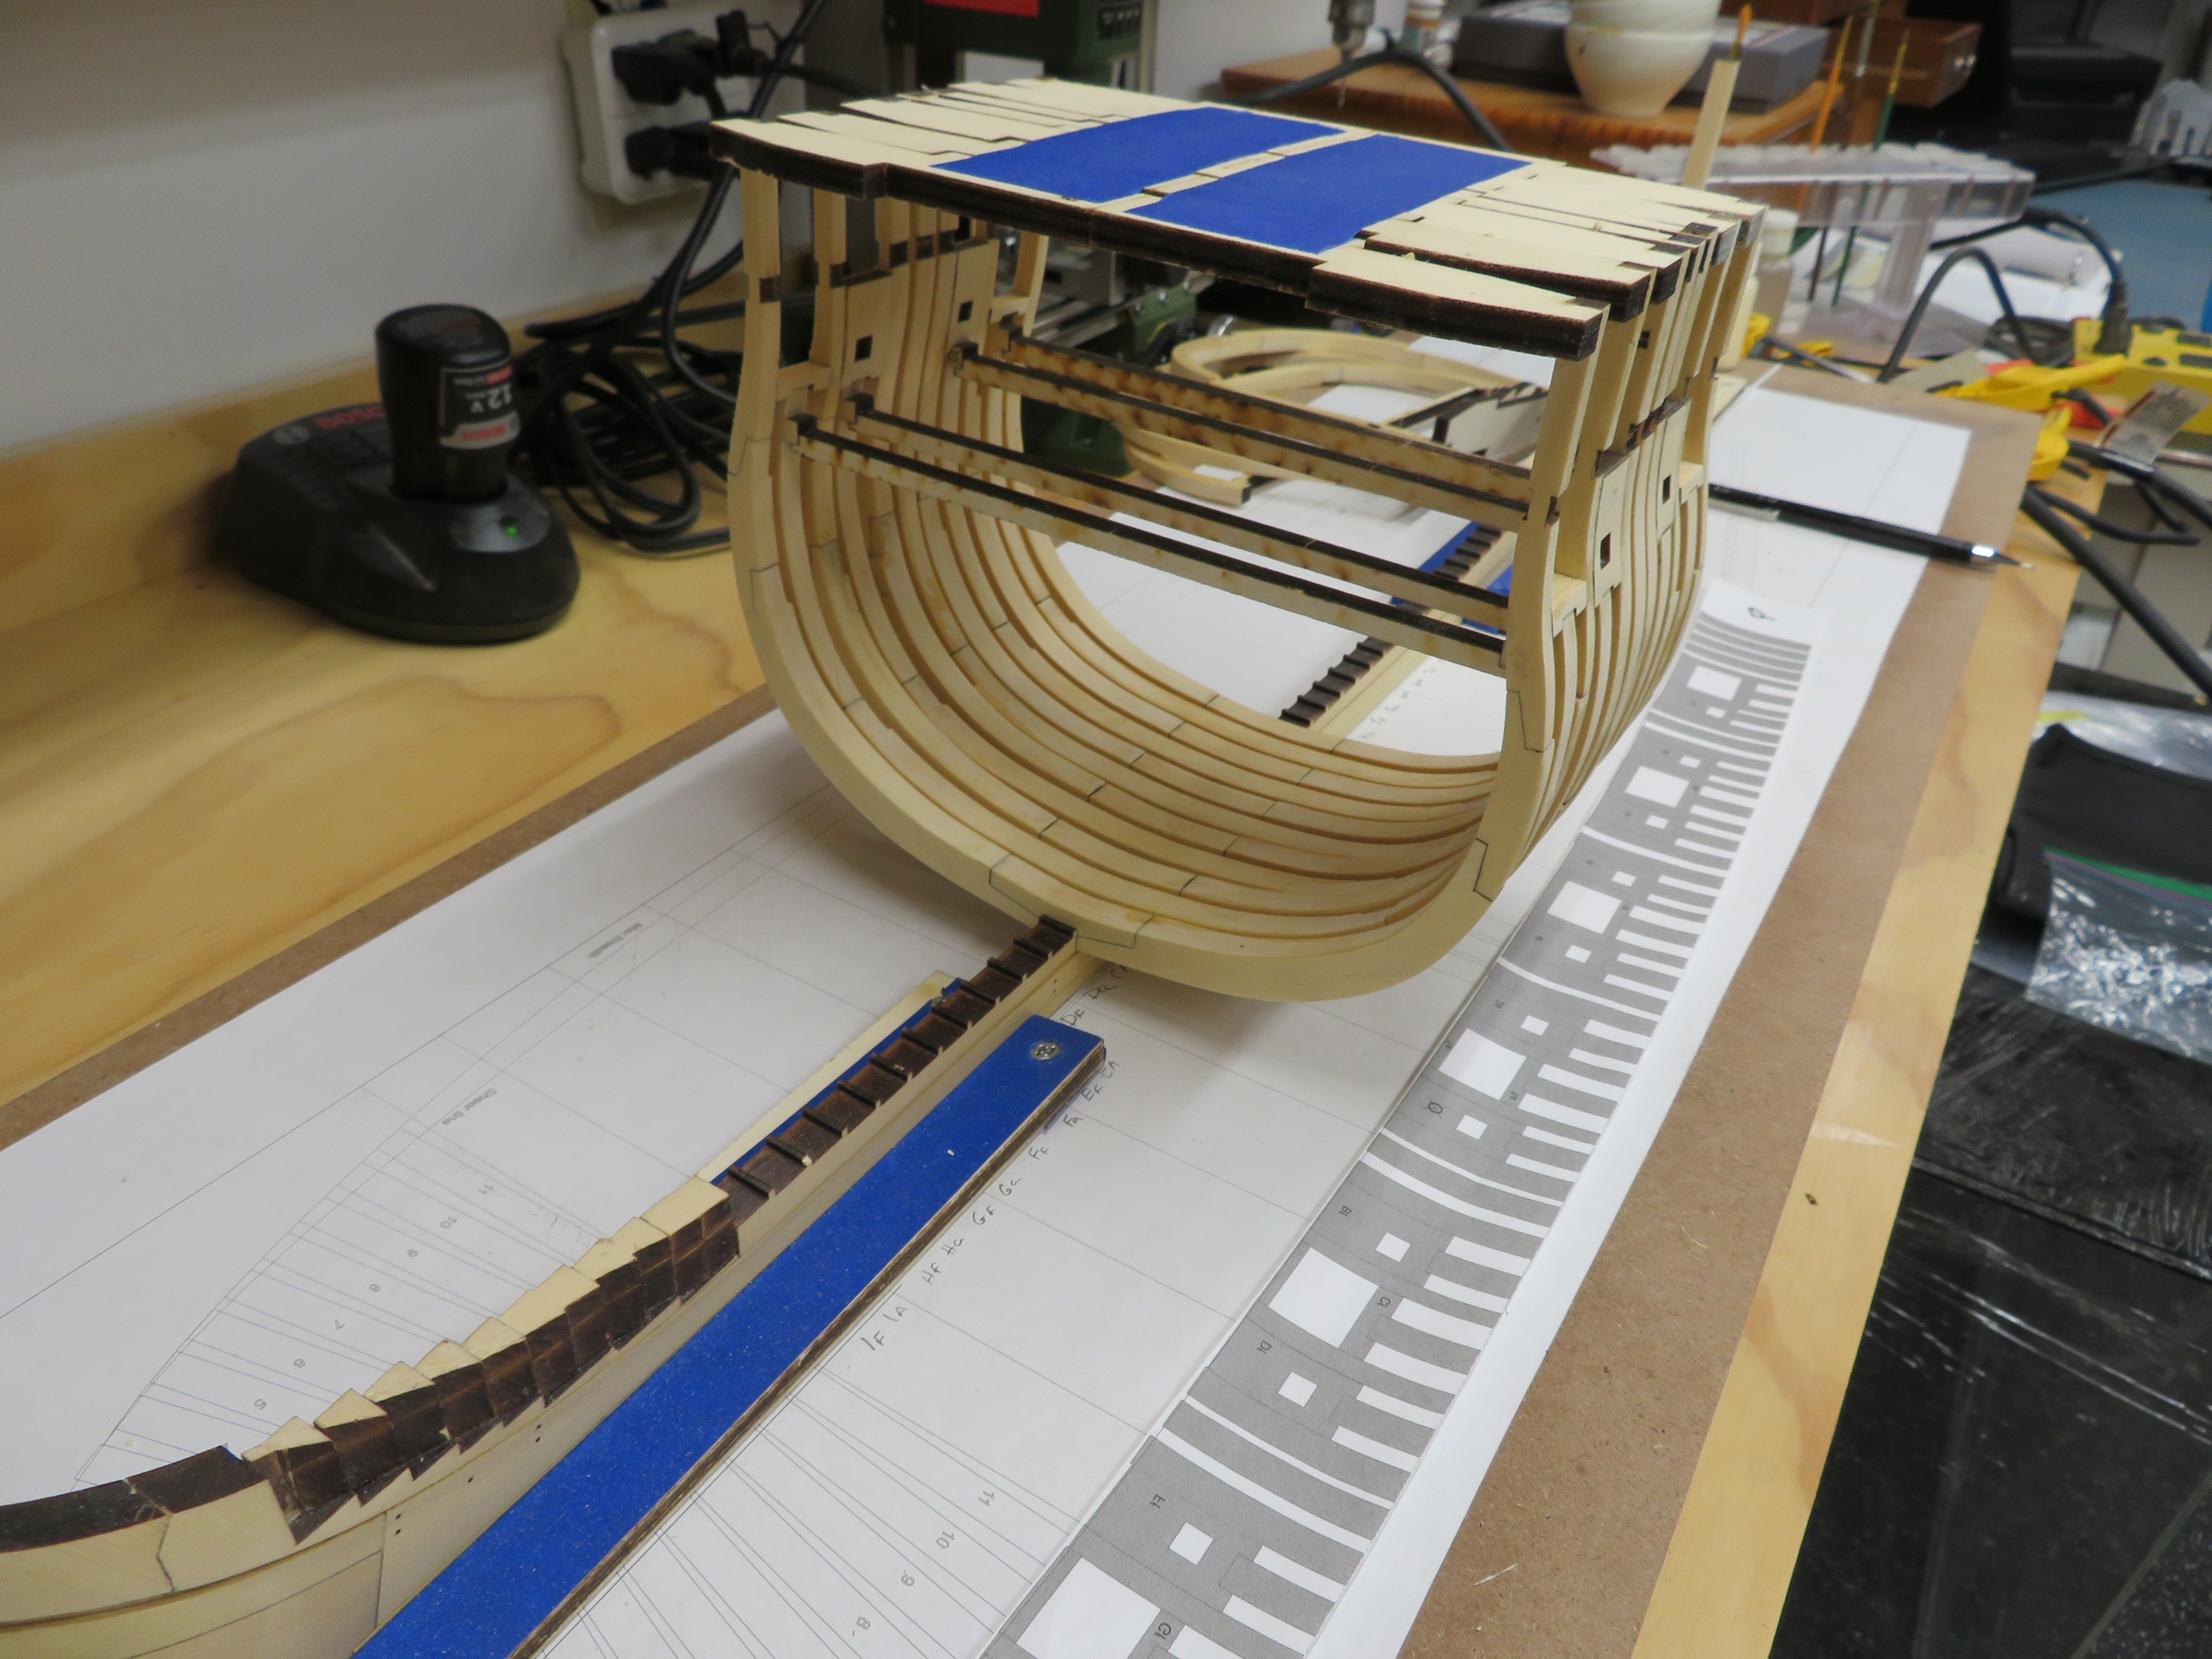
I had mentioned earlier I had a medical issue that needed to be addressed. I met with the doctor and the good news is I've been given a clean bill of health. The bad news is I've been given a clean bill of health and have to return to work! 🤣 Work will slow considerably now. 😢 And the adventure continues, I've now set 7 "tall" frames and 4 "short" frames. I've also added 2 sweep ports and 2 gun port sills on each side. I used the supplied template to ensure that the spacing and height is correct. As Mike mentioned earlier toothpicks were used on the jig for minor adjustments to fine tune the frame spacing. My plan is to now add all the forward tall and short frames. I'll then use the template to adjust them to their correct position. Once I confirm they are placed correctly, I'll start adding the sweep port blanks and the gun port sills.


-
I love looking at your work Mike. So nice and clean!
-
Oh I would have gotten them too.
-
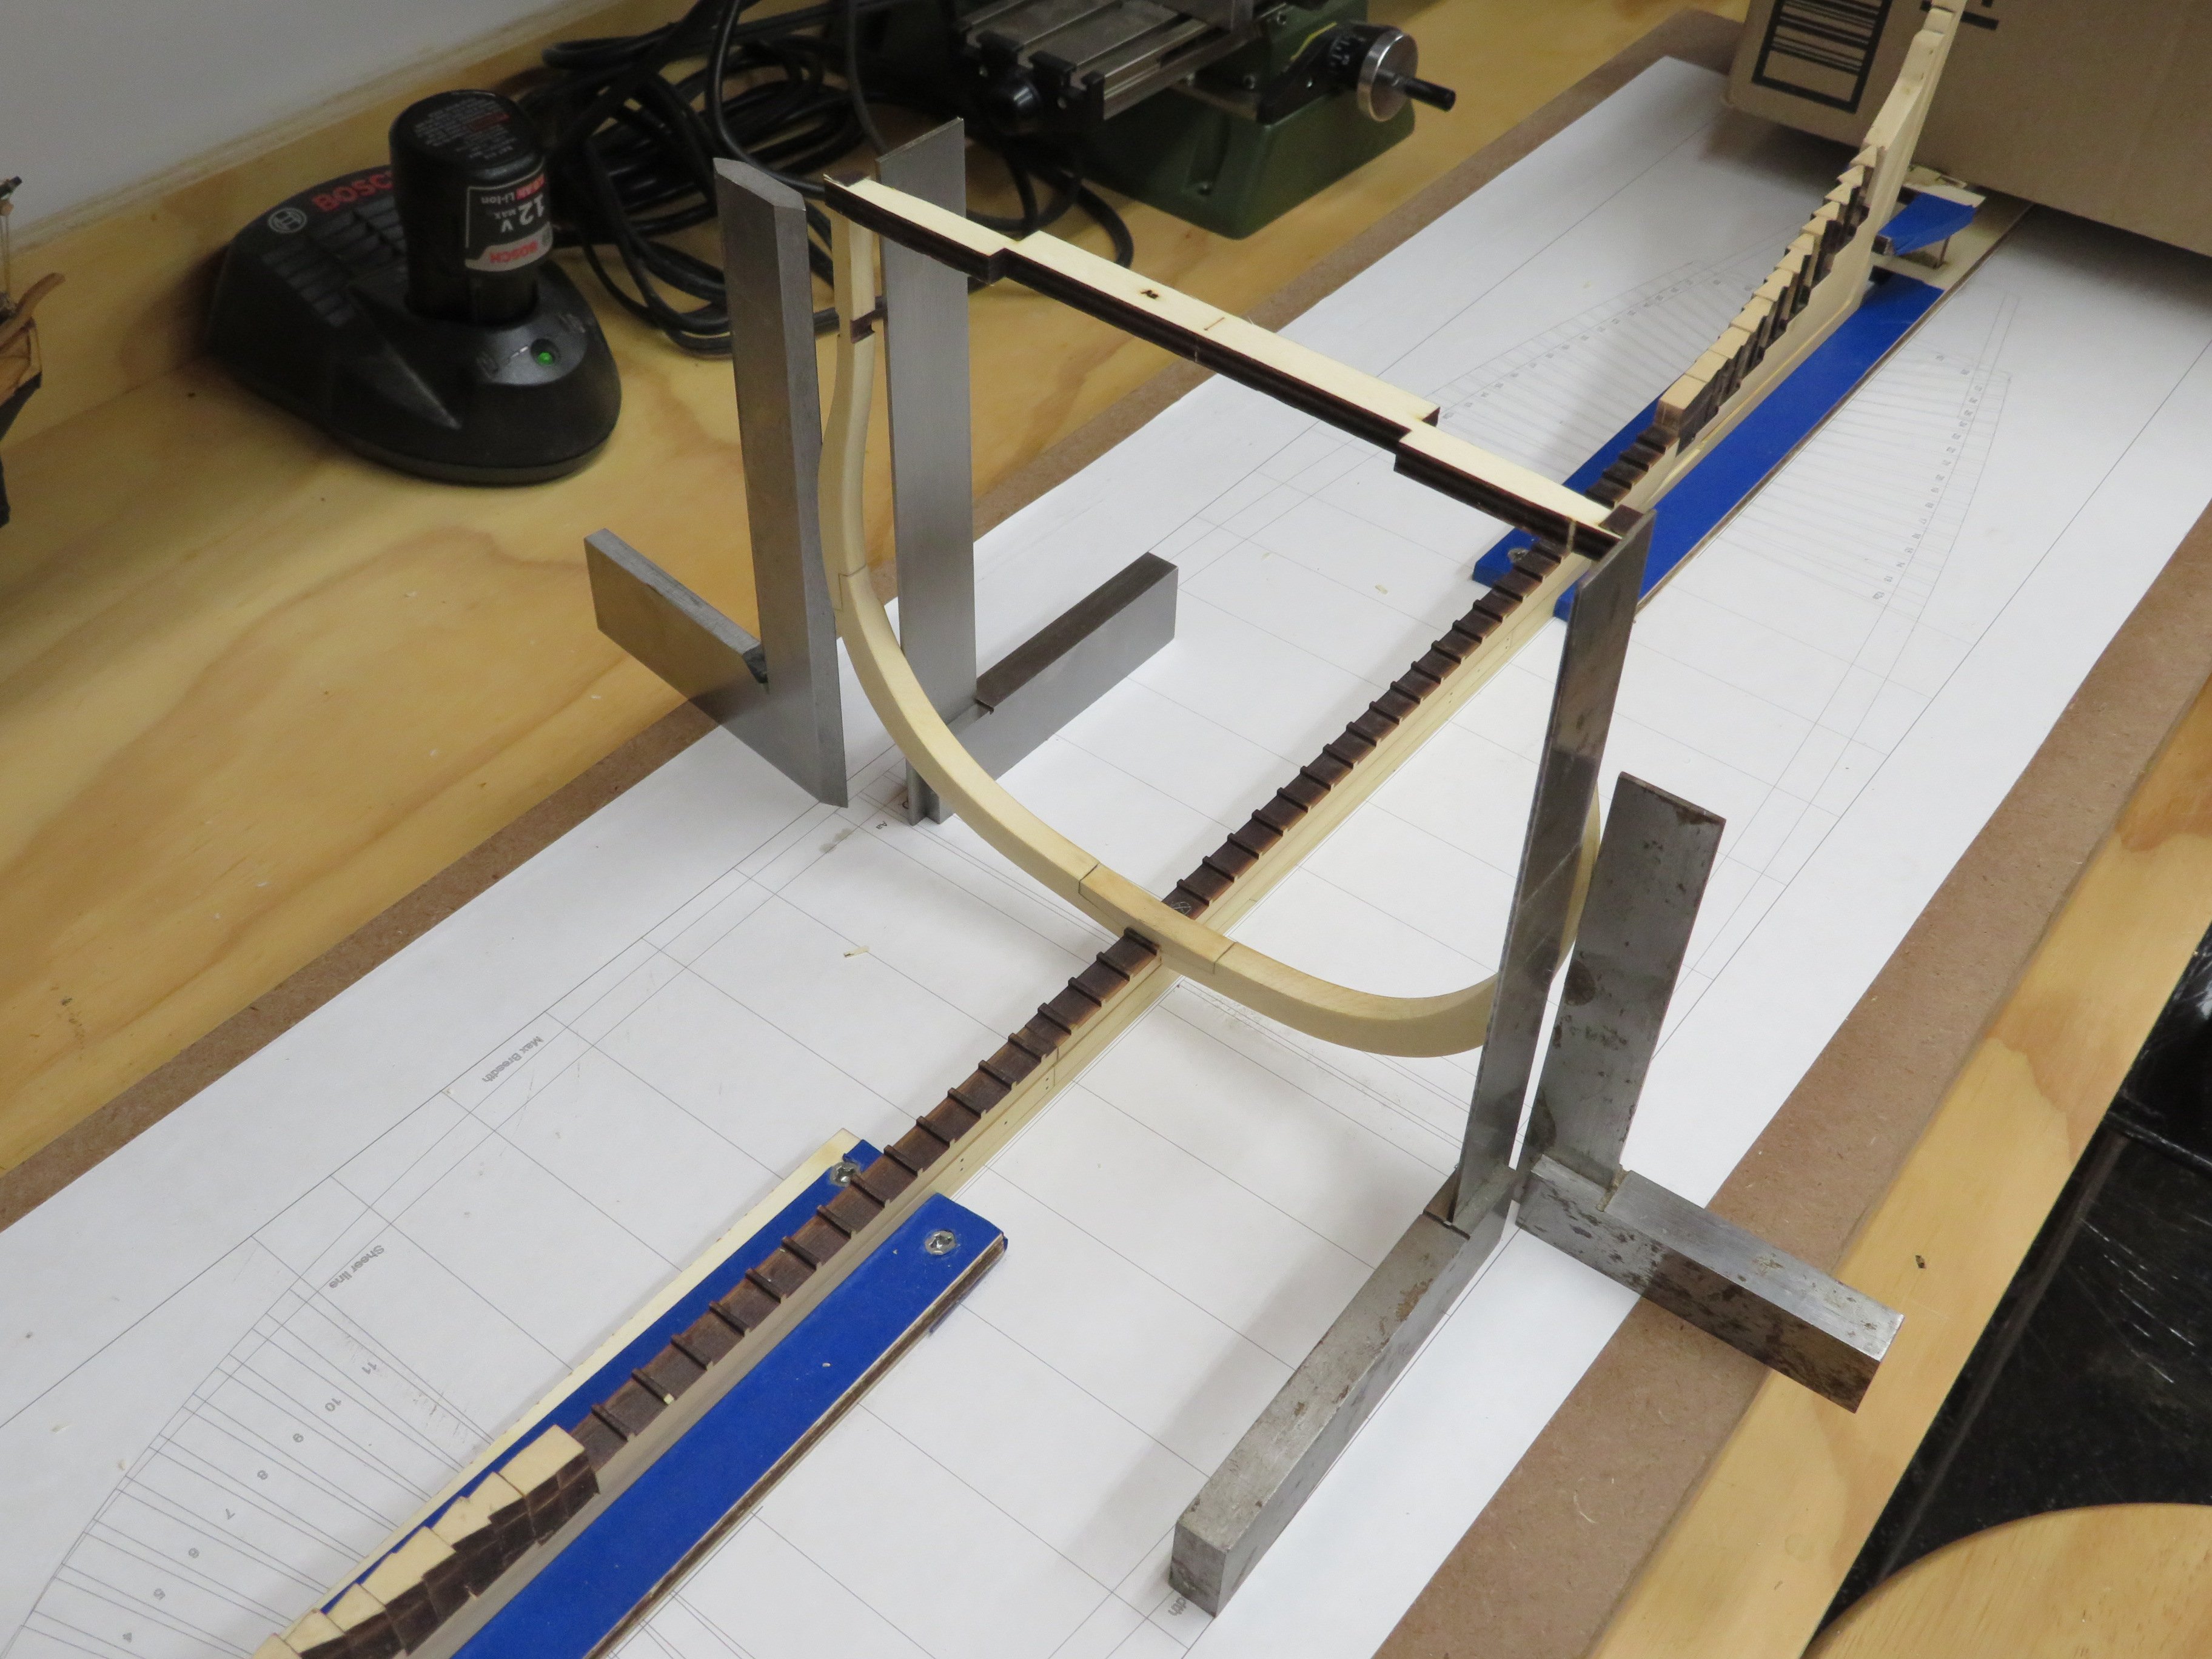
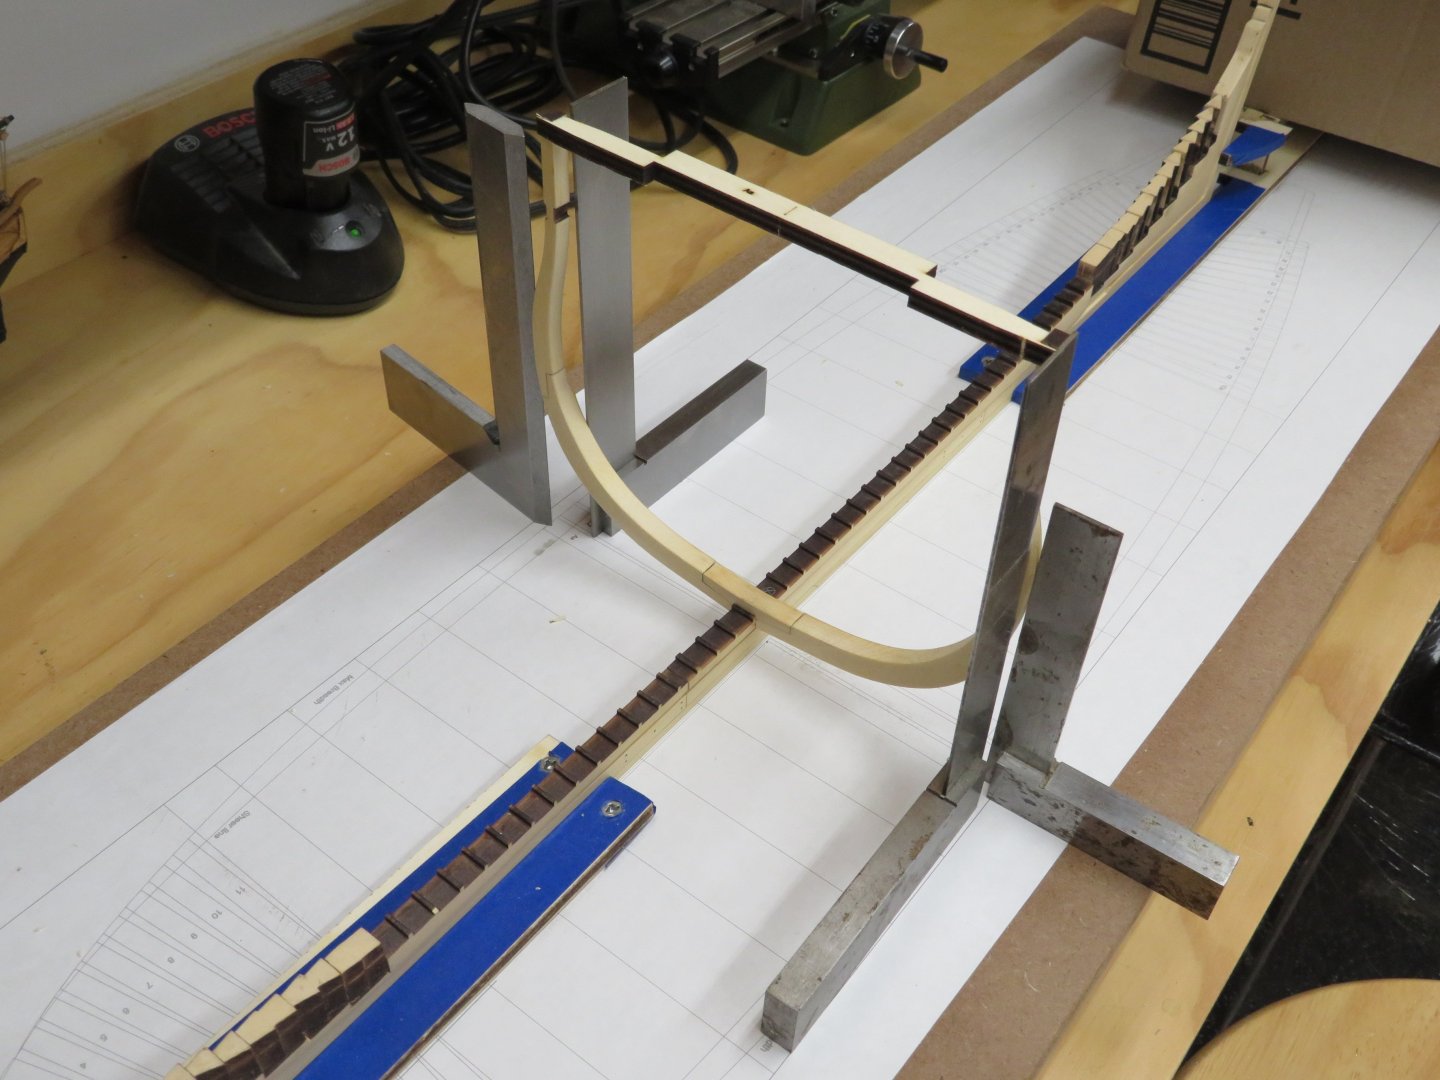
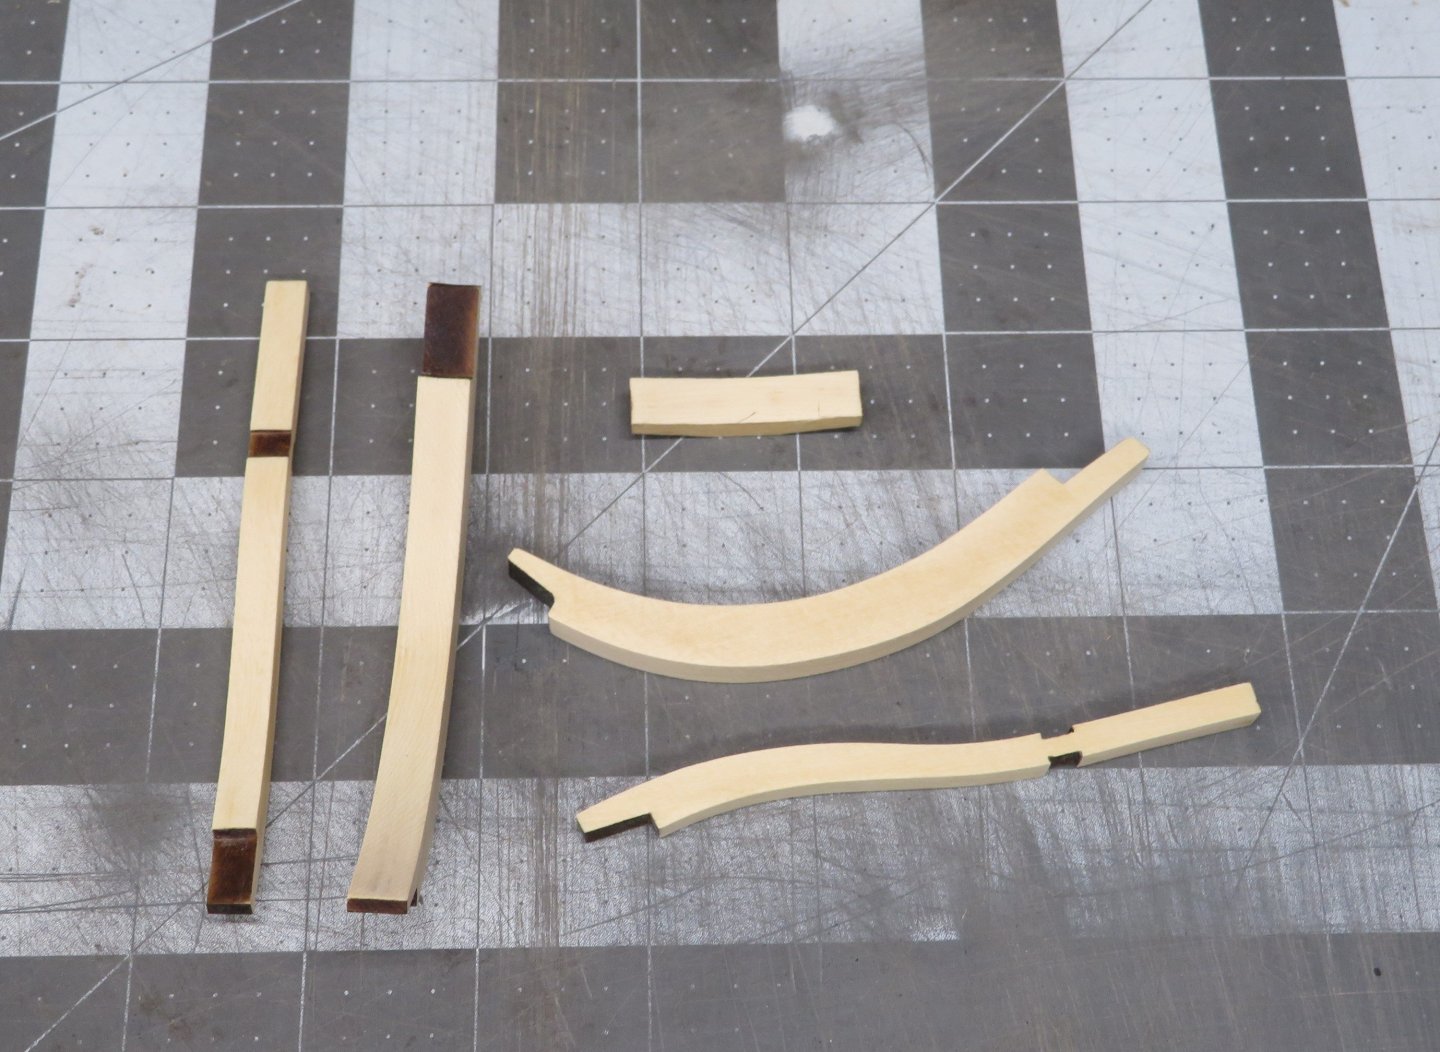
I'm continuing to raise some frames while cleaning and assembling other frames. Here are five "tall frames in place with the two "short" frames waiting their turn. You'll notice the blocks for the sweep ports there too. The two short frames have now been added and the sweep port blocks have been roughly shaped. More fine tuning is needed. I'm also checking the frame locations with the supplied templates and my height gauge to check the sweep port and gun port locations.


-
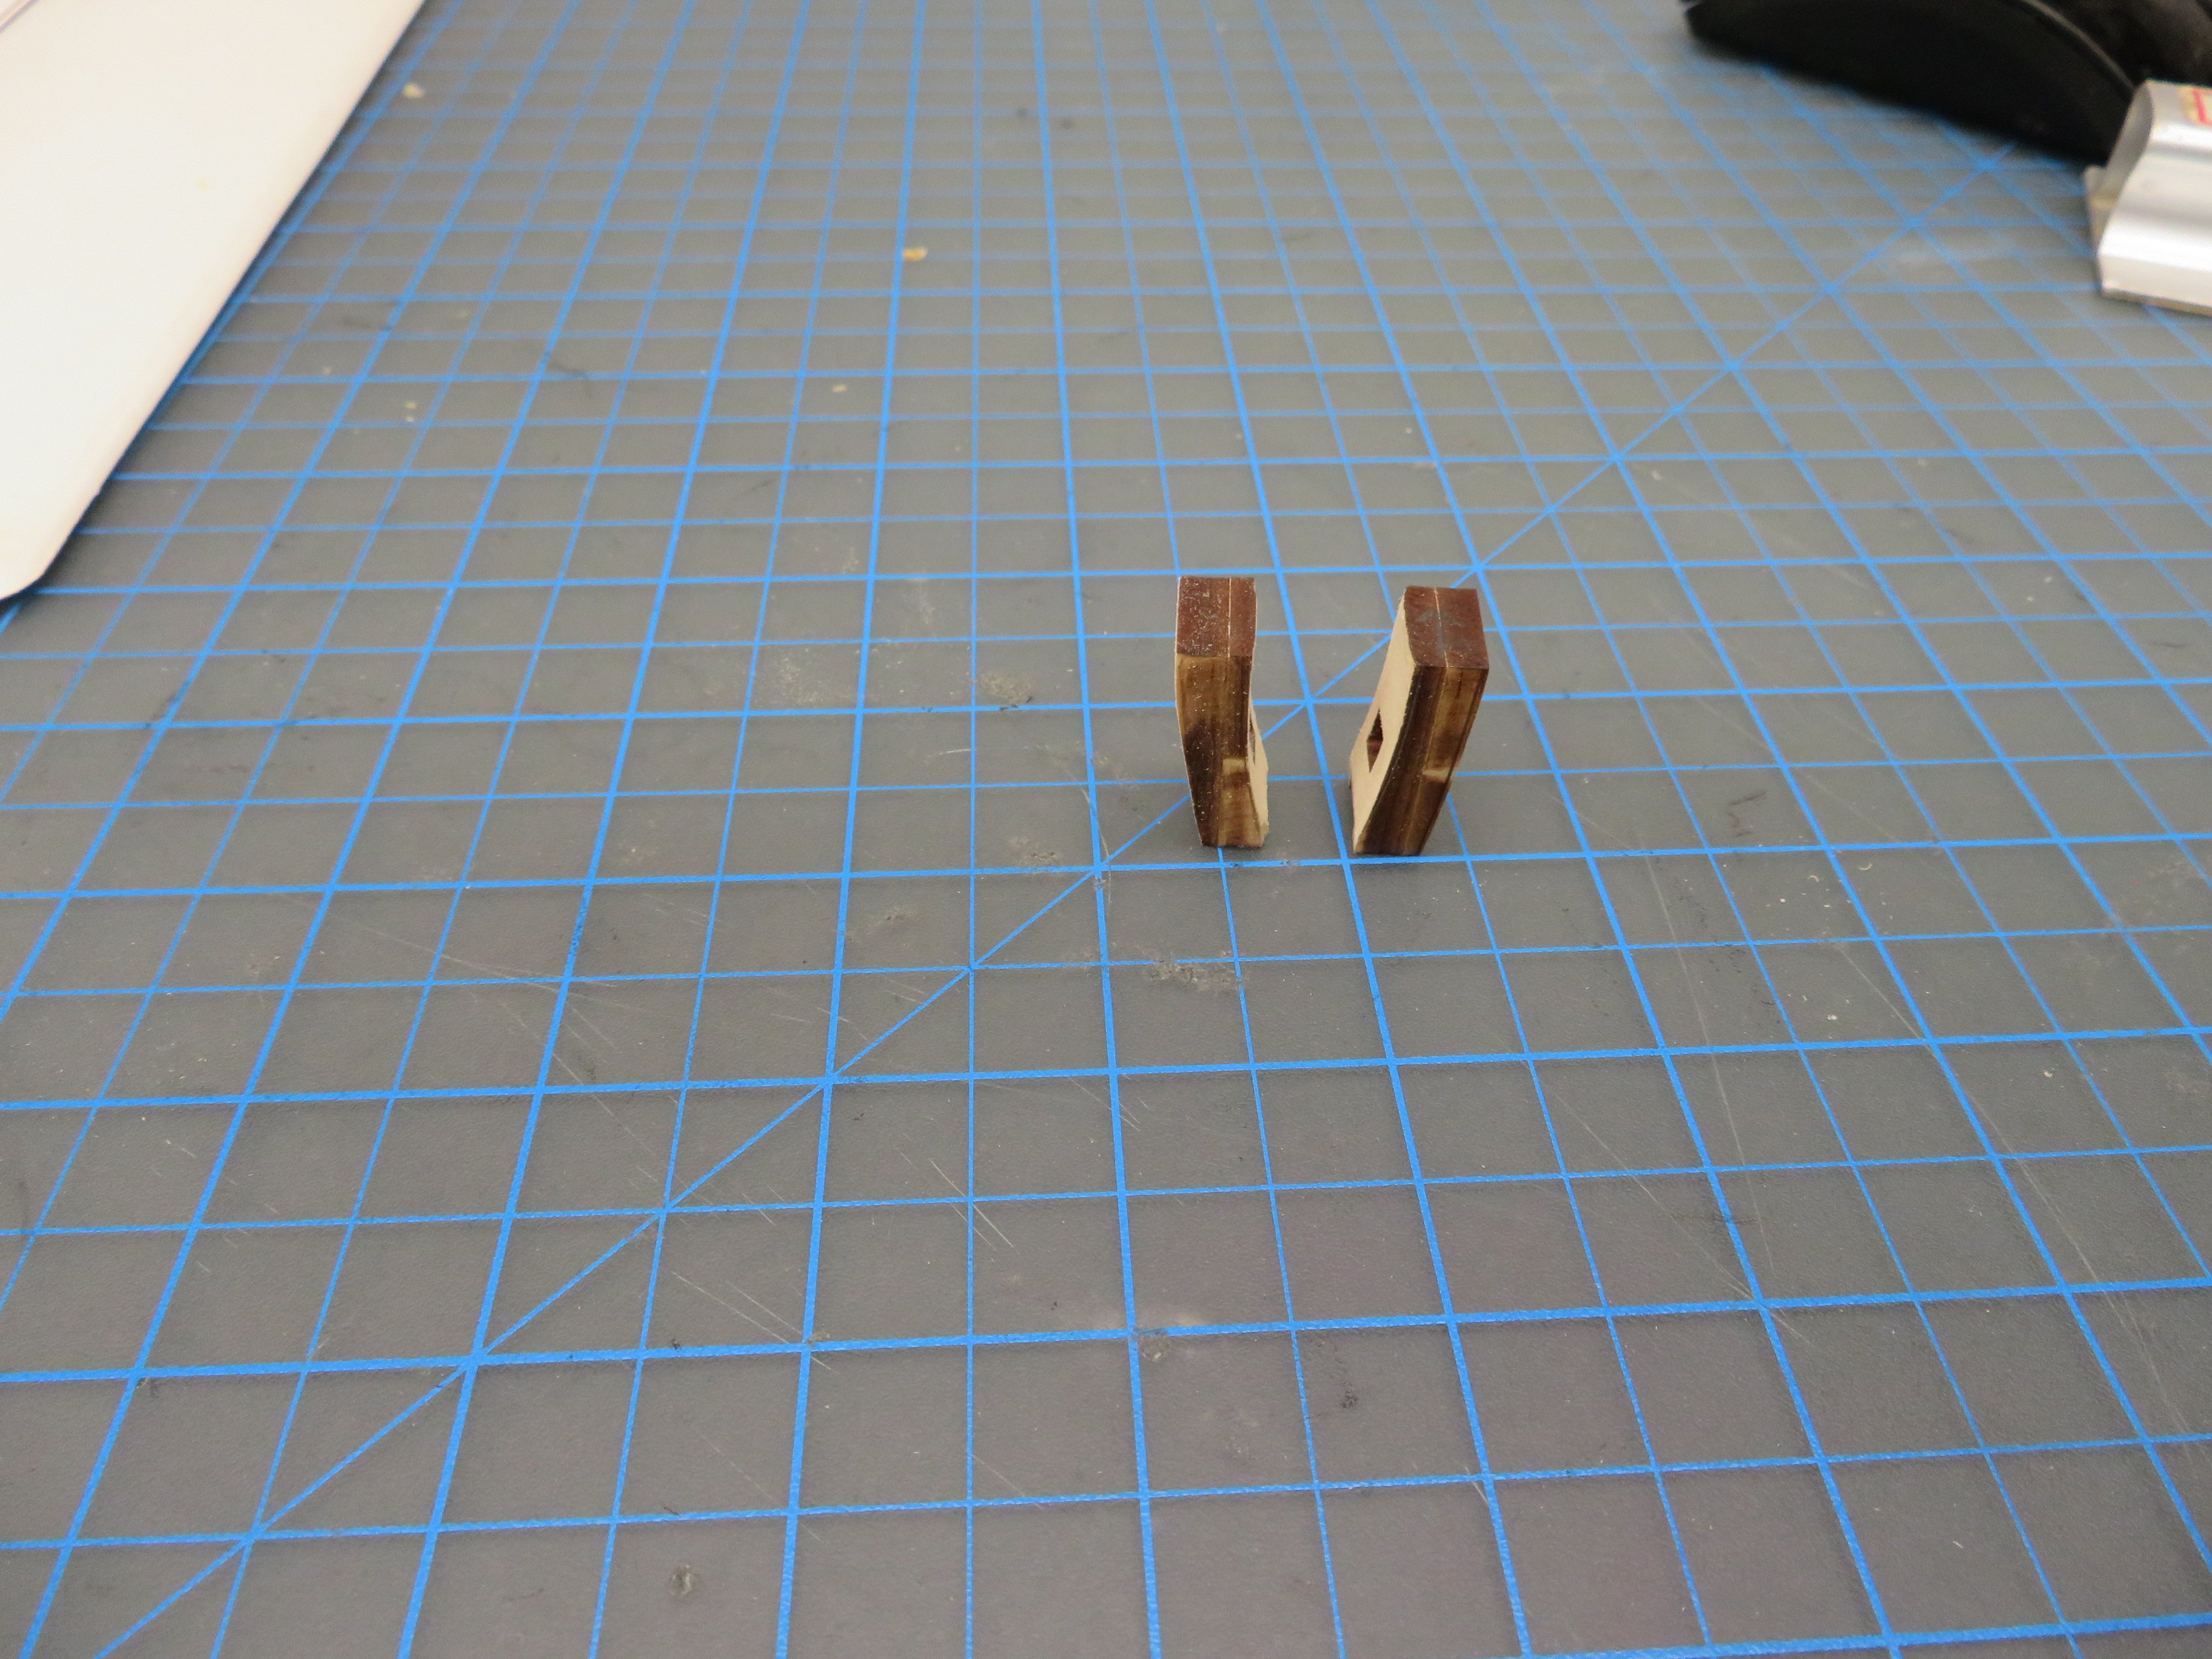
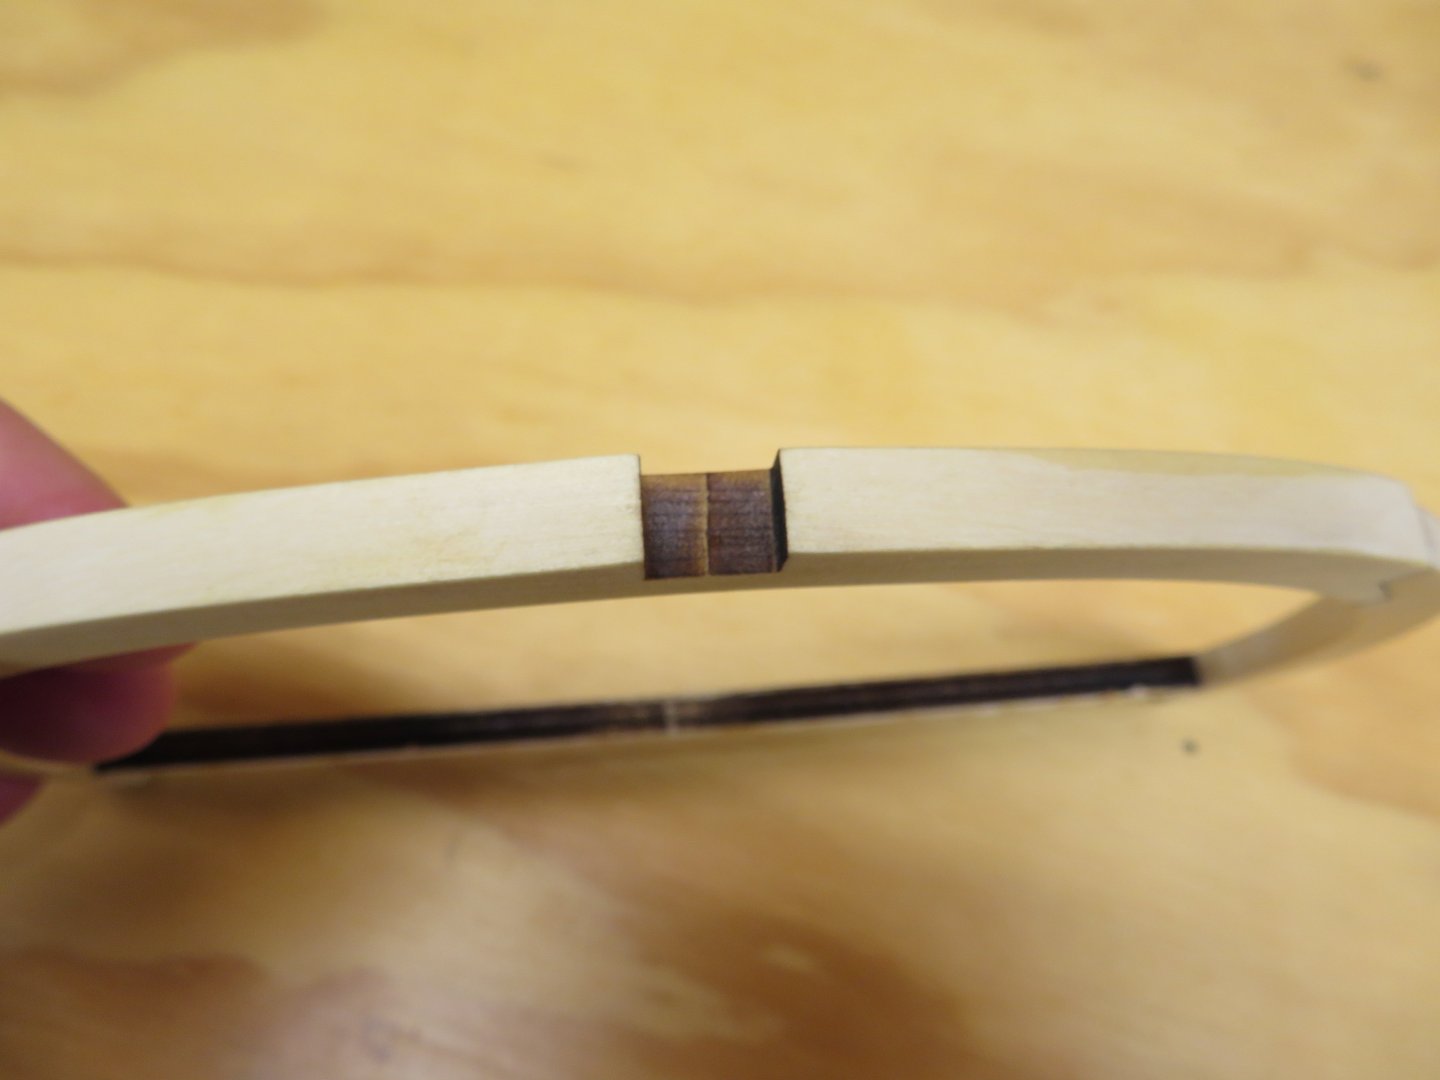
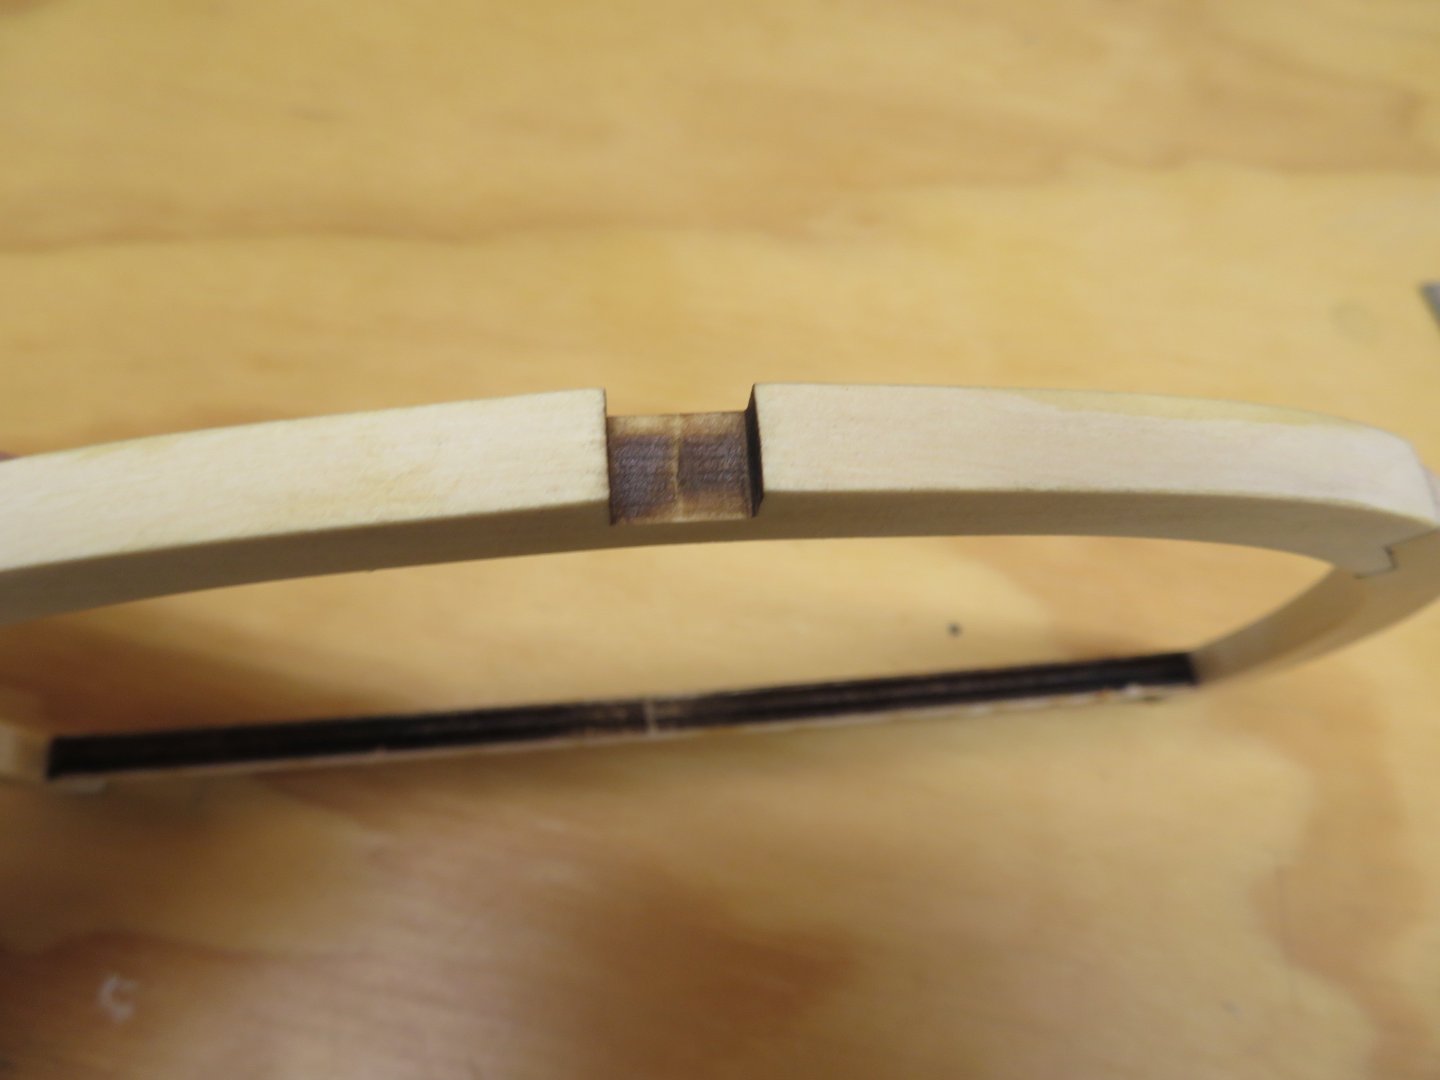
No not really. From the laser cutting there is a very small, raised area in the notch. I just lightly sanded it with a fine file to smooth it out.
-
Thank you Rick and Ben. Thank you for that information. One reason I haven't taped them together yet was I was wondering about that but had yet to confirm it. Thanks again!
-
Thanks Glenn, Just 41 more of the full frames! As I set a frame on the keel I continue to assemble other frames. I was going to assemble all the frames first, but this way breaks it up a little. Plus, it's nice to see some frames in place. You will see uneven application of poly on the frame outboard and inboard sides of the frames. I didn't worry about that as they will all be sanded a lot as I fair the model. Ok now just 39 more full frames to go!


-
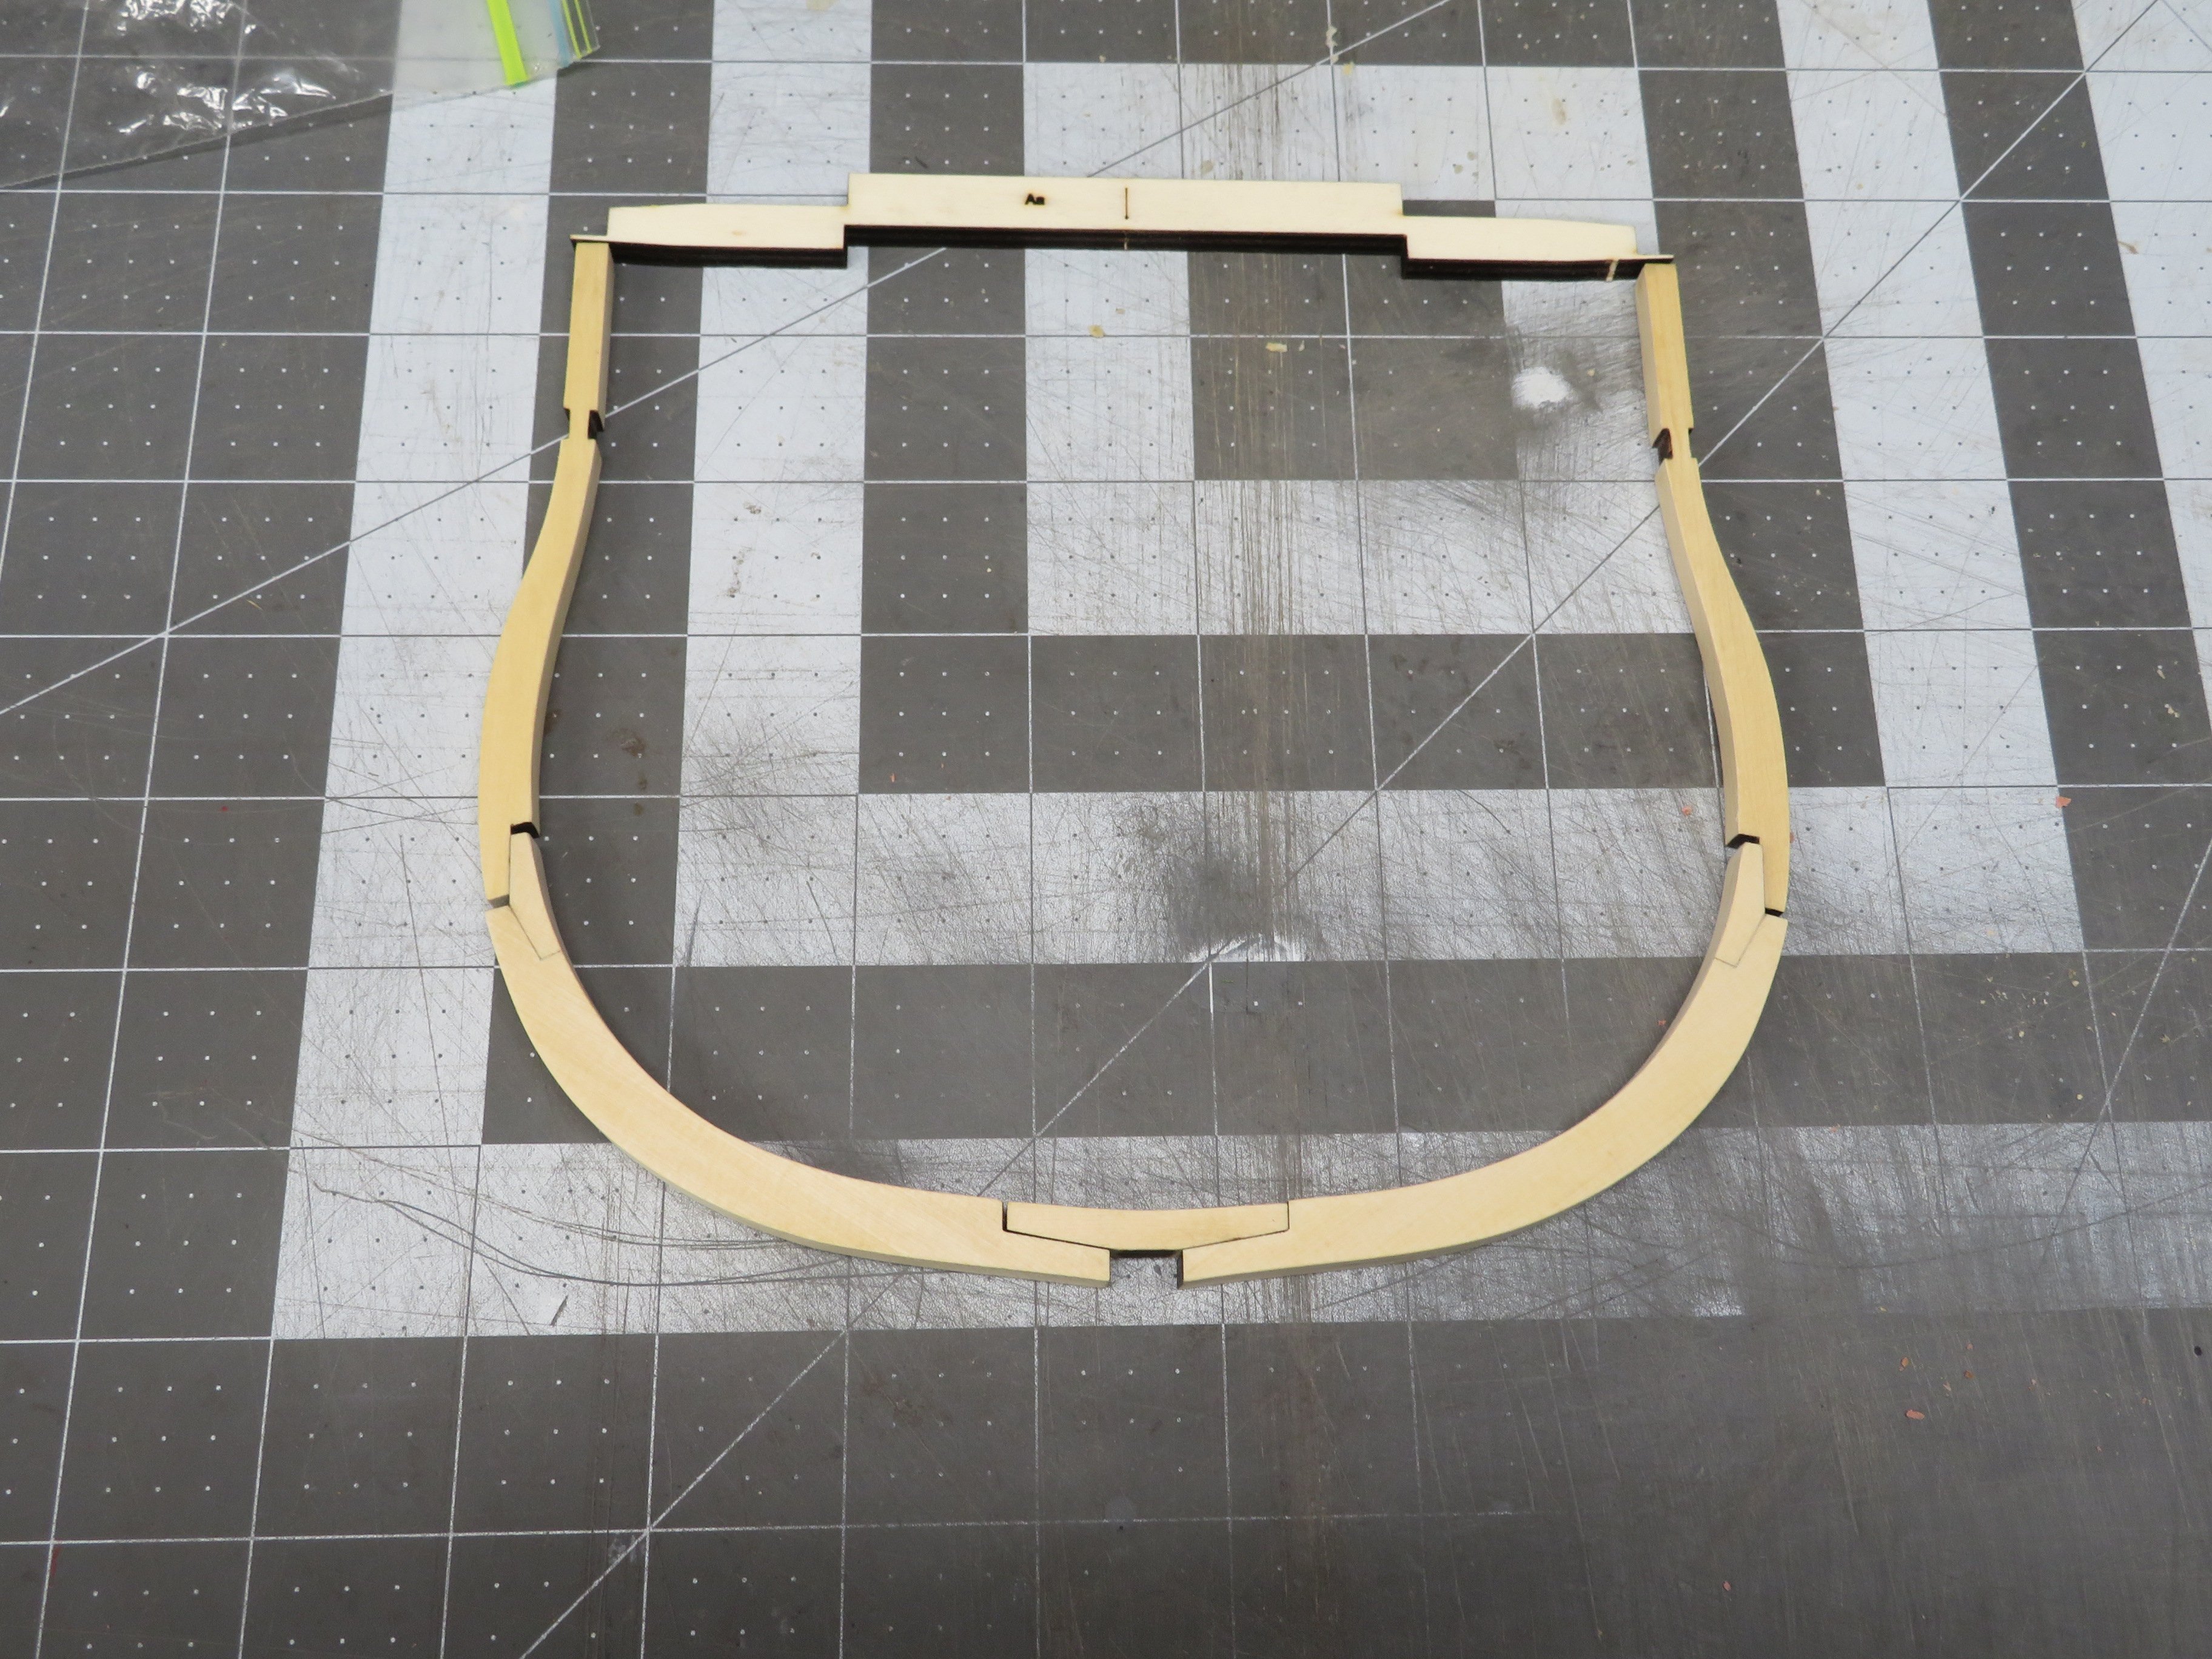
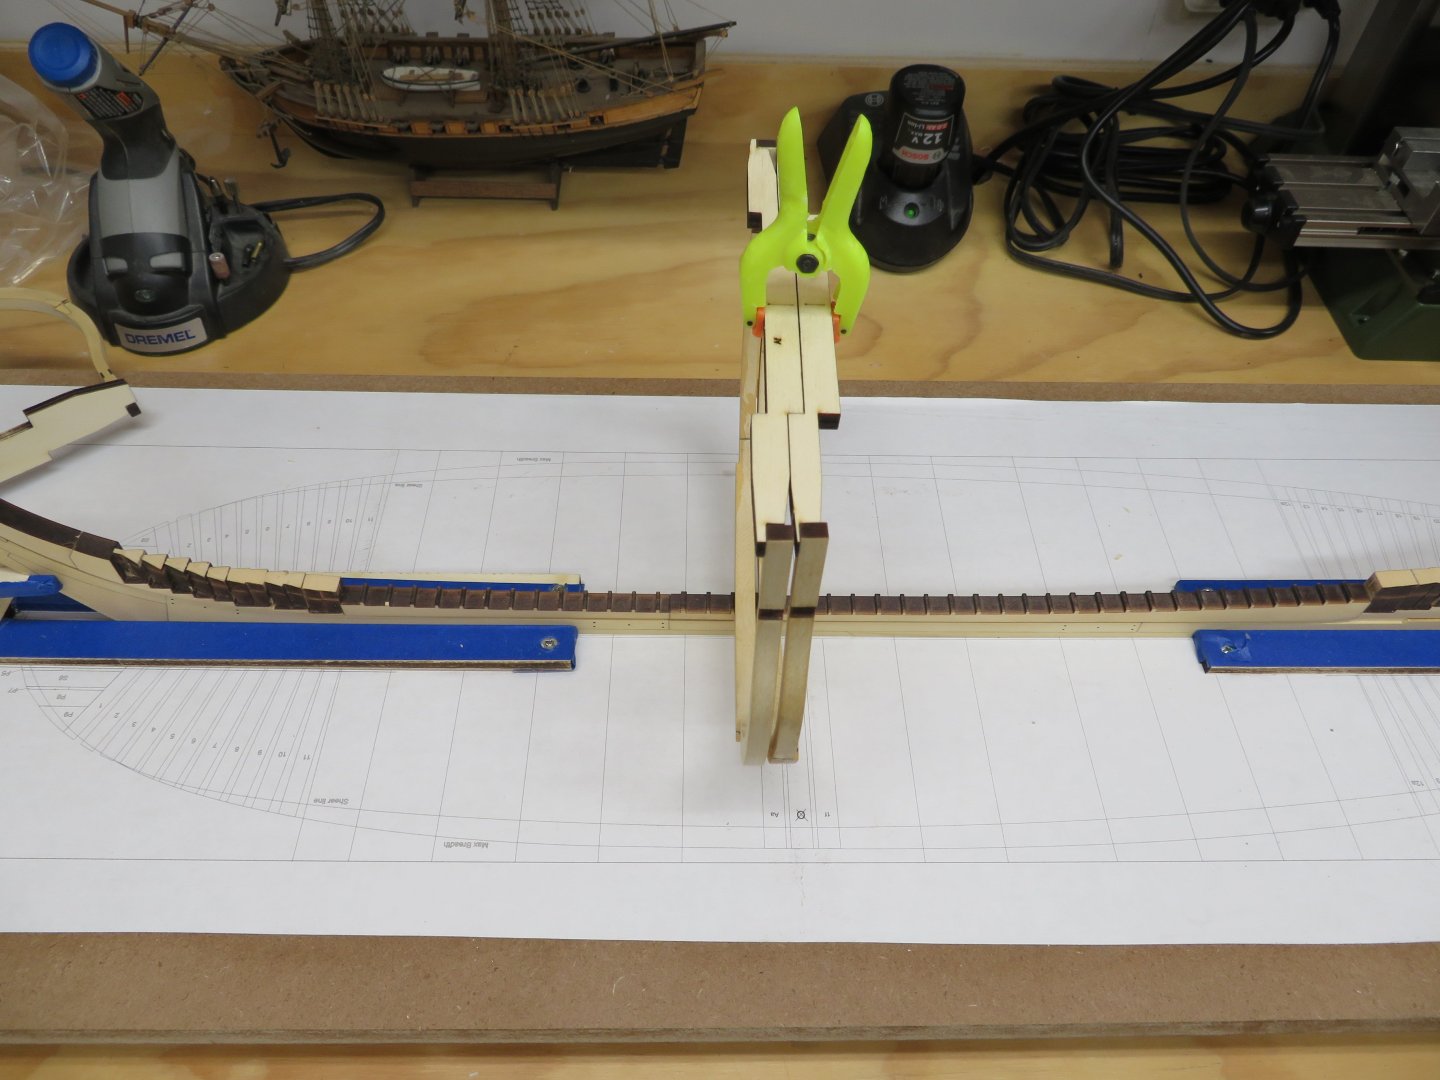
I've been assembling some frames, and they are going well. I just couldn't resist placing first frame (Aa) on the keel. For the picture I moved the left square to the back of the frame so you can see the how it lines up with the plan. It's now back where it belongs. Back to assembling more frames!
-
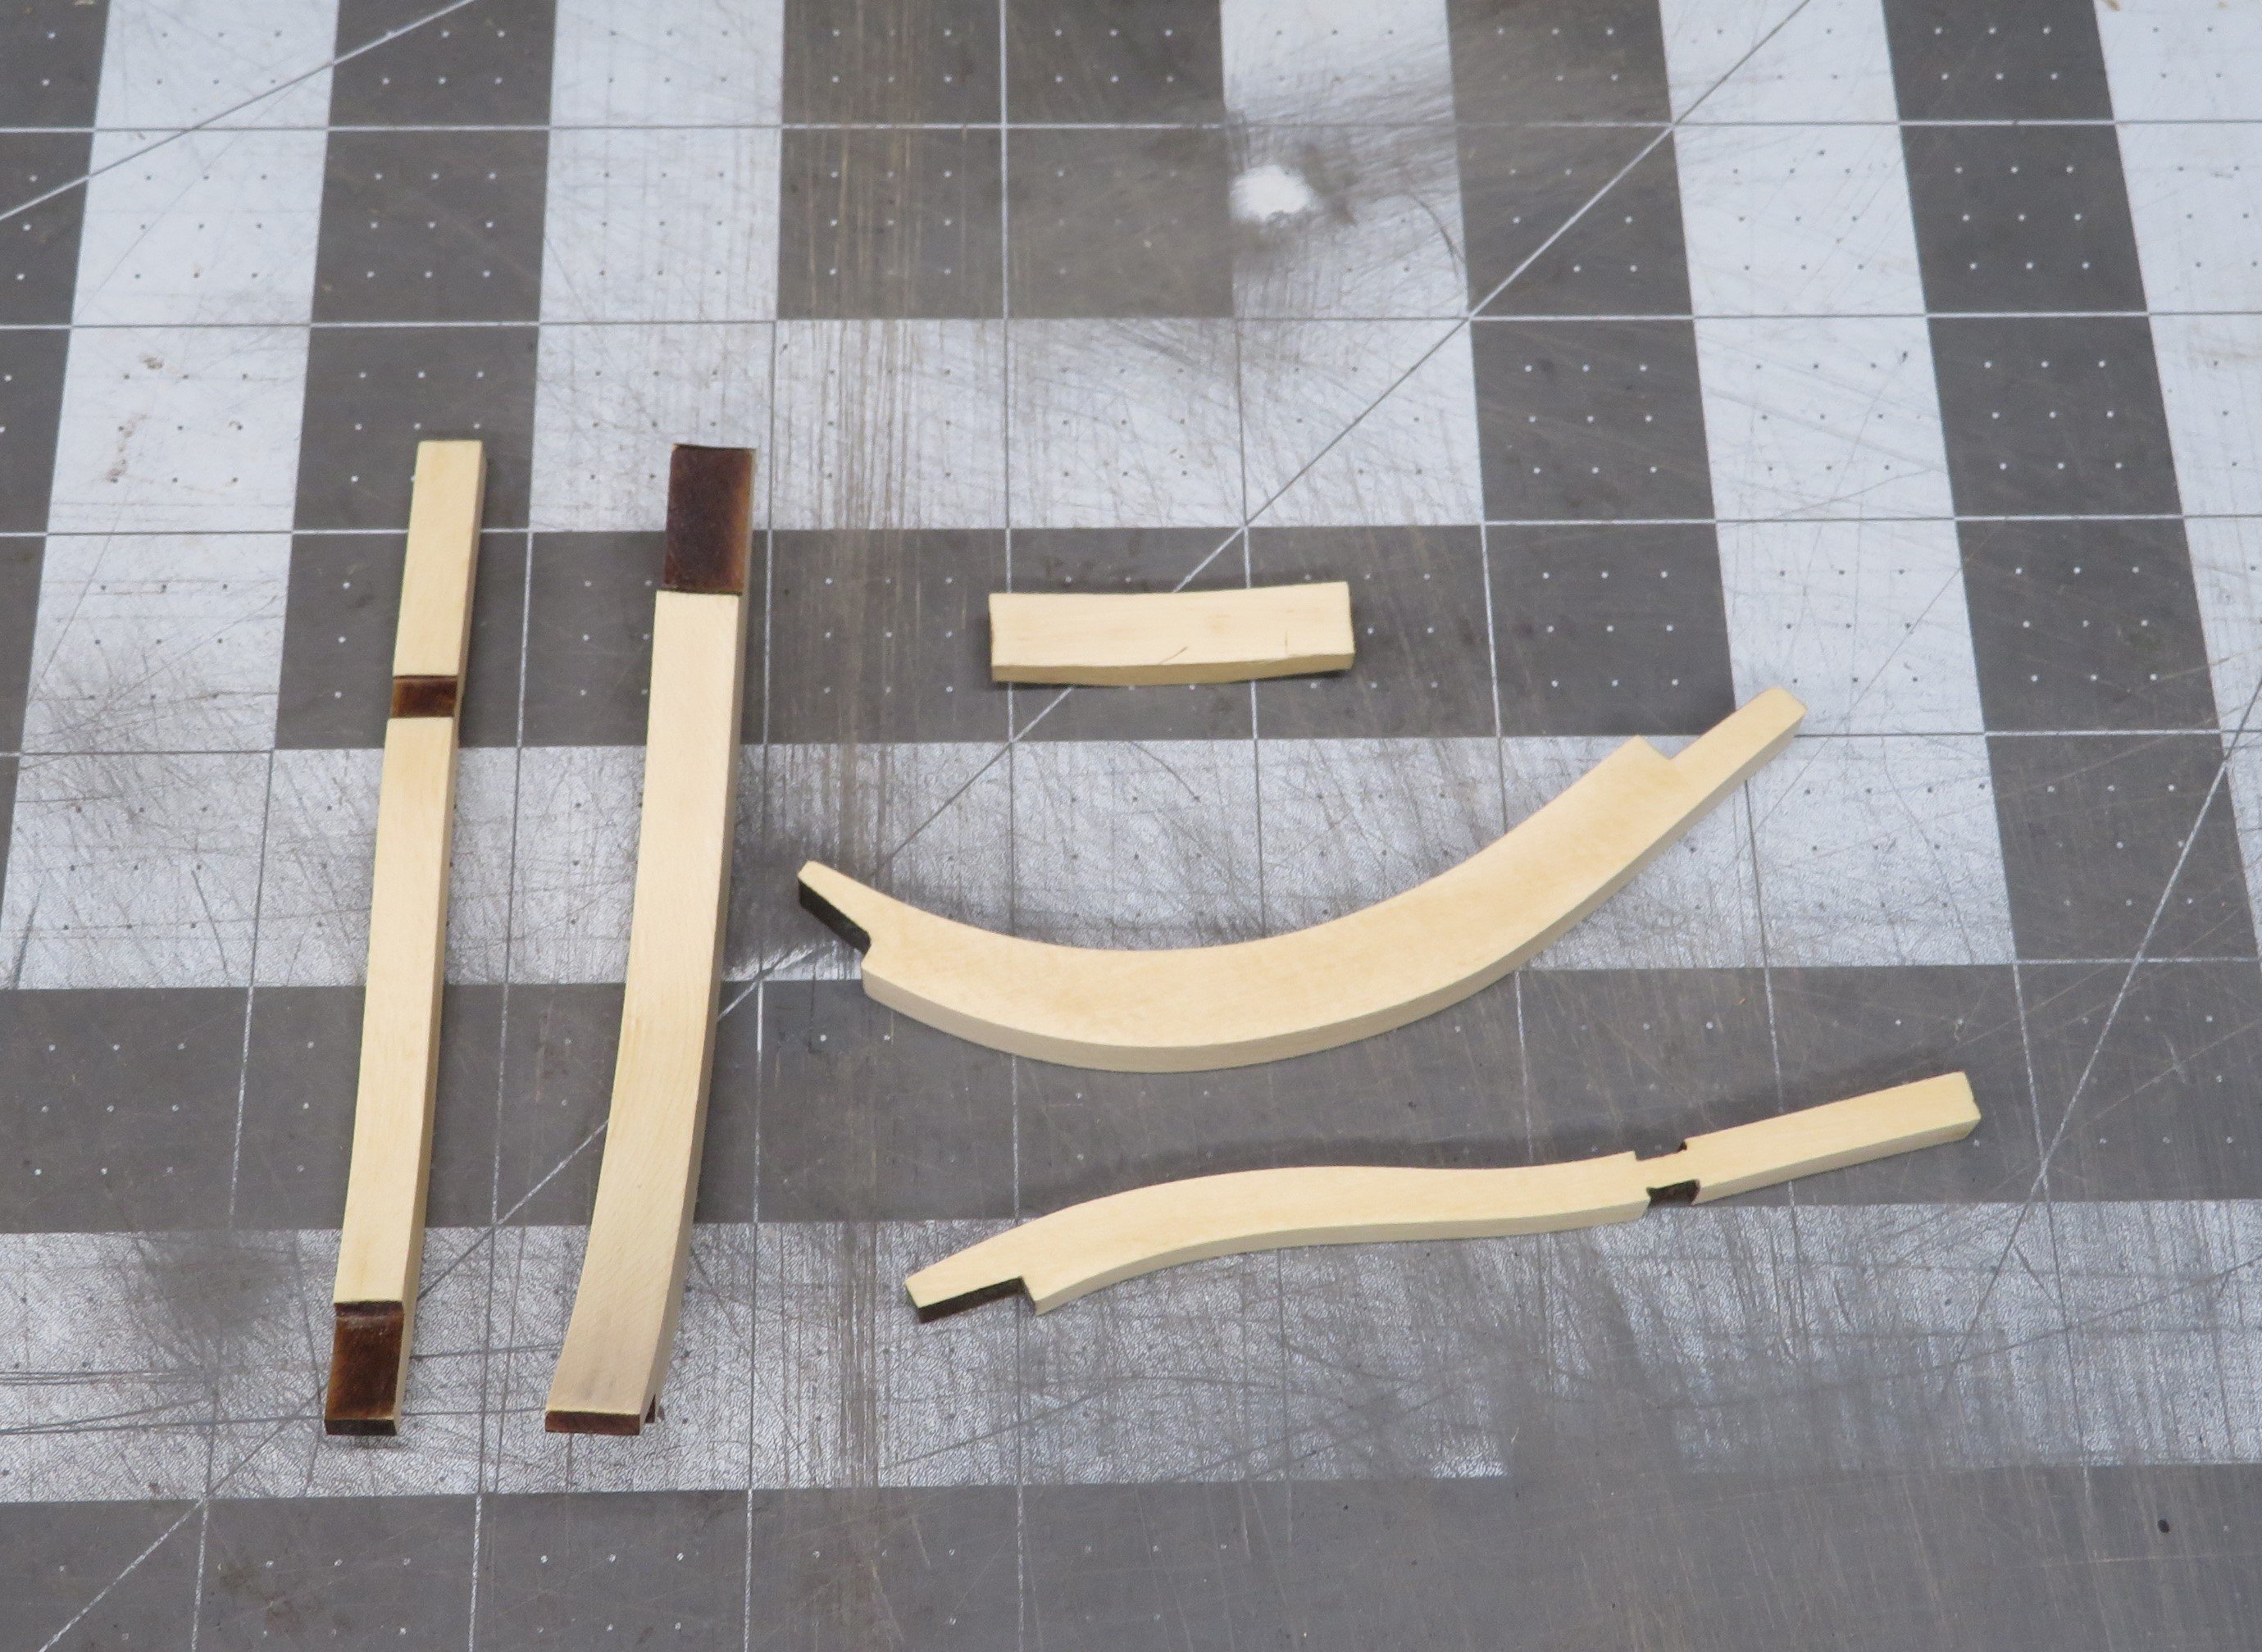
I'm continuing the char clean up and bagging the frame pieces until assemble. Below is a set all cleaned and ready for assembly later. The laser cutting is clean and precise. There are a total of 42 "square" frames to be made up in chapter 1. Back to scraping and sanding.

-
Glenn that is one beautifully built Winnie. The photos are awesome too.
- 840 replies
-
- 2
-

-
- winchelsea
- Syren Ship Model Company
- (and 1 more)
-
Hi all, I've just finished sanding the char off both sides of the billets holding the frame pieces. After that was done I applied a light coat of wipe on poly to both sides before removing any pieces. For me it seems to help keep the sides cleaner when removing the char from the rest of the frames. I'll be taking the frame pieces out one at a time, clean them up and put them in Individually marked storage bags until I'm ready to assemble them. This will take a bit of time as there are a lot of frames to do.😀