Rustyj
-
Posts
2,535 -
Joined
-
Last visited
Content Type
Profiles
Forums
Gallery
Events
Everything posted by Rustyj
-
 Good work Pete. Pulling wood through the draw plate can be tough on the hands. I pull some, do something else then pull some more trying to break up the pain!
 -
Hi Marius and welcome to the Triton build. You are off to a really nice start and I too like the looks of your wood.
-
US Brig Syren by Rustyj - FINISHED - 1:64
Rustyj replied to Rustyj's topic in - Build logs for subjects built 1801 - 1850
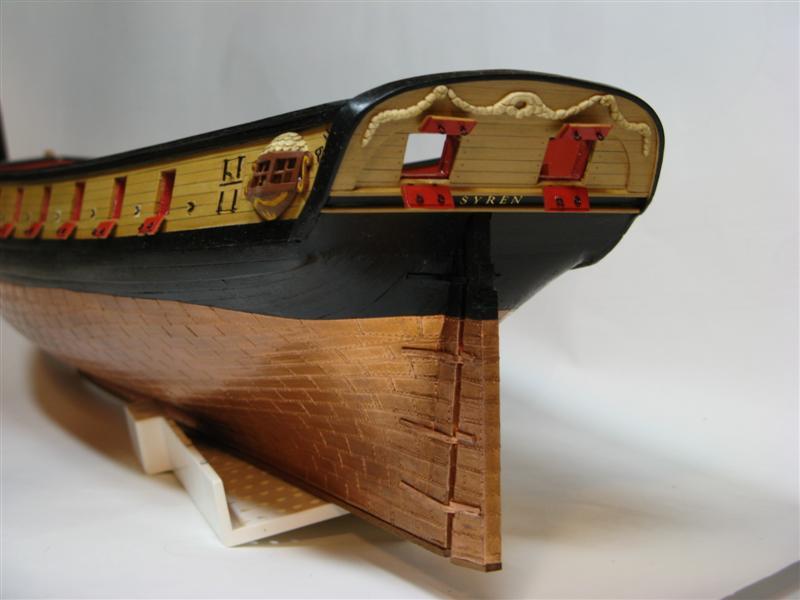
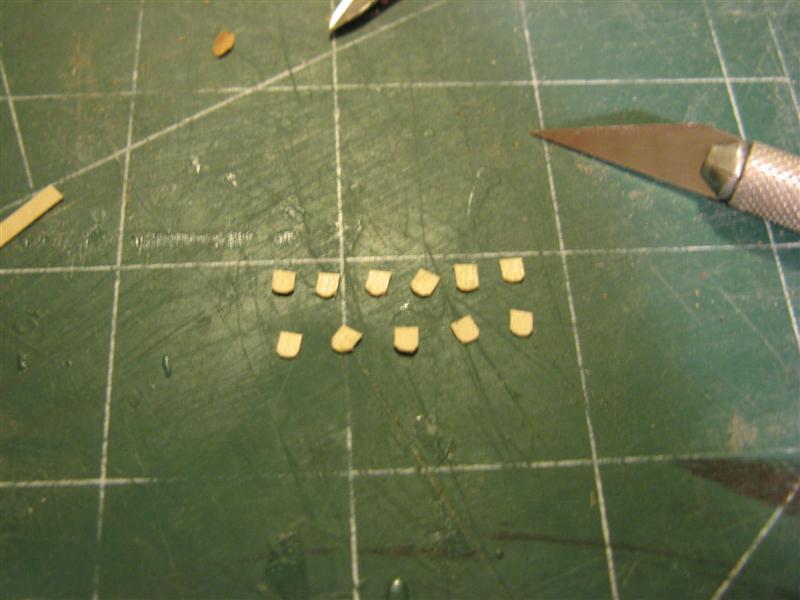
And here is the gunport lids being made and installed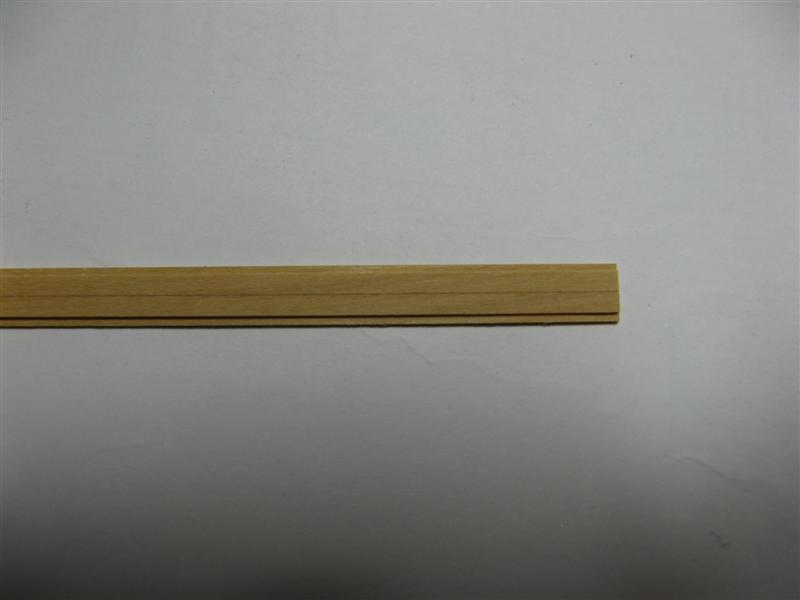
-
US Brig Syren by Rustyj - FINISHED - 1:64
Rustyj replied to Rustyj's topic in - Build logs for subjects built 1801 - 1850
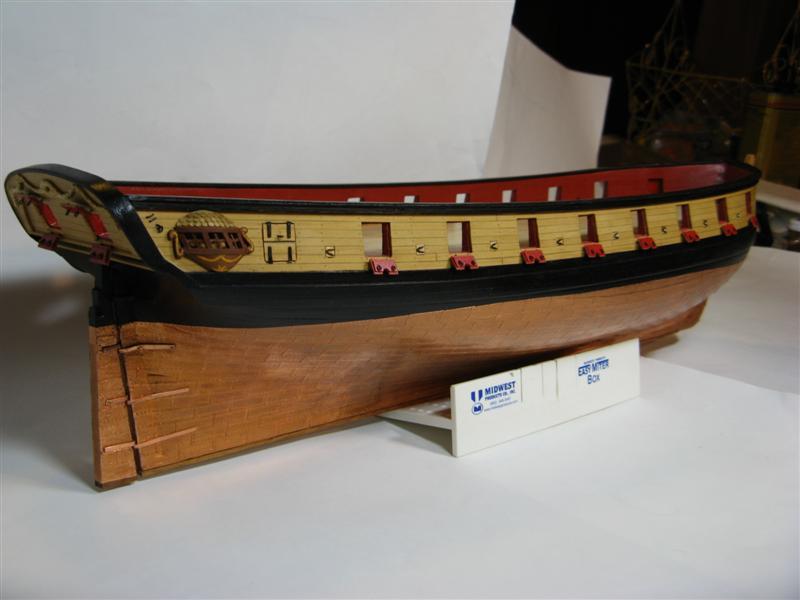
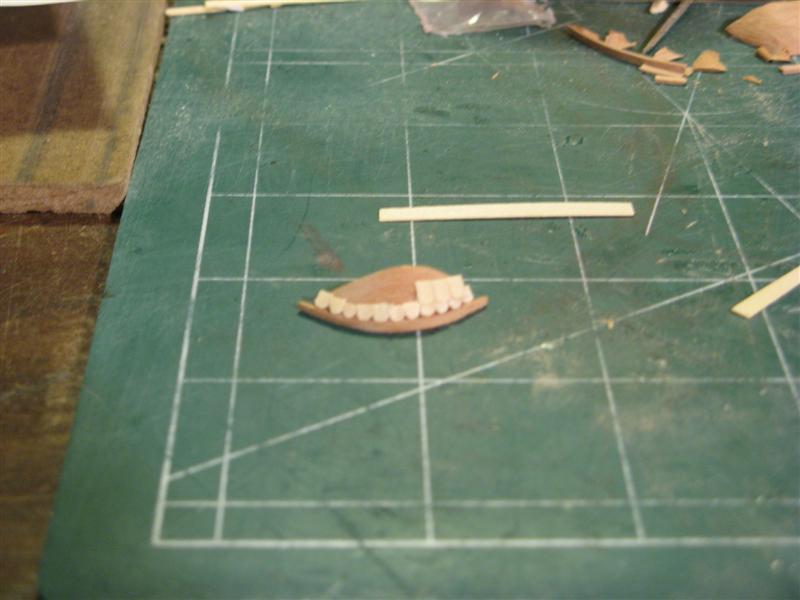
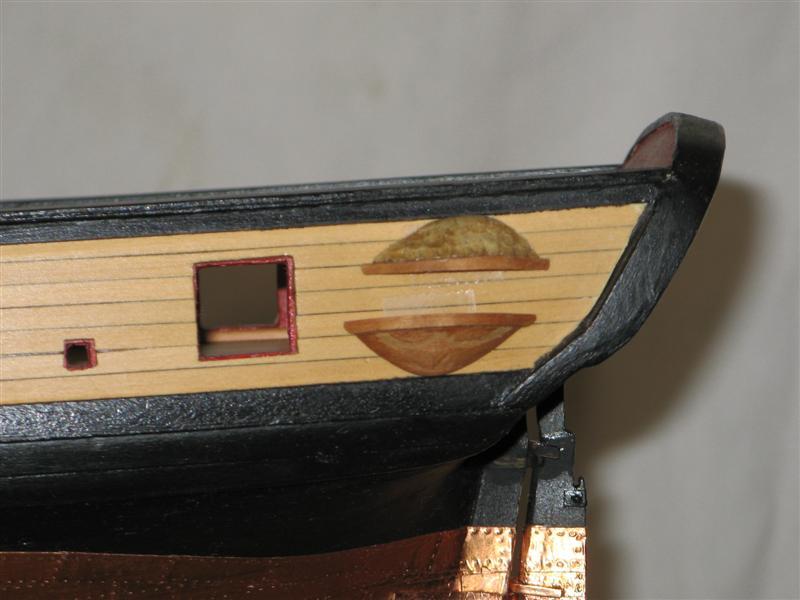
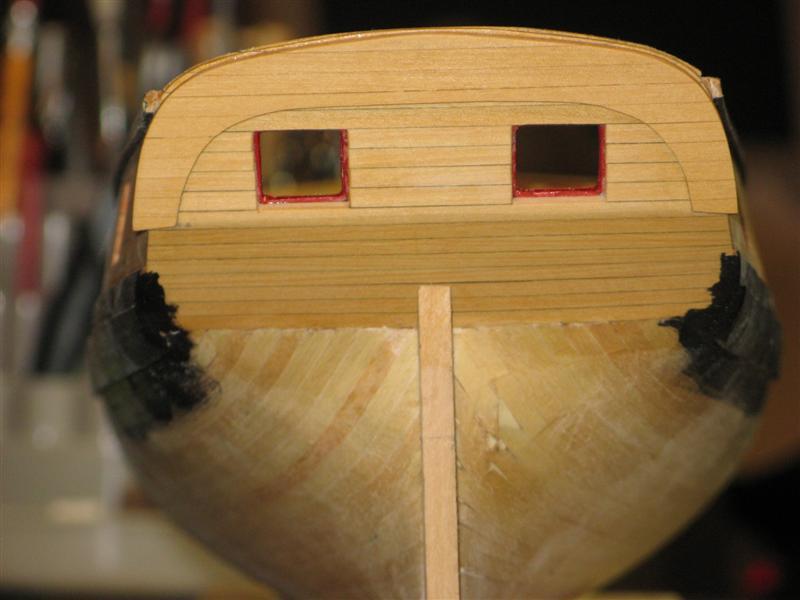
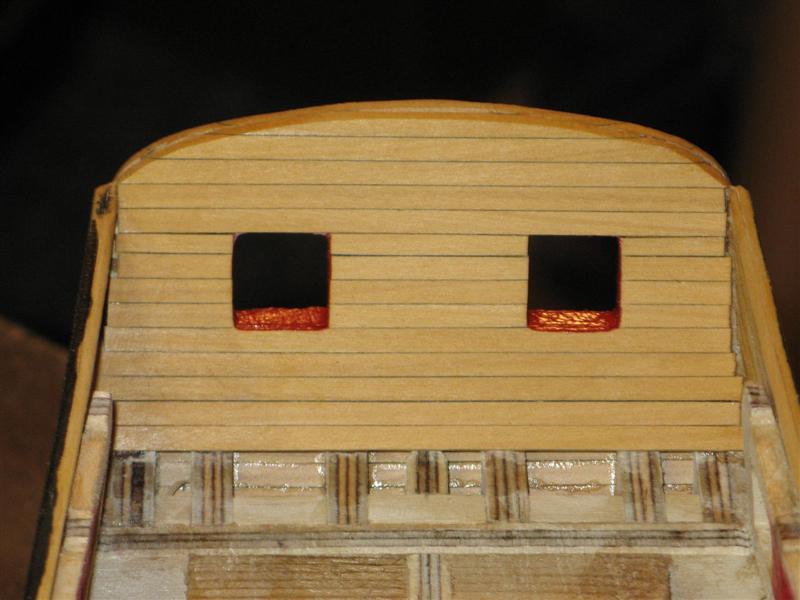
Making the quarter badges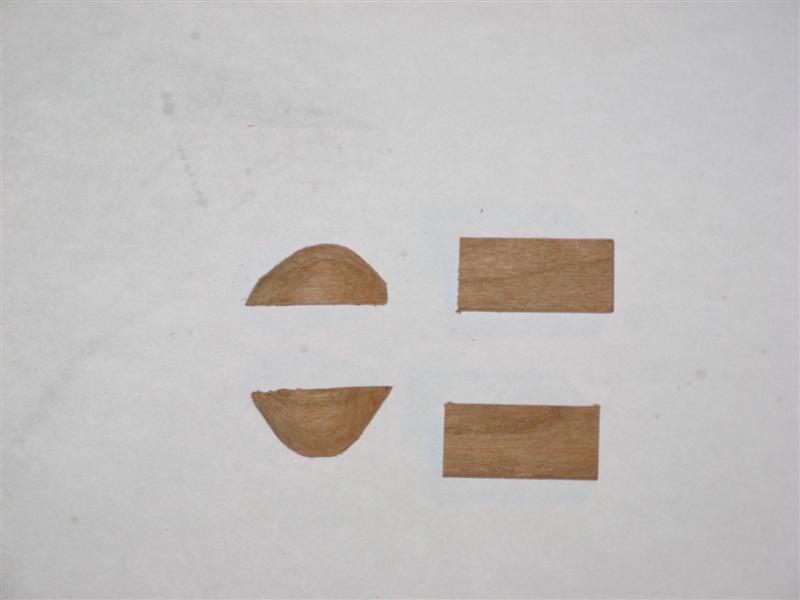


-
USF Confederacy by Rustyj - FINISHED
Rustyj replied to Rustyj's topic in - Build logs for subjects built 1751 - 1800
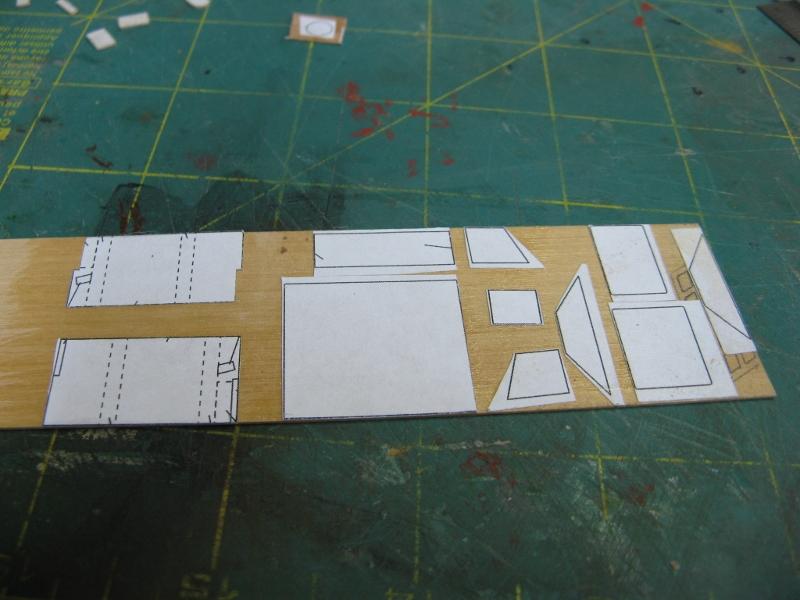
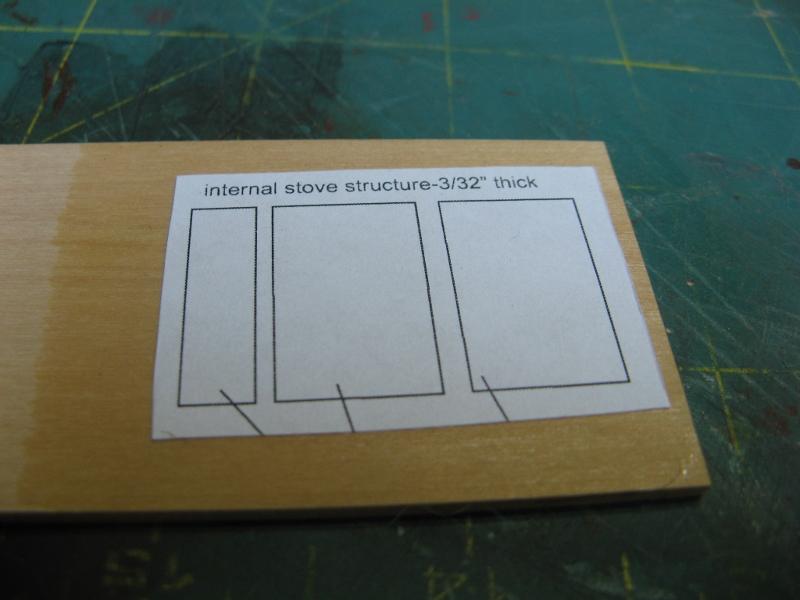
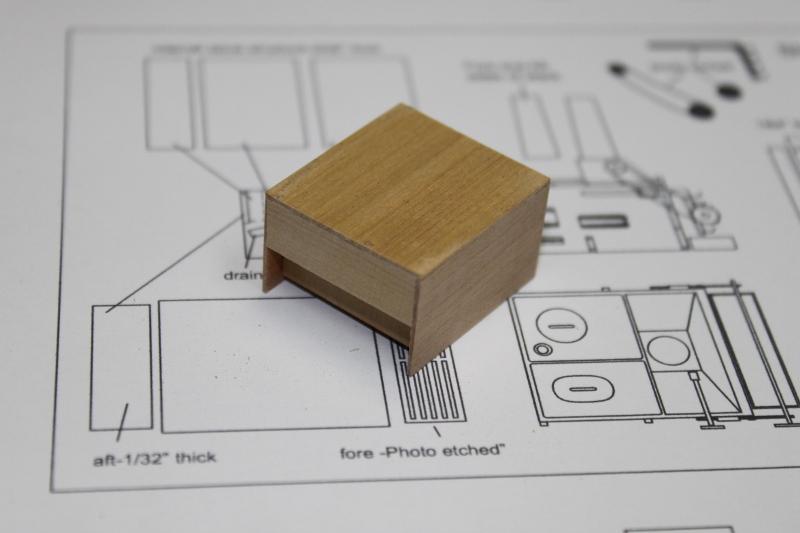
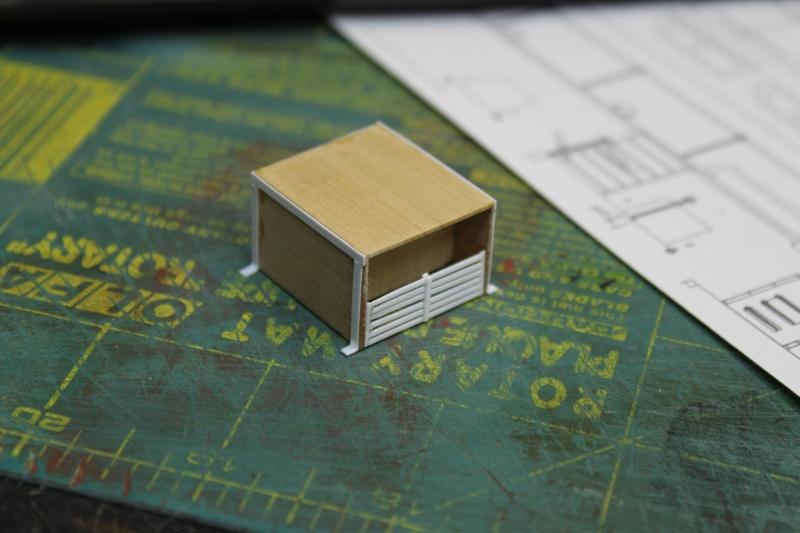
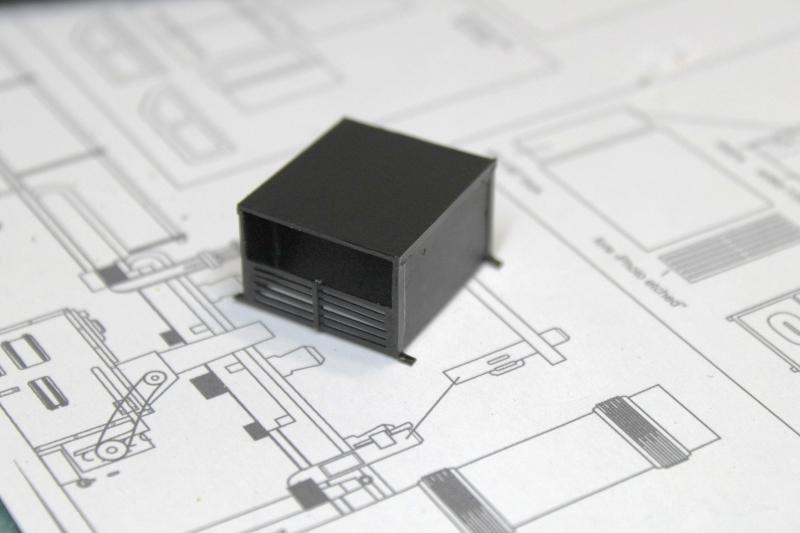
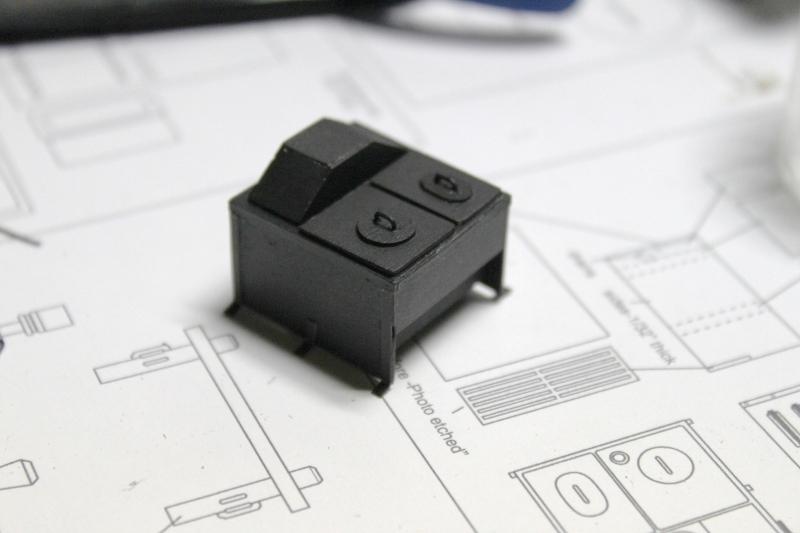
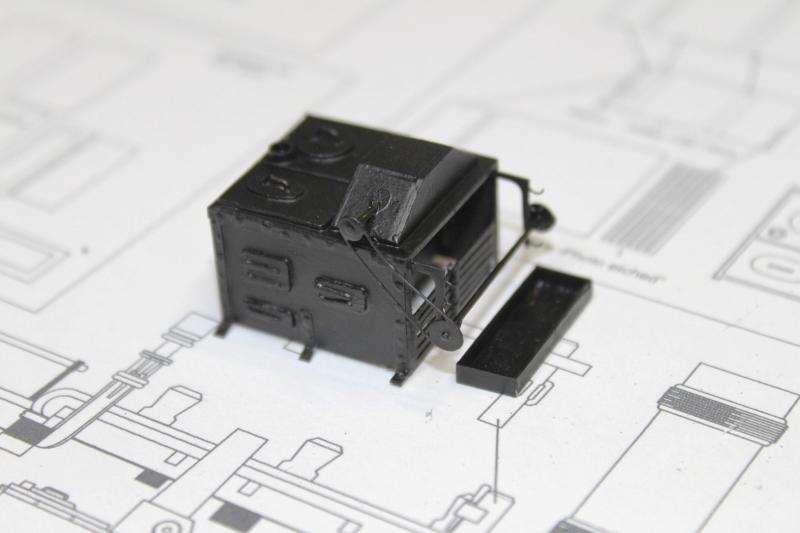
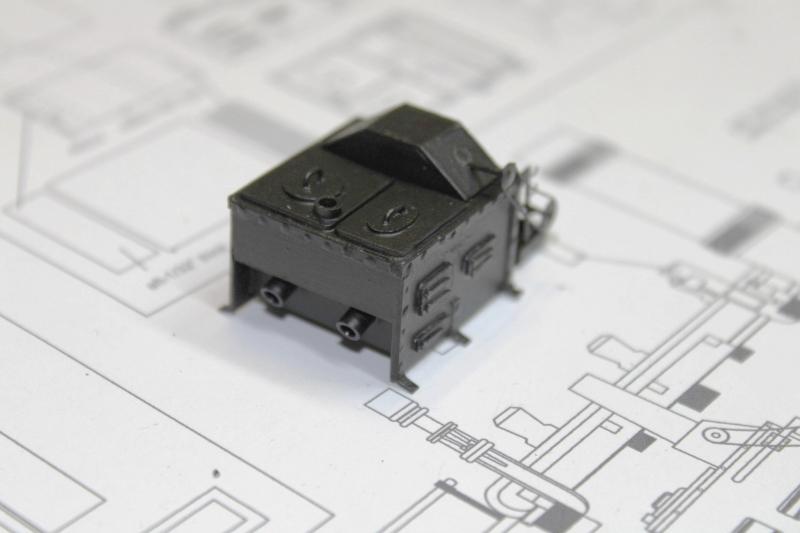
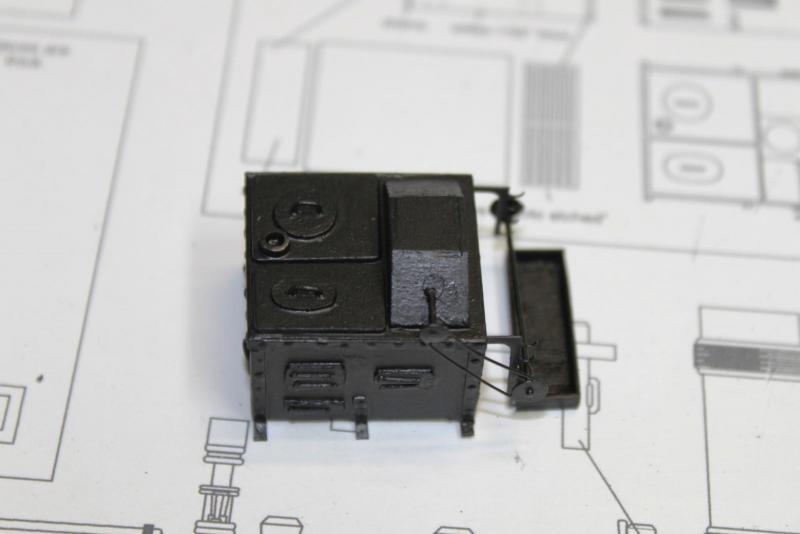
Here is the making of the ships stove.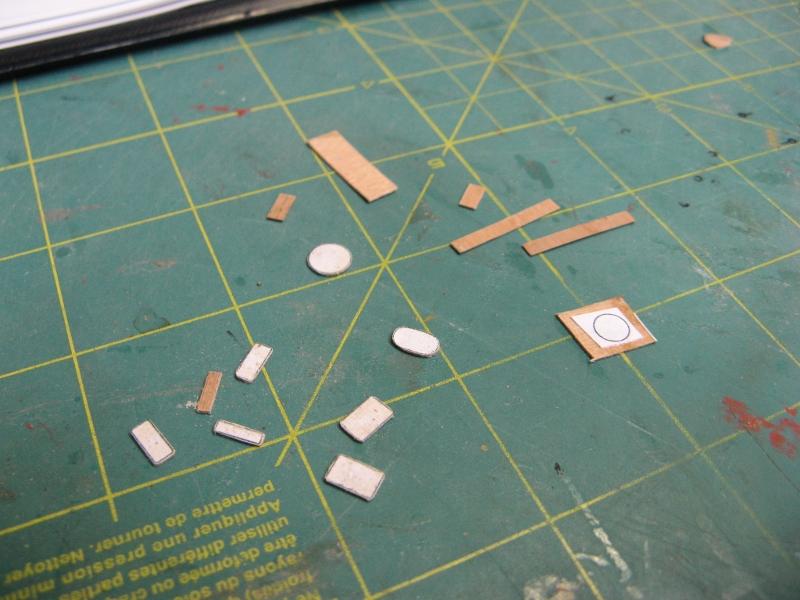
- 149 replies
-
- 4
-

-
- confederacy
- frigate
- (and 1 more)
-
USF Confederacy by Rustyj - FINISHED
Rustyj replied to Rustyj's topic in - Build logs for subjects built 1751 - 1800
Rudder cover, mass painting of the barrels and the start of the bulkhead.

- 149 replies
-
- 1
-
-
- confederacy
- frigate
- (and 1 more)
-
US Brig Syren by Rustyj - FINISHED - 1:64
Rustyj replied to Rustyj's topic in - Build logs for subjects built 1801 - 1850
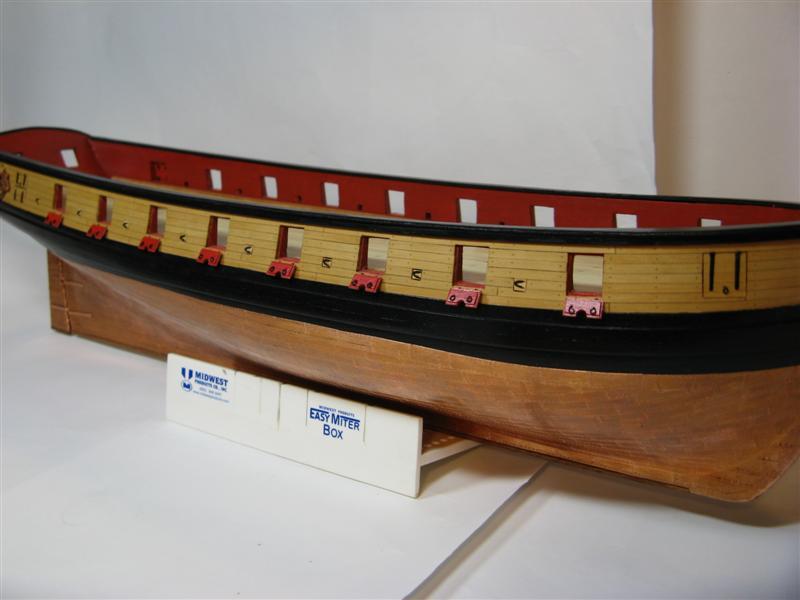
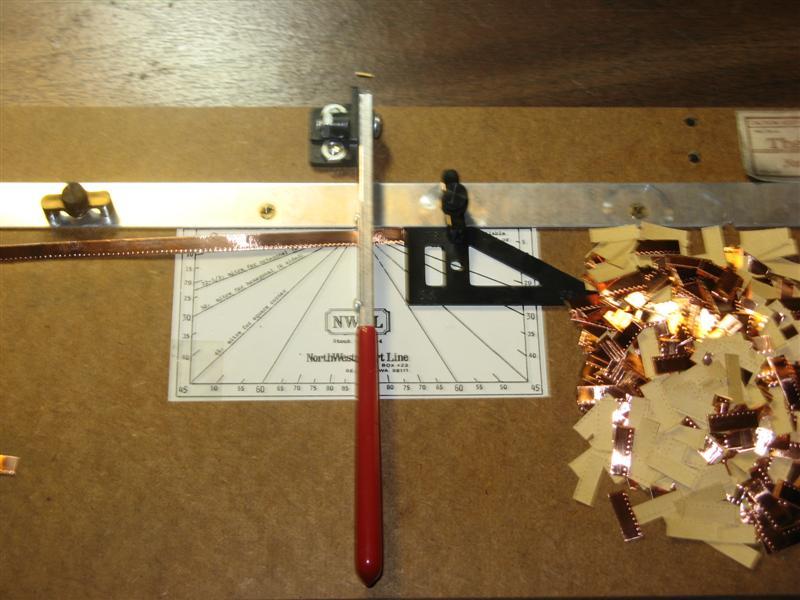
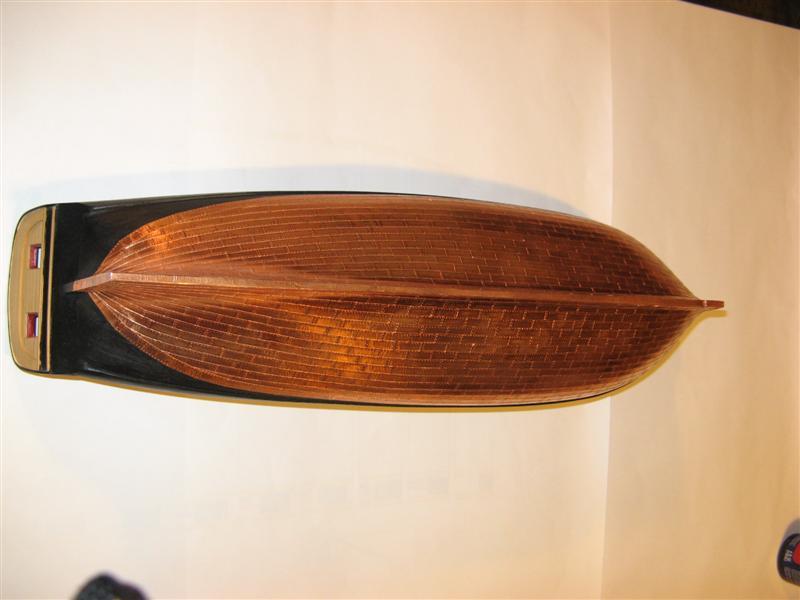
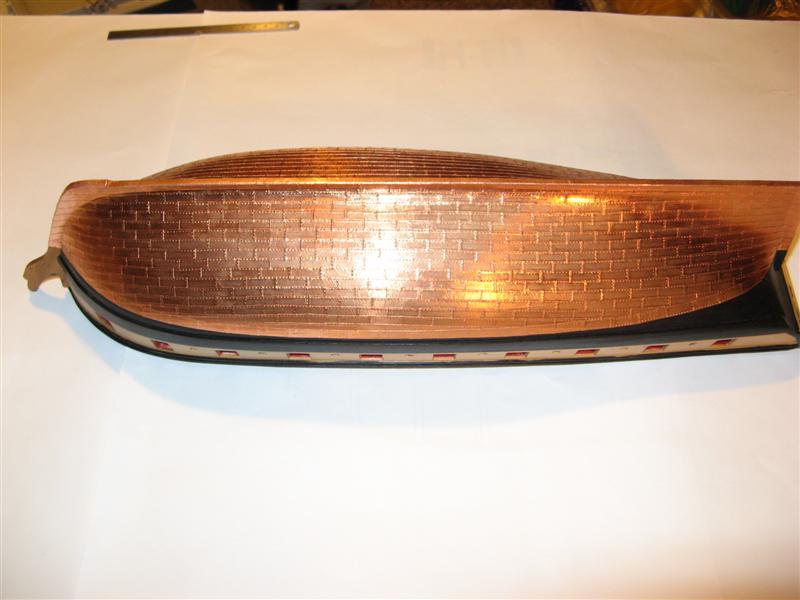
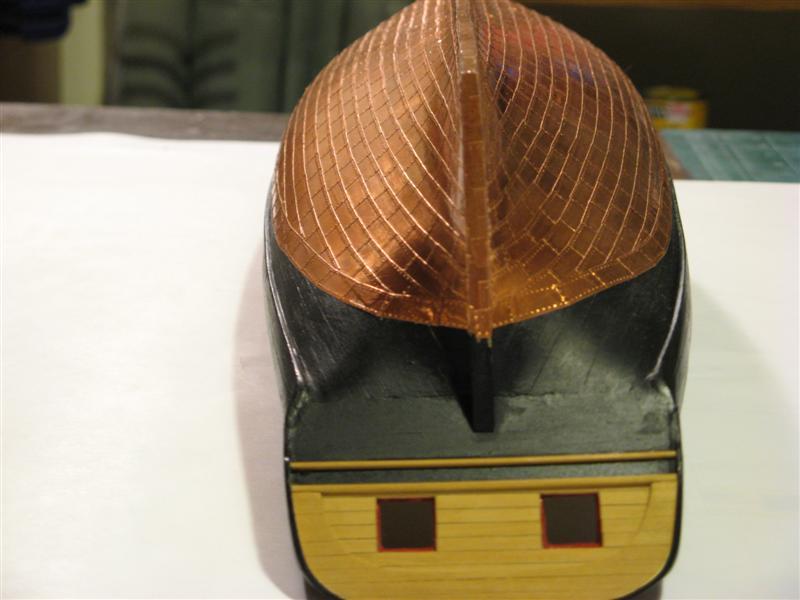
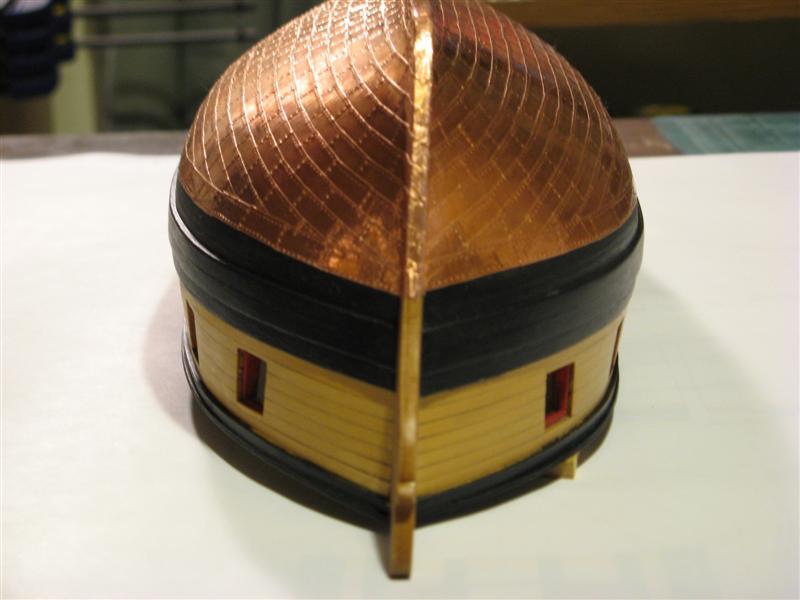
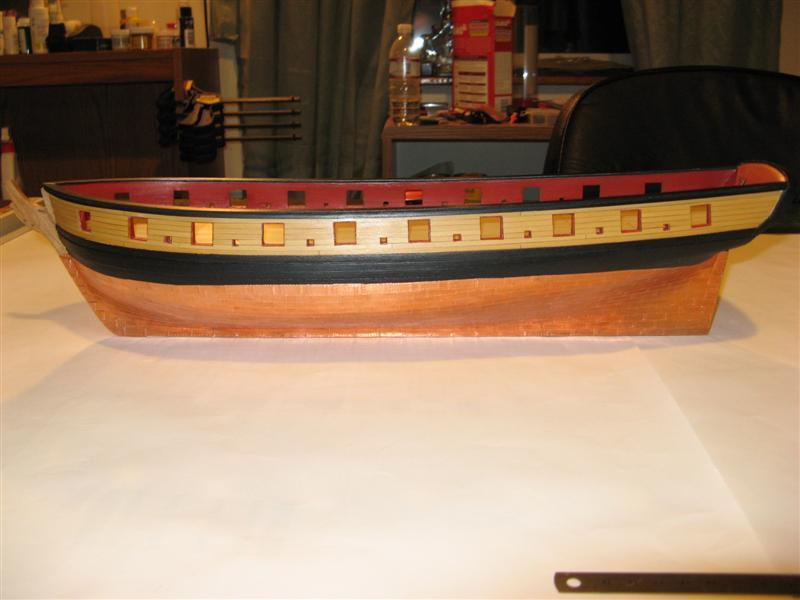
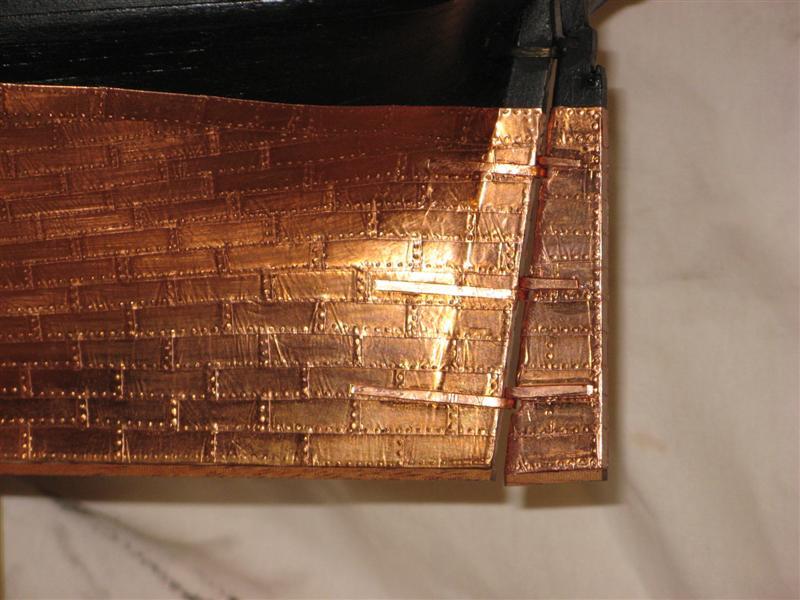
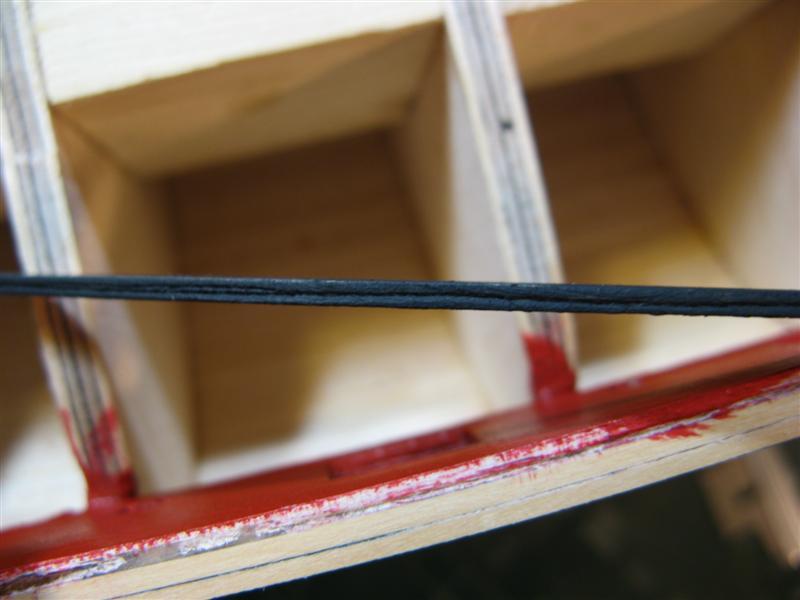
Cutting the copper tape to make plates and coppering the hull.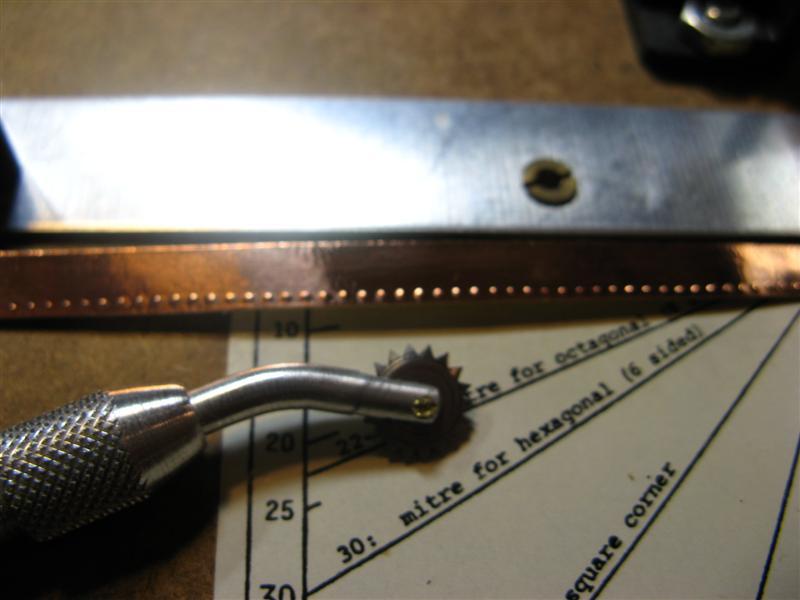
-
US Brig Syren by Rustyj - FINISHED - 1:64
Rustyj replied to Rustyj's topic in - Build logs for subjects built 1801 - 1850
More hull and deck planking.
-
USF Confederacy by Rustyj - FINISHED
Rustyj replied to Rustyj's topic in - Build logs for subjects built 1751 - 1800
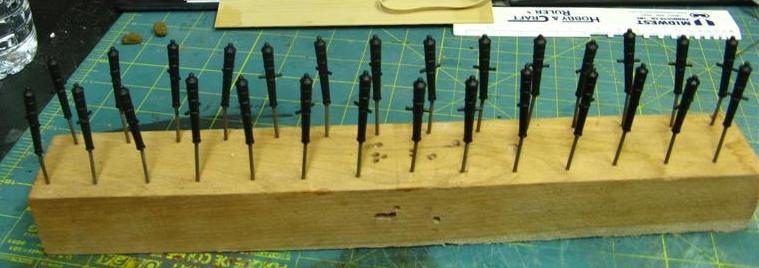
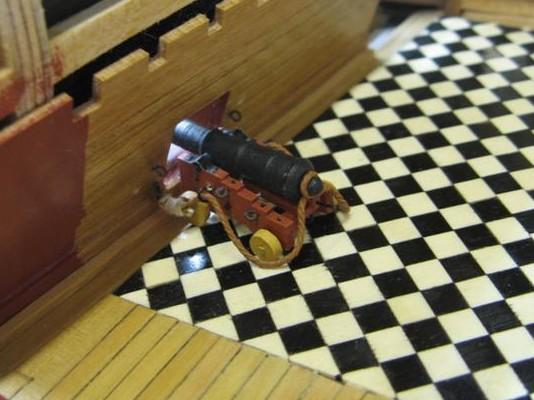
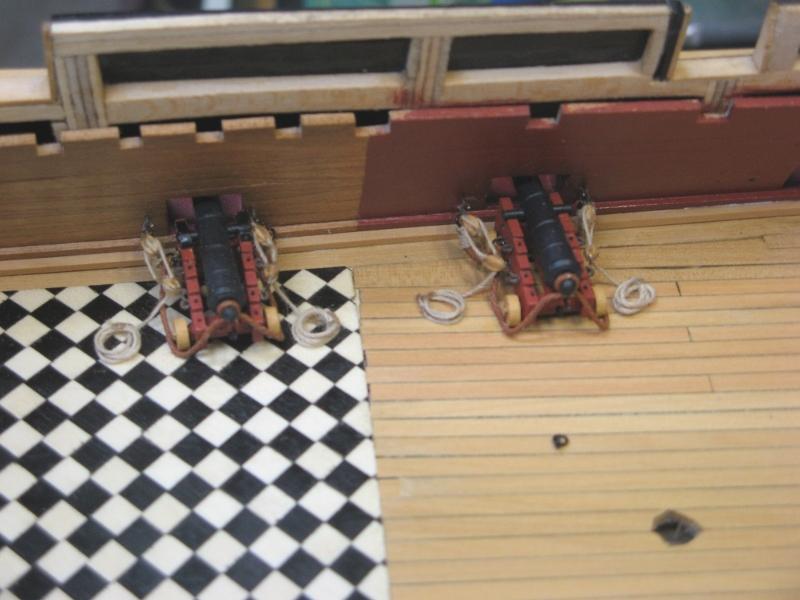
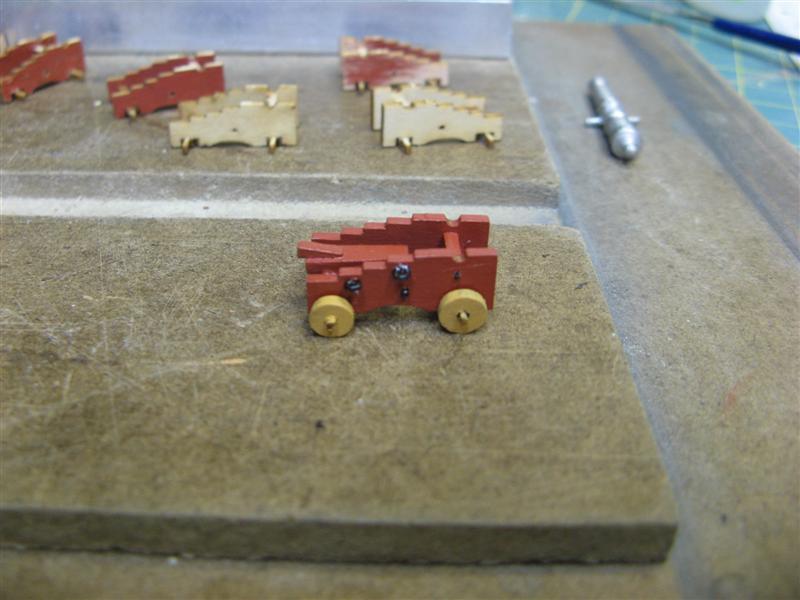
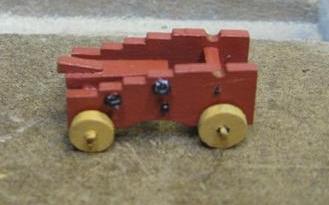
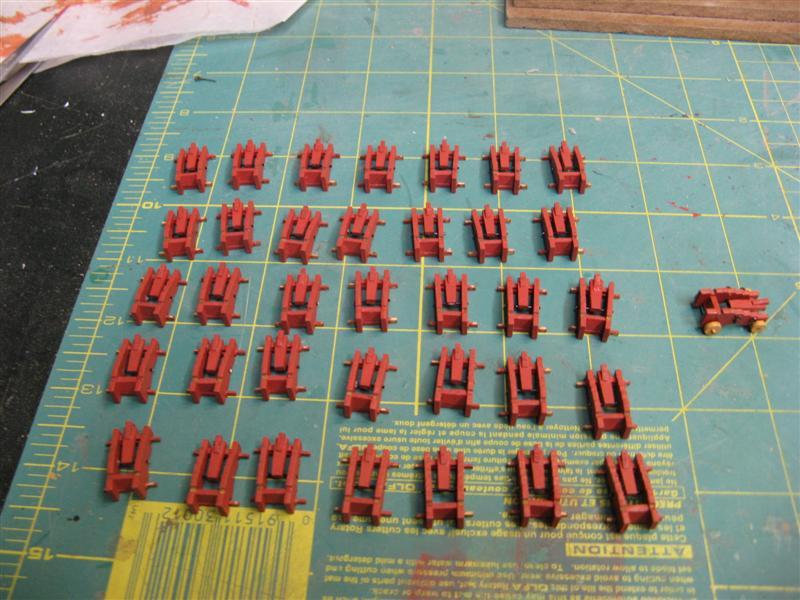
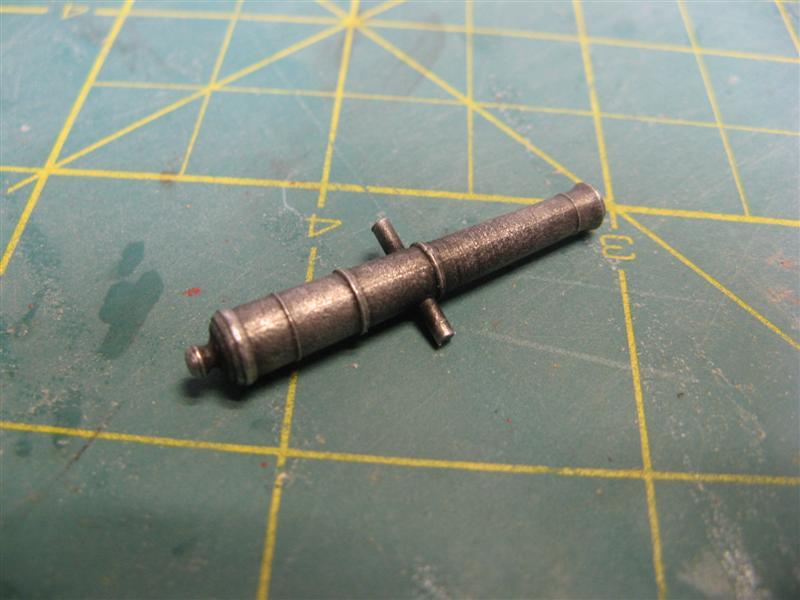
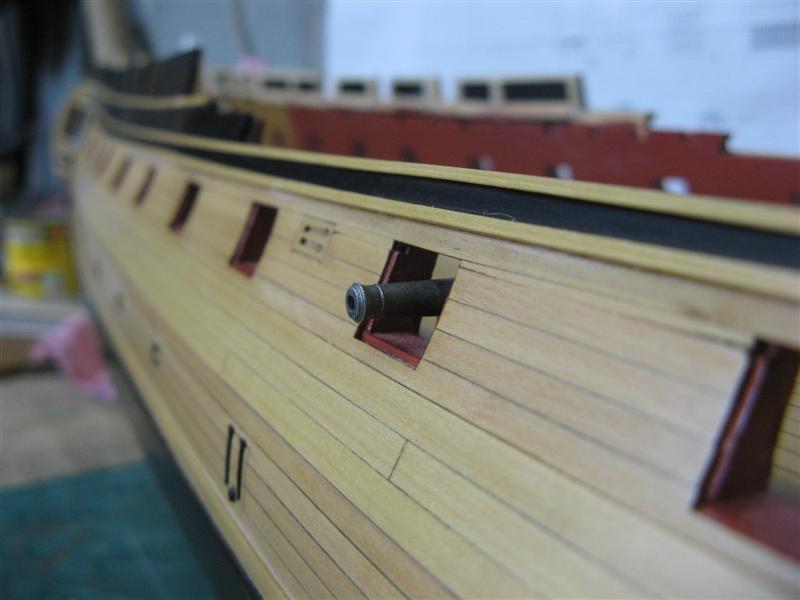
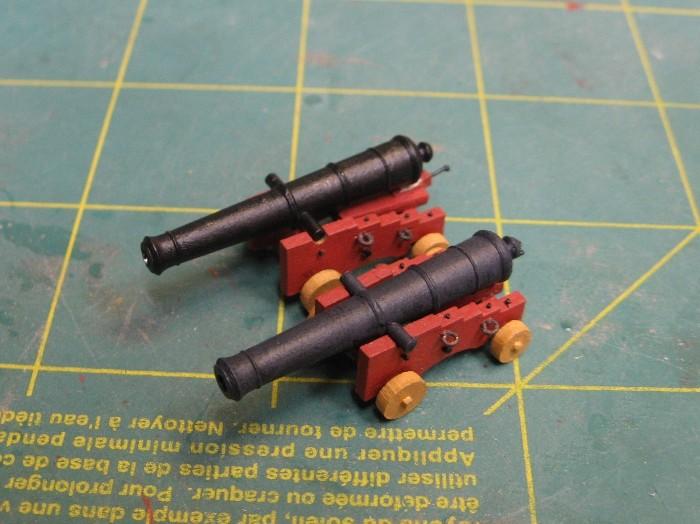
Here is a view of the cannon construction.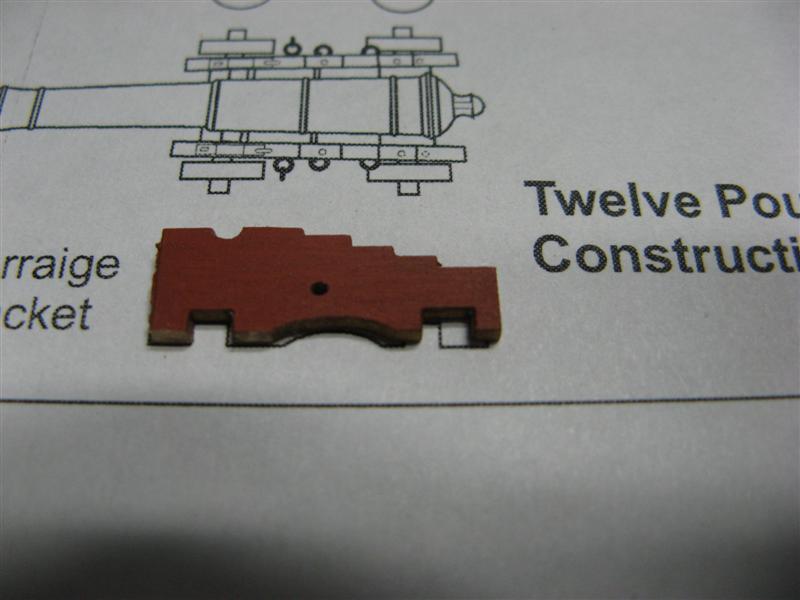
- 149 replies
-
- 4
-
-
- confederacy
- frigate
- (and 1 more)
-
USF Confederacy by Rustyj - FINISHED
Rustyj replied to Rustyj's topic in - Build logs for subjects built 1751 - 1800
Augie you’re being too modest! I’ve seen your work and it is very good. Besides we both have the same teacher. Ok here are some more pictures.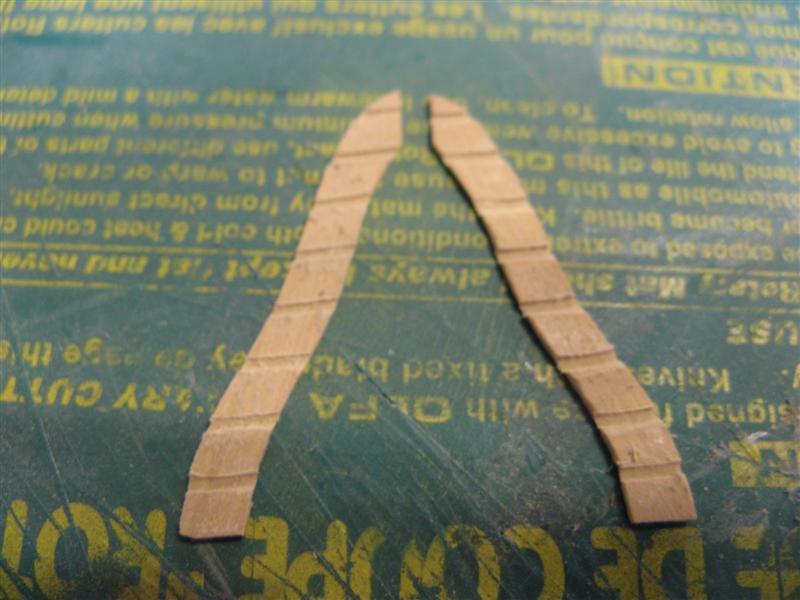
- 149 replies
-
- 2
-
-
- confederacy
- frigate
- (and 1 more)
-
USF Confederacy by Rustyj - FINISHED
Rustyj replied to Rustyj's topic in - Build logs for subjects built 1751 - 1800
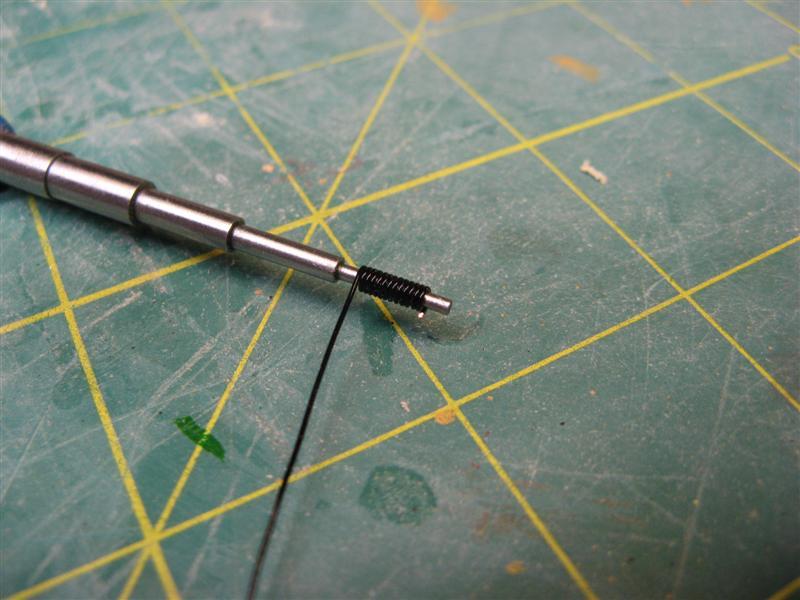
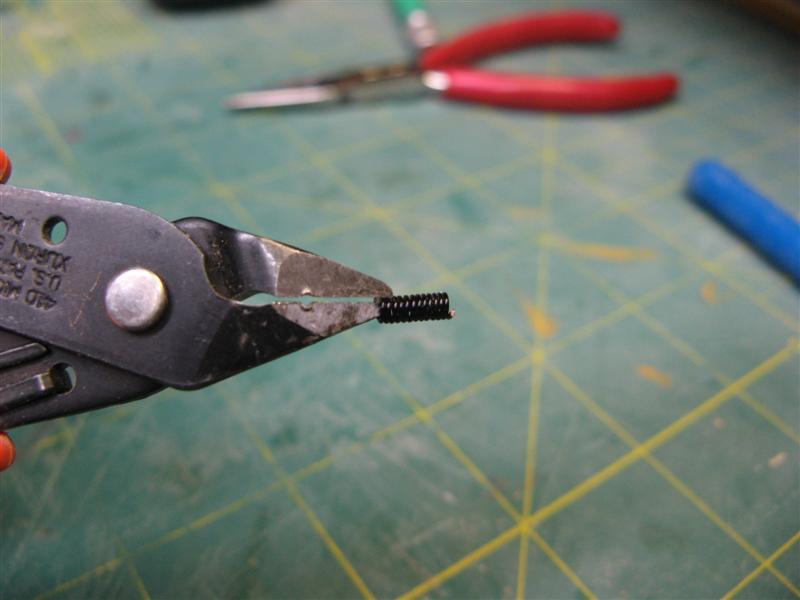
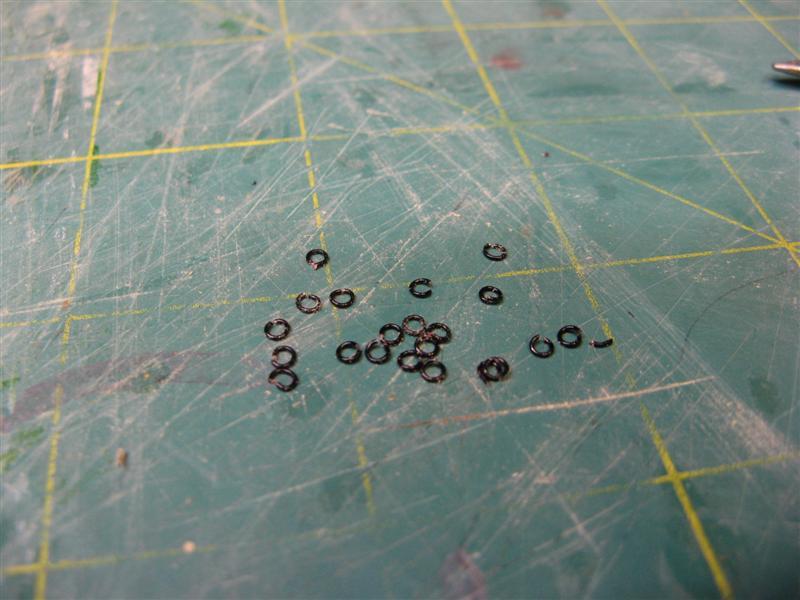
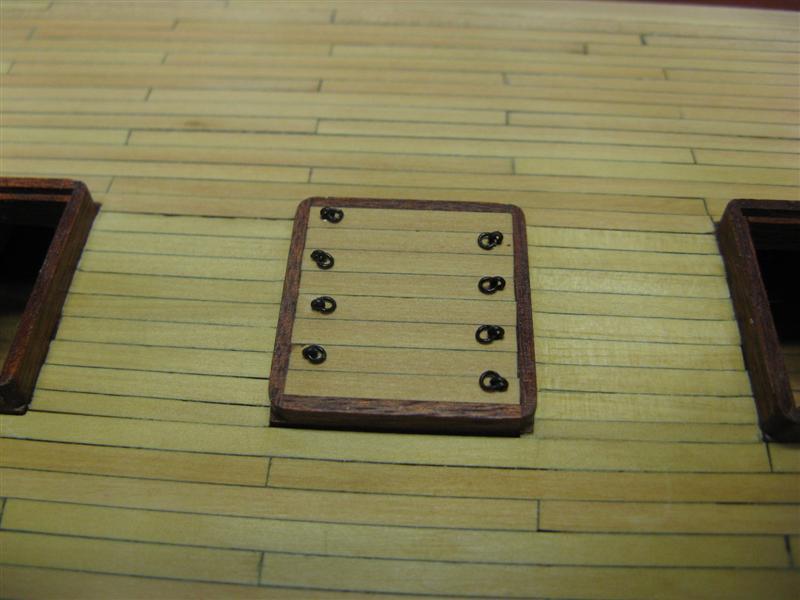
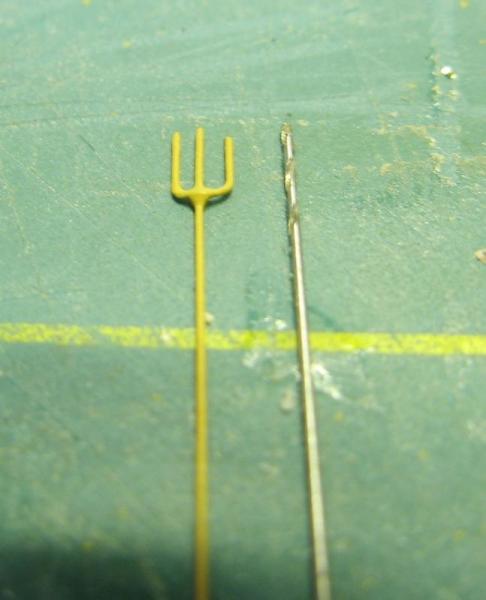
Hi Robert and thank you. The wire I used was craft wire. It was copper wire clad with a black covering. I believe it was around 24 gauge. I measured the shaft I wrapped the wire around and it was .054” (a little under 1/16”) so the rings should be pretty close to that. The size of the rings is just what I thought looked right and not taken from any measurement. Thanks again. -
US Brig Syren by Rustyj - FINISHED - 1:64
Rustyj replied to Rustyj's topic in - Build logs for subjects built 1801 - 1850
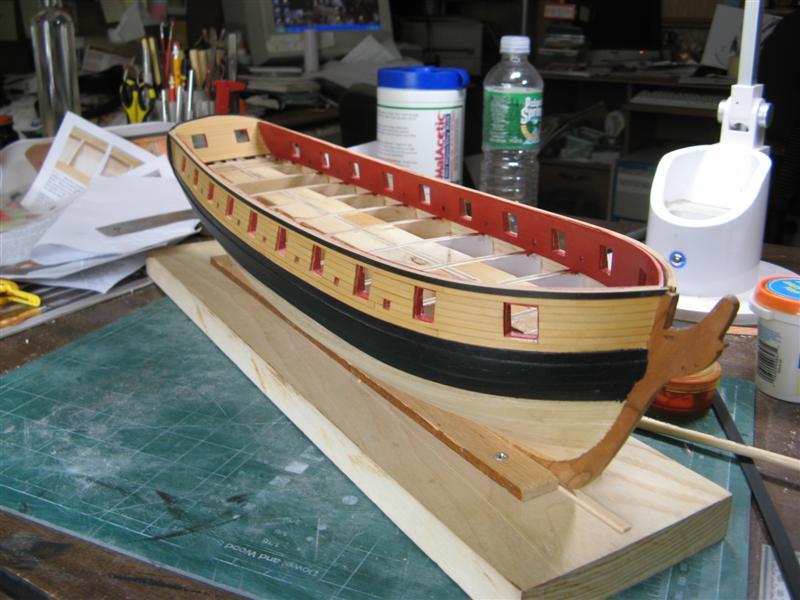
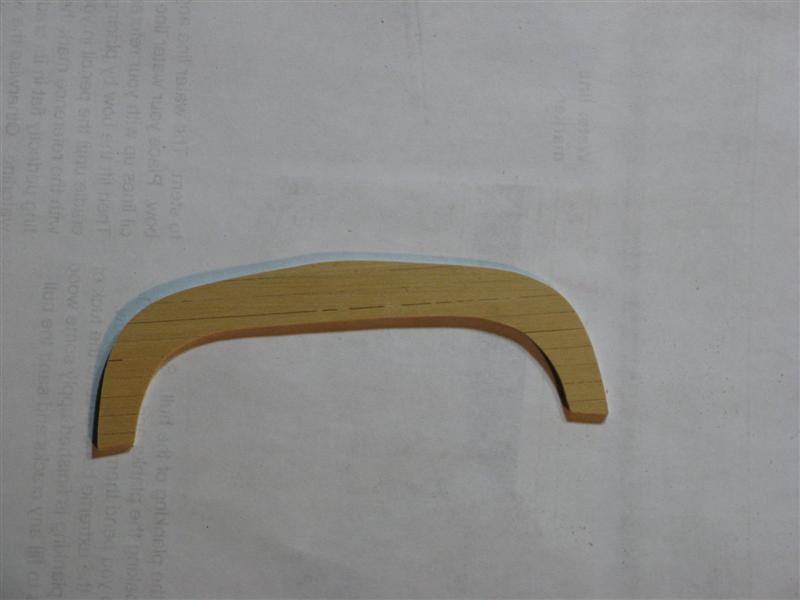
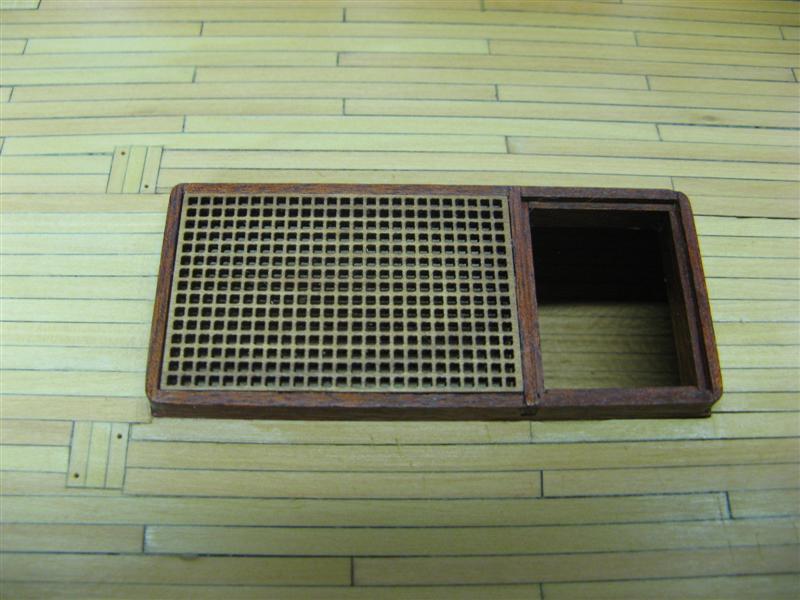
Hi Augie, If I remeber correctly???? The stem is pear as well as the framing for the hatchs. I used some cherry for assorted deck pieces, binnacle, shot racks etc. -
US Brig Syren by Rustyj - FINISHED - 1:64
Rustyj replied to Rustyj's topic in - Build logs for subjects built 1801 - 1850
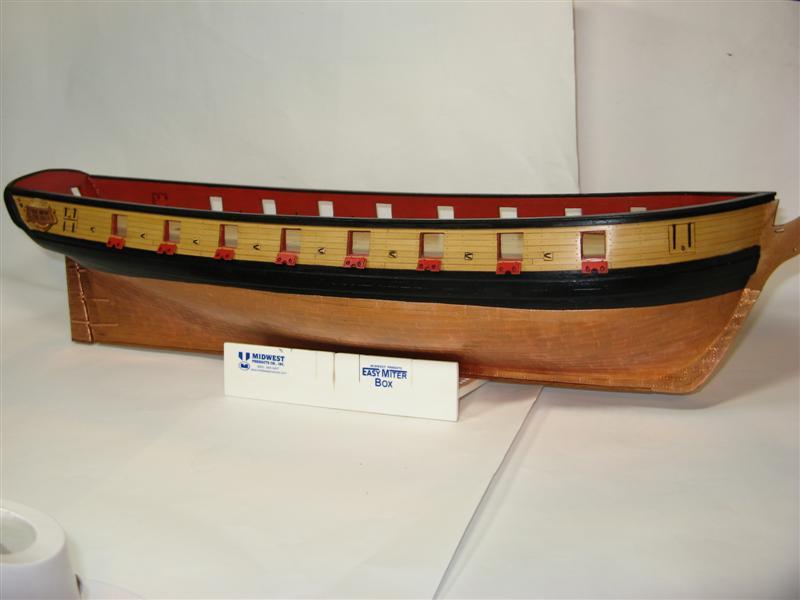
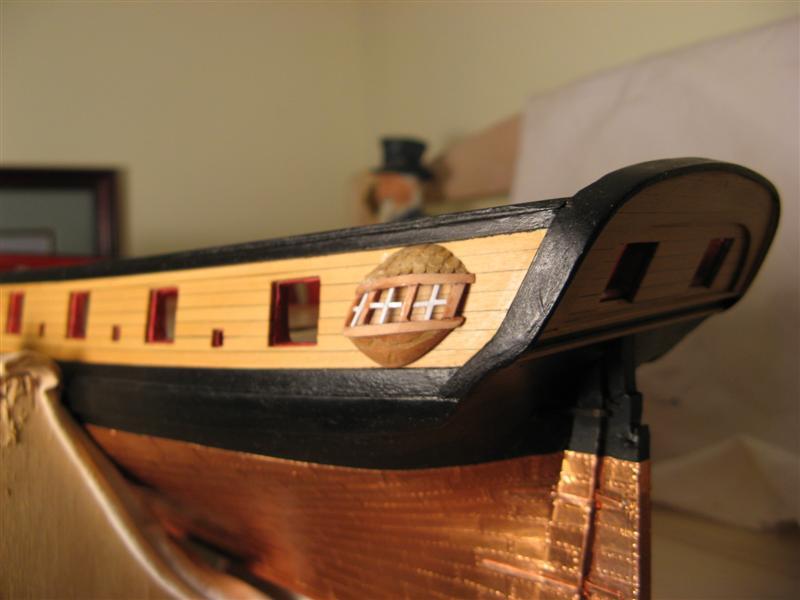
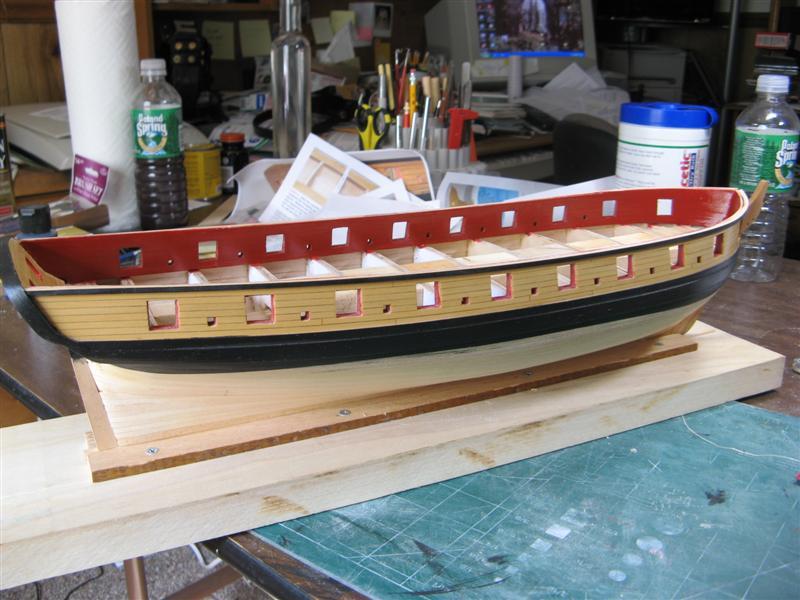
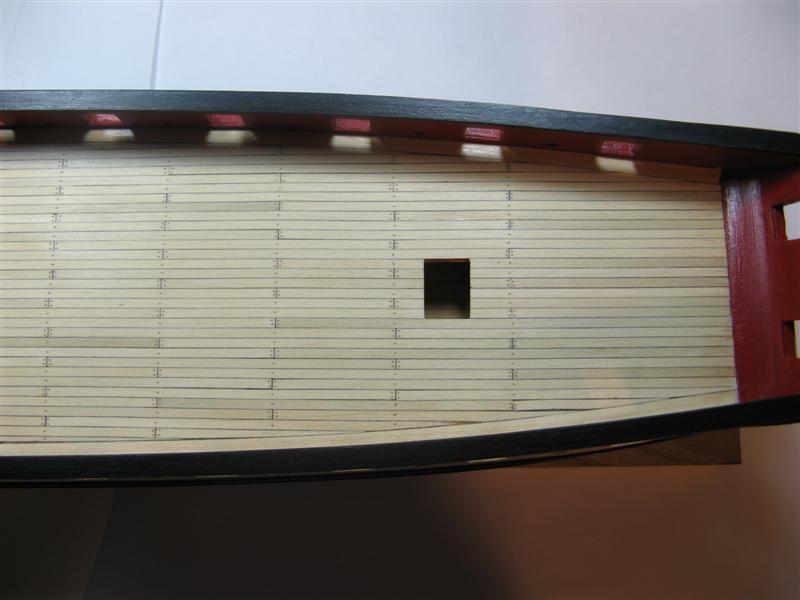
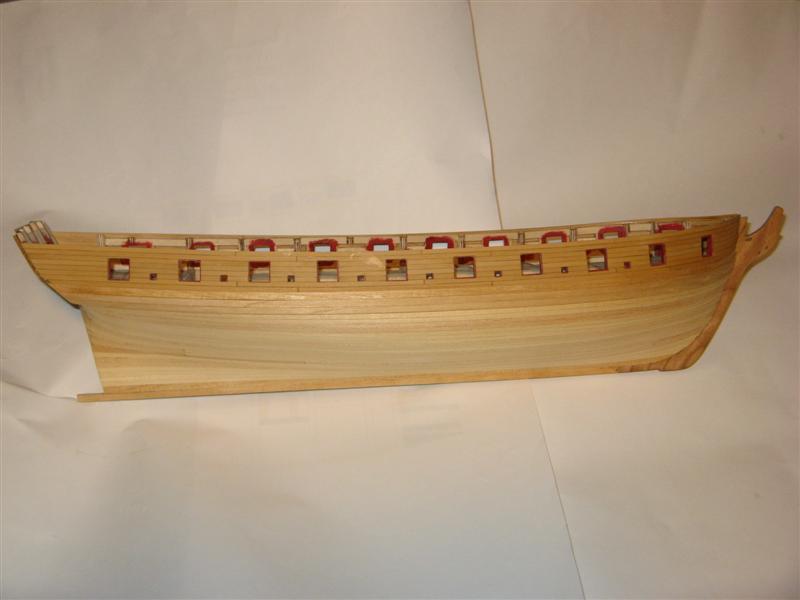
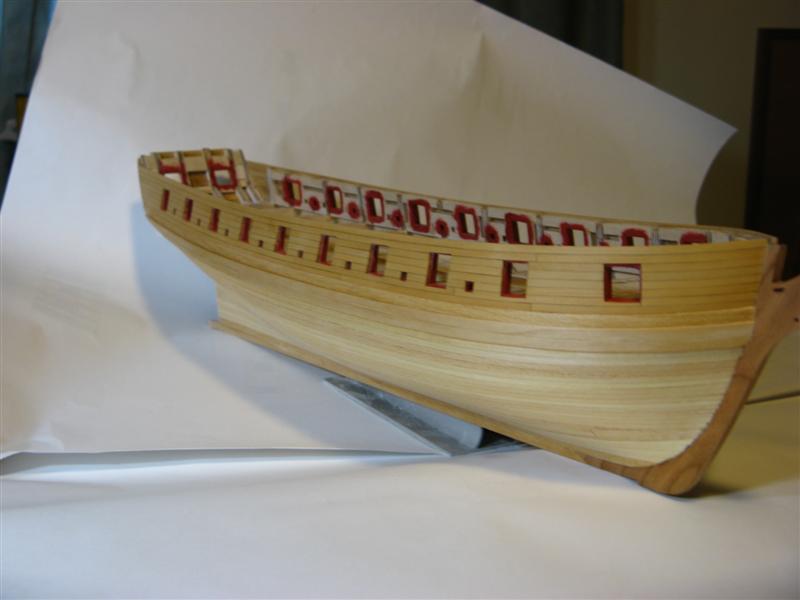
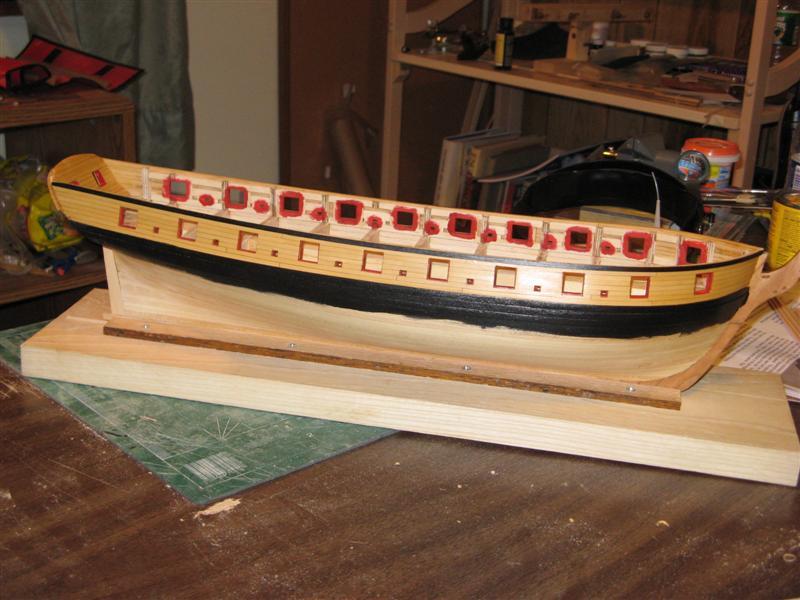
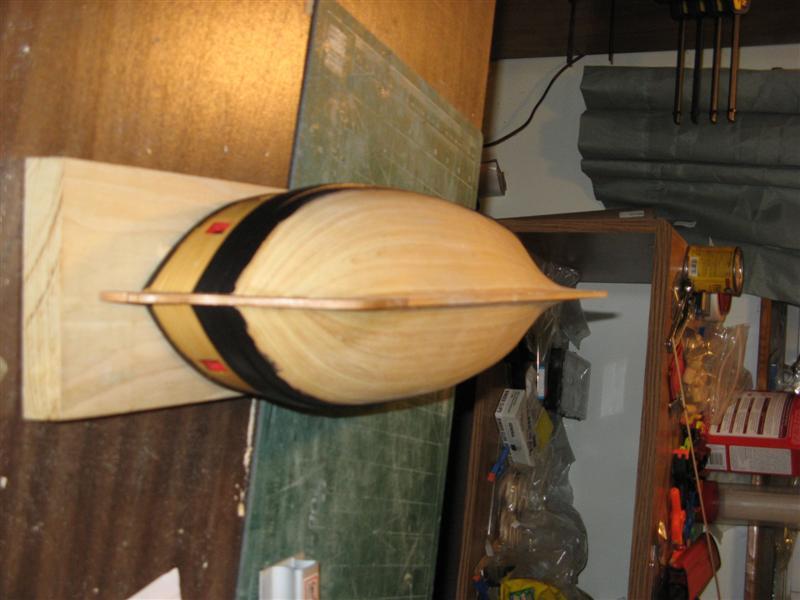
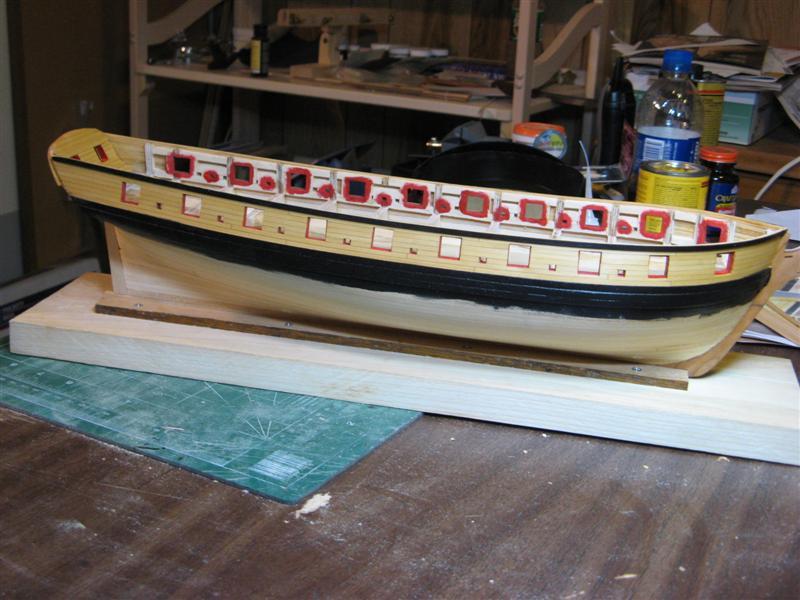
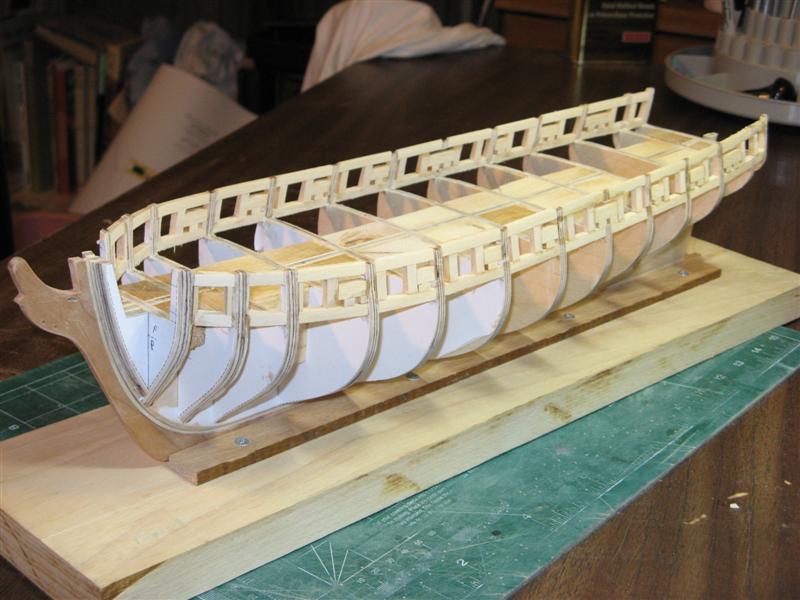
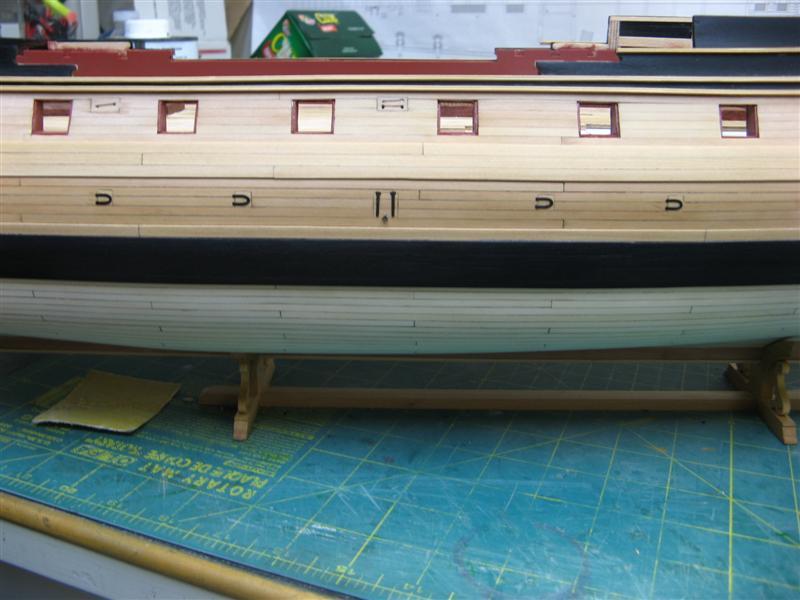
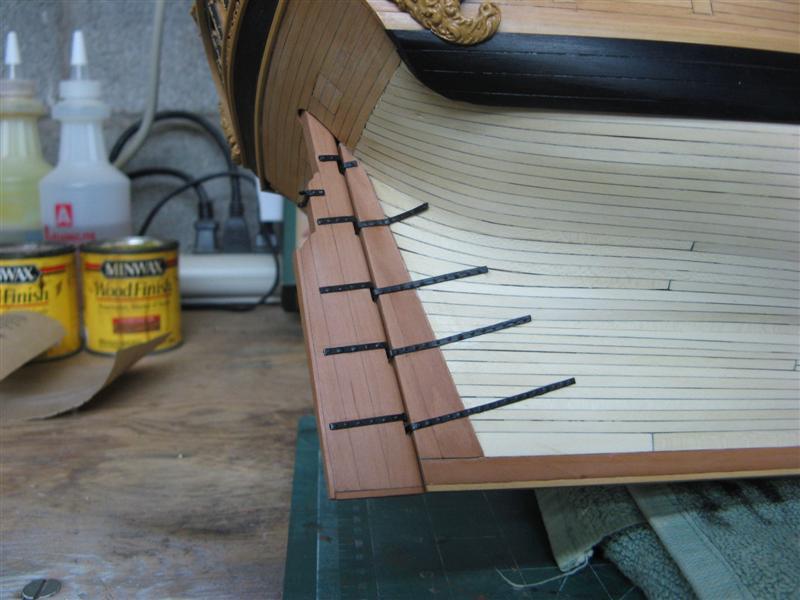
The hull was planked using basswood as I was going to cover it with copper plates.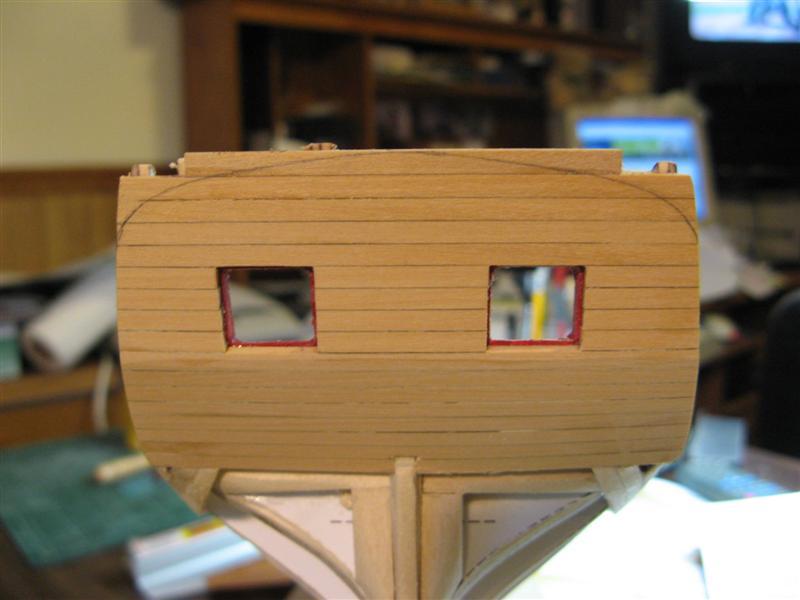

-
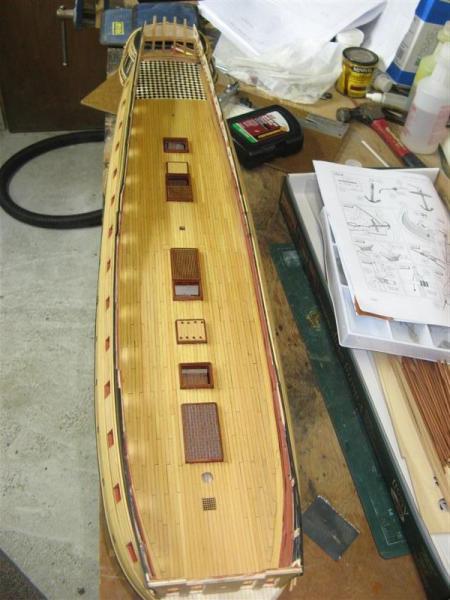
Hi All, I've been digging through my file and I'm putting to gether the pictures for my scratch build of Chucks Model Shipways Syren. The build is in the 1:64 scale. The main wood used was Boxwood, Cherry, Holly and Swiss Pear. This log was started back in 2007 and I was bad about taking pictures but here is what I have.


-
USF Confederacy by Rustyj - FINISHED
Rustyj replied to Rustyj's topic in - Build logs for subjects built 1751 - 1800
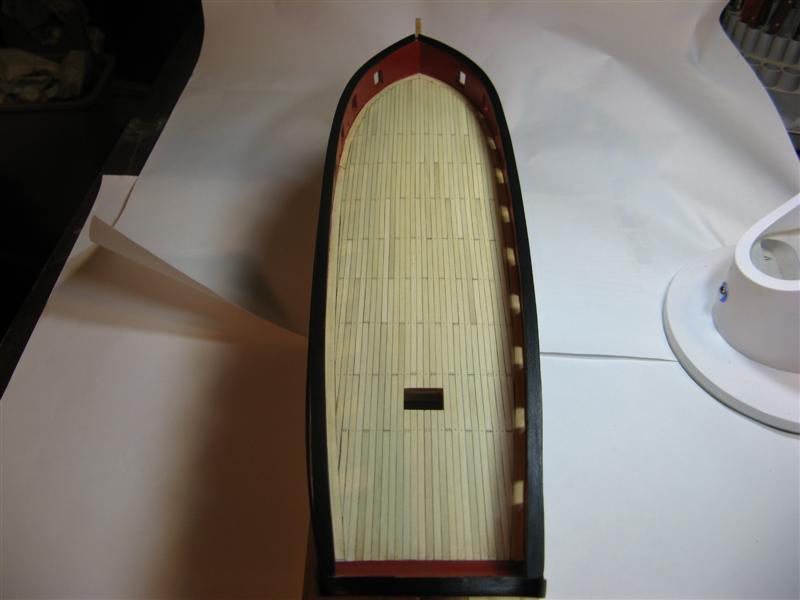
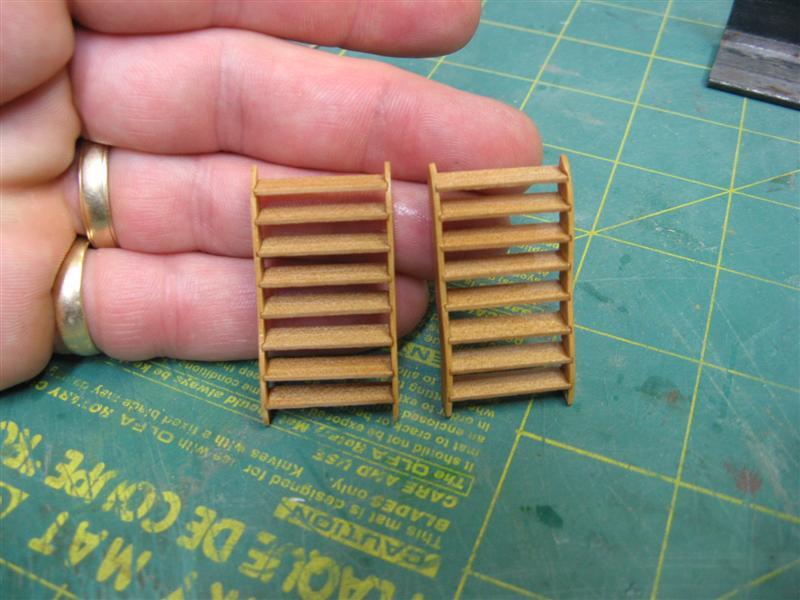
Some more deck work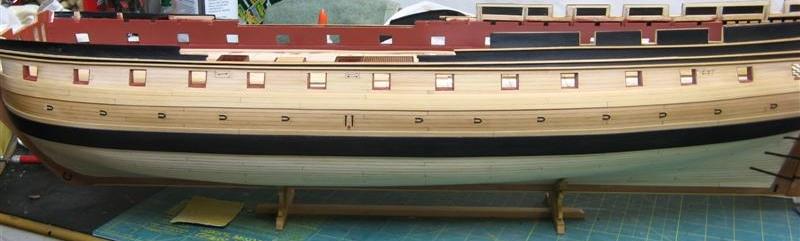


- 149 replies
-
- 3
-
-
- confederacy
- frigate
- (and 1 more)
-
USF Confederacy by Rustyj - FINISHED
Rustyj replied to Rustyj's topic in - Build logs for subjects built 1751 - 1800
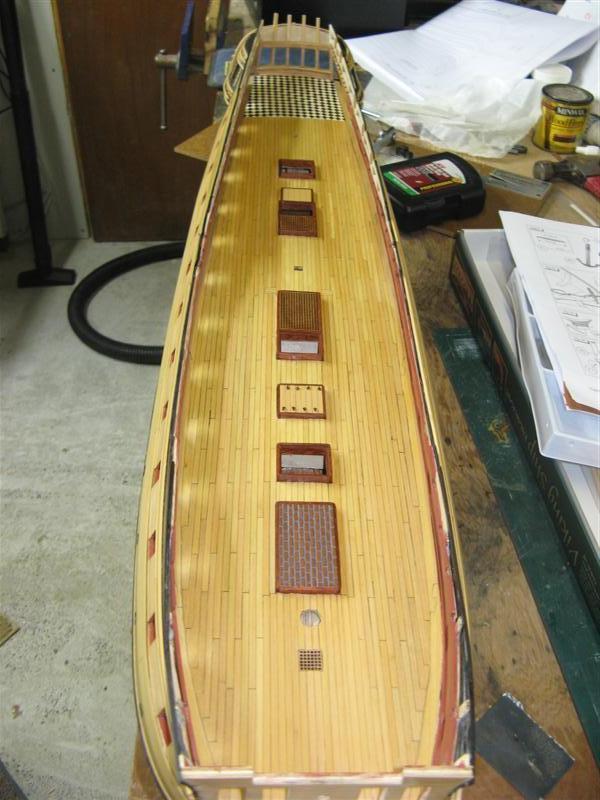
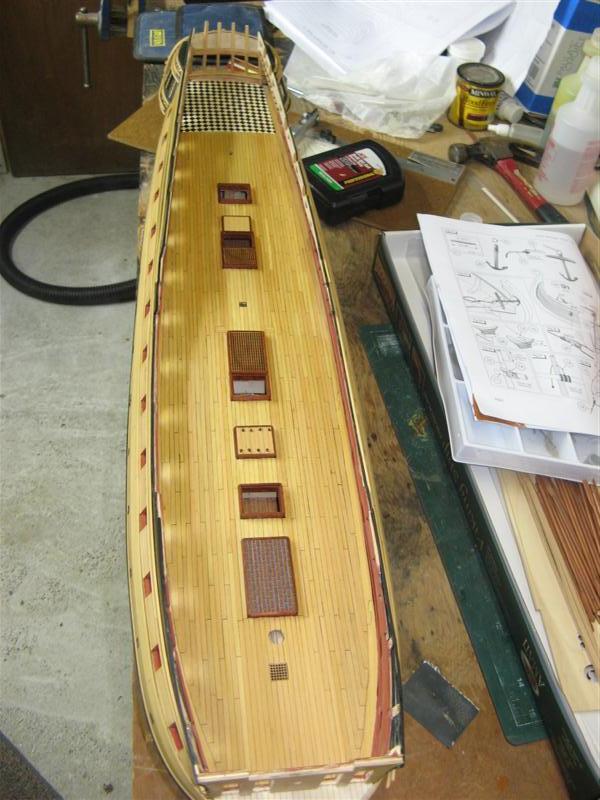
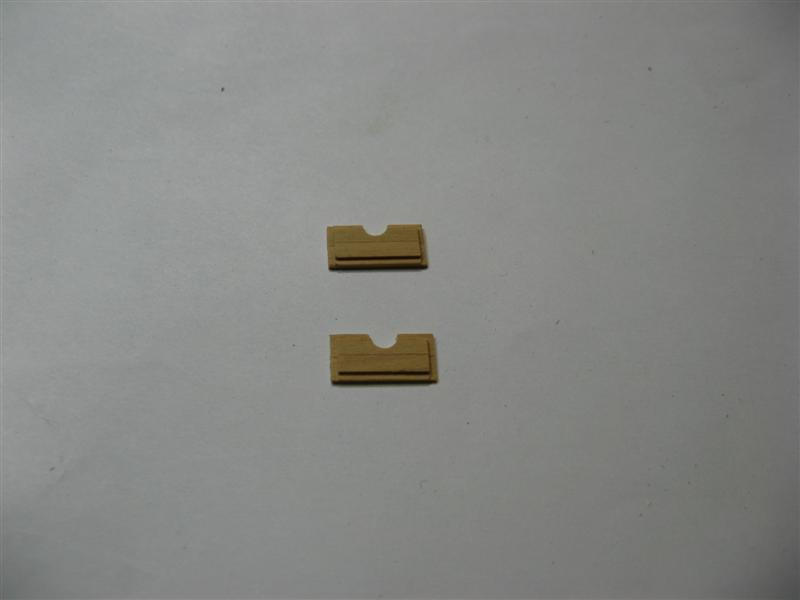
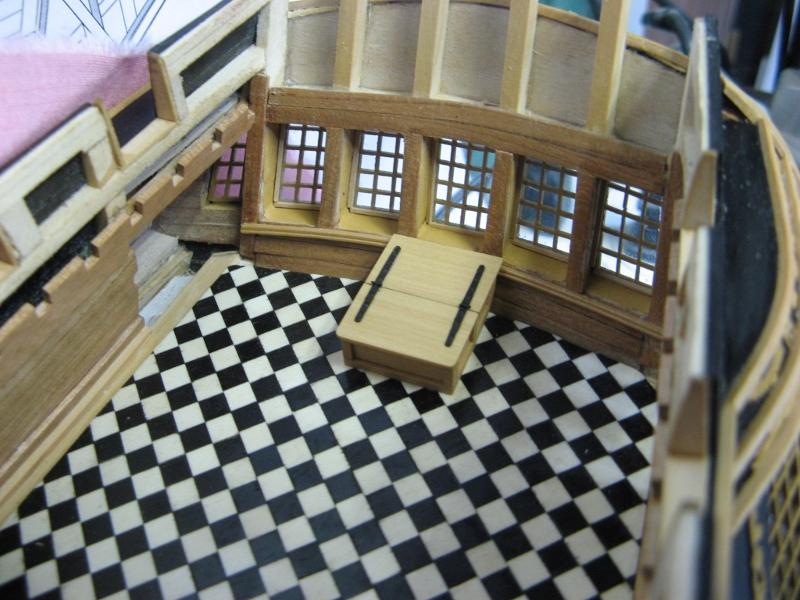
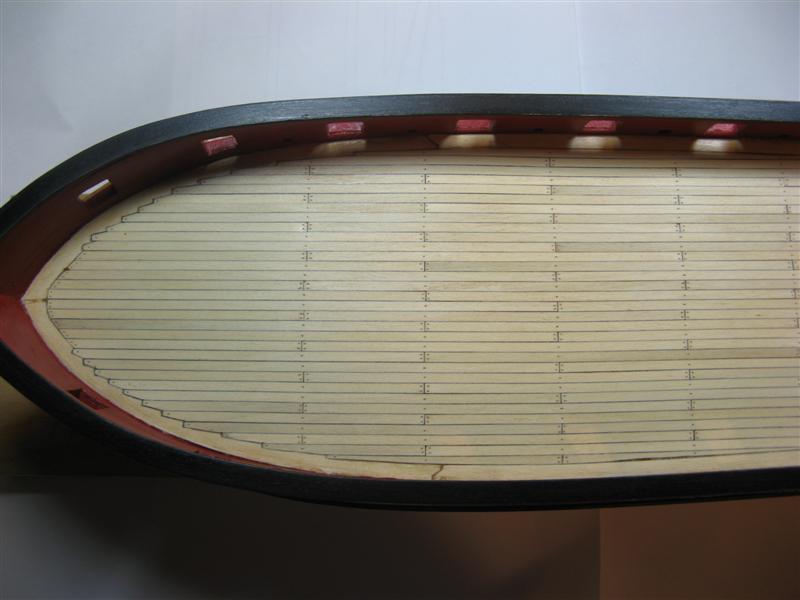
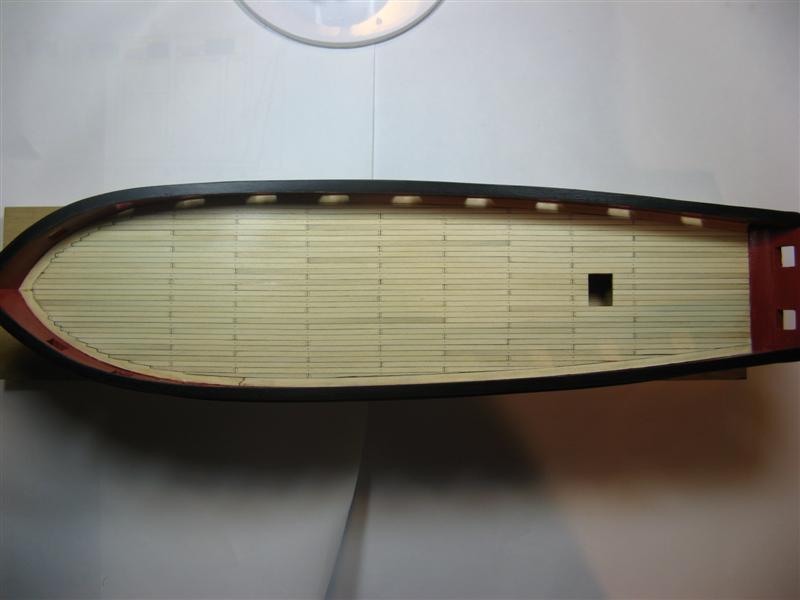
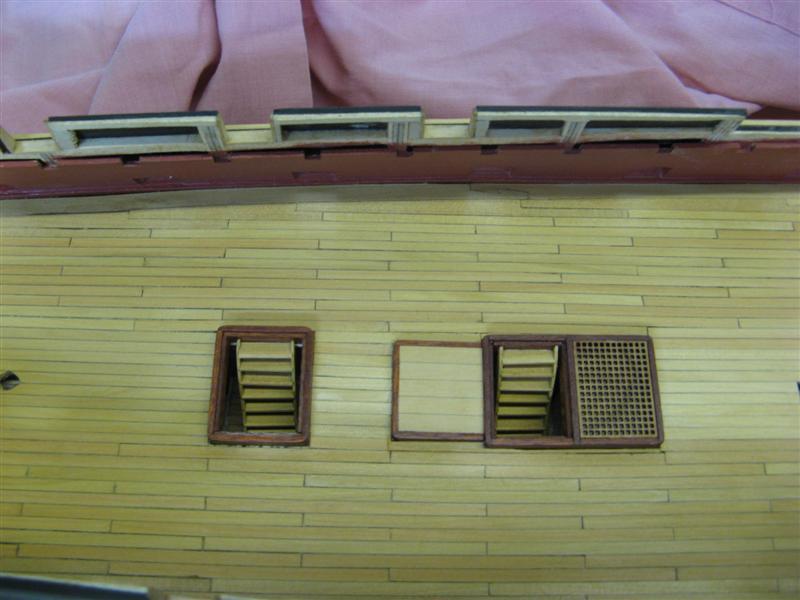
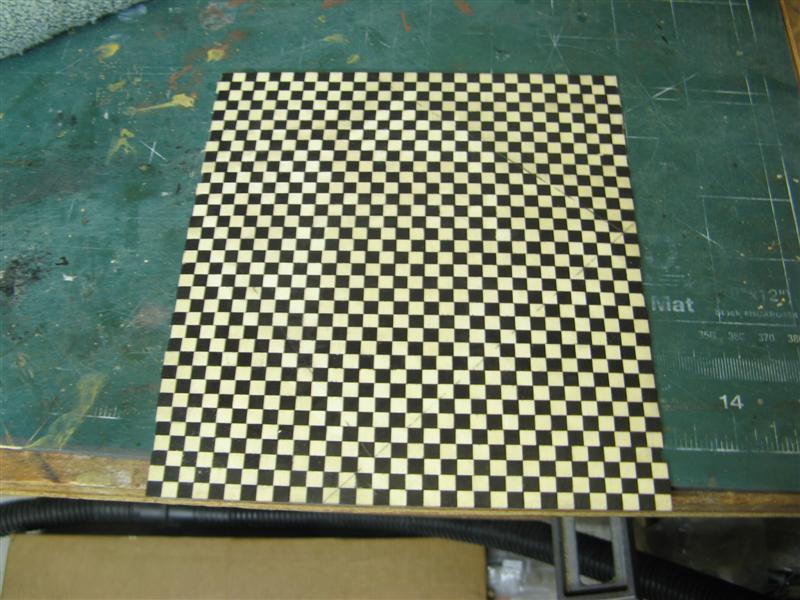
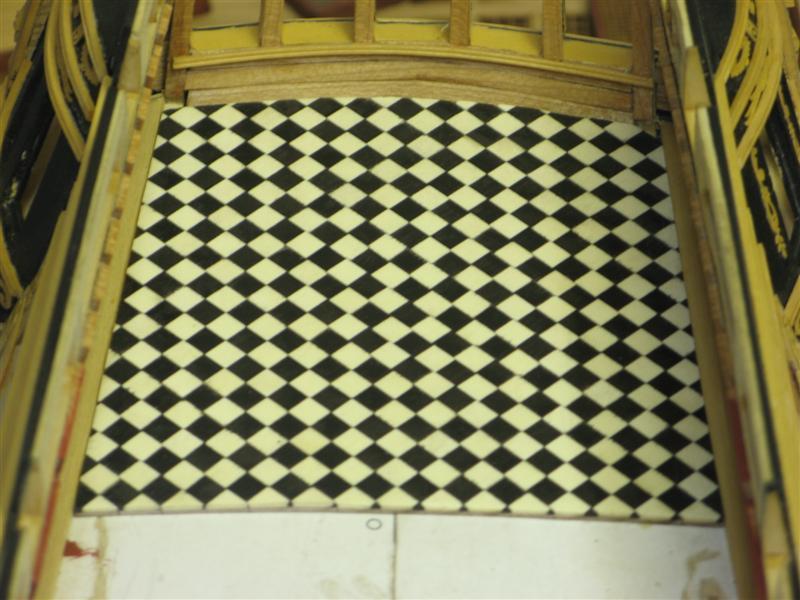
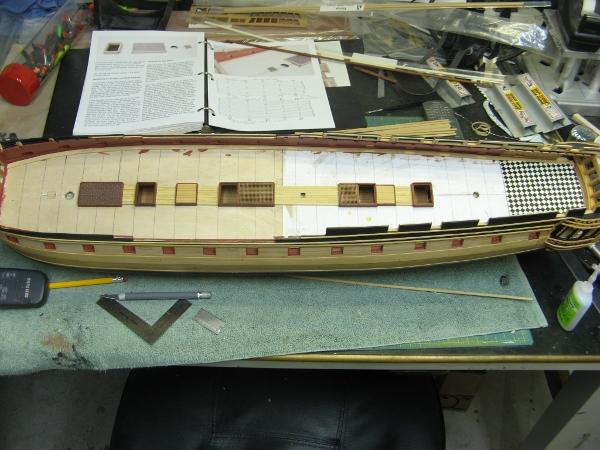
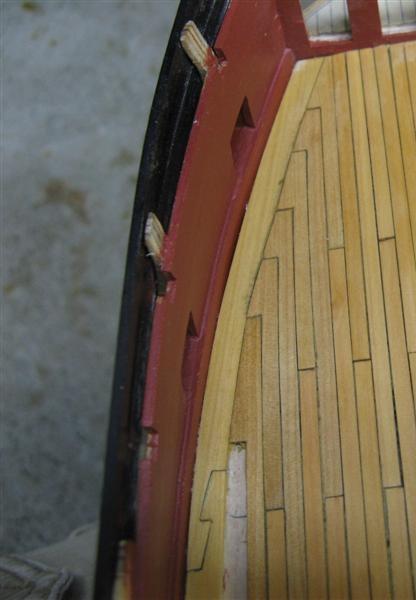
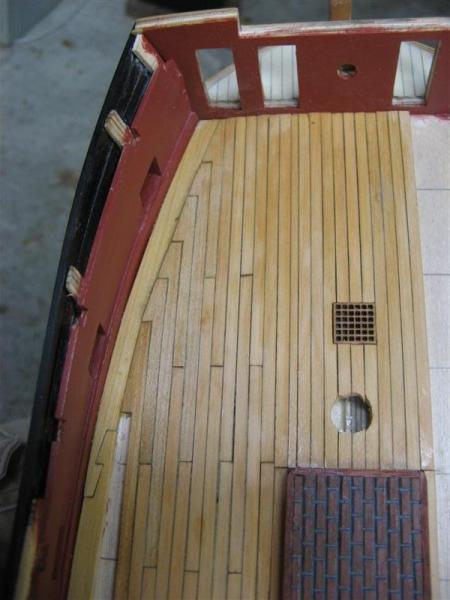
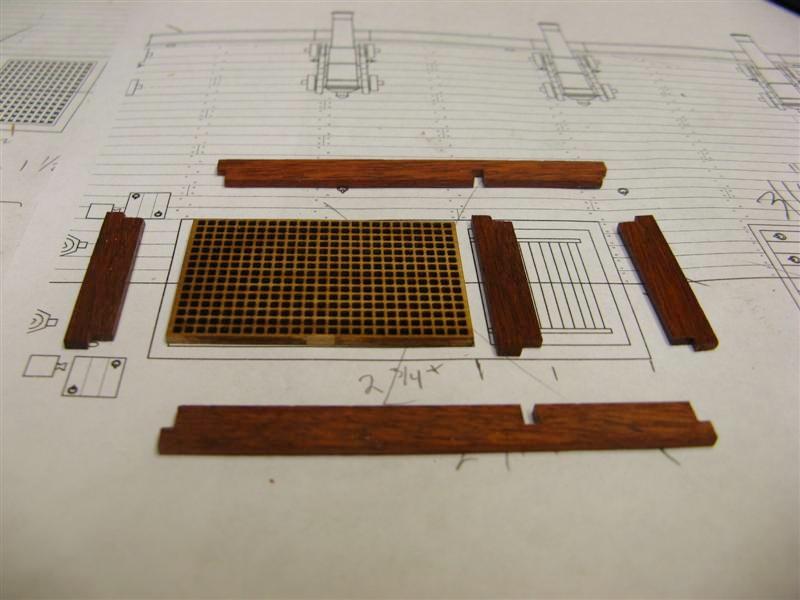
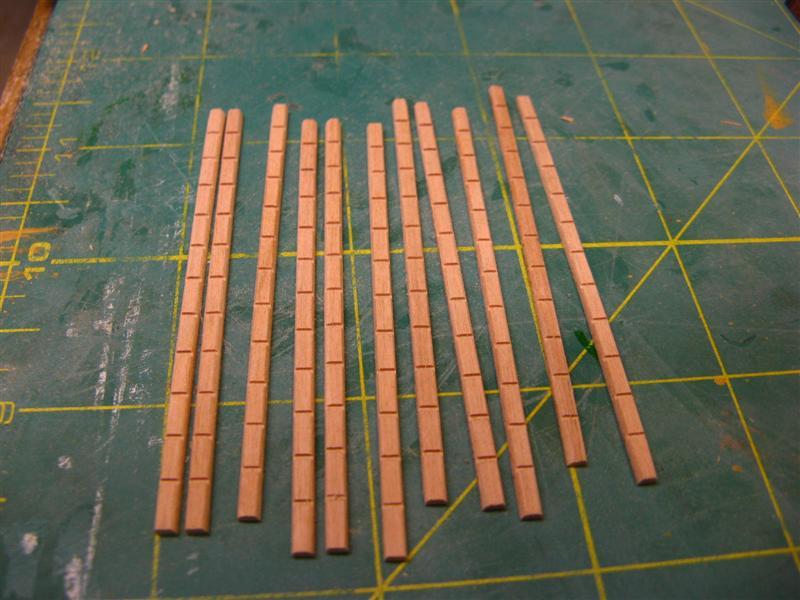
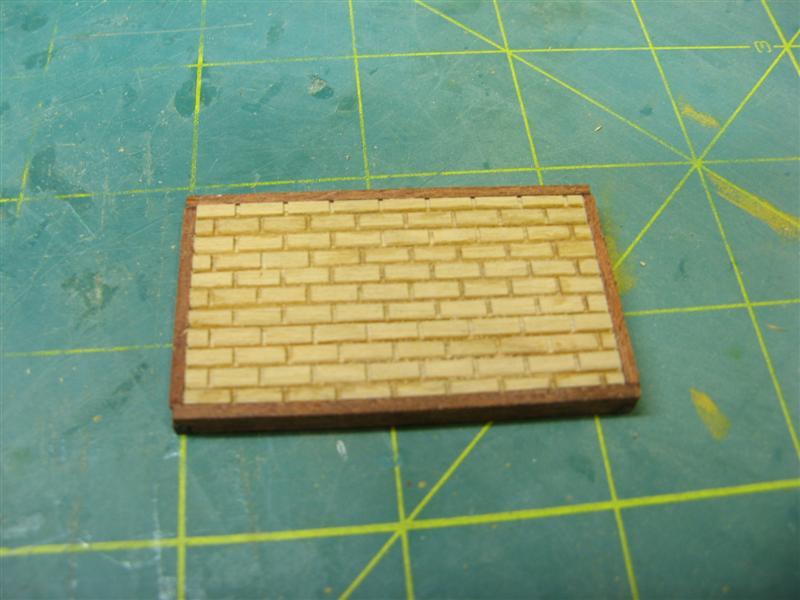
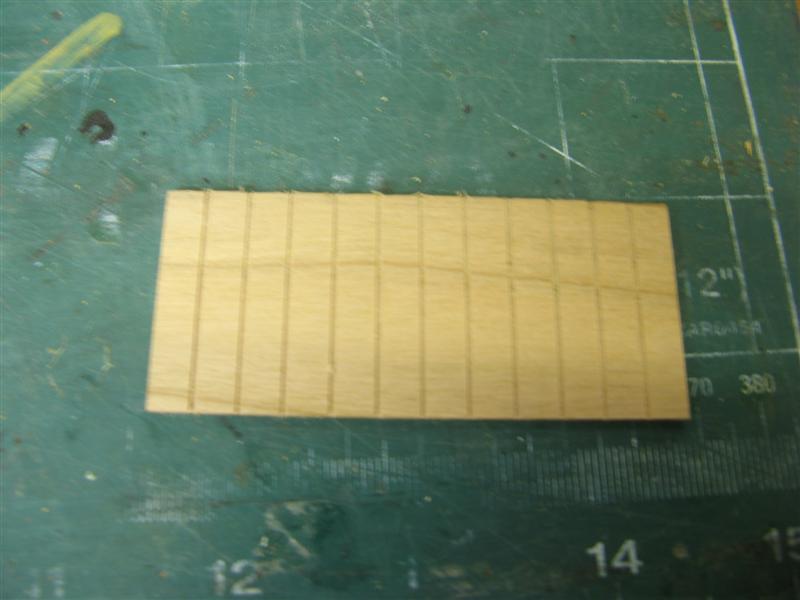
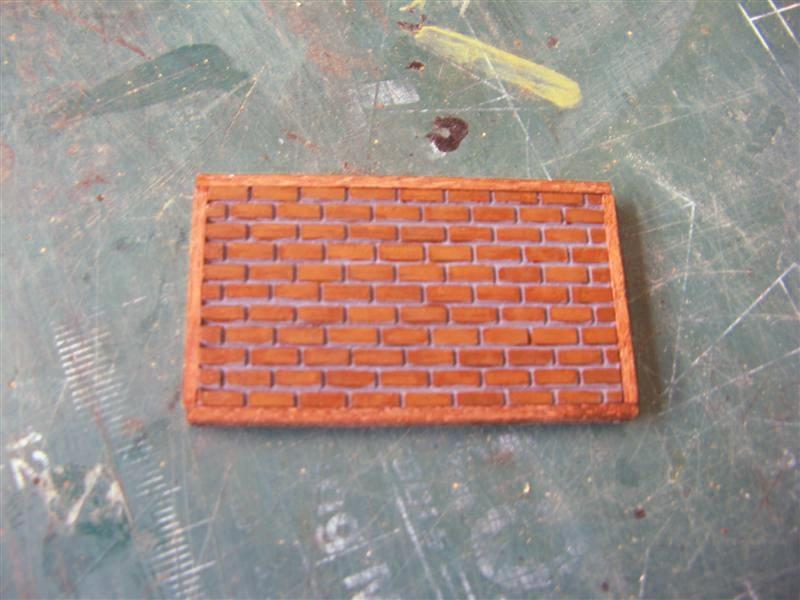
Here is the ebony and holly strips I made to deck the great cabin floor as well as placing the hatchs and starting the planking of the deck. The deck planking is boxwood.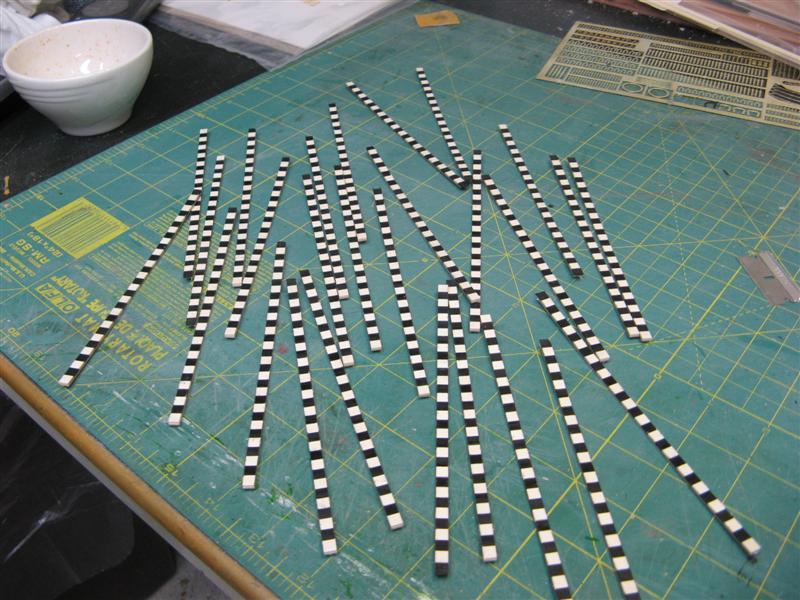
- 149 replies
-
- 4
-
-
- confederacy
- frigate
- (and 1 more)
-
Hi Pete, I glue them in place and then cut the notches. It will be harder to do it this way but for me I feel I can get a better fit in the end.
-
Very well done Mario. It's a great reference for the rest of us. Thanks.
-
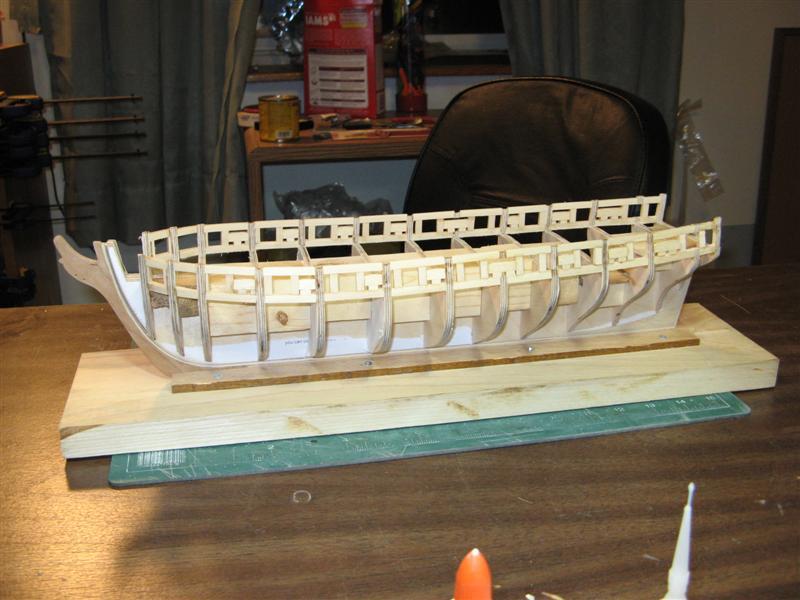
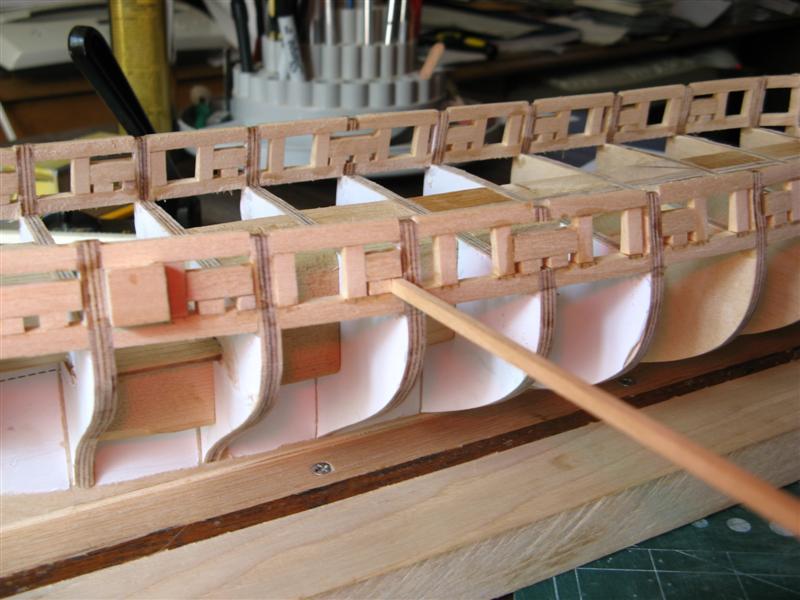
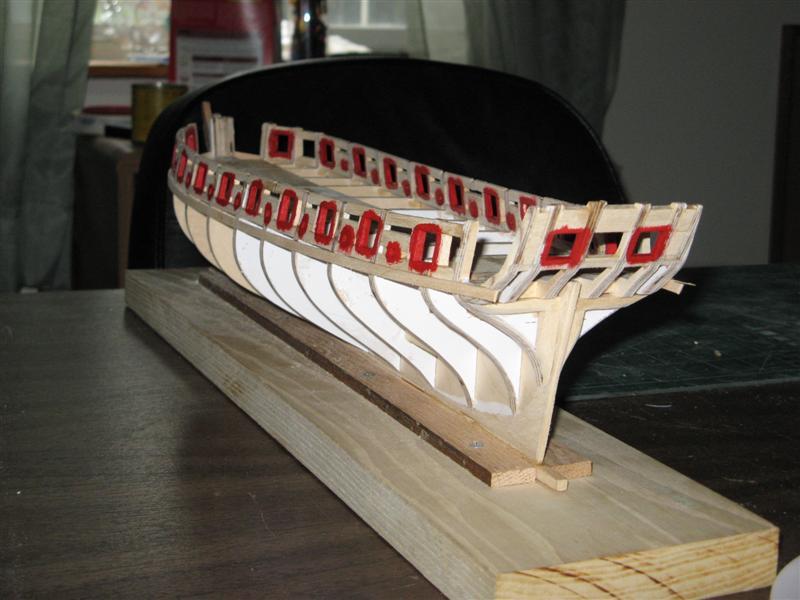
Nothing much to show other than just working my way across the lower gun deck. I temporarily glued the plans on because I didn't trust myself to transfer the measurements. Seems to make straighter lines for me at least.
- 332 replies
-
- 1
-
-
- Triton
- cross-section
- (and 1 more)
-
USF Confederacy by Rustyj - FINISHED
Rustyj replied to Rustyj's topic in - Build logs for subjects built 1751 - 1800
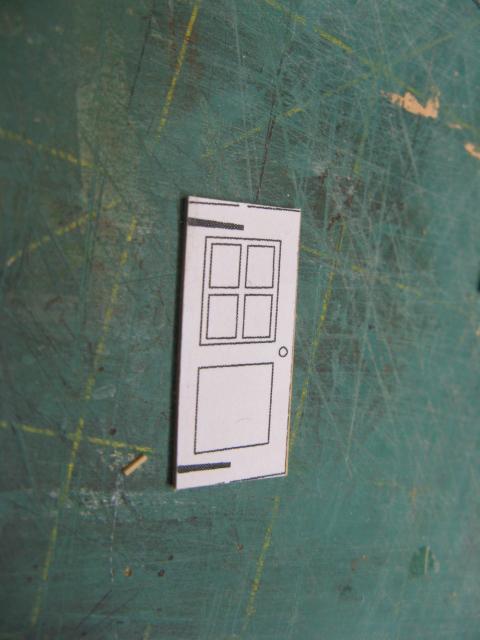
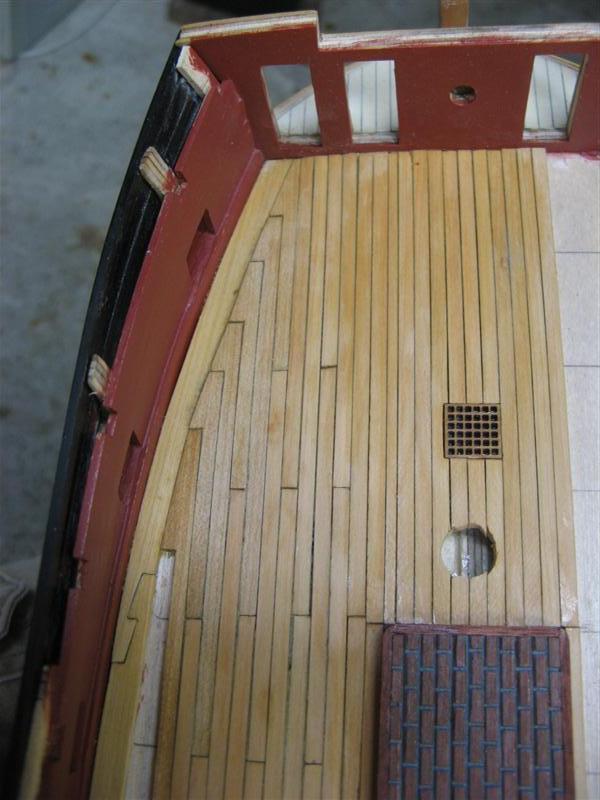
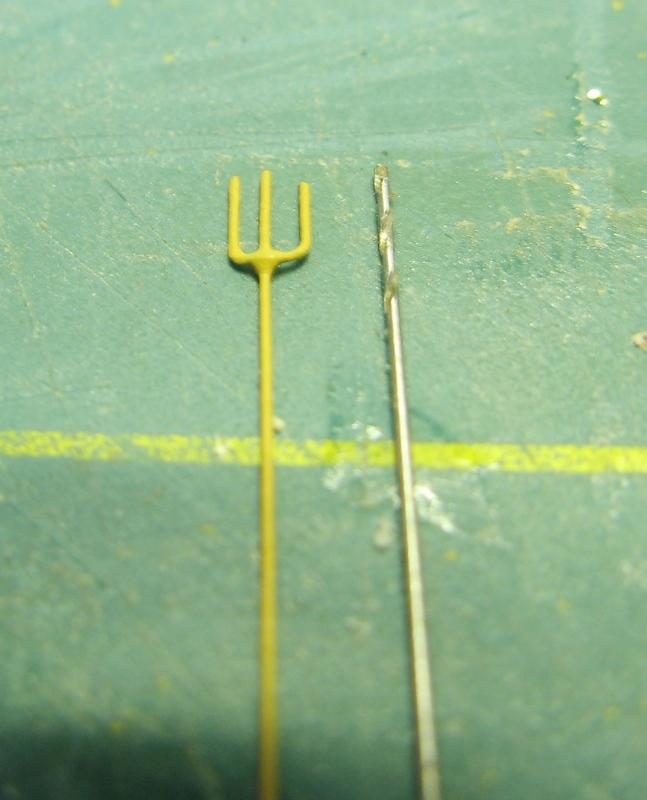
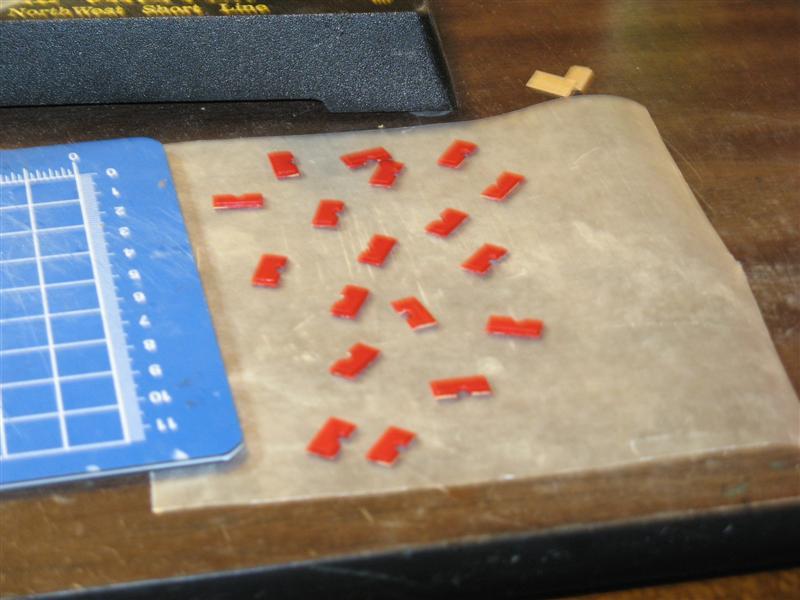
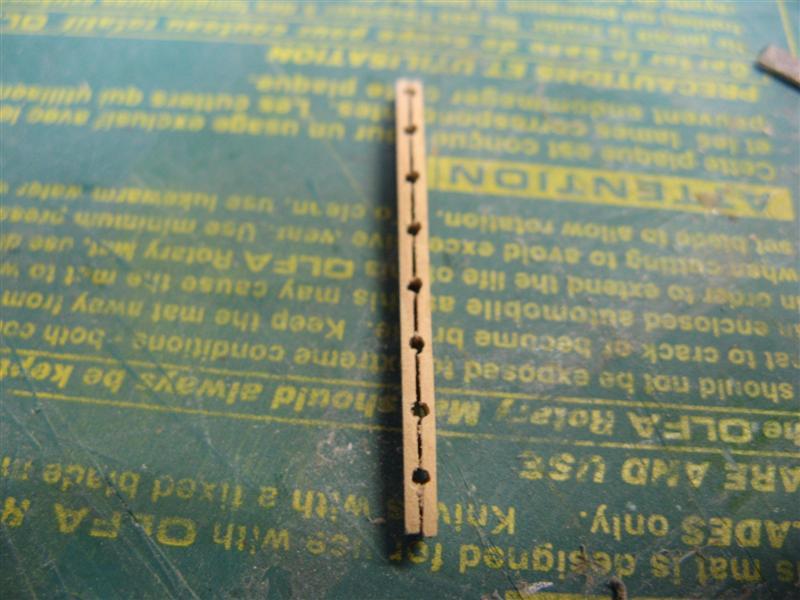
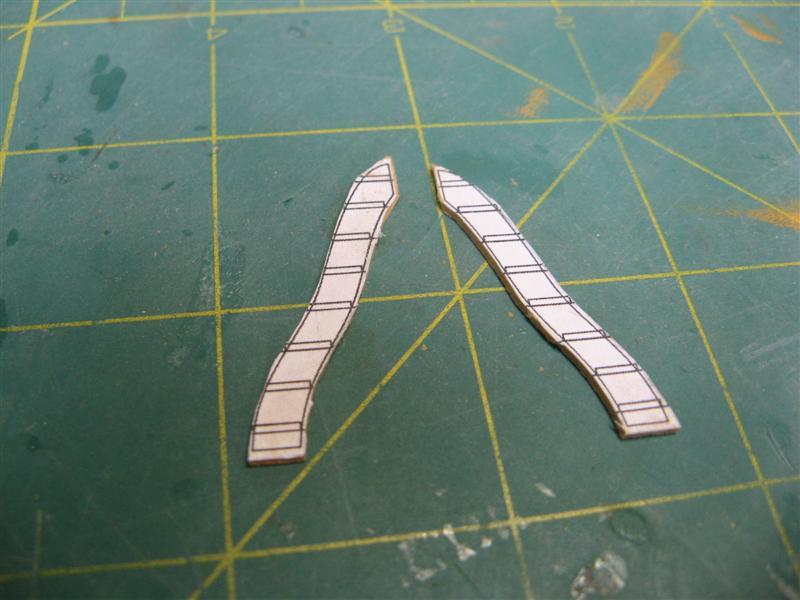
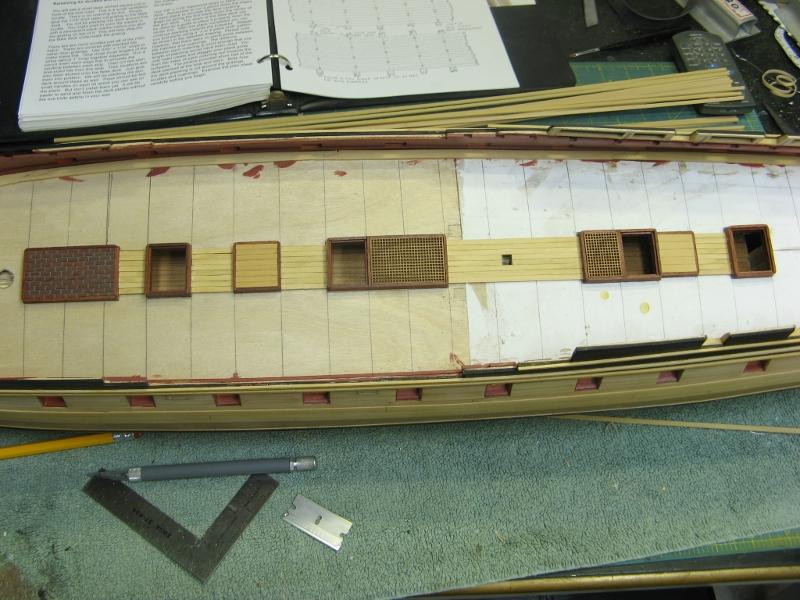
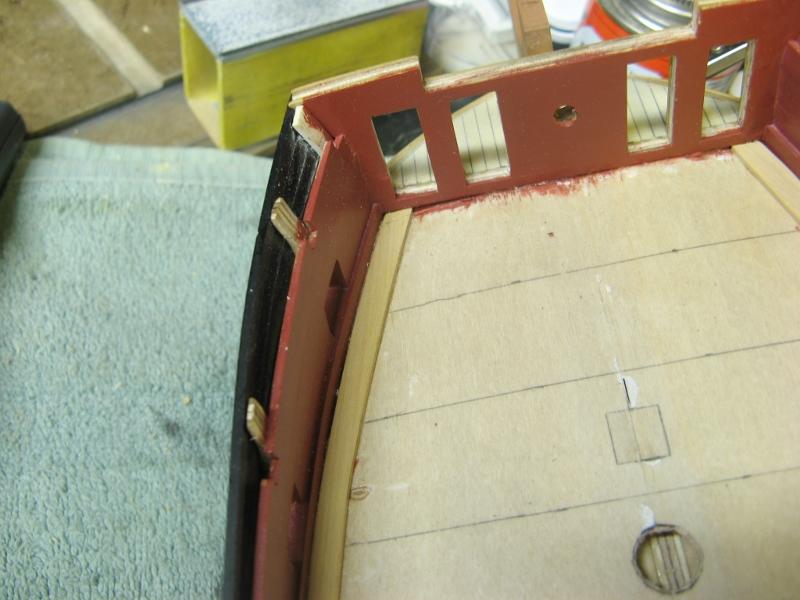
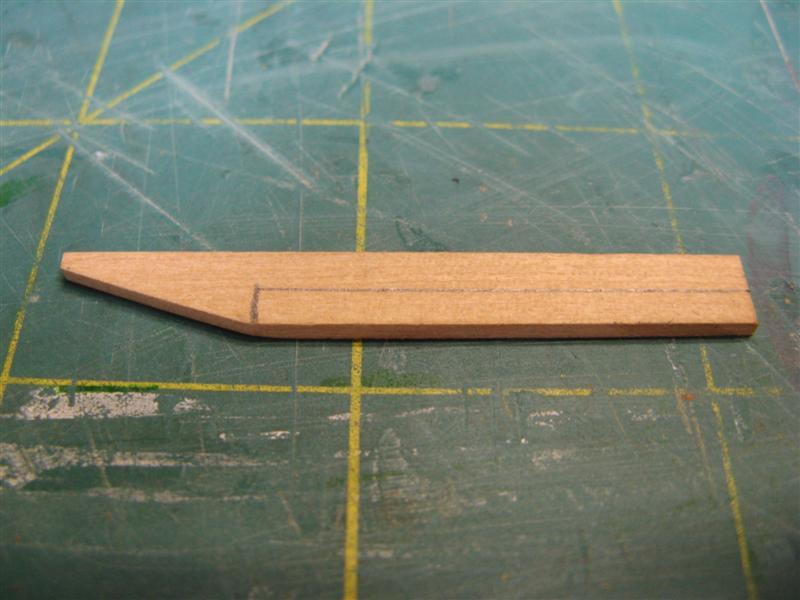
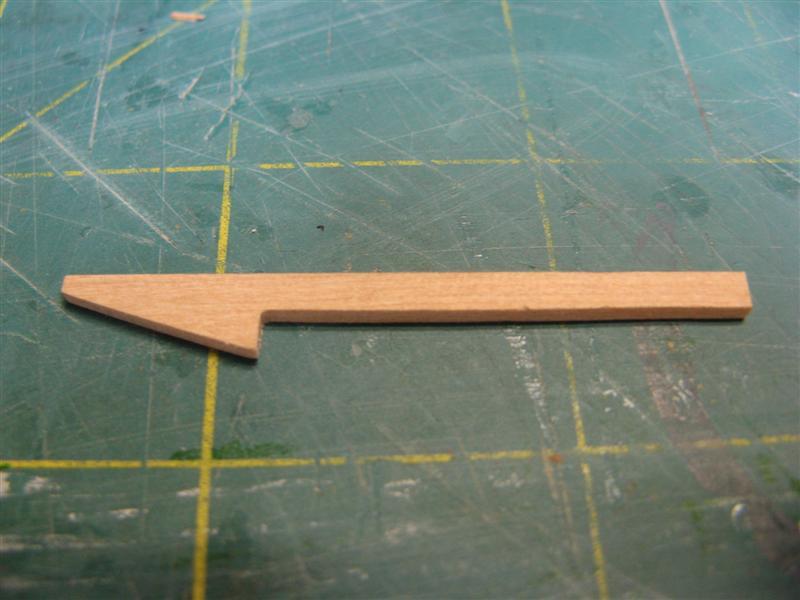
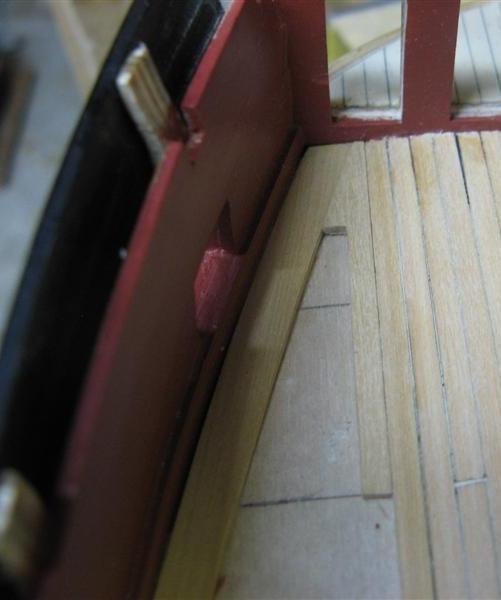
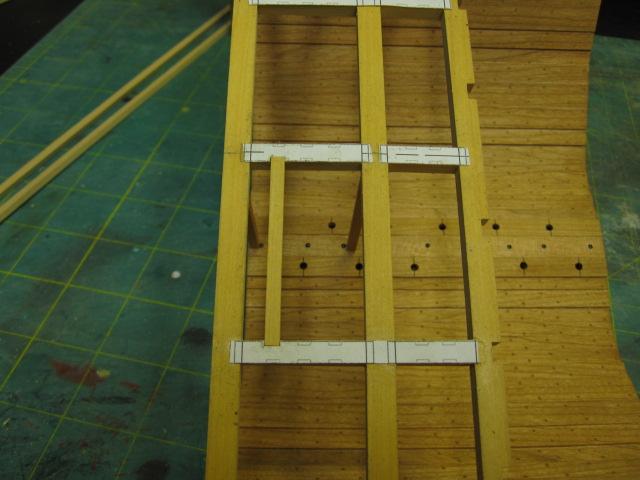
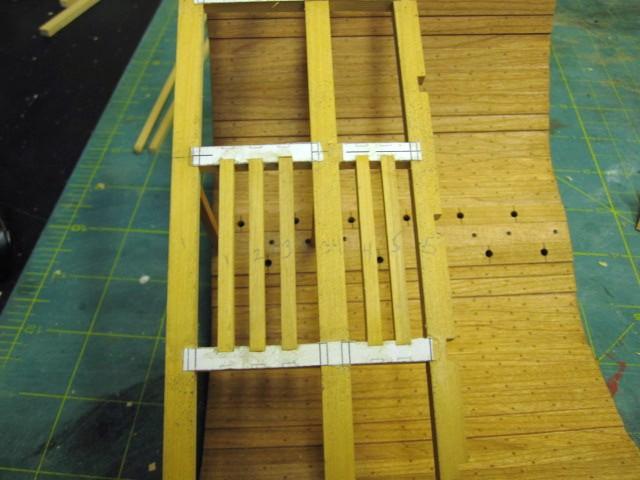
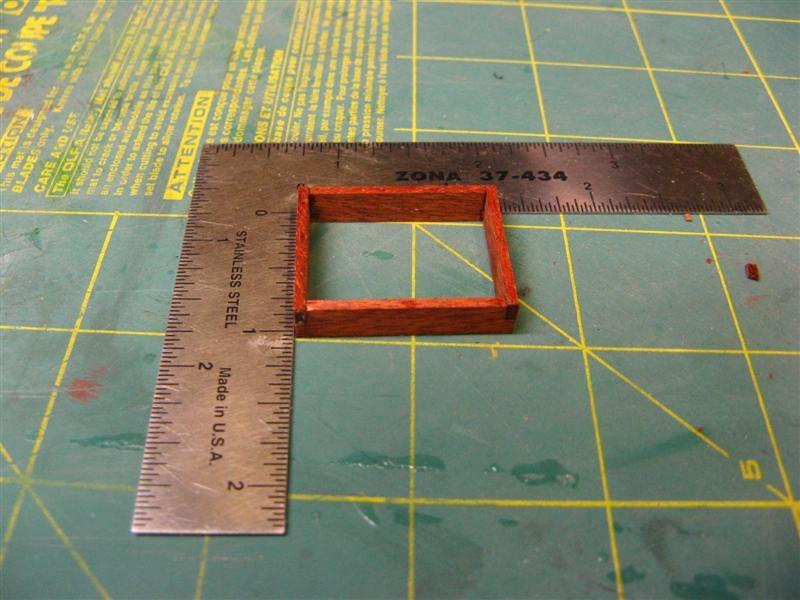
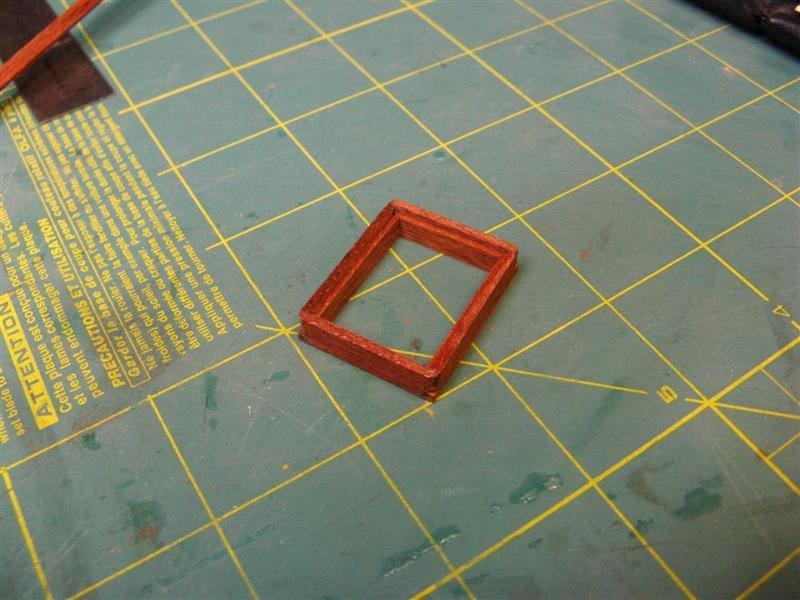
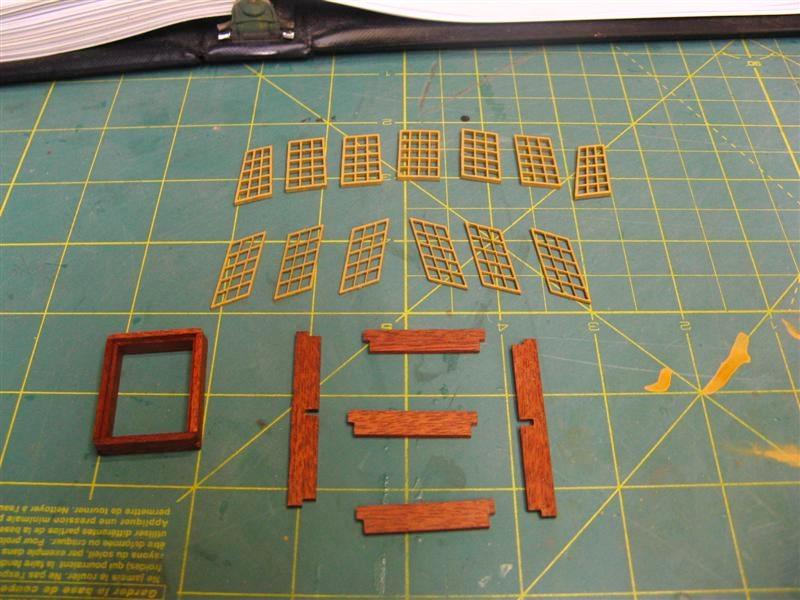
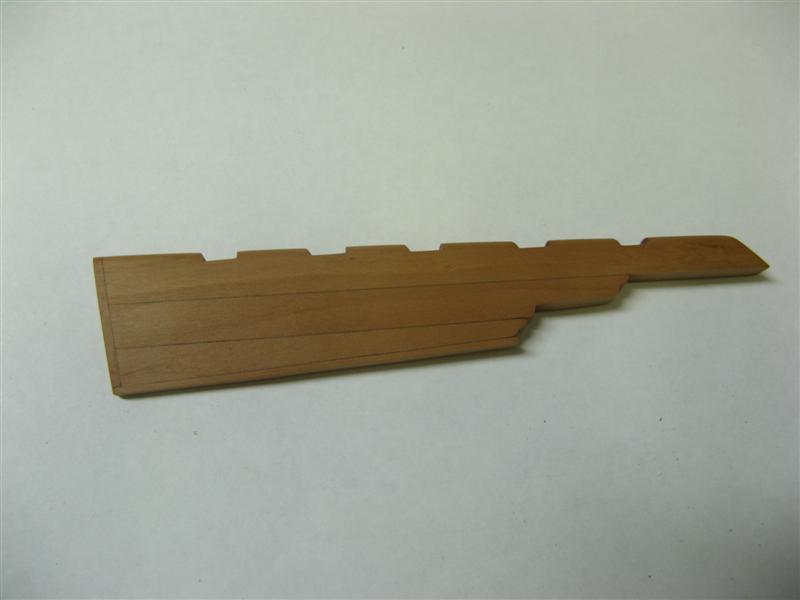
And here is the start of doing some interior hatches etc. The red wood on the hatches is bloodwood.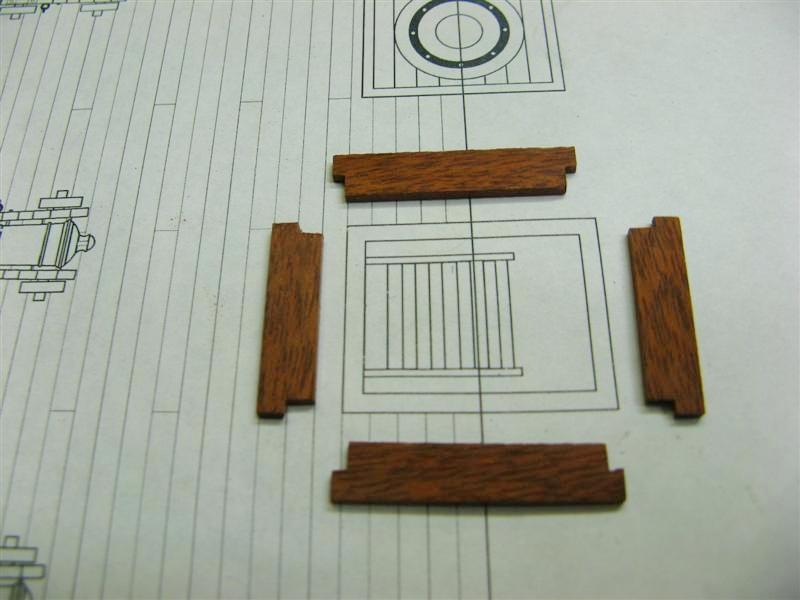

- 149 replies
-
- 3
-
-
- confederacy
- frigate
- (and 1 more)
-
USF Confederacy by Rustyj - FINISHED
Rustyj replied to Rustyj's topic in - Build logs for subjects built 1751 - 1800
Here is some more.
- 149 replies
-
- 3
-
-
- confederacy
- frigate
- (and 1 more)
-
USF Confederacy by Rustyj - FINISHED
Rustyj replied to Rustyj's topic in - Build logs for subjects built 1751 - 1800
Hey it's no problem Ben. Love the talk. Yves having been one of the lucky ones I understand your wishes. -
USF Confederacy by Rustyj - FINISHED
Rustyj replied to Rustyj's topic in - Build logs for subjects built 1751 - 1800
I have not seen the castings from the kit but I did see the mess they made of the figurehead. Ben are you out there? Can you help?- 149 replies
-
- 1
-
-
- confederacy
- frigate
- (and 1 more)
-
Byrnes table saw accessories
Rustyj replied to Neill's topic in Modeling tools and Workshop Equipment
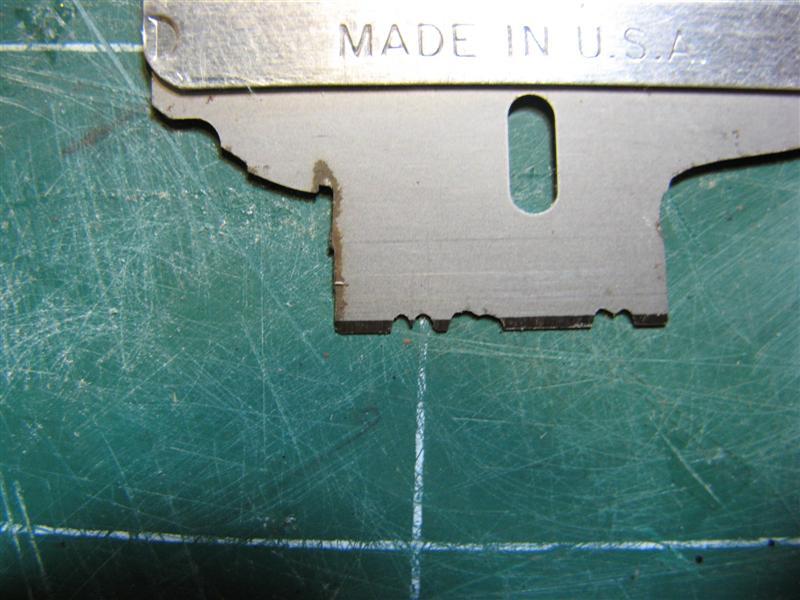
Hi Frank.I don't have any jigs and such but to cut the insert I do use the same size blade. It's aluminum and doesn't seem to dull the blade. -
USF Confederacy by Rustyj - FINISHED
Rustyj replied to Rustyj's topic in - Build logs for subjects built 1751 - 1800
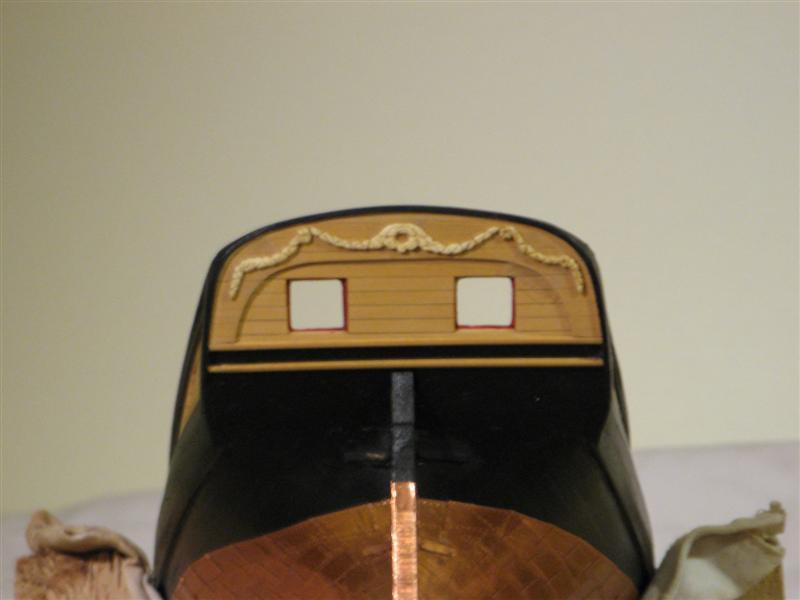
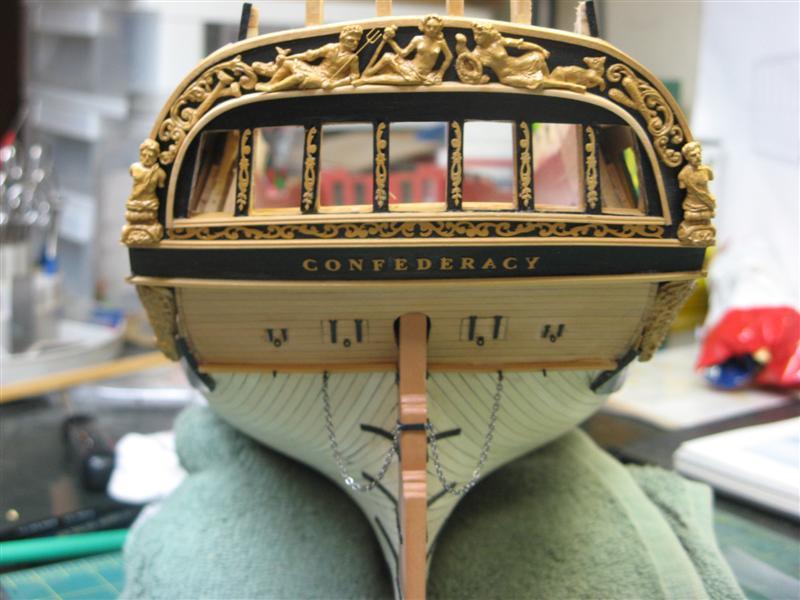
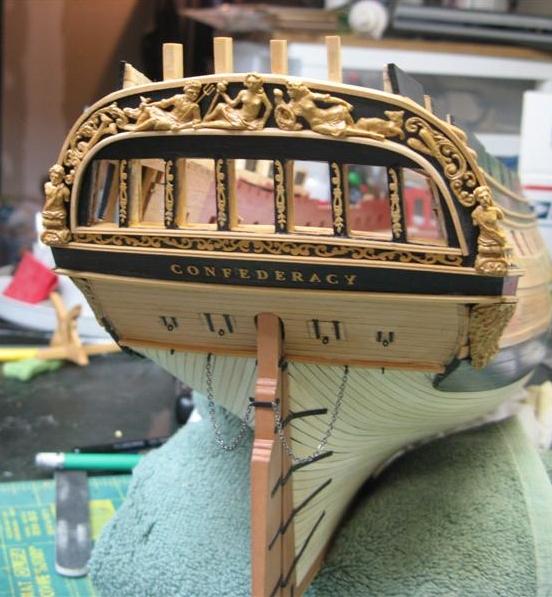
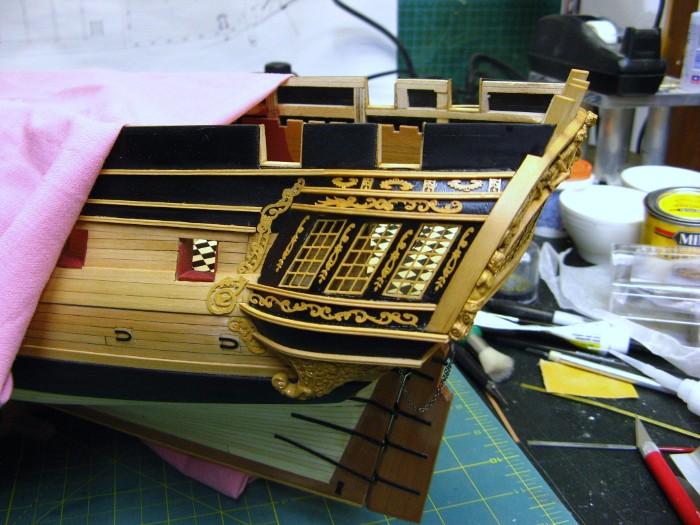
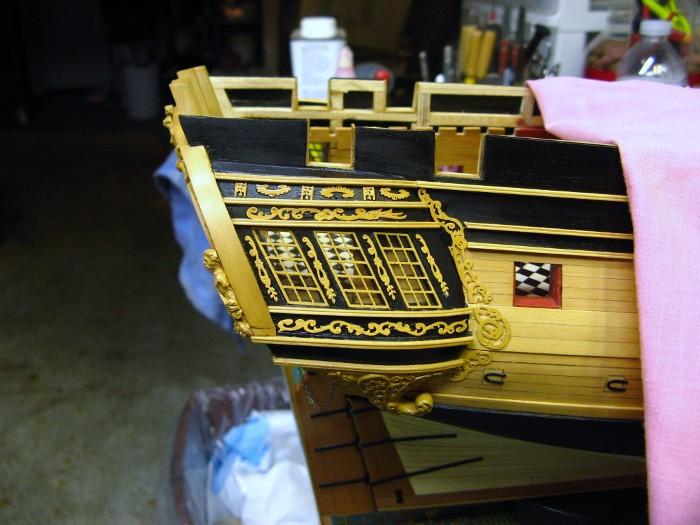
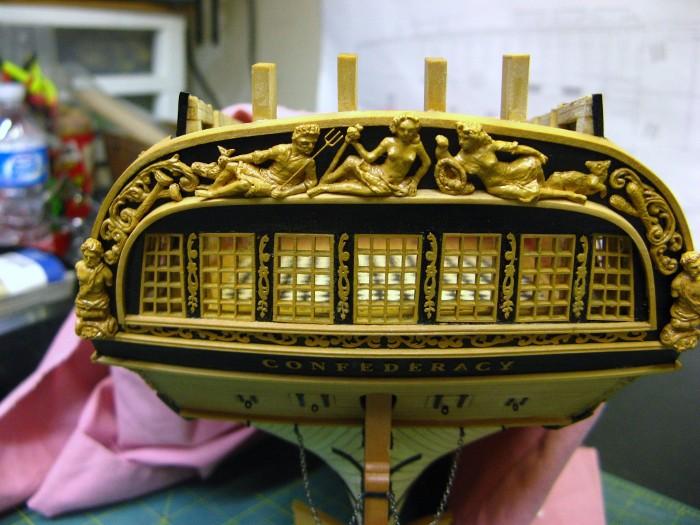
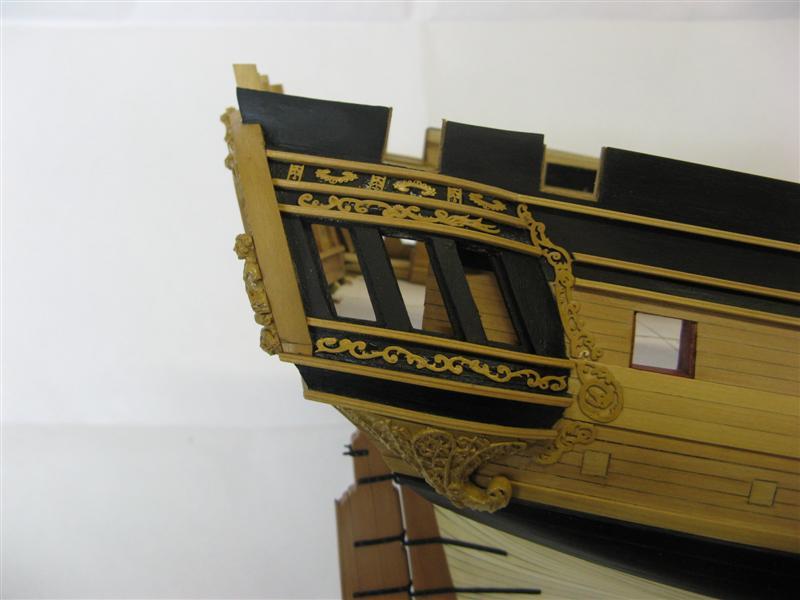
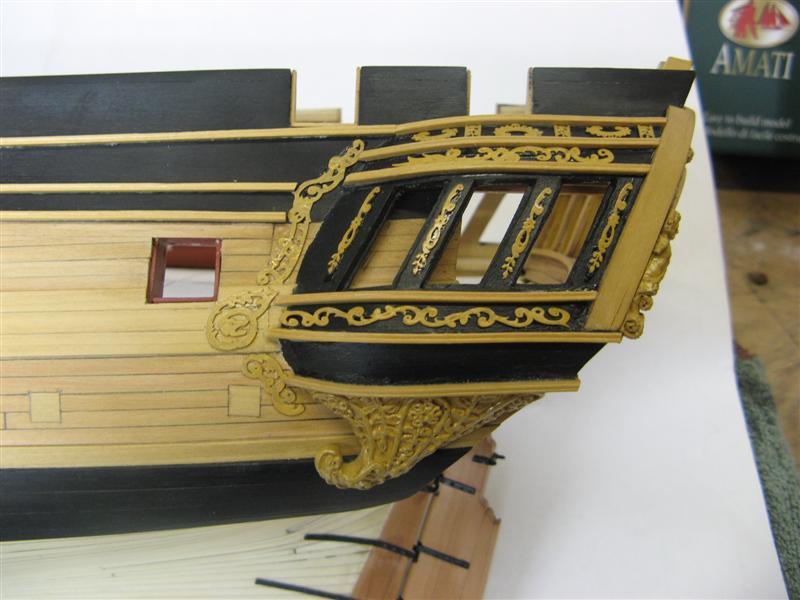
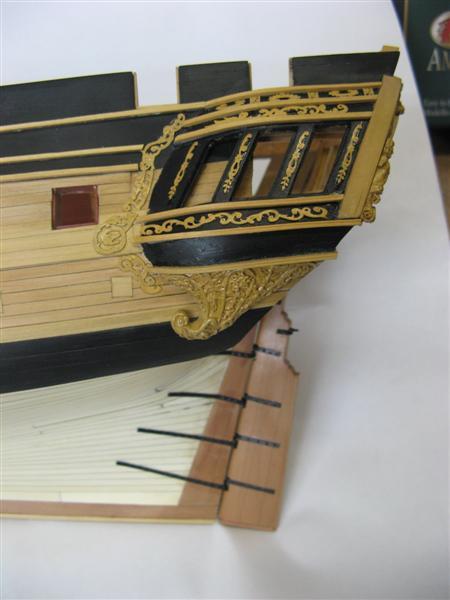
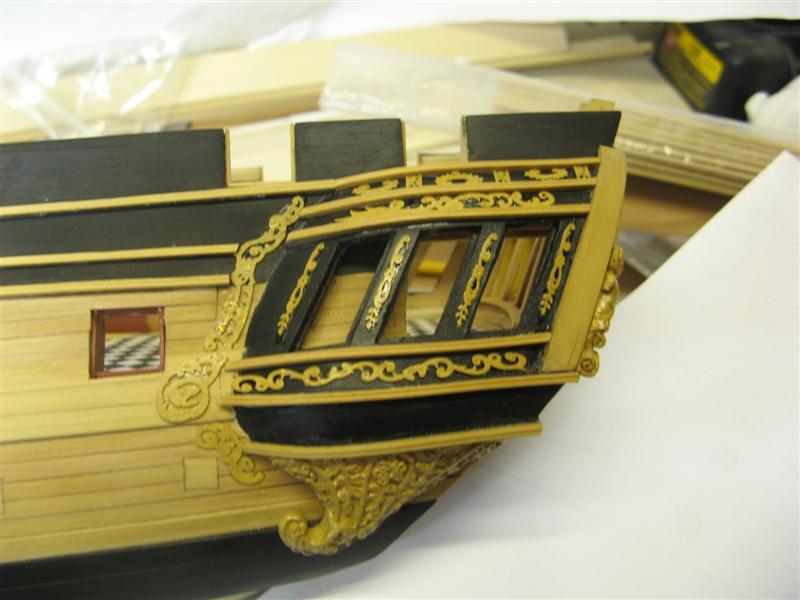
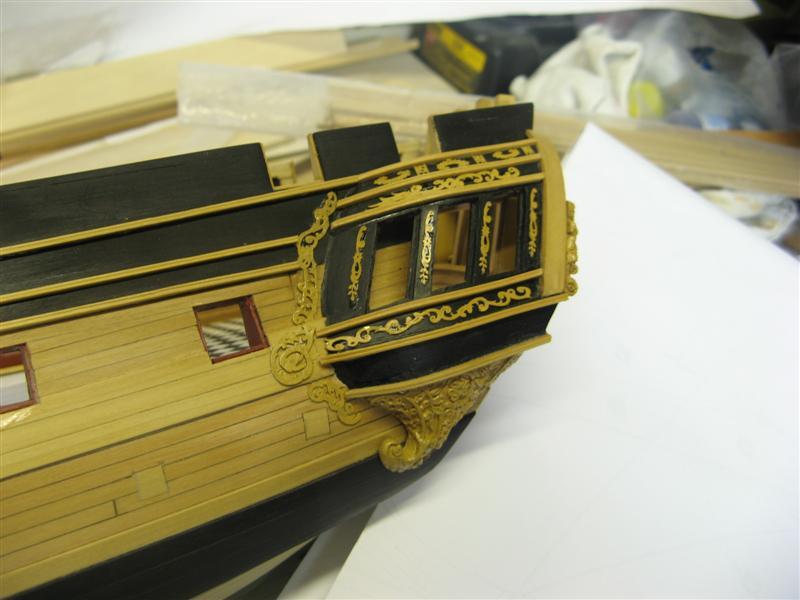
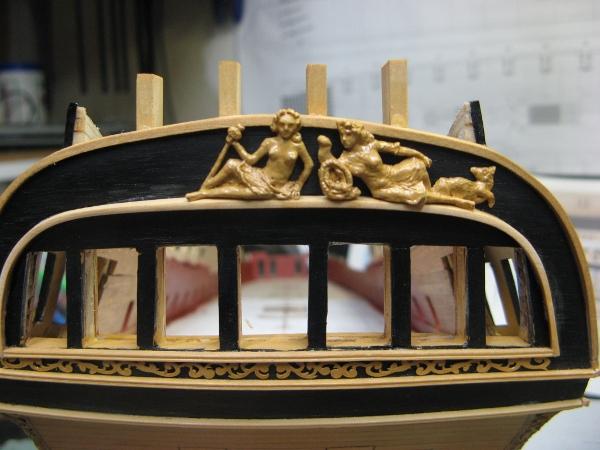
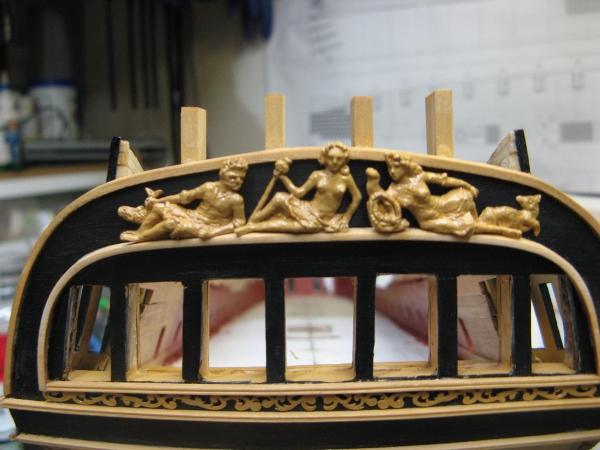
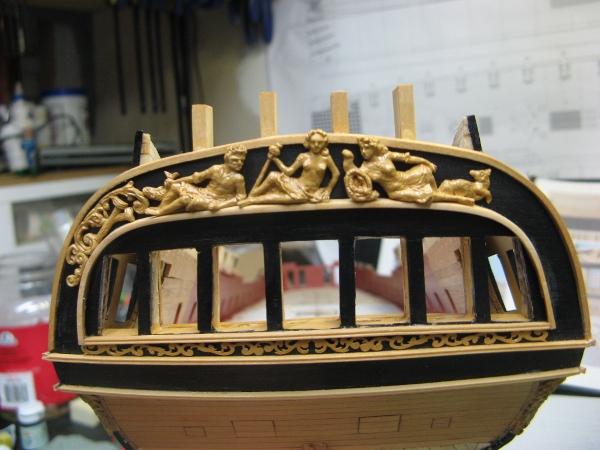
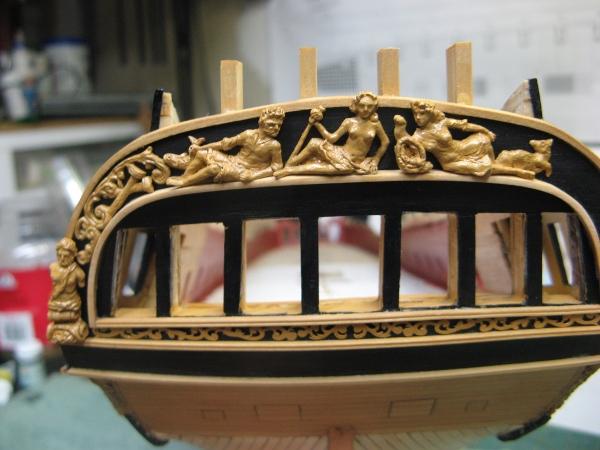
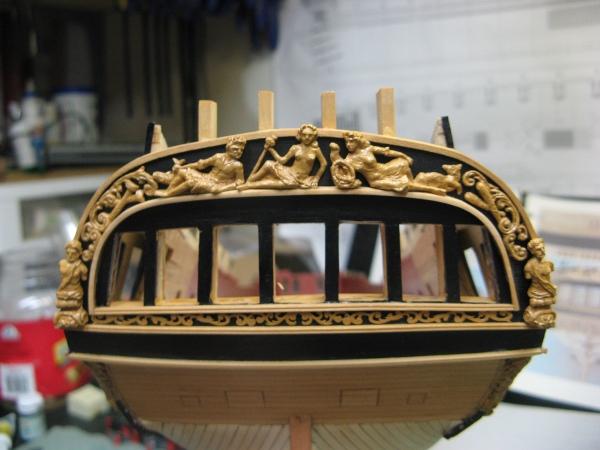
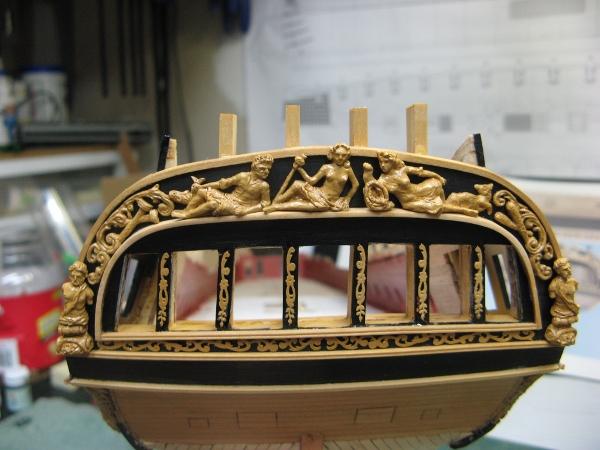
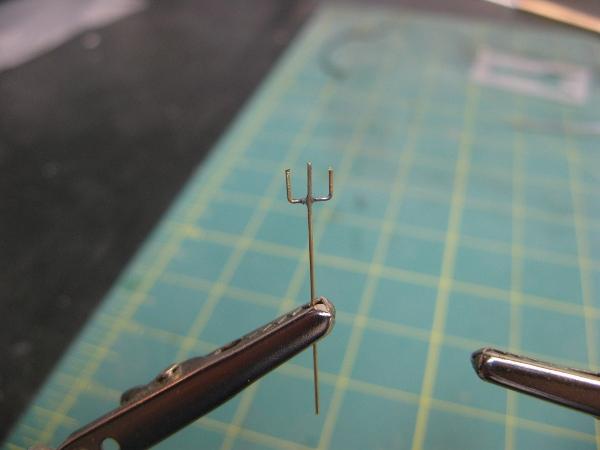
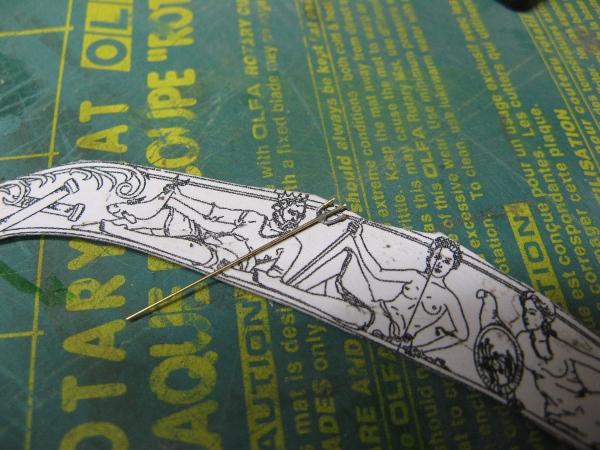
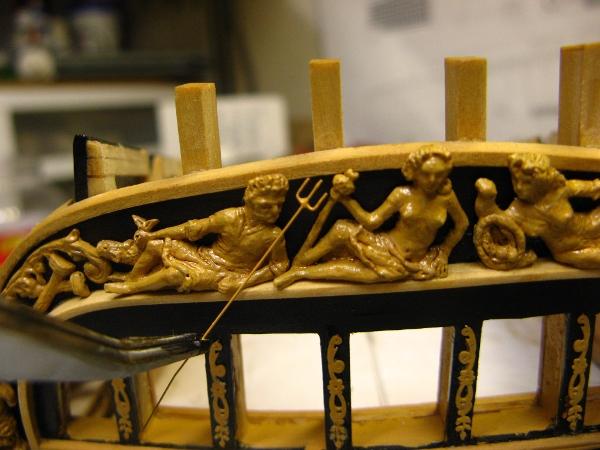
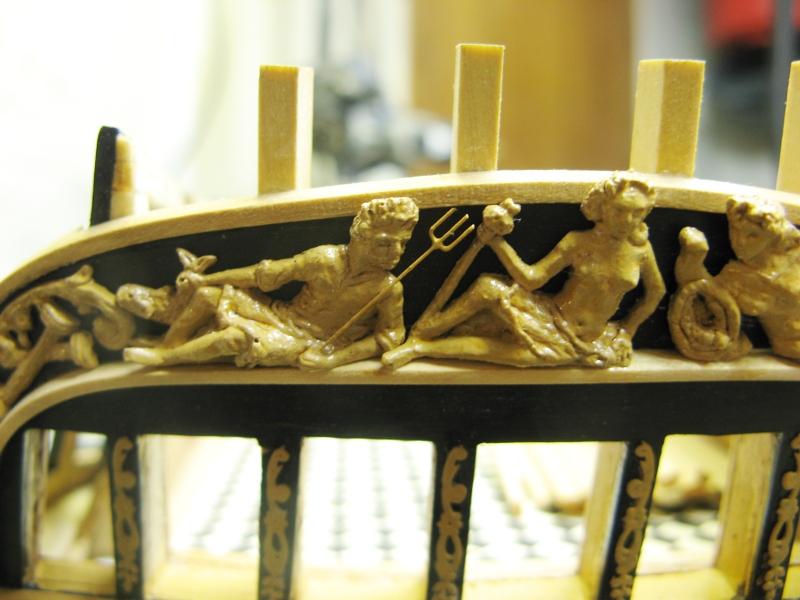
Here are the stern decorations the were generously provided by Chuck. They are resin cast by Chuck and then painted by me. I could take 50 years and not be able to sculpt anything close to this.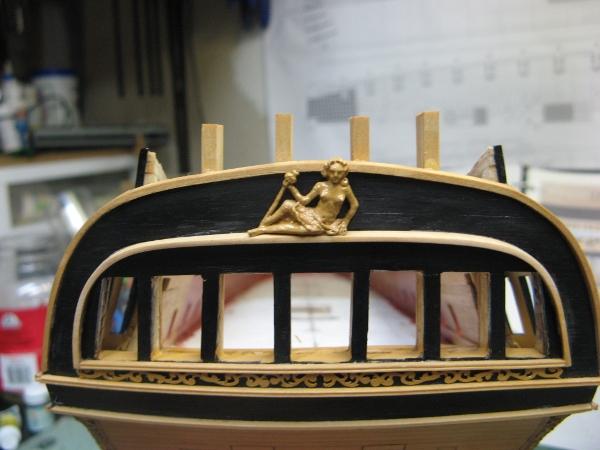

- 149 replies
-
- 7
-
-
- confederacy
- frigate
- (and 1 more)