Rustyj
-
Posts
2,535 -
Joined
-
Last visited
Content Type
Profiles
Forums
Gallery
Events
Everything posted by Rustyj
-

USF Confederacy by Rustyj - FINISHED
Rustyj replied to Rustyj's topic in - Build logs for subjects built 1751 - 1800
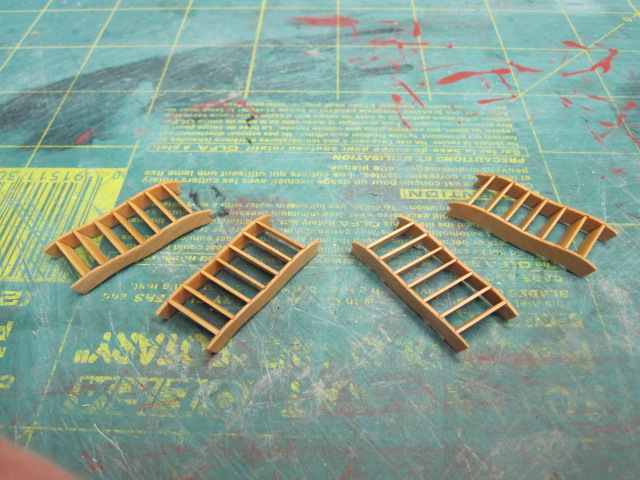
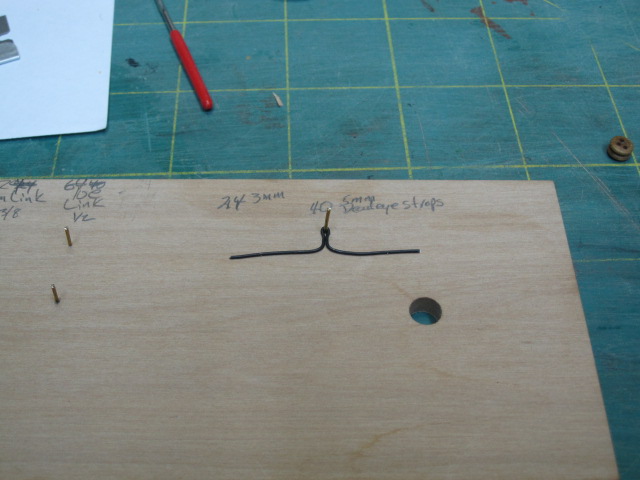
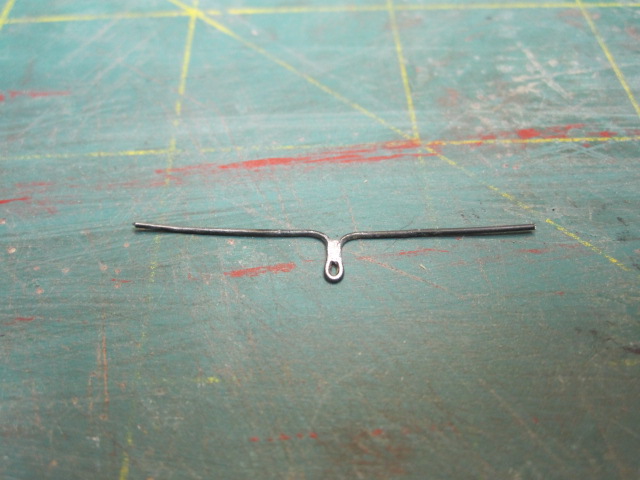
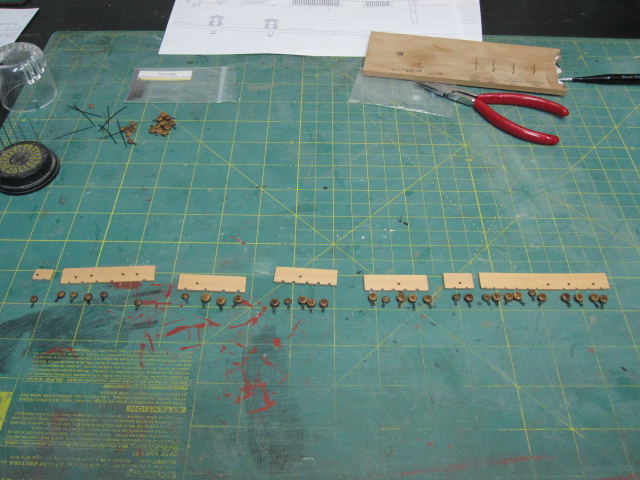
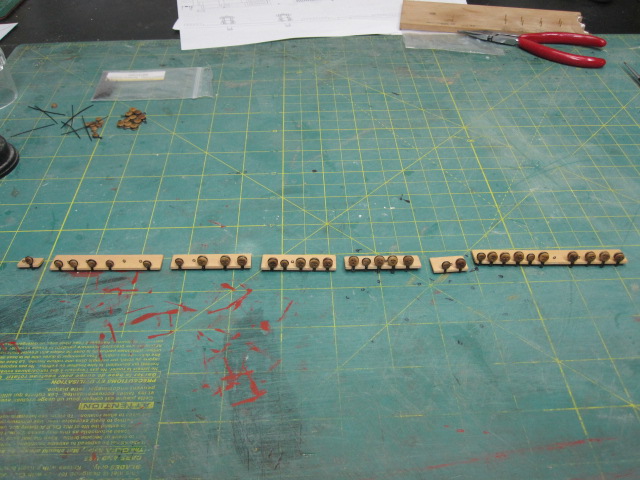
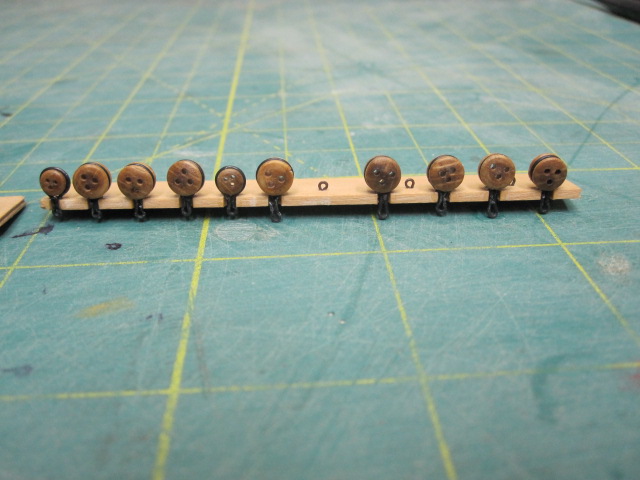
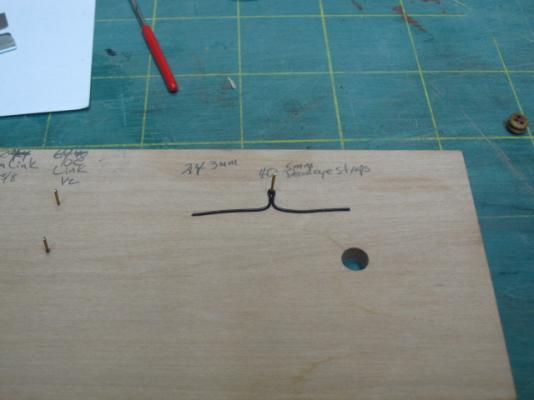
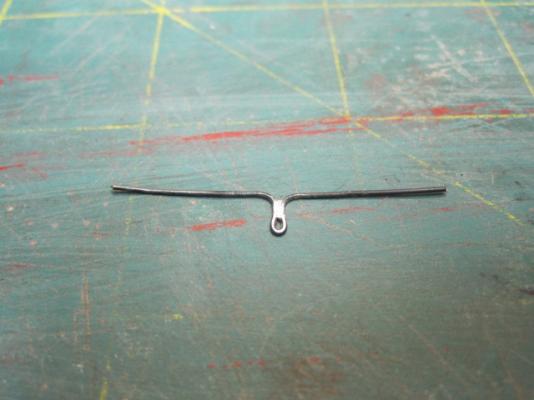
Thank you all very much. Here are more of the chain plates and the knees for the walkways and stairs.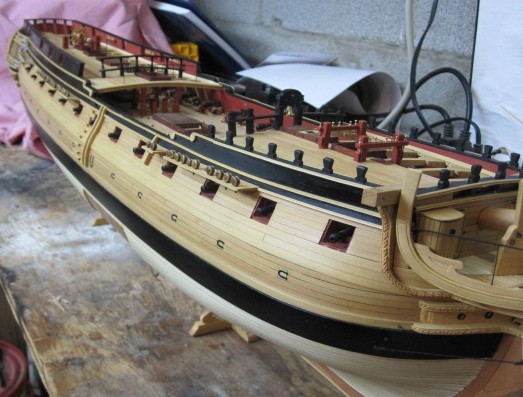


- 149 replies
-
- 3
-

-
- confederacy
- frigate
- (and 1 more)
-
Very good. Once you get the motion down you'll be amazed how many you can do in a short amount of time.
-
Echo by Rustyj - 1:48 - cross-section
Rustyj replied to Rustyj's topic in - Build logs for subjects built 1751 - 1800
Hi all, Still plugging away here. So far I’ve completed the first seven frames and I’m working on the eighth (3 aft). Here a couple of frames set in place just to see them there. This one has a top timber that really has a curve to it. Here is another top timber with a much more subtle shift. Greg recommended aliening it on the plans as shown. It really helped with getting the shift right. Only had to throw around three away. Here is a frame being assembled. I placed handi wrap over the first plans so the glue wouldn't stick to the plans. Once I get all of the frames completed I’ll then start to raise them.


-
She's coming along nicely. I agree Pete. It'll look real nice once sanded and oiled.
-
Thanks Grant. As you know “set up” can be endless. Ben, I just wish my brother hadn’t retired as a machinist. He once made a working cannon. Pete, I hope you plan on it taking a while! You know “set up” takes forever. Mark, As long as you haven’t applied a sealer or Poly it could be considered “set up”.
- 421 replies
-
- 2
-
-
- granado
- bomb ketch
- (and 2 more)
-
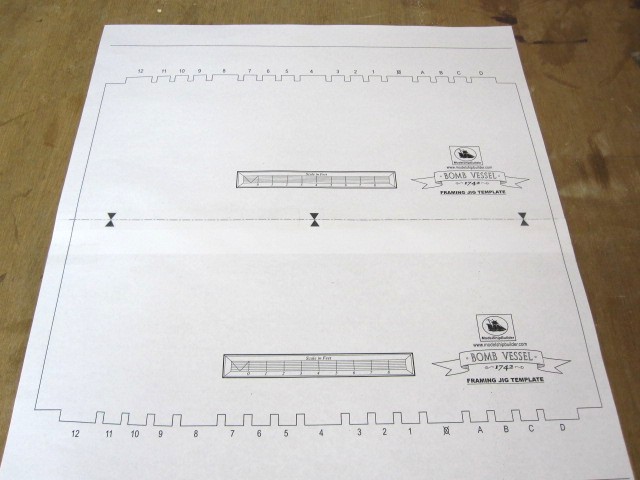
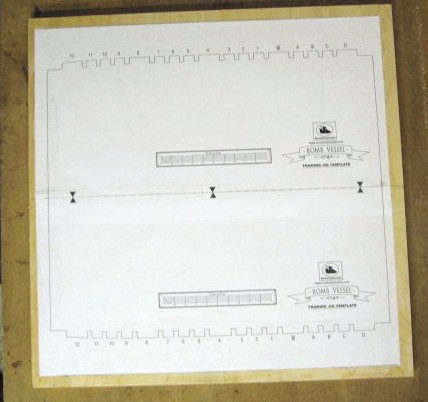
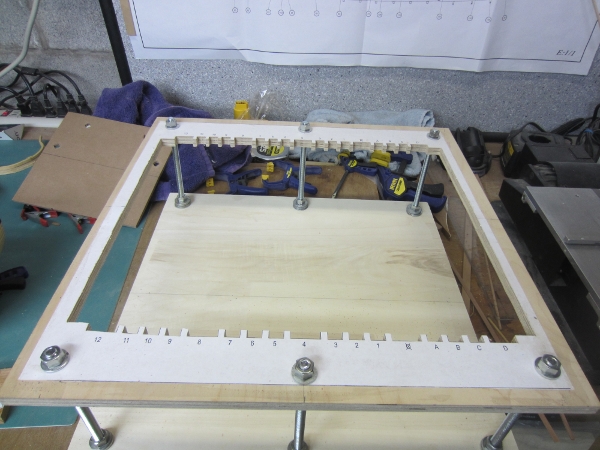
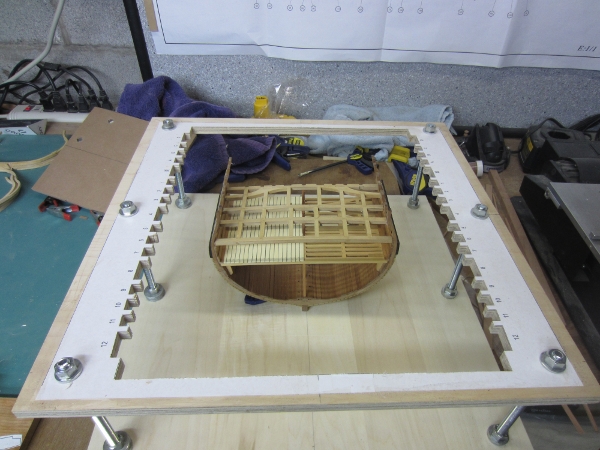
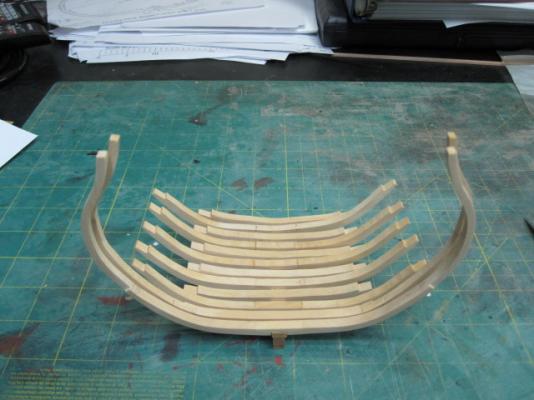
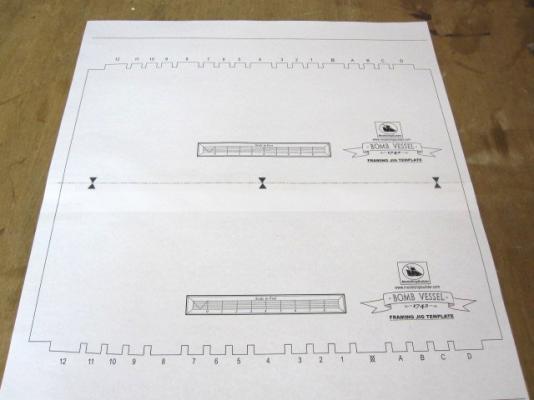
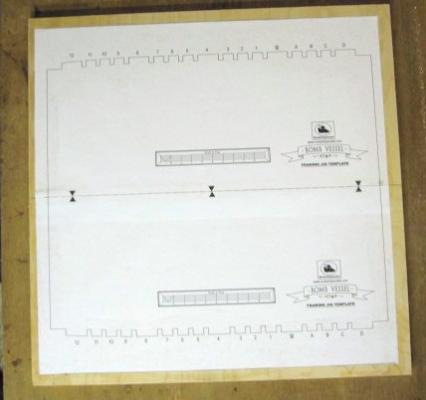
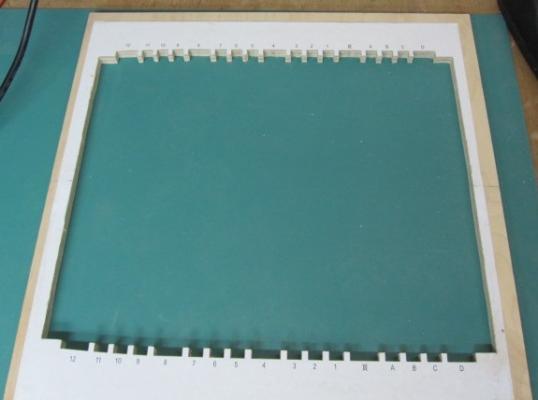
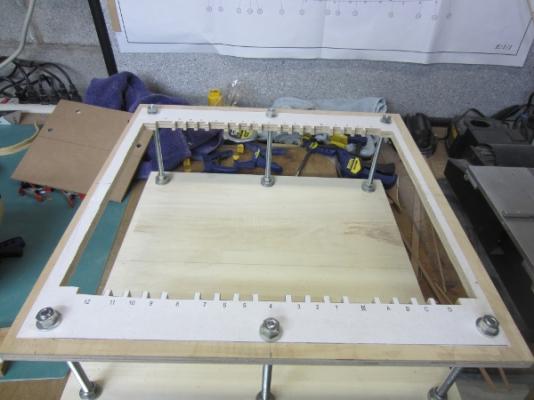
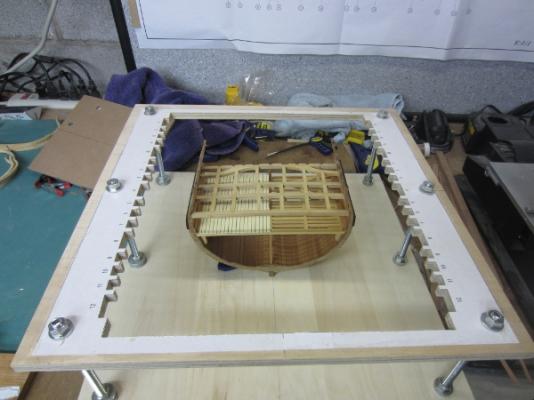
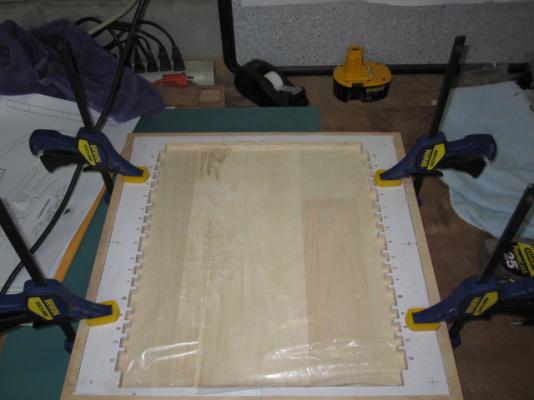
Hey Ben, Already way down that rabbit hole my friend! Rice n beans again for dinner. Thanks Pete it may take awhile but should be fun. I’ve continued on with the now infamous “Set Up” work. Quiet Mark! Here I’ve constructed the jig that will hold the set up keel and frames in the correct position. The bottom board is some ¾” ash that I had left over and the top piece is ½’ beech plywood that is eight ply and very solid. I glued the plans to the plywood and then cut it out using the scroll saw. After it was done I placed it evenly on top of the bottom piece, clamped it and drilled 6 holes for the bolts. This way I was pretty sure the top and bottom would stay square to each other. Once the bolts were installed it was a simple matter of adjusting the nuts until the correct height was archived. Here’s the Triton Cross Section placed in side for another size reference. As I complete more “Set Up” work I’ll let you know.

- 421 replies
-
- 3
-
-
- granado
- bomb ketch
- (and 2 more)
-
The planking looks good. If you hadn't fessed up I would never have known it.
-
USF Confederacy by Rustyj - FINISHED
Rustyj replied to Rustyj's topic in - Build logs for subjects built 1751 - 1800
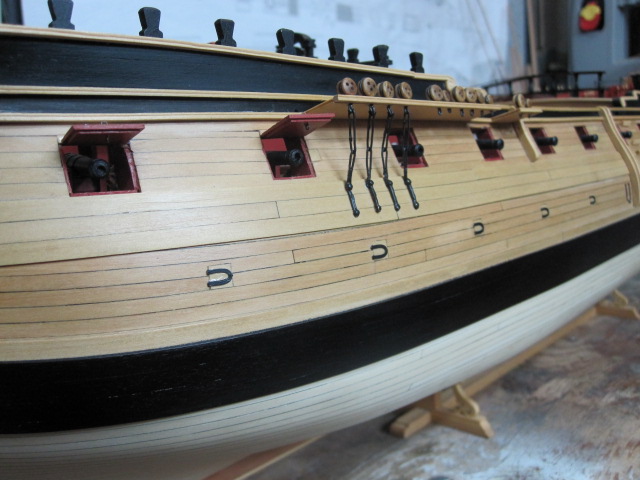
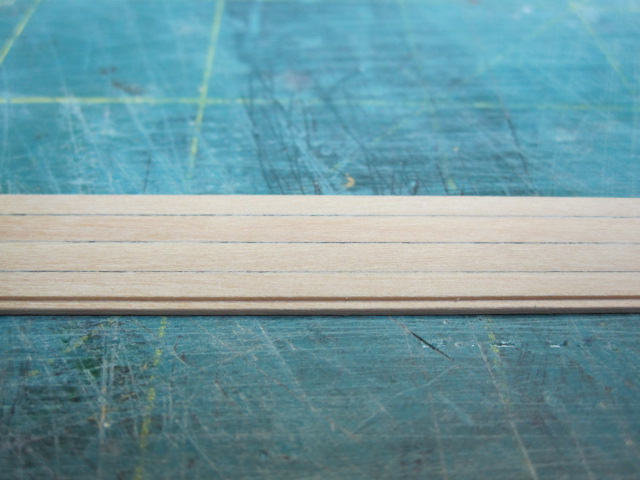
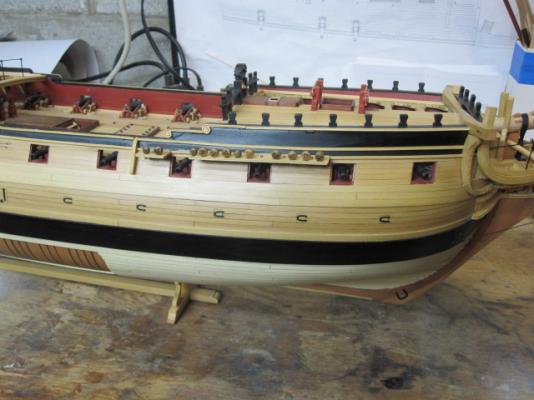
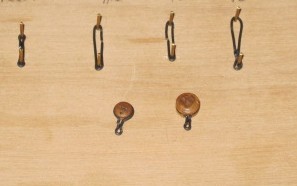
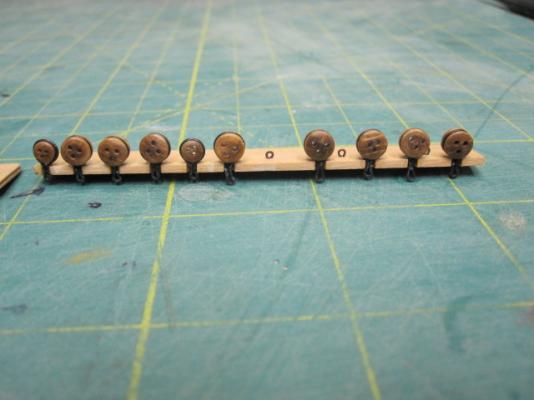
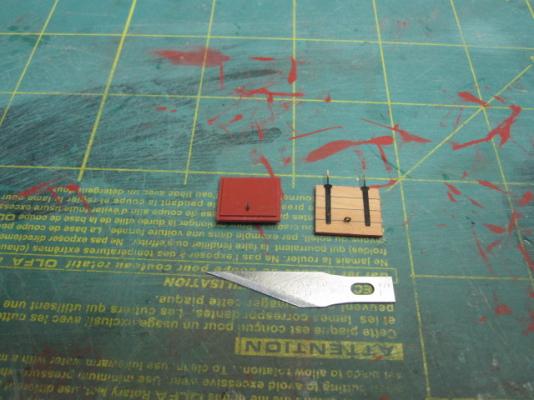
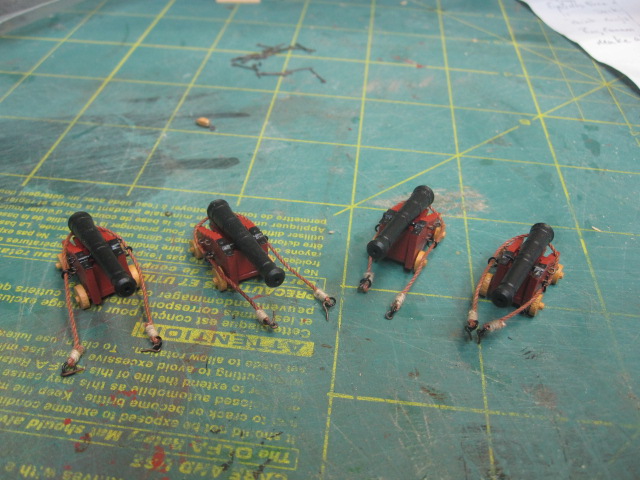
And here is the making of the gun port lids and deadeyes.


- 149 replies
-
- 1
-
-
- confederacy
- frigate
- (and 1 more)
-
USF Confederacy by Rustyj - FINISHED
Rustyj replied to Rustyj's topic in - Build logs for subjects built 1751 - 1800
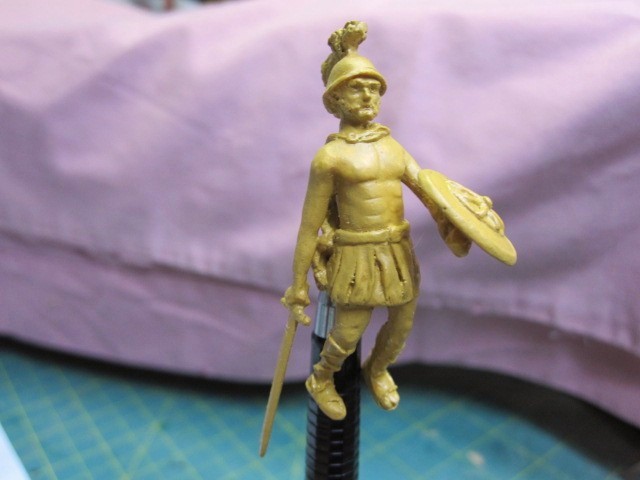
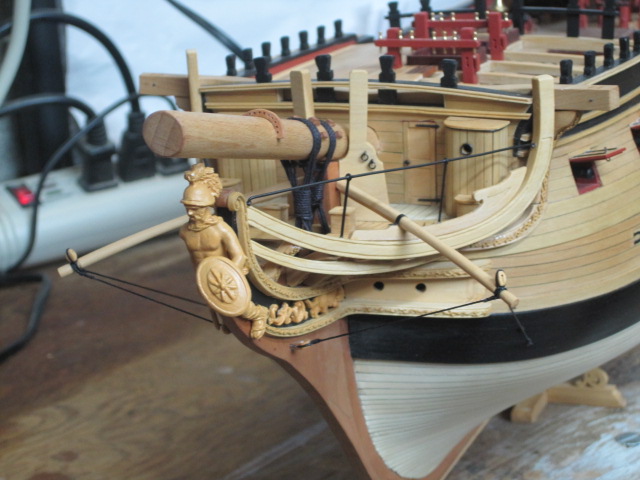
It will be no surprise to anyone that Chuck generously supplied me with one of the original resin castings of the figurehead which I painted and dry brushed to look like the boxwood.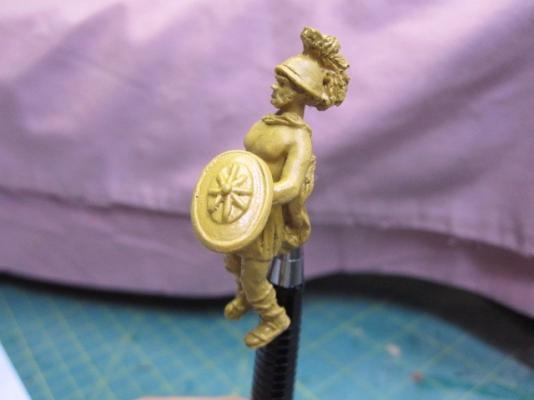


- 149 replies
-
- 3
-
-
- confederacy
- frigate
- (and 1 more)
-
Hi Bob, Thanks for reposting your build log. I'm looking forward to seeing your great workmanship all over again.
-
Hi Pete and Ben. There’s nothing special I do. I just make sure that the paper is completely glued on both sides. I only leave about 1/32” excess on the topside and none on the bottom. Once dry I sand with 150 then 220 then 400 grit sand paper. I sometimes I will scrap it too with a single edged razor blade. I’ve only tried this on hardwoods like holly, boxwood and par marfin. I hope this helps. Hi Bob, Thanks’ and the chisel’s I use are the small and mini palm chisels from U.J. Ramelson. Thanks Russ. Doing them really makes me want to get a lathe! Thanks Paddy. I wish I hadn’t lost the pictures though. Thanks Bob. I was pleased with the contrast with the planking, paper and treenails. Hi Daniel. I just use a strip of wood cut to the desired width and lay it on the beam and mark each plank prior to drilling. Thanks Mark. Much appreciated.
-
Very nice work Jeff. I too am a fan of the closed gunport lids. Glad to see you progressing so nicely.
-
Alright Bob, You are now officially on your way to the "Dark Side"
-
Hi All, Sorry all but the camera decided to hack up the hair ball. I was taking pictures thinking all was good. I pulled the memory card to download the pictures and nada, zip, zero nothing. Put the card back in, took some more pictures. Nope. I replaced the card and still nothing. You would think that a $100 camera would last longer then 6 years of being covered in dust in a work shop and repeatedly knocked on the floor. So anyway, I stole the Admirals camera to take some pictures to bring us up to date. The decking was completed and I used Holly treenails with the black construction paper for the caulking. For the support beams I used some Swiss Pear and using a xacto and files. I then went on to framing in the gun deck with the boxwood which the main beams are almost done and then I’ll start on the carlings ledges and knees. That's were I'm at right now!


- 332 replies
-
- 2
-
-
- Triton
- cross-section
- (and 1 more)
-
Hi Bob, Your build was a pleasure to follow and you work is simply stunning. Well done!
-
Hi Bob and welcome aboard. I think you will love it and I'm excited to see your build take shape.
-
USF Confederacy by Rustyj - FINISHED
Rustyj replied to Rustyj's topic in - Build logs for subjects built 1751 - 1800
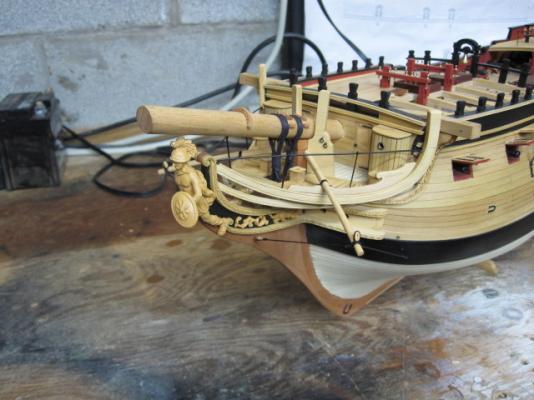
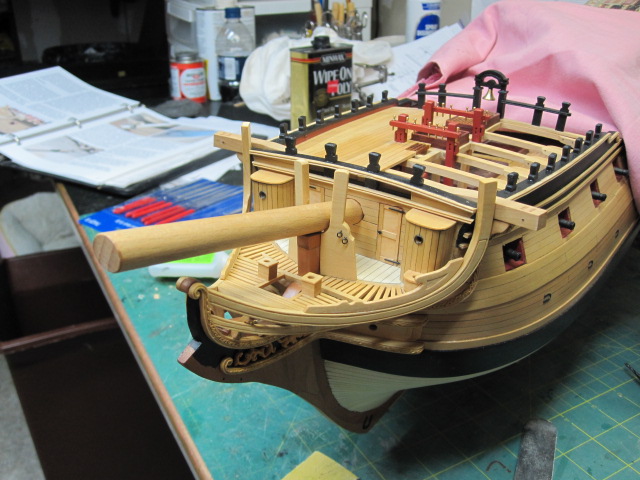
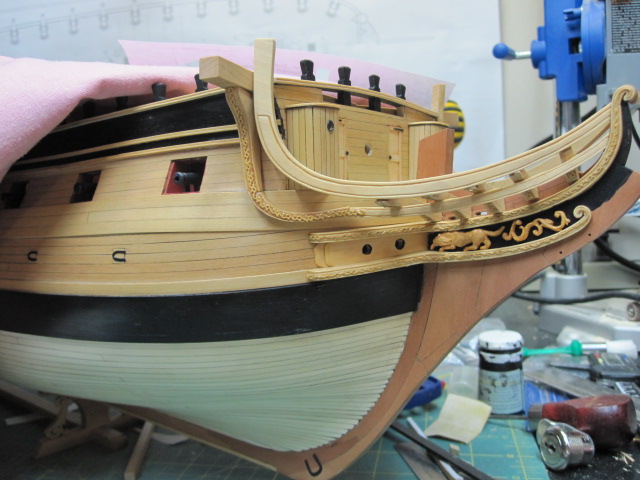
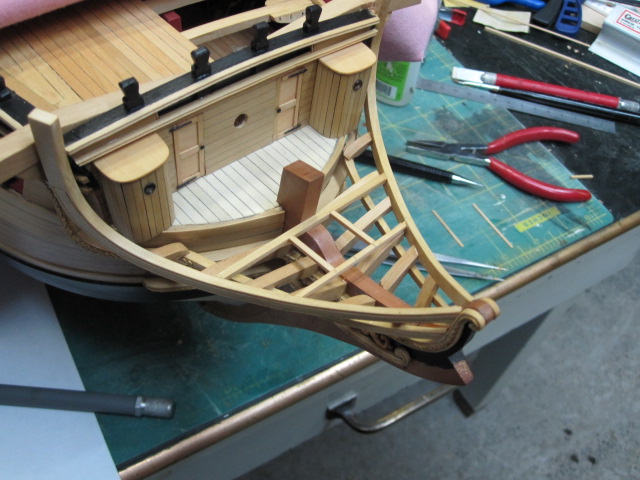
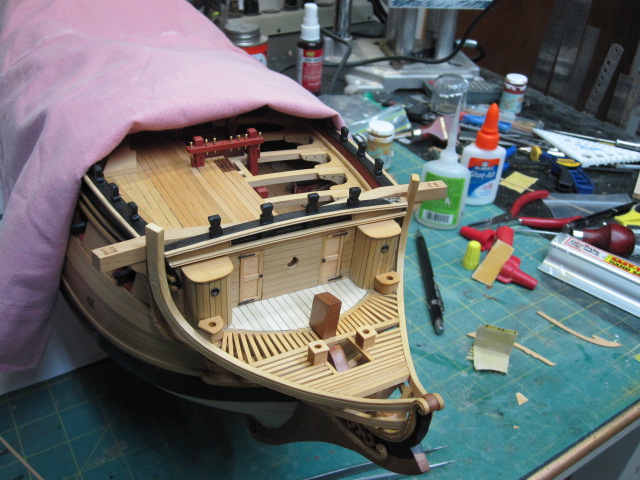
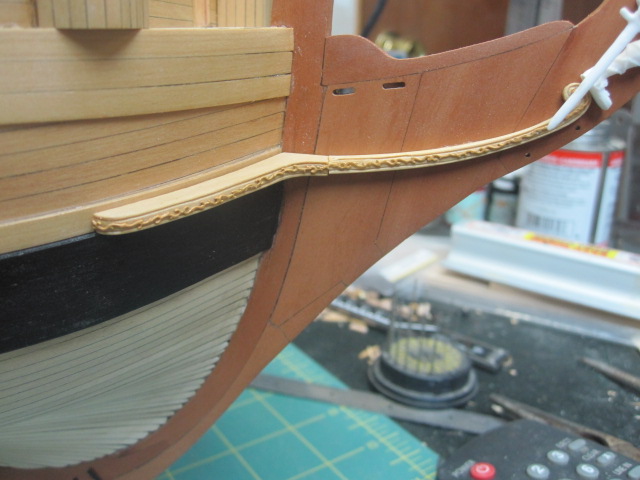
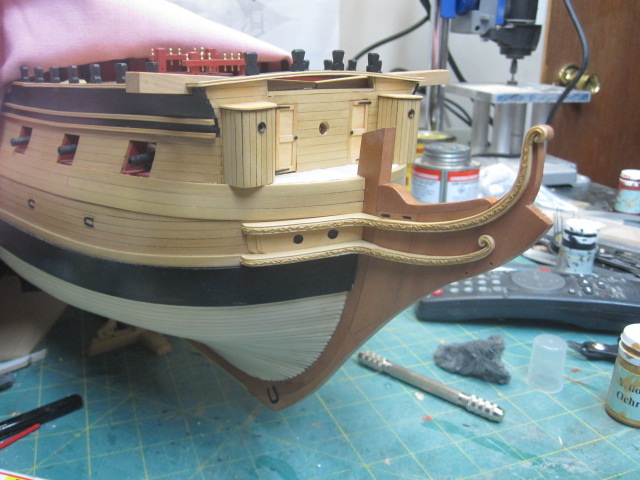
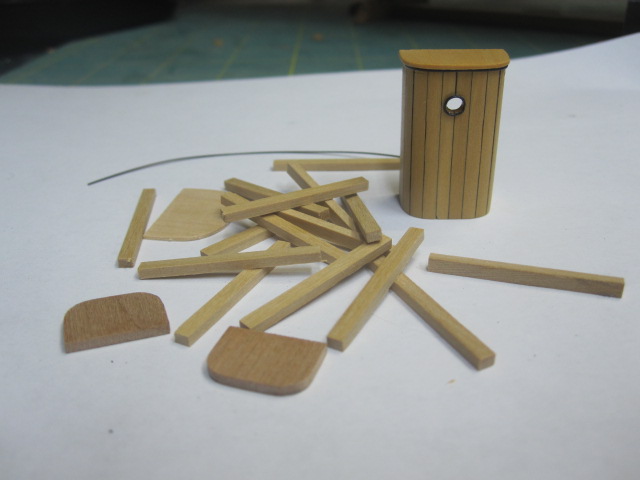
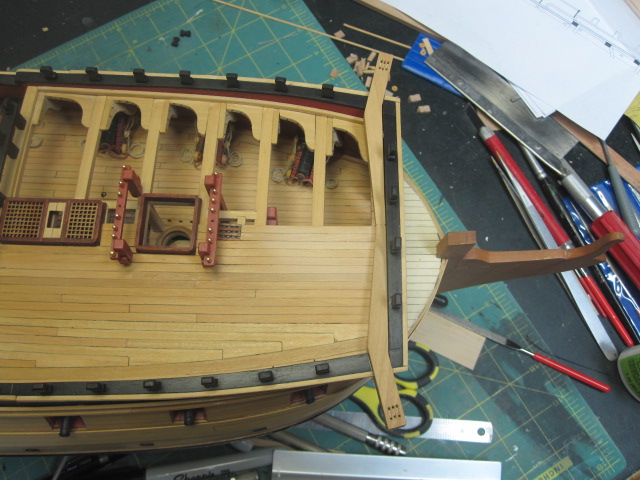
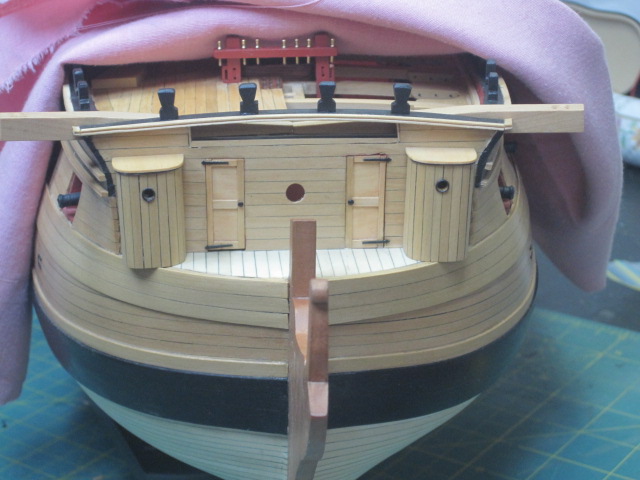
Thank you Bob, Greg and Michael. Very much appreciated. Winding up the head rails, boomkins etc.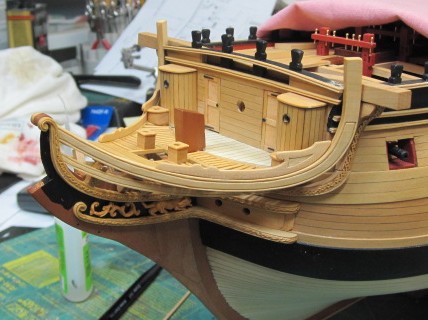


- 149 replies
-
- 5
-
-
- confederacy
- frigate
- (and 1 more)
-
USF Confederacy by Rustyj - FINISHED
Rustyj replied to Rustyj's topic in - Build logs for subjects built 1751 - 1800
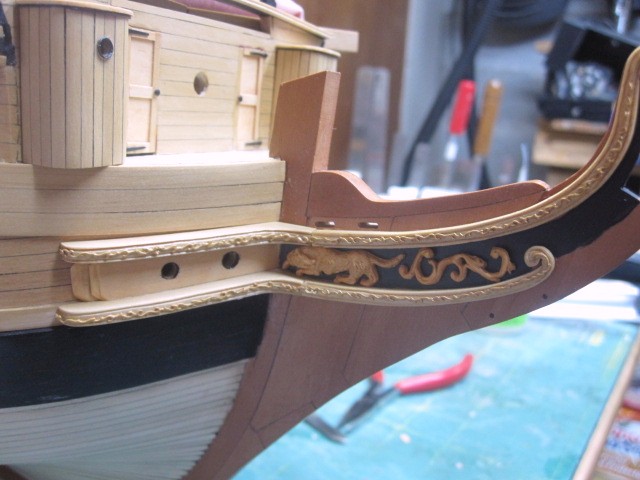
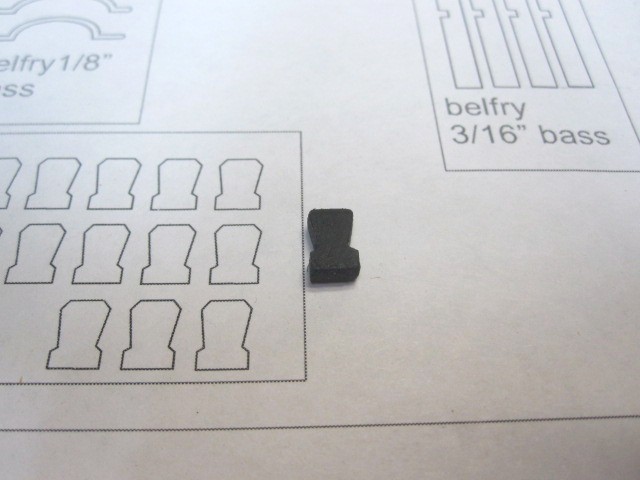
Hi 42Rocker, Popeye, John and Dirk. Thanks for joining me on the trip down memory lane. Funny thing looking at the pictures is my desk still looks like the same mess just a different build sitting on it! Well here are yet more pictures of the head rails.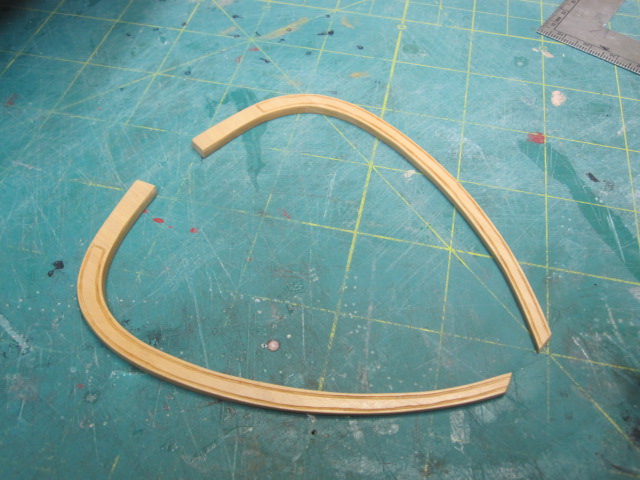

- 149 replies
-
- 2
-
-
- confederacy
- frigate
- (and 1 more)
-
Hi Ron, When I bent my deck beams I did over bend them by about 1/32" and they came back to the correct camber but then I only let them sit for 24hrs. Everything is looking good.
-
USF Confederacy by Rustyj - FINISHED
Rustyj replied to Rustyj's topic in - Build logs for subjects built 1751 - 1800
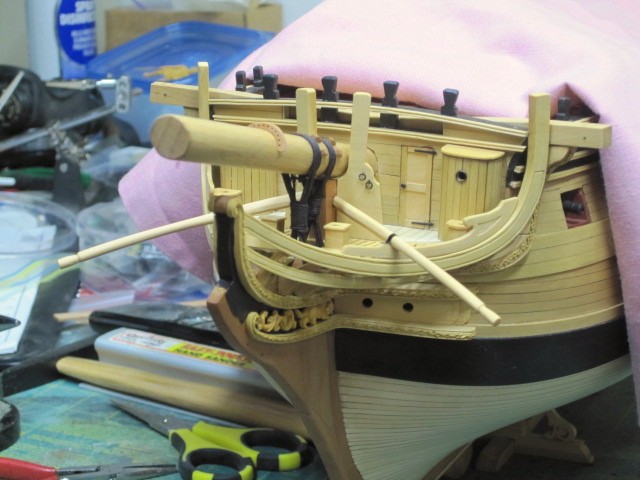
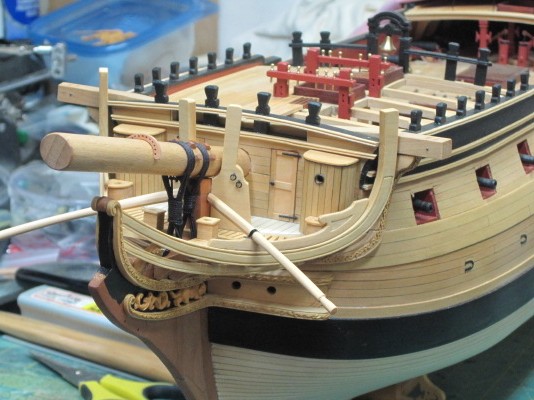
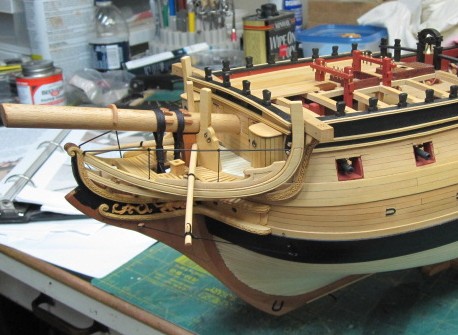
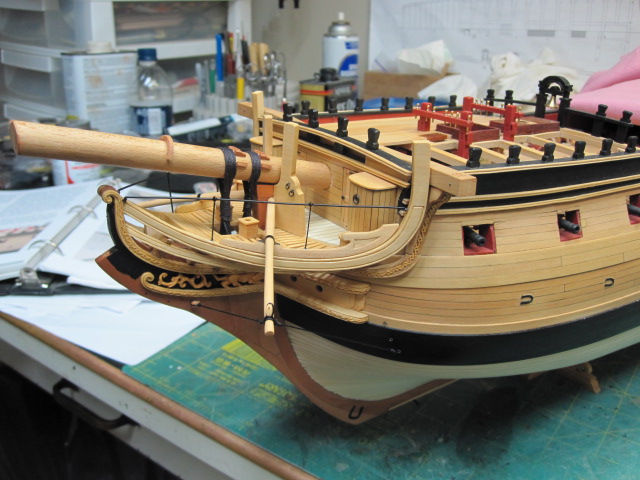
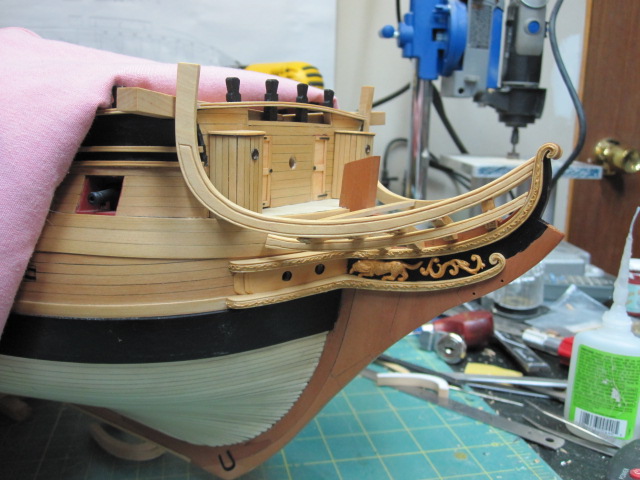
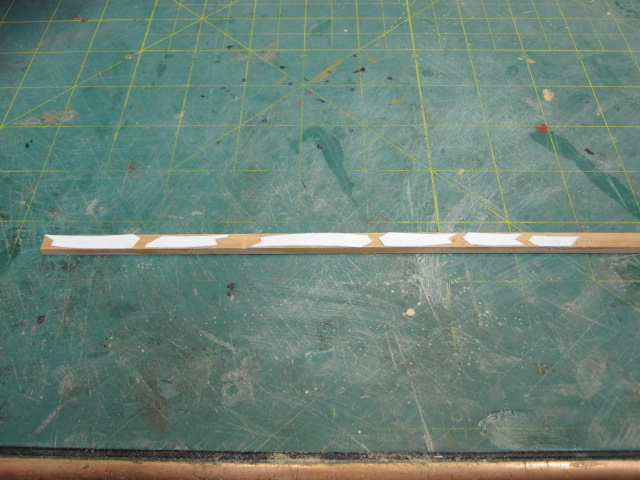
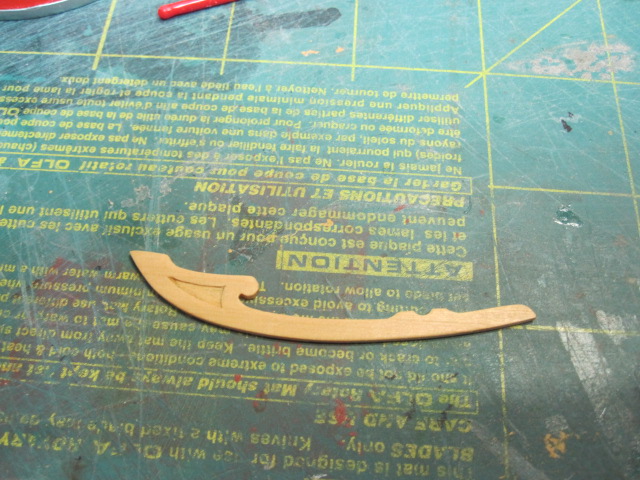
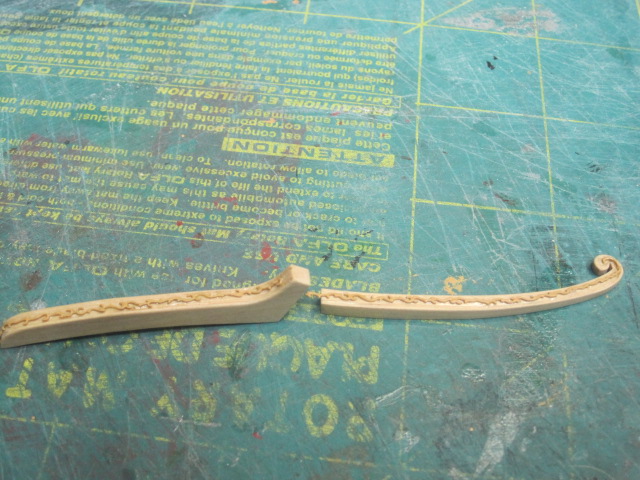
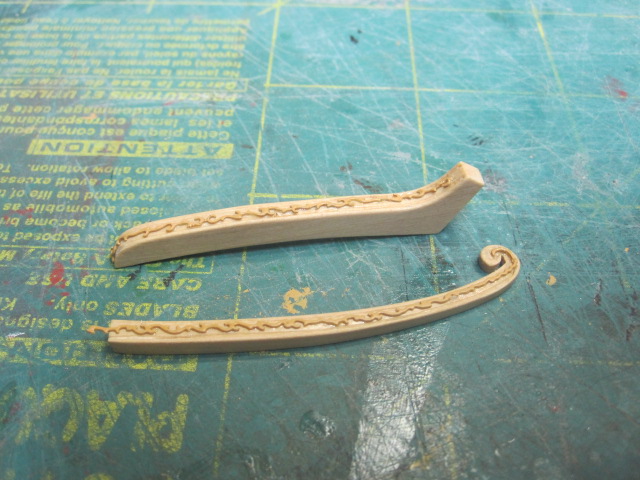
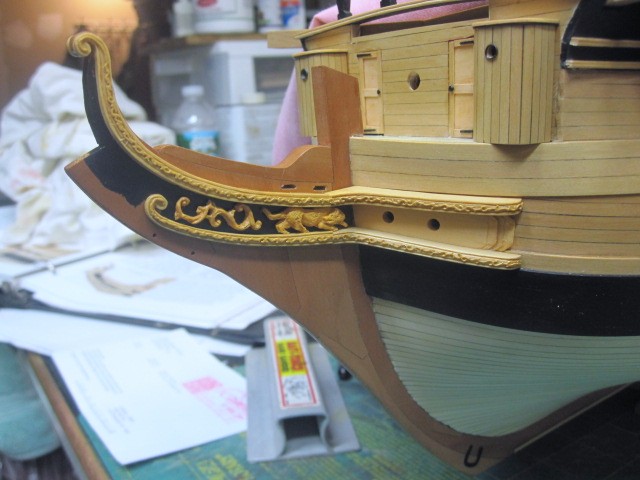
And more head rails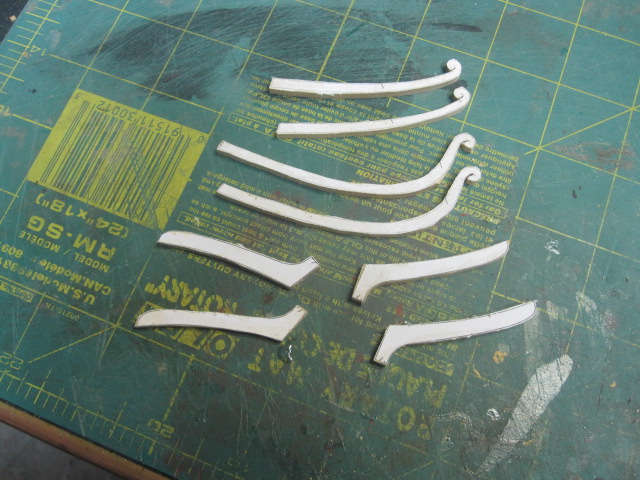


- 149 replies
-
- 2
-
-
- confederacy
- frigate
- (and 1 more)
-
USF Confederacy by Rustyj - FINISHED
Rustyj replied to Rustyj's topic in - Build logs for subjects built 1751 - 1800
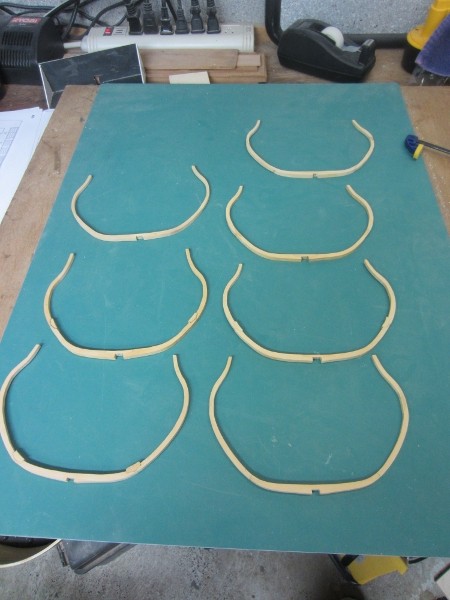
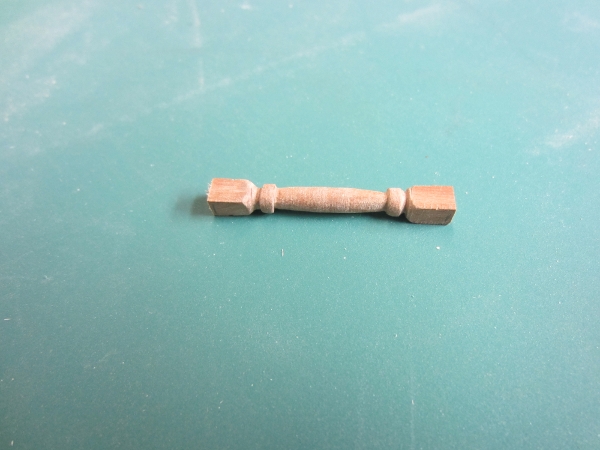
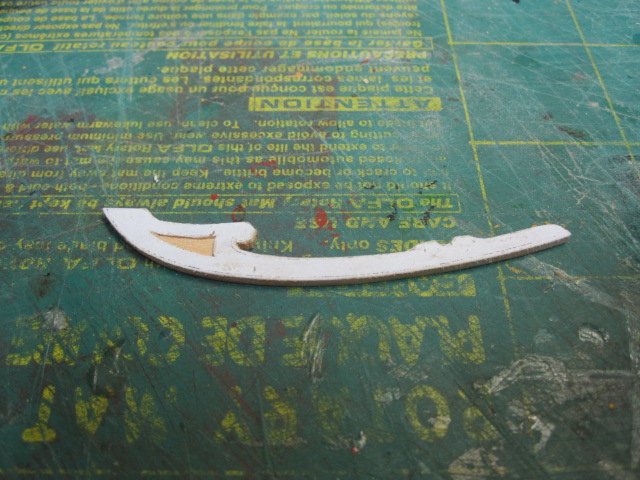
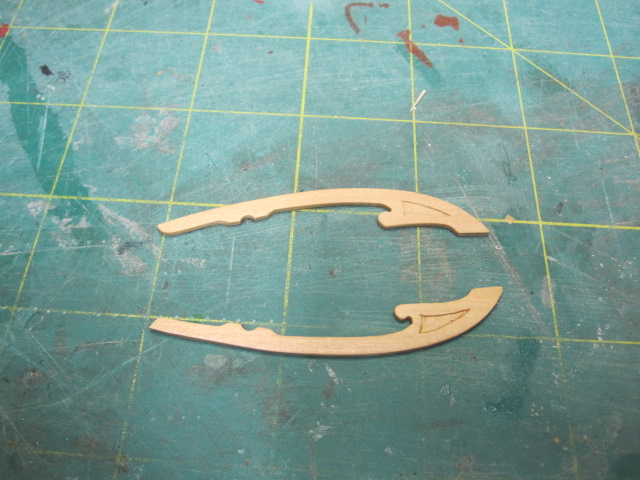
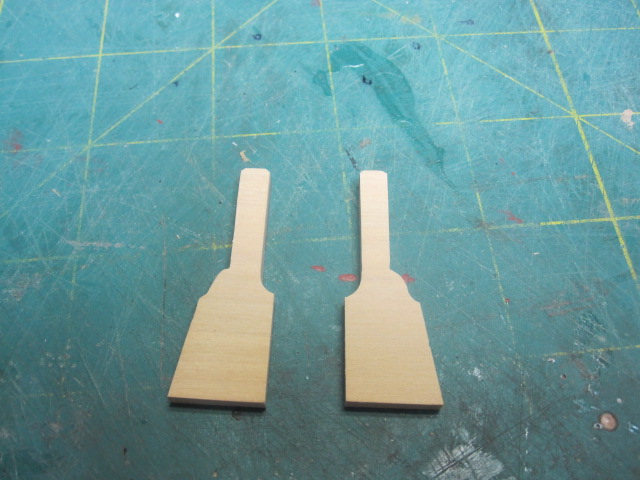
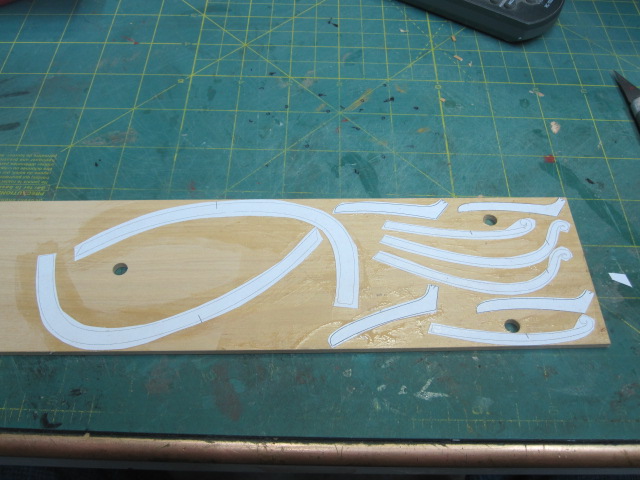
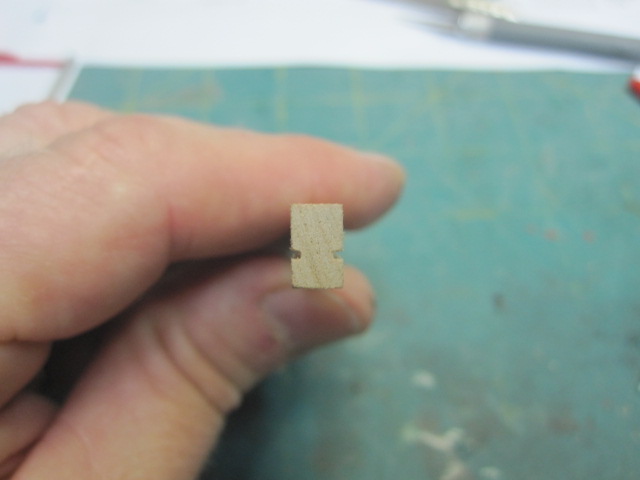
Here is the start of the head rails.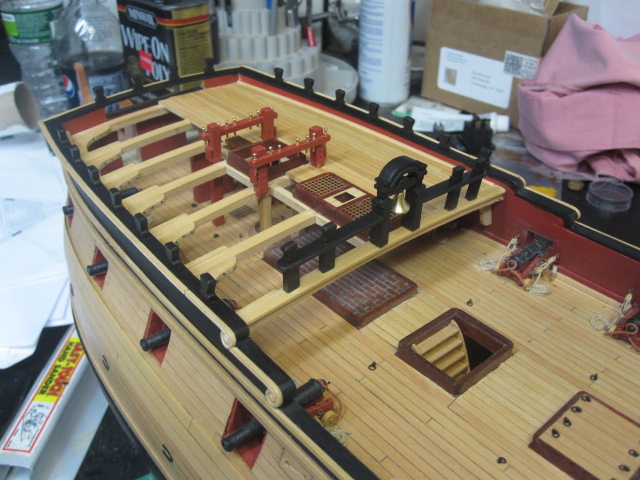


- 149 replies
-
- 2
-
-
- confederacy
- frigate
- (and 1 more)
-
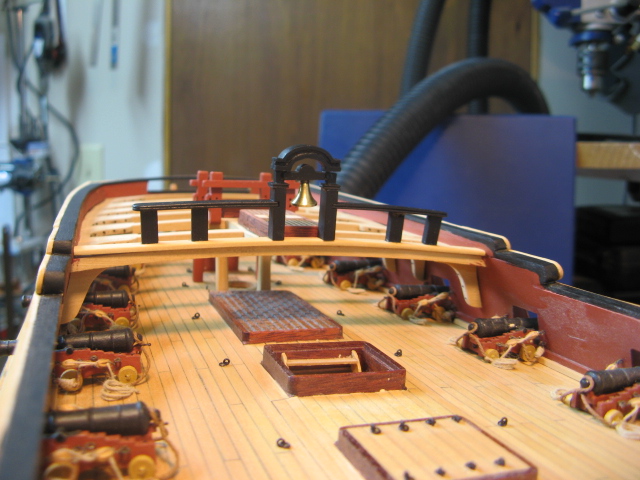
USF Confederacy by Rustyj - FINISHED
Rustyj replied to Rustyj's topic in - Build logs for subjects built 1751 - 1800
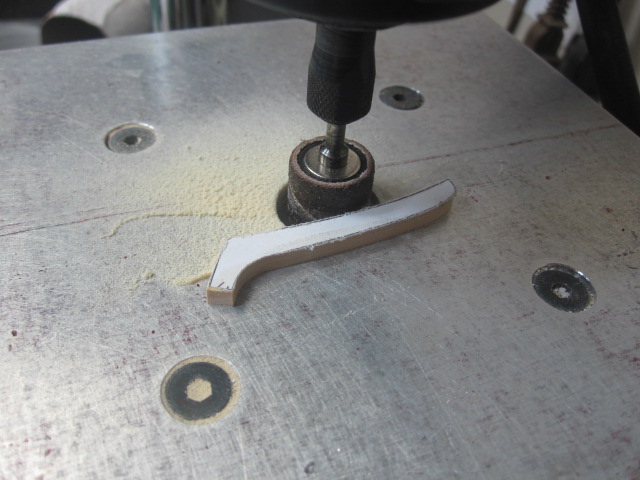
And yet some more!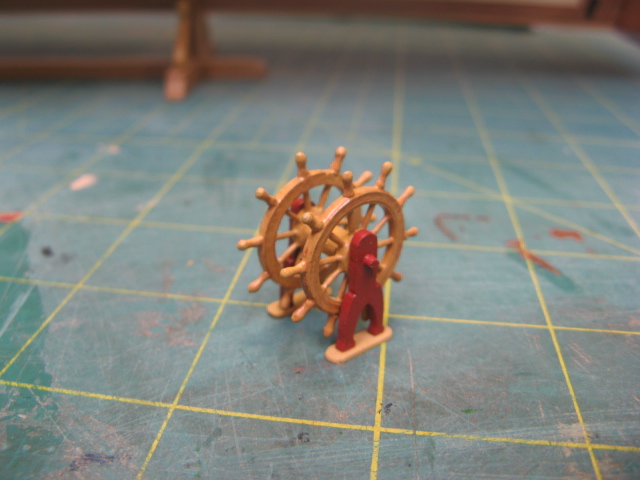


- 149 replies
-
- 2
-
-
- confederacy
- frigate
- (and 1 more)
-
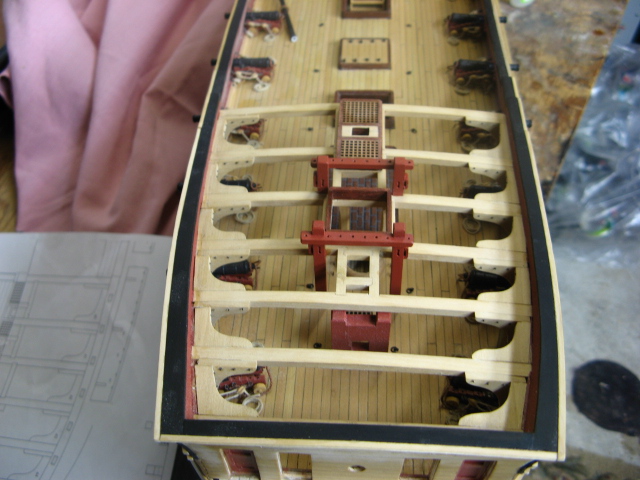
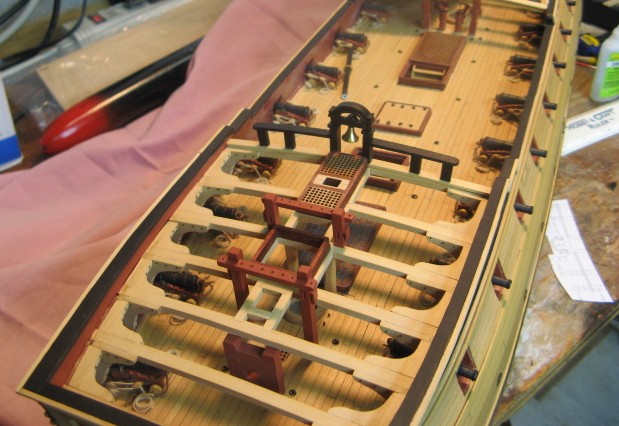
USF Confederacy by Rustyj - FINISHED
Rustyj replied to Rustyj's topic in - Build logs for subjects built 1751 - 1800
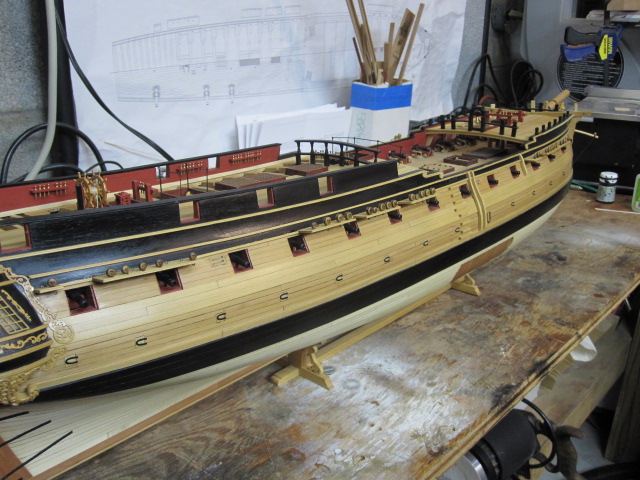
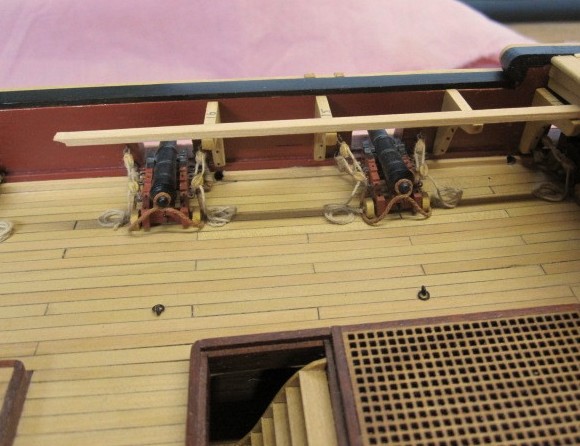
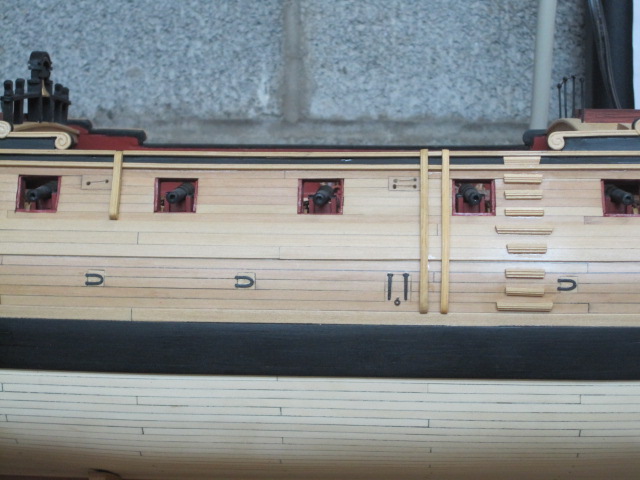
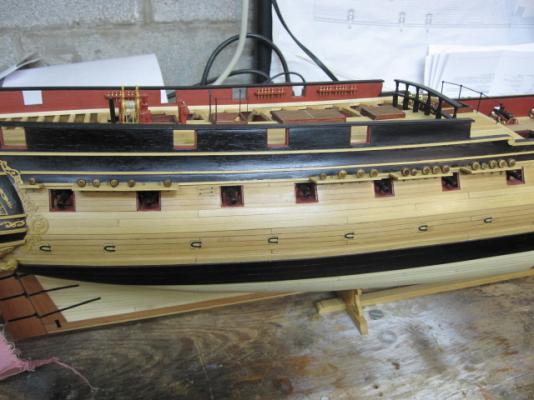
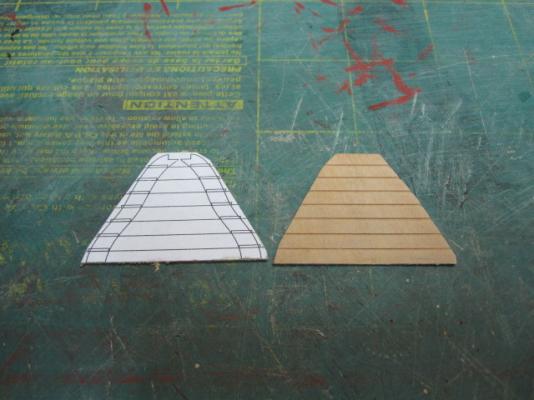
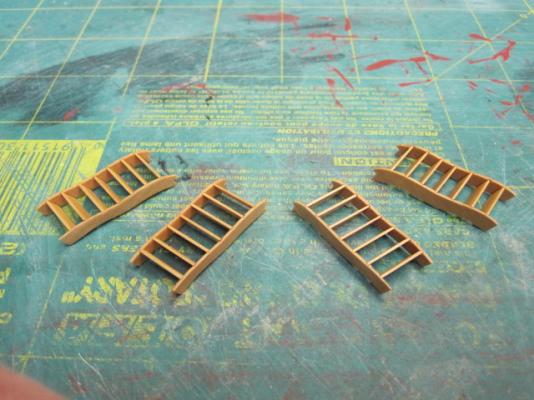
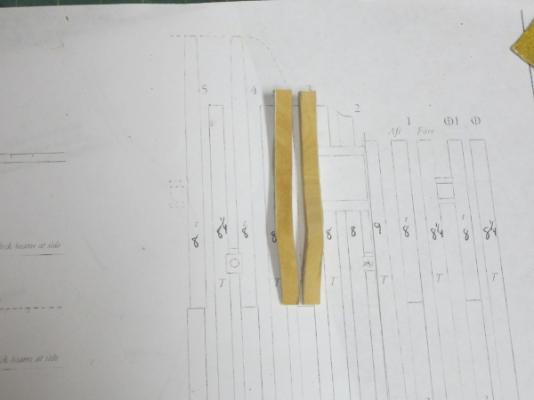
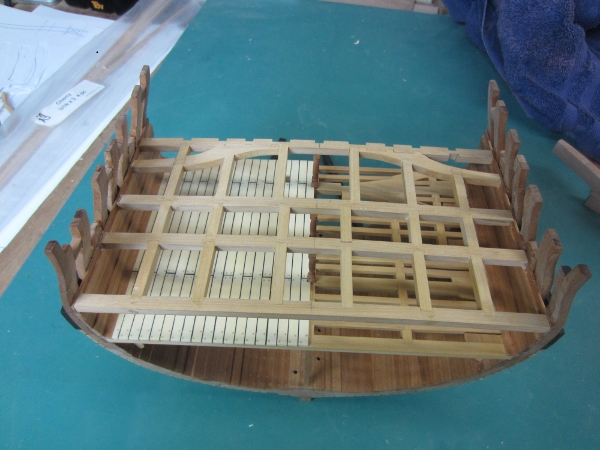
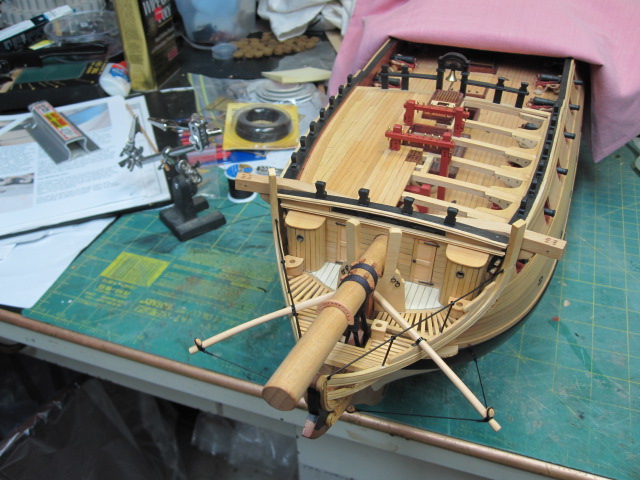
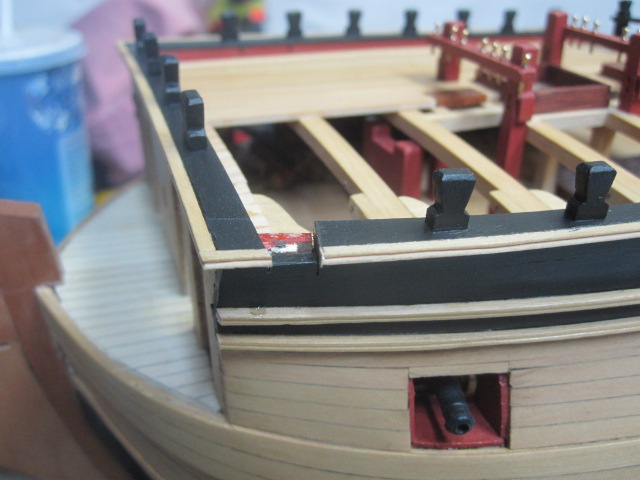
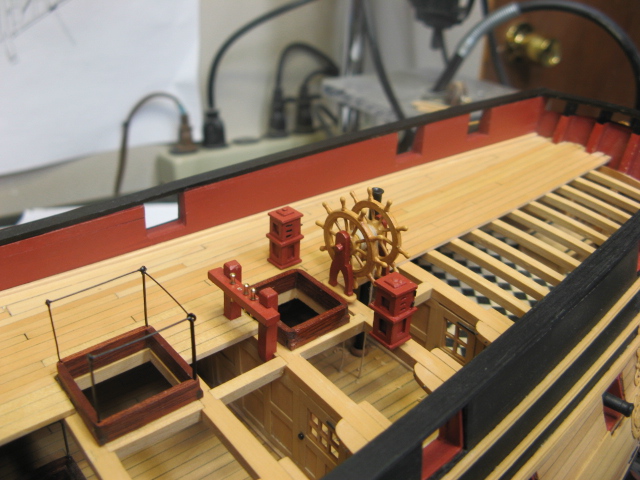
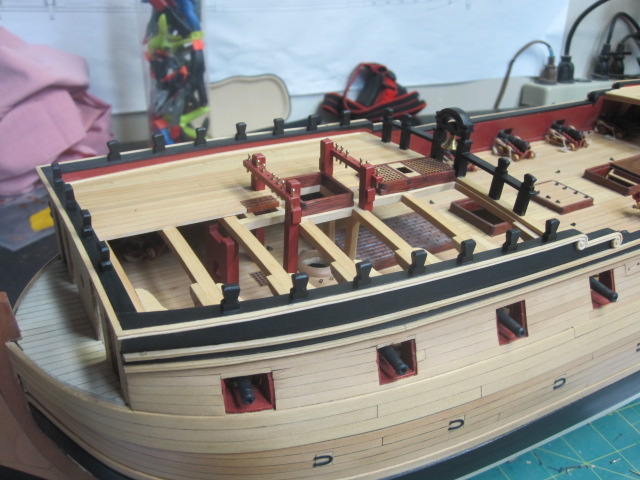
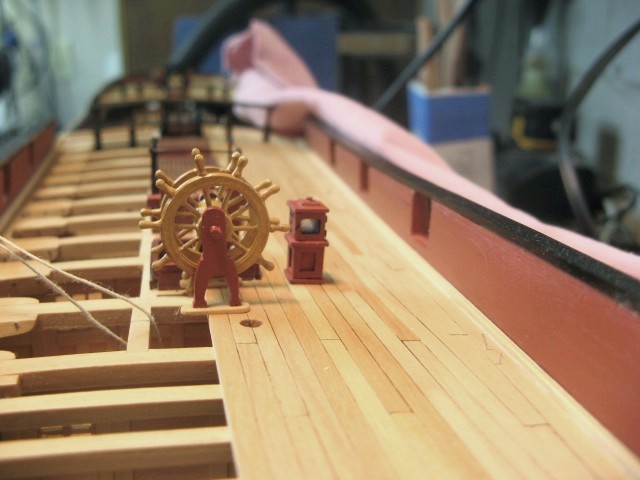
Here are some more pictures of the deck works.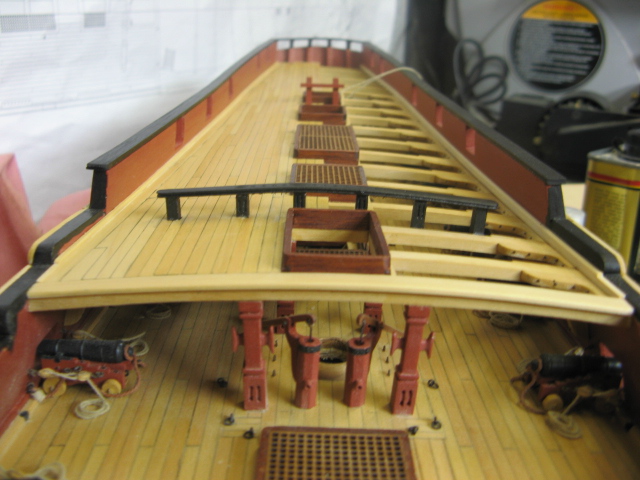


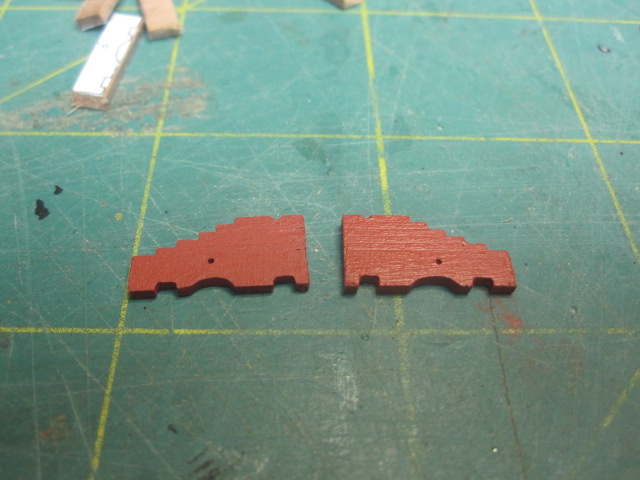
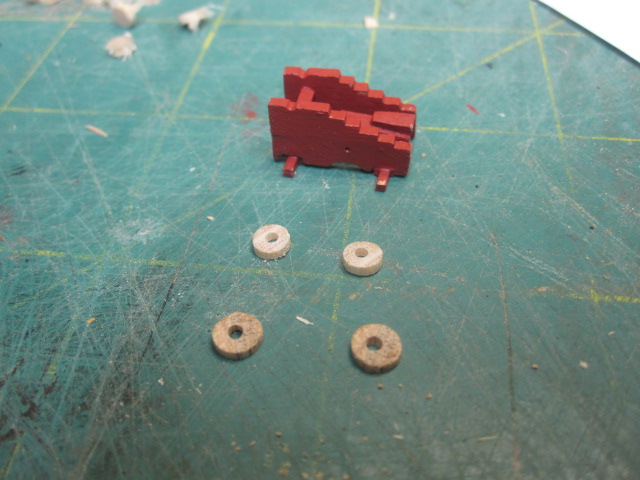

- 149 replies
-
- 1
-
-
- confederacy
- frigate
- (and 1 more)
-
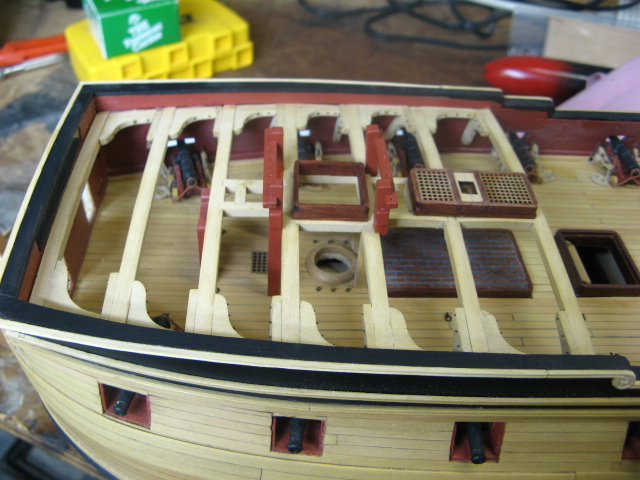
USF Confederacy by Rustyj - FINISHED
Rustyj replied to Rustyj's topic in - Build logs for subjects built 1751 - 1800
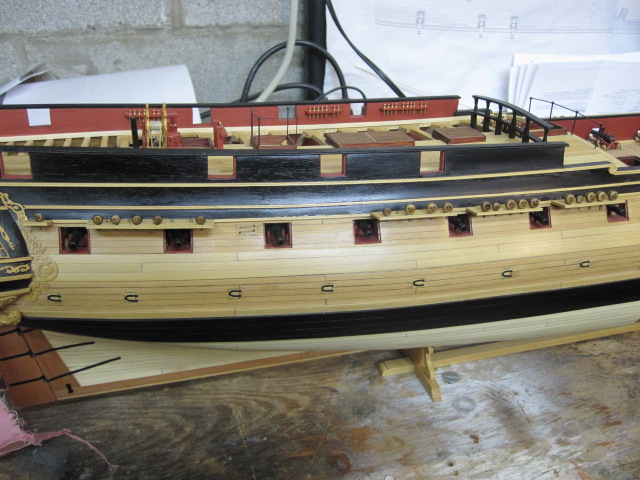
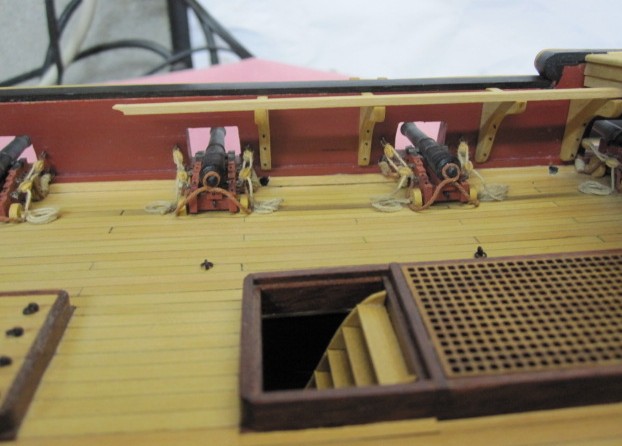
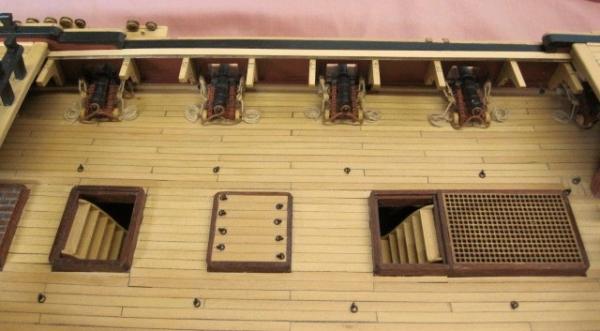
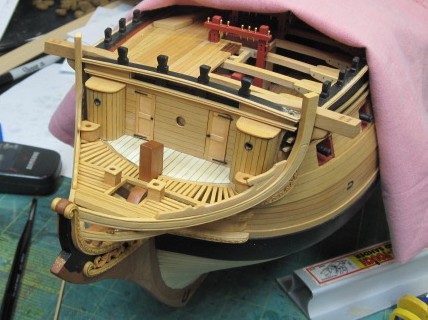
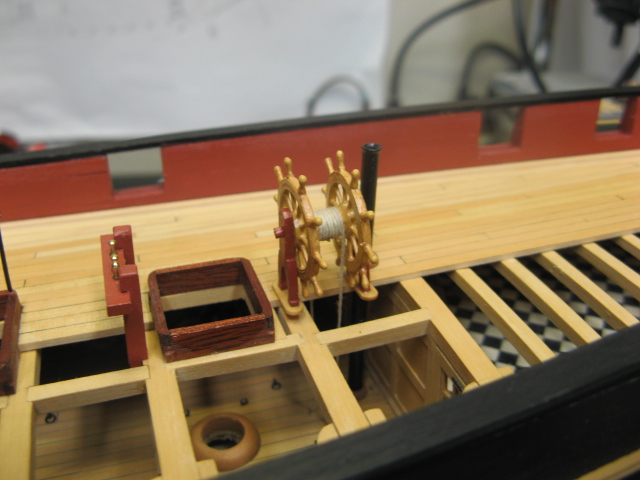
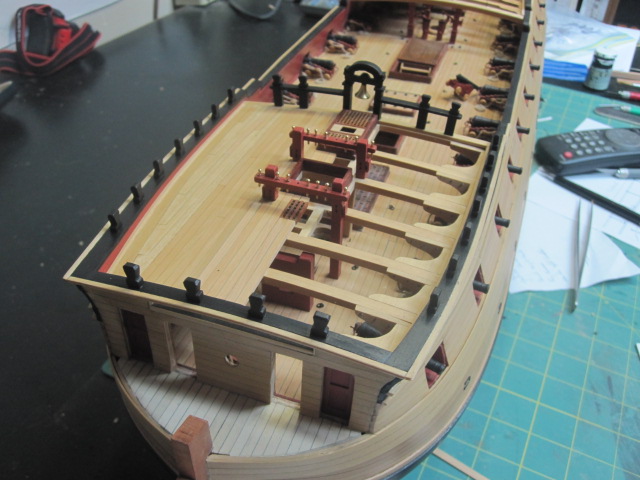
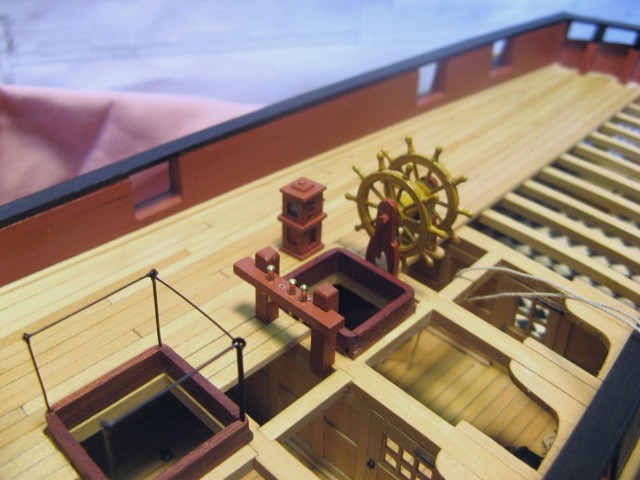
Here is some more of the upper deck and hatches.

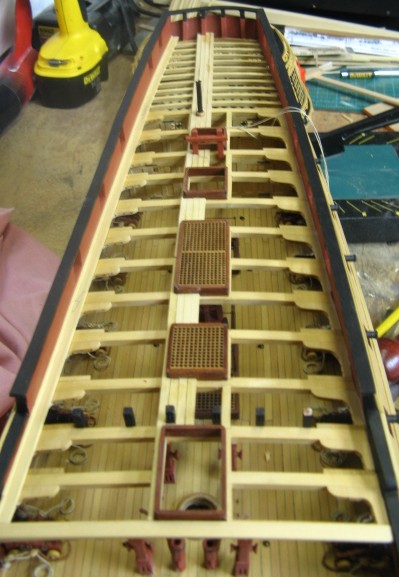

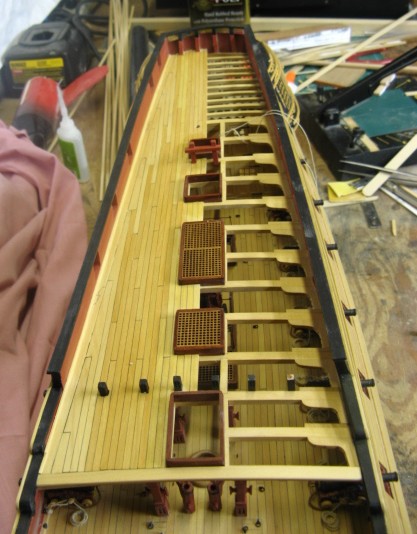
- 149 replies
-
- 2
-
-
- confederacy
- frigate
- (and 1 more)
-
I have had Jim's tools for years and everything has performed exceptionally. A little while ago I had an on/off switch burn out on my disk sander. I sent an email, received a prompt response and within a couple a days I had a package at my door. Not only did I get a new switch but they sent along a second switch just in case. No cost, no haggle just great service.