Rustyj
-
Posts
2,534 -
Joined
-
Last visited
Content Type
Profiles
Forums
Gallery
Events
Everything posted by Rustyj
-
 Hi Joss, I will be using the black paper for the caulking just like I did the hull. Some time I want to try the black wood filler but for now I'll stick to paper.
 -
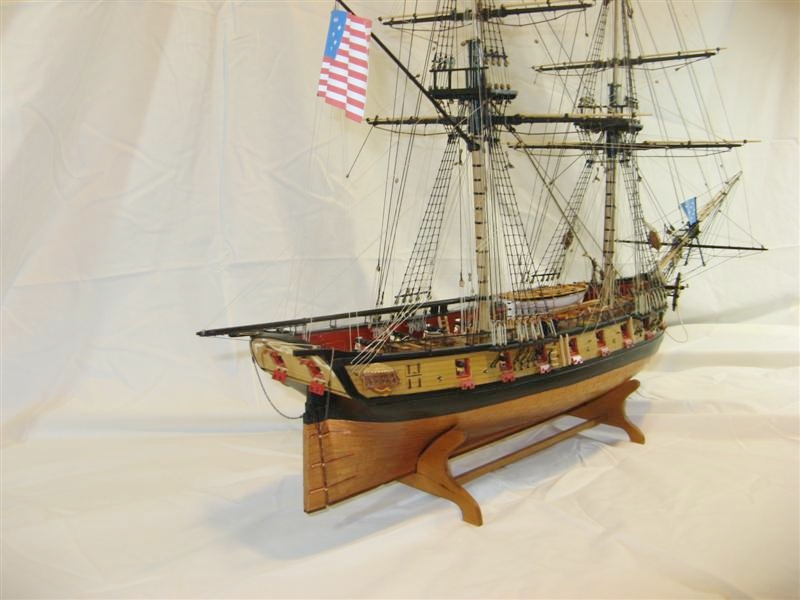
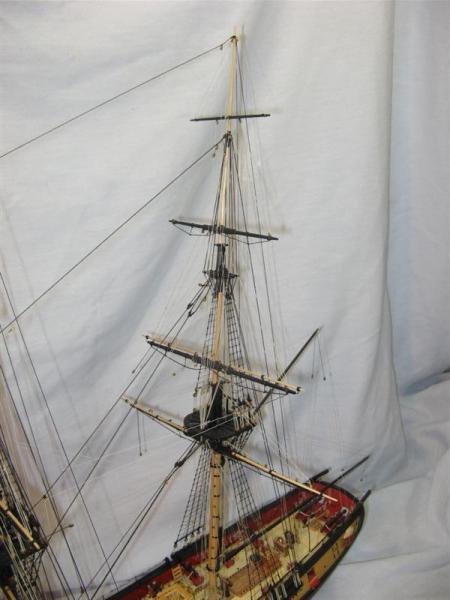
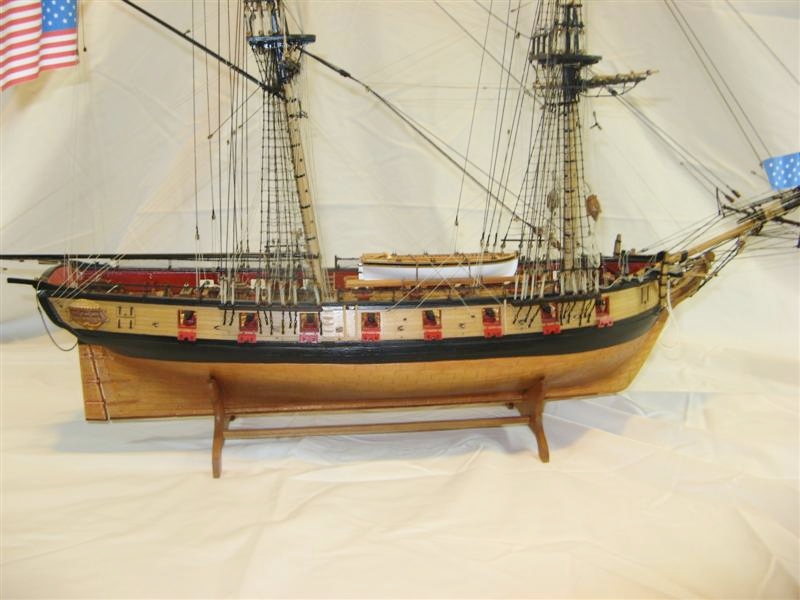
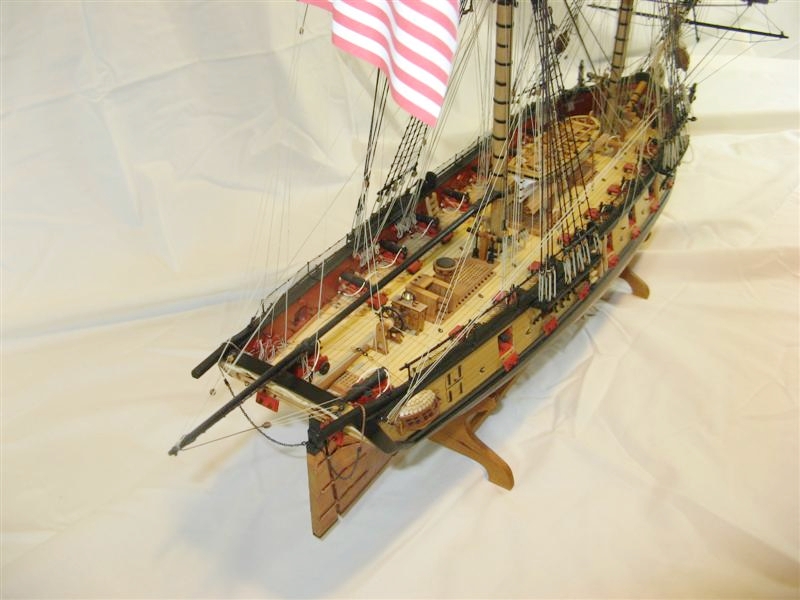
USF Confederacy by Rustyj - FINISHED
Rustyj replied to Rustyj's topic in - Build logs for subjects built 1751 - 1800
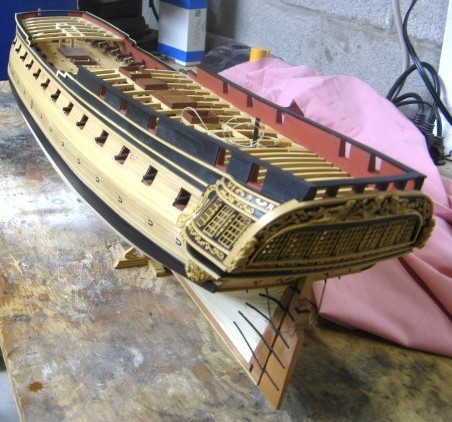
Thank you all for visiting and your kind words. Chuck it’s kind of strange seeing two and a half years of work completed in a couple of month huh?- 149 replies
-
- 1
-

-
- confederacy
- frigate
- (and 1 more)
-
Hi larry. The second time turned out very nice!
-
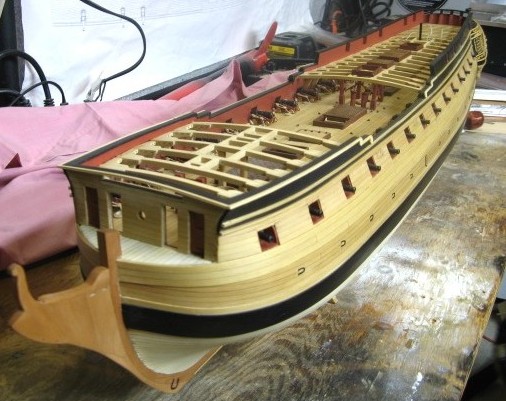
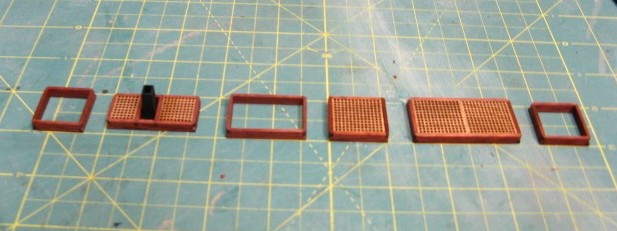
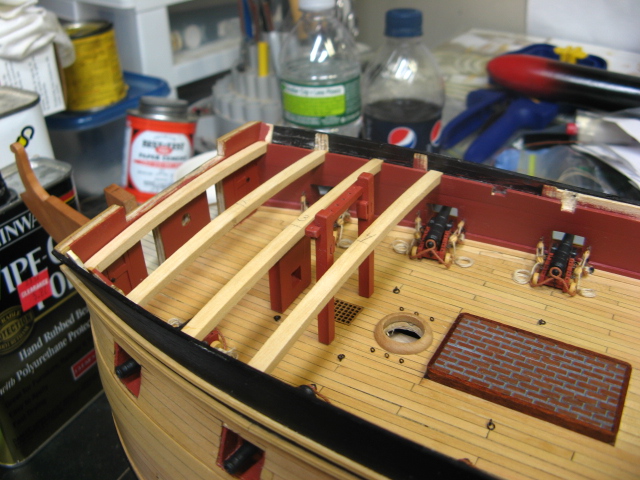
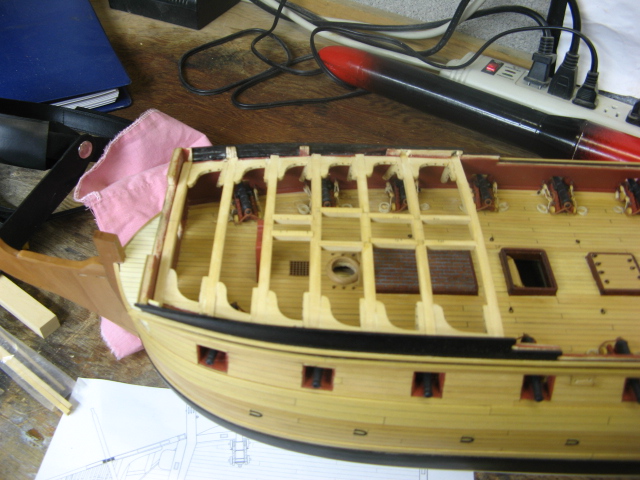
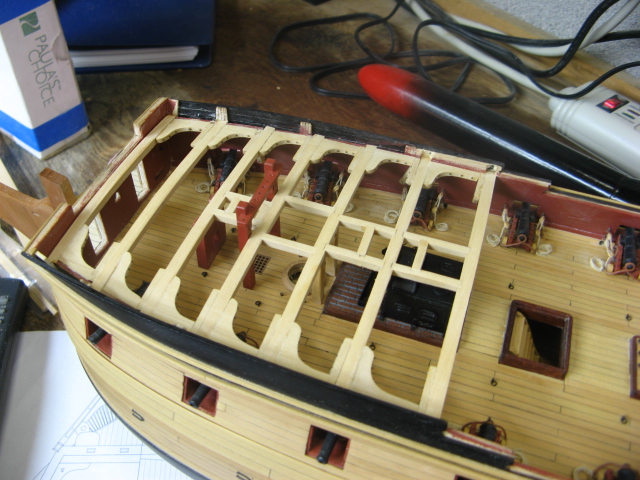
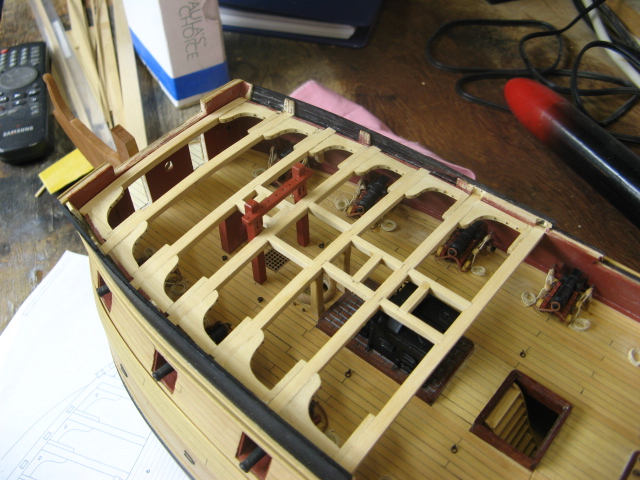
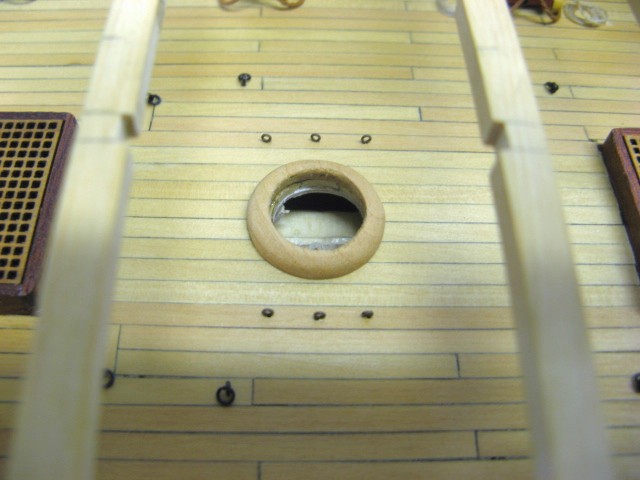
Here is the first row of holly set in place. I pre-notched the plankes for the main gun deck supports.

- 332 replies
-
- 1
-
-
- Triton
- cross-section
- (and 1 more)
-
USF Confederacy by Rustyj - FINISHED
Rustyj replied to Rustyj's topic in - Build logs for subjects built 1751 - 1800
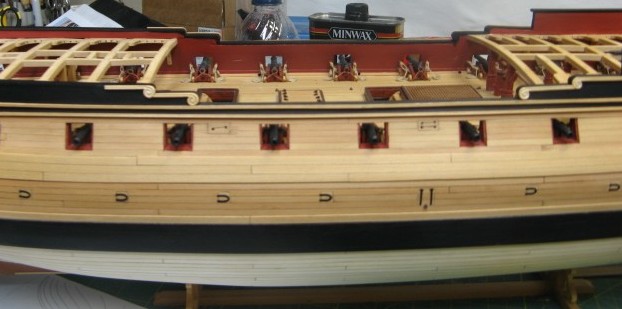
And here is some more.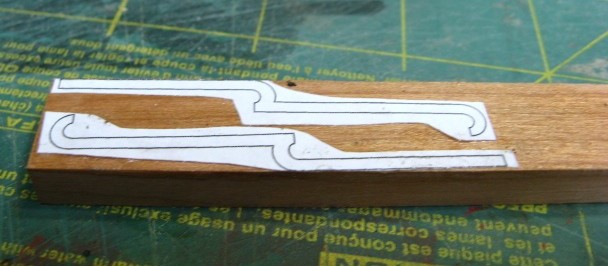

- 149 replies
-
- 2
-
-
- confederacy
- frigate
- (and 1 more)
-
USF Confederacy by Rustyj - FINISHED
Rustyj replied to Rustyj's topic in - Build logs for subjects built 1751 - 1800
Thank you all for revisting this build. I sometimes forget all the stuff that I did during this build and it is kinda fun reliving all of the pictures.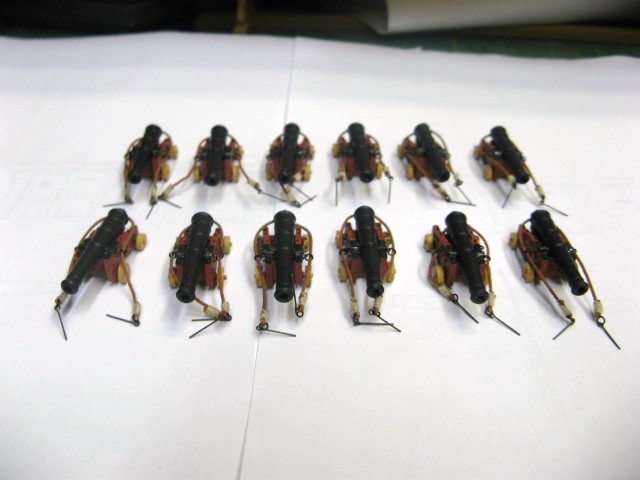
- 149 replies
-
- 2
-
-
- confederacy
- frigate
- (and 1 more)
-
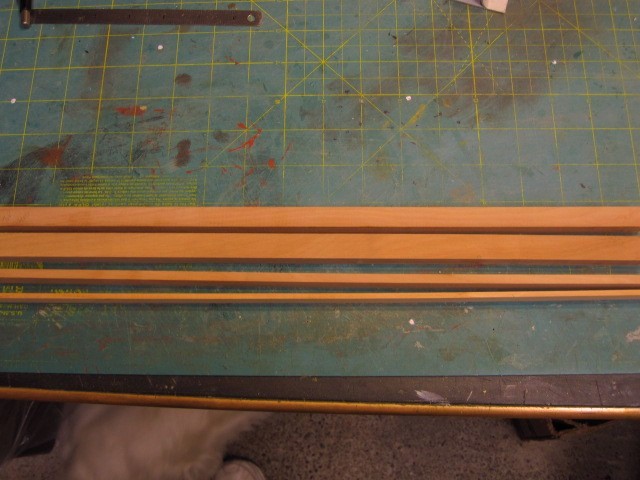
Ok now since the saw and thickness sander were out I figured what the heck I'll just cut up the pieces needed for the keel. I mean after all I am just doing "set up " work here! So here is some swiss pear cut to the proper thickness all "set up" for when I'm ready to start actually doing some work on the cross section.
-
Thank you all for the kind words. Here I’ve started adding the planking up to the point under the main deck beam location. At this point I'll move on to planking half of the deck with Holly.


- 332 replies
-
- 1
-
-
- Triton
- cross-section
- (and 1 more)
-
USF Confederacy by Rustyj - FINISHED
Rustyj replied to Rustyj's topic in - Build logs for subjects built 1751 - 1800
Thanks Augie. Ben after that monster planking job you'll soon get to enjoy making the deck pieces. It was one of my favorite times. Oops a little too much pressure. And here is the correction of the above error.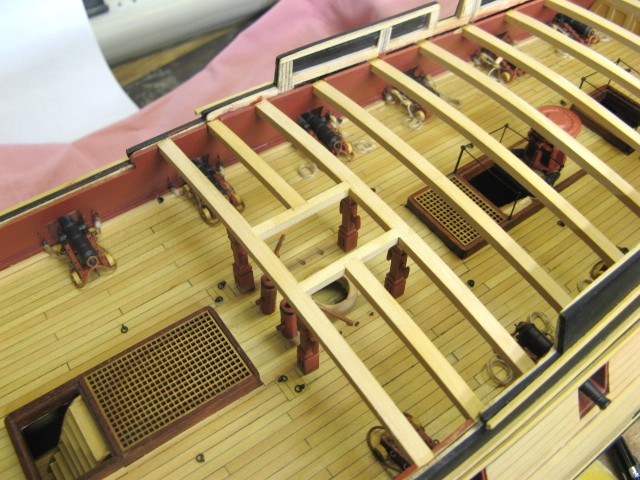

- 149 replies
-
- 4
-
-
- confederacy
- frigate
- (and 1 more)
-
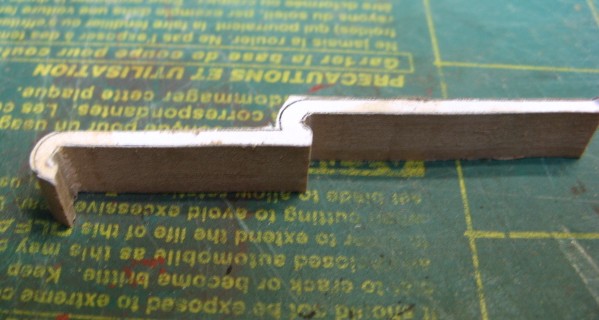
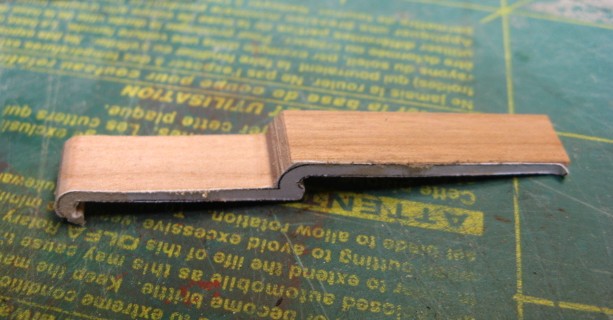
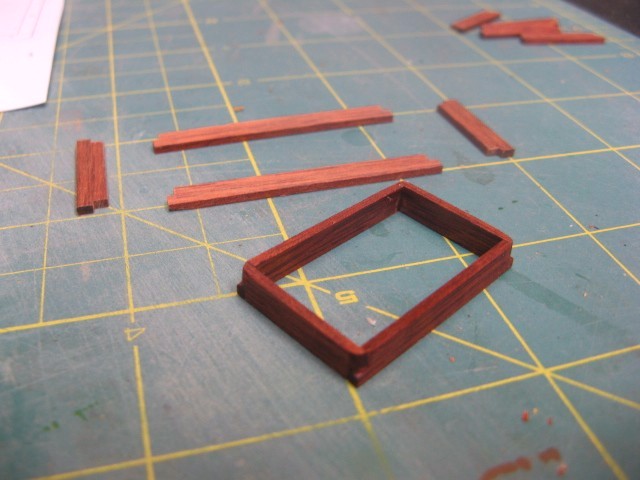
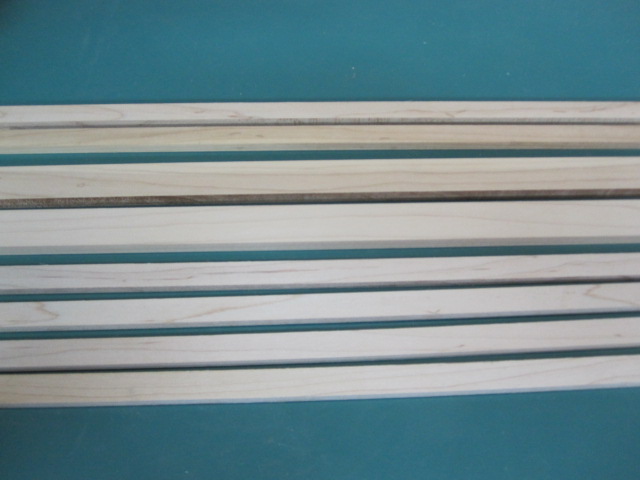
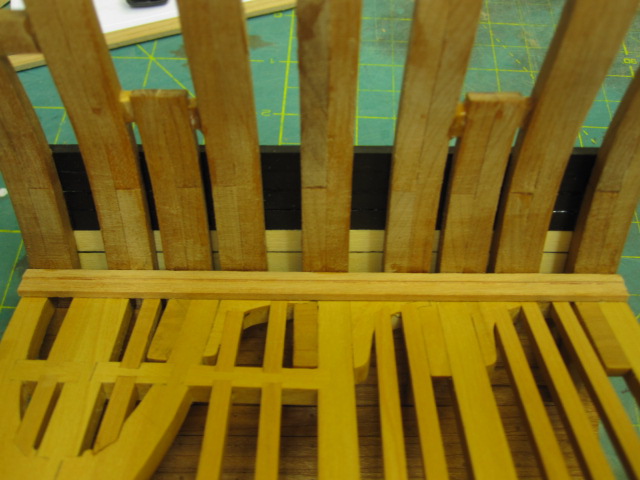
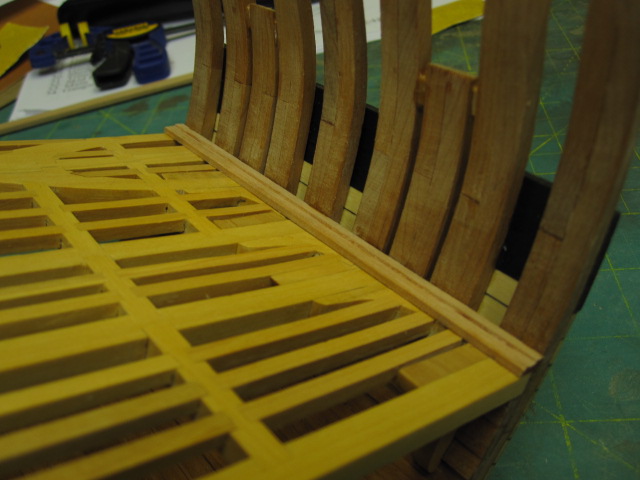
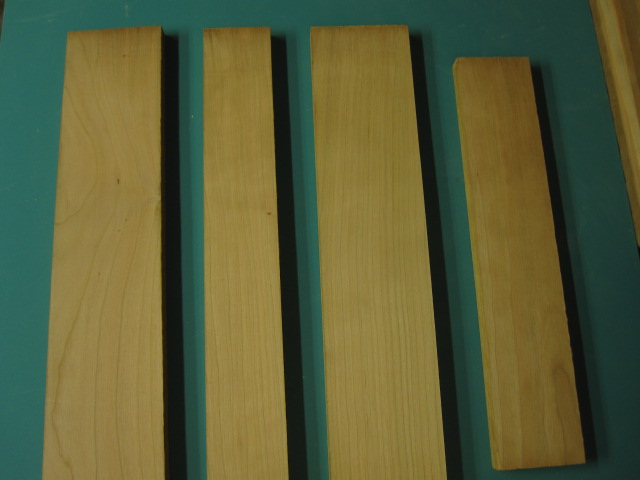
Ok this is all Ben’s fault. Ben are you out there? It’s your entire fault. Not mine. Nope no way. I’m just and innocent bystander. You asked about wood choices and I was thinking of using some maple I have on hand but I wasn’t really sure. So all because Ben asked I just "had" to see what the maple would look like. Out came the saw and thickness sander and I cut up the maple into the correct sizes for the mortar pit deck clamp lower and upper strakes and the upper deck clamp upper and lower strakes. Here it is with no finish on it. I think I will like the lighter color against the darker cherry. I’m thinking the deck beams might come from maple too. They are just way too thick to use boxwood not to mention it would take half my pension check! Thanks for asking Ben!
- 421 replies
-
- 3
-
-
- granado
- bomb ketch
- (and 2 more)
-
Echo by Maury S - FINISHED - Cross-Section
Rustyj replied to Maury S's topic in - Build logs for subjects built 1751 - 1800
Very nicely done Maury. Your pictures and explanations really help. -
Echo by jml1083 - cross-section
Rustyj replied to jml1083's topic in - Build logs for subjects built 1751 - 1800
That's a great job on your frame Jim. I look forward to seeing you do the rest. -
USF Confederacy by Rustyj - FINISHED
Rustyj replied to Rustyj's topic in - Build logs for subjects built 1751 - 1800
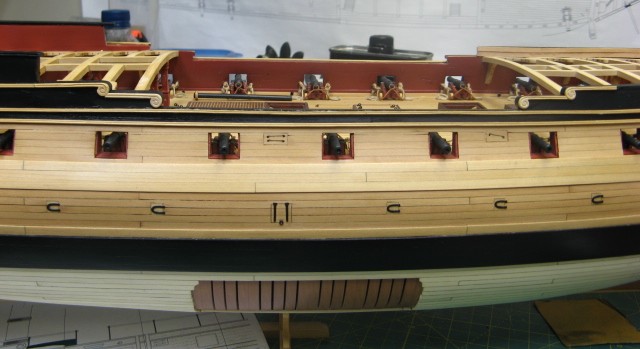
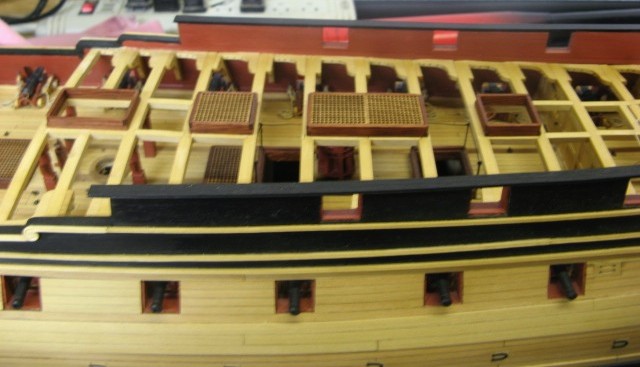
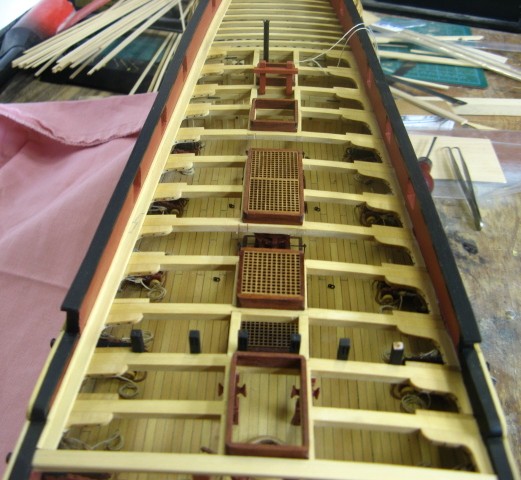
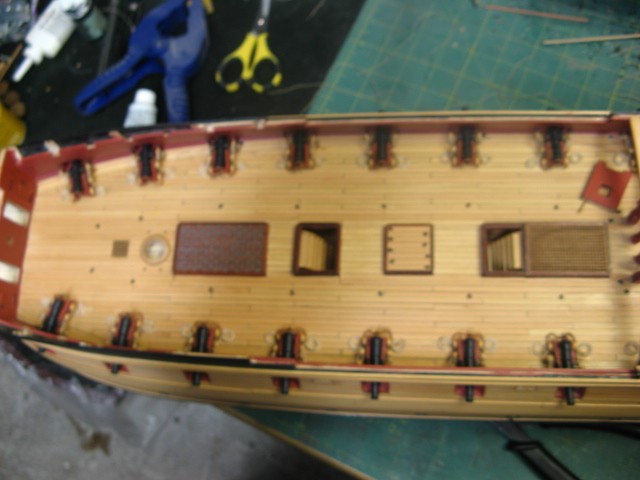
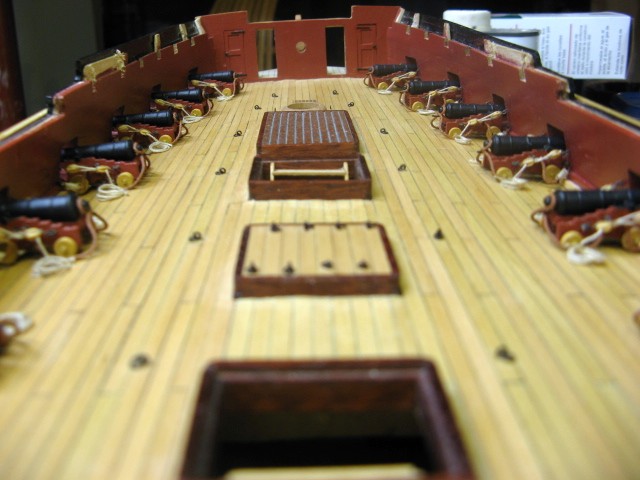
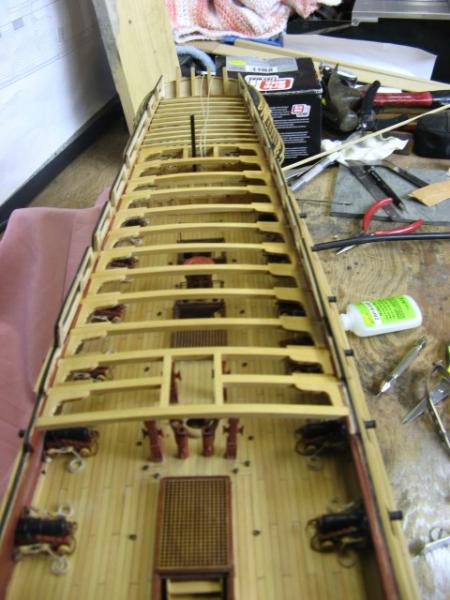
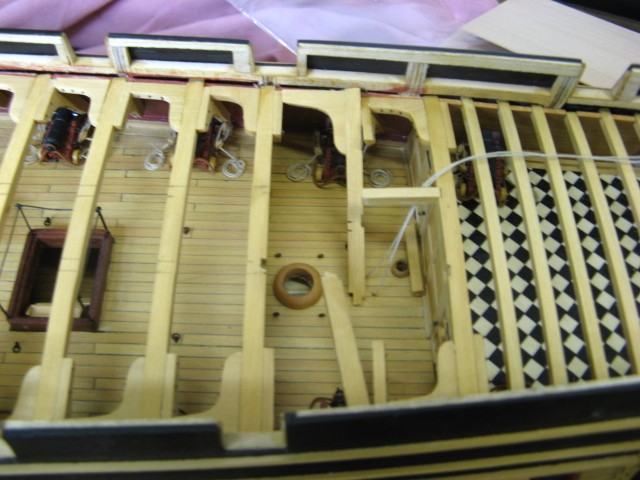
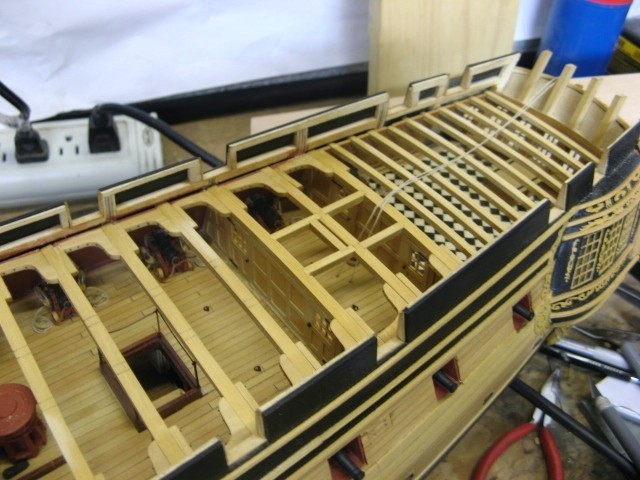
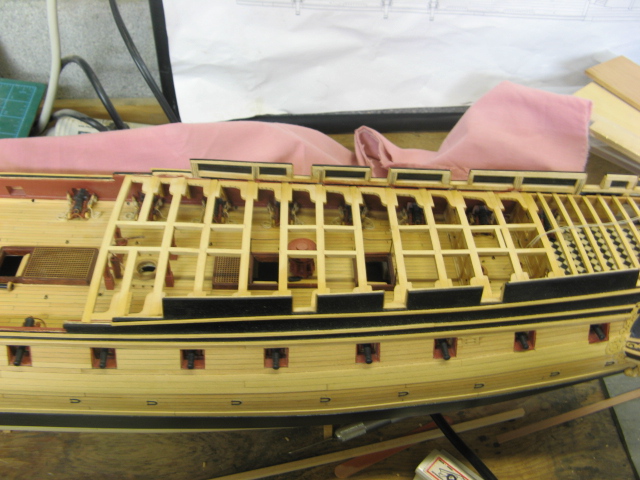
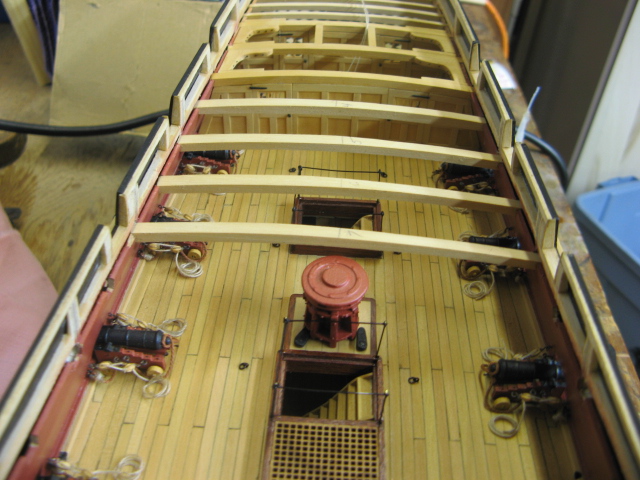
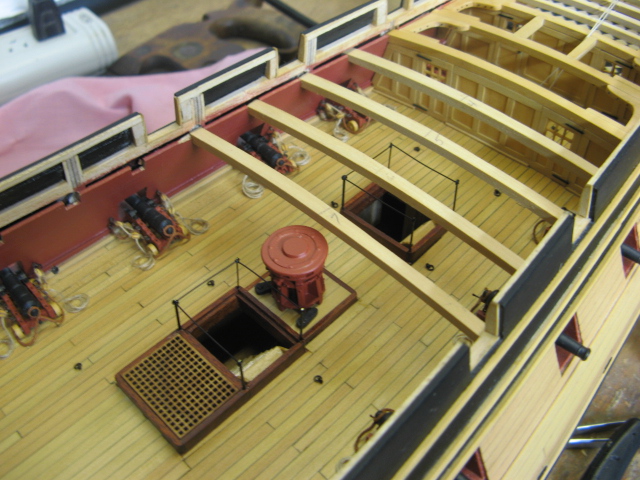
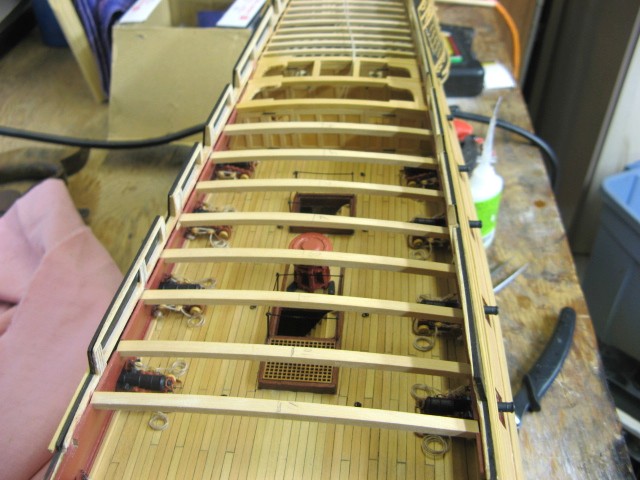
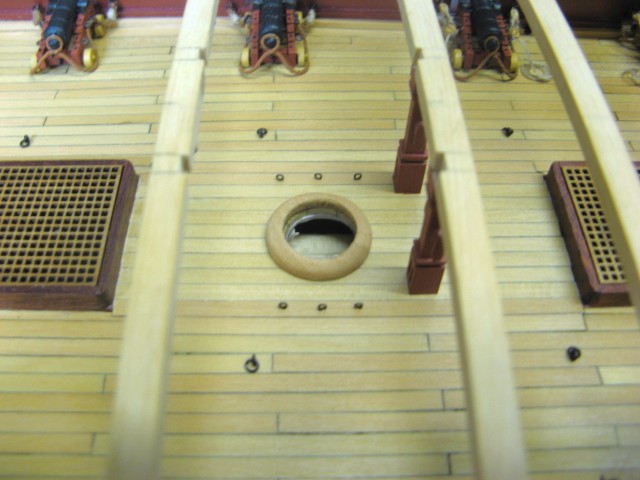
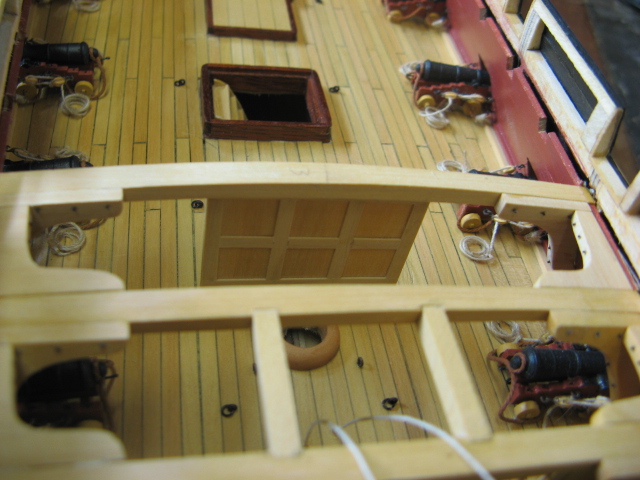
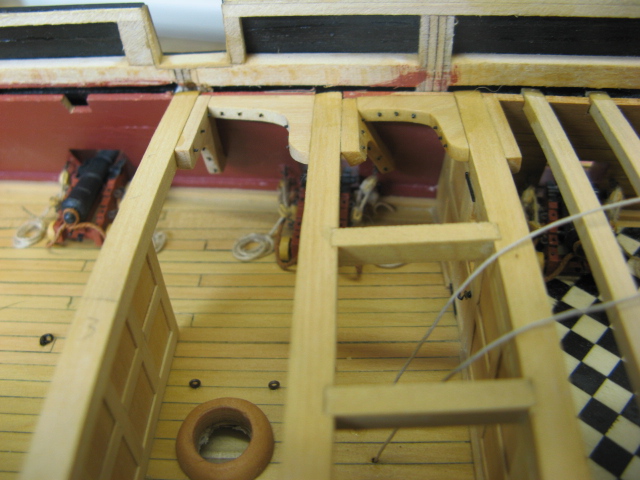
Working forward adding deck pieces.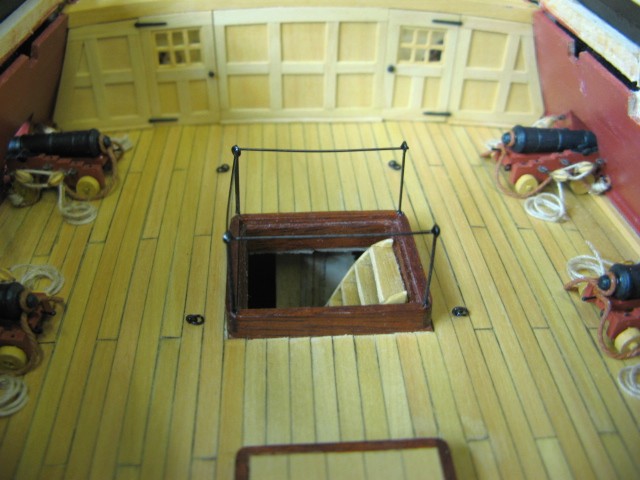
- 149 replies
-
- 5
-
-
- confederacy
- frigate
- (and 1 more)
-
OH CRAP MARIO THAT REALLY SUCKS! I do have a bulldog who hates cats that I can loan you! Enjoy whatever you need to get back here. We/I will miss your build.
-
Well done Snowmans! A very sharp look. I like it a lot.
-
USF Confederacy by Rustyj - FINISHED
Rustyj replied to Rustyj's topic in - Build logs for subjects built 1751 - 1800
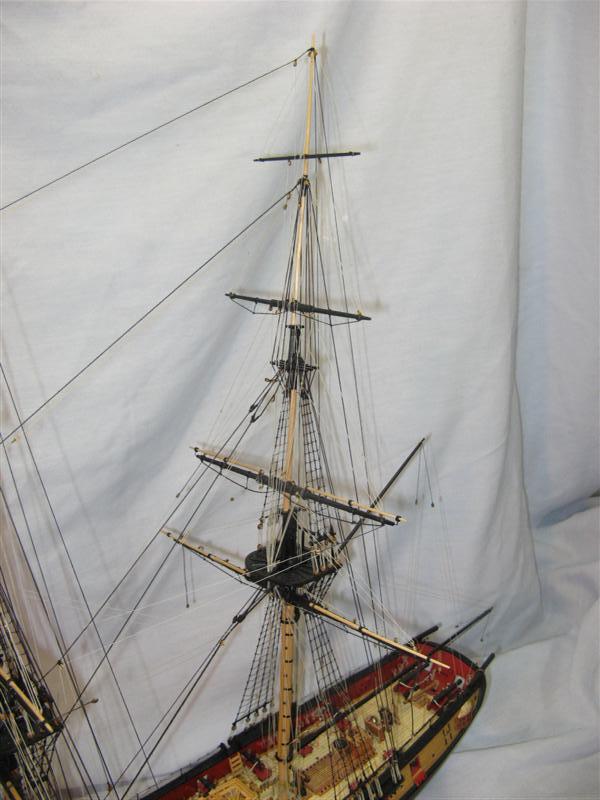
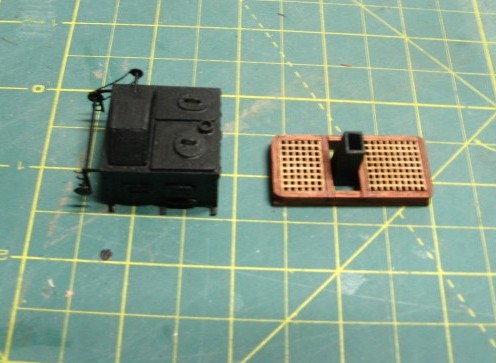
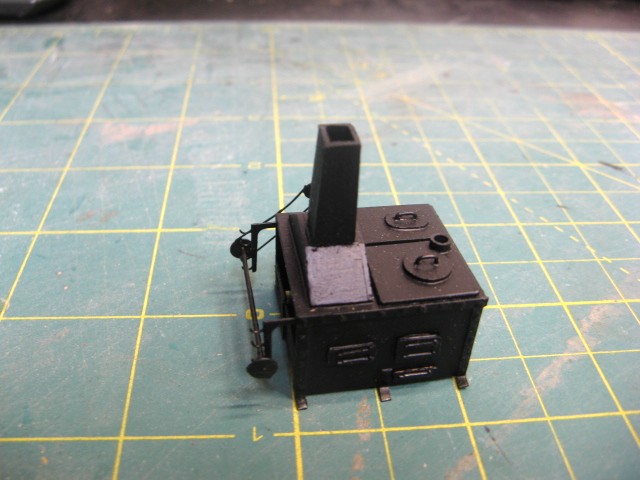
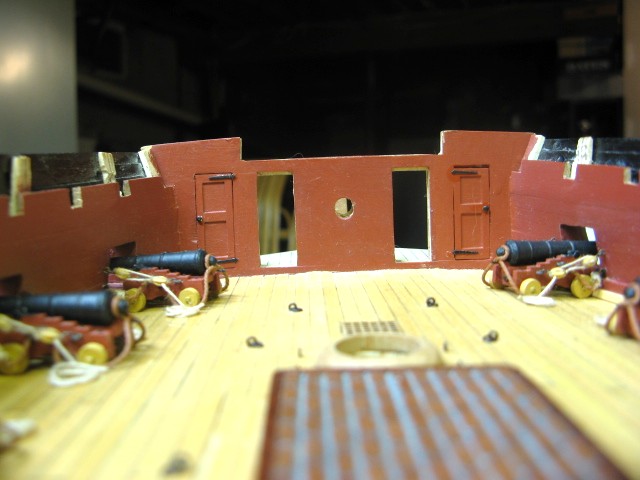
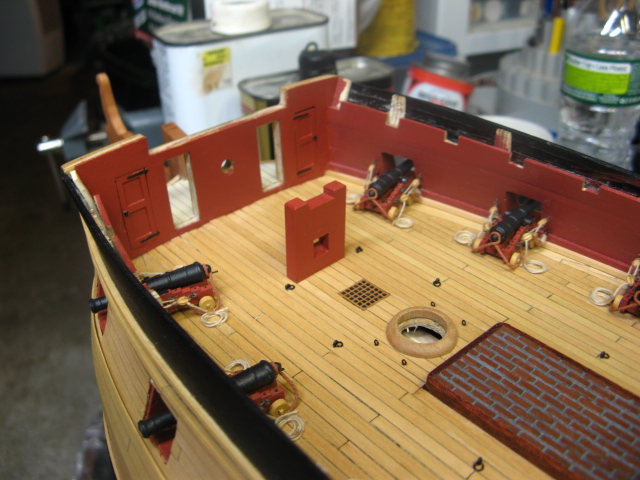
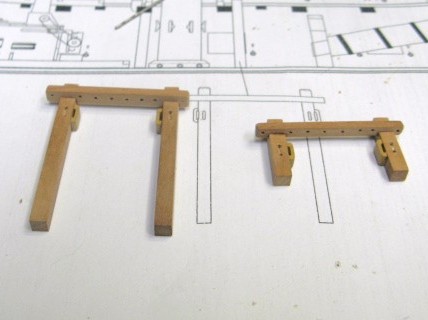
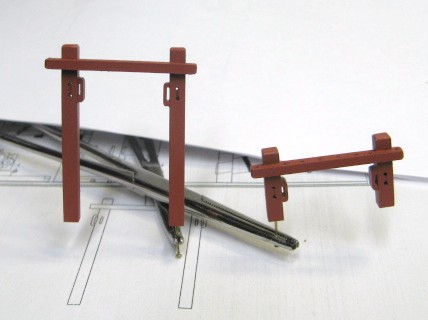
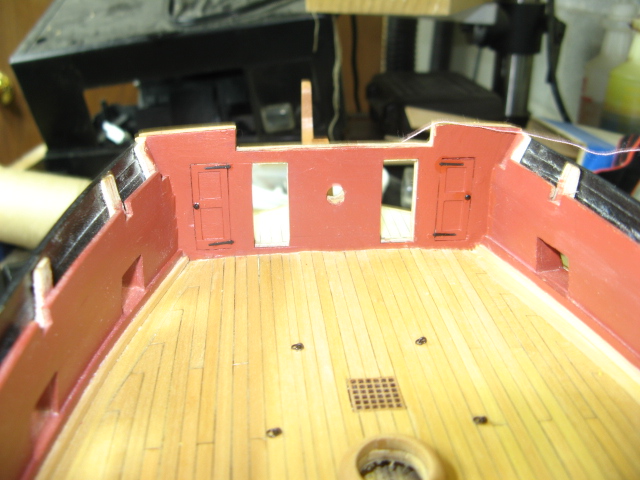
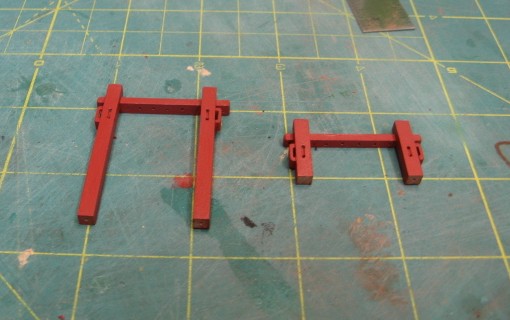
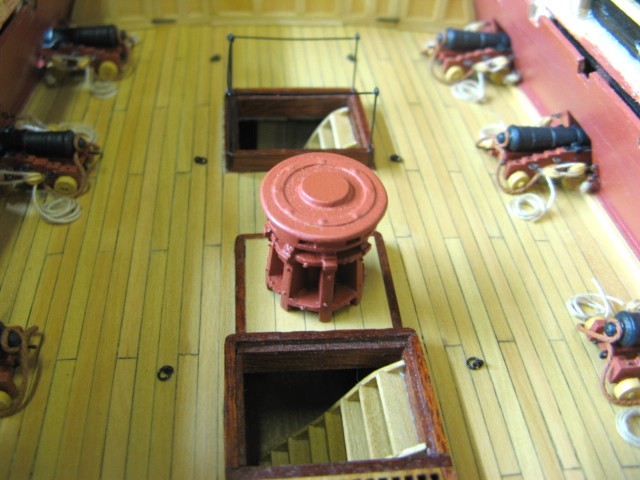
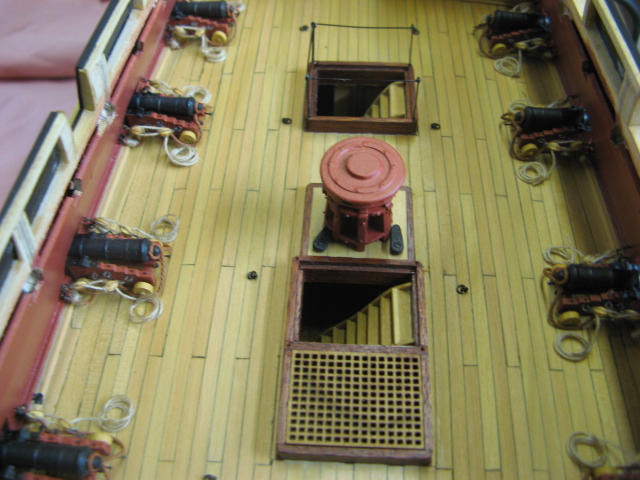
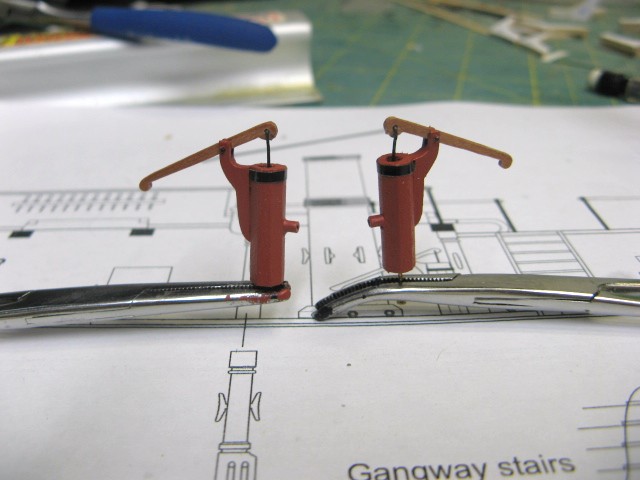
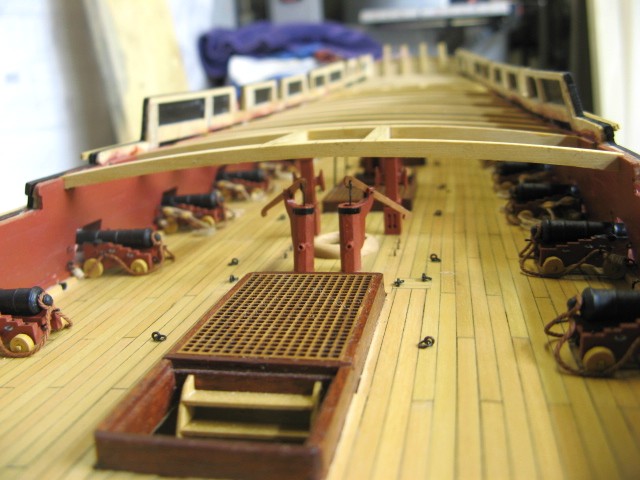
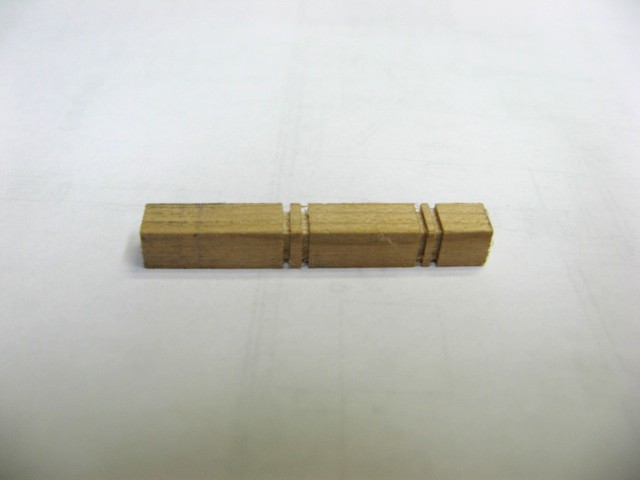
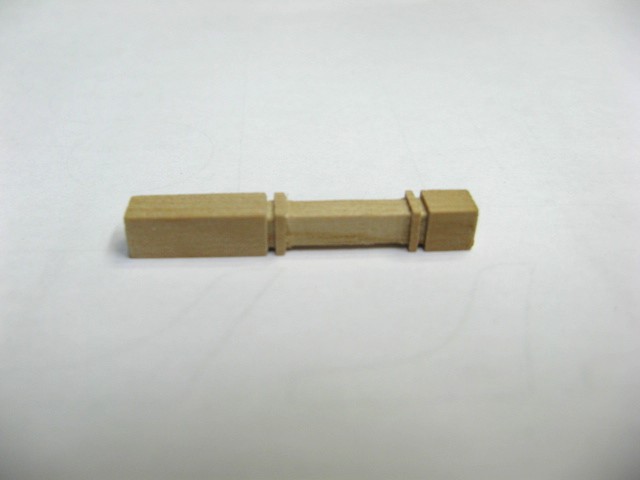
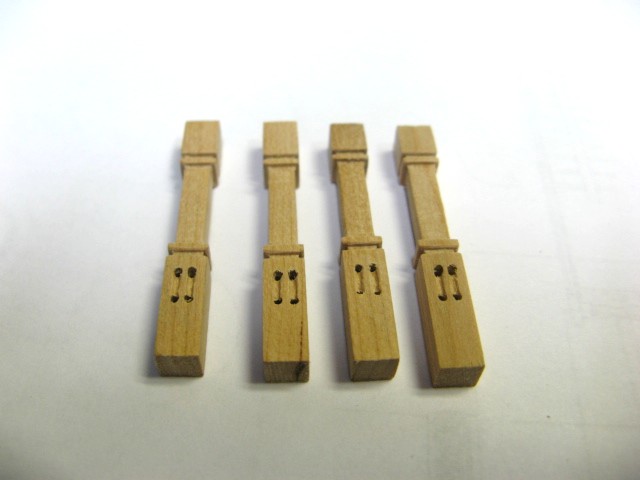
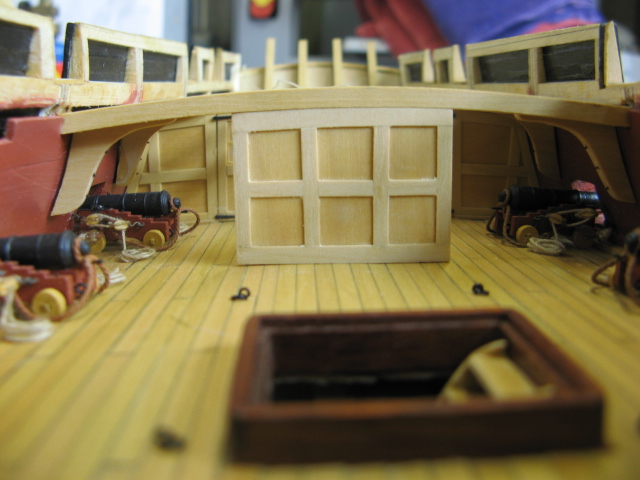
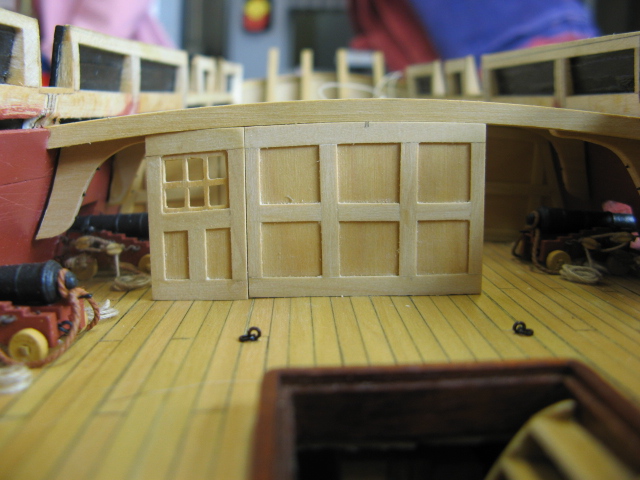
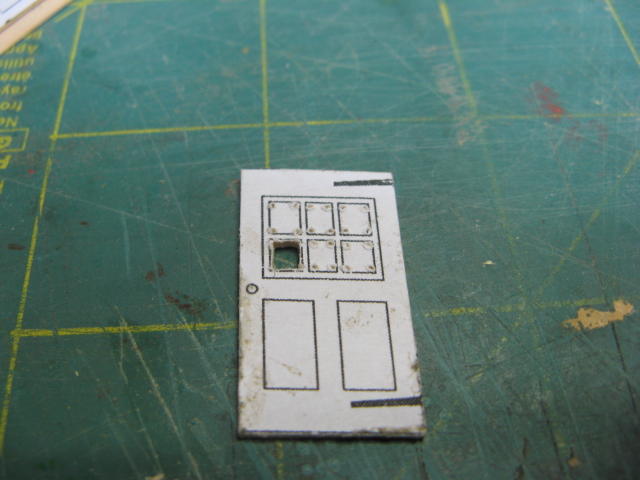
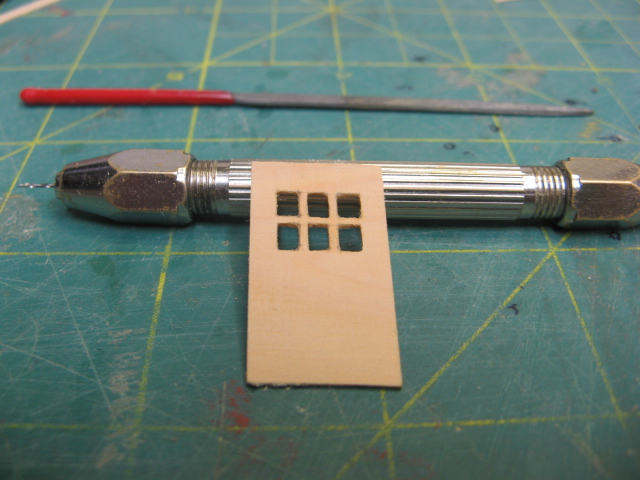
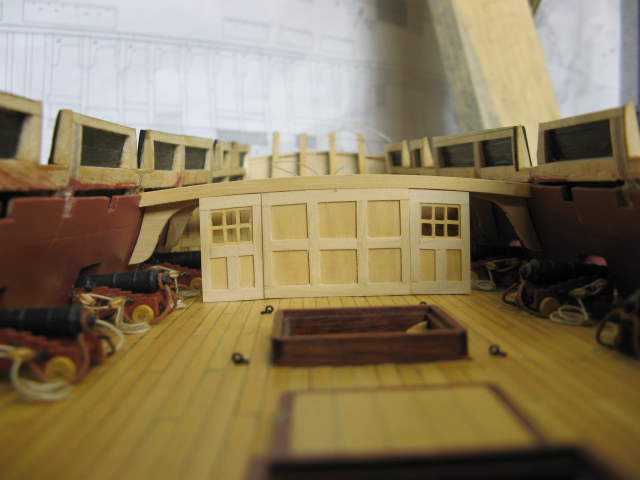
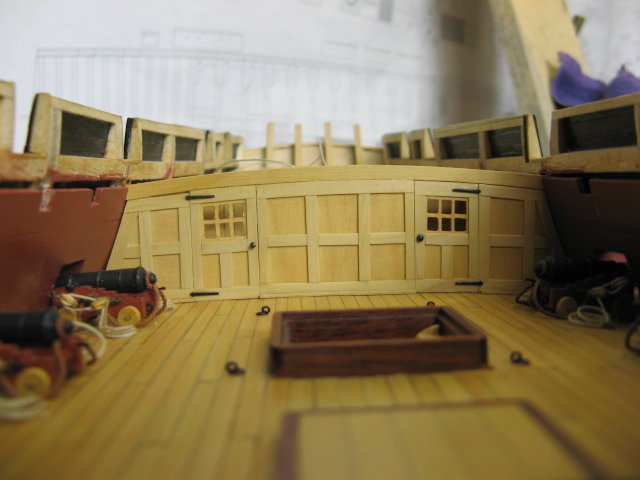
Here is the making of the capstan and bulkhead.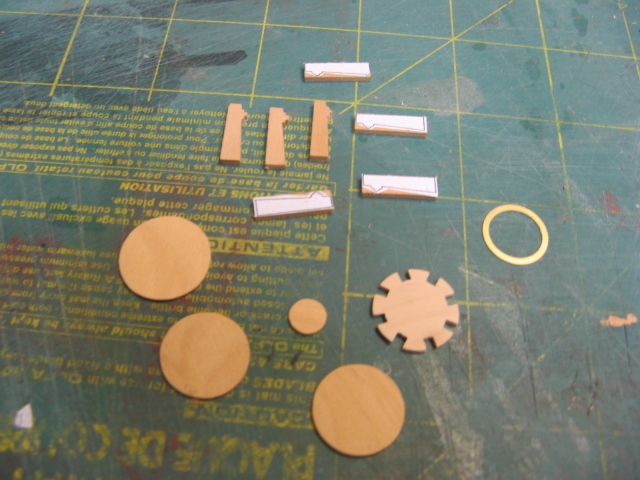
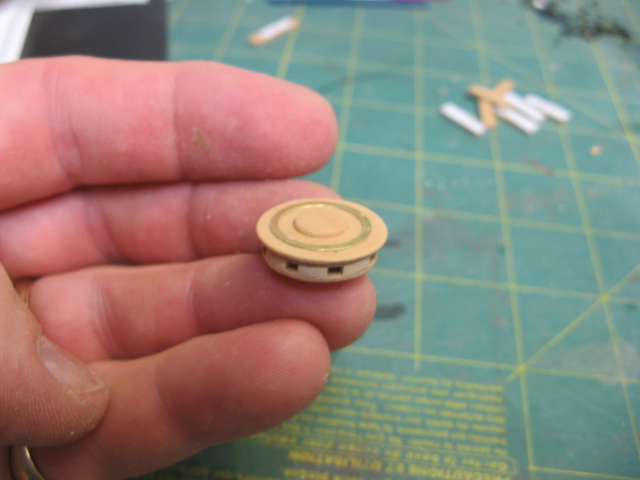


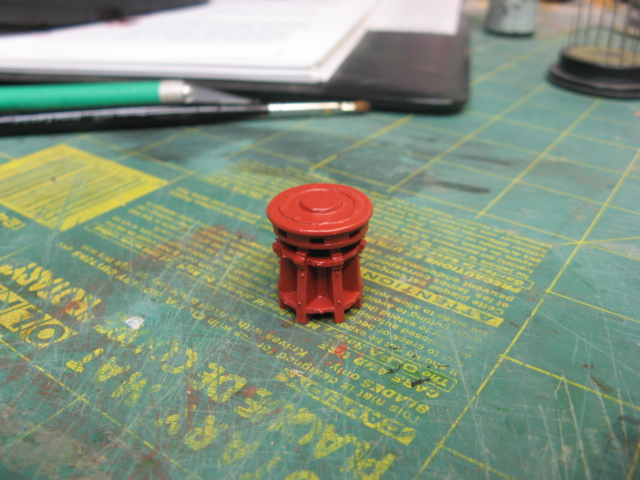
- 149 replies
-
- 3
-
-
- confederacy
- frigate
- (and 1 more)
-
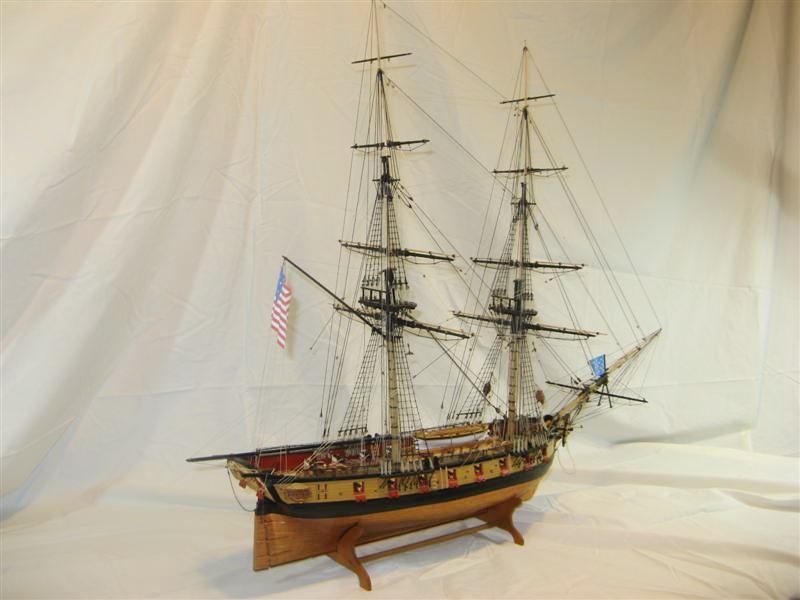
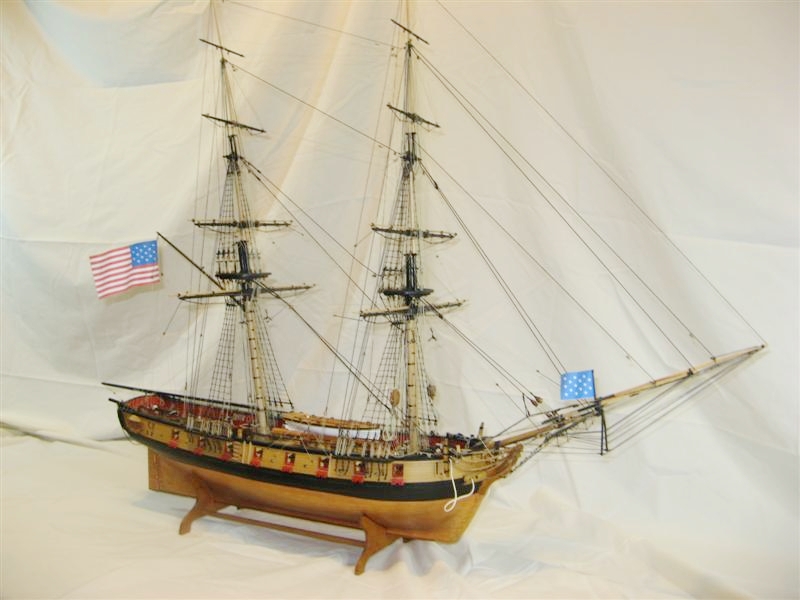
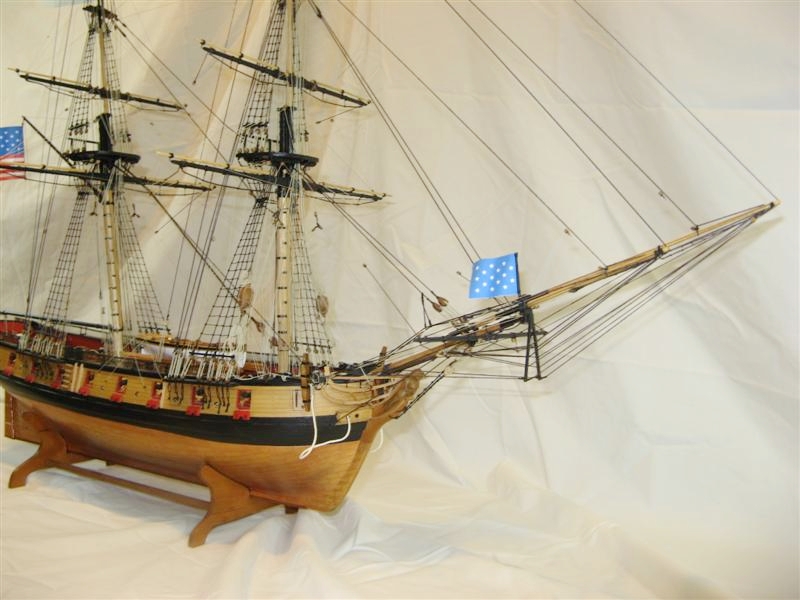
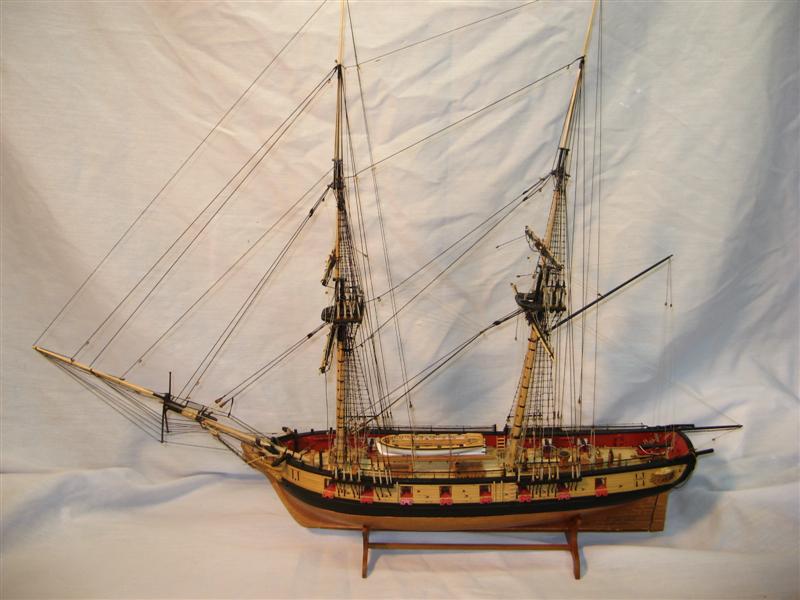
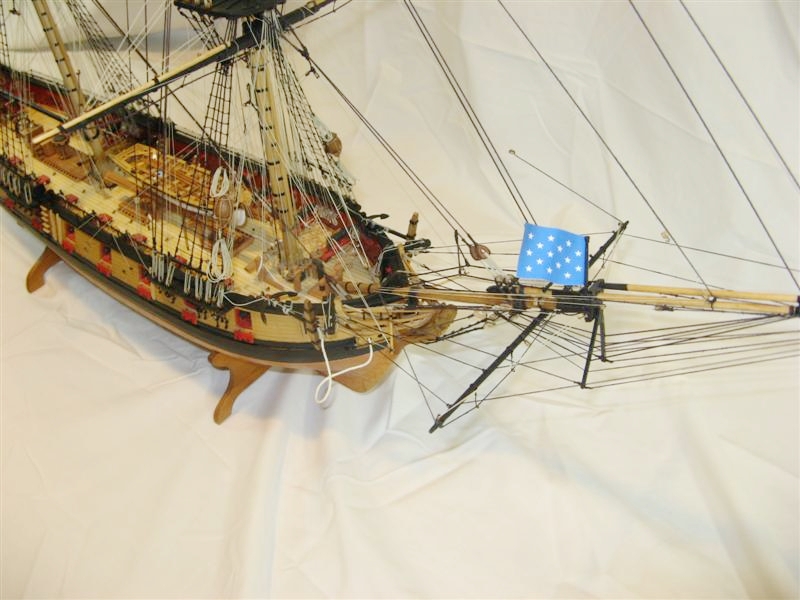
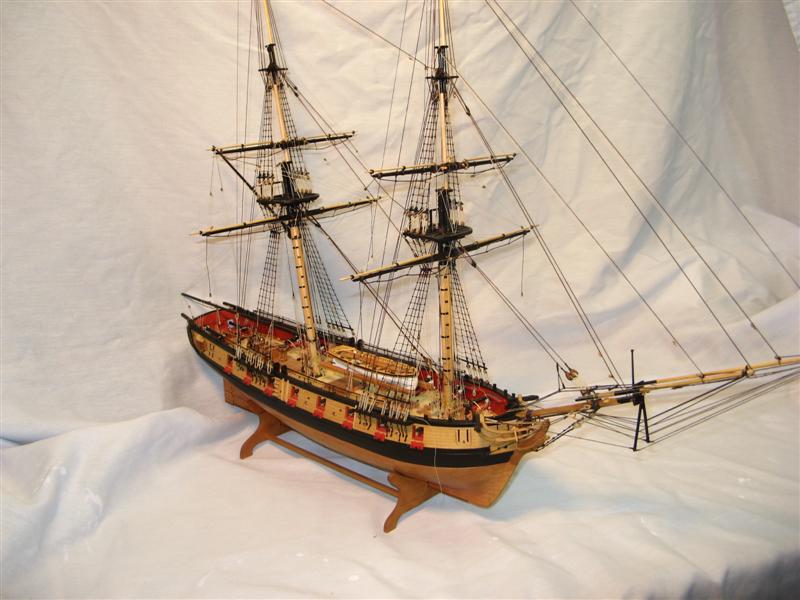
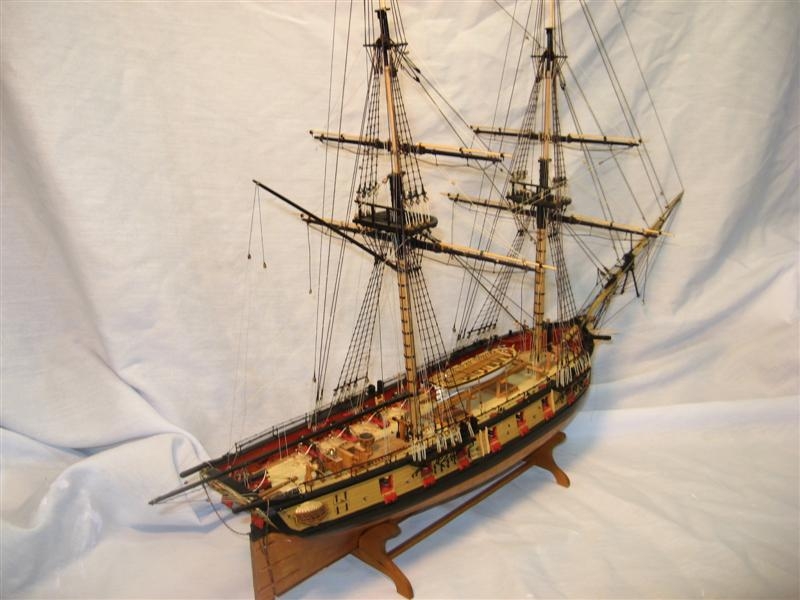
US Brig Syren by Rustyj - FINISHED - 1:64
Rustyj replied to Rustyj's topic in - Build logs for subjects built 1801 - 1850
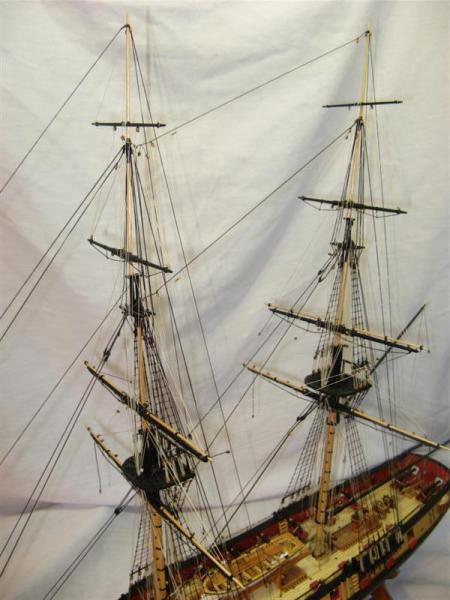
Well as I said before I have no pictures of the yards and running rigging, or at least I can't find them so here are the final pictures. If I ever find those pictures I'll add them. Thanks for looking along as we went down memory lane.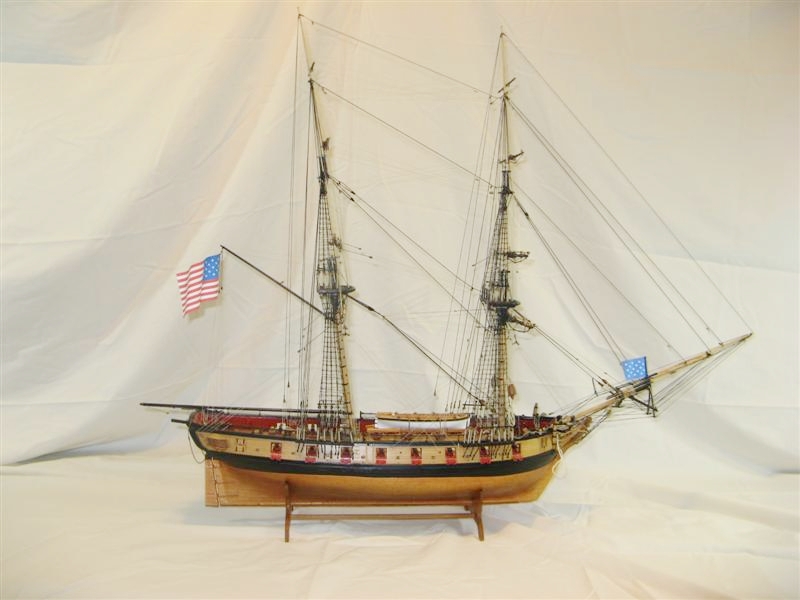
-
Hi Bob, Well done. That is a excellent job you did on a fine model. As always it was a pleasure following along.
- 103 replies
-
- 1
-
-
- picket boat
- model shipways
- (and 1 more)
-
Hi Christian, Yes the dark side is wondefull! Ben, That's for adding the main topsail bitts later on. At least that's what I hope the plans say.
-
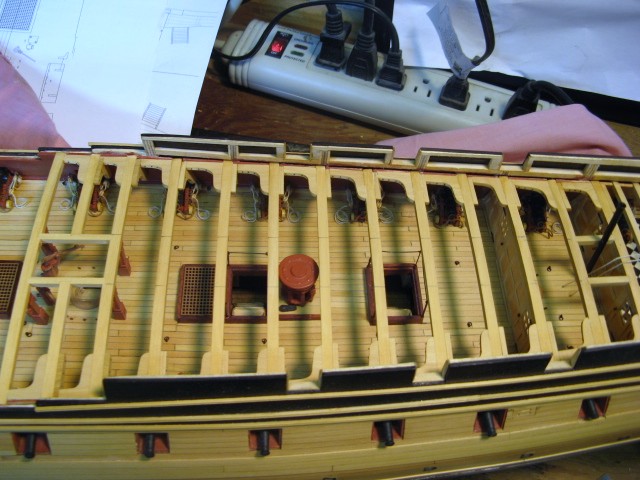
Well the lower deck framing has been completed and sanded. Ieven had time to add the waterways. They were cut from cherry as will the bulwark planks. Next up will be planking half of the deck with holly and then tree nailing it.

- 332 replies
-
- 1
-
-
- Triton
- cross-section
- (and 1 more)
-
Hi Jeff, When I was giving the dimensions I just didn't have the feel for how big it is. So as they say a picture is worth 1,000 words. Hi Bob, Thanks for stopping by. Mark, Maybe your idea of set-up and mine differ just a bit? Na not really. Ben, So far everything is from bits and pieces I have on hand. That doesn’t mean Jeff isn’t shipping stuff to me once he’s back! As far as wood goes, frames cherry, keel pear and ebony and deck clamps are maple. No other choices have been made. Yet. Now I’ve gotta get beck to my set-up!
-
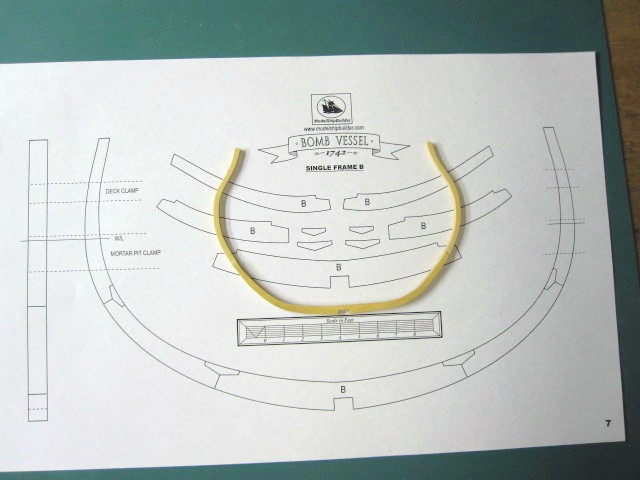
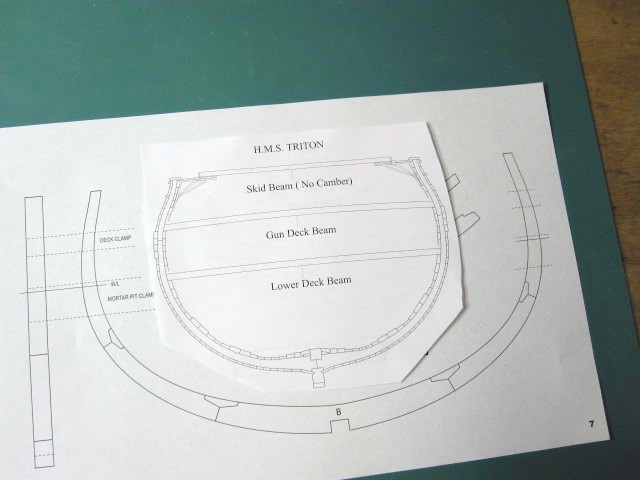
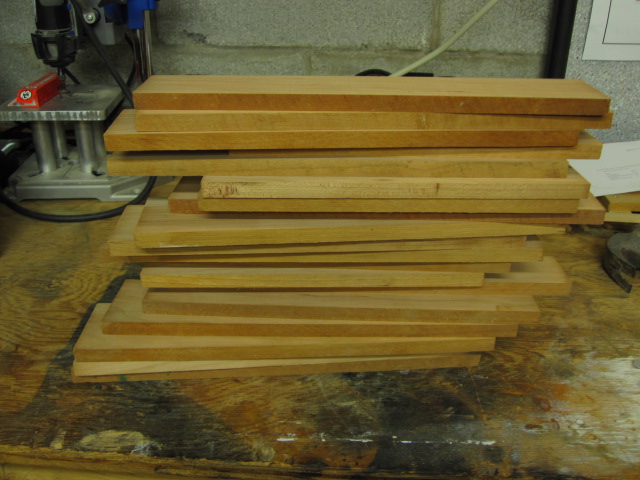
Hi Mark, Yeah I know but I couldn't resist at least starting some of the set up work. Christian, Seeing it on MSB was what really pushed me over the edge. Here is another reference to the size of this cross section. One plan is of a full frame with one of my Echo frames sitting inside of it. This picture has the scale plan of the Triton cross section sitting side. I couldn't use the actual Triton as it was drying then. Here are some of the billets of cherry cut down to size. And the first batch that have been through the thickness sander. Well that's it for now so I'm back to the work shop to work on the Triton/Echo/Bomb Cross Section.
- 421 replies
-
- 1
-
-
- granado
- bomb ketch
- (and 2 more)
-
Great attitude Mario. If we had a dollar for every oh crap moment we'd all be rich. Keep up the great work.
-
Hi Ben, I wouldn’t really say I’ve started, let’s call it just some preparation work. Jeff, this scale will really be different. I’ll post some pictures of the plans next to the Triton for some reference. Hey Grant welcome to the club. I too thought about 1:48 and even printed a set at 1:48 but the lure of building large got me. 42rocker, you will definitely start before I finish. With 3 at once the pace will be sloooowwwwww.