HOLIDAY DONATION DRIVE - SUPPORT MSW - DO YOUR PART TO KEEP THIS GREAT FORUM GOING! (Only 36 donations so far out of 49,000 members - C'mon guys!)
×


chris watton
-
Posts
2,315 -
Joined
-
Last visited
Content Type
Profiles
Forums
Gallery
Events
Everything posted by chris watton
-
 Cheers both! I hope so, too, I have wanted to do this one since Agamemnon, 23 years ago, so want to do the subject the justice it deserves.
 -
I have never designed a model ship kit without mast and rig. Indy is no exception - I did mention just a couple of posts up that mast stays will have BenD's rope.
-
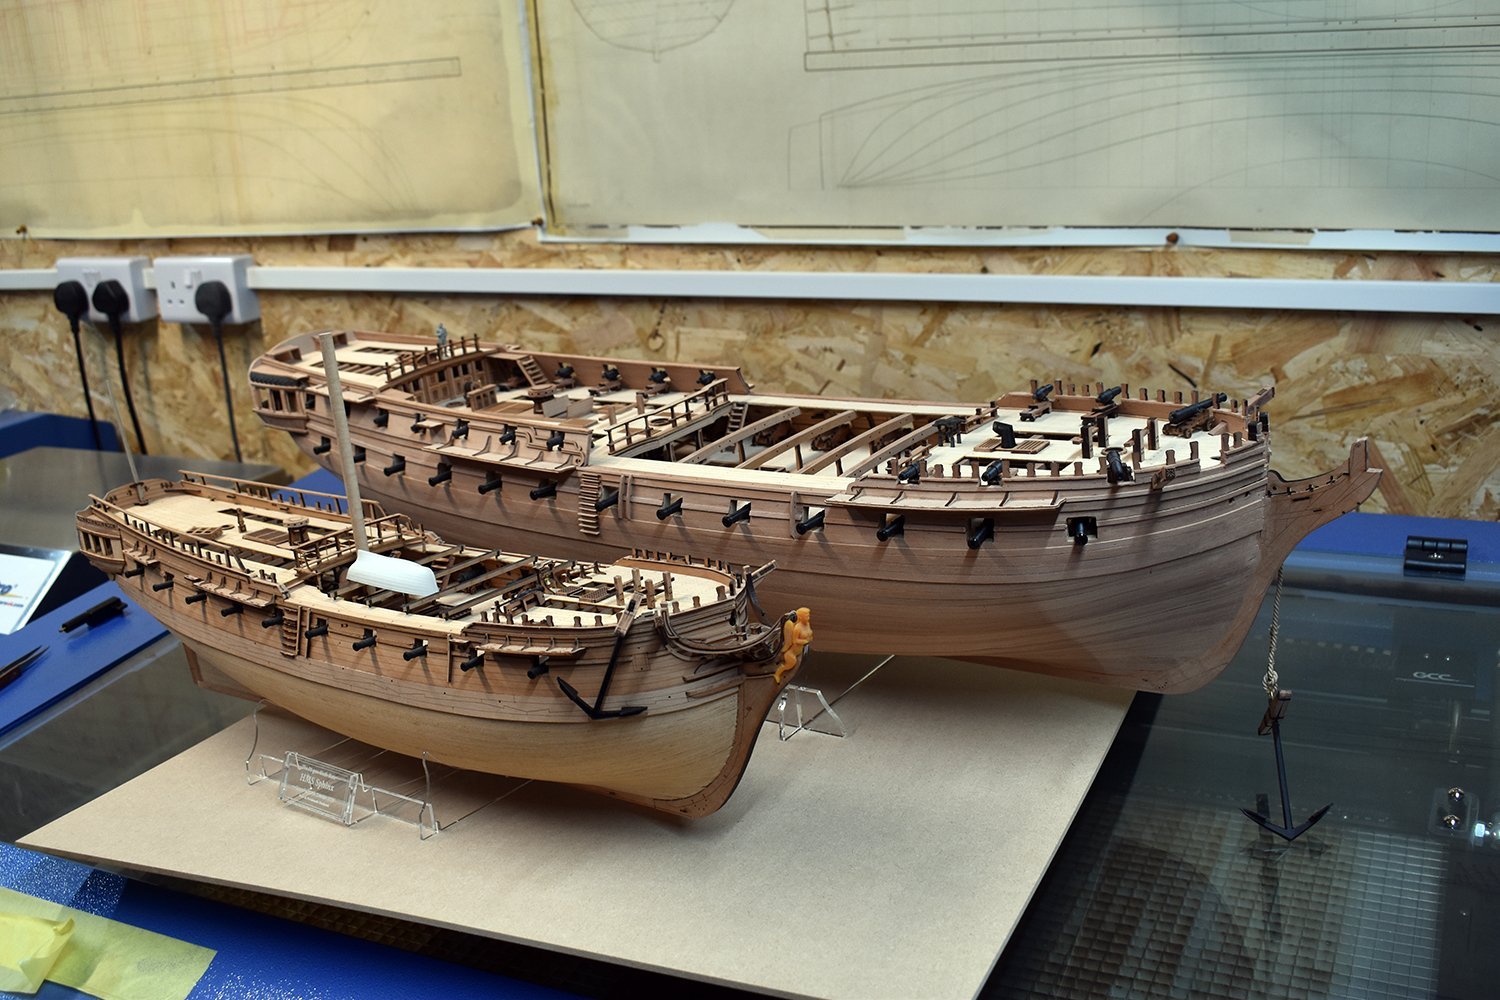
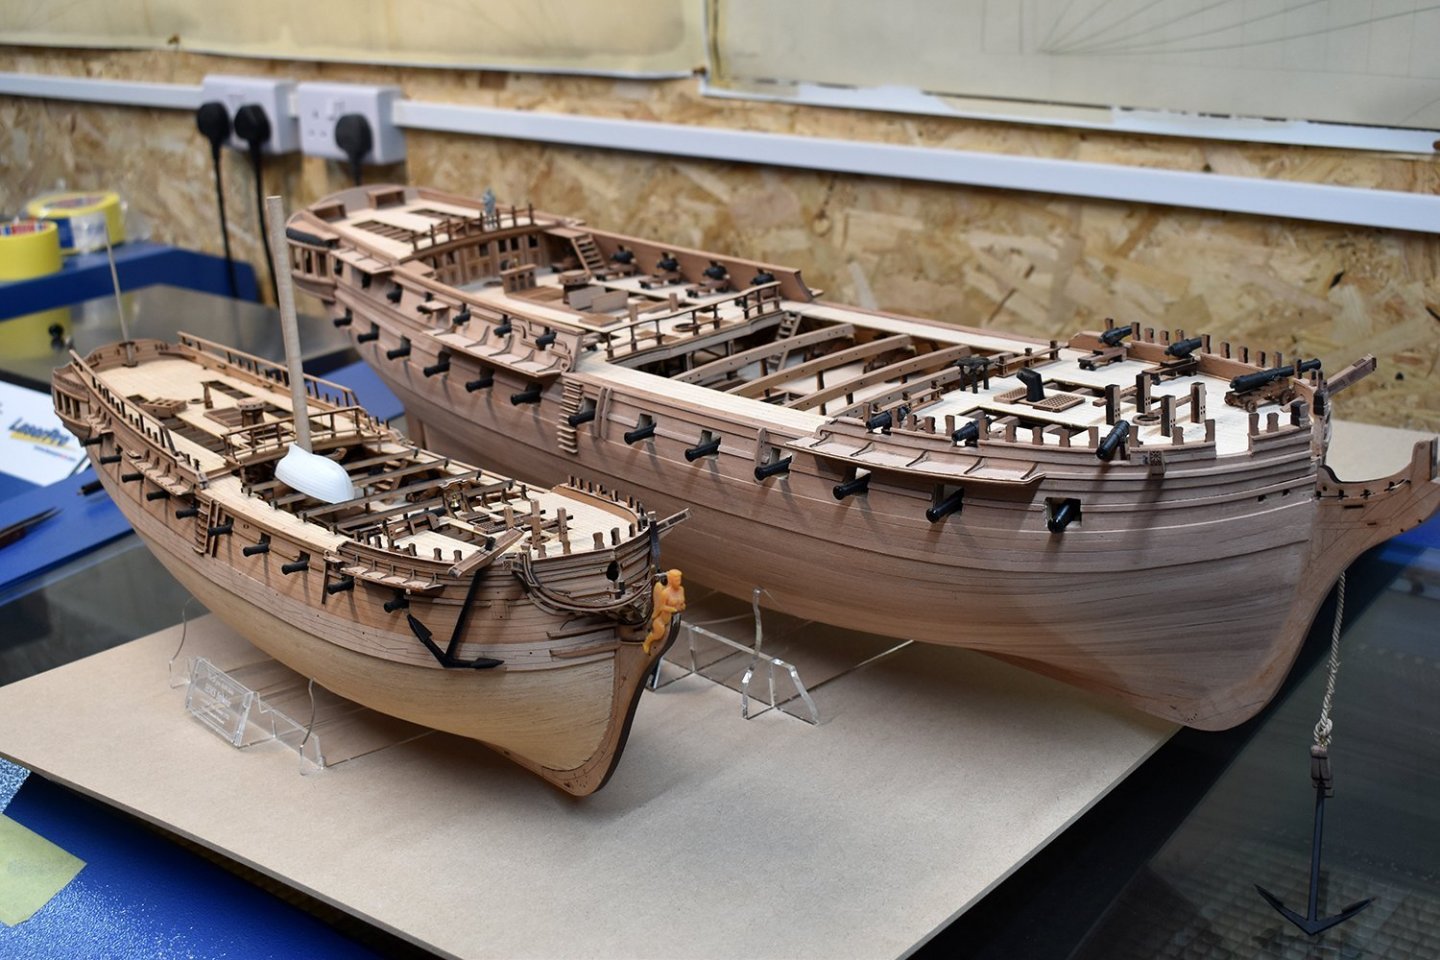
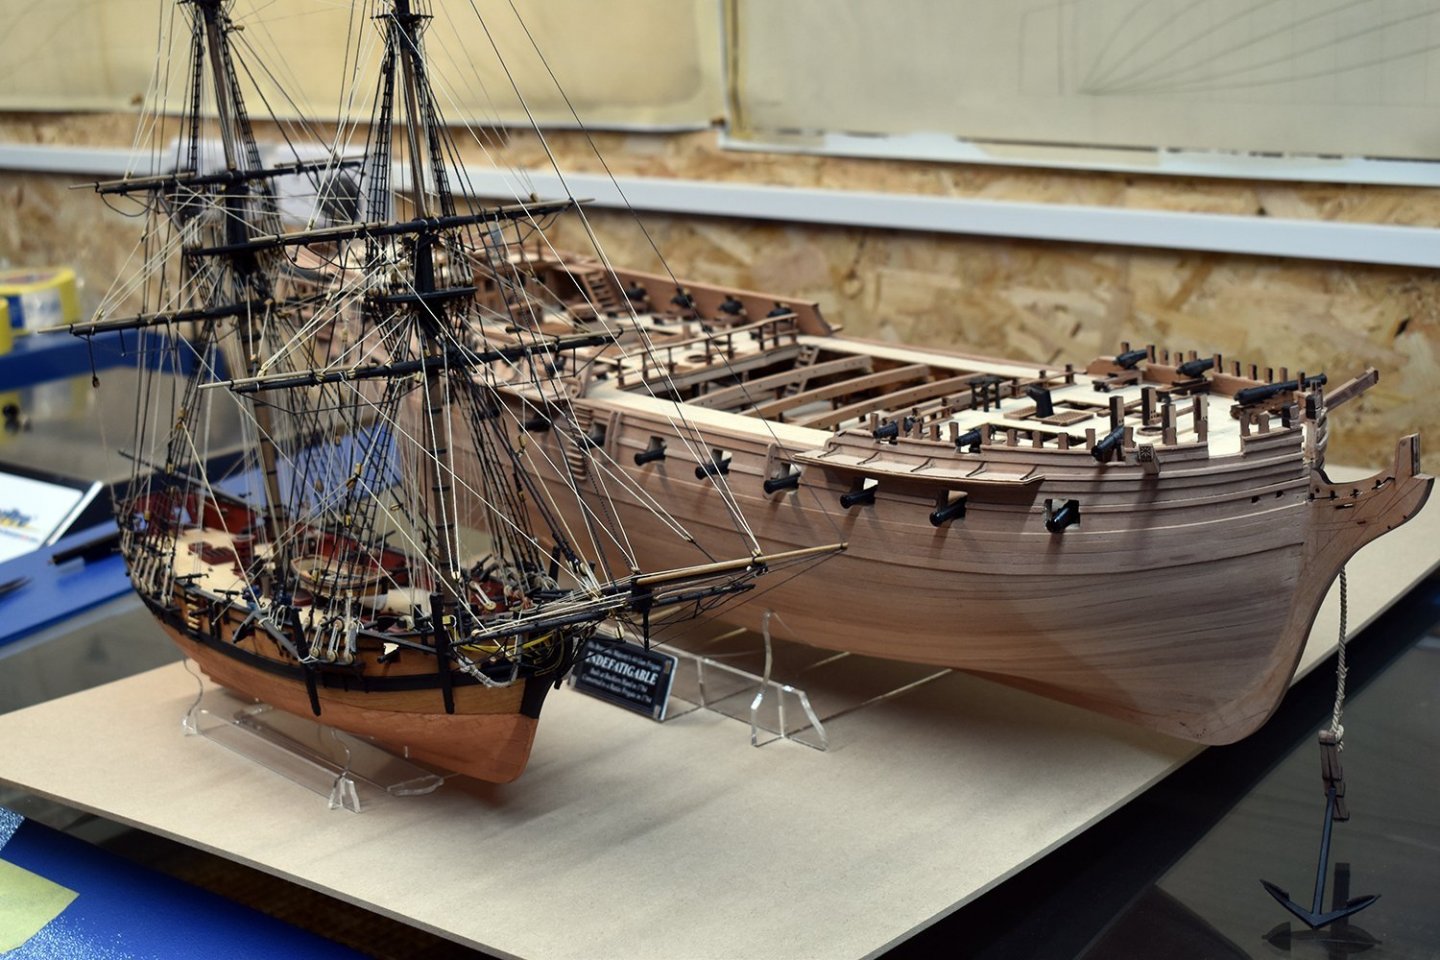
yeah - Illustrates the world of difference between Post Ship and a Super Frigate! (Indy being around 15 feet longer along the gun deck than standard 38's of her day) Am sure it has been mentioned elsewhere, but I will be included some of BenD's excellent rope in the Indy kit, most notably the anchor hawse and the larger diameter mast stays. Also forgot to mention, the stern name and depth markings are waterslide decals this time. Name being yellow ochre and depth markings are in white - there will be two sets for each kit (and already have them here with me), as I know mistakes can happen when applying.
-
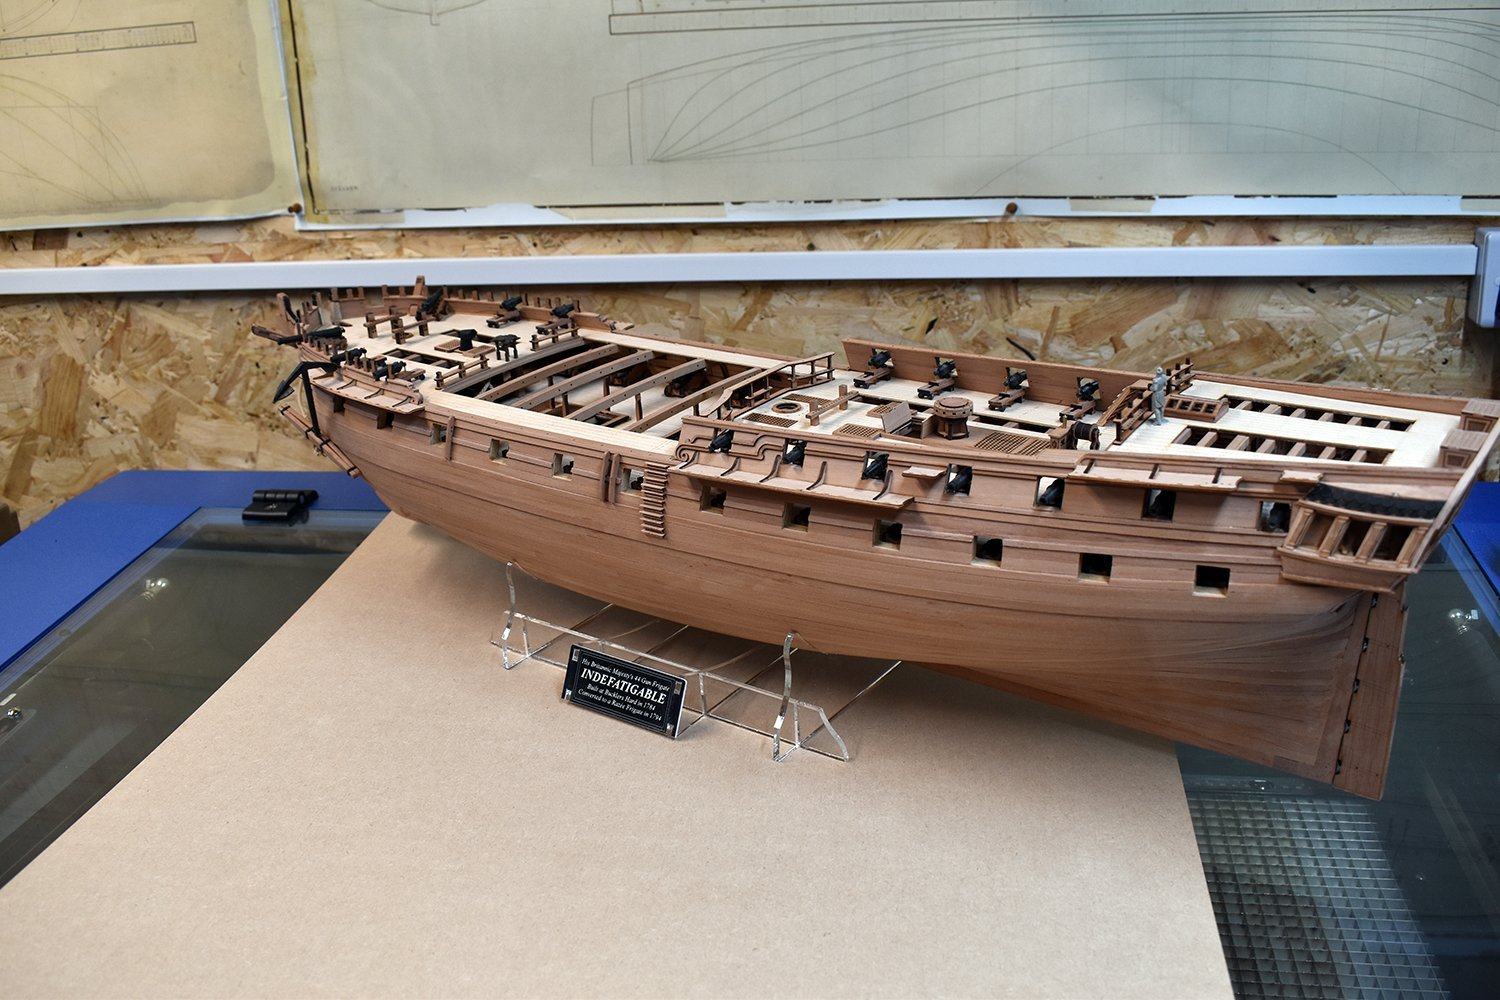
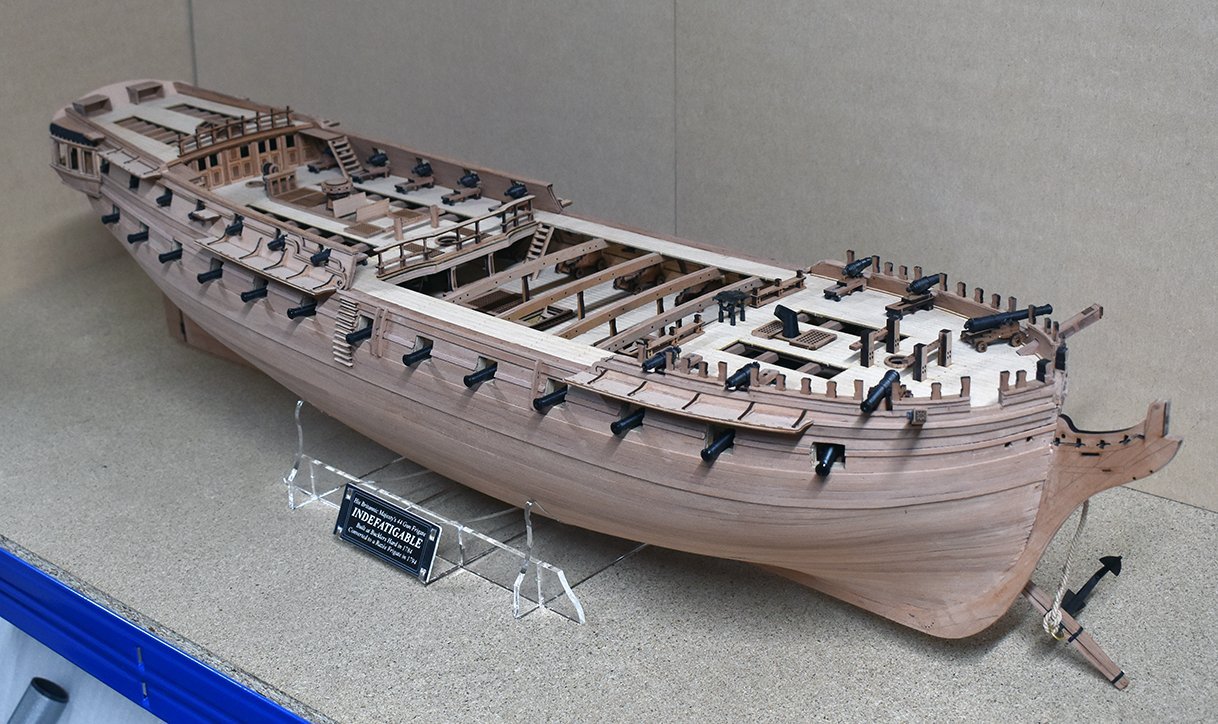
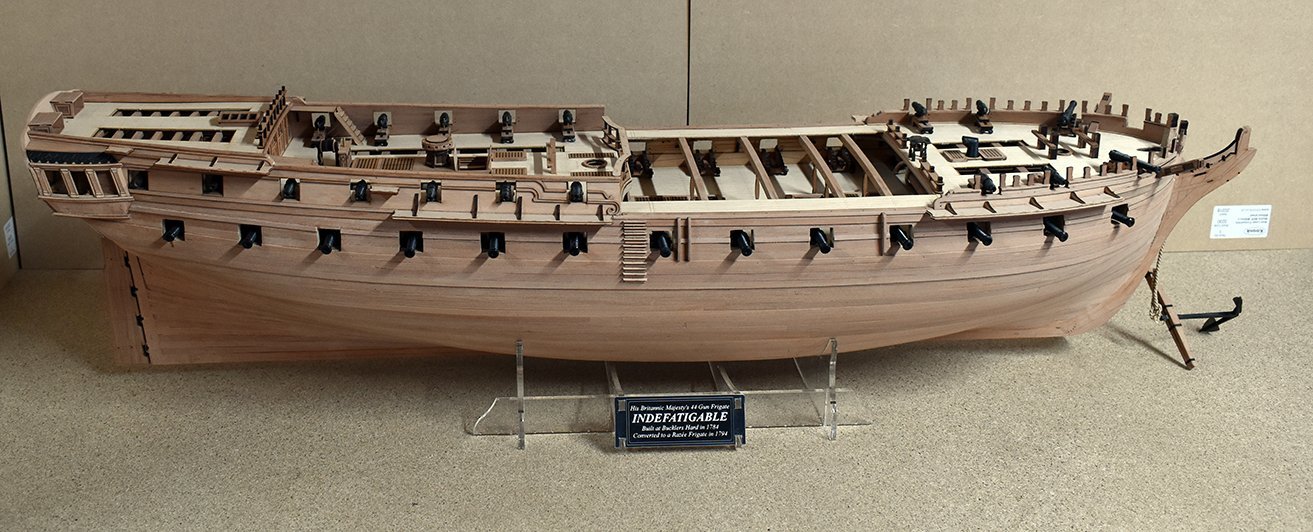
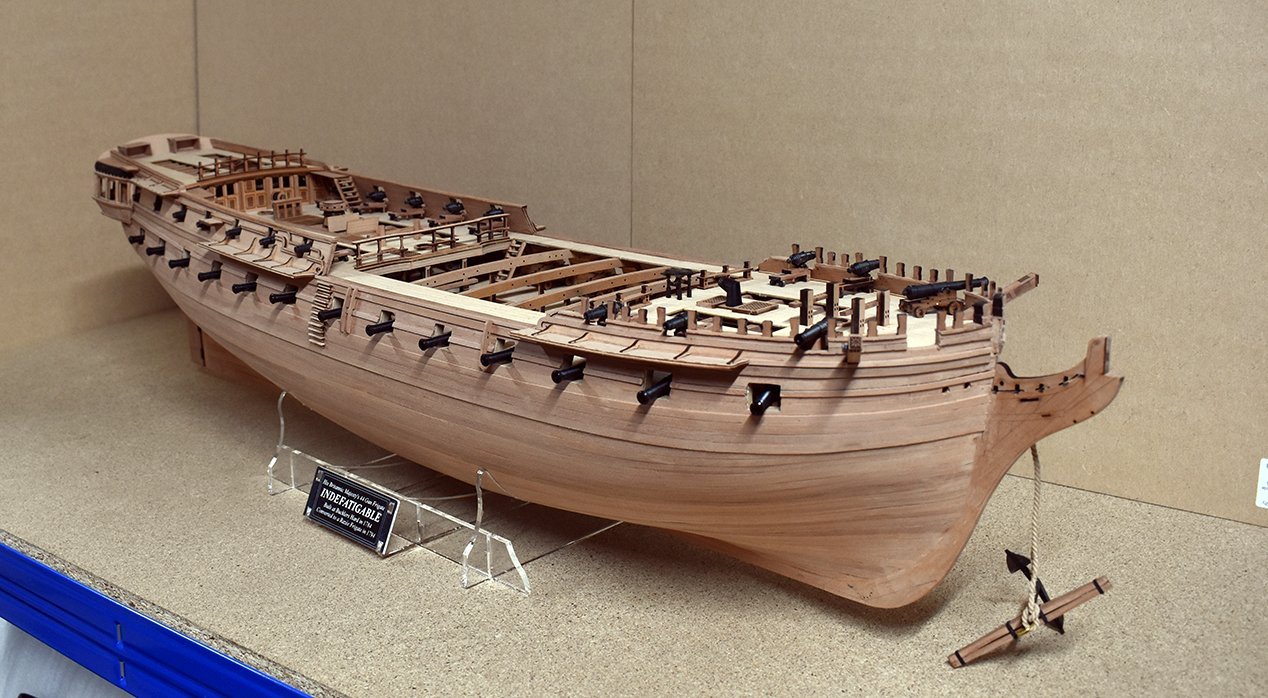
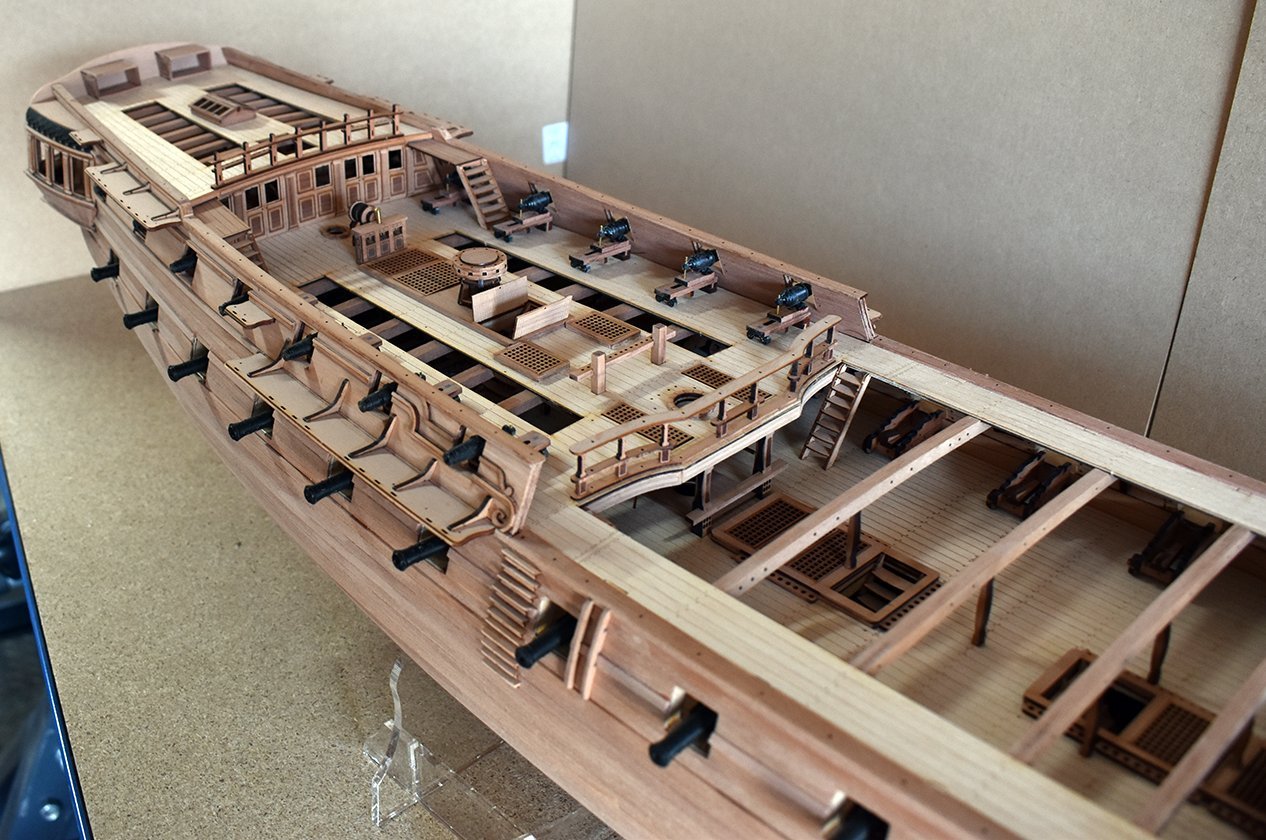
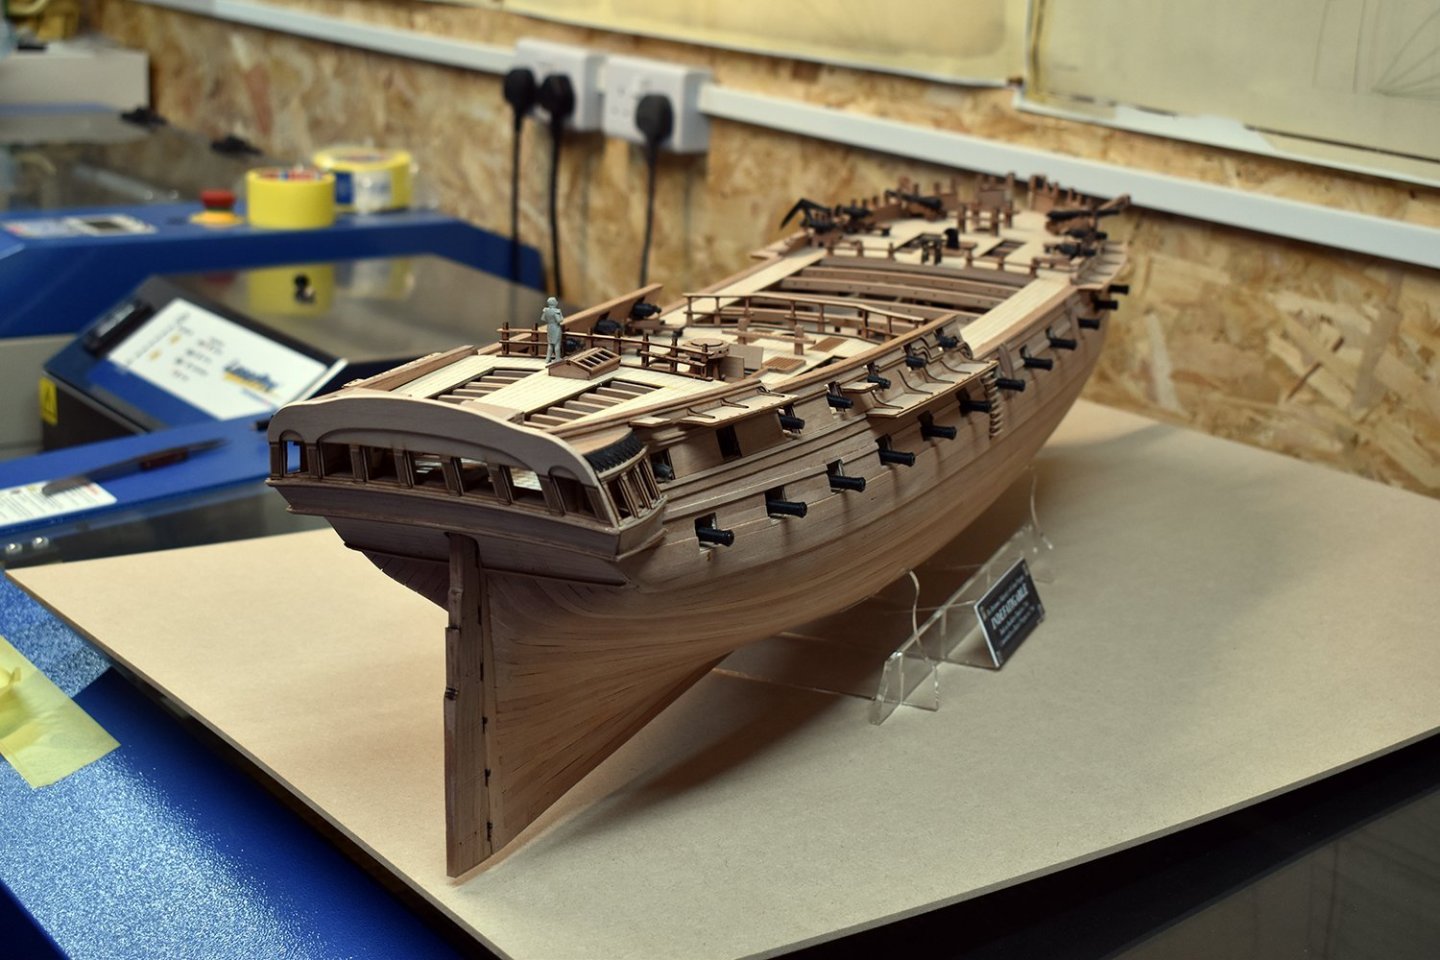
Well, relatively, yes, very rough. It has been built just to check parts - planking took almost a week, but I needed to plank it full to check all designed parts. One thing, as I mentioned, there will be quite a few changes for the production prototype that Jim will have. Nothing major, more refinements. For example, the waist rail will be in two layers of strip, not one as shown, and as already mentioned, the poop skylight. All hull detail above upper deck level is pre cut. The poop barricade is my idea, and I have integrated belaying racks either side, in lieu of the missing mizzen bitts. The flag lockers at the stern will be populated with PE parts (square compartments). For the quarter gallery tile effect, I have opted for laser cut black card. I think they are much easier to apply than PE parts, using PVA wood glue, and look better too. I was not 100% sure about the poop step gangways, should I keep them, or have the steps directly attached to the poop? problem is, if I do that, the steps are very close to a 42 pounder, so kept with the platforms. As Indefatigable was stationed in home waters at the beginning of her career, I do wonder if she would have had all of the latest 'innovations' early on, like quarter davits. Bet she did... Anyway, still a lot to do. I will send Jim the production parts in the next couple of weeks, once I have nailed the bow area.
-
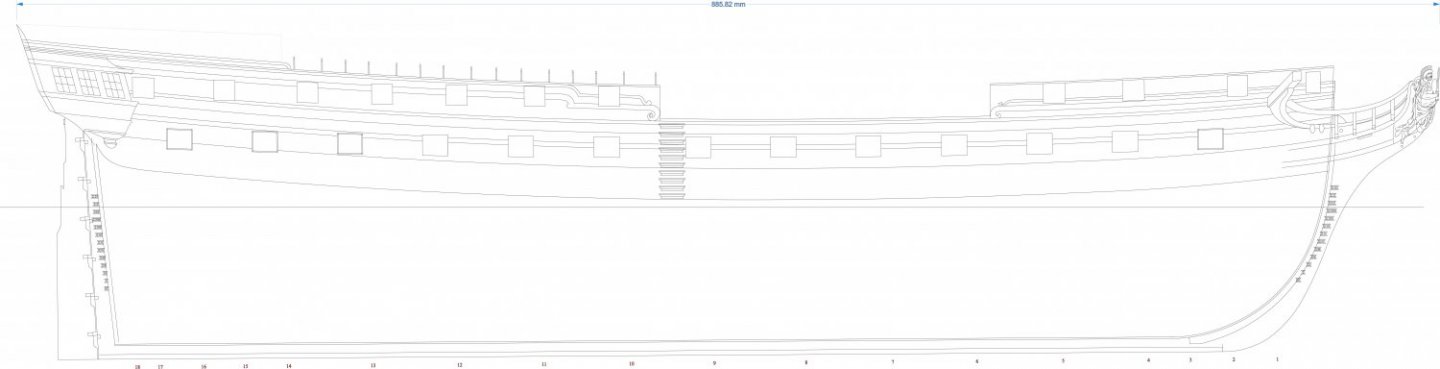
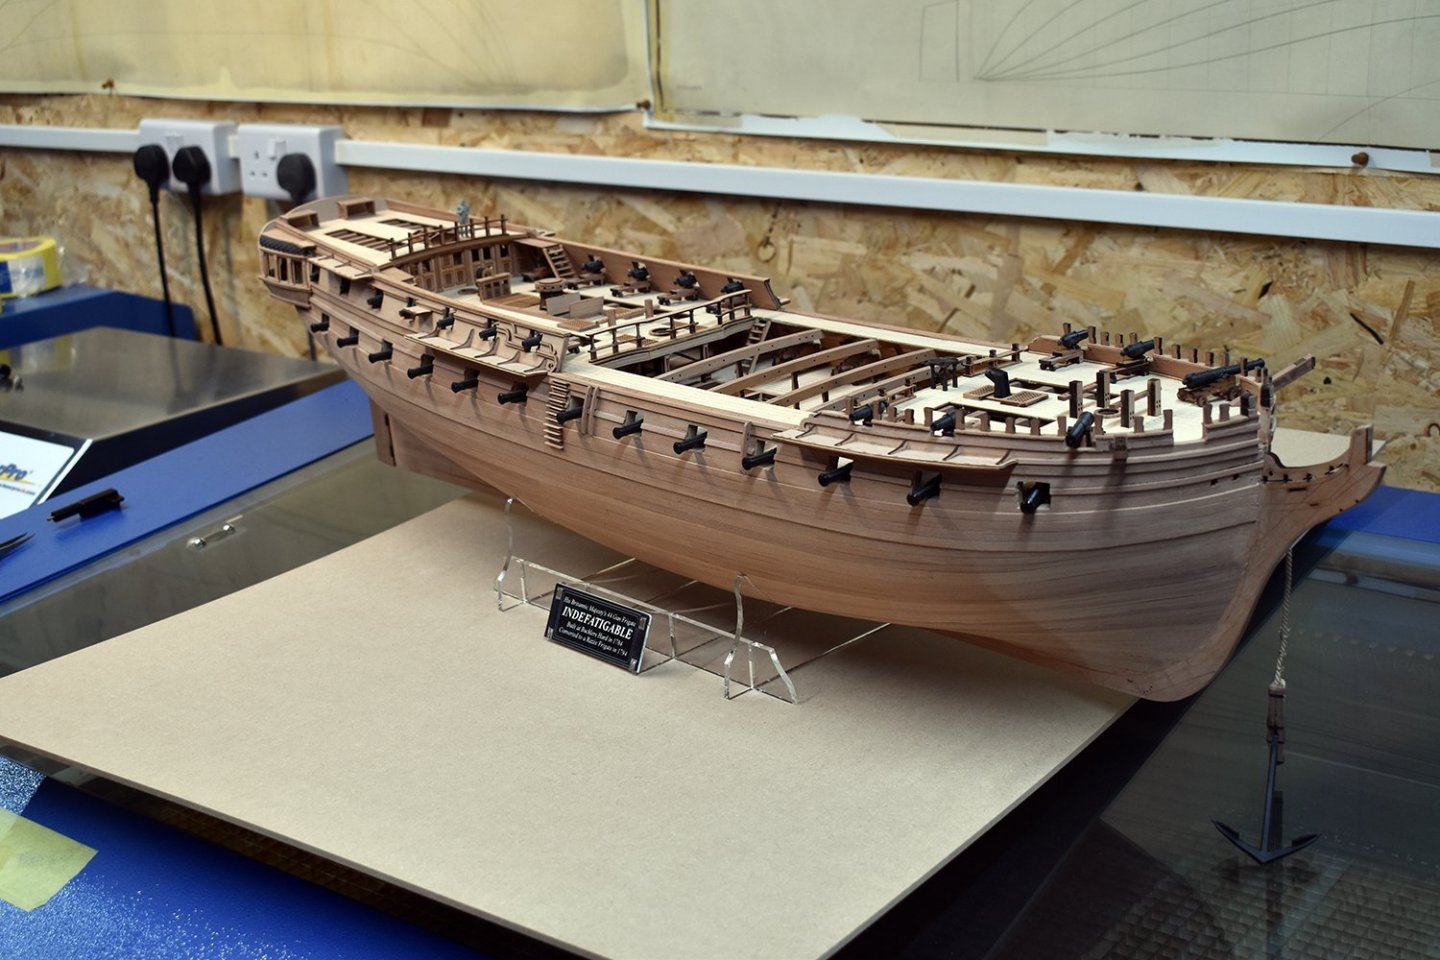
Forgot to add my initial side profile I did before I started designs.. The production model will be shown with coppered bottom, and fully painted sides in black and yellow ochre (The figurehead is from Vanguard, and used as a placeholder until I get her own made)
-
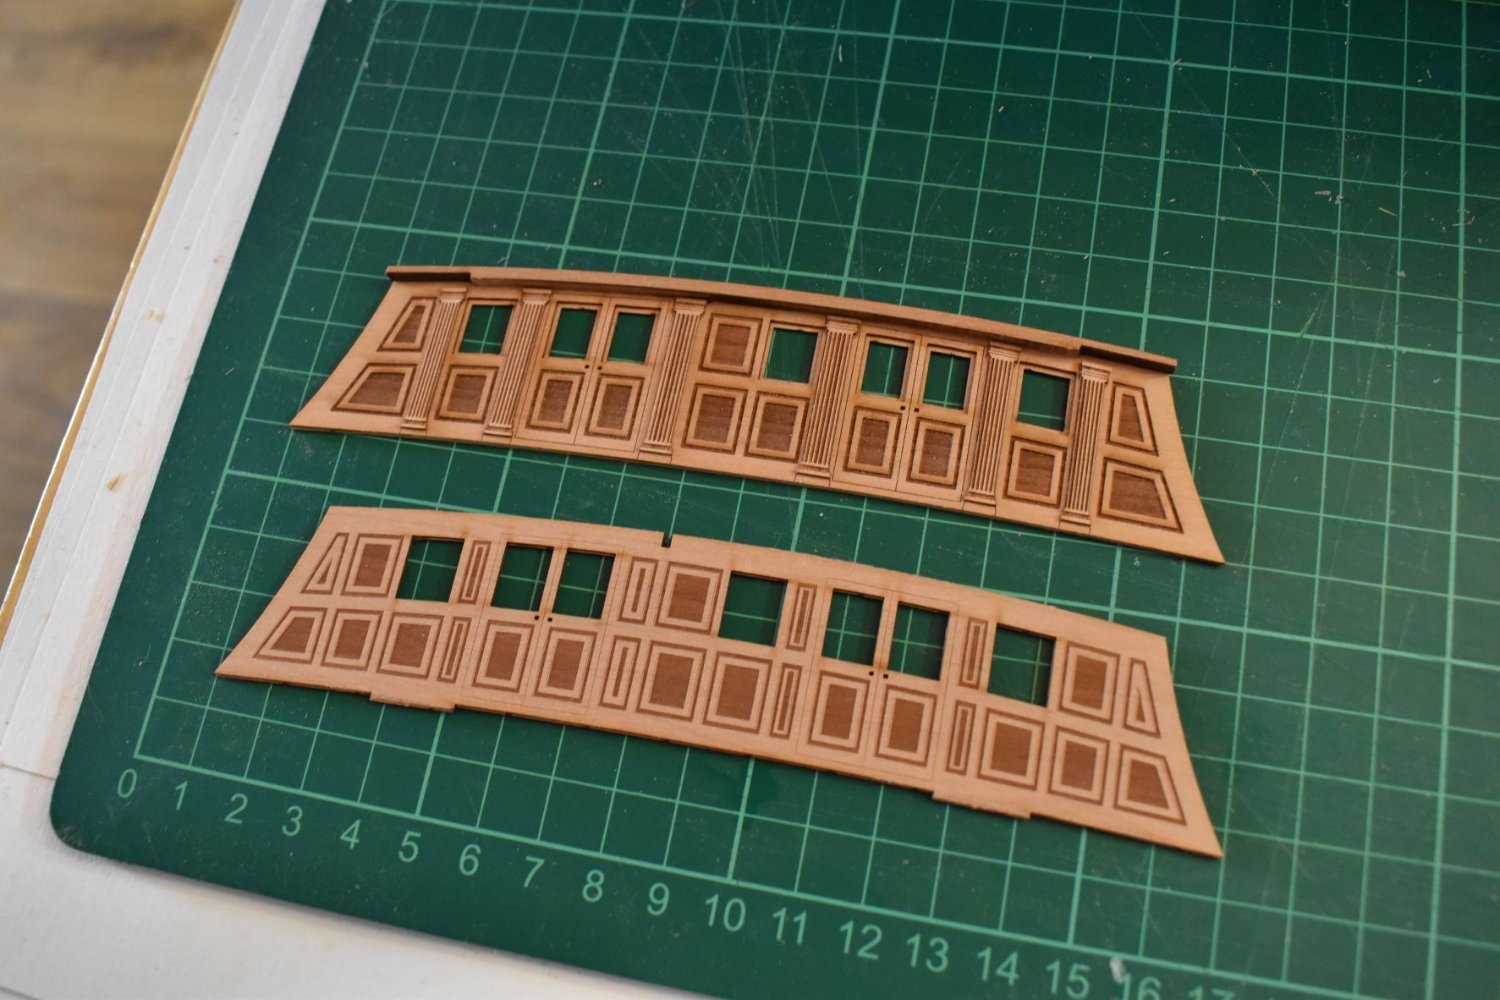
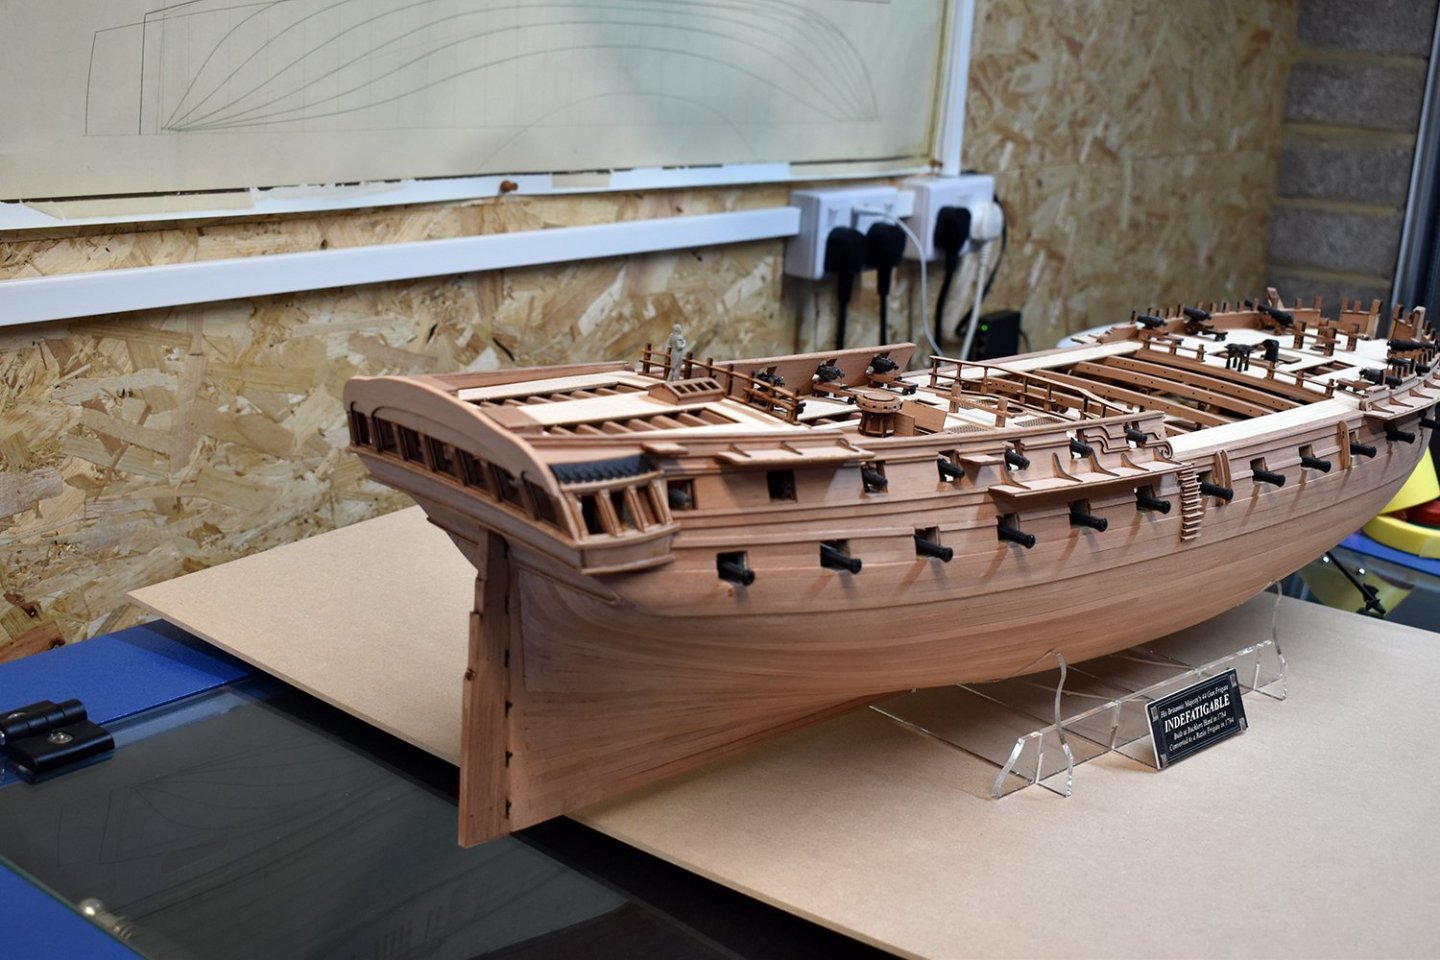
OK, little update. Designs for Indefatigable are now about 85% complete. The pictures shown are of the pre-prototype, so looks very rough as usual, as many parts have been glued, ripped off and new parts added in place - and is built for part checking only (just like Sphinx). There are still a few mistakes on this prototype model, so does not entirely reflect the final designs. I have also included a drawing I did of the basic outline of what I think Indy would have looked like during most of her career. The only concession I have made is keeping the forecastle timberheads, rather than berthing up this area, with the decision based purely on aesthetics (plus the plans show this anyway. What I did change is the quarter bulwarks. I know she had 7 gun ports per side and three (with spare chase port) at the bow, so the 7th port had to be worked in, and this meant altering the bulwarks to the same height. I have placed the additional 12 pounder long chase guns right at the front, as I could not see Pellew being chased, more the chaser... I have tried to keep the poop profile as low as I can. Pellew didn't even want the poop at all, and would have been happy to have his cabin on the main gun deck and Indy fitted with sloop like quarter badges (would have looked odd..). With this in mind, I have kept the poop profile to a minimum, as I am sure Pellew would not have requested anything that would have increased windage. I will add 'iron stanchions' to this area, and that's it. I have the bow area to design, which will be the last of the main areas, and then I need to do all the photo etched parts. (Oh, and of course, a figurehead and stern decoration - which will be minimal). For the first time, I decided to go with laser cut and engraved columns for in between all lights/windows, and I am very happy with how they turned out. Channels are made by laminating three patterns together, a wider and thicker centre and not so wide and thinner top and bottom. You will be able to build this without the open slots in the decks if you so wish, they are not mandatory. The stand is 4mm acetate and a 2mm duel colour engraved nameplate. ETA - Forgot to mention, I have moved the poop skylight back by 3 beams, as I realised it was too close the edge of the poop, so it is now over the great cabin, and not in the position shown.


-
Yep. I remember when in my 20's, and working at a foundry 5-7 days per week, I saved up a part of my weekly wage for 4 months in order to buy the Sovereign of the Seas, which I guess would be near the equivalent of £1000 today. As that took me two years to build in my spare time, I figure it was still a bargain, compared to a lot of other hobbies.
-
Fly was designed almost two decades ago, so quite old school. You do not need to chisel in a rabbet for my newer kits.
-
Shipping Costs
chris watton replied to Goodshipvenus's topic in Modeling tools and Workshop Equipment
My wife just posted a packet of fine brass pins to a customer in the US, and the exact postage cost was £4.20. Not every company inflate postage charges to customers. In fact, due to a bug in the UPS live module we use, we have supplemented the shipping of every Sphinx kit to the US by at least £5 - so not everyone is 'out to get ya'. -
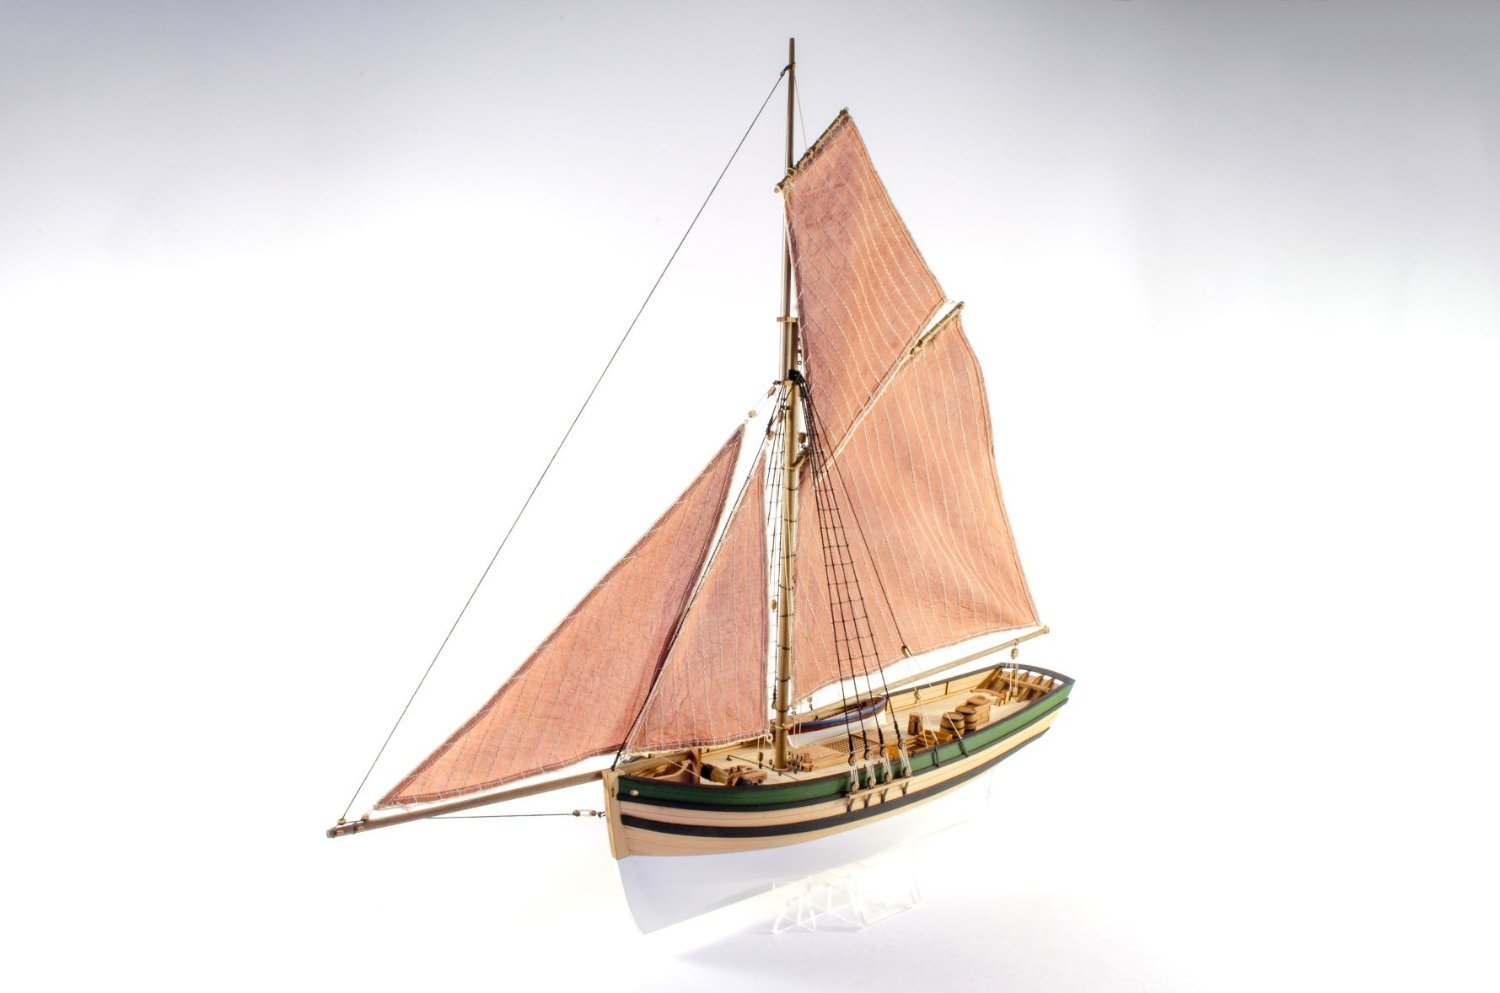
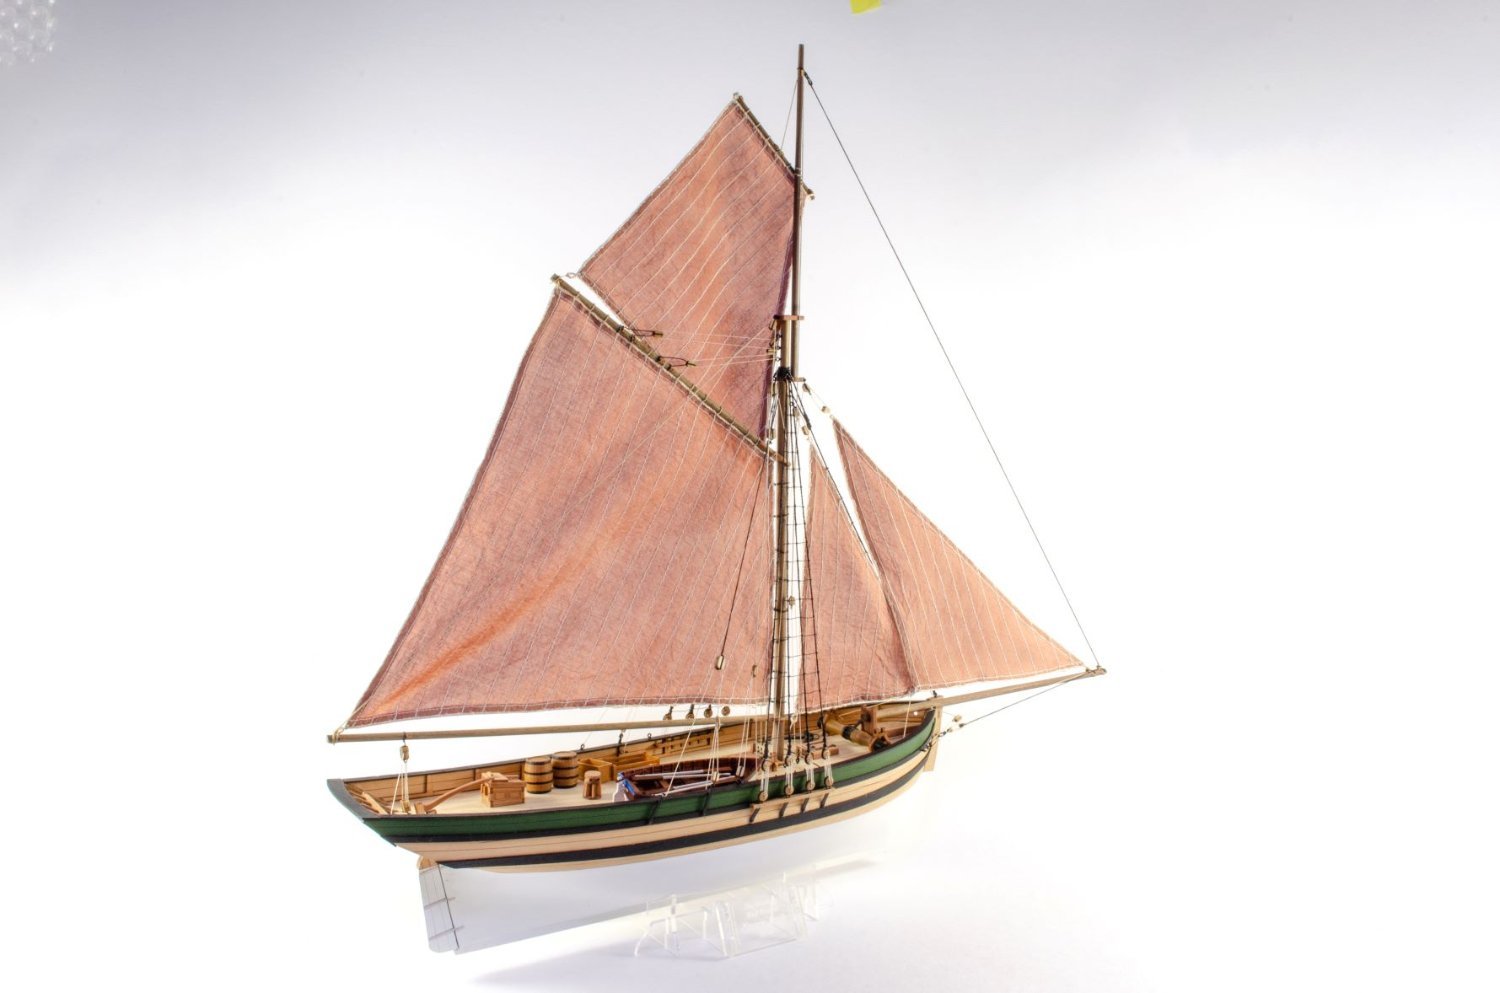
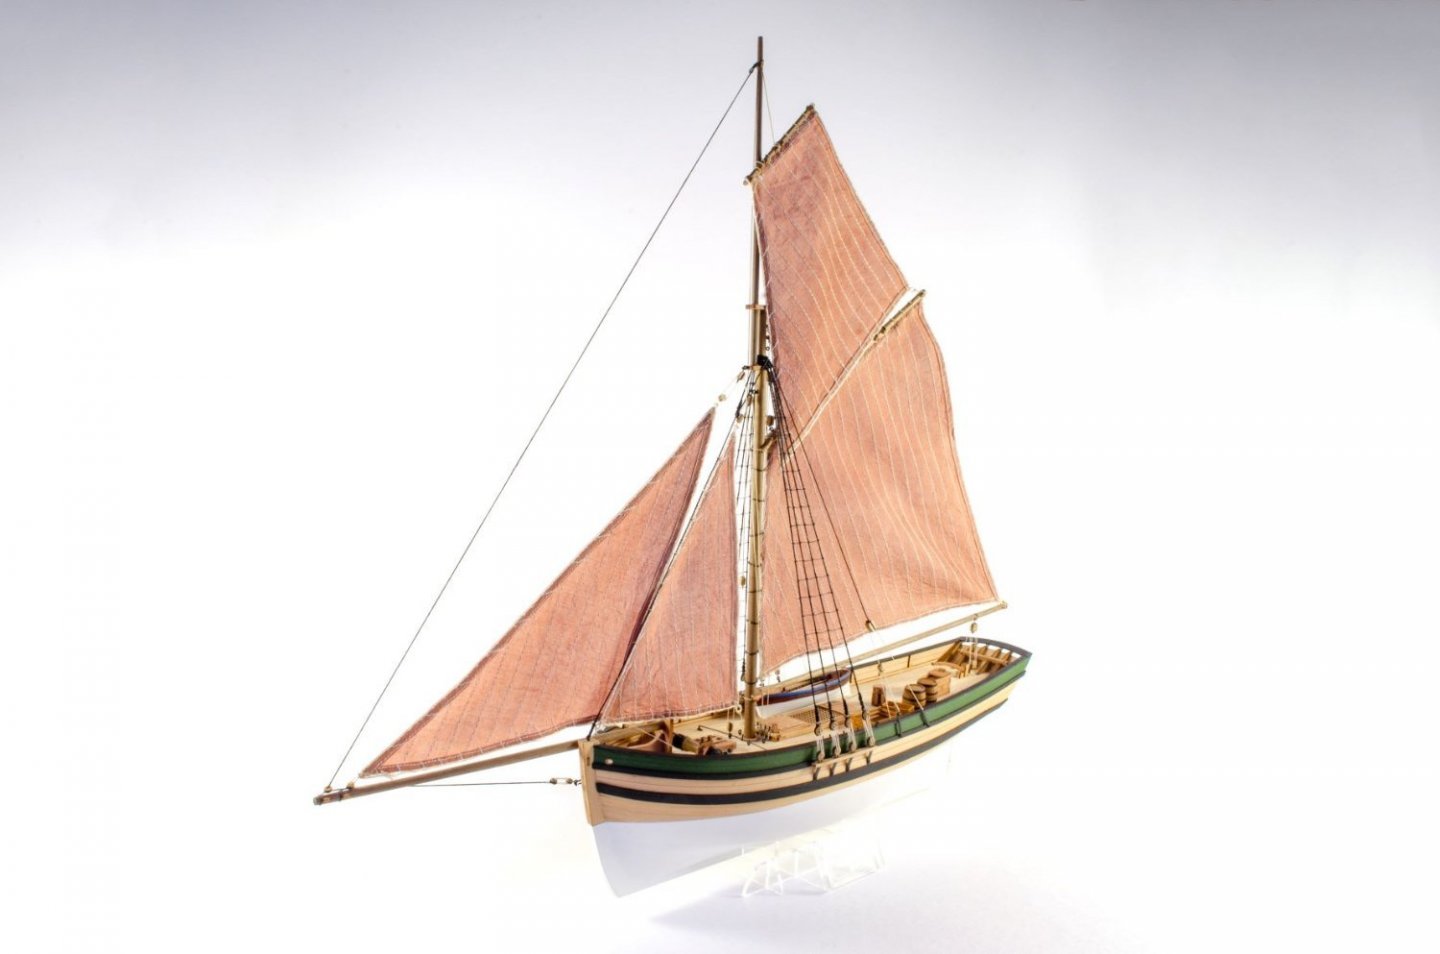
OK, I now have the Saucy Jack kit available, as my boxes just arrived, and those were the only thing I was waiting for (apart from premium sail sets) Saucy Jack – Barking Well-Smack – VANGUARD MODELS All kits with optional sail sets now have a sail set included, with the premium sails as an optional extra. I am including the 'standard' sail sets at no extra cost, as the quality is not what I expected and do not expect my customers to spend a Penny on them. This has been a disappointing lesson for me - sail sets made by the same people who produce for other manufacturers do not 'gel' with the overall quality of the kits I offer. The 'premium' sail sets are produced my Master-Korabel of Russia, and I was expecting a full shipment of all sail sets for all kits that have them. Unfortunately, yesterday, I only received sets for the Fifie and Zulu, and not Nisha, Erycina and Saucy Jack. I am OK for Nisha and Erycina for now, but would have liked the Saucy Jack sails available for the release of the kit, today. I am currently awaiting an ETA for these, but they are being produced and they will be available in the next few weeks. The picture shows the model with the premium sails. I have two sample sets made and sent when developing these kits, and then order the production quantities soon after. These were ordered in February, so under normal circumstances, I would have had these available as stock already.

-
For clarification about lines, it should be mentioned that I used the line drawings for Ranger, and not Saucy Jack, for the designs. I did not 'stretch' the lines of Saucy Jack to produce this - the plans I worked from are completely separate...
- 16 replies
-
- 4
-

-
- Ranger
- Vanguard Models
- (and 2 more)
-
I must be honest, I am not sure what's tripping you up here. The pendants are shown clearly on Rigging Plan 1, and there is even some text that reads 'Add pendants of tackles first: 2 per side for fore and main mast and 1 per side for mizzen mast and all topmasts'
- 476 replies
-
- 4
-
-

-
- sphinx
- vanguard models
- (and 1 more)
-
According to Robert Gardiner's Frigates of the Napoleonic Wars, Indy (and the other two razee's converted at the same time) had the quarterdeck and forecastle removed, and transforming the old upper gun deck into a frigate style quarterdeck with gangways. But because the great cabin was at this same level, a poop was needed, and the position of the stern and quarter galleries betrayed their origins as a two decker. She must have looked very distinctive when compared to standard frigates in her squadrons, with her oddly positioned stern and quarter lights and of course, being on average around 15 feet longer than a standard 36 and 38, and the full mast and spar plan as a standard 64 (although with the main mast cut down to compensate for the one missing deck). So Indy does have a certain 'Beefy' look about her.
-
When I have completed most of the hull on my test bed model, I will show it on here and explain my decisions regarding the choices I have made
-
I am the same! I almost forgot about the 4 carronades under the poop, and then had the problem of the barrels sticking out when in place. My solution for these 4 carronades (now inaccessible) was to make the carriages slide back and forth, and securing the carriage with the lower bed/slide with a pin. This means they can be pushed in until the outer hull is complete, and then can then be pulled back out.
-
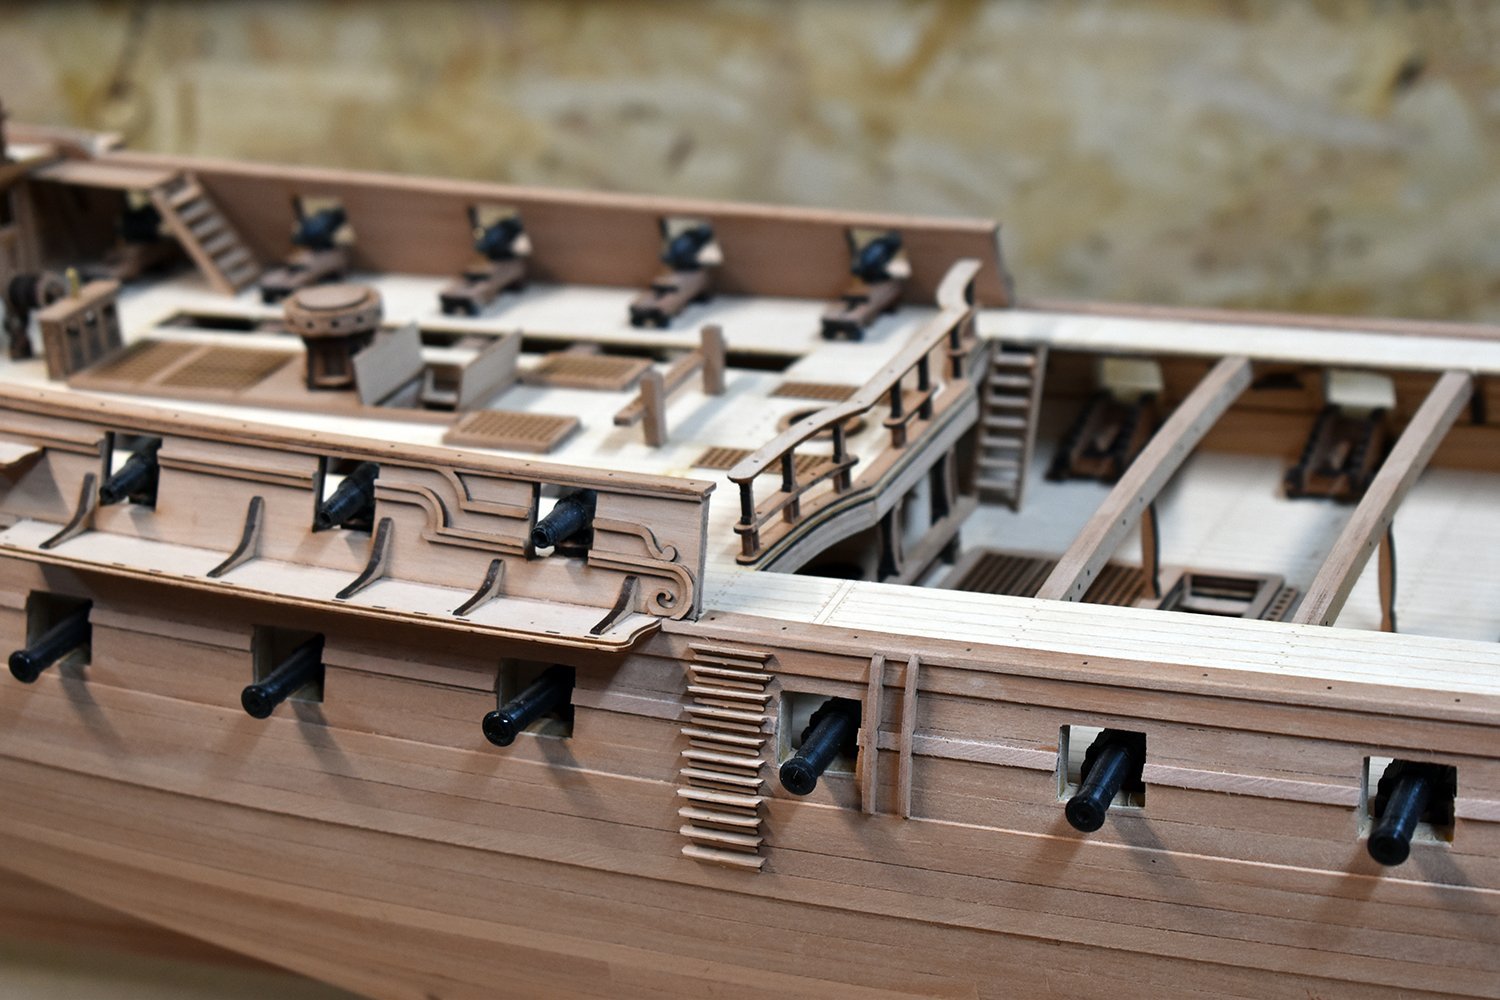
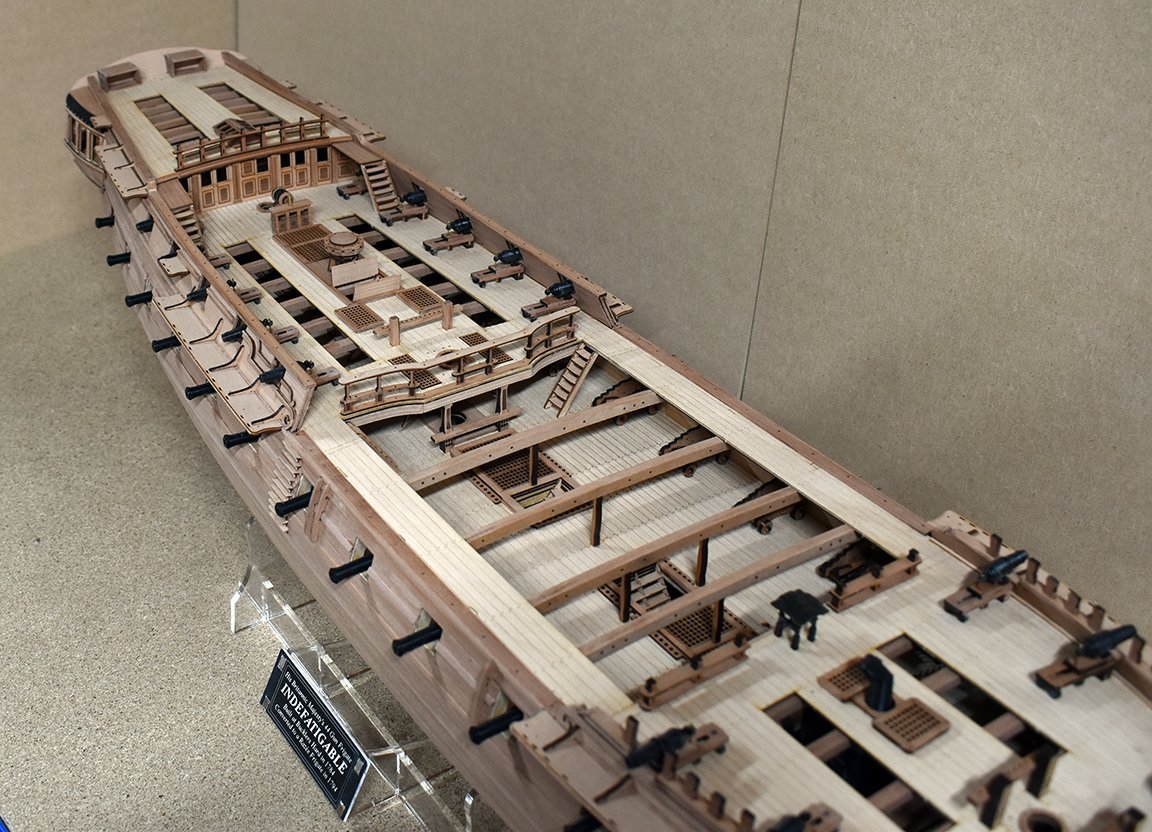
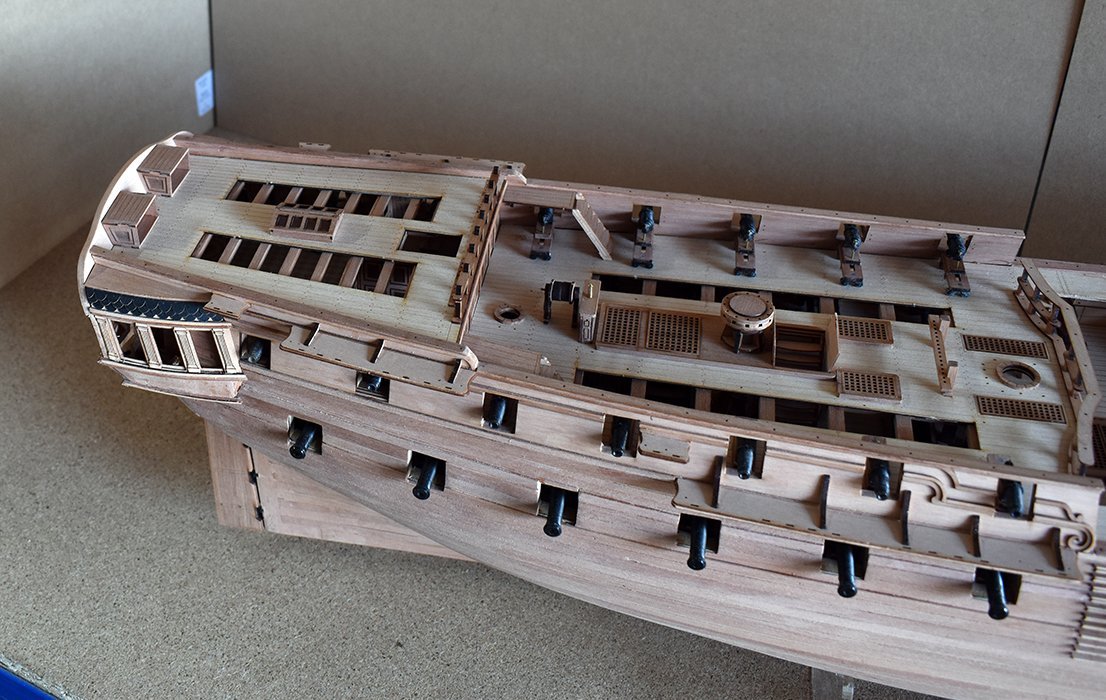
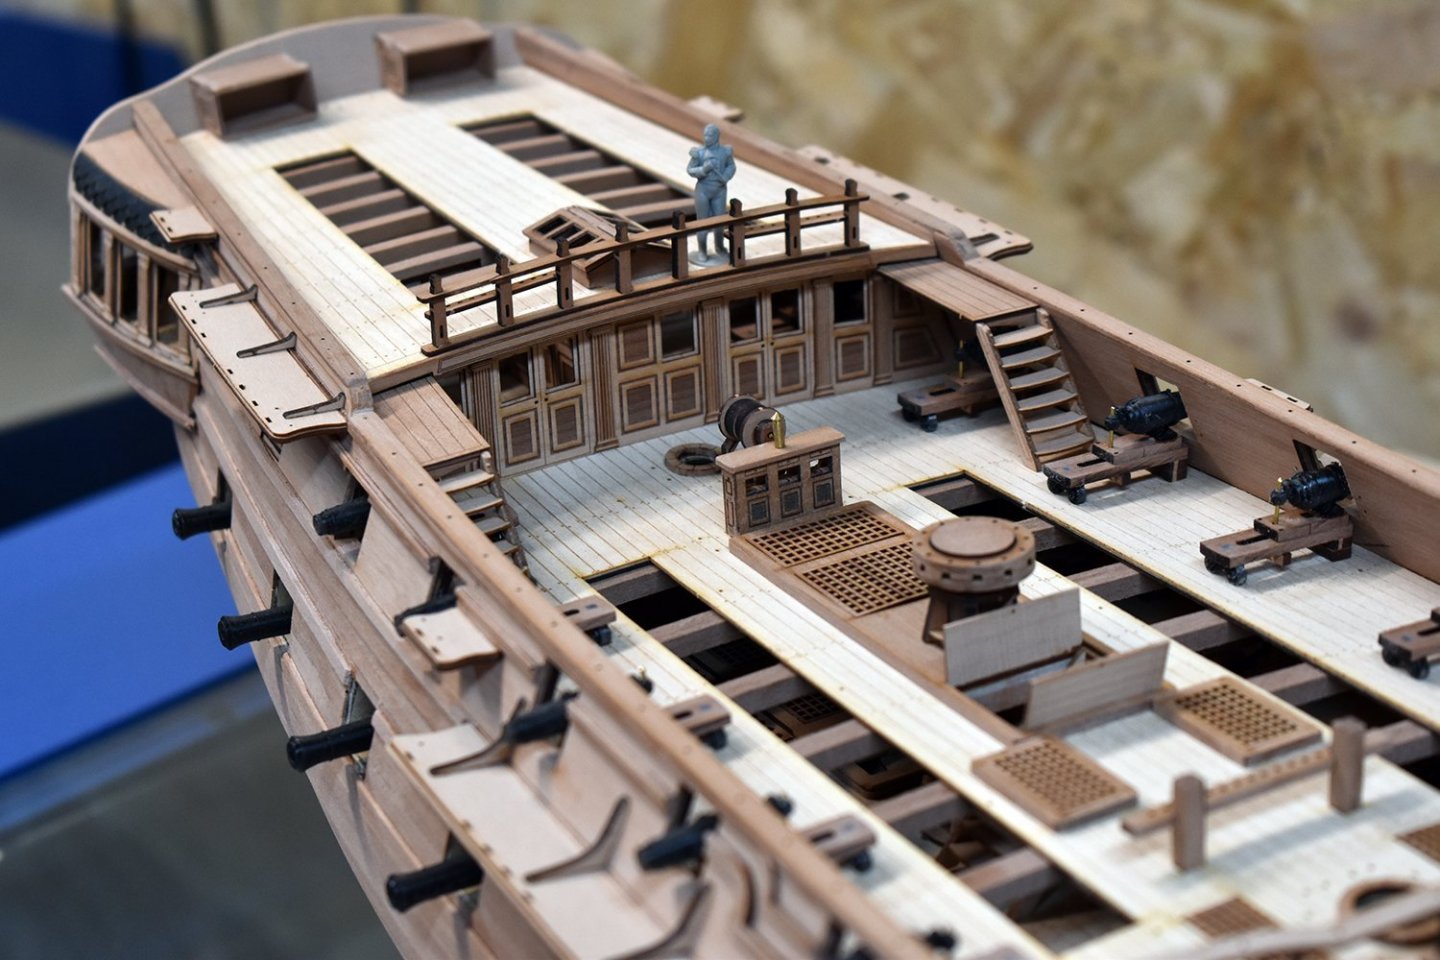
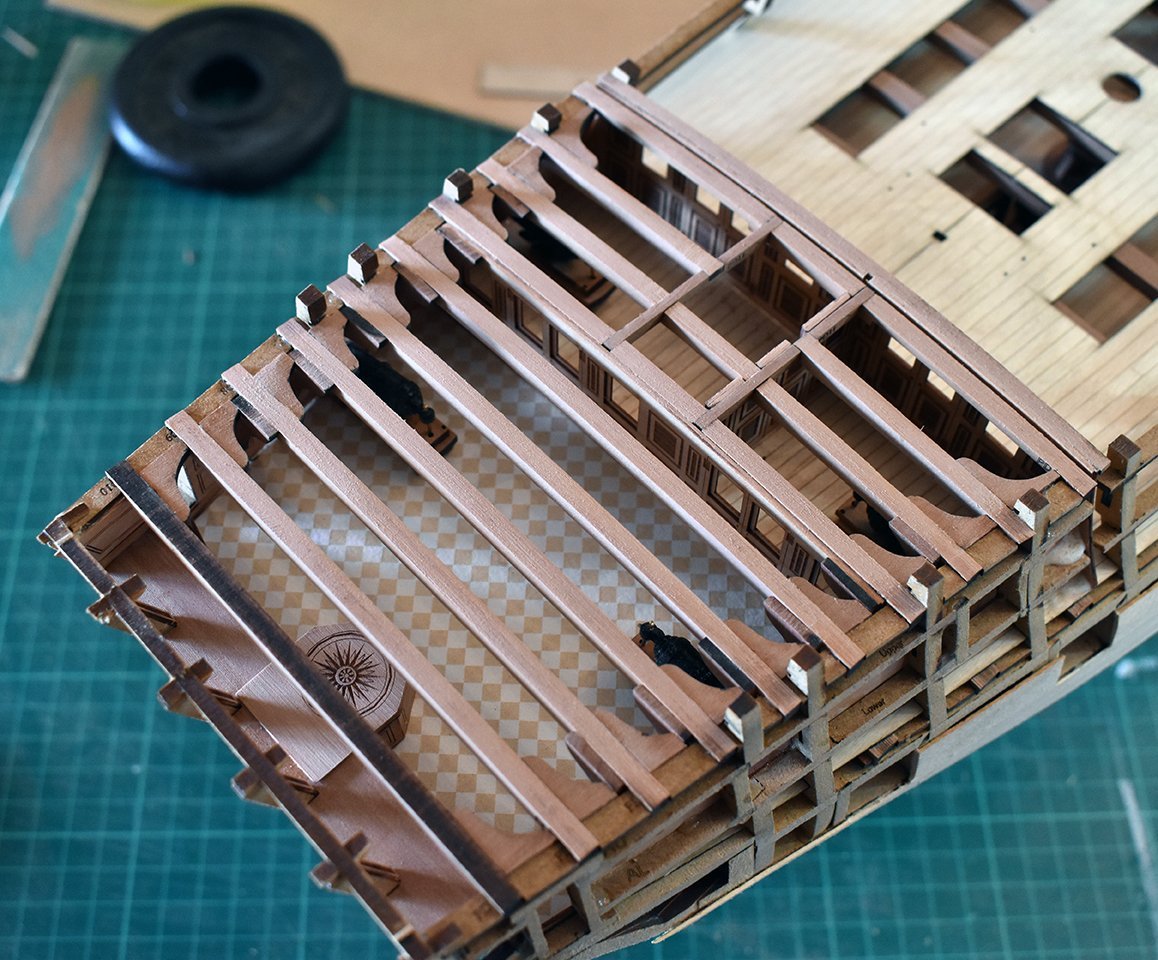
Just about completed designs for the poop area. Pics look a little rough, but please remember this model is used as a test bed, nothing more, to see how well parts fit. They are altered if required (and this is often...) The chequered floor is actually laser engraved high grade card. All false pillars in this kit for stern, quarter galleries and poop screen will be in pearwood. I think they are much better than the usual photo etched ones. I have just glued down the poop deck. Next - second planking... Oh, I also added a pic showing the two designs I did for the poop screen bulkhead. I decided to go the upper pattern.


-
I cannot speak for Amati, but I do have some good stock of Tanganyika that I use to plank my prototypes. You can see it on my Alert and Speedy, the original prototypes were made before finally settling on pear. But you are right, this material (and to a lesser extent, walnut) can be of massively variable quality. But I guess this is true to a certain extent for most natural materials.
-
I have a batch of really nice Tanganyika that I did intend to use for kits until I opted for pear, and I use it (Tang) for my prototypes. Problem with this strip is that I really like it, it looks tonally pleasing - but that doesn't mean the next batch I order would be the same. And this is the big problem with this material, it is never consistent.
-
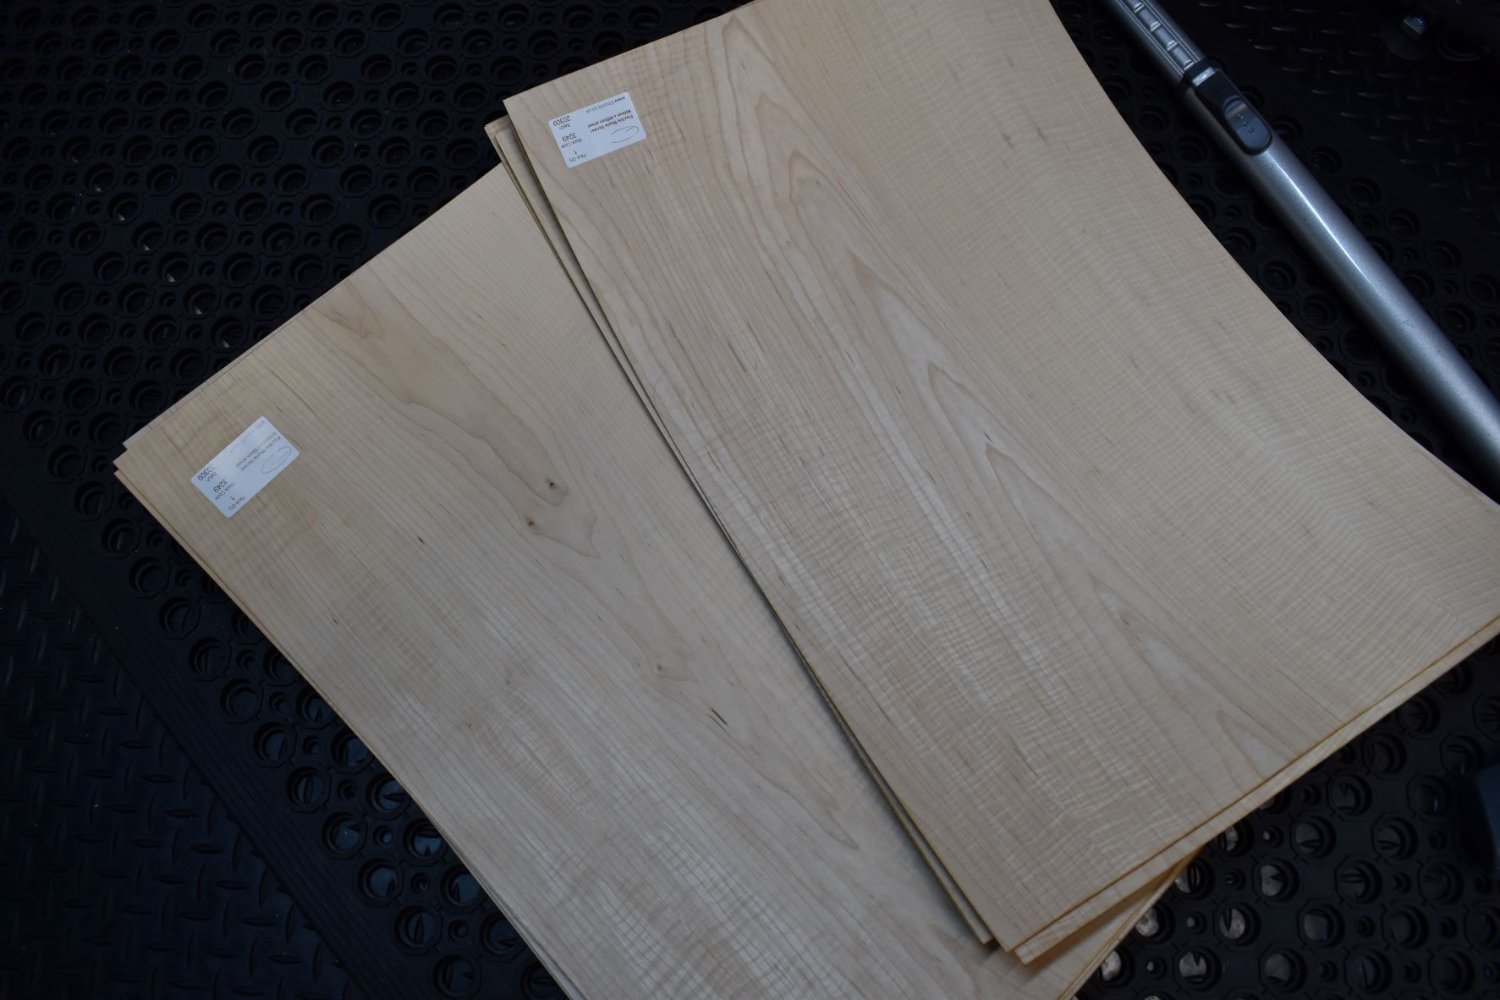
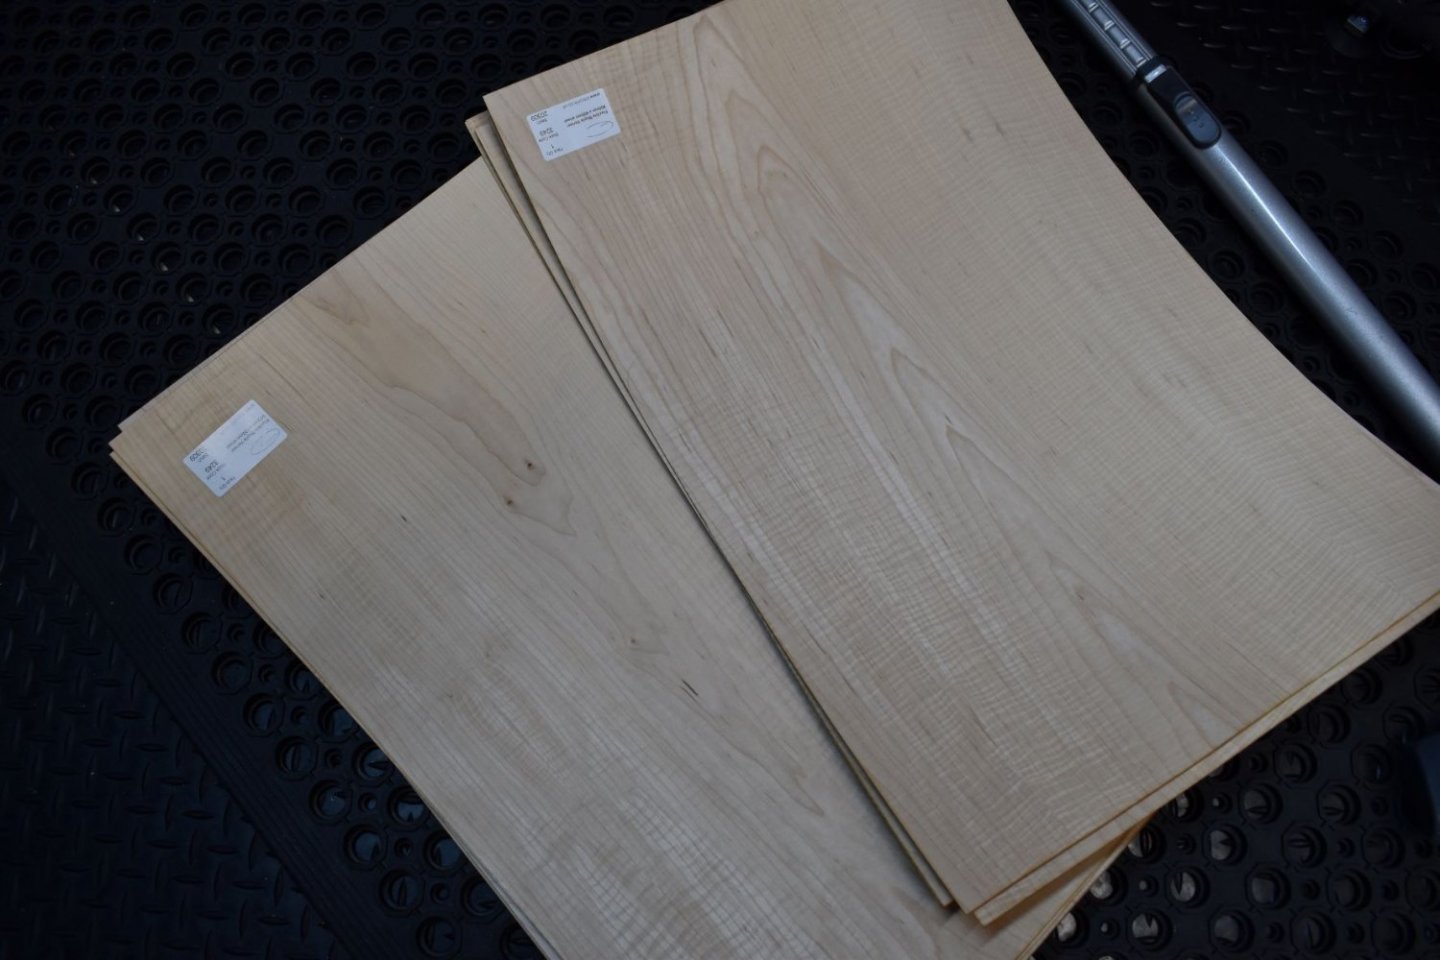
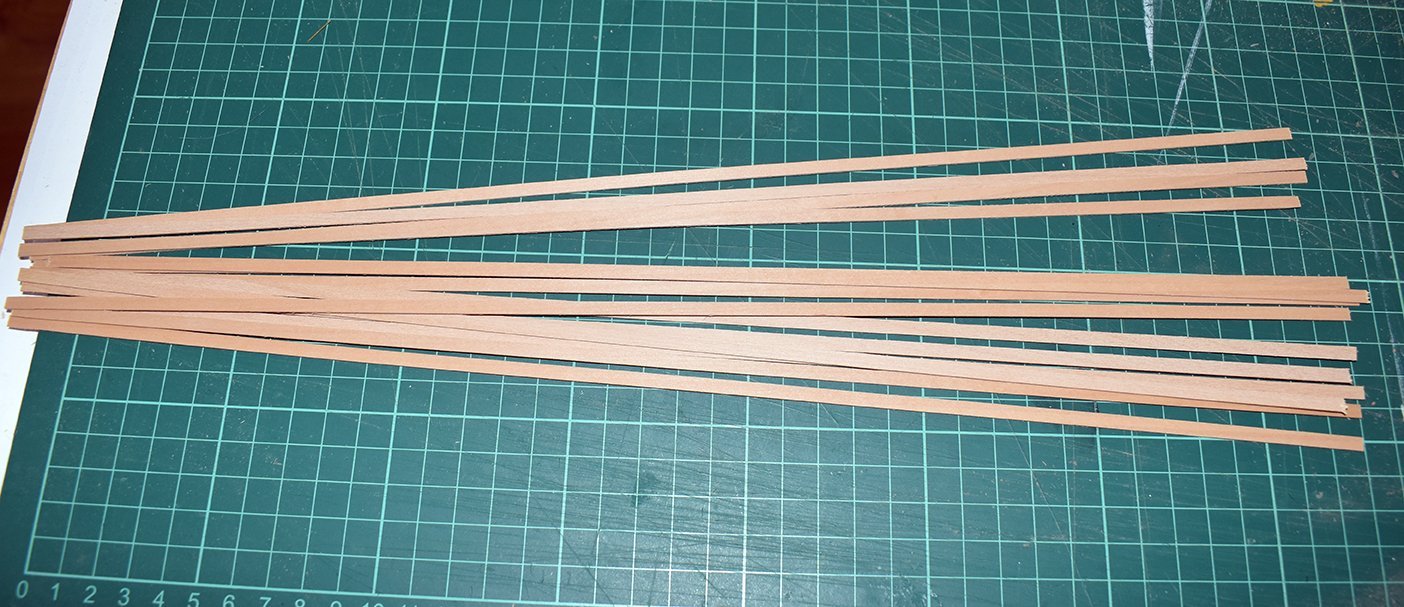
I will show you the problems I can have with maple veneer. This is a picture of a few examples of a whole batch I had to return. However, all of my supplier current stock is like this, which is absolutely no good to me. But as always with natural products, this is something I sometimes have to contend with. For Indy, I have attached a pic of the sample deck planking I received. It is called Red Alder. It is slightly darker than lime and consistent in colour/tone and grain fairly tight, which is important for deck planking - needs to be quite plain. I did contemplate Tanganyika, but realised that some batches are great, and some are God awful, so didn't really want to risk that. Same goes for maple strip, some batches could like like that scrap you see in the maple veneer pic.
-
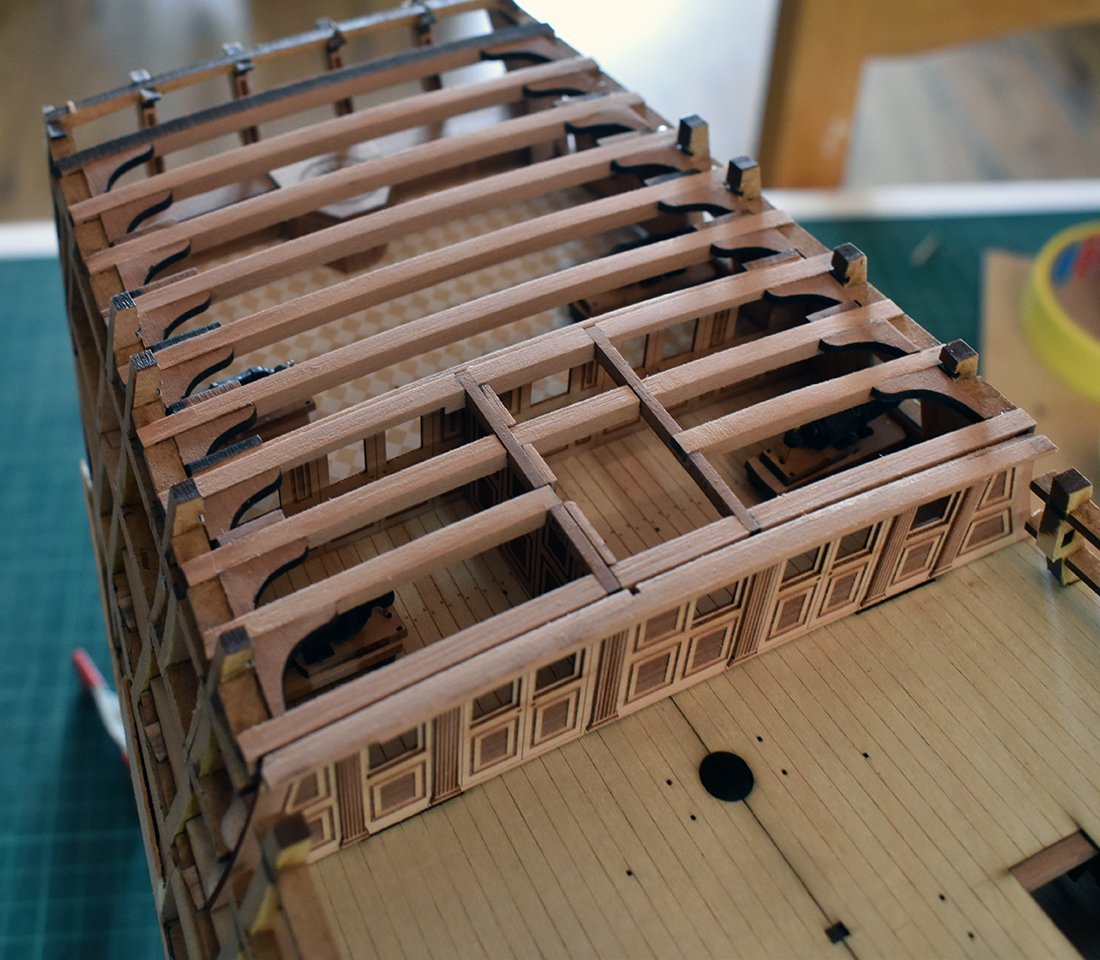
Cheers I had originally intended for the larger models to be not so parts heavy as Sphinx, more like the Amati Victory design, but I think scale deck beams are a step forward and, as the deck beams have absolutely no relation to the hull framing spacing, or kit bulkhead spacing, I could not go back to that relatively archaic method, not when a simple beam ledge pattern can in integrated in with the bulkheads to take the beams, making the beams perfectly aligned and spaced with the minimum of fuss. So I have already gone right past my original remit for this kit, but I do believe it's for the better. After Sphinx, anything less for even larger and more expensive kits would seem regressive.
-
There is no maple veneer laser etched decks in this kit, the decks you see are 0.8mm plywood sub decks (using 800x600mm size sheets), like any other normal kit, except I have lightly etched planking detail, in case some want to use as a guide when planking with the 1x4mm planking strips. the 1x4 planking strips will be standard in this kit, it does not have a laser etched maple veneer deck option for two reasons. The first is that I have to get this size made as a special order, and the price per sheet (one 800x600mm sheet per kit) is a lot, over double the cost of the standard 600x400mm sheets, coupled with the fact that I cannot use every one of the very expensive sheets, as some will have natural marks and colours too contrasting on the surface that will not look right on a finished deck. This is always a problem with the standard 600x400mm sizes, and I can only use around two thirds of each maple veneer order because of this. The second reason is time, each full Indy deck sheet would take over one hour each. It makes no economic sense, coupled with the fact that half the modellers who buy these kits go their own way anyway, and plank the deck. Indefatigable is designed with individual deck planking and hull planking in mind (as will all very large kits). I am using a maple veneer deck set for mine to simply speed up the development process. As for the cut outs on the ply sub decks, if you want to plank the whole deck without the optional openings, then just leave the retention tabs in place and plank over them. If the price to scrap ratio for the maple veneer was much better, I would use it, but unfortunately, this isn't the case.
-
Don't forget that there's quite a few cannon to be added to the quarterdeck (14) and forecastle (6), and they aren't small, so the openings have been made to take that into account
-
Although they will be completely hidden! Cannon carriages - These will be the same as I did for Victory. The front axles will have a tab which will locate into a slot on the gun deck. The barrels are added after. I didn't want to do this, and avoided this method, hoping to think up a solution. However, unlike Sphinx, this has some pretty heavy duty beams and a much wider gangway with boat beams under the gangway, not on top. The only real solution was to add the carriages and then barrels later, so no cap squares. The 12 pounder long chasers on the forecastle will have integrated cap squares, however, and the 18 x 42 pounder carronades have none anyway.. ETA - The kit will come with 1.5x6mm limewood for first planking, I used 1x5, so I could more easily check the overall run of the planking, all is fine...