HOLIDAY DONATION DRIVE - SUPPORT MSW - DO YOUR PART TO KEEP THIS GREAT FORUM GOING!
×


oakheart
-
Posts
518 -
Joined
-
Last visited
Content Type
Profiles
Forums
Gallery
Events
Everything posted by oakheart
-
 I have still got plenty of those to go.................. Your drawing show it really well, I was not clear before, but looking at the drawing it I am now. thanks.
 -
Hi Craig @iMustBeCrazy Not sure which you mean here? I have got it wrong or they are correct? I did make them as per the drawings ( yes I know they are in the wrong place 😞 ) and they are trapezoid in shape. It could be the angle of the photo. You can see it better in the photo in post #123 On a different topic Seeing it coming together I do think that the all pale wood is a bit too bland and needs some variation, so I need to do staining. as was discussed earlier. Tim
-
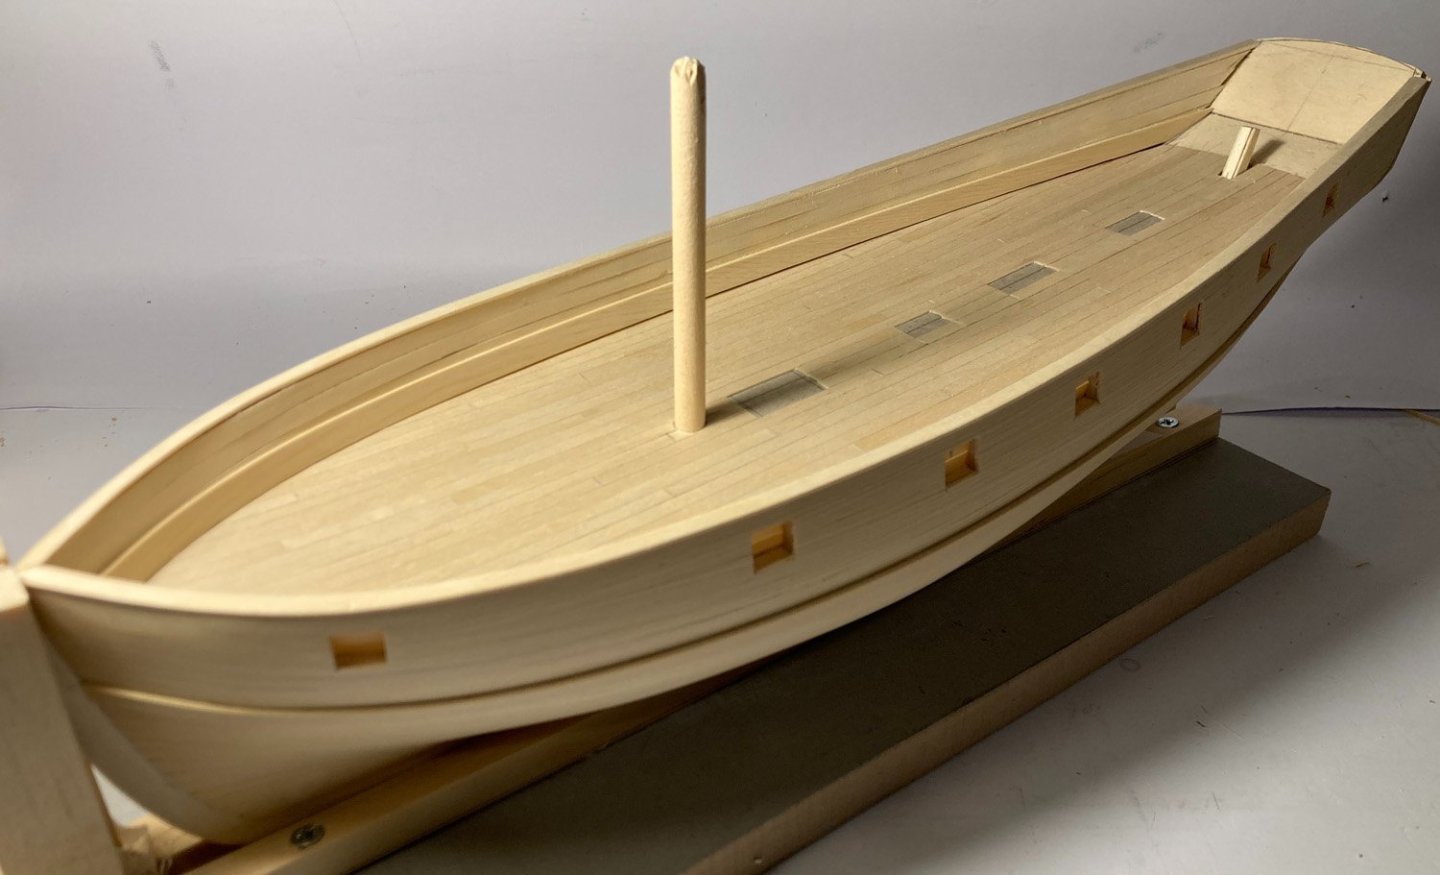
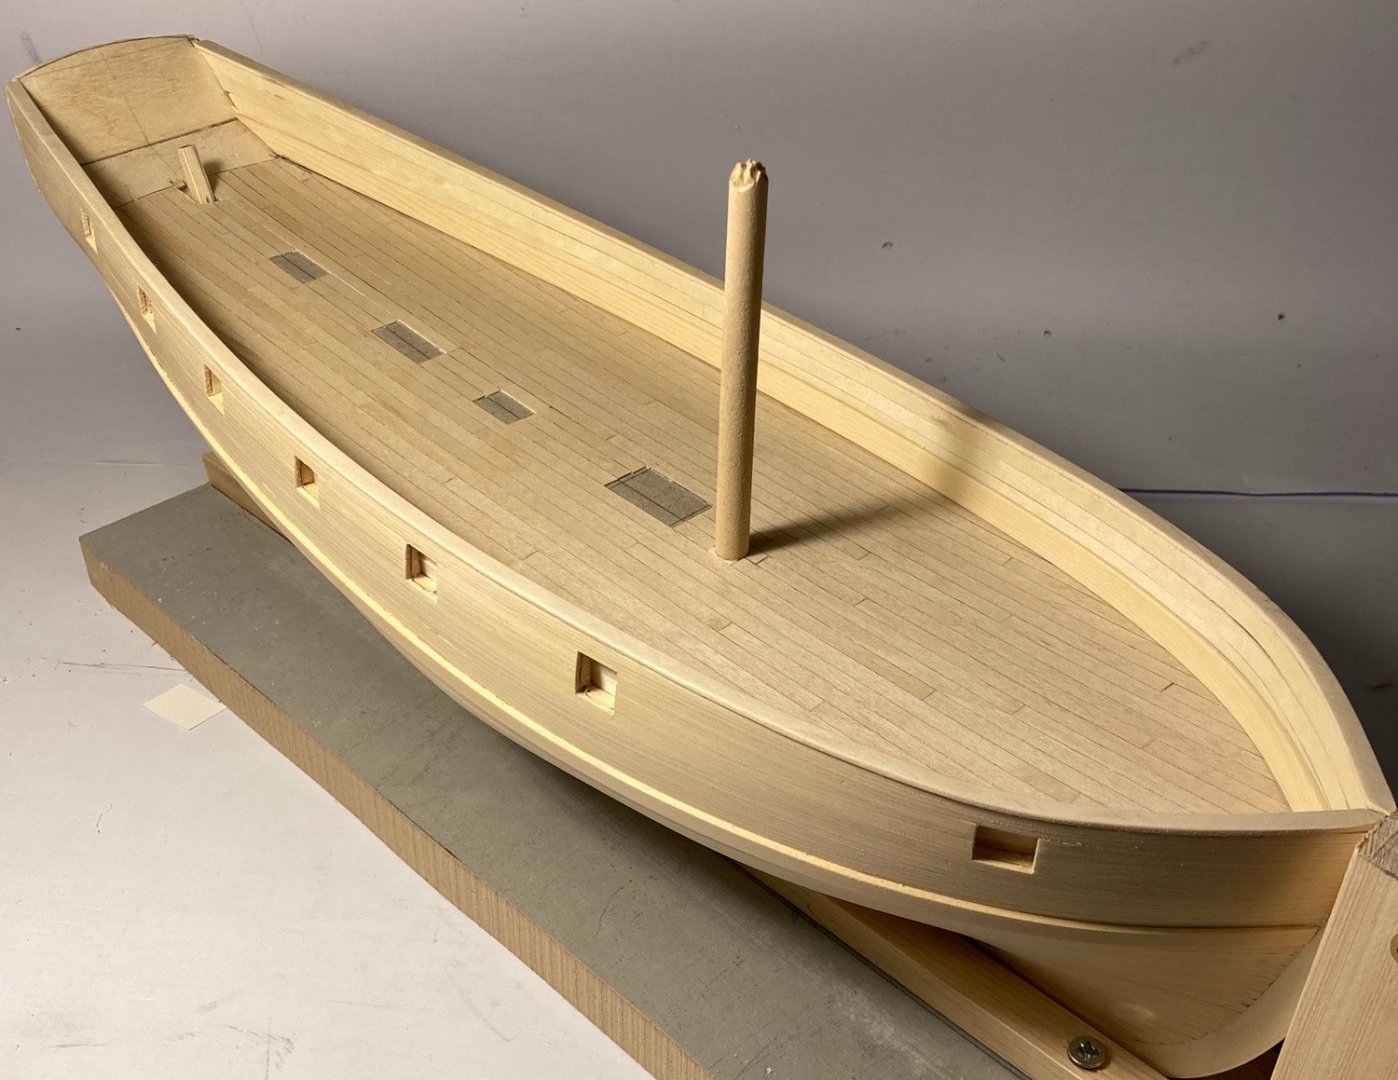
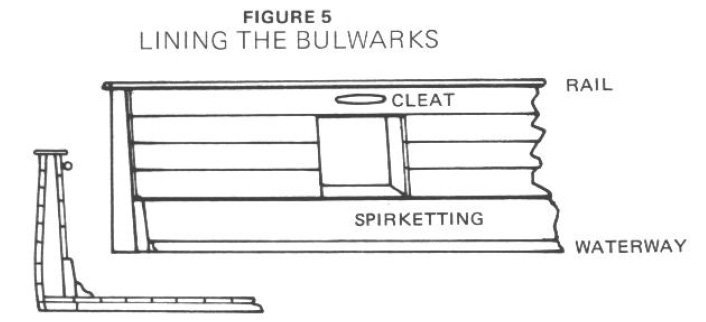
Managed to get some good work done over the last two days. working from Bills booklet Bulwarks lined, spirketting in place on both sides now I need to cut away the gun ports, line them and add the waterway fillet Tim
-
Log to PDF Tool
oakheart replied to VTHokiEE's topic in Using the MSW forum - **NO MODELING CONTENT IN THIS SUB-FORUM**
Hi VTH what a brilliant idea. so I downloaded the program ( GUI Version ) it runs and says its finished and the pdf has downloaded but there is no sign of the file? Even search of the whole machine does not turn it up? running Windows 10, chrome is installed in correct folder. any ideas? Tim -
Thanks @druxey and I will make sure to follow the line of planking. Tim
-
Thanks Mark @mtaylor, I happen to have purchased a copy from the famous Booths bookshop in Hay-on-Wye last summer. I often go there as it's only 40 mins down the road. I paid £5 which was a bargain looking at the prices online. Now I have some non fiction bedtime reading. Tim
-
Another thing I was not really aware of.
-
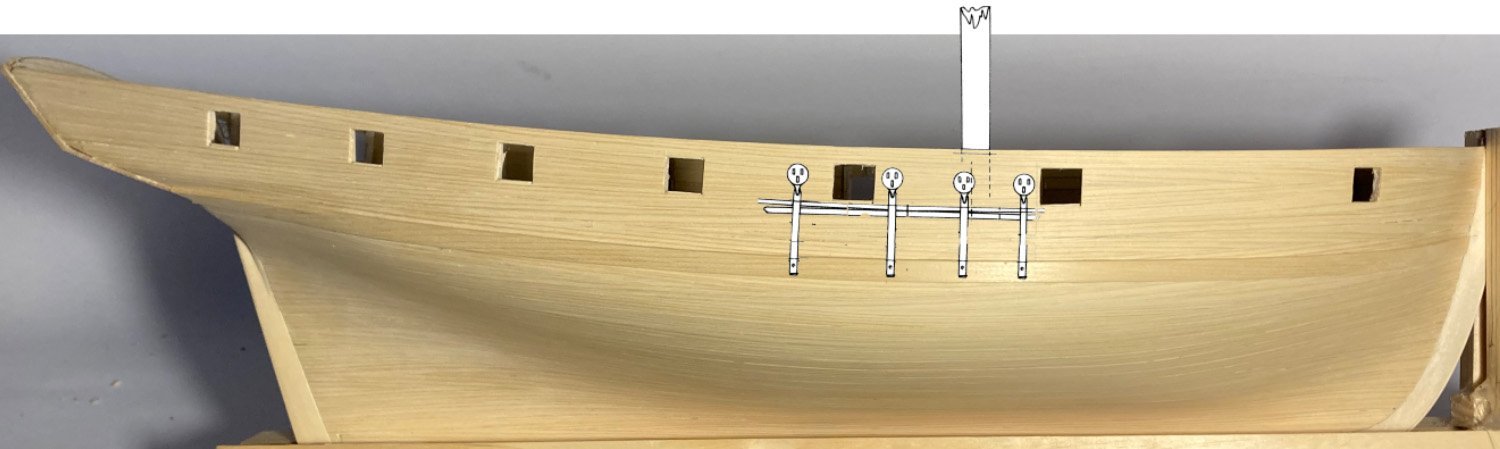
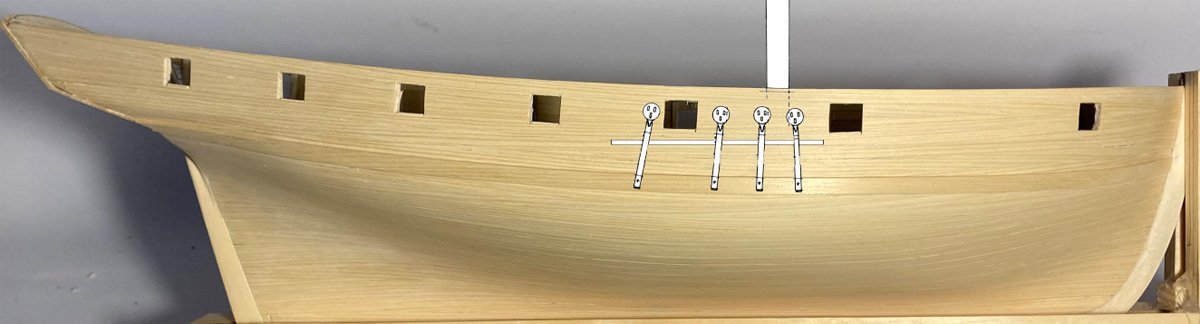
here is yet another revision of the chains mockup I have tried to incorporate the advice you have all given. Tim
-
Thanks Craig @iMustBeCrazy that as you say gives a clear example, what a fantastic resource RMG is. so now I have a couple of names, channel is the block of wood, chainplate is the metal strip. Is that correct? Now I am thinking I will make mine like this, with a planted strip on the outside. Tim
-
Talking about a lot to learn. The drawings in post #105 and #114 show the deadeye straps passing though the board attached to the hull, other drawings show it on the outside? OK now I think I need to do some more research on the names for the parts of what I believe are called the "channel" or "Chains" I found this webpage useful even though it seems aimed at a more general audience http://www.ageofsail.net/aostermi.asp Is there a good reference I can refer too? here comes yet another rabbit hole......................if I don't get too sidetracked I might get some ship building done. Tim
-
thanks @druxey I will amend the mockup, there is so much to learn and keep track of, I have learned so much on this forum. Tim
-
Thanks Craig @iMustBeCrazy, that will need to be worked out, but they should swivel on the bolt so I can adjust after they are fitted? Tim
-
Thanks @Thunder that encourages me to keep going.
-
Thanks for the advice @druxey, @Thunder and @iMustBeCrazy. have done a new profile view and think I will be able to make it work. This model will not represent any particular cutter but should work visually. I am not sure now if the straps ( don't know what their real name is ) should bolt into the wale? Tim

-
I know the feeling. I am struggling with a scratch build of a cutter in wood, can't decide whether to rig or not. You have inspired me with your excellent build, I will have to get and build this kit. I need to watch the movies again to get in the mood. Tim
-
Thanks Craig Using the side view helps to visualise how it might work. I will have another go at sorting it out in the morning. Tim
-
Thanks druxey So would it be better to move the shrouds back like this? Tim

-
Thanks Thunder, I can see how that could work. I have just been working up some drawings in photoshop. The rigging would take me well outside my comfort zone at this time. Lets see how I feel when I have completed the hull. Tim
-
Off to test this out. I have plenty of time here as we are hemmed in by floods all round, can't get out of the village by road, I could do a 2 mile walk across the fields. People are saying I should have built a full sized ship................. Tim
-
Hi Craig That is a nice idea. I did do some tests earlier using a water based stain which worked well on the cedar. But I am terrified that it will all go horribly wrong and I will end up with patchy tide marks all over the beautifully smooth hull. Someone suggested spraying the stain using a hand spray bottle, not sure if this would work I think more testing is required. Tim
-
Thunder, welcome onboard, glad you like the build so far, it was your original build that inspired me to start this model. Thanks for taking a look and for some very welcome advice. You are right I will have to move everything to match the revised gun ports. I had been considering doing a sort of "admiralty" style with a stub mast and bowsprit, so no rigging, it's above my current pay grade anyway. Could I get away with just moving the things you mention. The anchor will also need moving, that was a costly ( in effort ) mistake I made .............. Tim
-
Thanks for the encouragement. I seem to have difficulty even following the ones I do have 🙂 Next jobs, glue down the deck, line the bulwarks, fit the spirketting and waterway, then frame the gunports. I intend to leave it all natural wood so there will be no hiding any ( more ) mistakes.................. Tim
-
Have a look on this website, they have loads of info. http://www.lathes.co.uk/atlas/ Also as others have said search YouTube someone is bound to have fixed one up already Tim
-
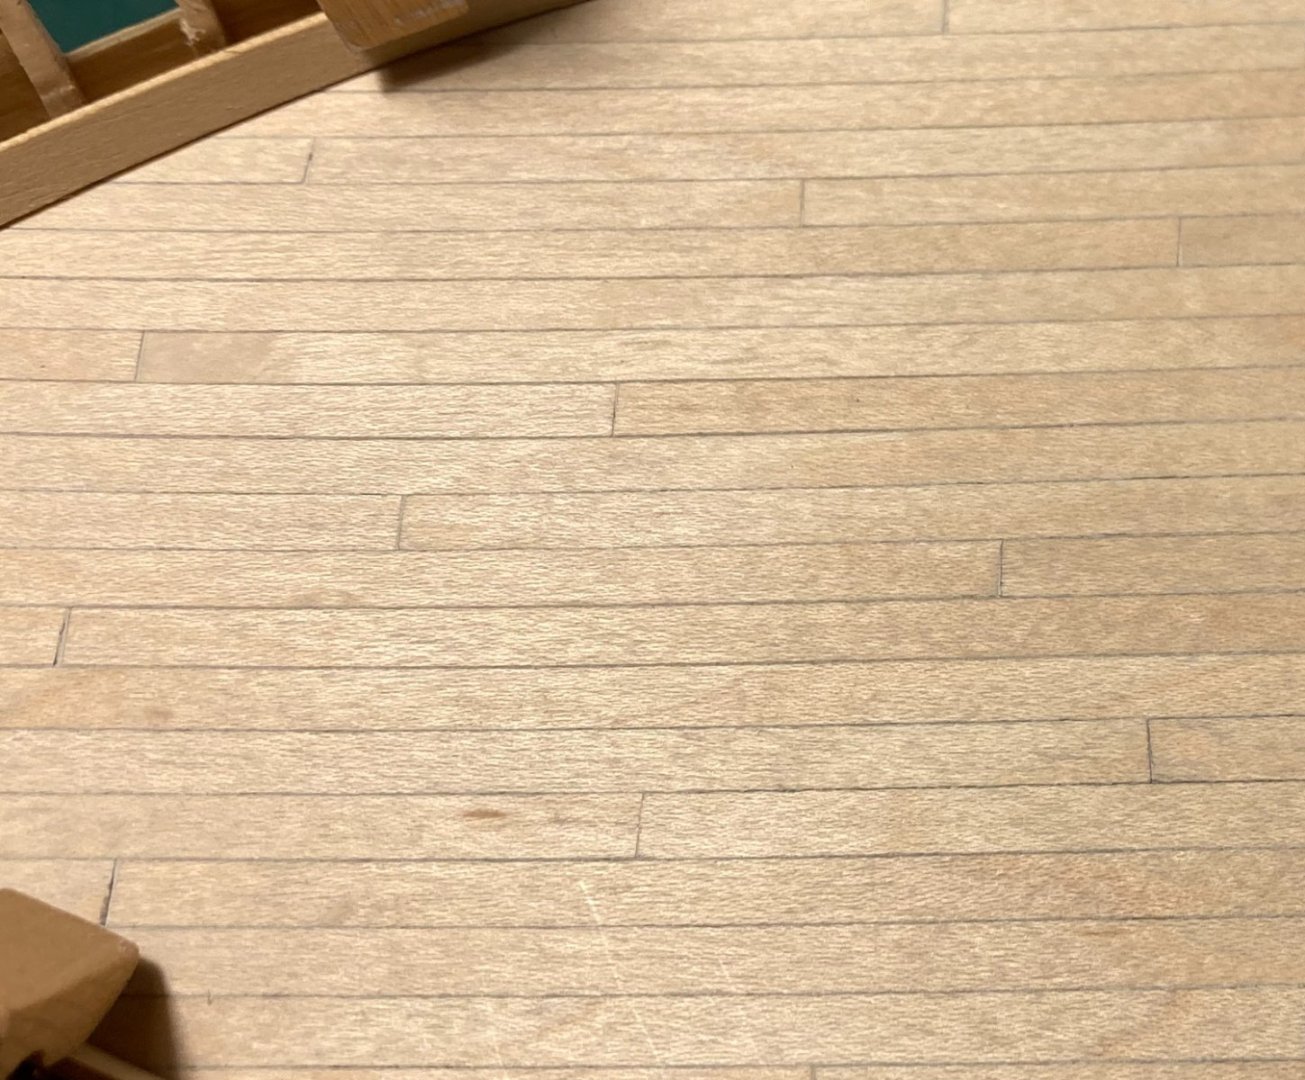
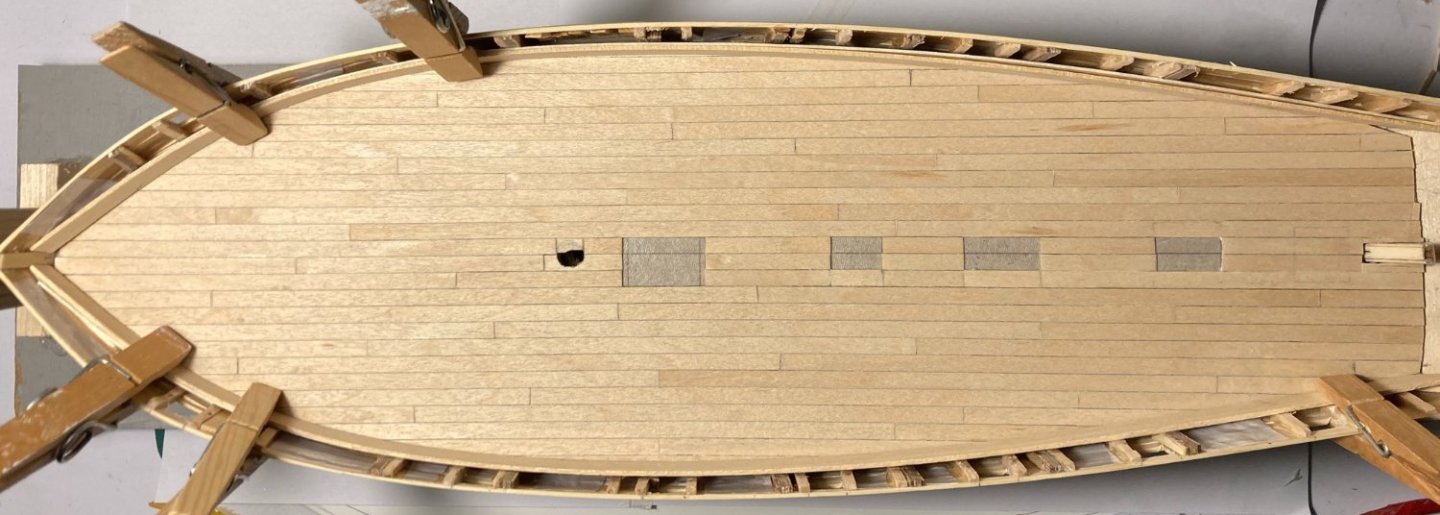
thanks for the compliment @kgstakes. Here it is with blemish removed, a bit more work than with photoshop, but worth doing. a quick coat of WOP ( water based Tamiya matt, thinned). looks much crisper now. width of planks is 5mm which at 1:48 equates to about 9.5 inches. the gap at the stern top right, will be covered by the pantry or the W.C. can't remember which goes on which side. Tim
-
Got quite a bit done yesterday, deck planked with 5mm white maple from Mantua Models. I think it looks good, there are a couple of planks I may replace. I was not taking notice, the brown blemish shows now I have sanded it down. here is a close up used the soft pencil for the caulking, it was glued to 1mm thick grey card, I have left it loose for the time so I can try other decking. what does everyone think of the colour and width? Tim