HOLIDAY DONATION DRIVE - SUPPORT MSW - DO YOUR PART TO KEEP THIS GREAT FORUM GOING!
×


oakheart
-
Posts
518 -
Joined
-
Last visited
Content Type
Profiles
Forums
Gallery
Events
Everything posted by oakheart
-
 Good luck with your build, I thought my flea market Unicorn Hull was bad, but this takes the biscuit 🙂 Tim
 -
My reserved wood is Alaskan yellow Cedar, which I am using on the cutter Speedy to get used to it, at this moment I have a love/hate relationship with it. It bends well, cuts well, but is really soft and dents very easily. I have never used Huon Pine, what's it like? Tim
-
🙂 I sometimes dribble these days, that's not good either. Tim
-
Slow but sure is the best way, so I am told.... I still tend to go at it too fast. Looks really good. What woods came with the kit? Tim
-
Did you turn the barrel ? How is your planking going? Tim
-
Good tip, Don't know about the spit, depends if I am drinking tea or beer, maybe a jar of distilled water might be better. Sanding stick looks good, I have some sandpaper glued to a dowel for the lower curved part of the hull which seems to be working. Tim
-
Thanks Craig, I like that idea. But as I am going to stain the hull, I would worry about glue getting on the front surface of the planks. I need to do a test and see what happens if I do. Tim
-
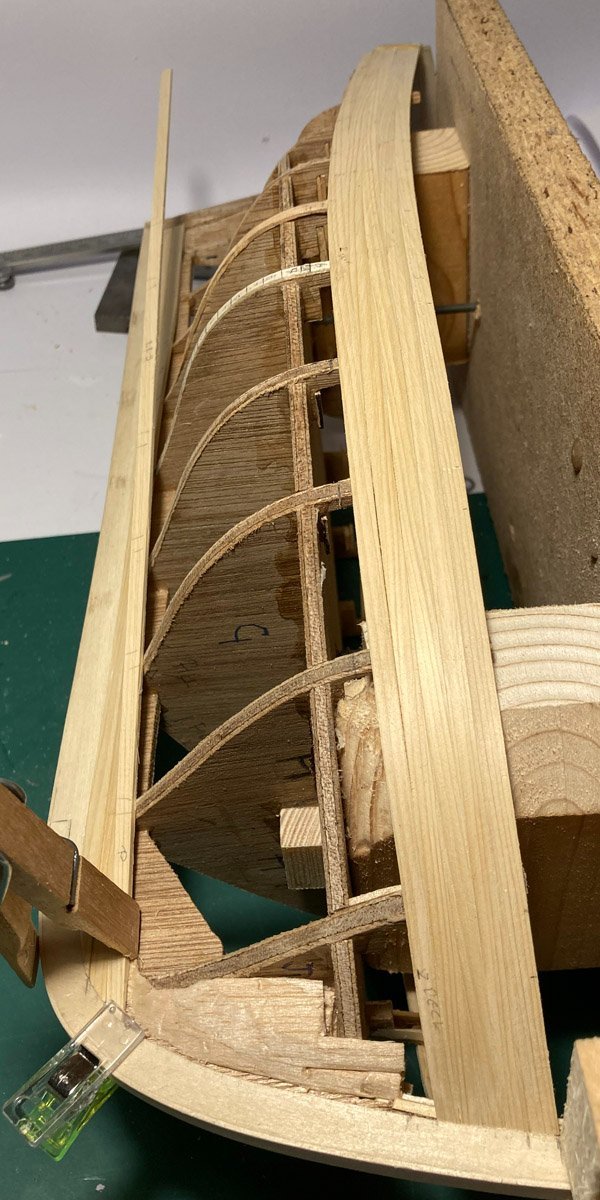
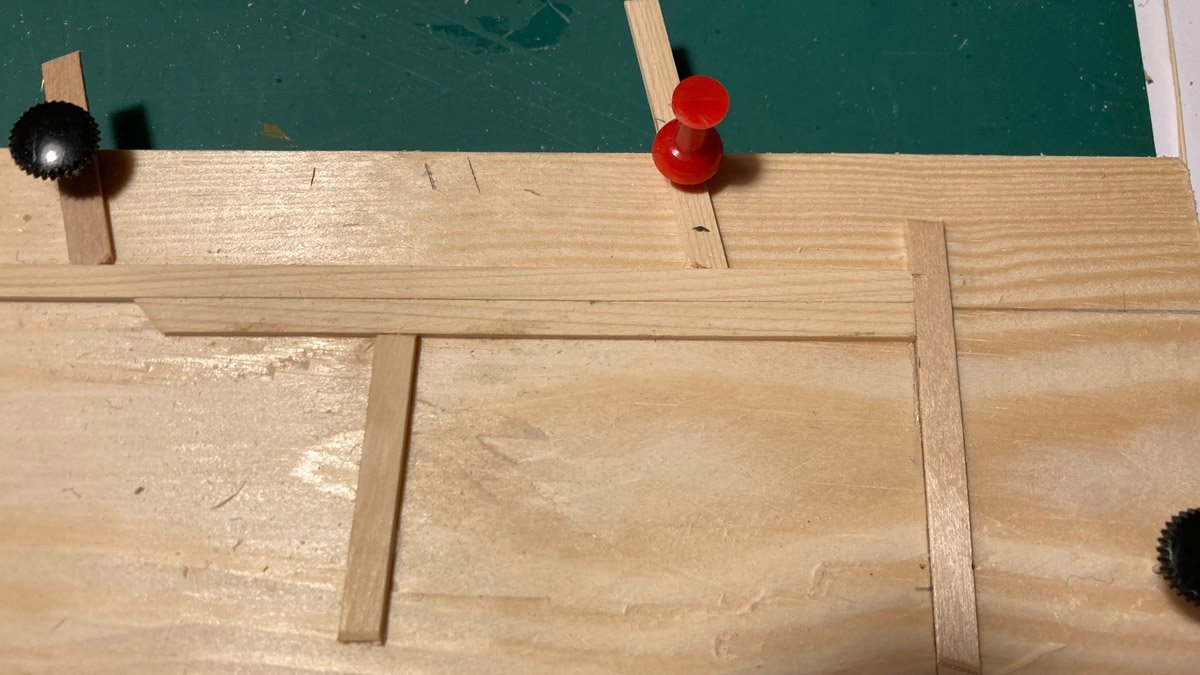
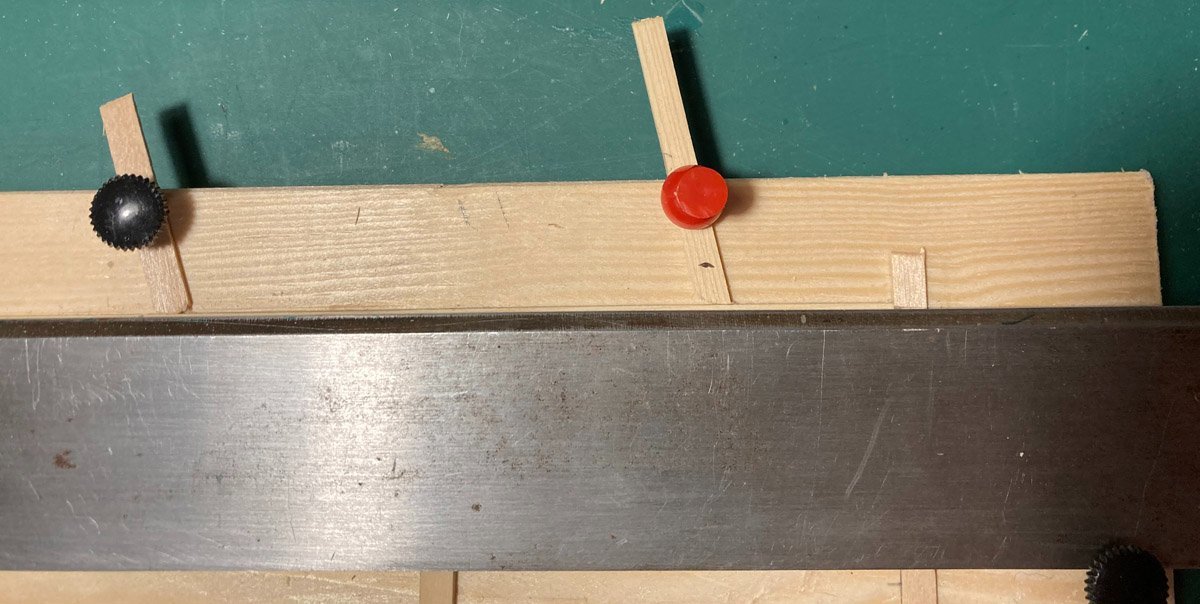
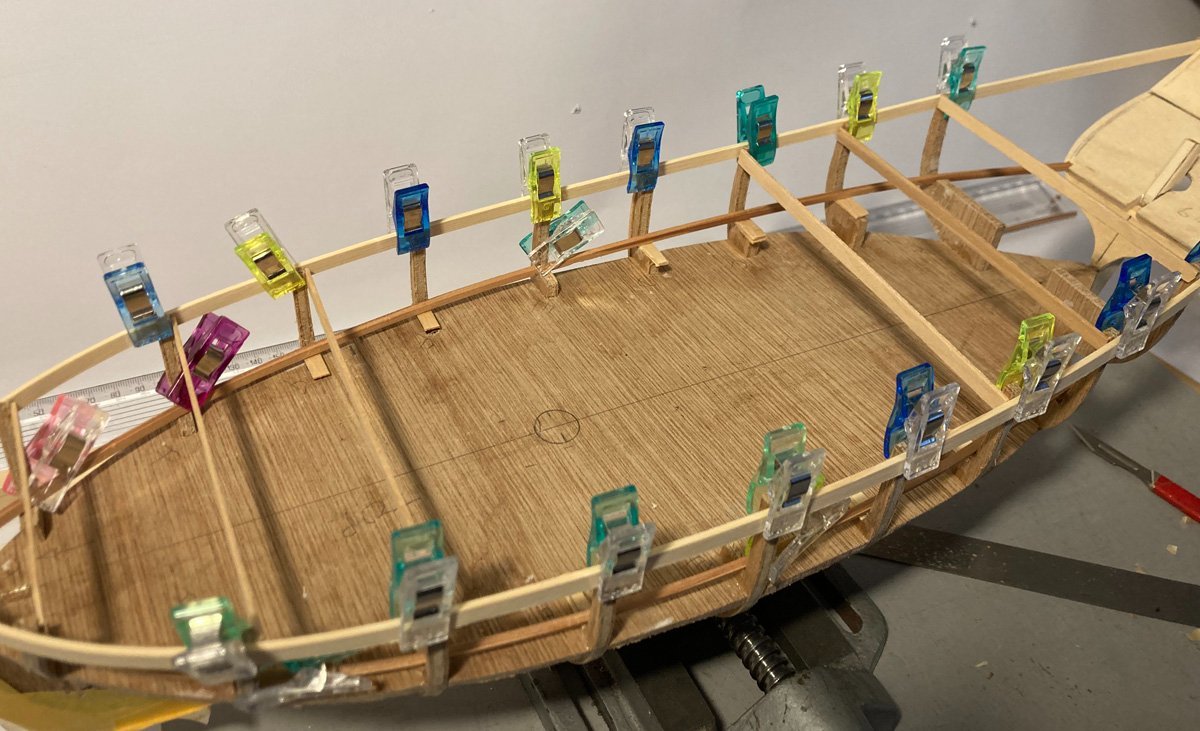
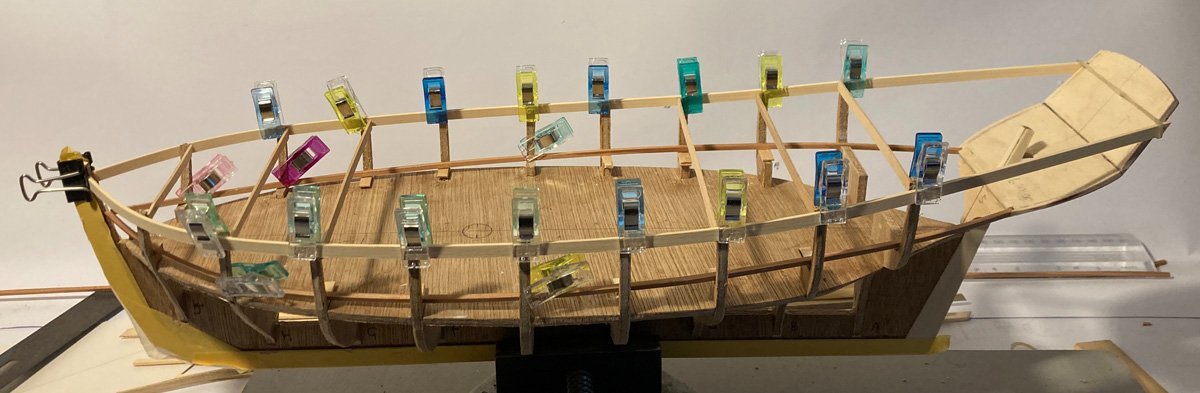
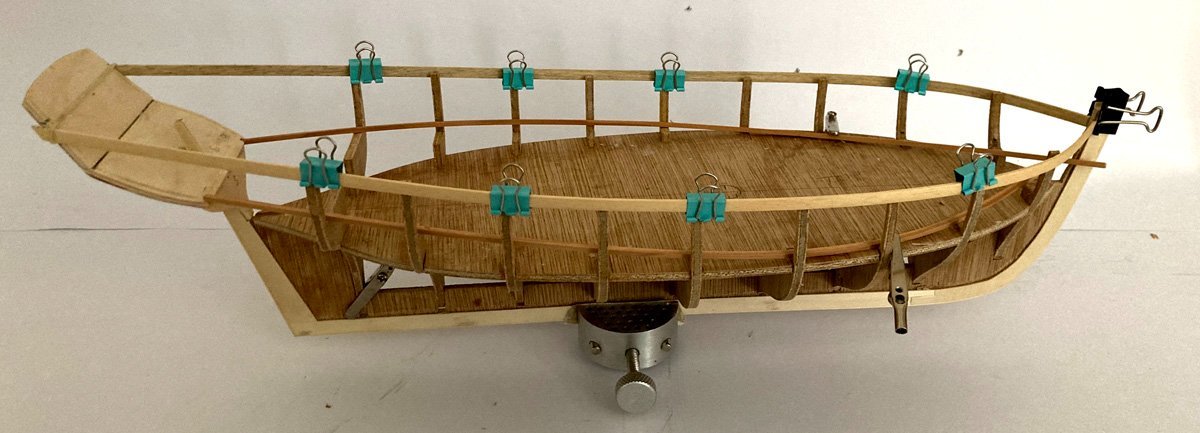
Could not resist, I started sanding the planking already done. Using 50 grit sandpaper on a small wood block. But I have a problem with the 1.5mm thick planks flexing, while I am sanding the hull fair the planks are bending slightly in between bulkheads, I am not even pressing very hard. This means that the plank on either side gets sanded a little bit more and becomes thinner. This is sort of difficult to photograph, hope you get the an idea of what's happening. On my next build I will use more bulkheads, meanwhile I have glued a small strip behind the planks to stop the flexing. Has anyone else had this problem? What have others done about it? Tim
-
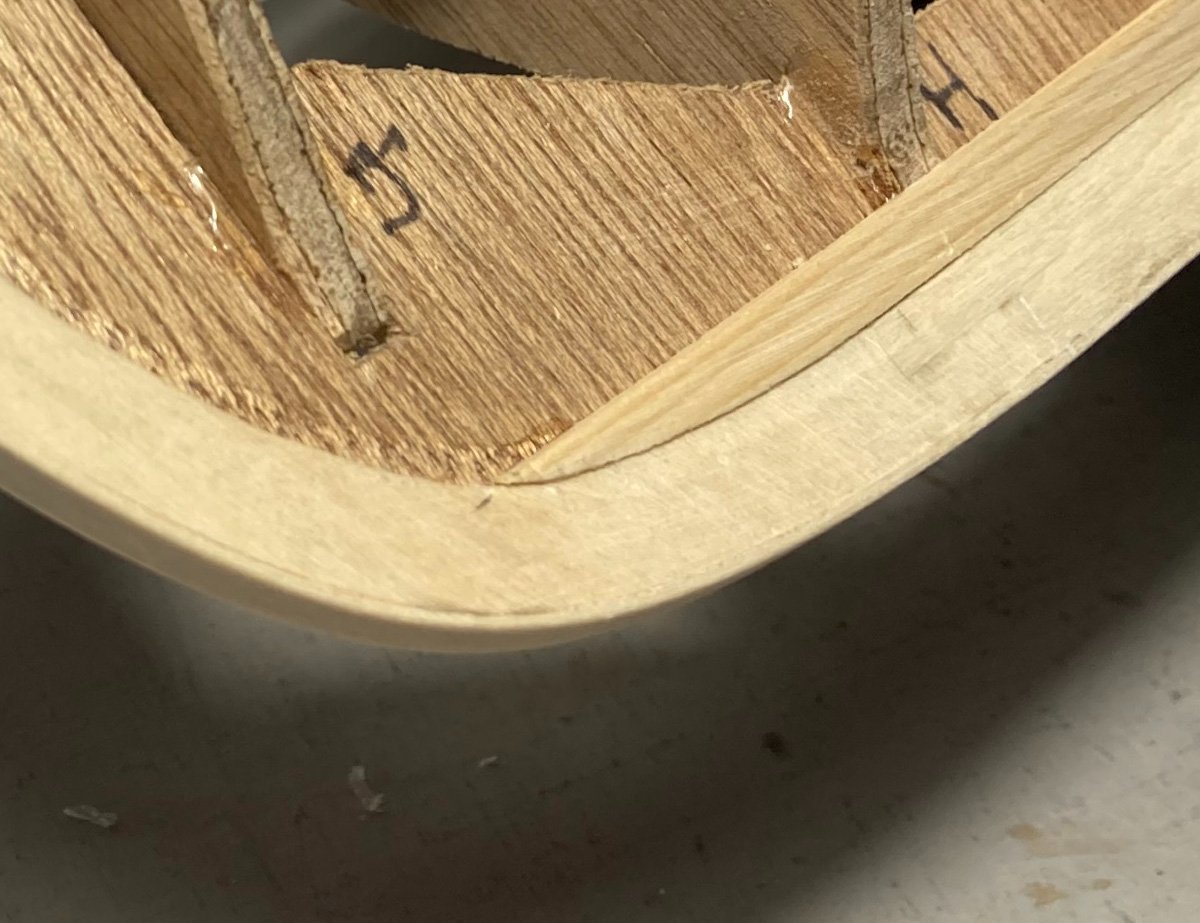
Thanks for the compliment Craig, and everyone for the likes. I have only just noticed that gap between 4 and 5, things show more in photos than in real life. Not sure if I will take it off and fettle it or not. Tim
-
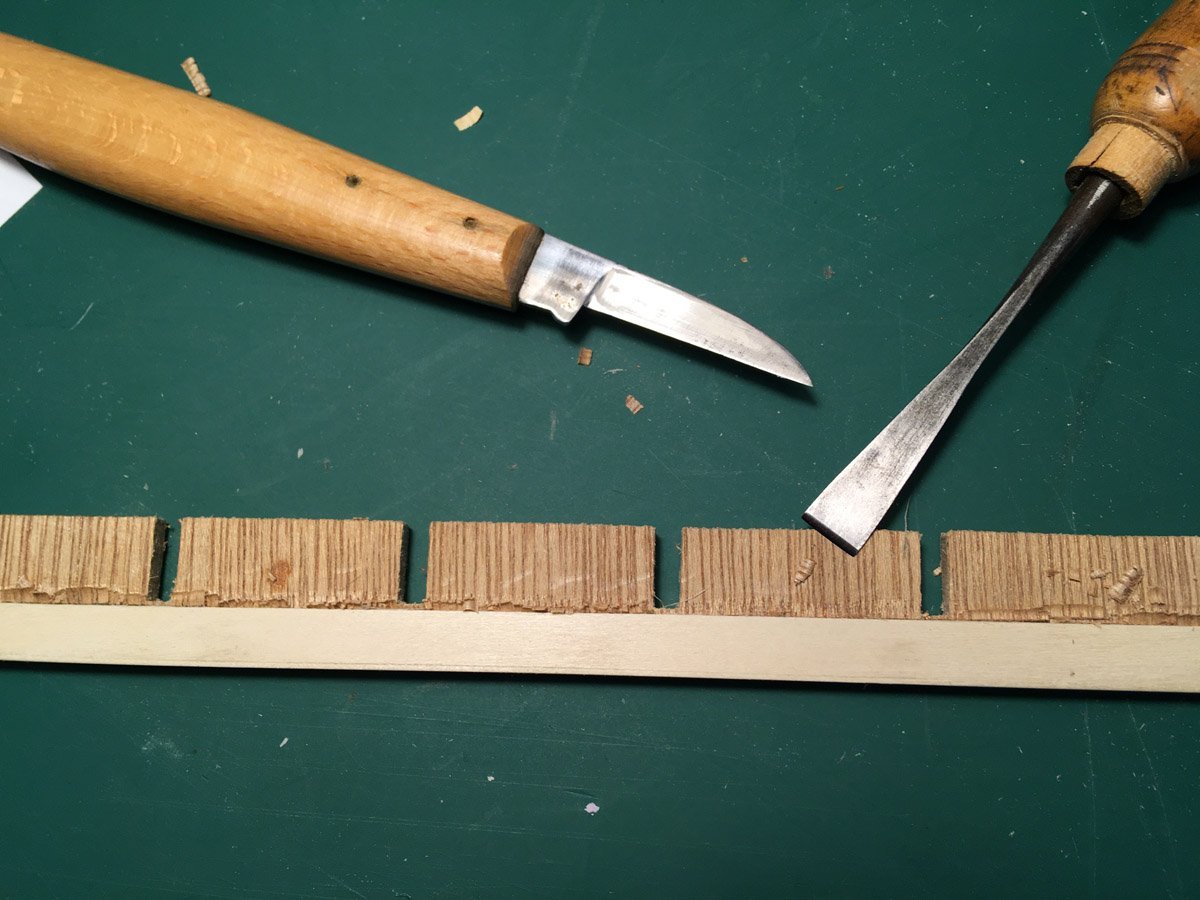
The planking continues. I made a simple jig to aid cutting the planks into the correct taper. here it is with the steel straight edge ready to cut the taper A few planks make it begin to look like a cutter. the shape begins to appear. close up of the bow. Doing the Bounty launch helped me with understanding planking. I want to stain the Alaskan Yellow Cedar to look like the old models in the RMG collection, so I have been testing a water based wood dye. Pleased with the result, also found I could not coat with brush on acrylic as the stain runs, so used a rattle can from Halfords. Tim


-
Now, I know you really are crazy. Tim
-
So here I am back, it's been a long summer, so much to do................. Managed to get a bit done on the Speedy. Garboard plank in place on both sides. while I am plodding away building this 1:48 scale model some people build full size Cutters. Here is the real thing Luke Powell built the 'Pellew' https://www.workingsail.co.uk/pellew?itemId=fihssy98q3833wr2jbjrsb17q7mzt6 loads of videos of it on youtube. and some action video of other Cutters , really shows what it must have been like sailing these craft. anyway, the sun is shining and I have more garden work to do. See you soon Tim


-
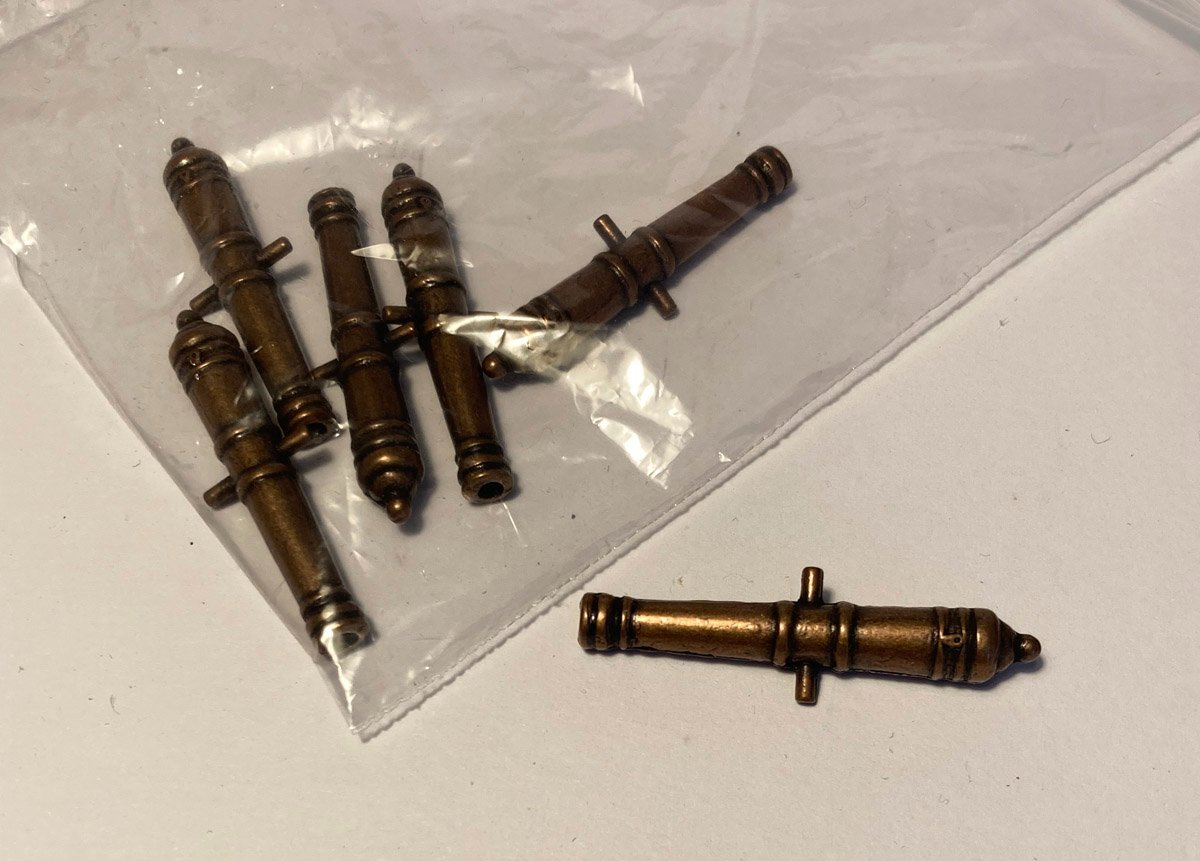
Thanks Allan For this build I have just gone with whatever Bill Shoulders has shown on his plans. I have no idea if they are accurate or not. I will try and find somewhere in the UK where I can get things 3D resin printed, I have tried cannons at this scale on my FDM printer and they do not look good. Tim
-
You are right, I need to : KISS As the plywood is a bit suspect the blocks will be better. Just some 4x2 ( measure it first ) blocks on the false deck would do the job. thanks Craig Tim
-
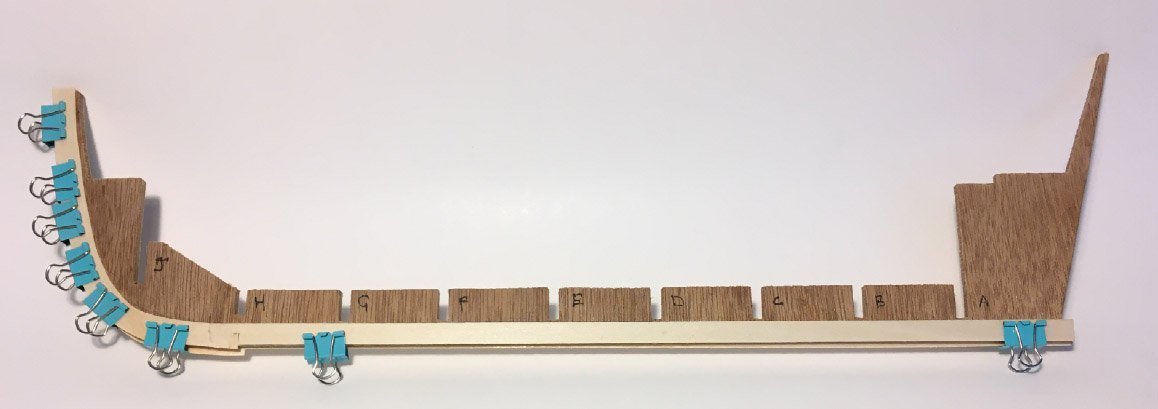
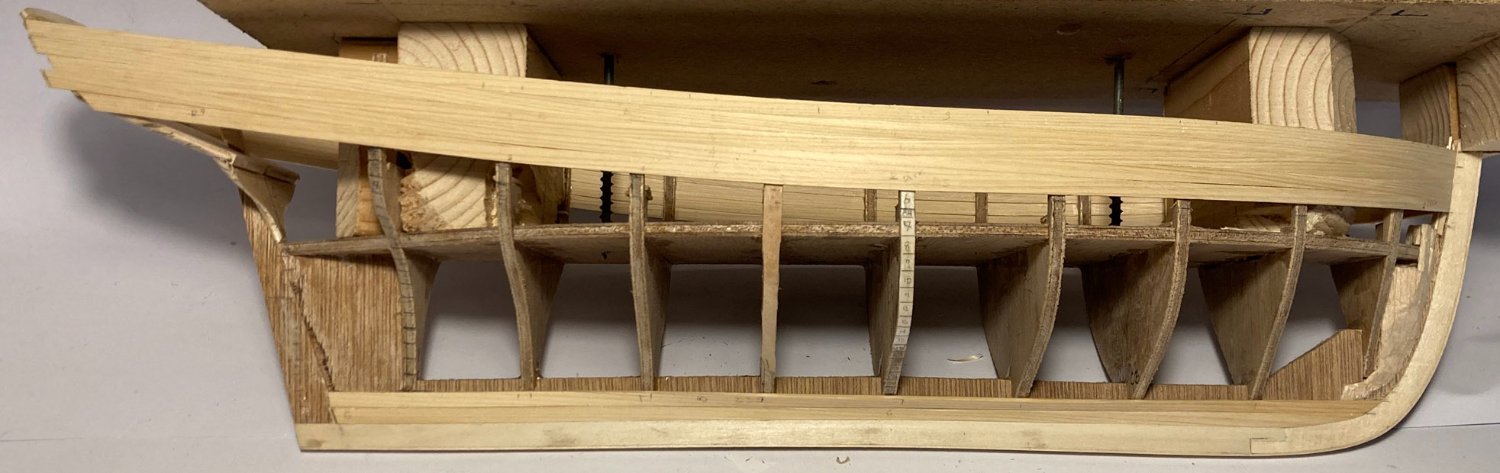
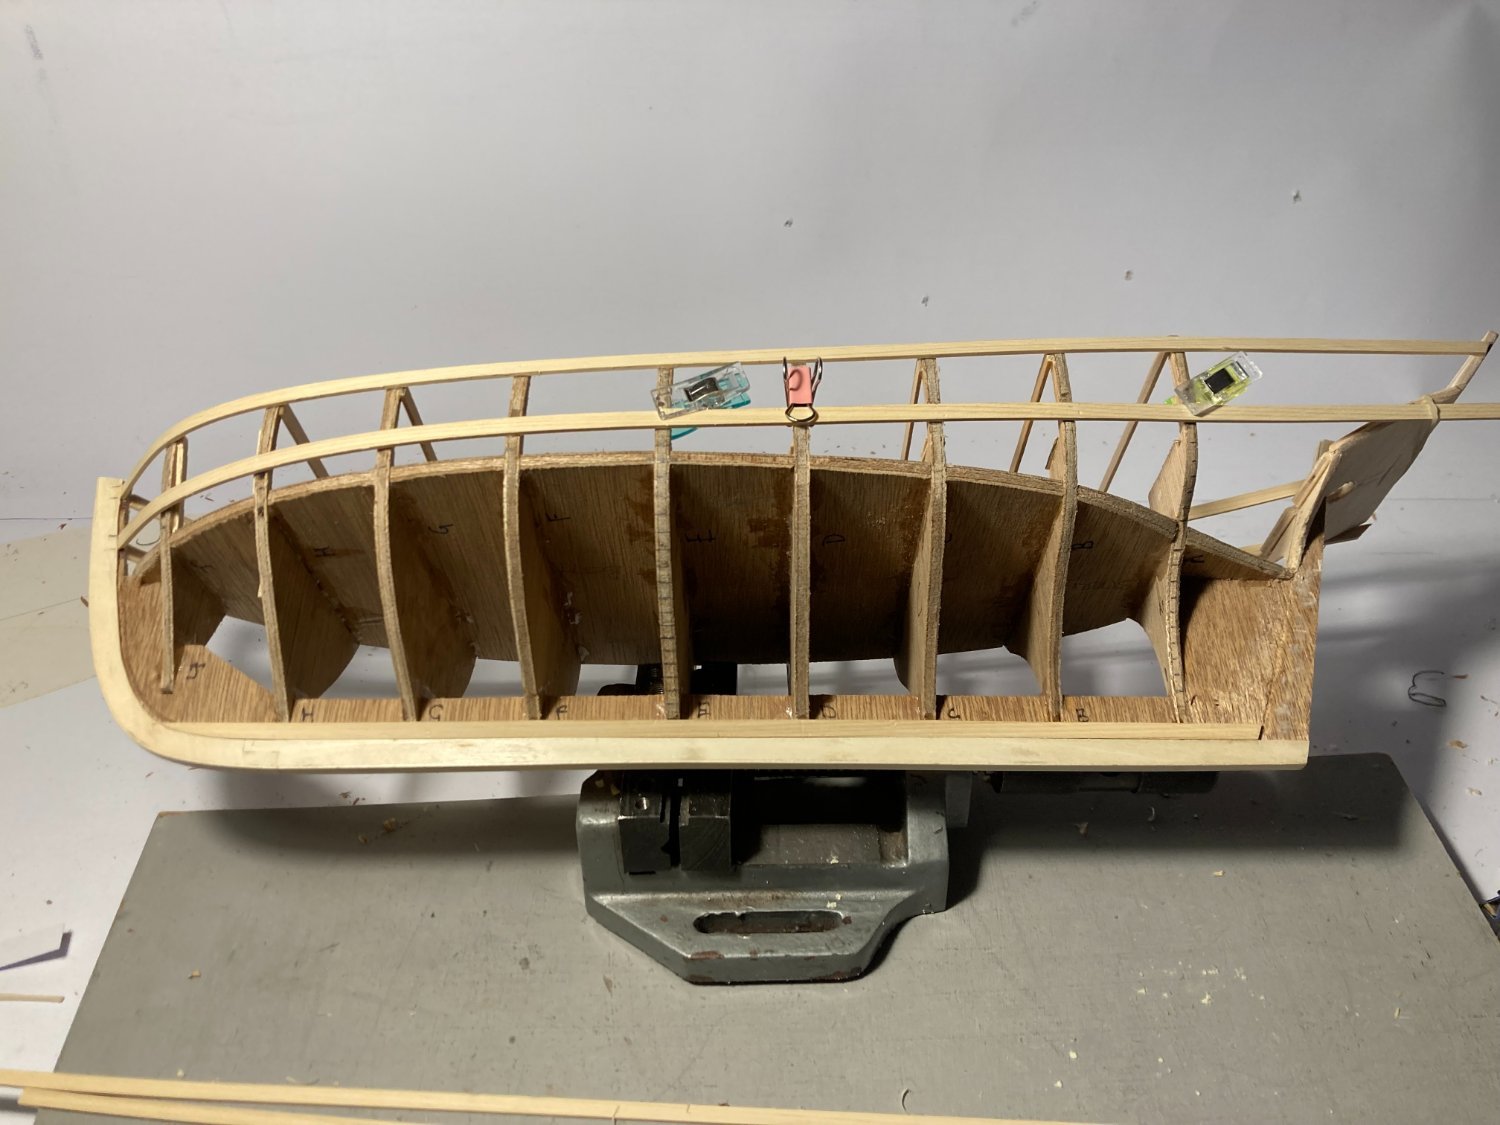
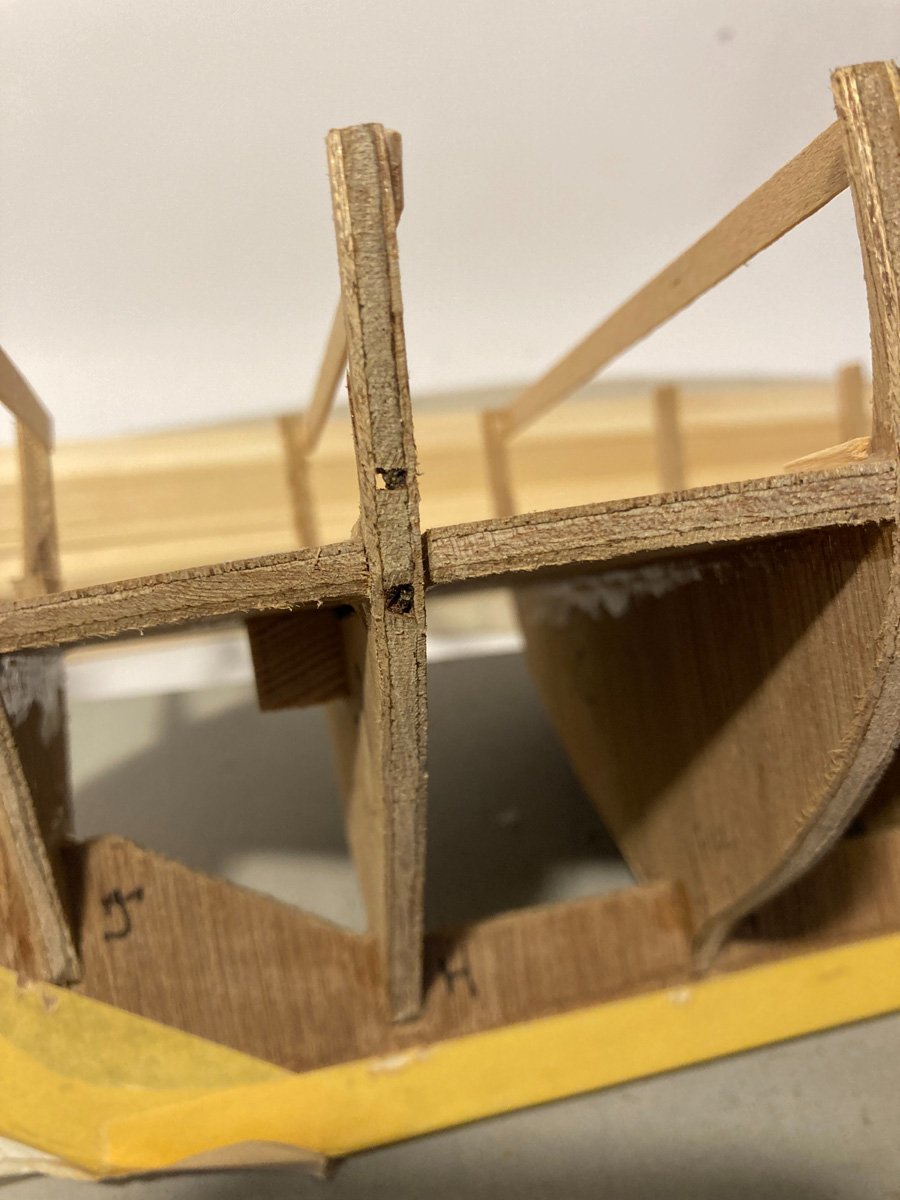
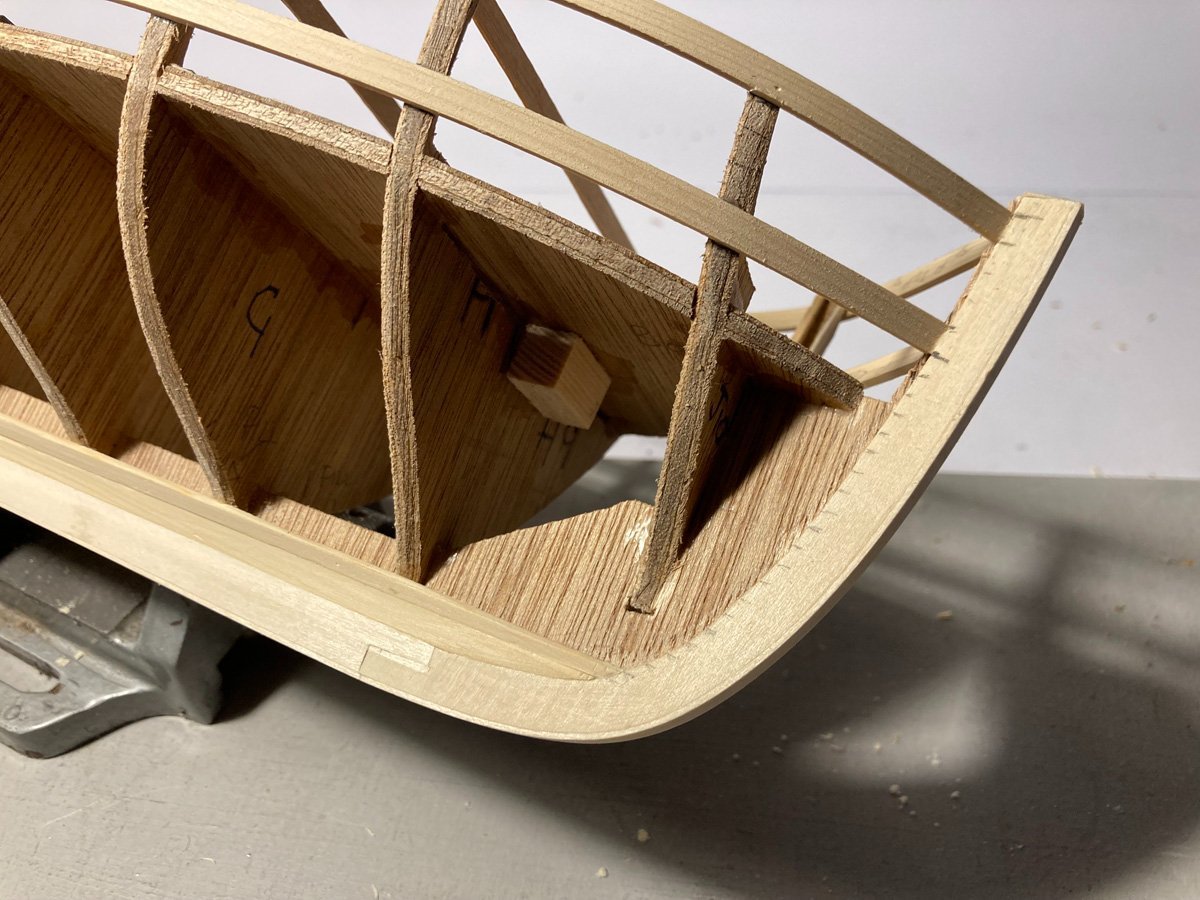
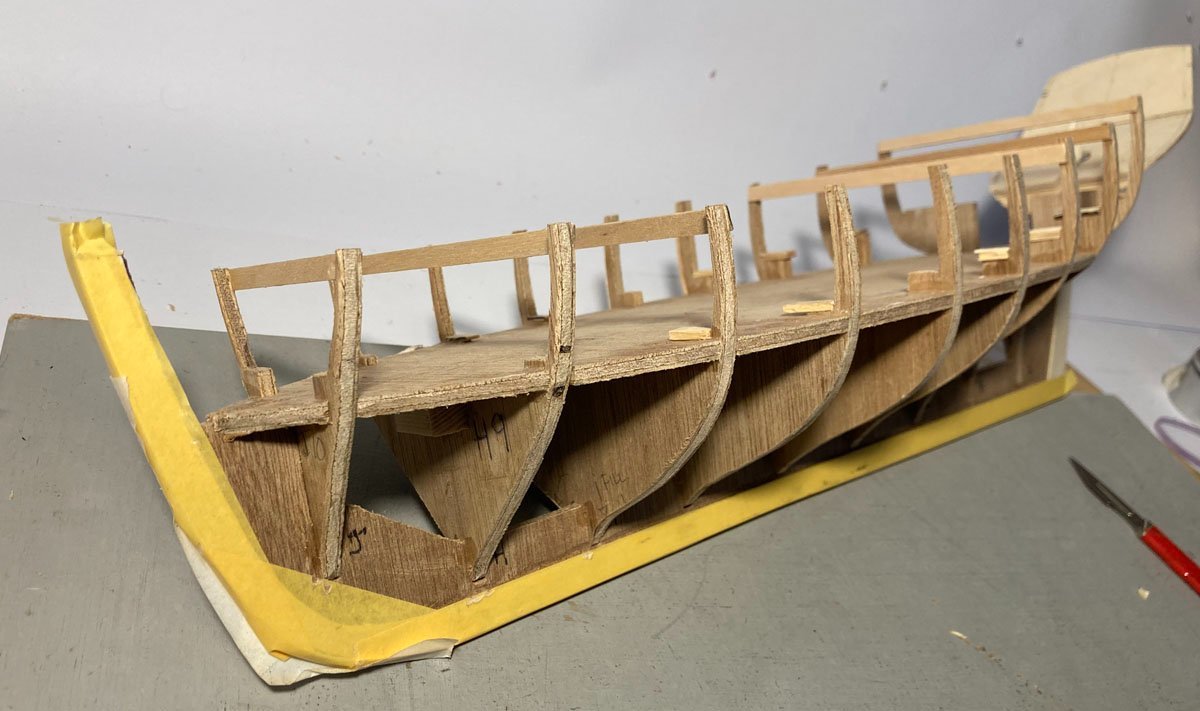
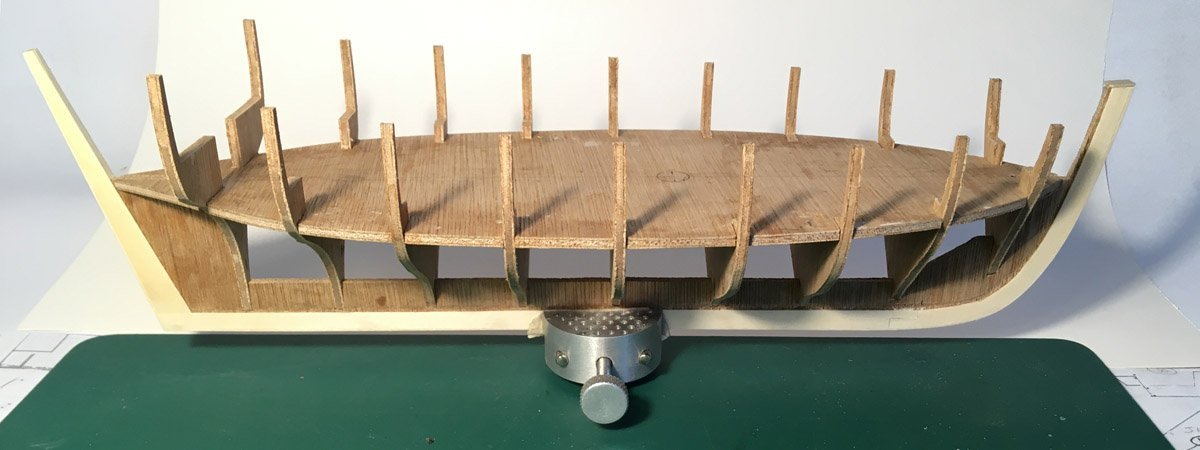
Managed to get some done to the hull over the last few days. Masked up the keel ready for fairing the bulkheads. Noticed a fault ( hole ) in the plywood made a quick and dirty repair I had to add some temporary beams to strengthen the bulkhead tops while I was sanding. they will be removed after I have done the planking. the planks now sit nicely on the bulkheads I now need to make a jig to hold the hull upside down while I do the planking. Off to do some research Tim

-
Now I know what my new build will be. Tim
-
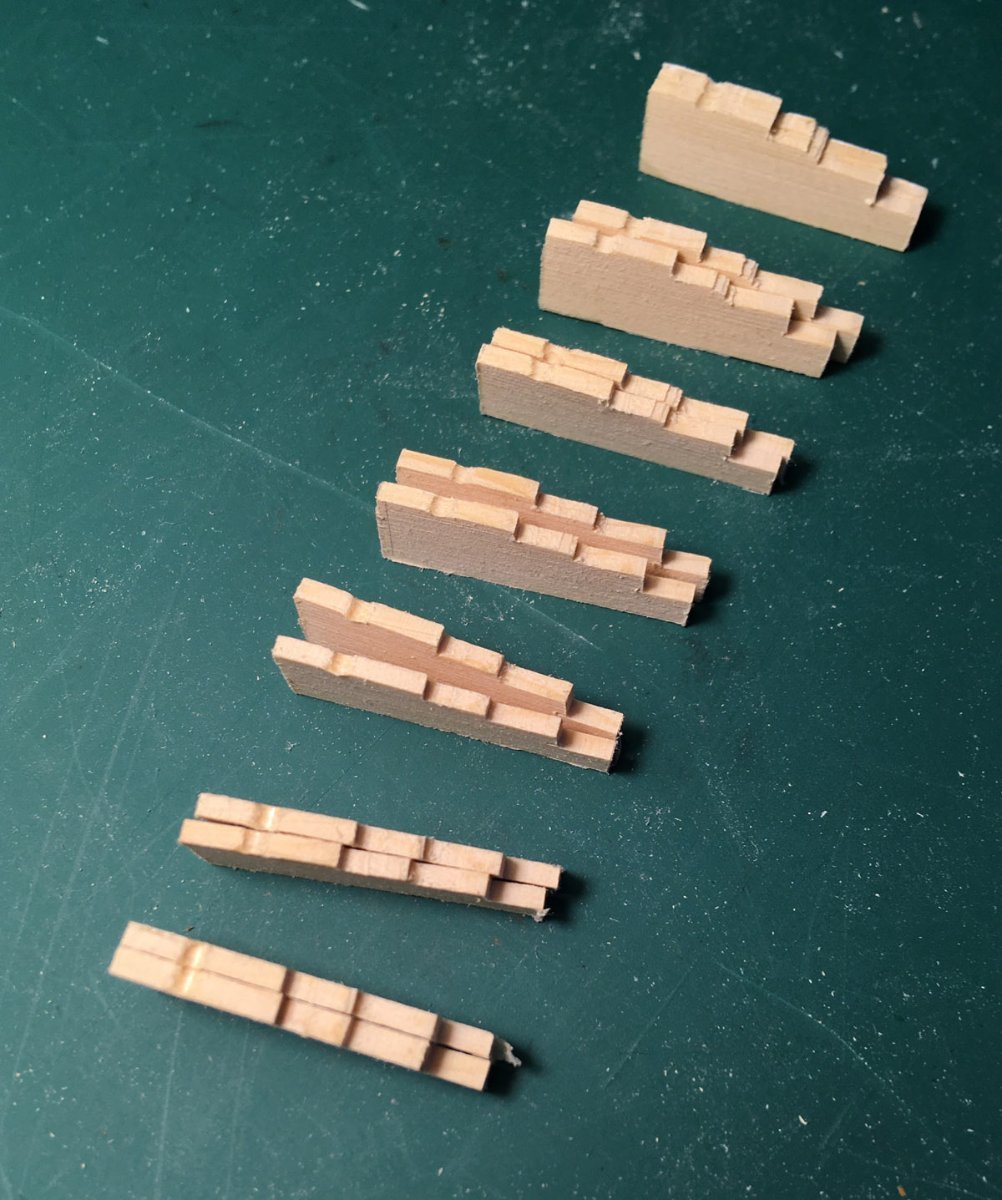
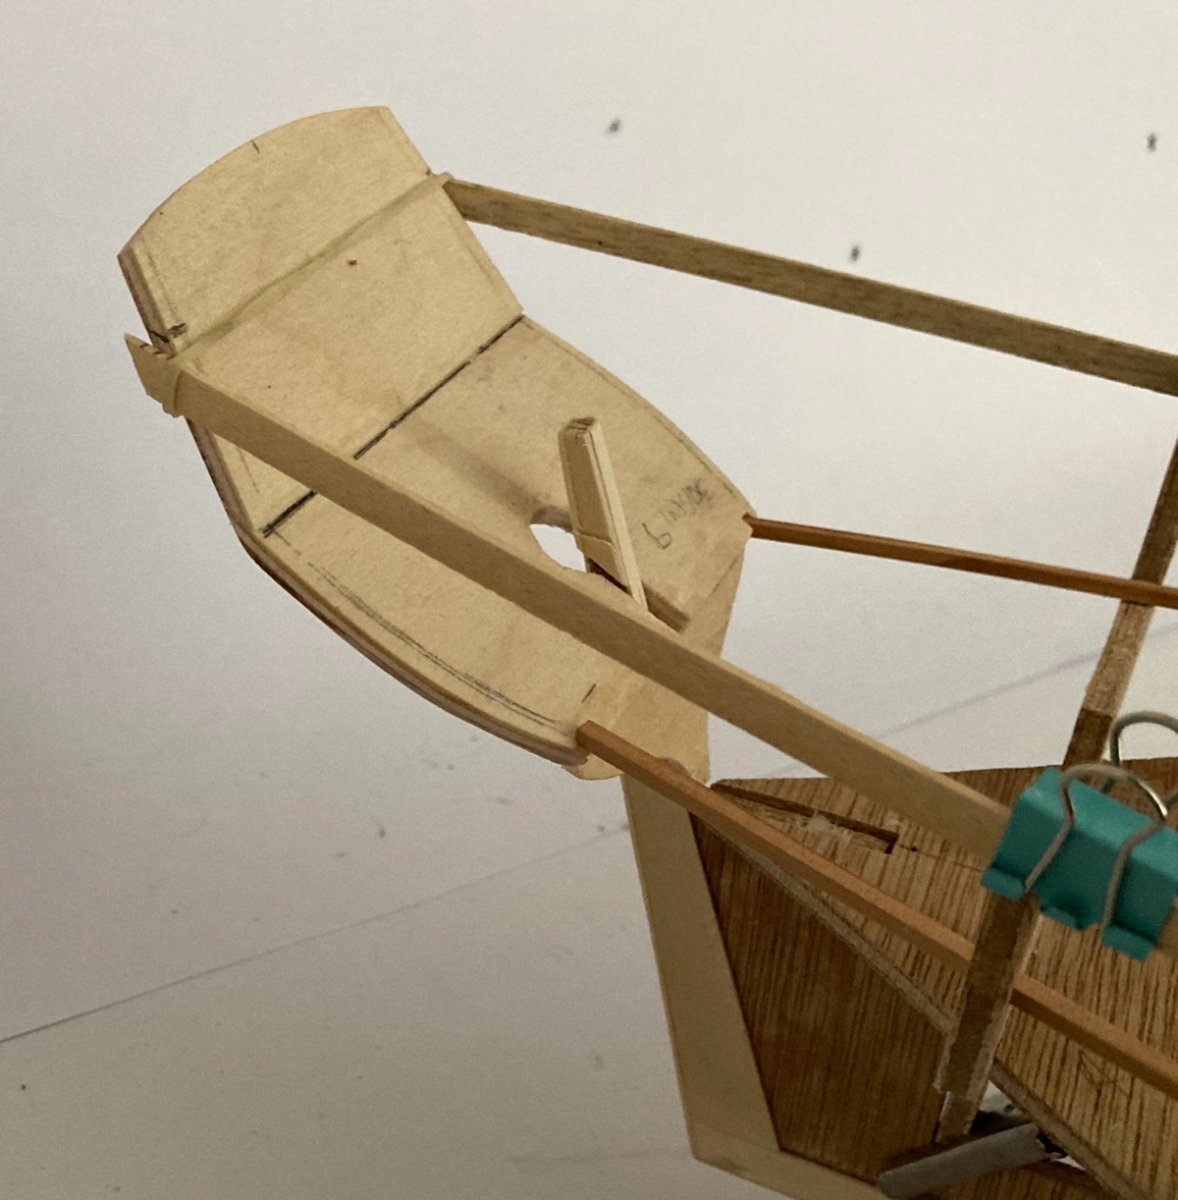
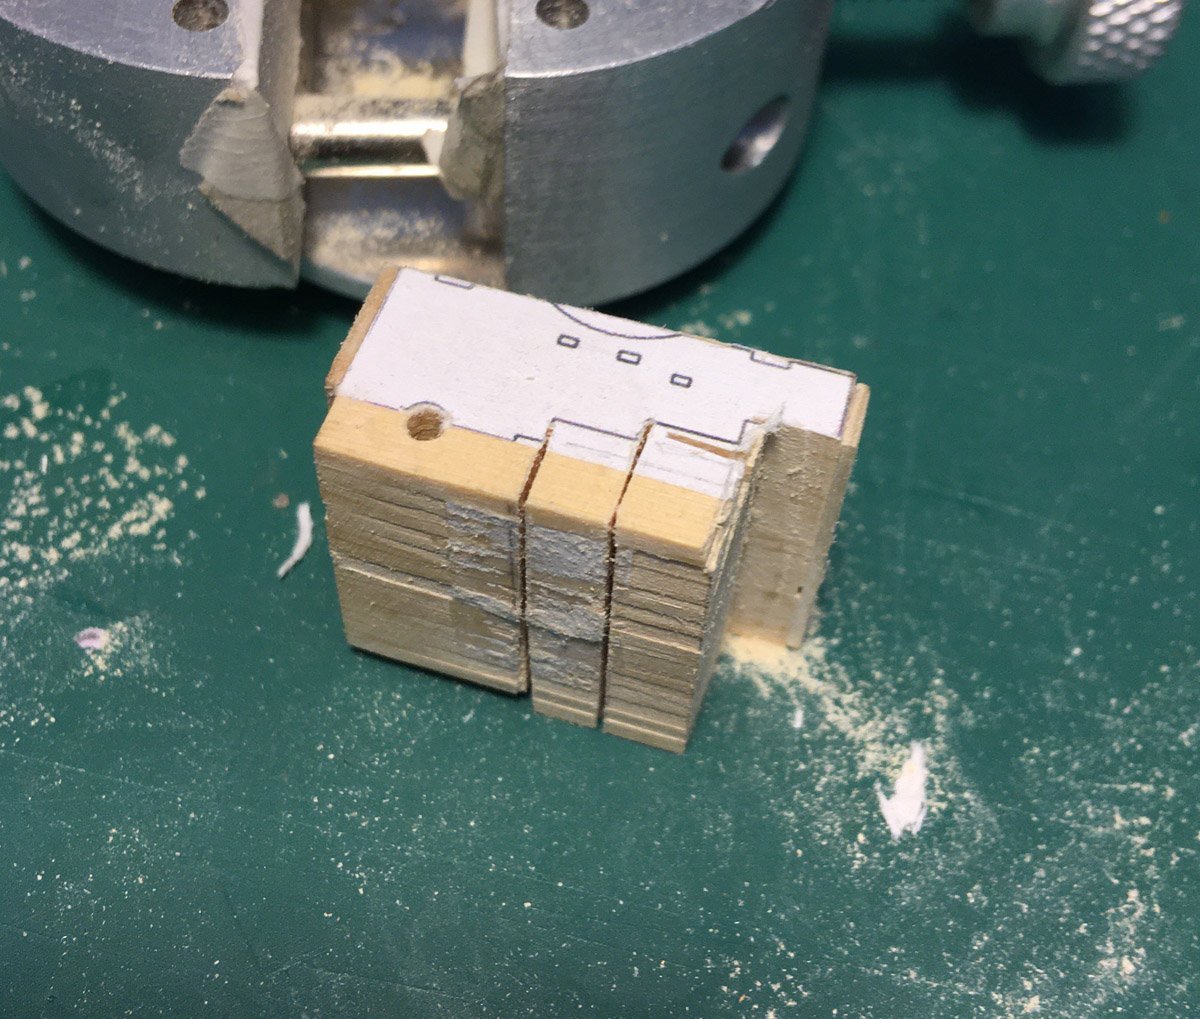
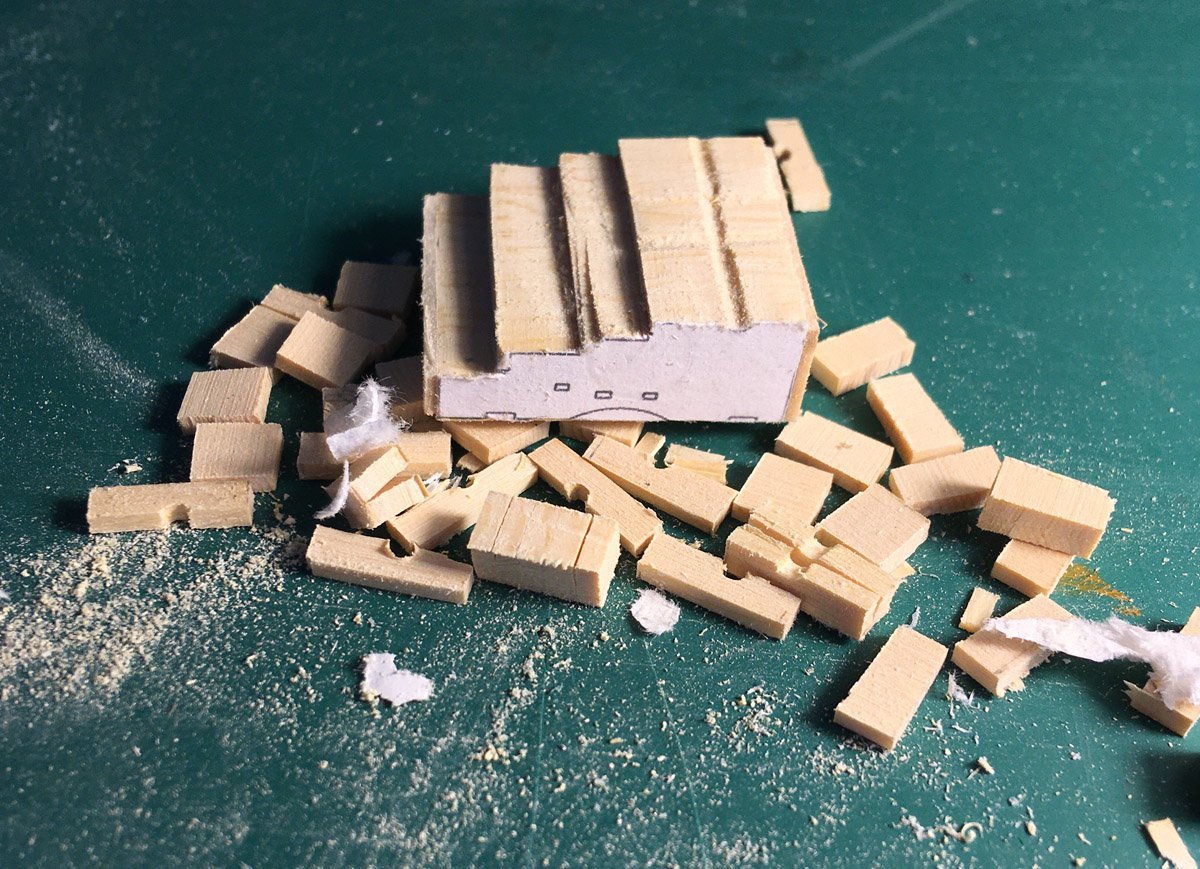
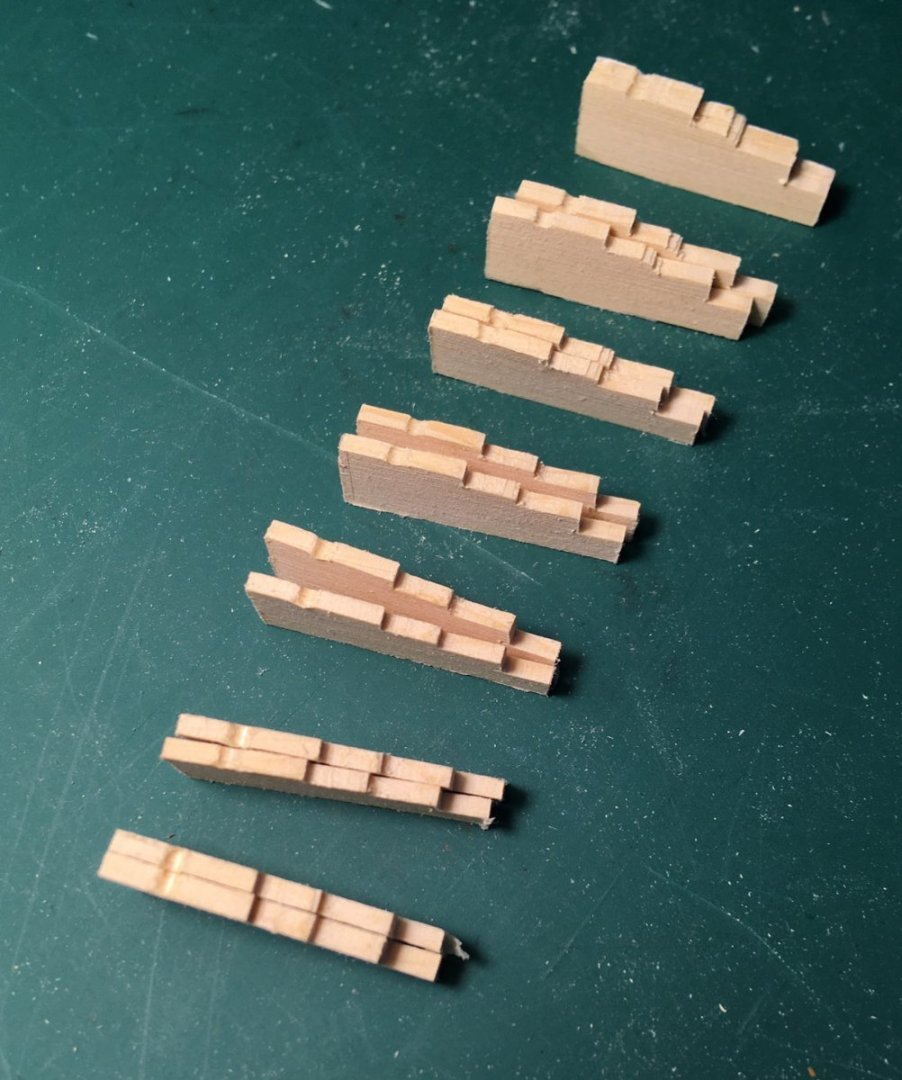
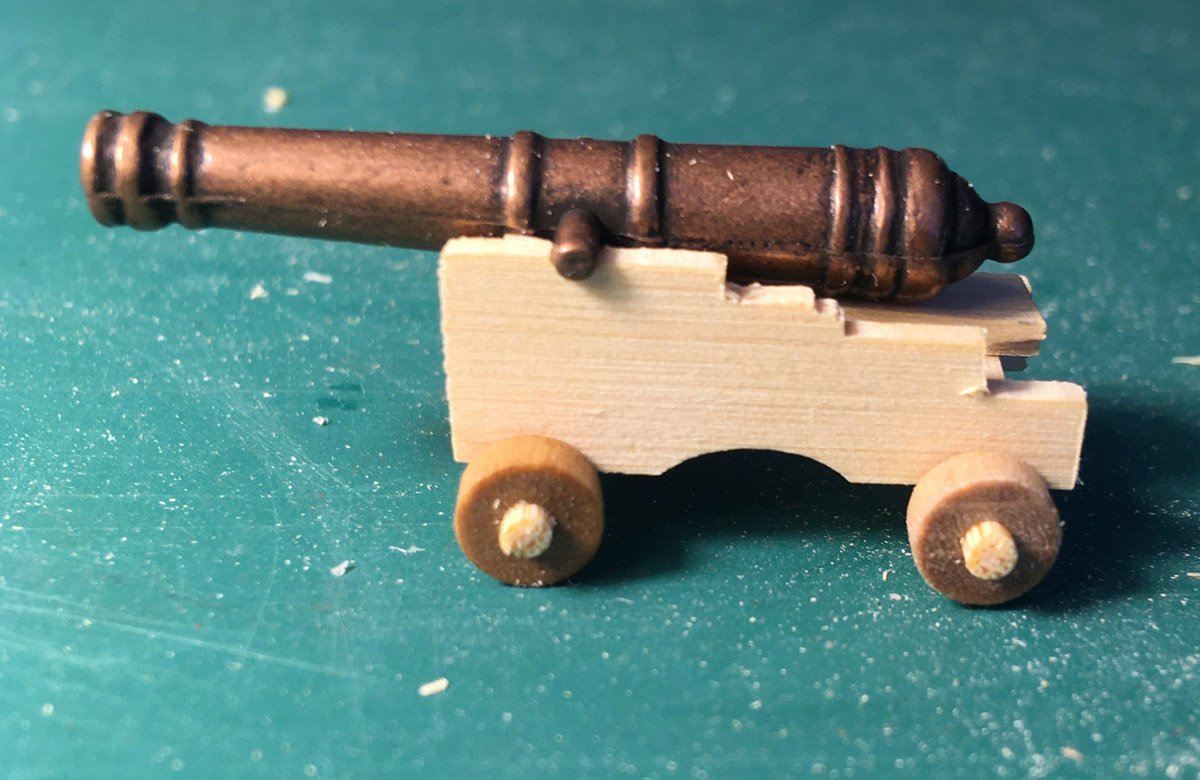
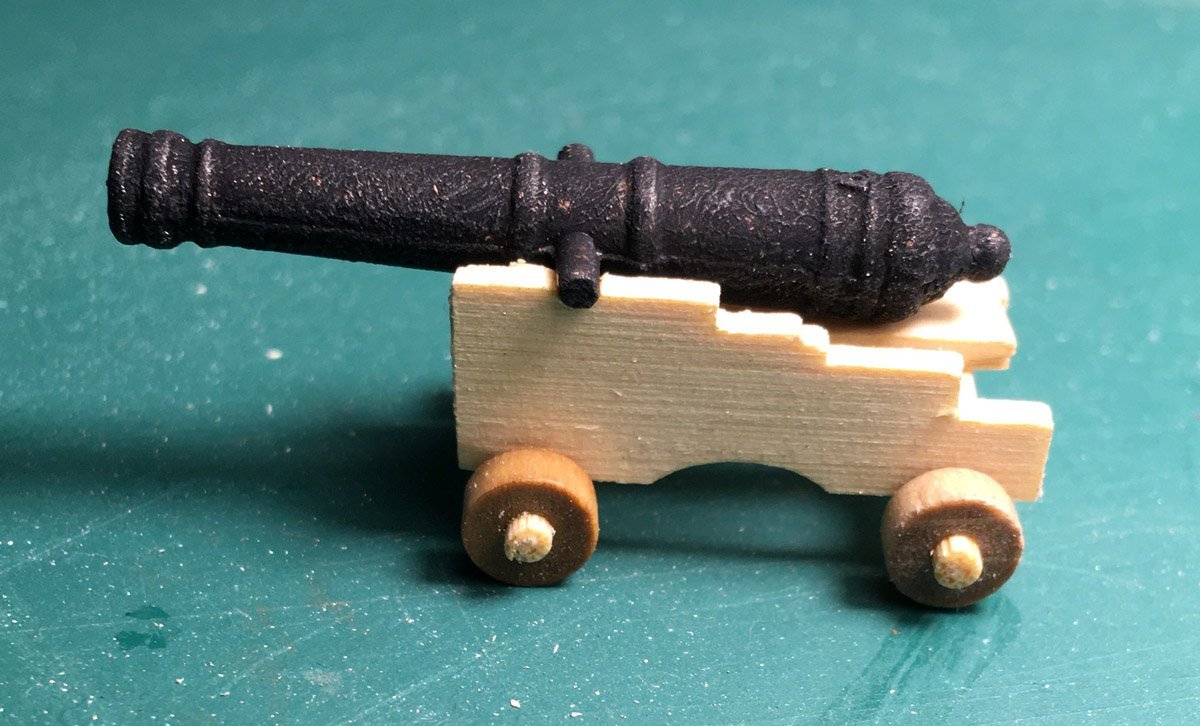
While the glue on the bulkheads was drying, I turned to the cannons. I had ordered a set of Amati barrels and wheels from my favourite model shop https://www.cornwallmodelboats.co.uk/acatalog/amati-cannon-barrels.html I drew out the carriage to scale, printed it out then assembled a stack of 2mm thick wood cut to those dimensions, a small strip was glued along each end to hold the block together. The template was pasted on one side of the block. Then using a jewellers saw cut out the shape of the carriage. There are a few errors with the cuts, but not too bad overall, a quick touch up with a small fine file. I ended up with enough to make the required number of carriages These were assembled and with the barrel in placed look pretty good, the barrels are a bit to garish so gave them a coat of matte black that I dabbed on with an old scrubby brush. Looking good. But I have just realised looking the photo that the wheels are on the wrong way round, should be the larger at the front, lucky I had not glued them in place Tim
-
With the angles corrected and the top part made narrower it looks muck more the part. the shape begins to look like a cutter now to glue the bulkheads in place. Tim
-
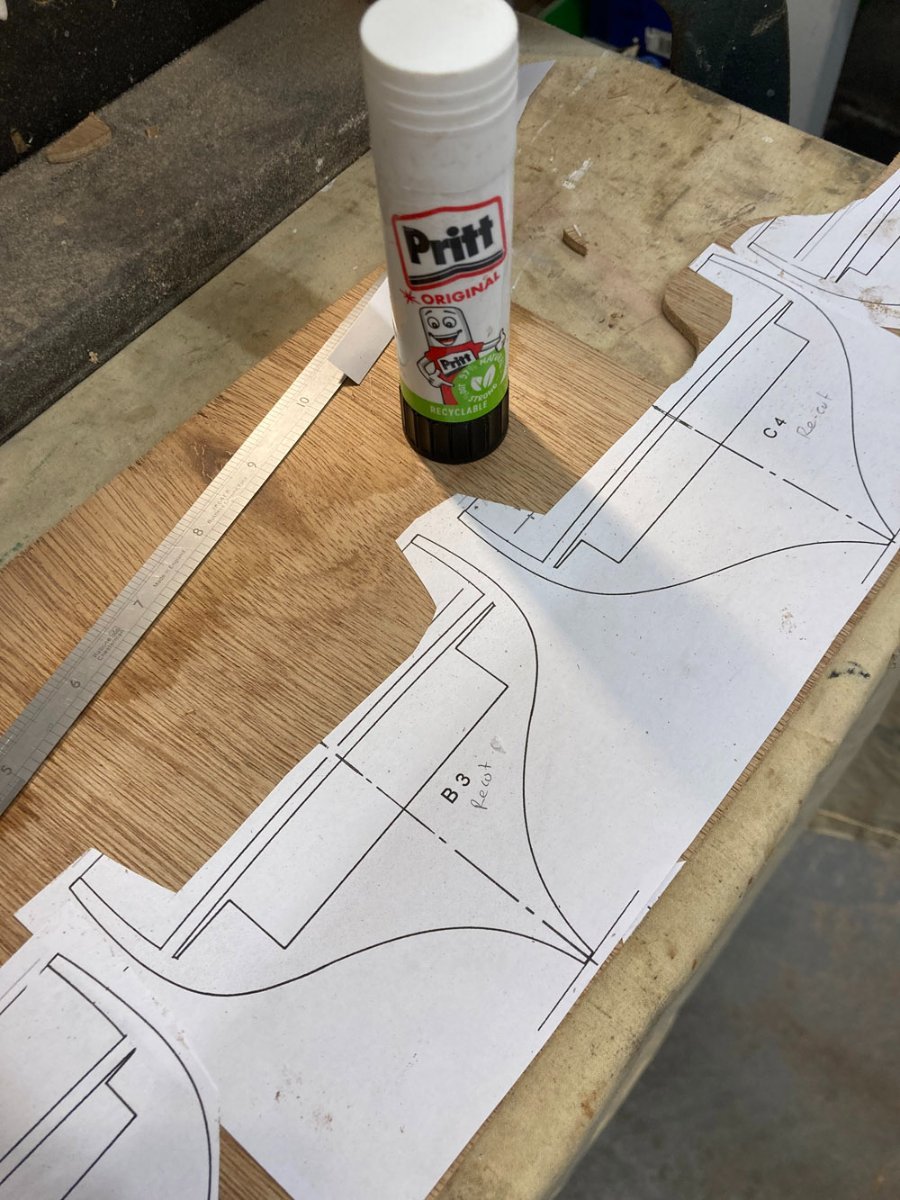
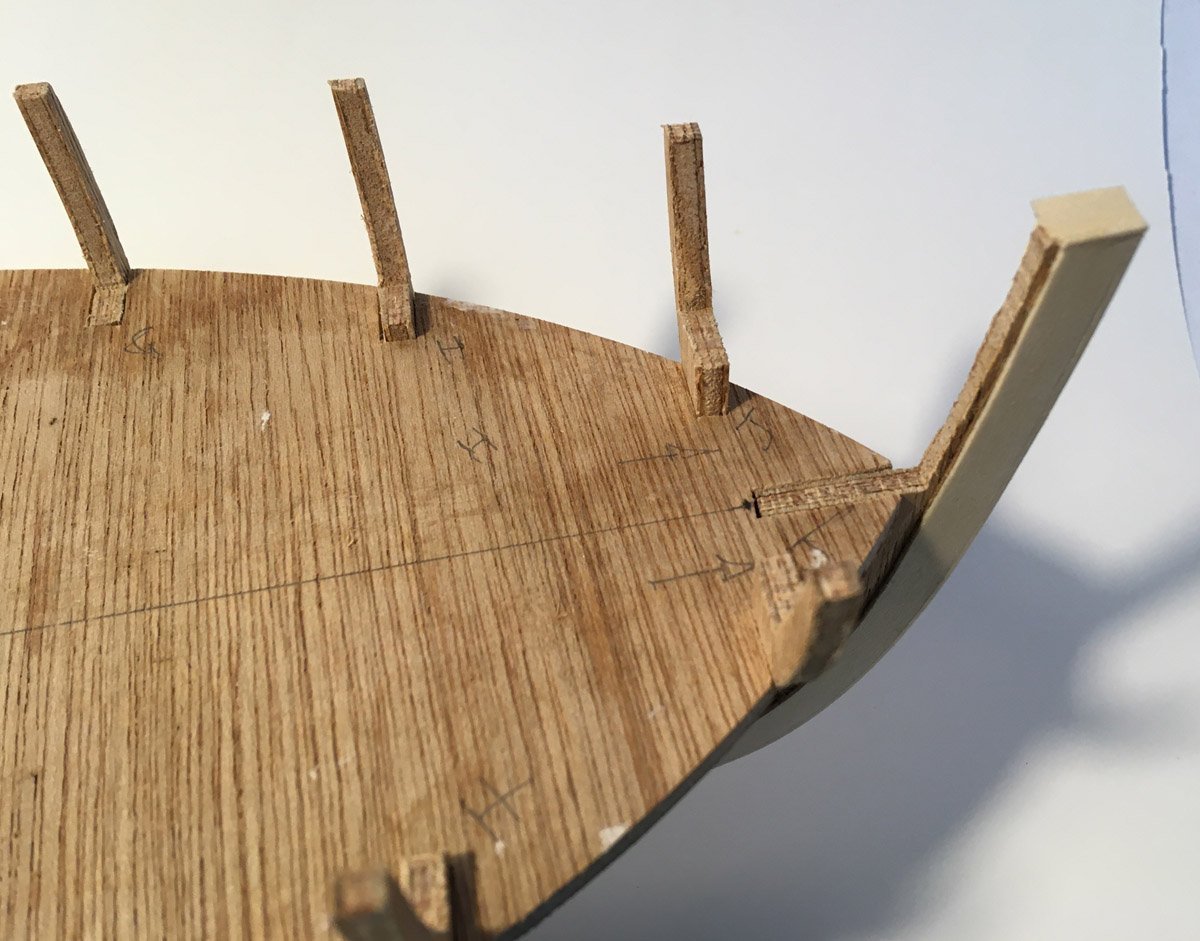
Hi Craig Well spotted, you have a very keen eye, it is high and I did not join it the same as either you, thunder the booklet. I went off on my own and it worked out wrong, I have no idea where those angles came from? So back the the drawing board, printed out new templates and cut some new parts. I now need to sand them to the correct angles and glue them up. Back tomorrow Tim.
-
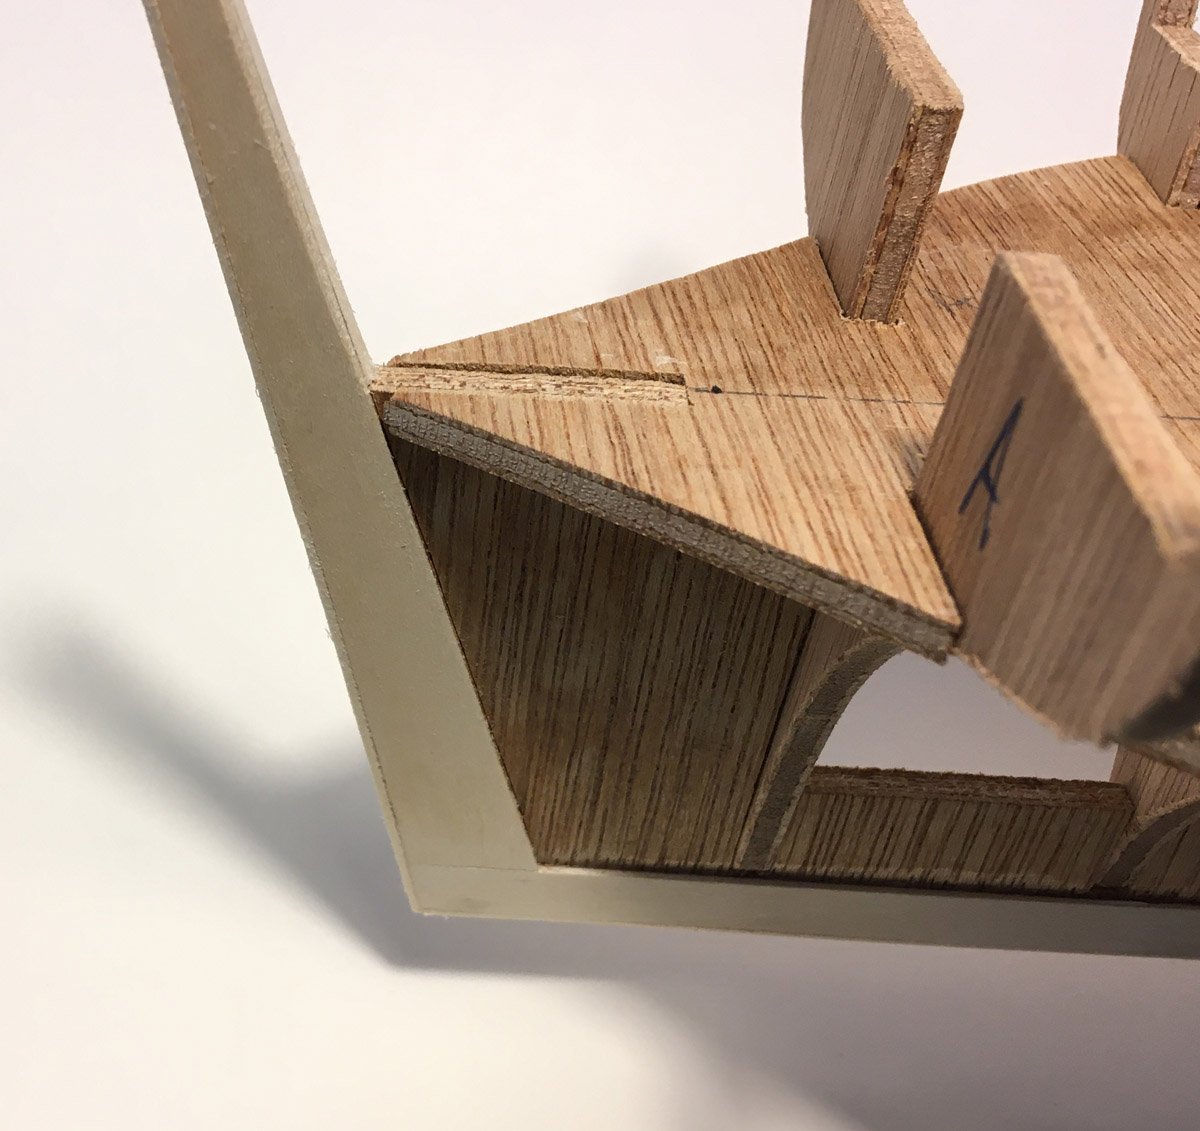
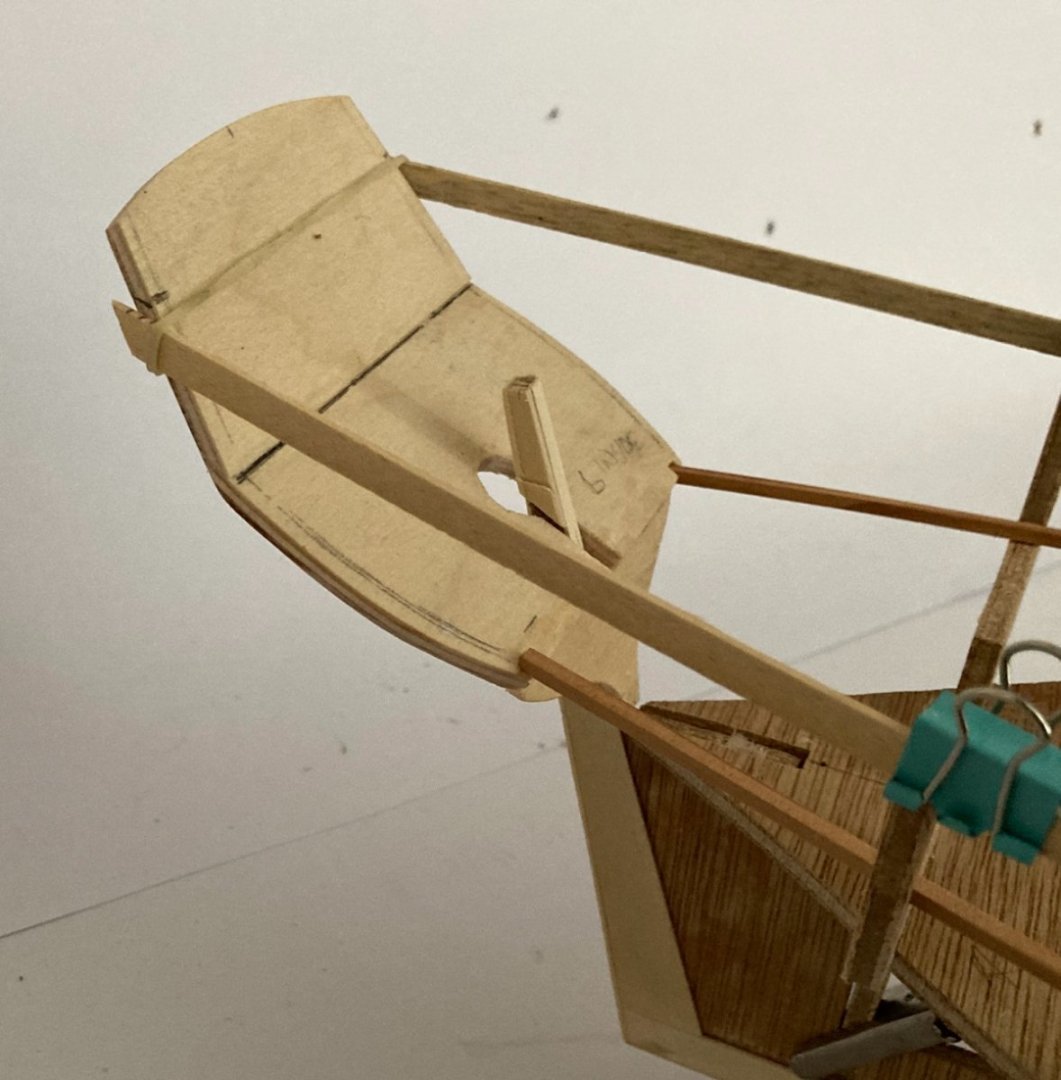
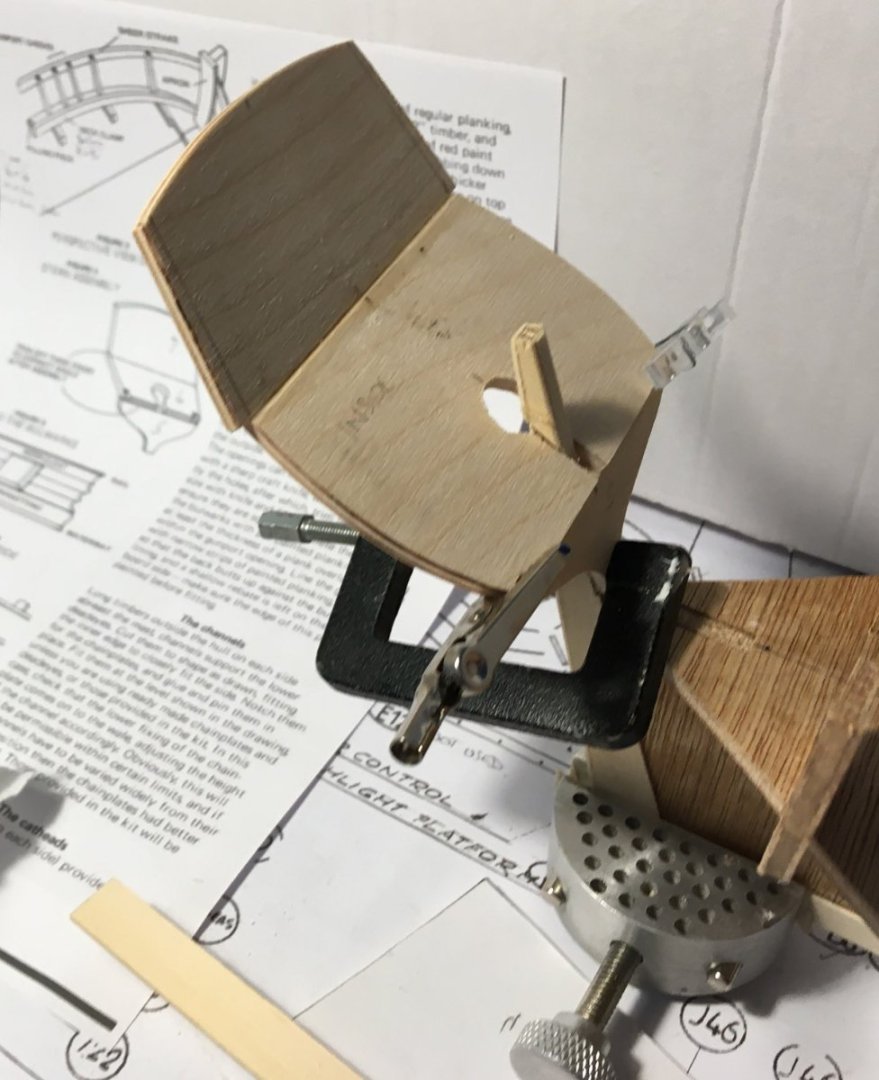
I cut the parts for the transom, but the parts on the plans do match those in the booklet or on Thunders log. They will need to be sanded down to match more closely. the top part is too wide ! here is the version from Thunder's kit build see Tim

-
Thanks to everyone for the likes. Tim
-
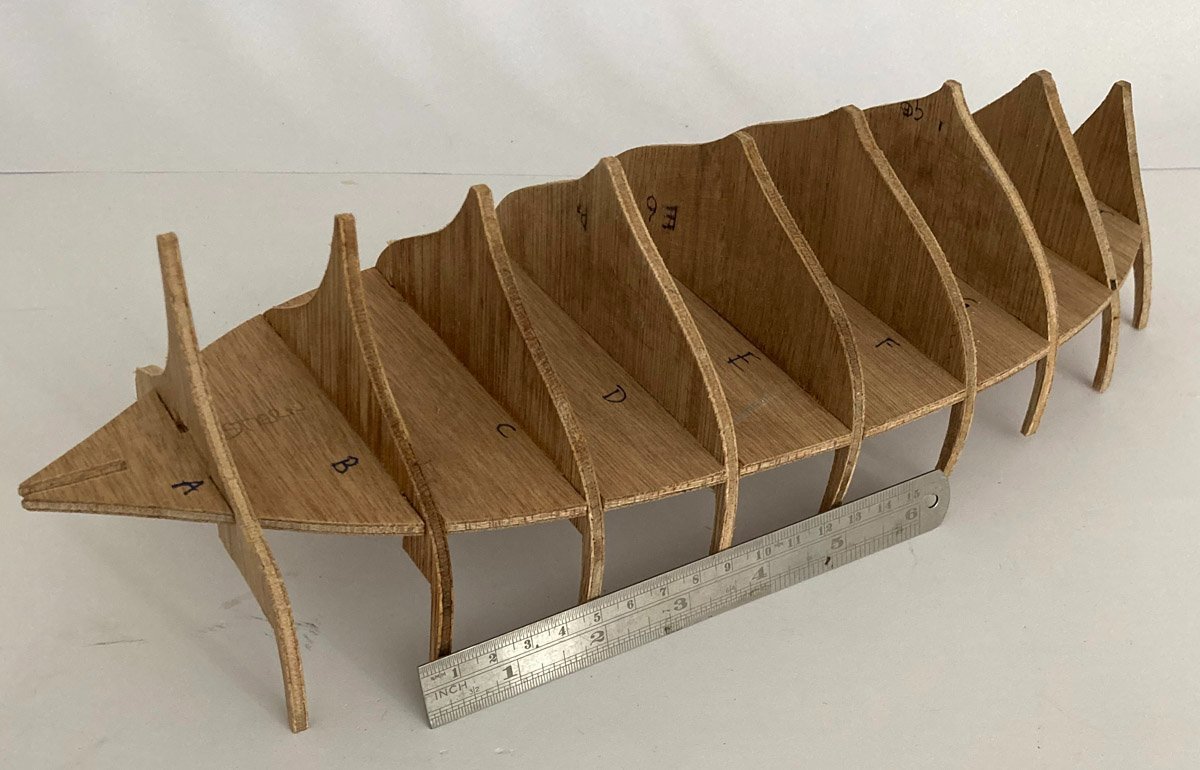
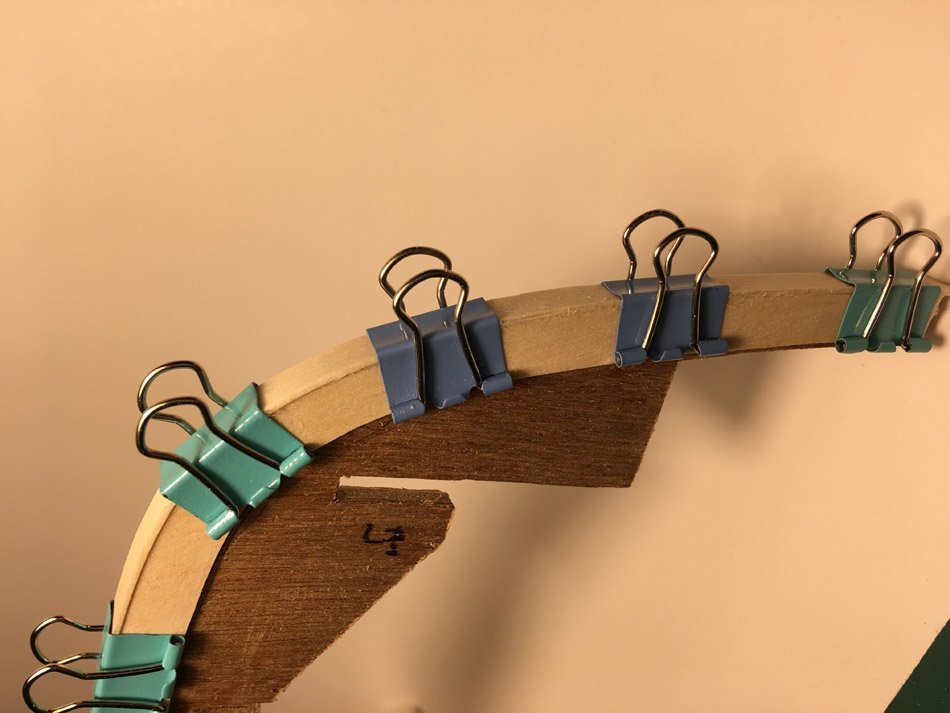
Found some time time to cut the rabbet and then trying the keel in place. stem and stern post its beginning to take shape Tim

-
Just a couple of small jobs to keep the build moving along. Glued on a strip of limewood to cover the raw plywood edge. then added a layer of limewood to the stern. In my next build I really want to make a solid wood stem, keel and stern post. but for this simple cutter model that I am using to get some practice at planking, this will do. Tomorrow I will cut a rabbet. Tim
-
Hi Igmar welcome to MSW I am glad to be retired, I used to build models for customers ( not ships ) Will go and have a look at your YouTube channel Tim
-
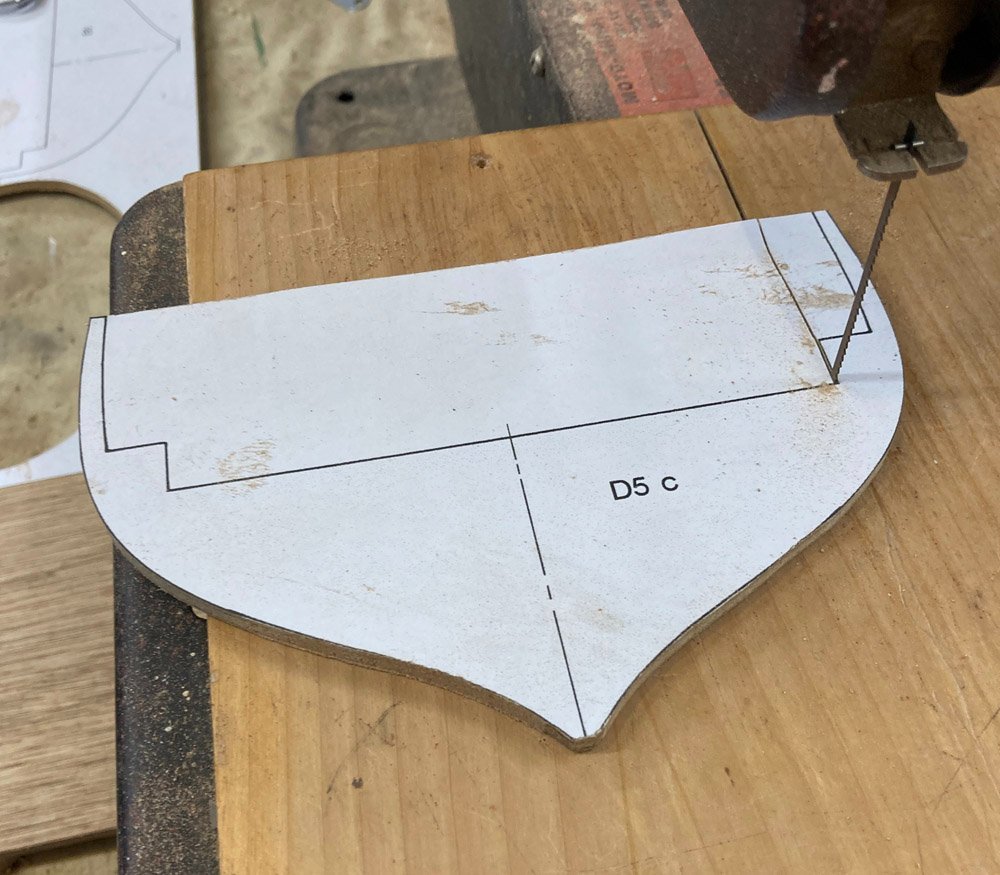
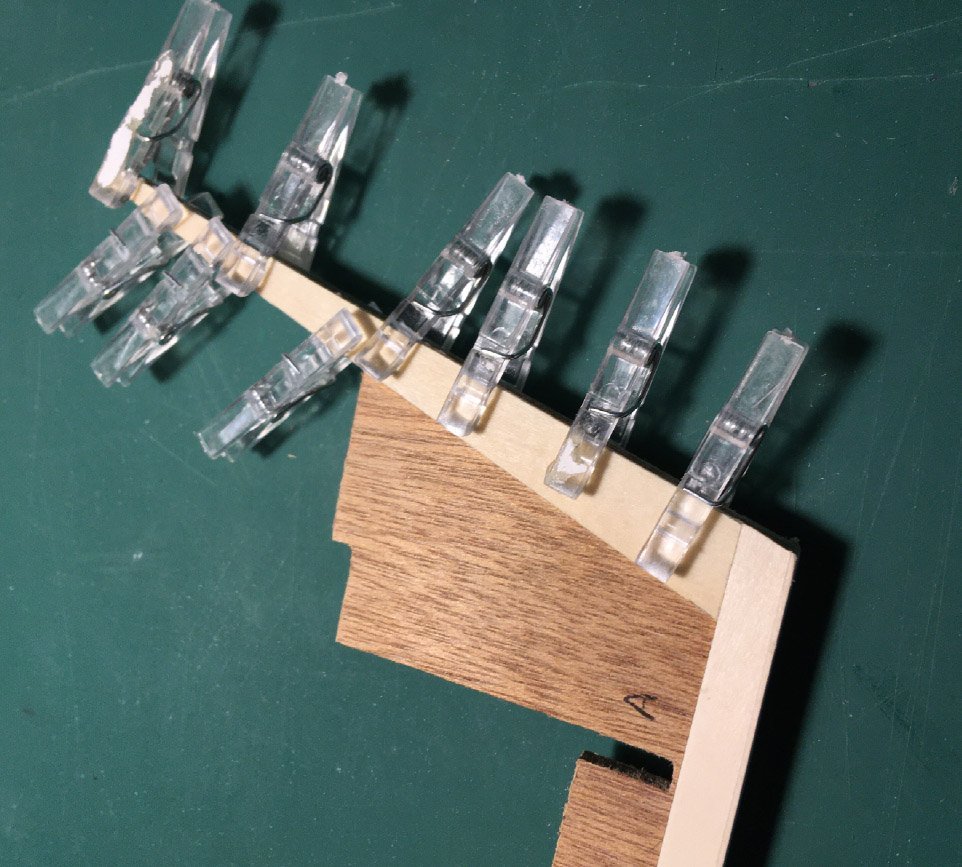
Yesterday in the workshop I managed to get quite a lot done. Pasted the paper templates onto the plywood. then made some sawdust here are the bulkheads and the 'deck' which holds the whole thing together. I then glued the rabbet strip on the keel using some 1mm limewood. I will leave that to dry overnight , then cover the plywood edge grain as well. A good days work Tim