HOLIDAY DONATION DRIVE - SUPPORT MSW - DO YOUR PART TO KEEP THIS GREAT FORUM GOING!
×


oakheart
-
Posts
518 -
Joined
-
Last visited
Content Type
Profiles
Forums
Gallery
Events
Everything posted by oakheart
-
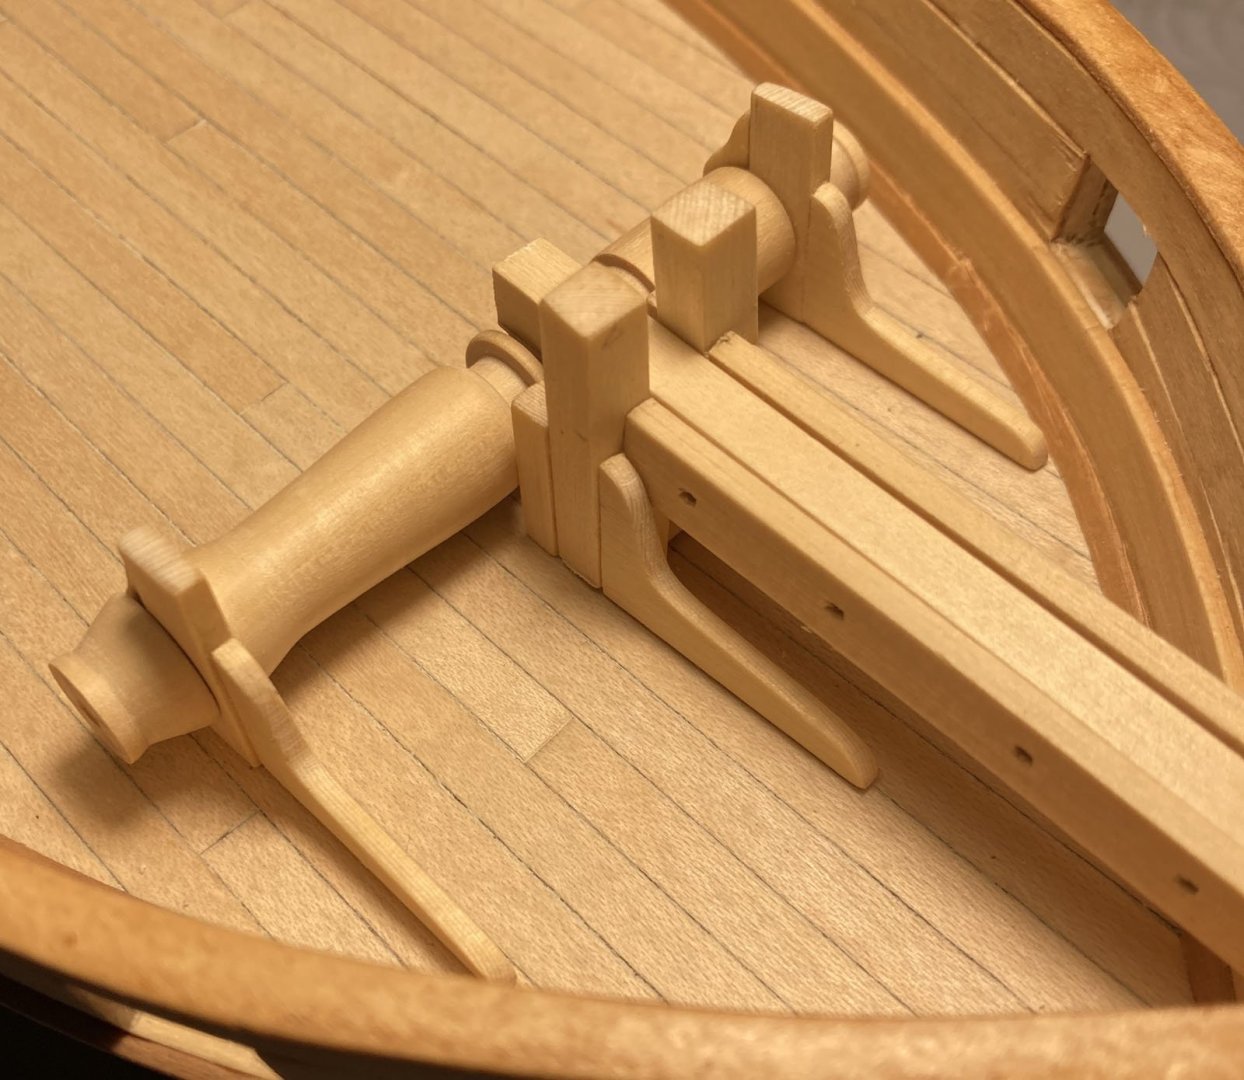
 Thanks @iMustBeCrazy for the compliment. I personally think that the windlass looks better without welps. next problem is to drill some square holes ! Tim
 -
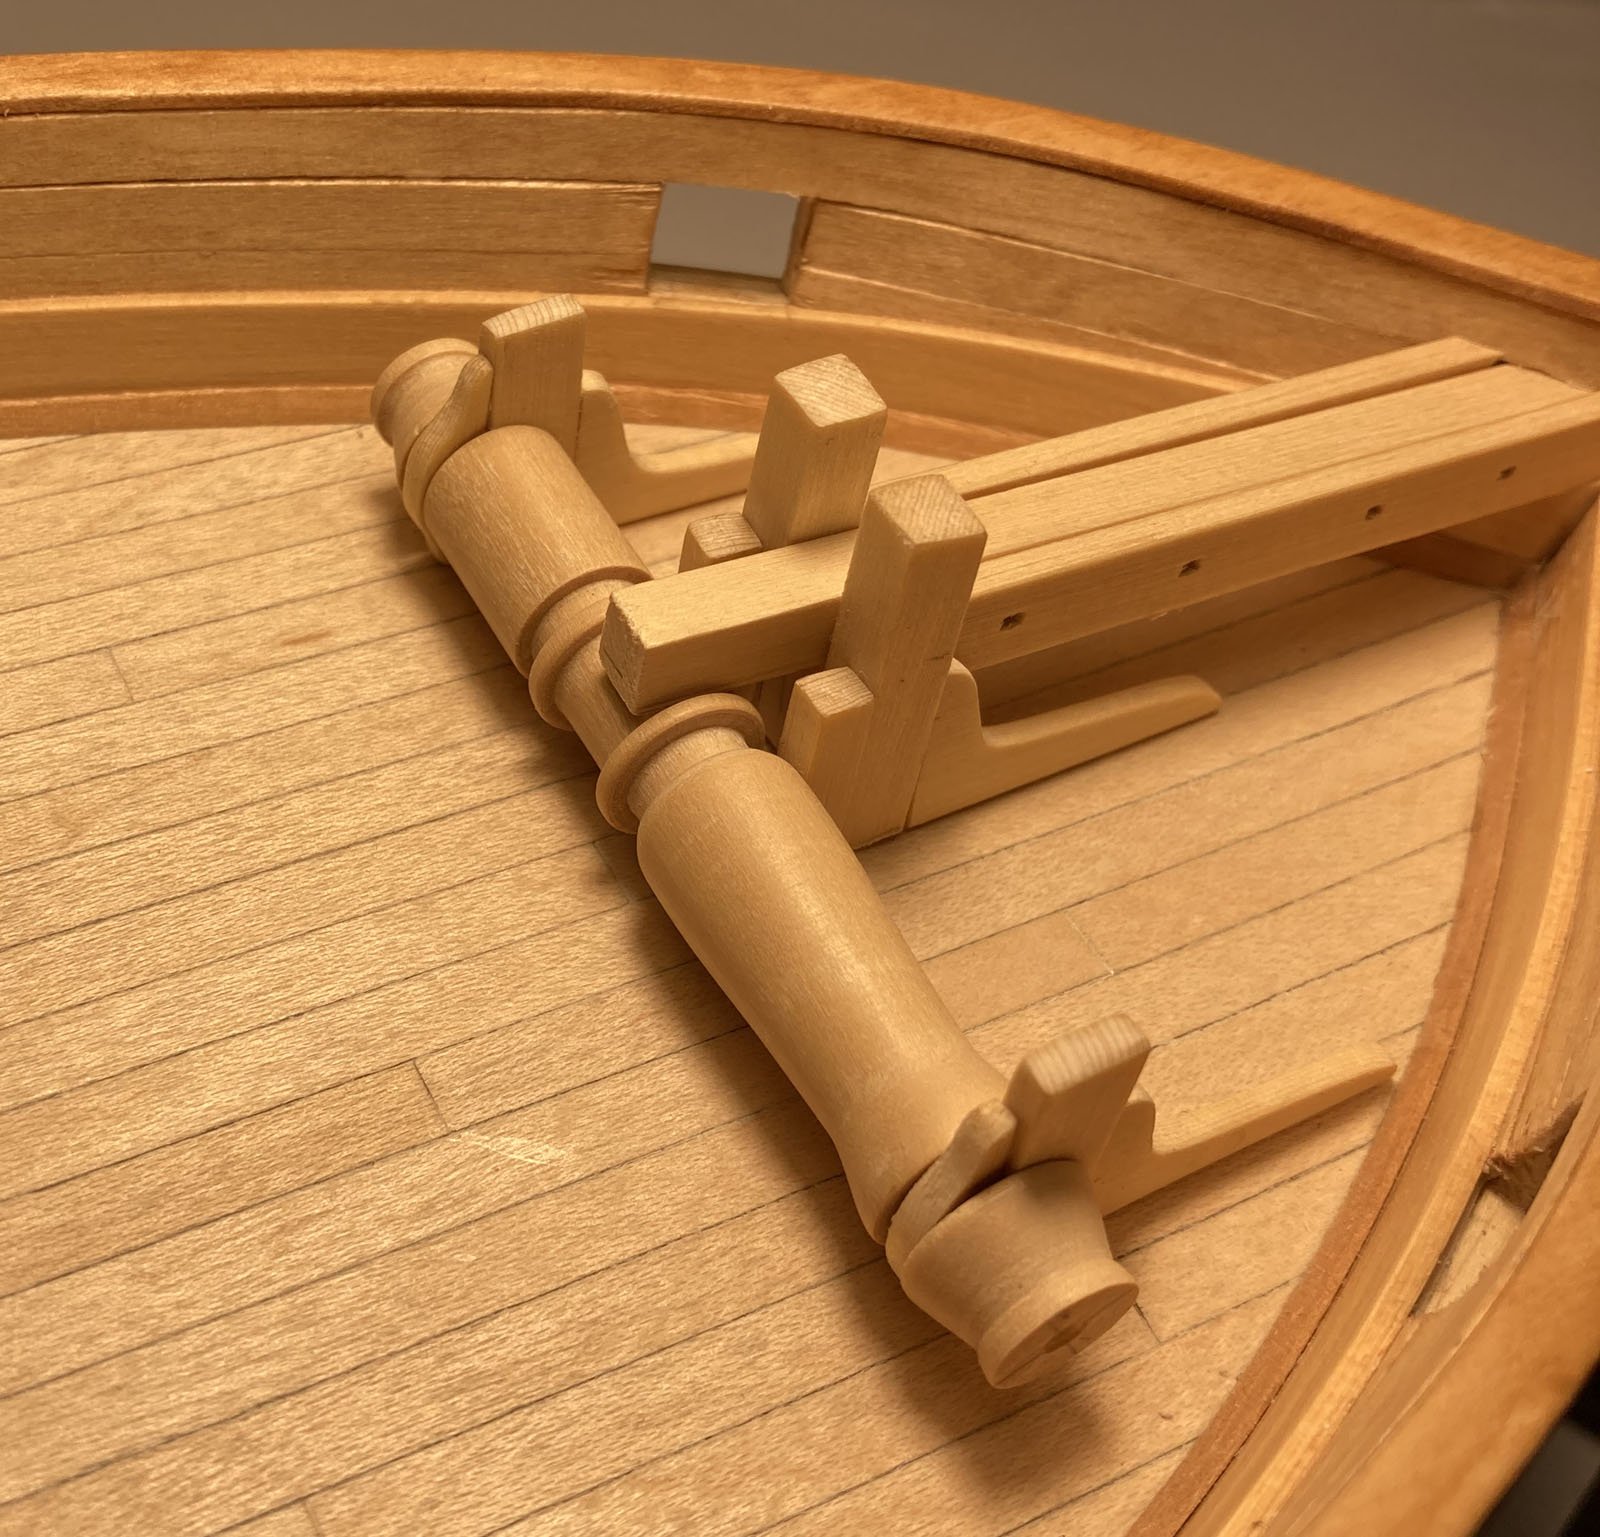
I have found a bit of time and energy to get some work done on Speedy. Bill Shoulders designed the windlass for speedy which looks good, the problem is that he did 2 drawings of it. One has thin strips added, I think they are called "welps", the other not, what is the consensus, should I add them of not? Here is the work in progress................ still details to add Tim

-
Update long overdue. Not much to report on the build I'm afraid been busy with a restoration project for the Model club, its a beautifully made model of Harbour Defence Motor Launch. No one at the club knows who donated it or who built it. So pleas everybody put a note on a every model you build. Other news is I have been diagnosed with eyelid cancer, going for a biopsy tomorrow, so will find what kind. The consultant says it should all be fixed by the end of the year, so not a lot of model making for me for at least a couple of months. I always listen/look in to all of your builds and enjoy them, so keep them coming..... take care - Tim
-
Had some time out from trimming the 'Box' hedges so made a ladder for the companionway with a bit of sanding and tidying up it should look the part. Tim

-
I too have used a sanding stick, just a home made one, scrap of planking with sandpaper double sided to it. Place them flat on the cutting board and roll them round lengthways making sure they are always supported as you rub the sanding stick along the length. Practice on a bit of scrap that you cut from the sheet first. Tim
-
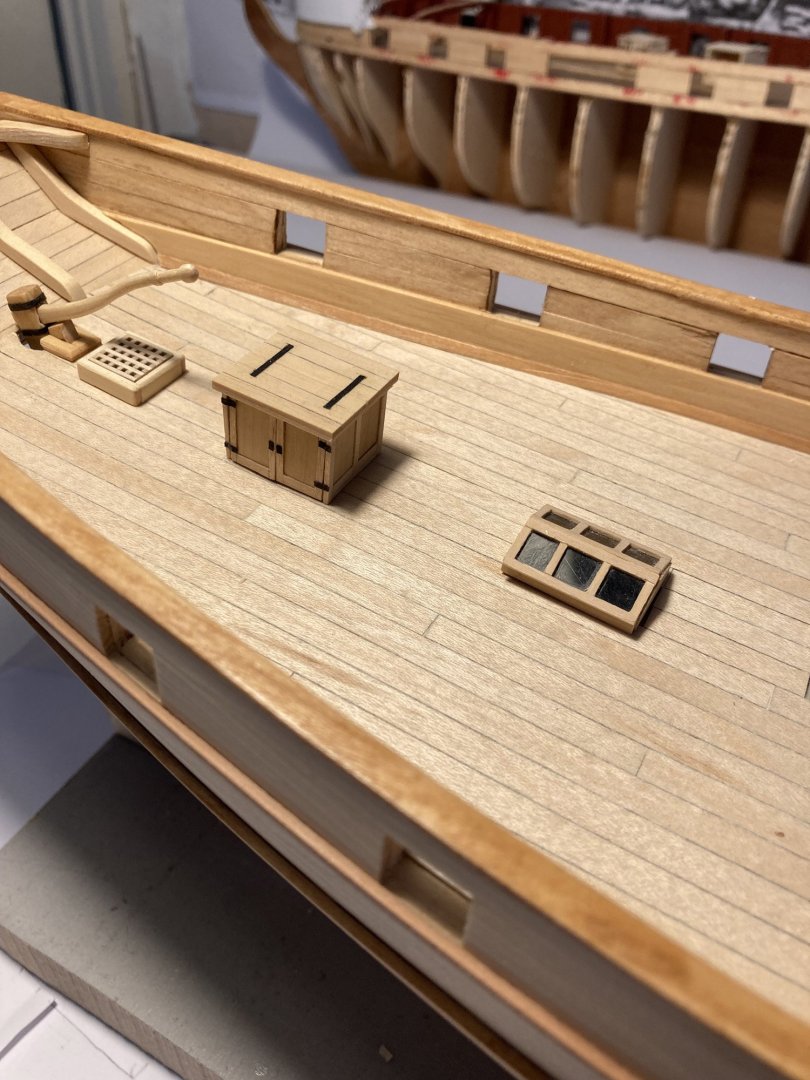
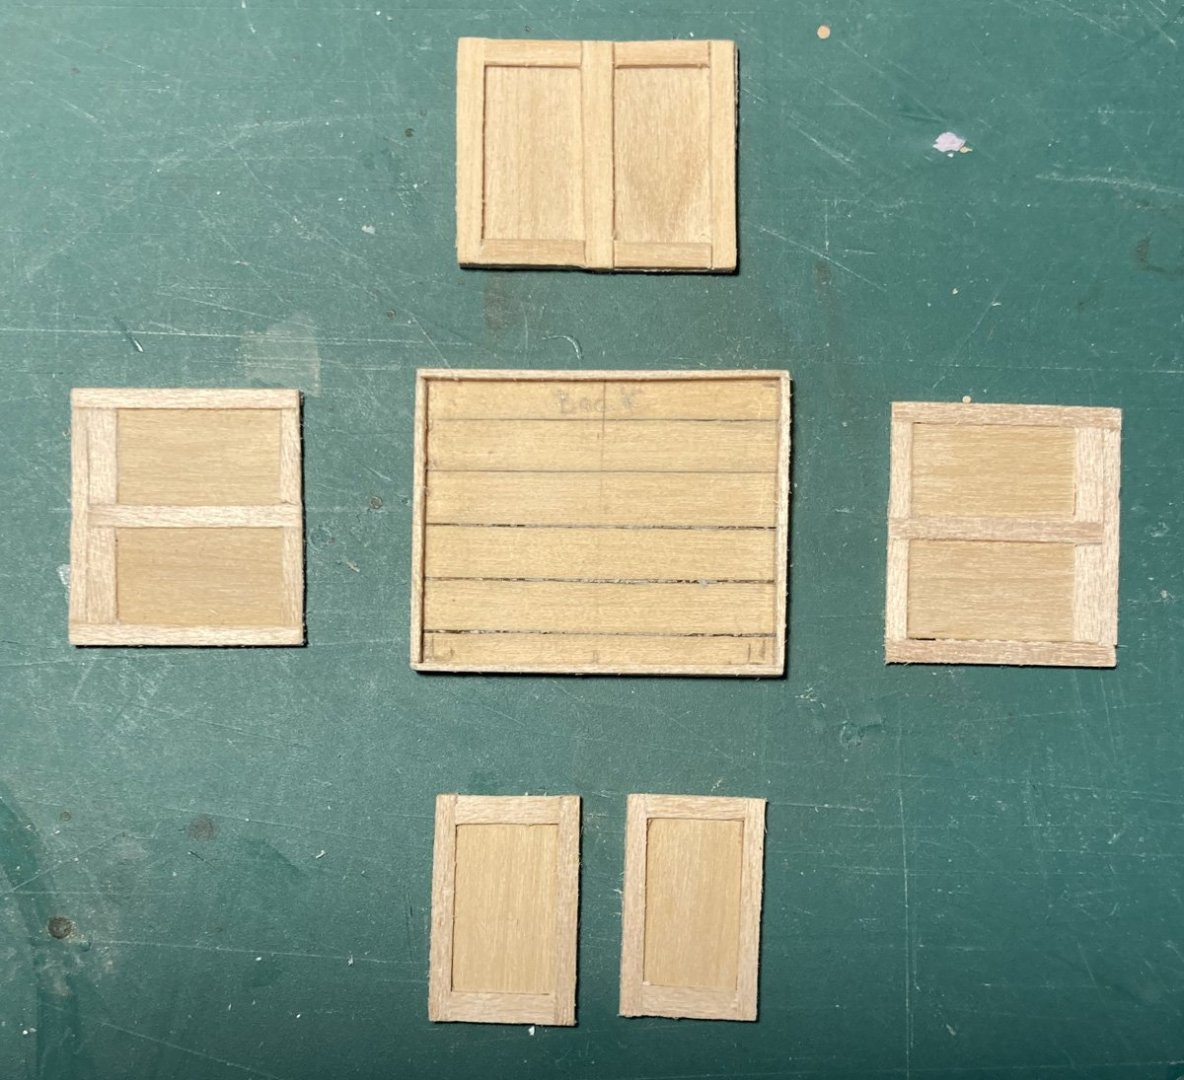
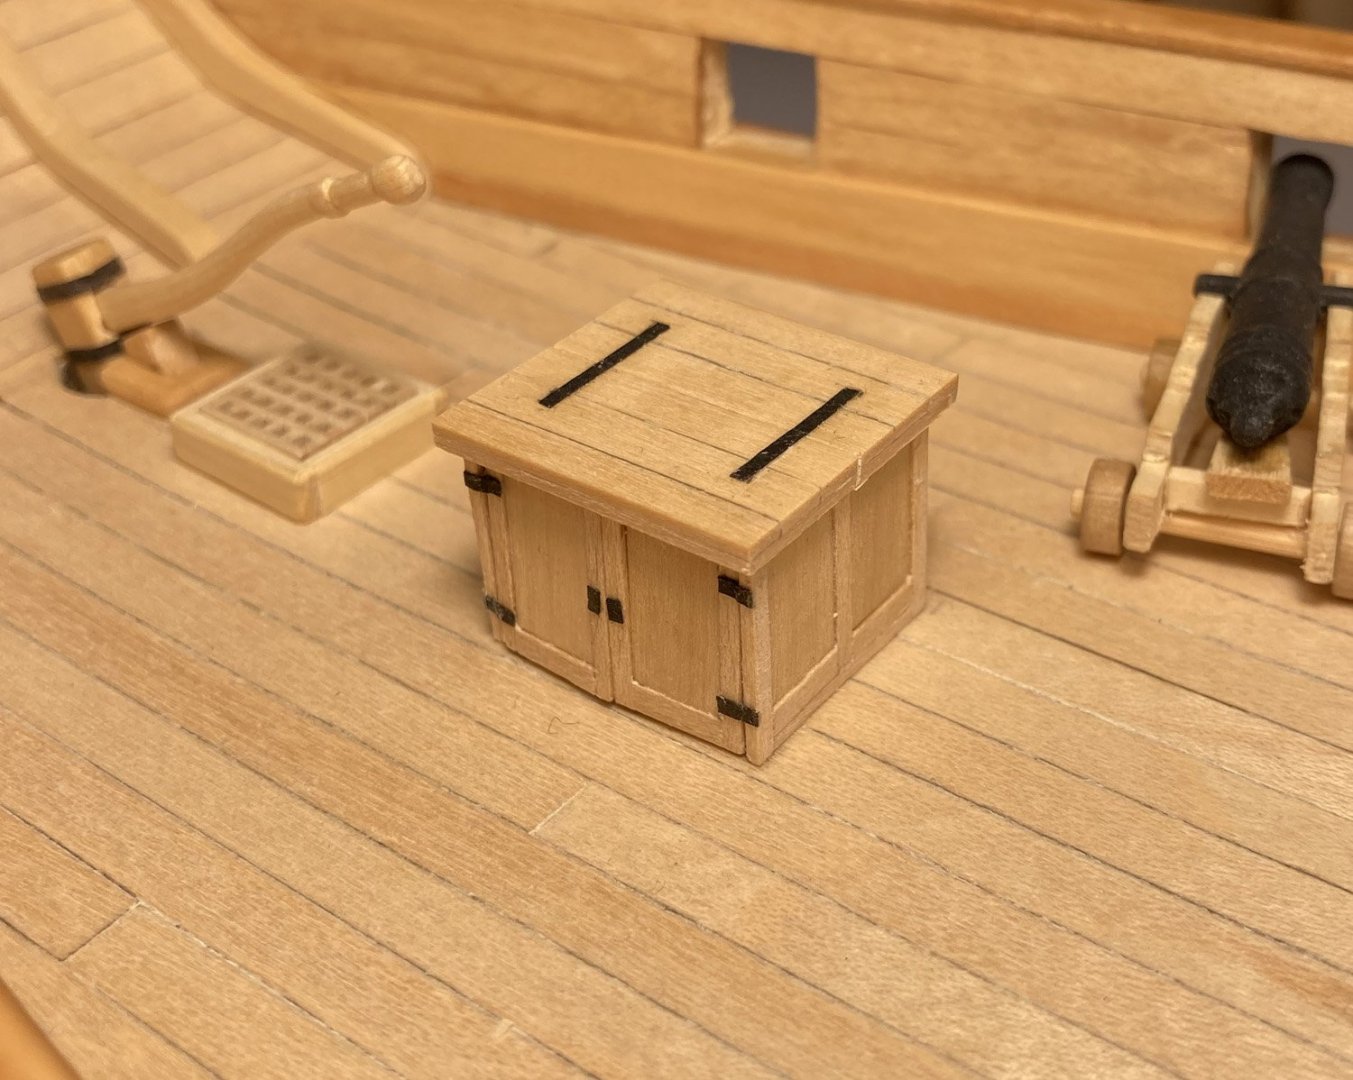
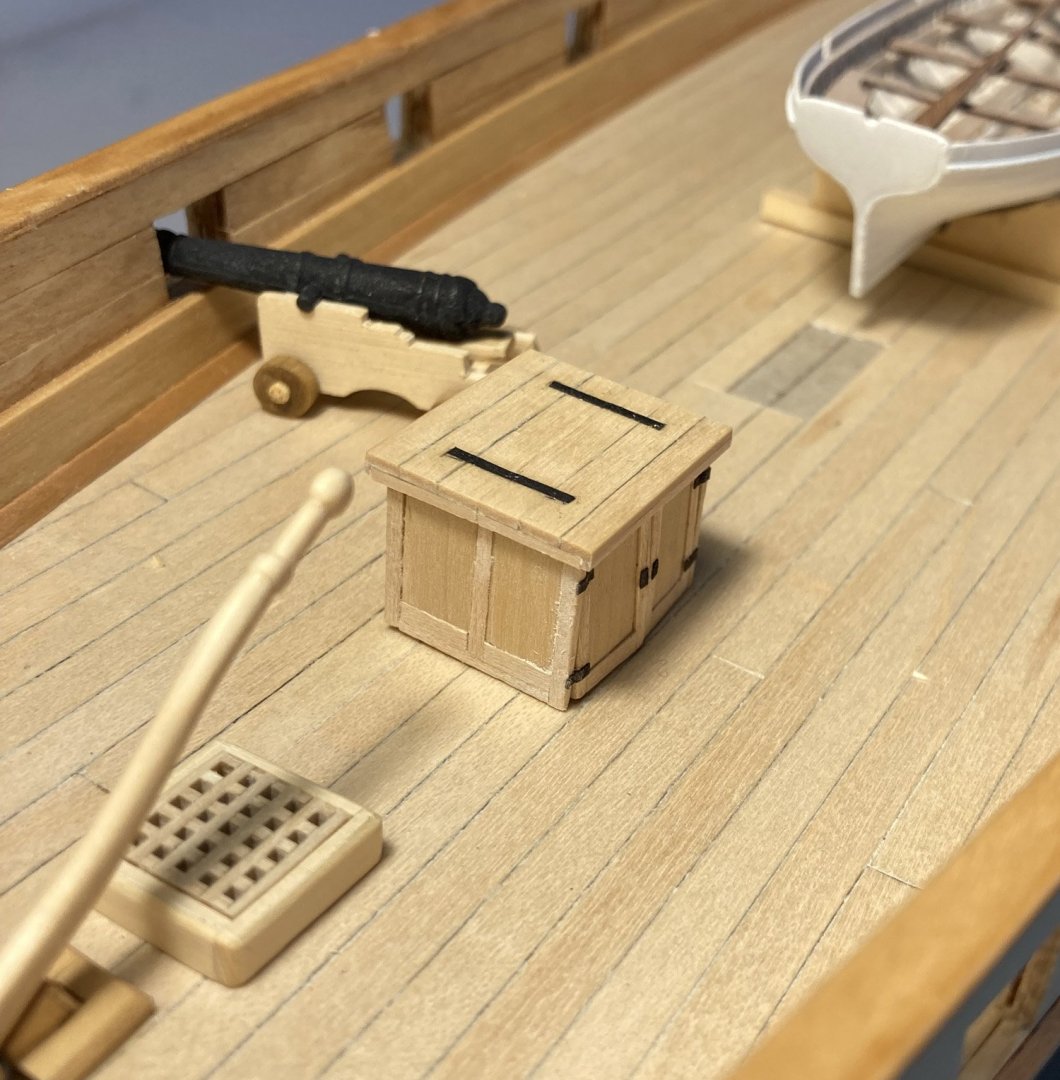
Things are moving forward with the deck furniture. The larger skylight is done. Tim
-
it was probably better to be in a small ship, this write up paints a grim picture. https://holfiesfamilyhistory.blog/2014/10/26/to-australia-by-sail-in-the-1850s/ here is another article:- https://museumsvictoria.com.au/immigrationmuseum/resources/journeys-to-australia/ In their dash to reach the Victorian goldfields in the quickest possible time, many ship's captains adopted the new 'Great Circle' route in the 1850s. Passing far south of the Cape of Good Hope, they sought the 'Roaring Forties' – the strong prevailing winds that blew from the west to the east between 40 and 50 degrees south. This route involved enormous risks from drifting icebergs and the wild seas generated by frequent storms. It required exceptional navigational skills, as even the slightest error could lead to disaster. The large number of ships that were lost when navigating the narrow path between King Island and southern Victoria led to the West Coast of Victoria becoming known as the Shipwreck Coast. Tim
-
From what I remember you saying they had loads of other people as passengers, how did they manage on the very long journey? Do you know which route they took? Was the weather with them or did they have bad storms? I remember seeing film of a sailing ship going round the 'Horn' it was a not a comfortable thing to do. Hope the head is better today Tim
-
Hi Craig @iMustBeCrazy according to https://www.vallejogallery.com/2022/item_mobile.php?page=item_page&id=3130 the painting was done in about 1950, there is a good write up about the chase there too. Now I must get back to a bit of ship building, I have done my garden work for the day. Tim
-
thanks gregory @Gregory I think I will add the ladder to the companionway hatch. It adds to the whole look of the model Tim
-
I know that had been bugging me, the problem is I wanted to make the model look like the painting which just grabbed me as an exciting image. Putting the boat off to one side upsets the balance of that look, what do I want from this build? I want a good looking display, I want to learn new techniques as well, it could do both of those. What if I just ignore the pumps or move them. I know they have to reach down into the bilges to work. I will leave the boat position until later in the build, then decide Tim
-
Looking at the painting of the cutter "Kite" I posted earlier, I had wondered how the crew would get the boat off the cutters deck. Taking break from ship building reading a new book that just arrived in the post and there was the answer: By Malcolm Darch in his bookModeling Maritime History Chapter 3: MARGUERITE-A Bristol Channel Pilot Cutter. A pilot's life was a dangerous one as ships had to be boarded day and night in all weather conditions. This was usually achieved by the cutter hailing the incoming vessel and asking the master to stop his ship and create a lee from the weather. The apprentice would make the dinghy or 'punt' as they were known, ready to be hauled over the port rail of the cutter (the Bristol cutters having higher rails used a gate). This was done by removing the ropes or 'gripes' securing it to the chocks on deck and most important of all, tying the bow line or painter forward of the rigging. The helm was lashed momentarily after the cutter had been sailed into the sheltered water behind the ship, though keeping a good distance away, as the vessel was being blown sideways towards them. The man who had been at the helm would assist in launching the punt stern first and then return to his station, while the pilot and apprentice clambered aboard the 12 or 13 foot clinker boat and the one oar carried was skilfully used over the transom by the apprentice to scull them to the waiting ship. A ship's ladder would normally be hanging down the vast wall of wood or steel which rolled menacingly above. The pilot waited for the right moment and would grab the ladder as the ship finished her roll towards him and before she started back up again. The punt would then be sculled away to be retrieved by the one man left in the cutter who would be attempting to heave his vessel to in the same position as before, enabling the apprentice and himself to haul the punt aboard. Some punts carried a strop secured fore and aft to which a burton was tied which travelled from the mast head, and this helped recovery. The job of the man left in the cutter was made a little easier by having most of the sail controls led back to the self-draining cockpit which was situated aft of the companion hatch. These vessels really helped to pioneer the way toward designs used by today's single-handed sailors. The whole operation was extremely dangerous on a wild winter's night, with often the added menace of snow squalls. I have only just discovered Malcolm Darch he is a professional model ship builder of some note. I also realised that when I add the skylights to the deck, the boat will need to sit much higher off the deck, I will have to revise the cradle. Tim
-
Thank you all for the likes and encouragement, keeps a body going. Tim
-
Hi Pitan @Pitan if he is on deck it could look a bit like something from an alien movie if I did that. Thanks for the tip about supporting the leg/foot while removing the base though. Tim
-
Thanks for the advice @Thukydides you are right, power tools are best avoided in this case. I have a jewellers frame saw which may be best to get rid of most of the base. Tim
-
Thanks for the tip BE @Blue Ensign the base is pretty thick on this figure. What ever I end up doing, I think I will leave it on the base while I paint it. Tim

-
Thanks Chris @chris watton Only one way to find out, I will let you know. Tim
-
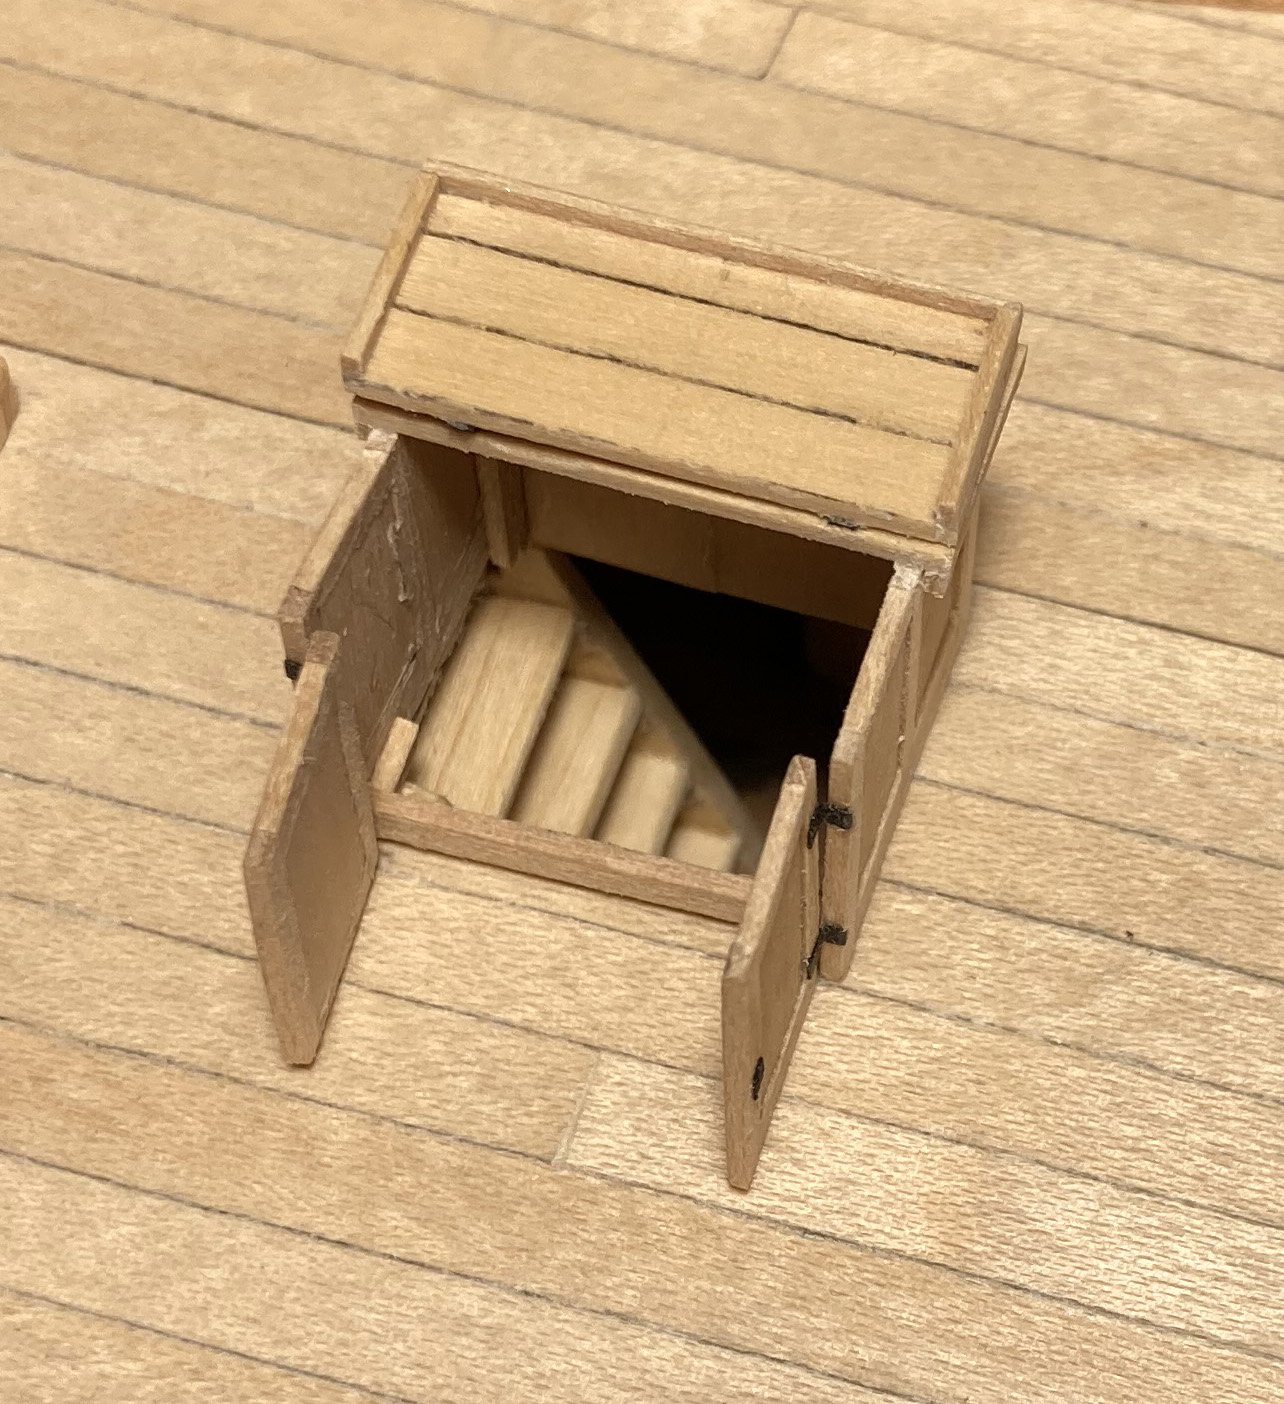
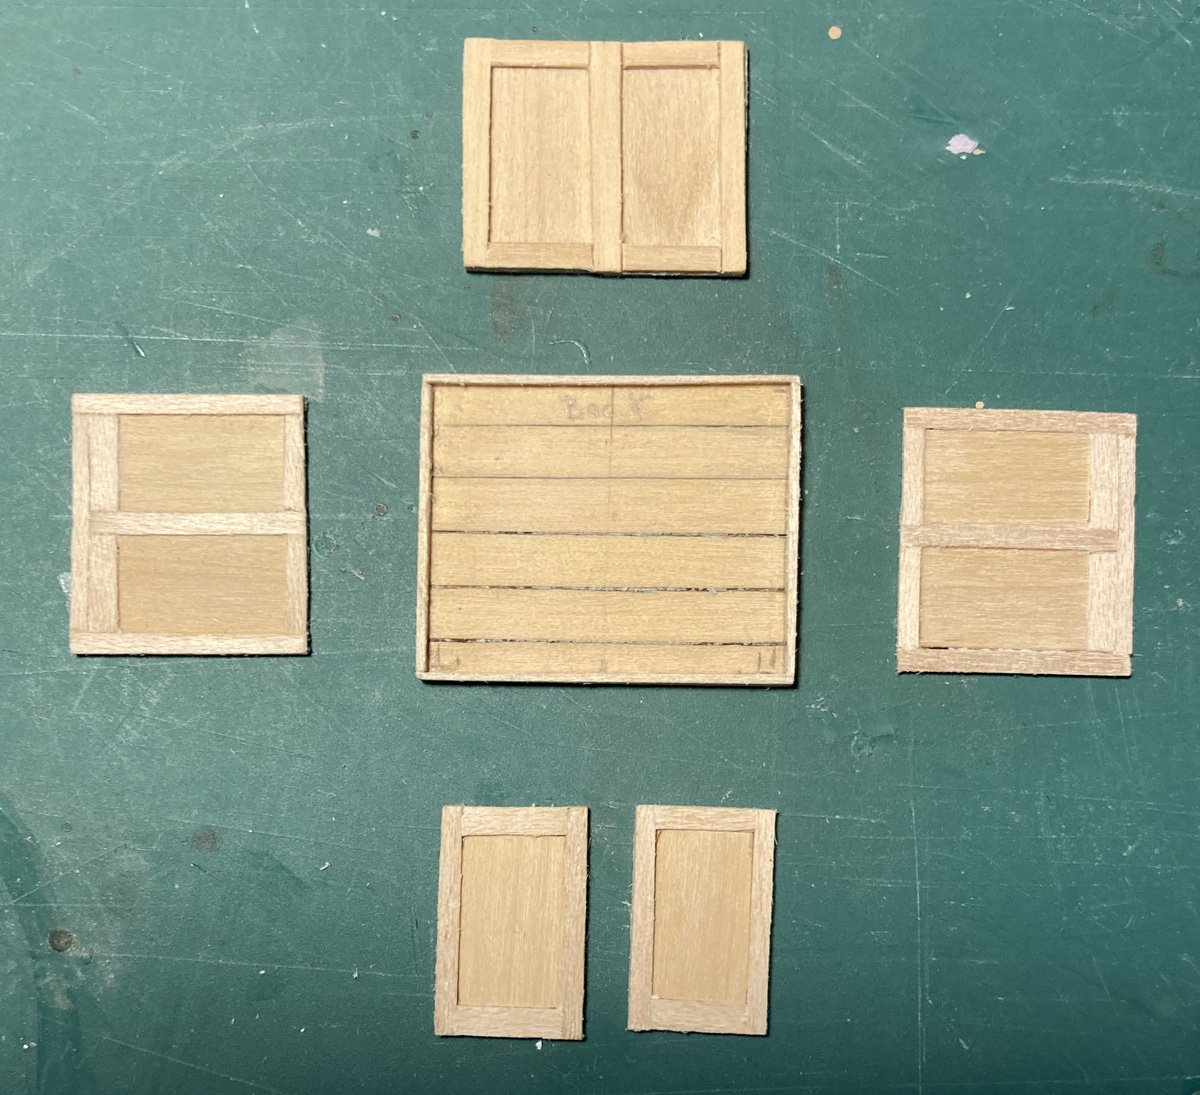
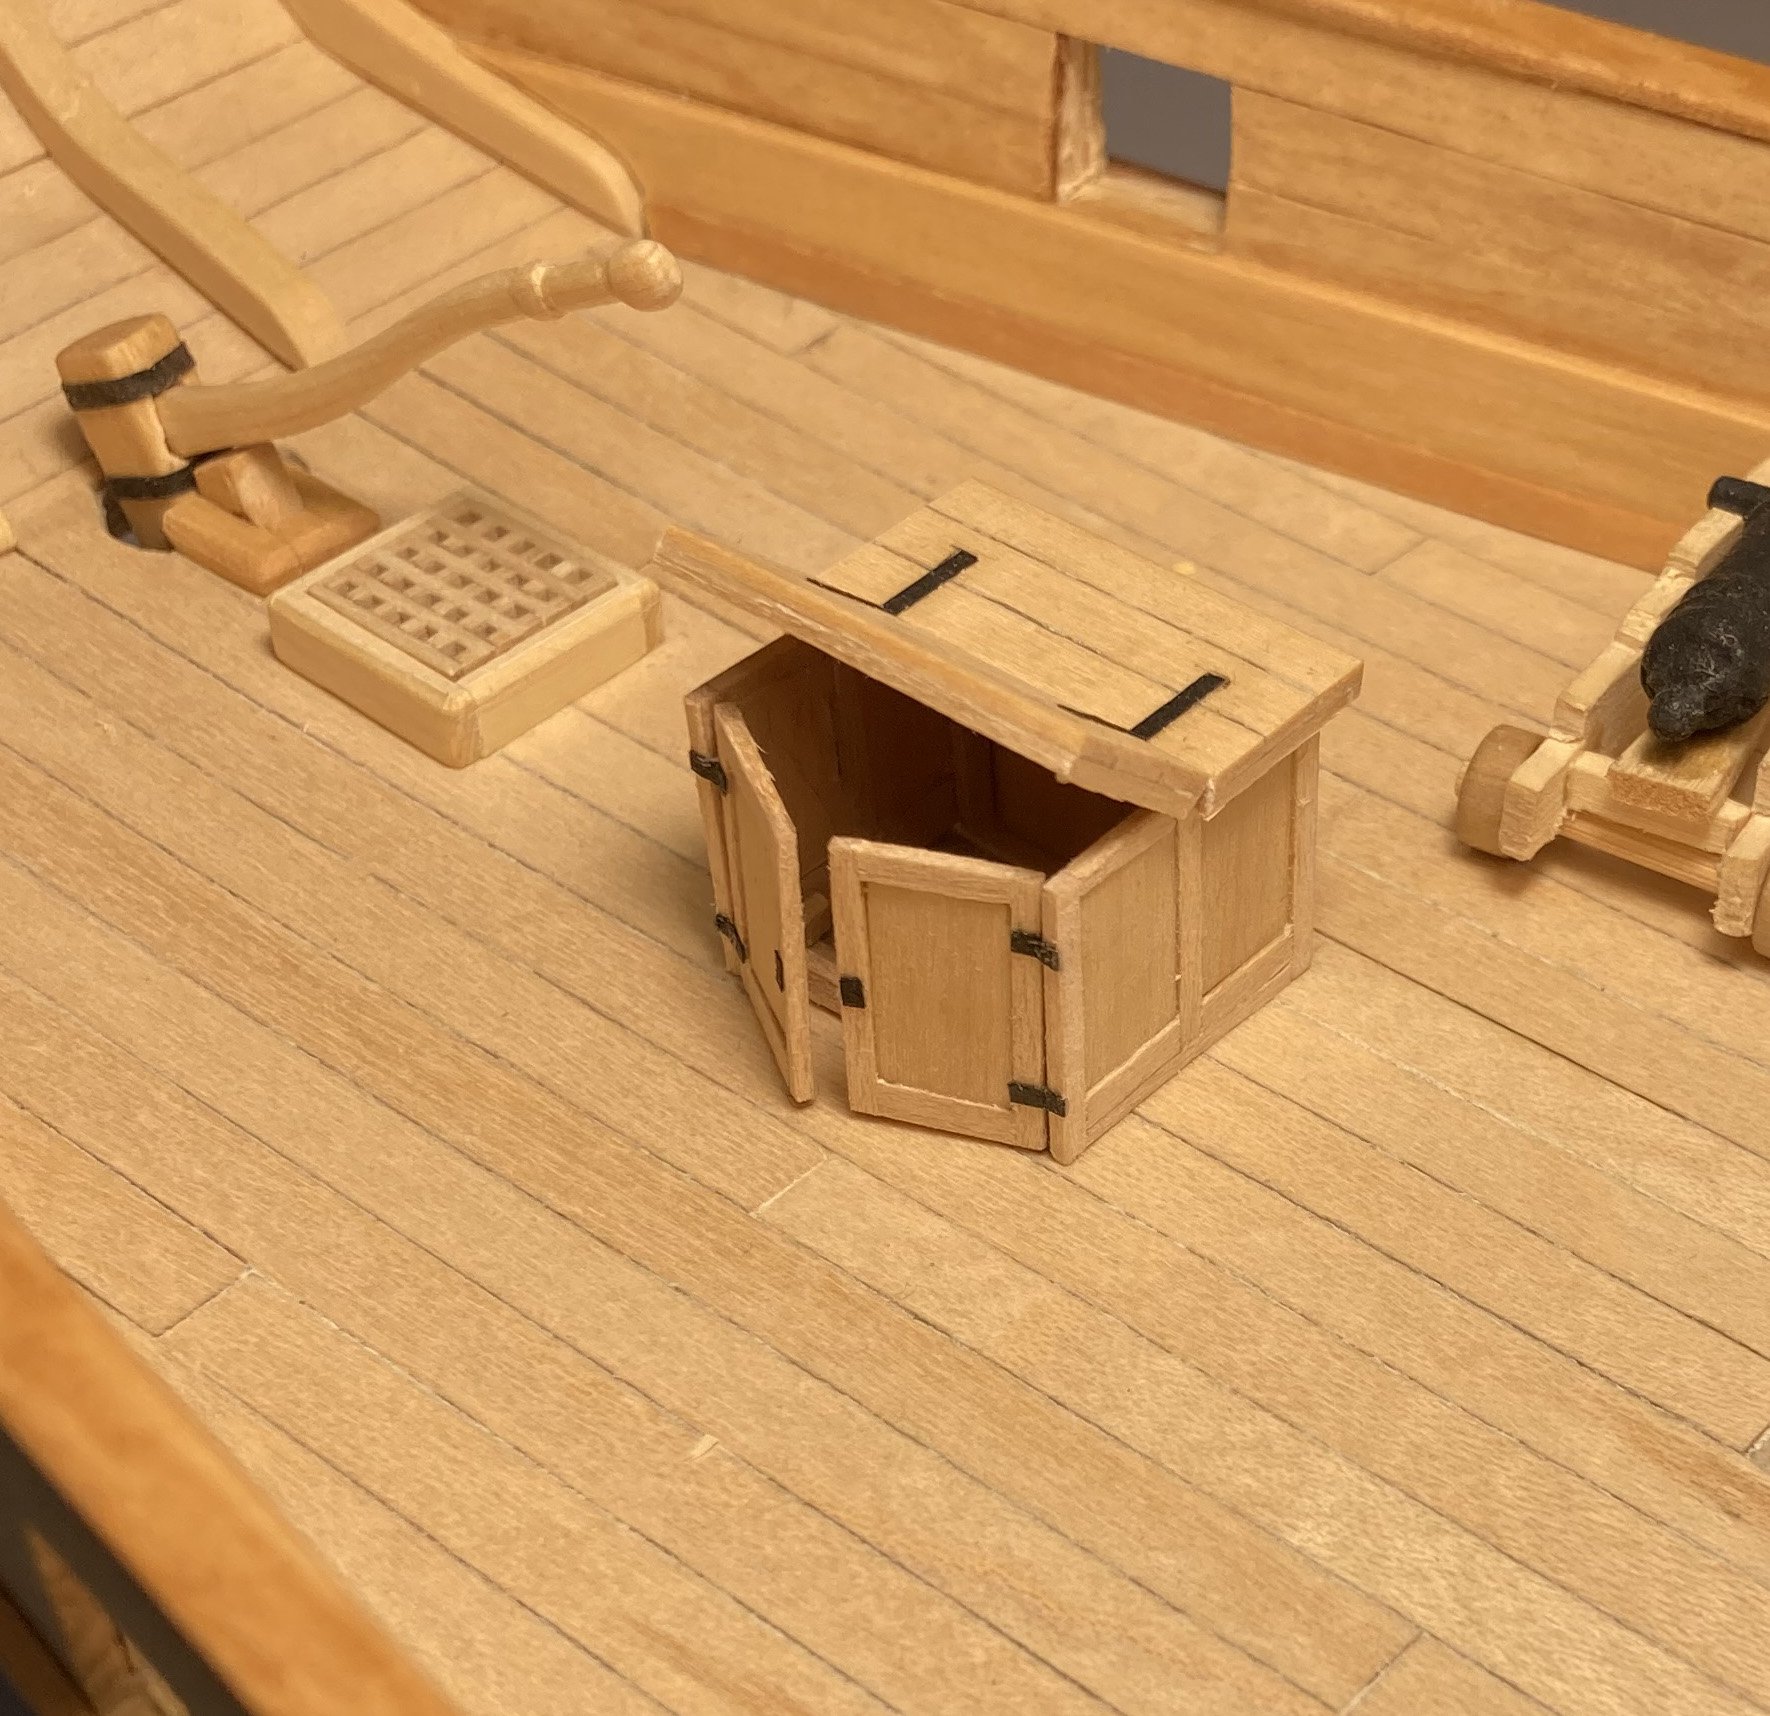
Thanks Craig @iMustBeCrazy. I have now added another cutter, based on advice you gave earlier I have made a new cutting jig and got tiny saw to go with it. Then from the drawings we discussed before I made a kit of parts. when glued together they make V3 of the companionway. With a bit of gentle sanding it will look okay. Not sure if I will add a hole and a ladder so I can show it open. Tim

-
Hi Chris On topic question ( I hope ), I recently ordered and received your excellent figure for 'Hornblower', I would like to remove the base so I can fit him to the deck of a ship. Can I just Dremel it off, not sure how the plastic will respond? Tim
-
Ha - that looks a really good resource, is there an index for what's on them ? Thanks toni @tlevine Sorry Chris @chris watton I have hijacked your thread. Tim
-
Hi Hollowneck @hollowneck Can I get back issues once I have joined? Tim
-
Is that U.S. or us ? I would like to read the article but not yet a member. I should get round to joining here in the U.K. Tim
-
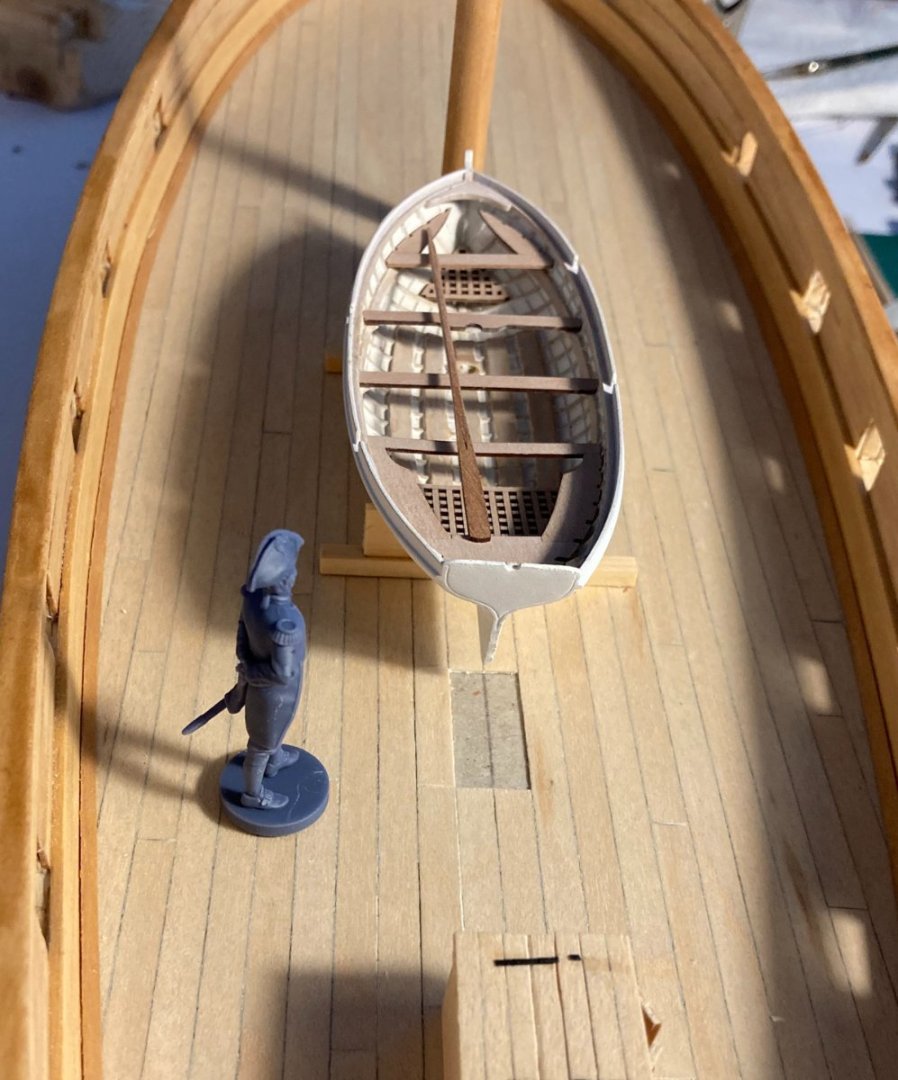
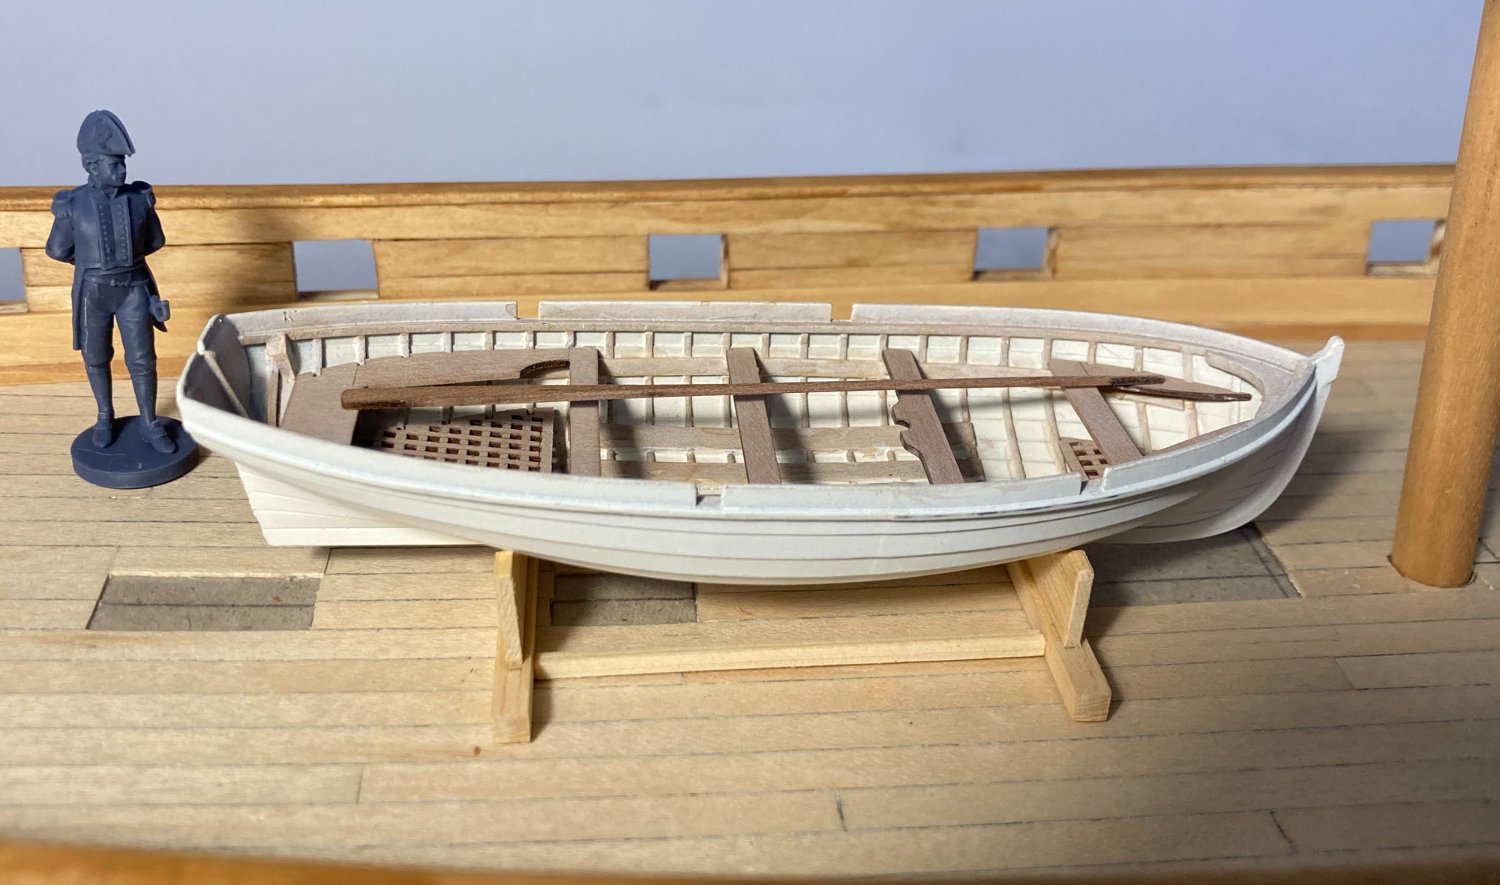
Where does time go? I keep getting diverted - Family, friends, house and garden all need attention the garden has woken up and keeps needing care. Then in the post I got the cutter from Vanguard Models ( thanks Chris ) @chris watton that I ordered to go on the deck of 'Speedy' if you remember the painting of cutter 'Kite' that I posted had a pair of boats, I will just have this one on 'Speedy' This is very much WIP, any comments welcome. Practicing my painting technique. Not sure if colour would sit well with the rest of the model. I have lightened the pearwood parts with a pale wash. The Lieutenant is waiting to be coloured in next, so I will need a lot of practice. Tim