
MORE HANDBOOKS ARE ON THEIR WAY! We will let you know when they get here.
×


oakheart
-
Posts
518 -
Joined
-
Last visited
Content Type
Profiles
Forums
Gallery
Events
Everything posted by oakheart
-

Hello everyone, a beginner dips his toe.
oakheart replied to Gaz's topic in New member Introductions
Welcome Gaz You will learn loads from the amazingly helpful crew here, if you get stuck just ask. Tim -
I'm sure a lot of us would like to know what those things are. As you say we are all learning Tim
-
Love the grunge look you are getting here, Tim
-
I have downloaded and will digest over the next couple of days. Initial view looks good. I assume they printout on A4 paper? Tim
-
Thanks for the great explanation, off I go to cut some parts. I will get back to the build eventually. but things keep diverting me, I am contemplating building a mini table saw, I have all of the parts to do it apart from a saw blade. Ali plate, bearings, motor, arbour etc. Not sure how useful it would be. I have a small bandsaw on which I can rip wood close to finished size and then thickness sand on my nice new sander. Tim
-
Two questions:- Is it MDF ? Are they blocks glued together? Tim
-
I like that idea. Tim
-
Thanks for that Craig @iMustBeCrazy. I have a really old and worn ali. mitre box which is no longer accurate. I have just purchased a new razor saw to replace the very old and now blunt saw that came with the mitre box. Looks like I need to make a cutting guide like you have. The new saw is pull saw which I like a lot better than the old push one, so I guess the cutting guide will need to be the other way round, in fact thinking about it, it should work either way round. The one downside of the pull saw will be that I will not be able to see how deep I have cut. I need to think of a way round that now, Tim
-
Question for Craig @iMustBeCrazy ( or anyone ) how do you get the half lap joints so neat? I have really been struggling with this tiny wood working. I need to learn some new tricks. Old seaDog Tim
-
That is very neat. Something for me to aim for. For those who have not seen Craig's @iMustBeCrazy Lapwing build log get over there and take a look Tim
-
Looking good so far................ Nicely done, I think it looks good open, but you could make working hinges so you don't have to decide. I can't decide which wood to use on mine. Tim
-
This gets even more intriguing , glad I haven't started cutting anymore wood I still don't understand having the stairs at right angles to the doors, the access is difficult enough anyway. I hope you have written this all up on your Lapwing build log! Tim
-
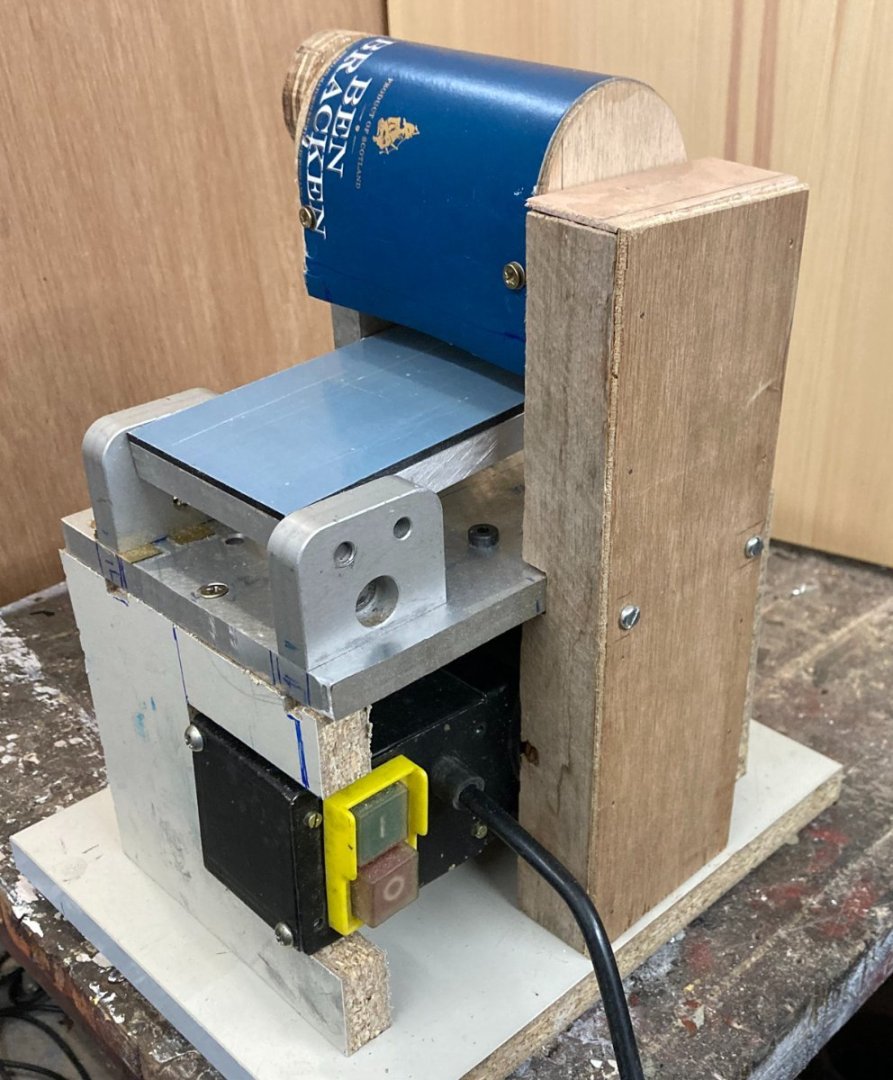
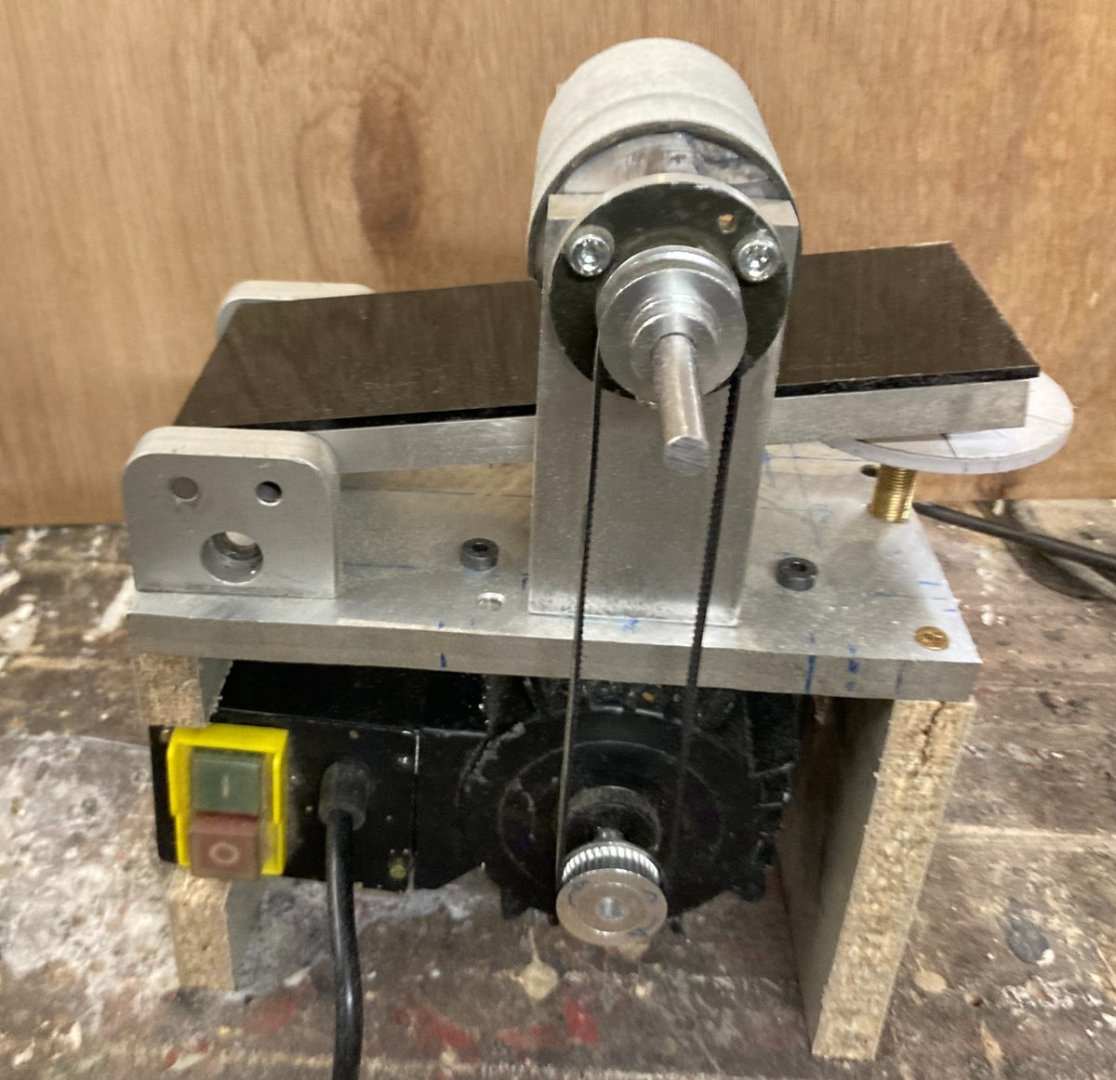
The motor I have used is 2,000 rpm the pulleys are the same size so that gives 2k at the drum, which is 50mm ( 2~) dia. I have 120 grit paper on the drum and it's pretty smooth, could hand sand with a finer grit to get it better. I very pleased with the mini machine, making it was almost as enjoyable as ship building. I have added all the safety features. Tim
-
Not much has happened on the cutter over the last few days. I spent the time building a thickness sander out of the drum from a 3" hand planer on which the motor had burned out, I happened to have a motor from an old belt sander, some Ali. plate some bearings and a lot of inspiration from Jim Byrnes. All I had to purchase was a GT2 belt. Everything else was scattered around the workshop, I get called a hoarder, but hey they did come in useful. It works, so now I need to add a dust collection hood and a belt guard and off I go. Tim
-
Aren't we all. 🙂 I will go and take a look at that post, thank Gregory @Gregory Tim
-
Thanks gregory @Gregory that looks really good what wood is that? Great detail, I like the ring handles they must have been fiddly to make. Is that at 1:64? Tim
-
I know I just did that as well the range of hinge styles was incredible, as you say, just pick one that suits. Yours does look as if it would serve the purpose. Tim
-
Next question has to be, what about the hinges, lot of kits show rather crude blacksmith made style. Which I copied in my V1. Looking at the models we have been discussing, they all look much more sophisticated more like cabinet hinges of the time, which I guess would be brass or bronze. druxey @druxey said " In the 18th century 'T' style hinges were most often used." https://modelshipworld.com/topic/2919-door-hinges/ but we are 20 plus years on from that. Tim
-
Yes, as far as I can see the models we have seen so far show something like that. Now I need to cut and mill some wood to the right sizes. At 1:48 I will need some 0.5mm ( 1" ) and 1.6mm ( 3" which I have some left ) I have just tested the new thickness sander and it works ( woohoo ) I only have a simple rubber band driving it for the test and it slips, just ordered the correct size of GT2 toothed belt, should be here next week. That will give me time to finish the rest of the mechanics of the sander. Tim
-
Wow 😵 I go away to the workshop to work on my DIY sander and when I come back you have drawn it all up. thanks Craig @iMustBeCrazy So do we think the lid would be made of planks with visible joints as I did on my V1, or would it be more refined with the planks closely joined and not really visible ? Tim
-
That would make it both stronger and easier for them to build. I just looked up that model on NMM and there are some photos there as well https://www.rmg.co.uk/collections/objects/rmgc-object-66309 Tim
-
Thanks Craig @iMustBeCrazy I agree that would be a good example to copy, I will draw it up to scale. edit: - you have already drawn it 🙂 I did look again at all the cutters that tony @tkay11 photographed but none looked similar. Tim
-
Ah yes, I see that now. That makes the most sense, I will do a new version like that.
-
I agree, they really did do it that way, my dilemma is how did they actually make the doors. should they be trapezoid and hinged oddly as I have done, or ? I need to research 18th and 19th Century wood work now. As used on ship of course. I am going to remake the whole thing in cedar, just building a dedicated thickness sander from scrap parts first. Tim
-
Here is another of a cutter yacht "Ganymede" of 1870 by the same artist Nicholas Matthew Condy https://www.mutualart.com/Artwork/The-R-Y-S--cutter-yacht-Ganymede--with-t/0861A8BC3D3D2429 it shows a head popping up the companionway with loads of other good detail. Once I started looking there are other paintings, the next one clearly show the lid hinged sideways and the windows that Craig @iMustBeCrazy mentioned. https://www.meisterdrucke.ie/fine-art-prints/Nicholas-Condy/825579/The-Yacht-The-Guernsey-with-her-Owner-and-his-Family-and-Crew-Aboard.html How she got down the companionway in that dress we will never know. Tim


