Supplies of the Ship Modeler's Handbook are running out. Get your copy NOW before they are gone! Click on photo to order.
×


oakheart
-
Posts
518 -
Joined
-
Last visited
Content Type
Profiles
Forums
Gallery
Events
Everything posted by oakheart
-
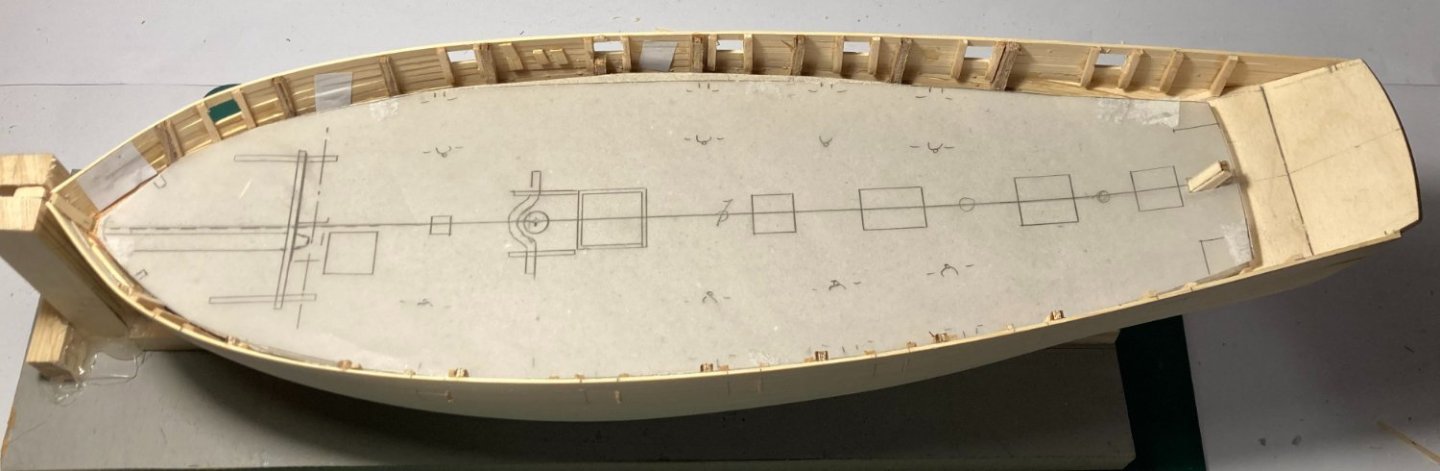
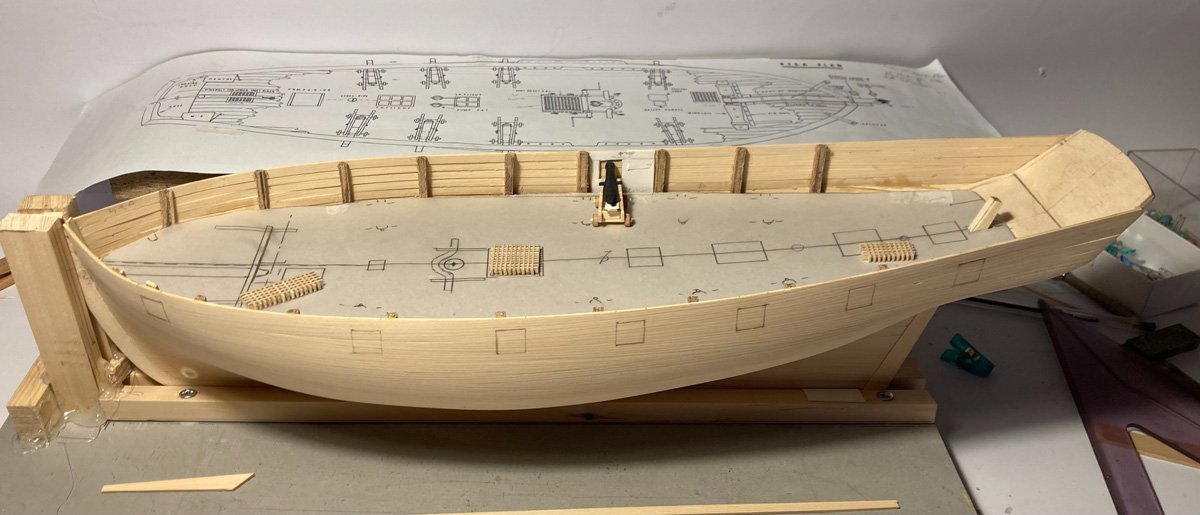
 Happy New Year to all onboard. I managed to get the wales cut and glued in place, I was really happy with the result. Then I went back to figuring out the deck. I cut out the deck plan from the original design as drawn by Bill and laid it in place. As I looked, the old saying of "measure twice and cut once" sprang to my mind. How did I managed to do that? I had measured from the transom taking measurements from the side view drawing, it looks like I had got the stern all wrong, it's too long, so that threw out the gun ports. Not a lot I can do about it now, so I will crack on and finish this model knowing that it's wrong, I think it should make a nice looking model all the same. I don't remember who said it, but apparently "we learn nothing from success." Tim
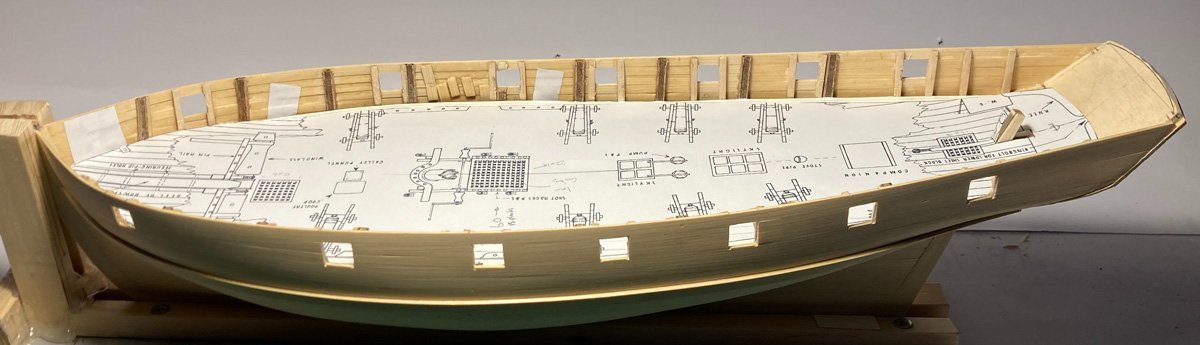
-
Thanks druxey. That confirms it, I will plank with the 5mm strips that I have, its a little wide but should look okay. This whole build is really to get more experience for later projects. Tim
-
Merry Christmas Craig, Hope Santa left some nice pressies ! I have to wait until tomorrow to see what I got.............. Thanks for the drawings they do help to get an idea of the difference, I may just stick with the 5mm planks I have already. They are maple not holly ( wishful thinking ) and too late for the Santa list now. Tim
-
I have been giving this some thought. On the plan drawn by Shoulders the deck planks measure about 5mm wide ( the lines are thick and uneven) At 1:48 scale that equates to a 9.5 inch plank is this too wide? I can get thinner planks in stock sizes so 4 mm = 7.5 inches which would seem to be a bit more realistic Dan Vadas said about his swan class sloop 'most of the planks (apart from the Kingplank) are no wider than 8 inches ' What would be the best for this model of a cutter, I did see another discussion about deck plank widths but can't find it again Tim Hope you all have a good Christmas, see you on the other side.
-
As usual your advice is good. That would make it look better. Is that deck / beam plan of the Speedy or a different cutter? I am tempted at this point to make this build the 'Kite' there is a great painting of her in action off Beachy Head on the south coast of Britain by Montague Dawson I think she was a sister to Lapwing. The painting shows the drama of a chase really well, my model will just be static on the shelf. maybe put a print of the painting behind it. Tim

-
Hi Carter Welcome to this crazy place. What is your current project? Tell us a bit about what you do. Tim
-
After doing some more research, I think I will go for a simple deck like the one that Chris Watton designed for his Cutter Alert. Here is a screen grab from the online manual. Saves me drawing up my own, thanks Chris. I will not do the treenails shown.

-
Having looked at Chucks deck, I think I will go for a simple straight run of planks for this build the curved planking will have to wait for another build. I have seen talk of a 3 or 4 plank shift designs, I will draw up some plans but not sure which would be appropriate for this type of cutter
-
Hi Craig, thanks for the link I will go and take a look I have some holly planks to try on the deck. Your other advice and drawings are very helpful. Is that dotted line an exit hole for the WC ? Tim
-
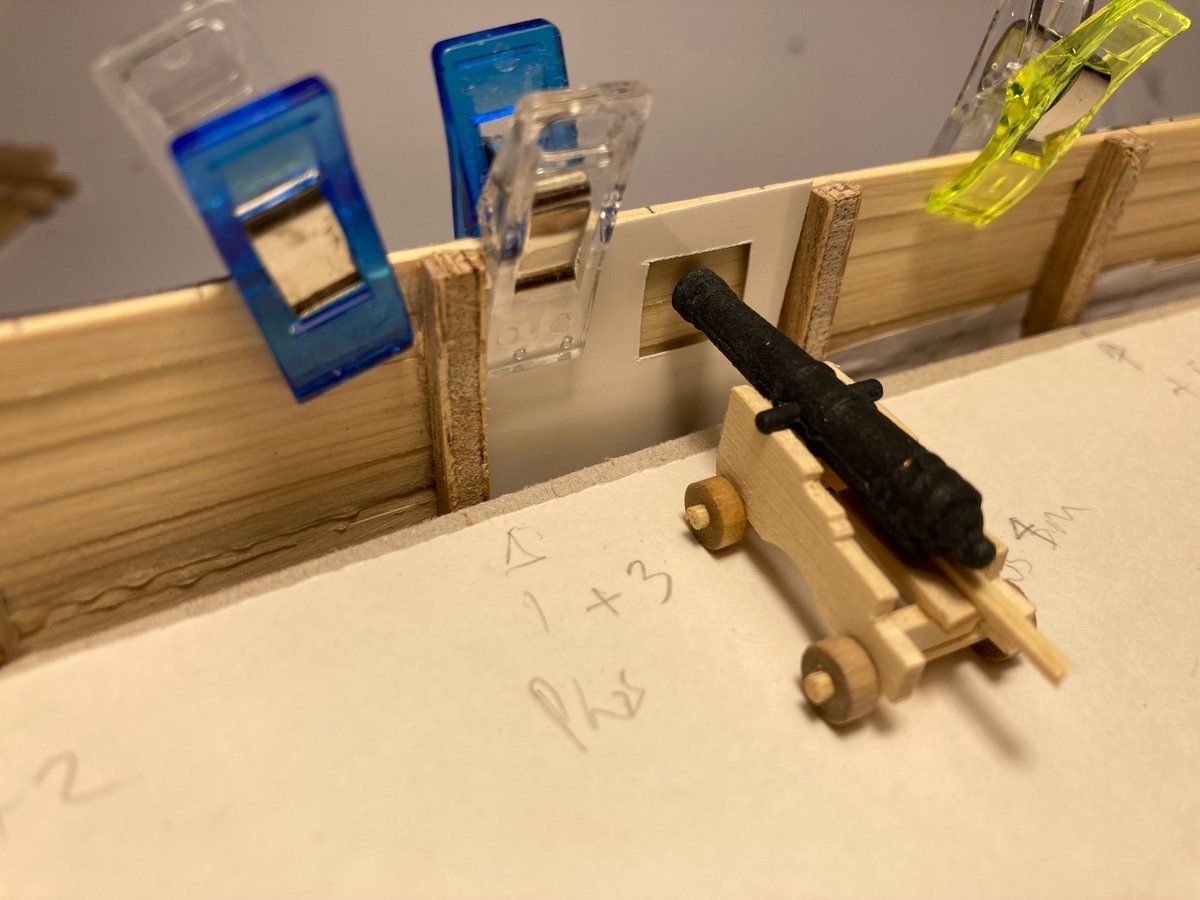
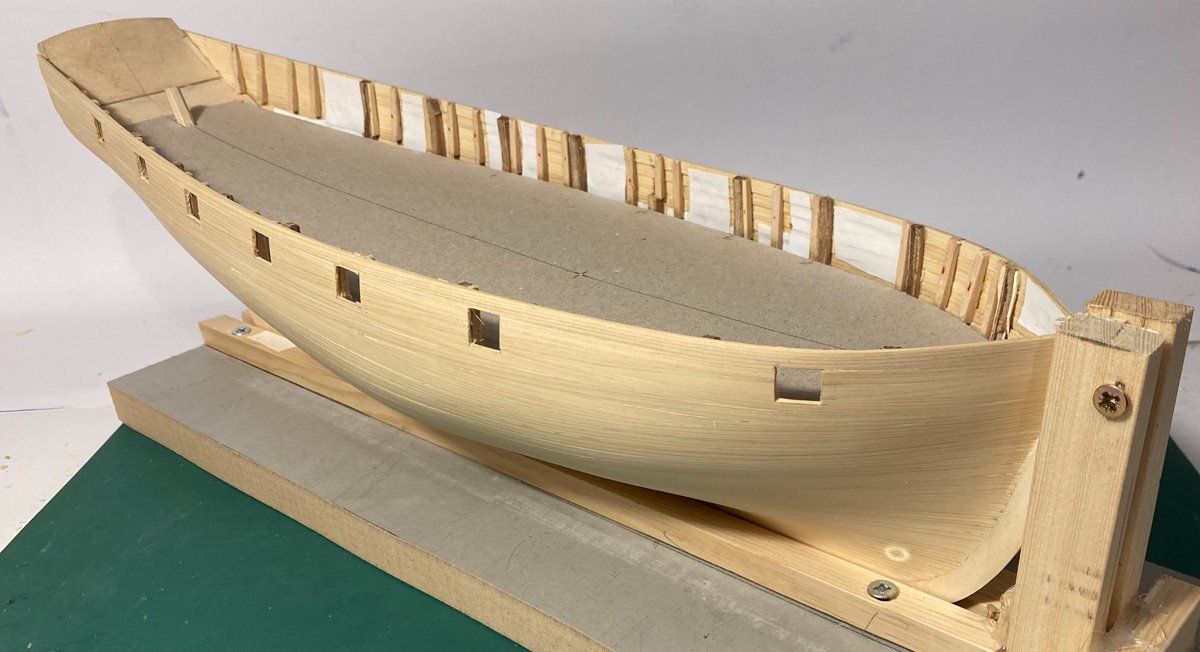
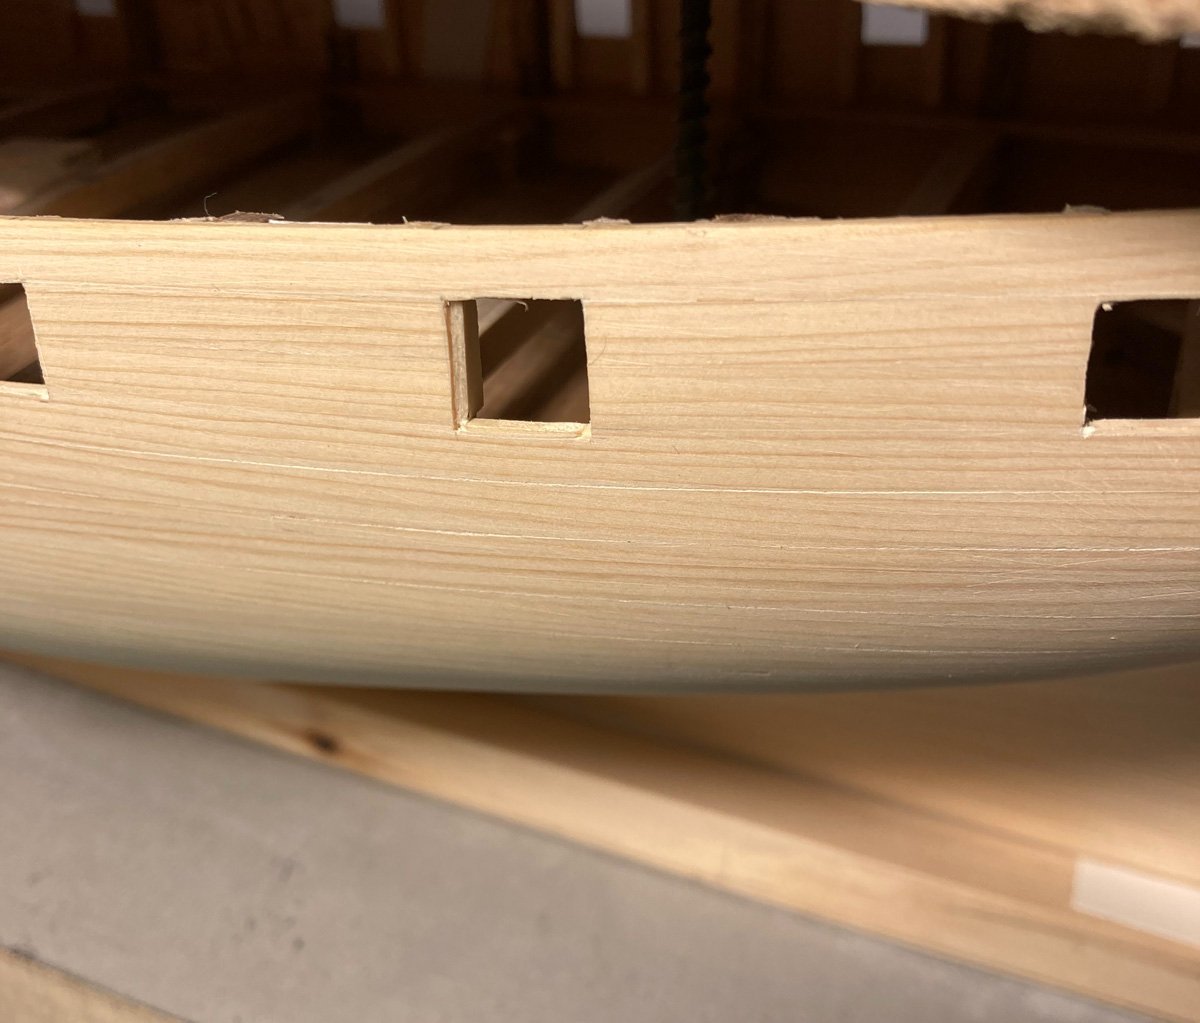
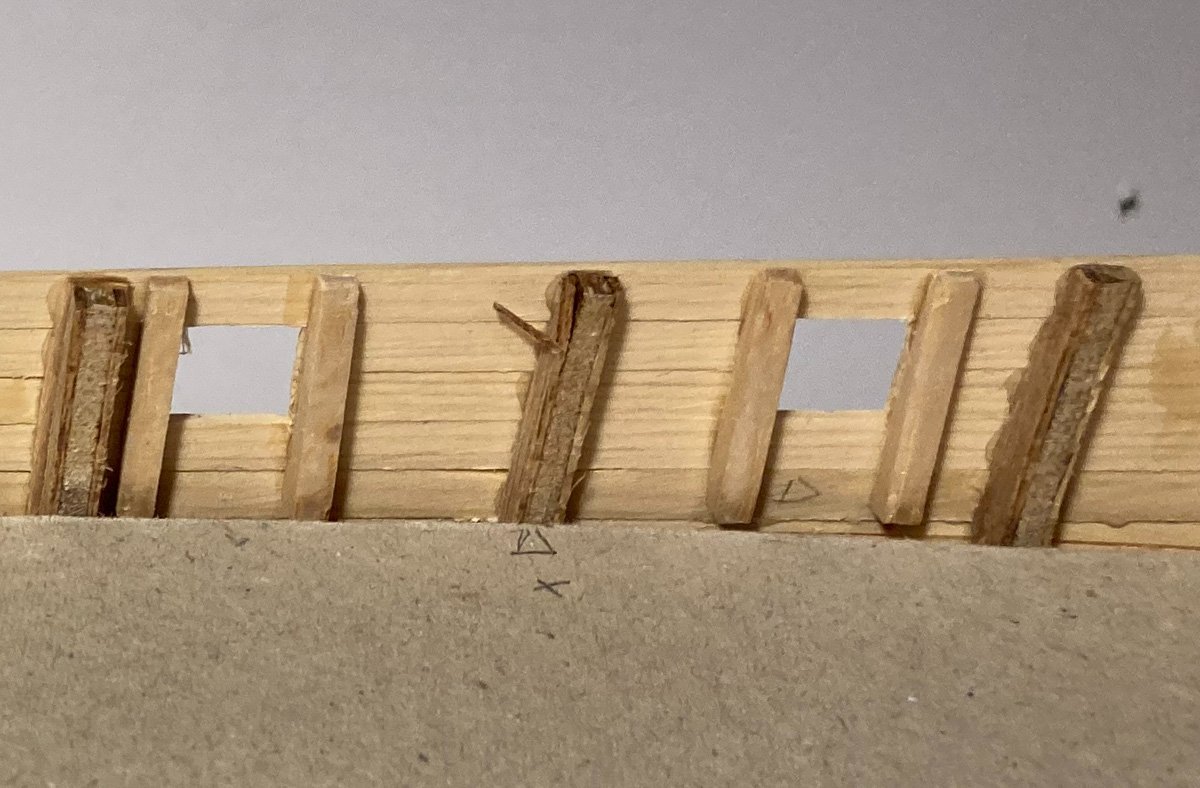
Thanks for all the likes. I have now completed the planking on both sides. The gun ports have been marked out as per the drawings before they are cut, I tested with the cannon and a card template here are the first half cut, I used a 10a scalpel to cut them, the cedar is a joy to cut. here is a test of fitting the lining, not sure if it's too thick? a lot of cleaning up to do before the ports look crisp. I have traced the deck fittings to give me an idea of what it will look like. I now need to plan the deck planking For this I need some advice, what would be the correct plank layout for a cutter like this? Is there a layout I could use, the drawings I have only show part of the deck. Only a few more days until Christmas, hope I can find some spare time to get a bit more done Tim
-
Hi Cisco Some good advice there and thanks for the compliment. I will make sure the plank is fully dry before gluing it in place. Not worked with holly, I must try and get some. Tim
-
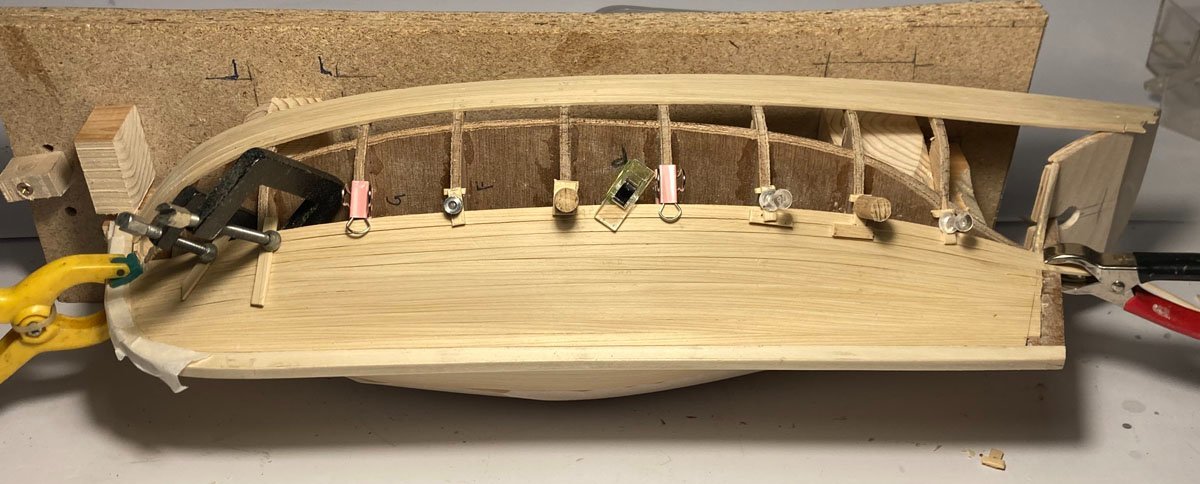
Hi Mark, my 20 year old heat gun has 2 settings, After doing a bit of research The maximum temperature of a hair dryer is 140°C, a heat gun's maximum temperature is upto 700°C Mine does low : 460°C and high : 600°C if I make a snoot for it as well it could work Here is the wet plank clamped in place, I soaked it in boiling water for several minutes then clamped it and left it to dry overnight. here it is clamped and gluing. fingers crossed 🙂 Tim


-
Thanks for that Mark, I too will try to keep it in mind. It also helps that there are not so many tasks that need attending to in the garden. I have just cleared the leaves from a Mulberry tree. The first hard frost and they all come down at once in great drifts. Hi Allan, I just tried this. The plank is keeping the shape nicely. I let it dry out off the hull as you suggested. After my coffee I will glue it in place. Tim
-
Thanks Allan, I do read my daily Stoic post on Facebook. But yes you are right, getting the right mind set before you start the task is key to getting a good result. Thanks for your support. Tim
-
I just don't seem to be able to stop myself from rushing things, spent my whole working life making models to tight deadlines, old habits and all that. I really want to slow down and enjoy the process. Any tips from any of you out there? Tim
-
Thanks Allan, I will try that. It will also slow me down. A bit worried that my hot air gun is a rather large beast, will it affect the rest of the hull? Tim
-
I have read that this could be a problem, I had done about 2/3rds of the sides together, do one plank and mirror the other side, then I could not stop myself and rushed ahead, finished one side so I could see what it looked like. ( you know me always rushing to get finished ) So far there is no visible twisting, maybe it only happens if you plank one whole side and leave the other blank. Talking of twisting, I am finding getting the twist of the planks at the stern right very difficult. I'm using a small hot iron the bend the planks and it works well it's getting the twist in the right direction and how much, that gets me all the time. Tim
-
Thanks for all the likes. I have pretty much decided to stain the hull as per the test I did earlier. So have ordered a larger bottle of the water based stain. After it's applied the gaps between the planks ( caulking ) I hope will show much more clearly. Once stained I will apply a coat or 2 of WOP. Onto planking the Port side now Tim
-
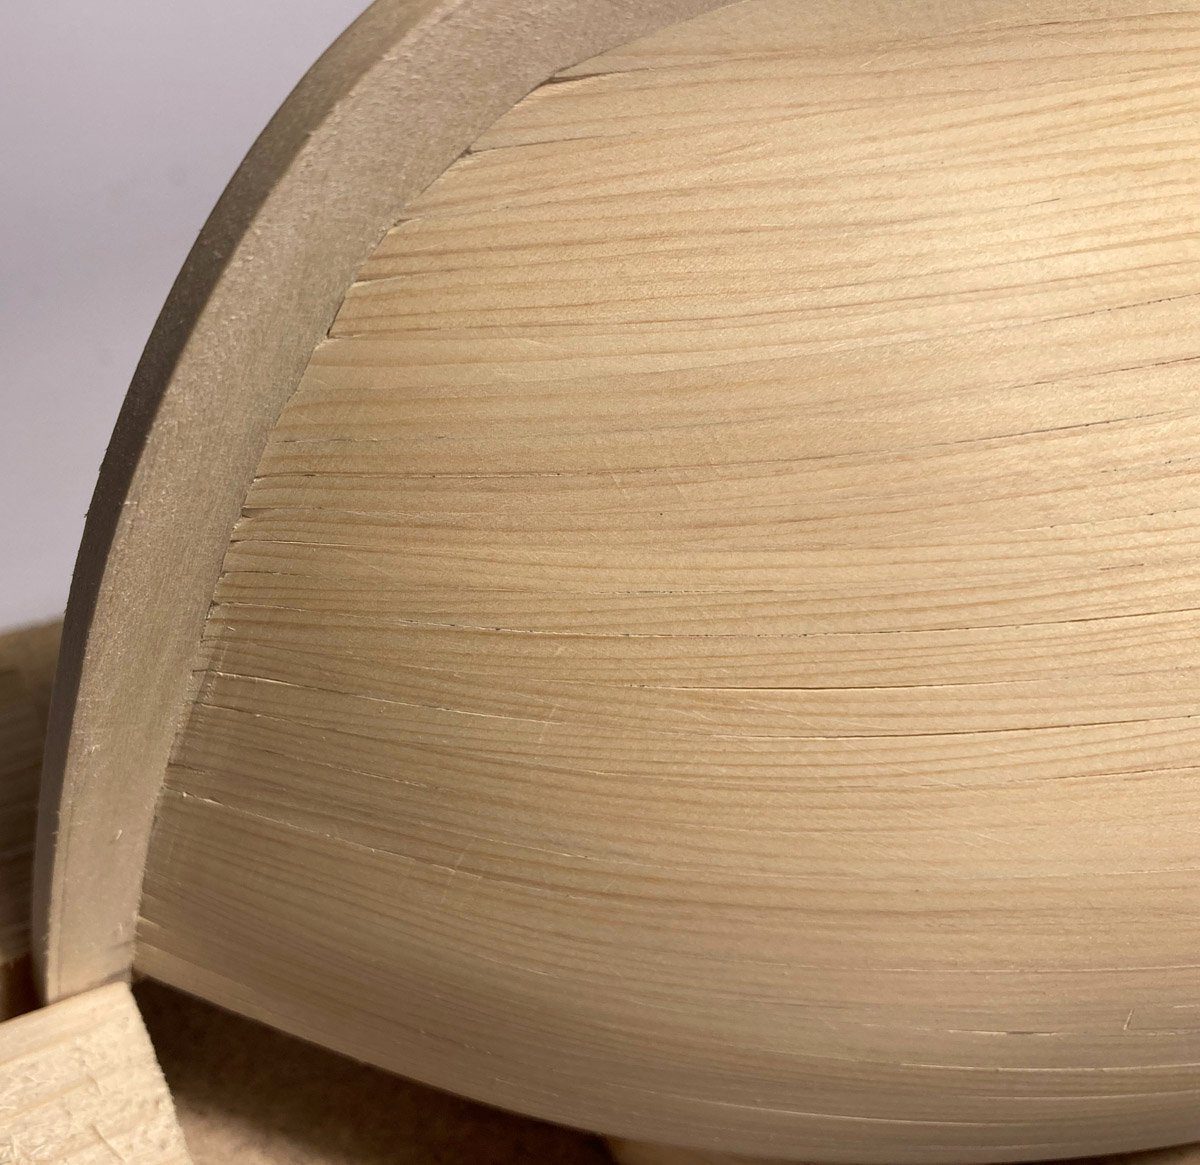
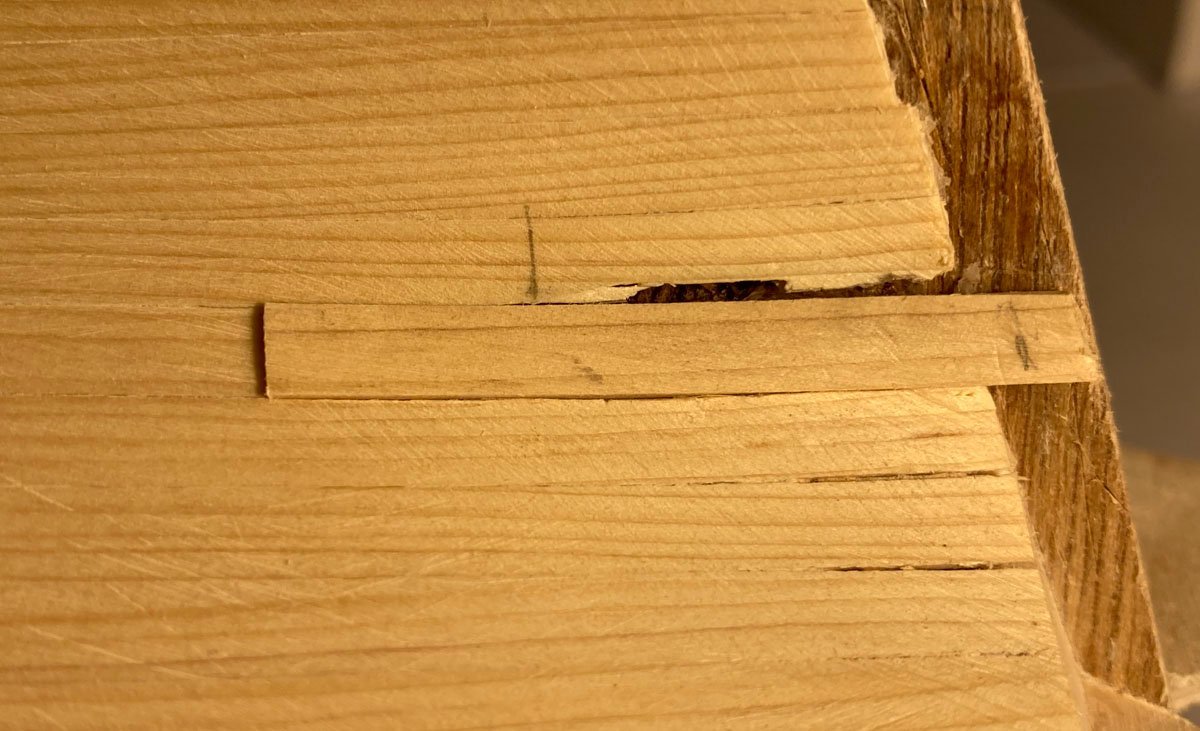
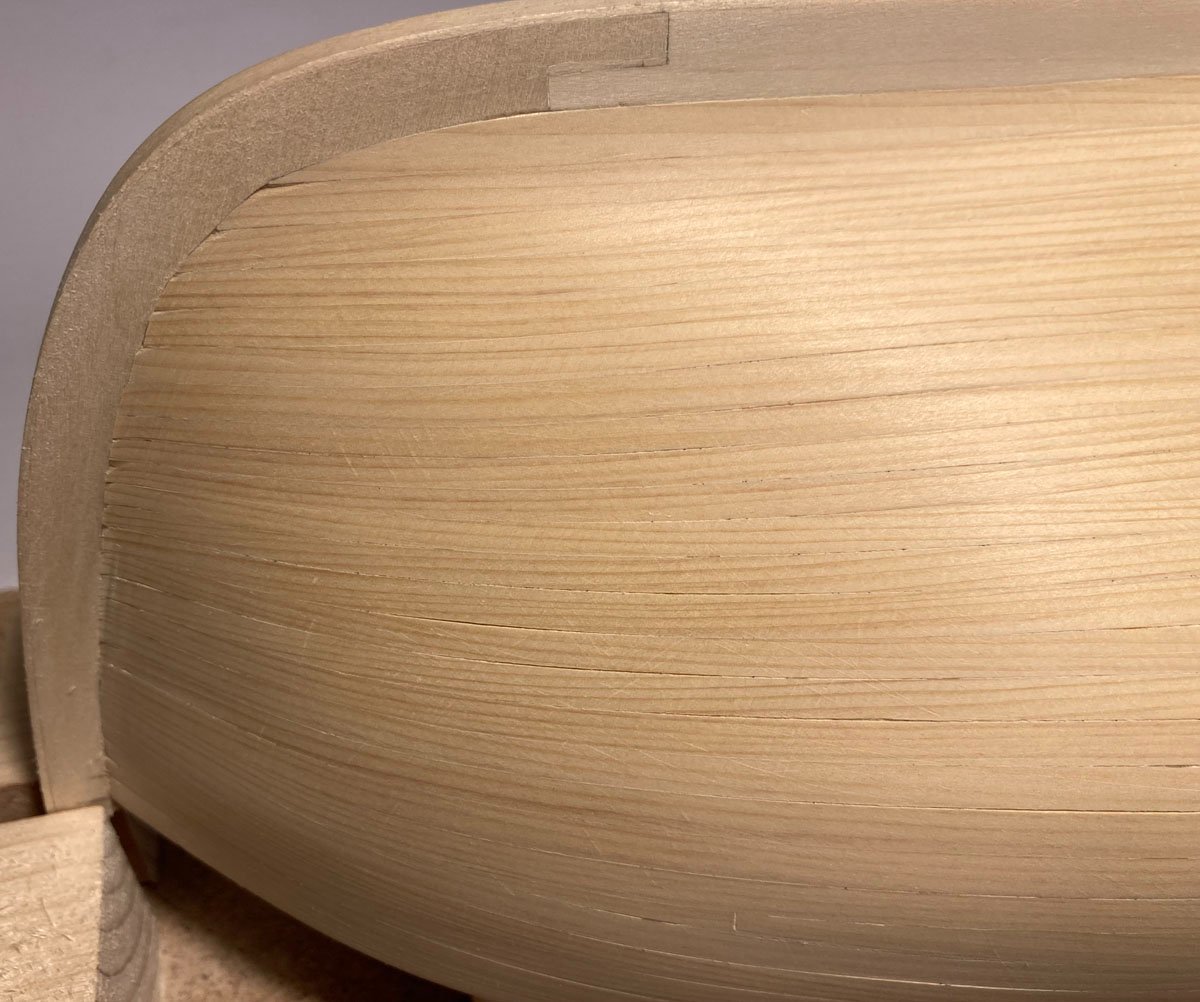
Another plank and some slivers glued in place. a bit of rubbing down and you can hardly see the join. Now just some more overall rubbing down with finer grit to get rid of the scratches. then on to the other side.
-
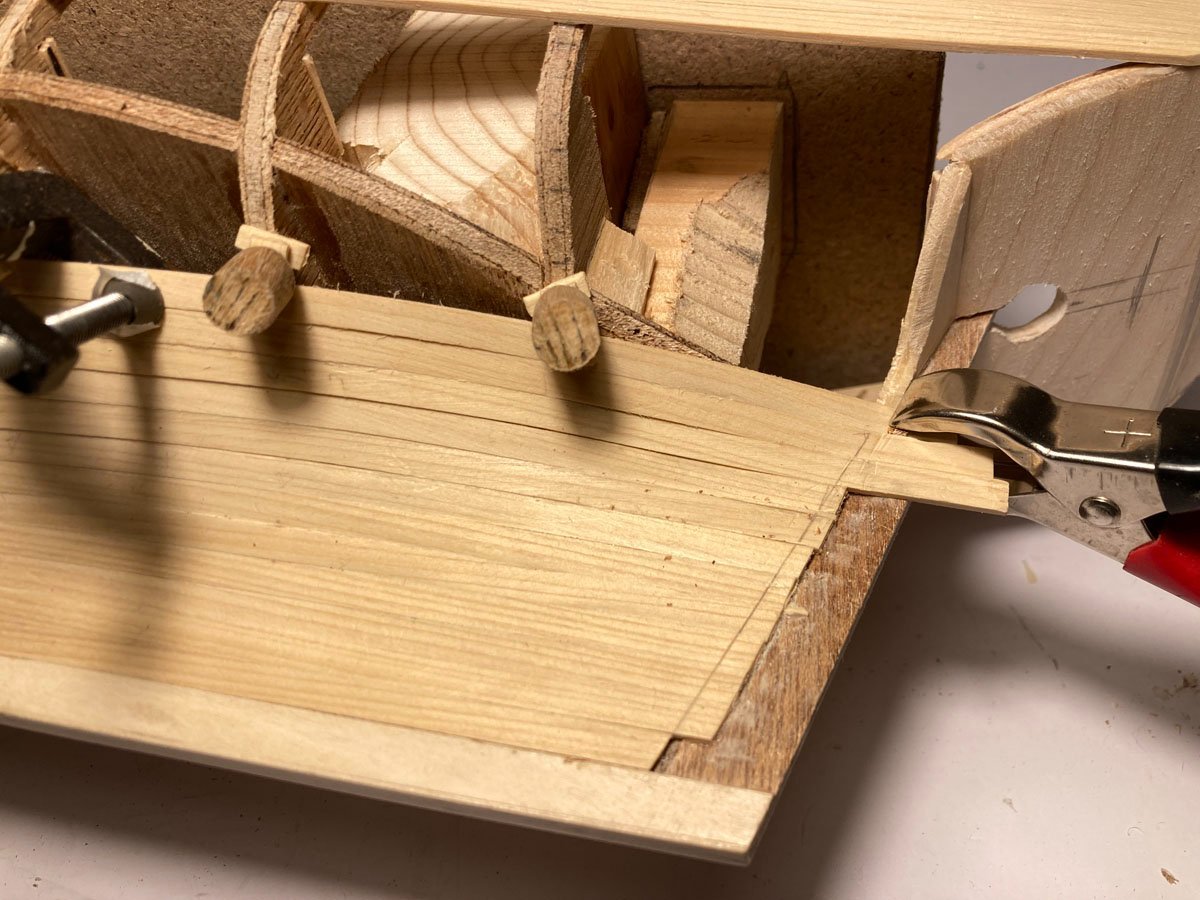
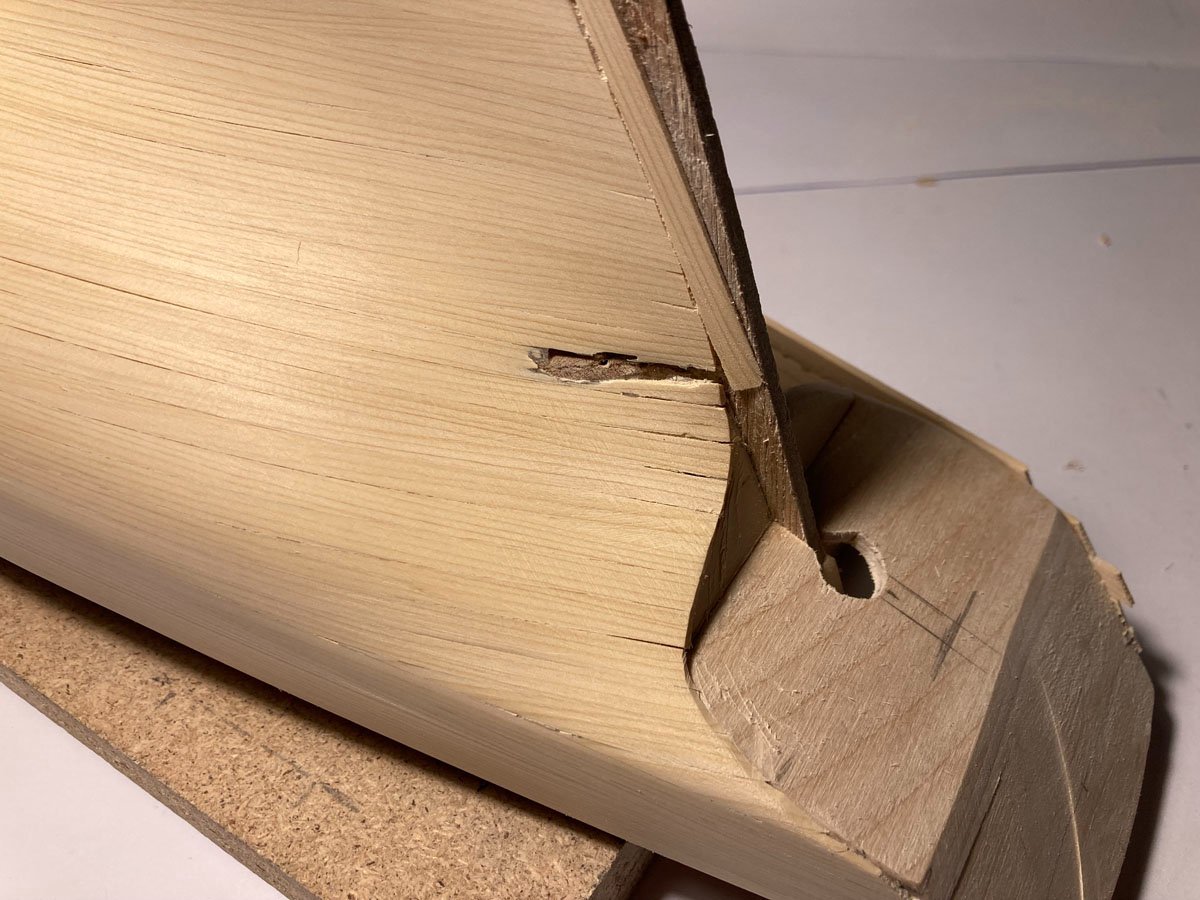
Thanks Craig - Task completed for the first plank. It looks a bit of a mess but it will not show. New plank glued in place. I will wait for it to dry and do the next one. I may make some tiny slivers to fill the cracks as well. The sternpost plank was just a sacrificial piece while I sanded the main planks down. I will make up a board as you suggest with the grain running parallel to the aft edge. Thanks again for your help and support. Tim
-
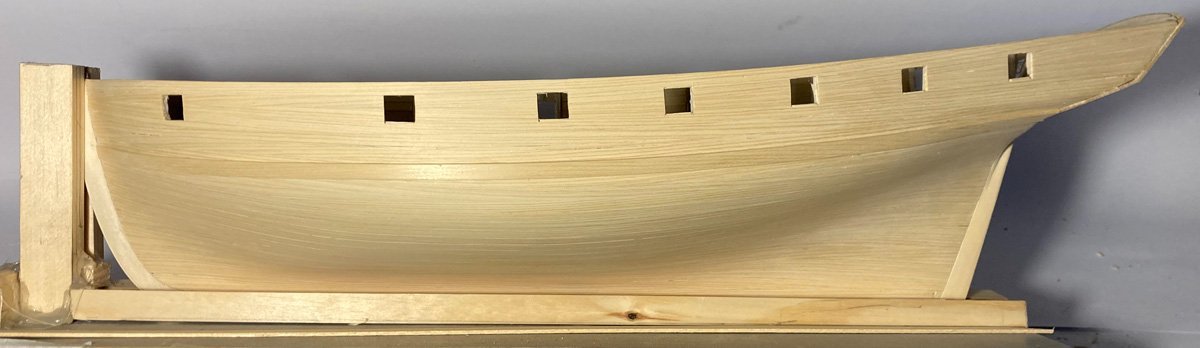
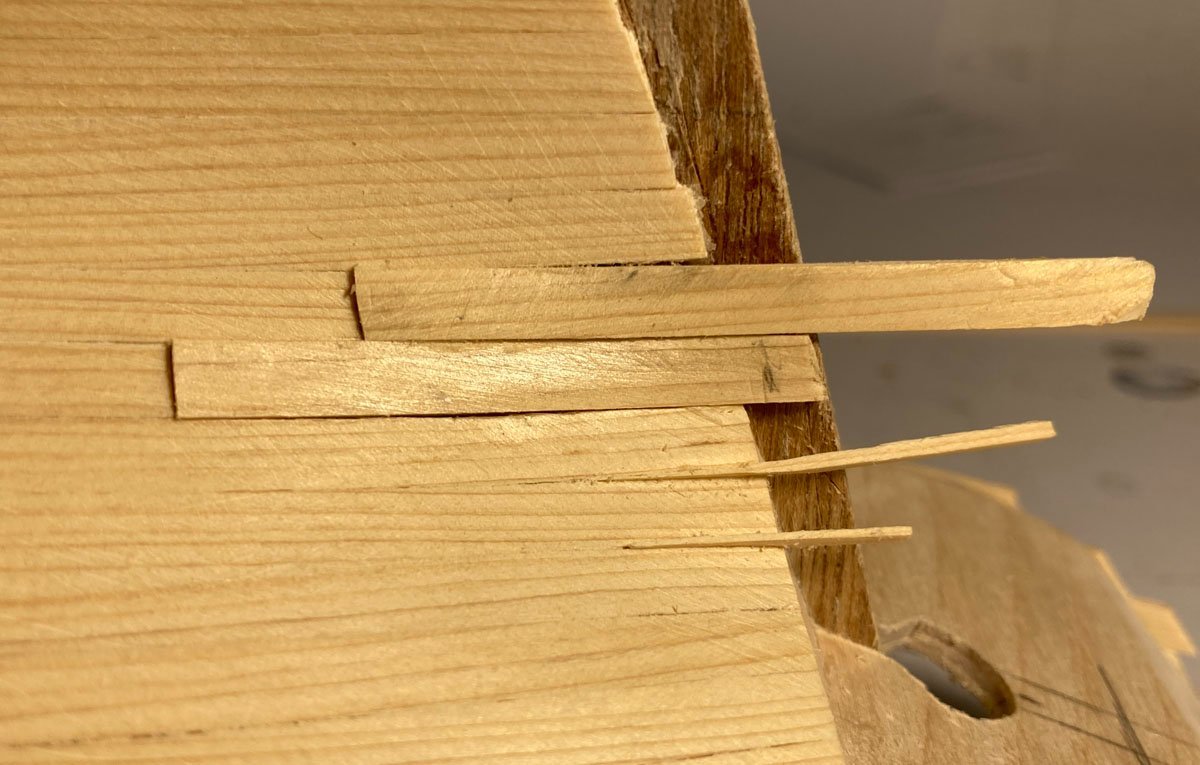
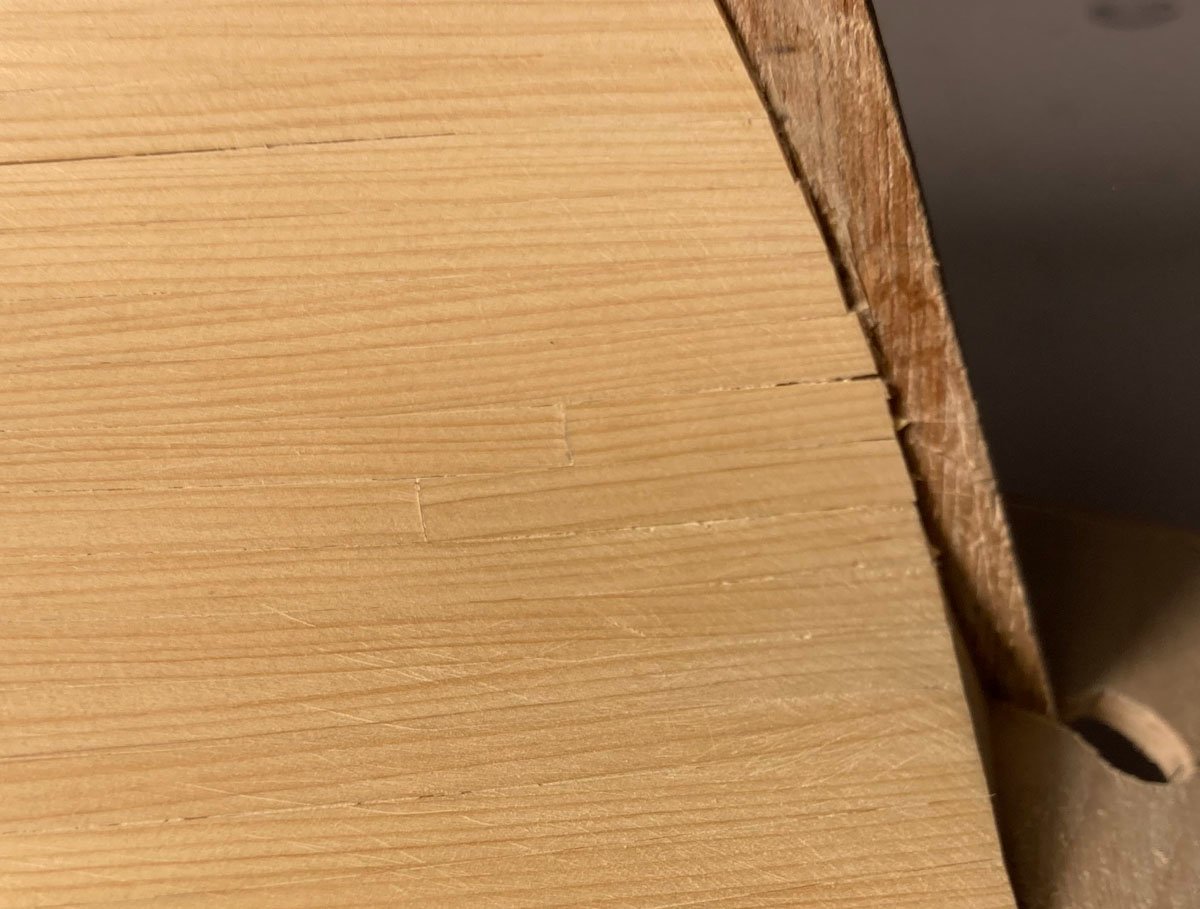
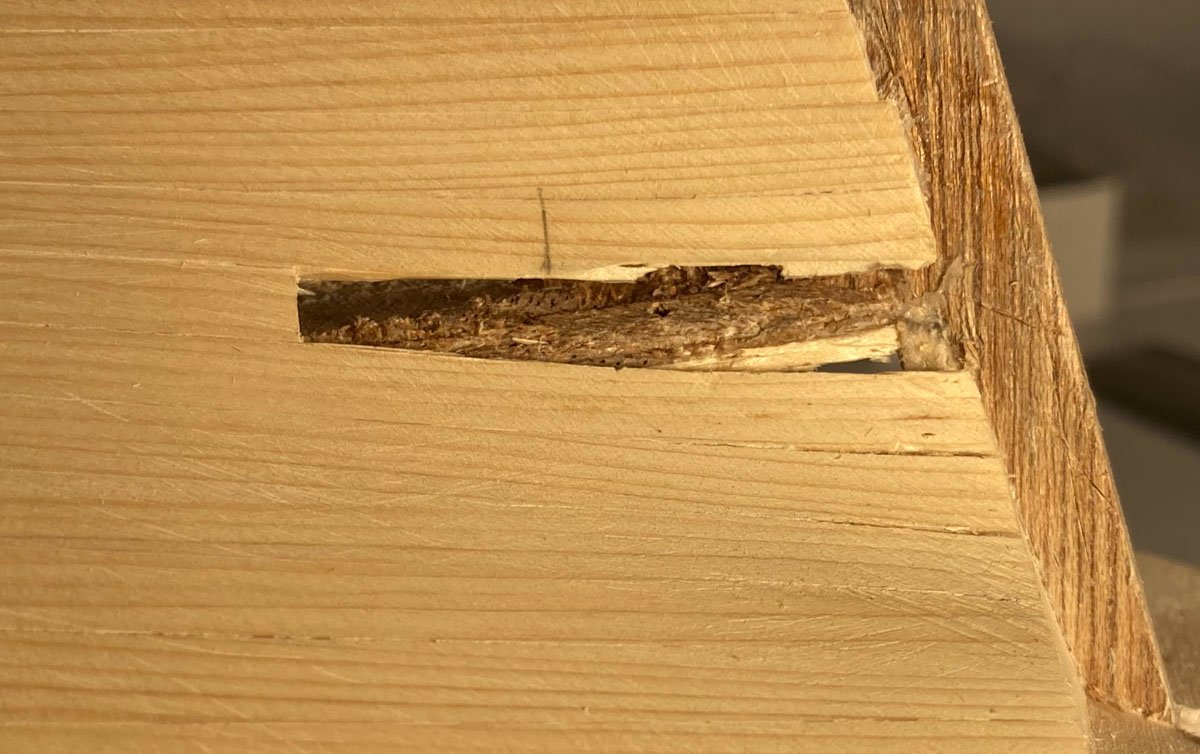
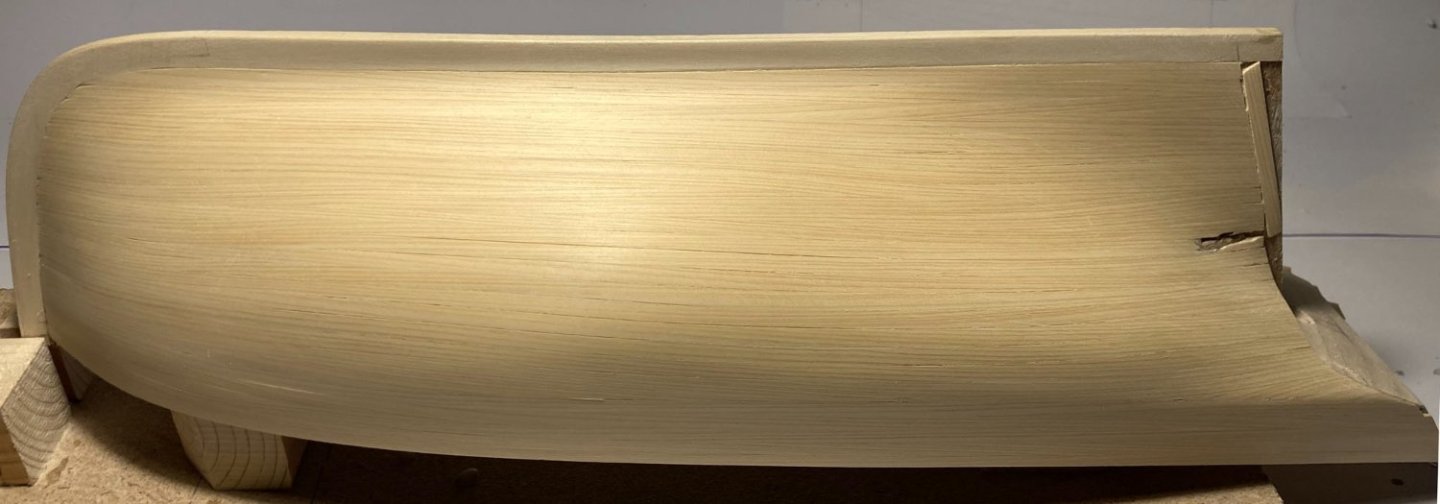
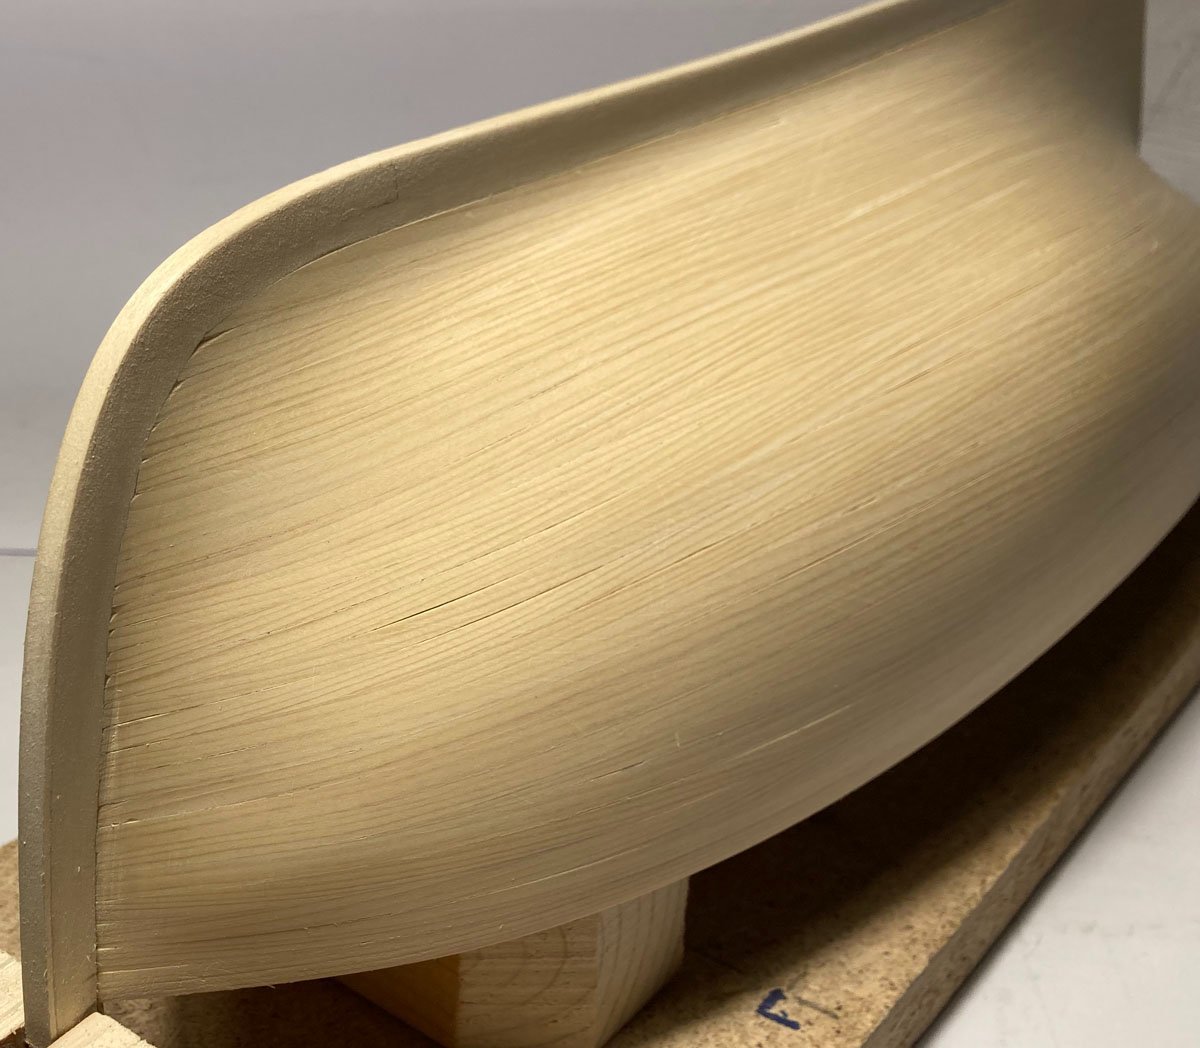
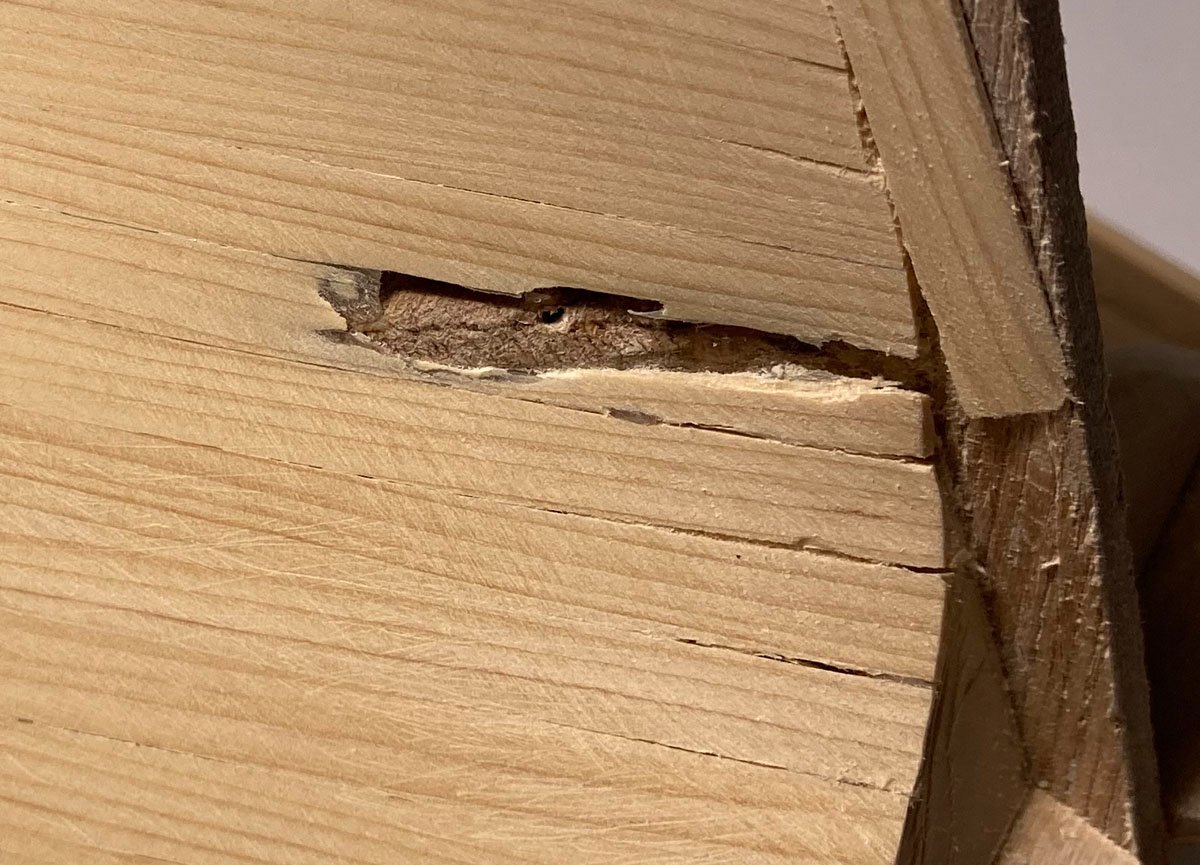
I have now finished one side of the hull really pleased with the overall result. it even looks okay close up. I did not manage to get the correct twist in the planks at the stern with the result that I sanded right through a couple of them. Looks like it may be repairable. I still need to do some clean up round the stem. So when I do the other side I now know what to watch out for. Not so sure if I will stain it, what a shame if it went patchy. all comments welcome, please give me some feed back. is the repair doable? Tim

-
Hi Craig While searching for information on cutters, I found these. some good photos of the replica https://www.britmodeller.com/forums/index.php?/topic/235131538-le-renard-1812-wip-artesania-latina-150-finished/ nice rigging and replica build https://bosco45-eklablog-com.translate.goog/?_x_tr_sch=http&_x_tr_sl=auto&_x_tr_tl=en&_x_tr_hl=fr&_x_tr_pto=wapp tim
-
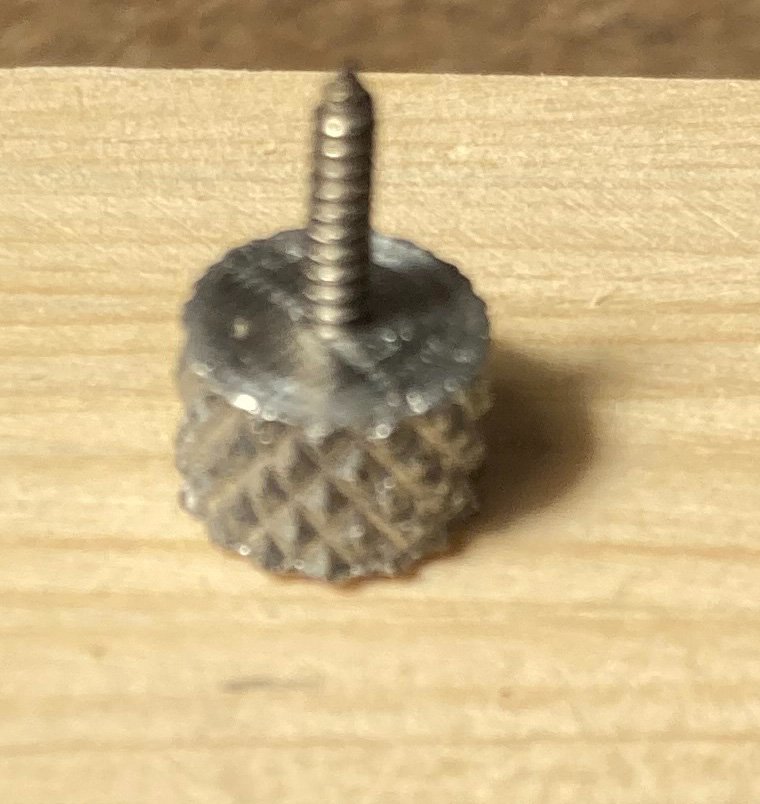
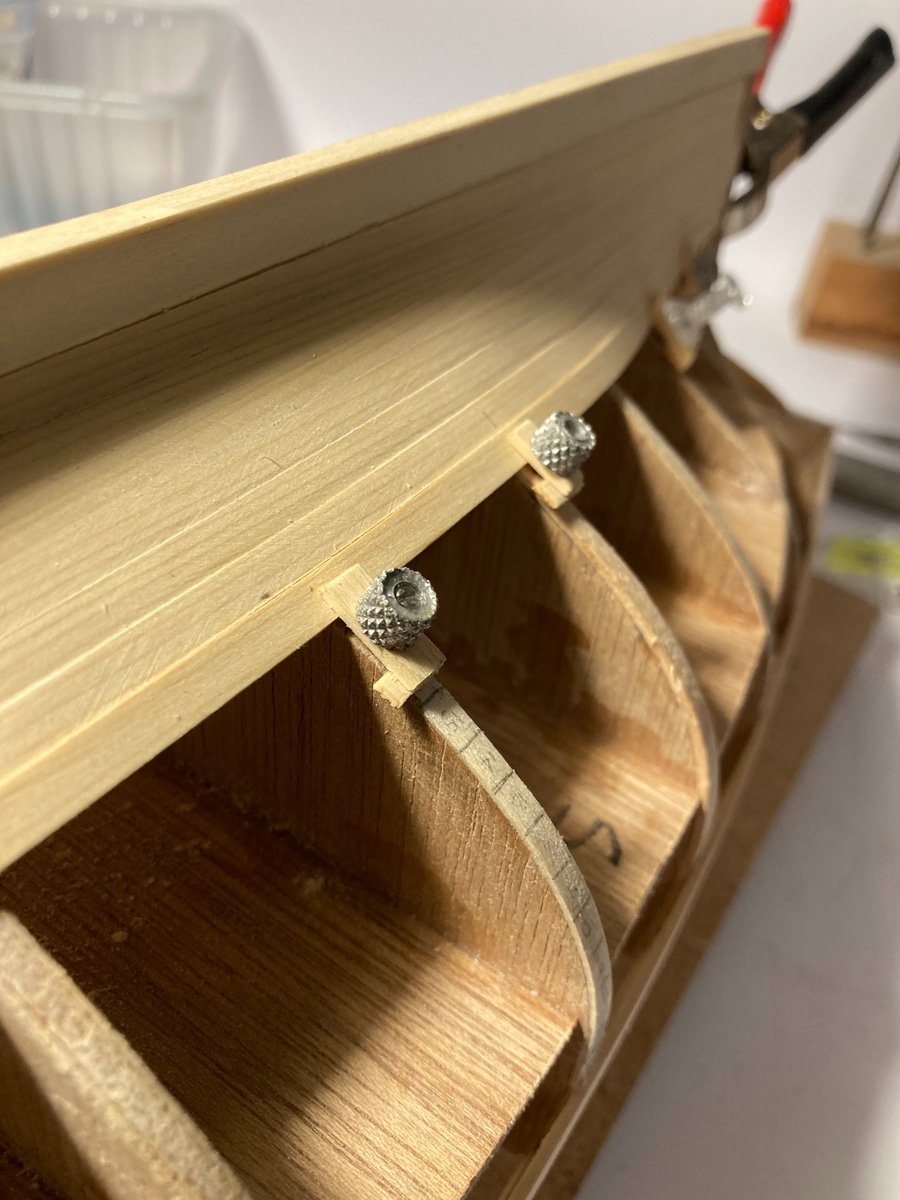
Hi javelin I did pre-drill, the screws are 1.5mm dia. so I drilled 1mm holes, not so much to stop any splitting but it is much easier to start the screws and tighten them up. Thanks for the compliment on the planking Tim
-
Thanks for the likes guys, it's nice to know you are still out there. Hope to get another couple of planks done today. Tim
-
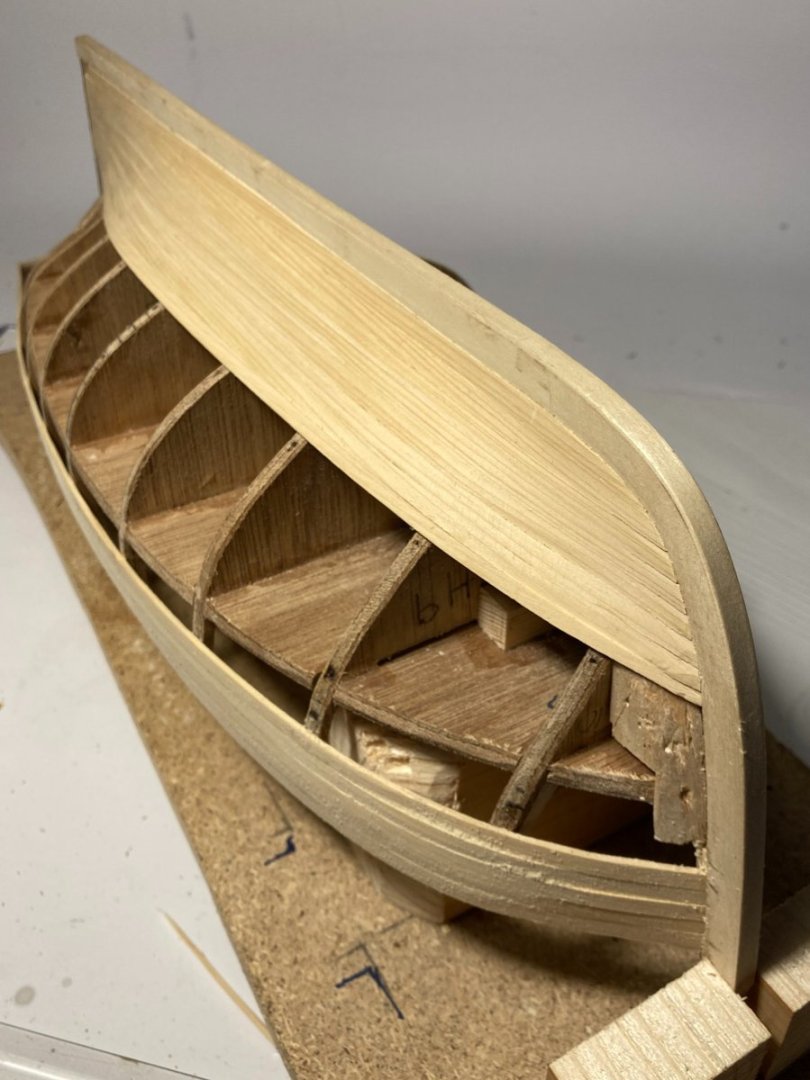
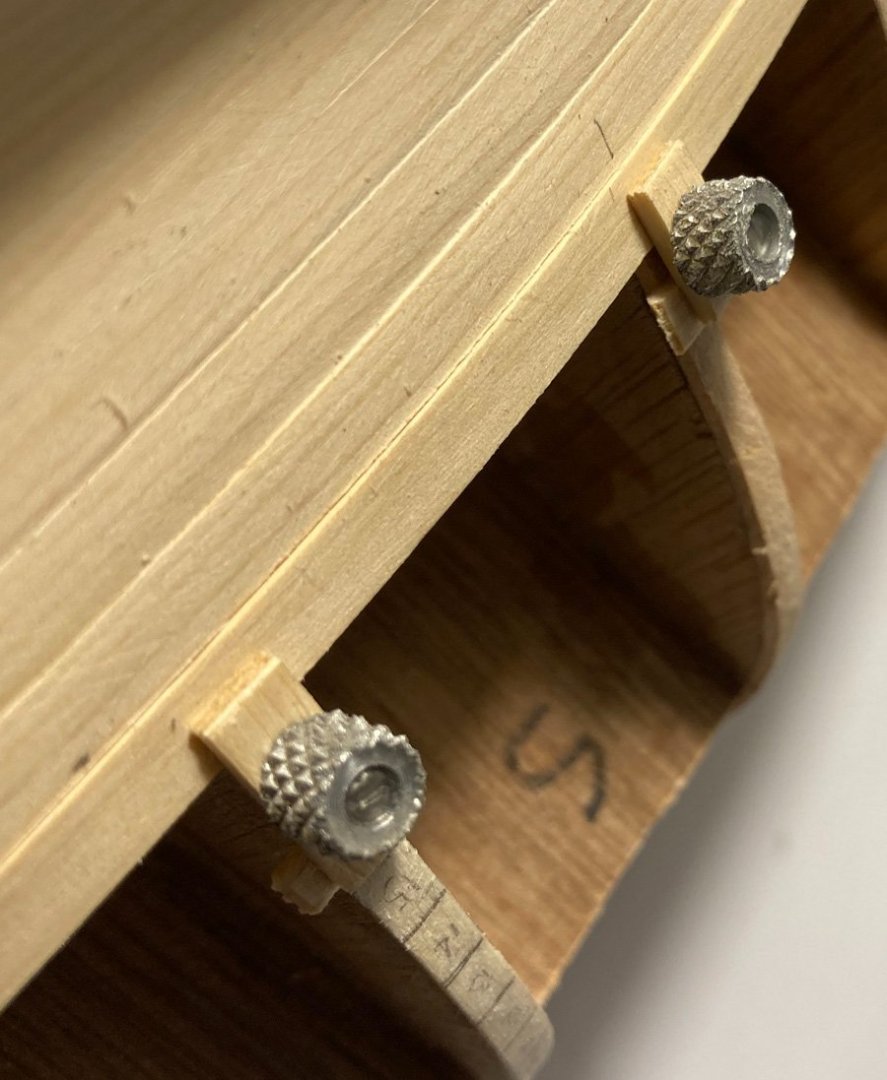
It feels like winter already. Heating on, managed to get a few more planks done. Not sure about my planking run, do I need to try and correct it. Ignore the hacking on the last two planks near the stem, I got carried away with the scalpel blade I was running out of room for the paper clip clamps, so I made some screw types, they work even better than the clips some number zero self tappers and a bit of ally rod drilled, with an offcut of plank strip. I have a knurling tool for the lathe to give the rod a bit of bite. A drop of glue on the head seems to be holding it okay.