HOLIDAY DONATION DRIVE - SUPPORT MSW - DO YOUR PART TO KEEP THIS GREAT FORUM GOING!
×


oakheart
-
Posts
518 -
Joined
-
Last visited
Content Type
Profiles
Forums
Gallery
Events
Everything posted by oakheart
-

Kit review 1/50 - HMS Supply - Artesania Latina - by Kevin
oakheart replied to Kevin's topic in REVIEWS: Model kits
I have some silkspan to play with, so you never know. Thanks for the compliments on "Speedy" Tim -
Kit review 1/50 - HMS Supply - Artesania Latina - by Kevin
oakheart replied to Kevin's topic in REVIEWS: Model kits
The kit arrived in good shape and on time . Delivery took 7 days from placing the order, so well done Artesania Latina and UPS. Eagerly opened it up, all of the parts look good the ply sheets are flat and there is no twisting or bends. Not sure I will use the sails? I will be making some better scale ropes to replace the sad looking threads that come with the kit. But for now it goes up on the shelf while I finish my scratch build of HMS Speedy ( 1828 ). Tim -
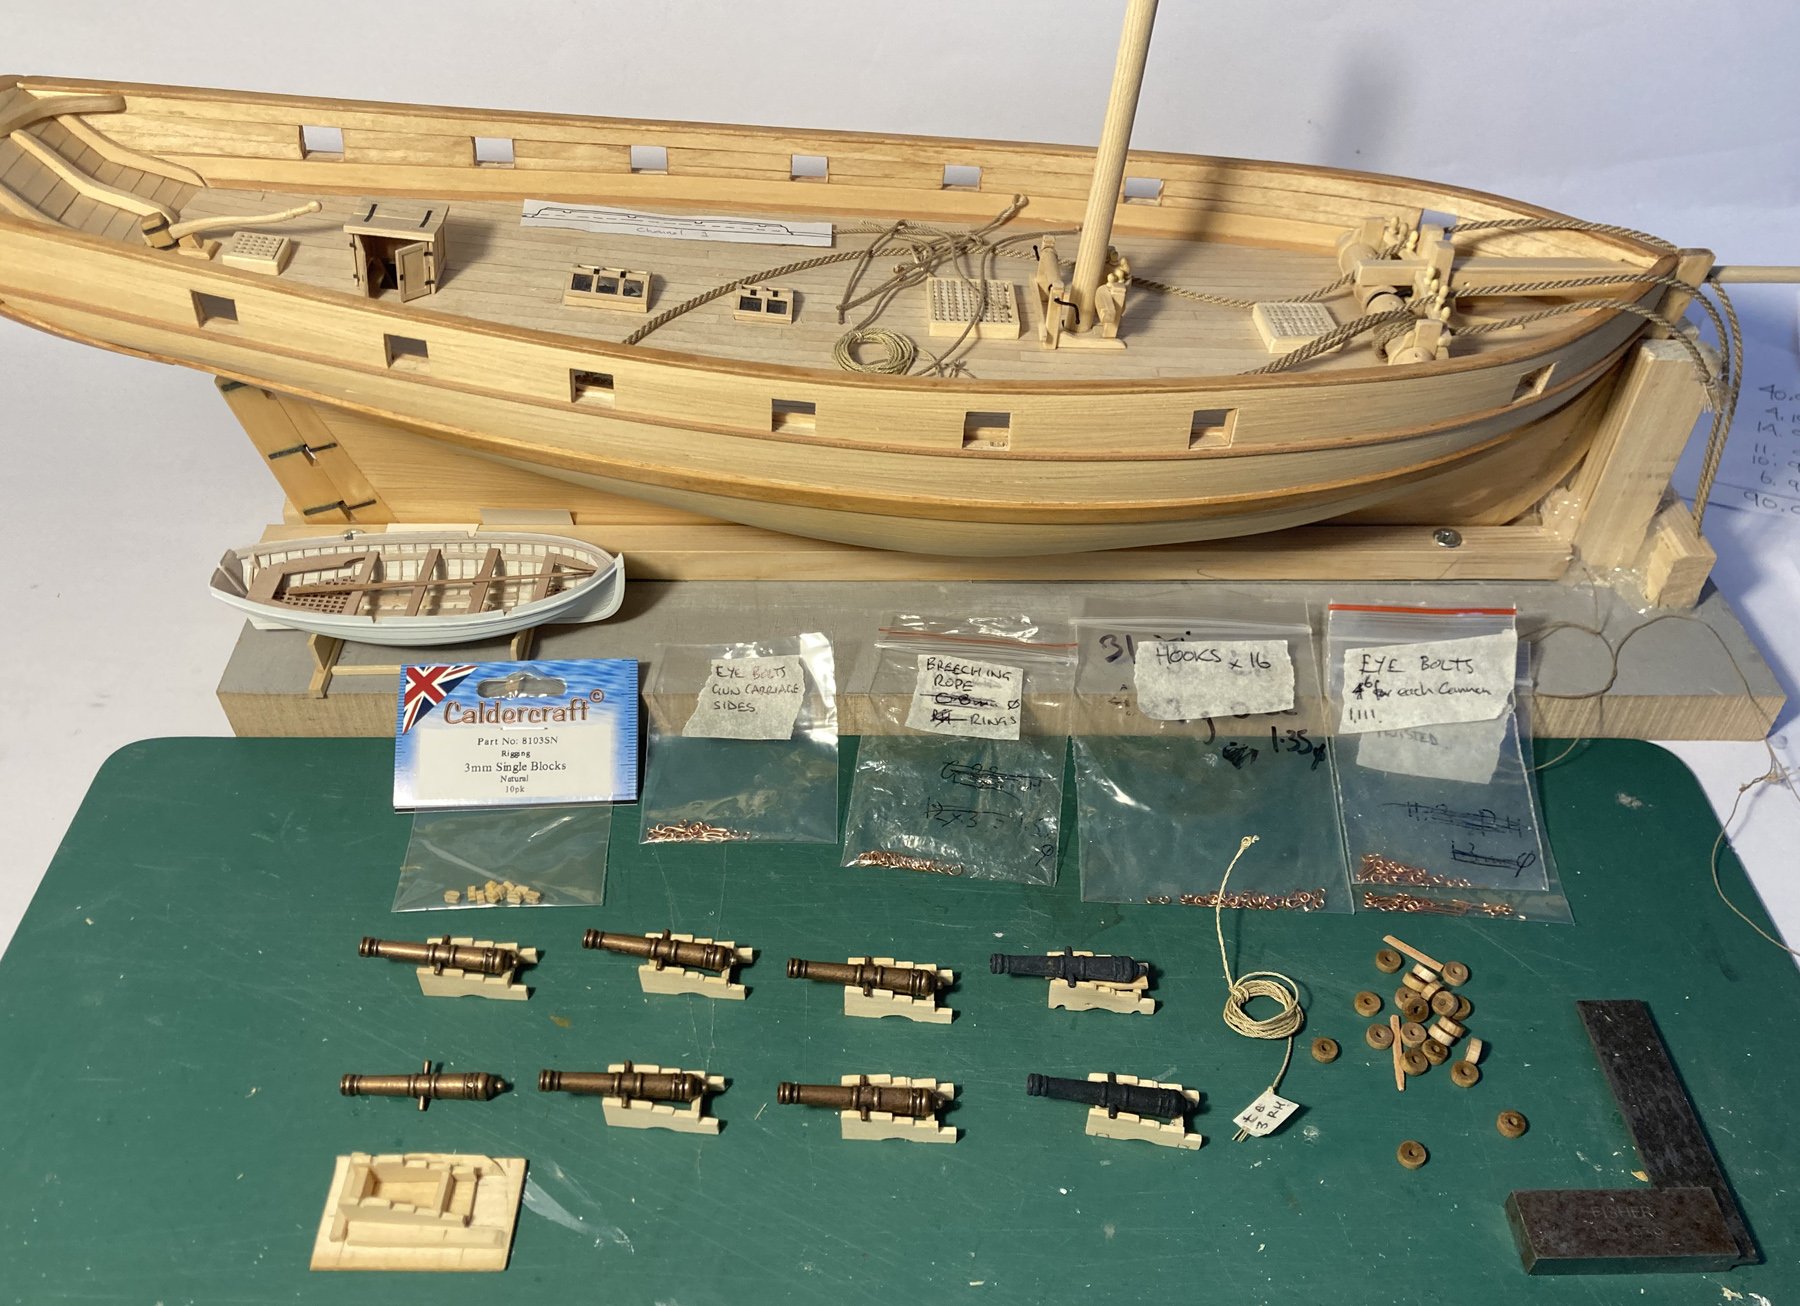
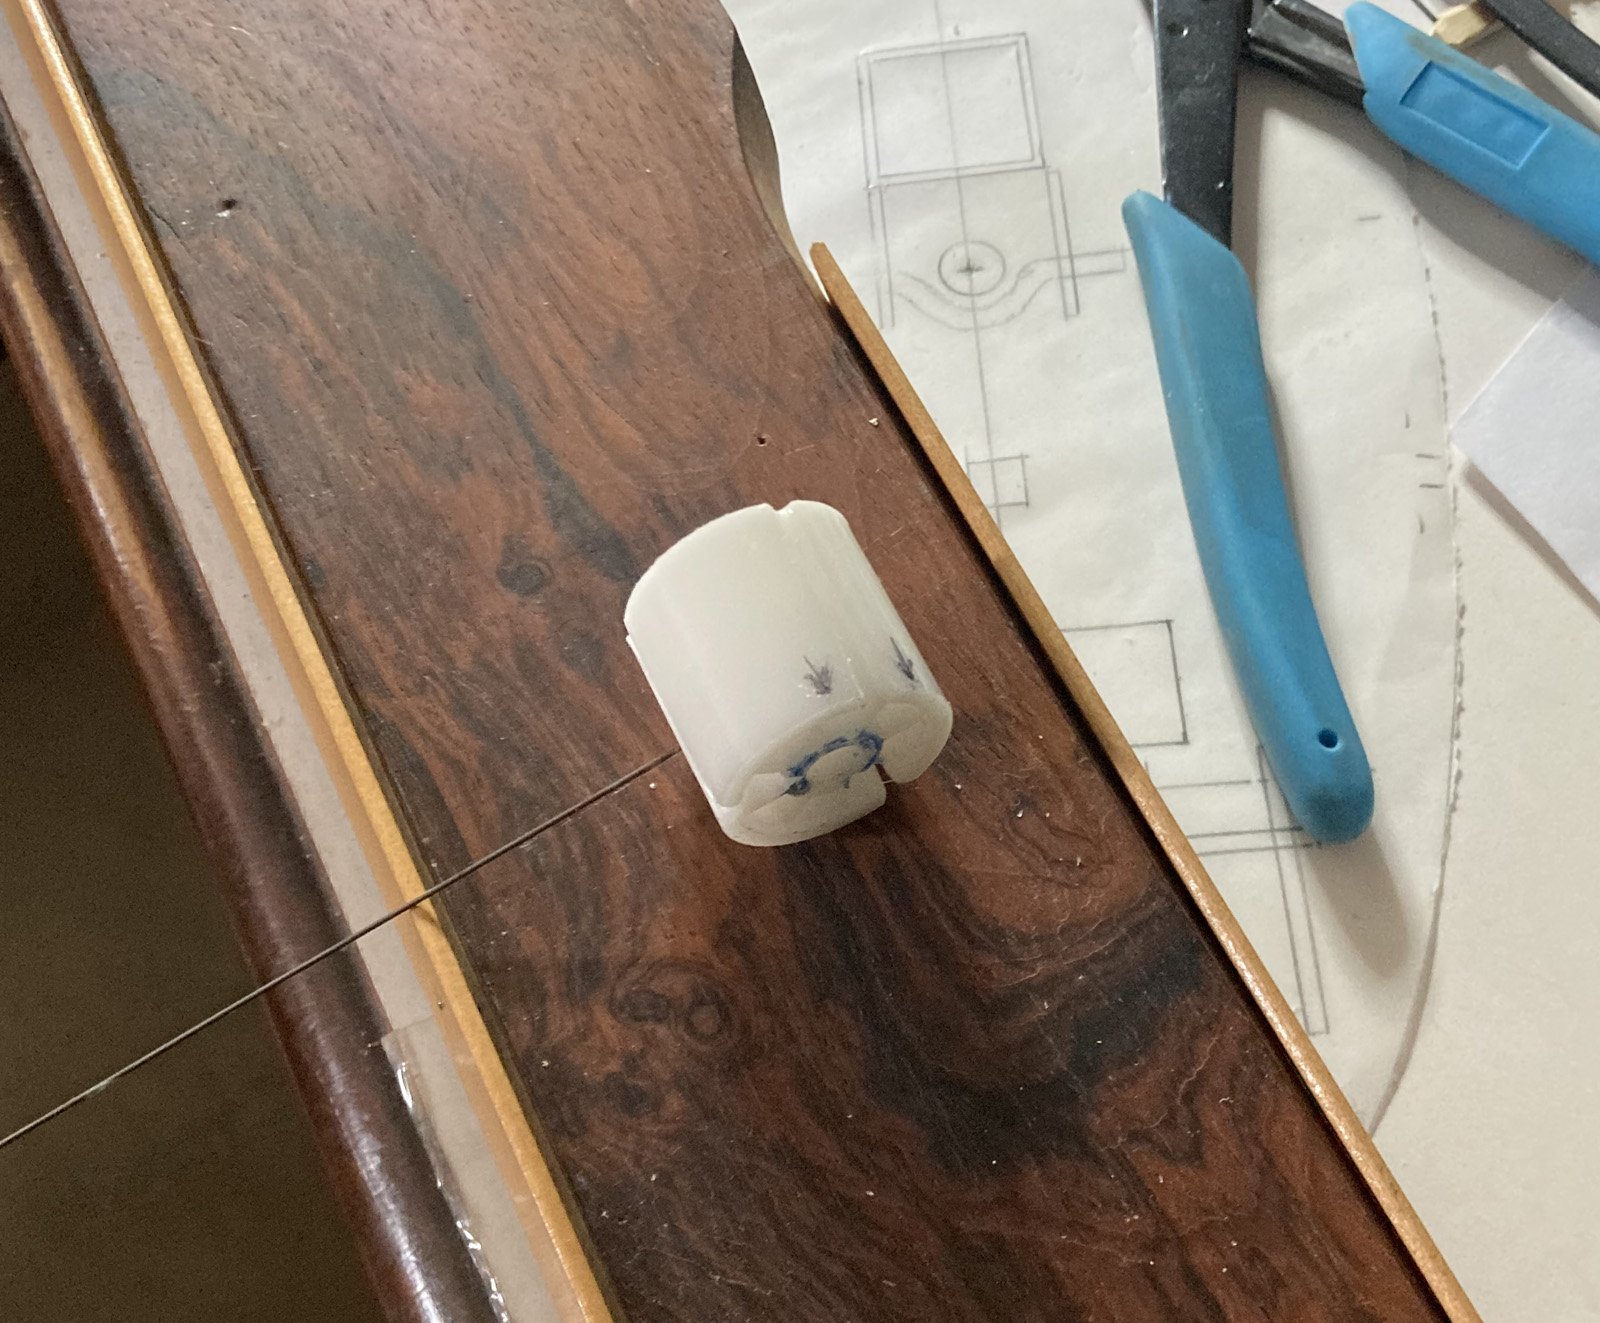
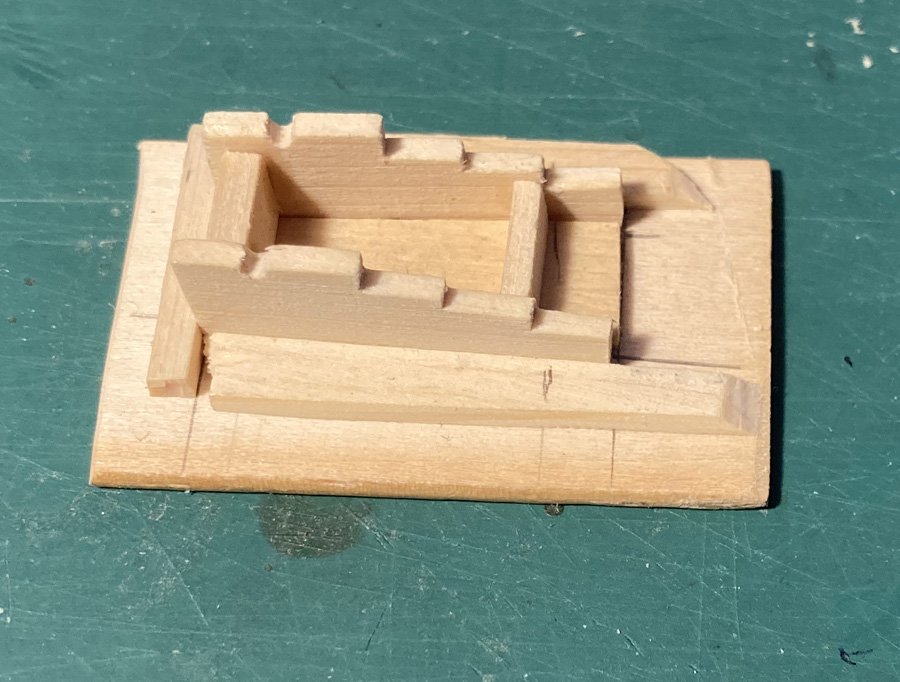
OK, I now have to get my act together and finish this build as I now have an HMAT Supply kit by Artesania Latina waiting on the shelf. Not to much to do now, this list got to about 25 things still to do, I'm sure there will be more as I build. I now have made all of the parts to start assembling the cannons, I am glad there are only 8 of them. I made a simple jig from scraps for assembling the carriages. Here is the kit of parts I am still undecided about how to rig the guns when I have assembled them, any advice is welcome Tim

-
Kit review 1/50 - HMS Supply - Artesania Latina - by Kevin
oakheart replied to Kevin's topic in REVIEWS: Model kits
Ha, Ha that will teach me to be so hot headed, just got a bill from UPS for £45.50 import tax, I blame Brexit. But it's still marginally cheaper than a UK supplier........... Tim -
Perfect timing for me 🙂 Tim
-
Kit review 1/50 - HMS Supply - Artesania Latina - by Kevin
oakheart replied to Kevin's topic in REVIEWS: Model kits
Hi all, while waiting for my kit to arrive I skimmed through the construction videos, surprisingly there is no list of contents, so I cobbled one together. Tim link to videos. this is a rough contents list, if anyone would like to add to or amend it please feel free. No. content 1 keel, bulkheads and decks 2 deck tree nails, bulkhead planks, wiring the lighting 3 transom, planking the hull 4 filling the hull, fit keel, bulwarks, stand, mark out hull, fit rubbing strake 5 mask and paint upper bulwark, paint transom 6 make and fit mouldings on upper hull, fit spirketing, fit cap rails 7 hawse holes, gun ports, beak head, rear quarter windows, forward bitts 8 catheads, mast rings, curly bits on beak head, forward deck hatch, chimney 9 windlass made from brass sheet 10 Gratings and doors 11 cannons 12 belaying racks and capstan 13 hand rails aft and swivel guns 14 cover for rudder head on aft deck, copper on hull 15 stern windows, rudder and tiller 16 channels, deadeyes, tiller ropes 17 hangers, pumps 18 bowsprit with rigging, stern arms and chains 19 fore and main mast, they look the same which is not correct? 20 mast stays ( ropes ) fore and aft, main mast fan ropes? 21 more stays, fore and aft, upper ratlines 22 sheets, stays ( not main ratlines ) 23 yards, 24 boom, pinrail, other sails and rigging 25 triangular sails, more running rigging, more rigging 26 square sails, running rigging for them, 27 next square sail and rigging 28 fore topsail and rigging 29 mainsail and rigging 30 next sail and more running rigging, lifts 31 topsail and lift rigging 32 bowsprit and other running rigging, anchors and rigging them 33 constructing the ships boat, 34 stand and nameplate, boat arm, wiring for lighting -
Kit review 1/50 - HMS Supply - Artesania Latina - by Kevin
oakheart replied to Kevin's topic in REVIEWS: Model kits
Oh dear I'm so easily seduced, I found it for £170 free PnP and could not resist adding it to my stash https://artesanialatina.net/uk/en/62490-first-fleet-brig-hms-supply-1-50-wooden-model-ship-kit.html Tim -
Kit review 1/50 - HMS Supply - Artesania Latina - by Kevin
oakheart replied to Kevin's topic in REVIEWS: Model kits
Hi Kevin, thanks a very useful review, what is the wood they supply for the hull planking and deck planks? When I finally finish my scratch built "Speedy" I quite fancy a kit to bash. Tim -
This may well be better for my Speedy.
-
No matter, it stays on the list. I really look forward to seeing the progress, very exciting Tim
-
That will be very interesting to follow, what an excellent idea this will be on my Christmas list for sure. Tim
-
That looks like it could make some serious rope, have you used it? Tim
-
Thanks @Gregory flattery indeed but I think others have produced better. Crazy Craig @iMustBeCrazy will be along soon saying all this will go to my head 🙂 Tim
-
Thanks for the compliment @vaddoc when first made the rope is already pretty flexible but becomes even more so when cooked at 170C for 6 mins. Tim
-
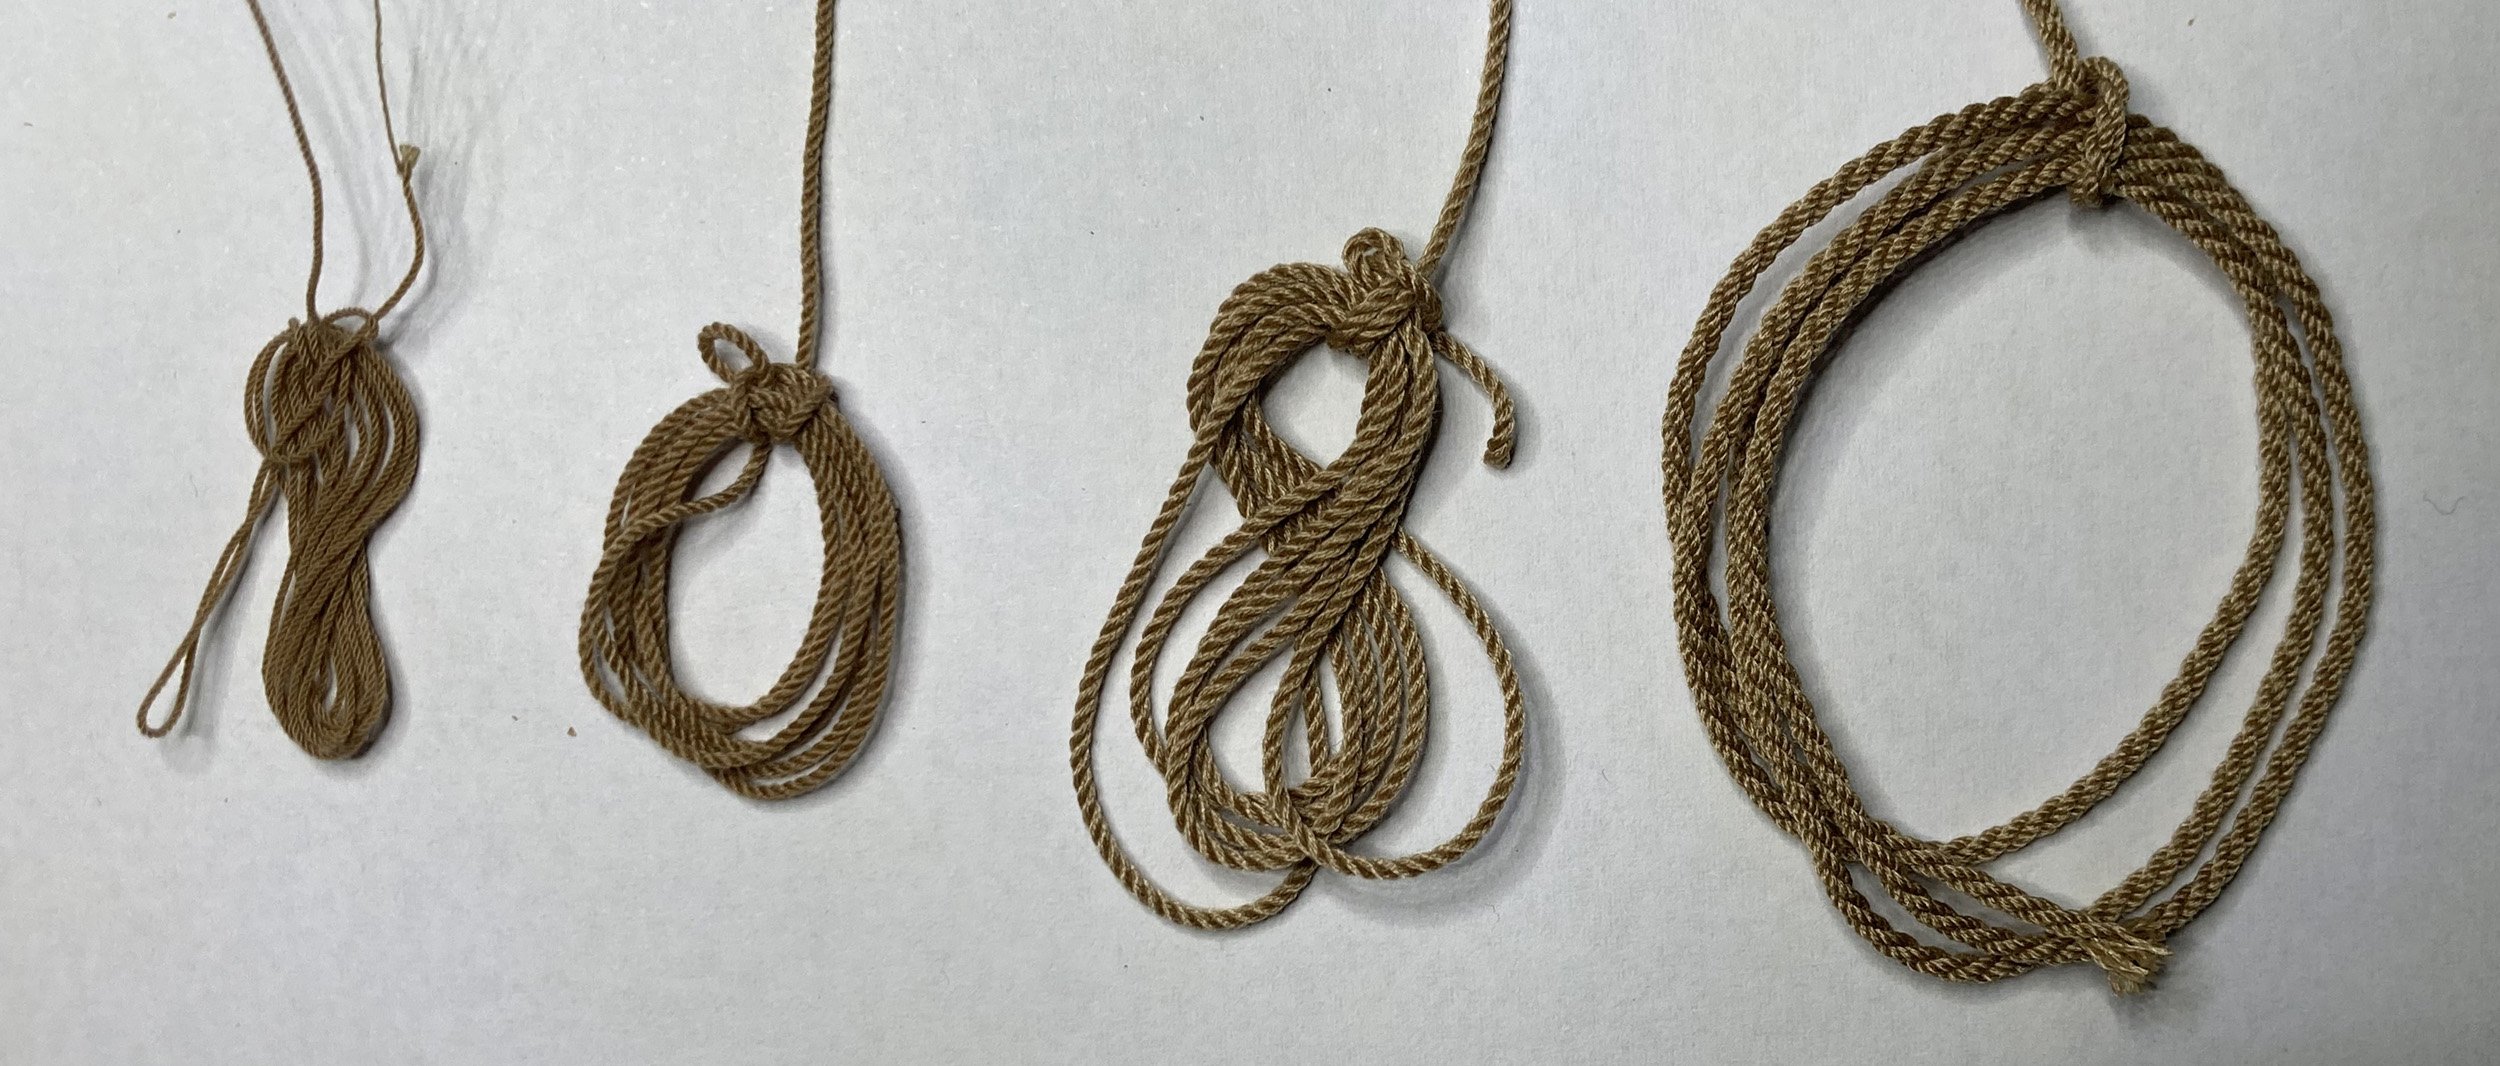
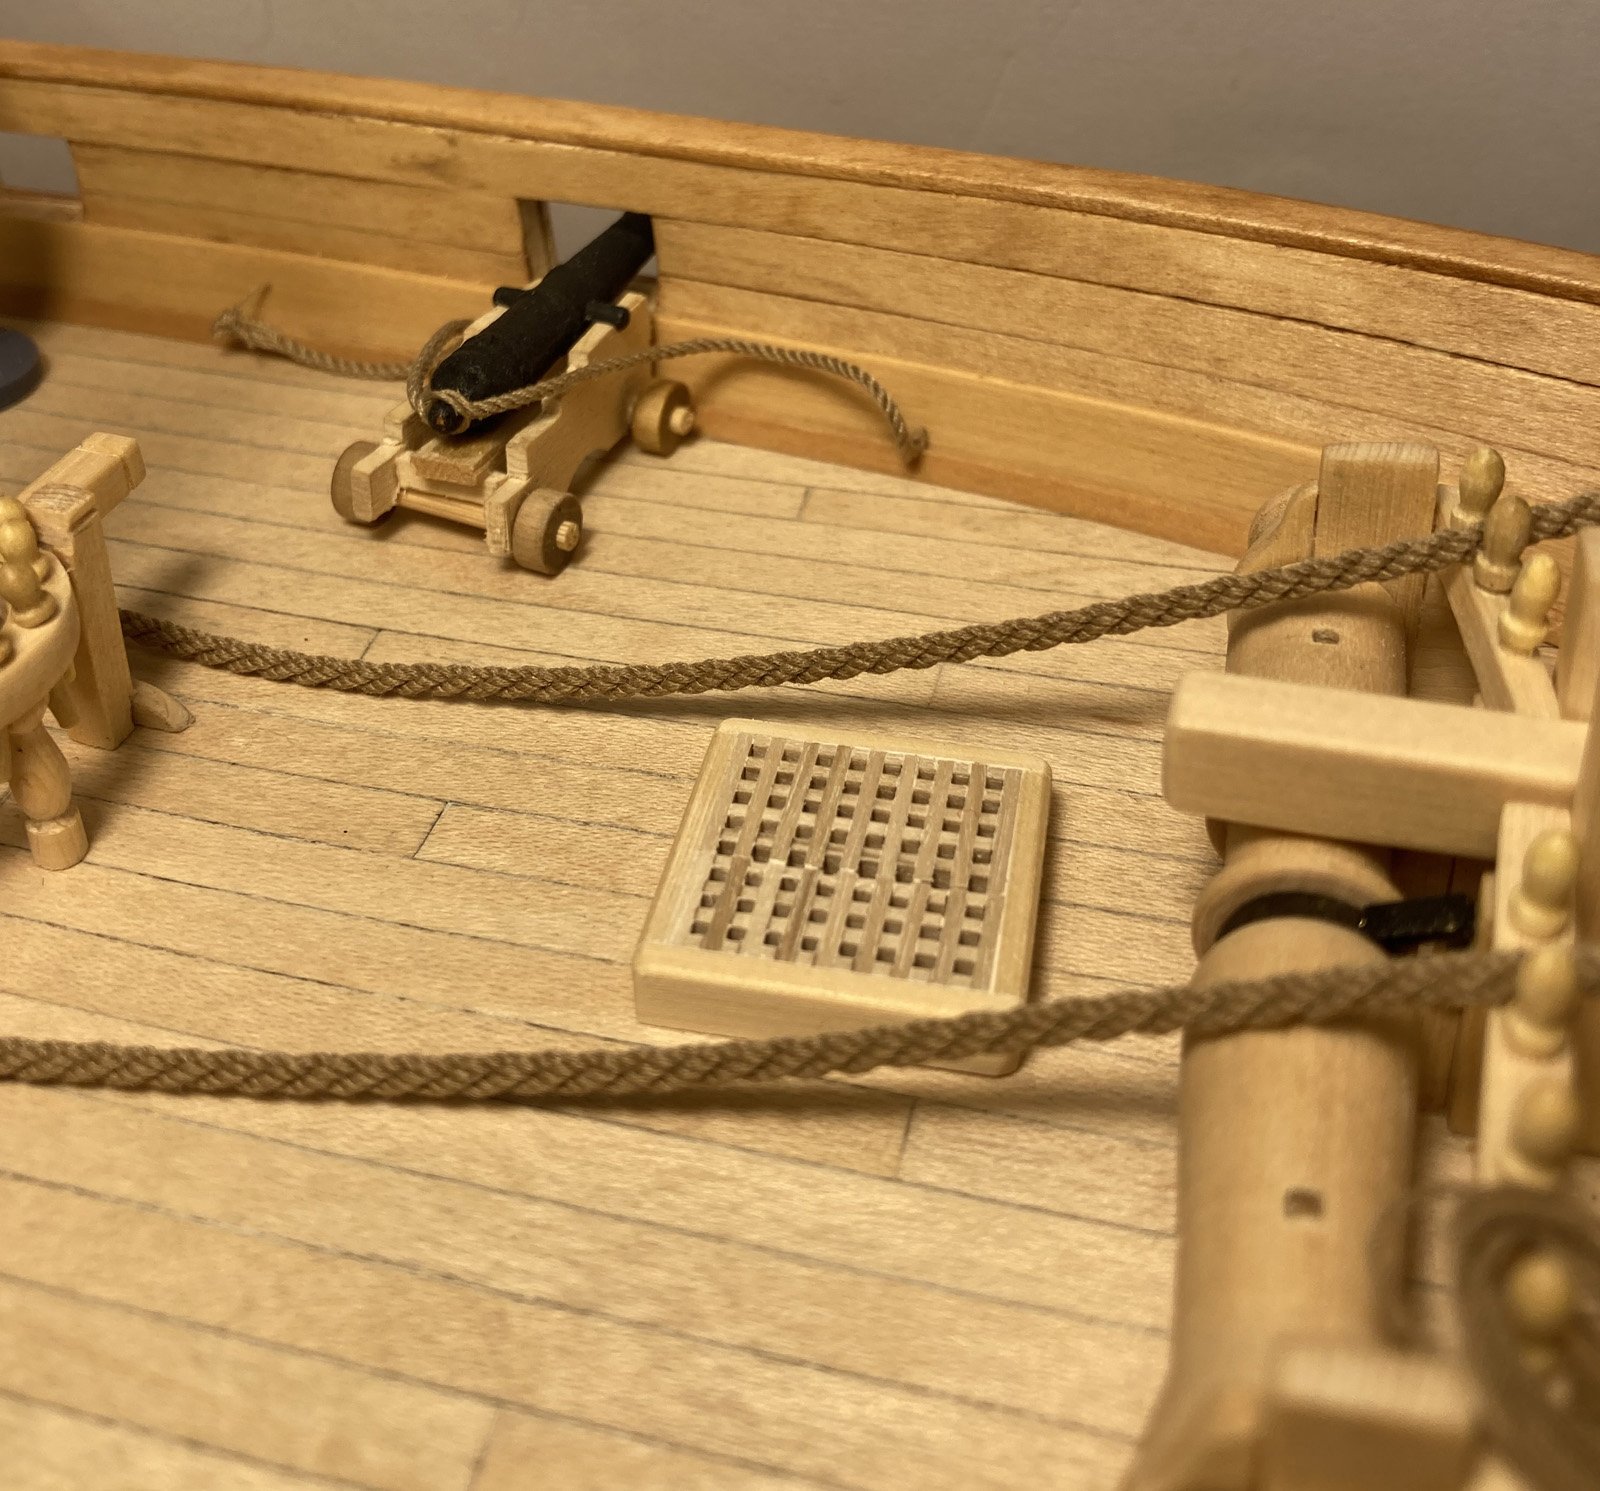
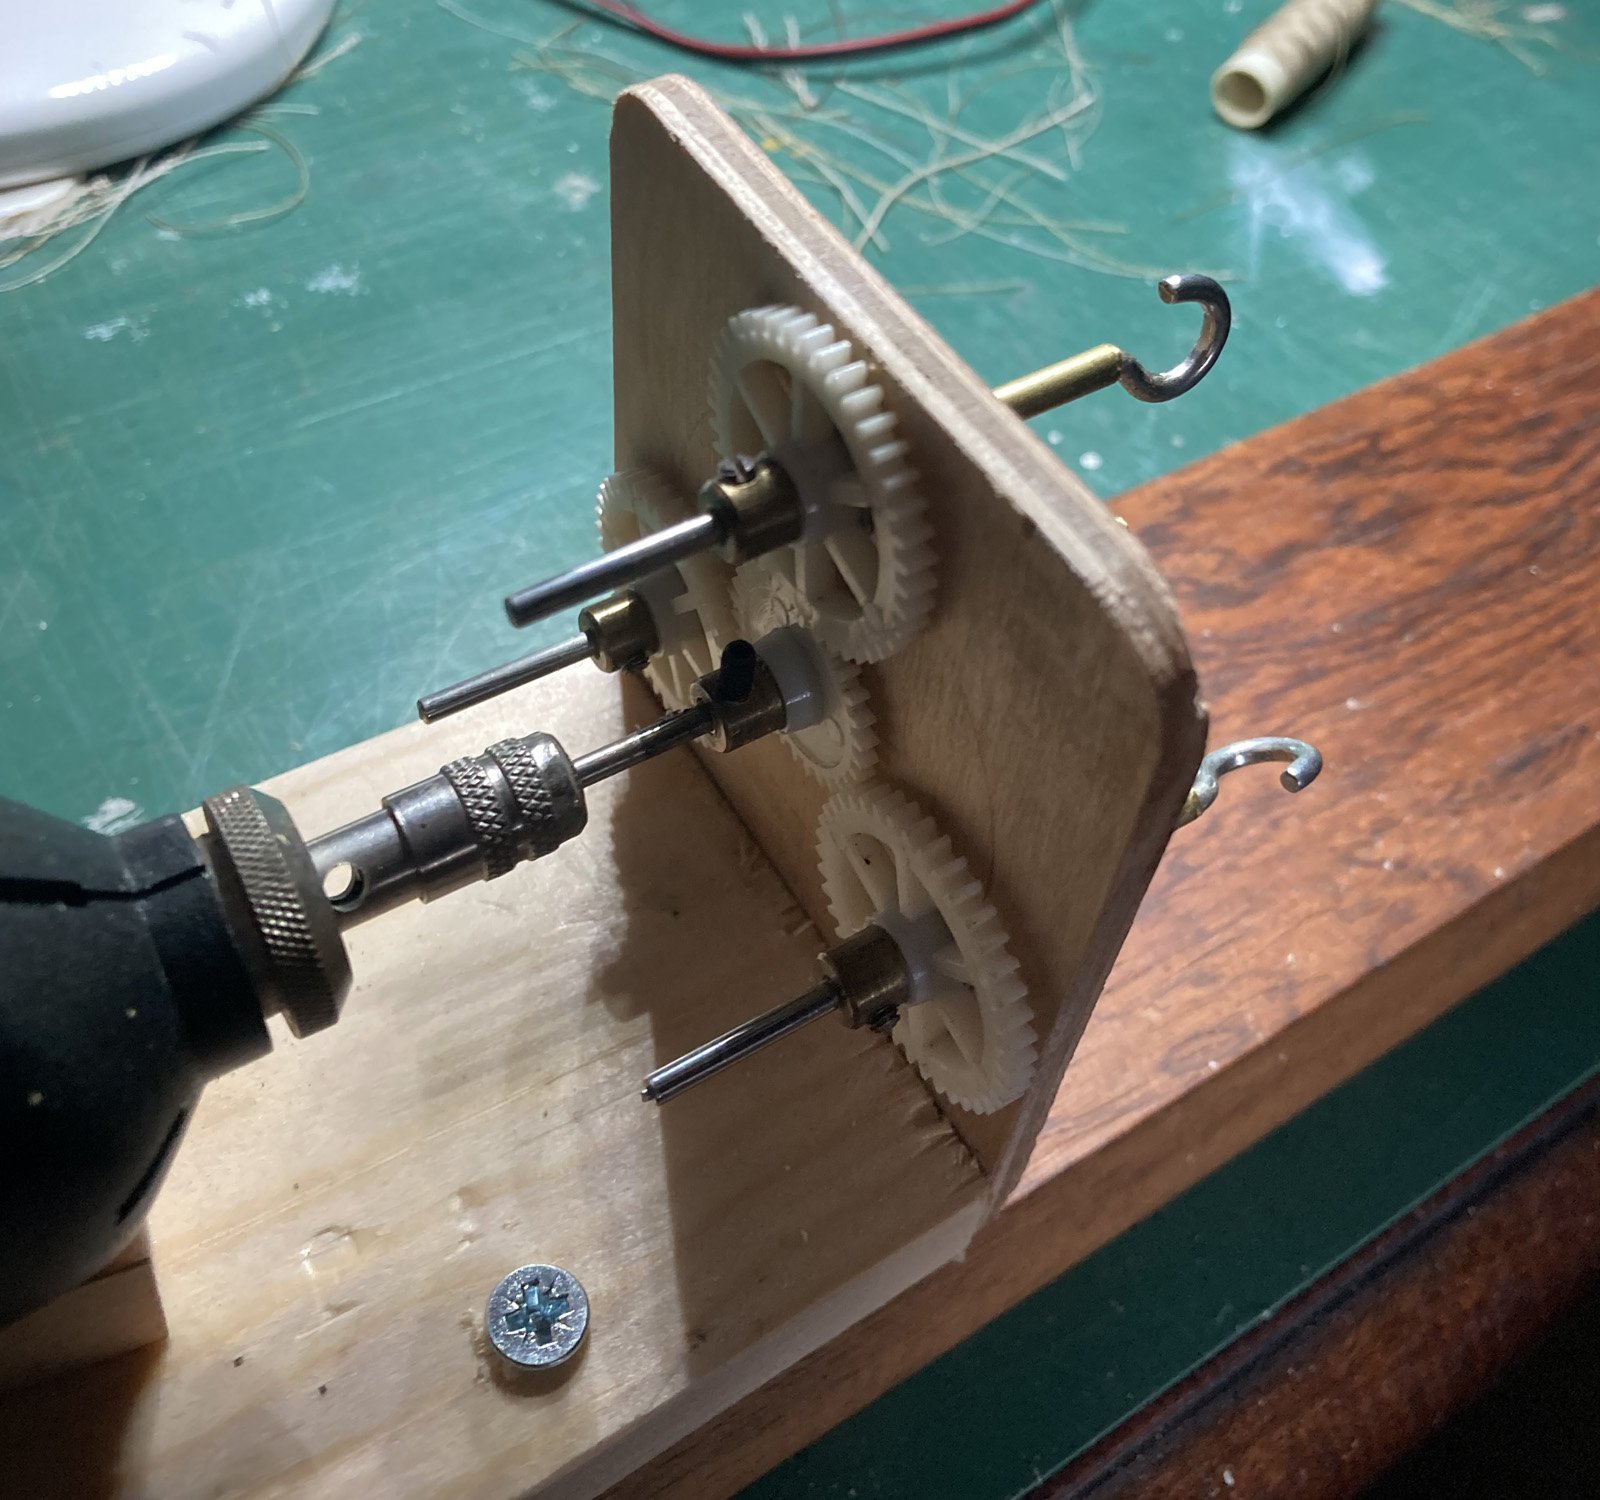
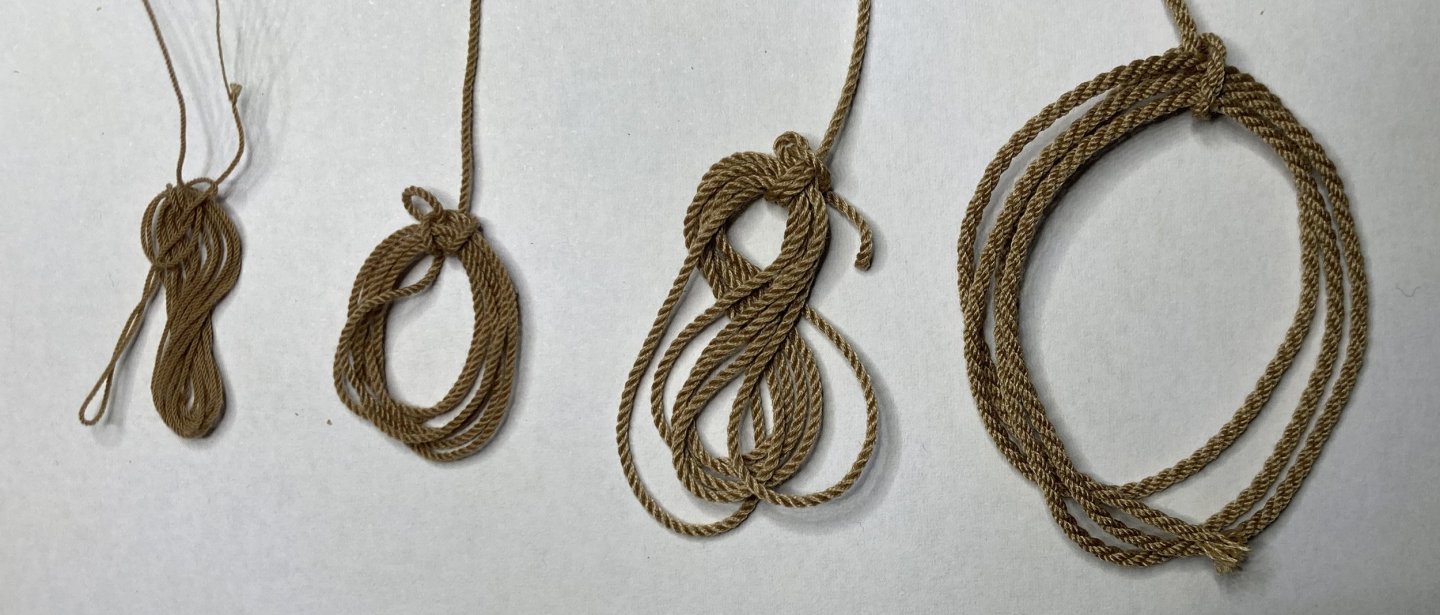
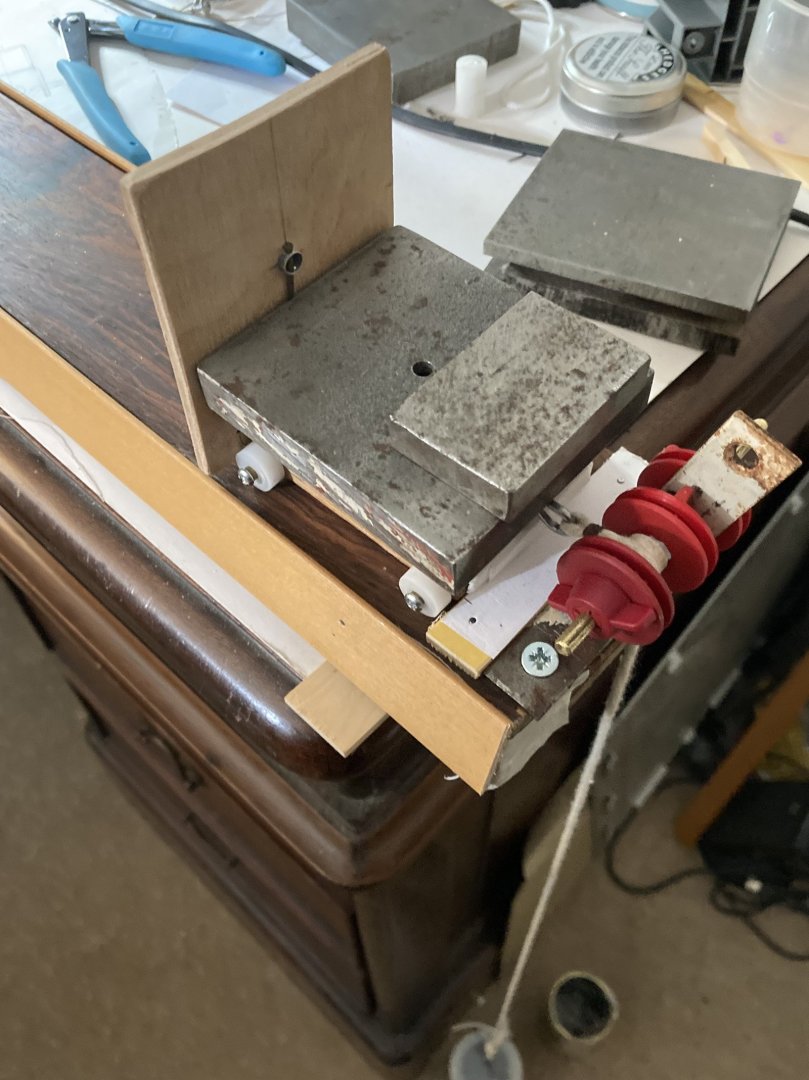
Having a lot of spare time over the last few weeks with nothing to do but listen to the radio was frustrating. Becoming bored I instead found yet another rabbit hole to explore right here on MSW – scale rope making….. Much reading and planning later, I got so much good information from Phil Kroll, Delf @DelF, Dubz , Olha Batchvarov, Paul Nixon, vaddoc @vaddoc, gregory @Gregory, michael mott @michael mott, wefalck @wefalck, dziadeczek @Dziadeczek, bob cleek @Bob Cleek, snug harbor johnny @Snug Harbor Johnny and of course Chuck @Chuck plus many others – There is such a wealth of good information here. https://modelshipworld.com/forum/82-discussions-about-rope-making/ https://modelshipworld.com/topic/19706-gutermann-polyester-thread-for-making-rope/ Anyway after much bodging with parts found around the workshop, here is my 3 hook rope walk and some sample ropes the gears are from an old RC boat, the shafts run in simple brass tubes, all powered by a Como Drills hand piece running at about 900rpm the bucket of nails weighs 150 grams topper made from some plastic part from a dismantled ink jet printer. The ropes shown here are all made from Gutermann Sew All polyester thread which is 0.1 mm dia. the colour is No 265 ( warm fawn or wheat ) which looks similar to hemp or hessian rope, which I can get from both Dunelm and Hobbycraft locally. 100m for £2.50 I found I can make all the rope sizes I need from this single yarn, the recipes are:- 0.4mm dia. : 1 x 3 ( that’s one thread on each of the hooks ) 0.6mm dia. : 3 x 3, gun tackle rope 0.8mm dia. : 5 x 3 breeching rope 1.6mm dia. : 14x3 a chunky hawser laid rope that would do for an anchor Then using 3 of the right hand 3x3 ropes I made a 1.6mm dia. left handed cable laid rope for the anchor. Thanks to Olha on YouTube for explaining how. The four ropes I have settled on after much testing are : left to right = 0.4mm, 0.6mm, 0.8mm, 1.6mm cable laid rope here are the breeching rope and anchor cable roughly place on Speedy. for such a simple machine it produces some excellent ropes, so thanks to all those out there for their help. This is so much fun, I may just decide to rig this cutter! Tim


-
Thanks for this brilliant tutorial @Chuck I have made some new rope on my shop made ropewalk and just about ready to rig the cannons on my 'Speedy' Tim
-
Make sure you go to a good one, the first one I went to missed my Eyelid cancer it was only later that a different optician refered me to the hospital eye clinic. If the first one had been on the ball I may not have had to have my eye lid removed ! Hope it goes well Tim
-
Ha Ha - let's see on that score............... 🙂 Tim
-
Thanks for all the likes, means a lot. Surgery went well, with just local anesthetic, I was awake for the whole 3 hours. A very strange experience. With one eye now sewn shut for some days, it's hard to judge distance and scale so don't think I will try and do any work on Speedy. all the best Tim
-
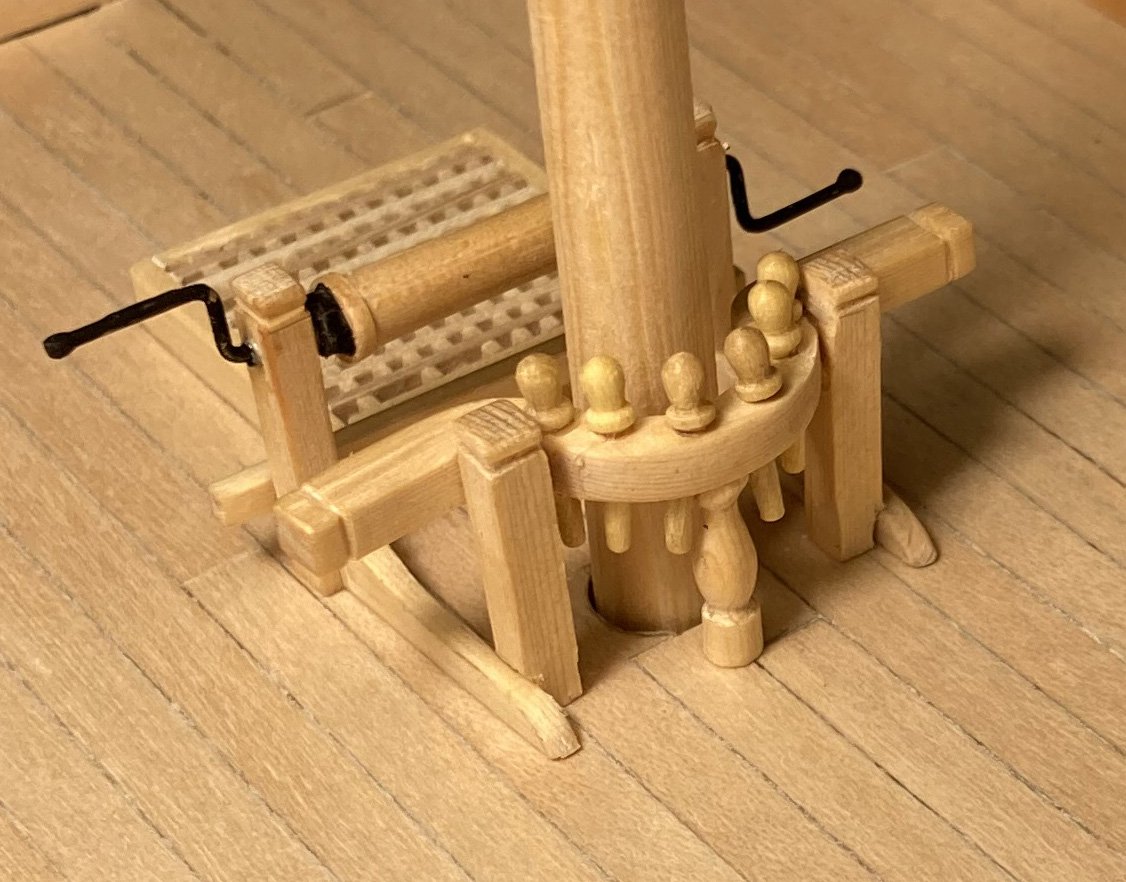
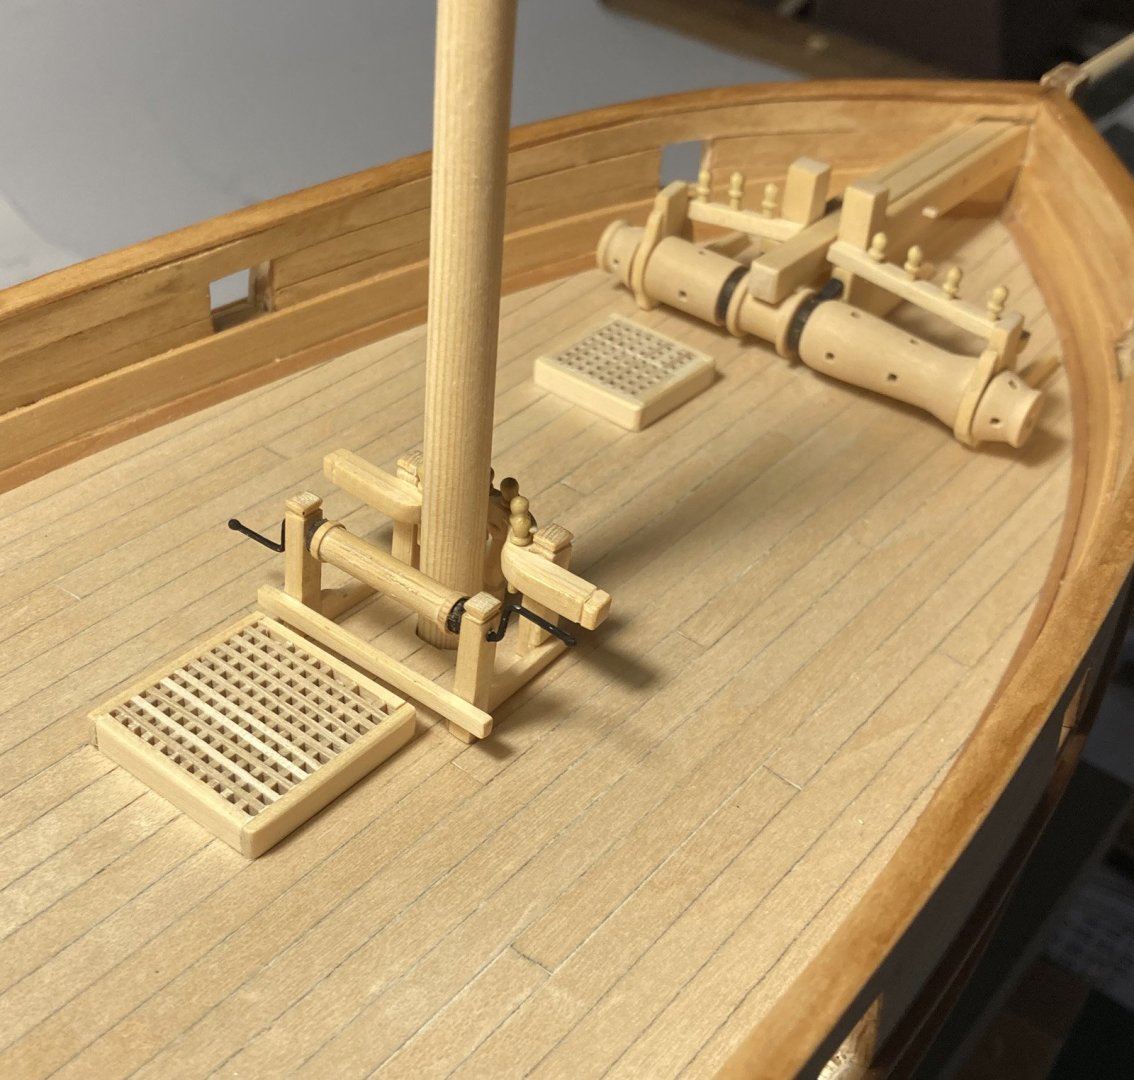
Managed to get a bit more done, winch and fife rail. Ignore the wonky Belaying pins I have new ones in the post from Cornwall Model Boats. the close up photograph really shows all the warts. I think a bit of fettling is in order. Tim There will be a bit of a break now as I have my eye surgery tomorrow, so will not do anymore till I can see straight again.
-
I have decided to leave the 'welps' off for the moment. Pleased with the way it looks just noticed, I still need to line the gunports..... Tim
-
I just made one, tapered as you suggested, works a treat, thanks again. Tim
-
ok @Gregory that does sound easy, the wood is boxwood which is pretty hard so it may need a tap with a hammer, will go off and test this Thanks
-
Thanks for the comment @Jim Lad Now I'm conflicted. I need to do some more work on it, so will leave it until later to decide. Tim