oakheart
-
Posts
518 -
Joined
-
Last visited
Content Type
Profiles
Forums
Gallery
Events
Everything posted by oakheart
-
 Bowsprit shaped from square and placed on model, shown in front of Bill Shoulders rigging plan with main mast and bowsprit It all begins to take shape. I have now got a copy of Lennarth Petersson's book rigging period fore and aft craft, which has all the details for rigging a cutter of this period so I will follow his drawings to do the rigging instead of Bills instructions / drawings. Tim
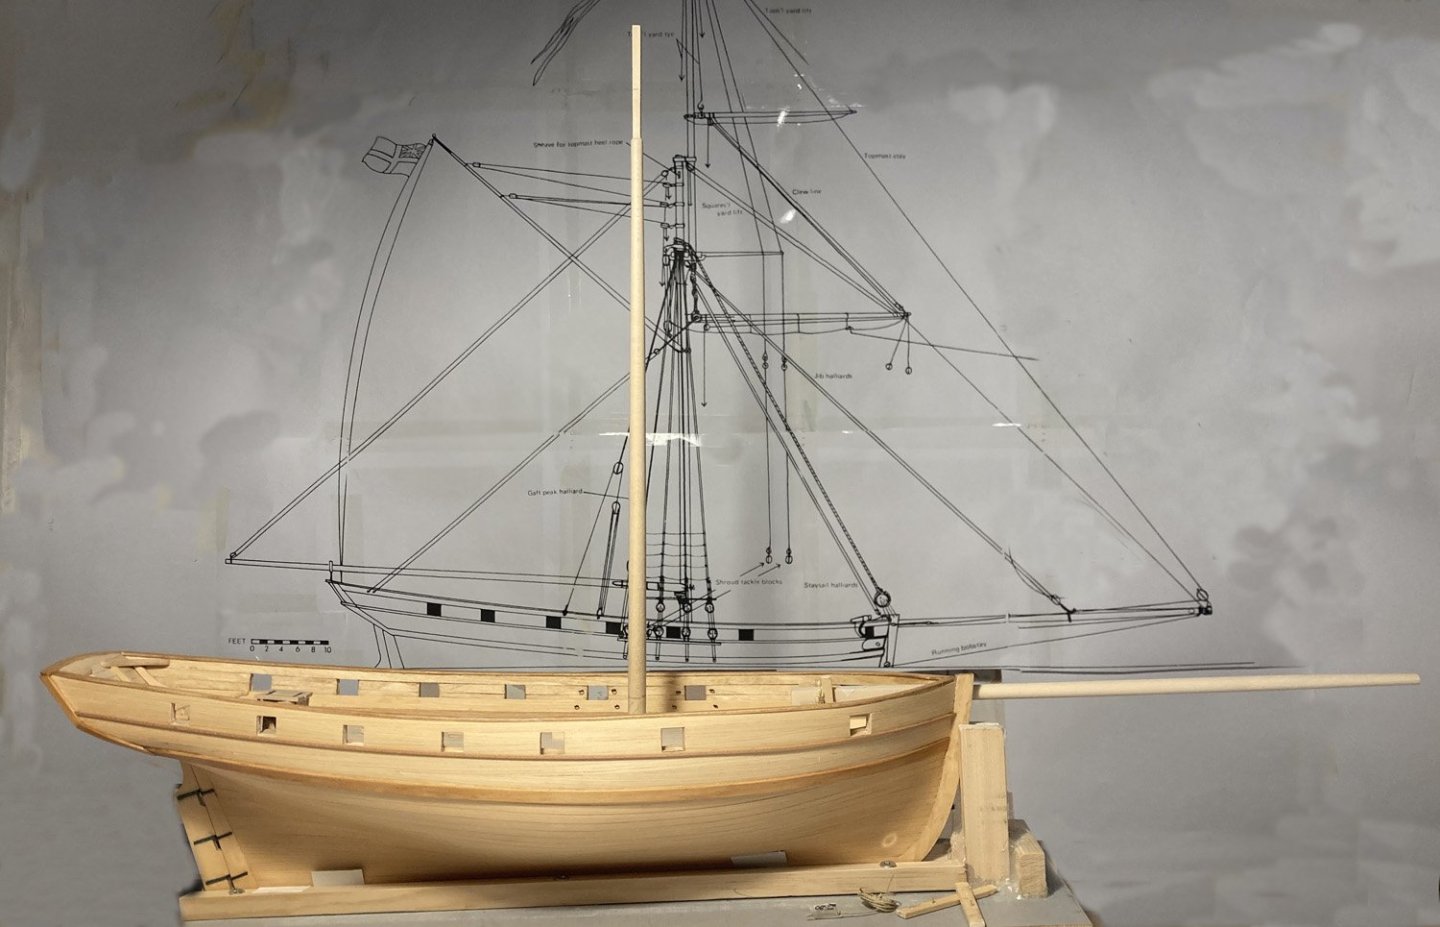
-
Thanks for all of the likes, it really helps to keep a body motivated. Tim
-
and here it is cleaned up. I would like to thank all those builders whose logs helped me along the way, of course Thunder @Thunder who without his help, I would not have even started this build. There are too many others to mention them all. The Cutter cheerful, which is pretty close to this cutter 'Speedy' was one of the designs that helped me a lot, so I must give a special thanks to Chuck and his very clean design and his prototype build log. Thanks @Chuck your design and build log have been an inspiration to me, and will continue to be so for the rest of my build. Then of course there is Crazy Craig @iMustBeCrazy who is a constant help with his wisdom and know-how. This forum / website is such a brilliant resource to have found. Tim
-
I found some close grained timber in the workshop, the wood carver who gave it to me said it was Lime. So some hours later this is what I got. I did a quick test yard from cedar as well. It was not quite long enough so I had to add a bit to the top. The join will be hidden under the metal strap here is a close up now I can see the detail, there still a few marks to get rid of Tim

-
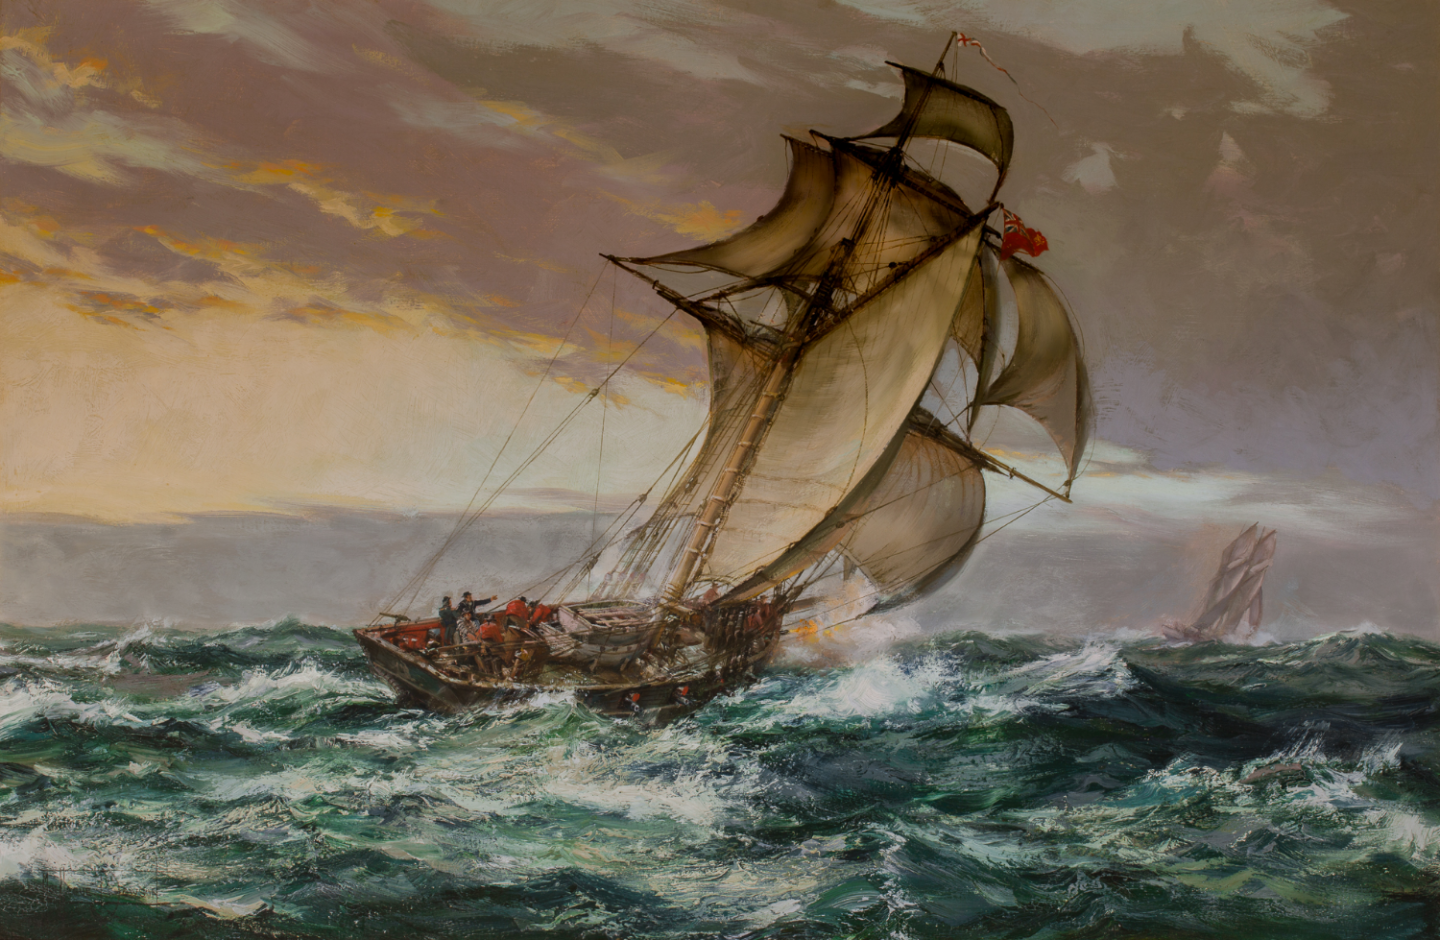
OK Craig @iMustBeCrazy you set me off now. I found another cutter painting from 1810 with a boat dangling, this time off the stern. https://www.rmg.co.uk/collections/objects/rmgc-object-12595 The boat looks very small compared to the crew on deck, which suggests we should probably not take these paintings as accurate, the overall image may be correct in that the artist saw a boat hanging off the stern but did not draw it in proportion. Tim
- 11 replies
-
- 1
-

-
- cutter
- ships boats
- (and 1 more)
-
thank for reminding me @georgeband I have a copy on my kindle, I must read it. I got my copy from : - https://www.gutenberg.org/ebooks/6629 Tim
- 11 replies
-
- 1
-
-
- cutter
- ships boats
- (and 1 more)
-
Nice find craig @iMustBeCrazy , there is so much to find out there and on this site alone. Tim
- 11 replies
-
- 1
-
-
- cutter
- ships boats
- (and 1 more)
-
I just found this thread, here is another painting of a cutter with boats on. It shows cutter 'Kite' in action off Beachy Head on the south coast of Britain by Montague Dawson This discussion has made me realise that I may need to revise my thoughts on the size a boat on my build of Speedy. Tim
- 11 replies
-
- 3
-
-
- cutter
- ships boats
- (and 1 more)
-
Thanks craig. I have some ash logs that we have as firewood, unfortunately none are long enough. There are a few wood turners locally that I will have words with. Picking up on what @Gregory said I will also look in the local BnQ, Wickes stores in town as well they may have some ramin dowel. Tim
-
Thanks Gregory, that is a really good suggestion. I am in the big city over the weekend so will have a look at what they have in the model shop. The big problem with online stuff is you never know what you will get. Tim
-
made a new full height mast from a piece of pine I had, really just to see what it's like to turn down the taper. Not sure about using it, the grain is a bit over size and makes look a bit toy like. I do have a piece of boxwood that would do, but that goes to the opposite extreme and can look very bland. Really I would like to use Cedar but I don't have any 9.5mm thick. I could try gluing a couple of 5mm strips together? Tim
-
I apologise, It was very rude of me not to mention Fred's wonderful build here, I will certainly be using some of the ideas here on my own cutter. For anyone who's interested I found the article. By Malcolm Darch in his book Modelling Maritime History Chapter 3: MARGUERITE-A Bristol Channel Pilot Cutter. "A pilot's life was a dangerous one as ships had to be boarded day and night in all weather conditions. This was usually achieved by the cutter hailing the incoming vessel and asking the master to stop his ship and create a lee from the weather. The apprentice would make the dinghy or 'punt' as they were known, ready to be hauled over the port rail of the cutter (the Bristol cutters having higher rails used a gate). This was done by removing the ropes or 'gripes' securing it to the chocks on deck and most important of all, tying the bow line or painter forward of the rigging. The helm was lashed momentarily after the cutter had been sailed into the sheltered water behind the ship, though keeping a good distance away, as the vessel was being blown sideways towards them. The man who had been at the helm would assist in launching the punt stern first and then return to his station, while the pilot and apprentice clambered aboard the 12 or 13 foot clinker boat and the one oar carried was skilfully used over the transom by the apprentice to scull them to the waiting ship. A ship's ladder would normally be hanging down the vast wall of wood or steel which rolled menacingly above. The pilot waited for the right moment and would grab the ladder as the ship finished her roll towards him and before she started back up again. The punt would then be sculled away to be retrieved by the one man left in the cutter who would be attempting to heave his vessel to in the same position as before, enabling the apprentice and himself to haul the punt aboard. Some punts carried a strop secured fore and aft to which a burton was tied which travelled from the mast head, and this helped recovery. The job of the man left in the cutter was made a little easier by having most of the sail controls led back to the self-draining cockpit which was situated aft of the companion hatch. These vessels really helped to pioneer the way toward designs used by today's single-handed sailors. The whole operation was extremely dangerous on a wild winter's night, with often the added menace of snow squalls." Tim
- 113 replies
-
- 2
-
-
- Cheerful
- Syren Ship Model Company
- (and 1 more)
-
The revenue cutters on the south coast of England did indeed carry boats, they are used for boarding suspect boats for searching. I did read a very interesting article about how on a pilot cutter the boat could be launched single handed. I will see if I can find it again. Tim
- 113 replies
-
- 1
-
-
- Cheerful
- Syren Ship Model Company
- (and 1 more)
-
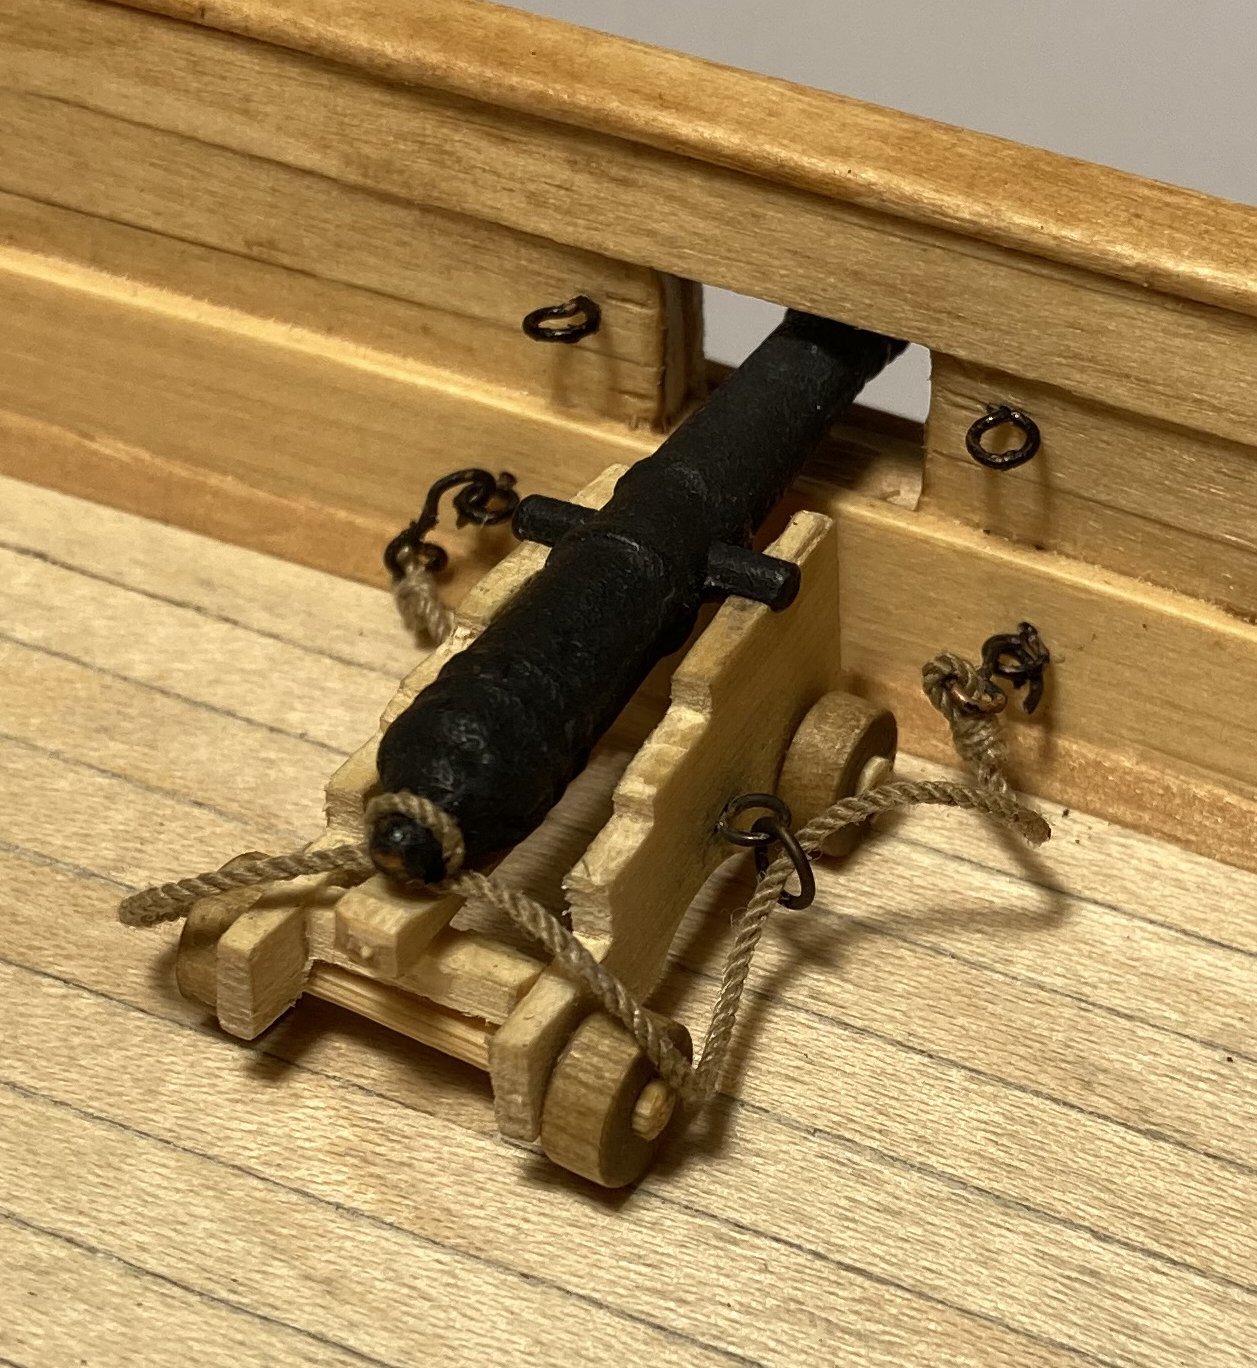
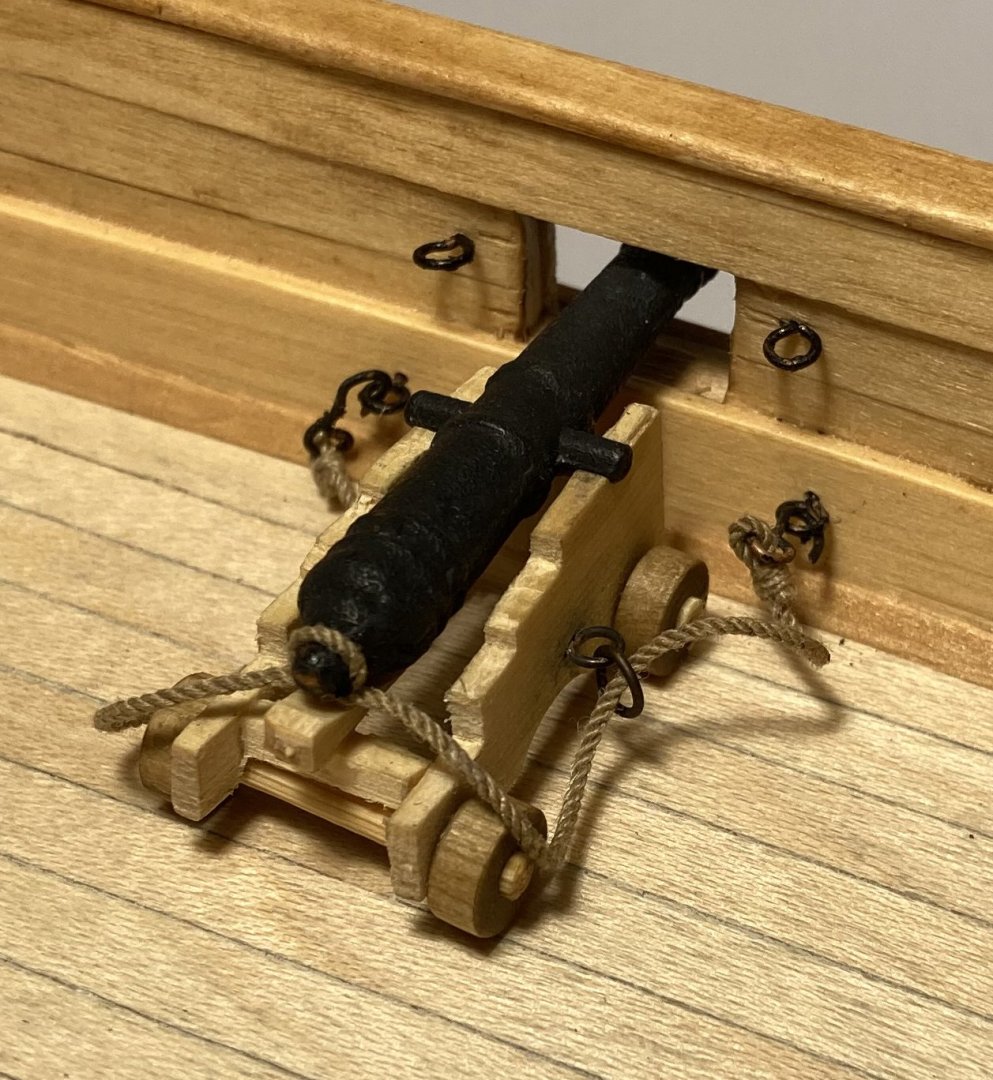
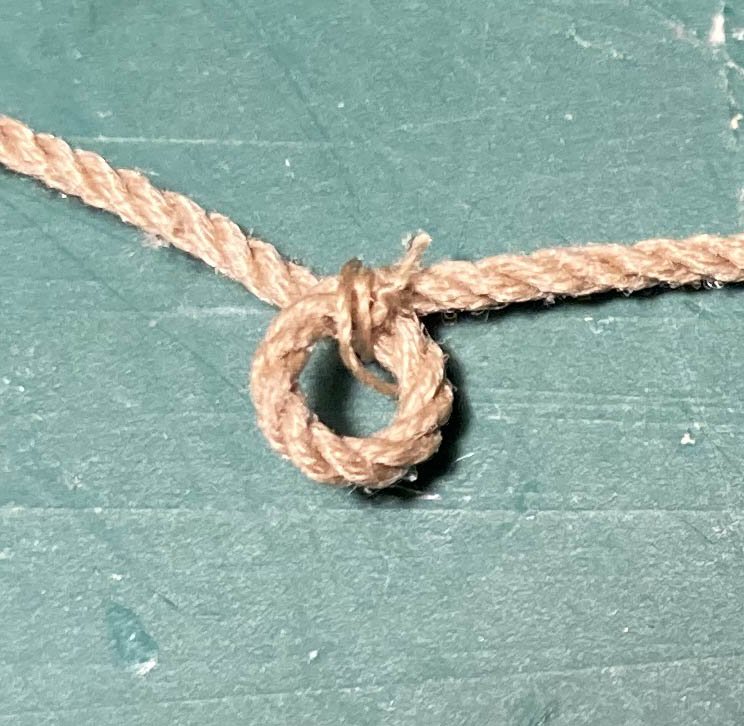
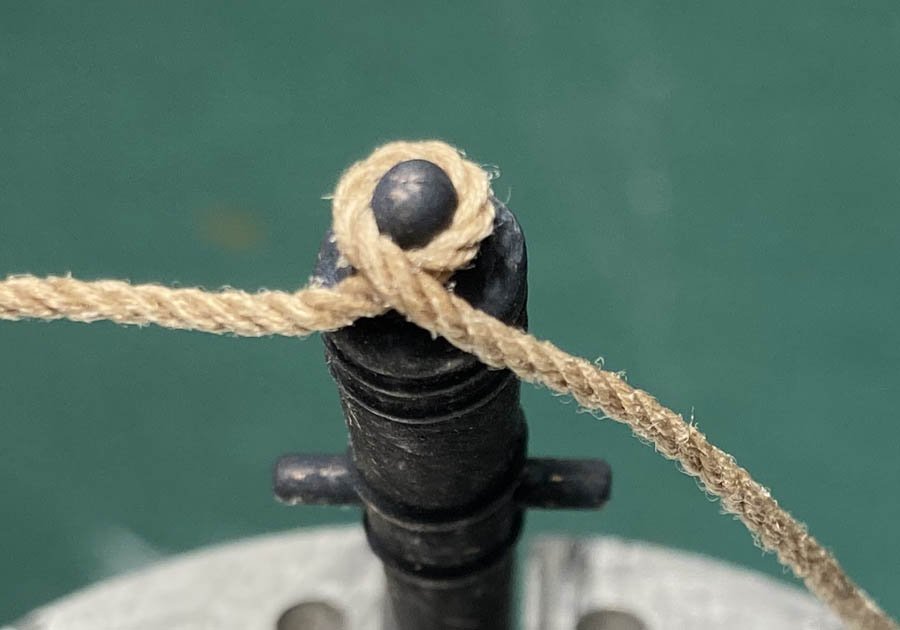
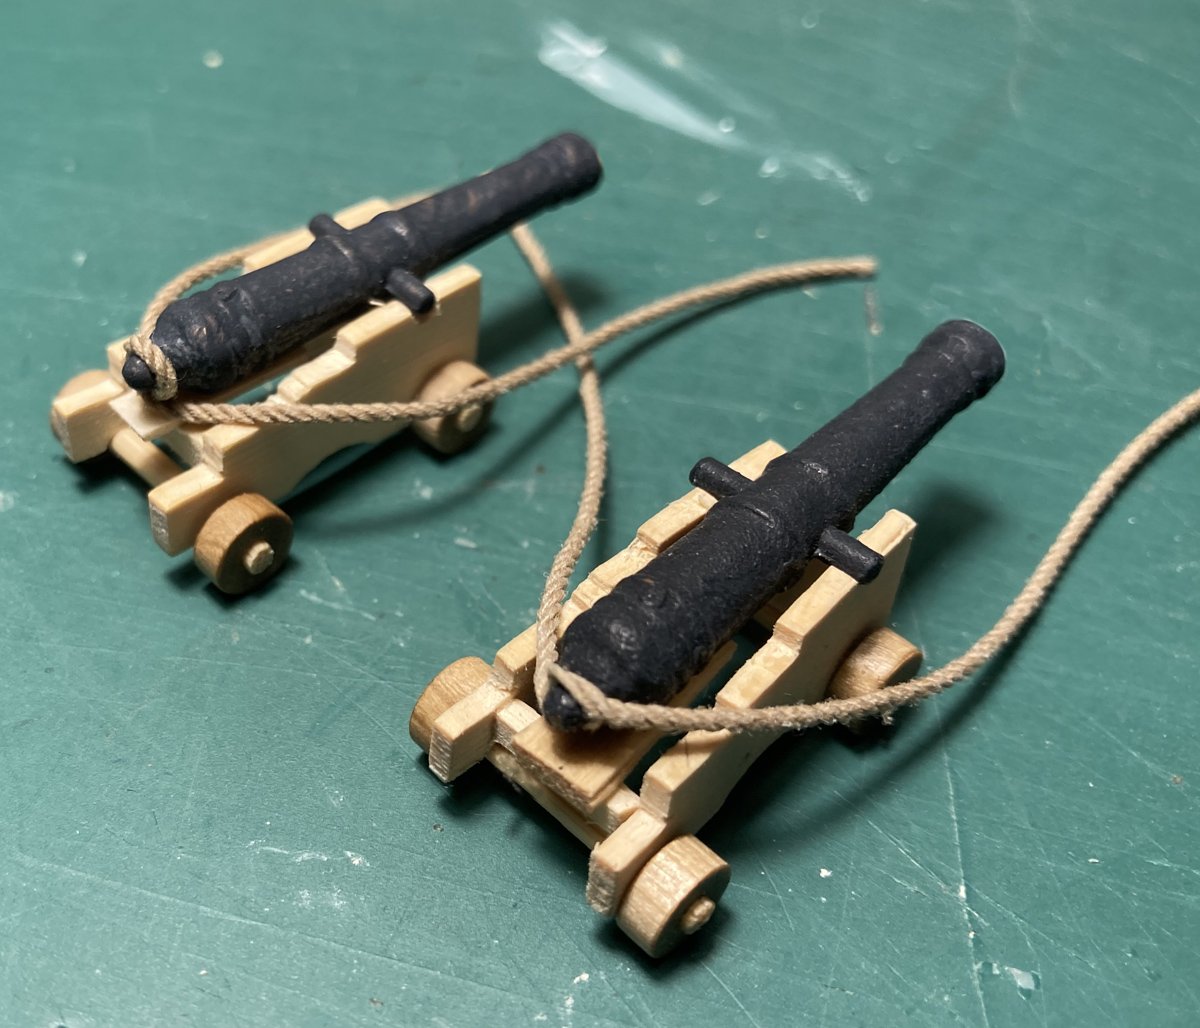
Hi Phil @Dr PR thanks for the feedback, I did try doing that splice but it looked really messy, see post 316 above. I think it may be because I am using a 3 thread rope? There are examples of the wrap around method on contemporary models, but they may have been altered at a later date here is SLR0673 a 16 gun brig ( 1810 ) that I photographed during my visit to Chatham Dockyards. It shows yet a different style. here is one I have done with a simple wrap that I have seen done on full size cannons. I have a problem with unruly ropes and I think the hooks are much too big. I also need to do some fettling on the carriage. Tim
-
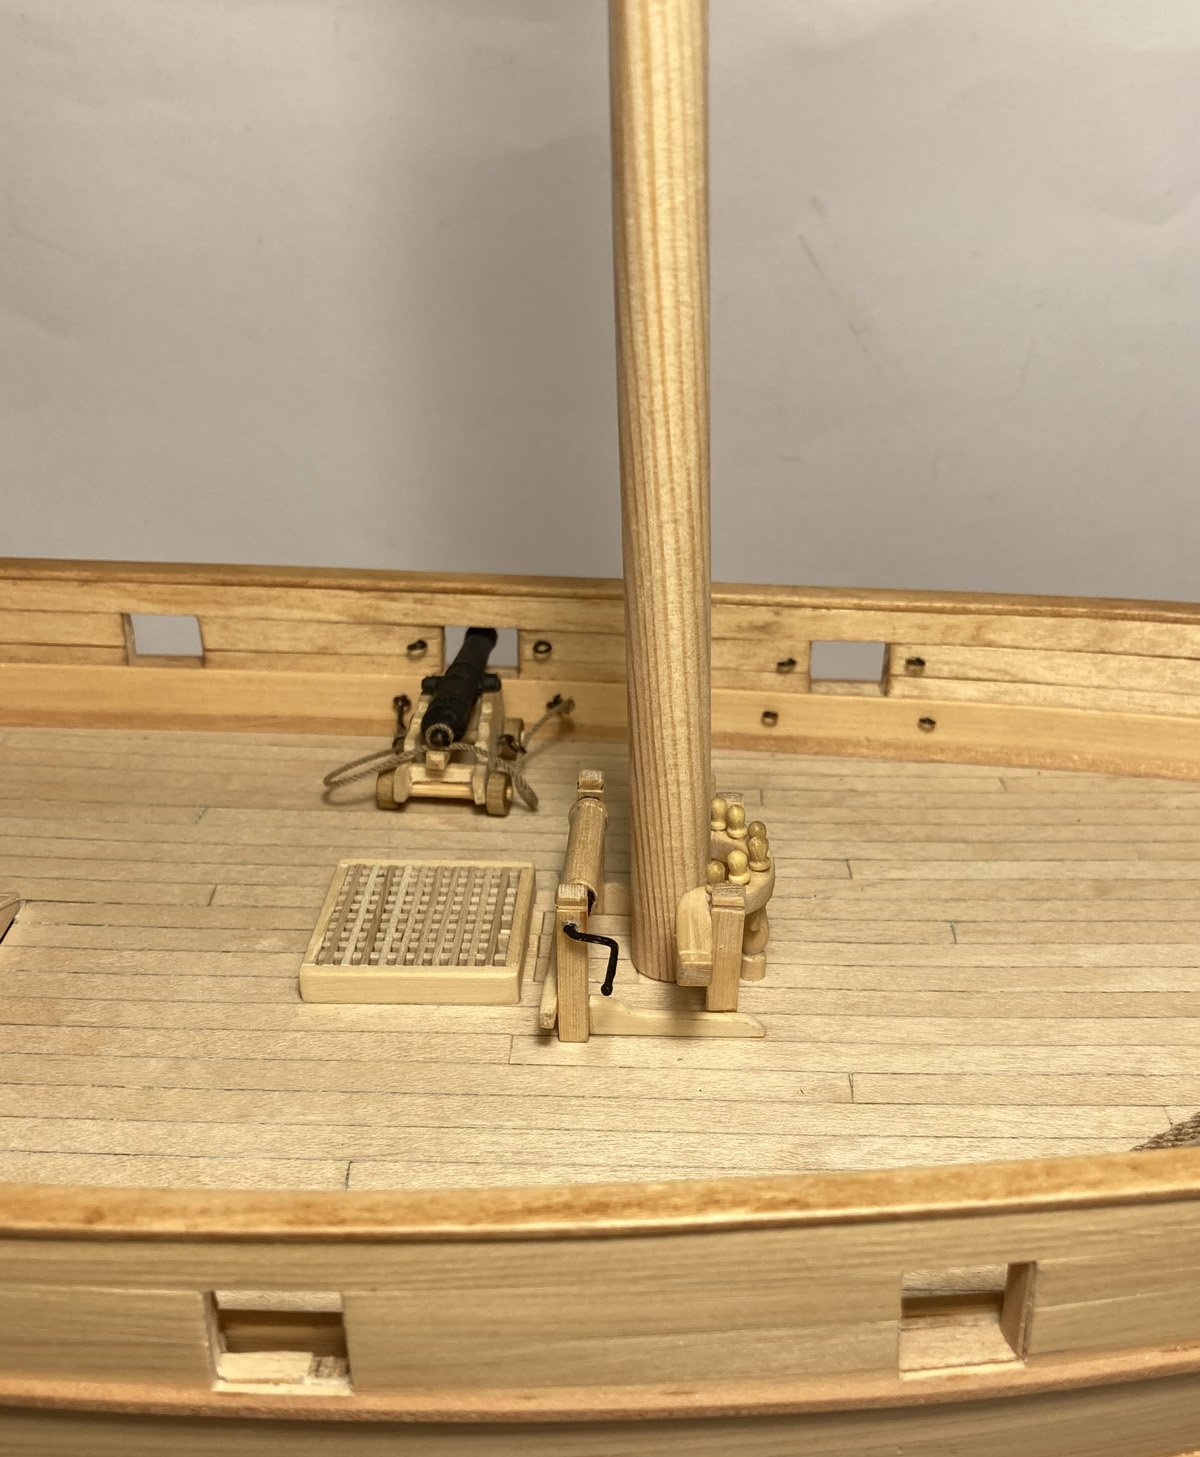
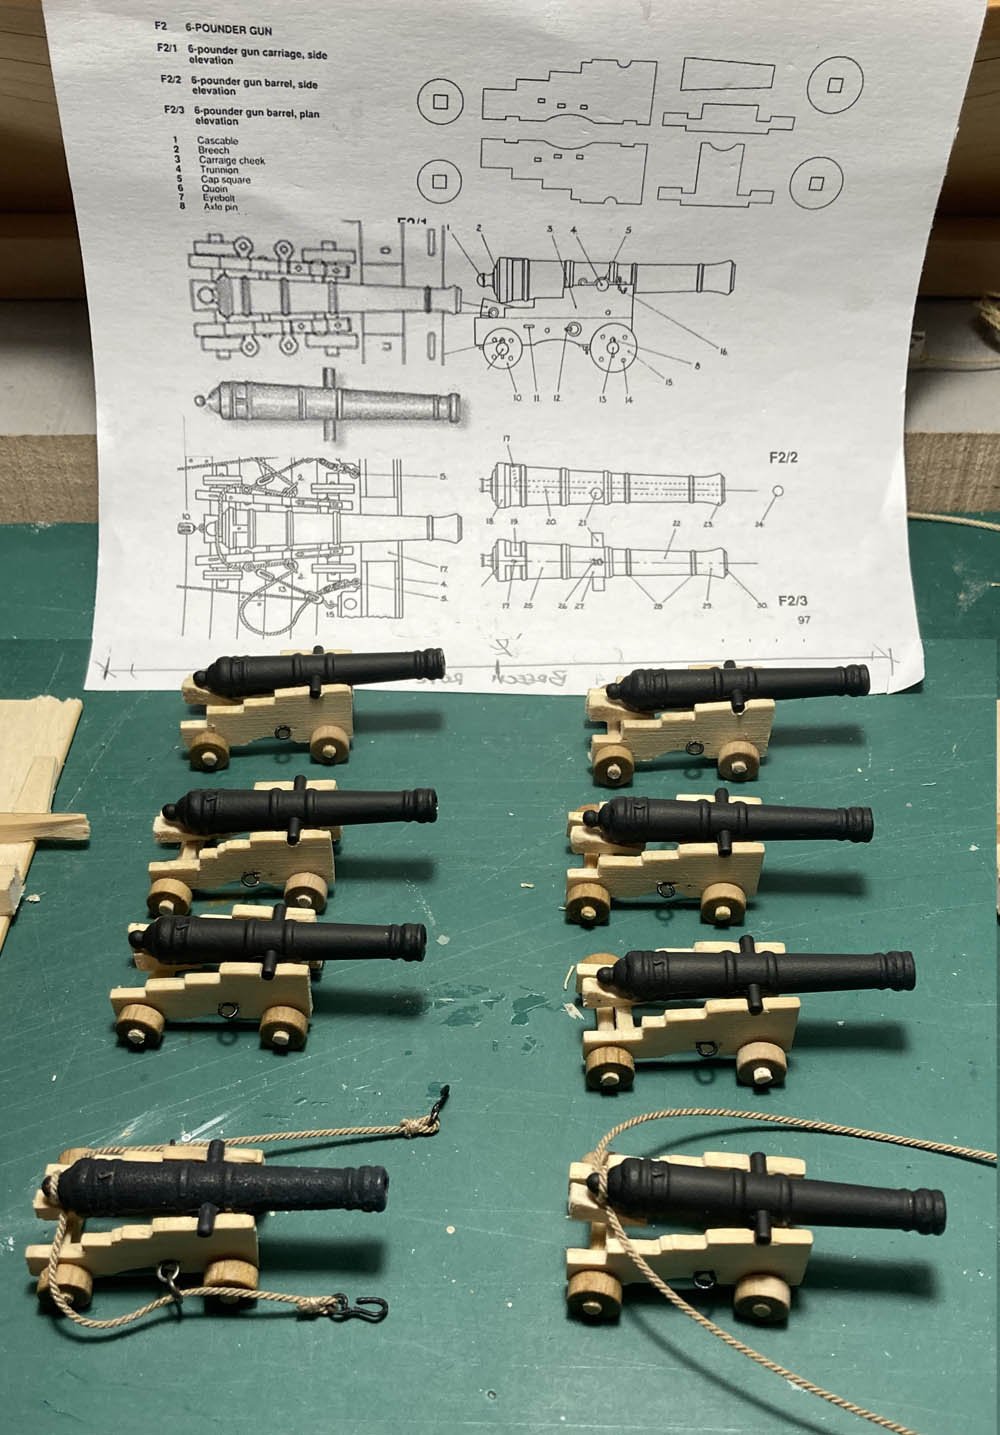
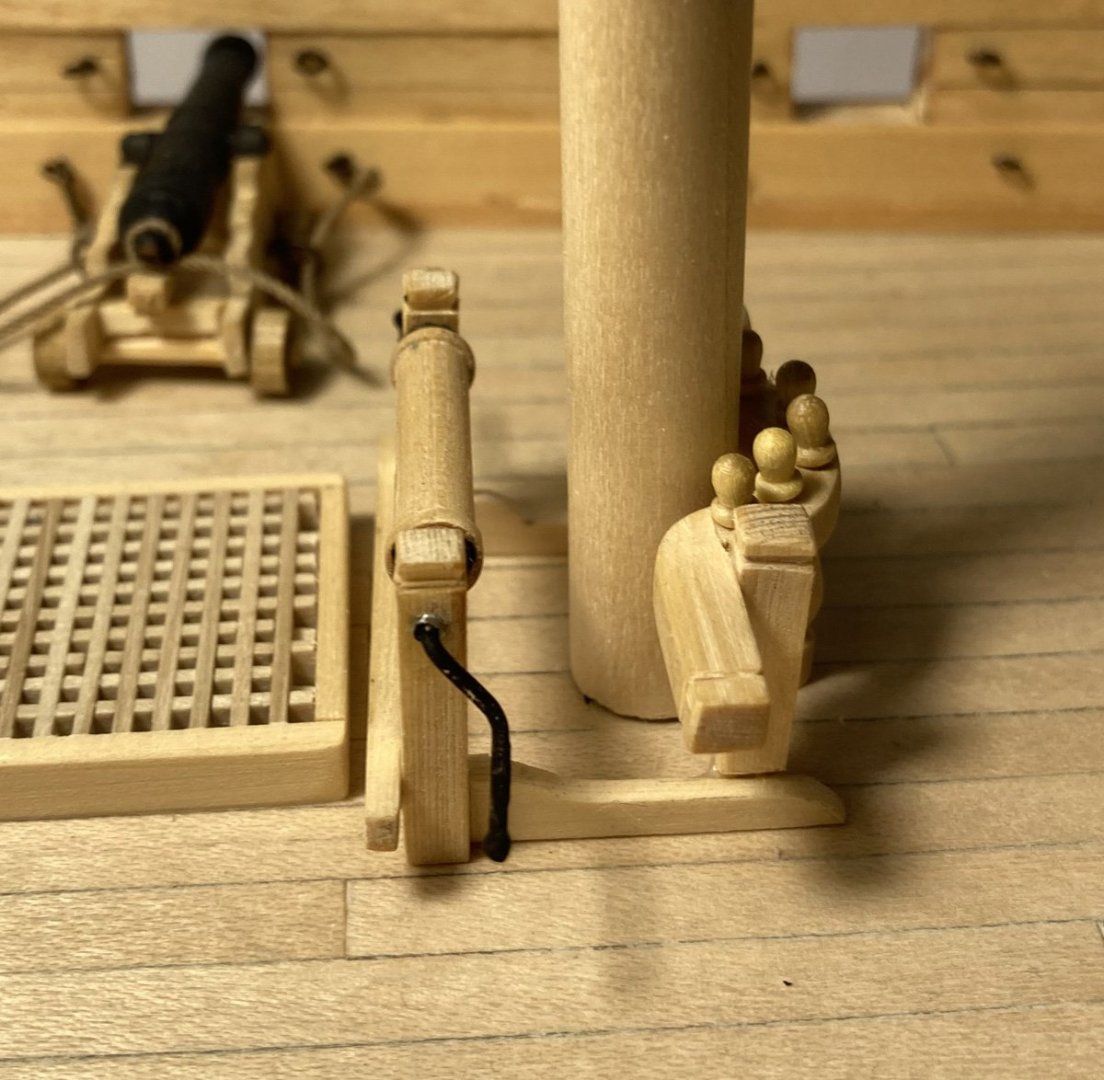
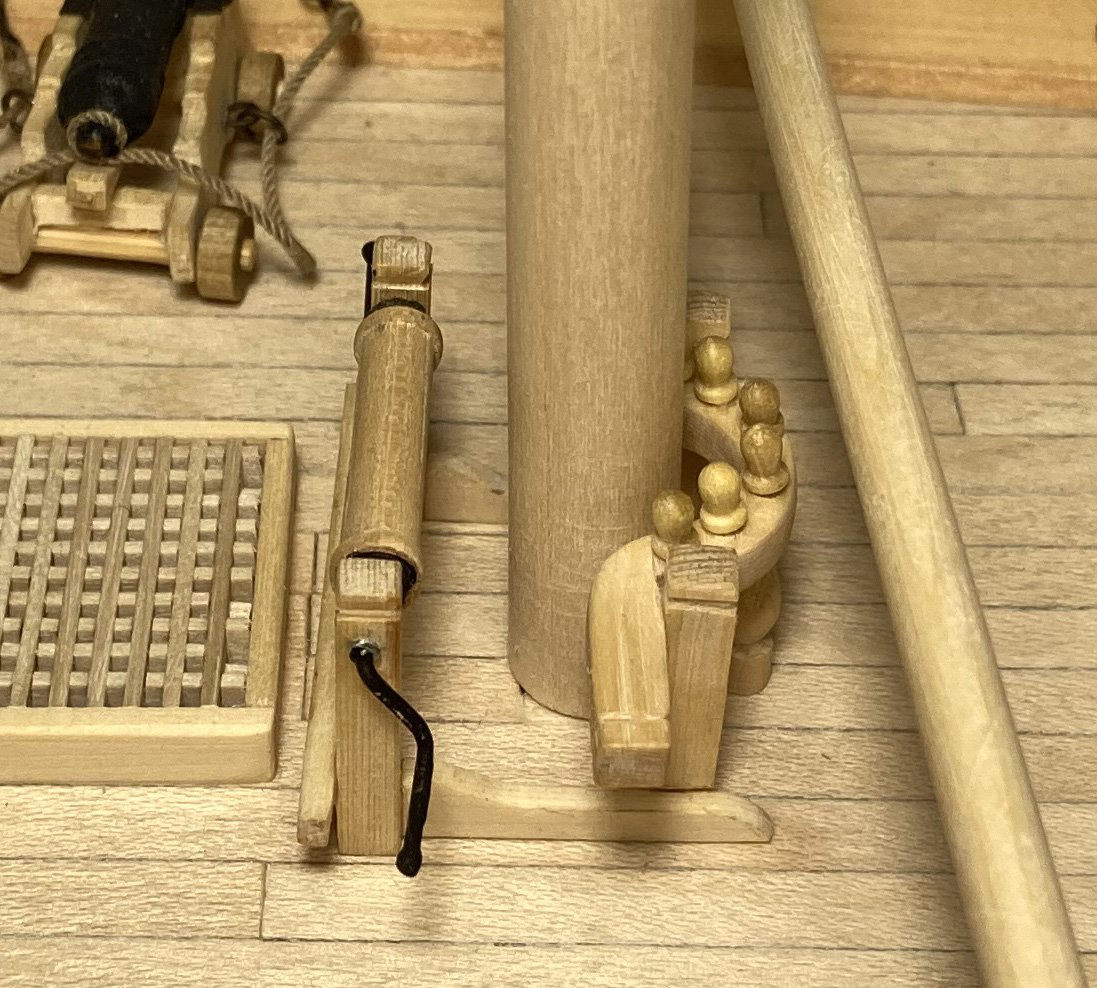
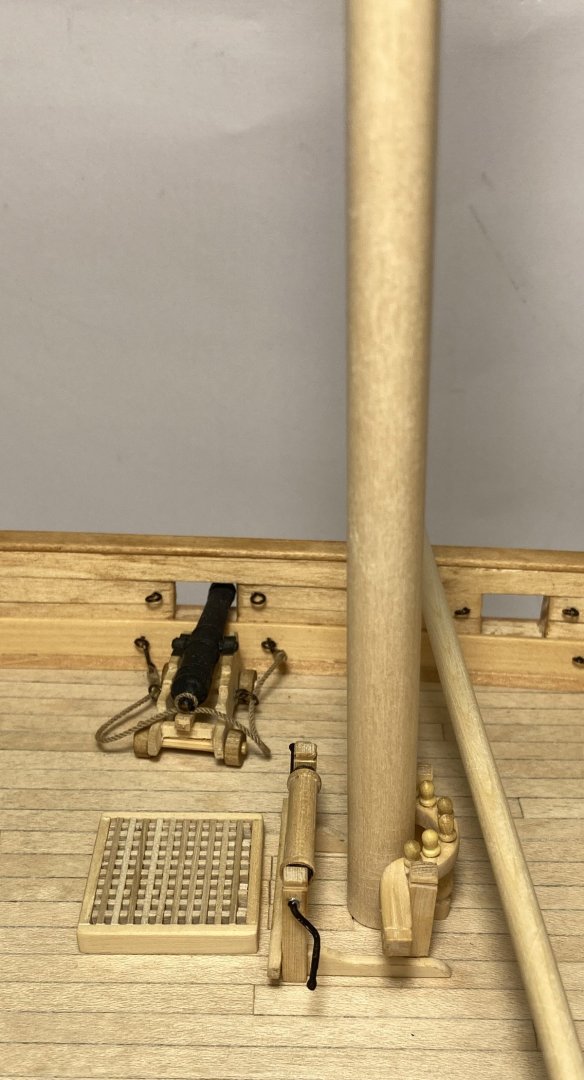
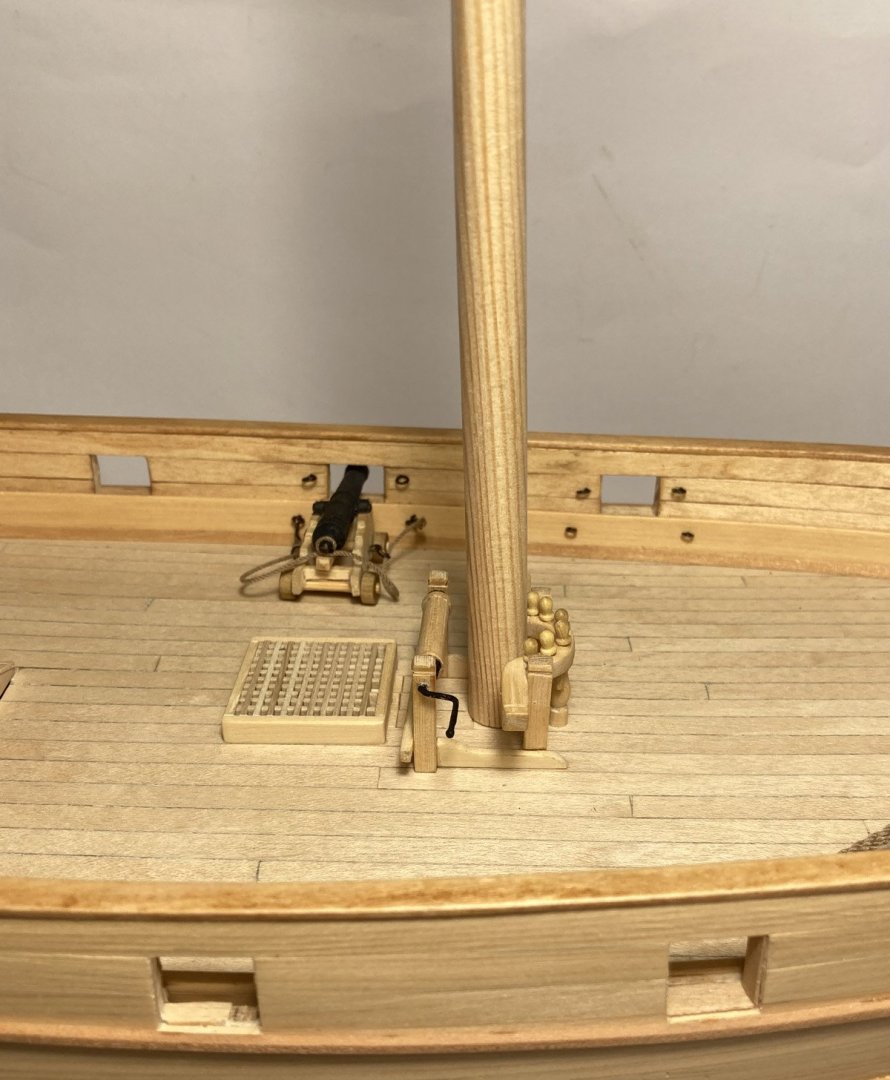
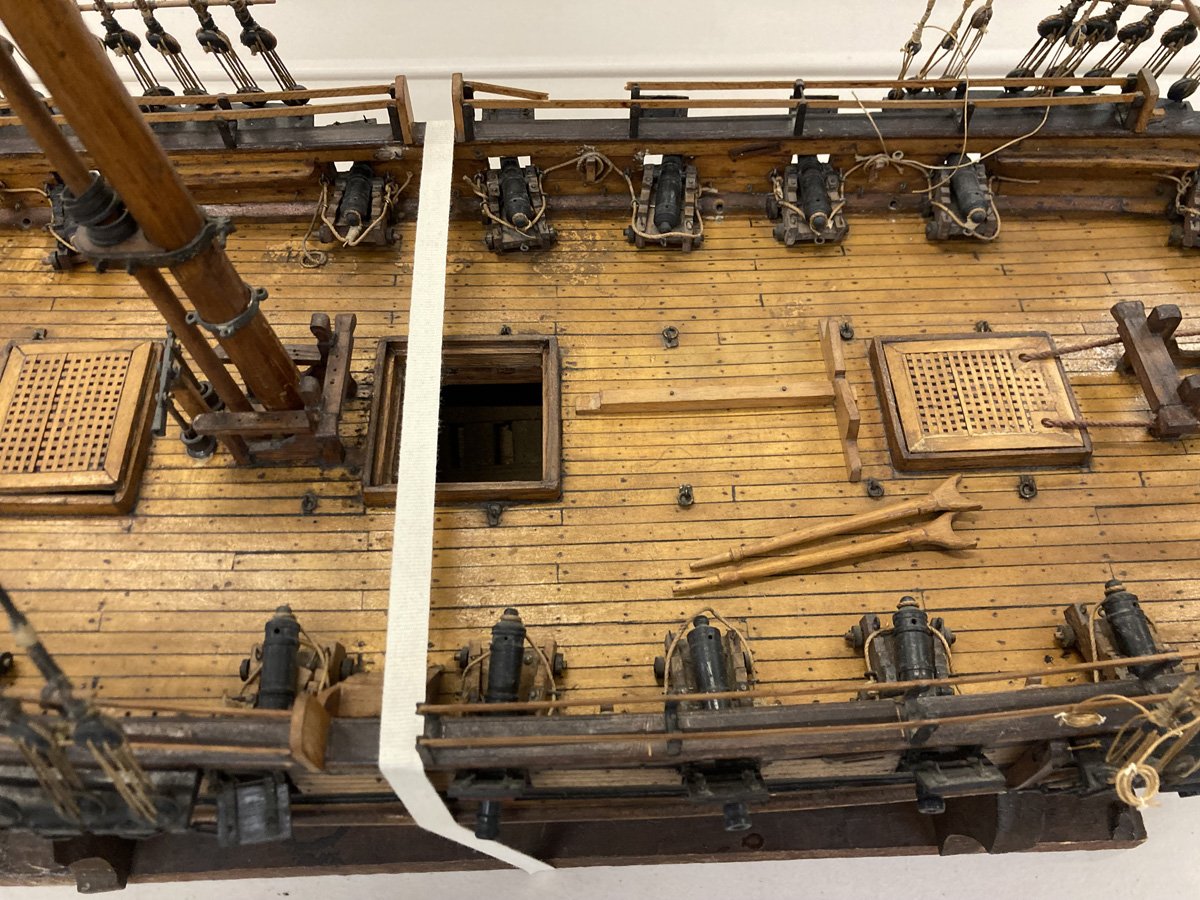
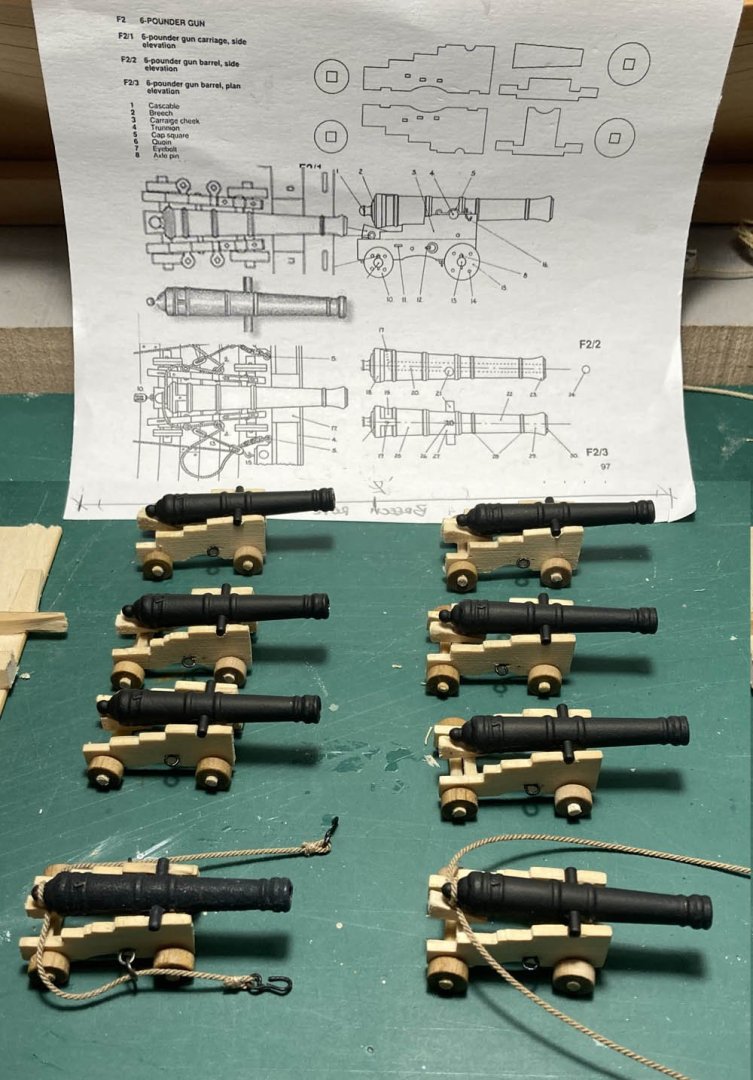
managed a bit of work on the cannons With this build I was going to leave it un-rigged, but I am now considering using this as a vehicle for learning for when I build the HMAT Supply. Can any one recommend books, logs on here to help with this? The booklet by Bill Shoulder is not bad but a bit lacking in detail. Thanks Tim
-
Thanks Allan.
-
I think I have decided to go with the wrap around breeching rope. Next question is do I seize it or not? here it is just super glued in place here is my attempt at seizing it. maybe it looks neater without. Tim
-
Hi Allan @alpayed. That is a very useful image, thanks for posting it. Do we know when it was drawn? Tim
-
Thanks @bdgiantman2 I have indeed seen @Chucks very good tutorials on doing that splice. My tussle is whether to go with that style or the other one on the left, which has the rope wrapped once around the cascable / cascabel ( not sure of the correct spelling for that ). The wrapped splice is more bulky but also in some ways looks neater, at least with my rendition. Tim
-
Ah yes, we have spoken of her before on your Lapwing log, I knew she had served as a lightship after her career as a tender to HMS Rattlesnake (1846 ) on a survey of the East coast of Australia. The book "The Rattlesnake" by Jordan Goodman is a good read. She had a very long life. TIm
- 9 replies
-
- 1
-
-
- Artesania Latina
- First Fleet
- (and 1 more)
-
Thanks, I think I will need it on this build, really not sure about the video only instructions - a bit like IKEA instructions with no words just pictures. Tim
-
Kit review 1/50 - HMS Supply - Artesania Latina - by Kevin
oakheart replied to Kevin's topic in REVIEWS: Model kits
Thanks Kevin, here is the new log. -
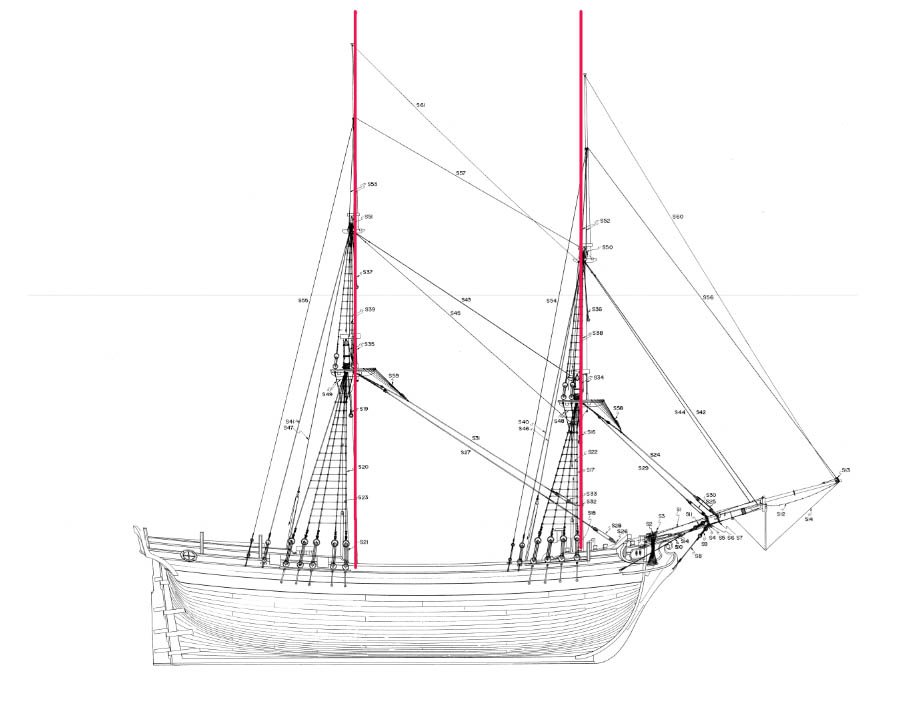
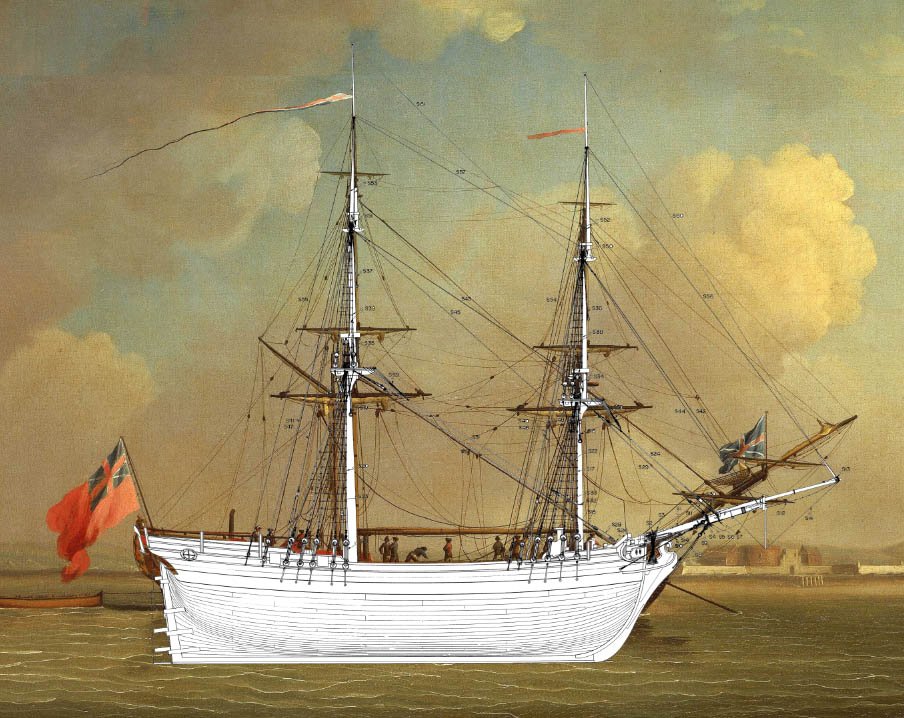
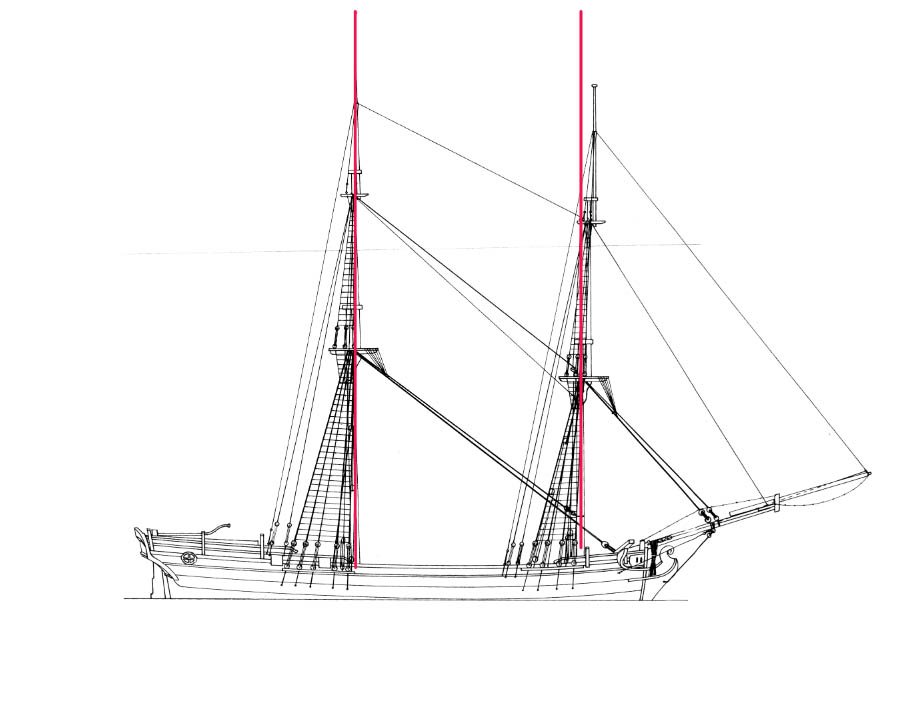
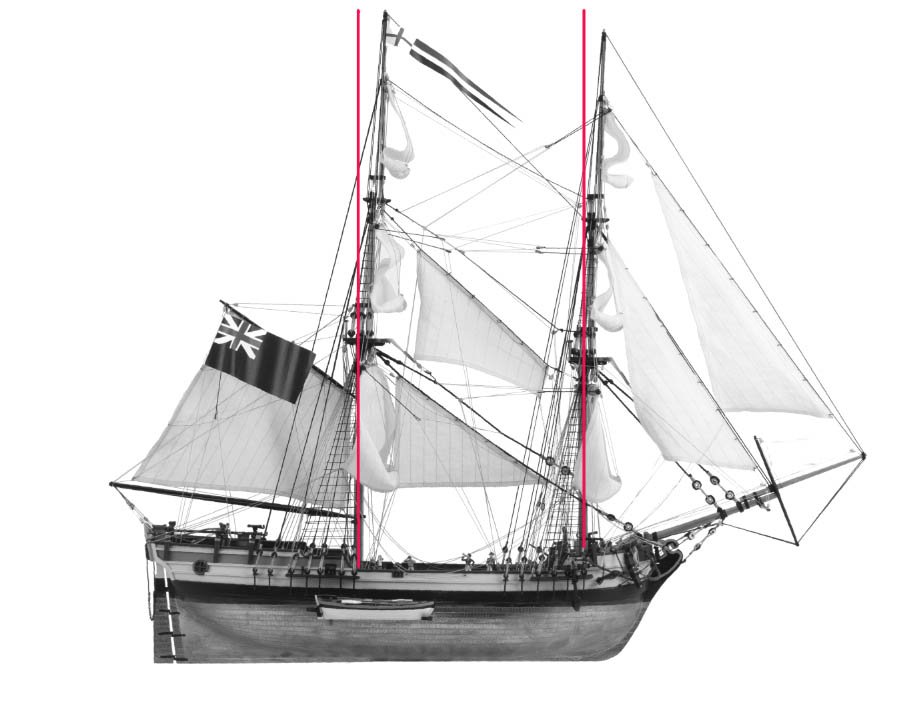
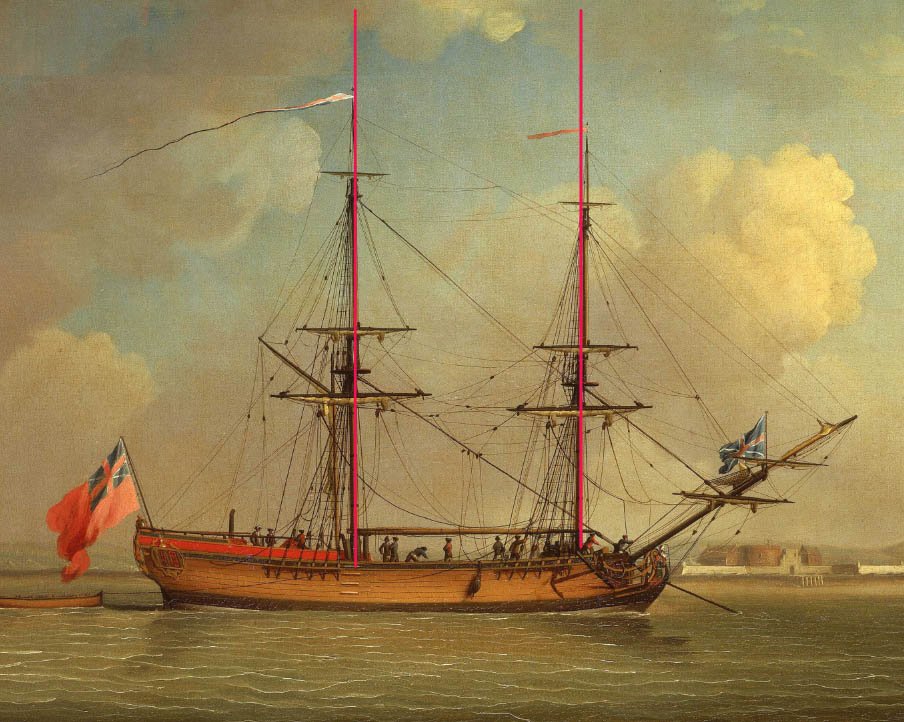
So there I was happily working away on my cutter speedy then I read Kevin’s @Kevin review of the revised AL kit of the HMS Supply. ( apparently it really should be called HMAT Supply ( HM Armed Tender ) Some of you may remember a while ago I was thinking of doing a scratch build using the plans that Allan Tyler @alpayed sent me. But now after scratching my way through ‘Speedy’ I quite fancied doing a kit this time. When I searched online I was very excited to find the kit direct from AL for only £170 free PnP. It was only when it arrived in the UK and I got a text from UPS saying I needed to pay them VAT and handling fees before they would deliver it. So that was an extra £45.50 so it’s now only £10 cheaper than buying it in the UK, lesson learned. (Lets not mention Brexit) Well it arrived and I opened the box I have to say that overall I was happy with most of the kit materials supplied. The plywood was flat, the laser cutting looked good. Sails and rope are pretty poor quality, but now I can make my own ropes that’s okay. I will not start the kit until I have finished Speedy. But there is research I can do before I start. With the Artesania Latina kit, the profile image supplied is at odds with the other reference I can find. The Artesania Latina image shows it with a definite forward lean. see image below. Below is the drawing that Allan Tyler @alpayed has produced. Then there is the Karl Marquardt article and plan set from my copy of Model Shipwright Magazine No. 95 March 1996. Then this contemporary ( 1759 ) painting of a 'Snow' which I believe is a similar ship, shows the masts vertical. https://www.rmg.co.uk/collections/objects/rmgc-object-12513 Here I have overlaid Allan’s drawing on the painting, as you can see it’s pretty close. So it looks like I will have to make some changes to how the masts fit. Tim
- 9 replies
-
- 4
-
-
- Artesania Latina
- First Fleet
- (and 1 more)
-
Here is the first choice I have to make, fitting the breech rope to the cascabel. Having look through many blogs here and other places. Not sure which one is best for this build. wrap around or divided rope ? Tim
-
Kit review 1/50 - HMS Supply - Artesania Latina - by Kevin
oakheart replied to Kevin's topic in REVIEWS: Model kits
Thanks @Gregory for the link, I have just had a quick look. It mentions mast angles, which brings up a question with this AL Supply kit, the profile image that comes with the kit is at odds with the drawing that Karl Marquardt did for the March 1993 ship modeler magazine. The AL shows it with a definite forward lean. This contemporary painting of a 'Snow' which I believe is a similar ship, shows the masts vertical. https://www.rmg.co.uk/collections/objects/rmgc-object-12513 more information is required to see which is correct. Not sure if this is the right place for this discussion, should I start a new build log for my research ? Tim