HOLIDAY DONATION DRIVE - SUPPORT MSW - DO YOUR PART TO KEEP THIS GREAT FORUM GOING! (83 donations so far out of 49,000 members - C'mon guys!)
×


oakheart
-
Posts
518 -
Joined
-
Last visited
Content Type
Profiles
Forums
Gallery
Events
Everything posted by oakheart
-
 Thanks @druxey I have just started reading the thread that Craig @iMustBeCrazy gave a link too above. Was there any conclusion yet? I can't see any details on the drawings I have, also the kit that @Thunder built did not give any details either. Was it just a given. The shipwright just did what was always done. I will be quite happy to make something suitable for this cutter model if I can find the shape and size. It's all a voyage of discovery for me at this stage in my model ship building. Tim
 -
Thanks Craig, that is indeed a very interesting discussion. My solution is much simpler. A sort of skirting, it won't stop much water but it looks a bit neater than just a ragged hole. Tim
-
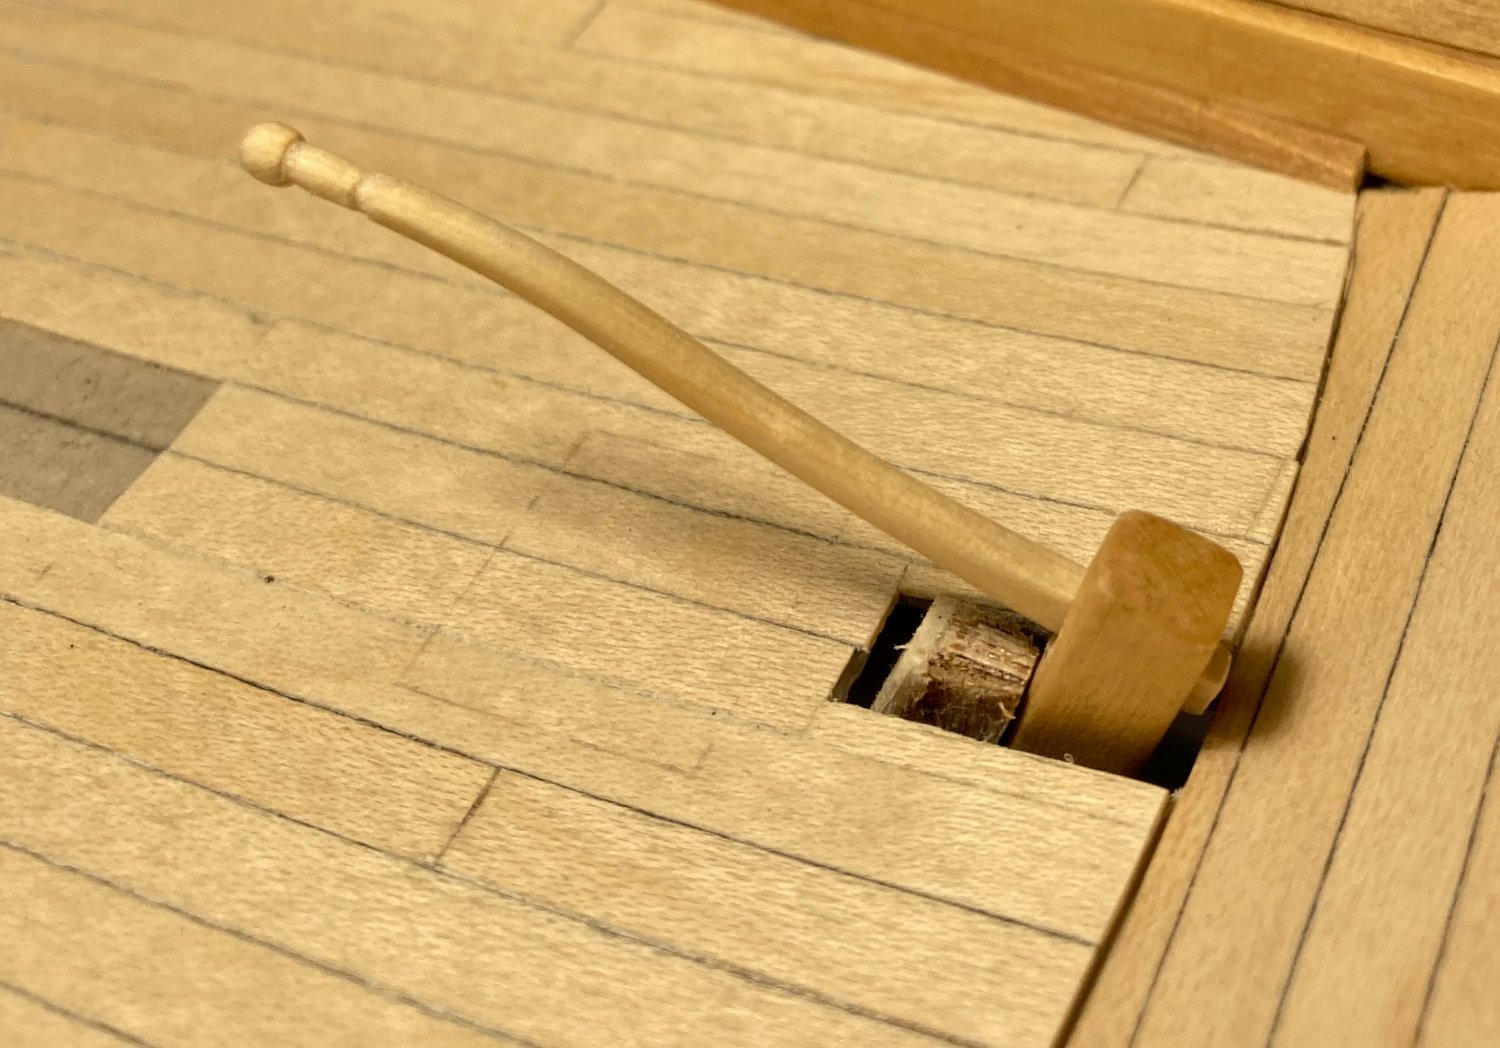
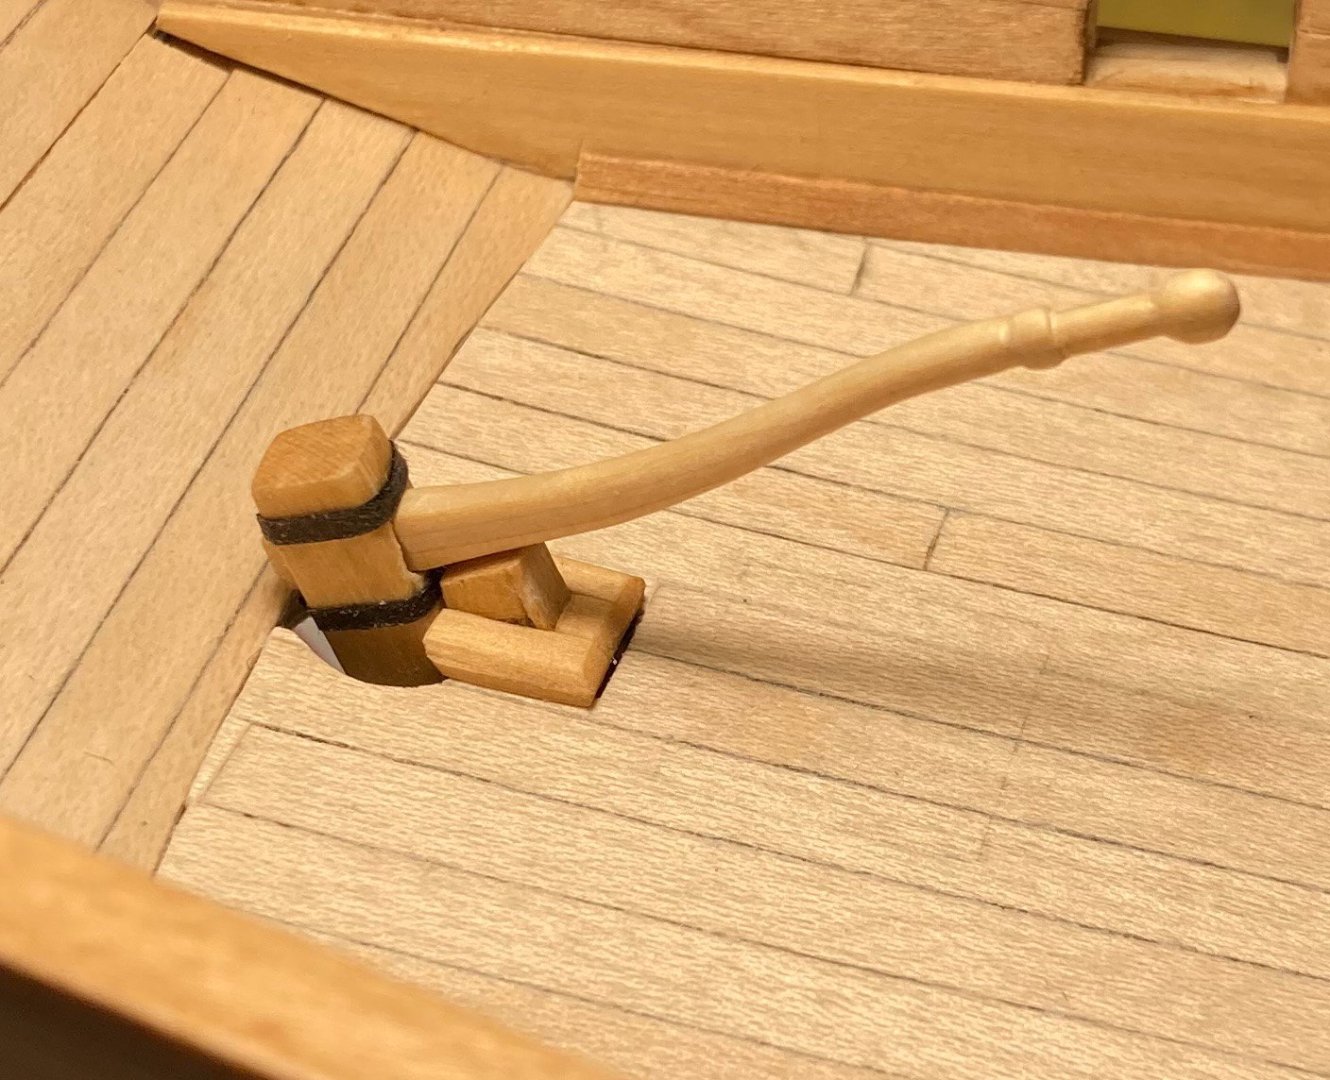
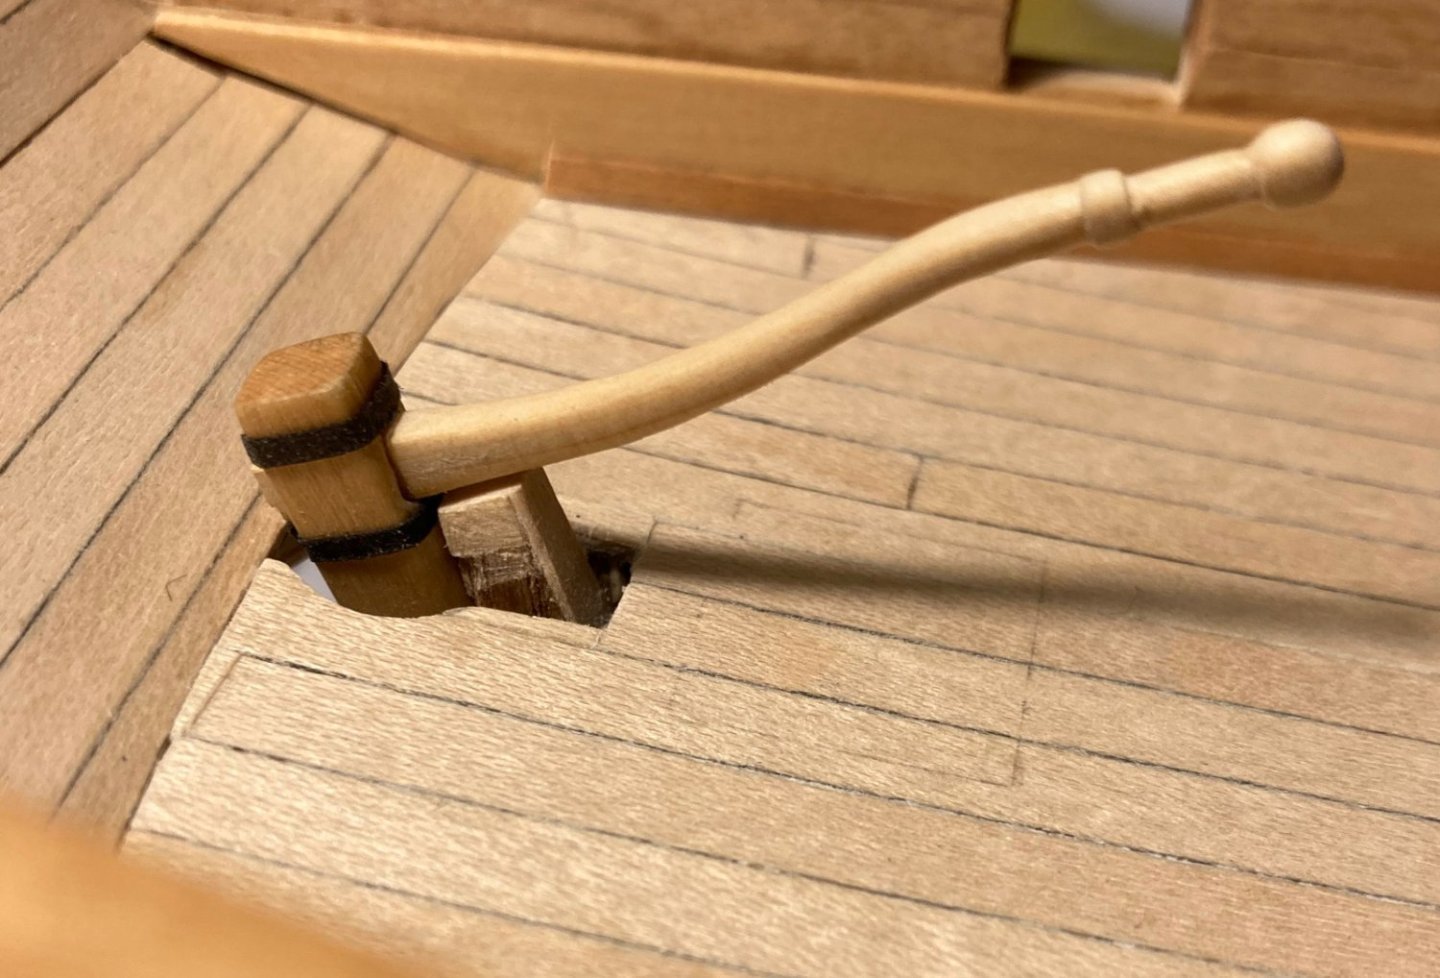
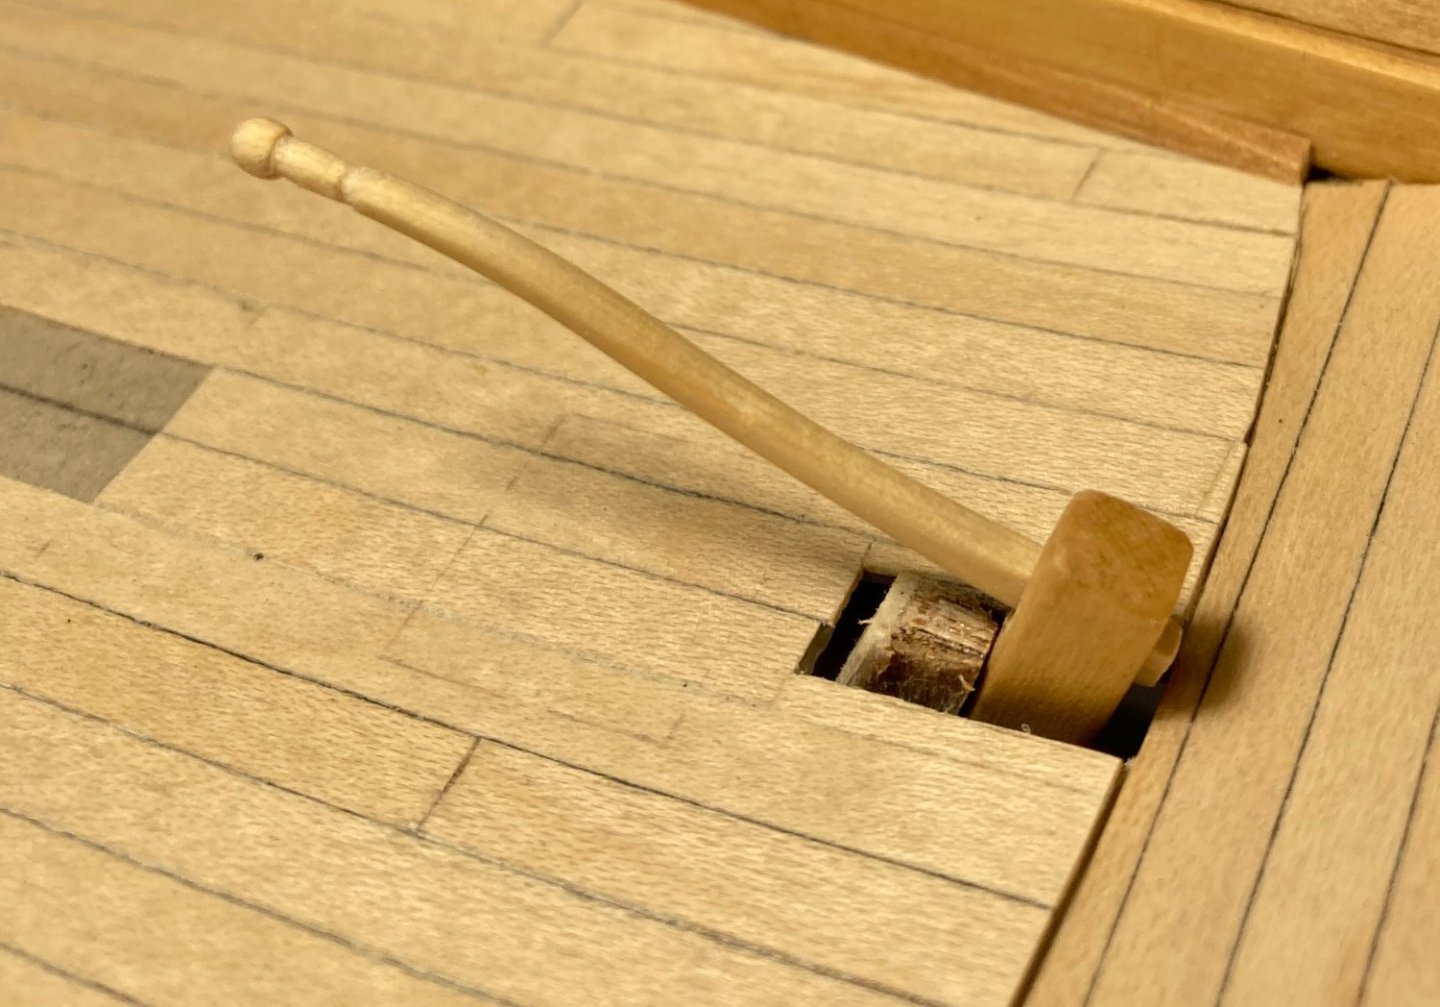
First thanks for all the likes guys The tiller is now finished, I just need to put some kind of lining around the post just to neaten it up What's next? I do have a list somewhere maybe I should look at it Tim
-
Yes now I look the RMG draught is different again to both that and Bills drawing. I like the Danish shed better. looks to be more leg room. Tim
-
And some whittling later a much nicer tiller now to tidy up round the base. Tim
-
the 'sheds' WC and pantry also look better in the orginal Tim
-
Thanks Craig, that is much more elegant, I will remake it to suit. I forgot, your Lapwing is a sister to Speedy Is that from zaz6425? I have a copy of that, should have checked it. Tim
-
Good to see you making sawdust, looking good Tim
-
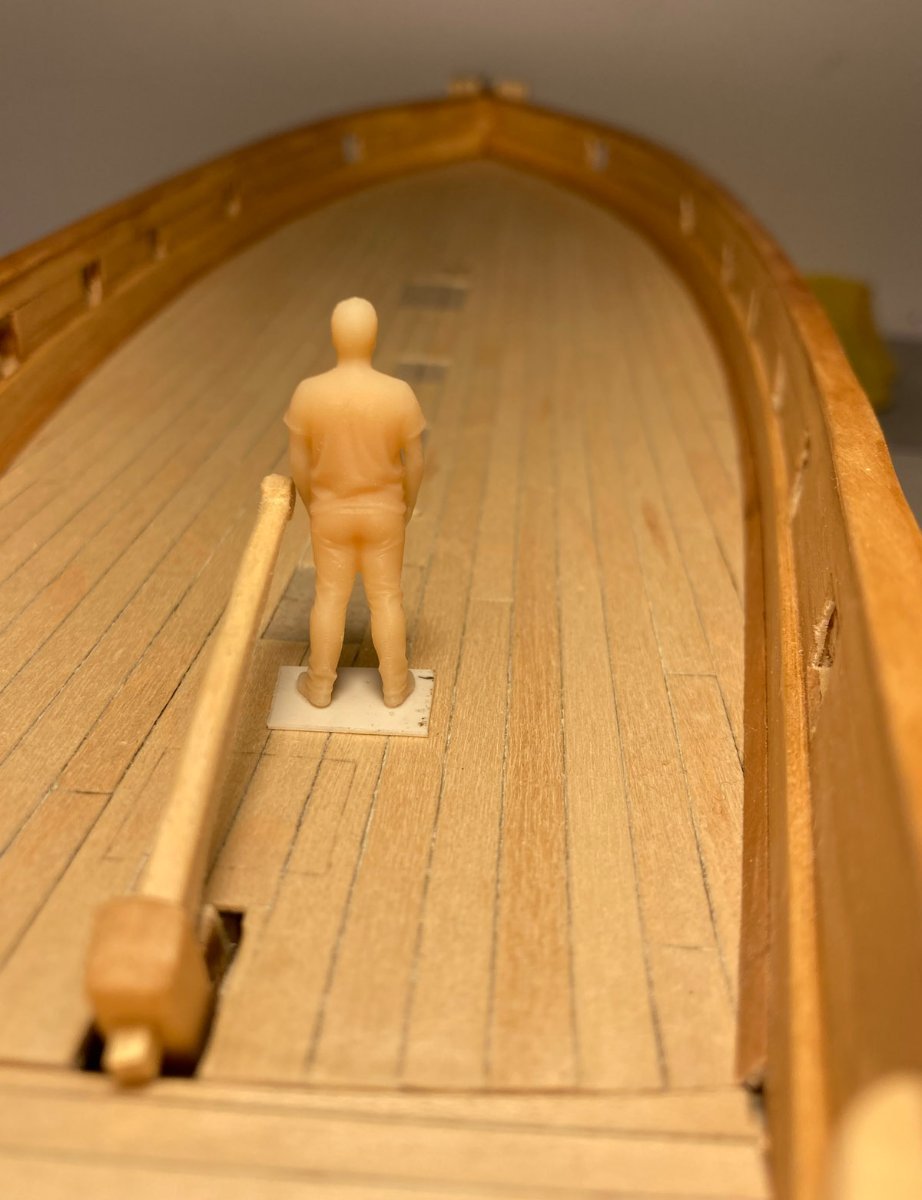
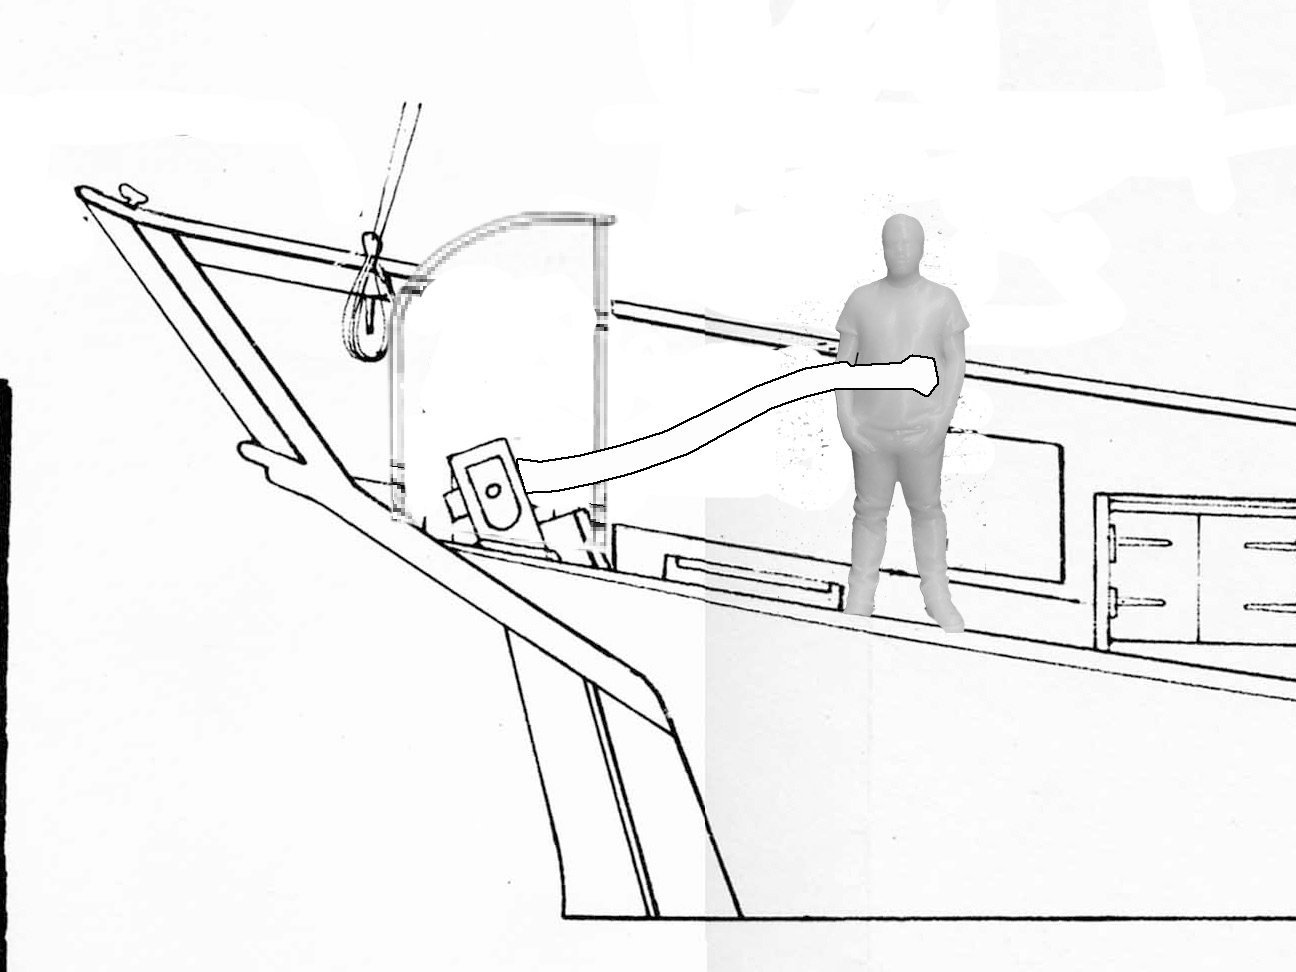
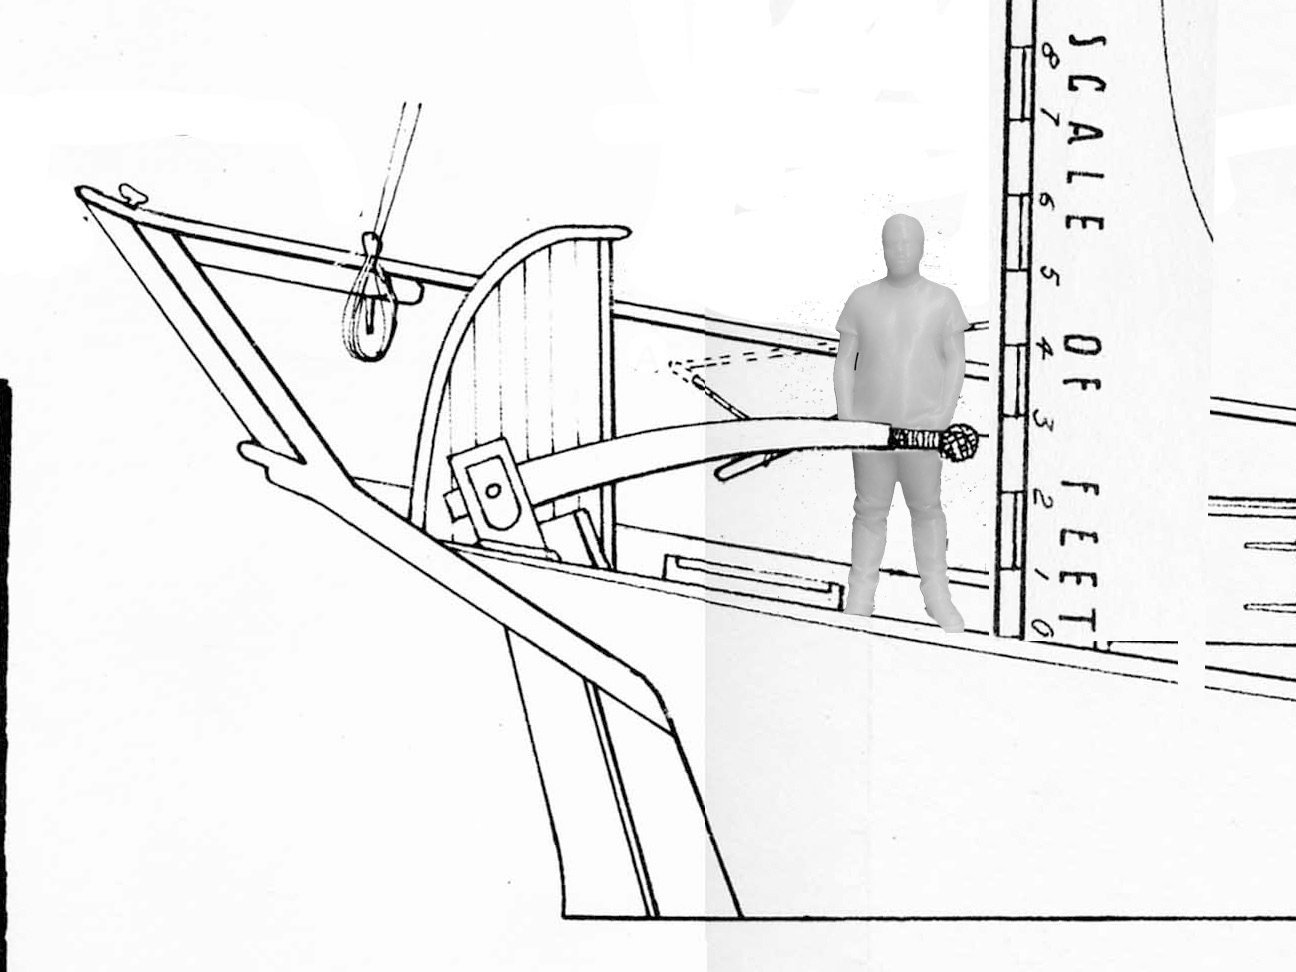
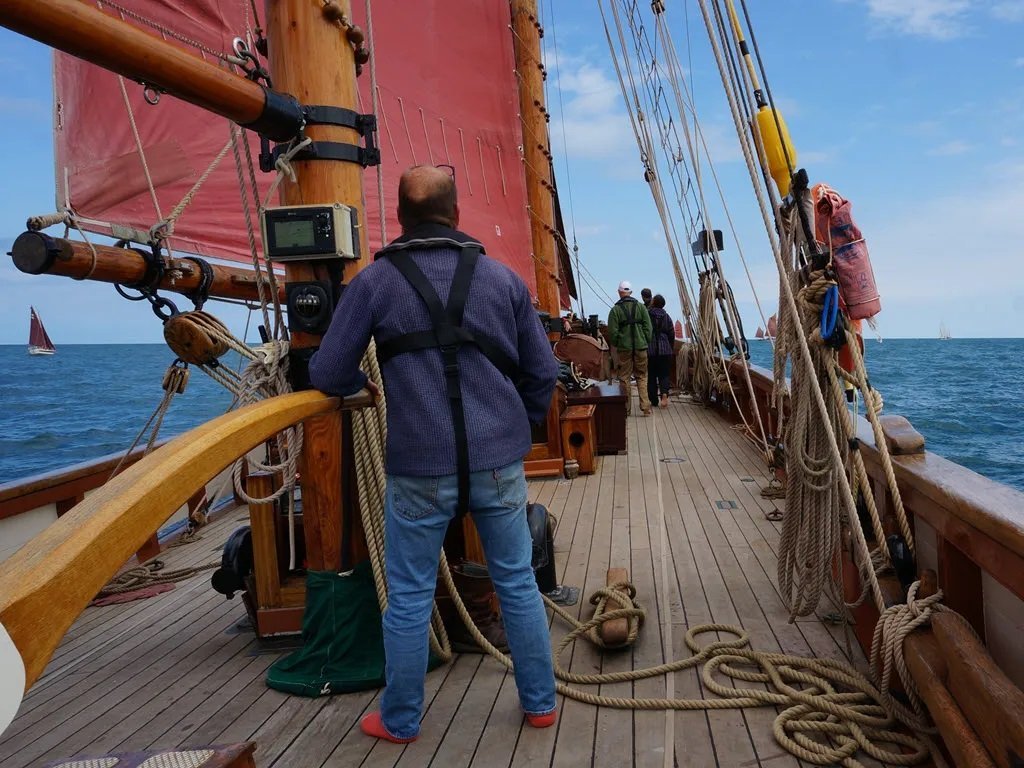
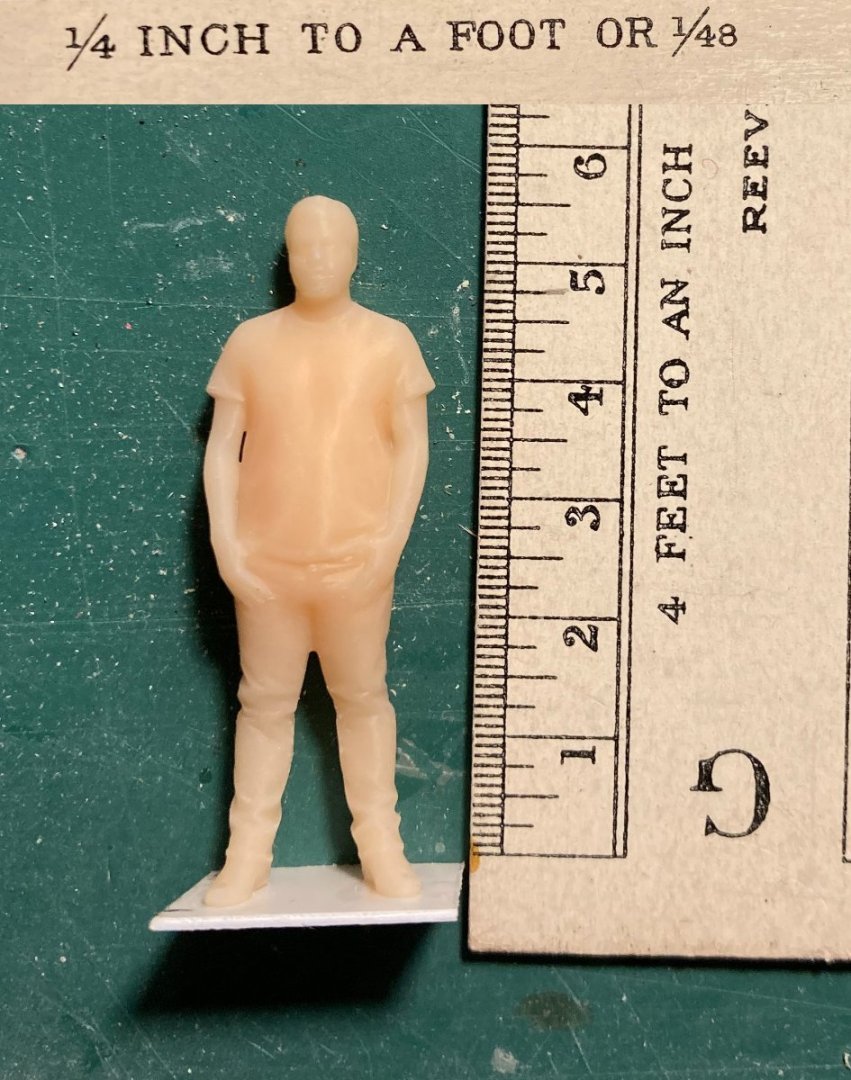
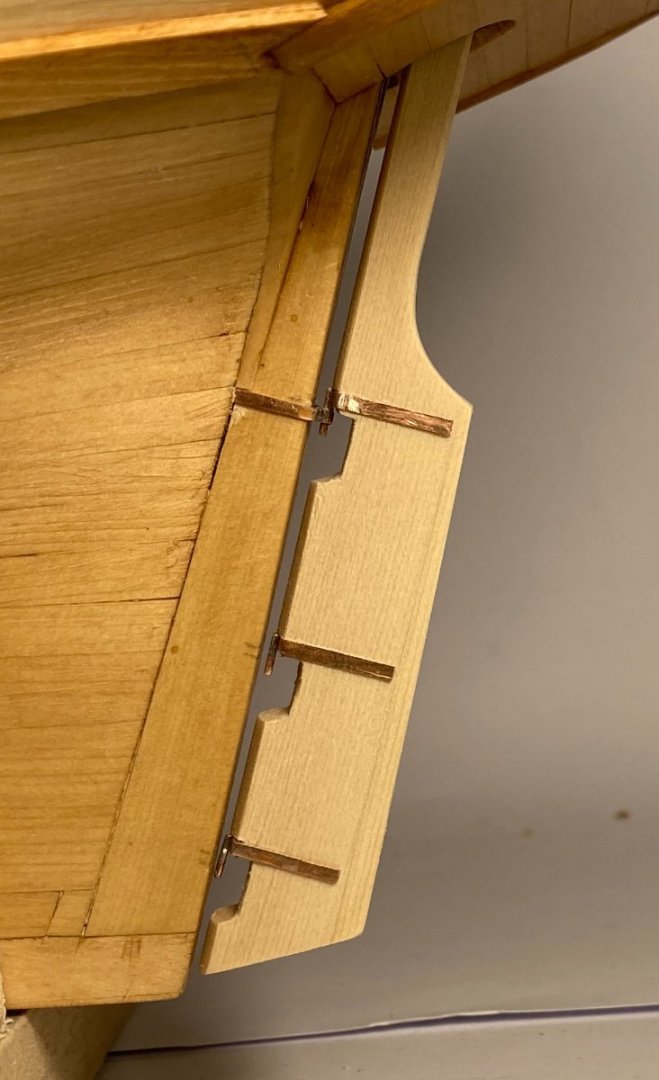
Working up to the tiller. My feeling about the original drawing is that it does not look right? I have a scale and figure ( @ 1:48 about 5' 9" tall ) which I have placed in bills drawing I have this photo of BM45 Pilgrim built in 1895 ( much later I know ) but about the same size as speedy. here is my rough cut based on Bills original drawing does it need to be longer / higher to look right ? Tim and yet another rabbit hole, Alice here I come.............. may be of interest to others, here is Pilgrim BM45 in 2008 before her £1 million rebuild

-
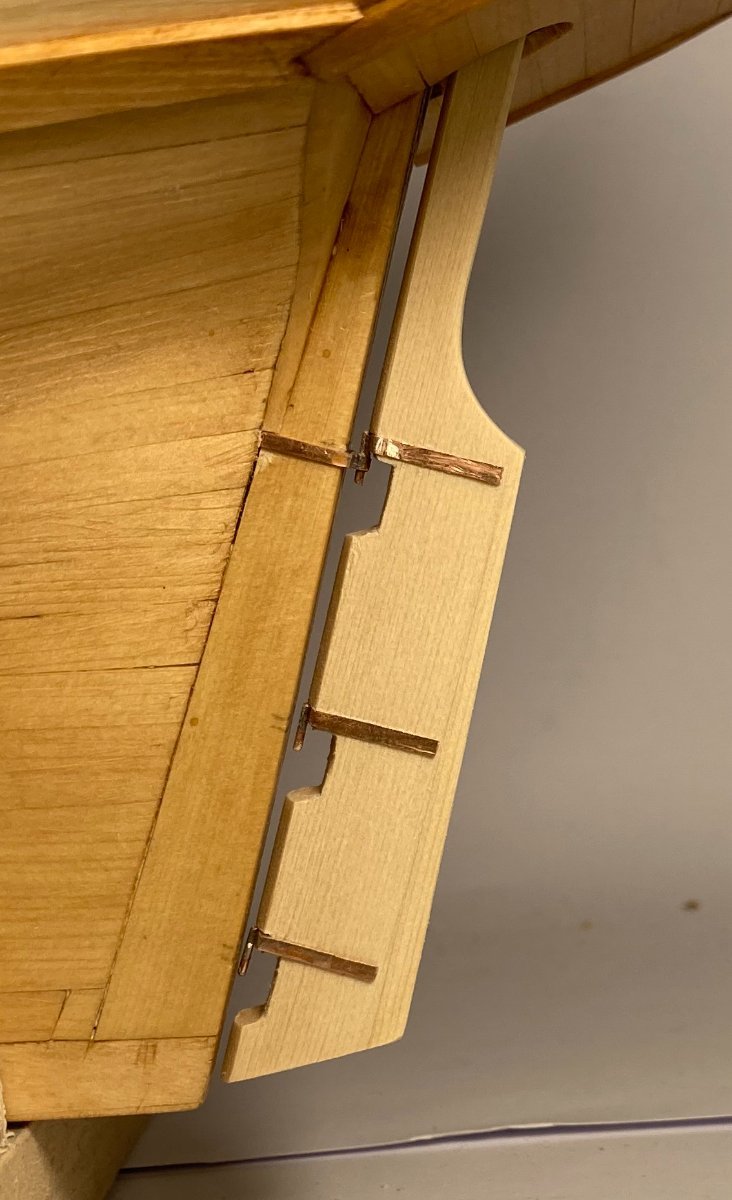
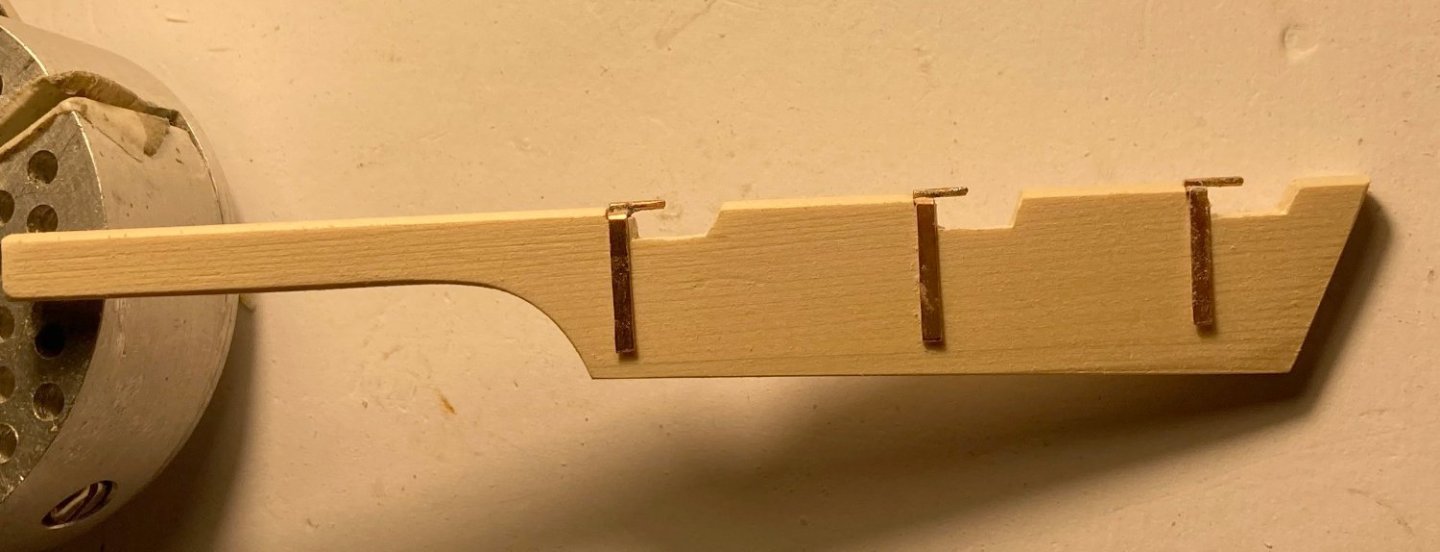
Gudgeons in place still to be bolted down and blacked. The centre one I cut a bit short, If I can find the energy I may remake it, then again once the model is finished I may never notice it. I need to trim the pins to a better length. Tim
-
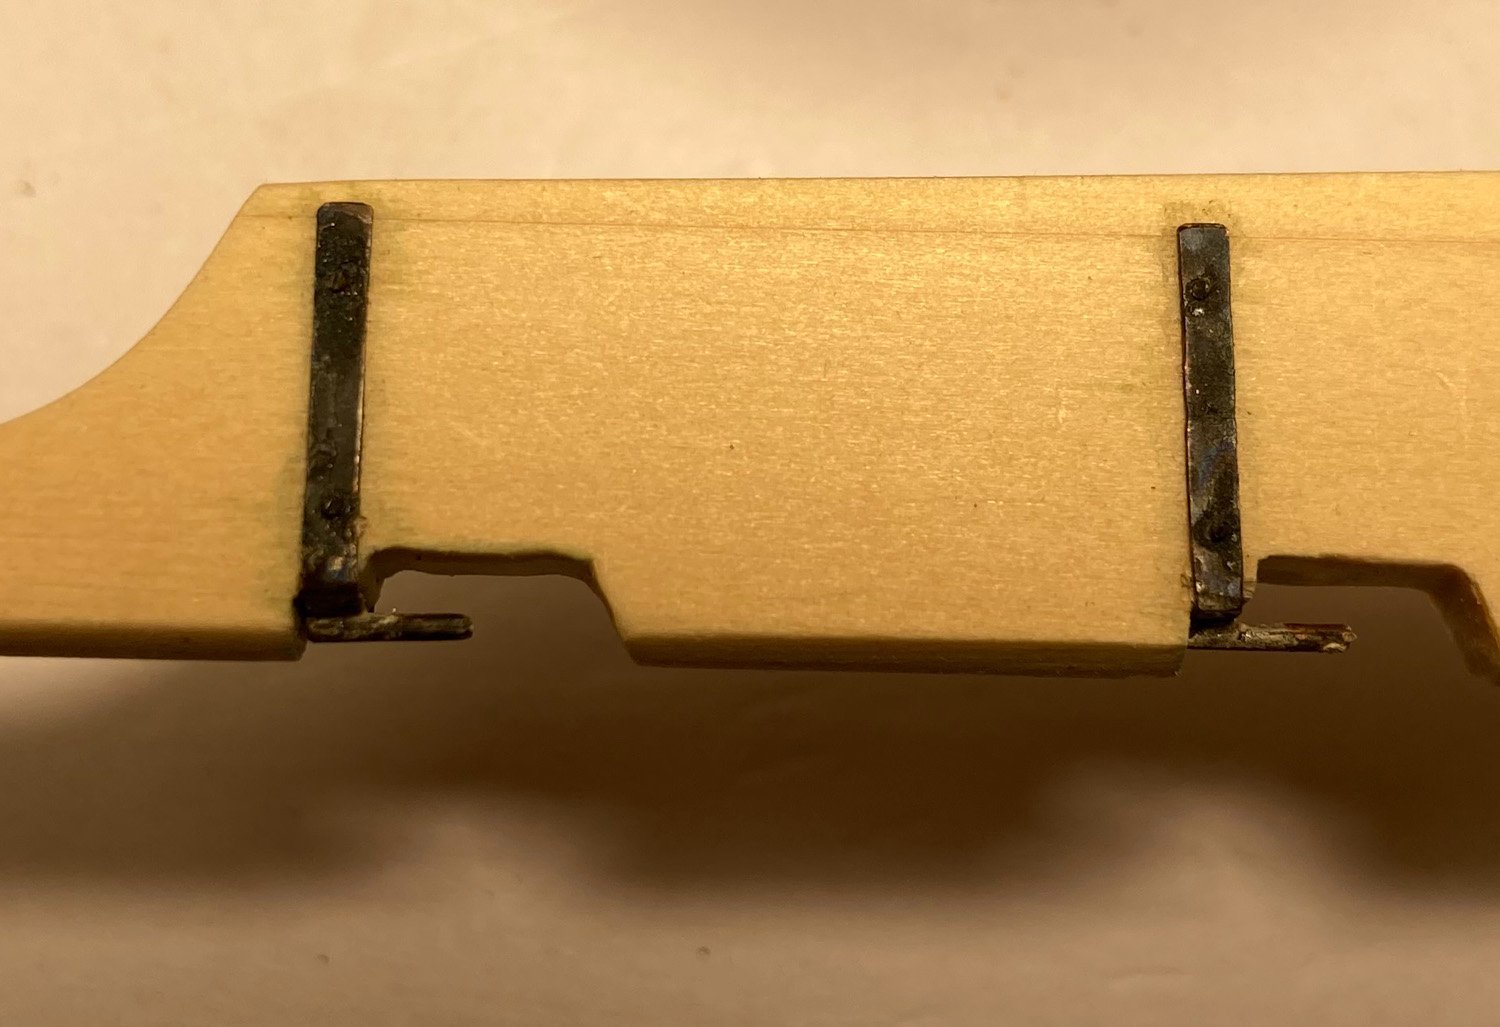
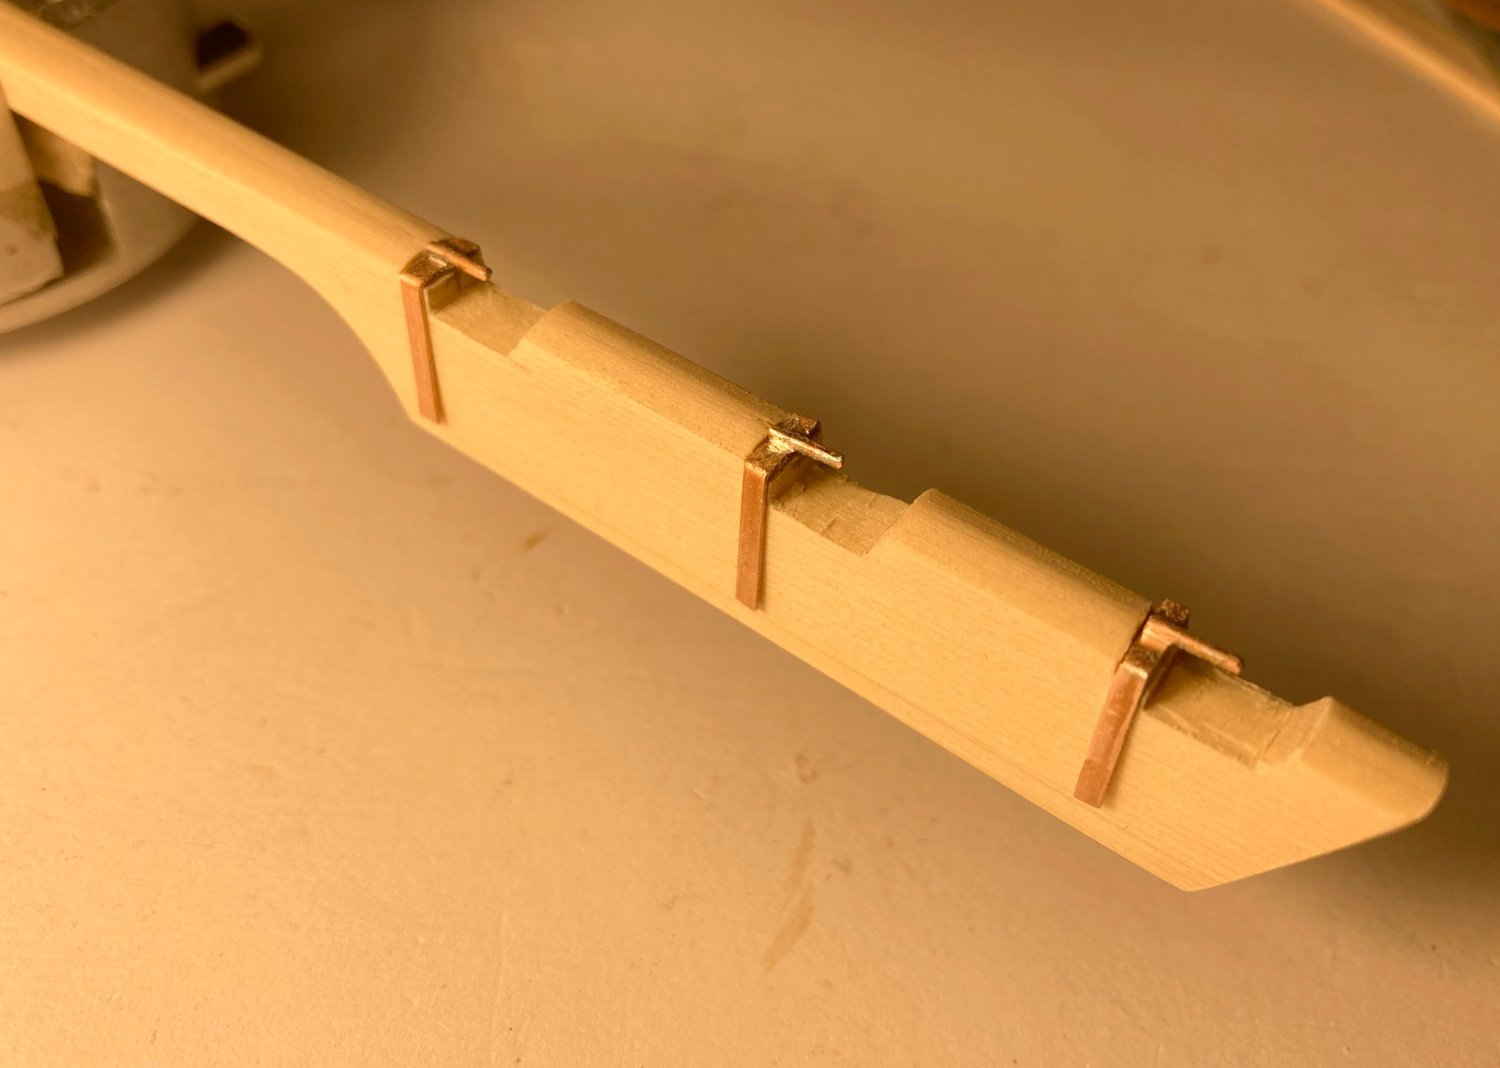
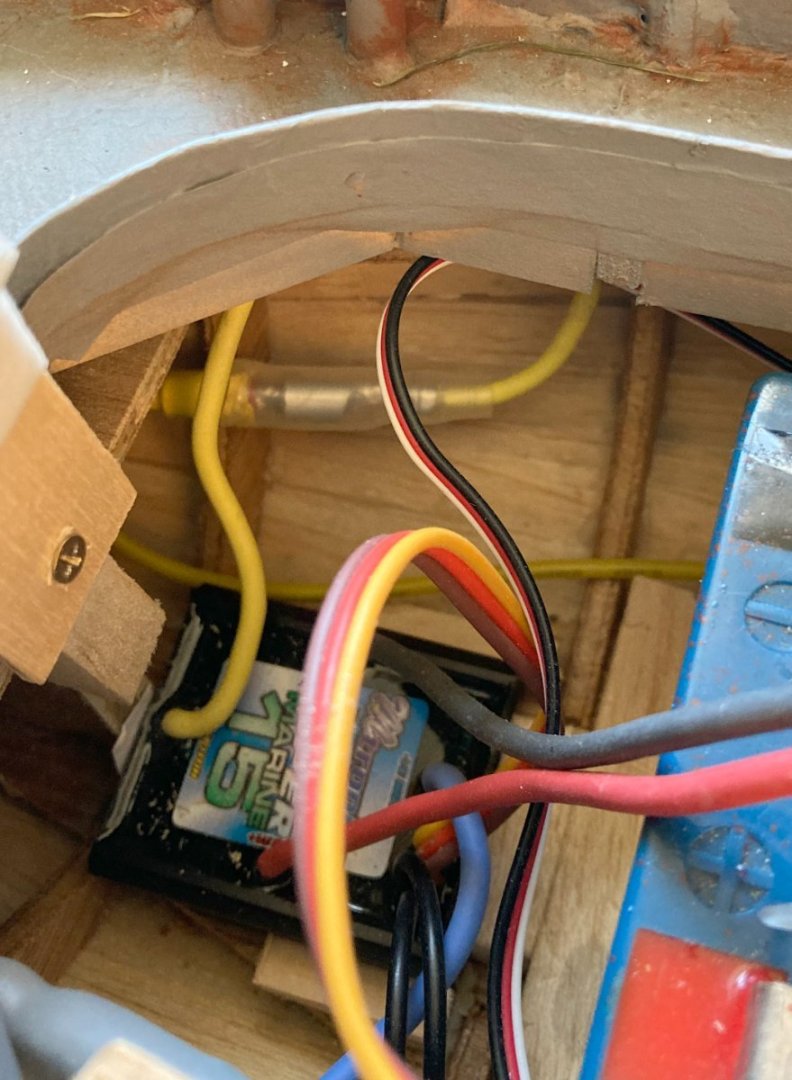
Always ready to rush ahead. I tapered the rudder top to bottom and fitted the top two pintles. Then blacked them, I think they turned out pretty well. I am very pleased closeup you can see there is a bit of bleed round the straps but it almost adds to the reality of the model? they do look the part Tim


-
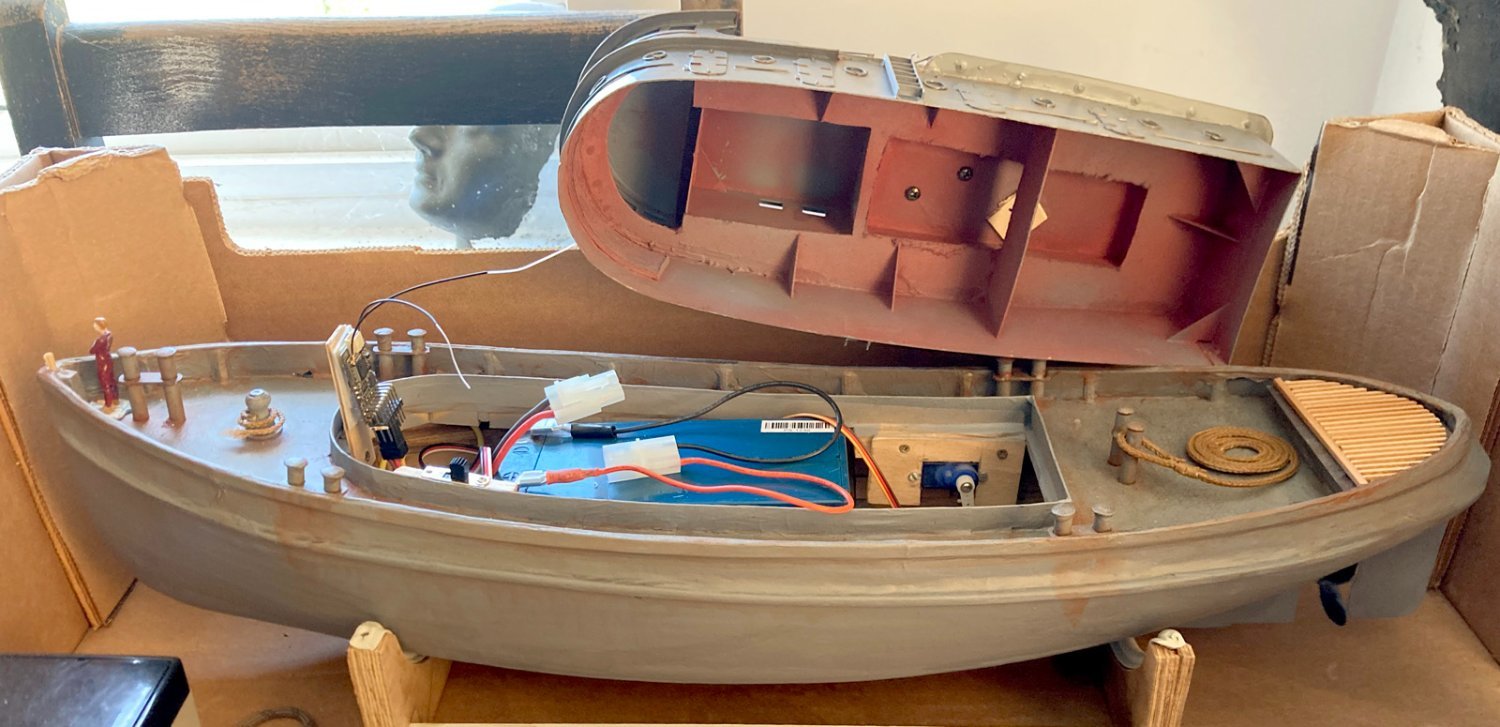
Hi Ian I have used Pritt stick to glue printed paper plans to ply wood, just needs a wet rag wiped over the paper to remove. With my 1:48 scale, 85ft Harbour tug I used 3mm ply for bulkheads, 3mm ( 1/8") balsa planks 6mm wide, then used brown parcel paper and Ronseal matt varnish instead of fibre glass with Halfords grey primer over the top of that. It ran all last summer without a leak 🙂 I wish I had taken photos of the build now. I used cereal packet card for the superstructure which was also painted with Halfords grey primer. I am amazed at how well it has performed at the clubs pond all last summer, as long as it does not sink I hope to keep going for years. I love its knock about quality. The other things I am build tend to become precious, you worry about damaging them. Tim

-
Hi Craig @iMustBeCrazy talking of notch, it looks like the straps are rebated onto the wood of both the rudder and sternpost? Don't think I will be doing that. Tim
-
Hi Allan @allanyed, thanks for the compliment. Those look a little complex to replicate at this scale, but I may amend the shape a bit
-
Thanks @Gregory it will be the next job on the list.......
-
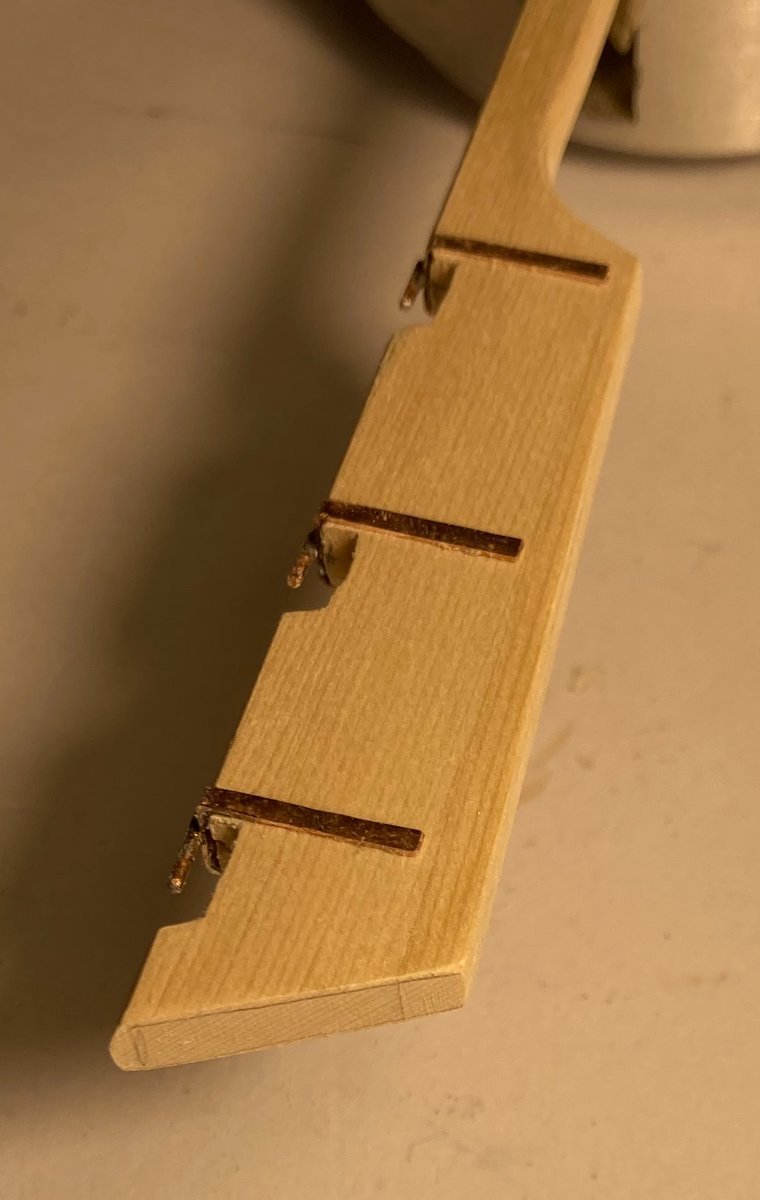
Here is the rudder just balanced in place, now I can see how much I need to move the pintle. these photos do show warts and all, don't they Tim
-
Thanks Gregory @Gregory I really was not sure about the position. I will adjust the position. Tim
-
Never too late Allan I have reshaped the leading edge of the rudder, not sure if the pintles work that shape? still work to do on cleaning up and detailing, but it begins to look better thanks to the advice from @allanyed @iMustBeCrazy @druxey @Thunder


-
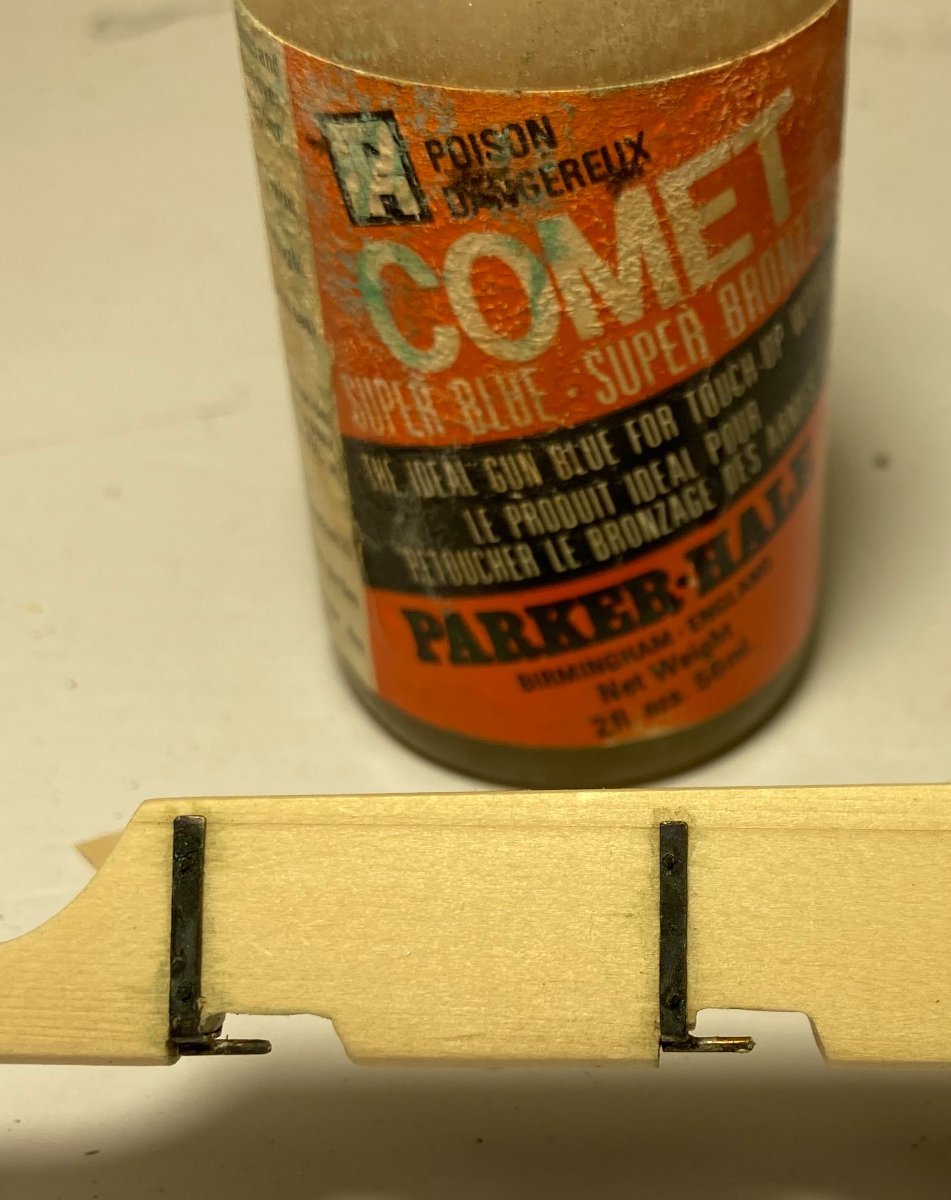
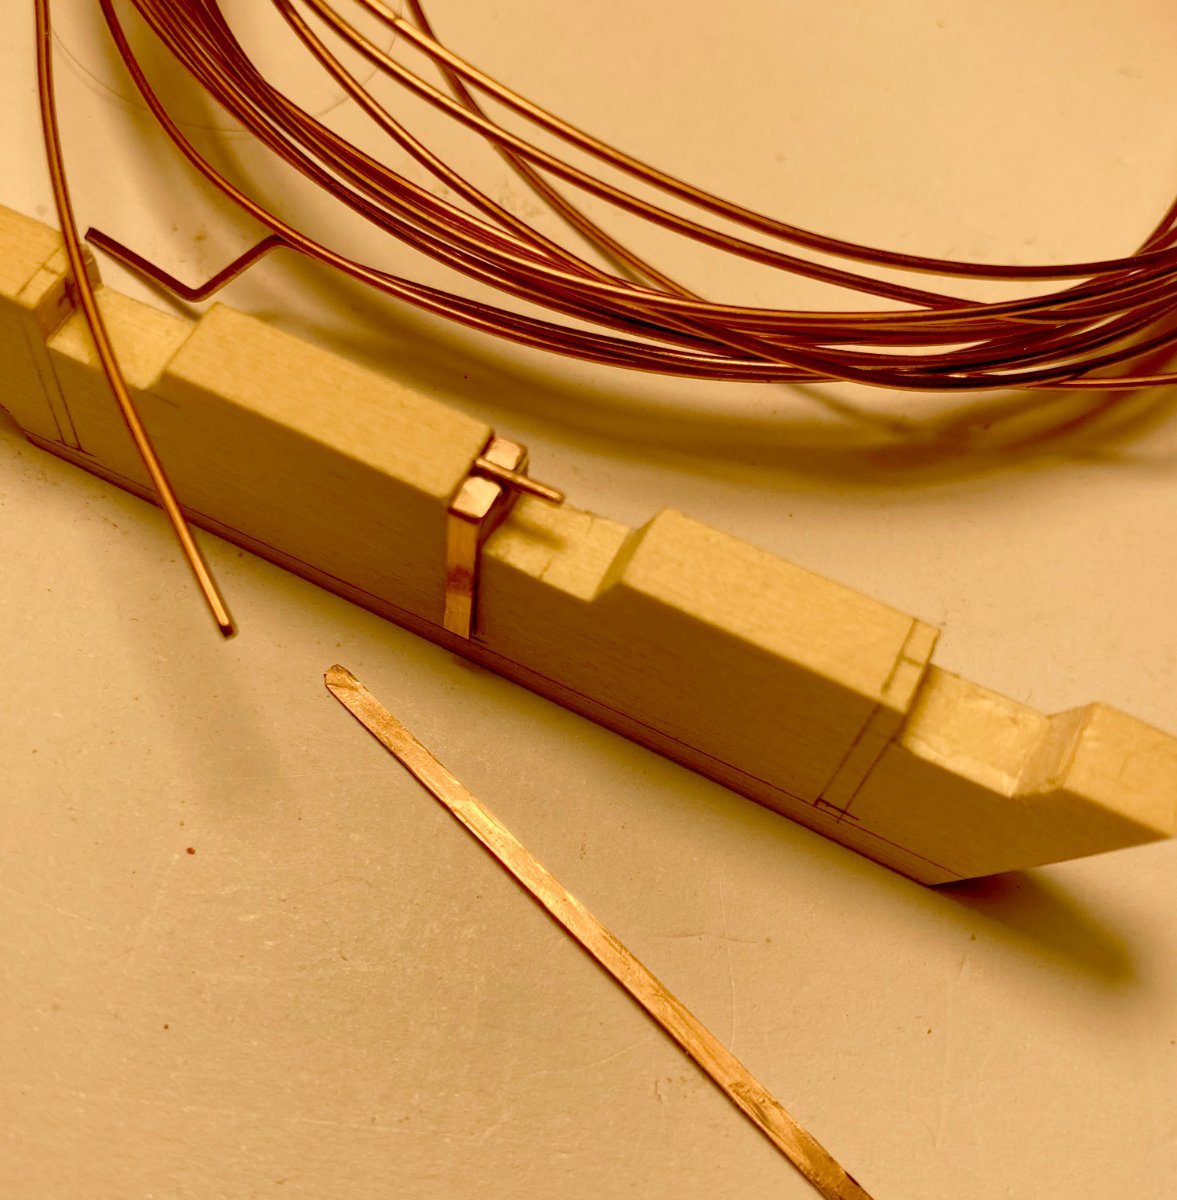
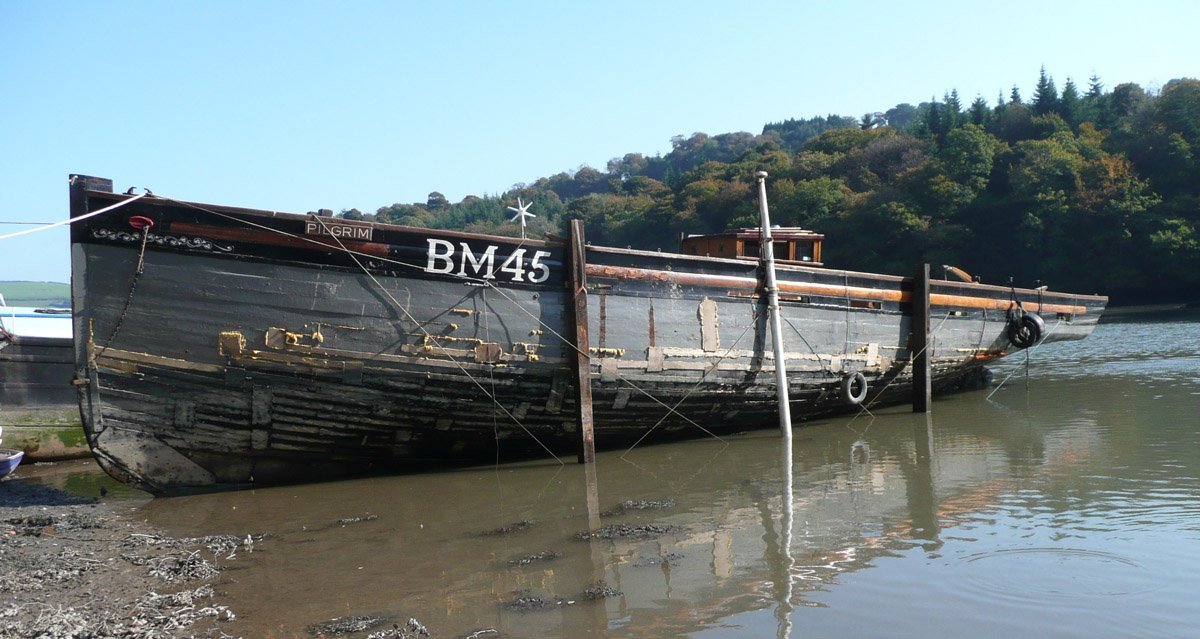
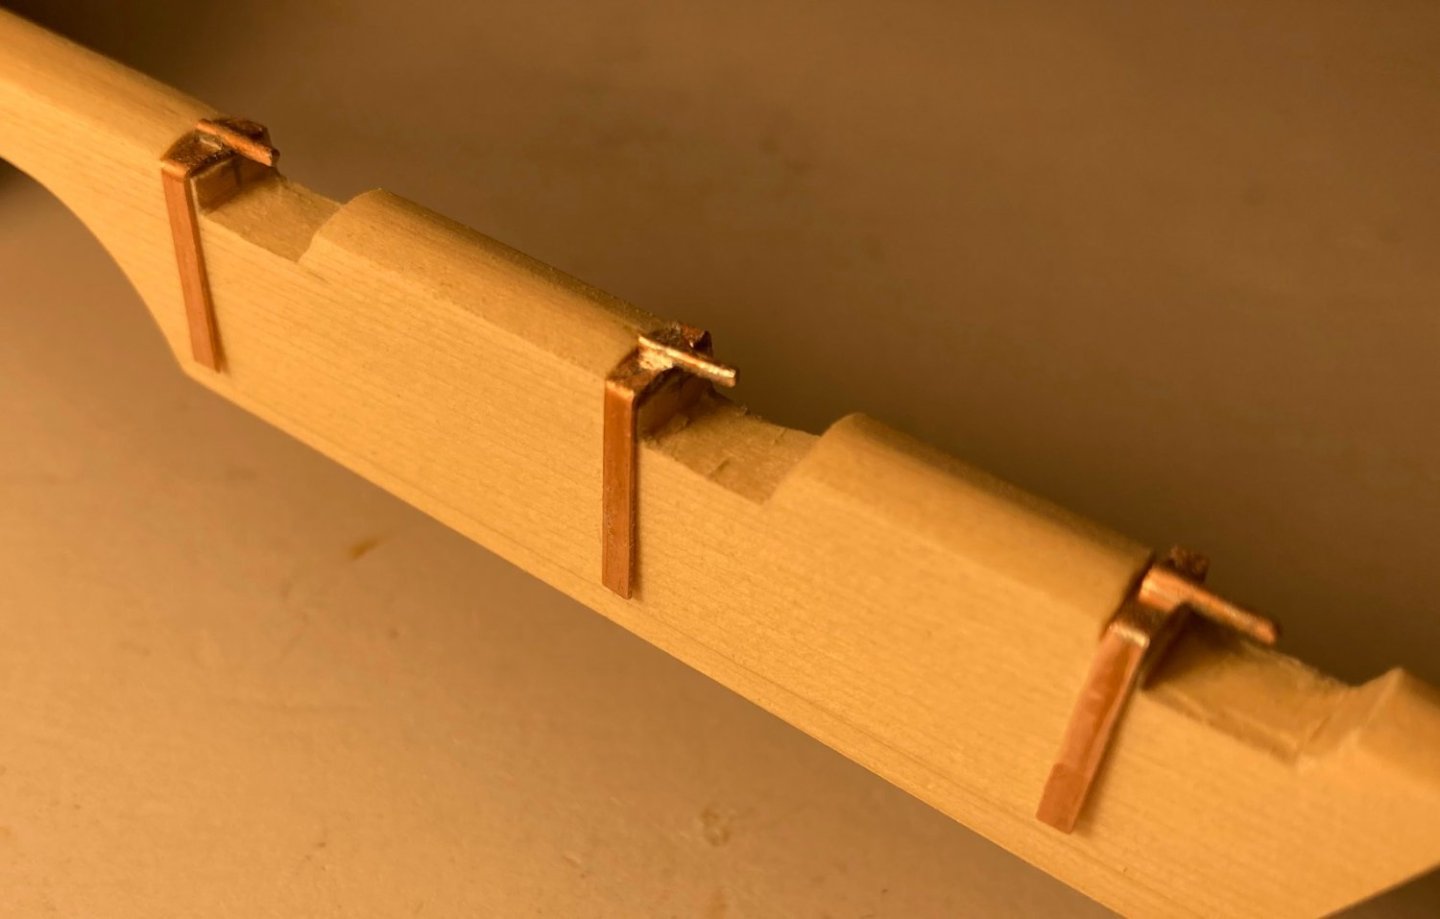
Here is my first attempt at making a pintle. I had some 0.8mm dia. copper wire which looks about the right size for the pin, amazingly when hammered flat it is also a good match for the straps. When I have completed it I will black it with Liver of Sulphur as advised by Allen @allanyed The parts are 'soft' soldered together with some good old lead based solder I have from years ago. When I have decided on the final shape of the rudder I will remake it to suit the profile. I am assuming the centre of the hinge should fall in the gap between the rudder and the sternpost? This is fun. Tim

-
Thanks Adrian @Thunder so very like the example that Craig @iMustBeCrazy showed us. Tim
-
Wow : Thanks for all the research, the first one looks like it could be an angled leading edge. The drawing / painting looks more like a bevel than rounded. I does look like a flat plank. As this is no longer a model of any real cutter, I may use artistic licence here. Personally I quite like the angled look, so I may just go with that. Tim
-
Hi Gregory Thanks for that, it will certainly be enough for me to make mine. Oh dear I seem to have done it again, I was going to line the gun ports, now suddenly I making the rudder. Focus, focus, focus now I am here I will complete the rudder, pintles and gudgeons. Thanks for all the help, advice and likes Tim
-
That seems true of lots of things we build. Tim
-
Ok next question. Just cut the rudder to shape but I can't find any reference on the drawings I have, to the rudder cross section or the cut away for the hinges ( name )? @Thunder what did you do? @allanyed are there any documents that give those dimensions? thanks Tim
-
Thanks Allan @allanyed what an amazing amount of detail we can call on from that period. Interesting that the oar ports had their own lids Tim