

Scotty W
-
Posts
76 -
Joined
-
Last visited
Content Type
Profiles
Forums
Gallery
Events
Posts posted by Scotty W
-
-
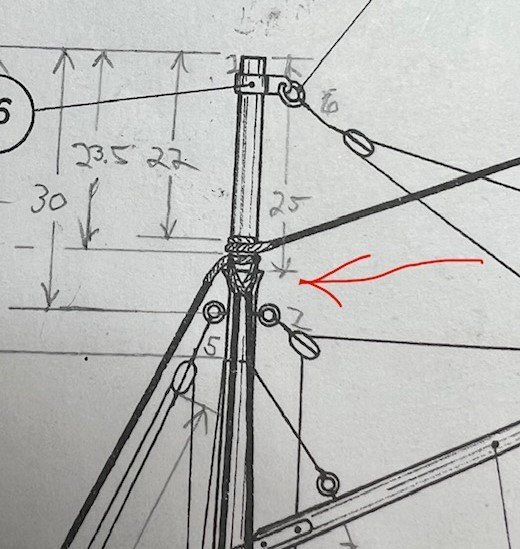
On 11/1/2023 at 8:36 PM, Wawona59 said:
Hi Scotty, I just found your build log today so I know I'm late the party. Your AL Swift came out really nice; much better than when I built that kit many moons ago. IIRC, the kit I built had die cut parts and the bulkheads looked like they were formed with a router as there was a 1/6" gap all around them.
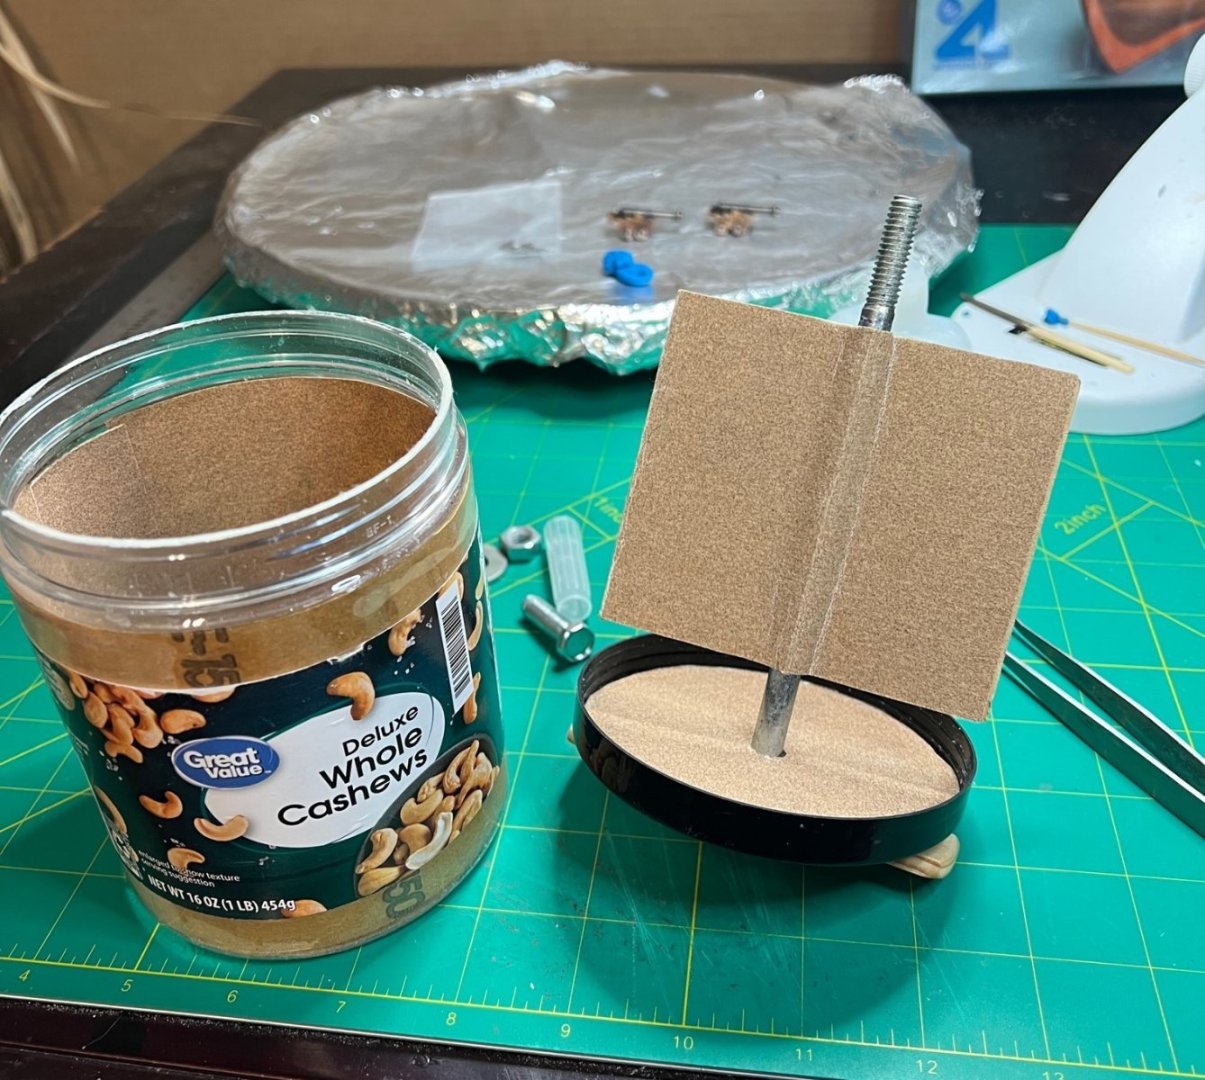
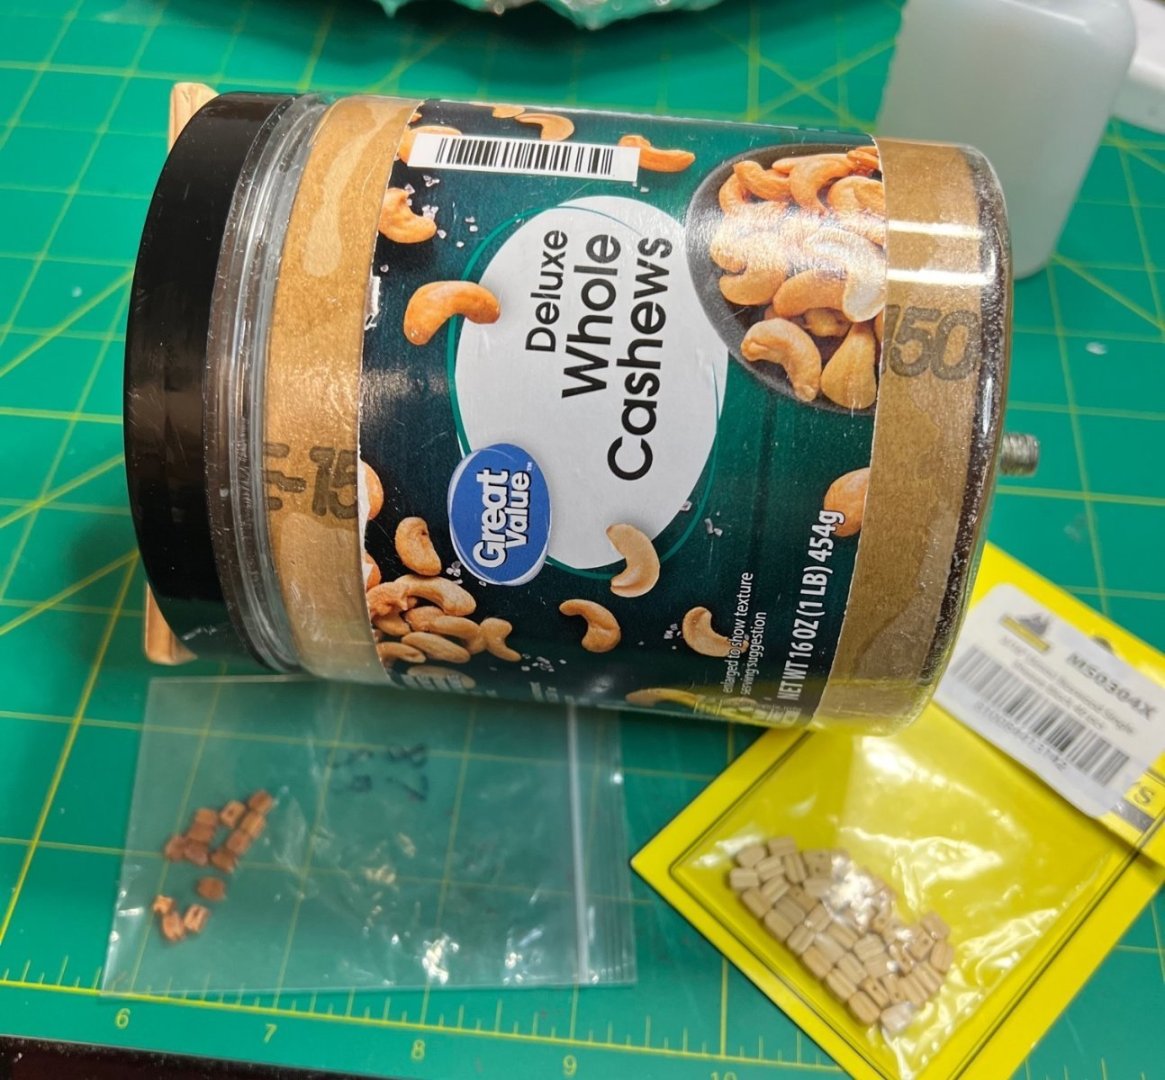
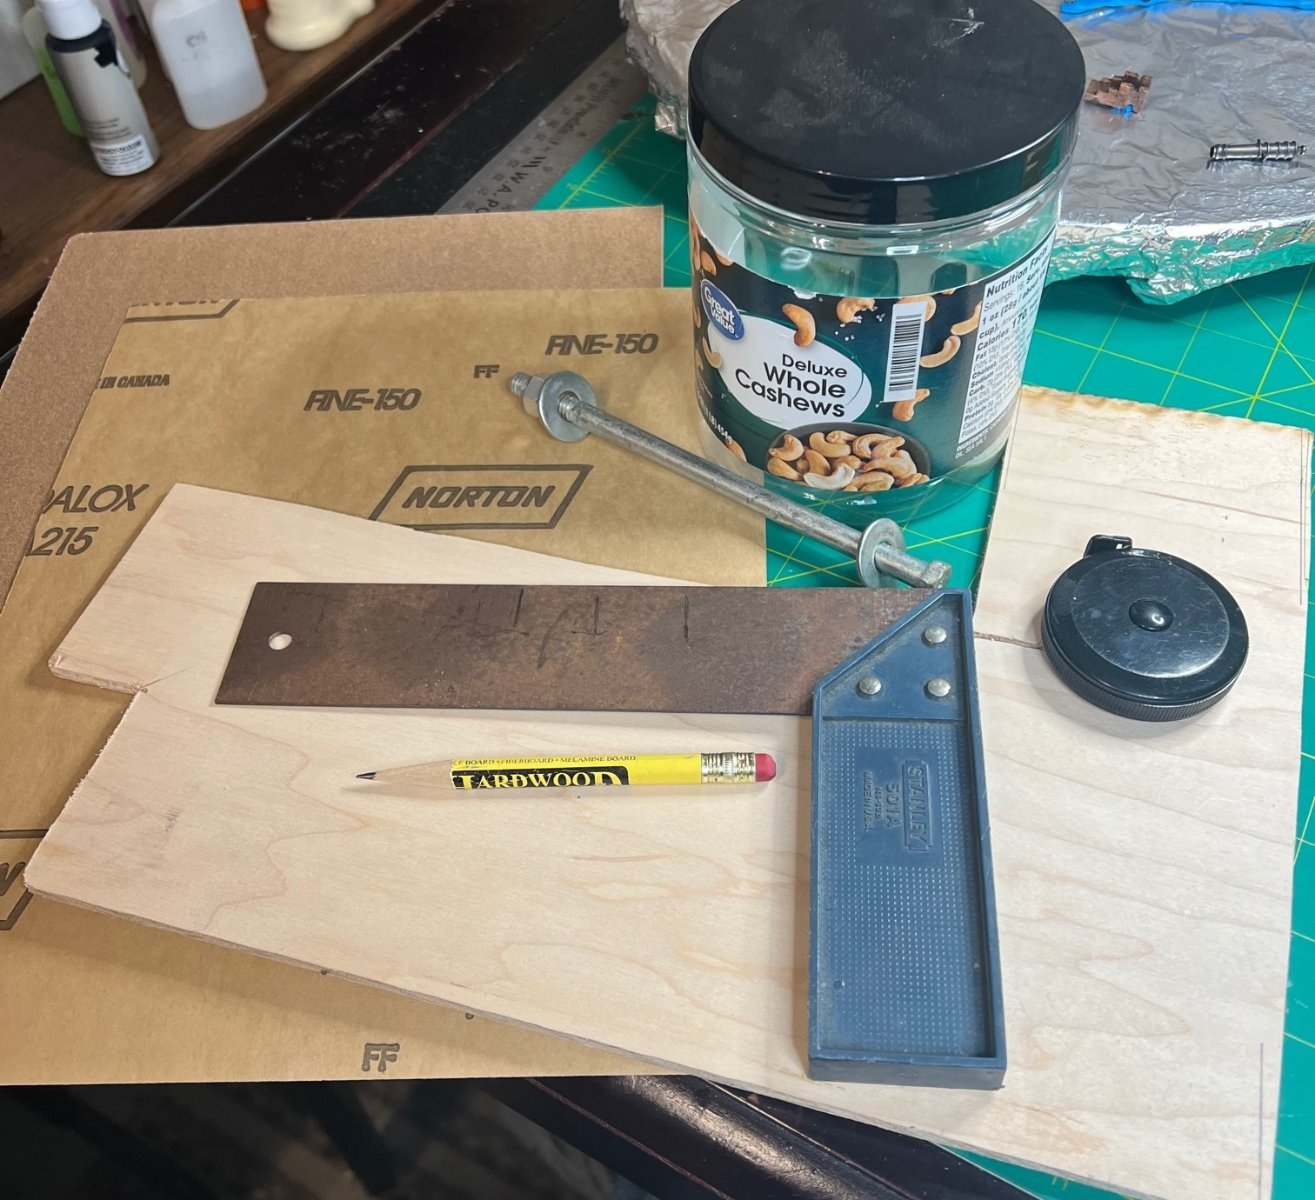
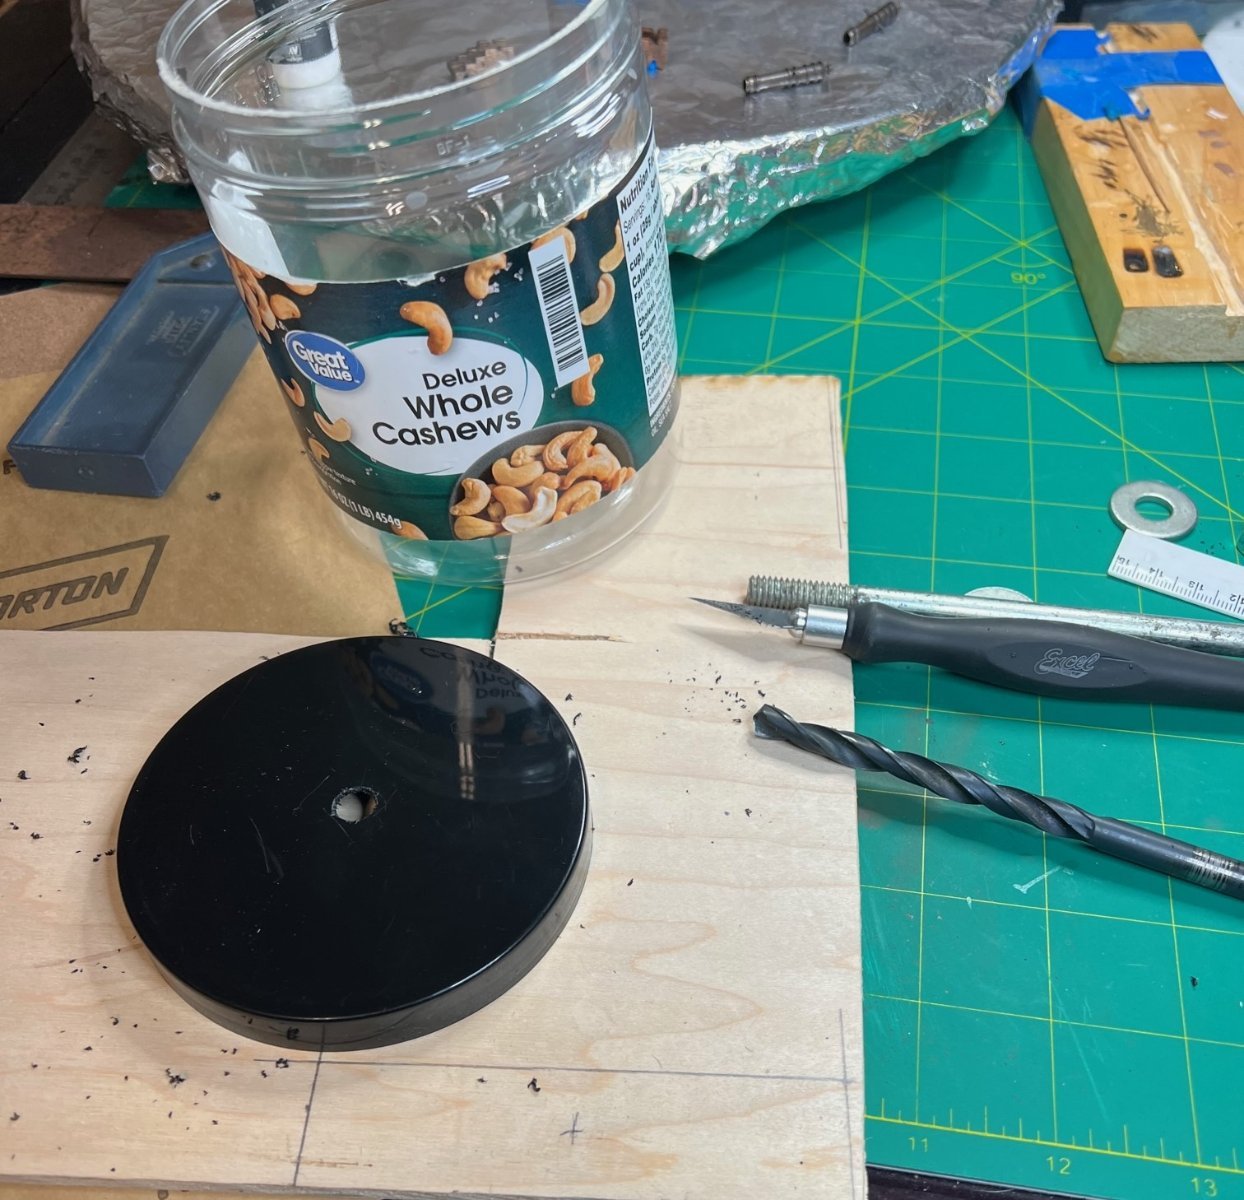
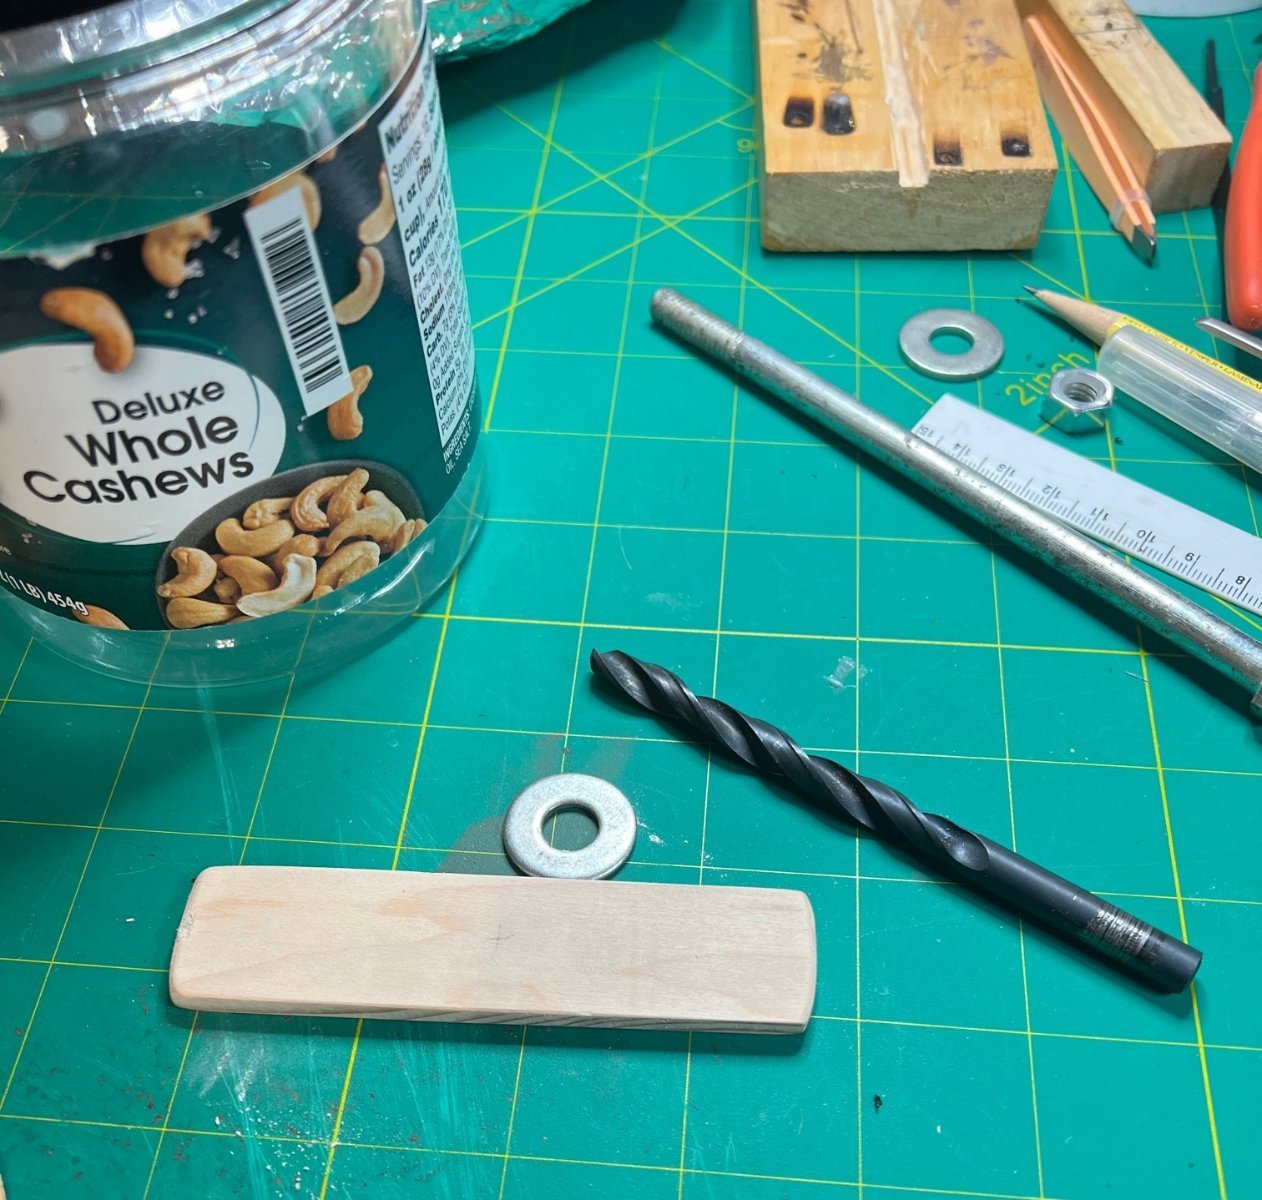
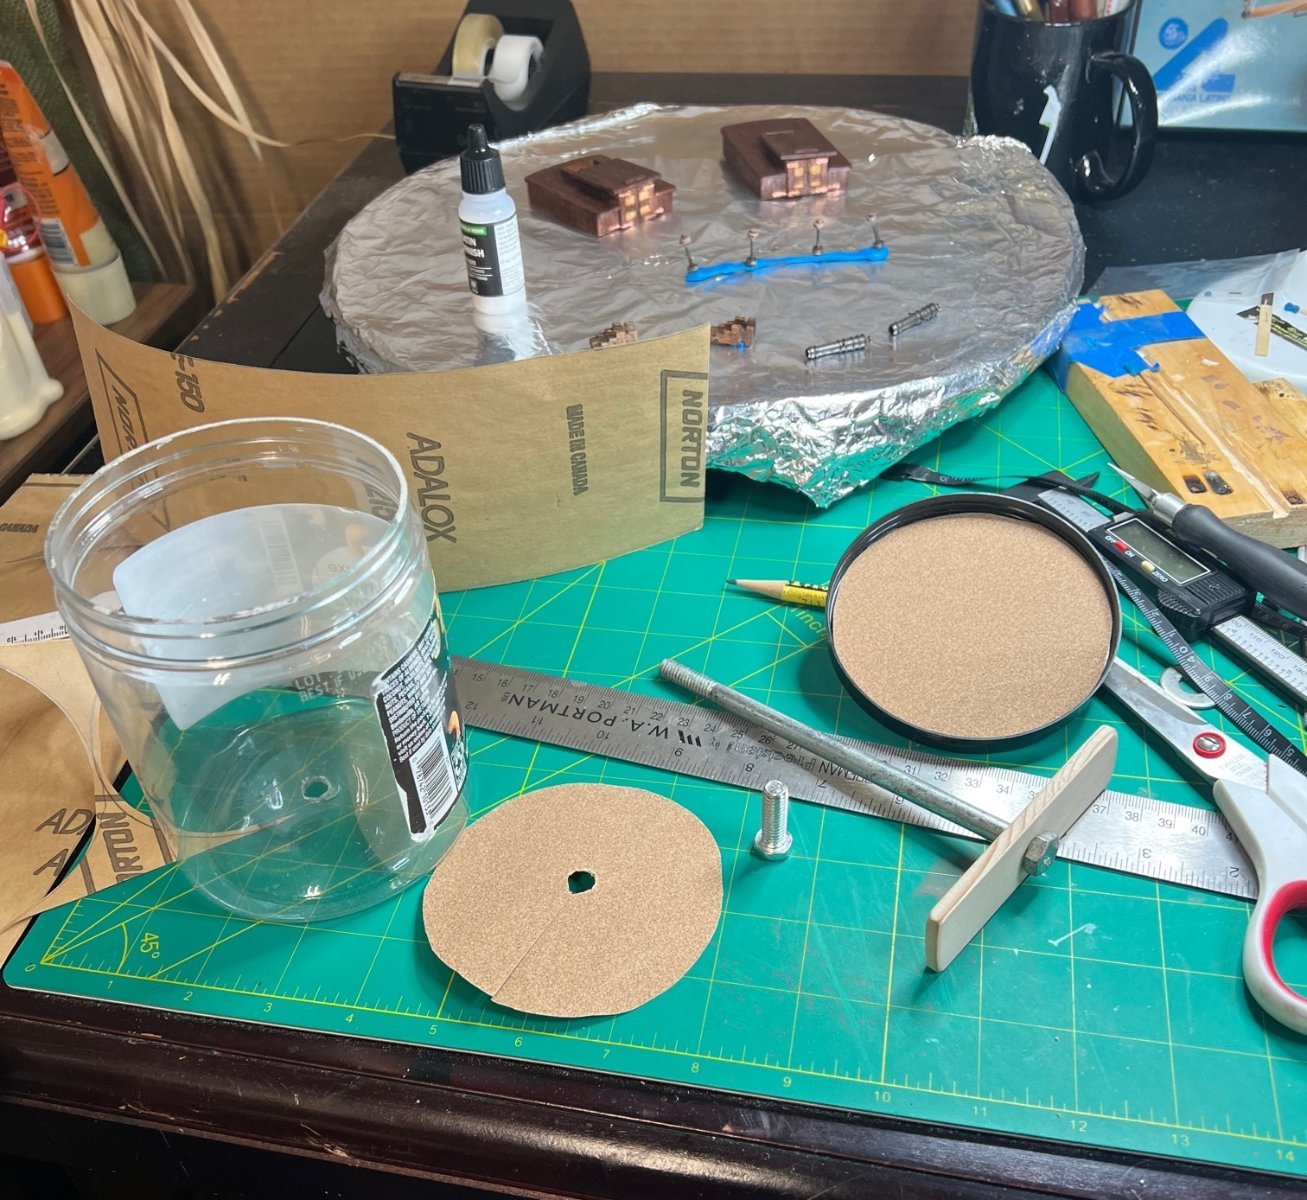
I'm really impressed how much your planking improved from the first layer to the second. I also really like some of the small details you added such as the entry of the rudder stem into the transom. I like your homemade block sander too. Looks like I'm going to have to buy some containers of cashews in order to make one myself (at least that will be my excuse).
We're sort of Pacific Northwest Neighbors. I live a little north of you in Renton, WA.
Do you have any plans for your next build?
Welcome to MSW.
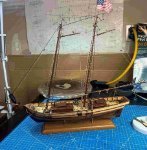
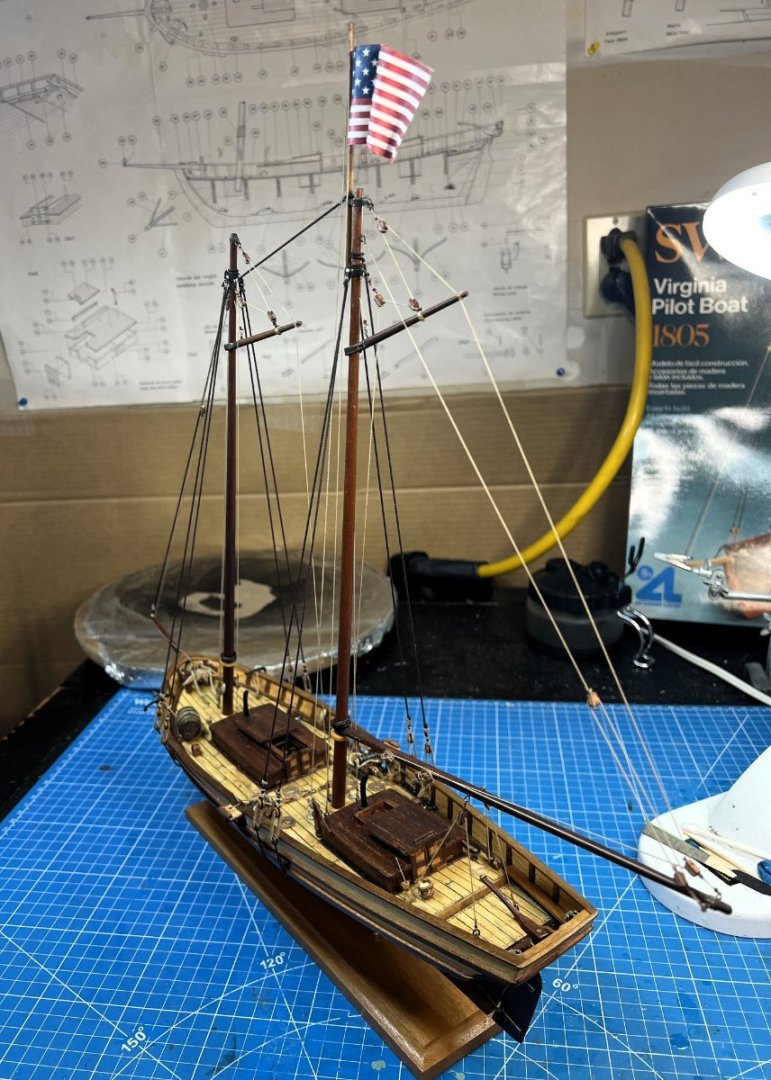
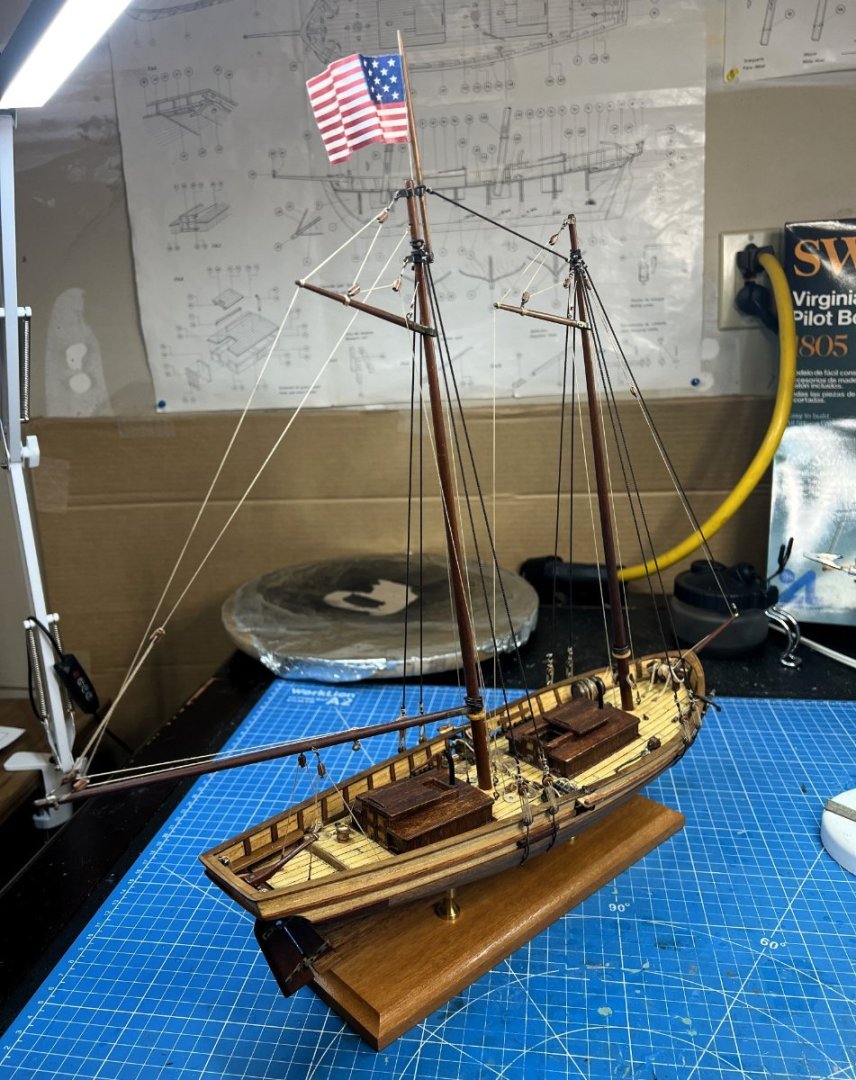
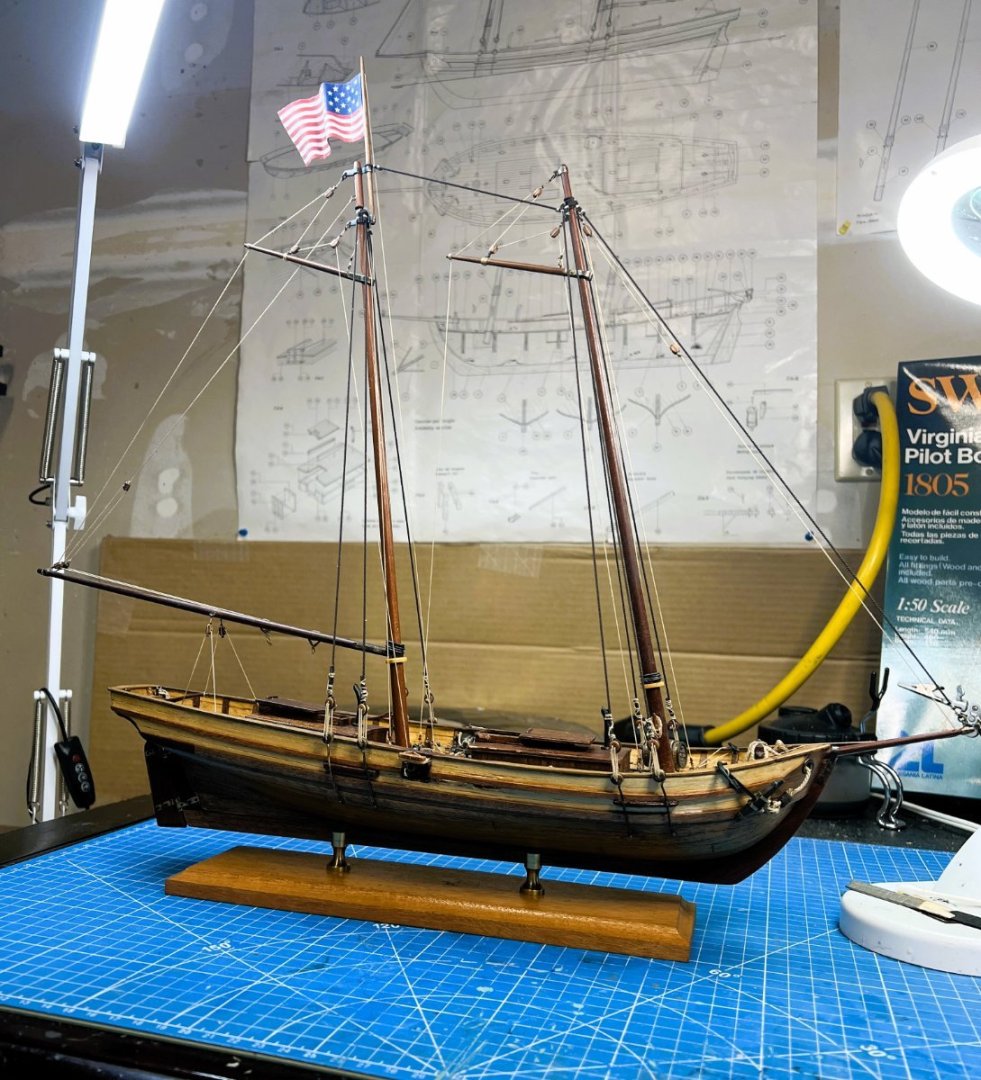
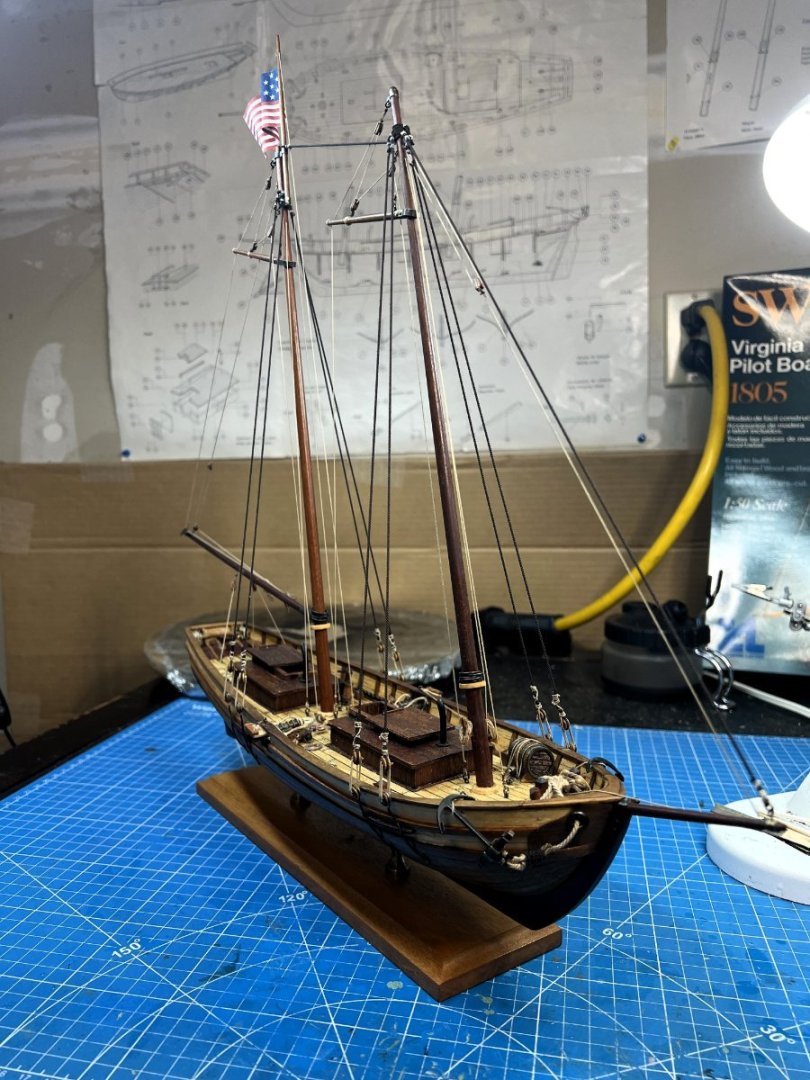
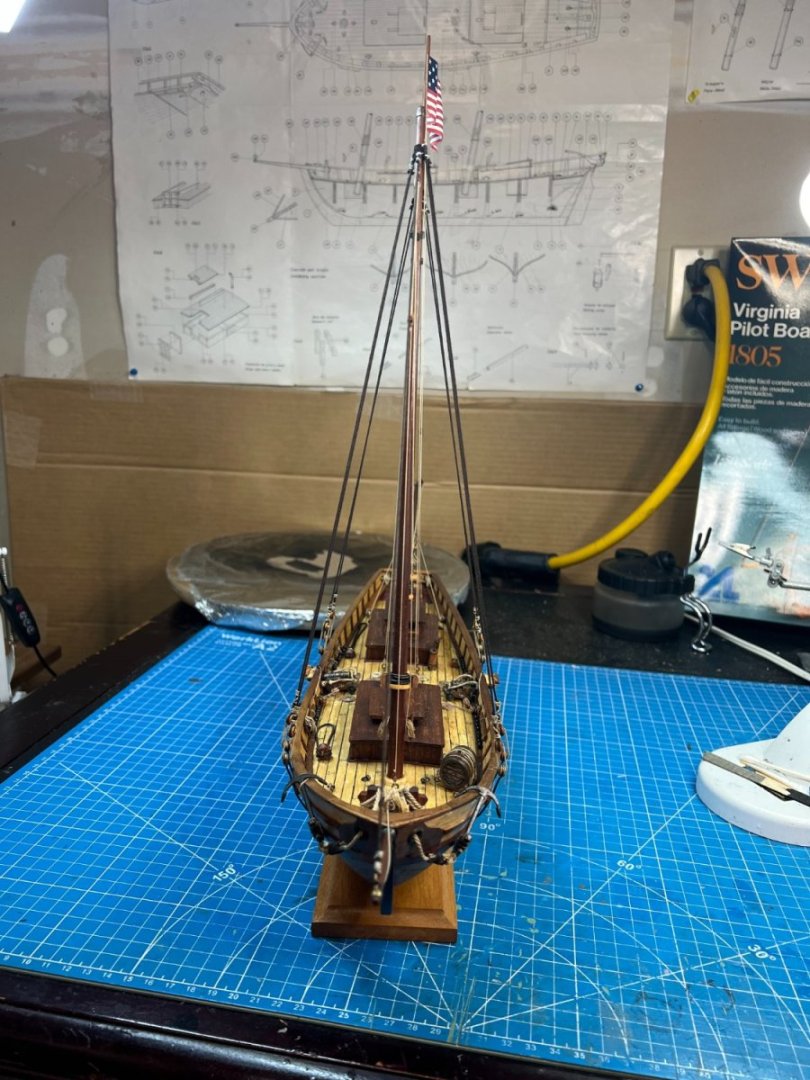
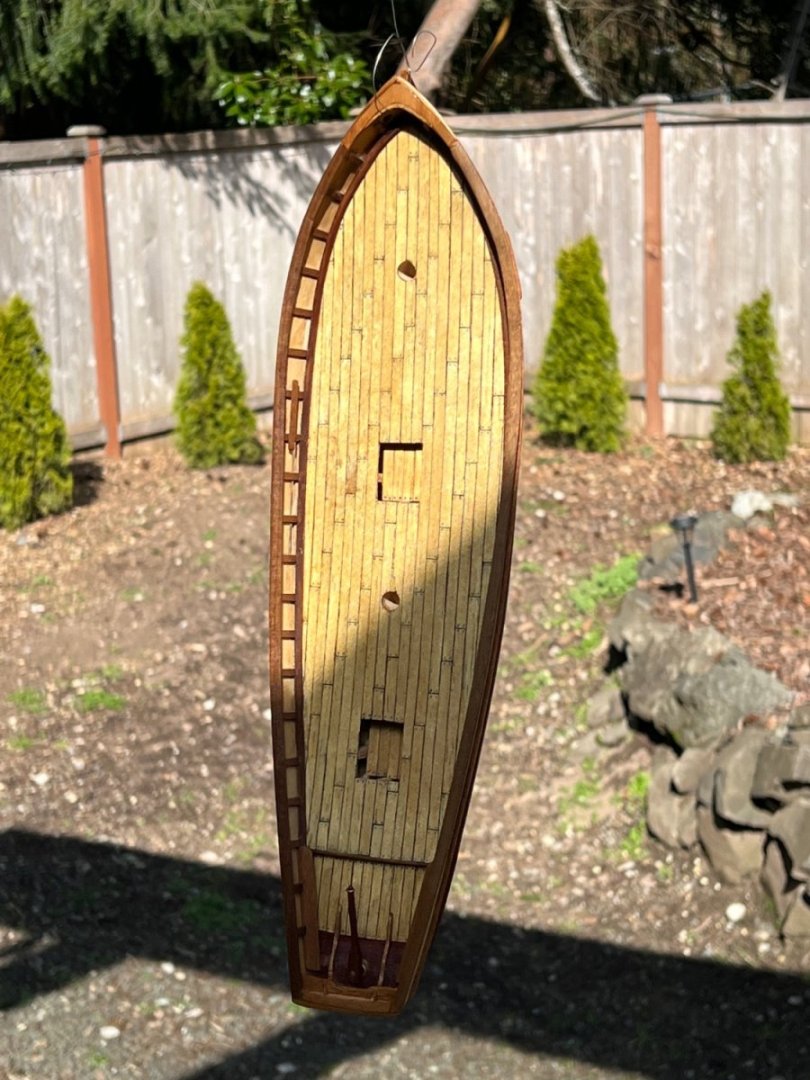
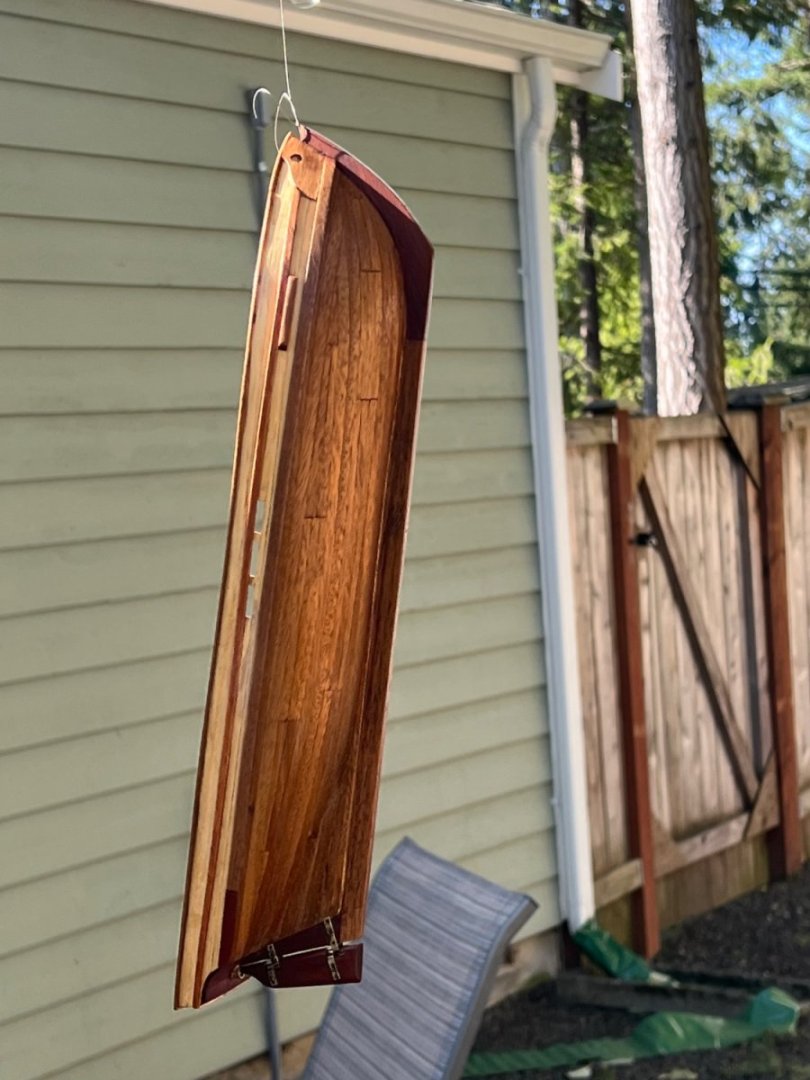
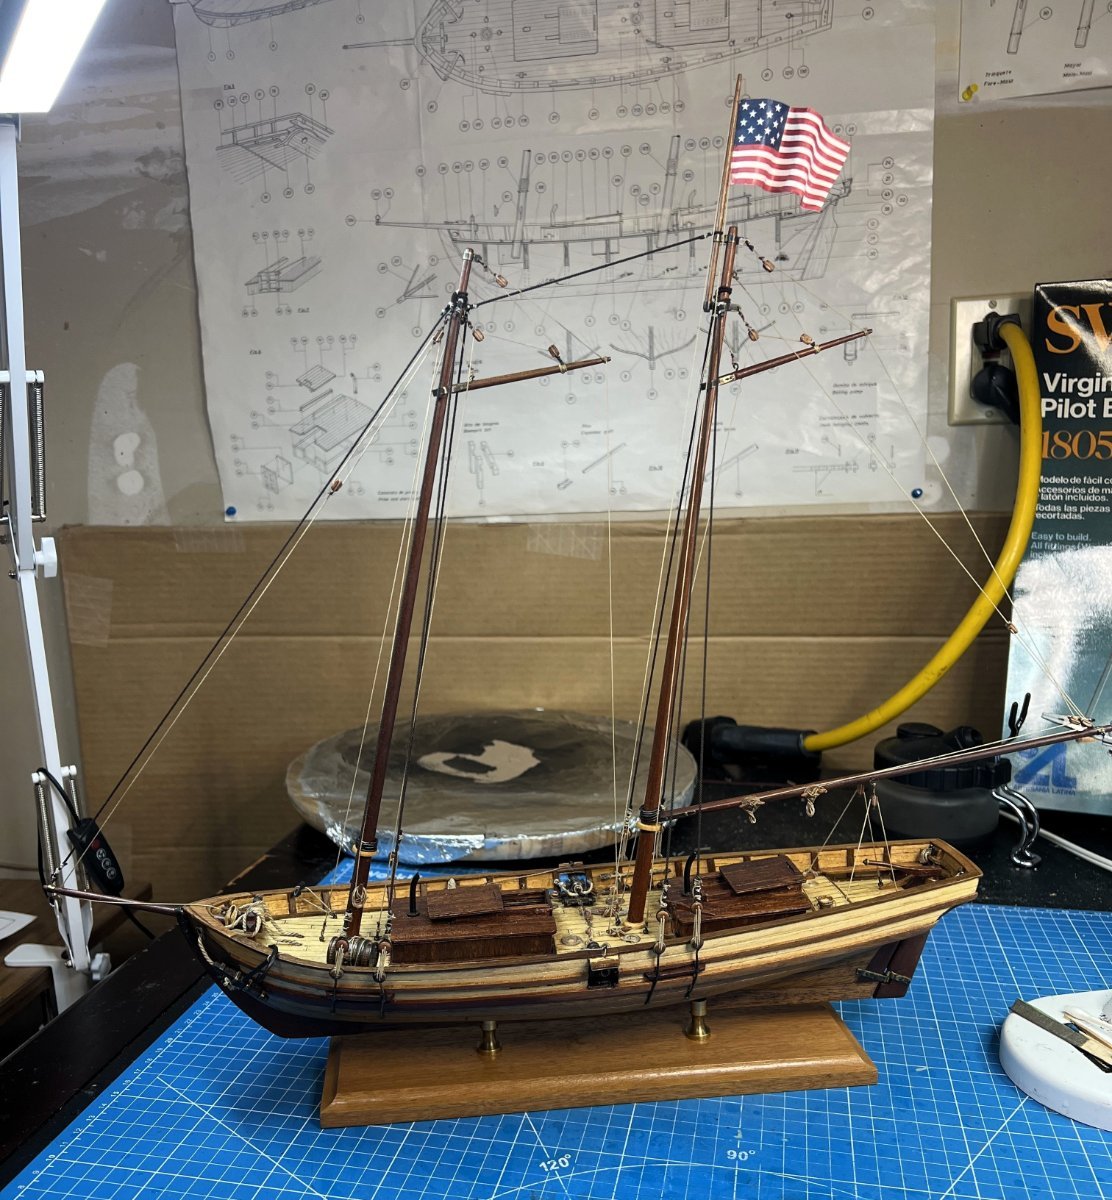
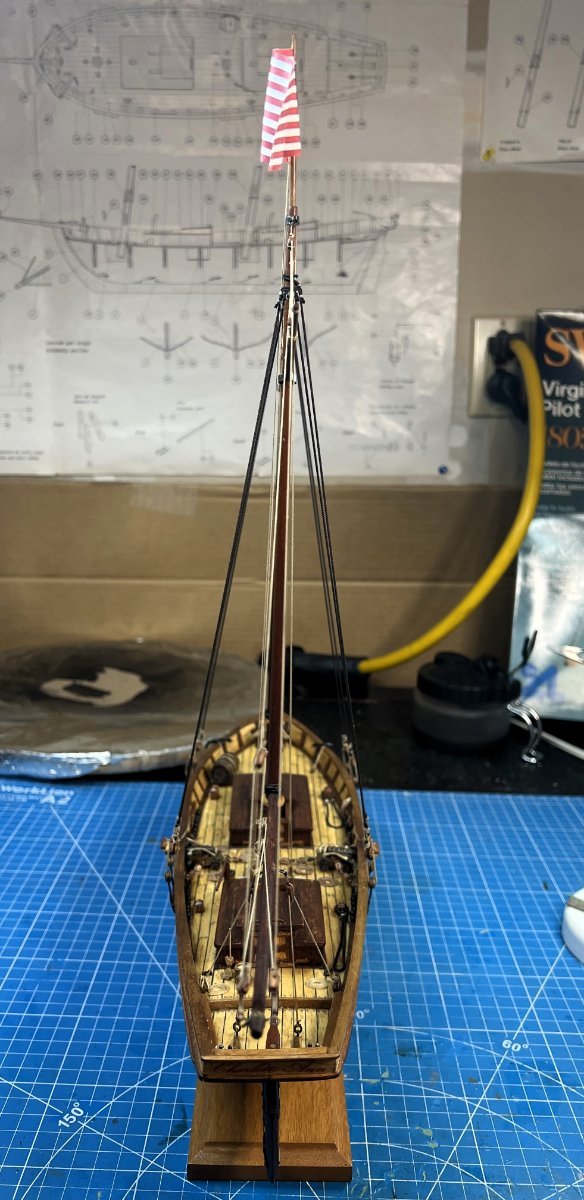
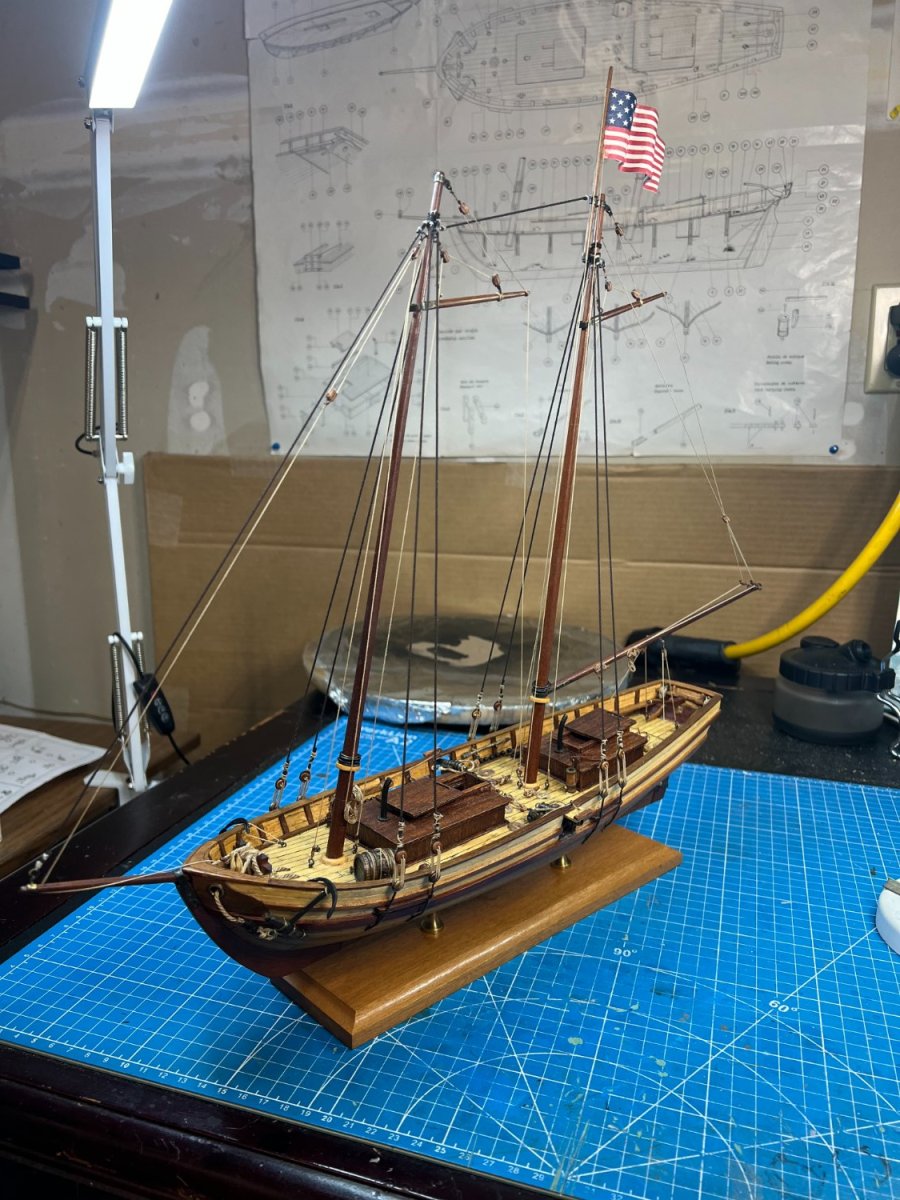
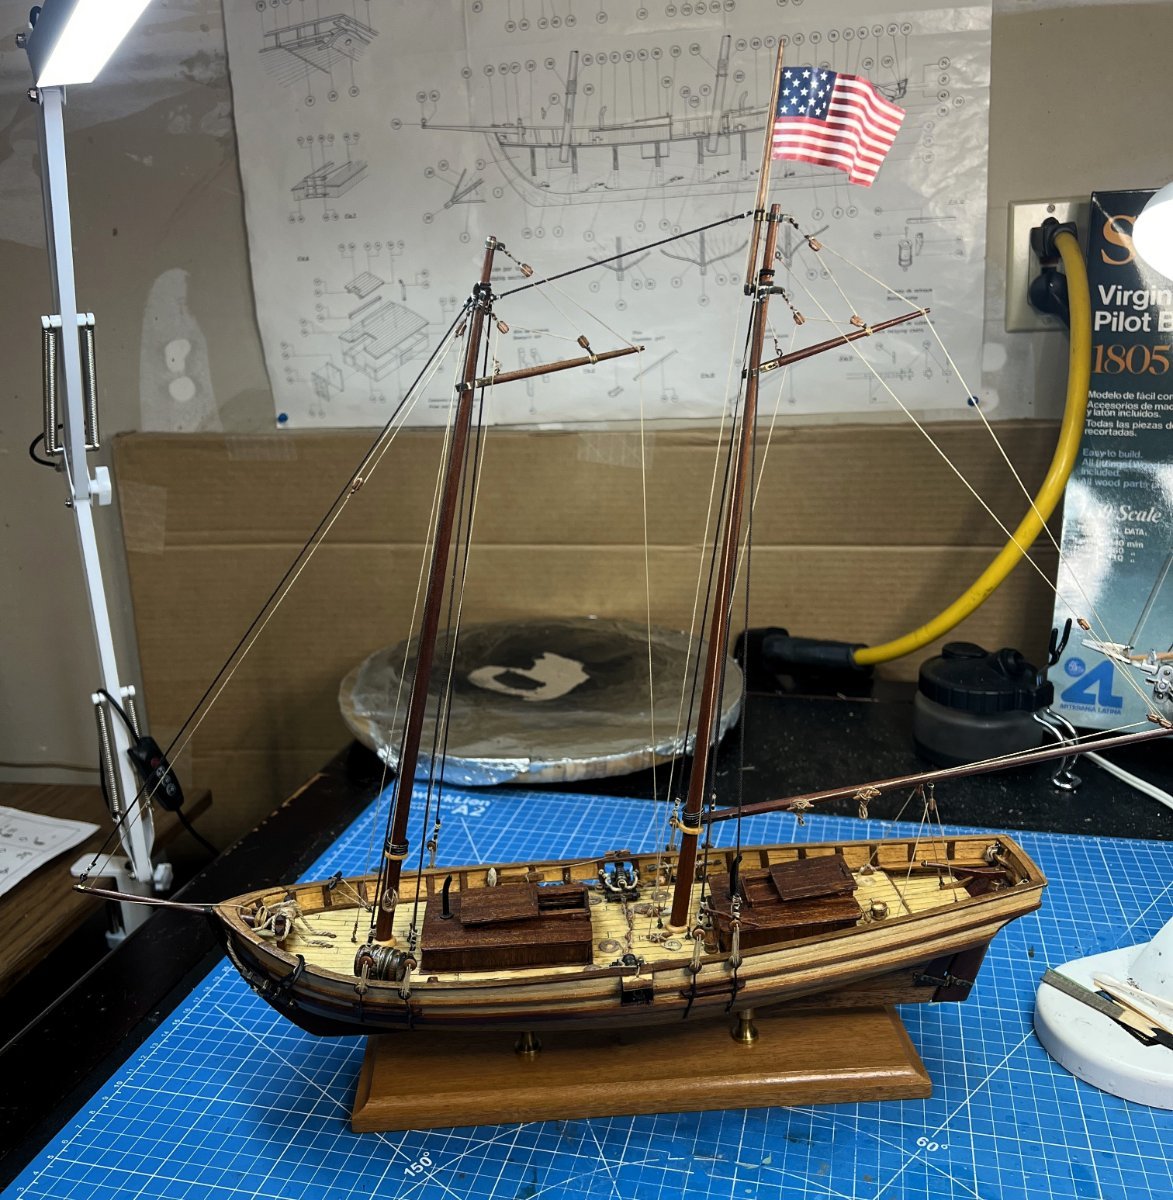
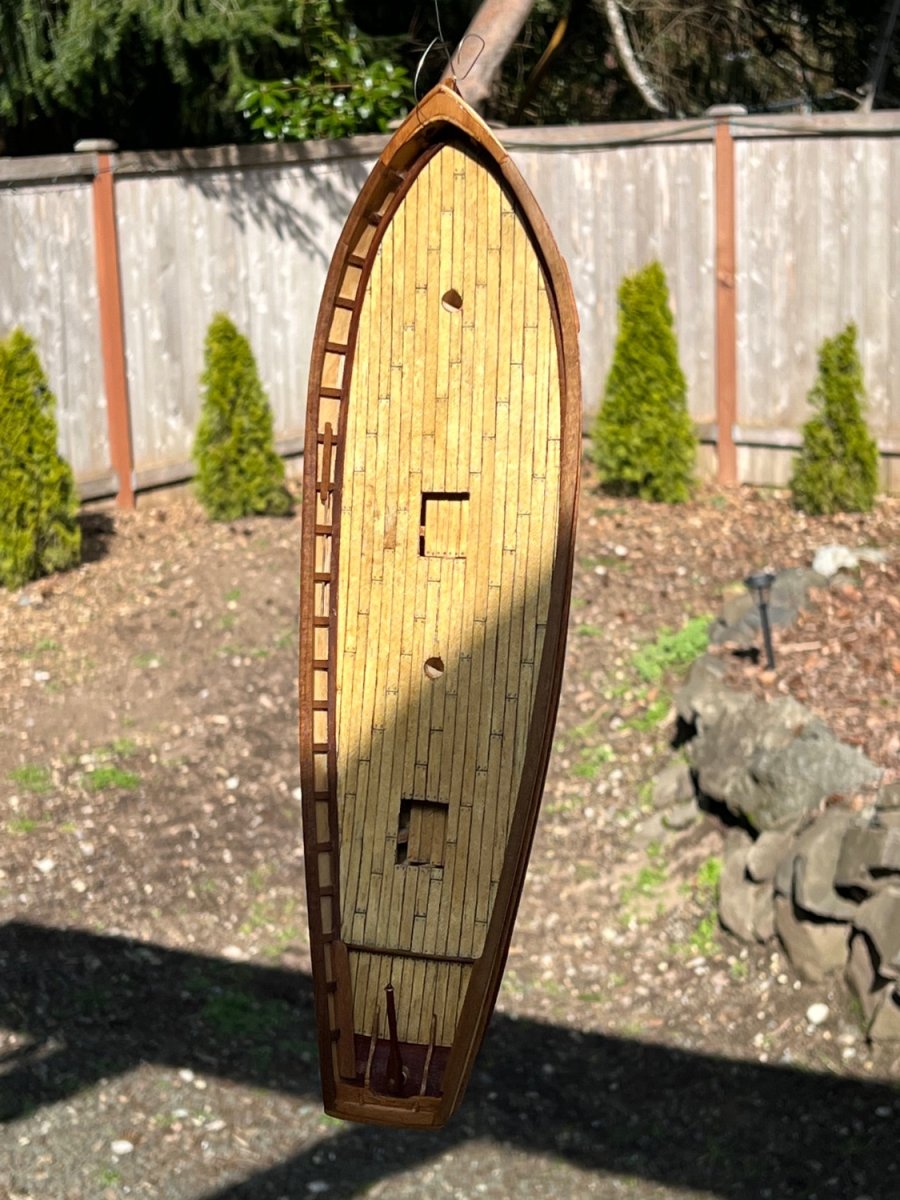
Howdy! So nice to meet you neighbor! Thank you for your compliments. I am sorry I failed at responding to you any sooner, my bad. I get lazy and just goof off at times. The ship has been complete since 8/4/23 but I fought my resistance to finish all this typing and git 'r done! Stand by for the completion of the Swift, this one strapped with two 12 pounders, because, why not, they included them in the original 1984 kit. Anyhow, here's a spoiler of the final product but I will continue my build log through completion because there is so much more comedy to come. Regards, I give you the Charlotte Ann (my wife's name).


More later. Thank you all for helping me to complete my first wooden model ship. My next chapter will cover the puddening of the anchor rings.
- Keith Black, Mr Whippy, VTHokiEE and 4 others
-
 7
7
-
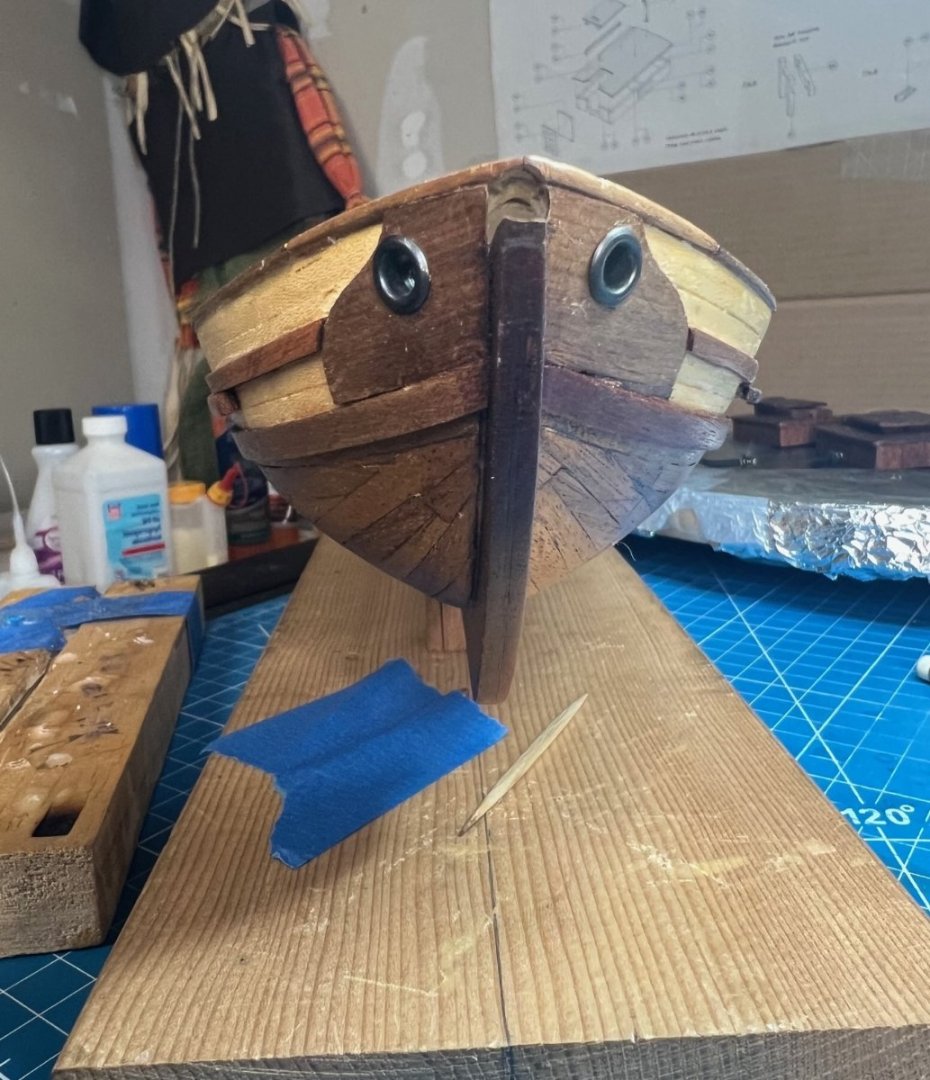
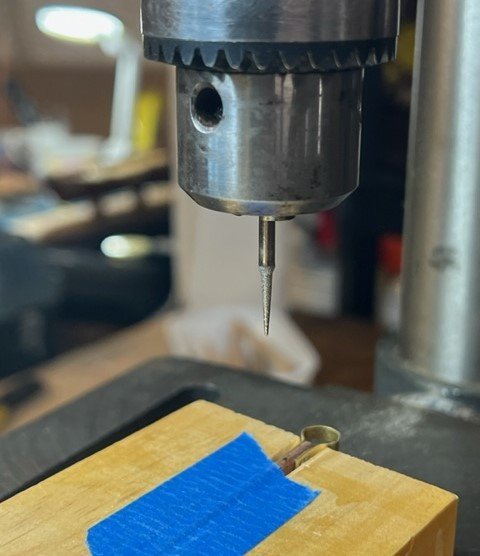
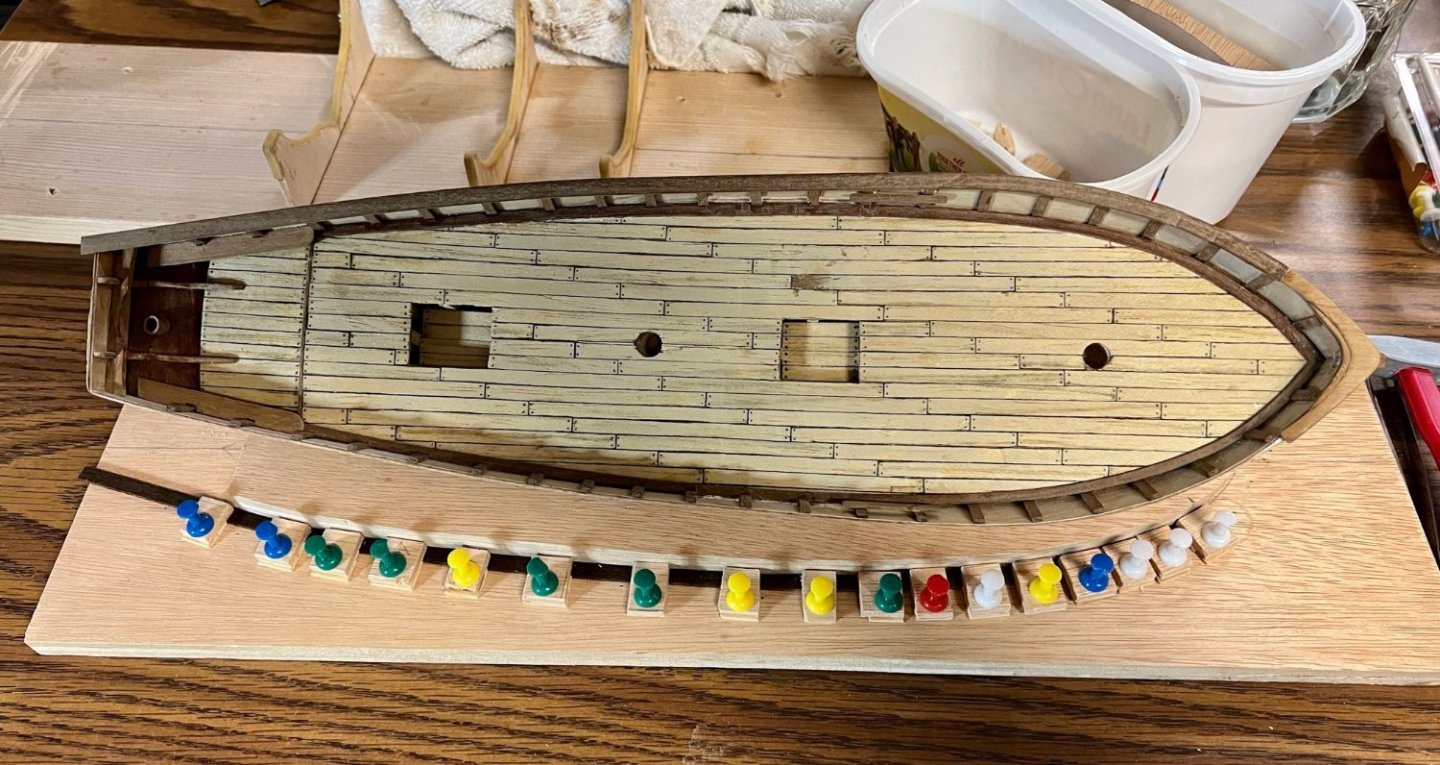
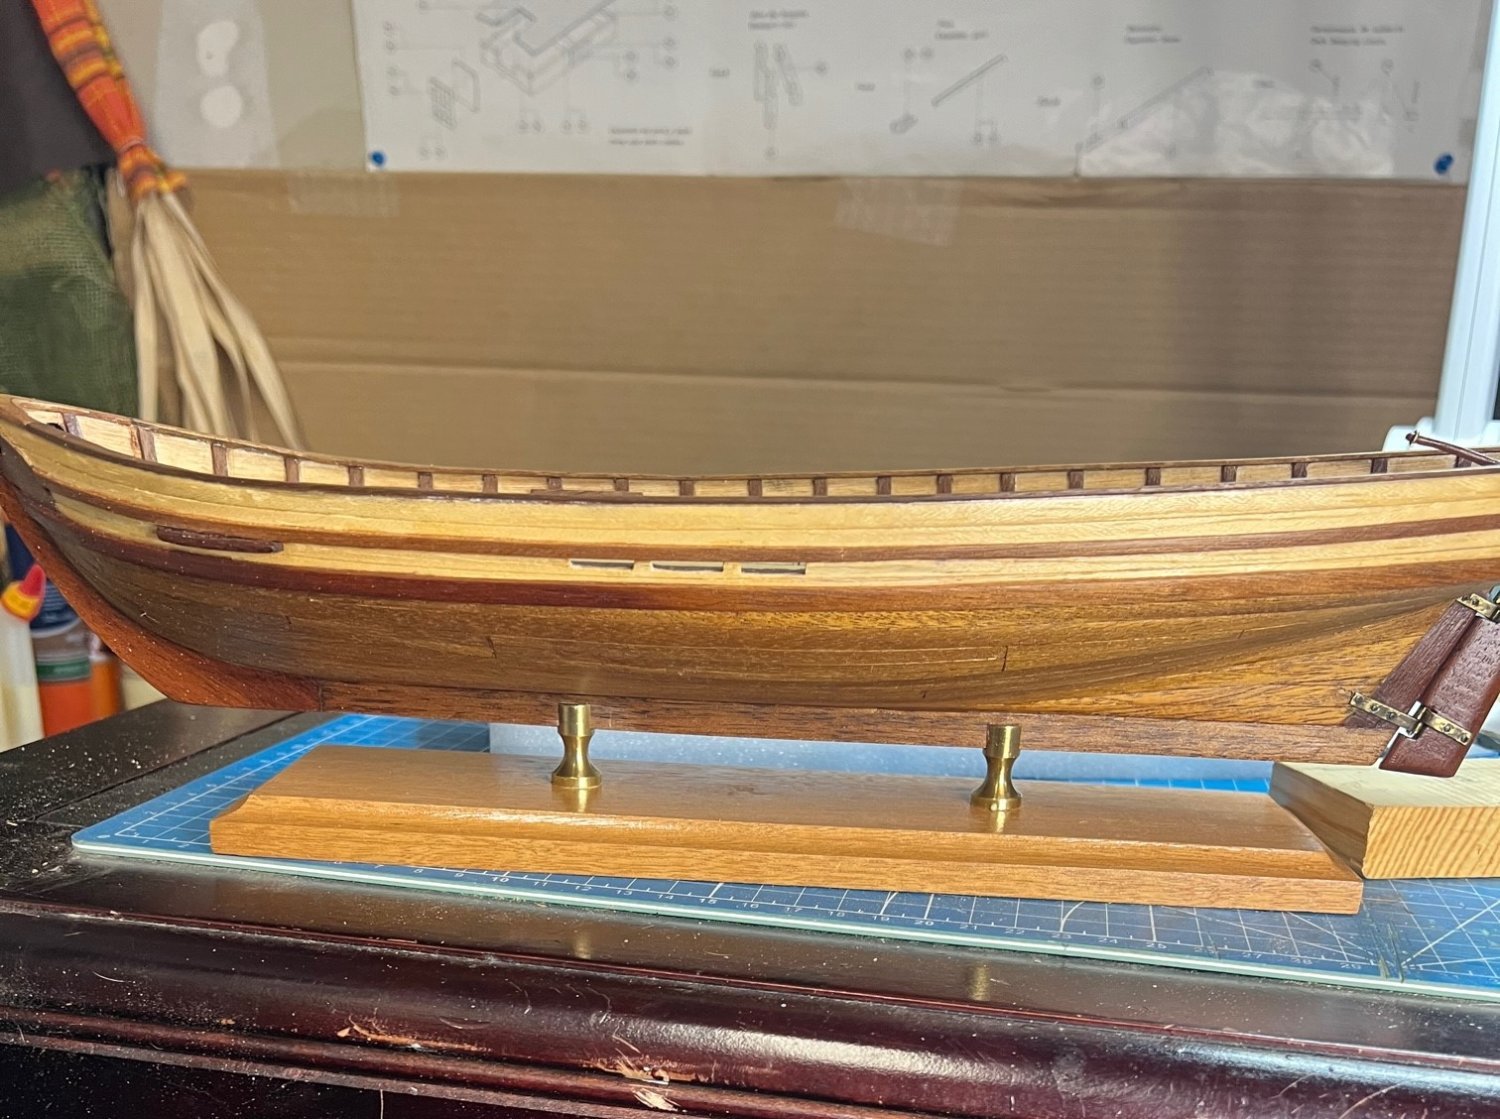
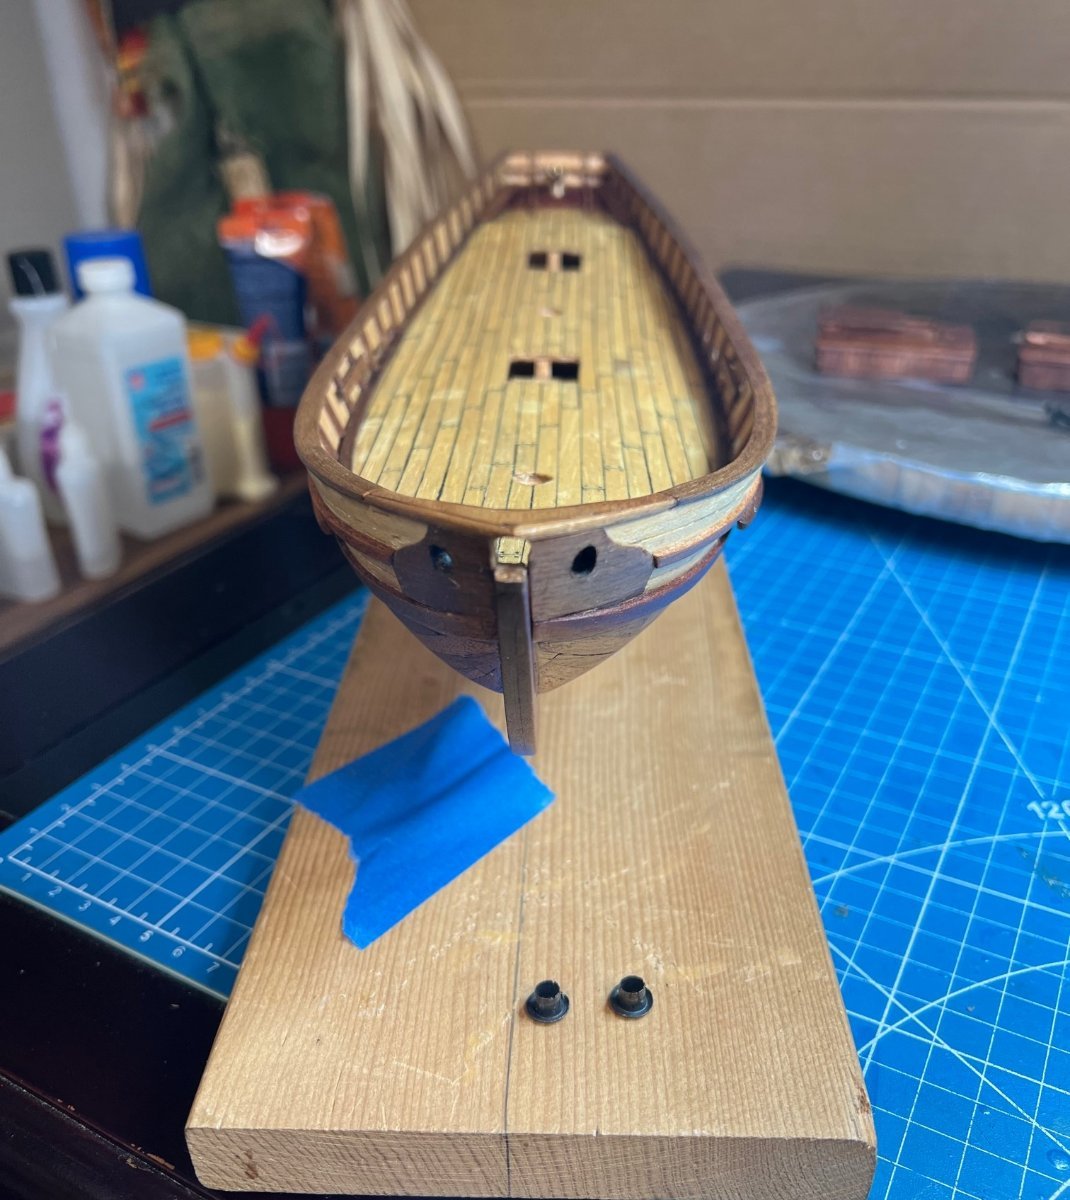
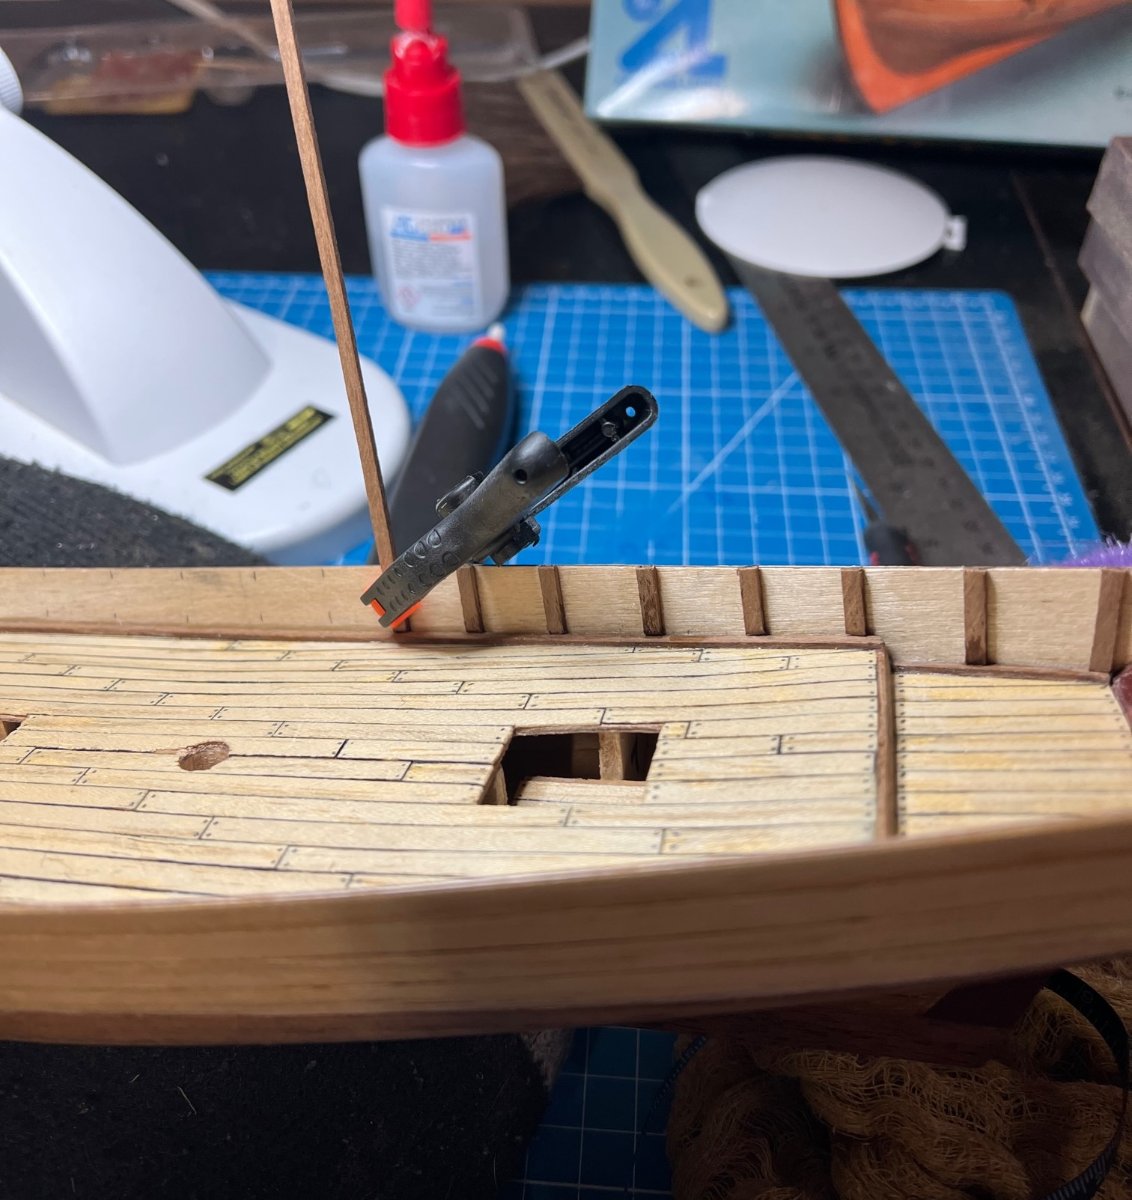
Mounting her, (to a base), get your minds out of the gutter.
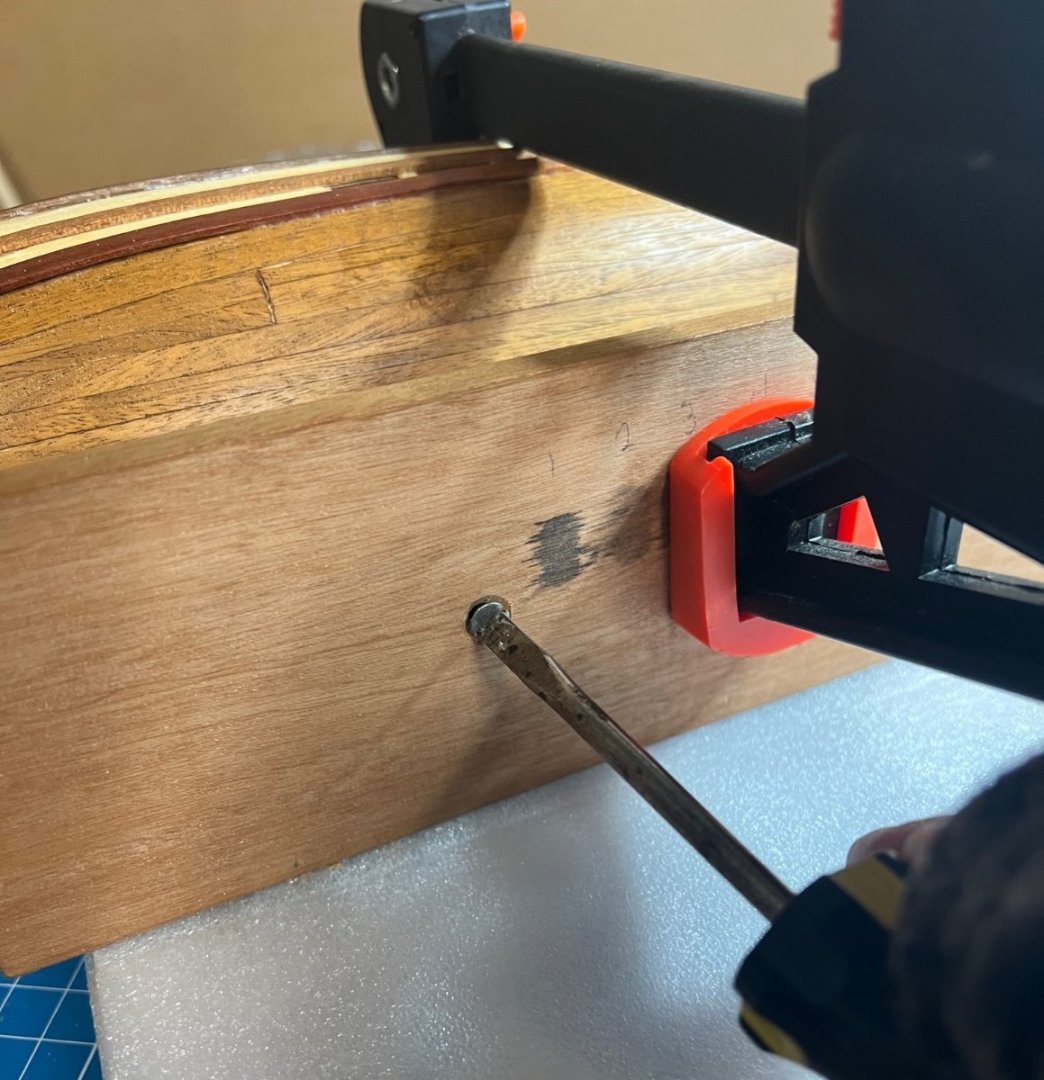
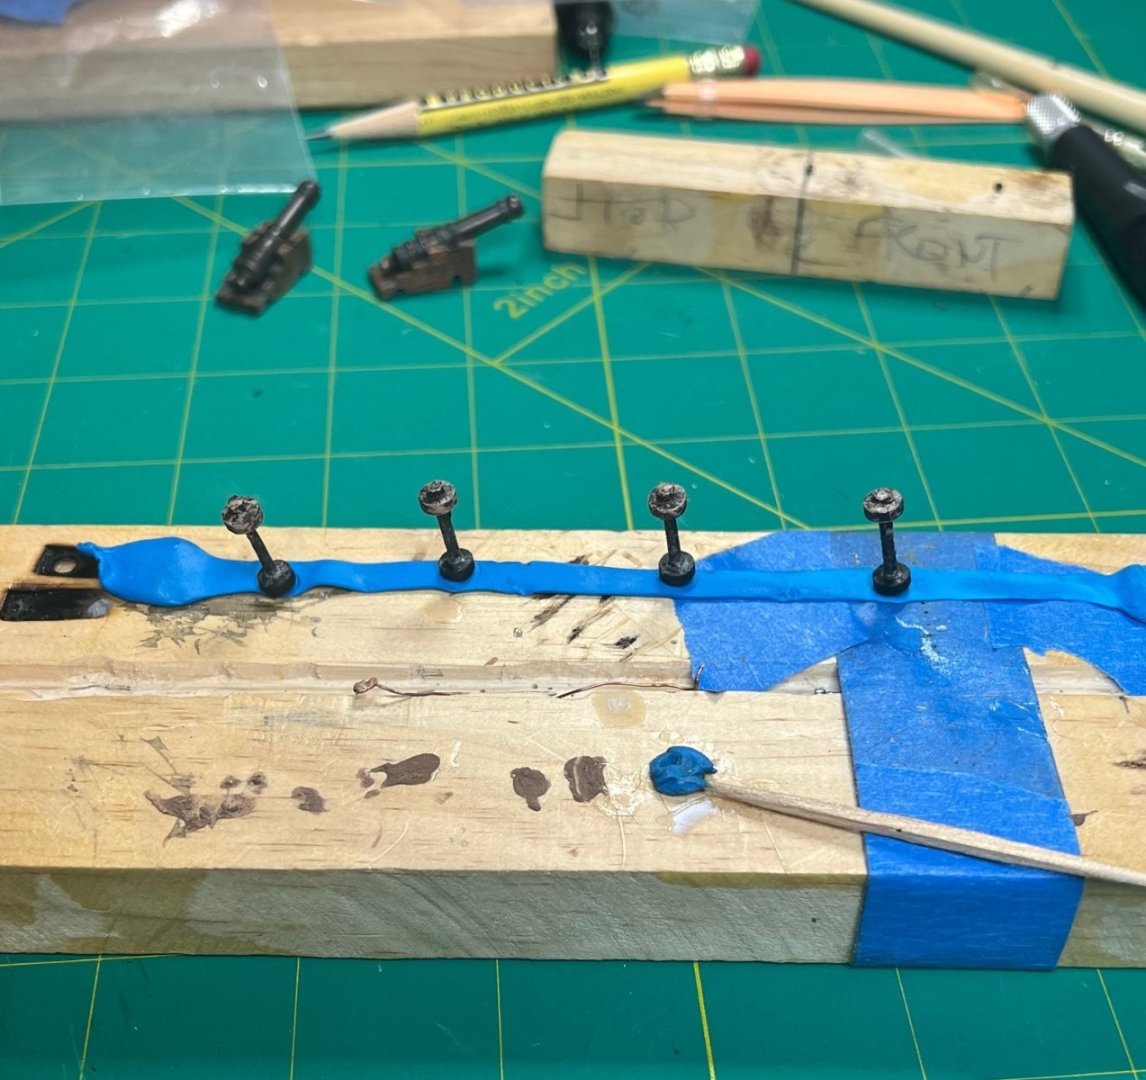
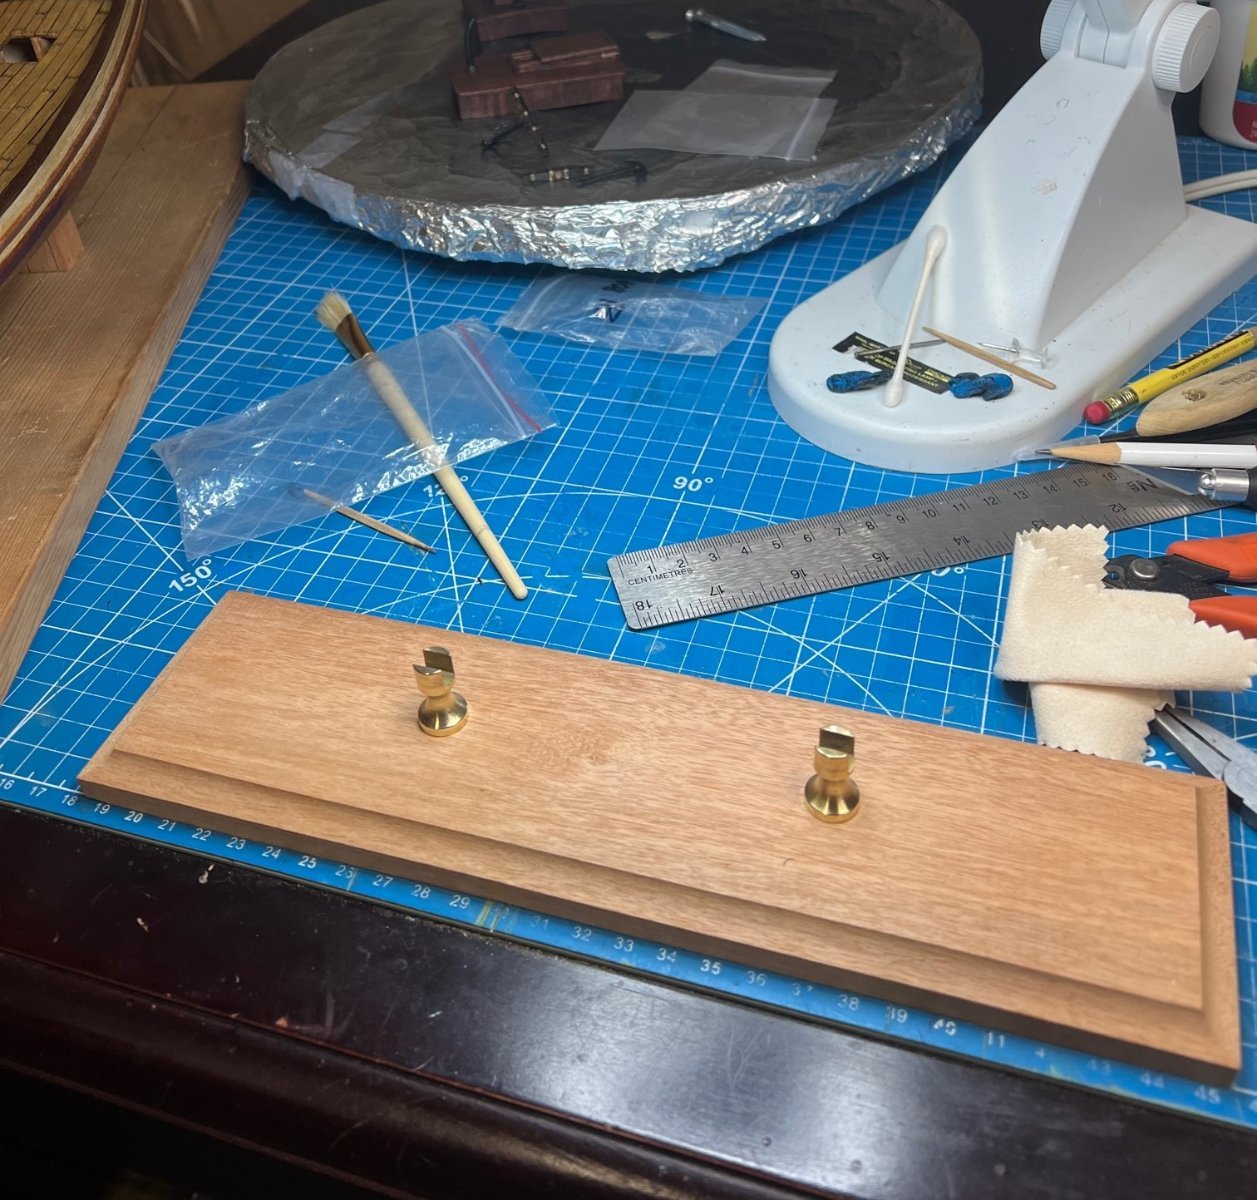
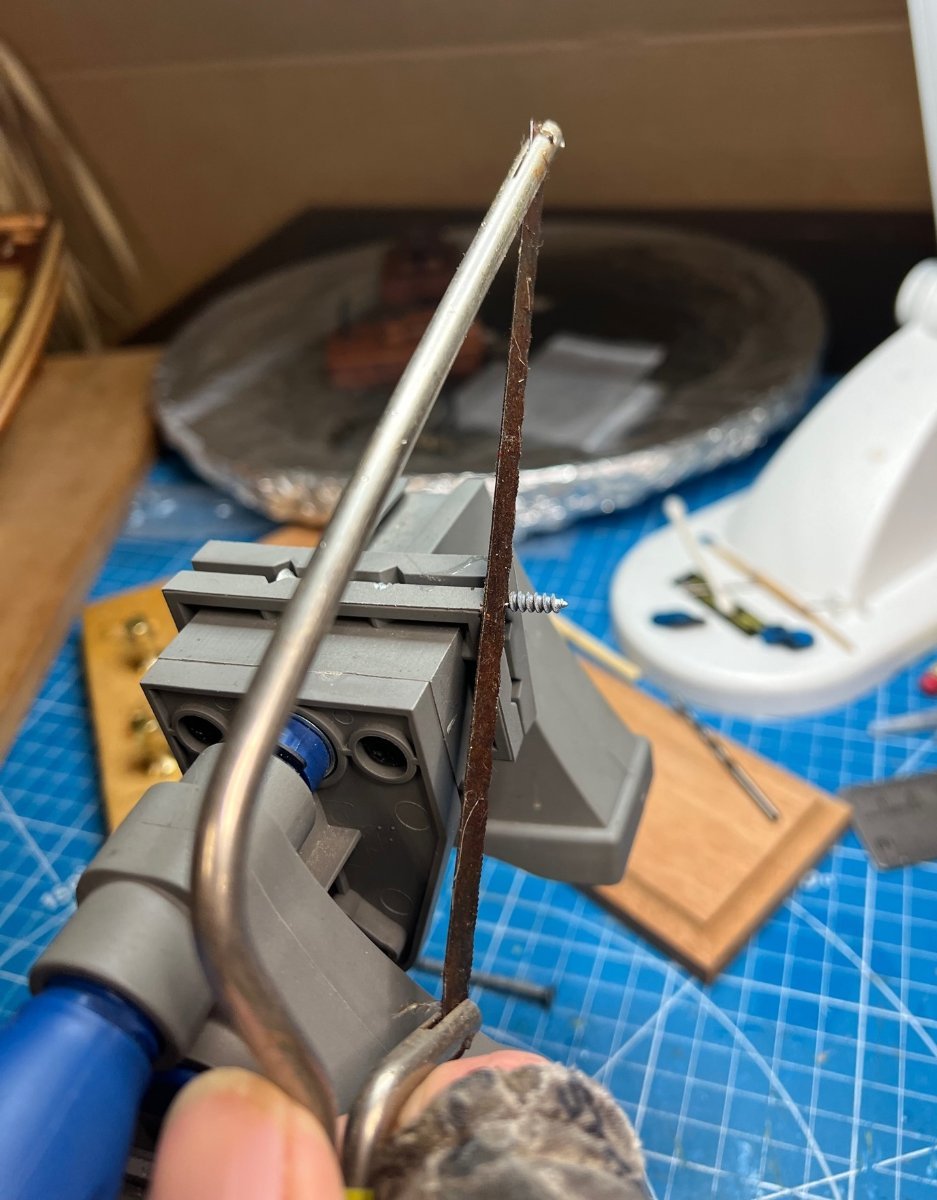
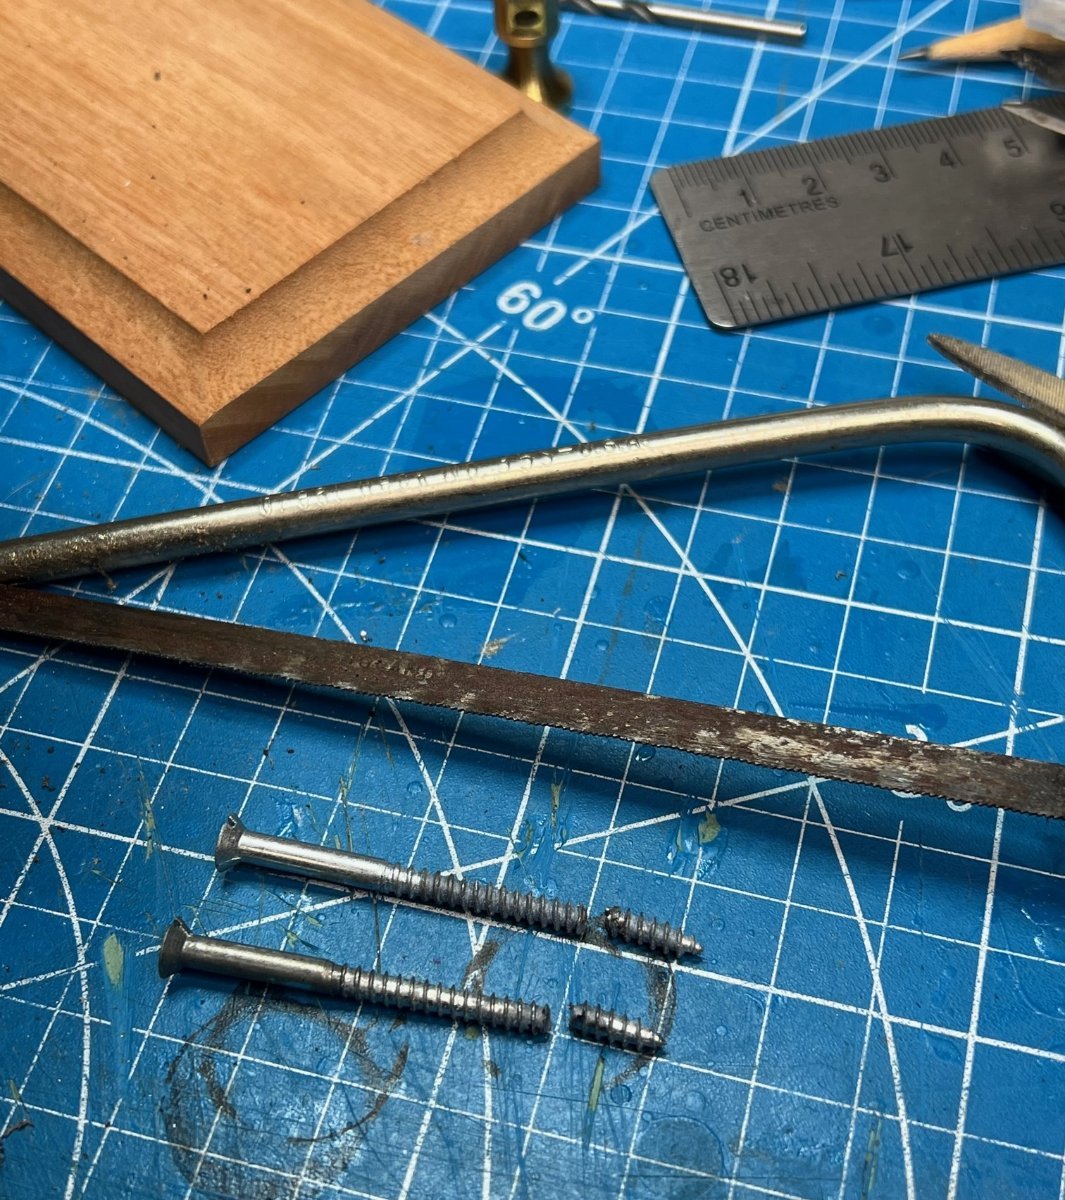
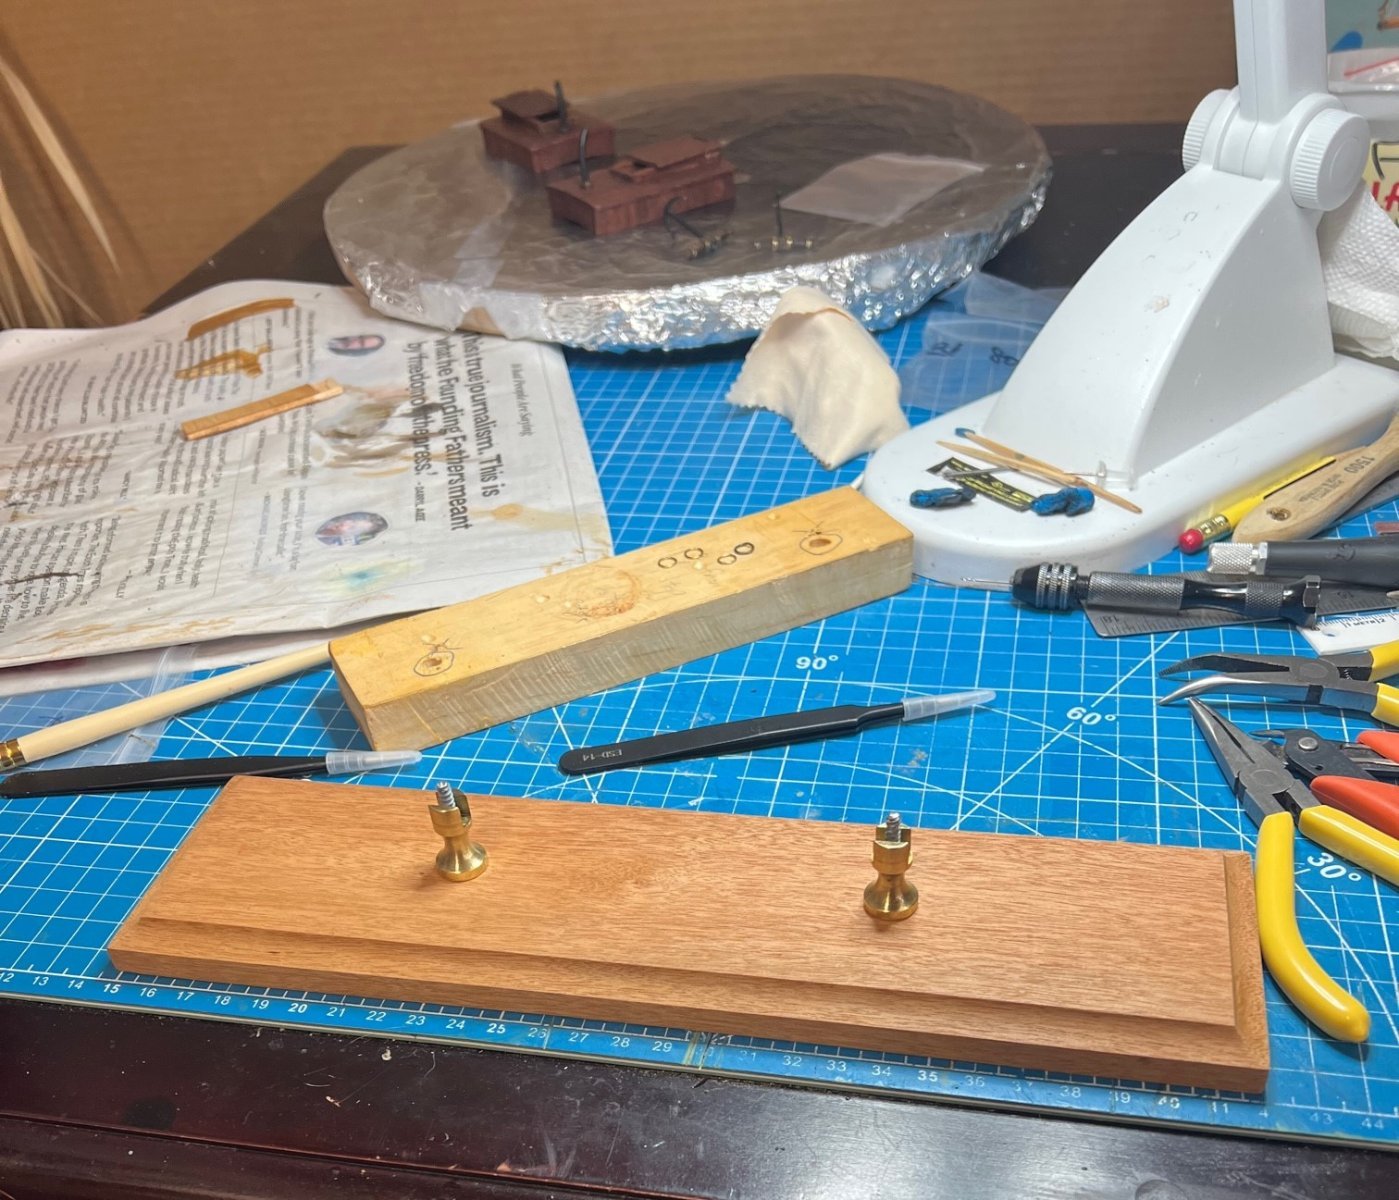
Now it was time to get the ship mounted on its permanent base from its temporary construction mount. I was terrified to drill the mounting holes for the screws through the keel and into the interior of the ship. I measured and measured and planned and planned how to do this critical step.
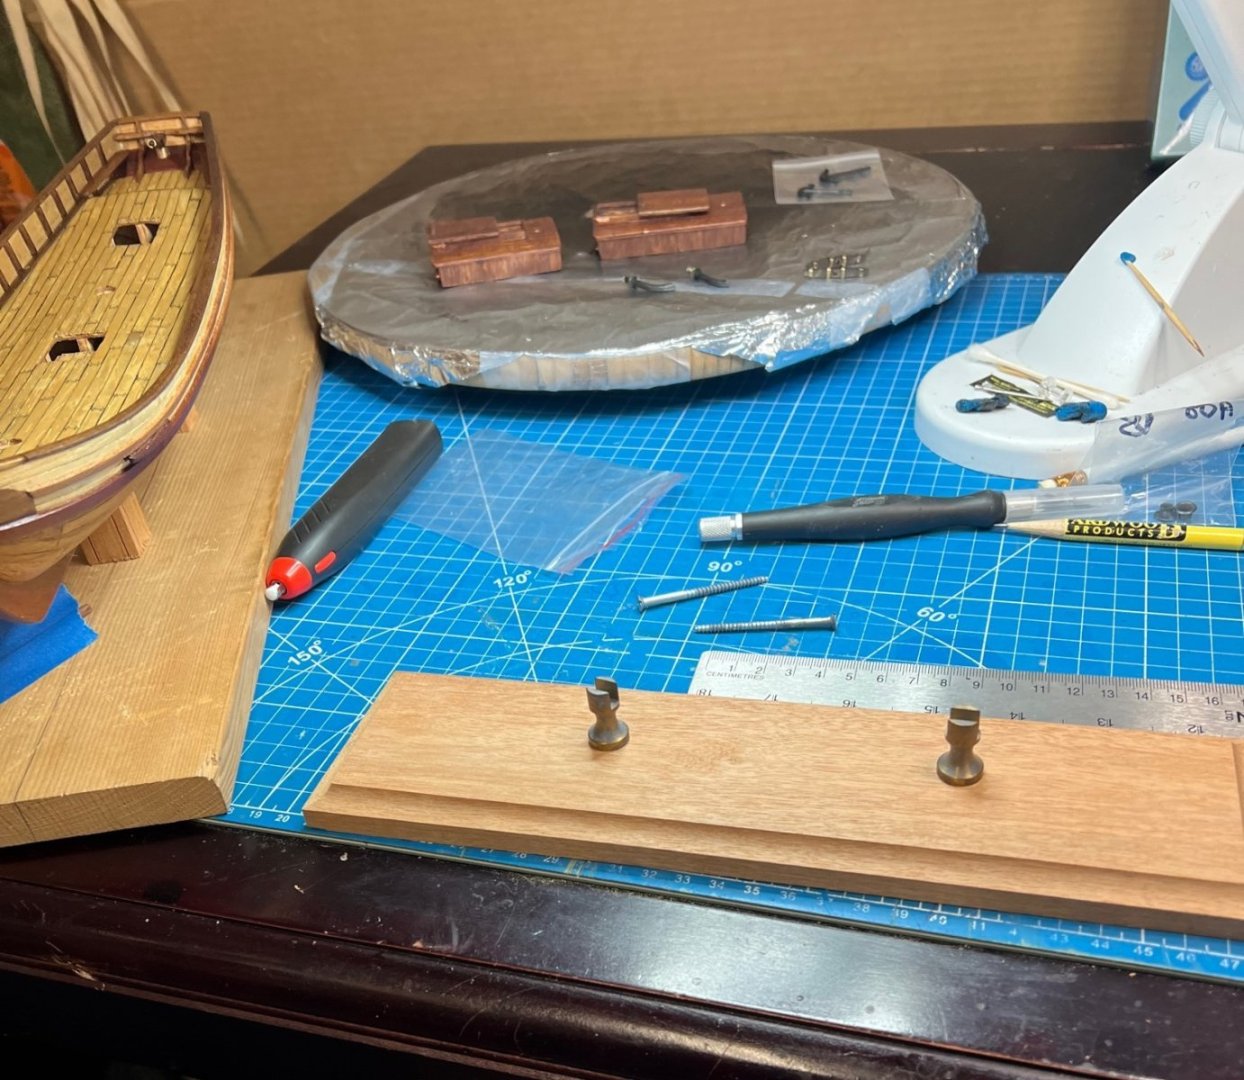
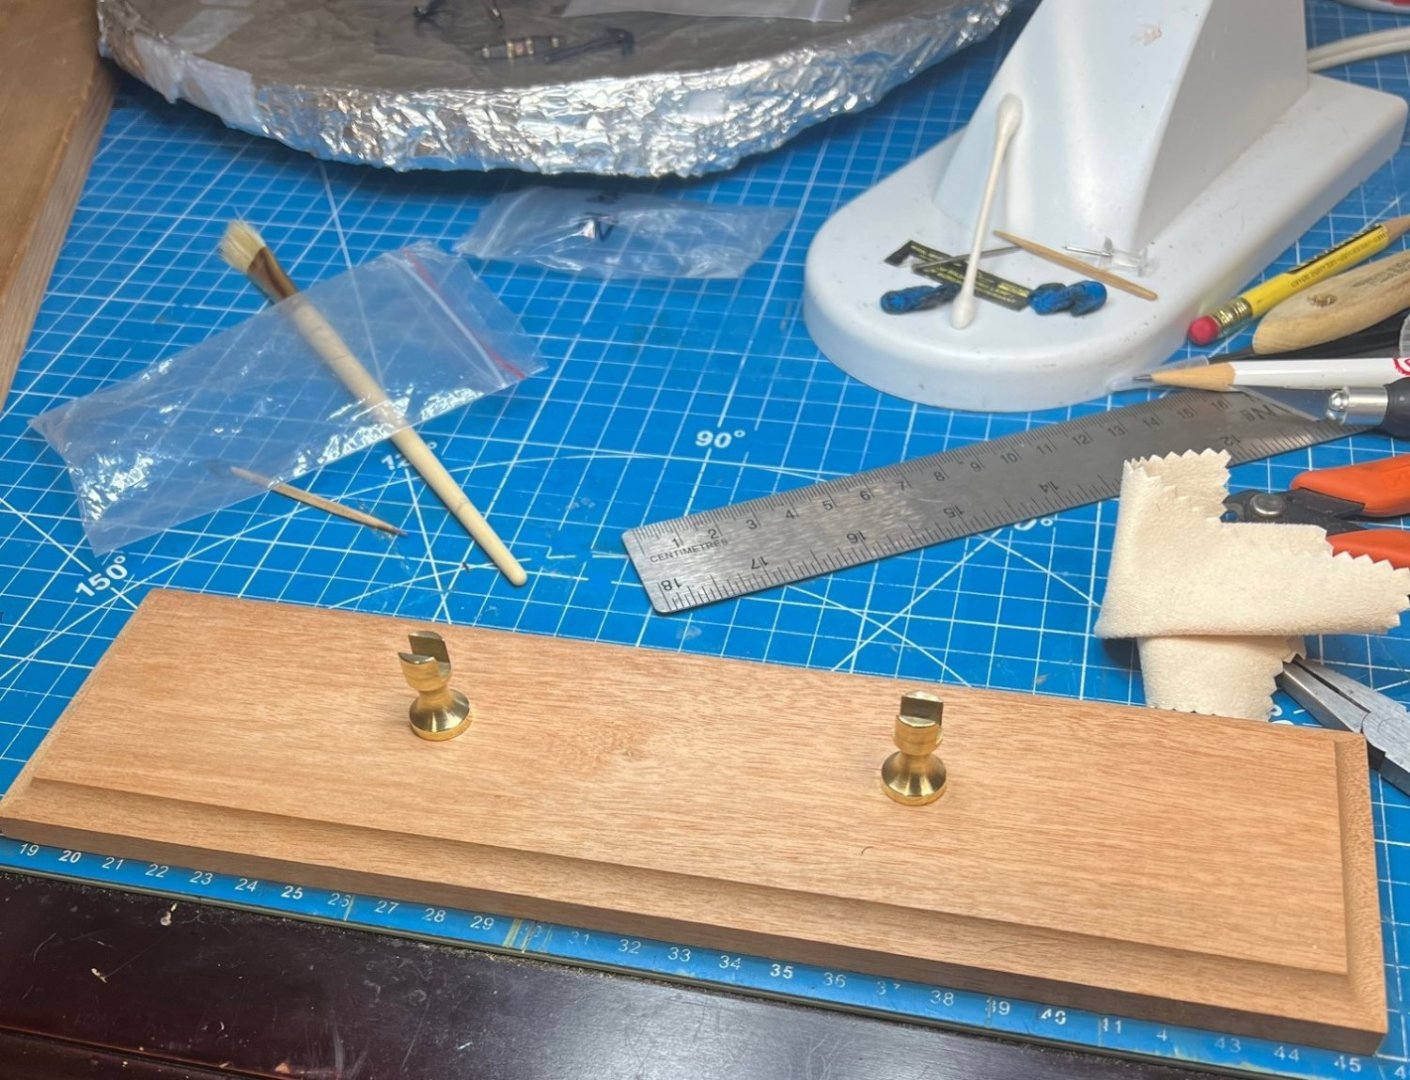

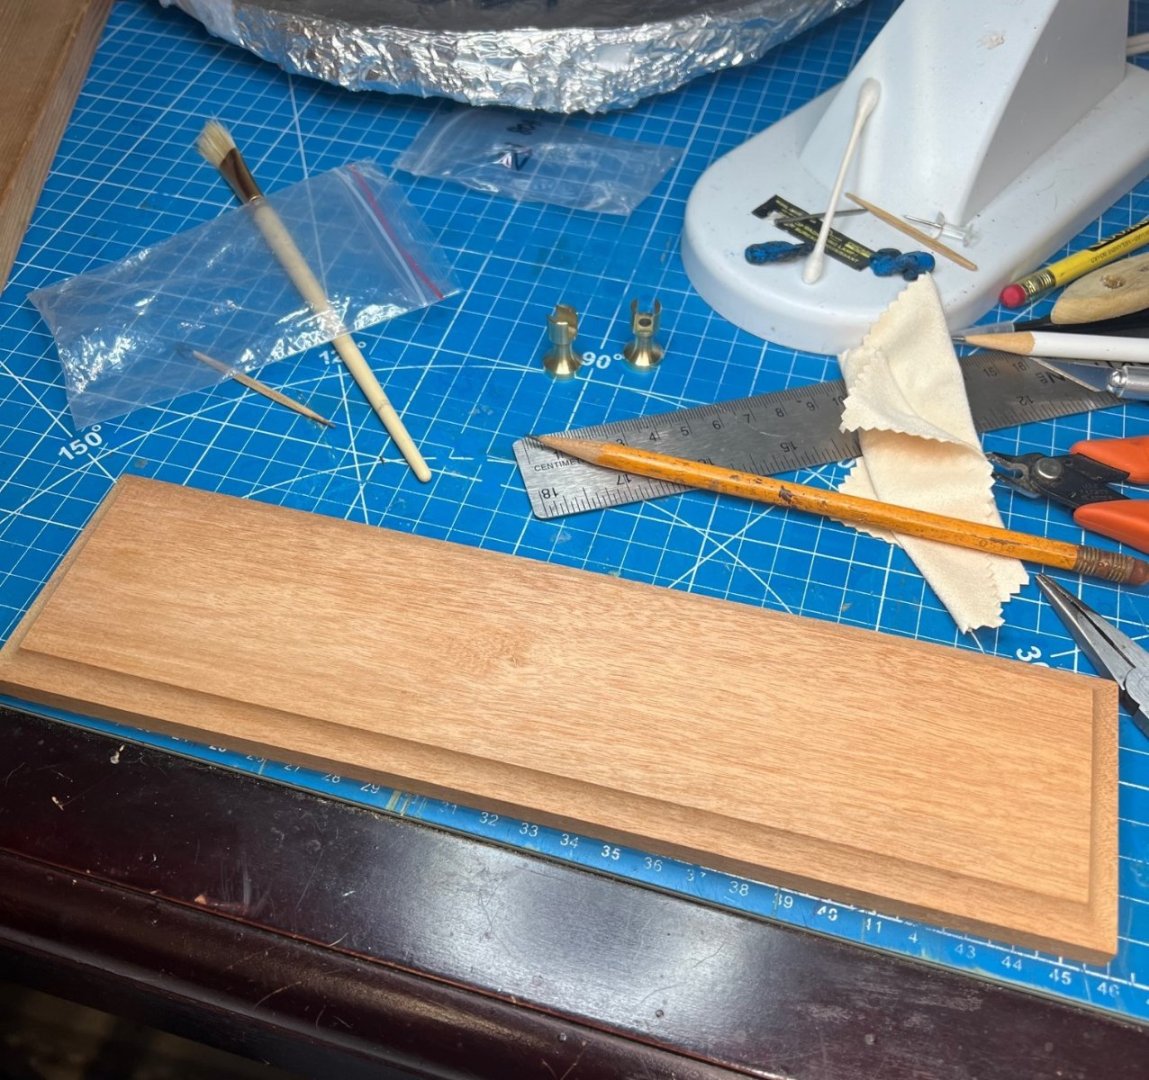


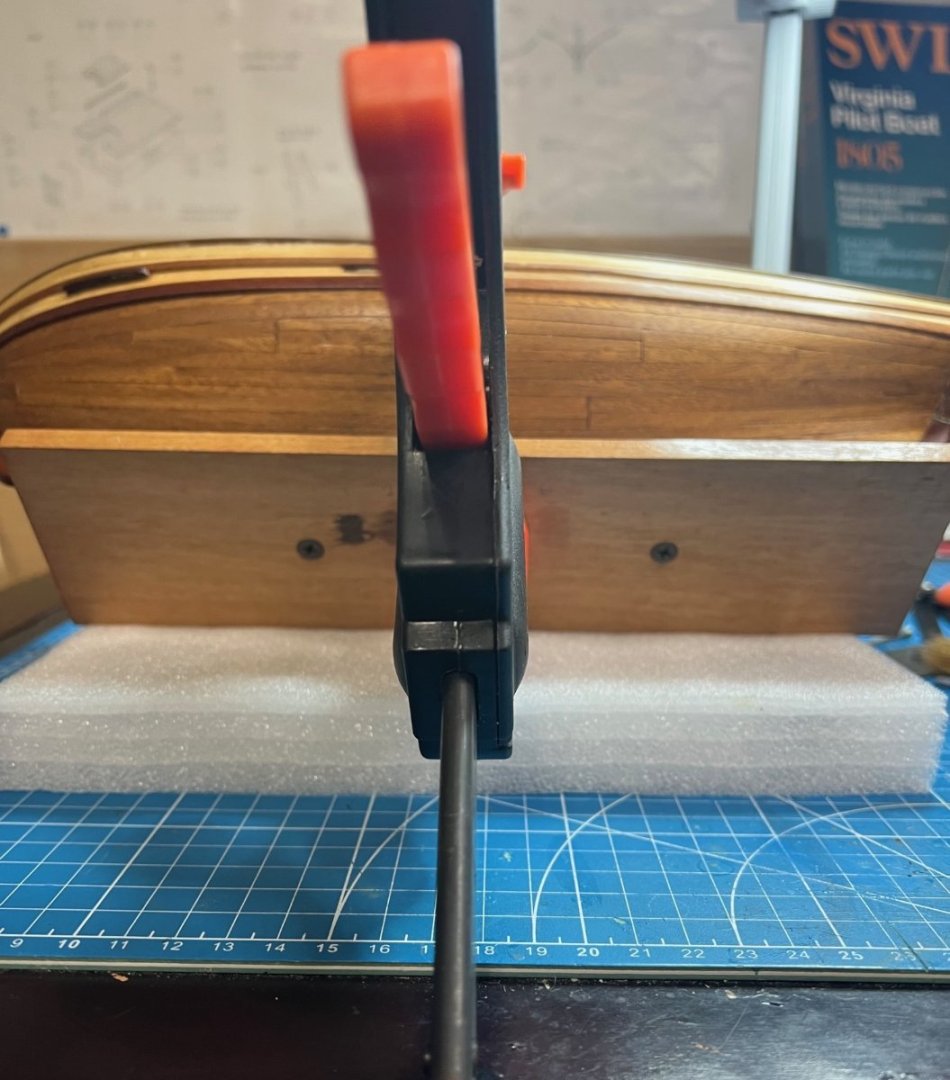
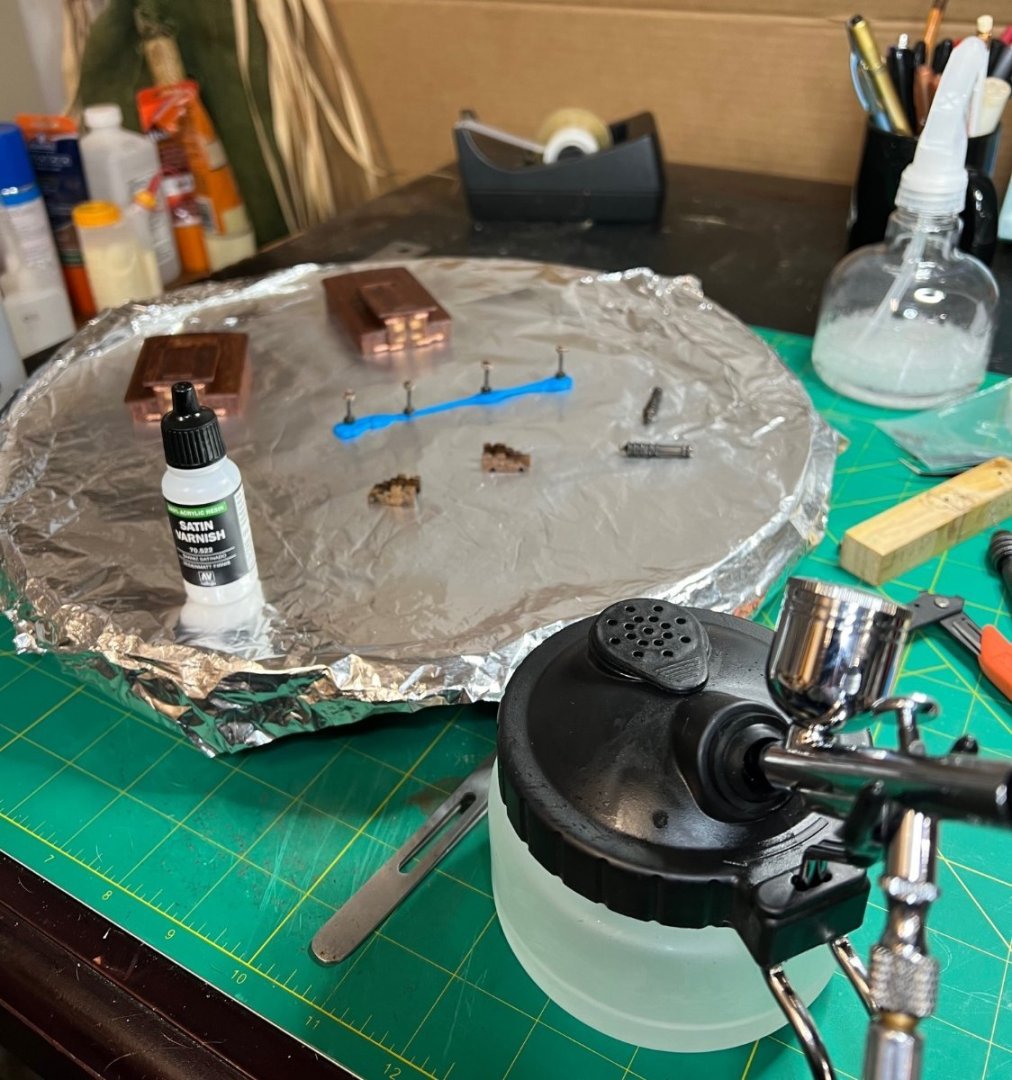
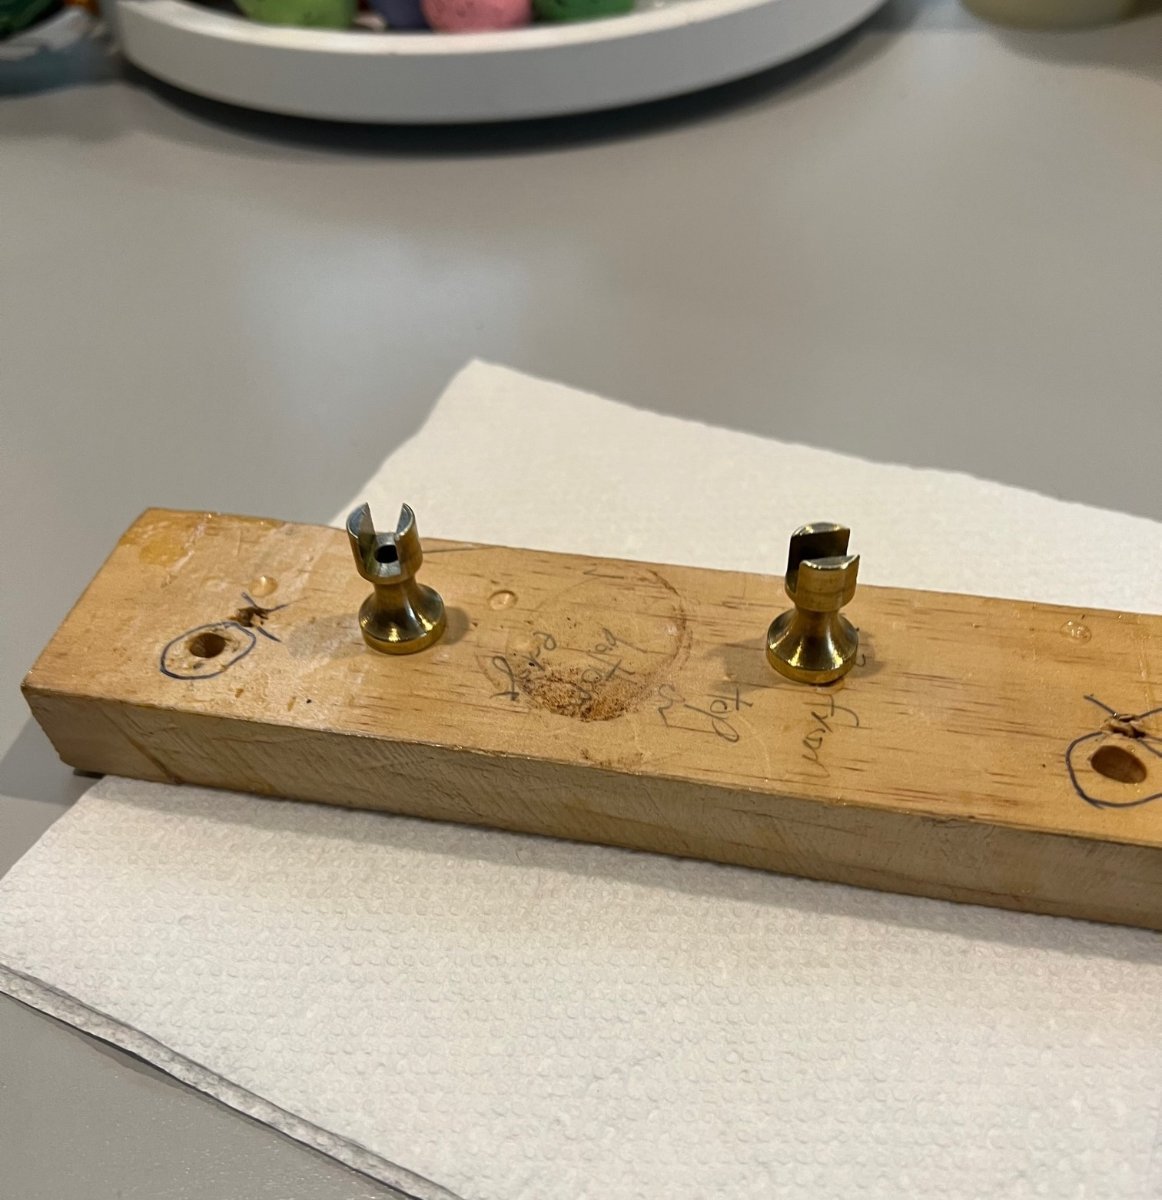
I searched for the best possible screws to do the job since I thought the ones that came with the kit were too long. The kit supplied a beautiful piece of wood for the stand, already routed on the edges. It just needed a little sanding, some stain and good gloss varnish. The brass mounts were terribly tarnished after being in the box for almost 50 years, so I gave them to a neighbor to clean up with his Brass-o since he was so interested in the model. He brought them back shiny as new a couple of days later, thanks Rob, so I never touched them with my bare fingers and gloss varnished them as soon as I could. Next onto drilling holes in the stand for the mounting screws. I measured two points along the centerline of the stand equidistant from the ends of the stand and at points on the ship that broke the keel into thirds.


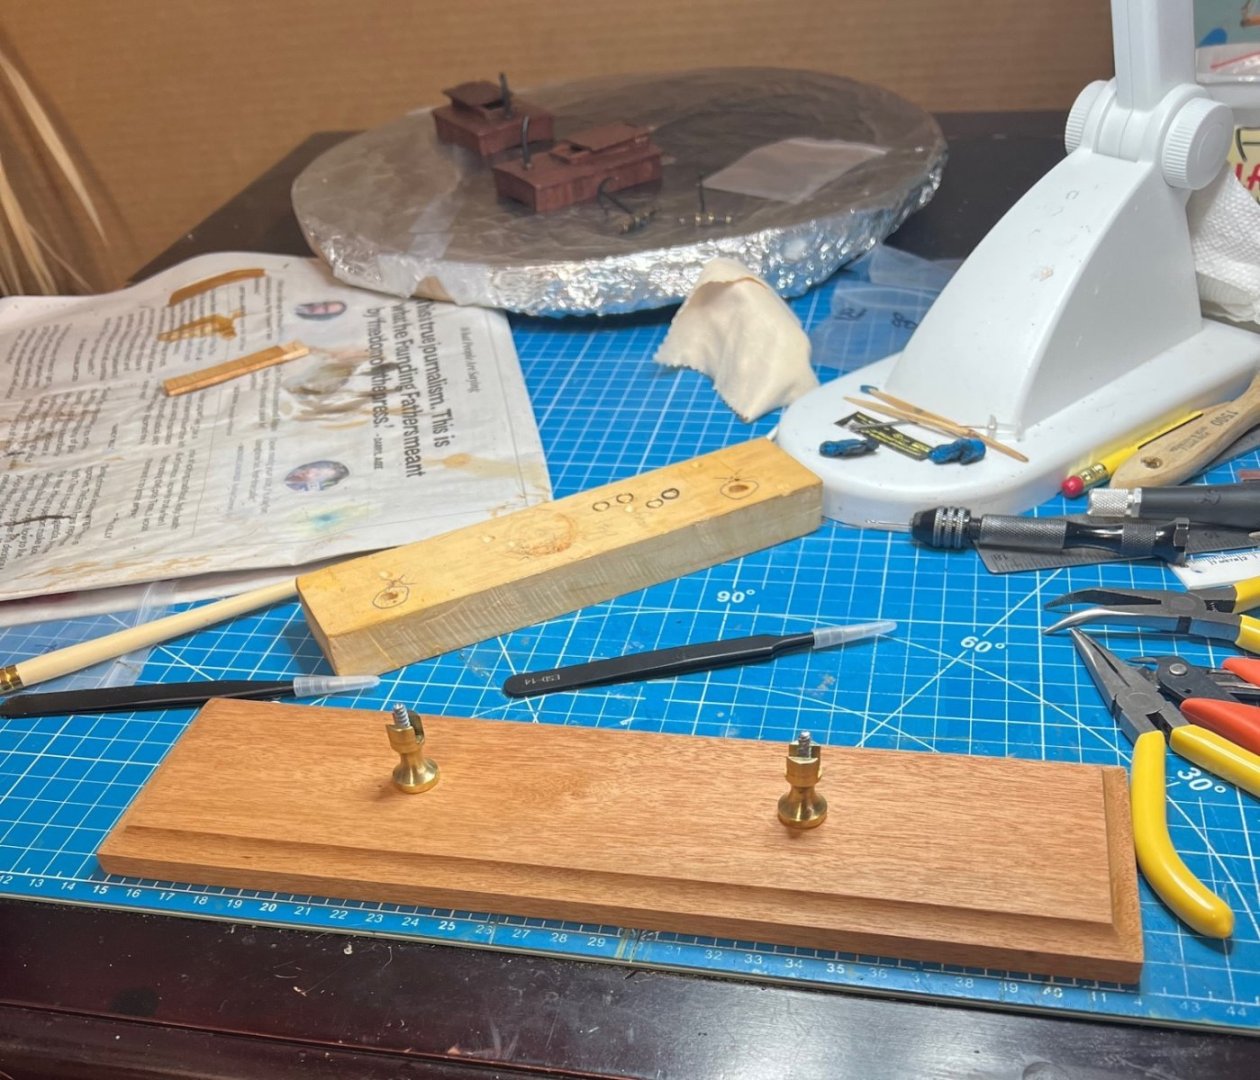
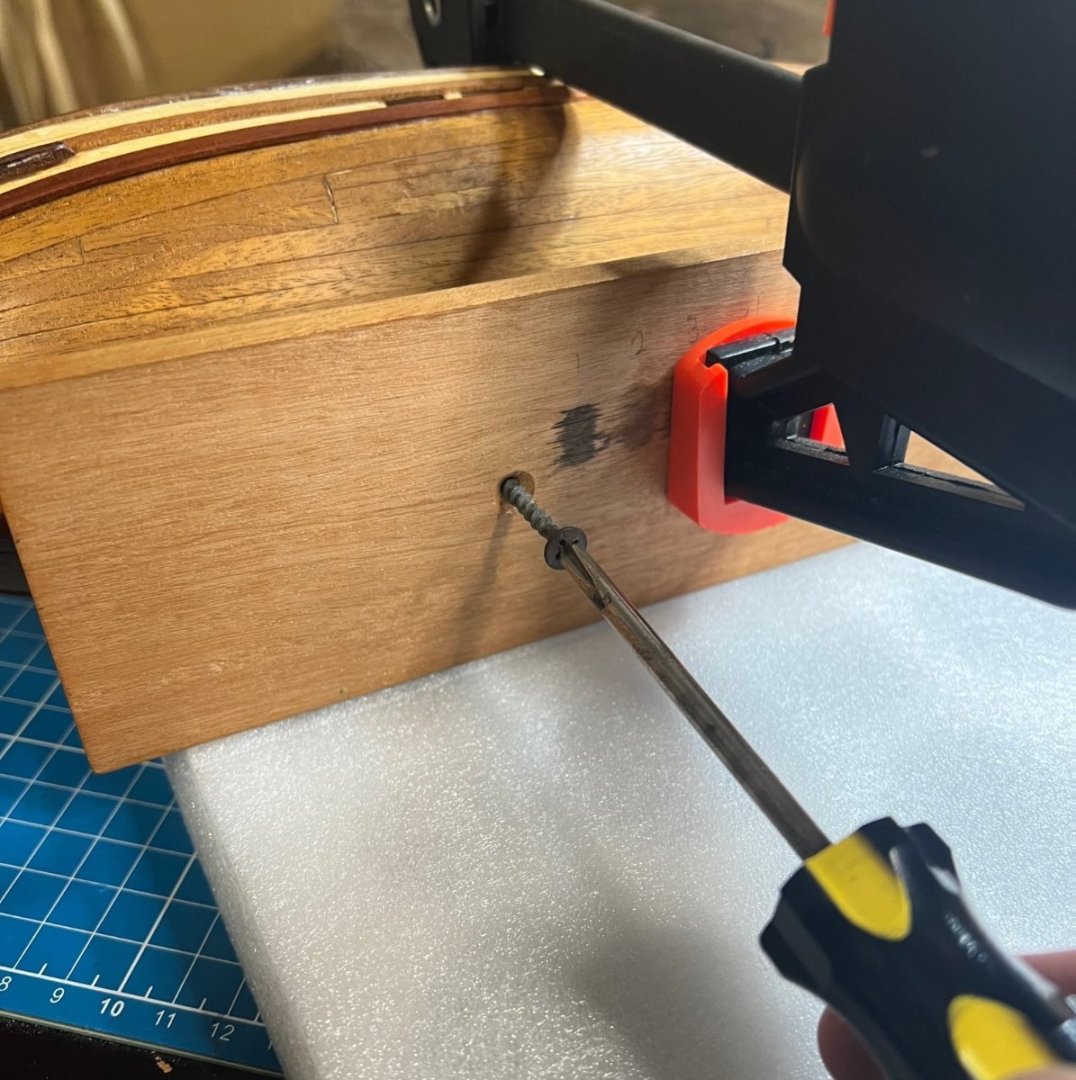
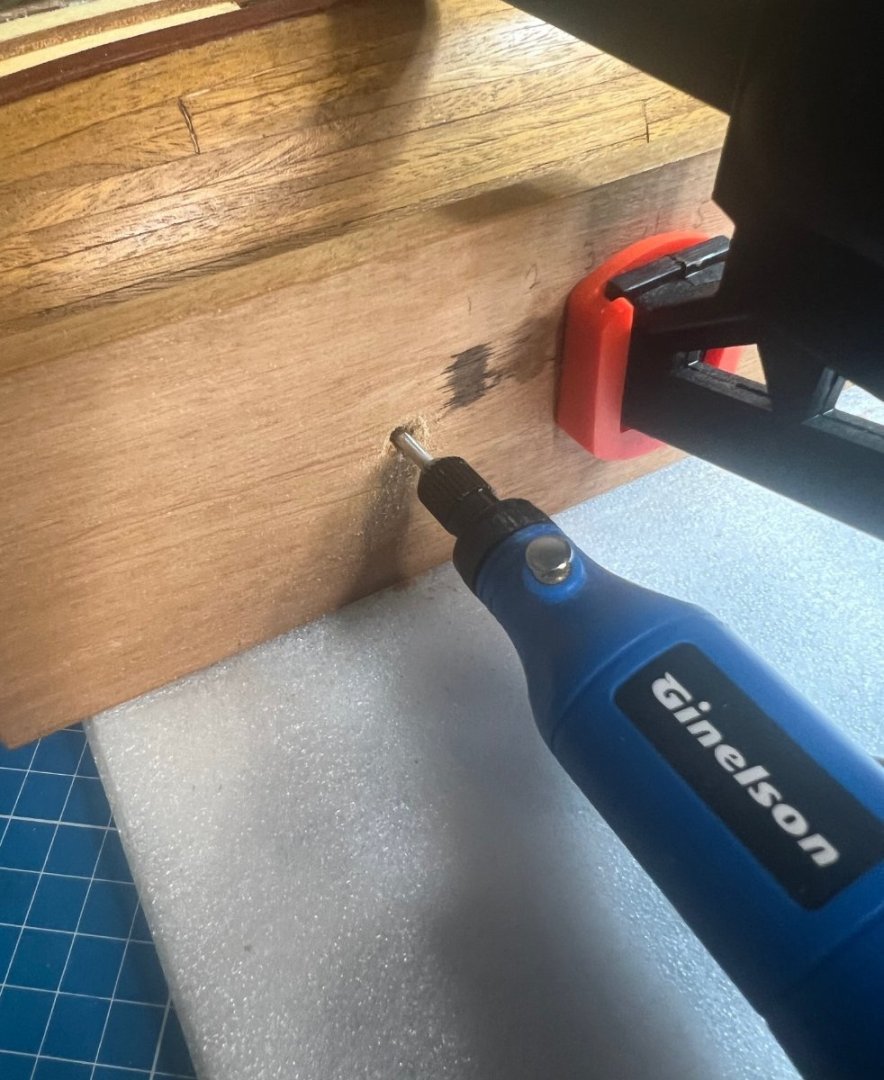
After searching for better replacements for the kit screws, I went with the originals but had to cut off a little from the end of each so they wouldn’t go into the interior of the ship but stop in the keel. I had to find a shorter screw to hold the brass stands in place while the ship sat in them so I could use them as a drilling guide to drill into the keel from below. I countersank the holes on the bottom of the stand where I’d tested the stains so the screw head would be flush with the base.
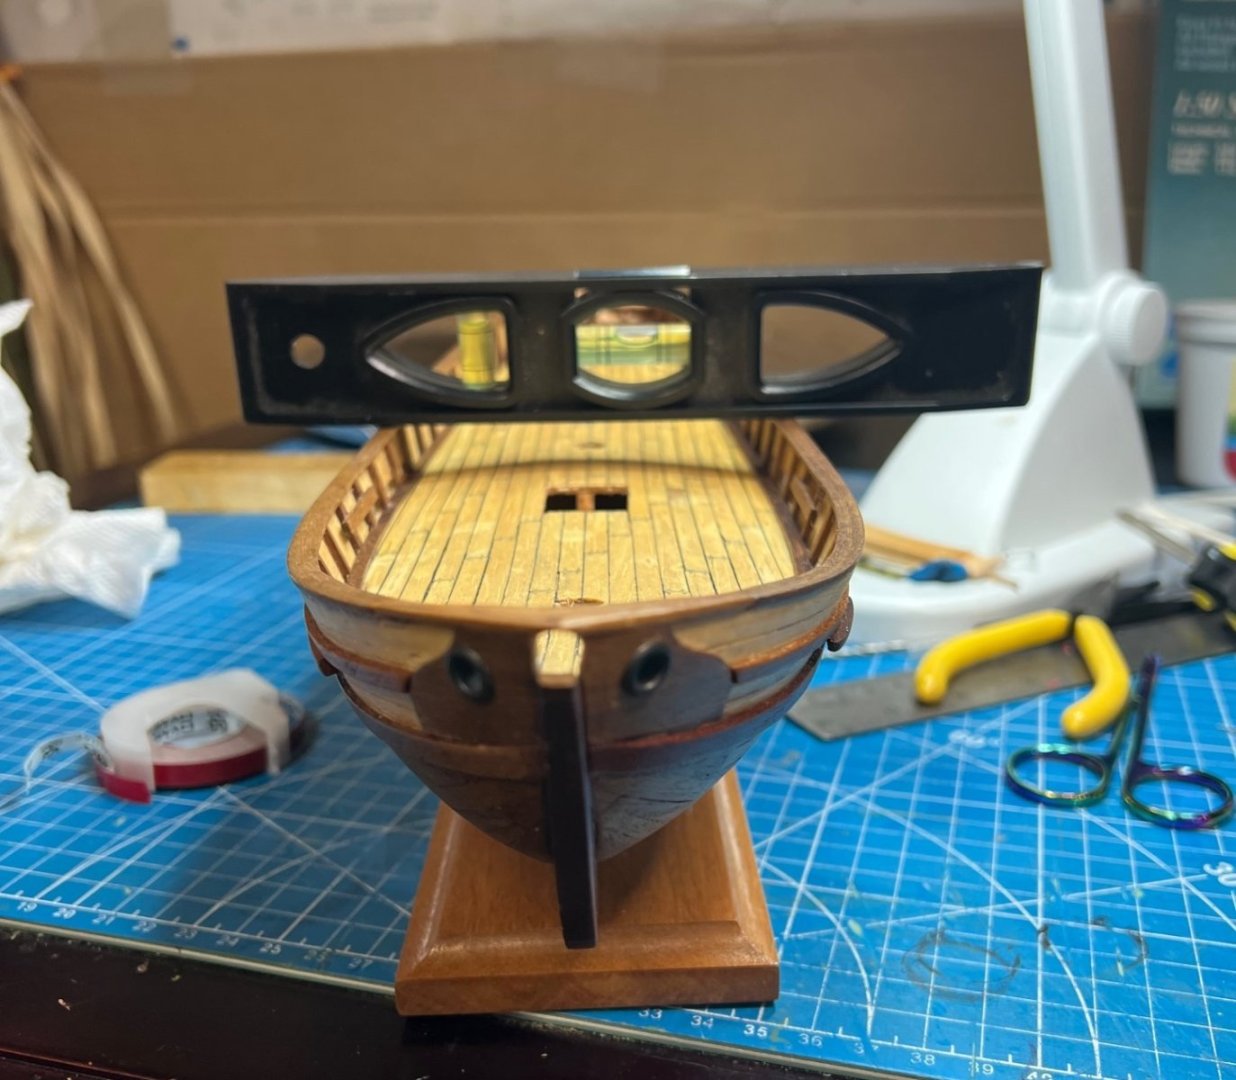

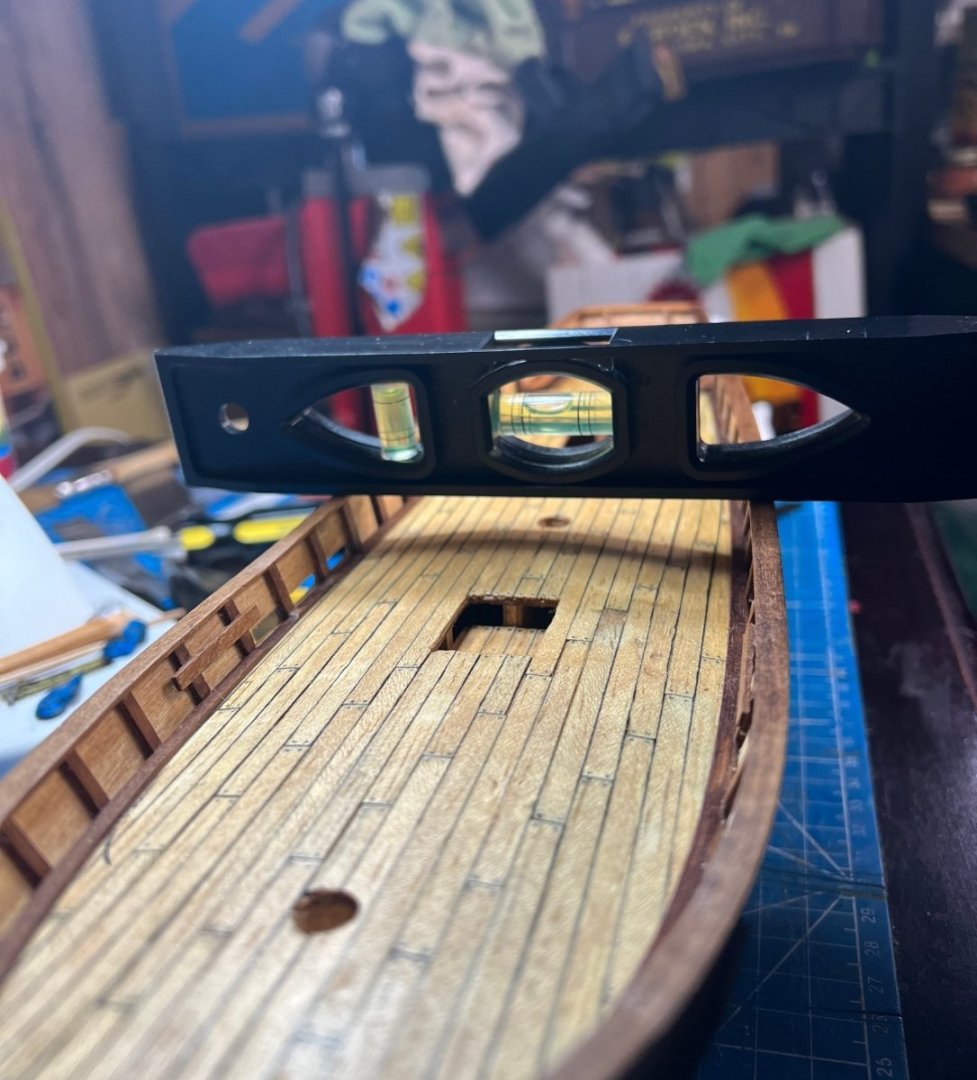
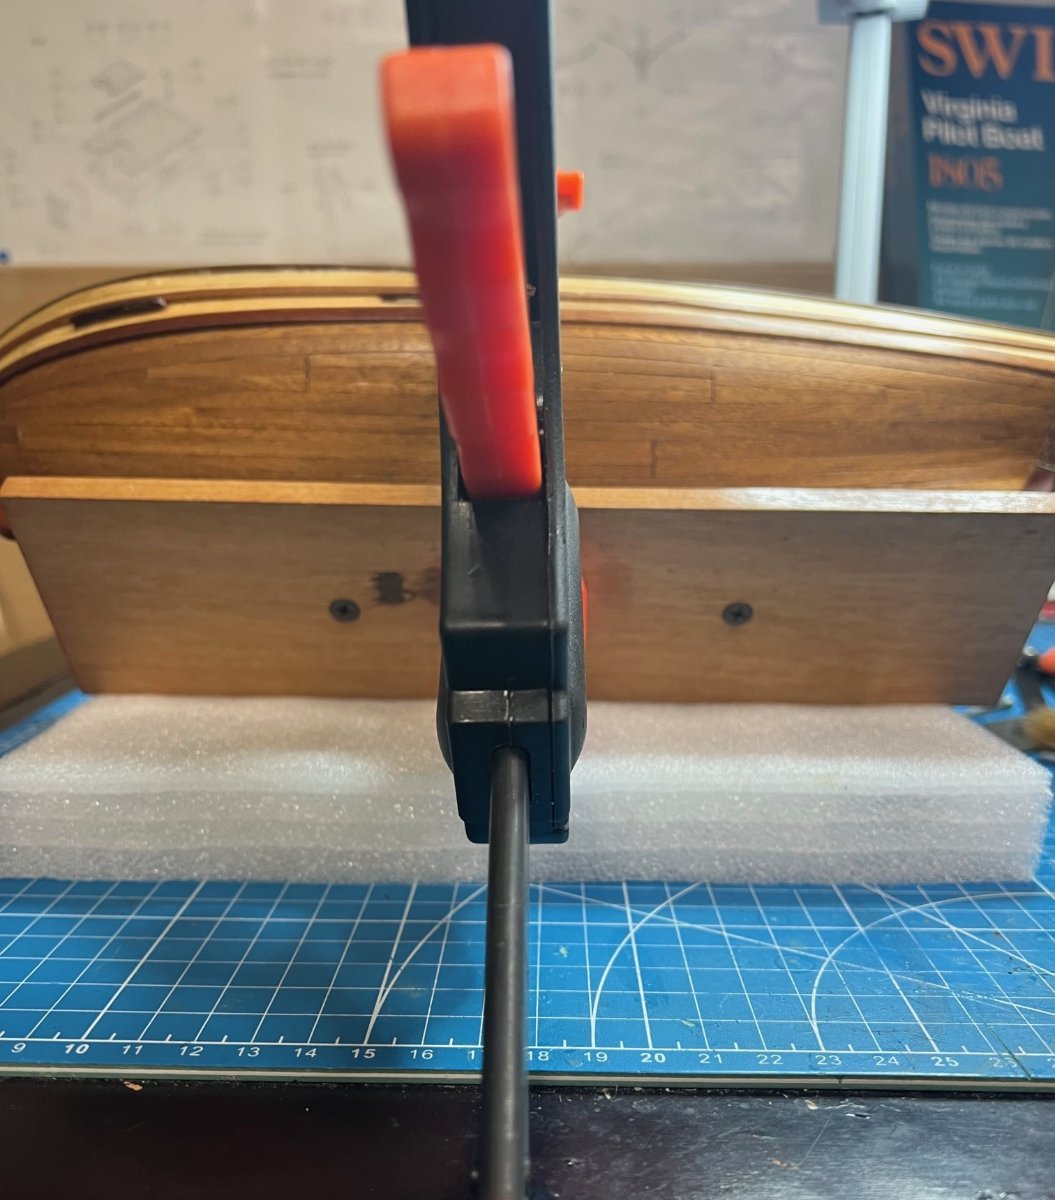
Once it appeared level side to side, I clamped the ship to the base and flipped it on its side. I them removed the temporary shorter screw and drilled the final sized hole into the keel through the base and brass stands, holding my breath all the way in. I only had a mm or so of clearance on each side of the keel.
 .
.
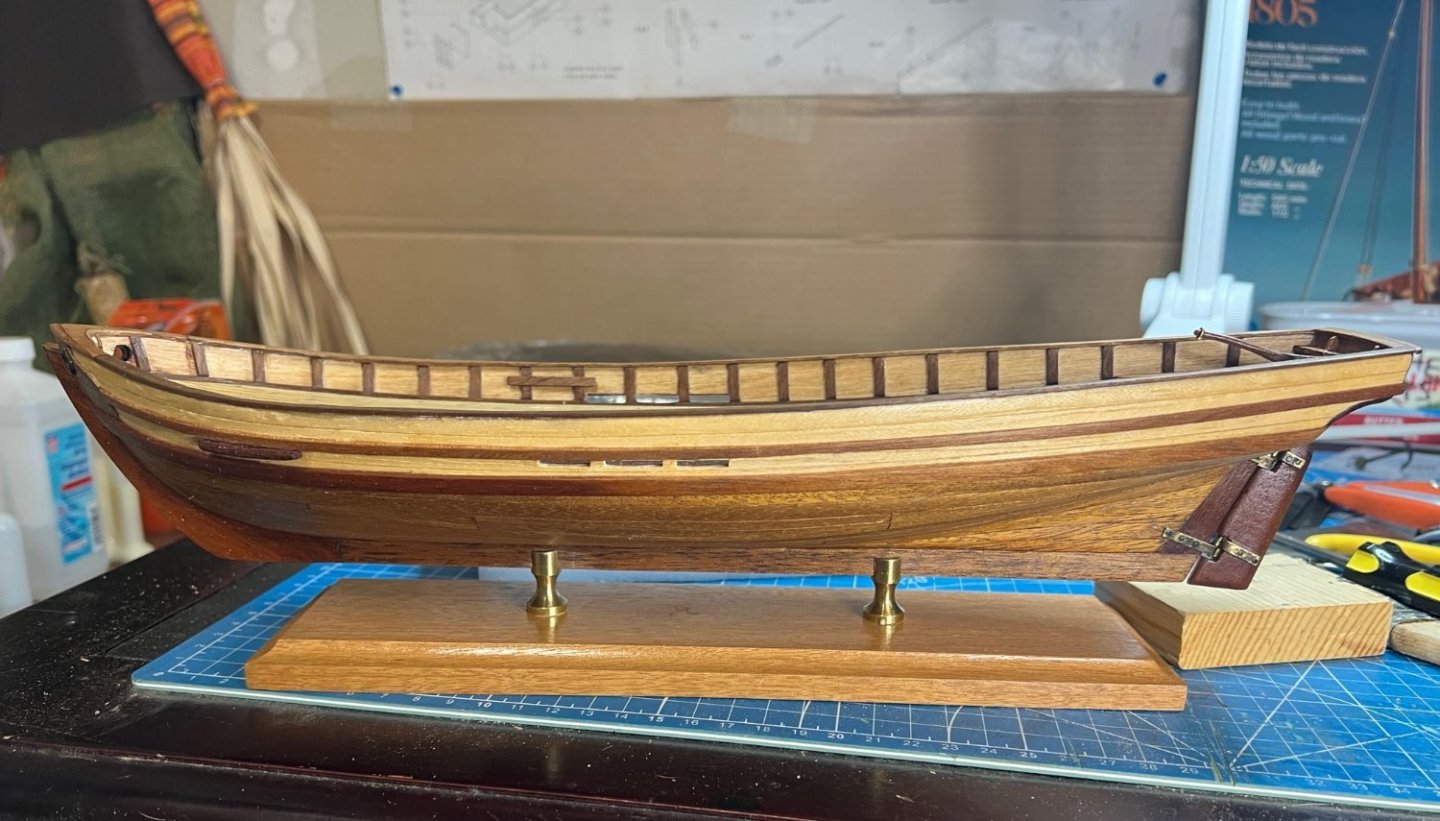
Having gone well, I screwed the permanent screws in and done. So glad to be done with that, it was stressful but I managed and it looks great.
Thanks for reading! More to come when I get not lazy enough to write about it. Model on!
- Gabek, ccoyle, Knocklouder and 3 others
-
6
-
Guns, guns guns, Pt 2., and more!
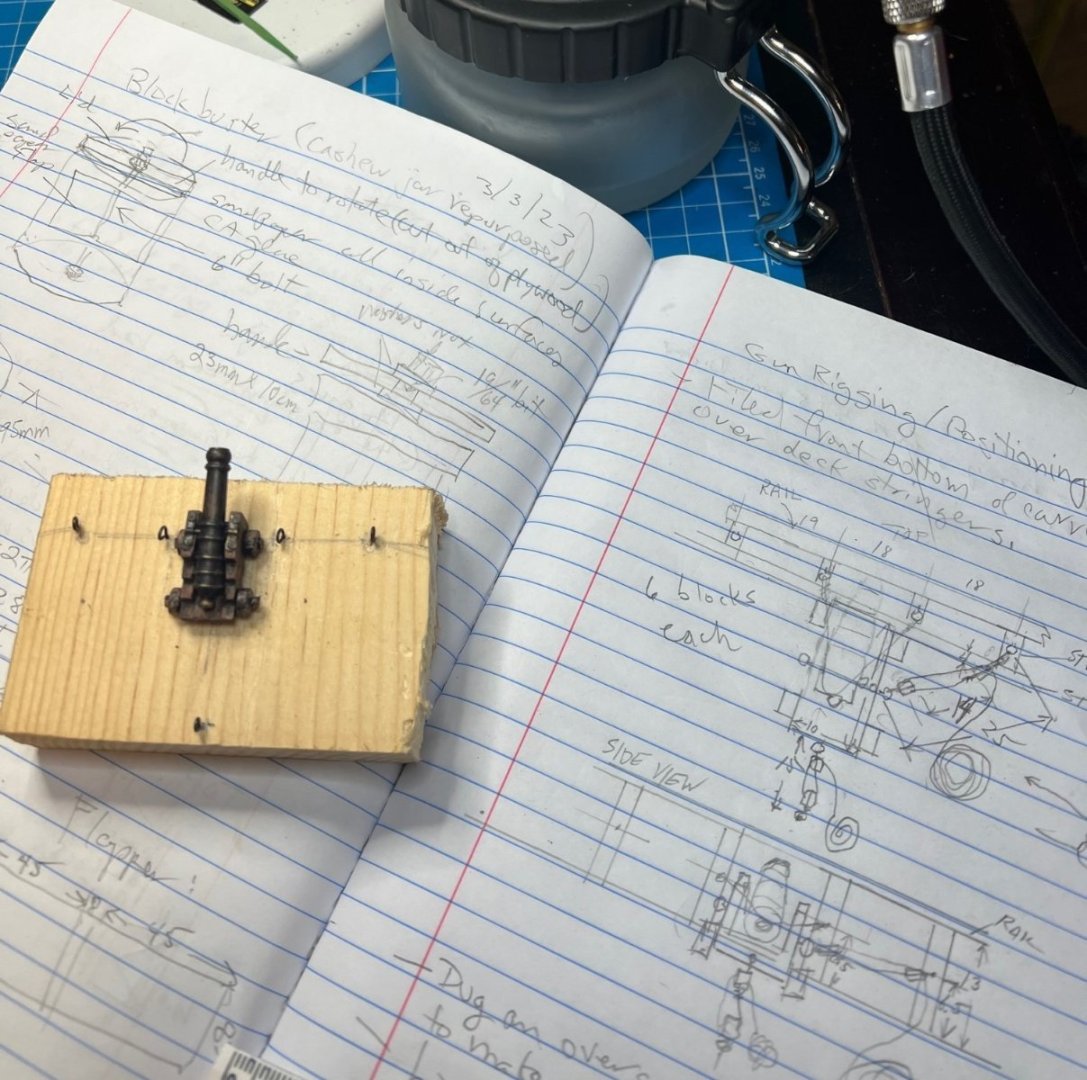
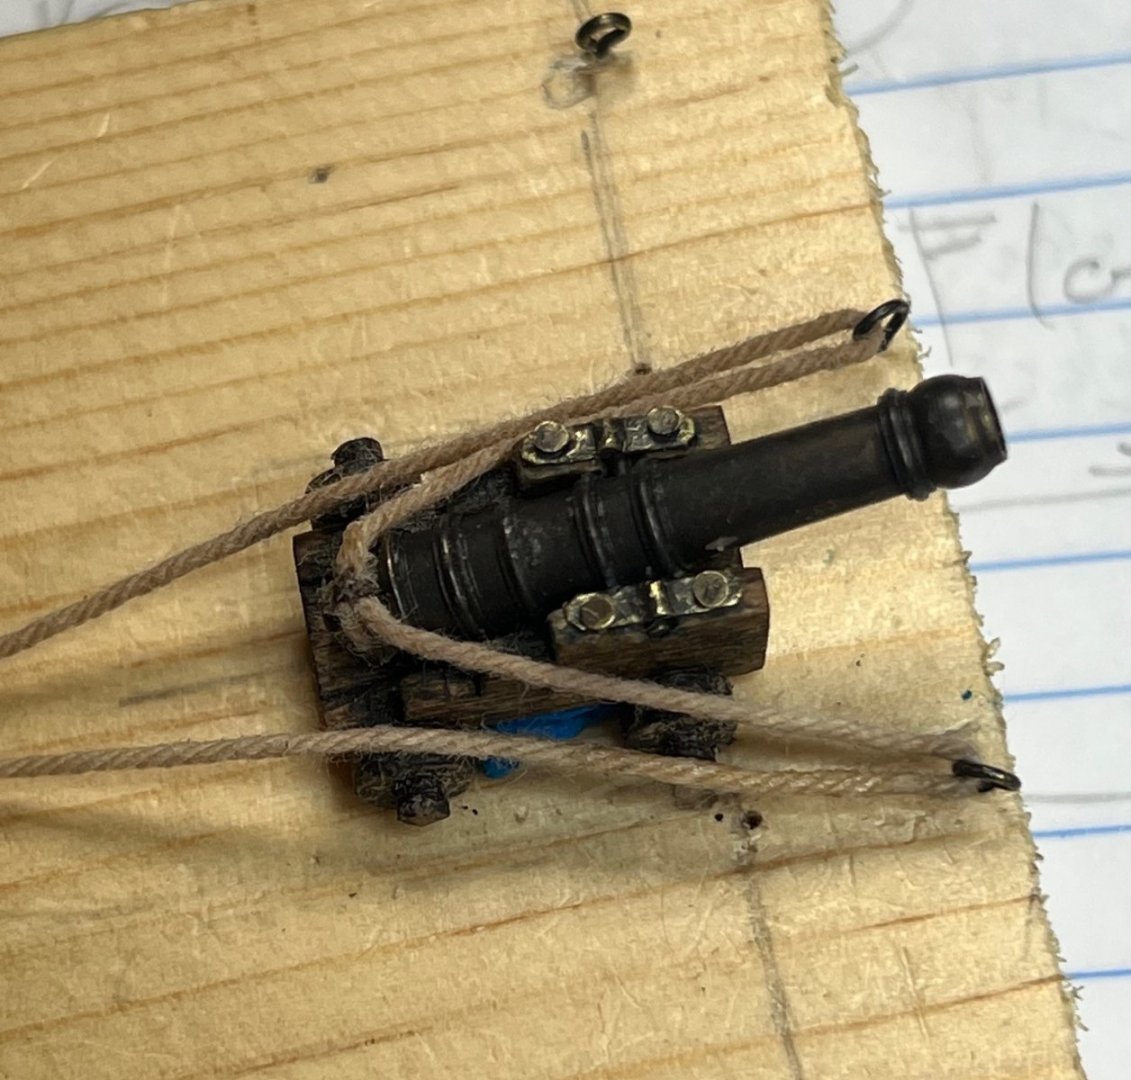
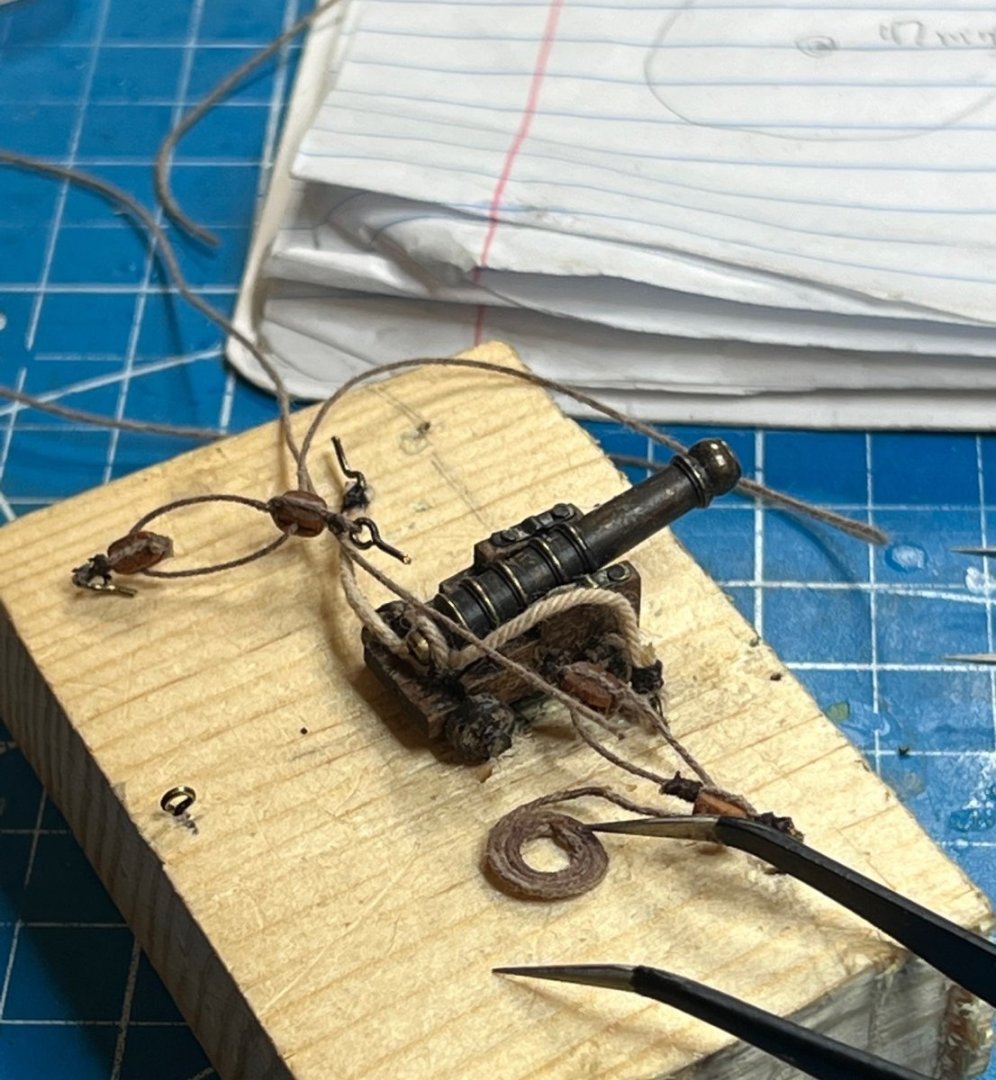
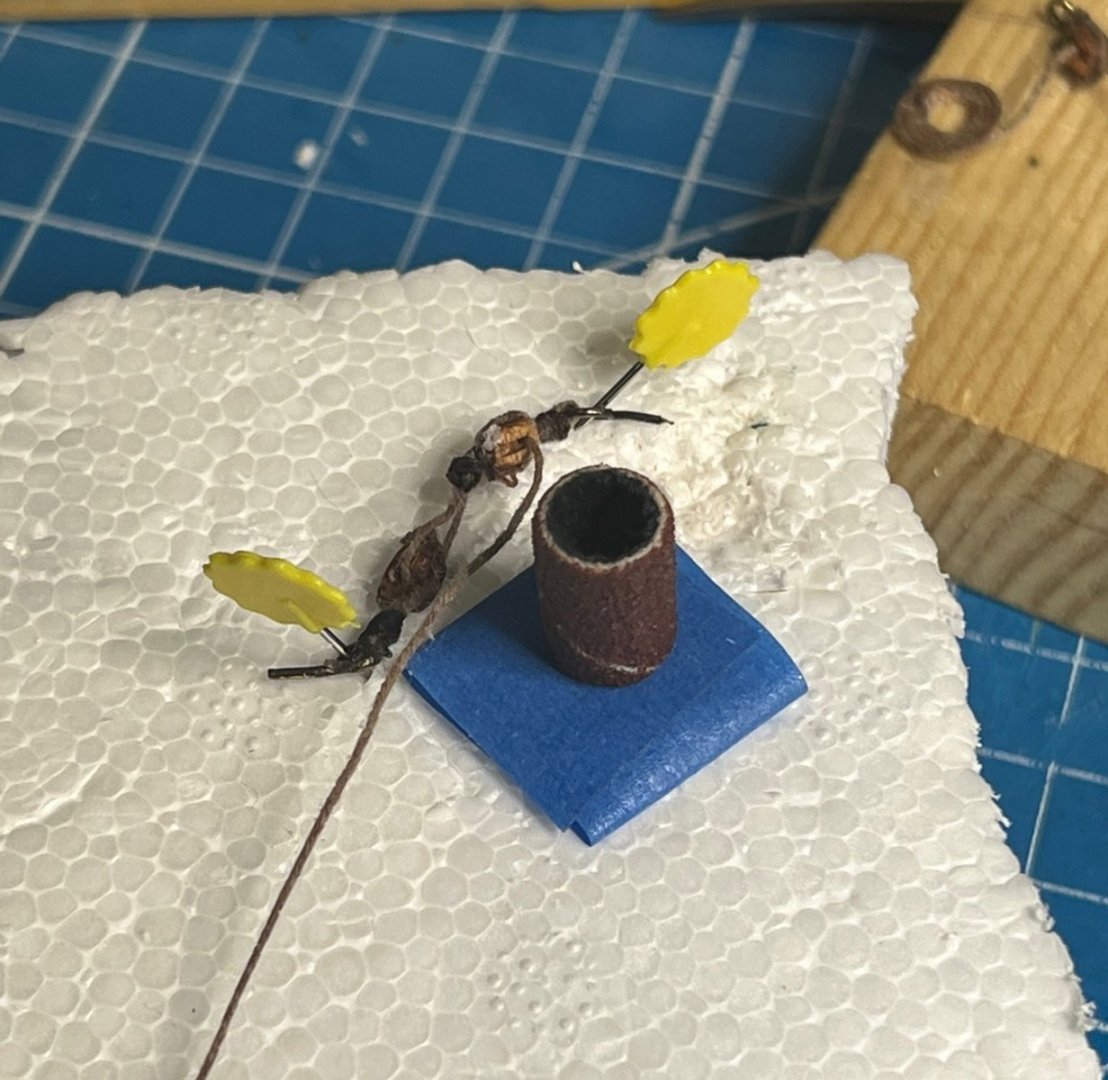
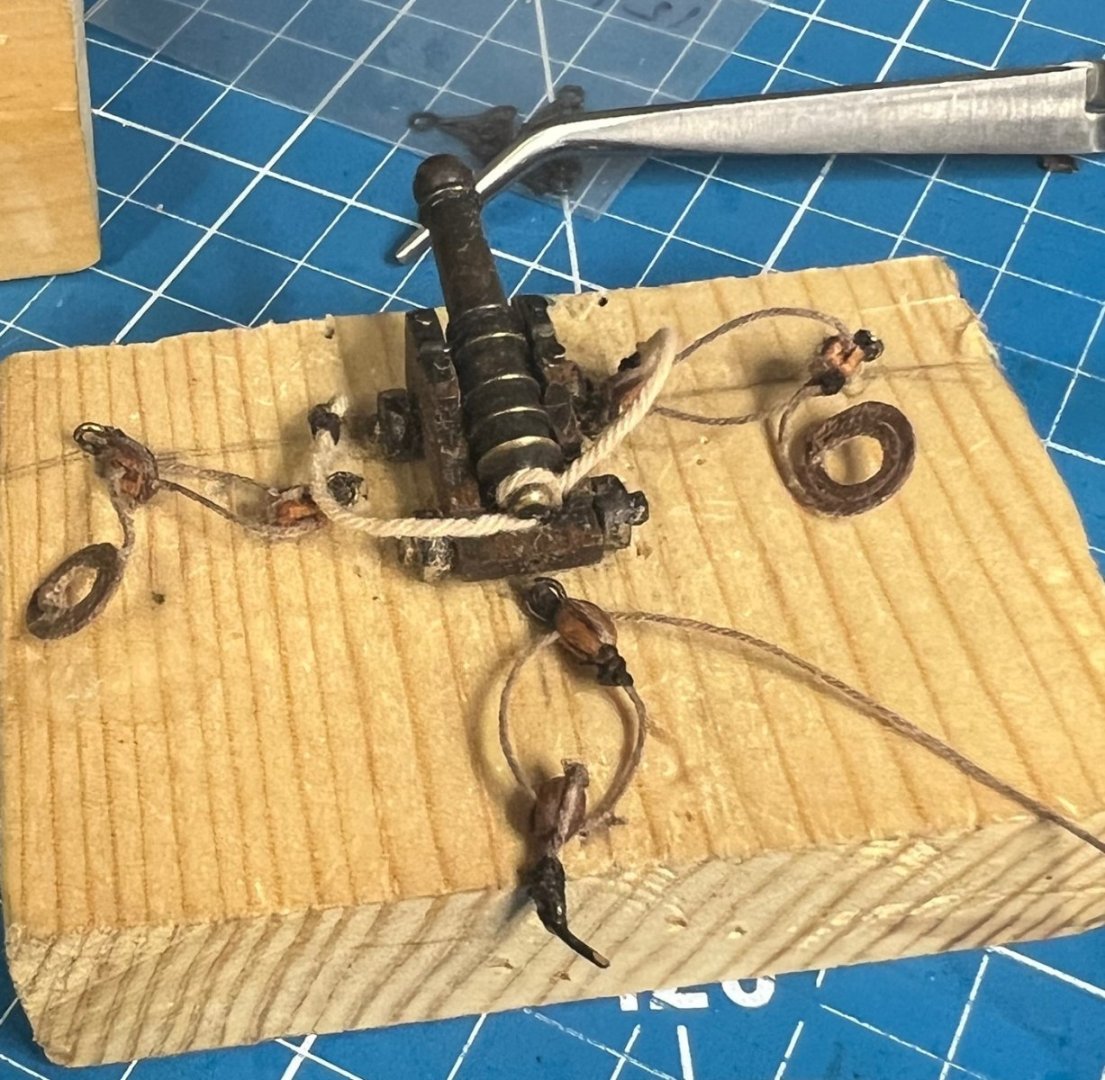
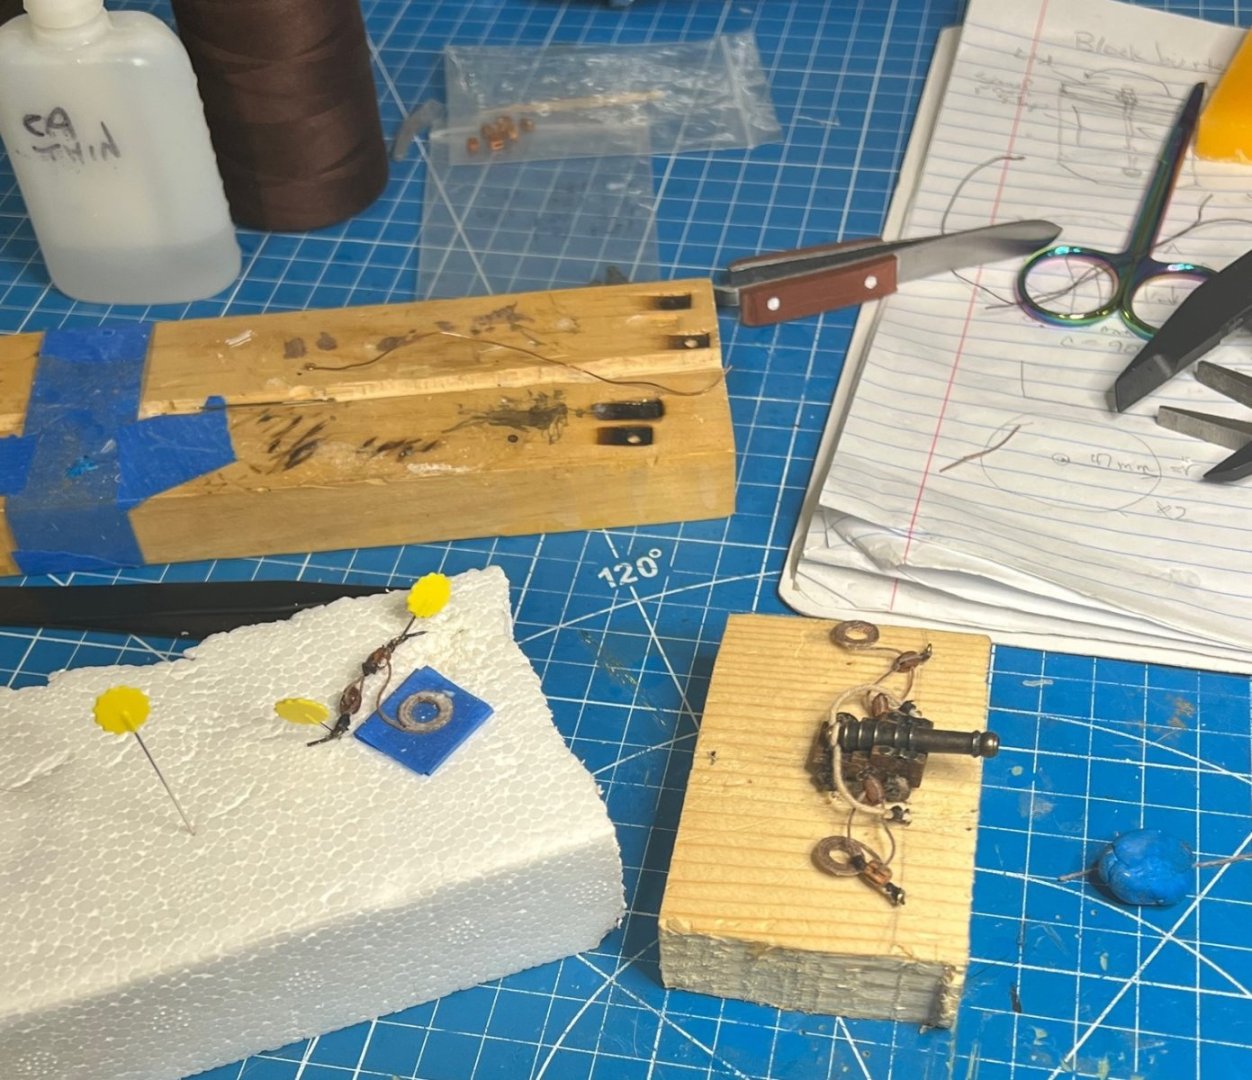
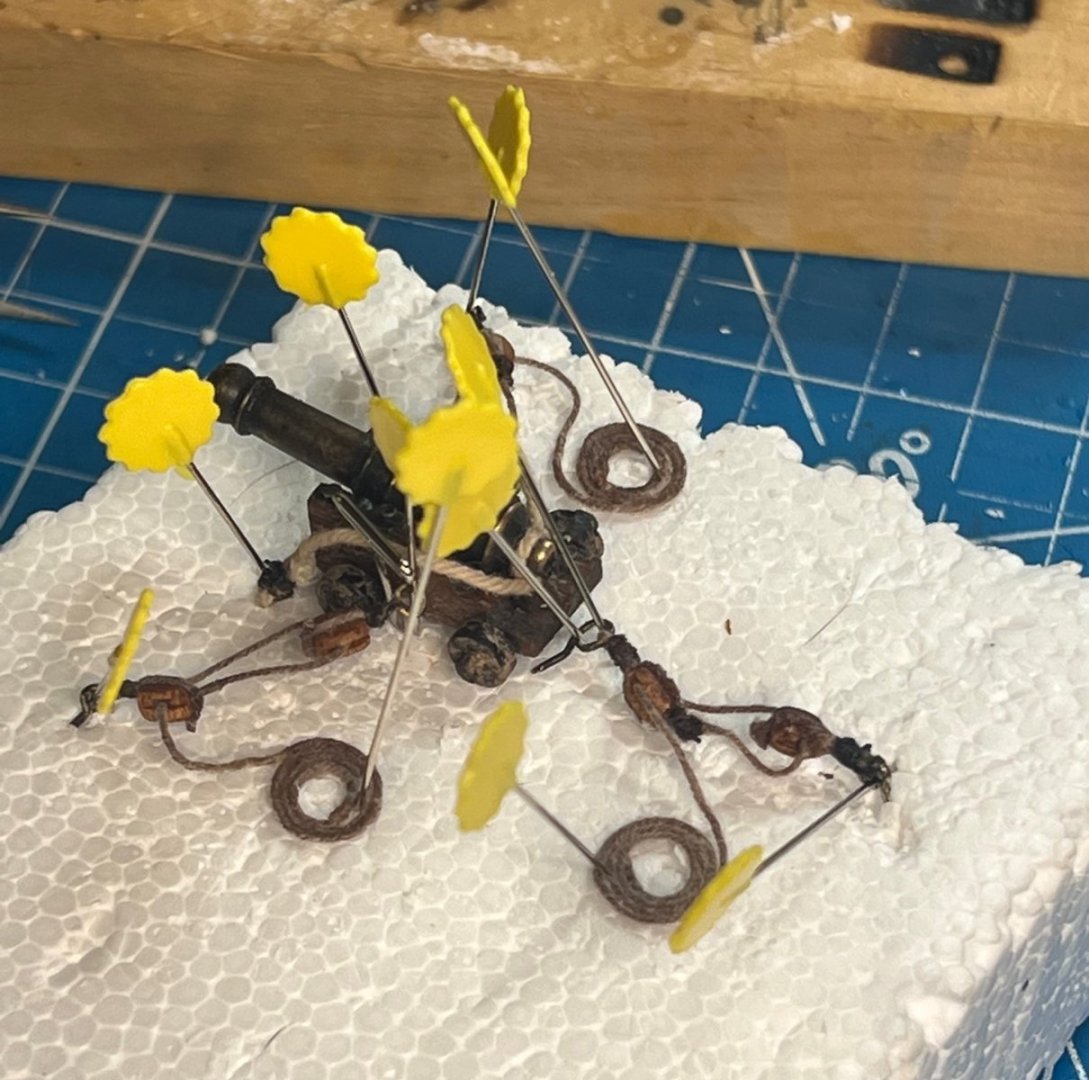
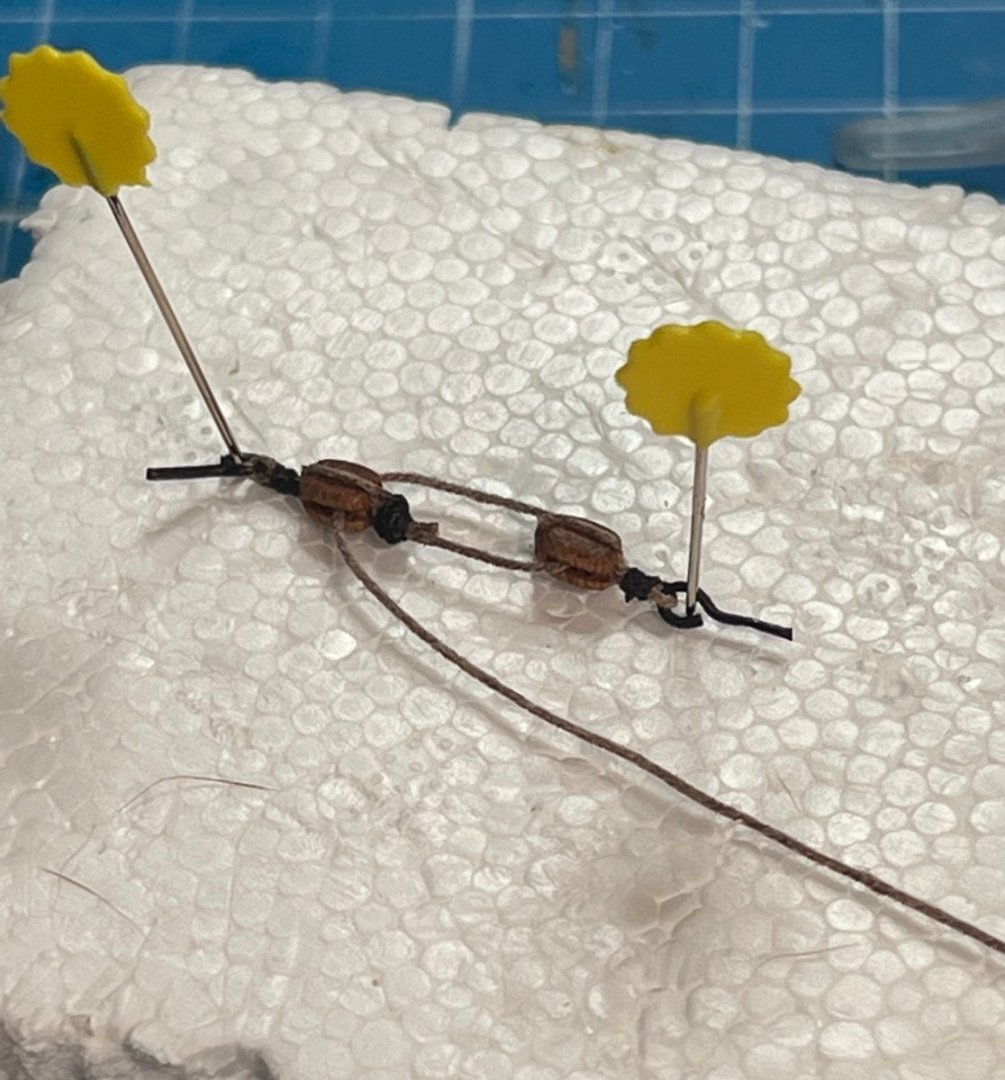
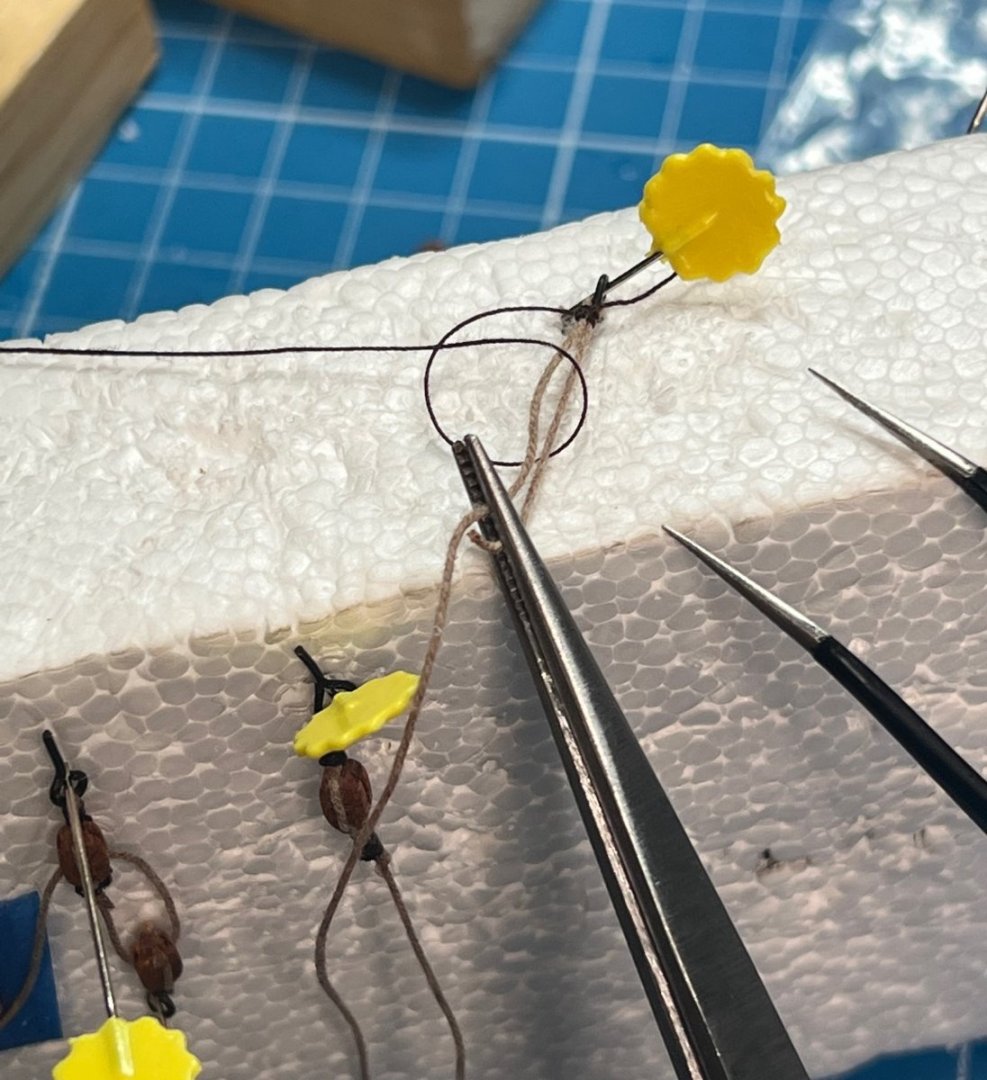
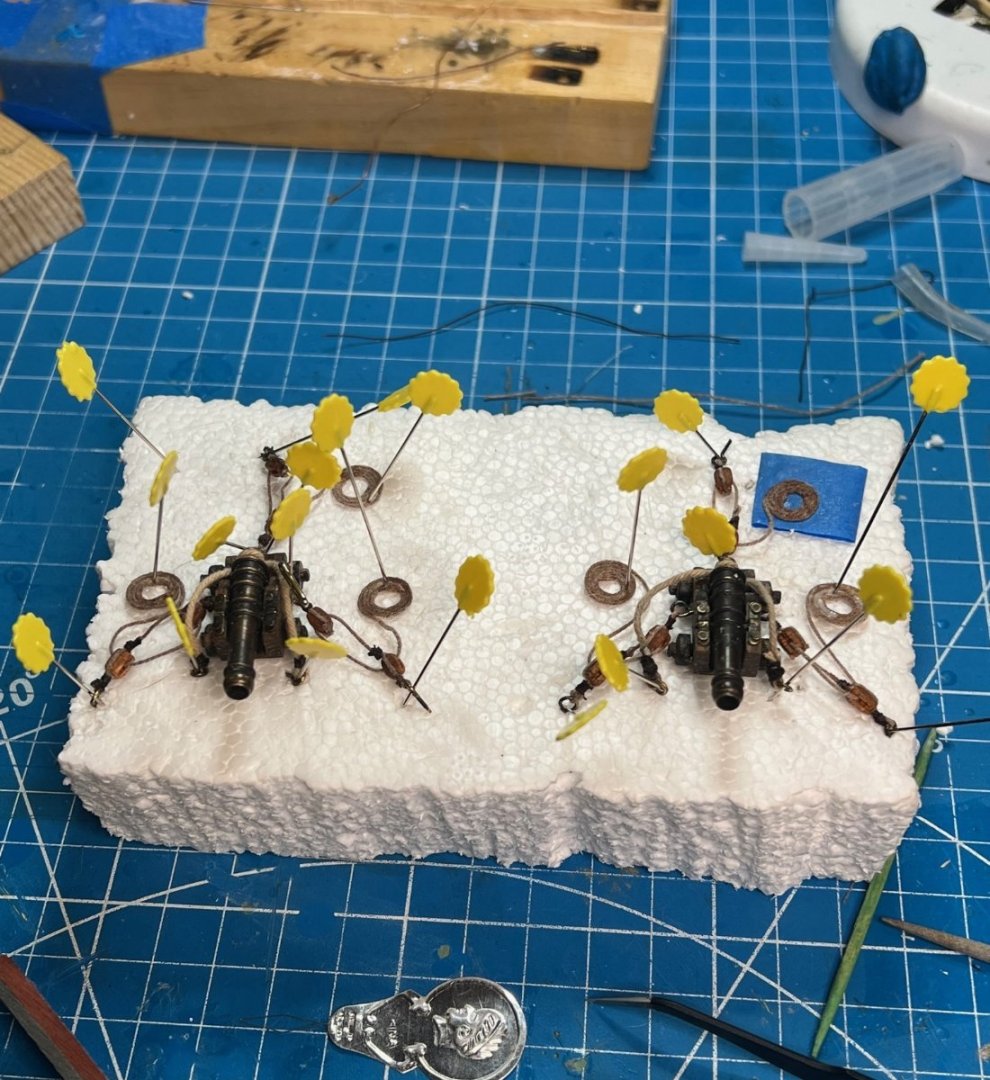
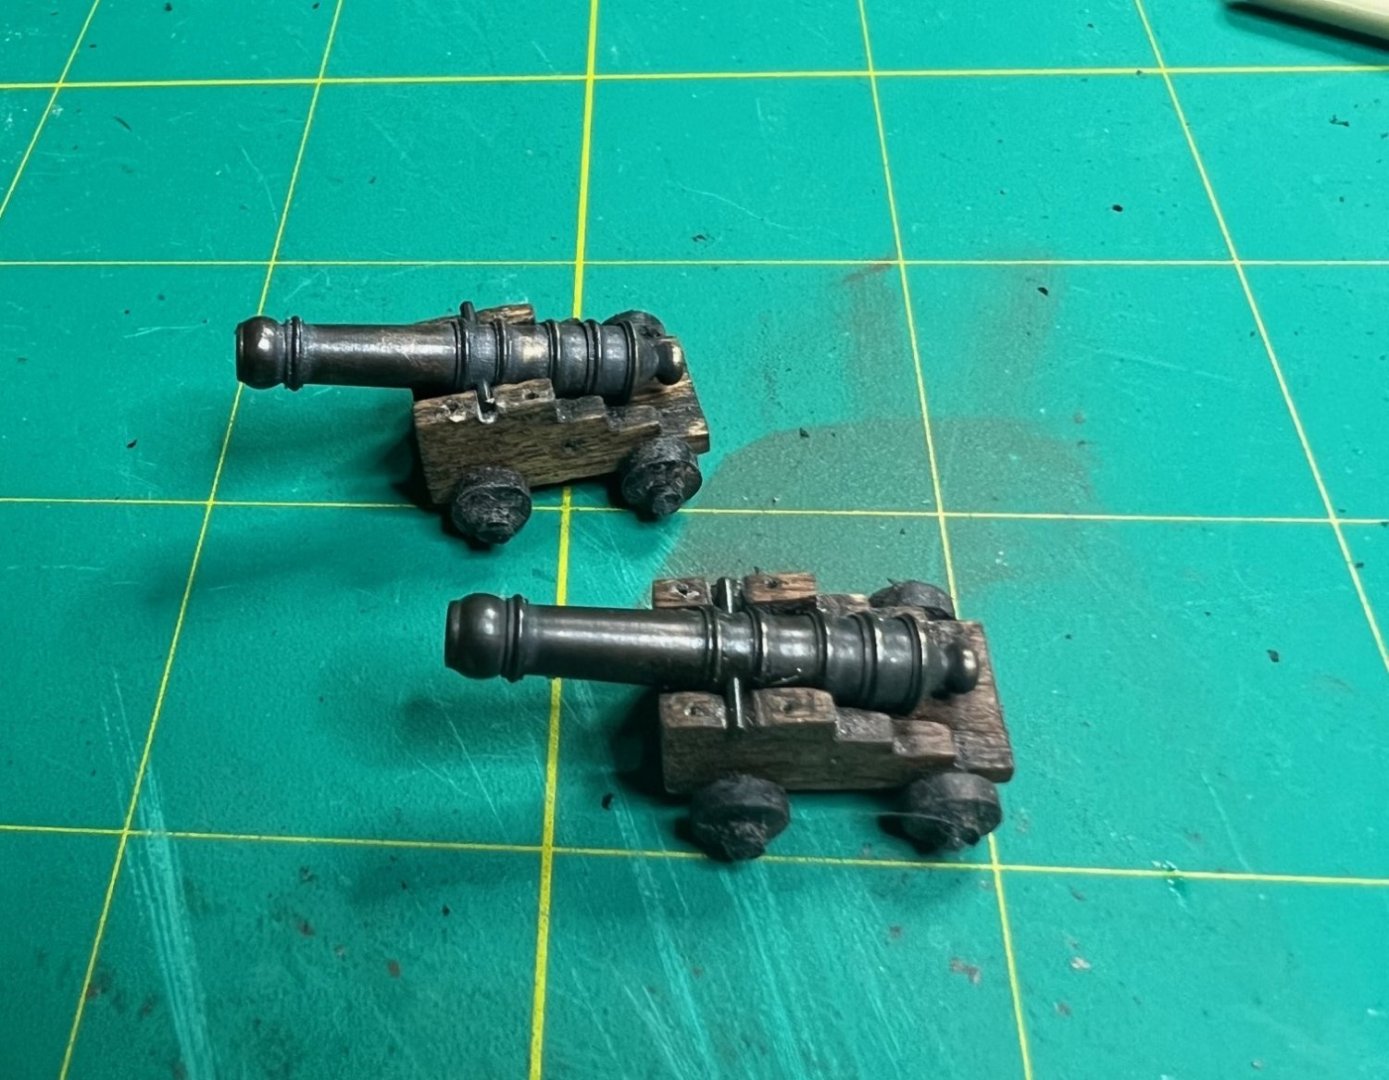
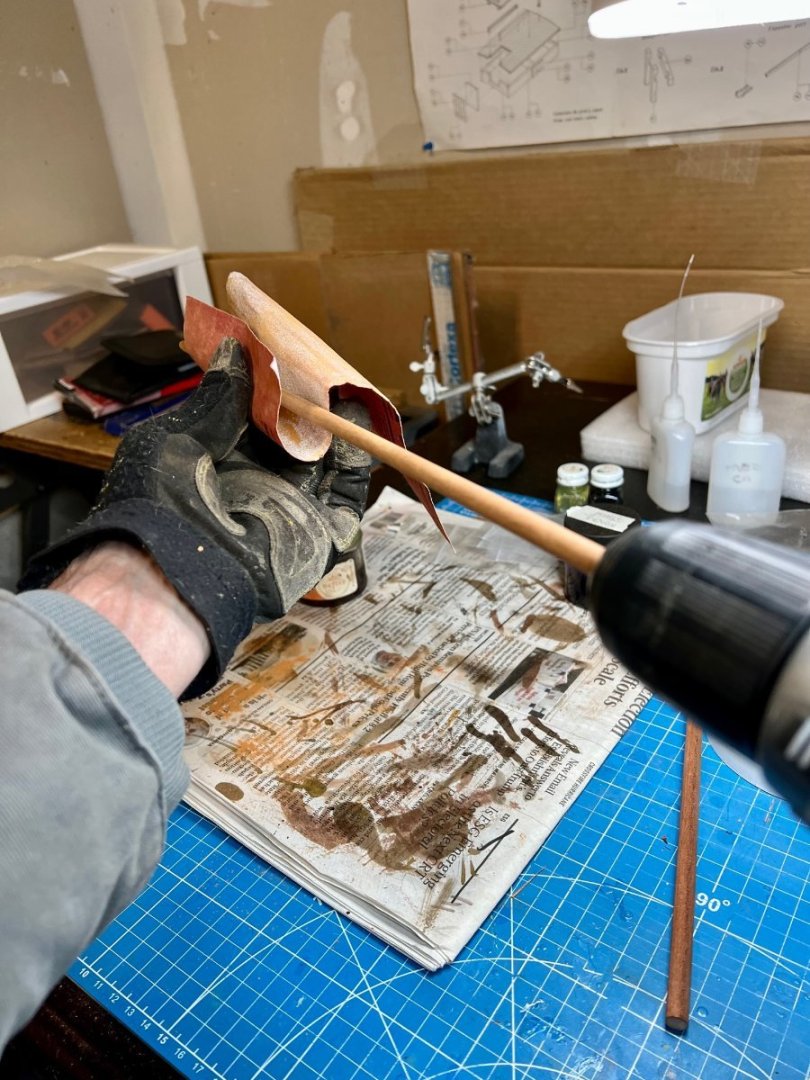
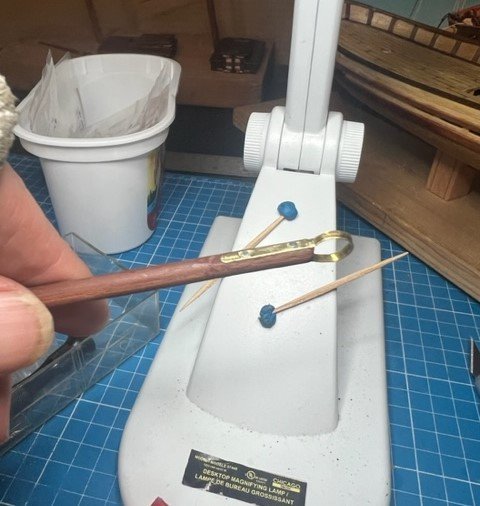
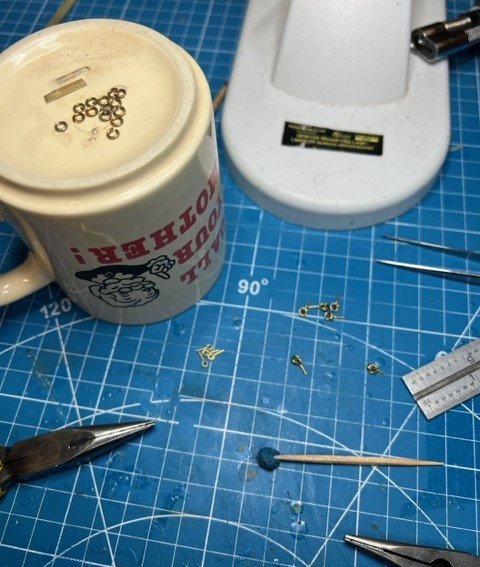
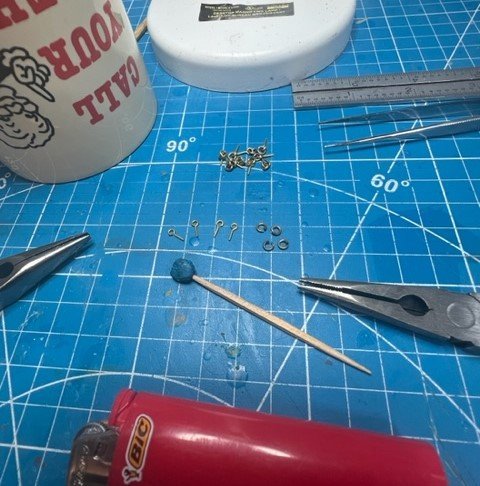
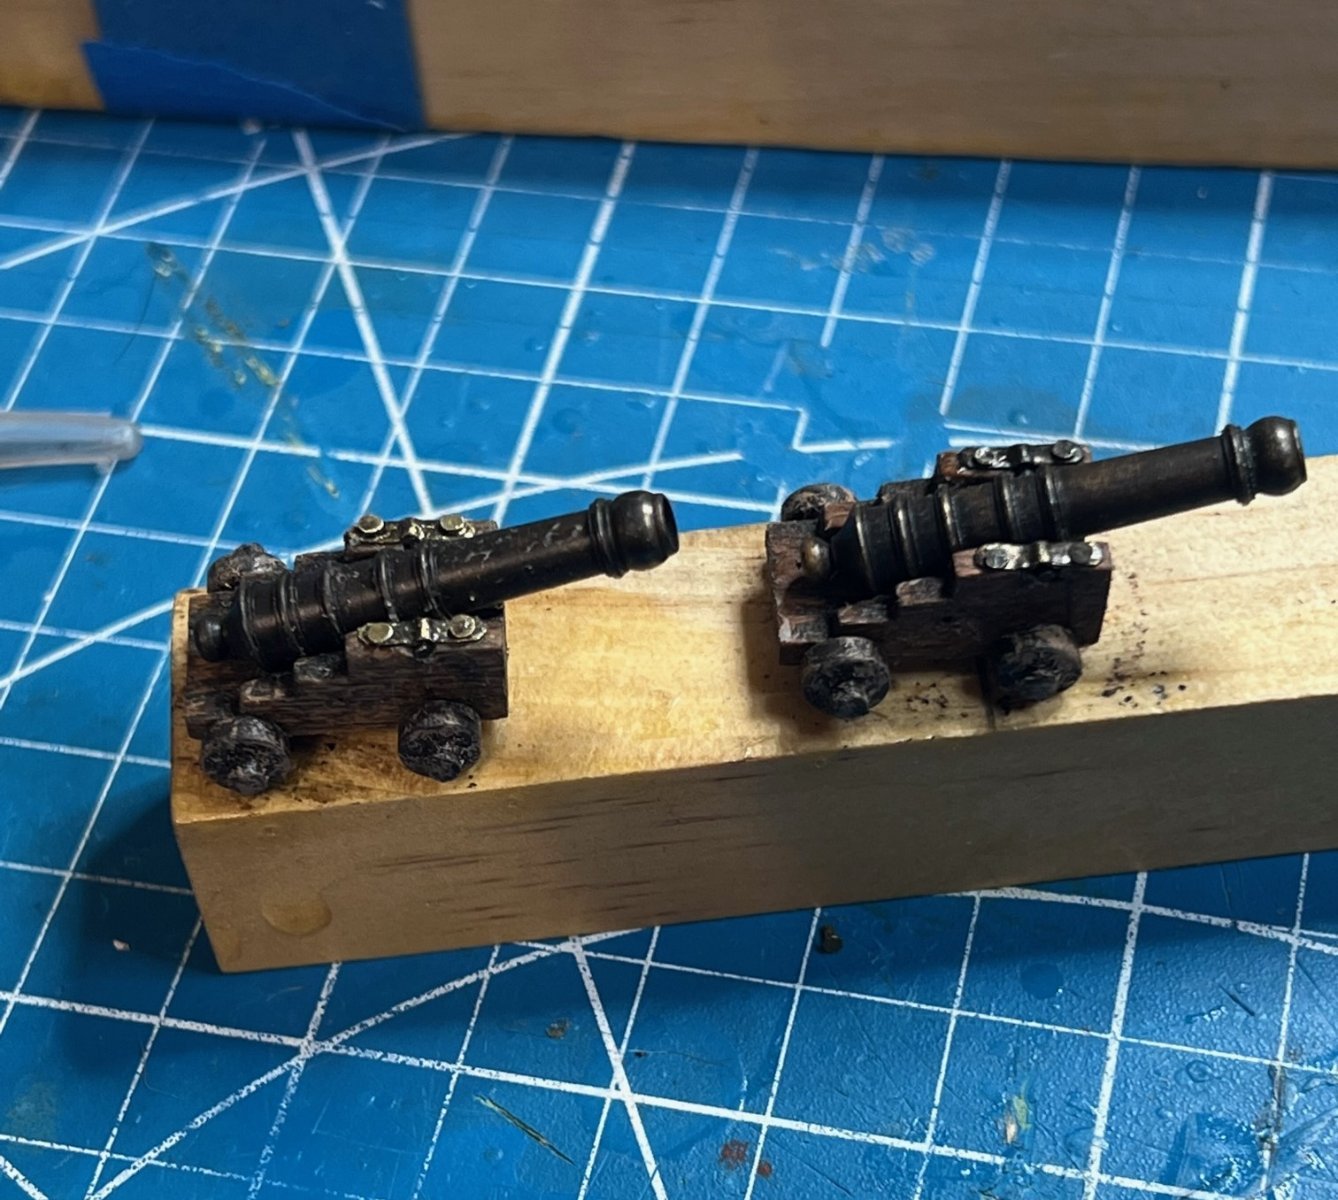
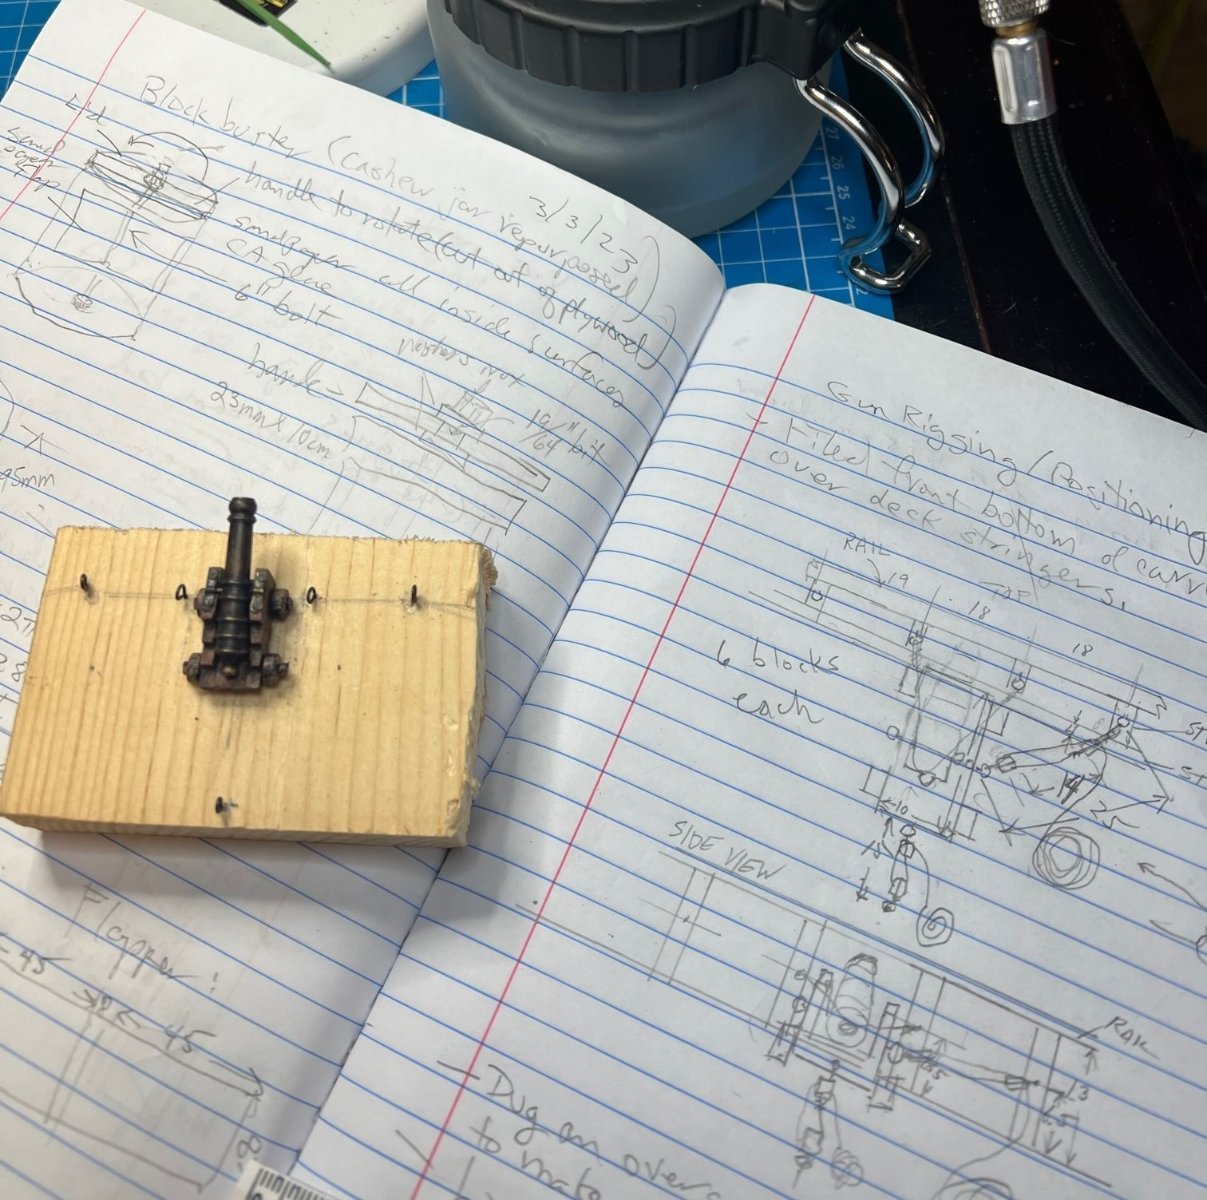
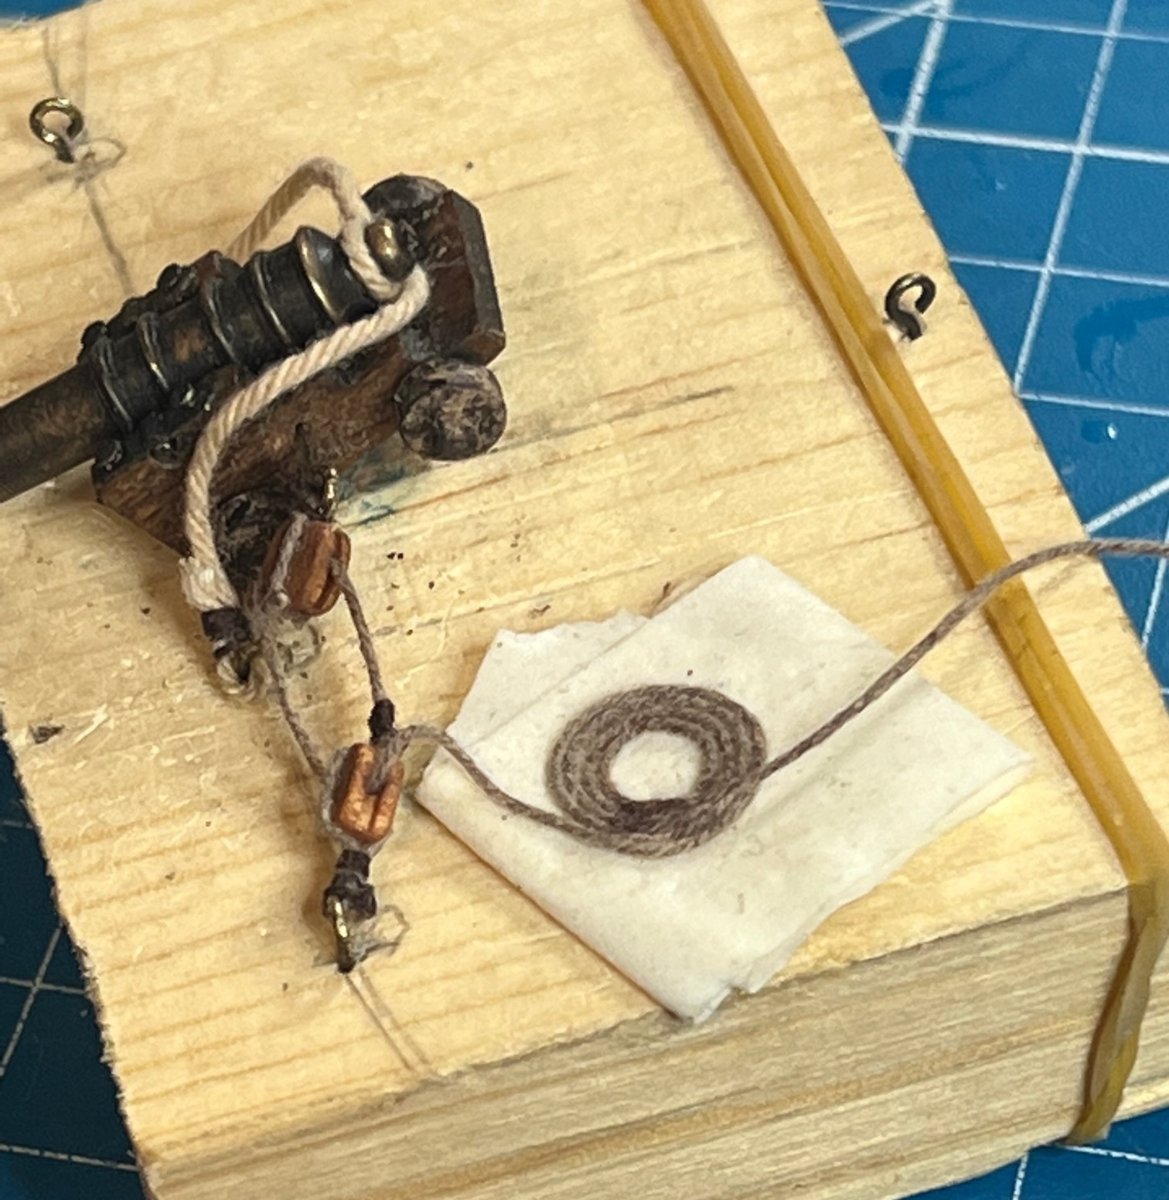
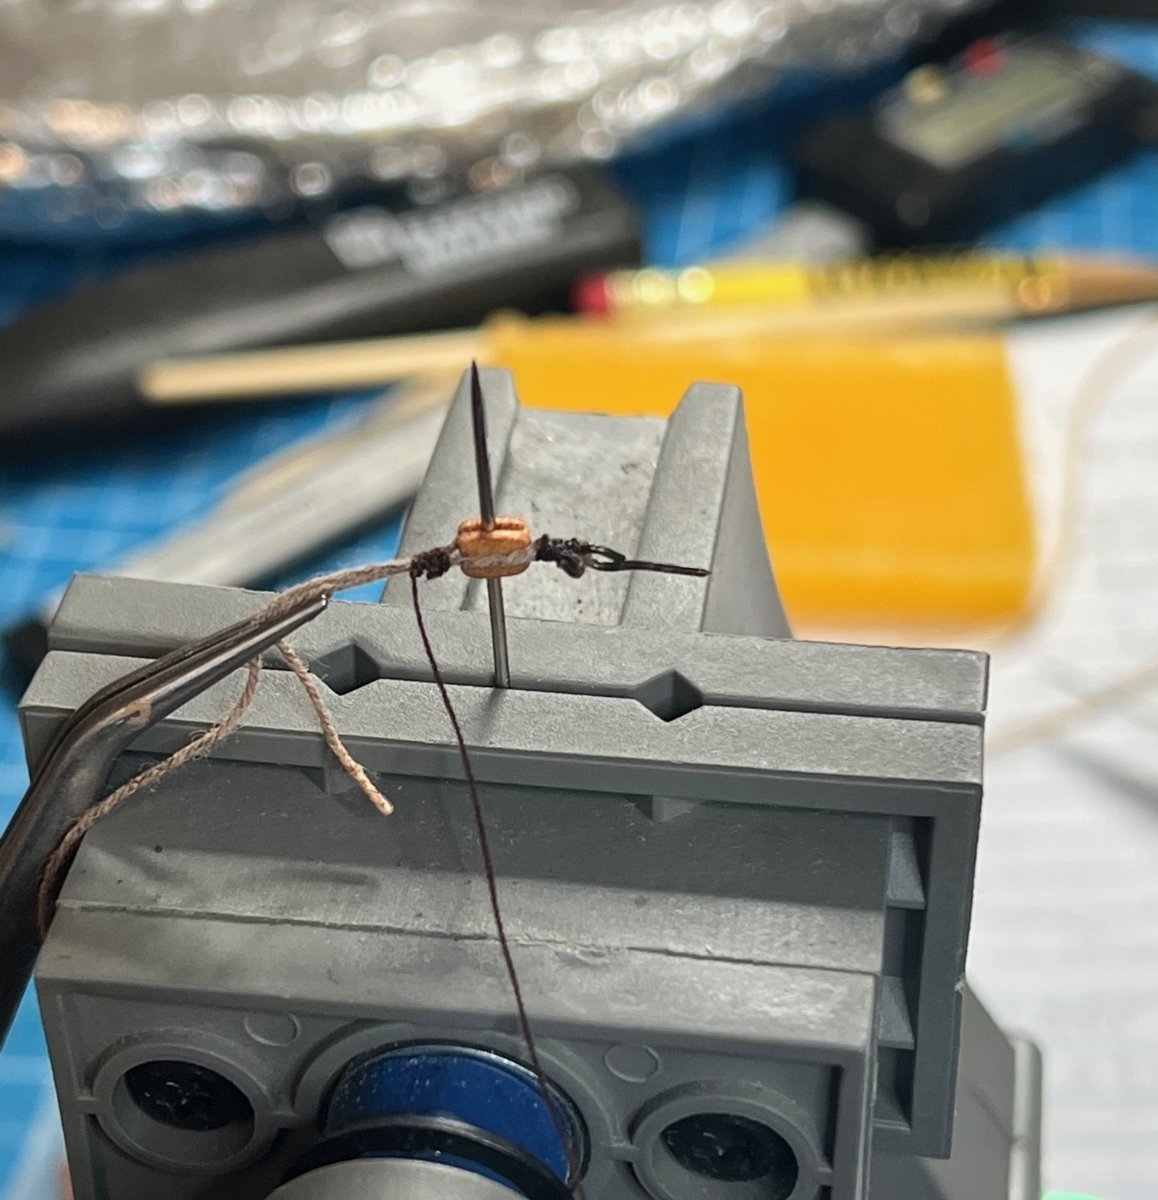
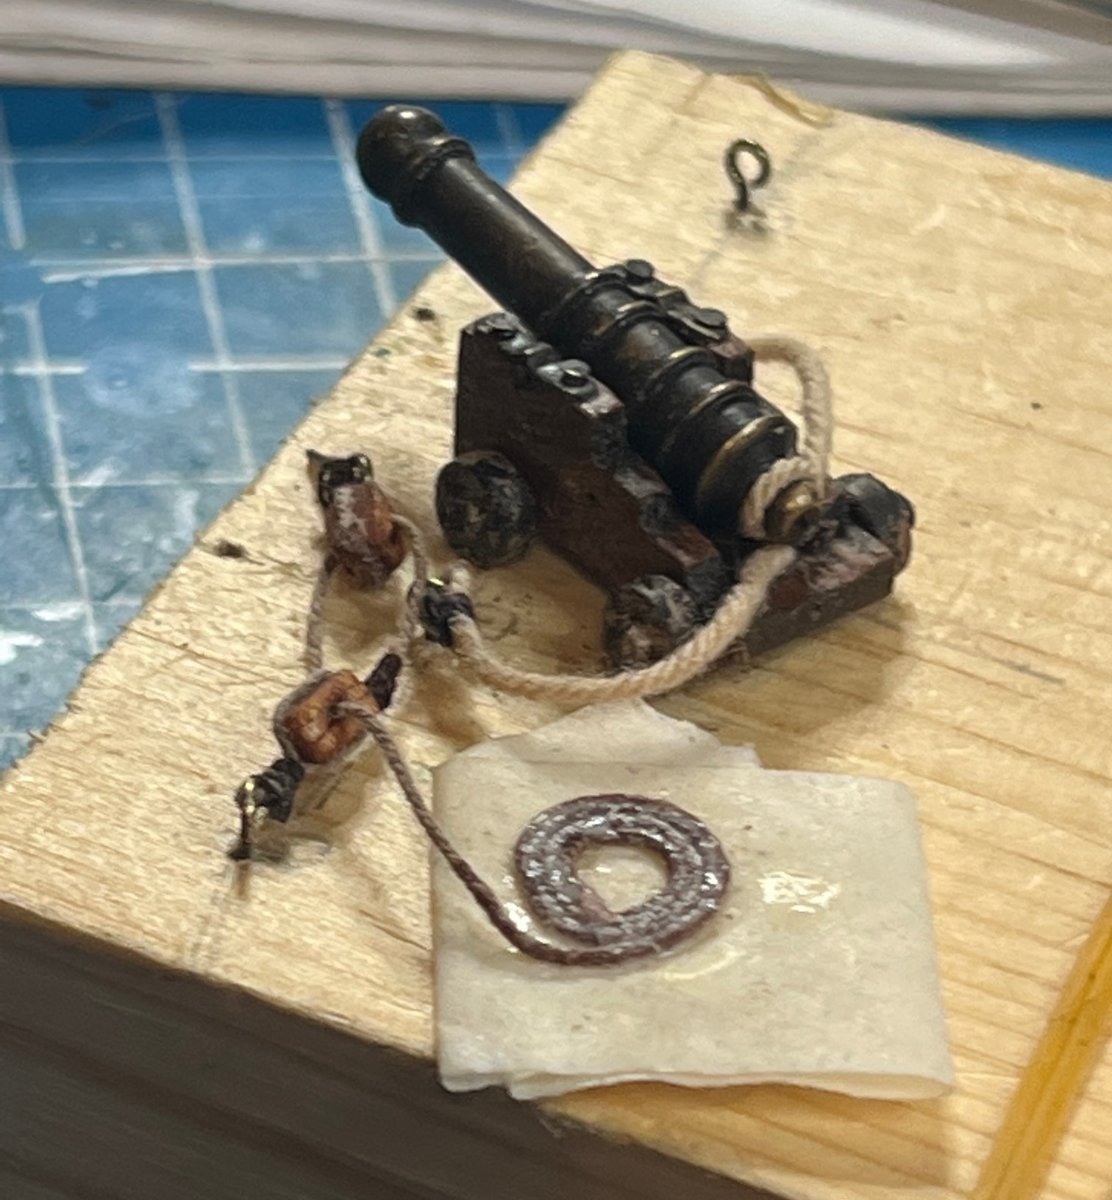
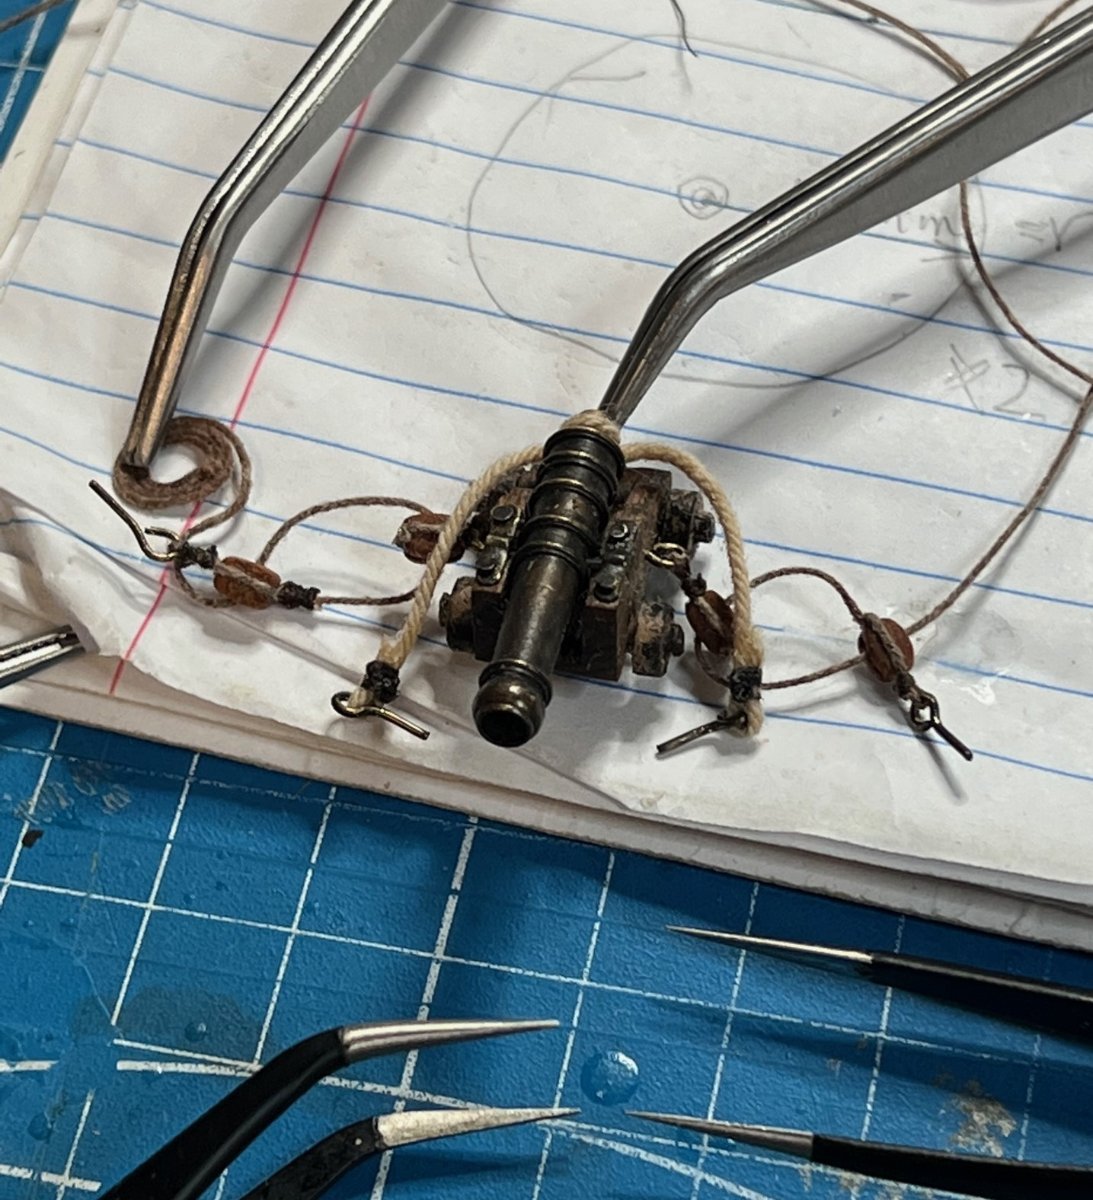
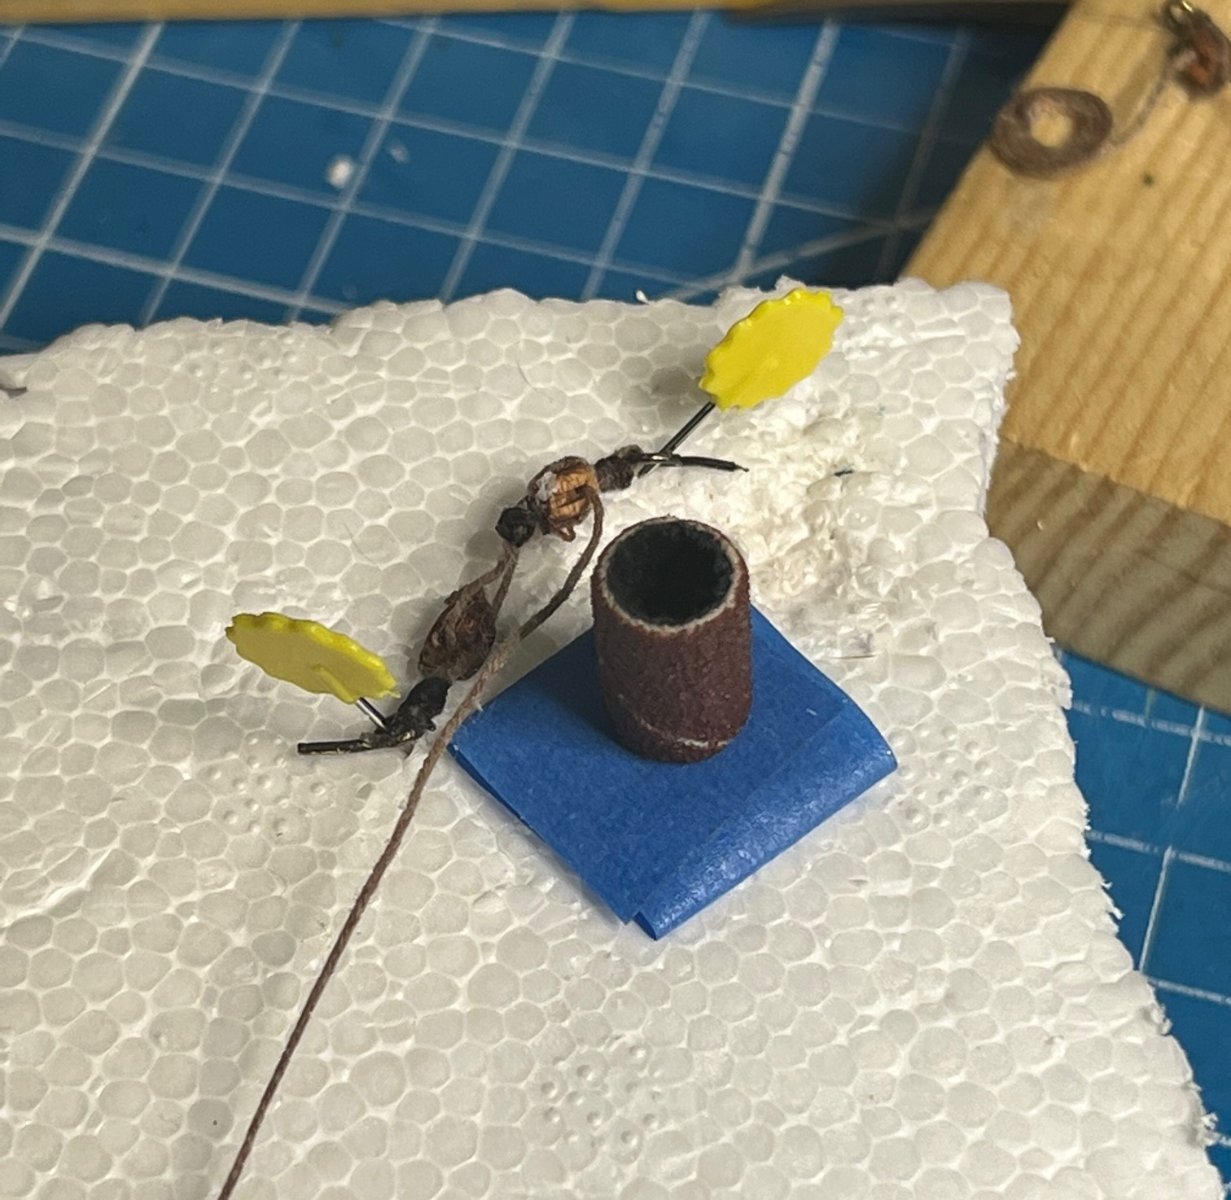
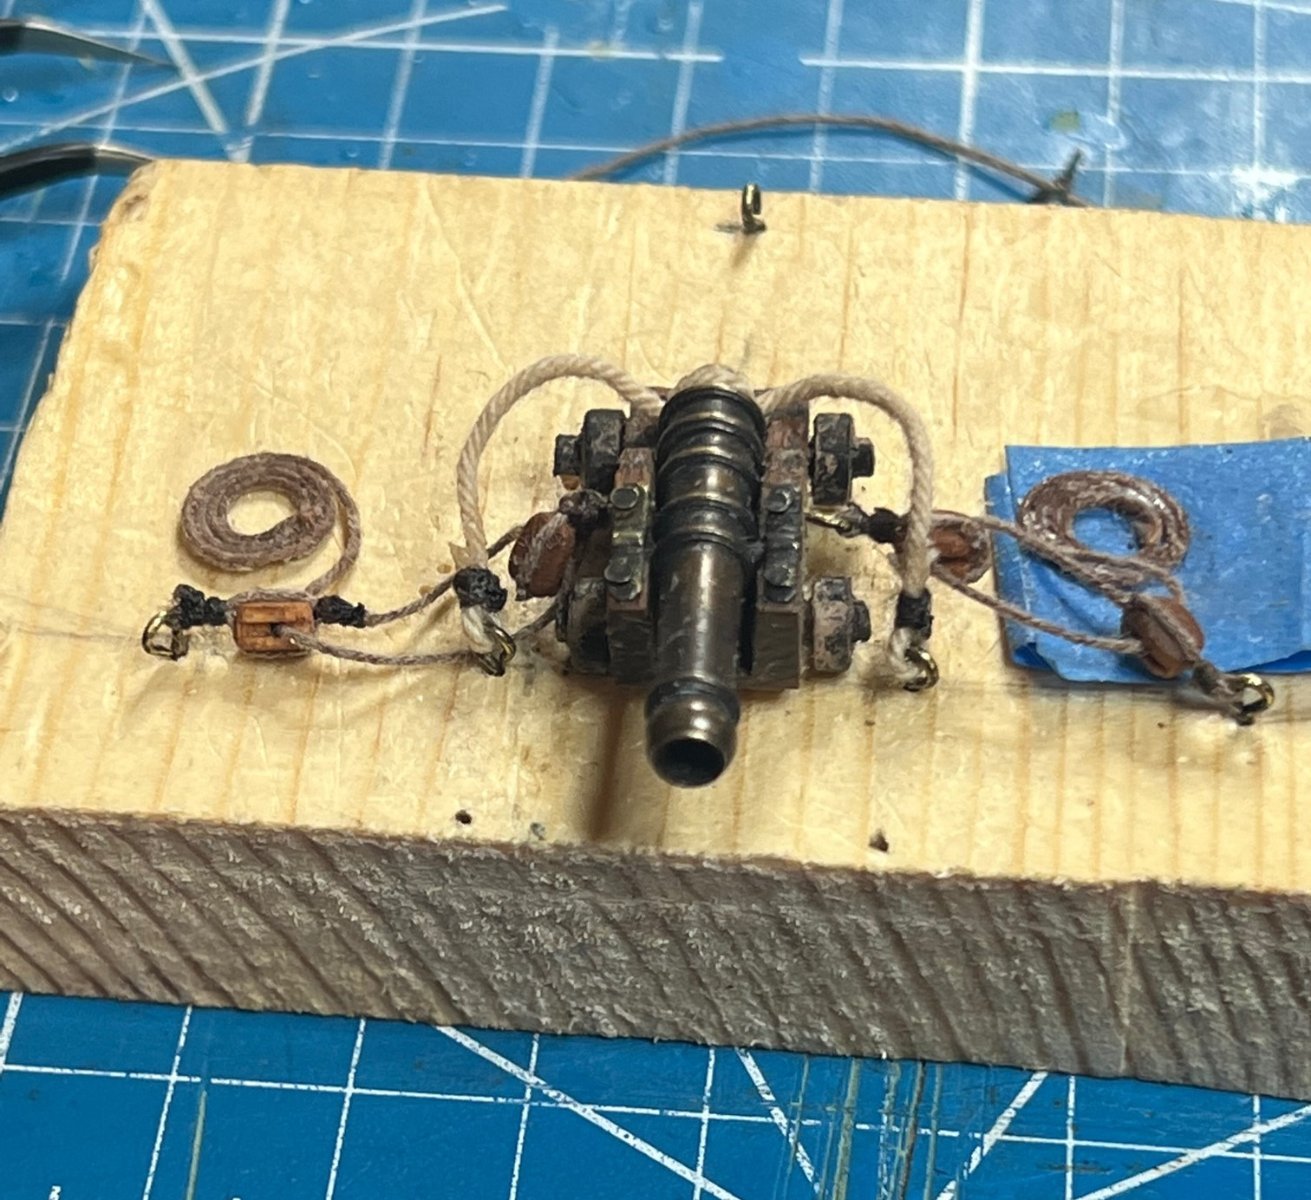
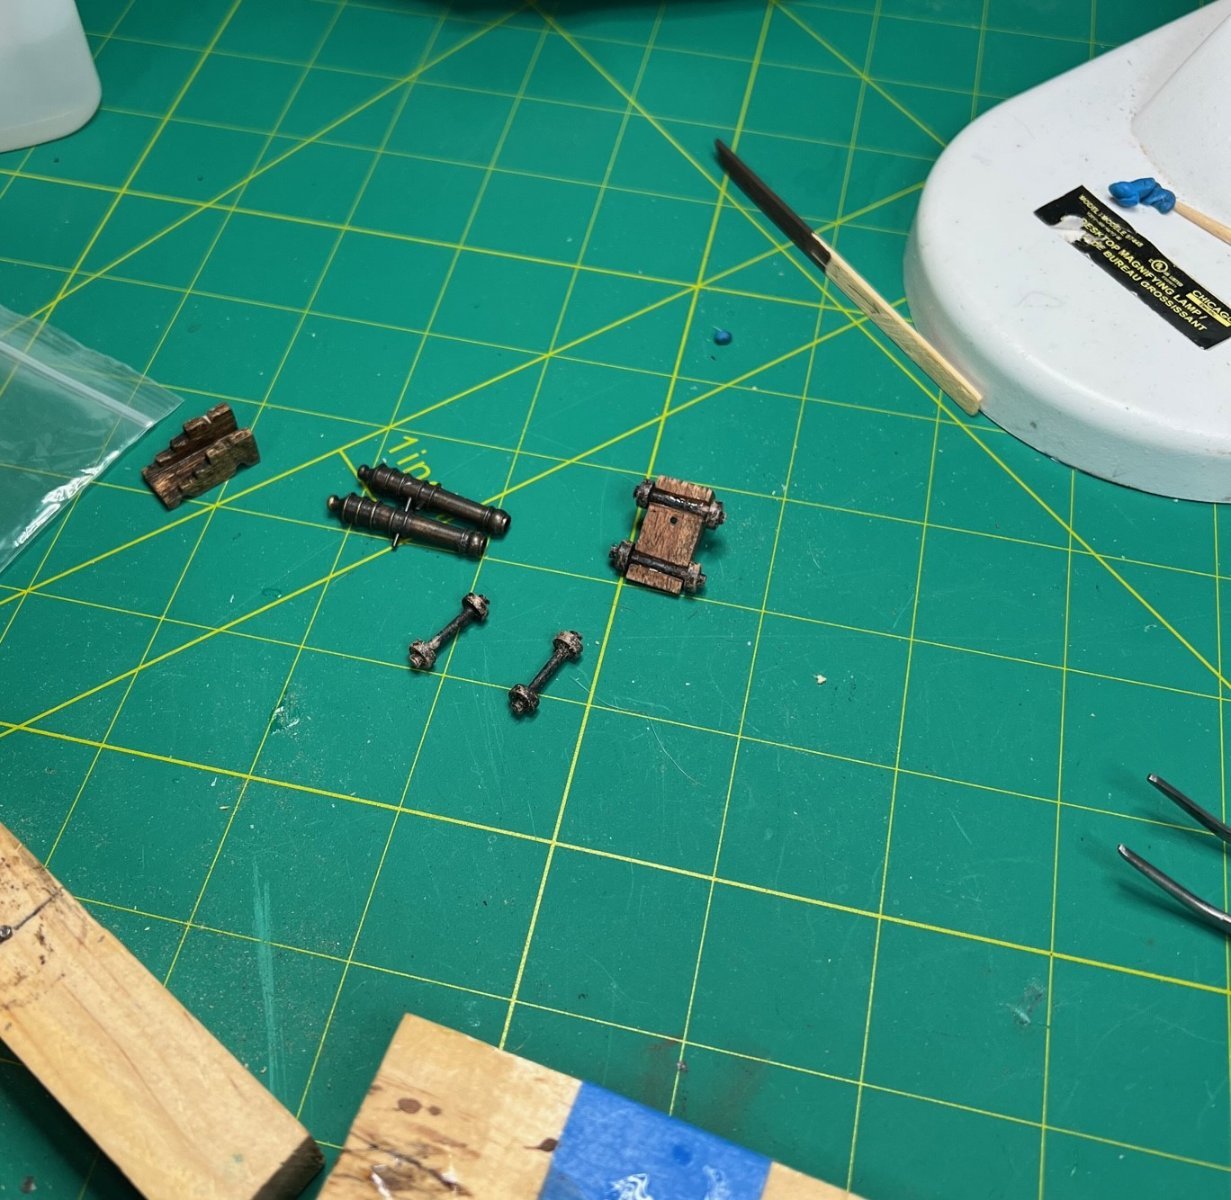
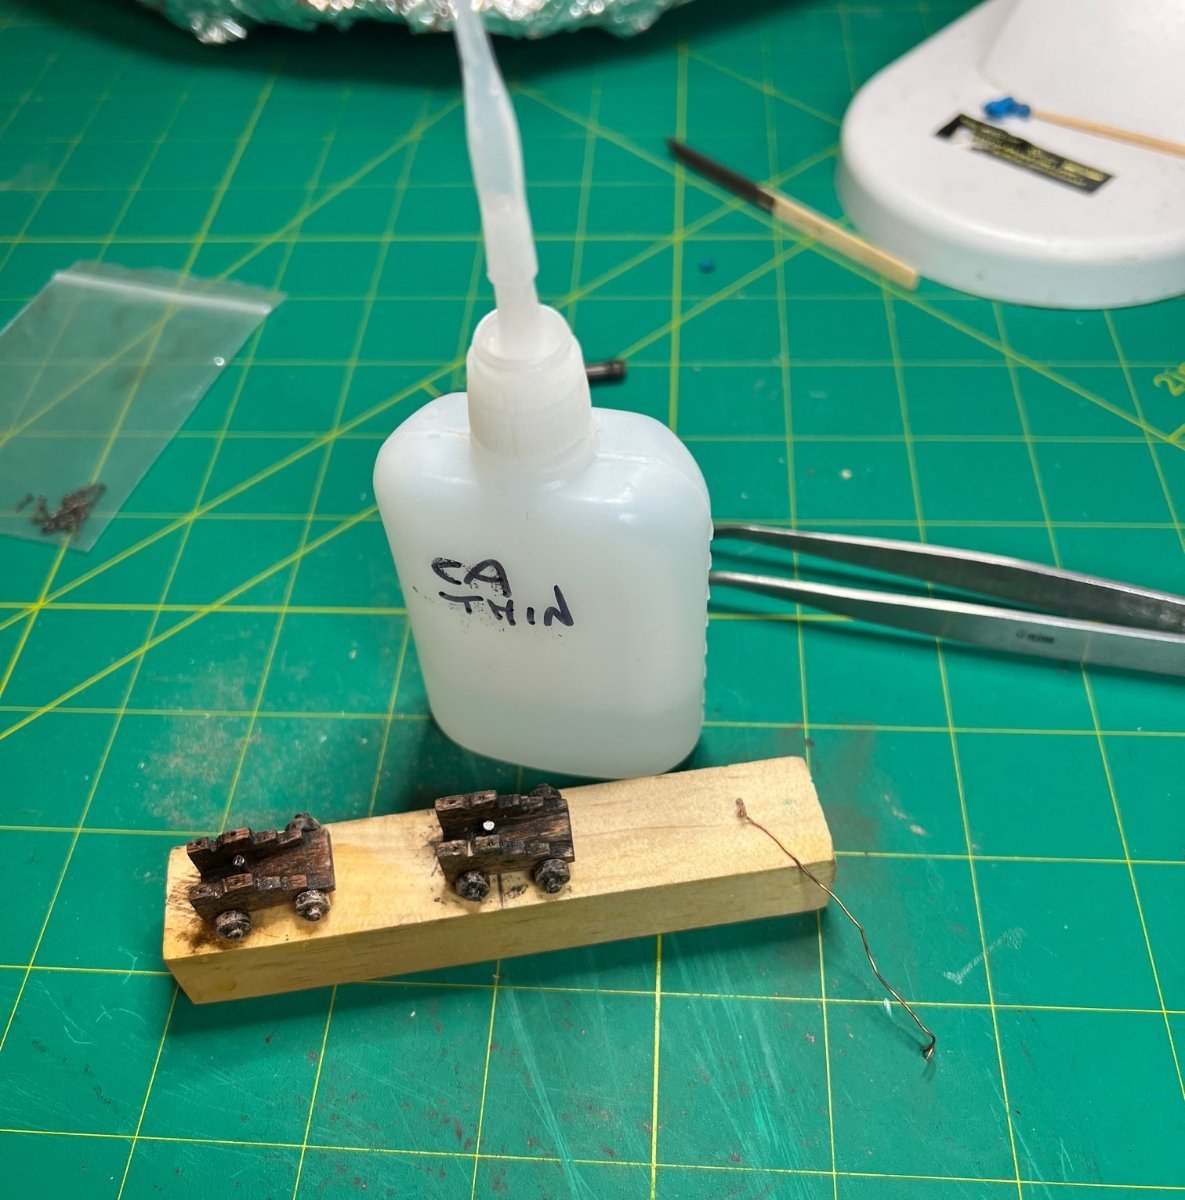
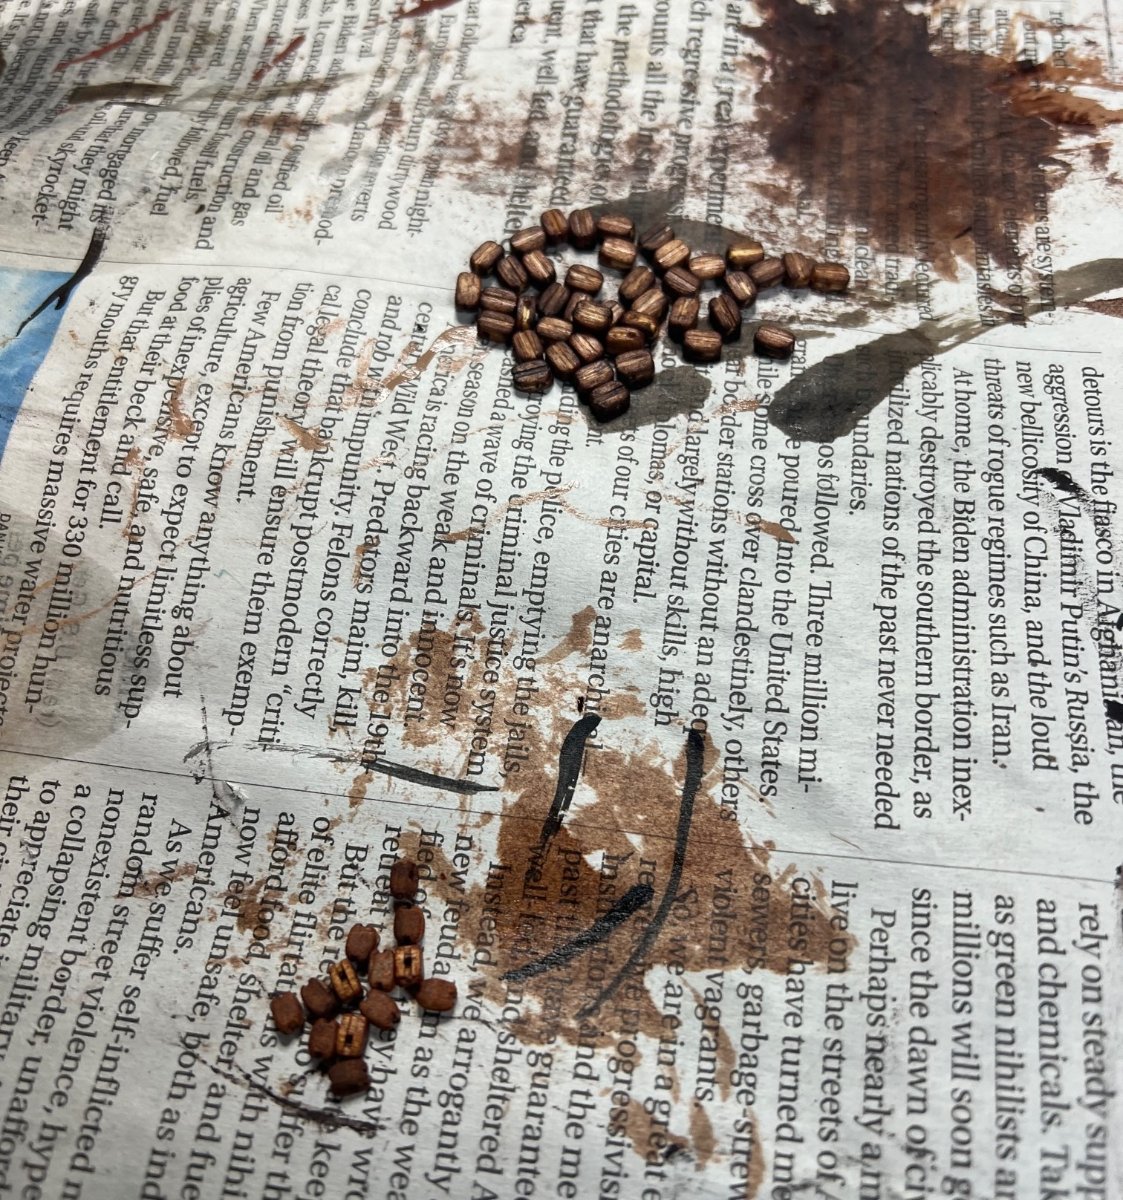
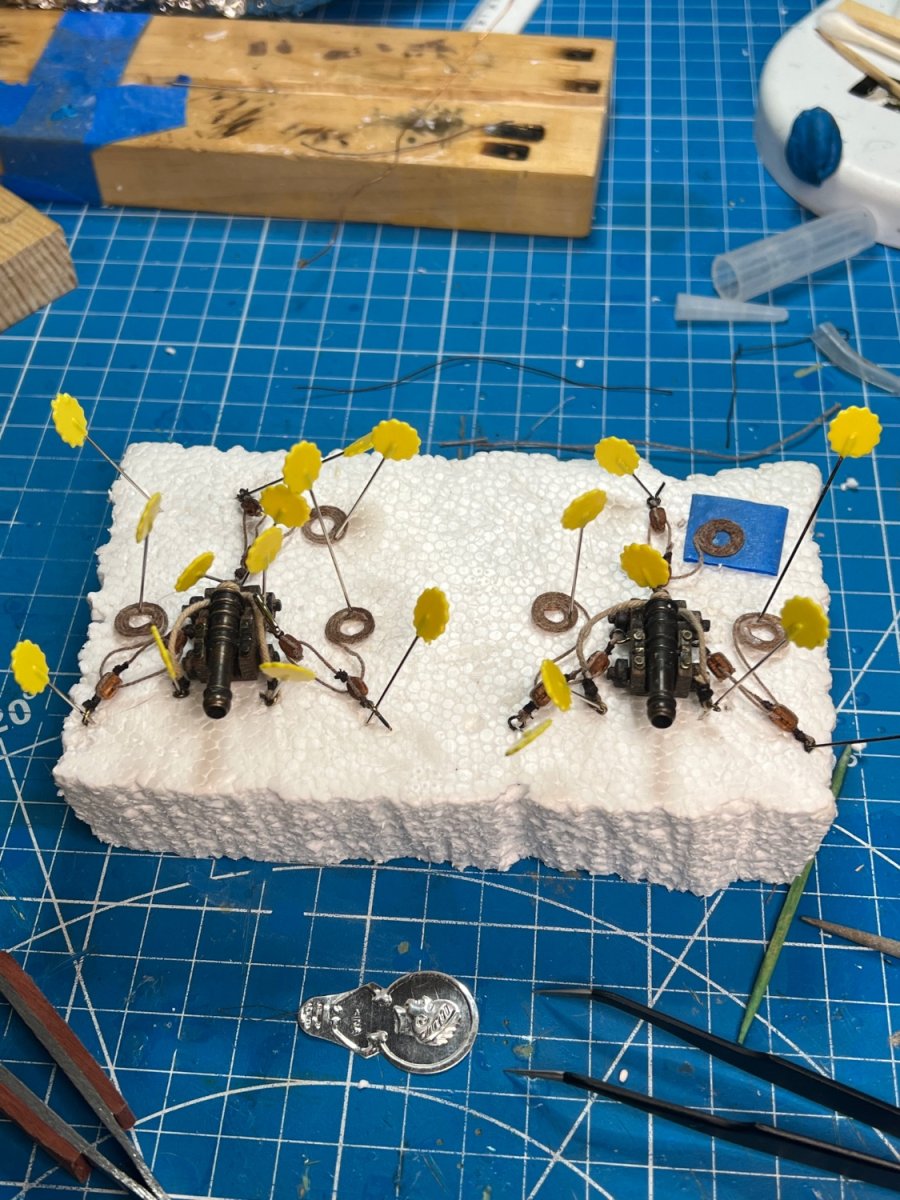
Having my blocks ready, it was time to complete and rig the guns. I’m just glad there was only two of them. I wasn’t anywhere near ready to install the guns, but would complete them and store them on a pinned up piece of Styrofoam with the pins holding all my tackle in place. I watched others create the coils of rope and gave that a try, not too bad. I dyed and used the line that came with the kit to rig the guns, saving my Ropes of Scale good stuff for the ship’s rigging. I made up wooded jigs to rig the guns on and transferred them to the foam when done. This was my first block stropping other than the two practice ones I did way back. I didn’t know I needed polyester thread to create the “Olha” knots for seizing where you make a loop and then wrap the thread around the tip of your finger a few times and back through the loop and place around the line with tweezers and tighten. So these were just wrapped, tedious. Fiddly, finicky work but satisfying once done.


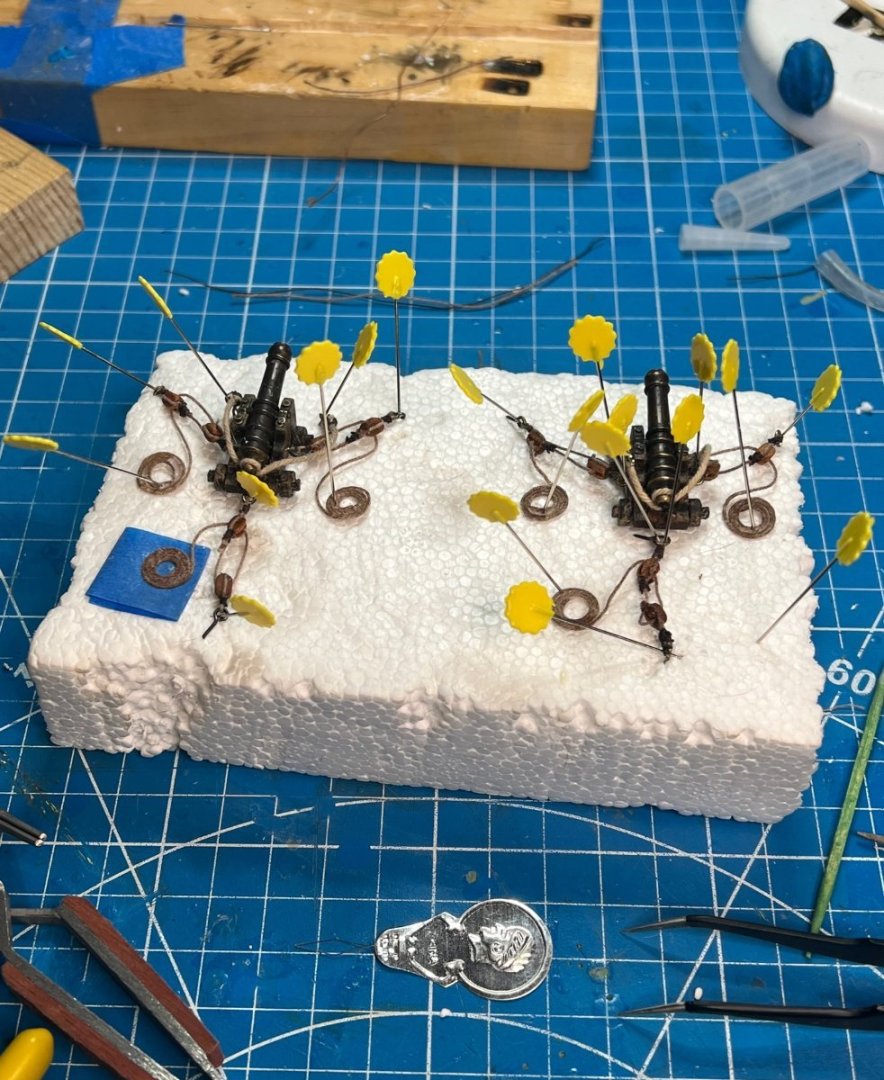
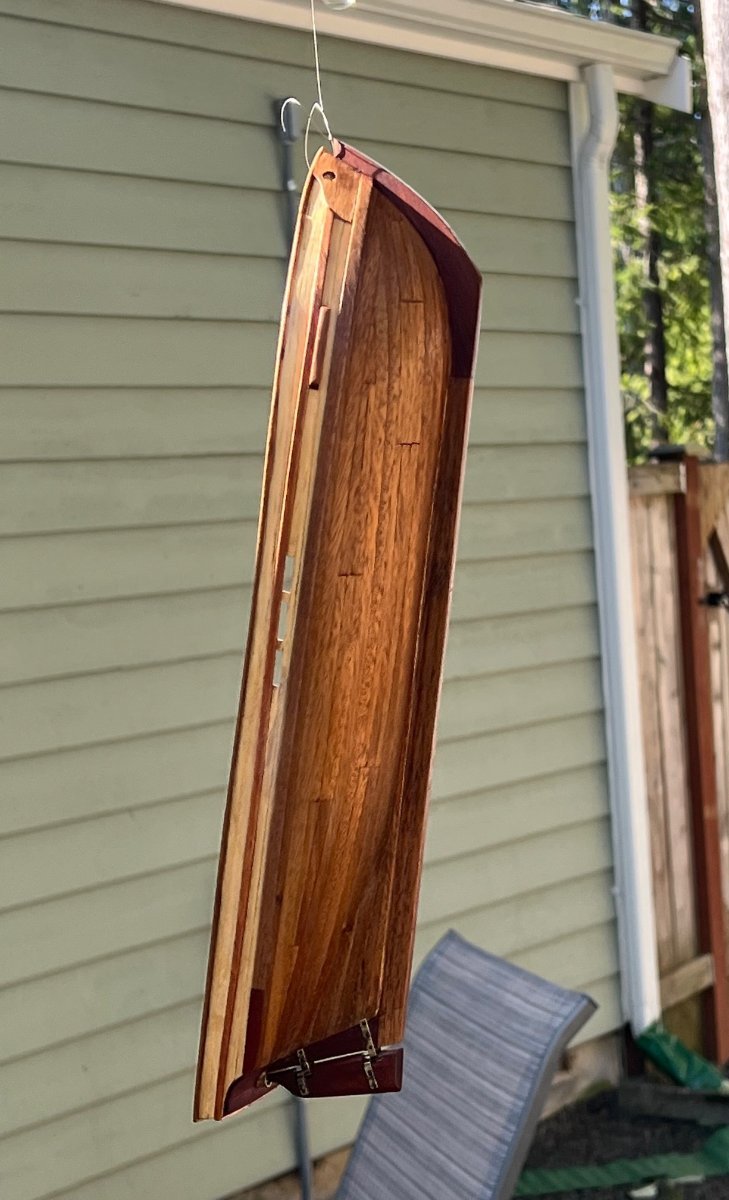
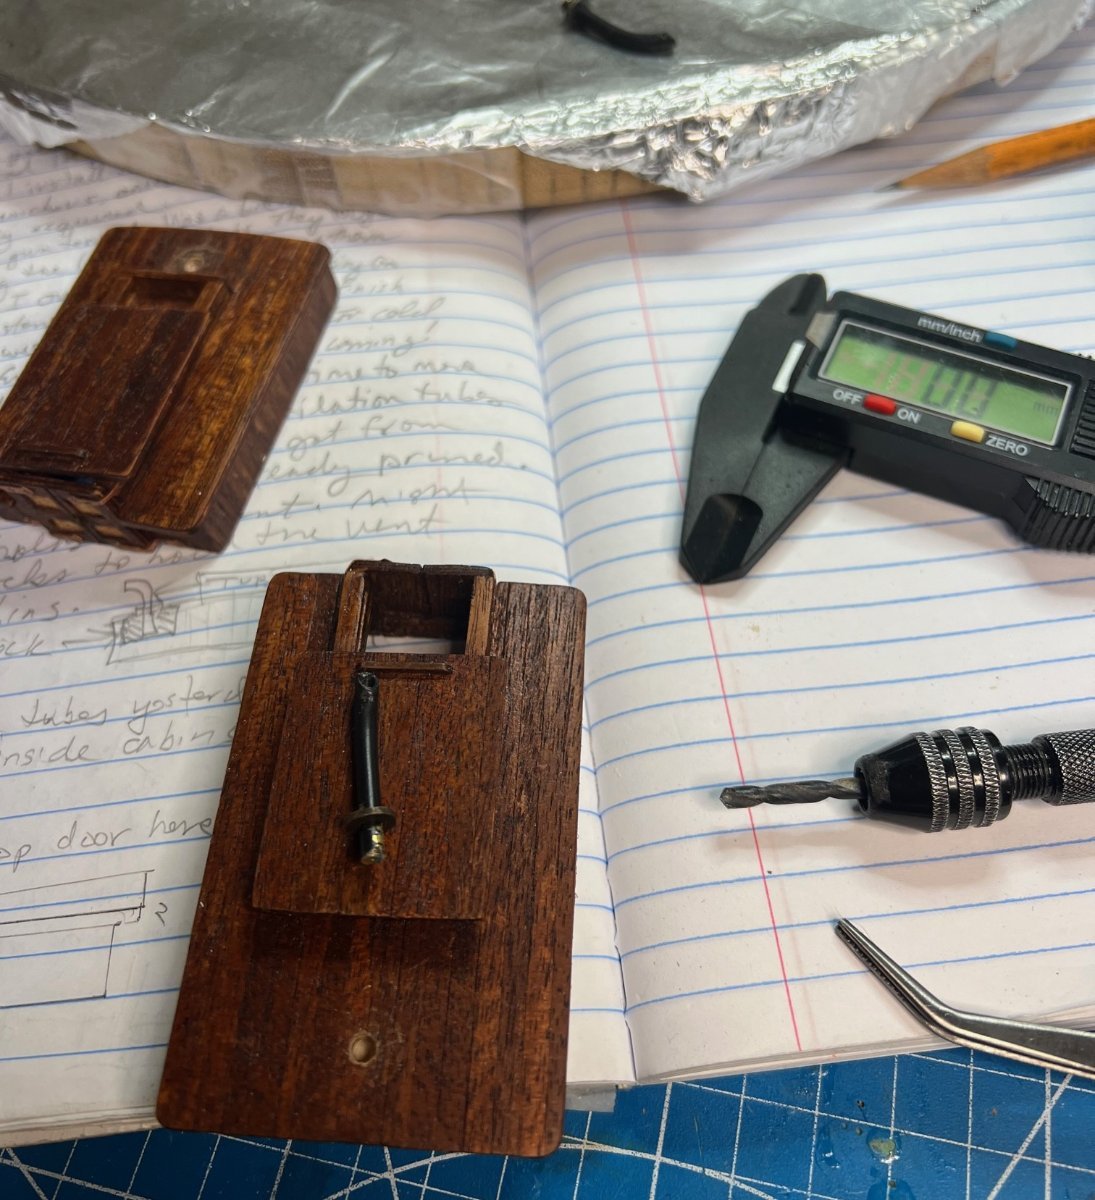
Now with a short stent of warmer weather, it was time to varnish the hull and mast with satin varnish. This was an outside job, so I made hangers from old guitar strings I still had. The varnish really made the walnut pop on the hull and the deck was looking good too. While the varnish was drying, I mounted the scratch made ventilation tubes to the tops of the cabins. I didn’t glue them in yet since they might get in the way of rigging something later. The cabins won’t get installed for quite a while yet. For support, I glued a little block of wood inside the cabins where the vent would be glued since one layer of the thin plywood was not going to hold it.


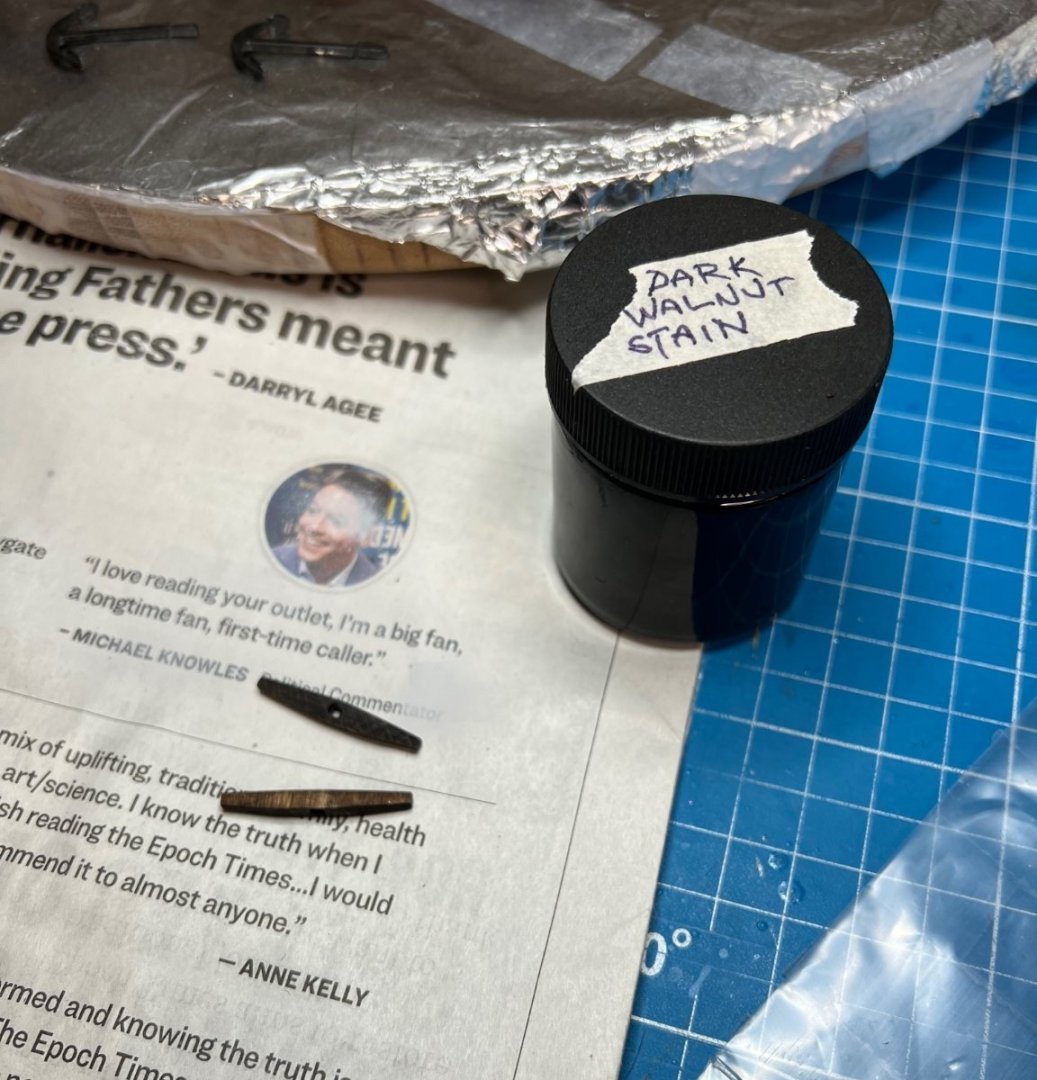
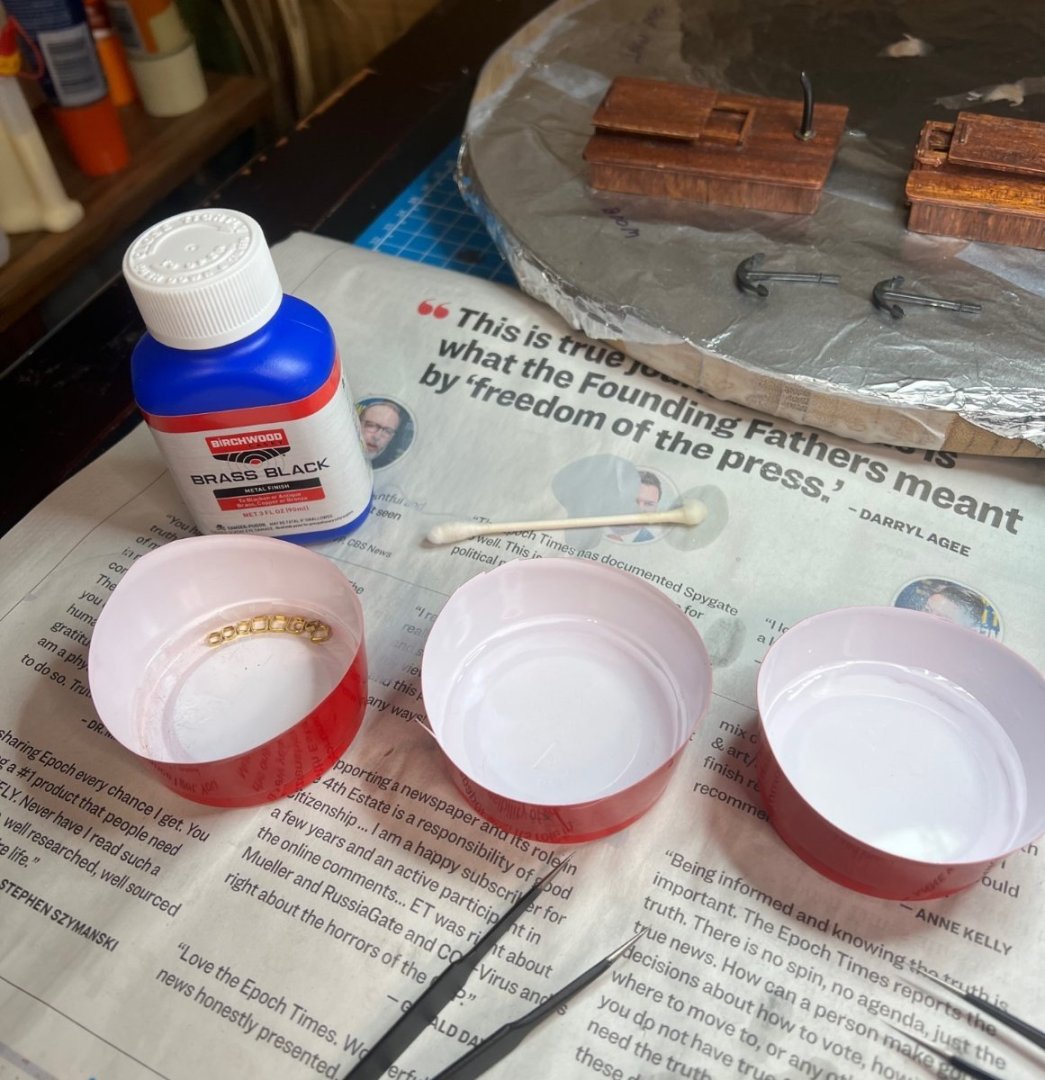
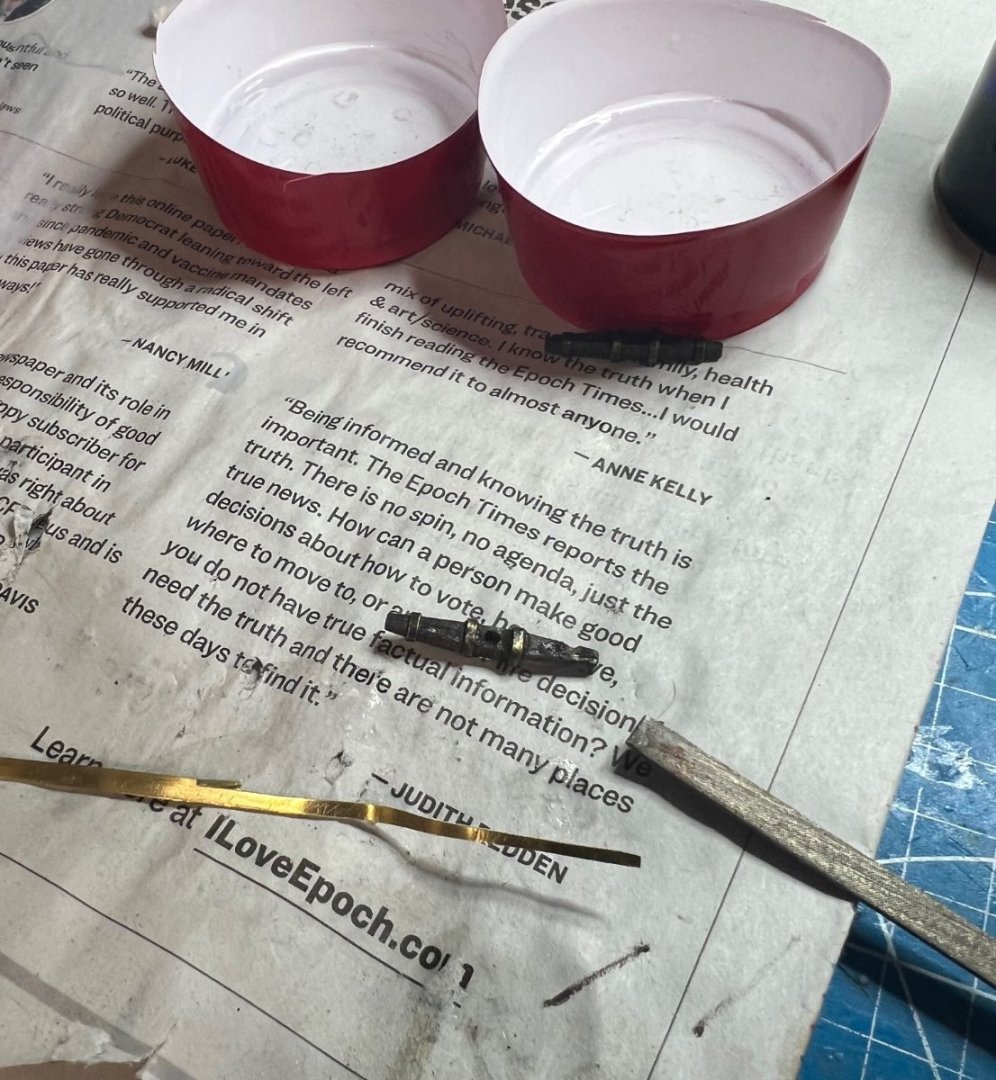
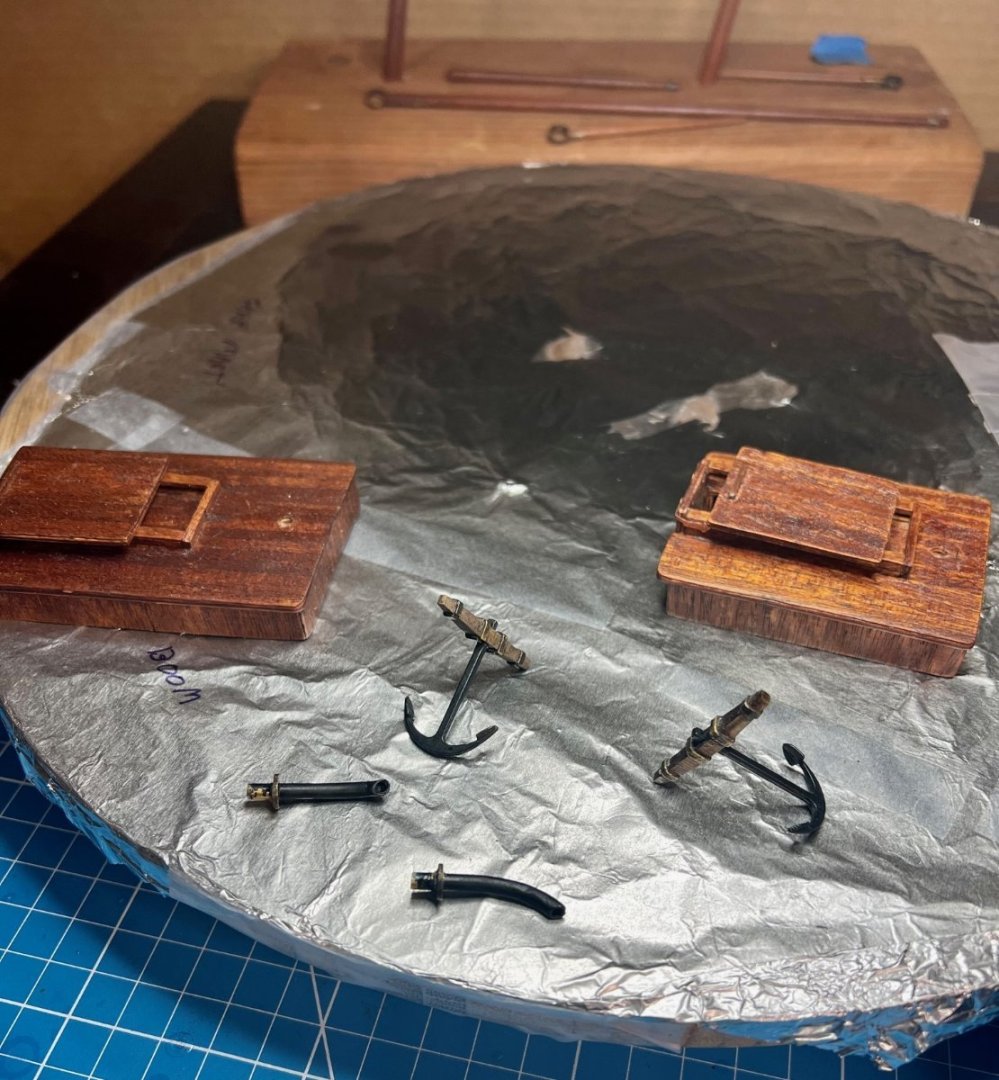
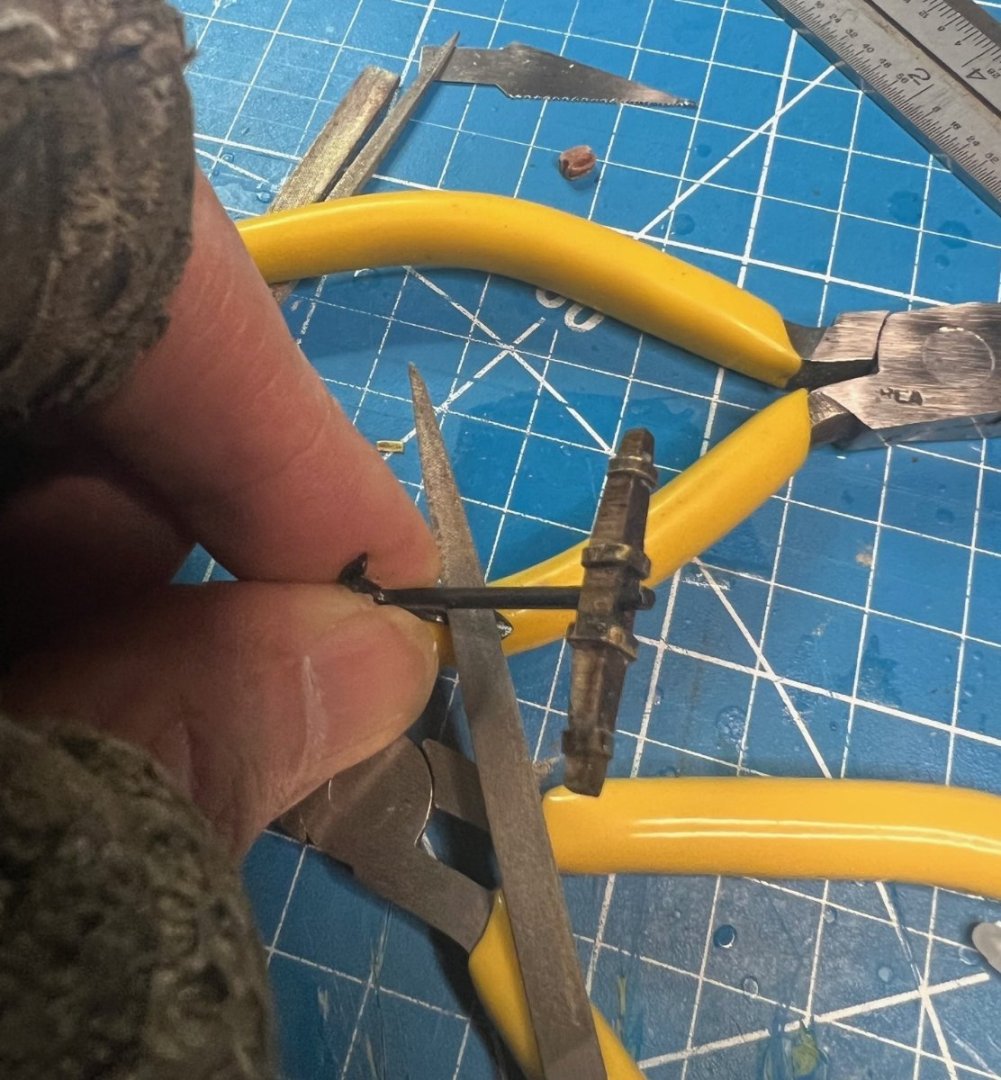
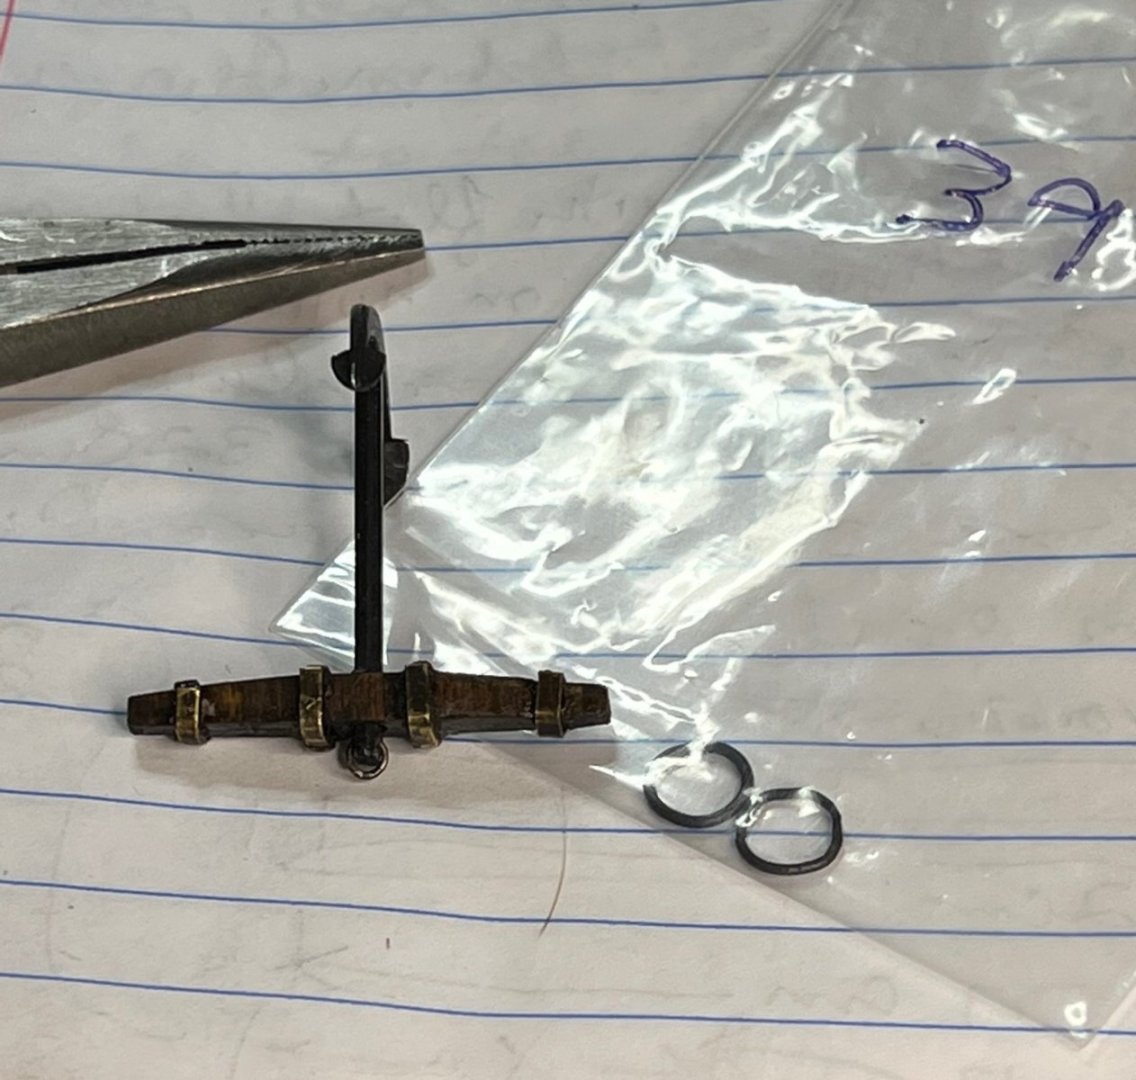
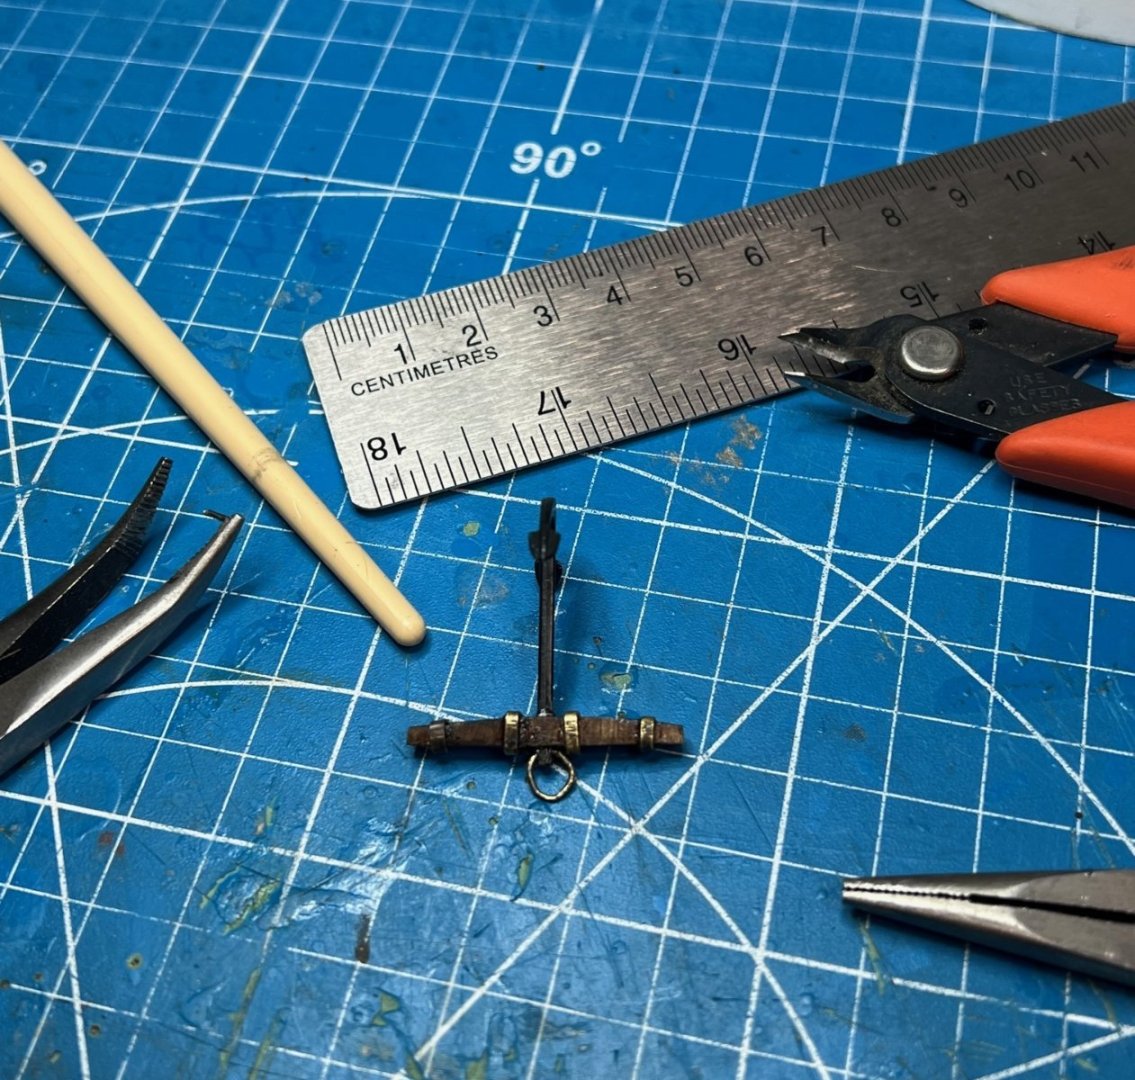
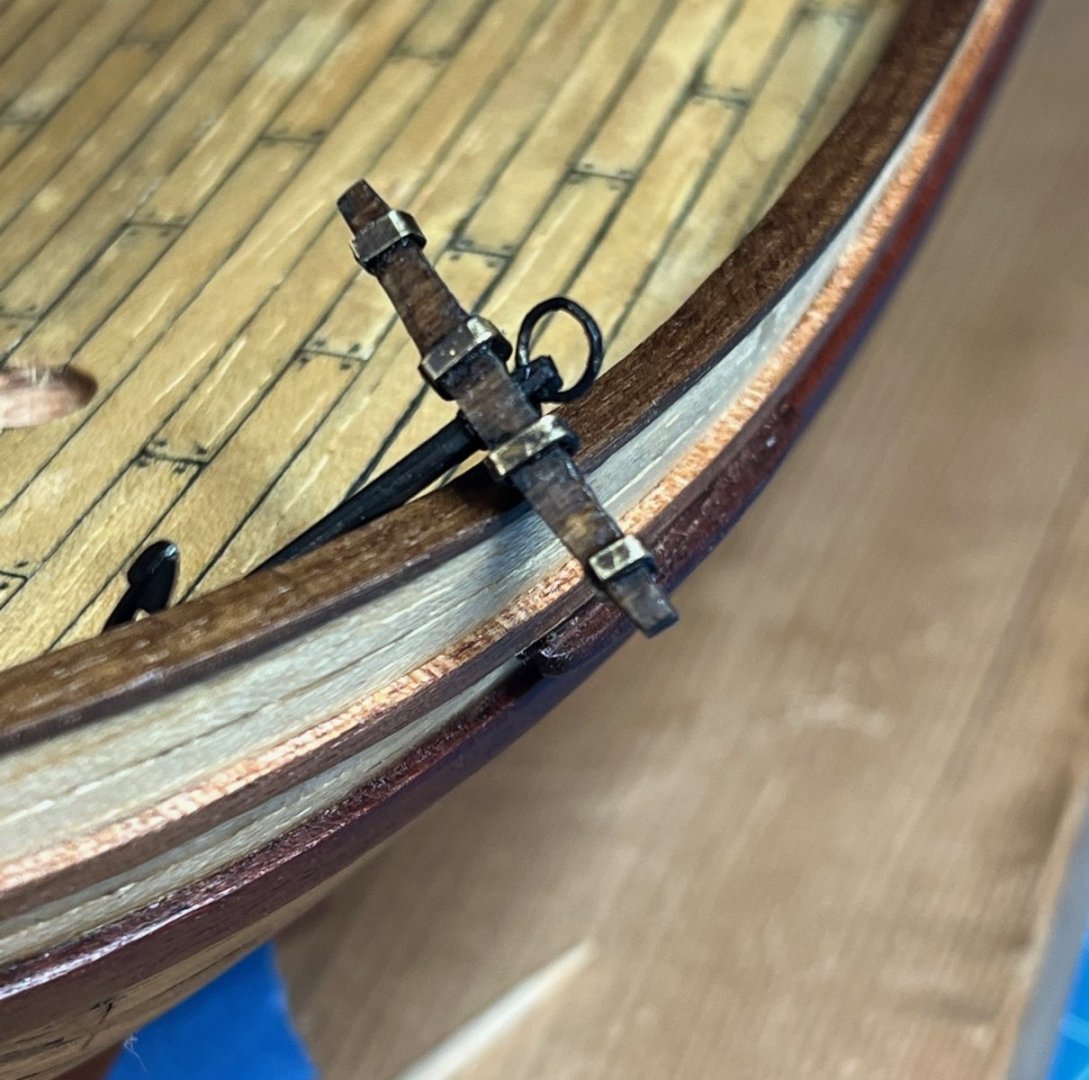
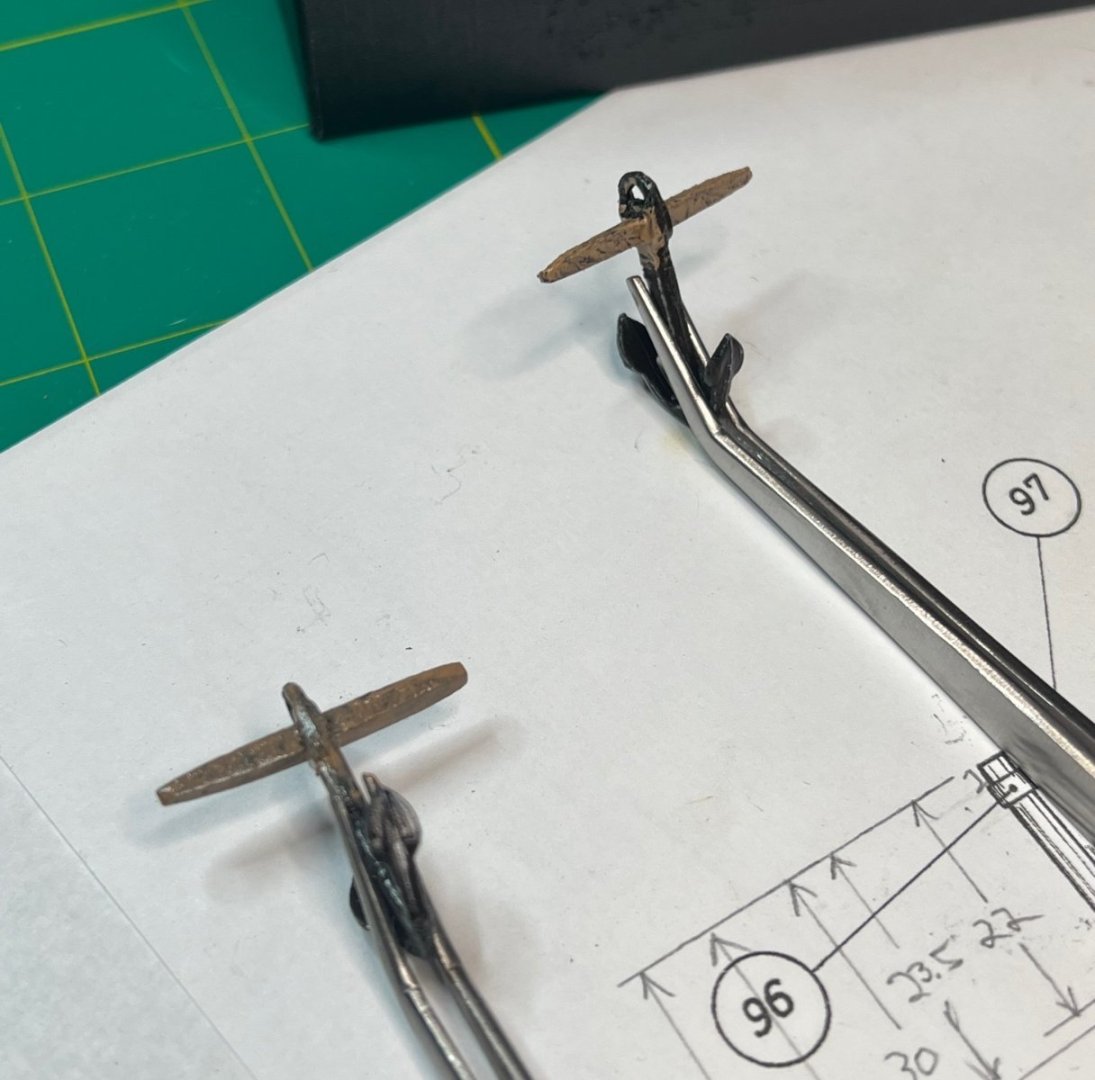
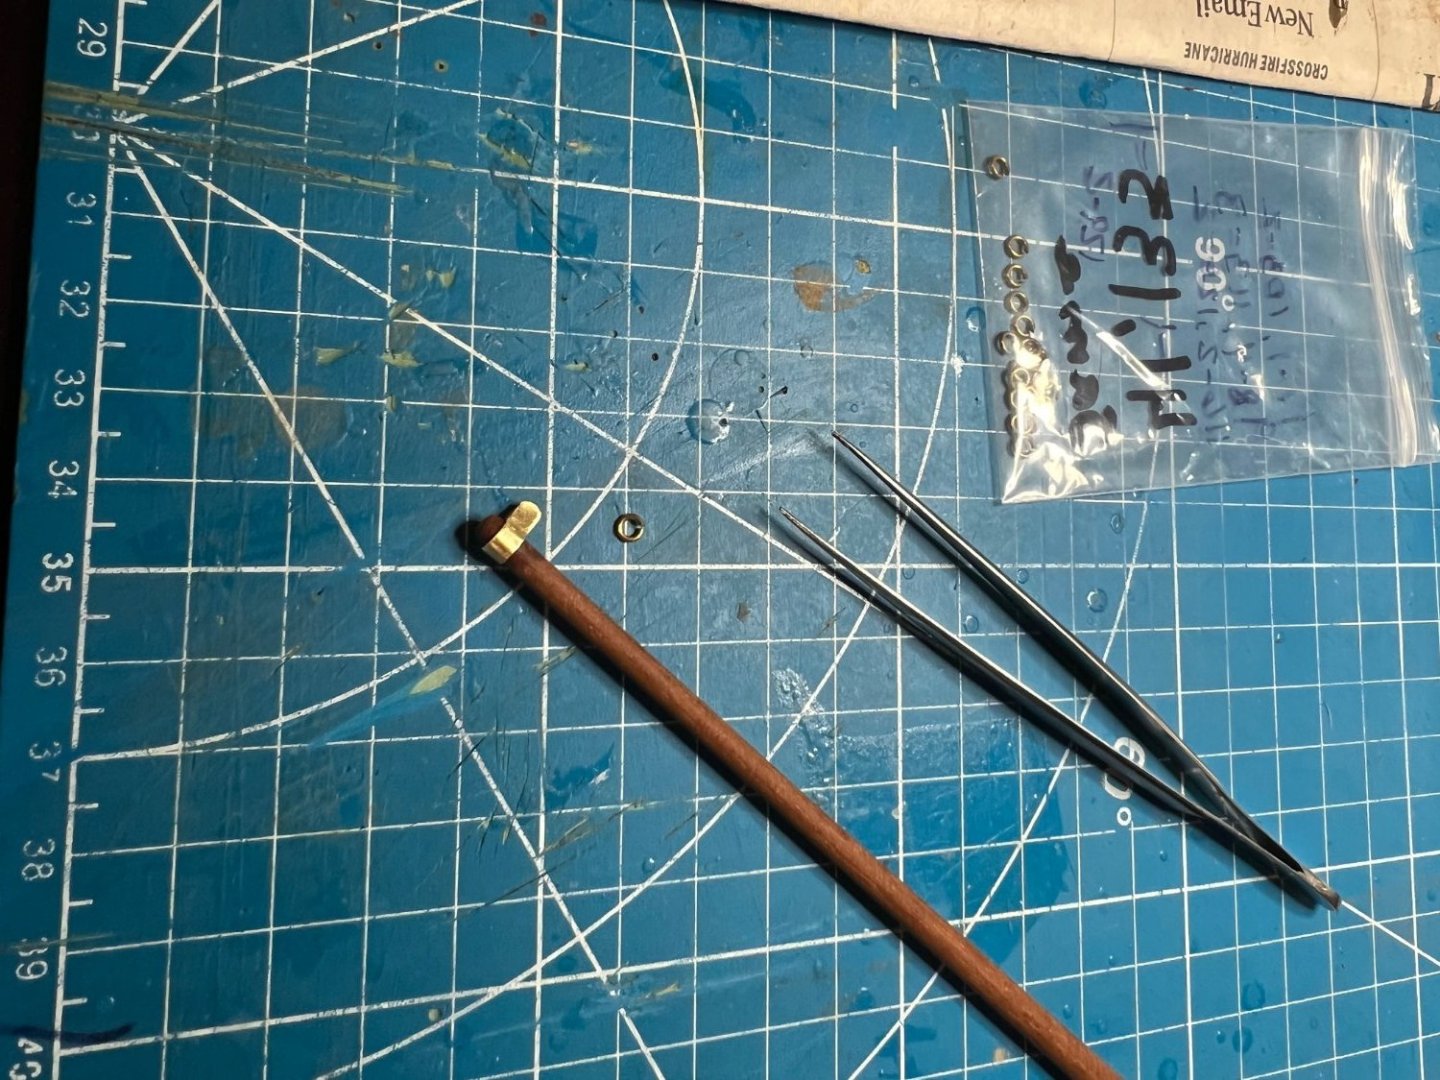
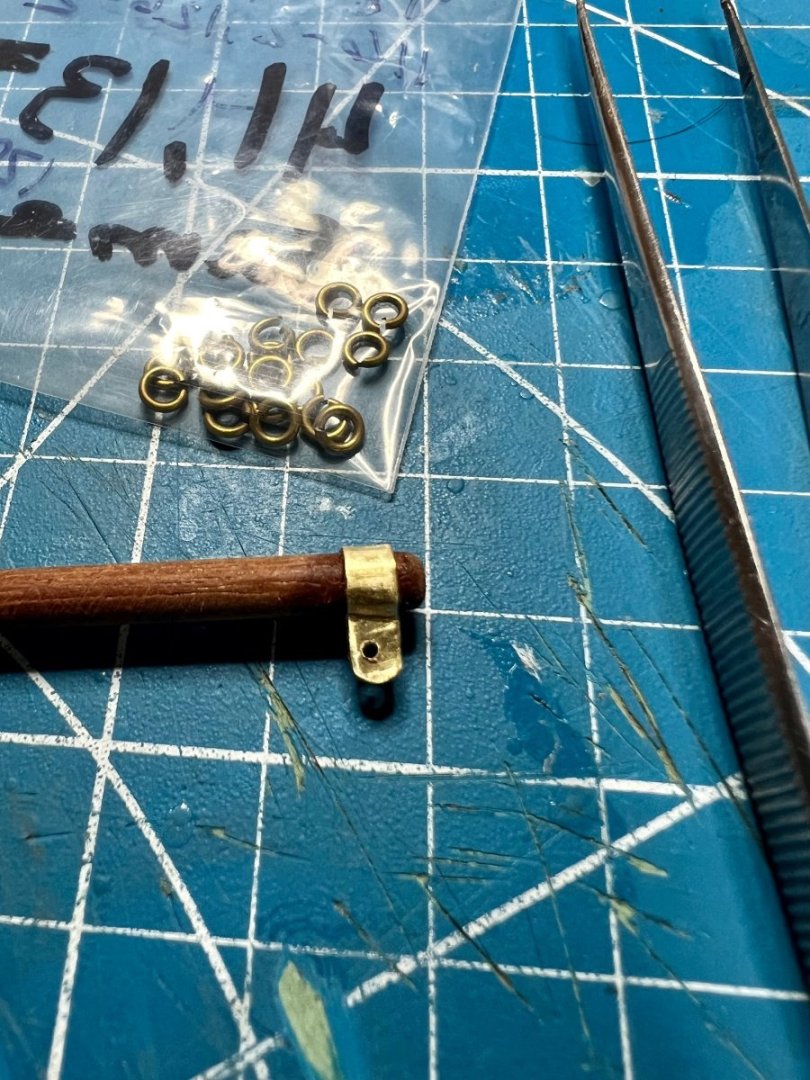
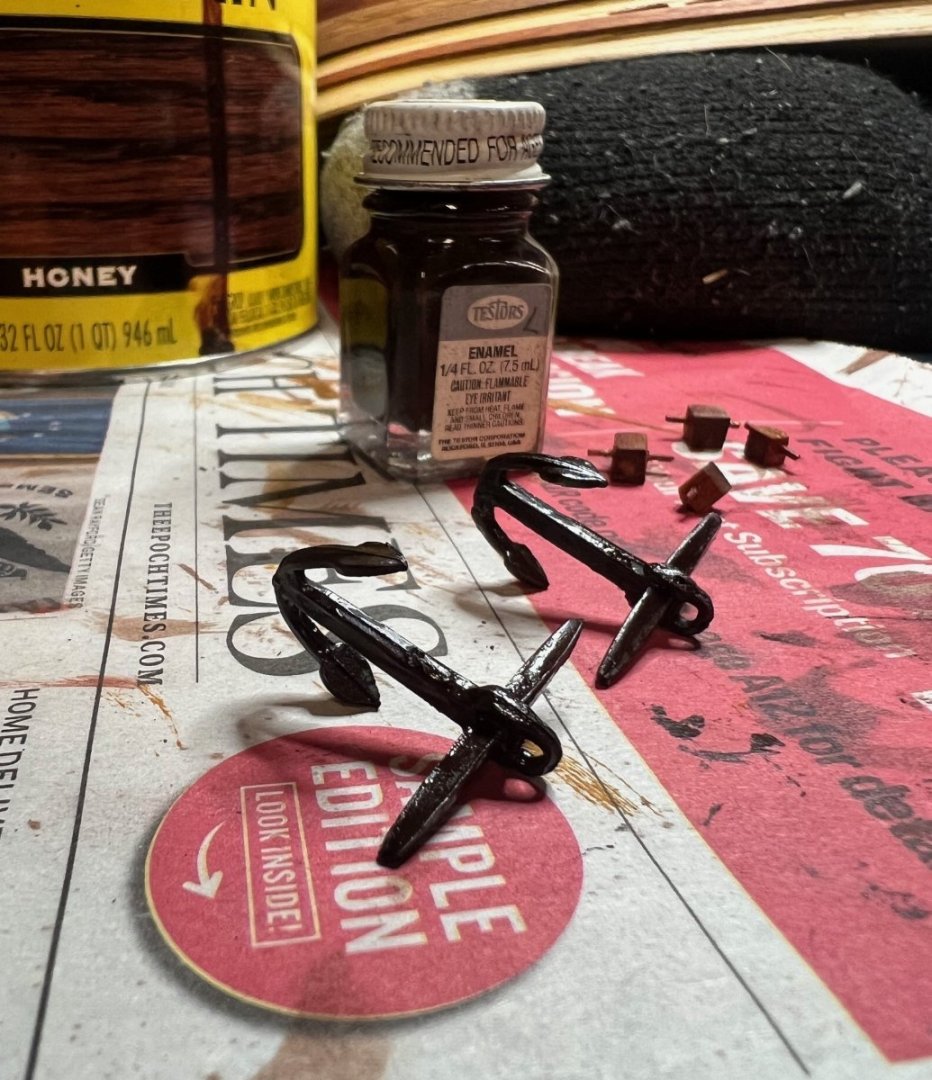
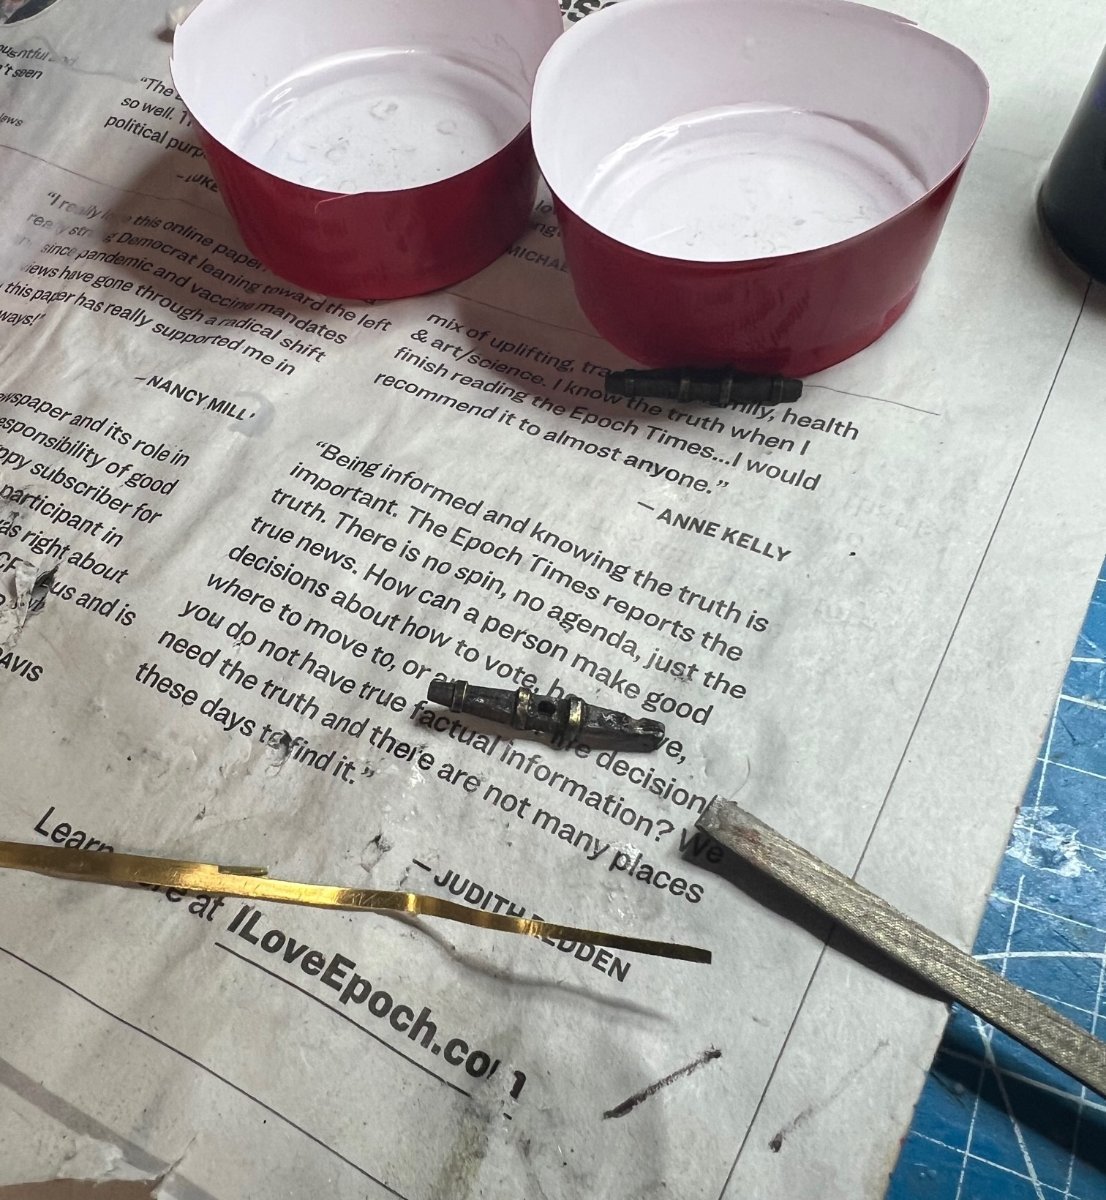
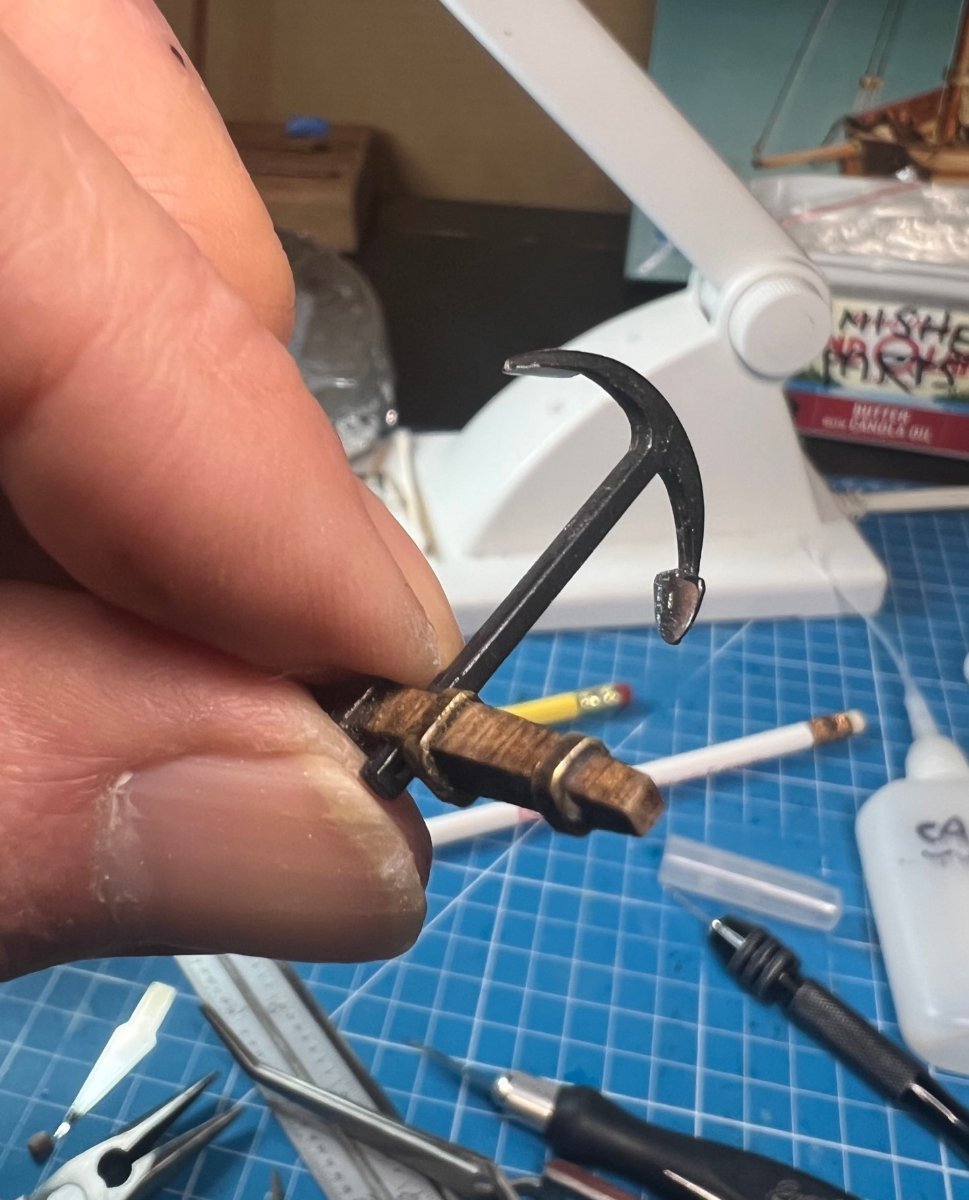
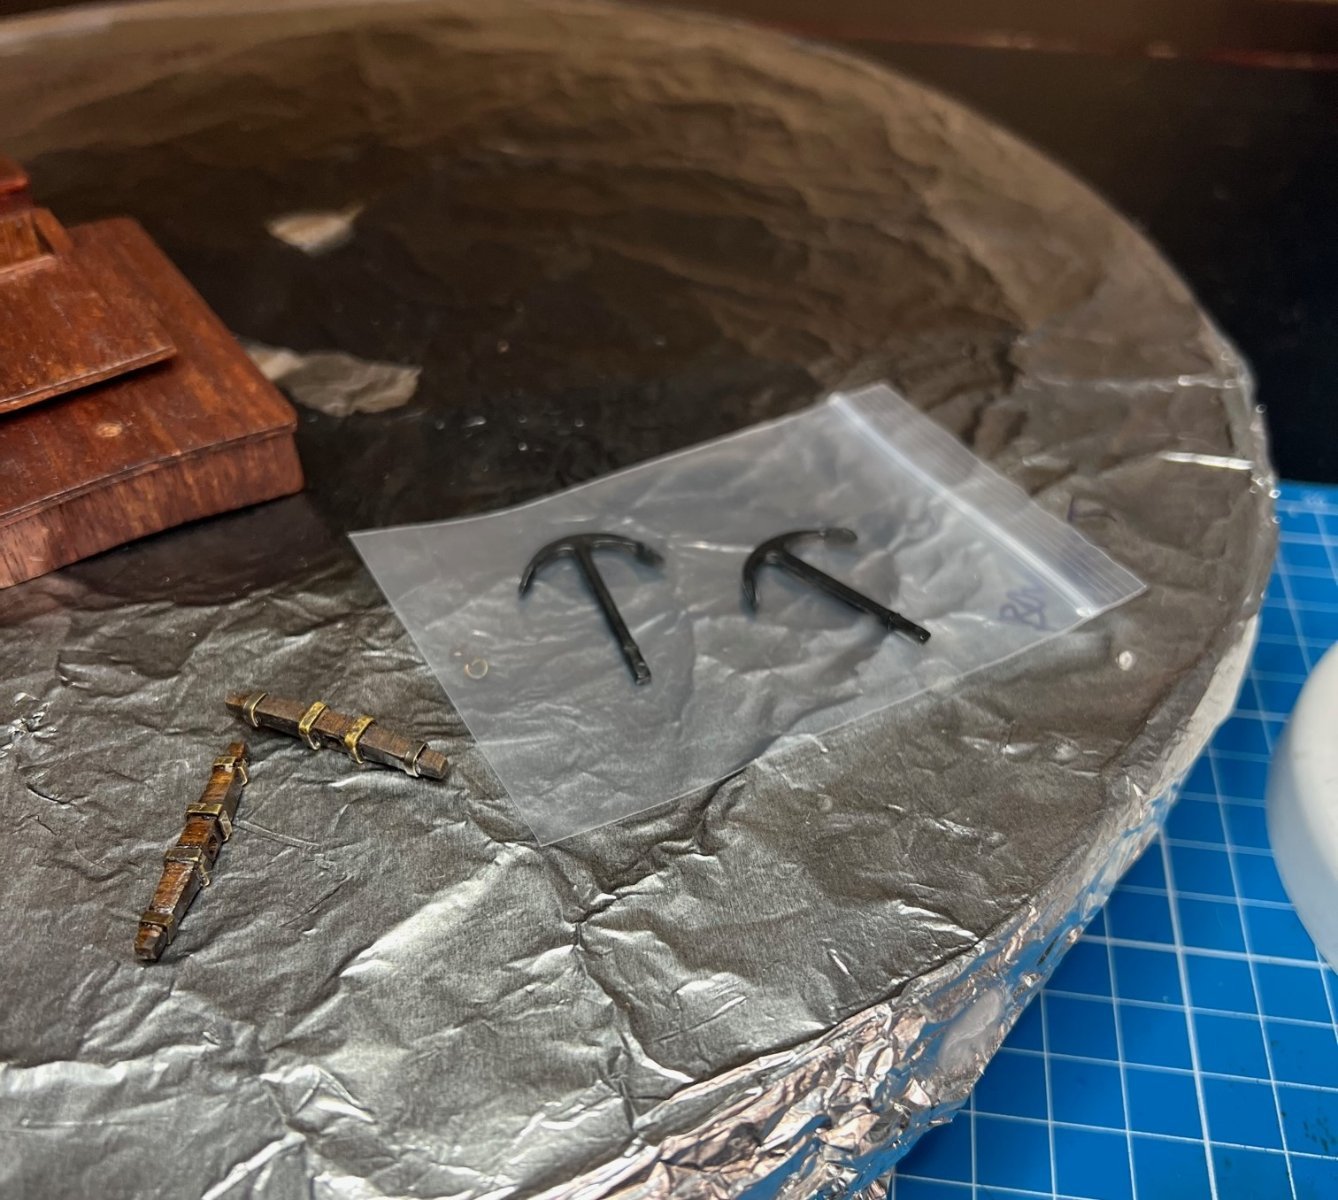
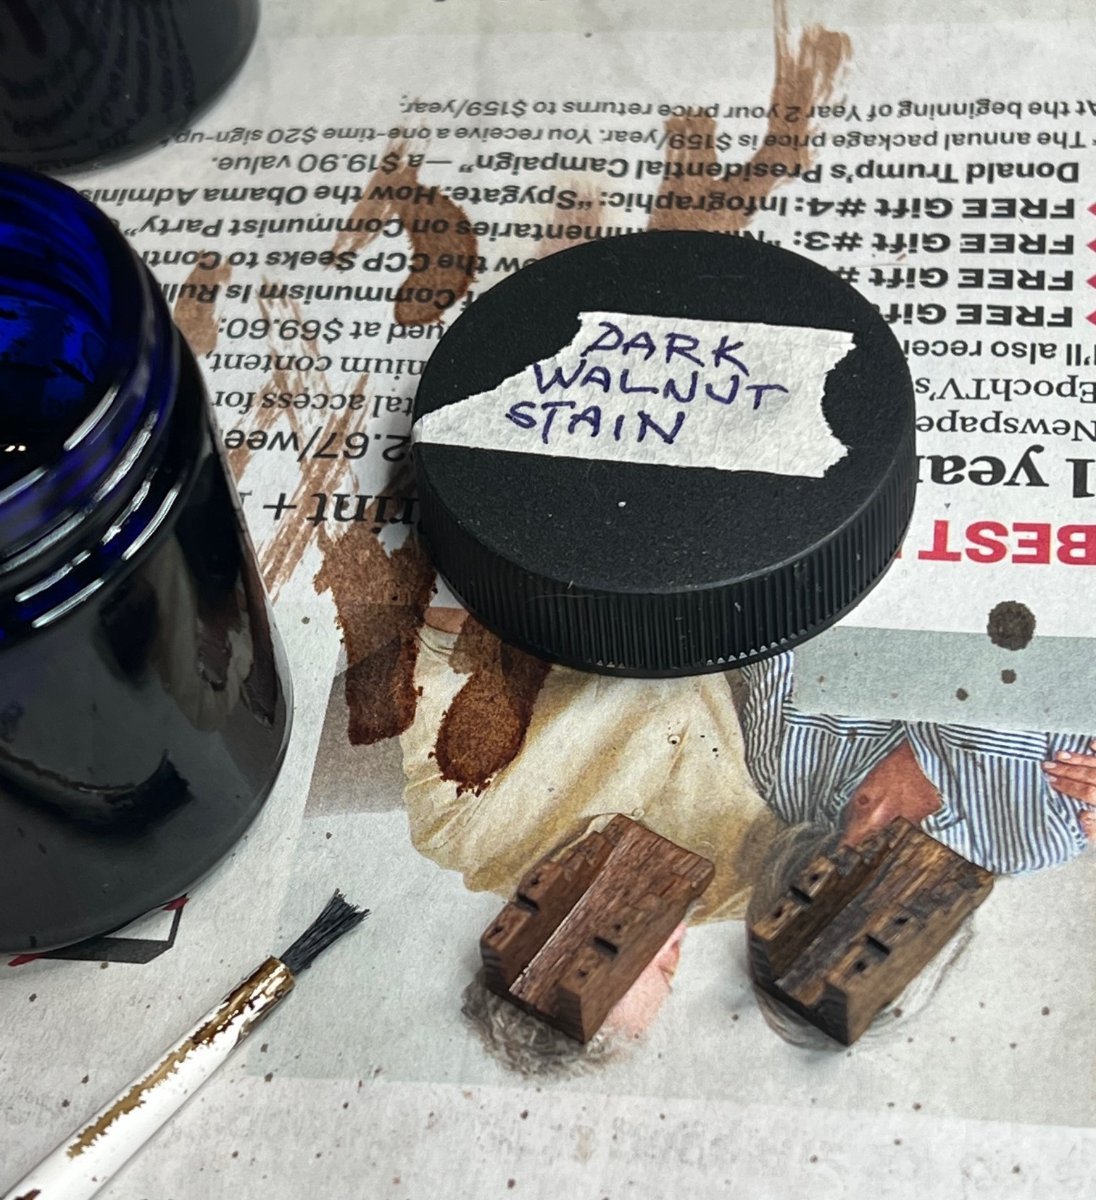
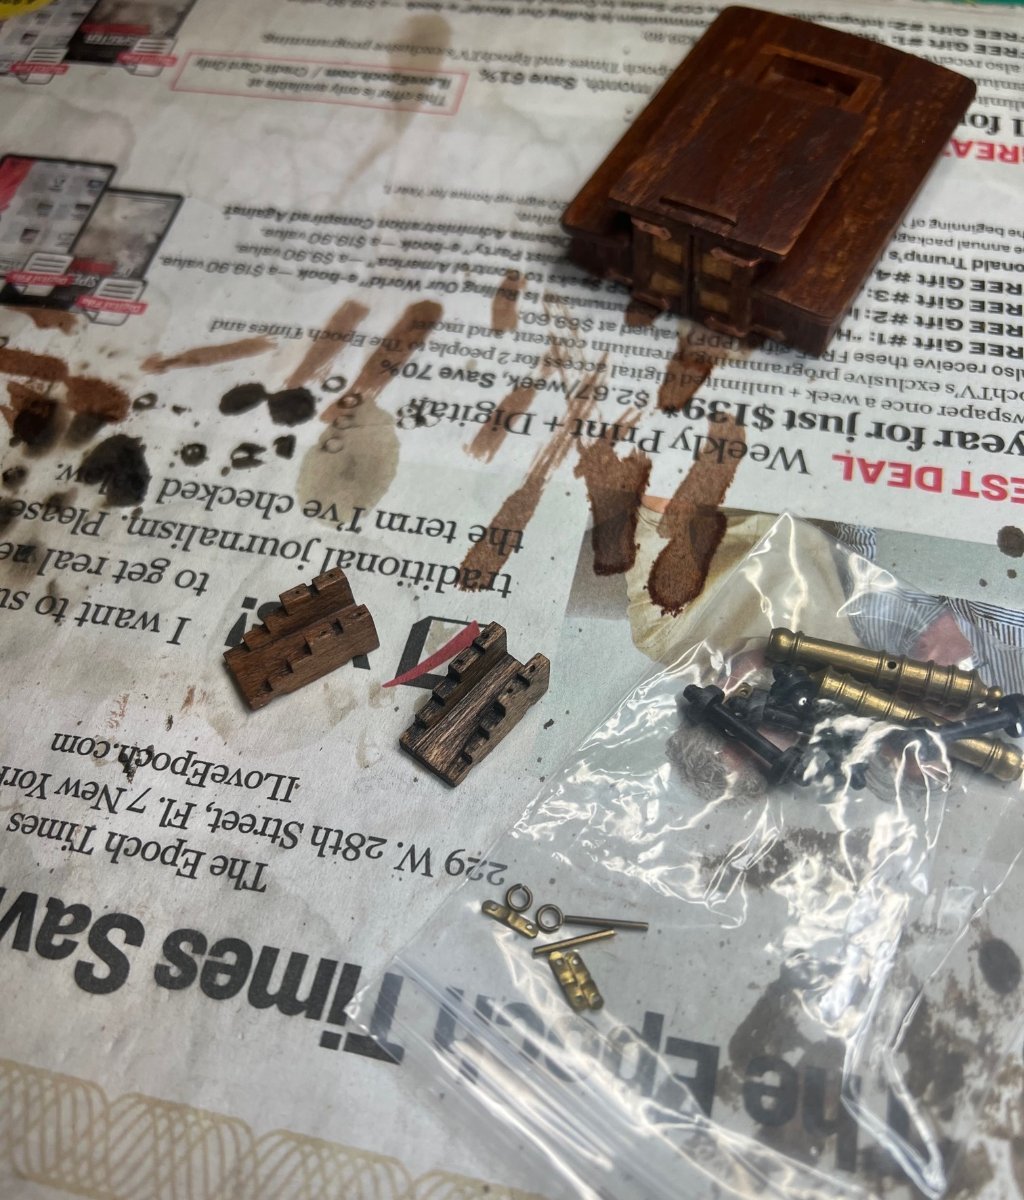
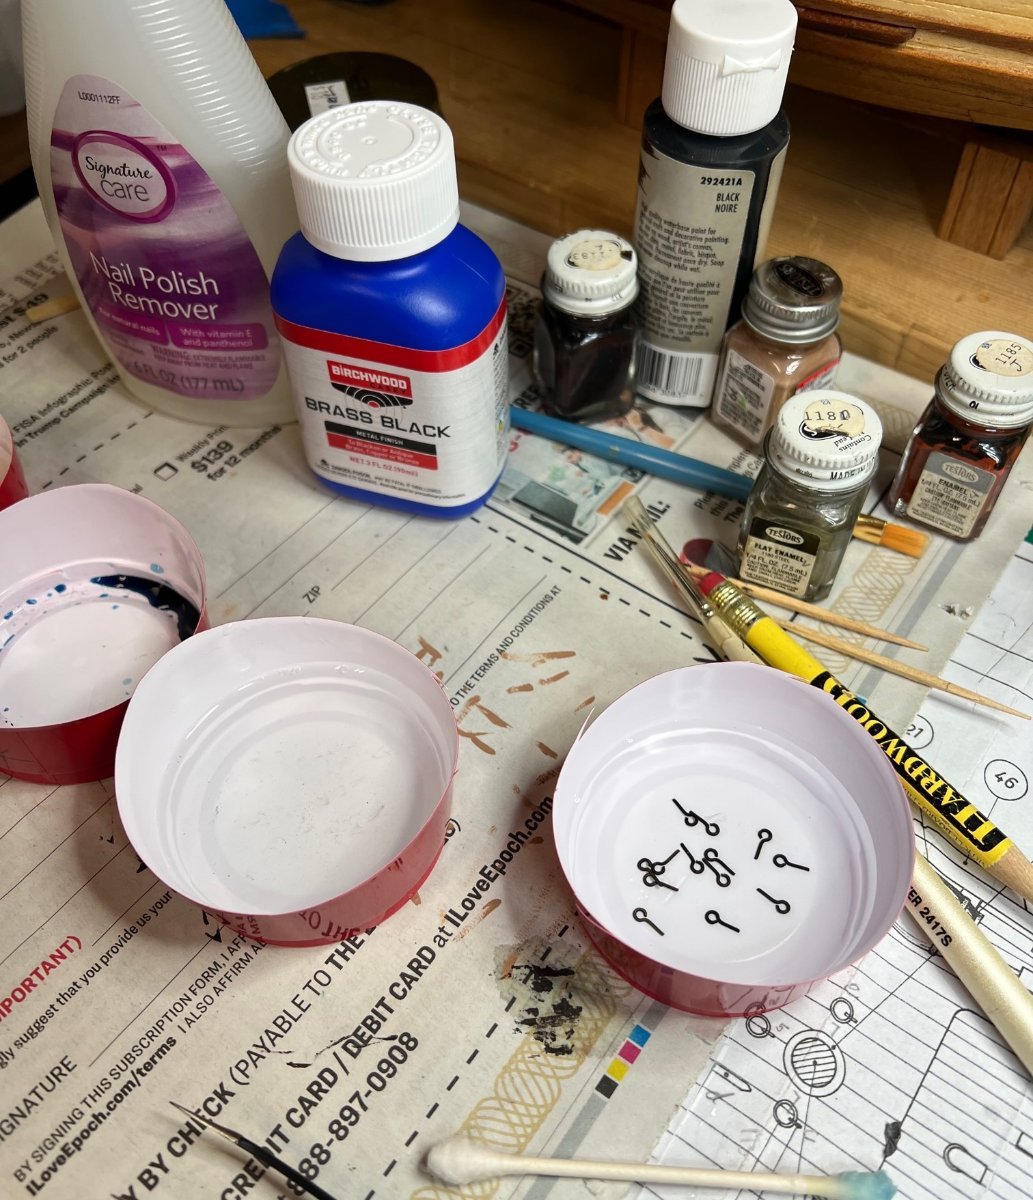
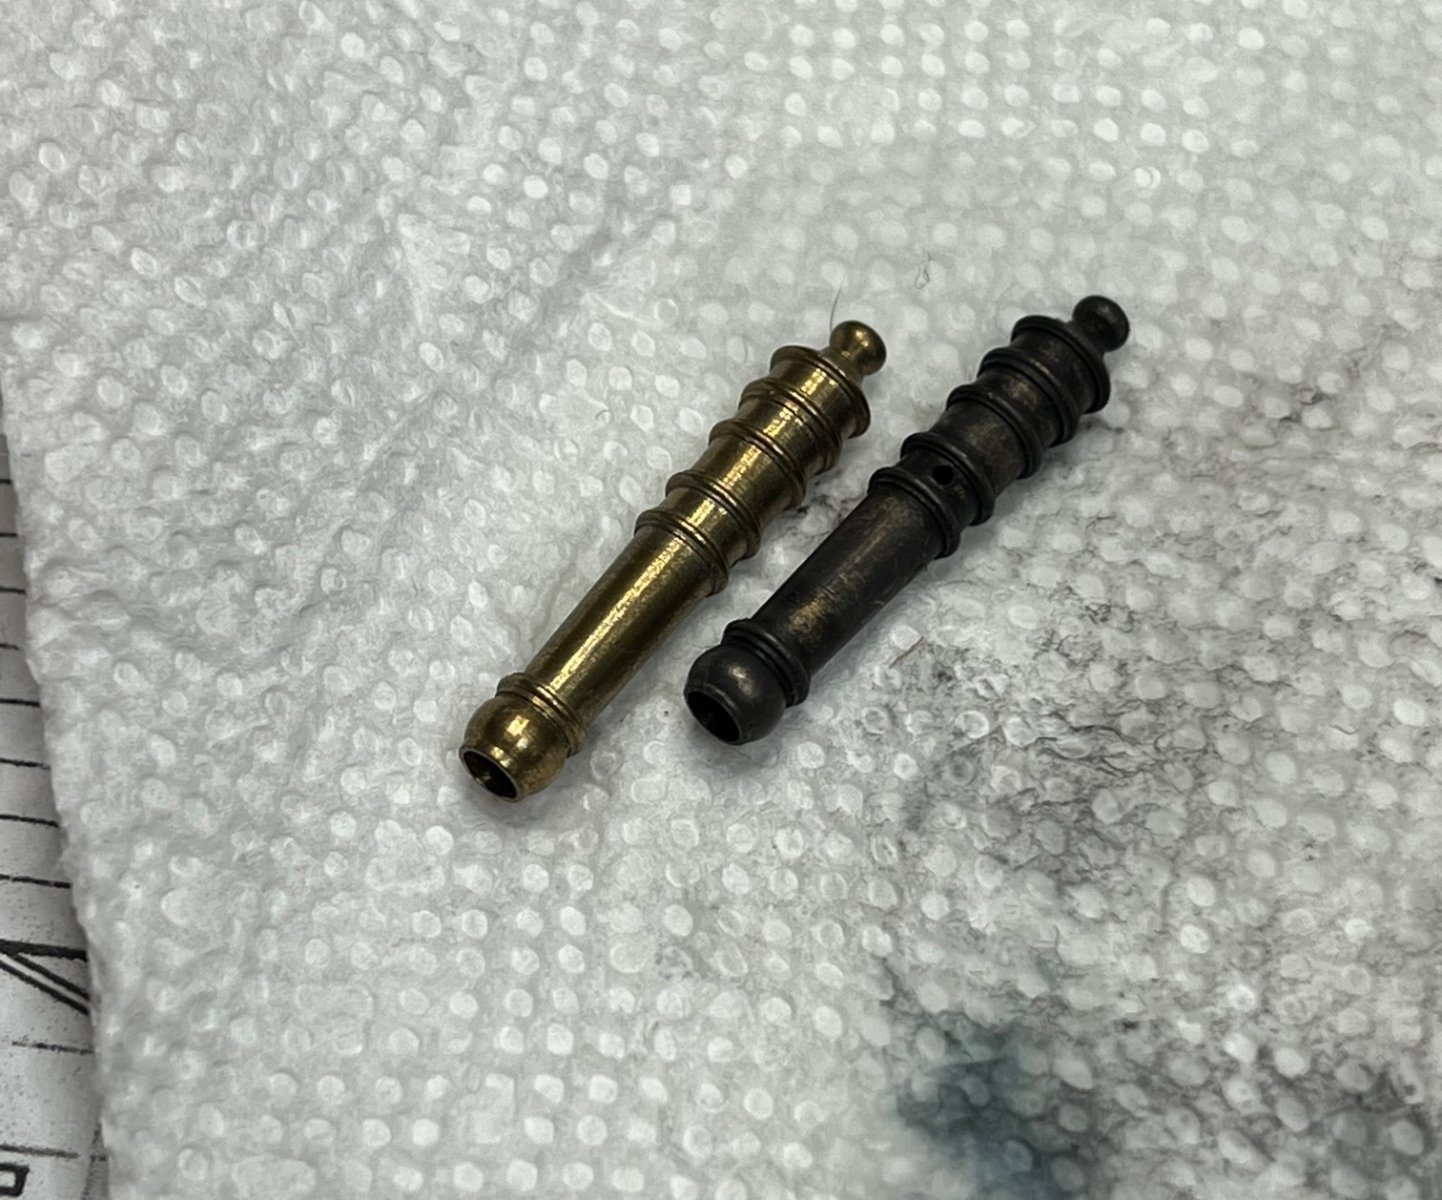
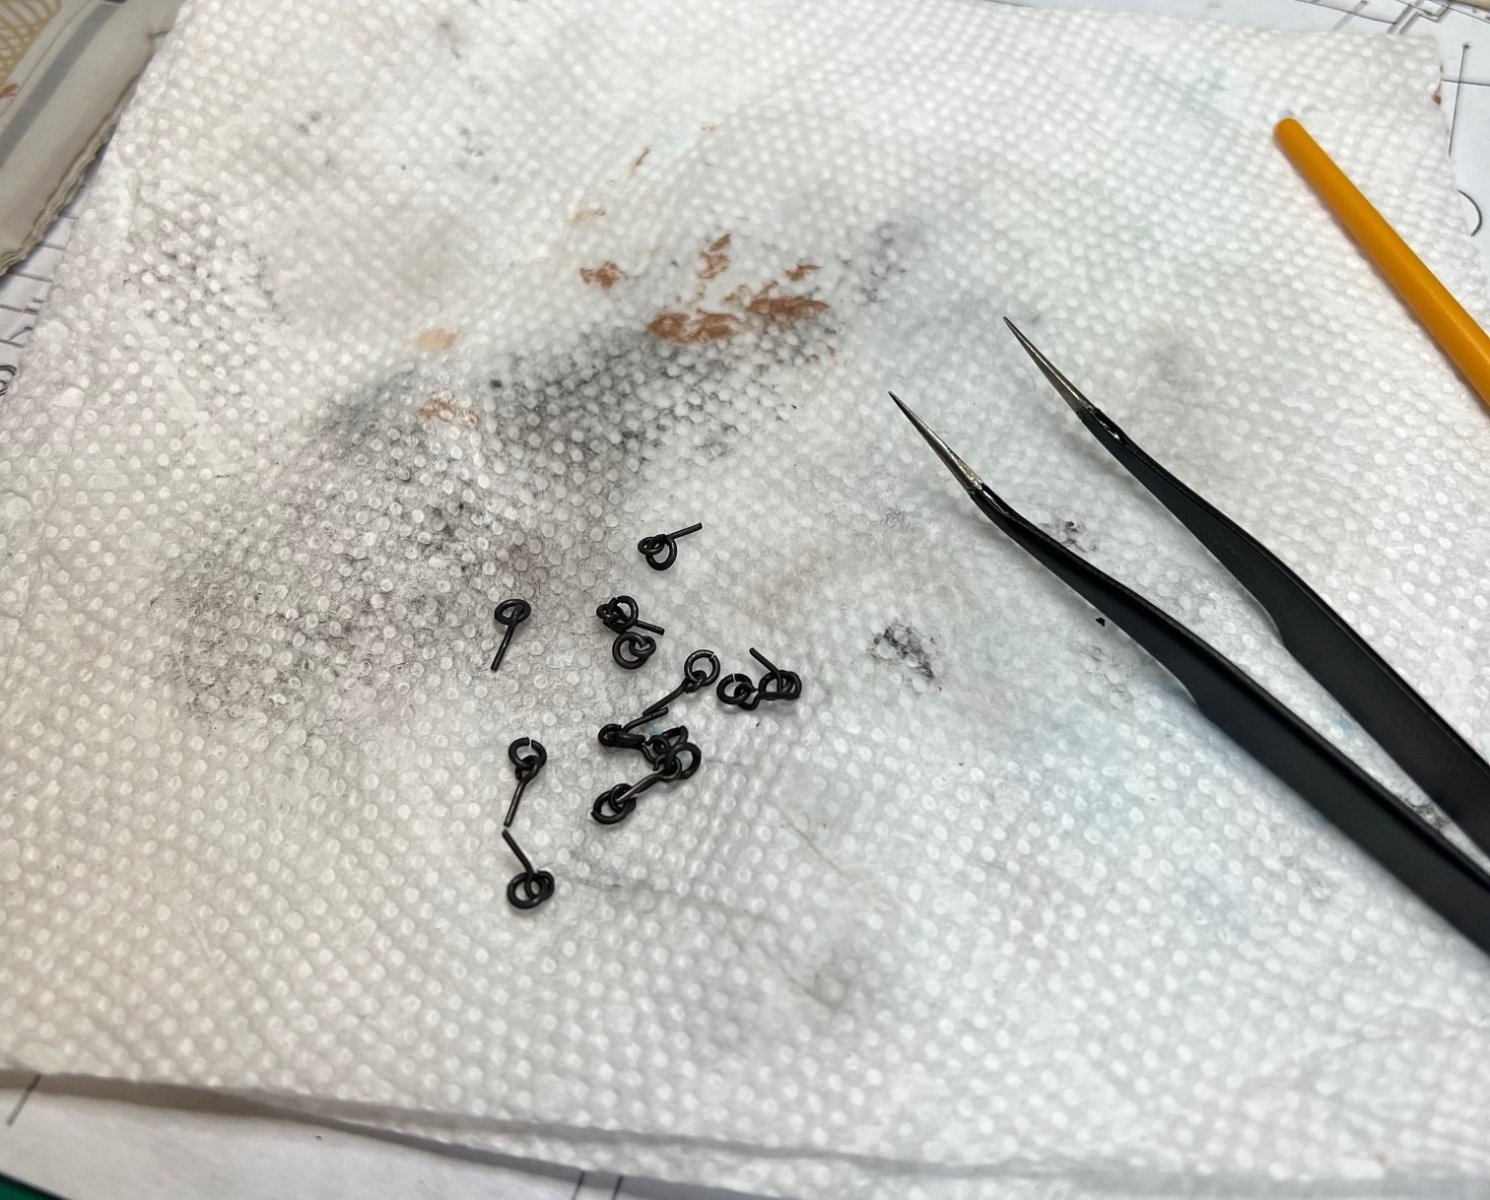
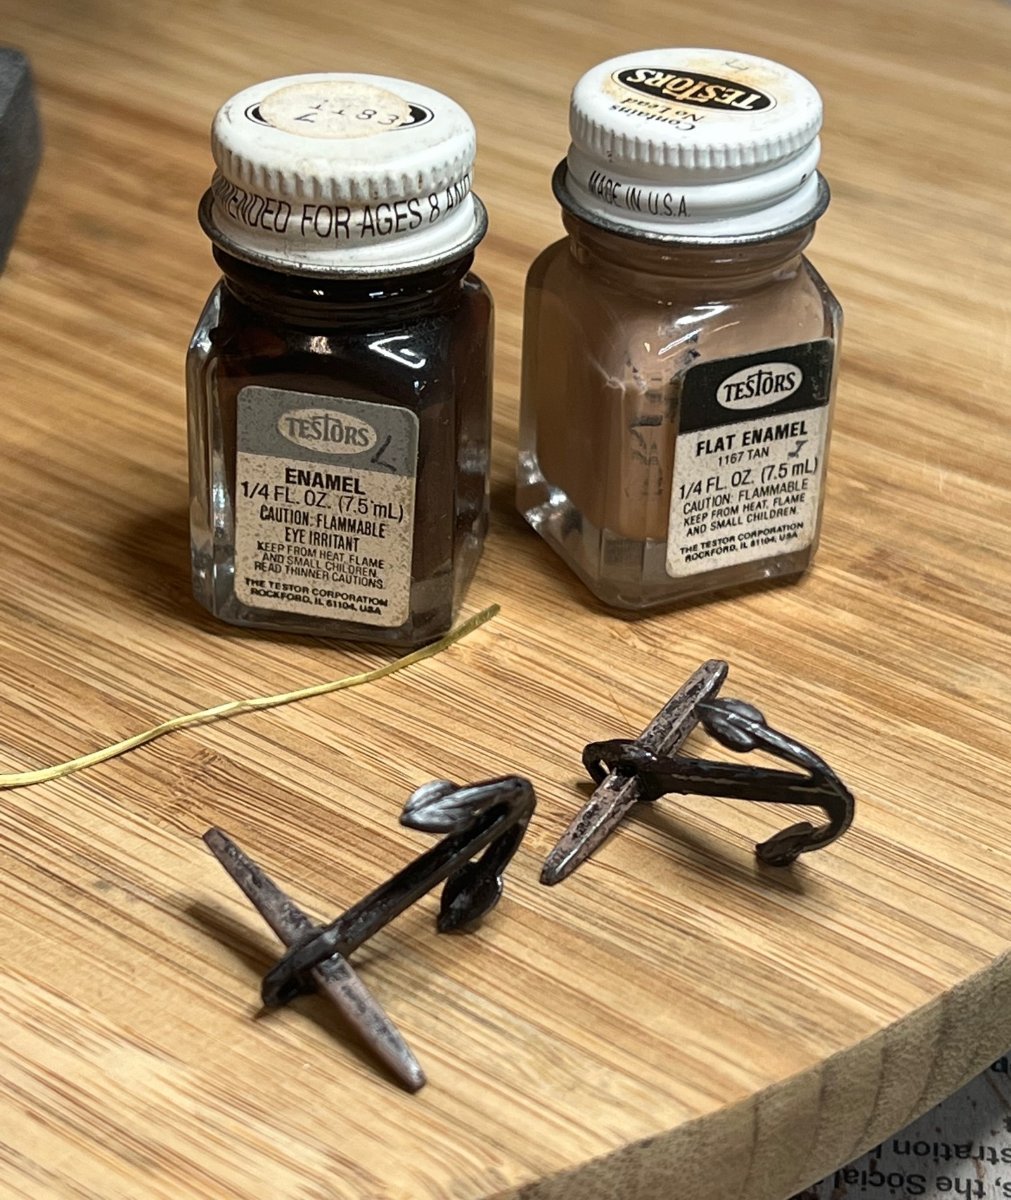
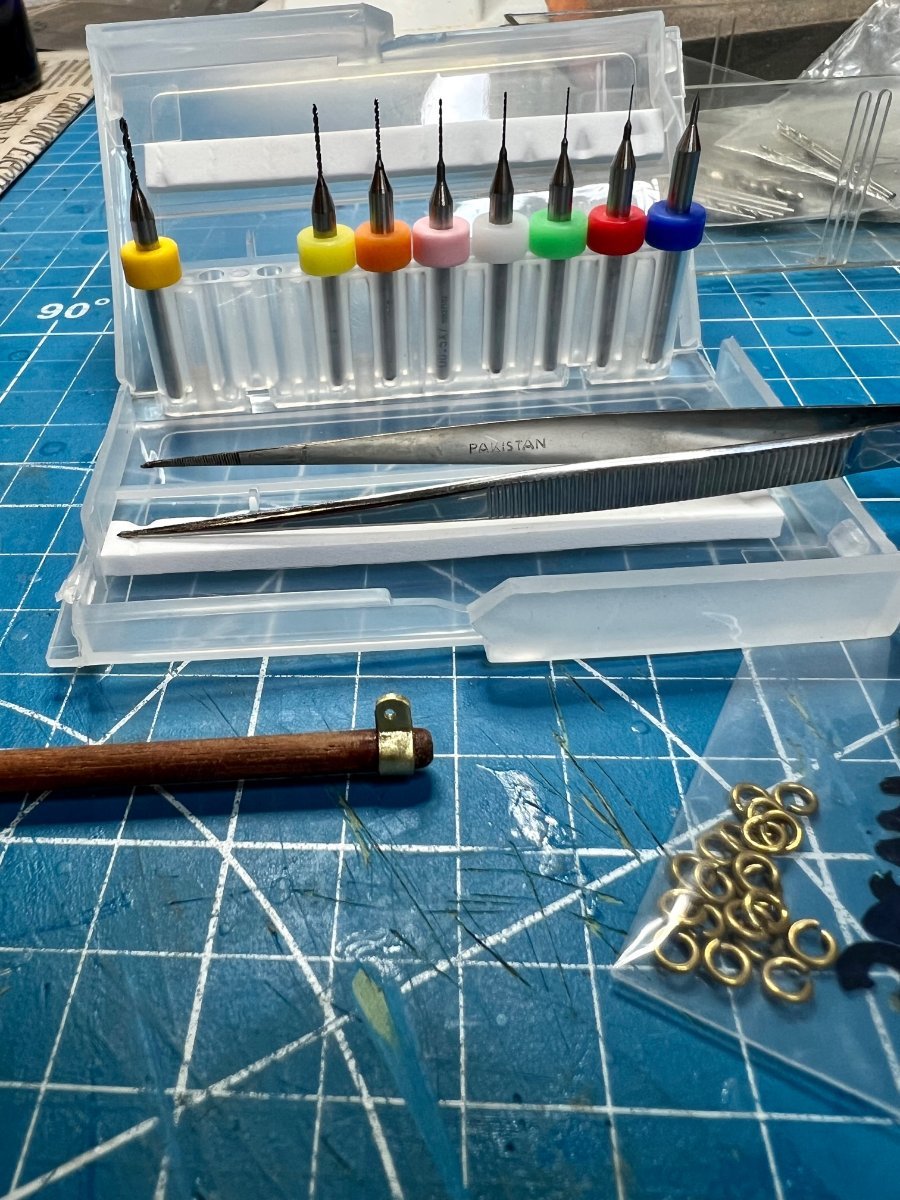
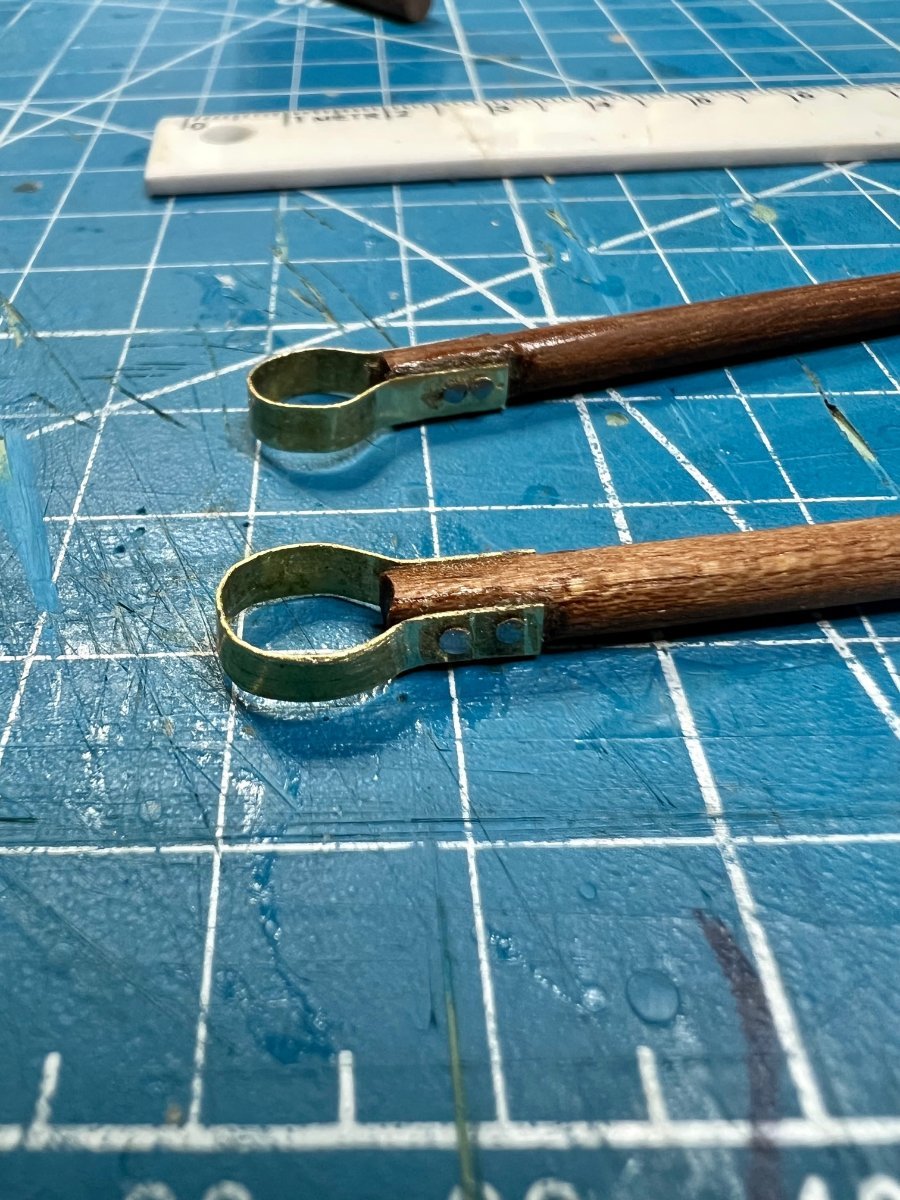
Next, I moved onto assembling the Amati anchors I had waited to get here from Australia. I blacked the brass parts and stained the wood. The anchor was already painted black and looked fine, so I left it. I did manage to lose one of the small hoops to the carpet monster, so I fabricated one out of the thin brass strip that I had left over from the mast bracelet I had to replace after breaking. That went fine. I filed the casting seam lines off where they were bad on the anchors and touched up with flat black paint. I cut the anchor line holes into the bow next and painted the inside of the channels flat black since grommets were only supplied for the outboard of the holes. With the anchor parts ready to assemble, I glued them together and mounted the brass rings. I didn’t like the size of the supplied rings, so I made new ones with brass wire. I hadn’t yet learned that puddening would need to be put on the rings much less what puddening was so that would come later.


That completes this finally done chapter, sorry, I've been finishing the ship and I'll show you more soon! Thanks for checking it out! This gets us to March 25, 2023 so you see how far behind I am with the log. Until next time! Keep modeling! Next, it's time to put her on her base.
-
Guns! Guns! Guns! At least two guns anyway.
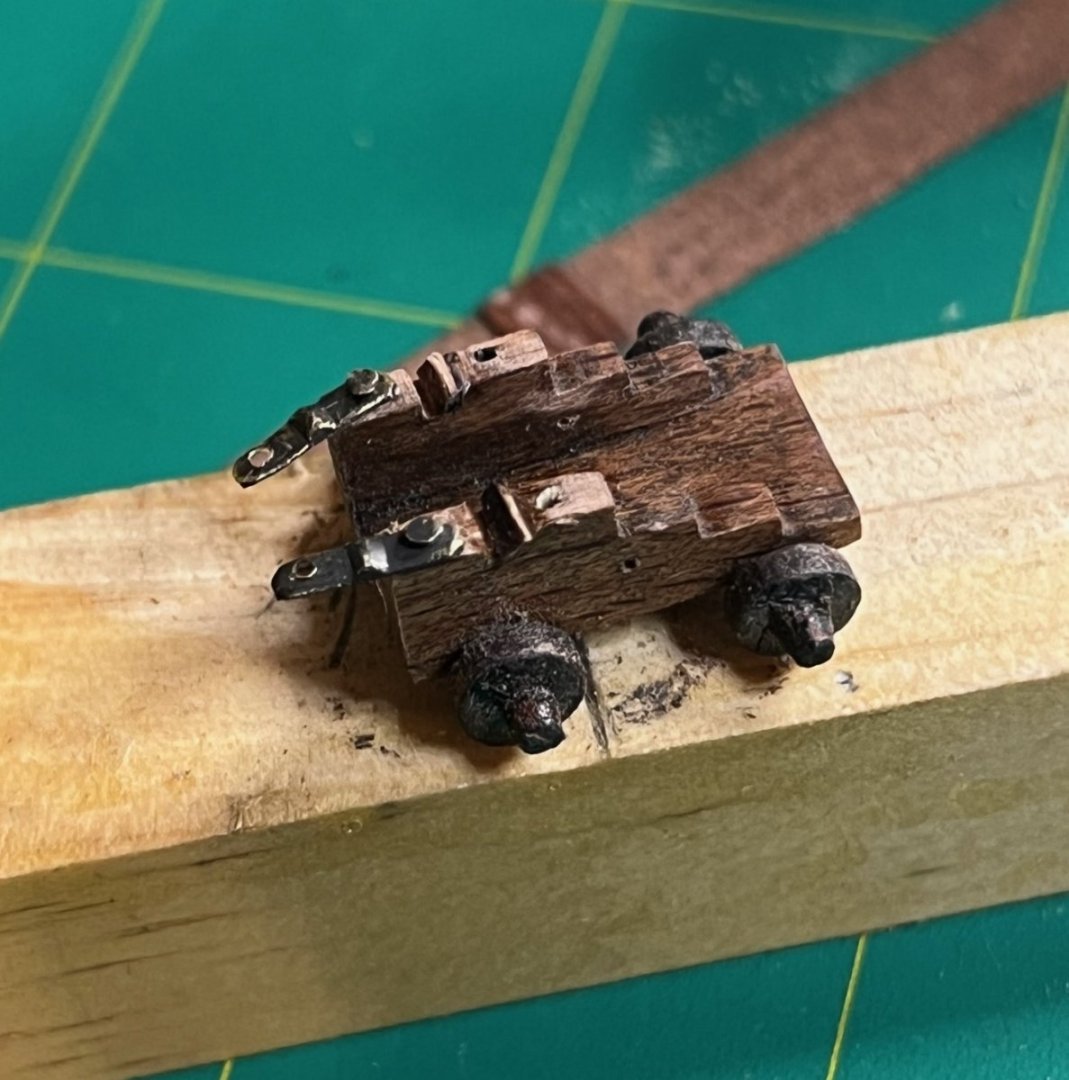
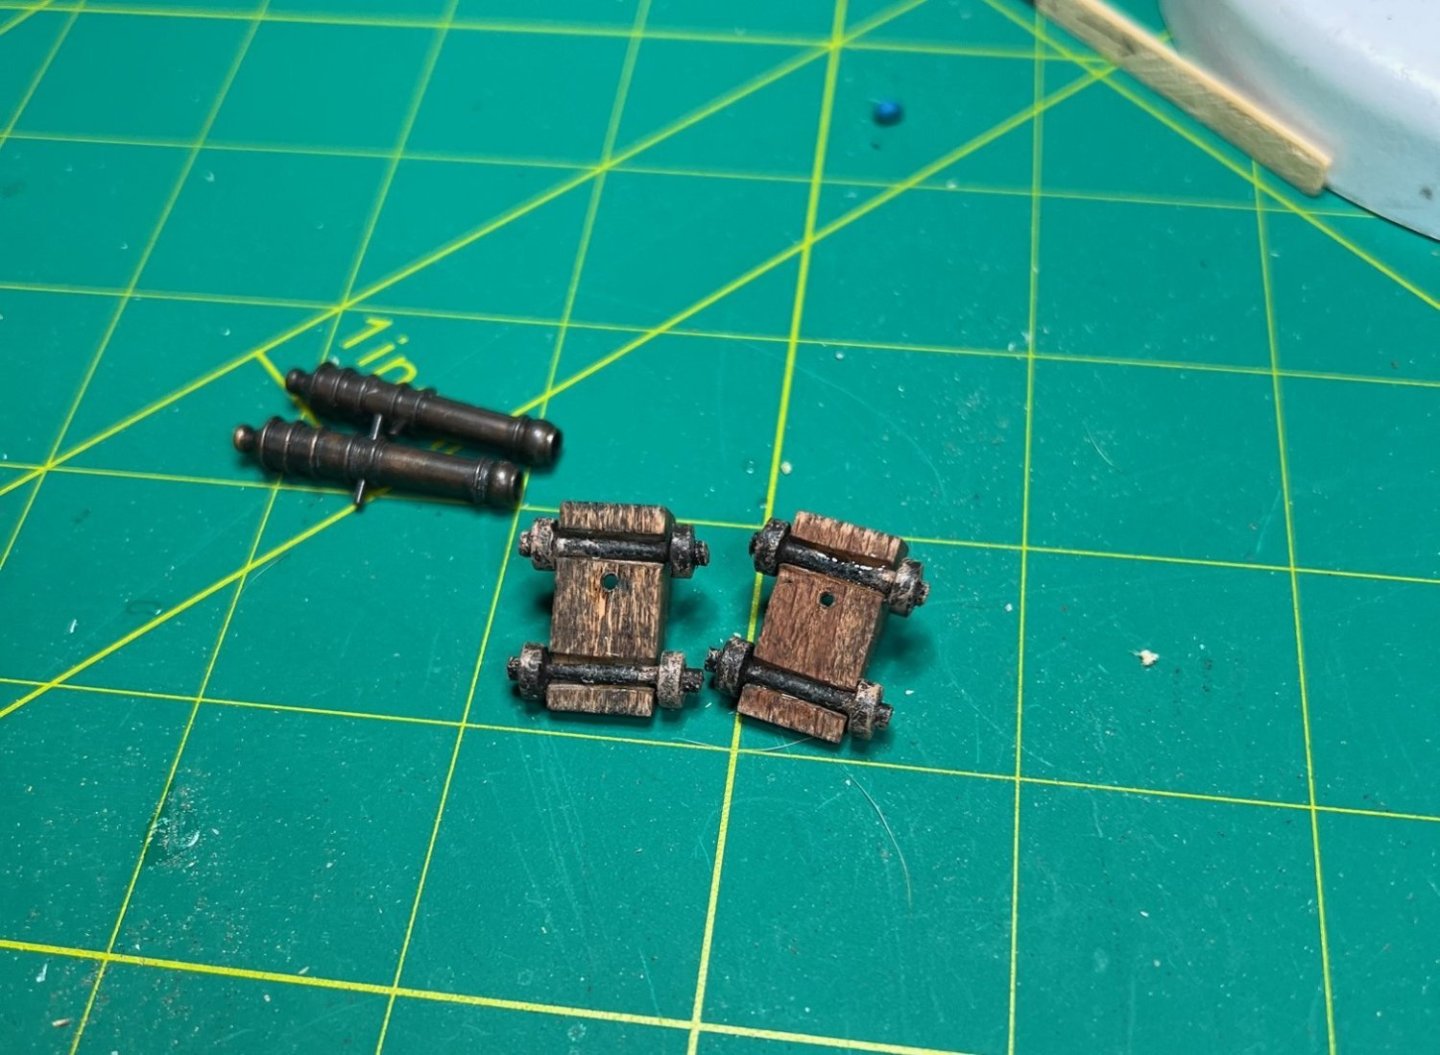
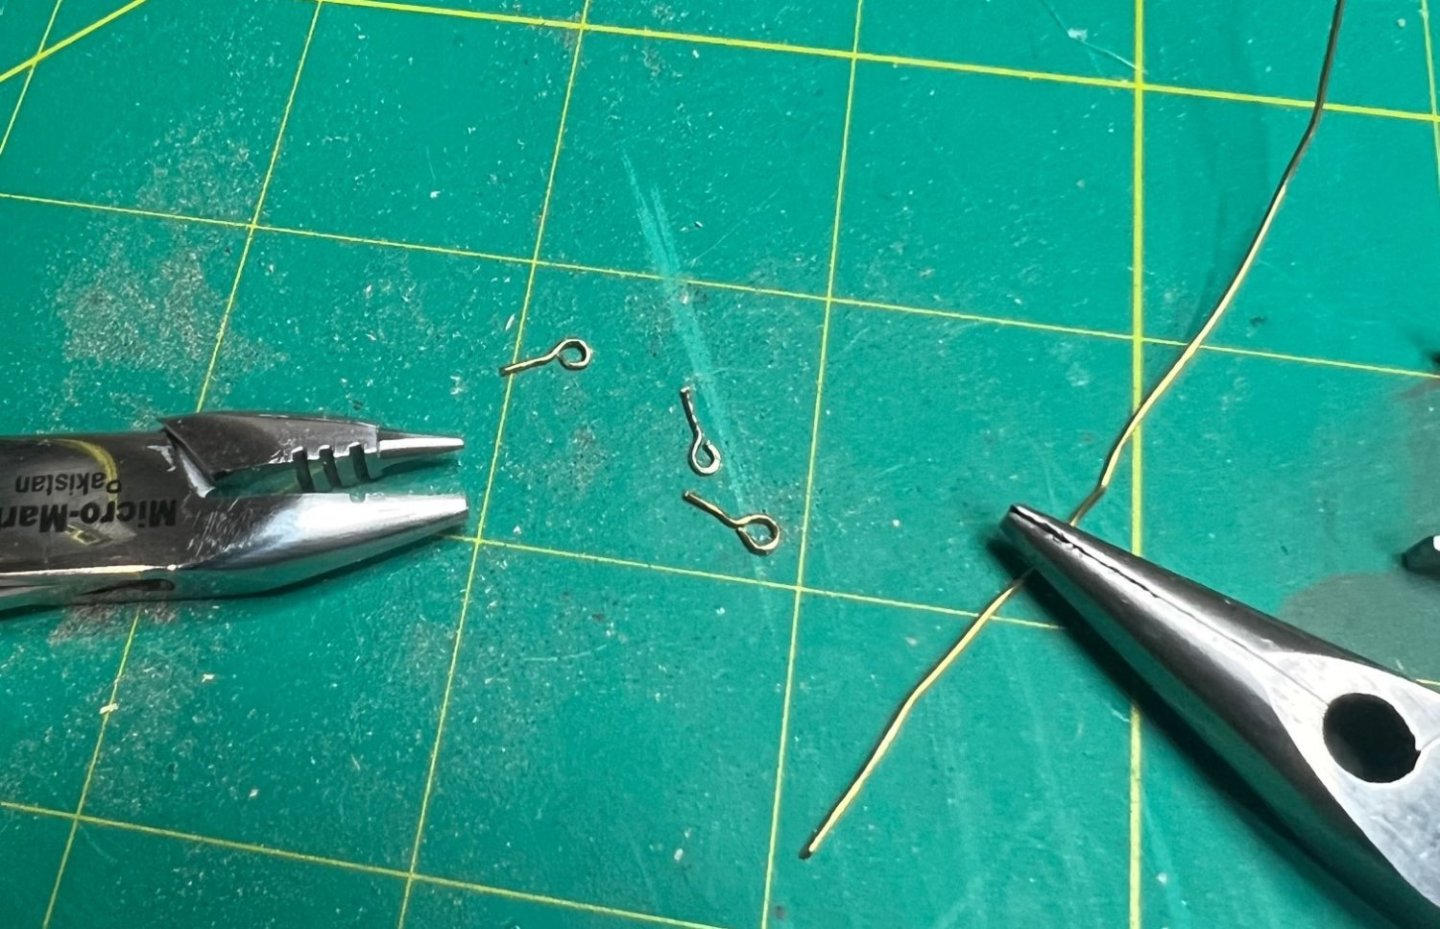
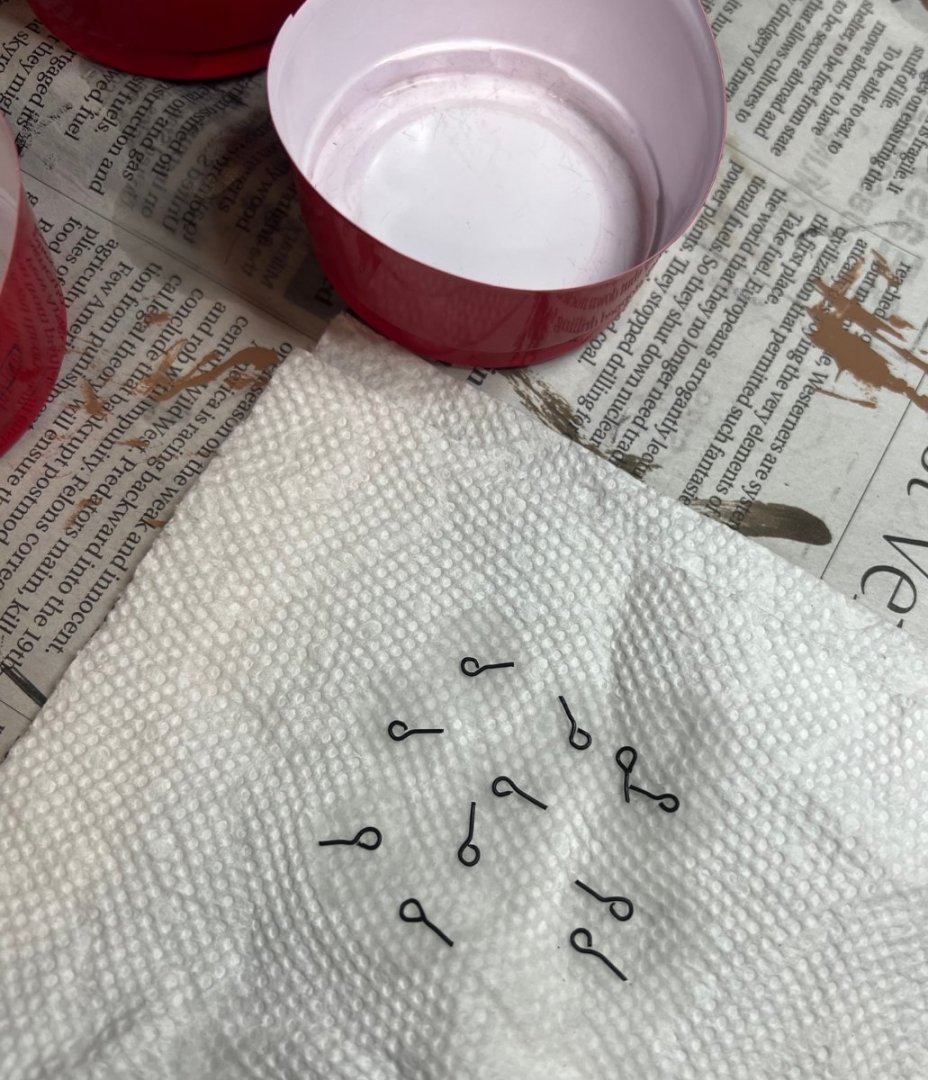
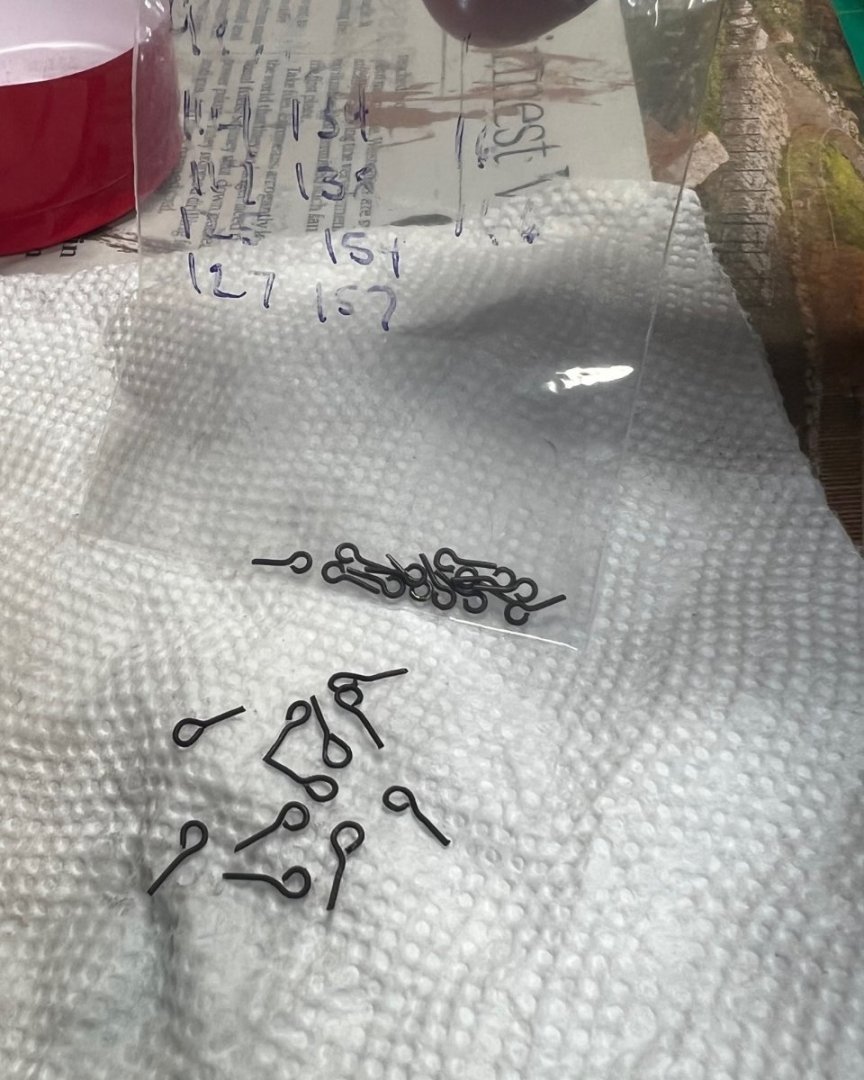
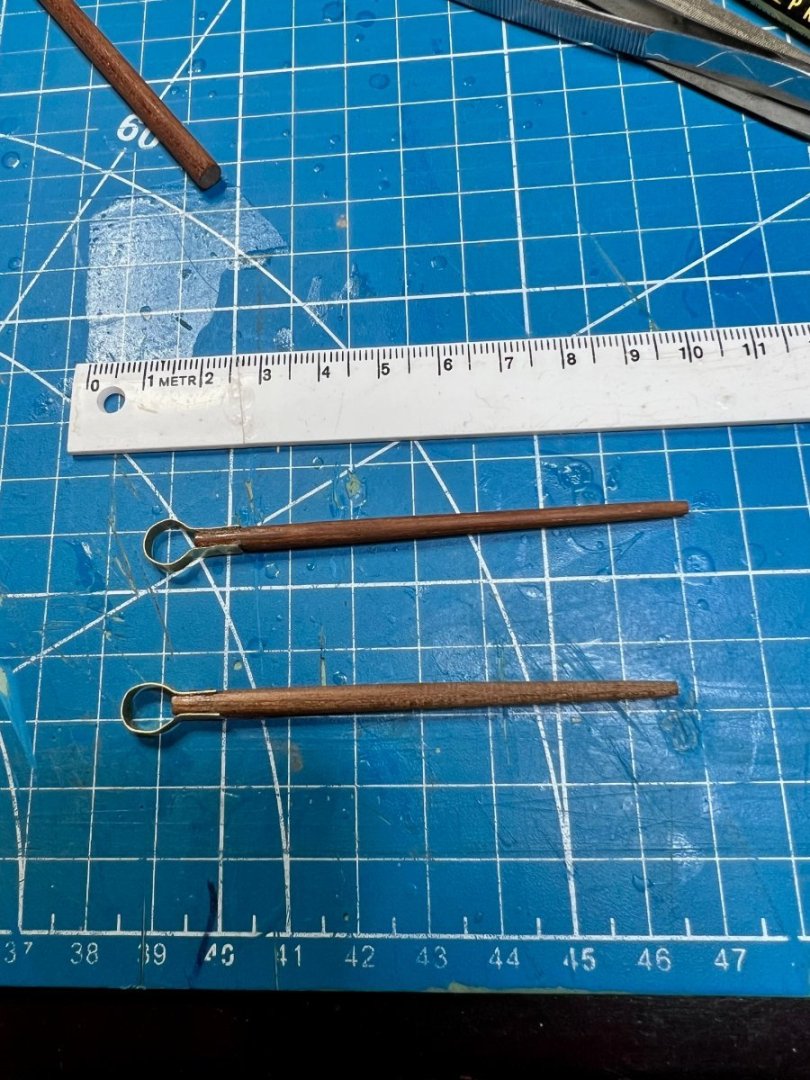
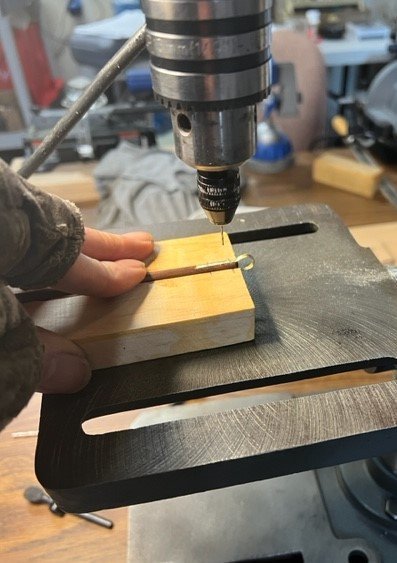
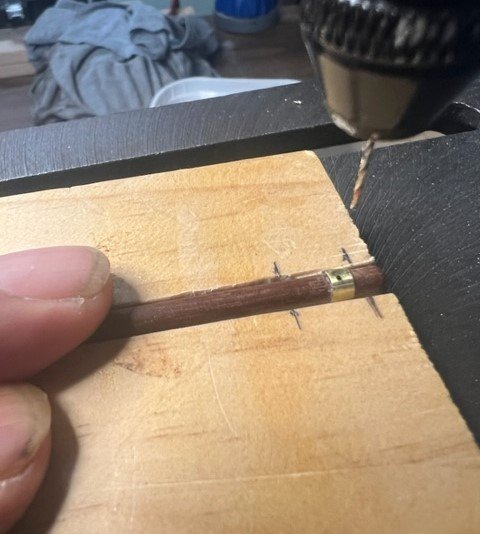
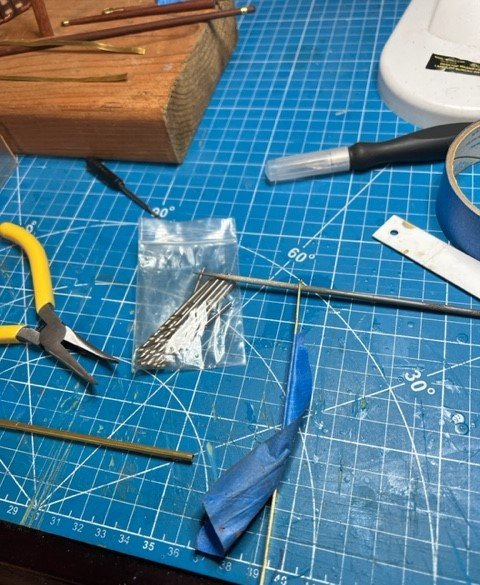
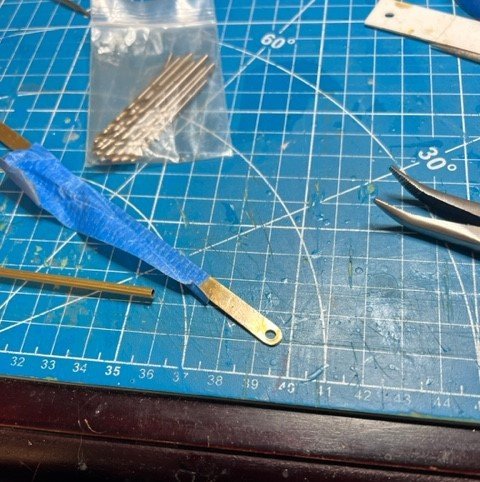
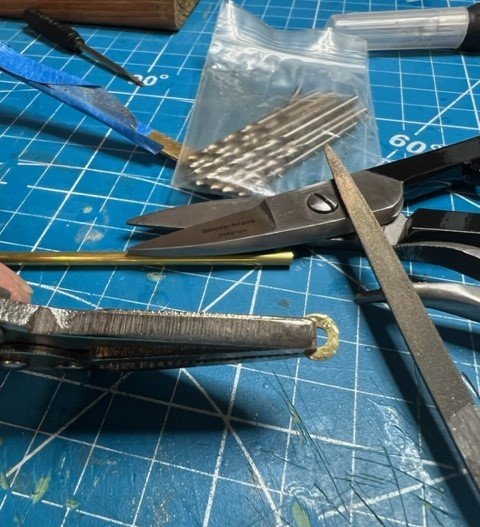
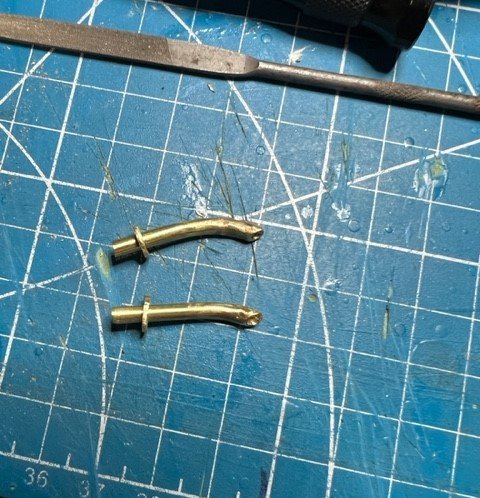
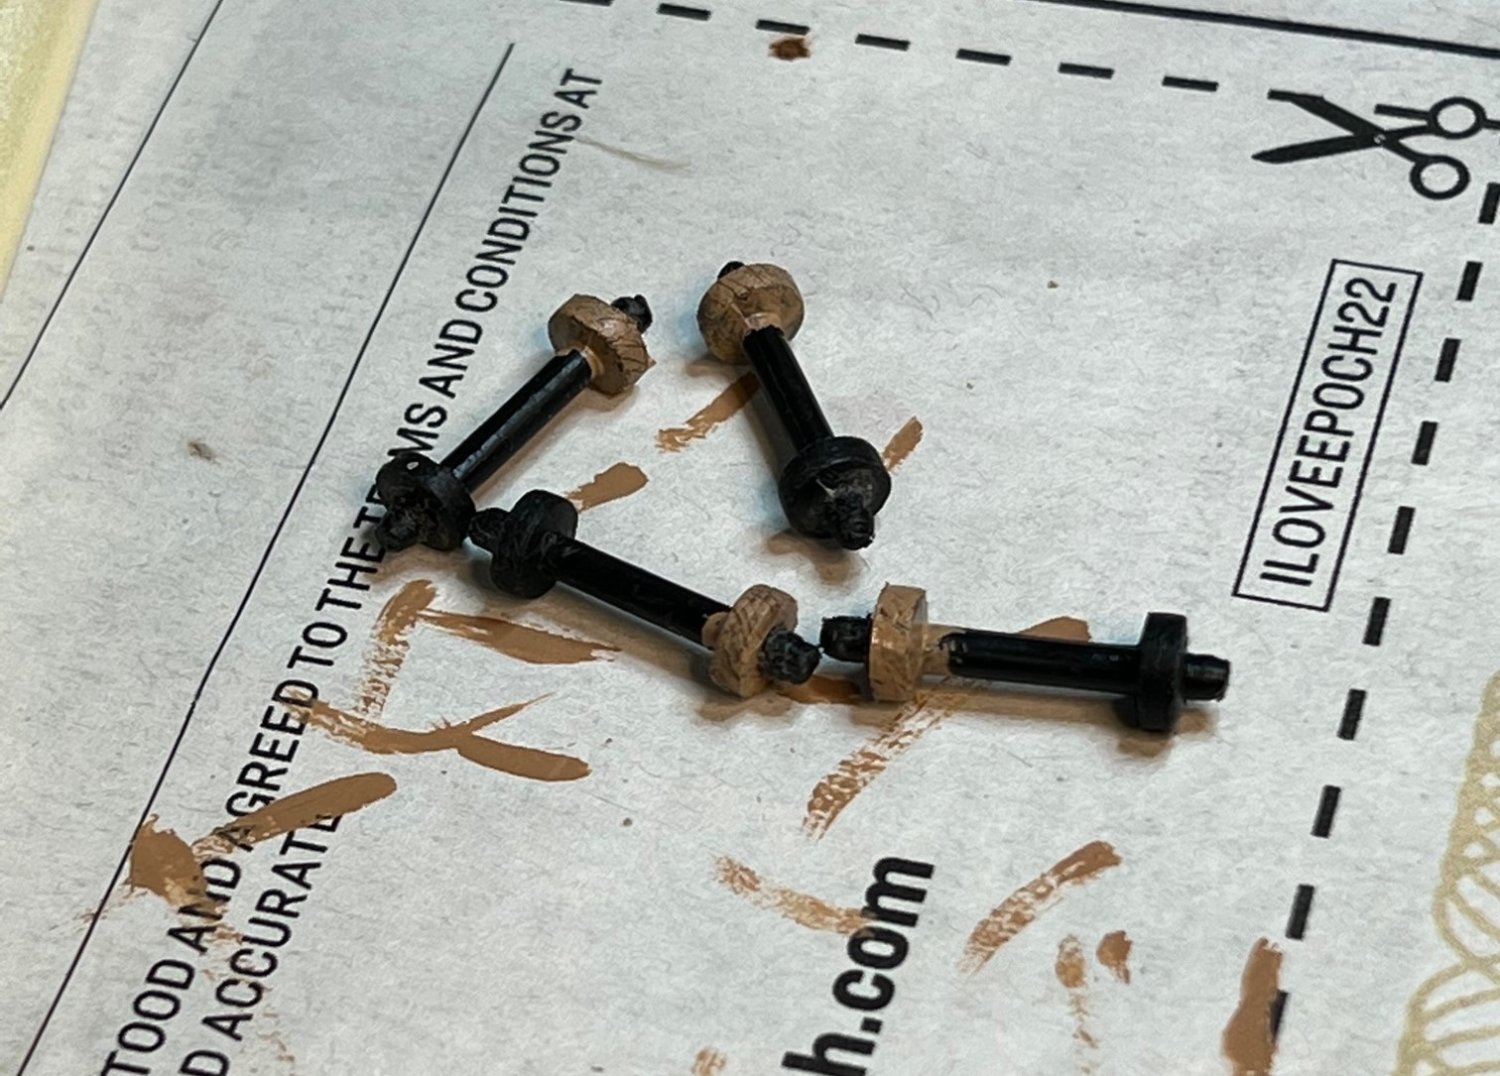
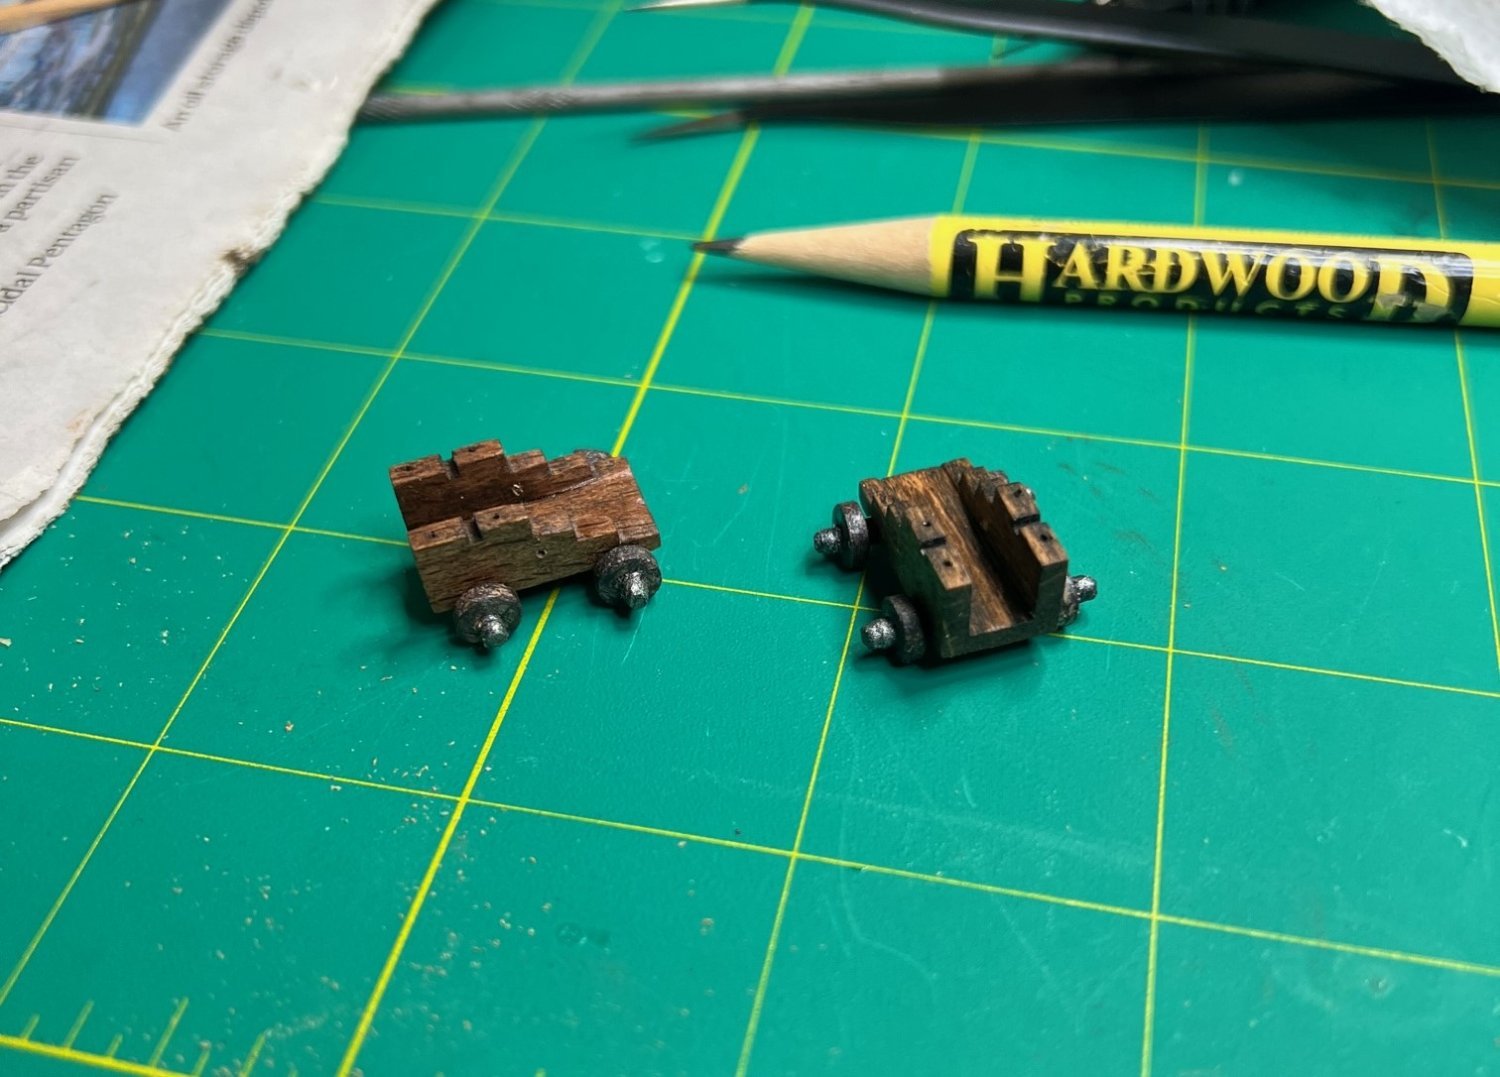
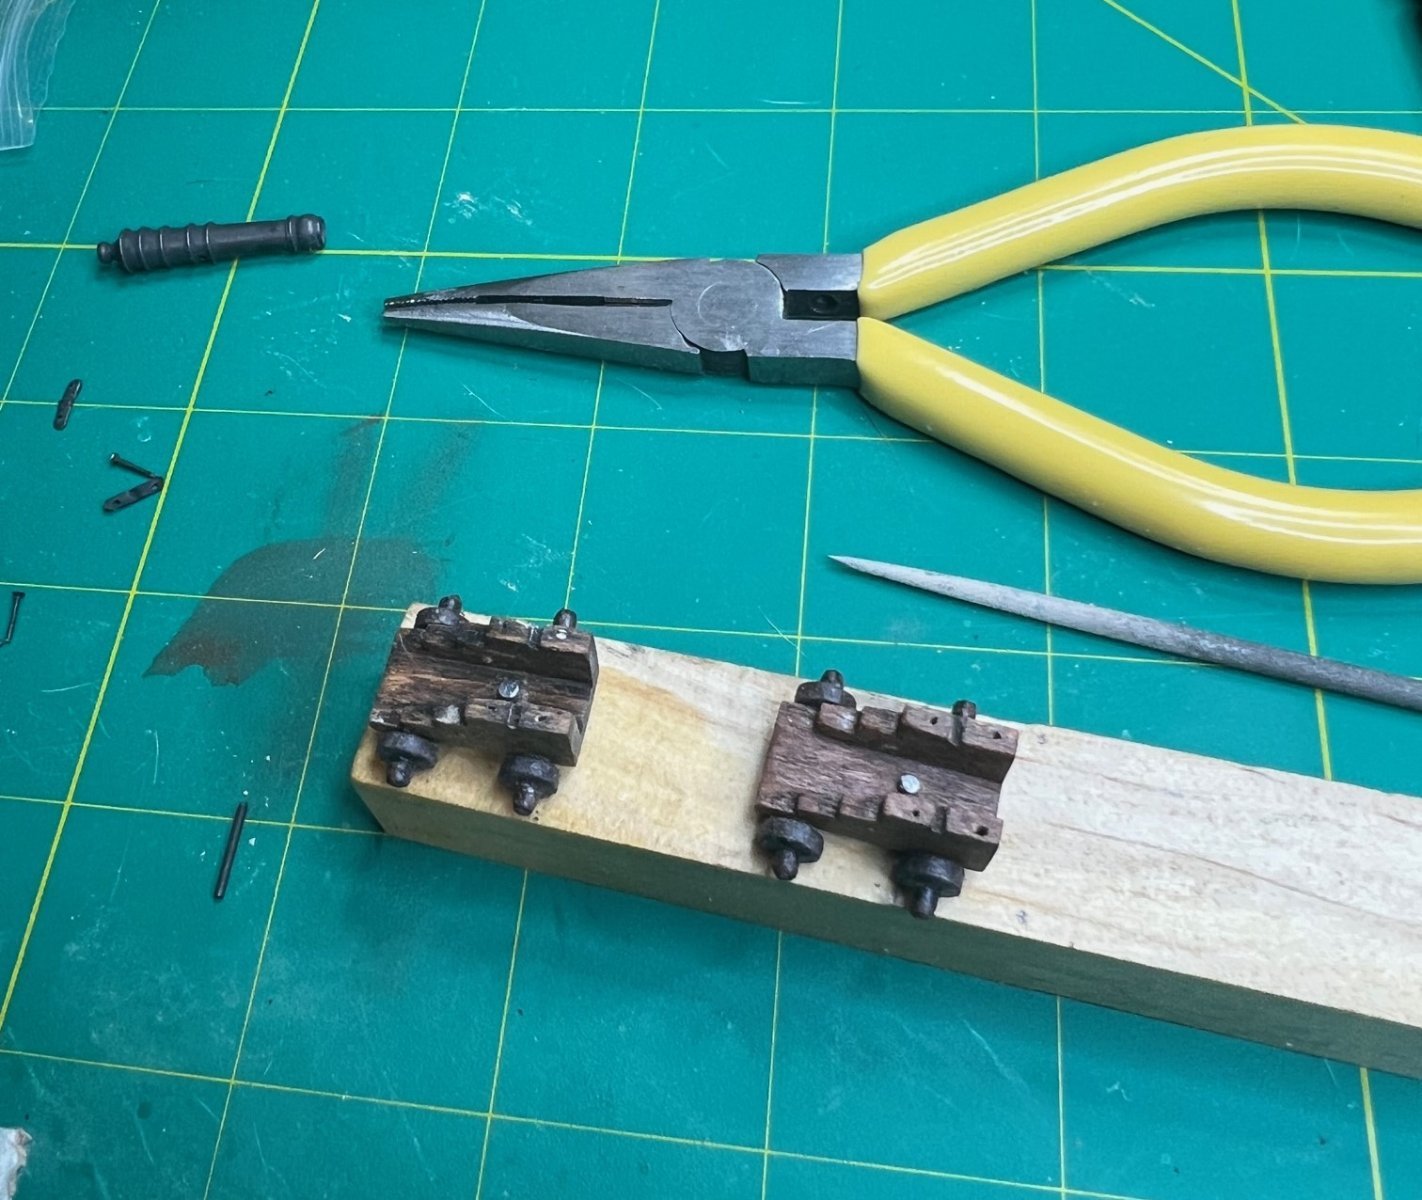
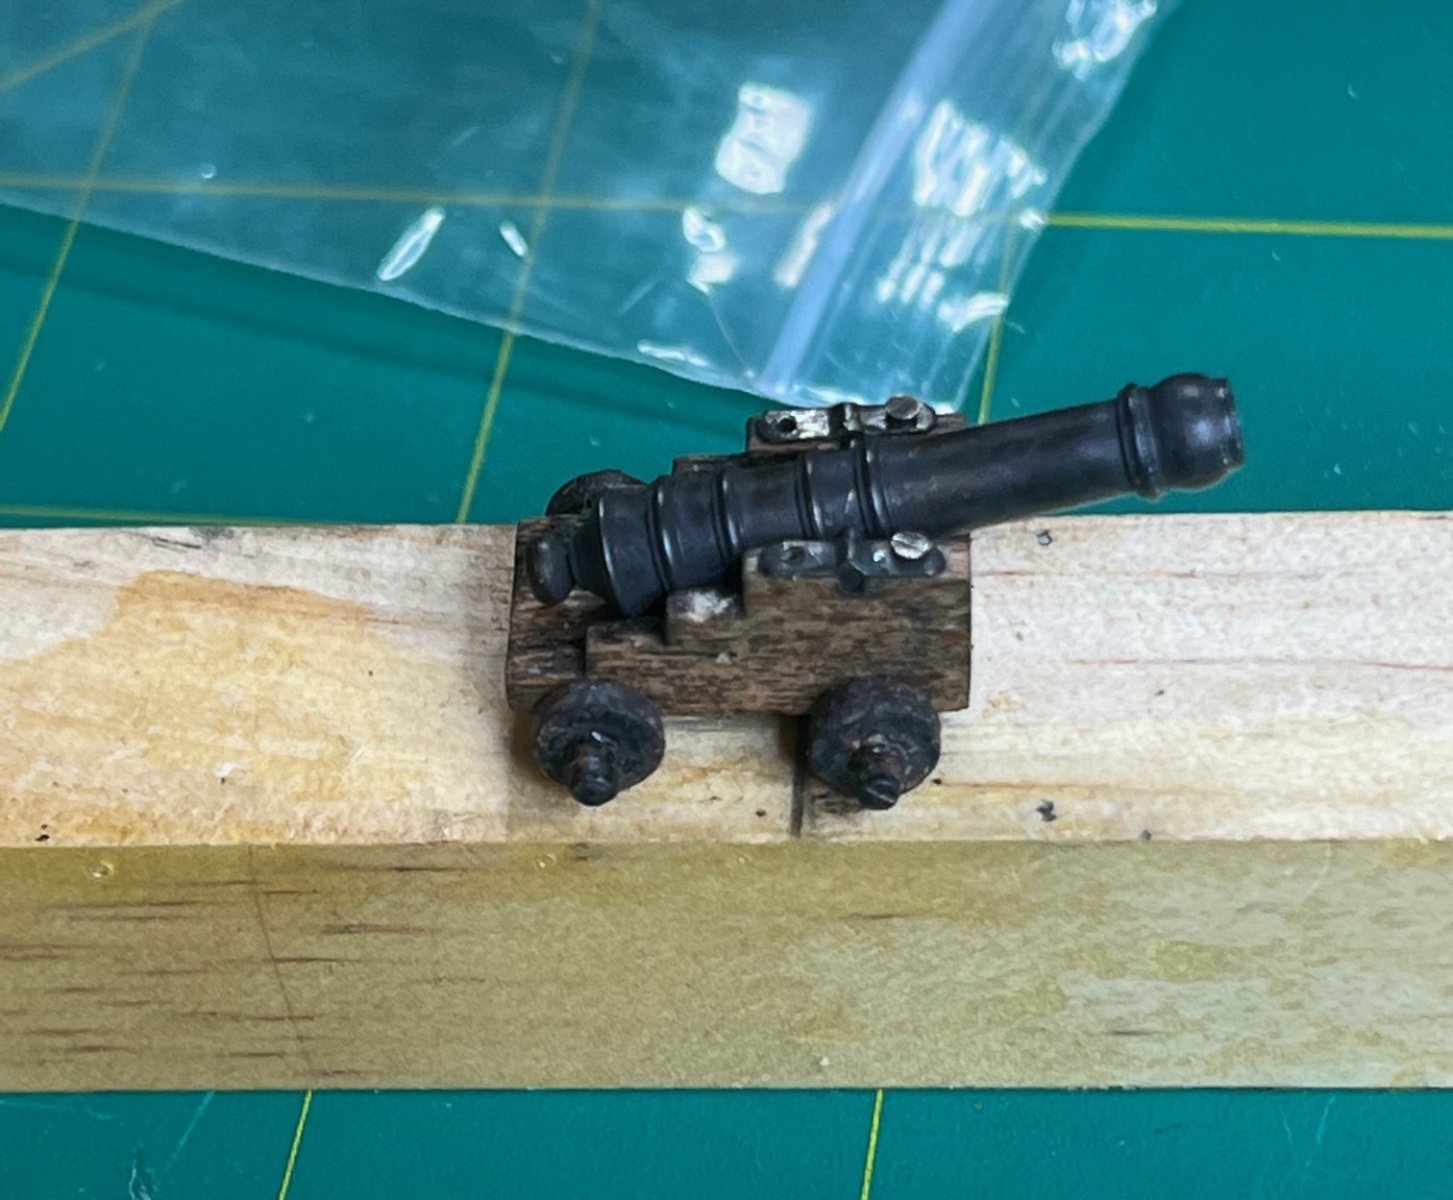
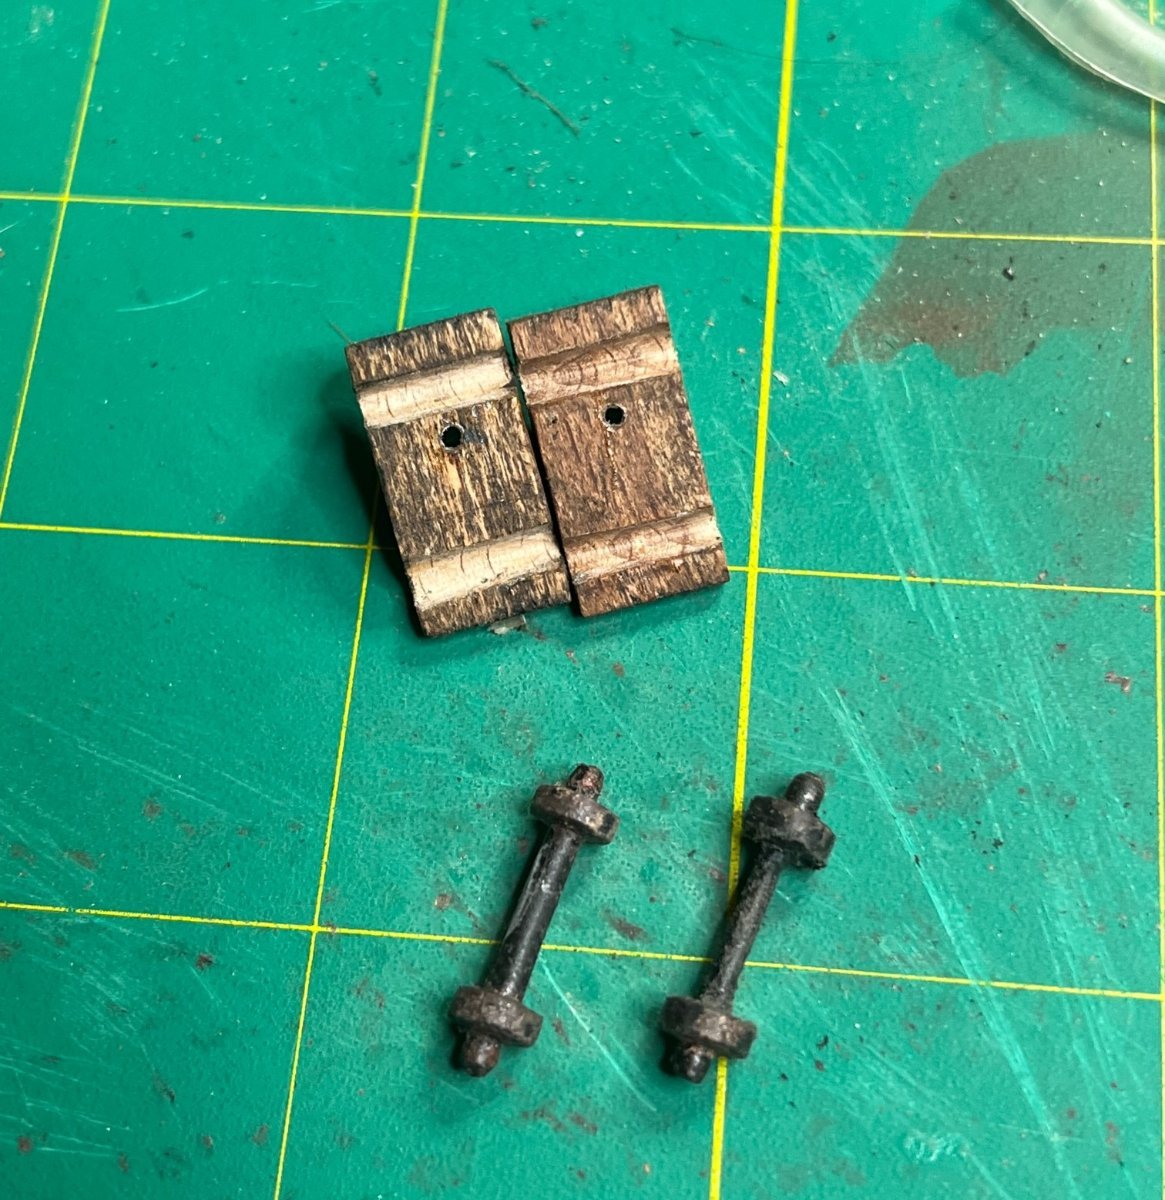
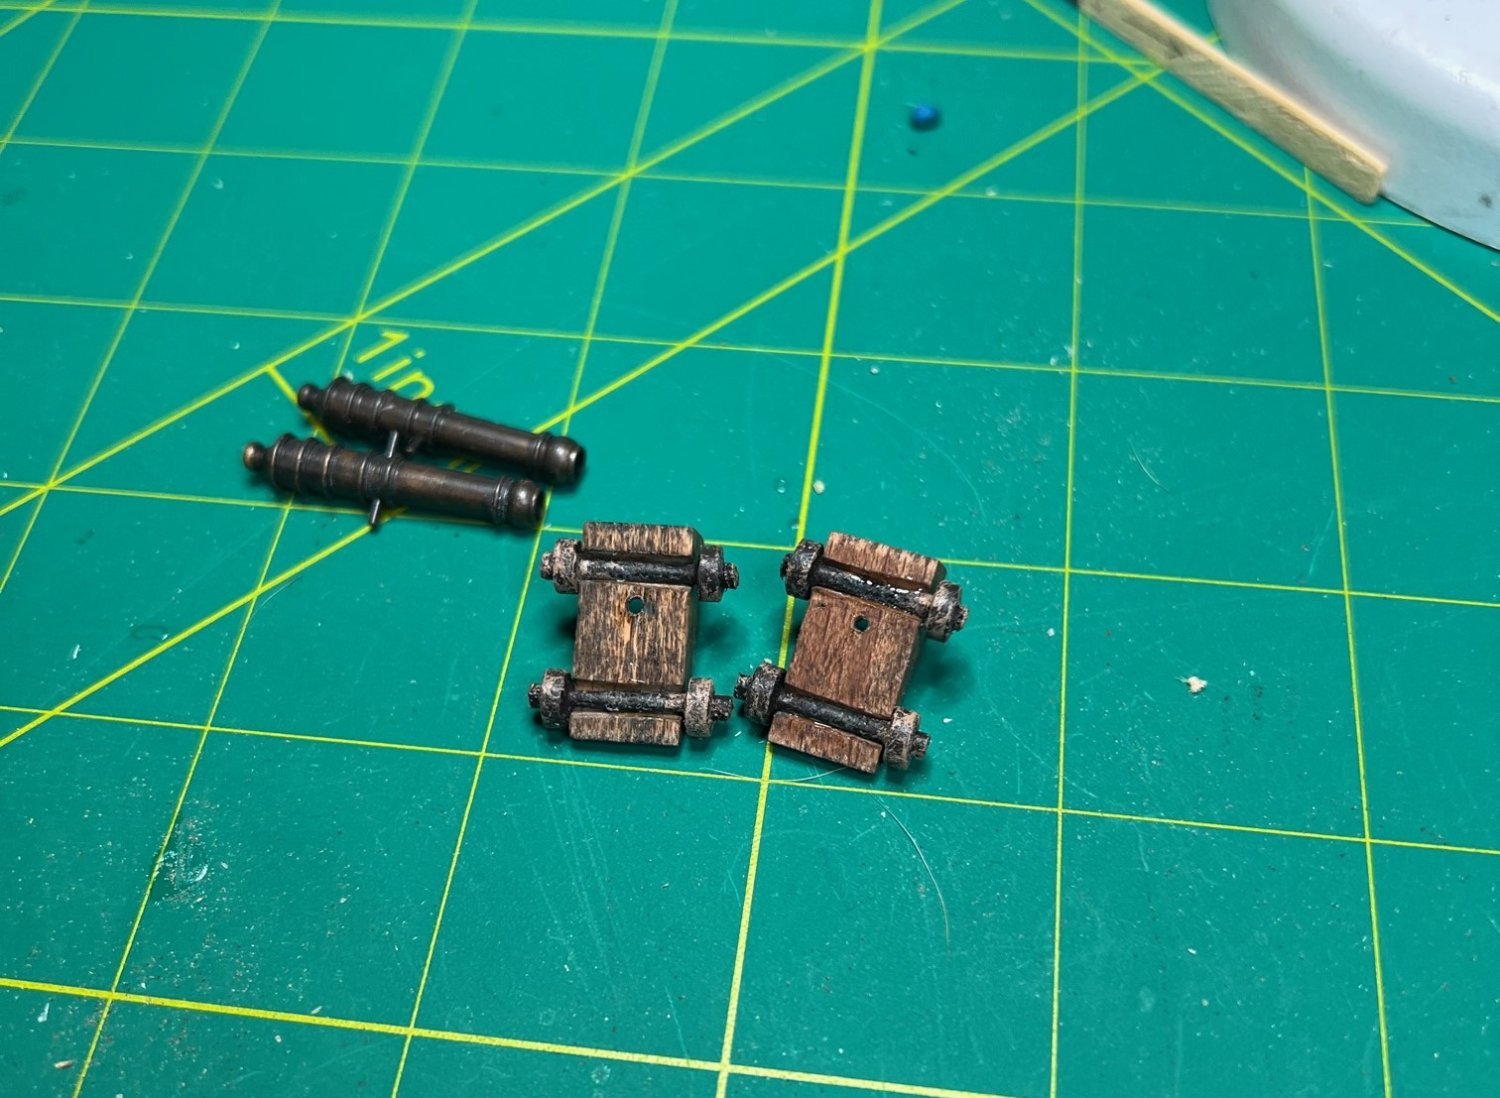
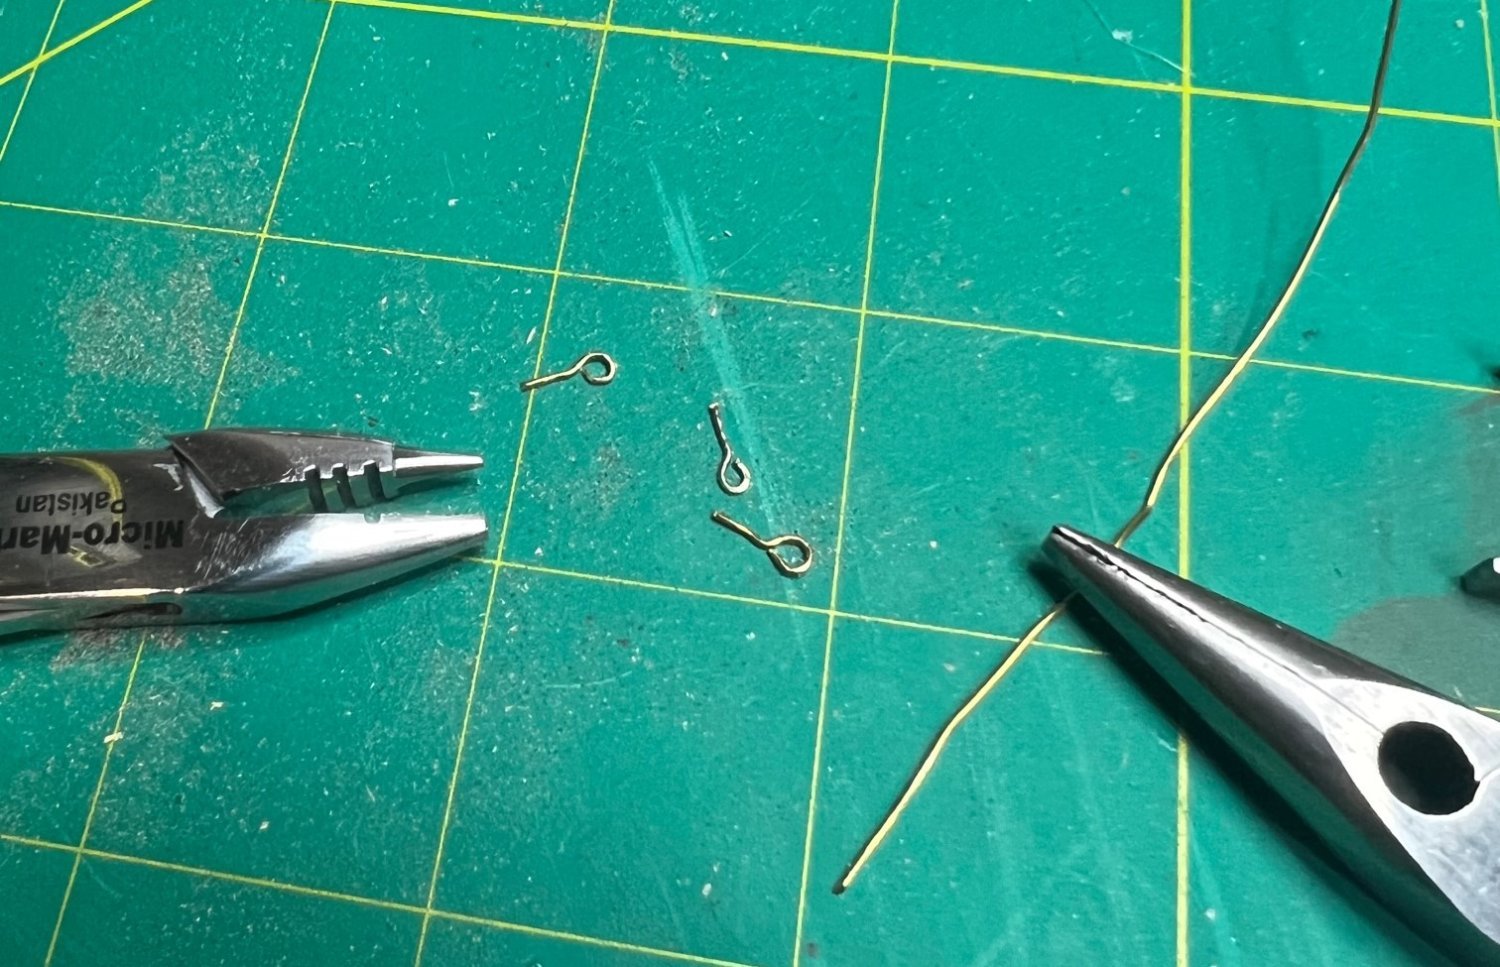
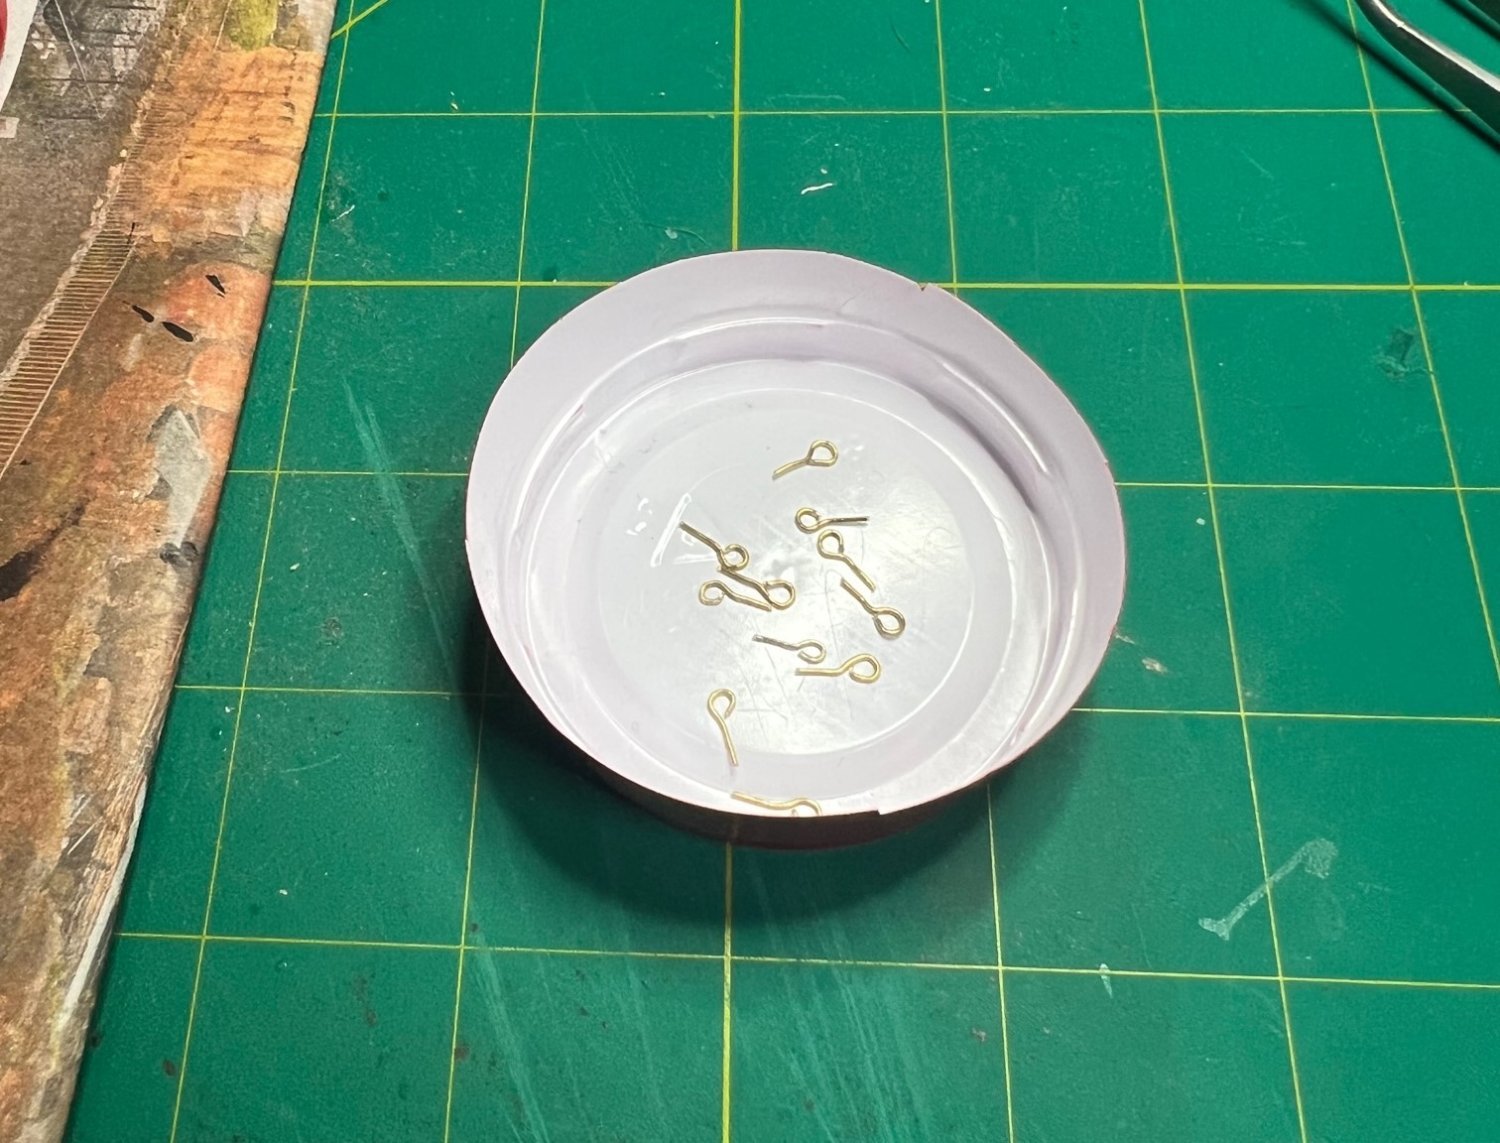
The kit included a bonus set of two guns which were optional. I pondered long and hard to decide if I wanted to include them. They would take up most of the midship if rigged completely as was shown in the diagram they included. I watched several videos on gun assembly and installation and after finding another place to mount the barrel, I decided my ship would be strapped and got to work. The guns were a kit in a kit. I would have to get more blocks since two guns would use up 18 blocks if rigged completely so I ordered some 4mm blocks, slightly larger than the 3mm blocks that came with the kit. I ended up using the kit supplied blocks on the guns and the 4mm blocks for the ship’s rigging. First, I stained the wooden cannon stand dark walnut. The wheels and axles were on piece plastic parts, soft plastic. When test fitting the frame on the axles, I discovered they would be far too high off the deck to even fit through the lower gun ports I would cut above the aft scupper. I both filed the slots deeper into the bottom of the frame and tried to reduce the diameter of the axles to make the guns sit lower on the deck. I thought maybe I could cut the wheels off the axles and just glue them to the side but decided not to. I would keep thinning the axle which was difficult because it was soft plastic and didn’t take to filing or sanding very well. Next the brass parts of the guns would need to be blackened. I realized I was going to run out of kit supplied eye bolts so I ordered some 0.6mm brass wire so I could fabricate my own.


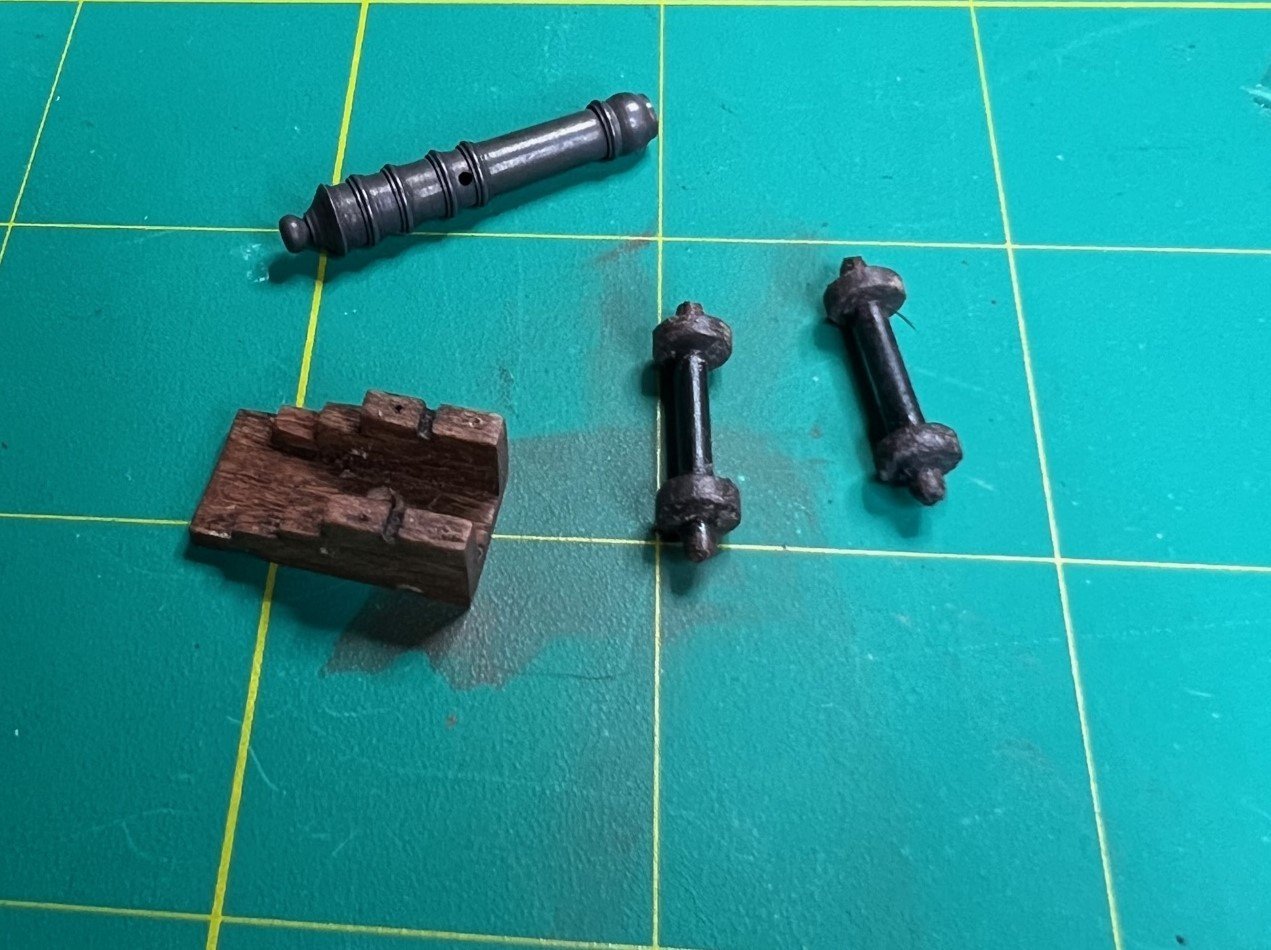
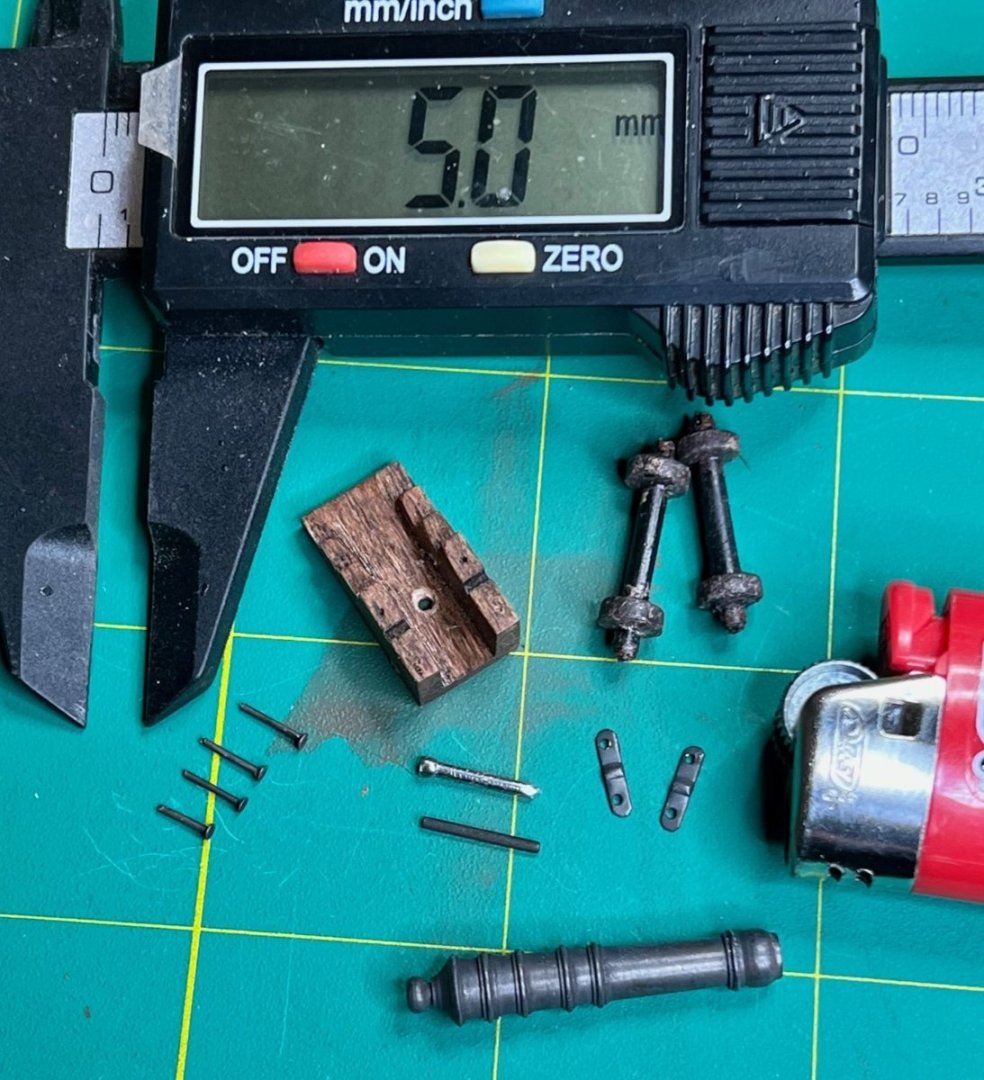


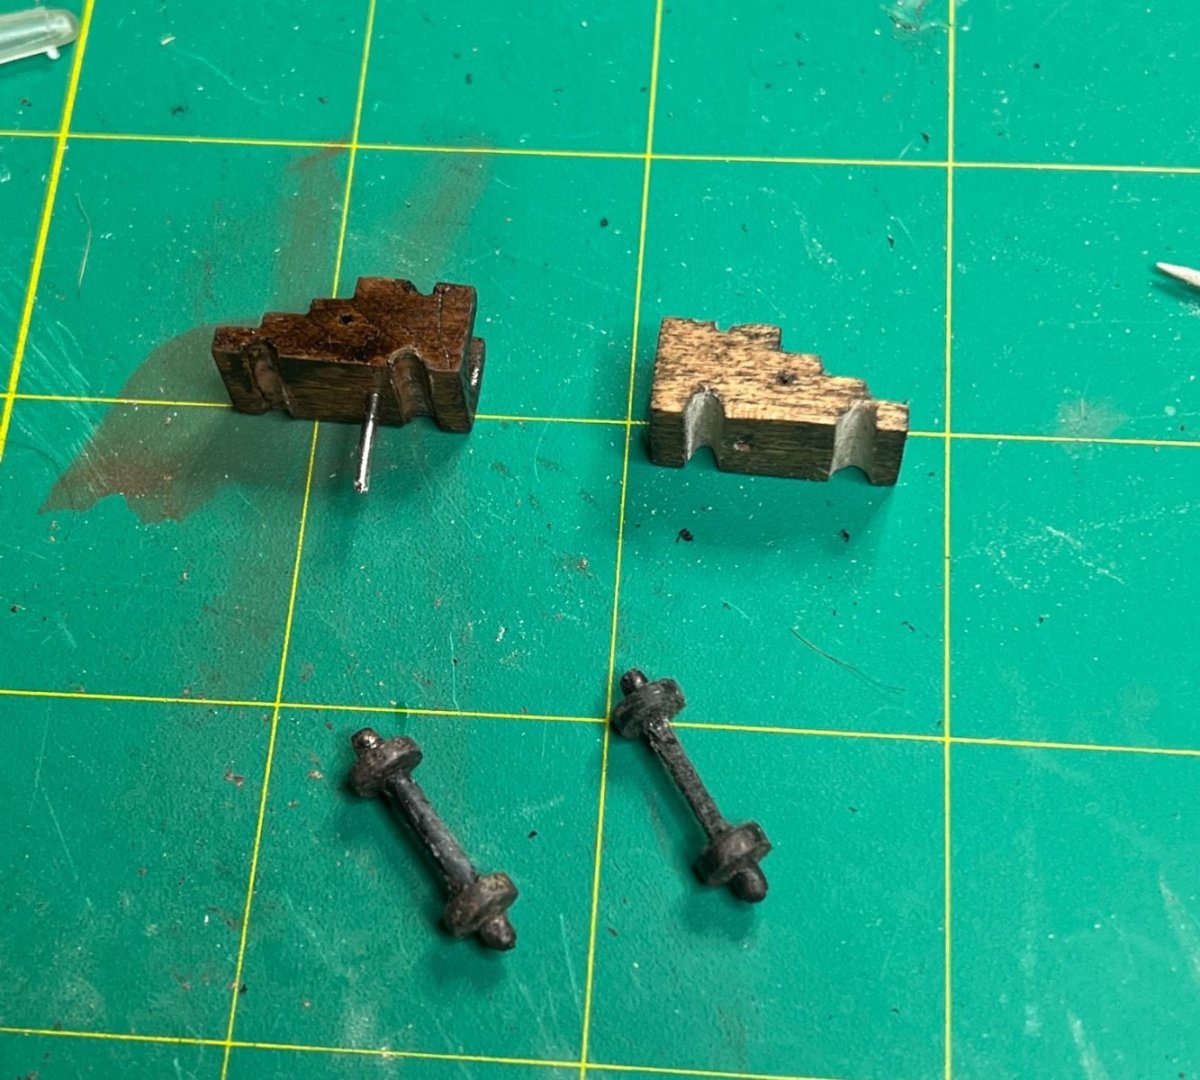

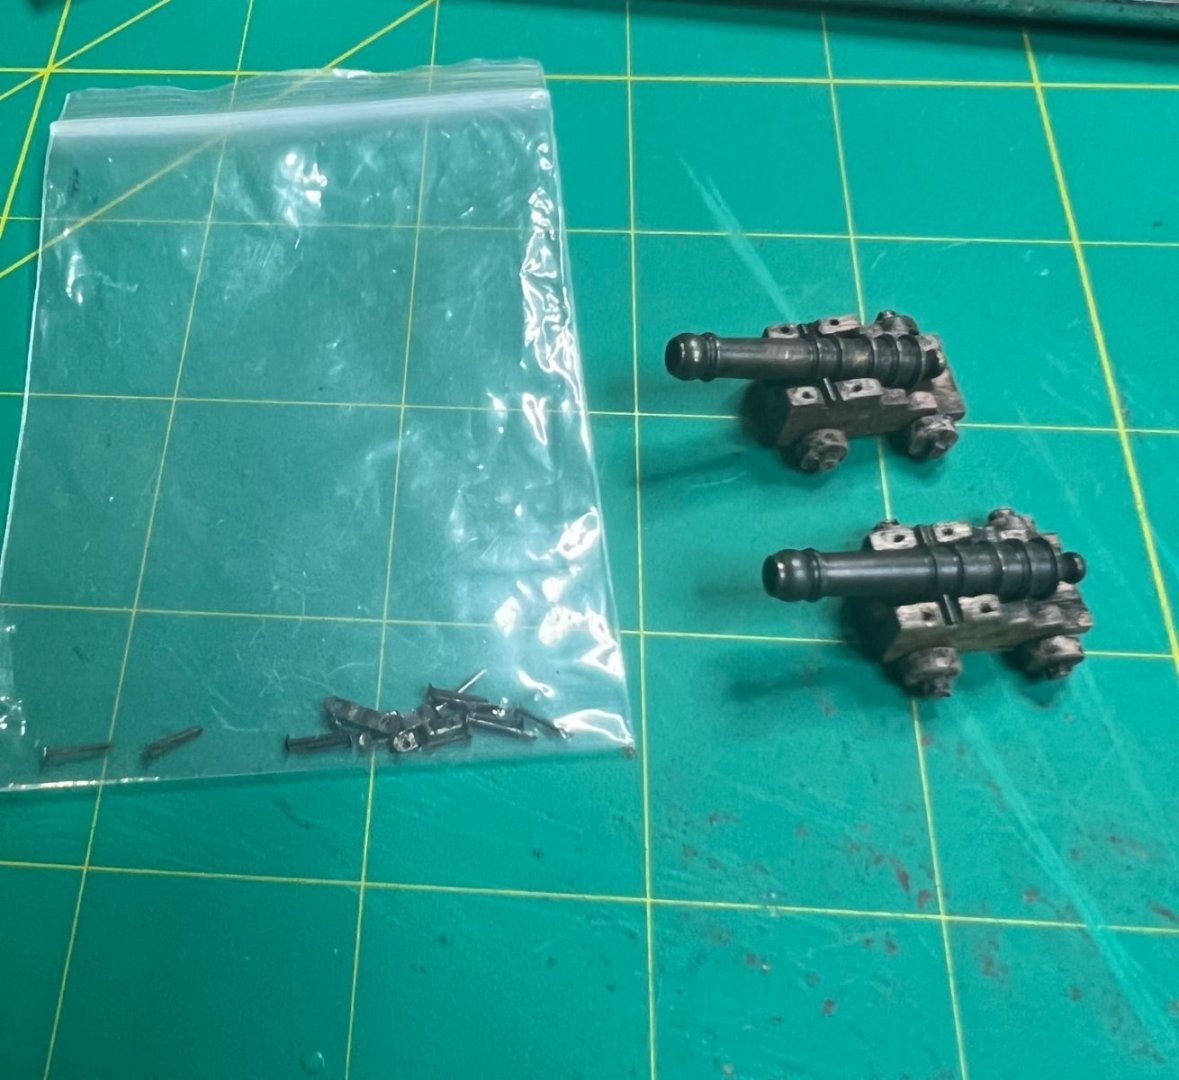


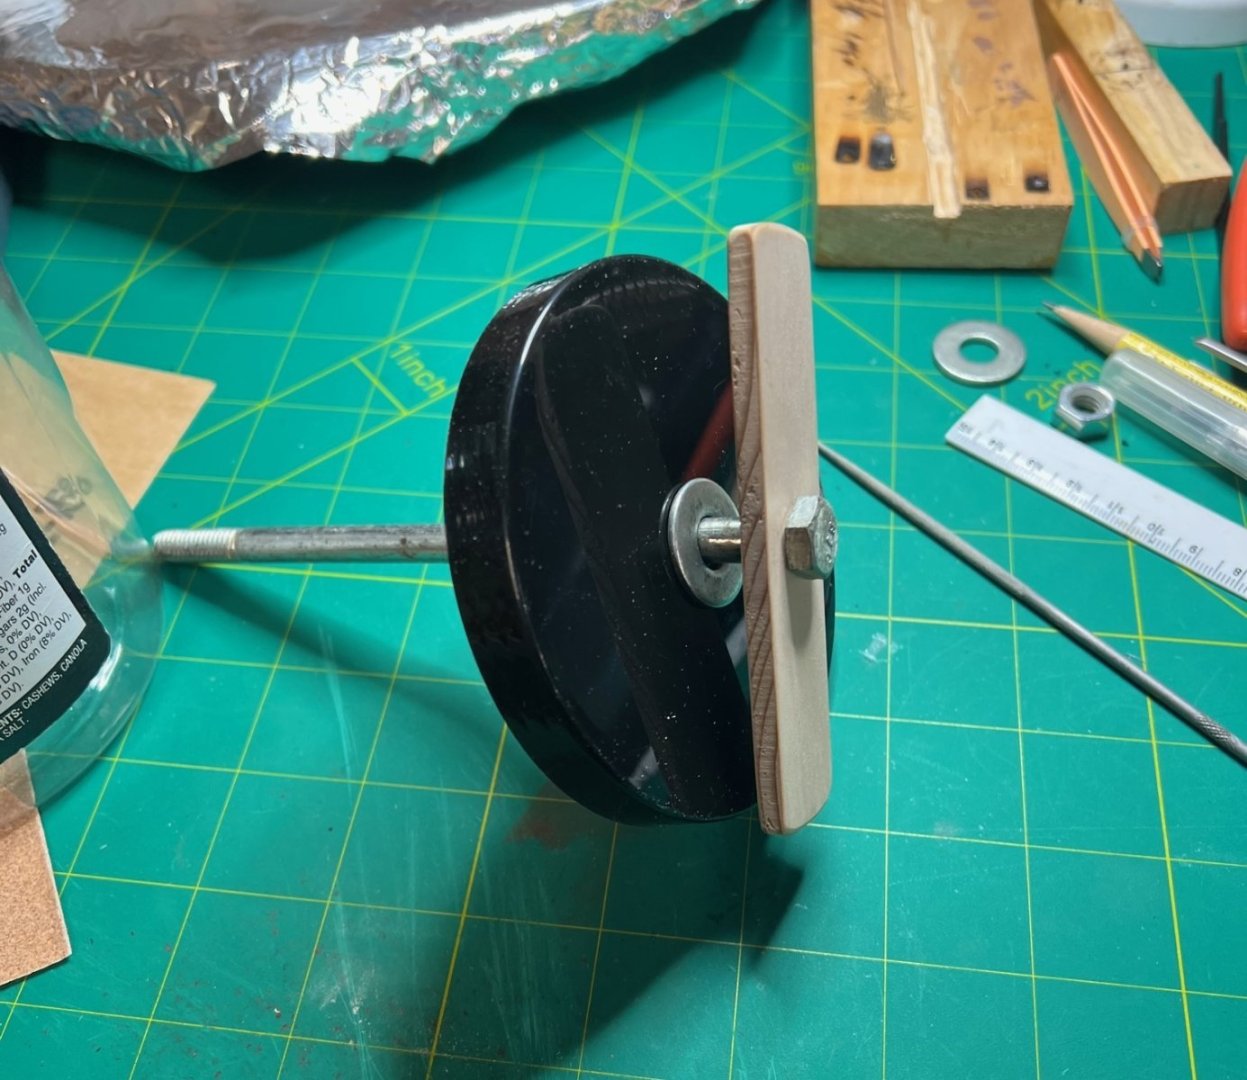
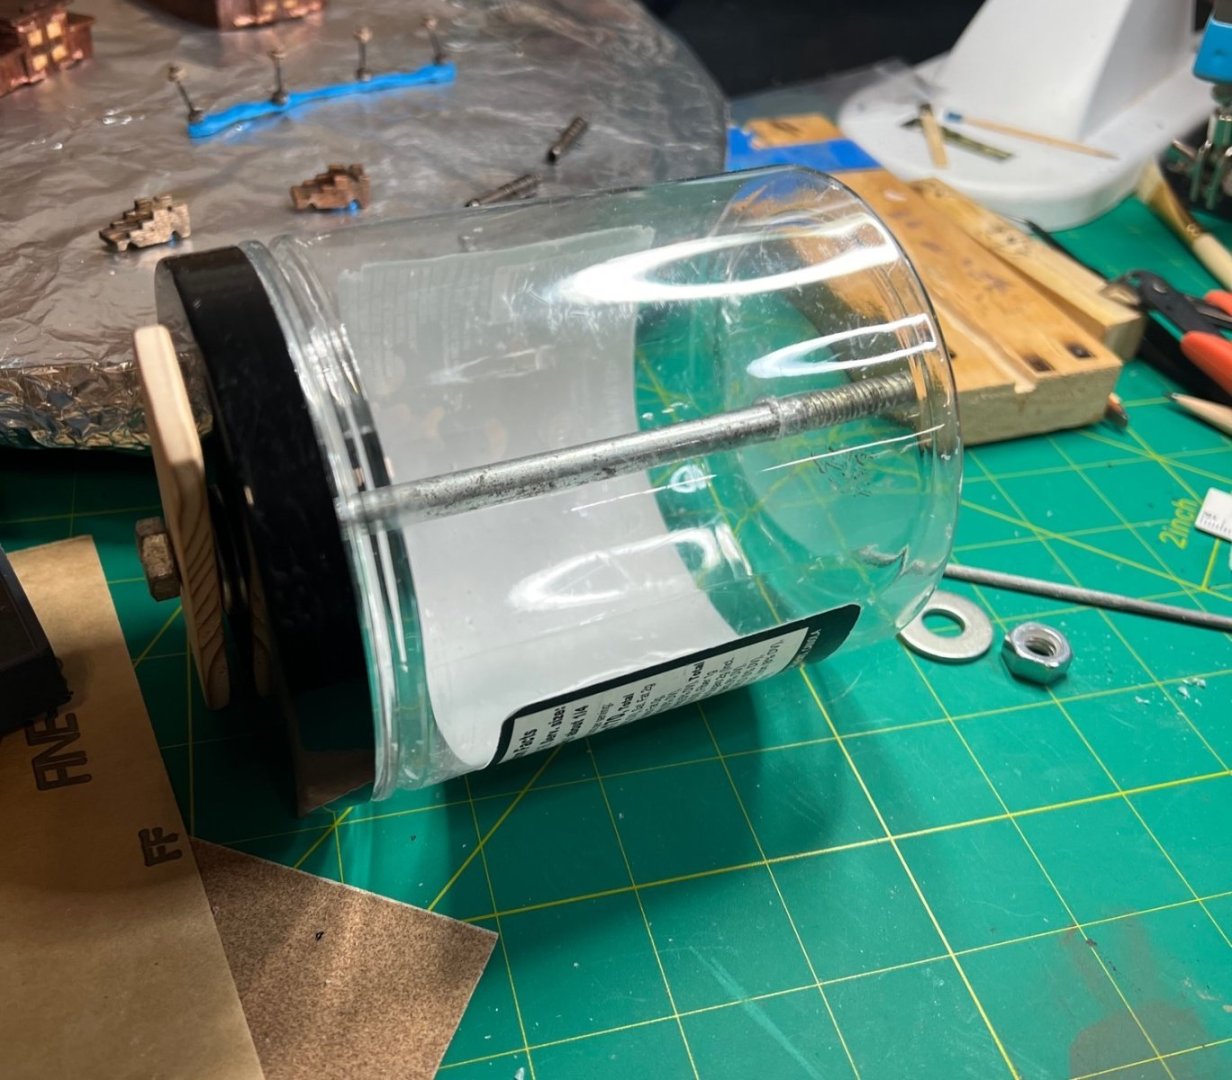
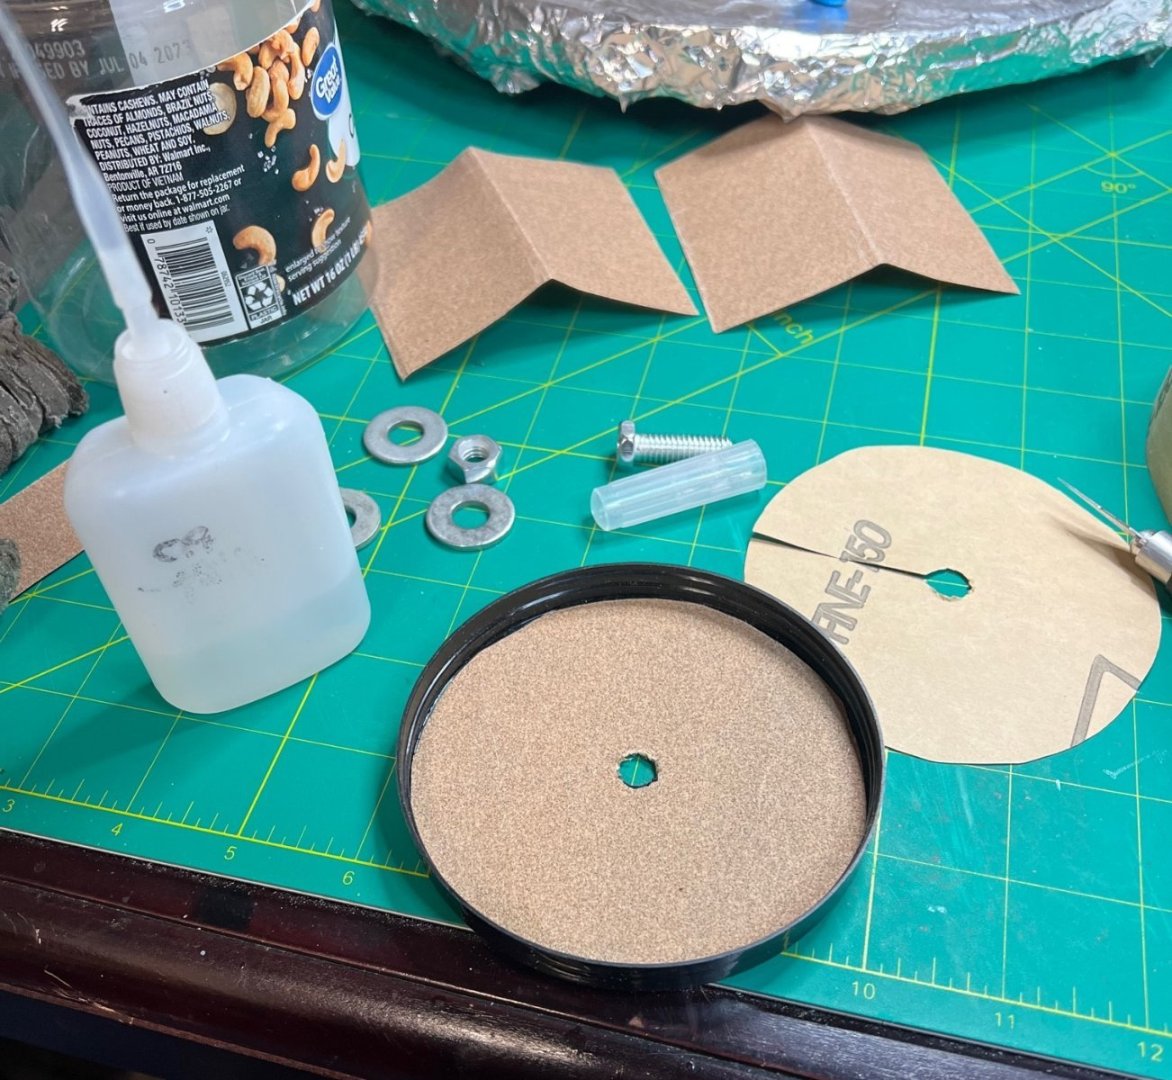
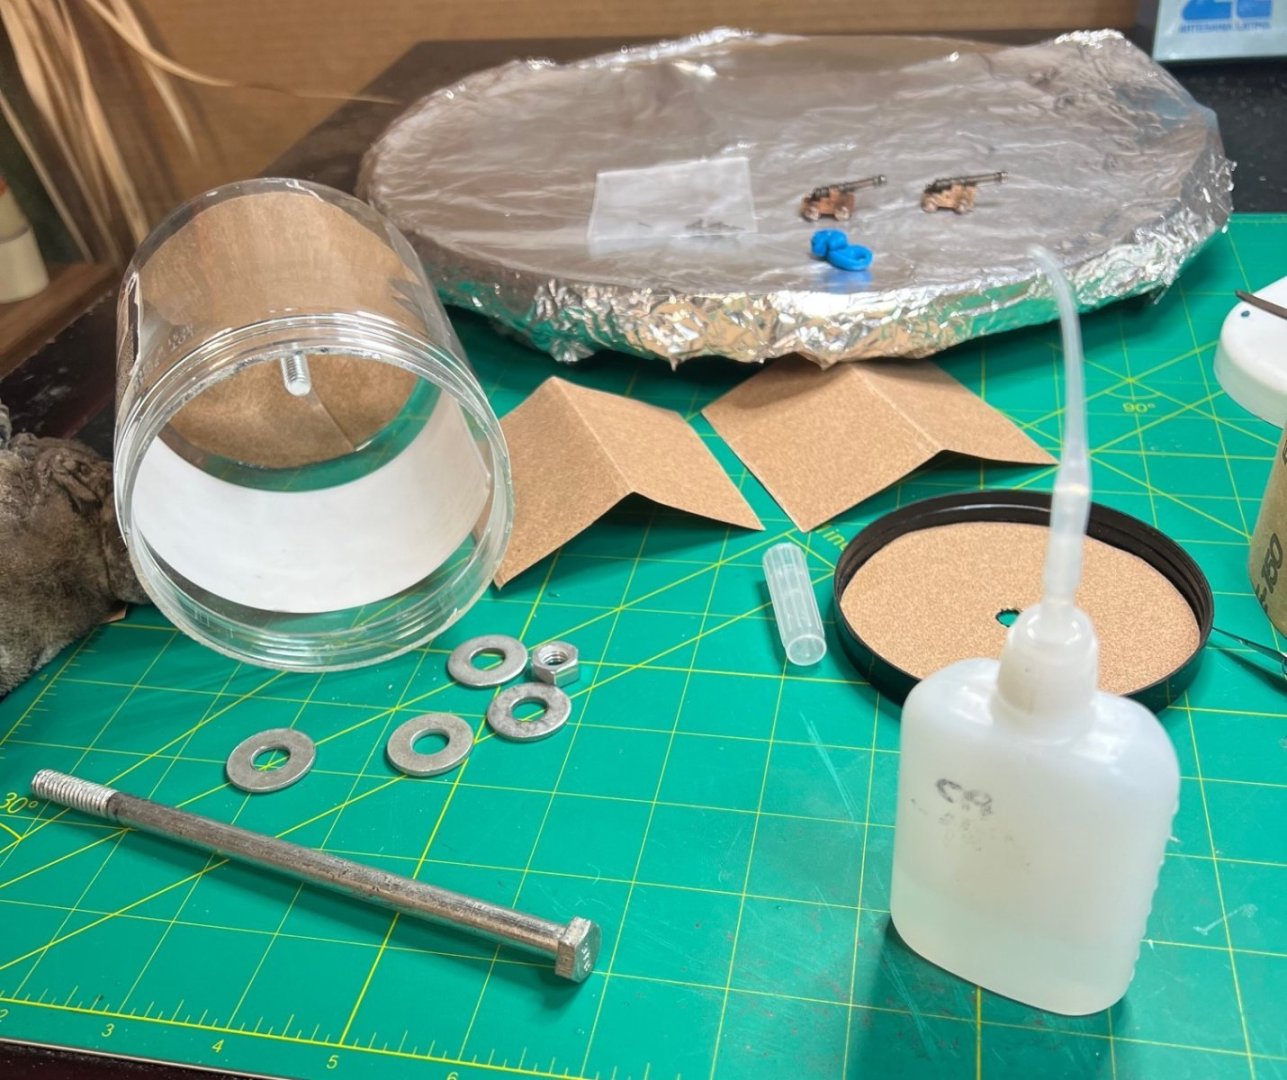
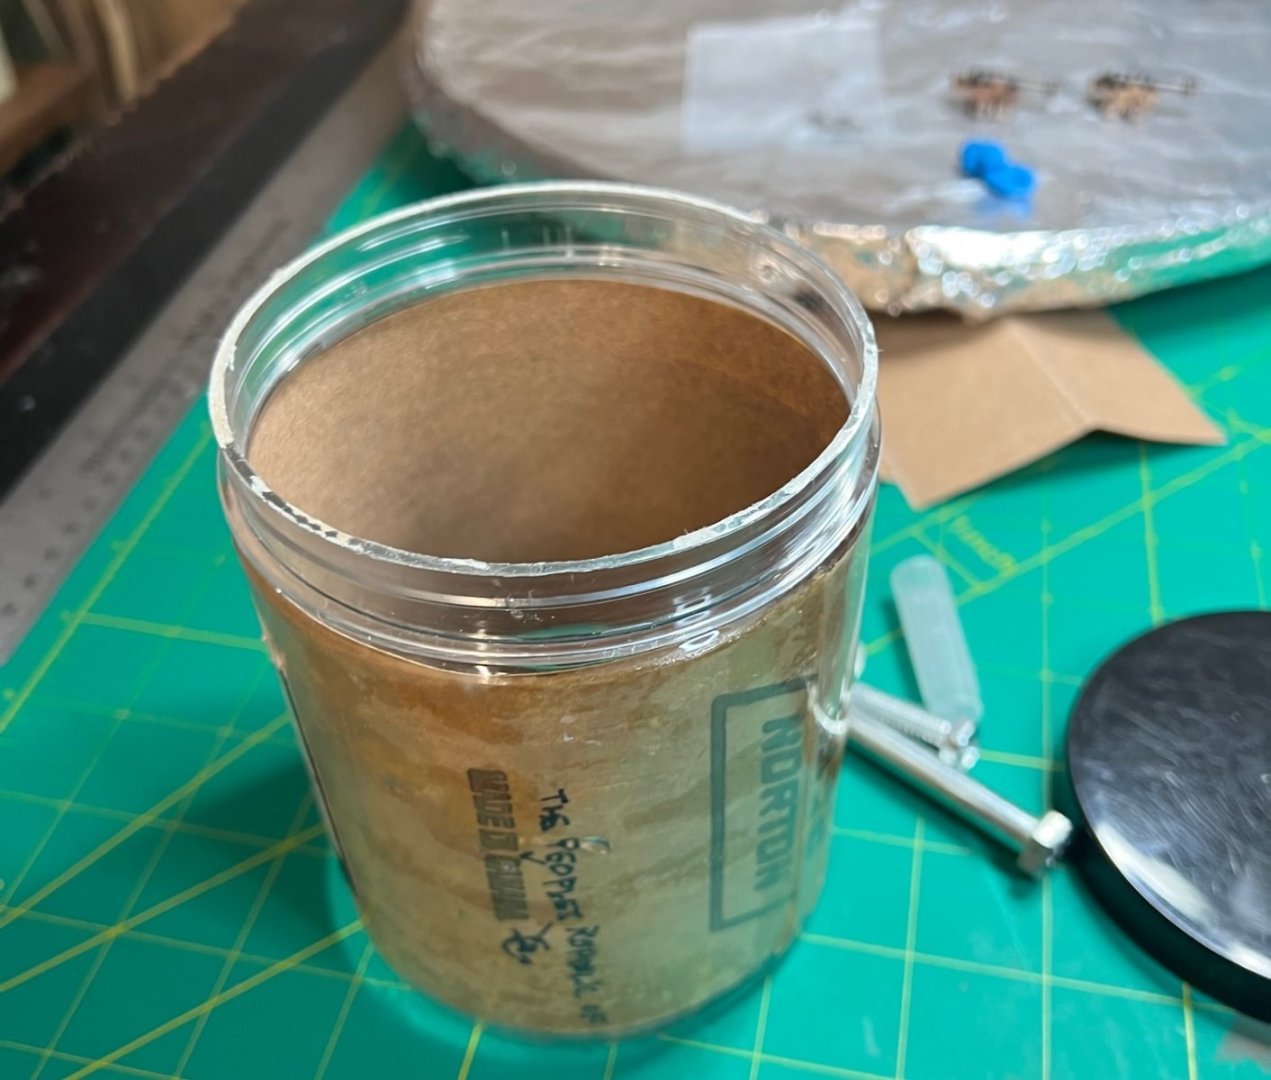
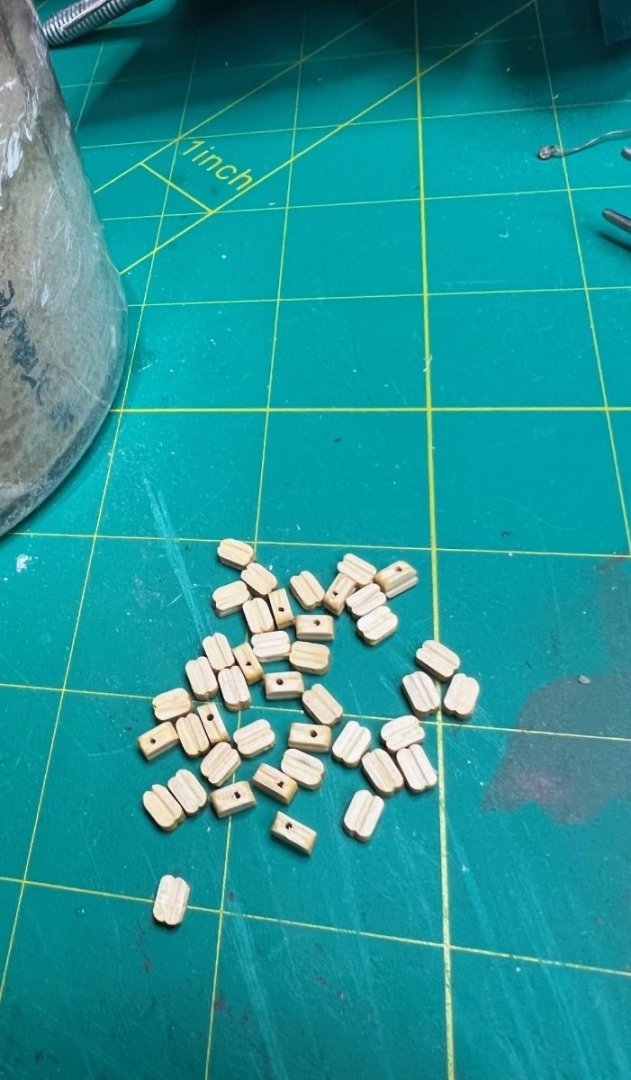
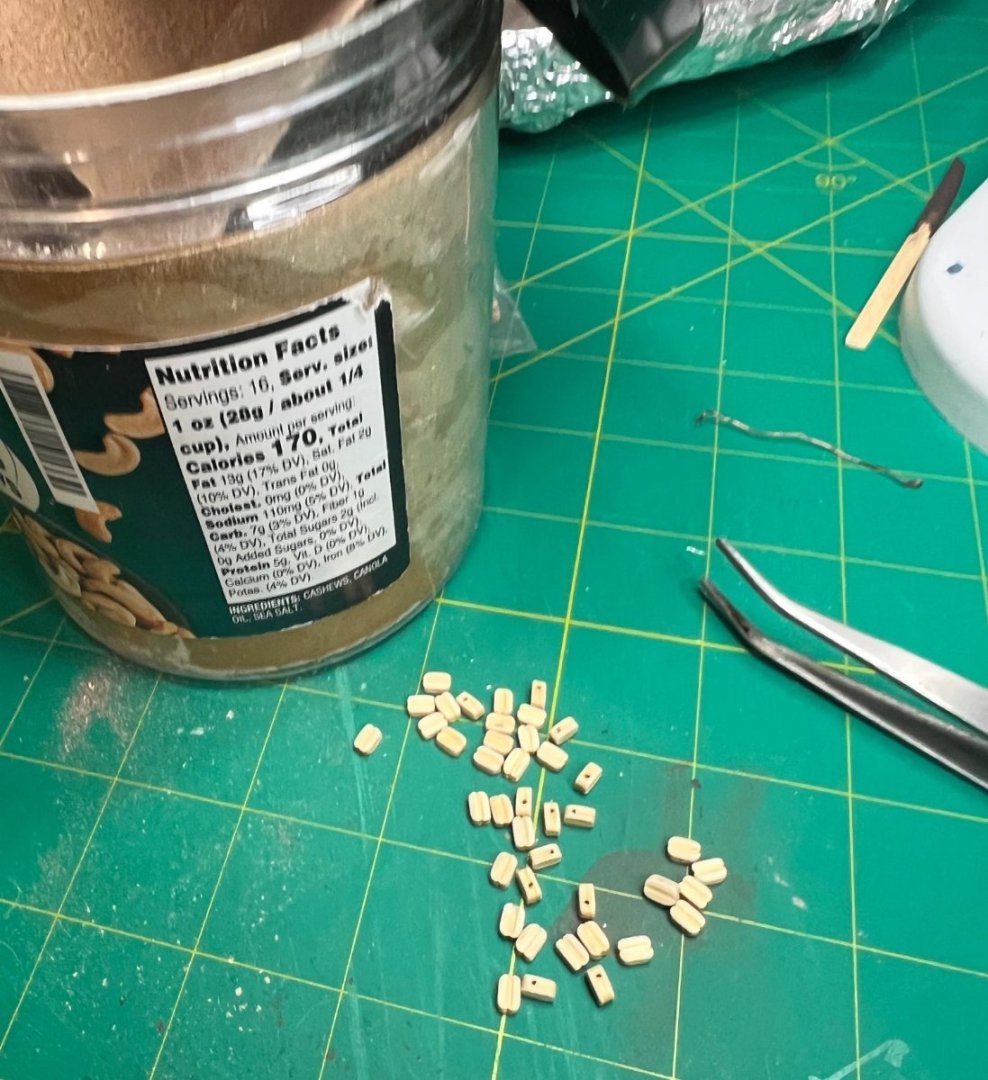
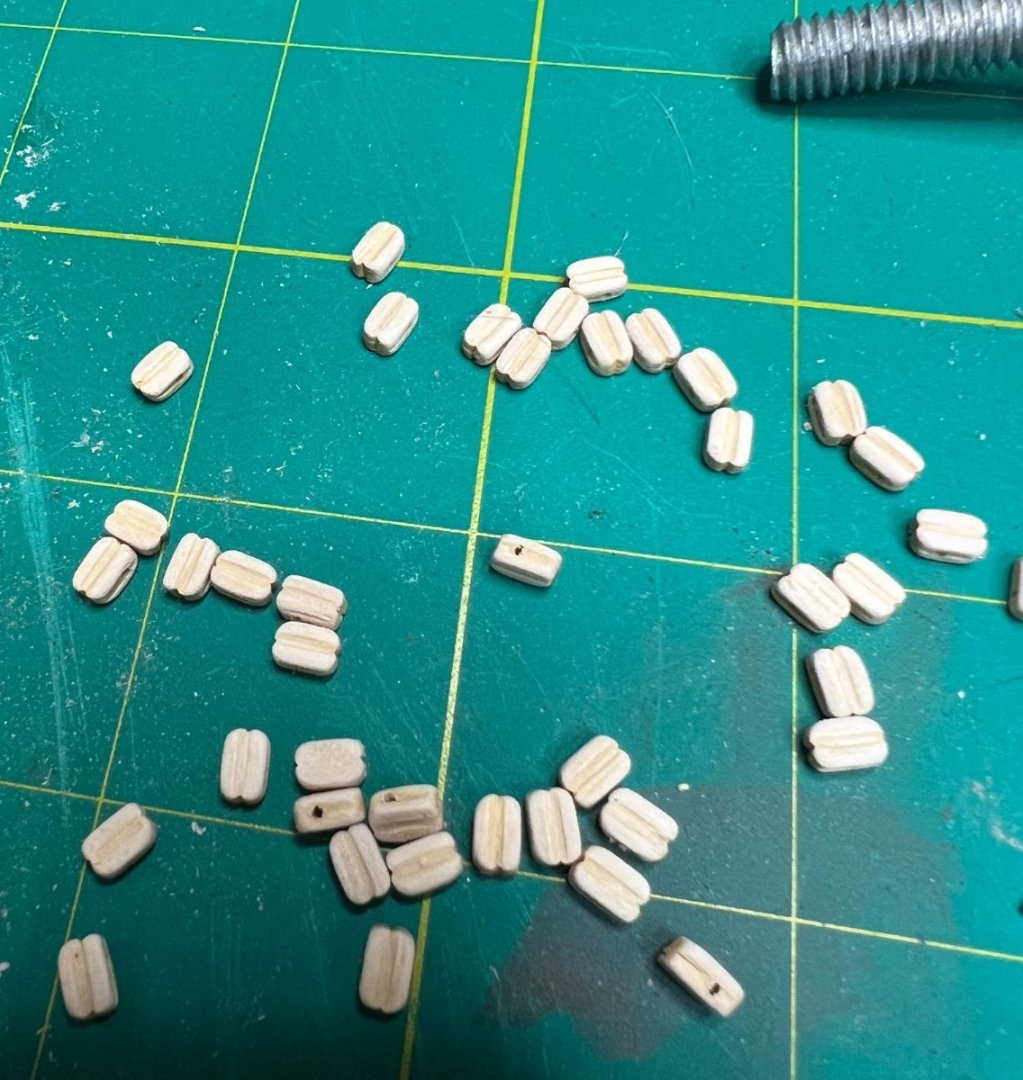
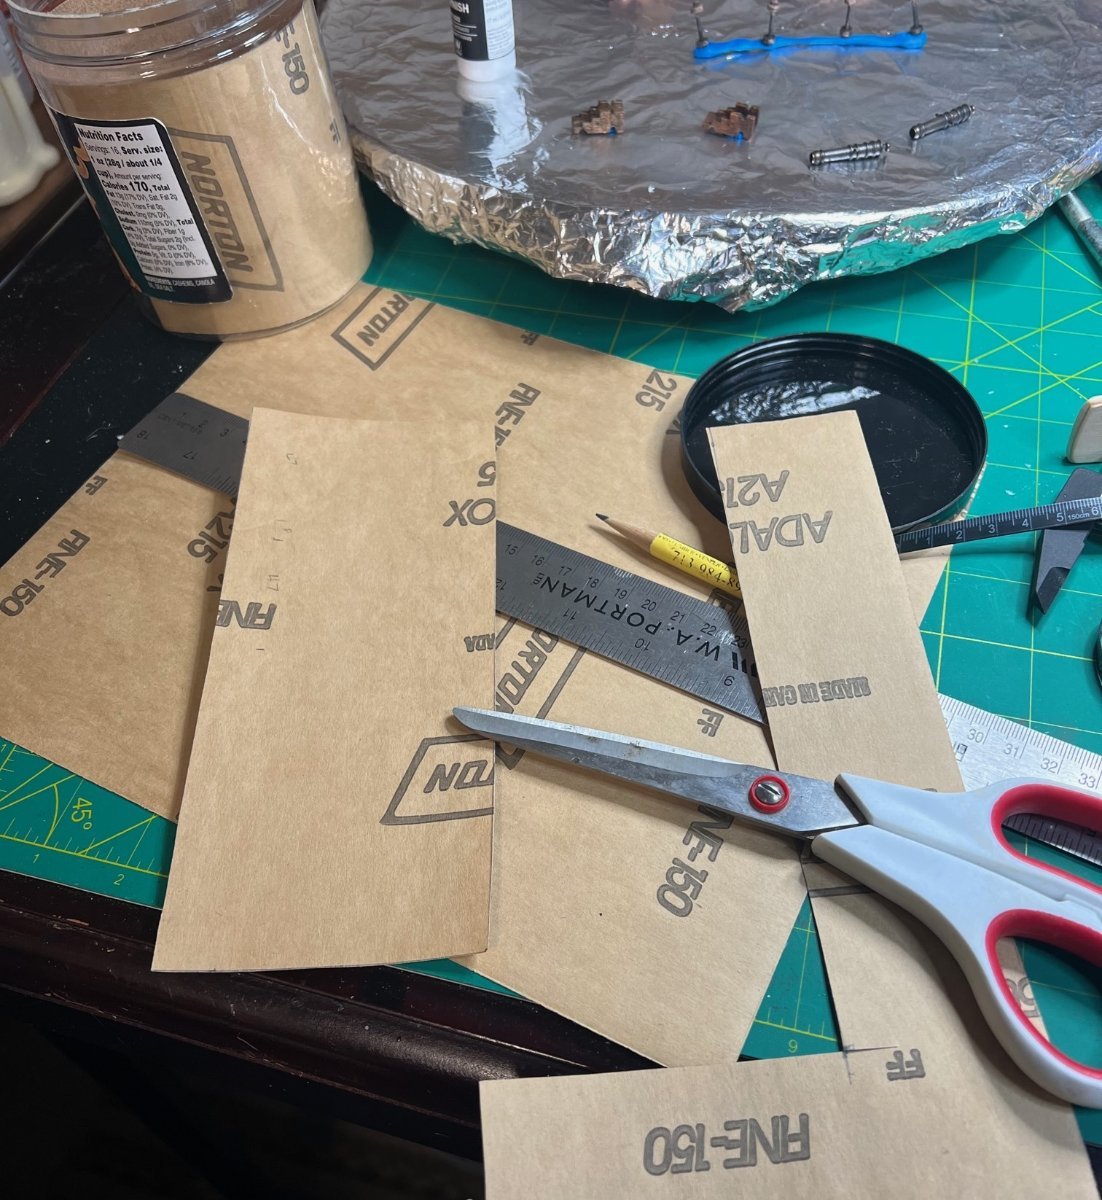
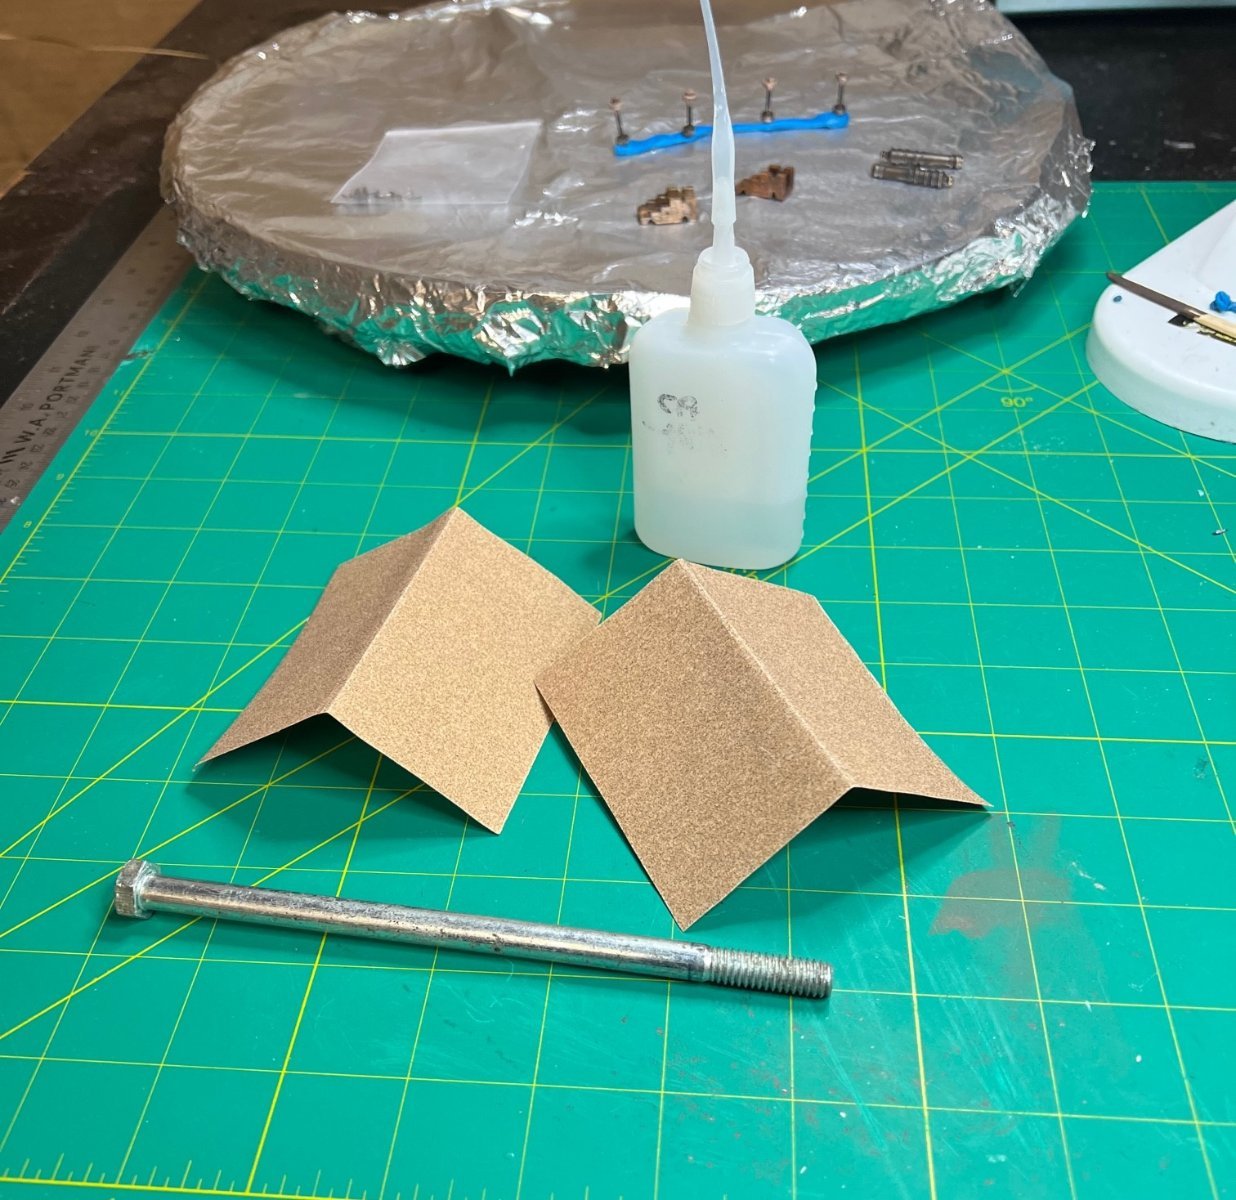
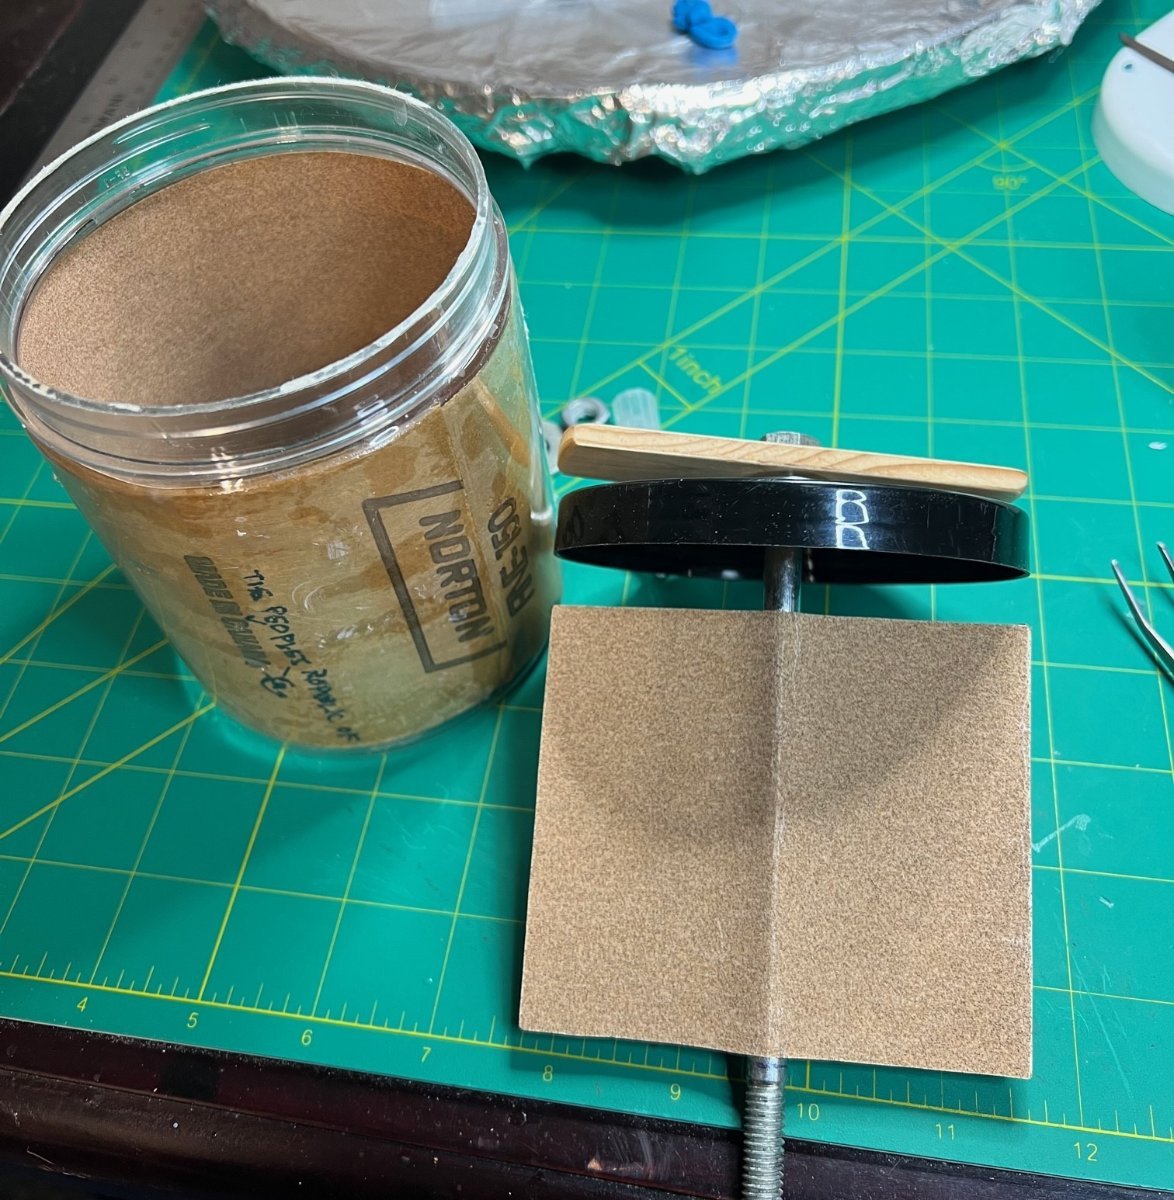
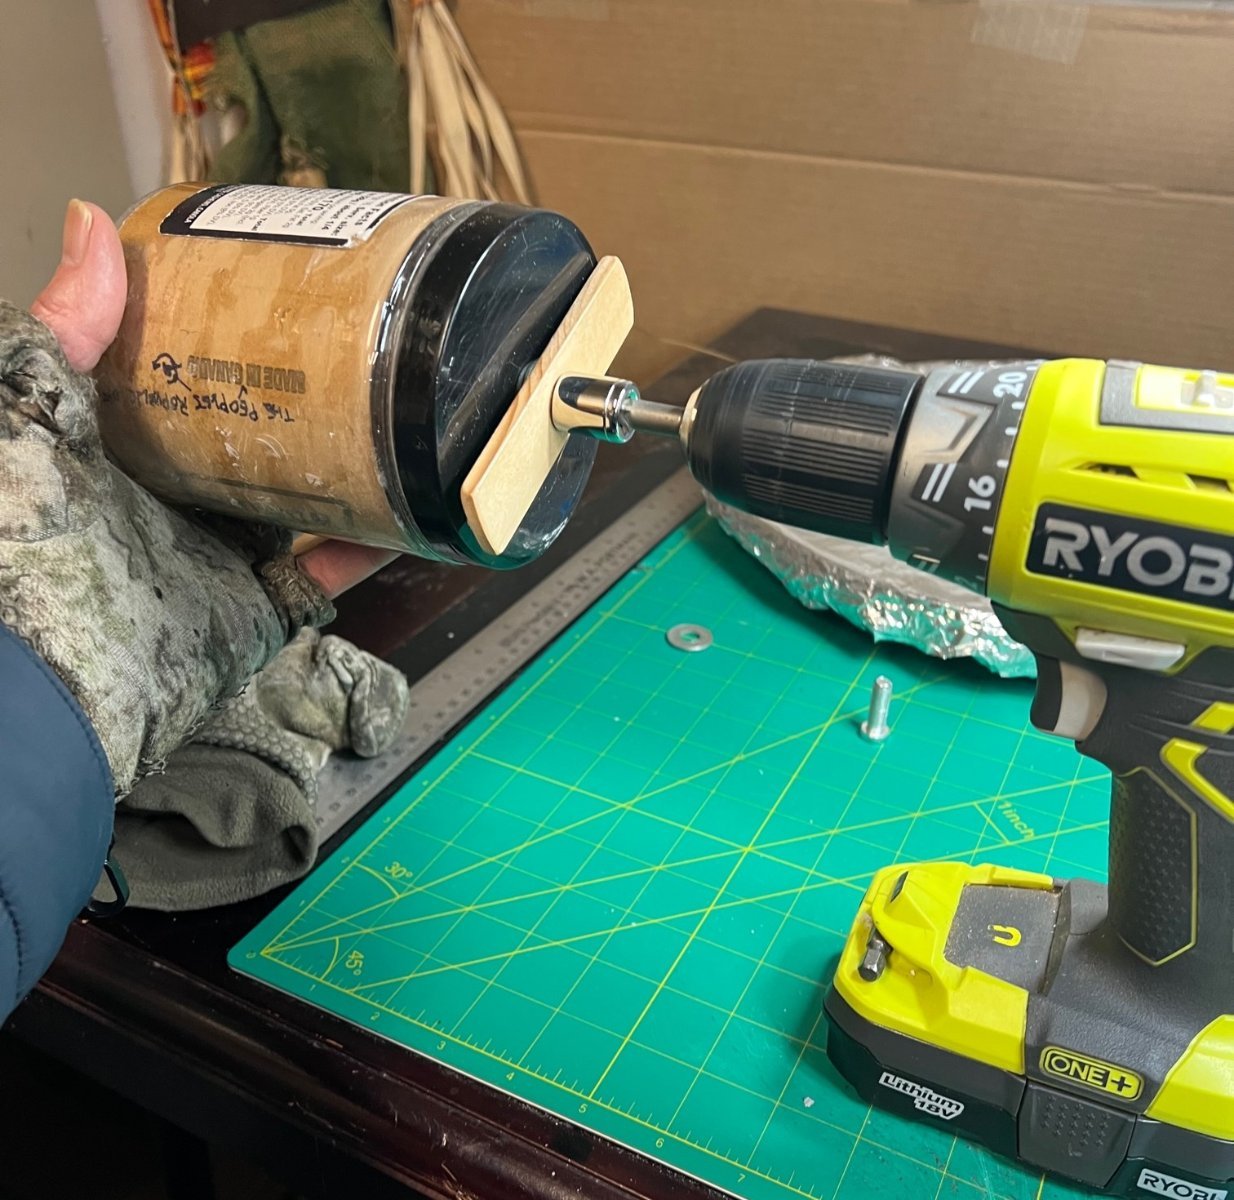
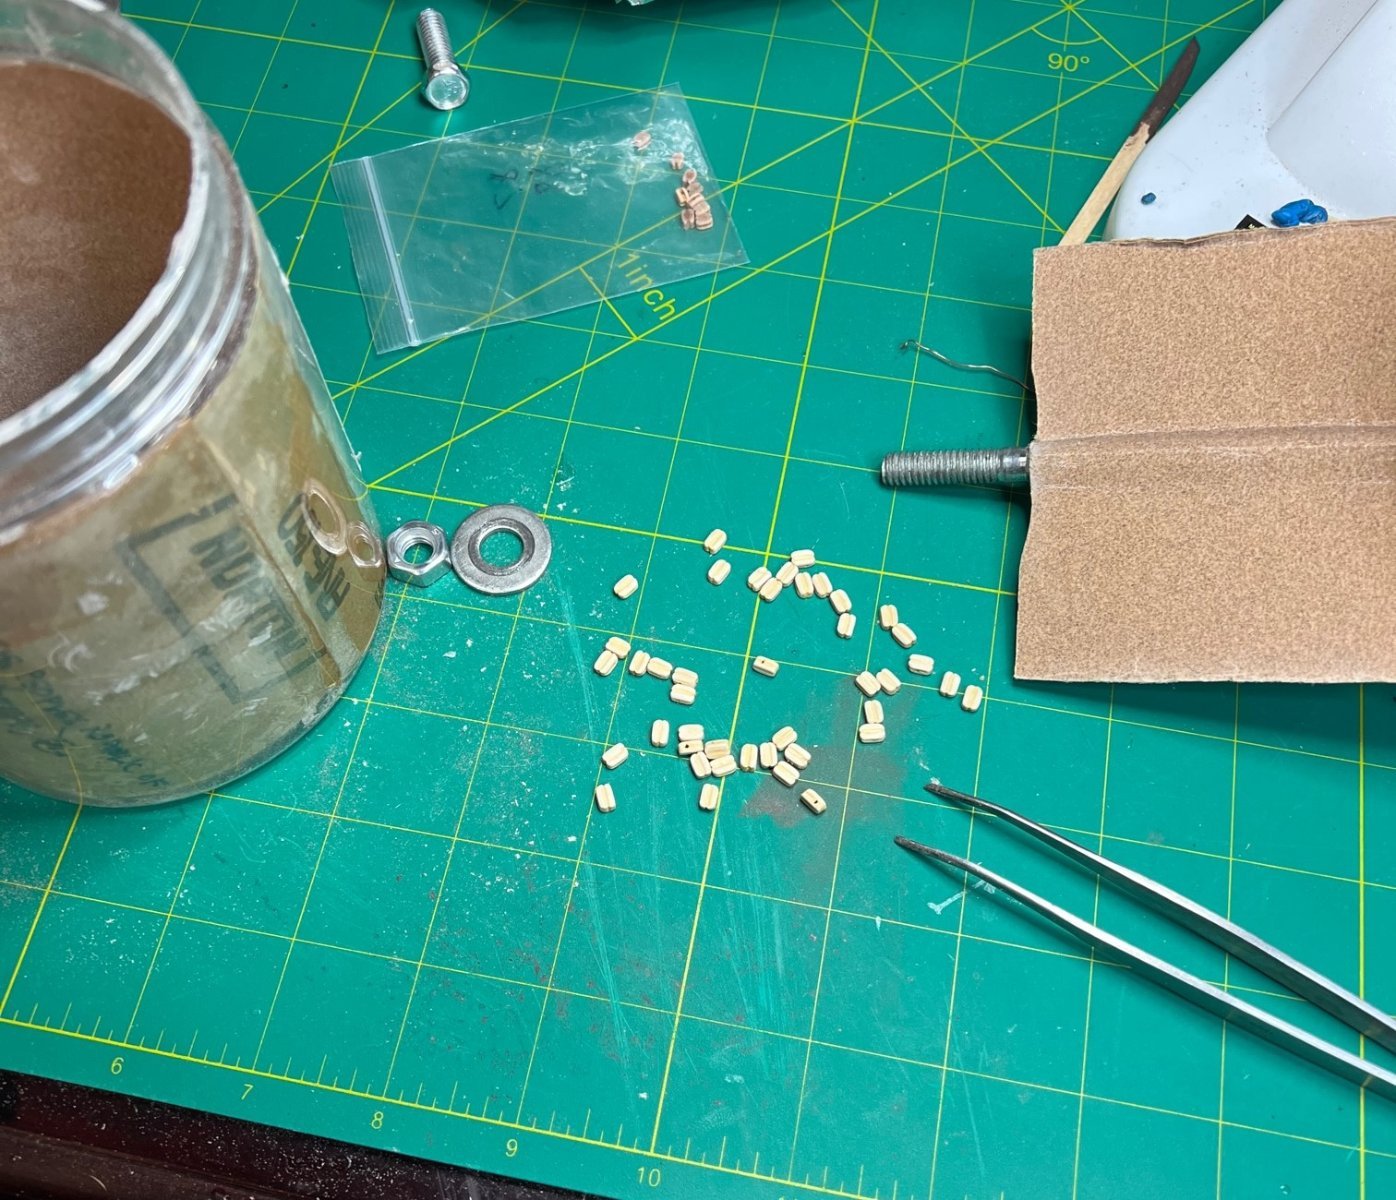
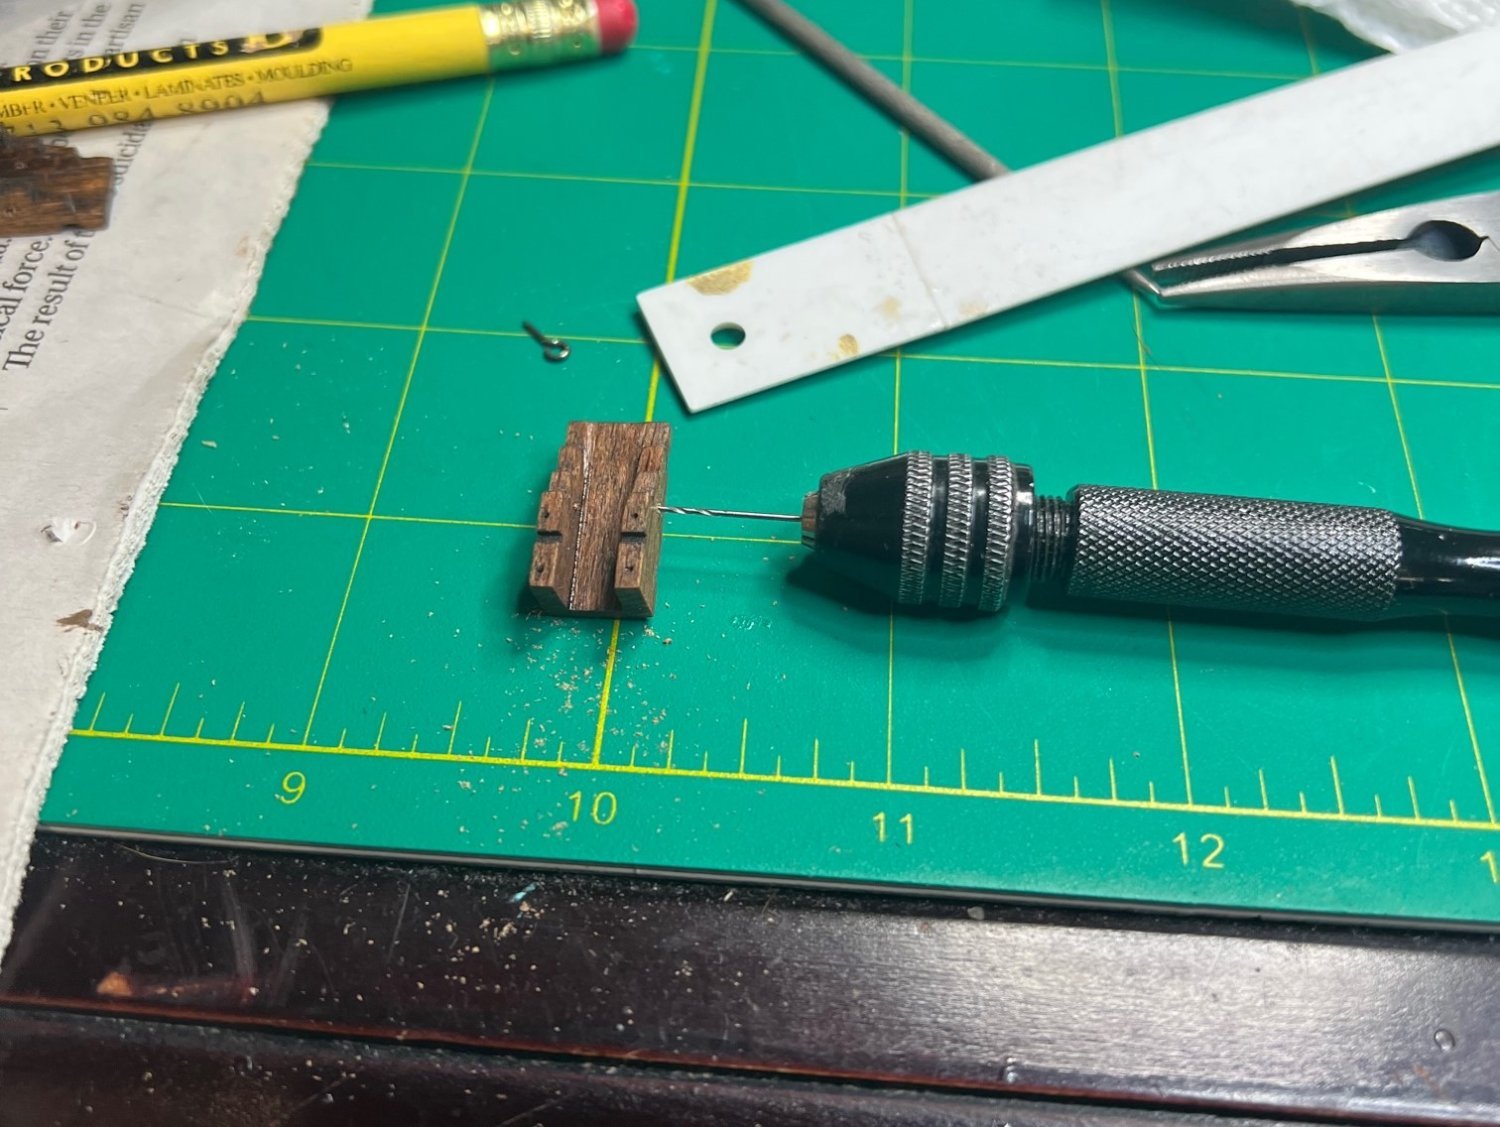
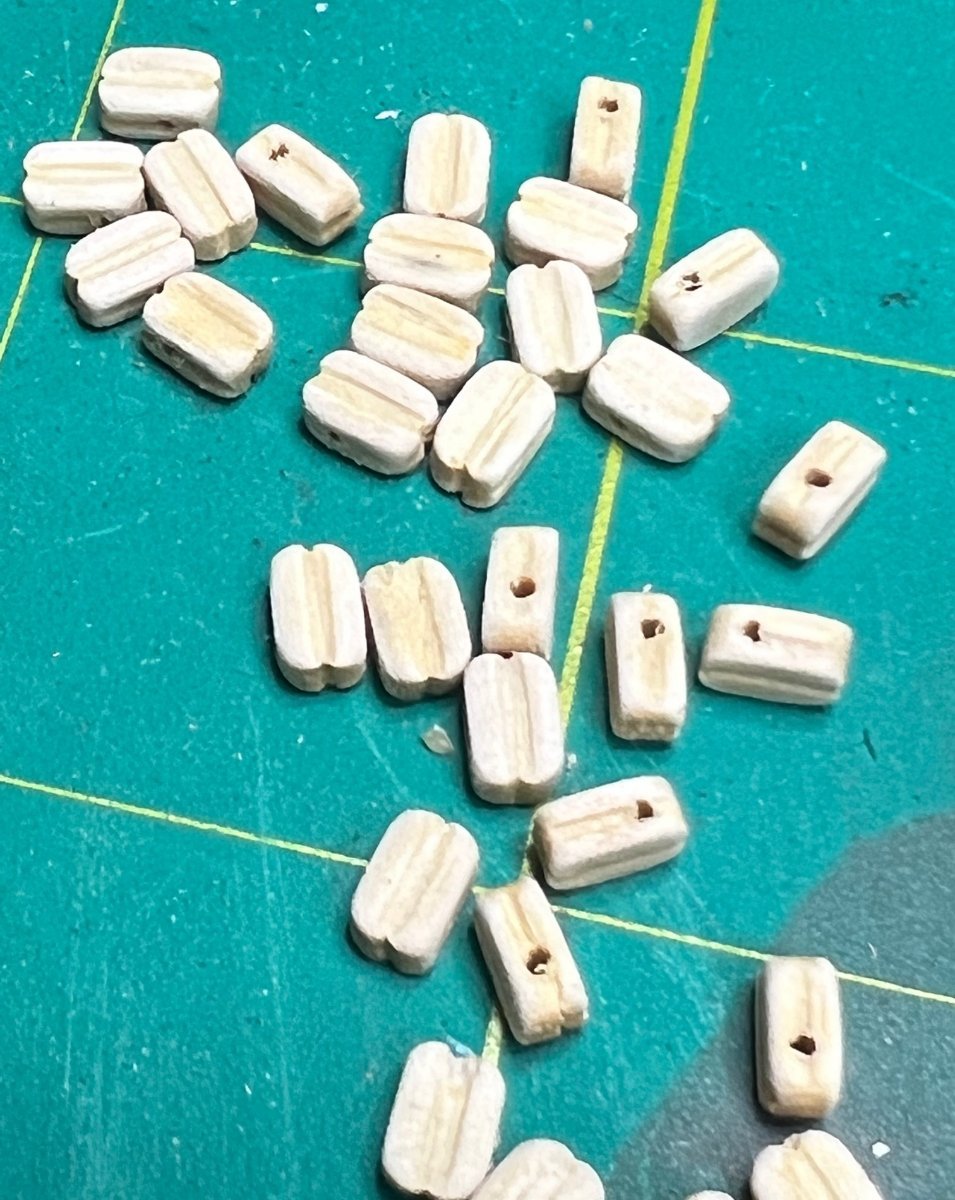
Had to wait to get the blocks to continue so I started on a block buster. I saw on YT how to make a “block buster” from a plastic nut jar, a long bolt, nut and washer and sandpaper. So I made one and it worked great. I also needed more eye bolts so I got some wire and made some.


Thanks for reading, this post is getting too long so I'll continue in another. This gets us up to March 5th, 2023 so we’re slowly getting this log caught up. Next, finishing up the guns and rigging them. Model on!


-
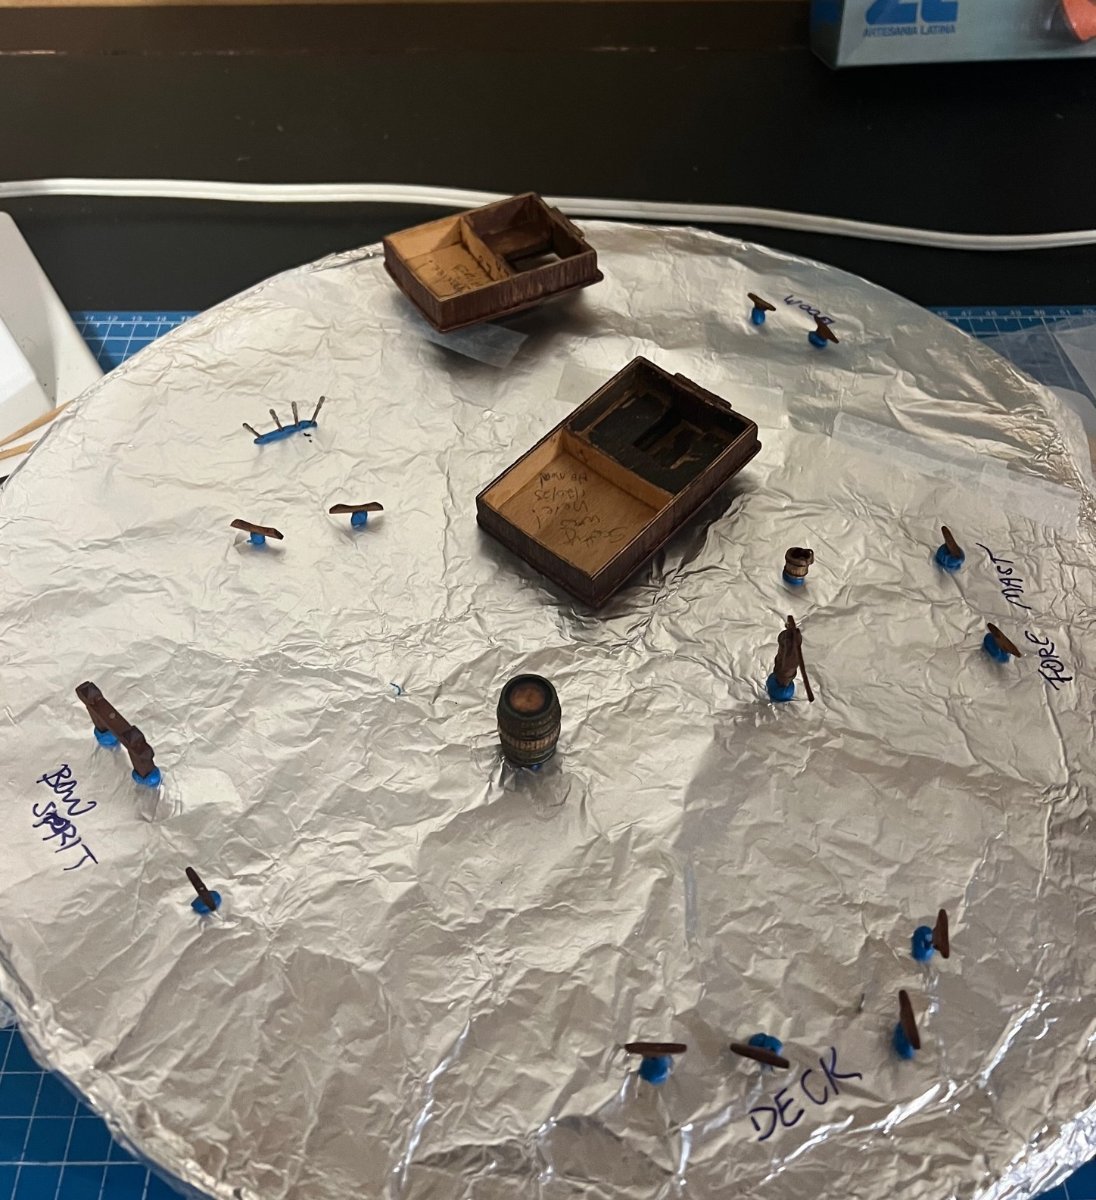
I think I'm ready to install the two masts on my 1805 Swift but I'm terrified I've forgotten something before I do. This is my first timber ship and I am spending all my time on the ship trying for figure out why I shouldn't glue the masts on yet. Please someone calm my nerves and give me a checklist for what to have done, other than the obvious, before I glue the two masts on. I have attached all the blocks and drilled all the holes into the masts and spars. The bowsprit is already installed as are the guns, hardware (cleats and rings), the anchors and the deck furnishings except the cabins, pumps and fiddly details. What am I overlooking? Pictures to come on edit...
- BLACK VIKING, thibaultron and mtaylor
-
3
-
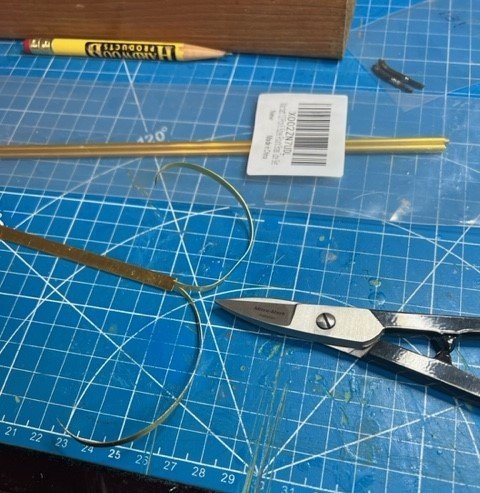
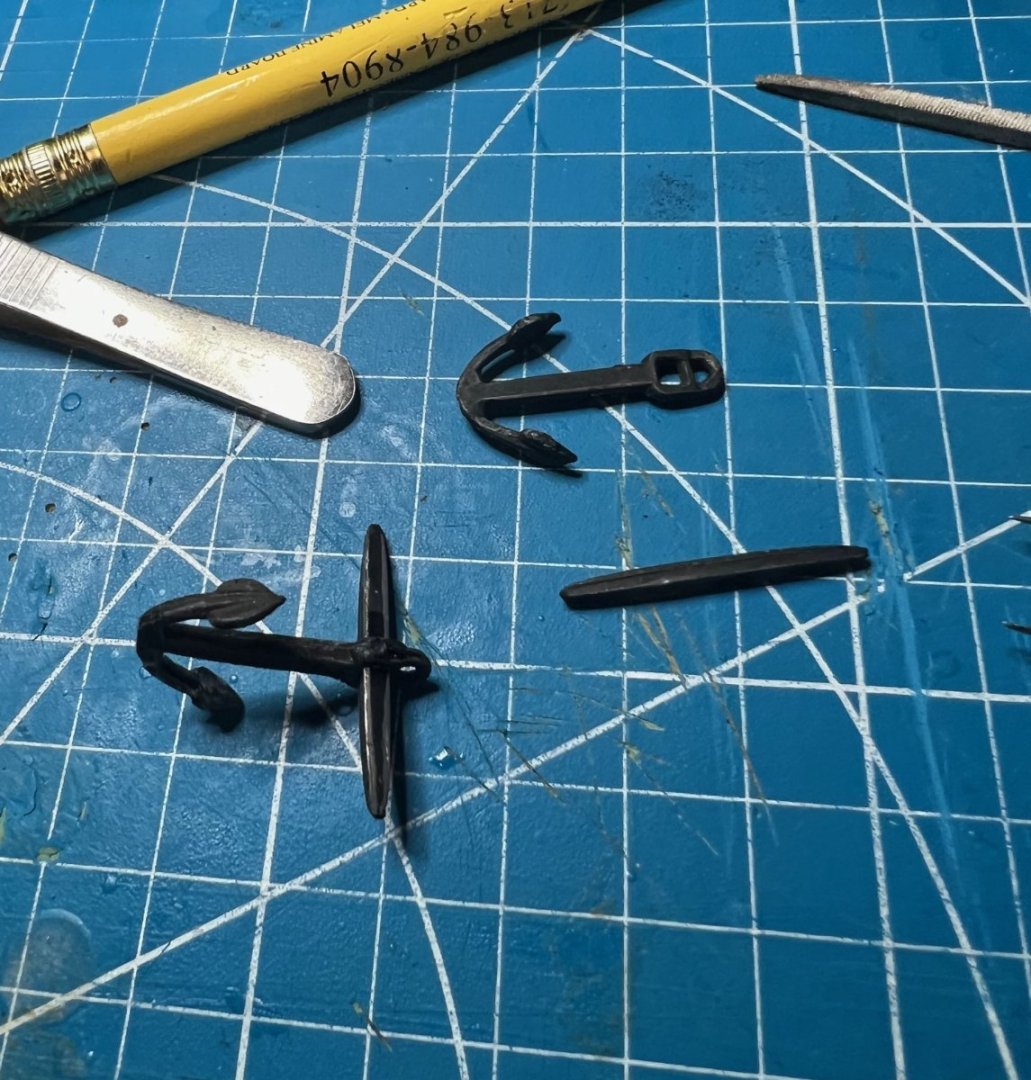
Now I decided to get off onto the anchors. The kit came with two cast zinc or some crap metal anchors that didn’t impress me but I was going to use them anyway. First I picked a couple of old enamel colors I had to try to paint them to look like wrought iron and wood. I put them aside for a week or so and then when I came back to them, I noticed they needed a lot of filing to remove the hideous seem lines from the casting process. It was during this “clean up” that I cleaned up a little too hard and broke one of them. I thought surely I can solder the broken piece back on but as you can see in the photo, this resulted in disaster. I think the melting point of the anchor was less than that of the solder so… one anchor now. What to do? I measured the anchor and ordered two Amati anchors that were within a couple of millimeters of the size of the kit anchors from Modelers Central, the only place I could find online that would ship to the US. Turns out they were coming from Australia so throw another shrimp on the barbie and have a Fosters while we wait four weeks for my two new anchor kits.


Oops! Melt down.
Here's the one anchor that turned out ok. Still needed the bands around the stock but the fake wood looked ok to me.

In the meantime, I practiced stropping blocks with some of the kit rope since I didn’t want to waste any of the fine ropes I got from RopesOfScale.com practicing. I used my helping hands as I learned on YouTube videos to try my first ever block stropping in 65+ years on this planet. It was a learning experience but gave me confidence that I could do it when the time came.

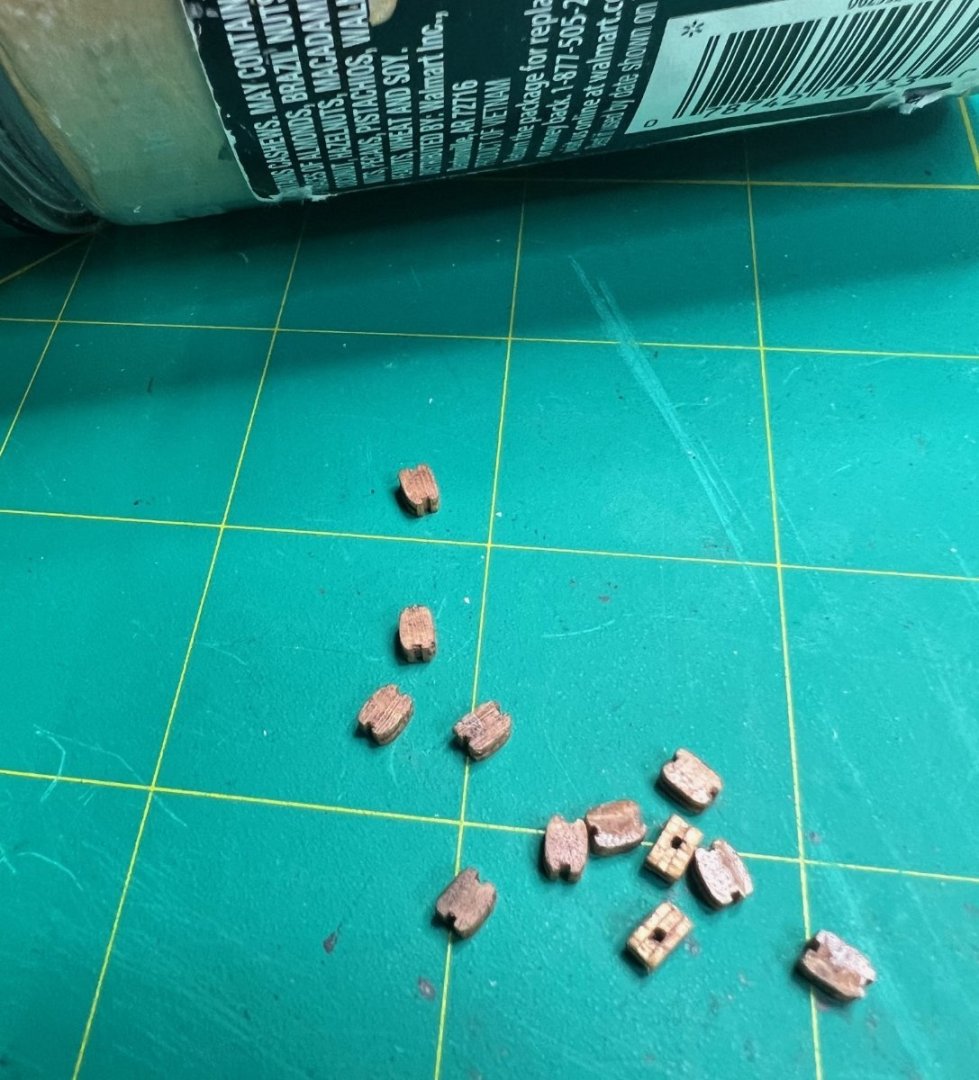
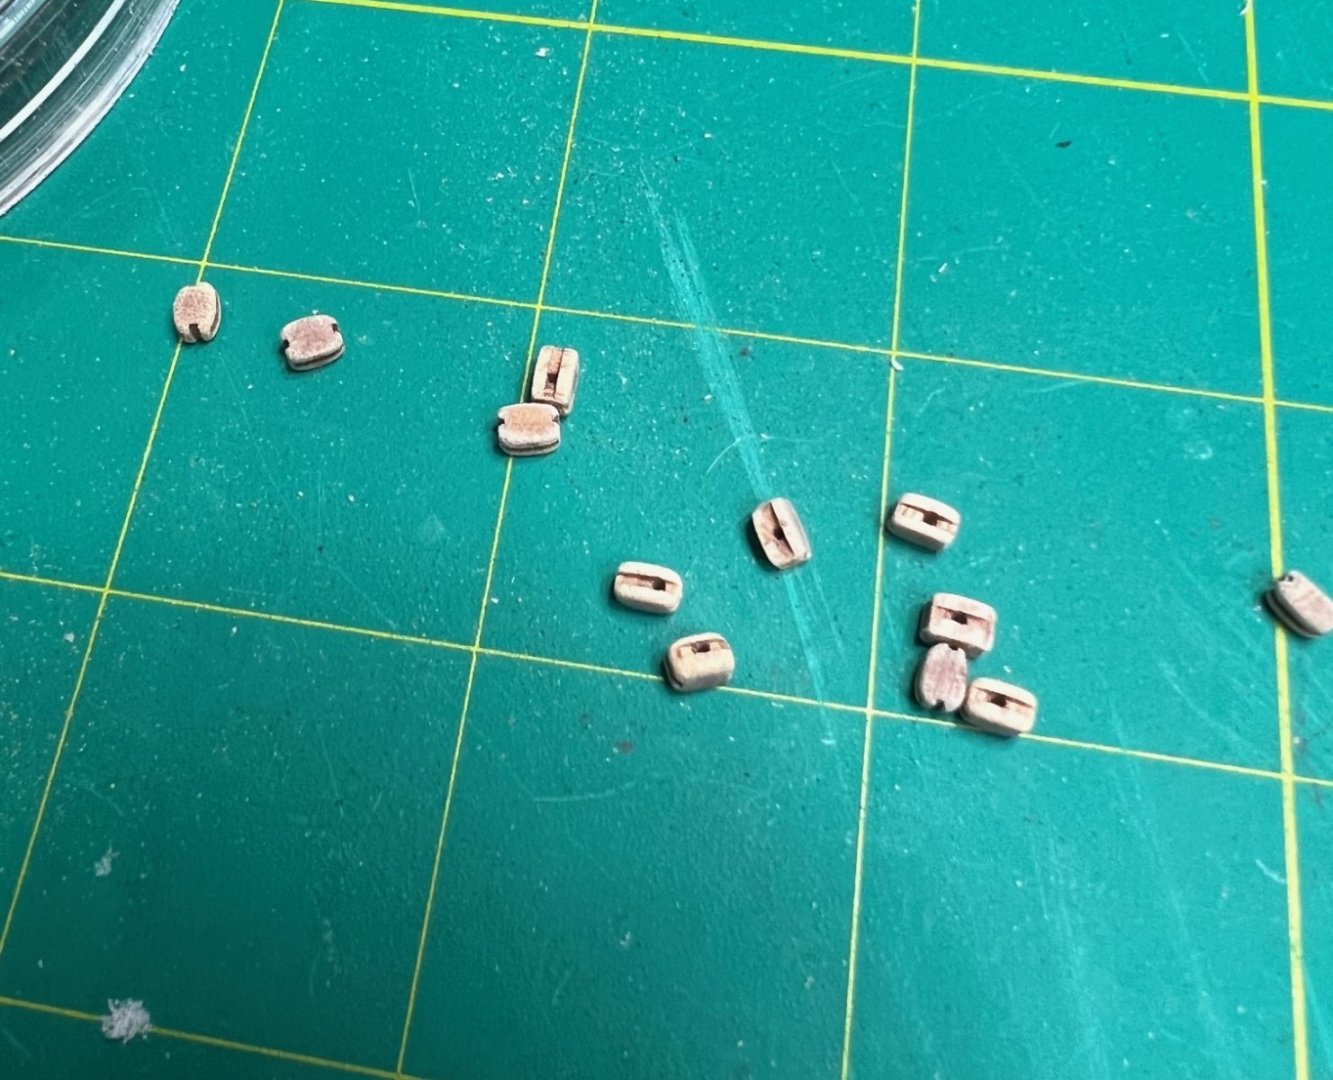
My old blocks split like crazy when I stained them, so I had to glue them back together. Ended up ordering new blocks online to replace. I ordered 4mm because I thought the 3mm blocks in the kit were too small but I could use both. In the next episode, I make a block buster to knock the rough edges off the blocks I learned how to make from Olha.


Still no anchors so I had to decide if my ship would be strapped and since I stay strapped I figured my ship would be too. That is next. Guns, guns, guns! That gets us to Feb 23, 2023. Thanks for reading! Until next time, keep on modeling!
- Peanut6, Keith Black, ccoyle and 2 others
-
5
-
Cleats and an unfortunate discovery about the foremast, but a solution and ropes arrive.
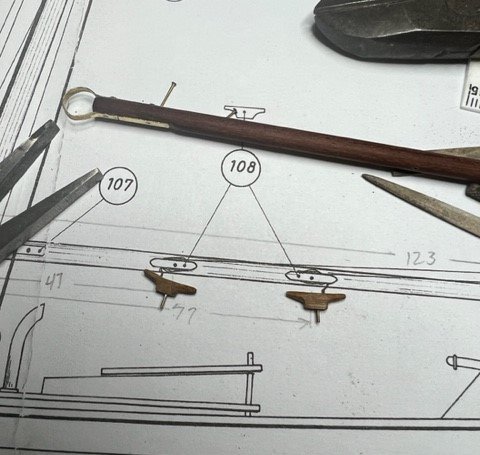
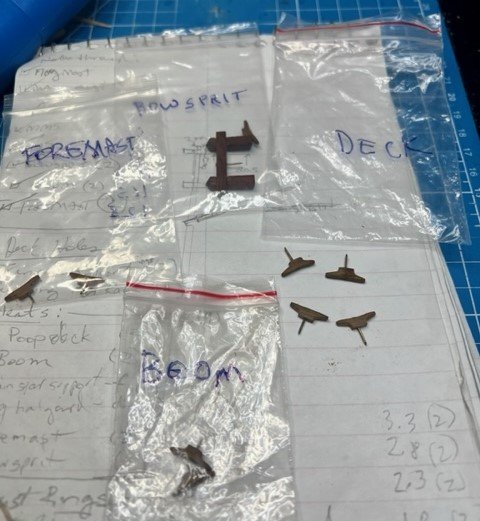
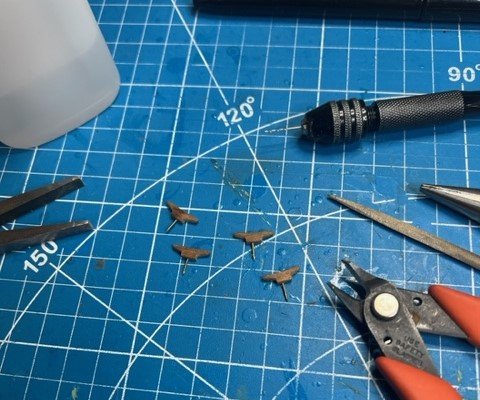
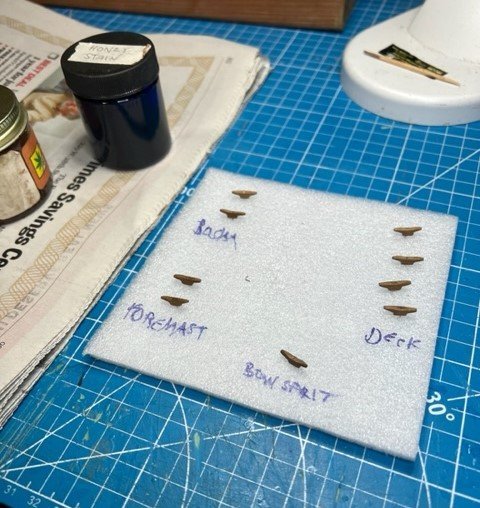
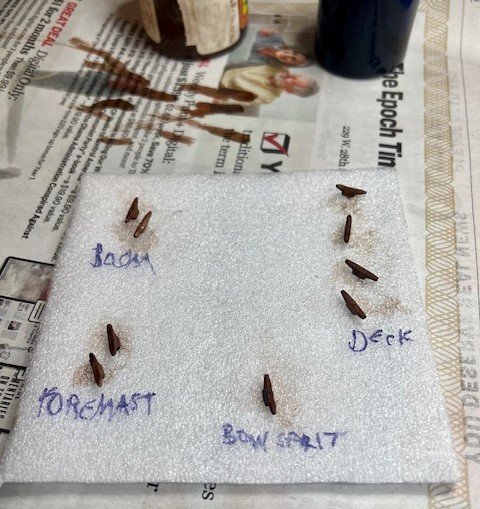
Sorry it’s been so long since my last post. I took a very cold Mexican Riviera cruise on the Carnival Panorama to Mazatlán, Puerto Vallarta and Cabo San Lucas. The ports were warm and beautiful, the Pacific was cold and windy. Then the weather got better here and I didn’t want to sit in the house and type and I wanted to make progress on the model and I have. Now to try to get you caught up with where I am I brought my laptop outside to enjoy the better weather and get on with this build log. The cleats were supplied with the kit and were rough die-cut so they needed a ton of shaping to curve out the right angles. I used my new sanding stick to slowly shape them. I then asked on MSW if I should pin them and the answer came back yes so I drilled 0.6 mm holes into the bottoms and glued in the points of pins to complete. I dry fit each one to decide where best they would fit and placed them onto a sheet of foam, labeling where each would go before staining. Some needed a radius on the bottom to fit masts. Afterward I bagged them up in labeled bags so I’d know where they went later and placed in my “completed parts” butter dish.
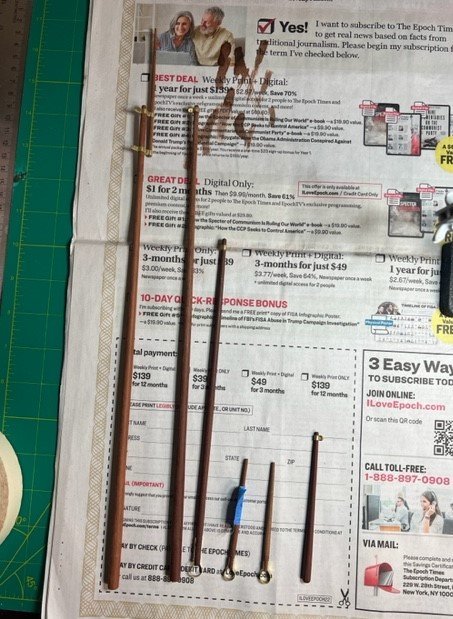
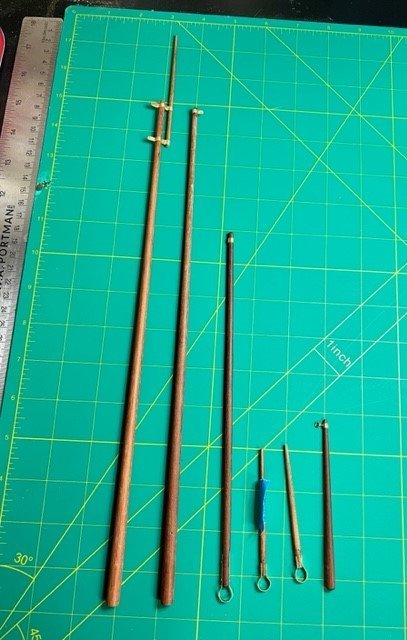
Next I finished off the masts and spars with the brass pieces needed and stained them up. I then gave them a coat of satin varnish.
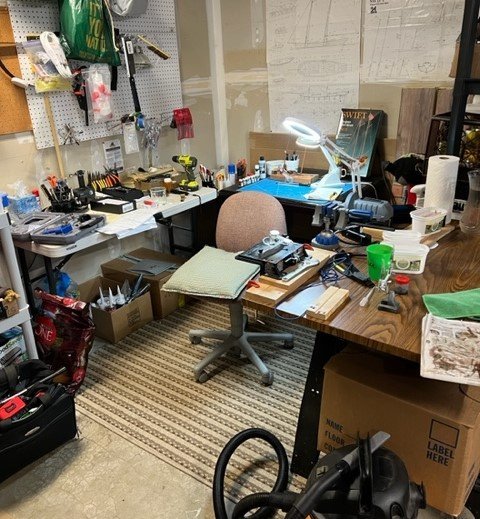
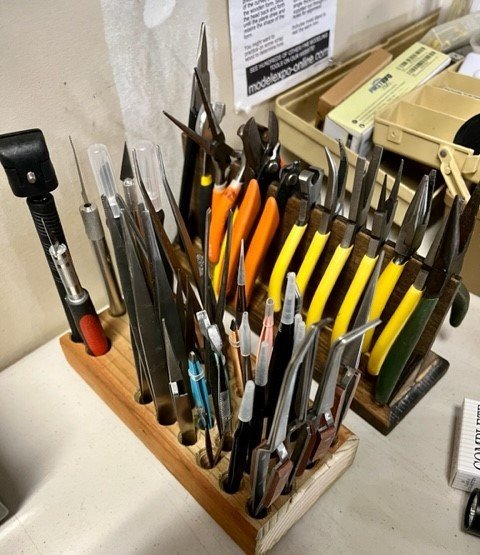
Meanwhile, here's a shot of my shipyard and some tool holders I made.
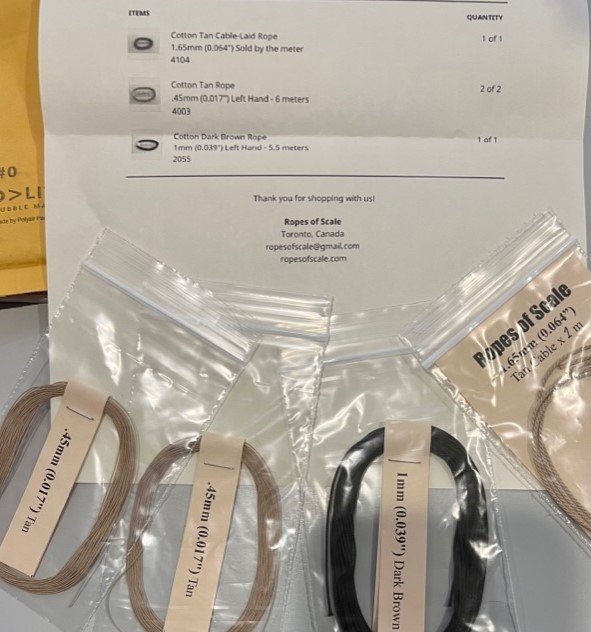
And here's my RopesOfScale.com order I received from Toronto.
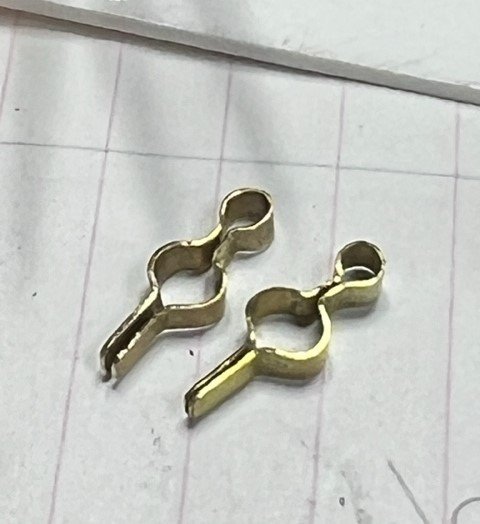
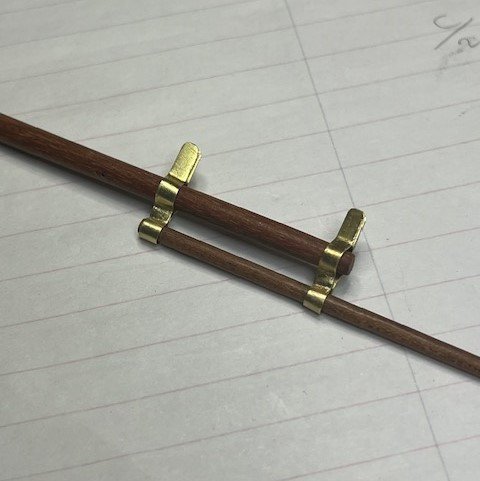
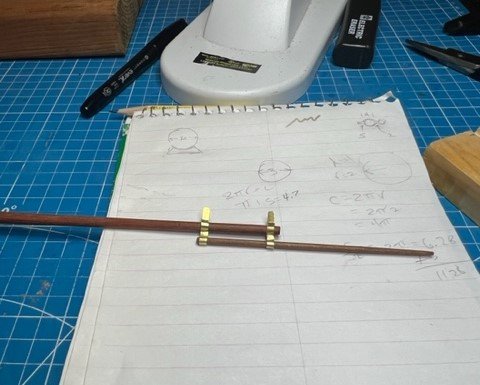
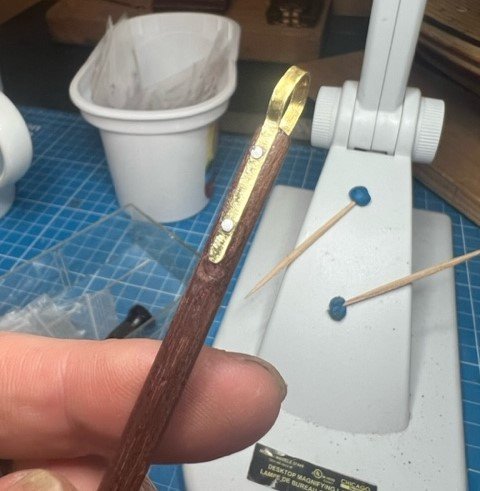
This is when I studied up on how the stays would “stay” on the foremast and looked more closely at the plans and saw a “shoulder” on the mast. I asked in the forums and got affirmation that I needed to install shoulders on the mast to hold up the forestays that would be seized around the foremast near the top. I got several suggestions on how to do it and chose to scratch make some parts to attach to each side of the mast and shape after they were glued on. You can see how tiny these parts were in the pictures below, and they was BEFORE shaping. I started with little rectangles that I could glue to the mast with both PVA and CA glue to try to increase the strength of their bond. The next day I shaped them to be little shoulders with a file and they seem very strong. I won’t know until I put the stays on and put some tension on them. I stained them to match the mast and varnished. I just hope they hold. The alternative was to make them pass-through the mast with one piece which would have required cutting a slot in a toothpick to pass the shoulder through. I doubted I could accomplish that so I went with two pieces instead.

This gets us to Feb 21, 2023. I hope to continue to update this when I get time. I have made a lot of progress and can't wait to share. Thanks for reading and model on!
- Knocklouder, Ryland Craze, Gabek and 1 other
-
4
-
Masts, spars, brass agony and other stuff…
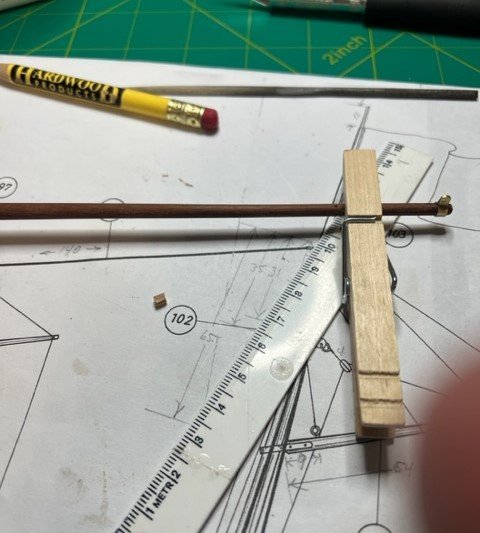
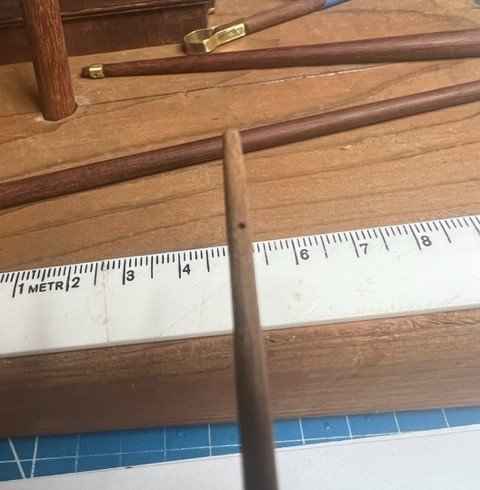
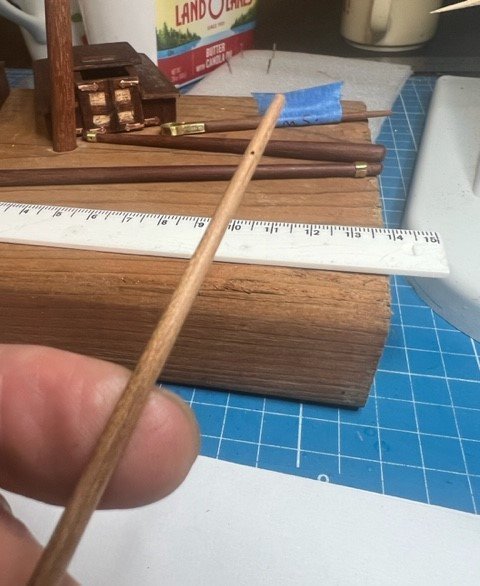
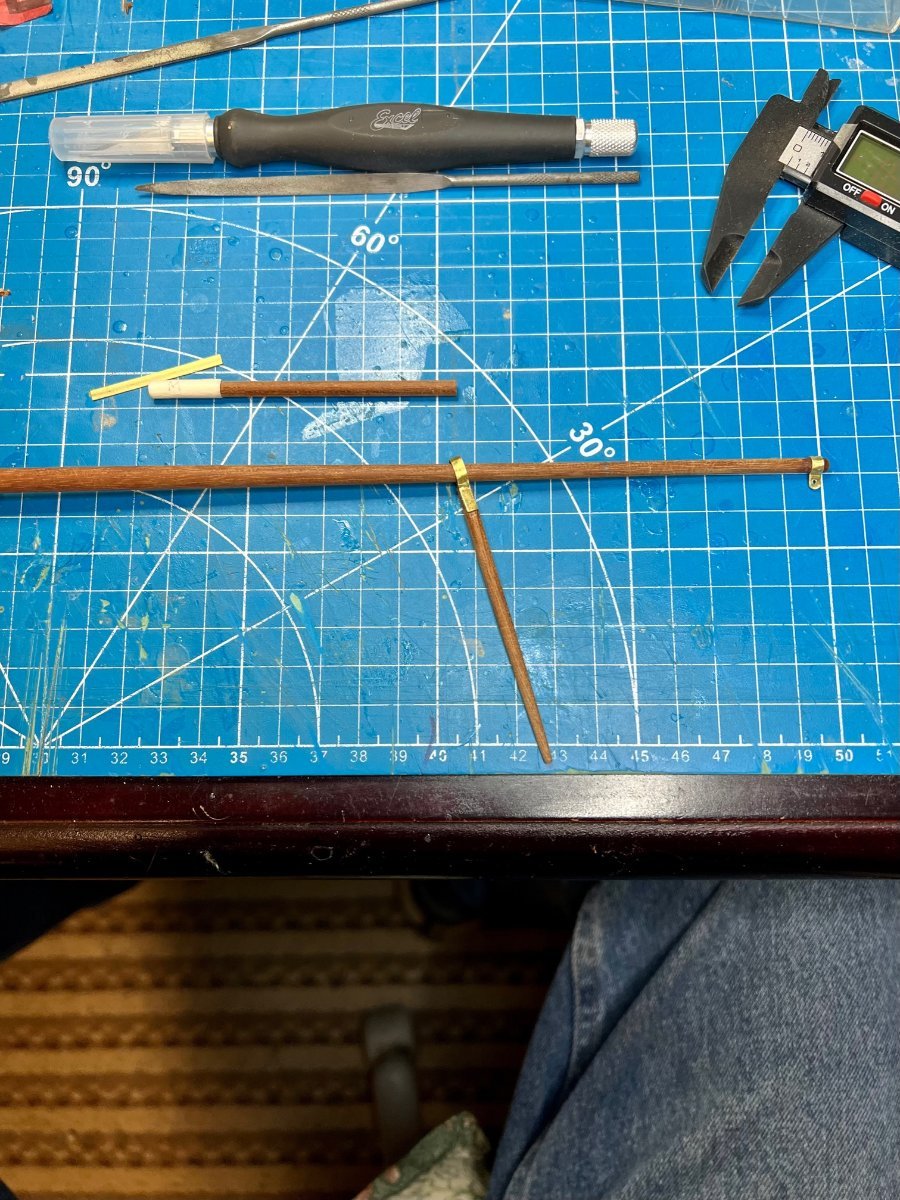
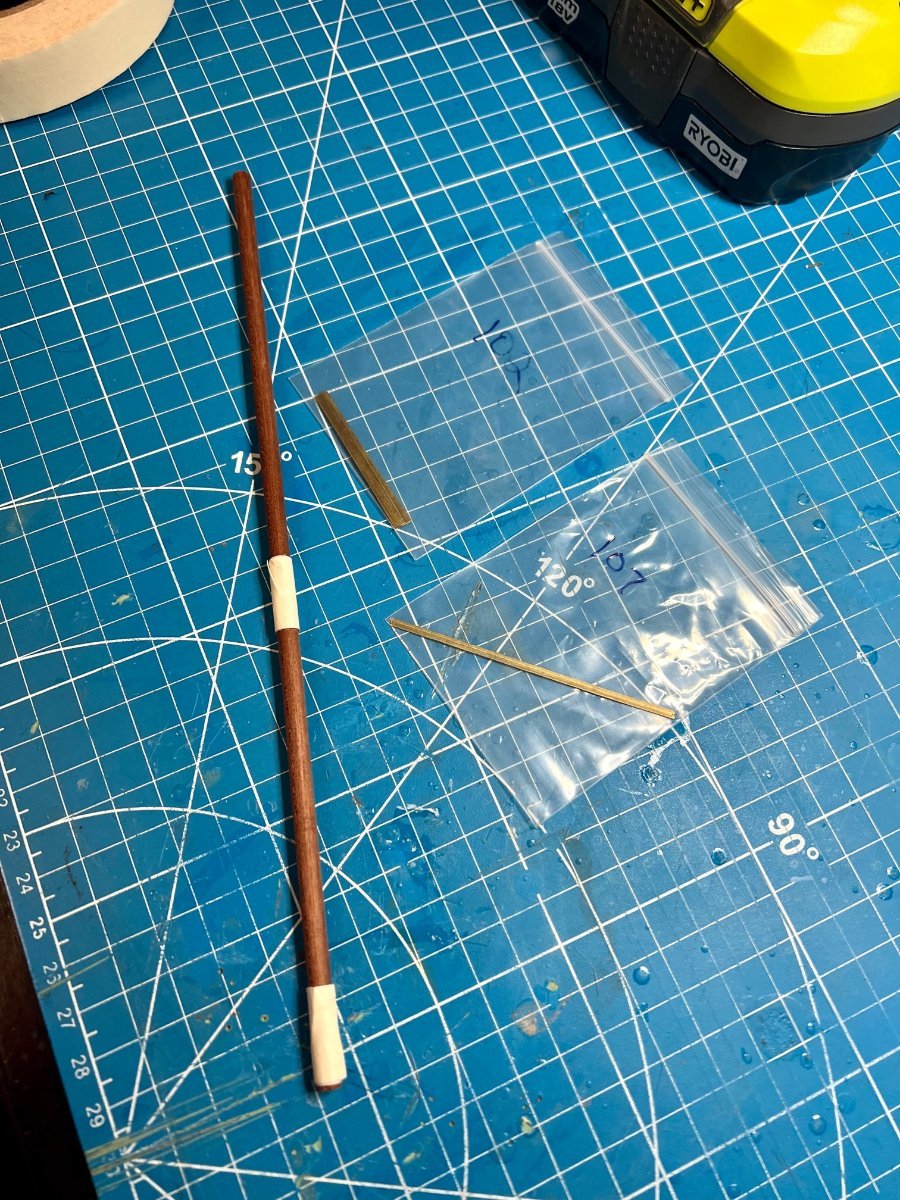
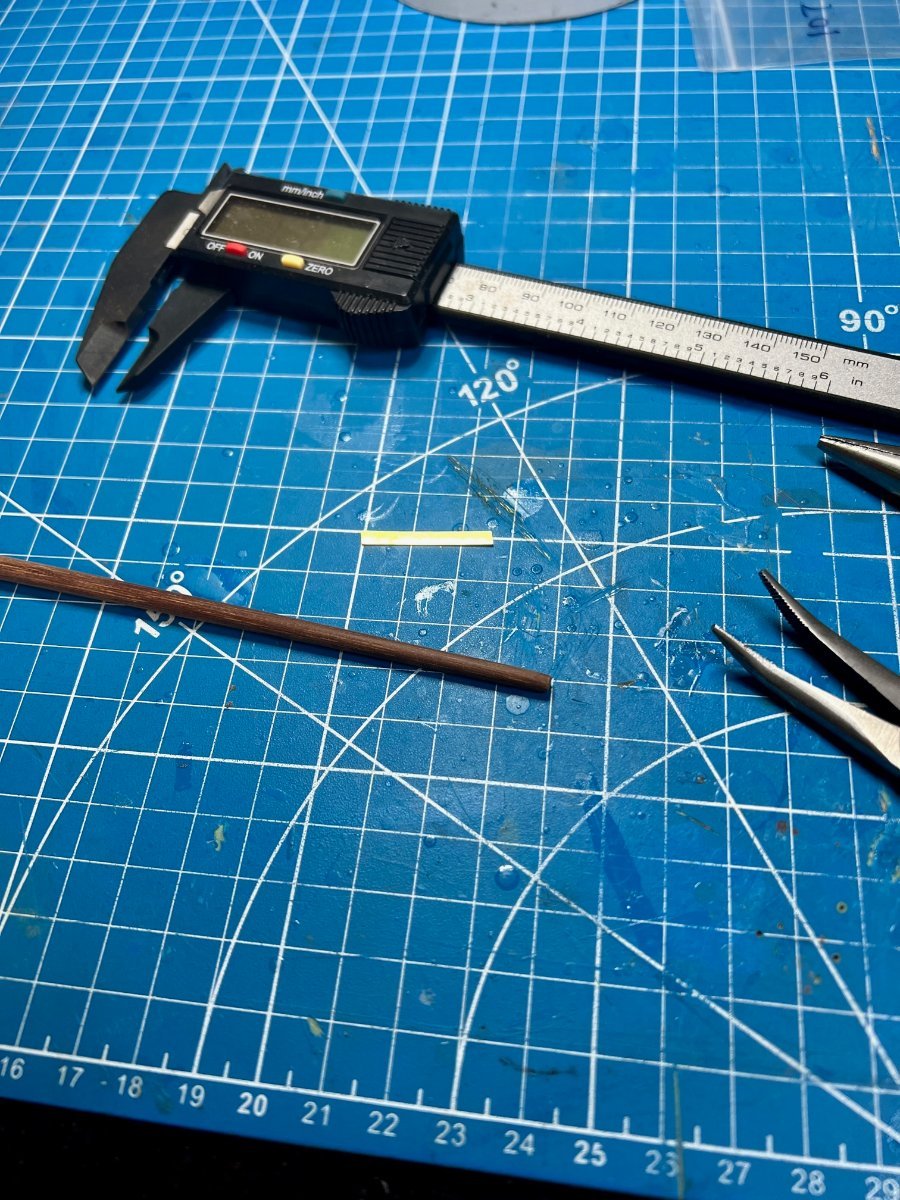
It was time to move on according to the instructions, which I began taking more with a grain of salt, to the dowels (masts and spars) and some of their rigging. Lots of firsts for me here. I had never used a drill as a lathe before that I could recall. I had never tried to shape little brass strips and wire into components of my models before. They were all plastic models, and I never used any photo etch. I had never had to drill a dead center 0.6mm hole in a toothpick before. Probably a few other things too. I quickly found out to do this outdoors with the amount of sanding dust it produced. I did ok with the tapering. I just kept calipering it at penciled off places on the mast to see if it met the model of it I had drawn and calculated the diameter at various places using that racist math. I got them pretty close. Here’s some shots I took along the way.

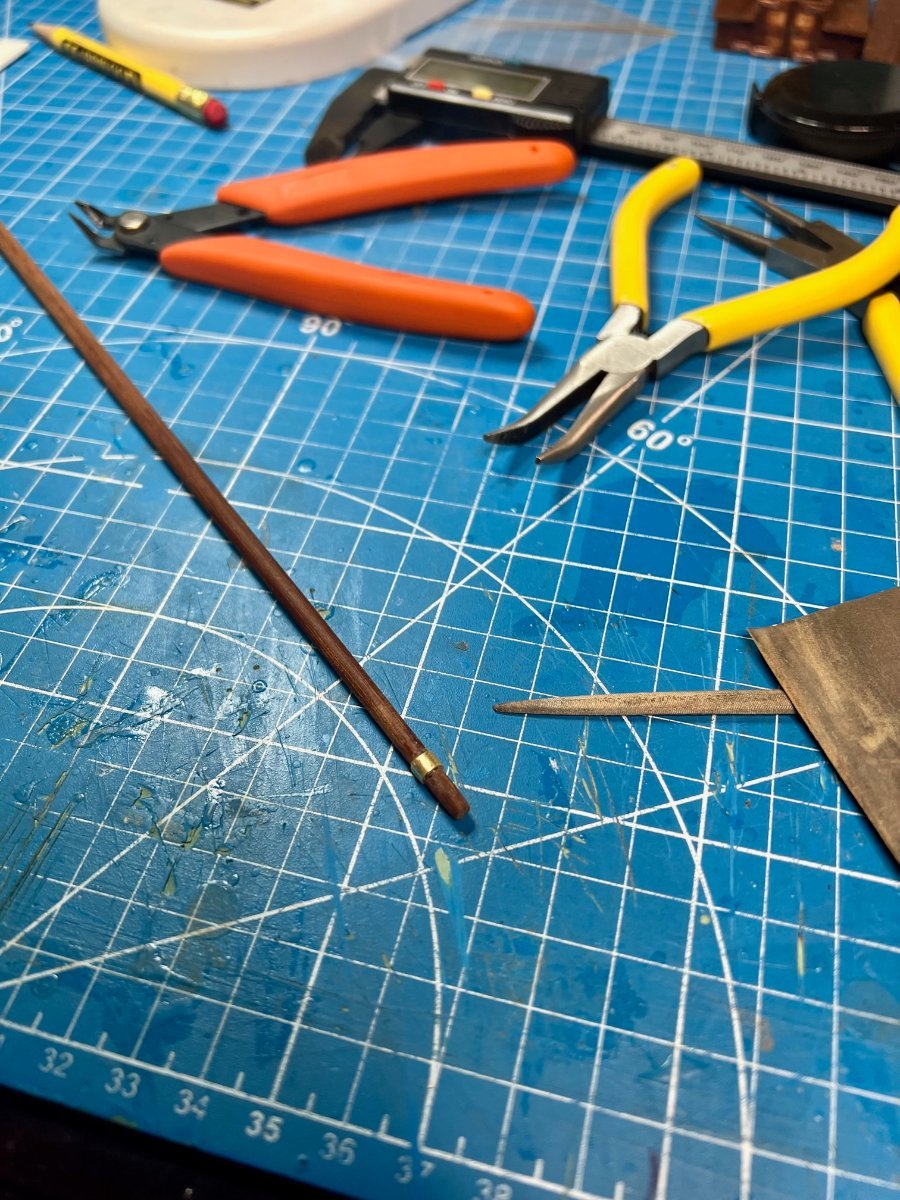
Then came the brass parts. Little strips and tiny rings are a challenge with my clumsy paws and after a lot of rewarding bending, shaping and drilling, I had some what I thought were nice looking pieces. I used my smallest needle nose pliers to bend, all I had at the time, the shapes into the claws that would go around the masts and attach to the boom and spars on both sides. The one on the boom broke off in a flat section that attached to the boom so I just installed both pieces and there’s a tiny seam there that no one would have ever known about until now.


All that out of the way, it was time to tackle the hardest pieces, the two pieces that connect the flag mast to the main mast. Keep in mind that I wasn’t here on MSW yet and wasn’t getting all the helpful advice from you folks. That would cause me great agony as you’ll see below. Turns out, trying to bend unannealed brass into tiny little curves with square angles off the curves is a really bad idea.

I pondered and thought for a few days and then decided to go looking online for help with bending brass. I had disrembered what I learned at Texas A&M Engineering School in metals class about annealing until someone on here reminded me about heating that stuff up before you try to tie it in knots. Having found the answer I was looking for here, I began asking more questions and always get great responses. I found a great source of scale rope here as well. Thanks BenD.
My plan was to get more brass strip, a set of bending pliers I found on Micro Mark and a small butane torch, which I did eventually. I also got some tiny shears from Micro Mark to cut the brass strips length. I could not find any strips thin enough, so I ordered the thinnest I could. I thinned them with a regular sized file on a shaper table until they matched the thickness of the piece I broke. File, caliper, file, caliper, you get the picture.


Meanwhile, while waiting for all that stuff to arrive, I built a rack for my pliers and cutters from some scrap I had. I also decided to shape the cleats using my new sanding sticks with the elastic belts I could change when full and was finally happy with their shape. I would later pin them when I asked here on MSW if they needed pinning and received a resounding yes.

I still had a zillion tiny holes to drill in the toothpicks (masts and spars) and got some good advice on MSW for how to do it. I cut a channel in a piece of wood to lay the masts in while drilling. I’d tape them down with the side up I wanted to drill and using a diamond sharp tipped file in my drill press, made a little dimple so the tiny bit wouldn’t walk. It worked on most of them but misdrilled one on the boom where a cleat would be pinned but fixed it.
Annealing and attaching the rings to the eyebolts:
Back to drilling:
Since I was still waiting for my benders, why not go ahead and drill the anchor line holes and dry fit the parts that went into them.

Still waiting for my bending pliers, why not stain up some deadeyes and blocks.

Also, I had more tiny holes to drill into toothpicks.
I had the brass strip for the bracelets thin enough from earlier so had to try my new shears when they arrived and was pleased. Finally I sheared them to width, and it worked out that I had twice as much thinned brass as I needed in case of another disaster. I learned quick to make more of the little scratch made parts I needed because I would lose them often, off into creation somewhere. I would set my little brass strips aside until my bending pliers arrived, but I had them ready.
Next came the task of scratch building the ventilation tubes to replace the old ugly ones from the kit. I had received a set of telescoping brass tubing with the largest roughly matching the diameter of the kit tubes but I needed the donut shaped flange at their bases where it meets the roof of the cabins. I probably could have used cardboard or wood or anything but the brass strip I decided to use because I didn’t think of using anything else. Oh well. First, I drilled a hole the diameter of the tube, simple. Then I filed the hole a little, taped the brass strip down edgewise and filed a semicircle to the end, attempting to match the hole. Having gotten that half of the flange done, I cut it off and holding it with mini vise grips, filed the other half of the circle. Took forever and totally would have done something else before jumping into that headache. Anyhow, got them done, they’re not perfect but I’m ok with them. They’ll get blackened later and placed on a dark cabin top so no worries.
I don’t have any tubing bending tools but tried to get away with bending a single tube without the springy tube required to bend them with and discovered that was not going to work. Not having metal rods the correct diameter, I simply telescoped all the tubing together which created a brass rod with a tiny hole in the center of the end I’d later use as a pilot hole to enlarge the opening. I bent them best I could at the top, again, not perfect but I won’t live long enough to finish this kit if I keep redoing things so there they are, ready for paint and touch up. The primer helped a lot with the dents.
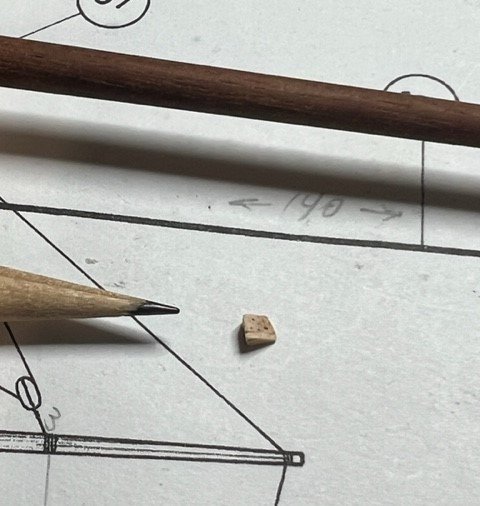
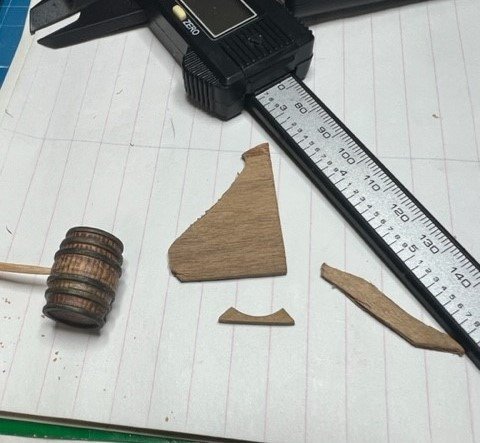
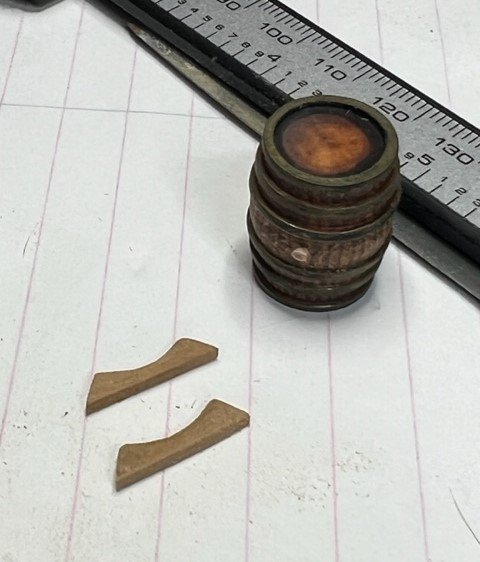
Still waiting on parts to do the mast bracelets, I decided my barrel needed trivets or whatever they’re called to secure them so they can’t roll around the deck. I had some excess from one of the sprues that my Dremel shaper table and disk sander made short work of. I made two of those and added a cork which is the end of a toothpick. I still need to touch up the top hoops where they meet the ends of the barrel. I’ll have to eventually tie it down as well to the deck. I can’t put it where the plans say because I decided that my ship would be strapped and was going to include the two cannons (guns) that were included in the kit as a bonus. We’ll get into that later, it turned into a monumental affair.

Finally, the bending pliers arrive. Must have been a slow boat from China. With the new tools in my arsenal, I became “Scotty, master brass bender” lol, not really. Those bending pliers really made the curves fairly easy with a little patience and practice. I made the two bracelets carefully and got them to fit exactly where the plans showed. I only glued them to the flag mast after lining up so I could take the flag mast off until needed because I would certainly break it off before getting it in a case, it’s what I do.
That’s enough for now, way too much in fact but trying to get caught up with it. This gets us to Feb 15th, 2023 so not too far behind now. Thanks for checking it out, feel free to comment. I barely know what I'm doing.

- Peanut6, Paul Le Wol, Keith Black and 1 other
-
4
-
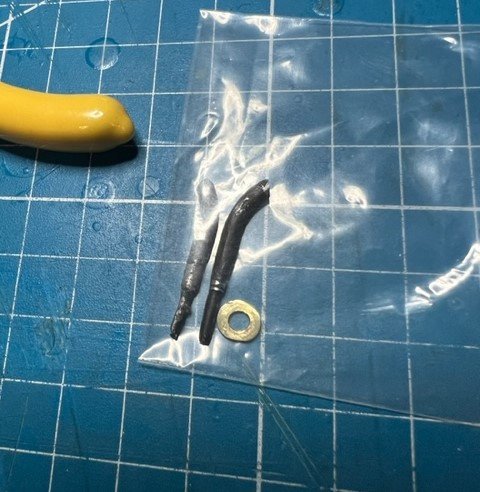
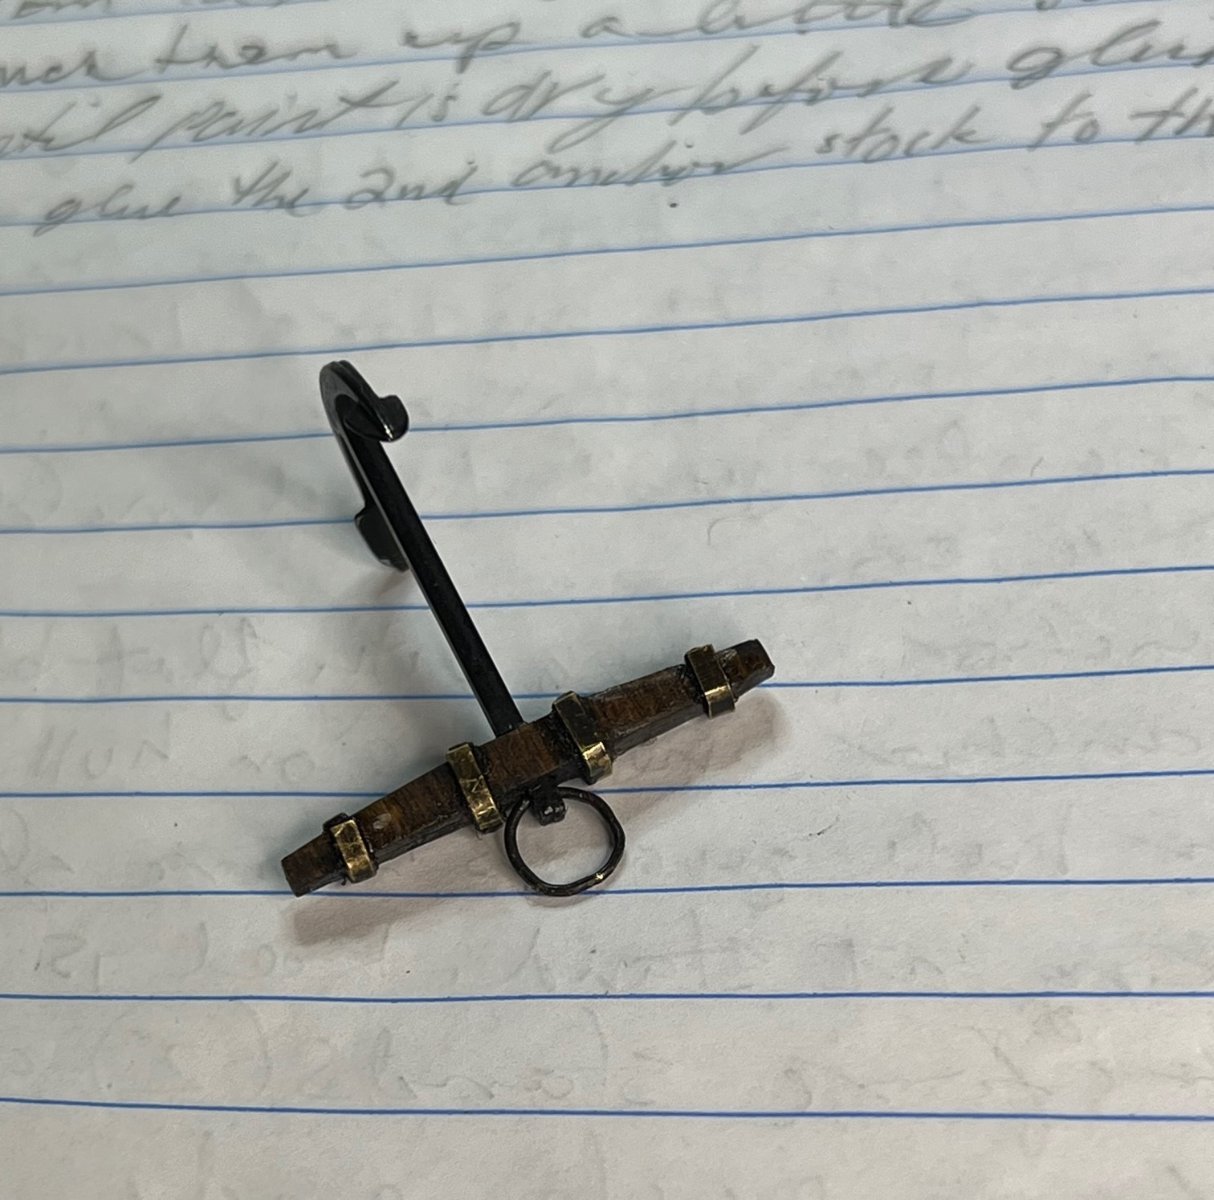
I melted one of the 50-year-old kit anchors trying to repair it. I ordered two anchors from the only source I could that closely resembled the original kit anchors, albeit they were 4mm too long in the shank, from clear around the world in Australia, ModelersCentral.com. After paying so much (shipping) and waiting so long for these after-market anchors, I'm going to use both of them along with both of the guns that were included with the old kit. The hoops look great to me in this scale. I had to scratch build one of them from brass strip I had filed down to thickness and width because I lost one of the smallest hoops when squeezing it onto the stock to remove the gaps. It broke the stock as well since I suck at this but I CA glued the splintered stock back together and covered the join with the scratch built brass hoop.
This is a legacy build for my long gone father who I gave the kit to in 1984. He would want it strapped, so I will include my Australian anchors and two guns and may leave a model i-Phone laying on the cabin roof. lol This is a learning build, my first timber ship, not a recreation of an actual ship that existed and I love my new anchors and gun rigging and now building the kit supplied stand since the mast rigging is next, maybe. I'm going to just strap the anchors to the side of the hull using the extra unused rings on the deck near the foremast to rig the line and wrap the anchor line around the knightshead and leave a coil next to it since this ship certainly only anchored in shallow water. I could run the cable through a hole in the deck near the knightshead and tell everyone there's an electric wench down below that weighs the anchor. lol I just got through varnishing the polished brass base stands as I'm readying to put the ship on it's base before proceeding to mast rigging because if I wait, I'll break something off while mounting it to the base, so base first. But I digress. Anchors away!
Perhaps I'll scratch build super accurate anchors on my next build. Thanks for the info. I will add the puddening to the rings if I can figure out how to do it.
-
-
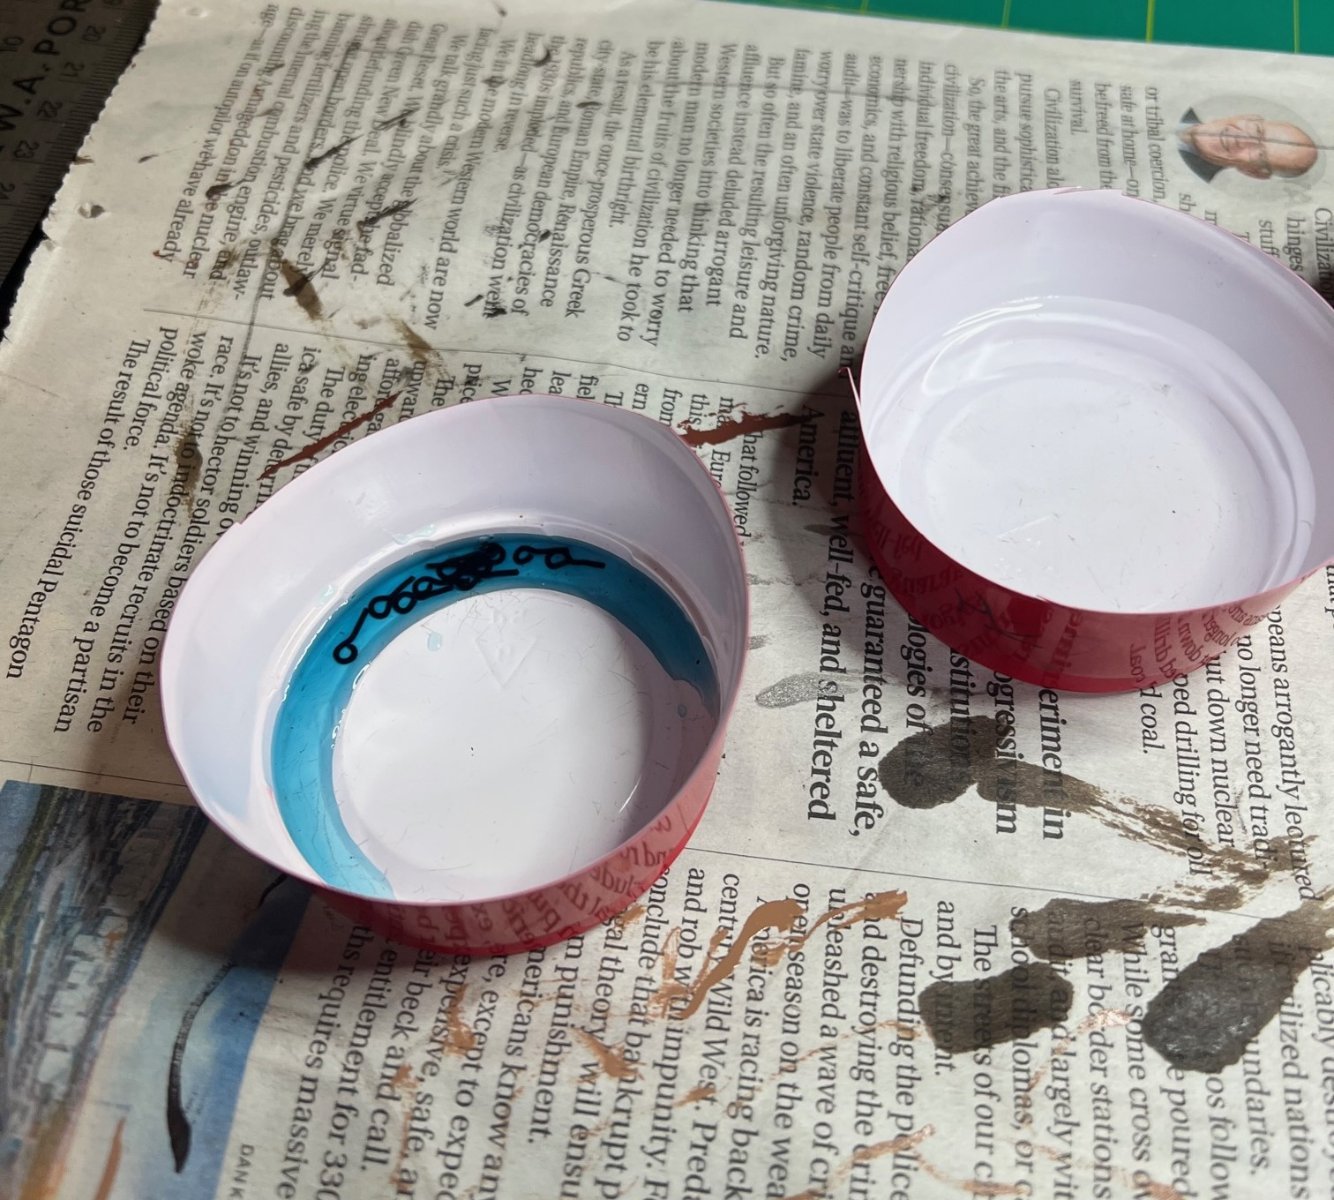
Something like that after Brass Black…

- Knocklouder and mtaylor
-
1
-
 1
1
-
Everything you wanted to know about anchors but were afraid to ask:
- mtaylor, Knocklouder and Bill Jackson
-
 2
2
-
1
-
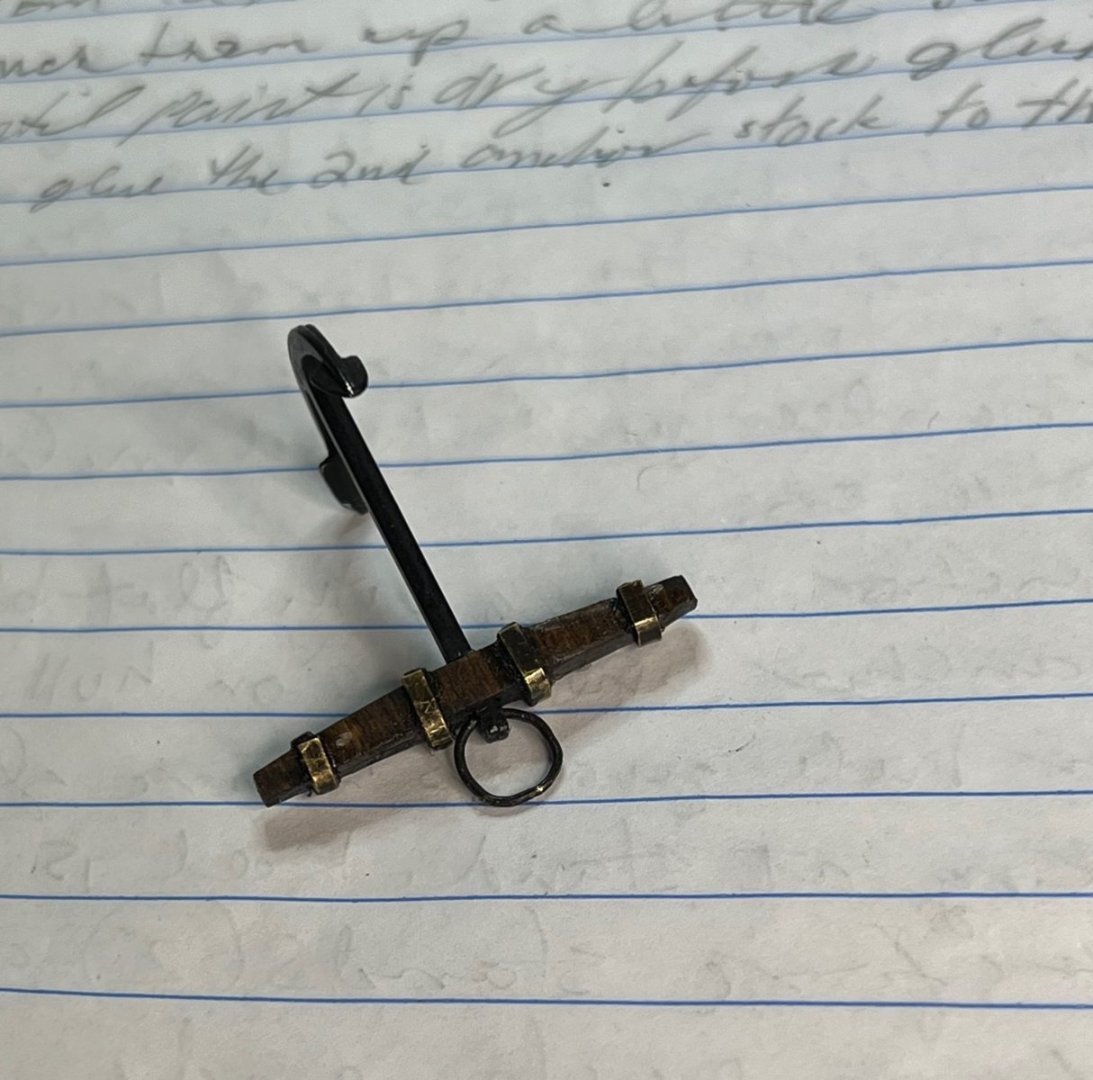
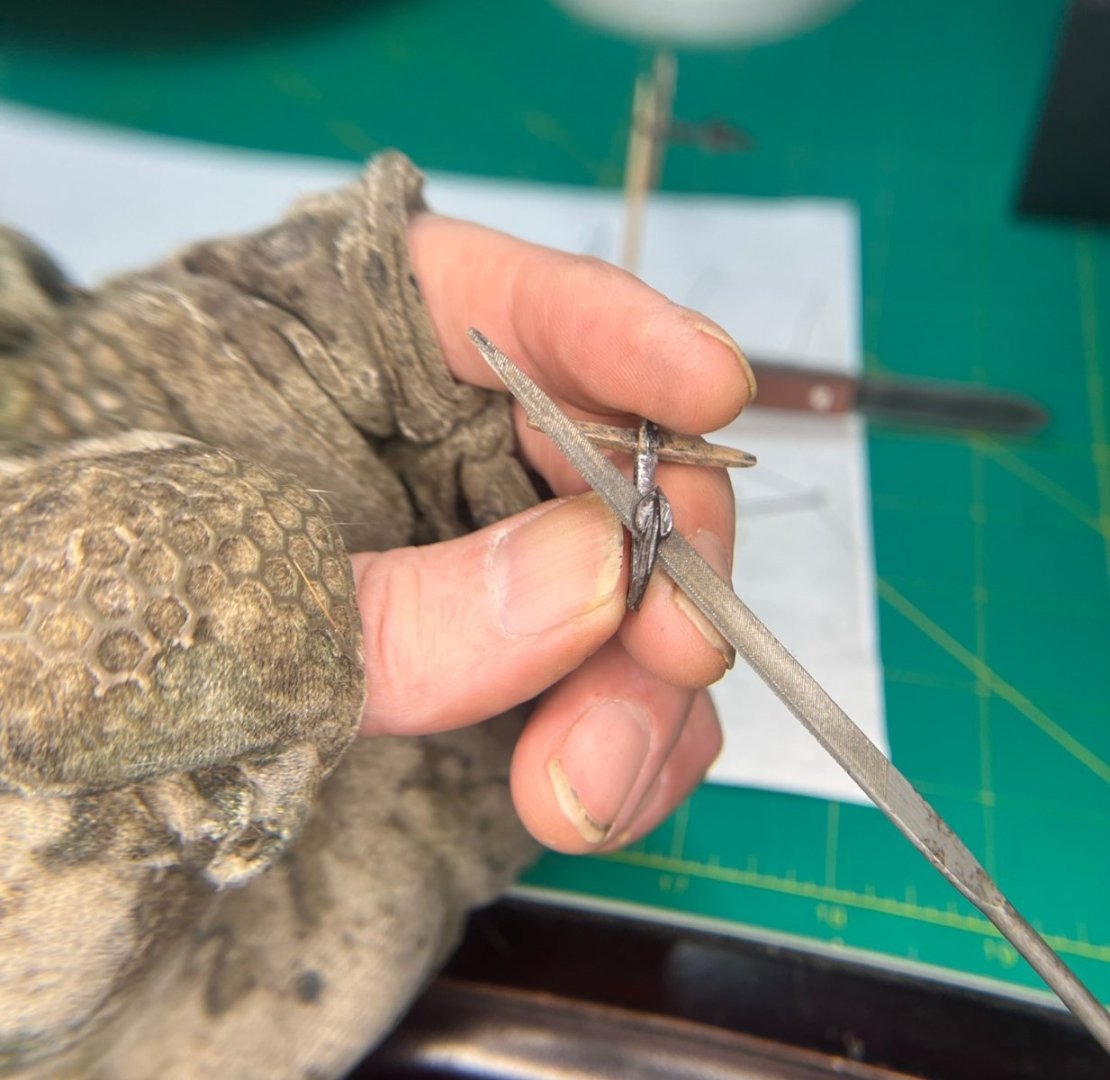
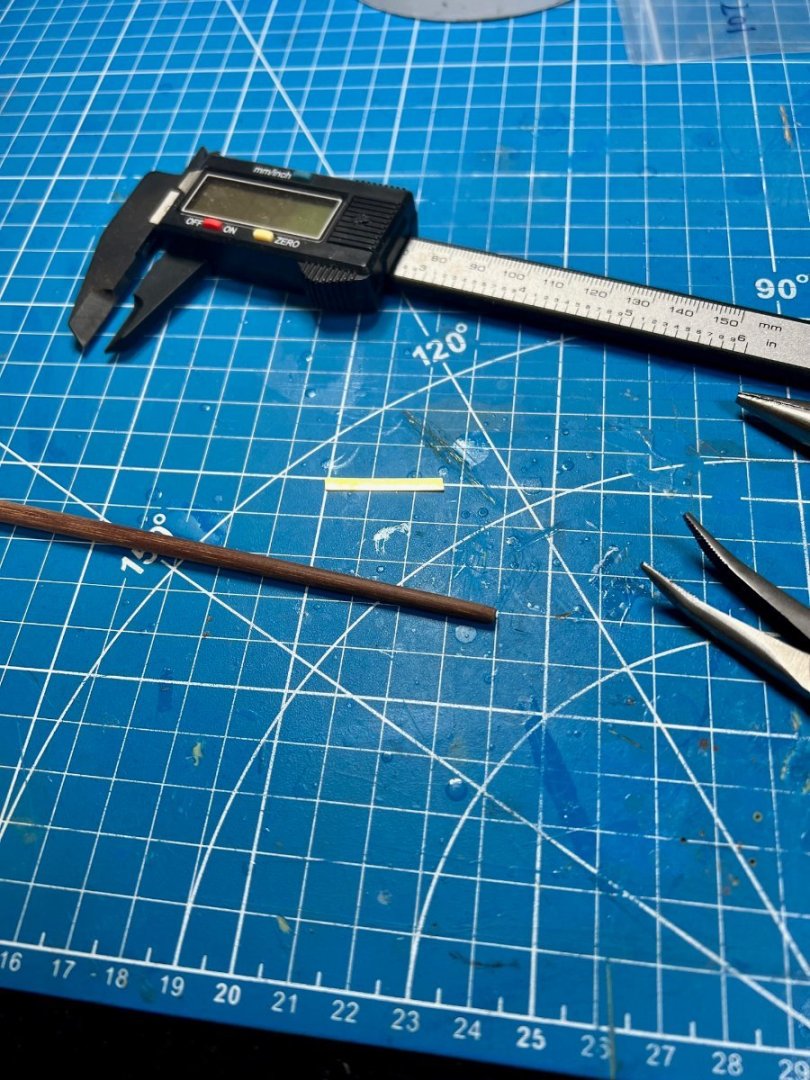
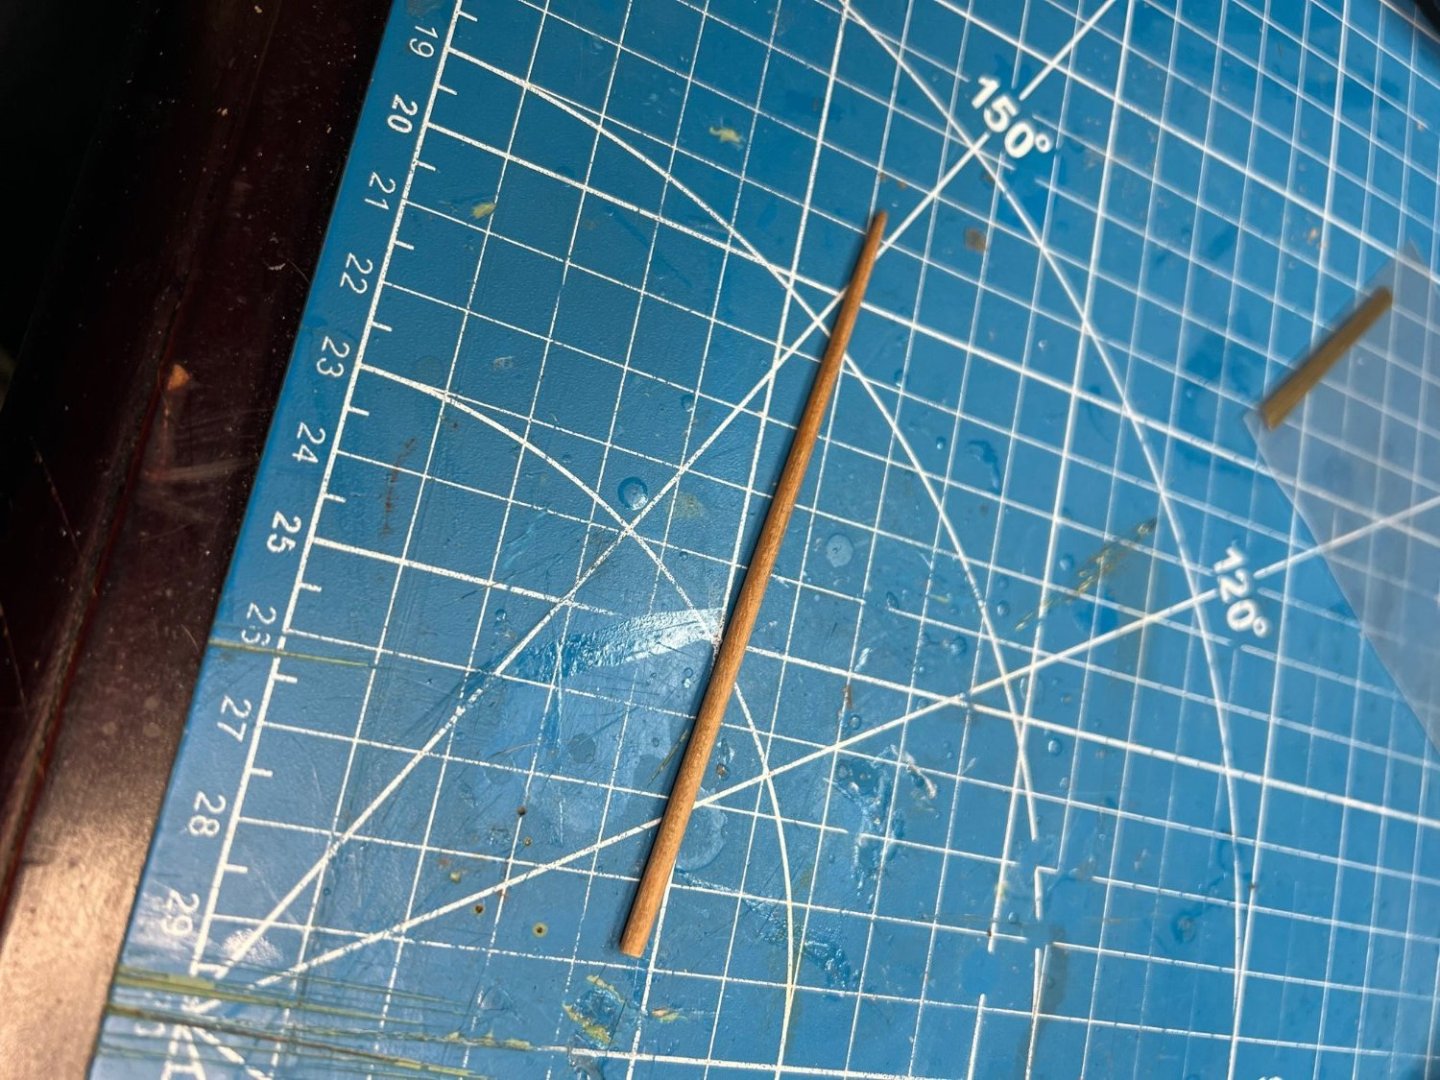
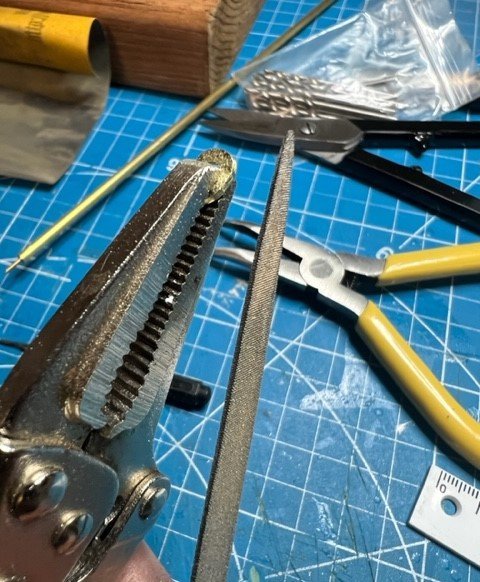
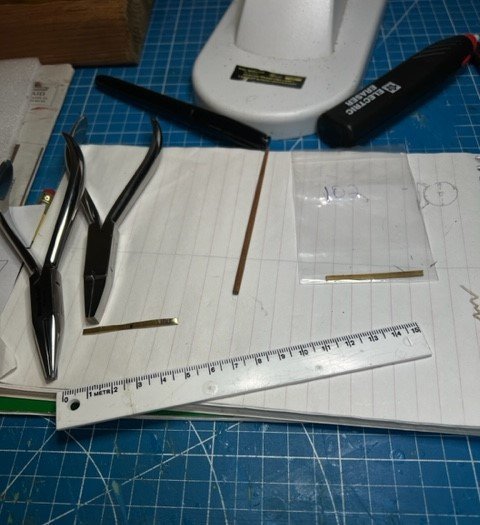
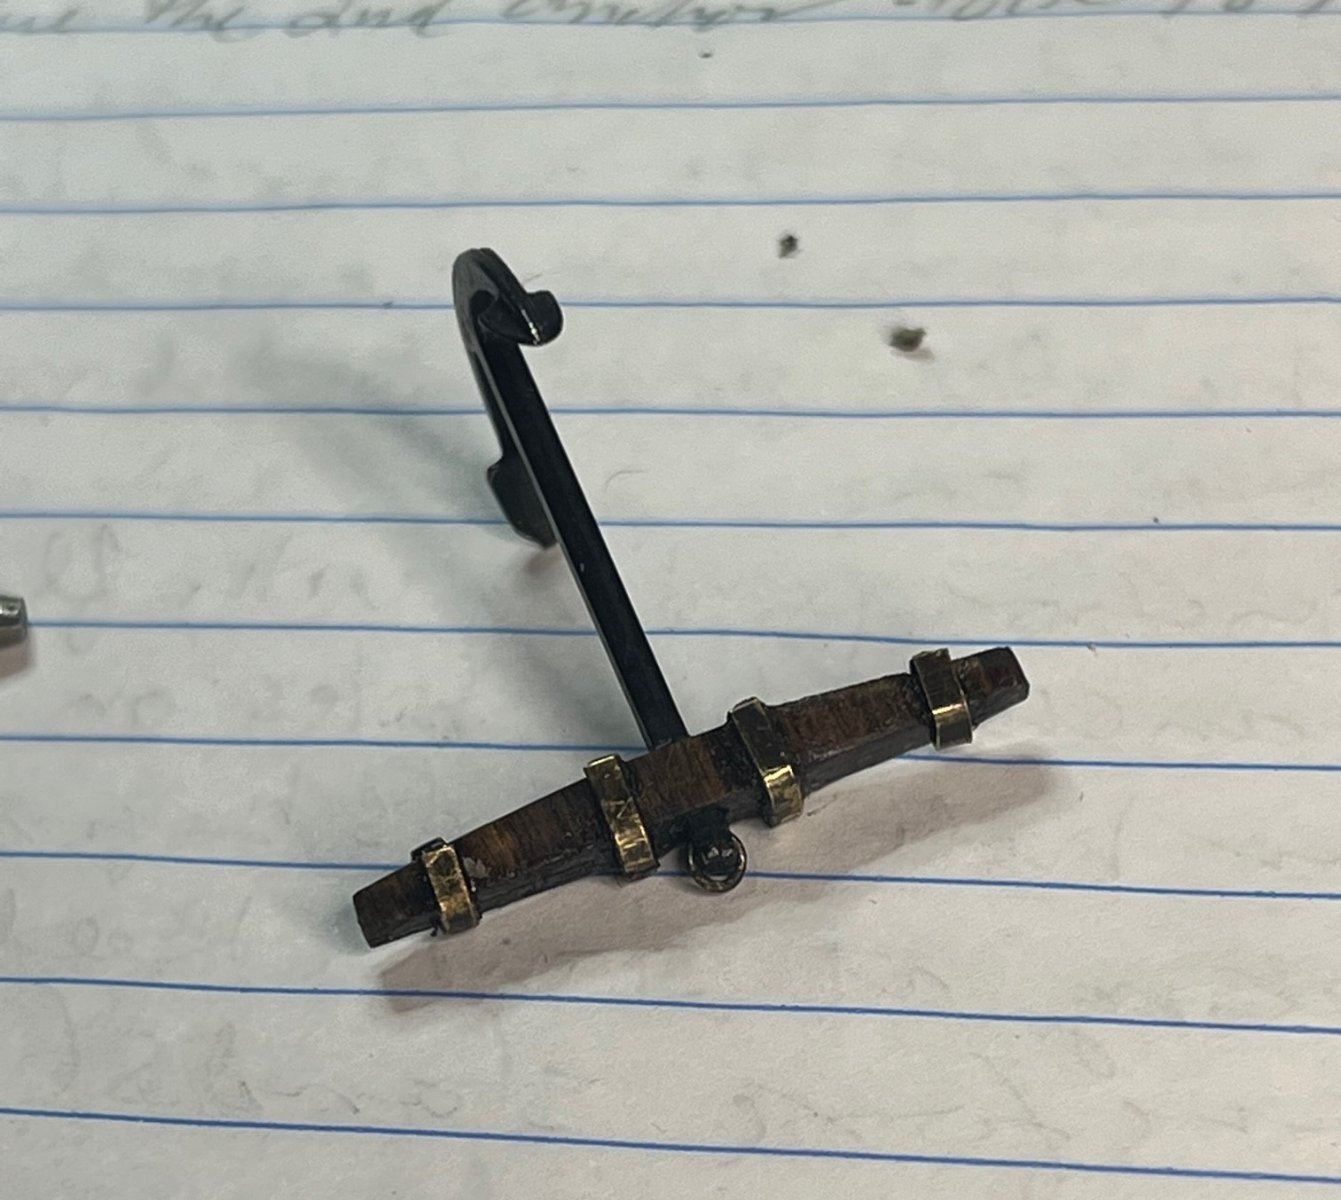
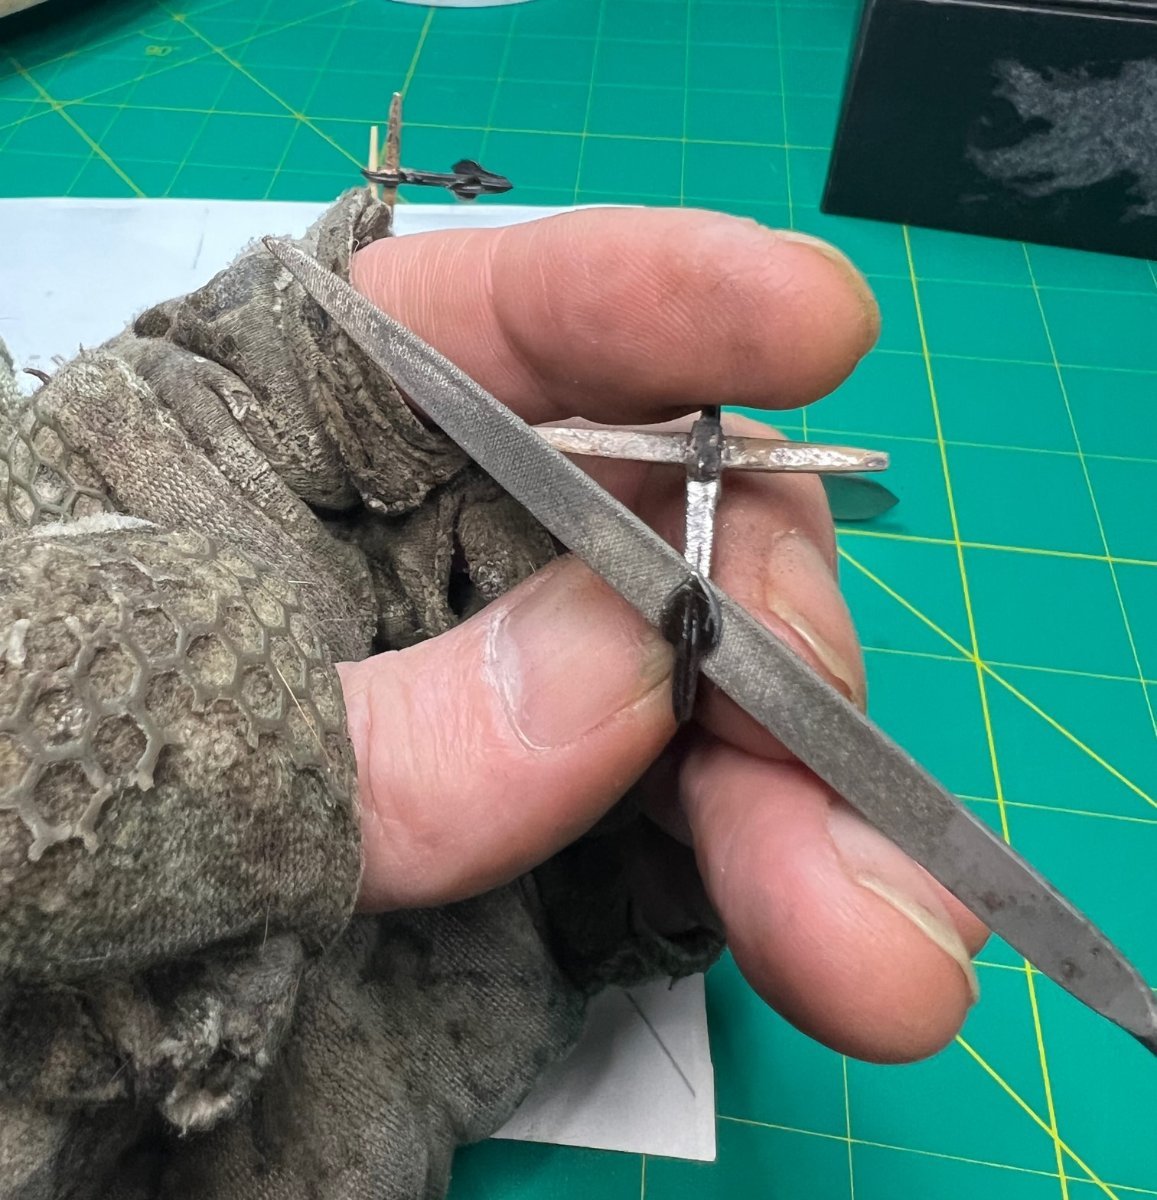
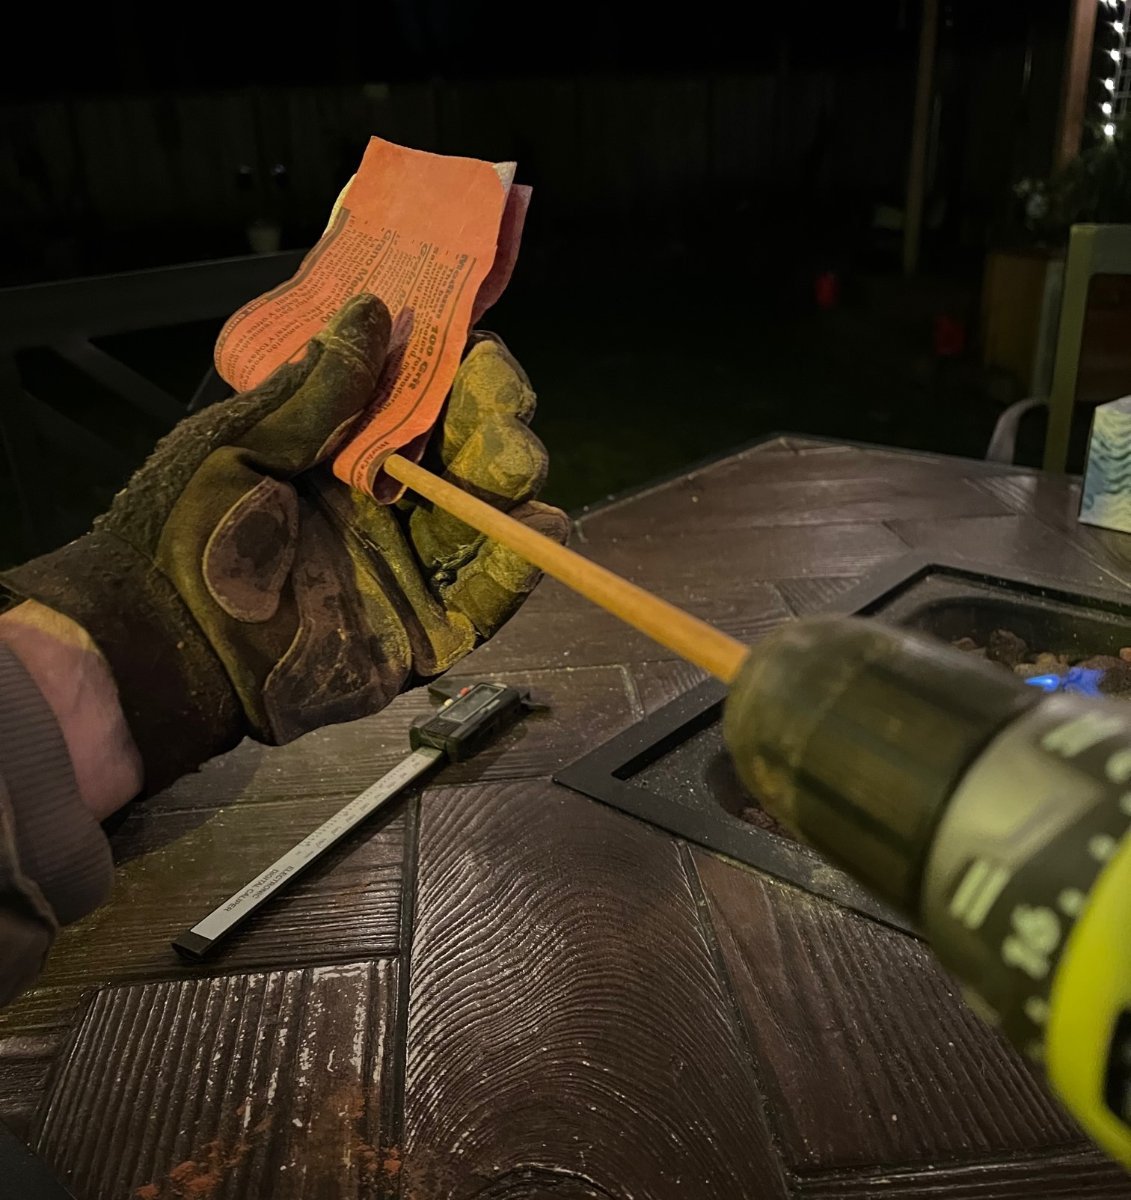
Ok, took the ring off, straightened the wire and measured and cut it to as close to 15.7mm as I could to result in a 5mm diameter once bent. Fortunately, it didn’t break. How’s this for size? It’s not quite a circle but you get the idea. Still working it, fiddly. May have to reburnish it unless I choose to serve it with thread. The jury’s still out.

-
1 hour ago, Knocklouder said:
Yes the ring looks a little big. Seizing the line to the ring, not the ring itself .
I had planned on seizing the line to the ring. I think Maury is talking about winding thread around the ring like you'd serve a rope and I haven't researched if that would have been on an 1805 Pilot Boat anchor but would add some detail. I will have to find out the best way of doing that if it's required. I can shrink the ring a little but will be fiddly as most things with this ship are. If it breaks when bending, and it might cause it's old and corroded a little I see when looking close, I'll have to get some appropriate sized wire and make more. I annealed them before brass blacking them but still not sure it will withstand any more of my abuse. lol The crew of this ship must have been super strong men because there is no wench to weigh the two anchors at all. The cables just loop around the knightshead from what I see in the kit and that would limit them to anchoring in very shallow water (which may have been the case) since you can't put that much line on the knightshead.
- mtaylor and Knocklouder
-
2
-
-
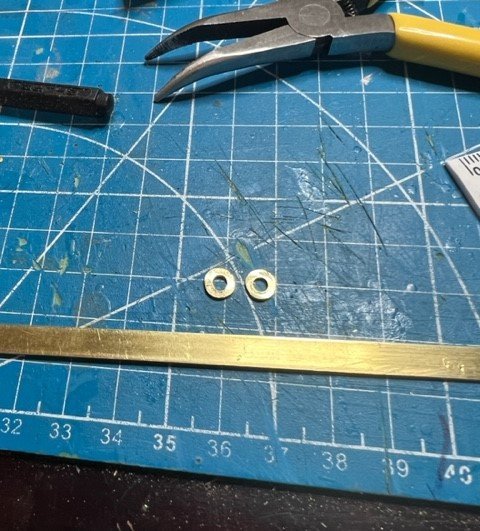
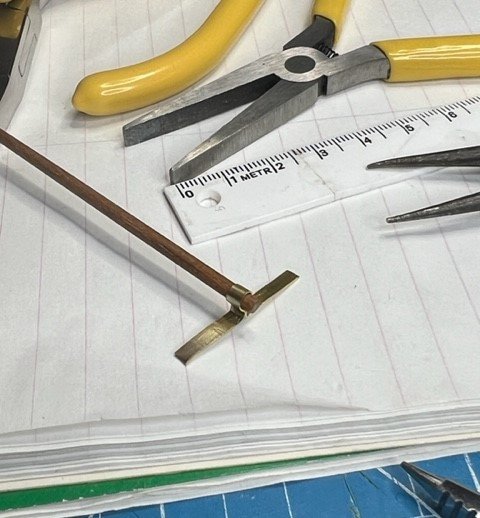
I finally got my two after-market anchors from Modelers Central in Australia and love them. I got the ring they supplied installed but it looks too small to me. I’m thinking of using the two un referenced larger rings that came with the ship kit. Unless I missed it, the instructions never talk about anchor assembly and which rings to use. I’m thinking the ones in the bag would look more appropriate. What do you think?
Thinking this is better but having trouble making the ring round.

What do you think? Thanks.
-
1 hour ago, Peanut6 said:
Everything is looking great and your fixes/work-arounds are impressive. IMHO the stain your using and the results are very nice, I really like the hue. Sounds funny to use a power tool in a manual mode but I've done it myself, the precision of the tool setup with the controlled speed of human power. The pump and the barrel turned out awesome . . . . but there was one thing I noticed in the close up of the barrel, and I'm sure I'm wrong here. But what about hitting the inside of the top ring with your marker trick (that also turned out good). Could be the lighting, or my old eyes without my glasses, but it appears to me that the inside of the "metal ring" could/should match the outside and top. I hope you're enjoying your progress as much as I am and thanks for the updates.
Thanks Kev! I do revisit the barrel later on and add a cork and scratch make some "deck barrel holders" whatever they're called. I disremember if I addressed the detail on top, but if not, I certainly will now. Thanks!
- Keith Black and Knocklouder
-
2
-
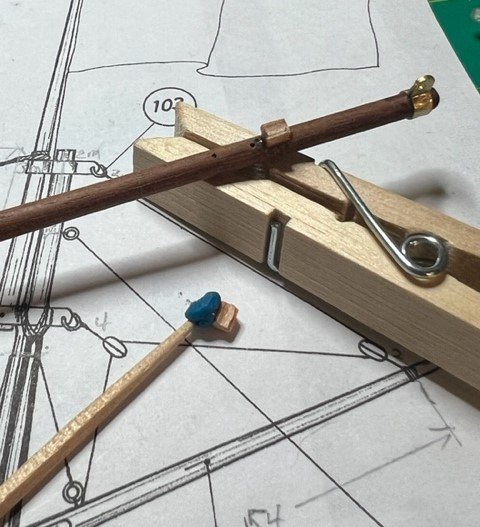
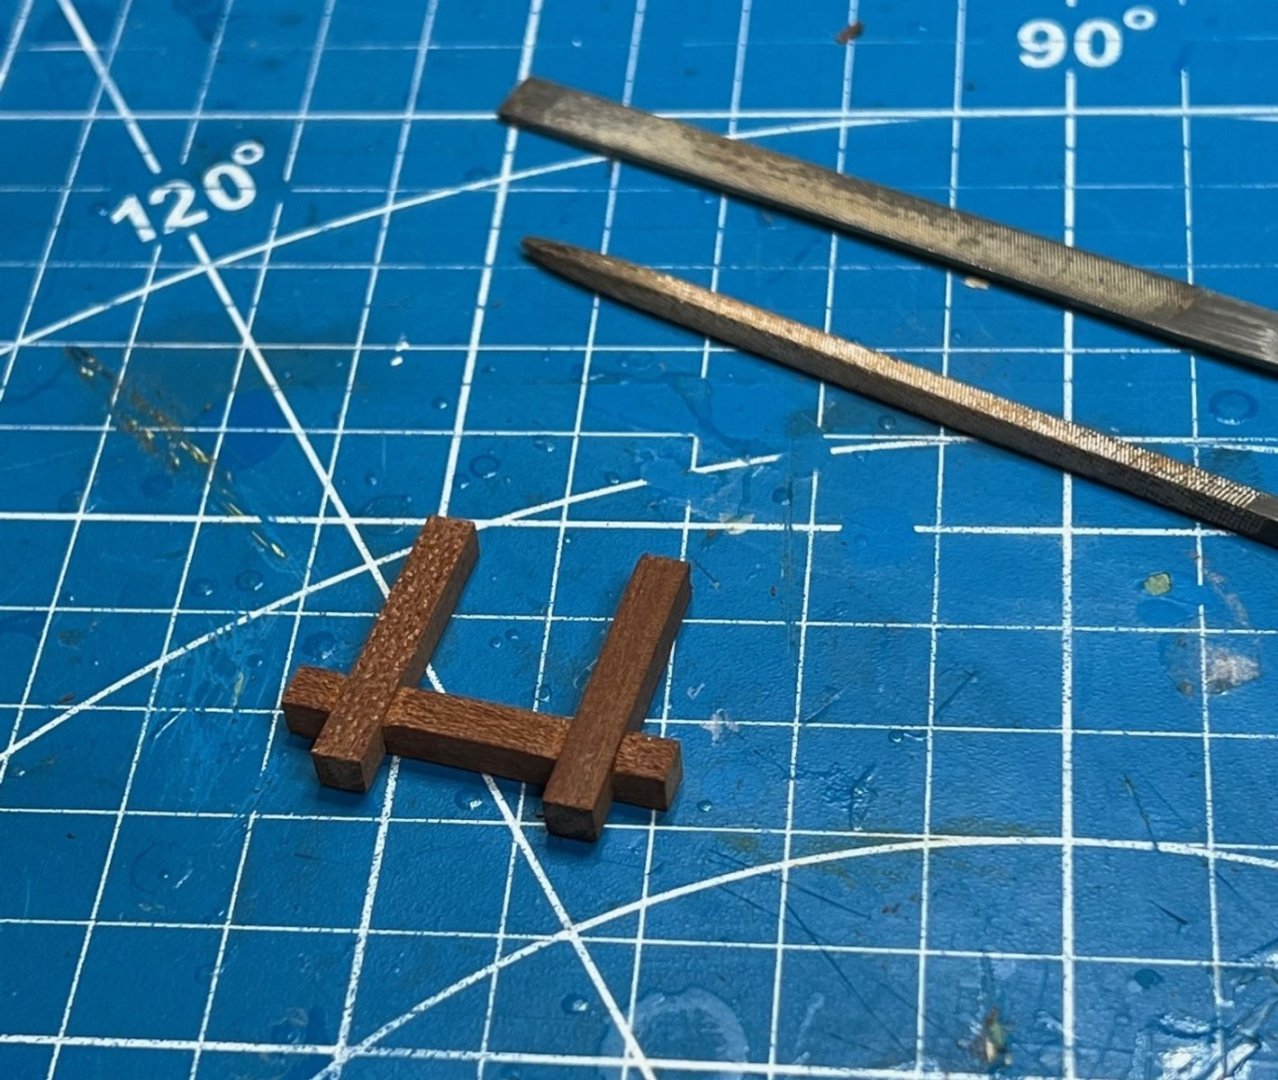
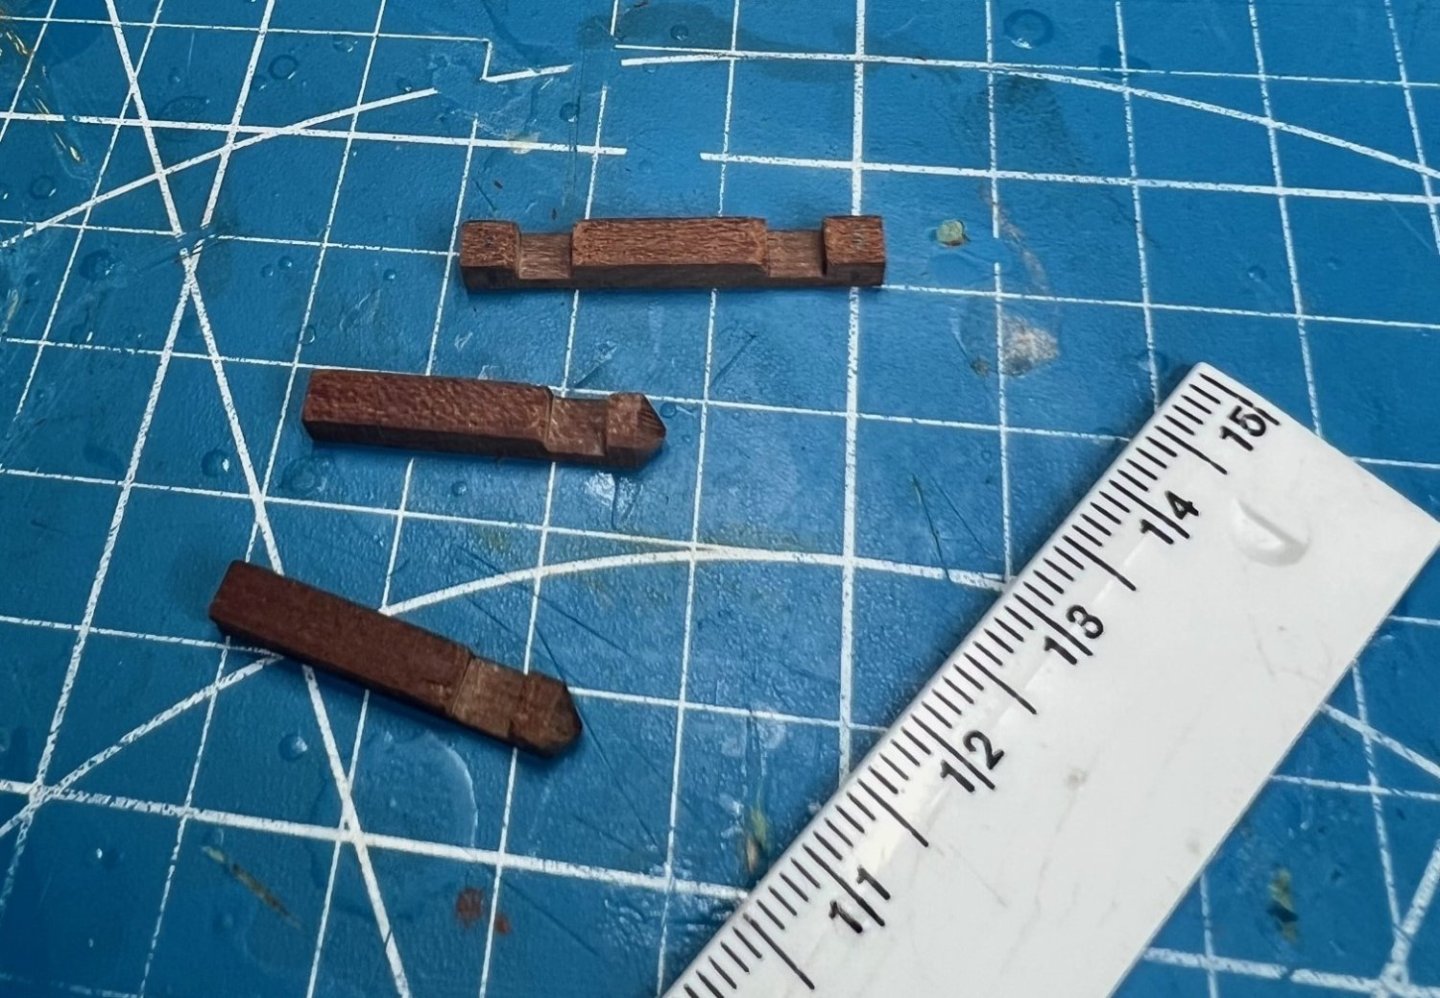
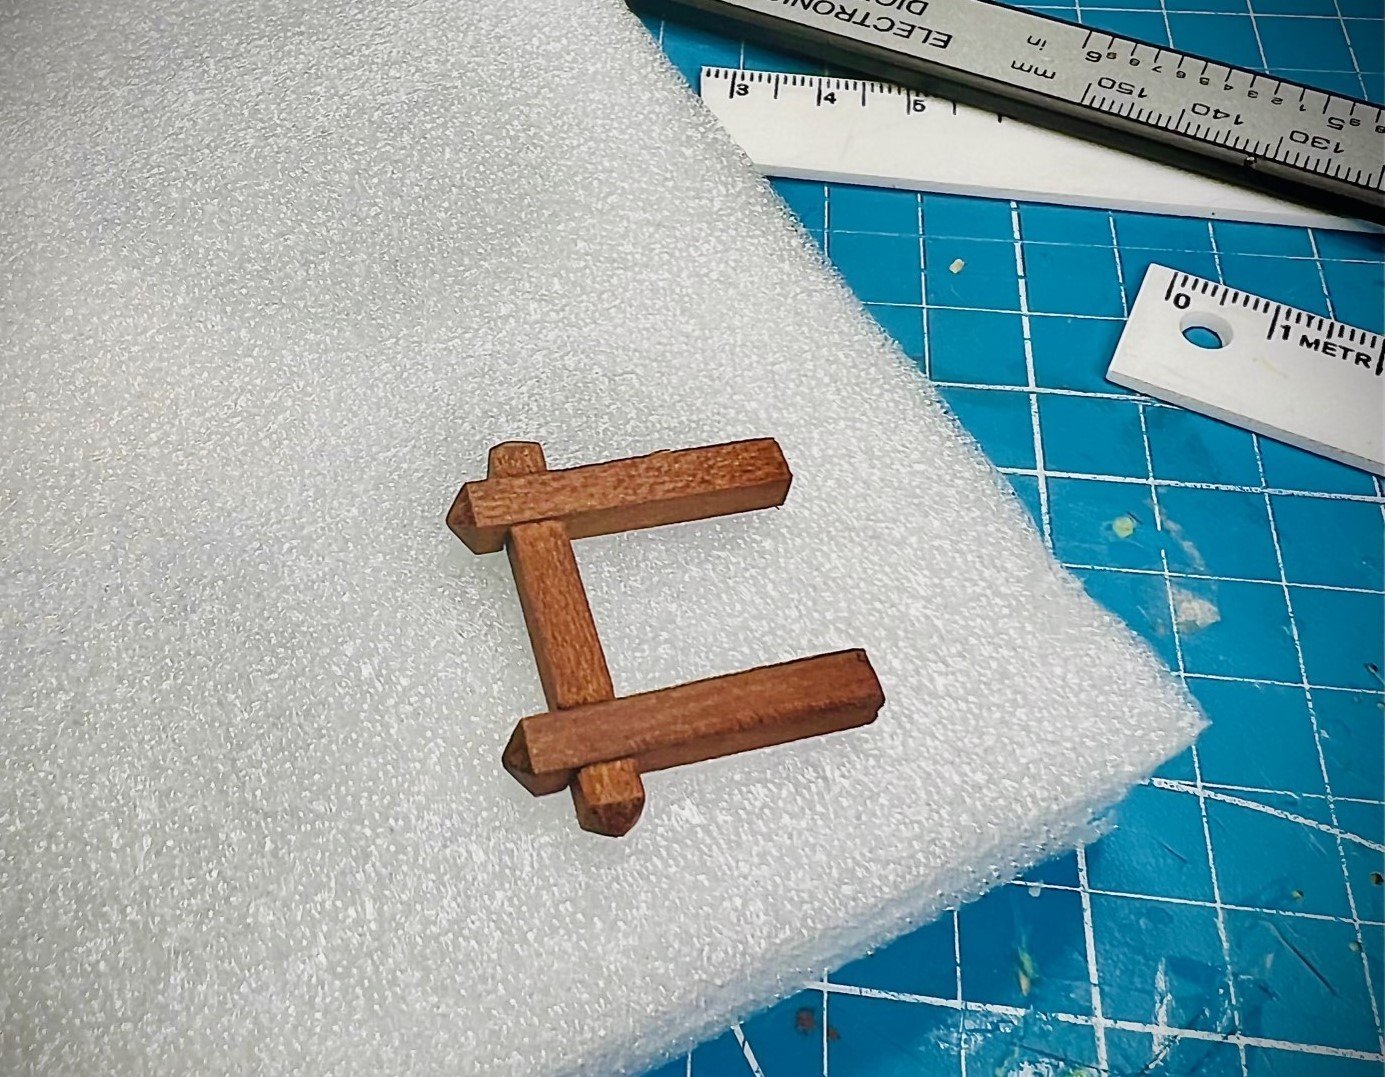
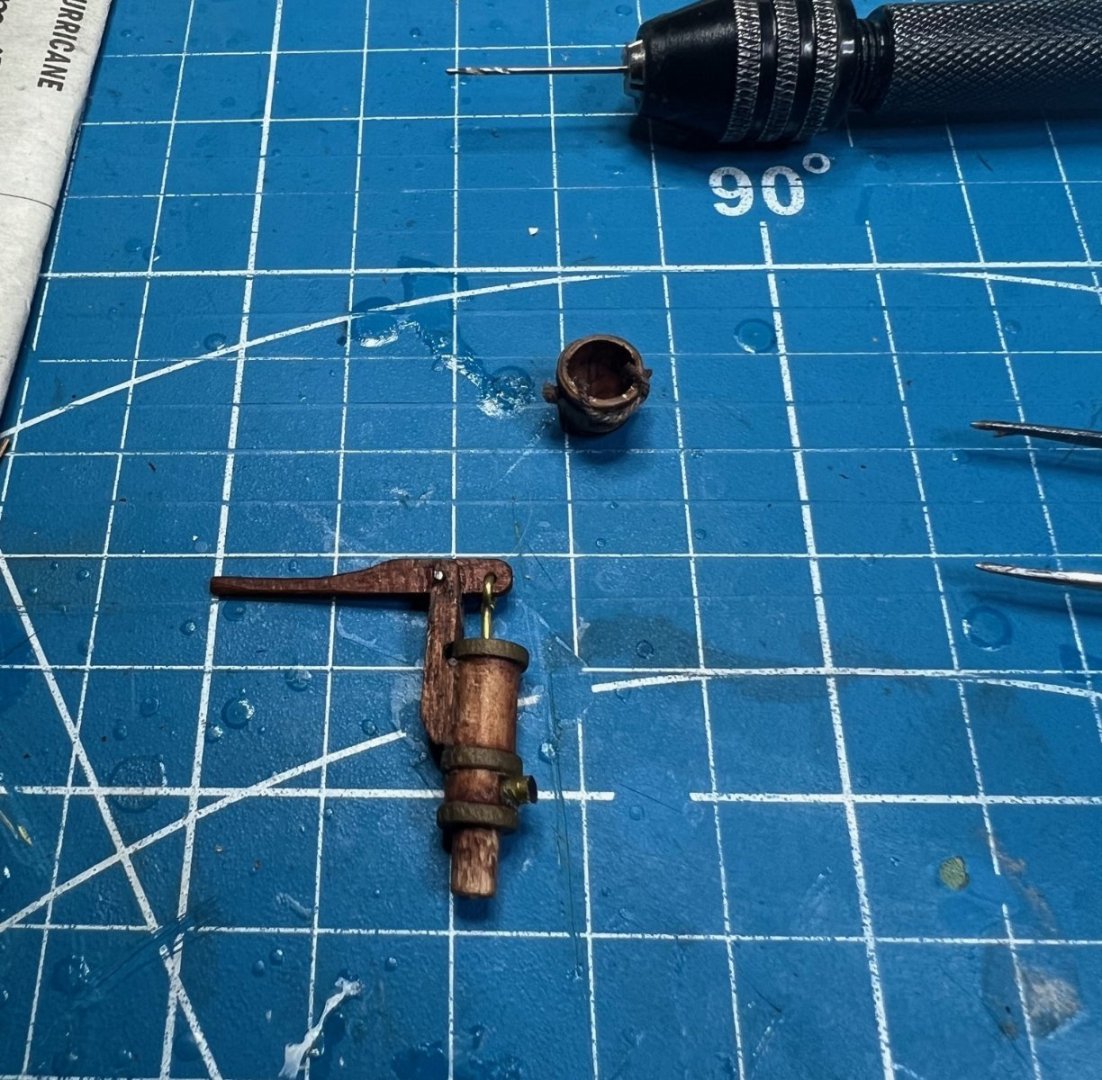
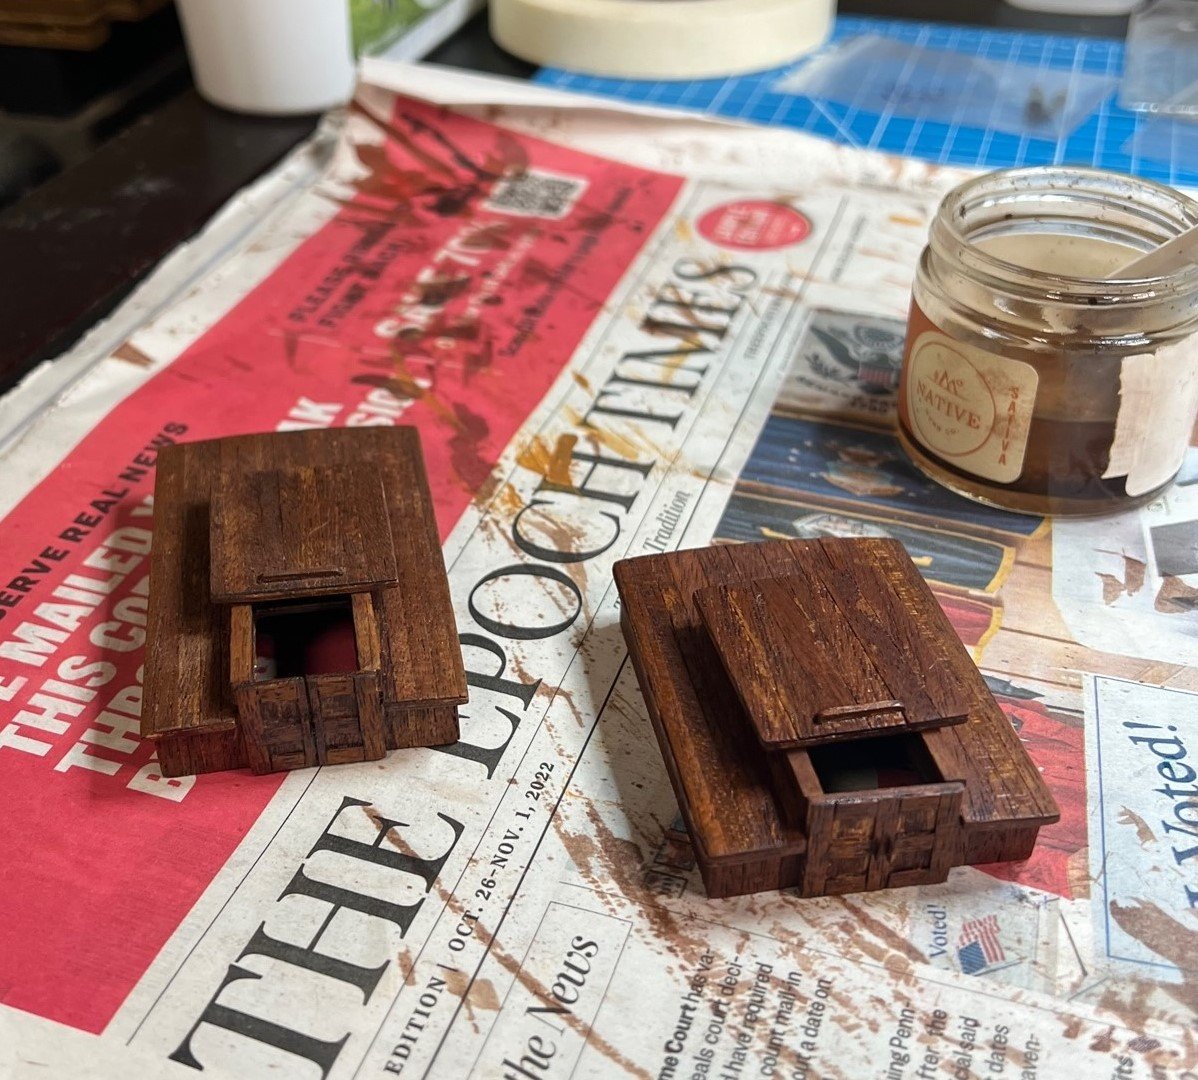
Knightshead, Barrel, Bucket and Deck Pump
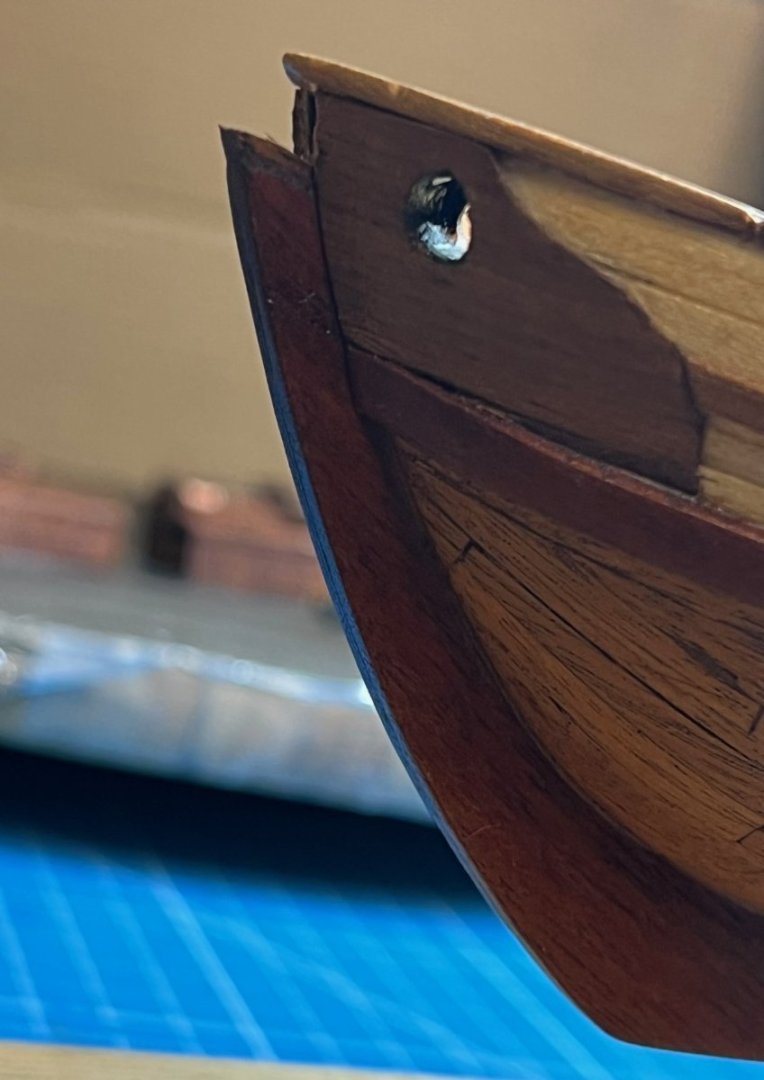
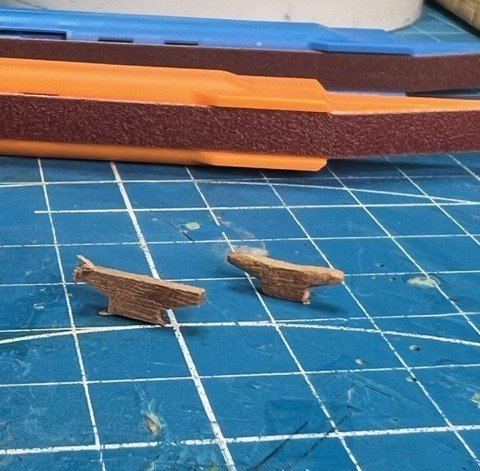
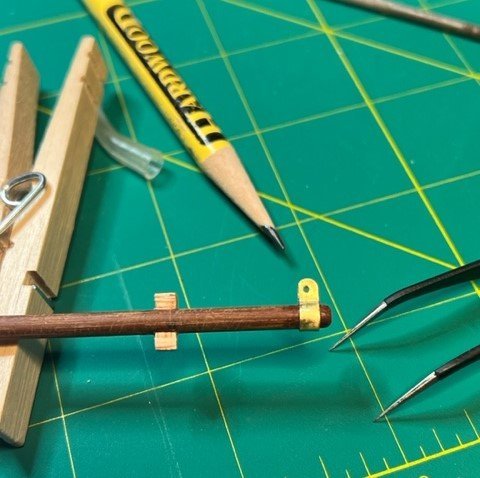
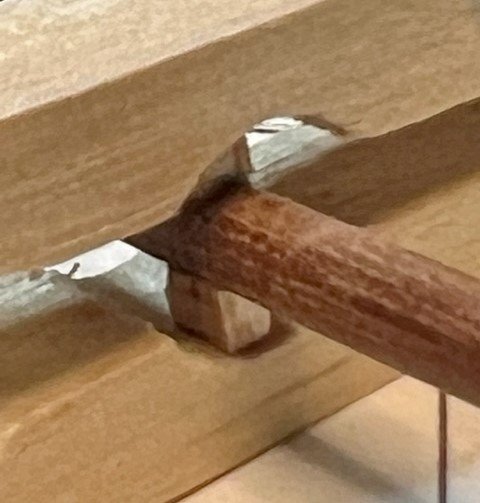
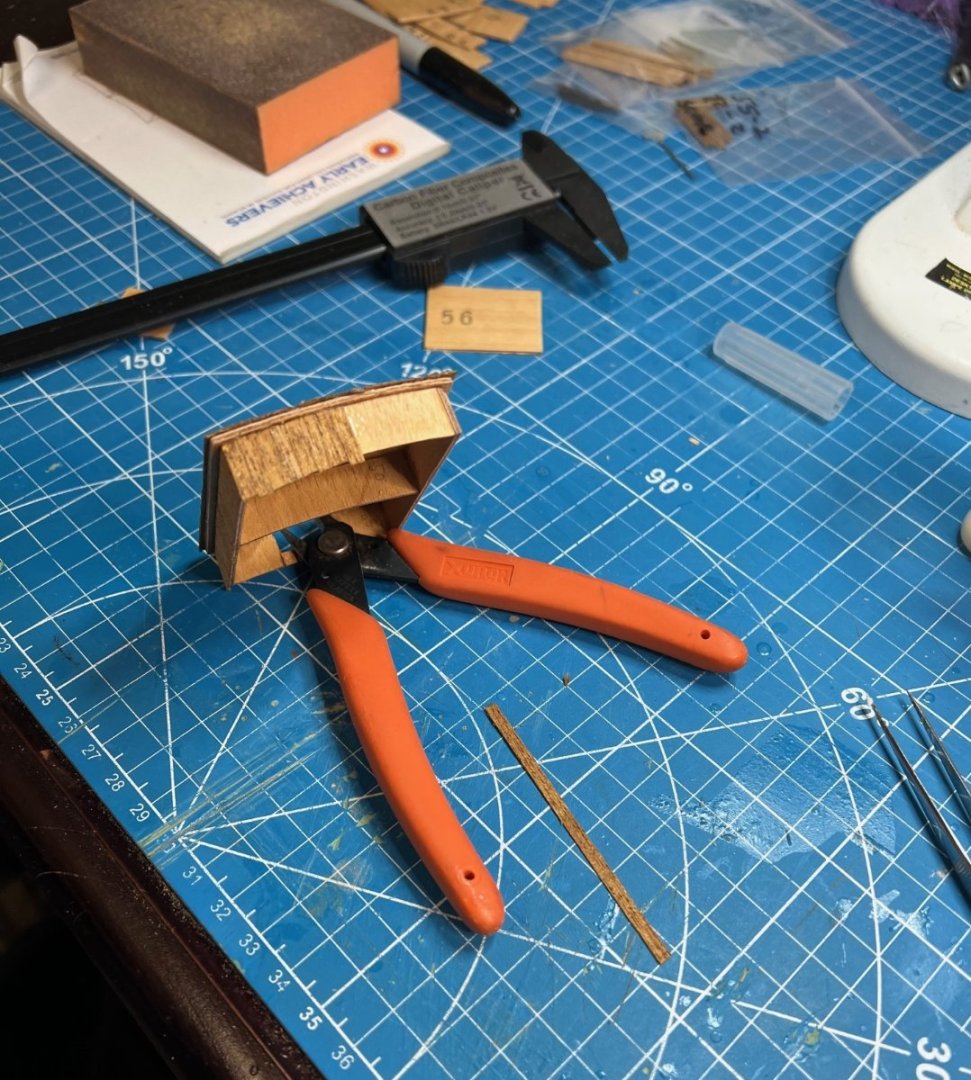
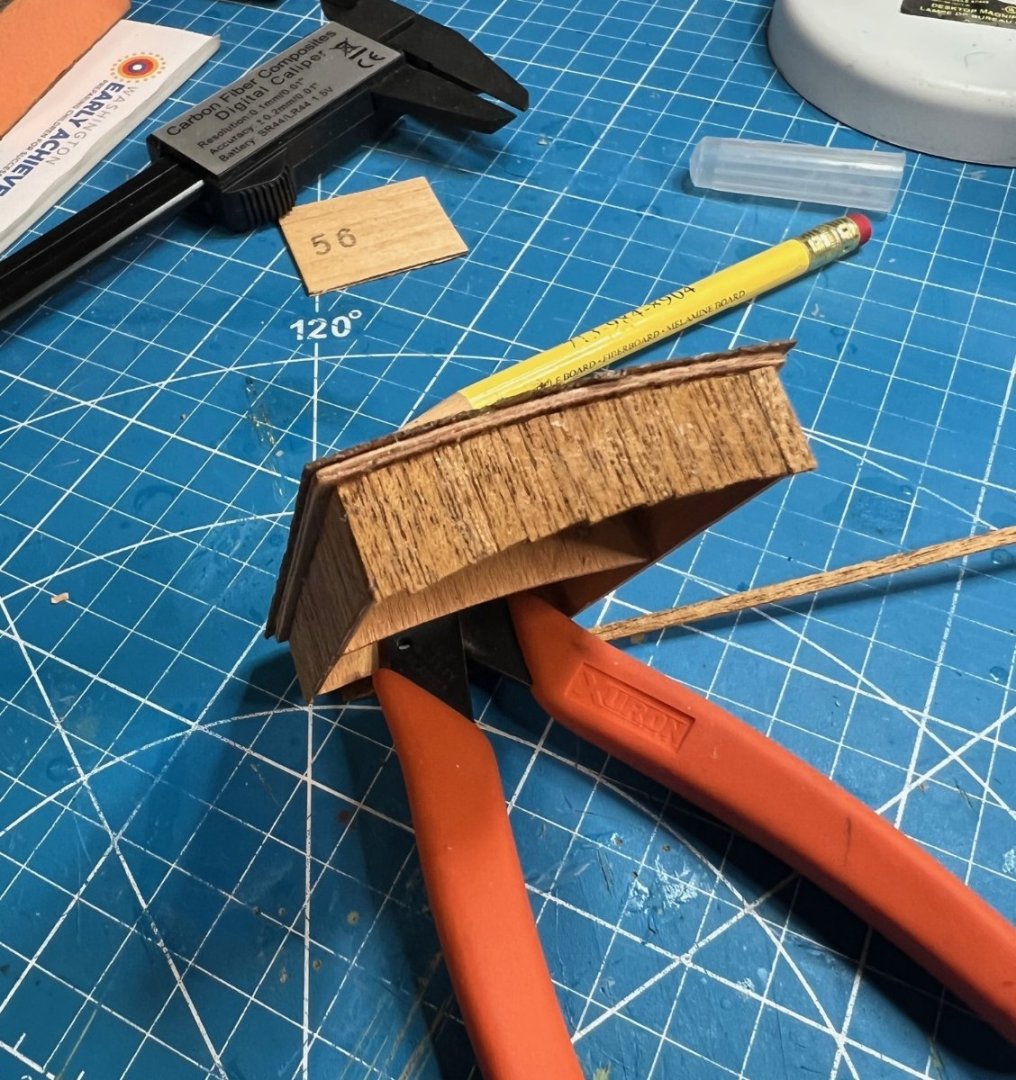
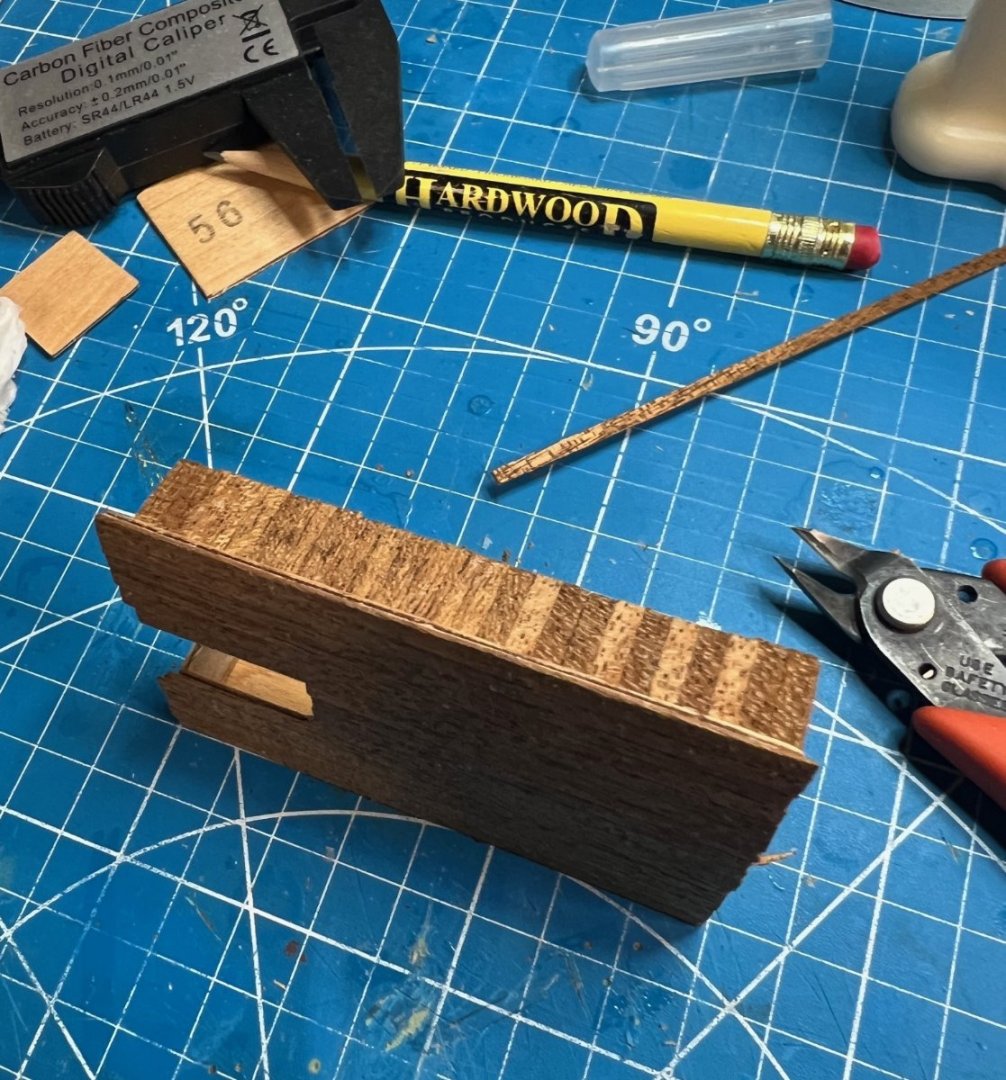
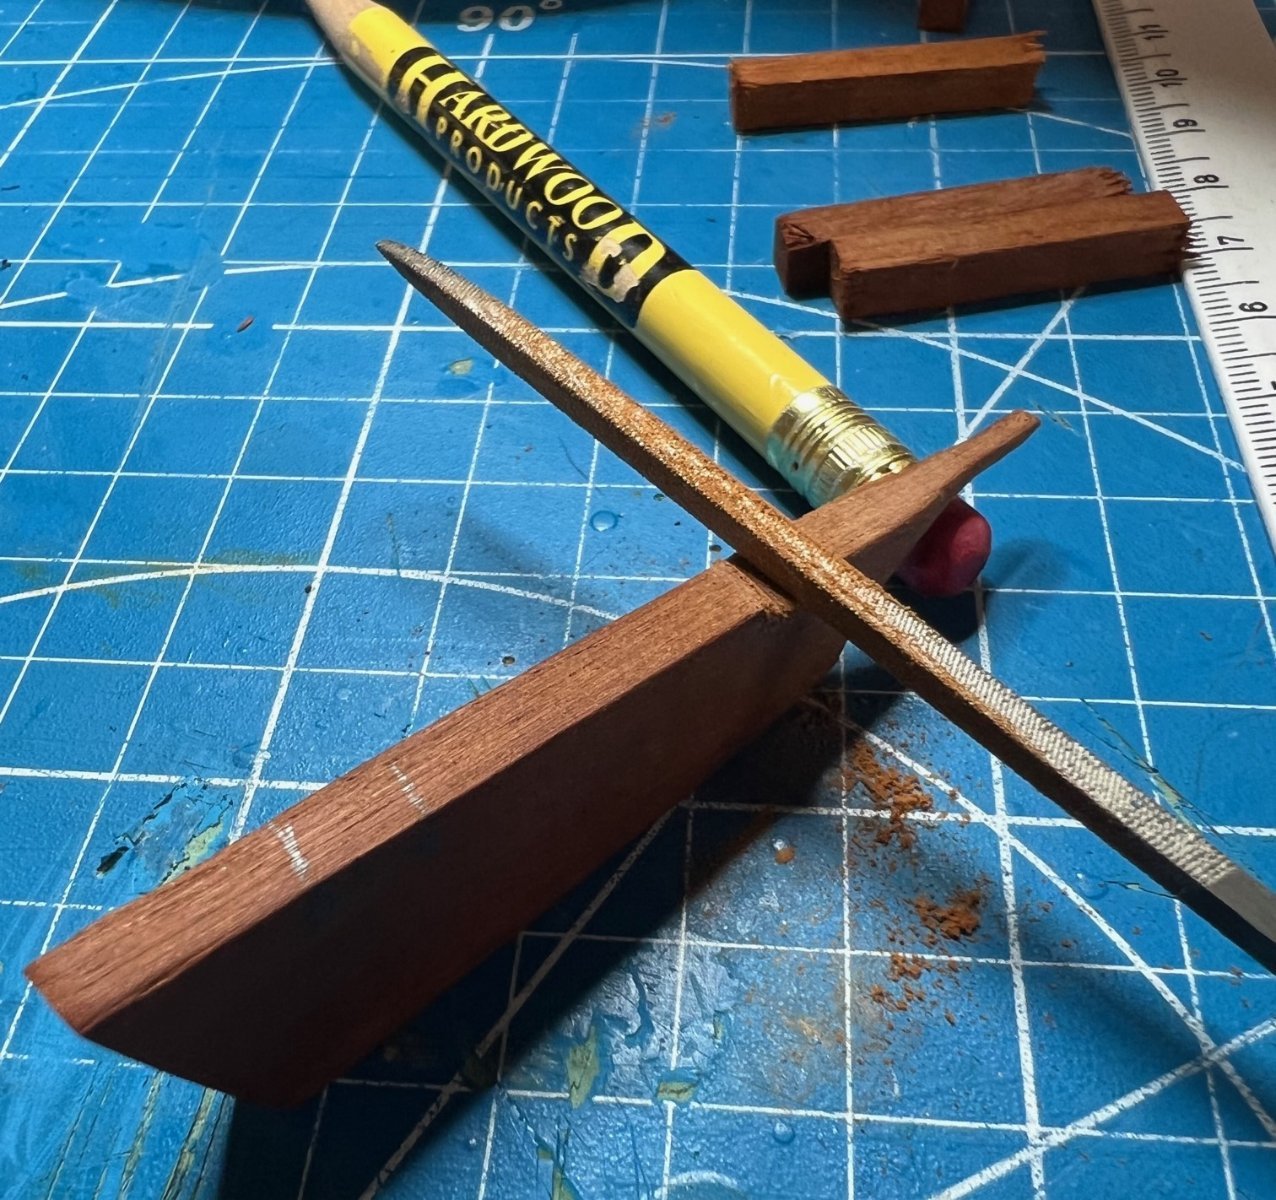
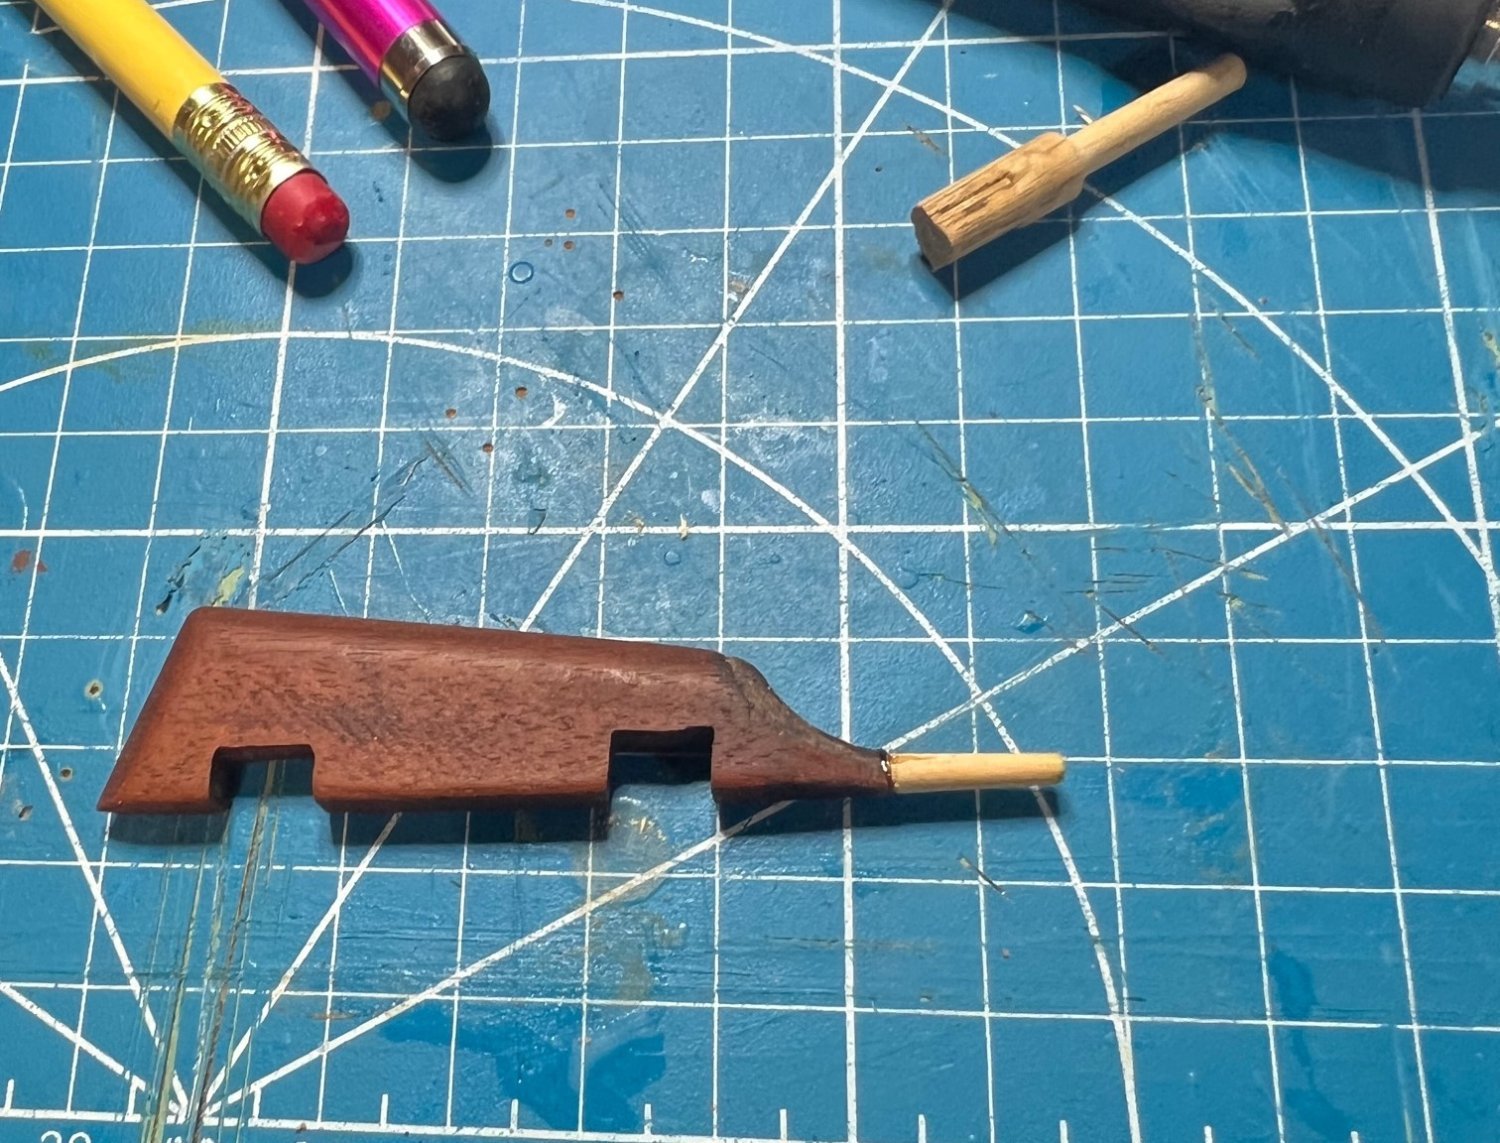
The three pieces for the knightshead came already notched but needed some additional shaping to fit and complete. Having gotten a good dry fit together, I had to shape little pyramids on top of the uprights. I set my disk sander to 45 degrees and simply turned the wheel by hand since I wanted to have a piece left after shaping. I just kept flipping and eyeballing to shape each of the four ends sticking out. I’ve since seen where other experienced ship makers knew to narrow the crossbar to just fit around the bowsprit but the rookie here had no clue so it is what it is. I did find a few weeks later when trying to dry fit the bowsprit that I had to lower it significantly closer to the deck so that my bowsprit didn’t point downward, I probably messed up on the bow somehow but we’ll get to that in a future chapter.


I highly recommend the PVA glue bottle I found on Amazon for about 7 bucks. Very good glue bottle!
Anyhow, another sub-assembly done and onto the next.
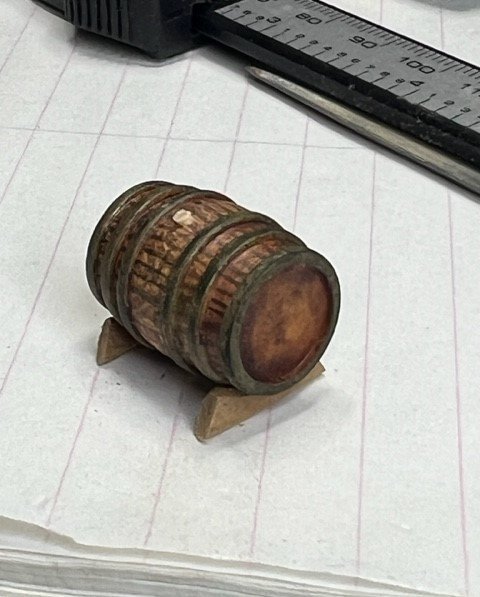
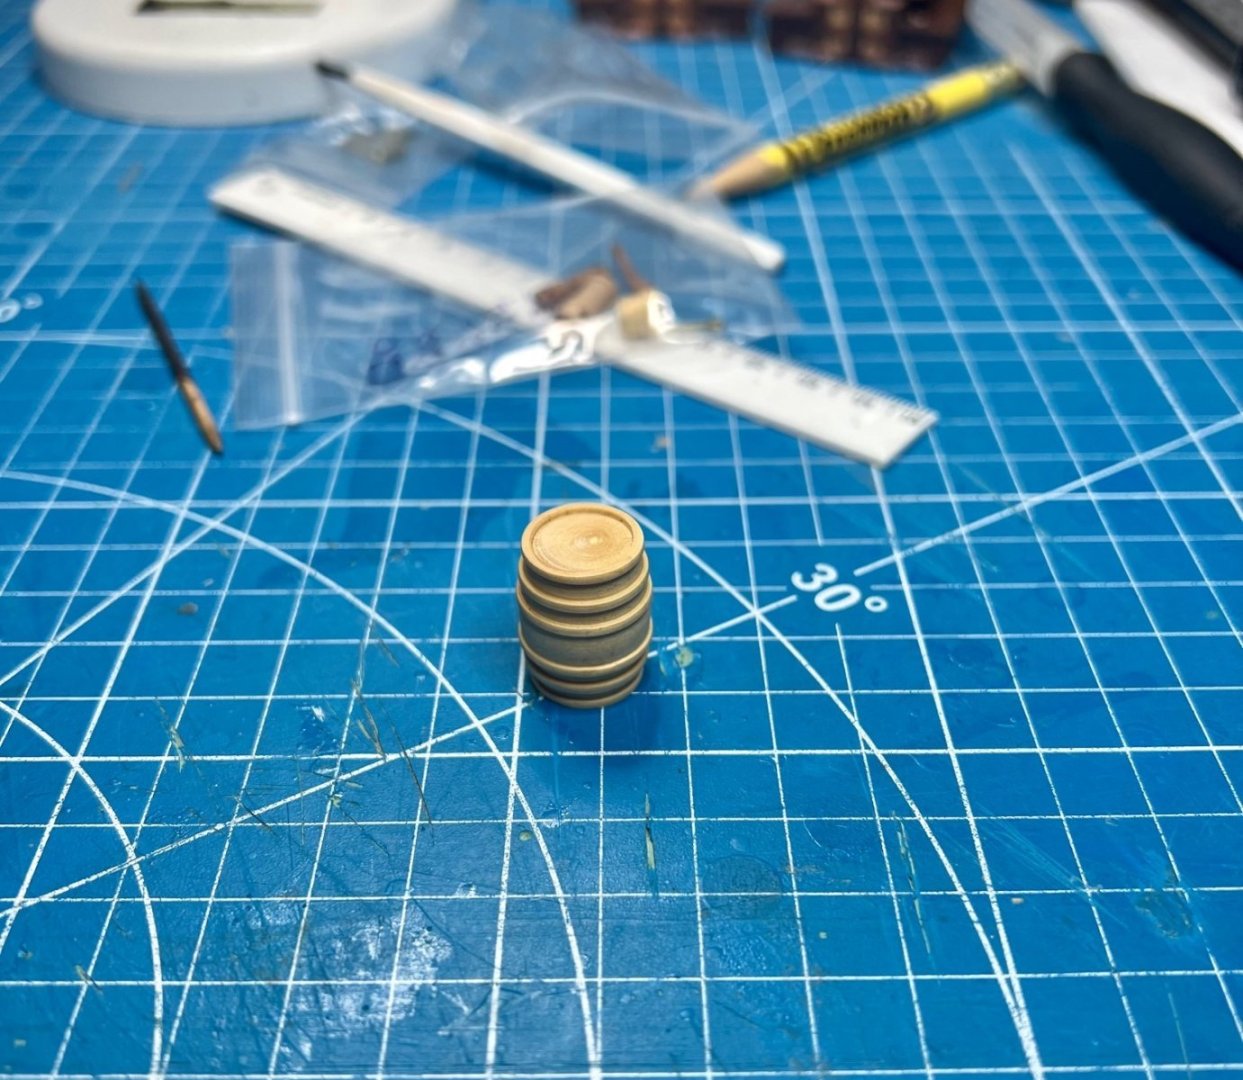
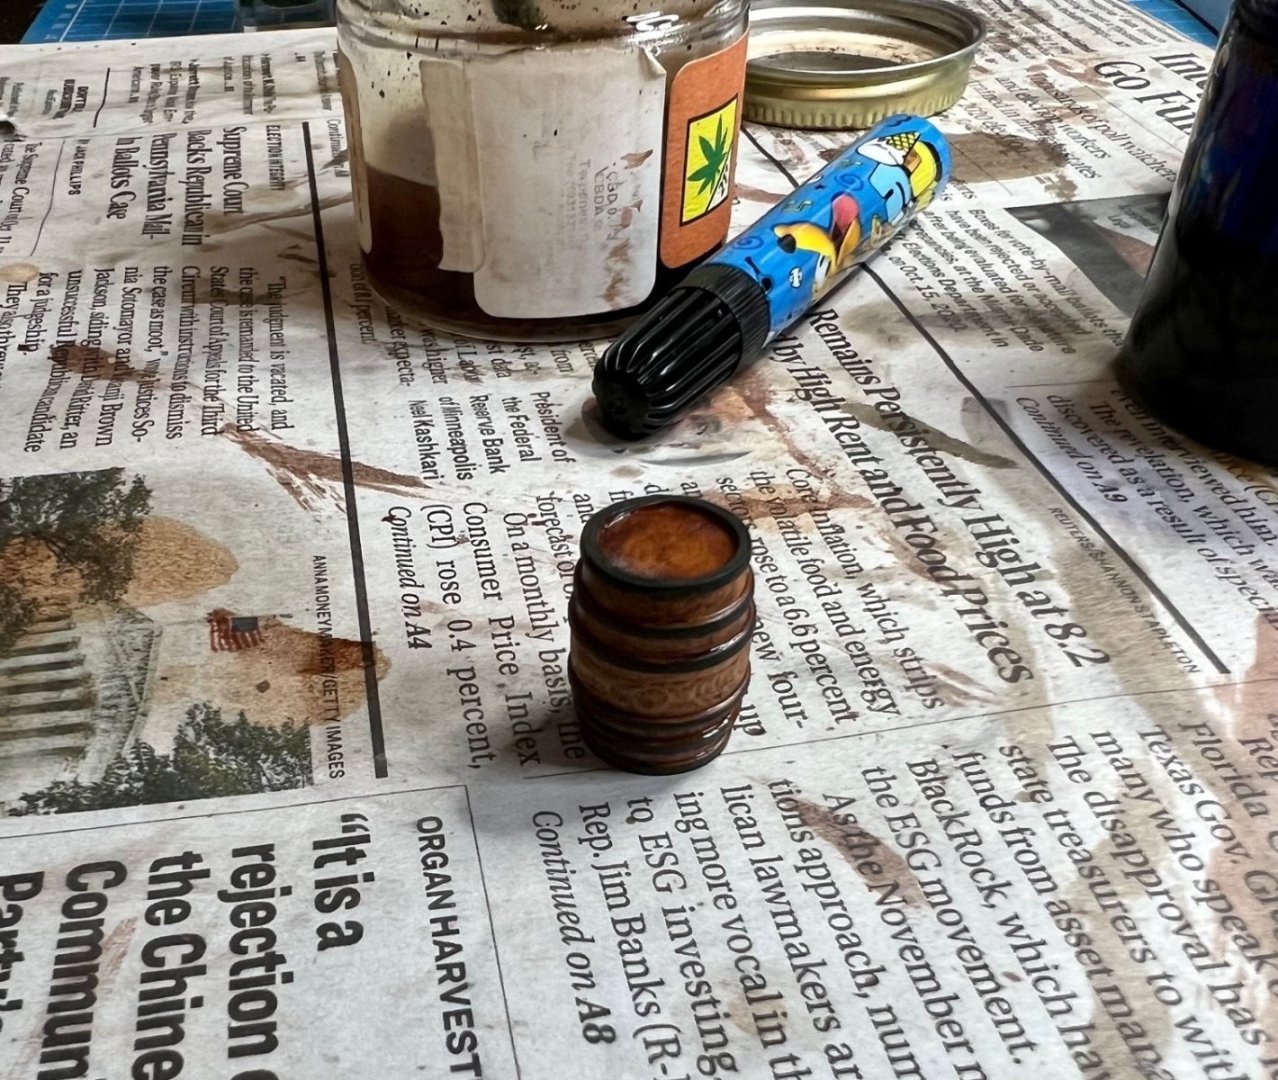
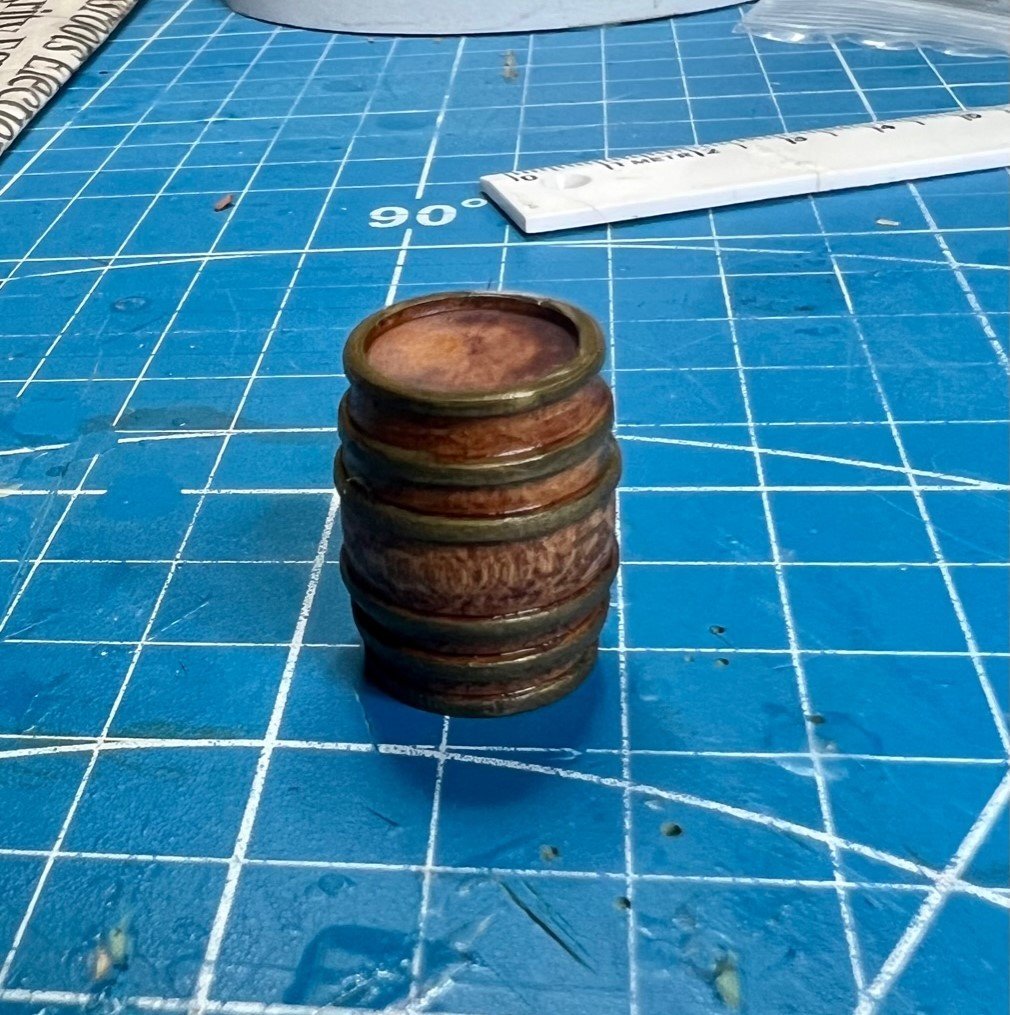
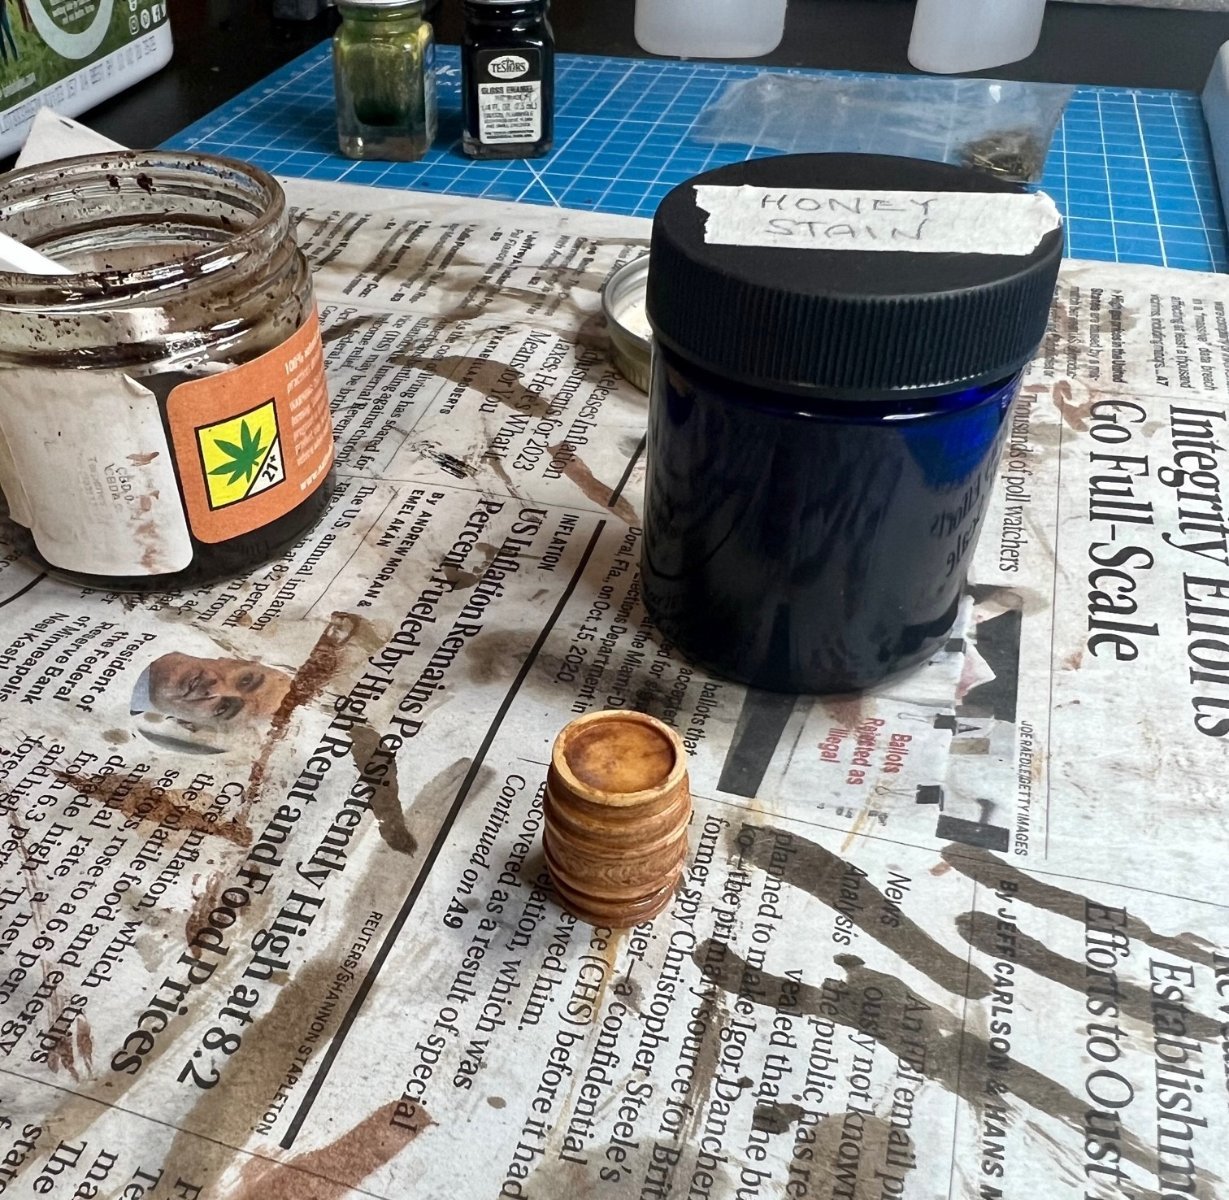
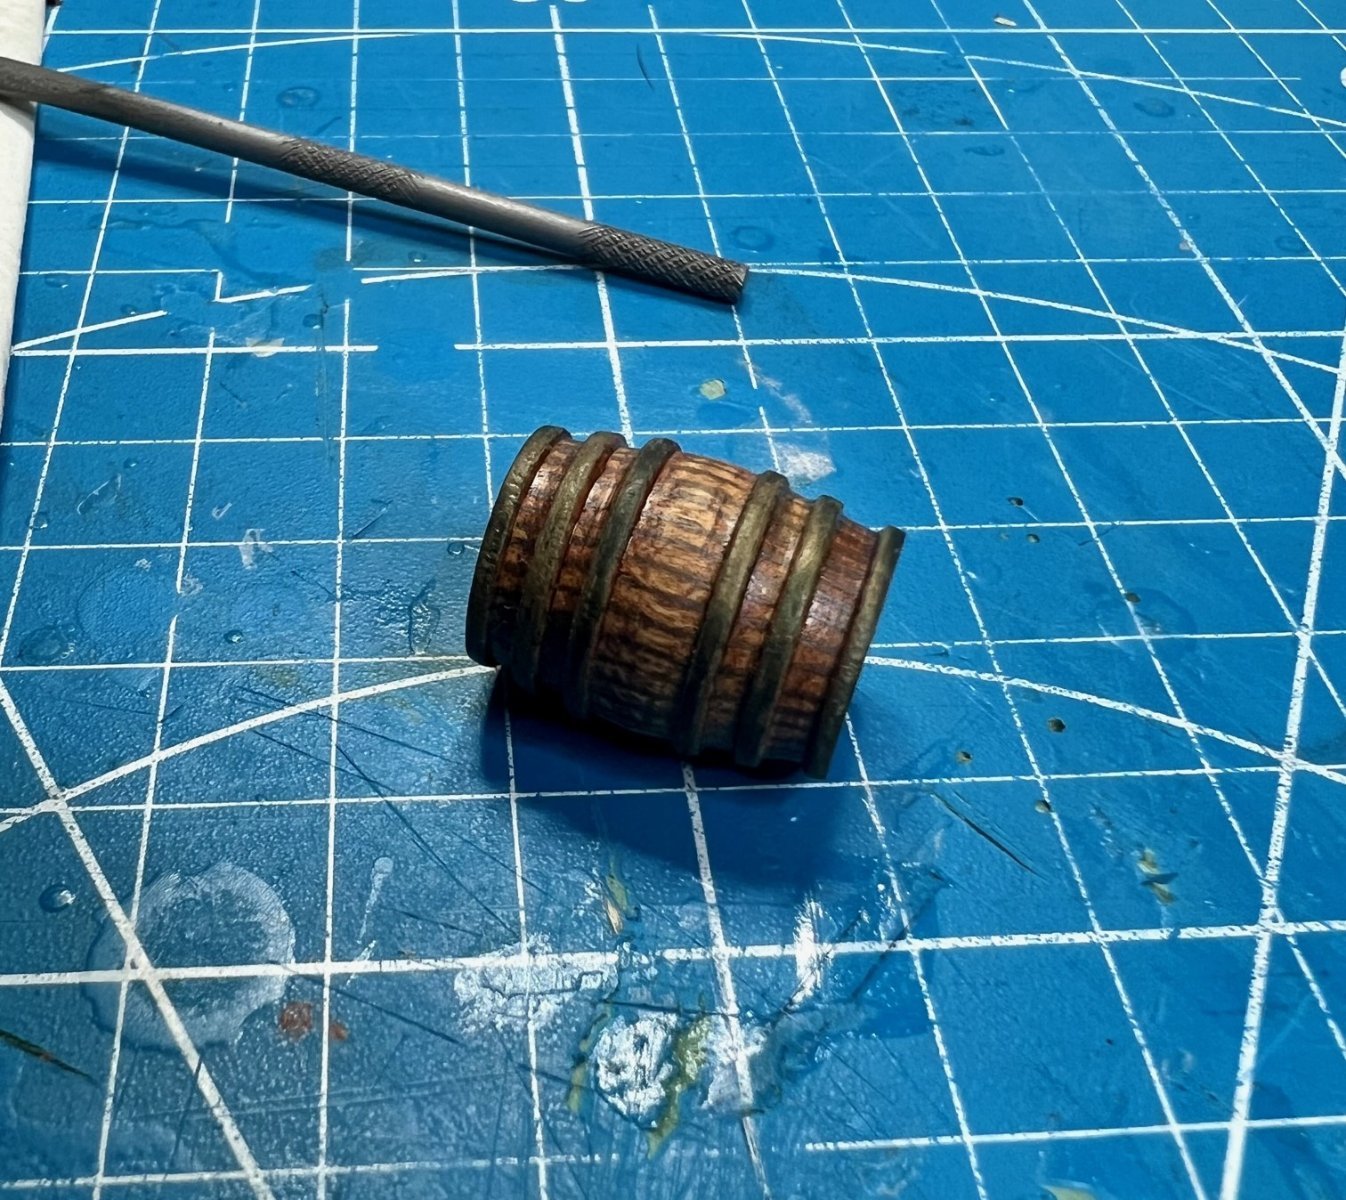
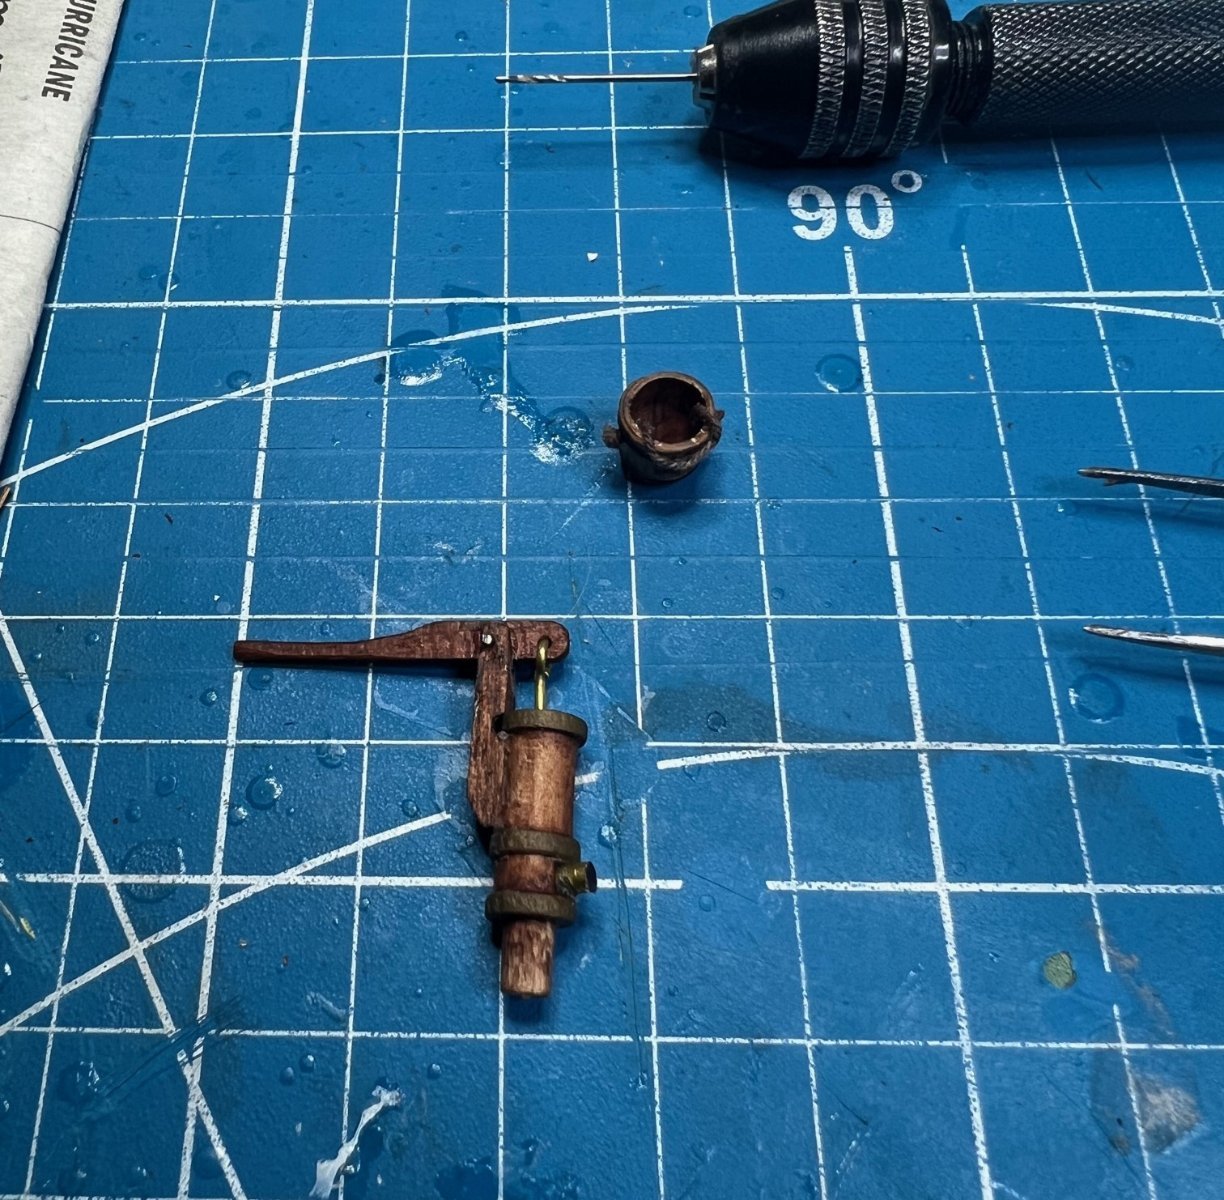
The kit came with a little barrel that was a light color to start with. I first stained it a couple of times to get the color I liked. For the rings, I first used a gold metallic marker followed by brown marker giving a bronzish tone. I then carefully used a sharp pencil to draw the slats of the barrel in, not bad for freehand but it was tiny so I could get away with it. I hadn’t bought any paint yet during the construction of this ship but was still using my 40-year-old paints that hadn’t dried up yet. I was surprised how much of my enamels were still good after all these years.


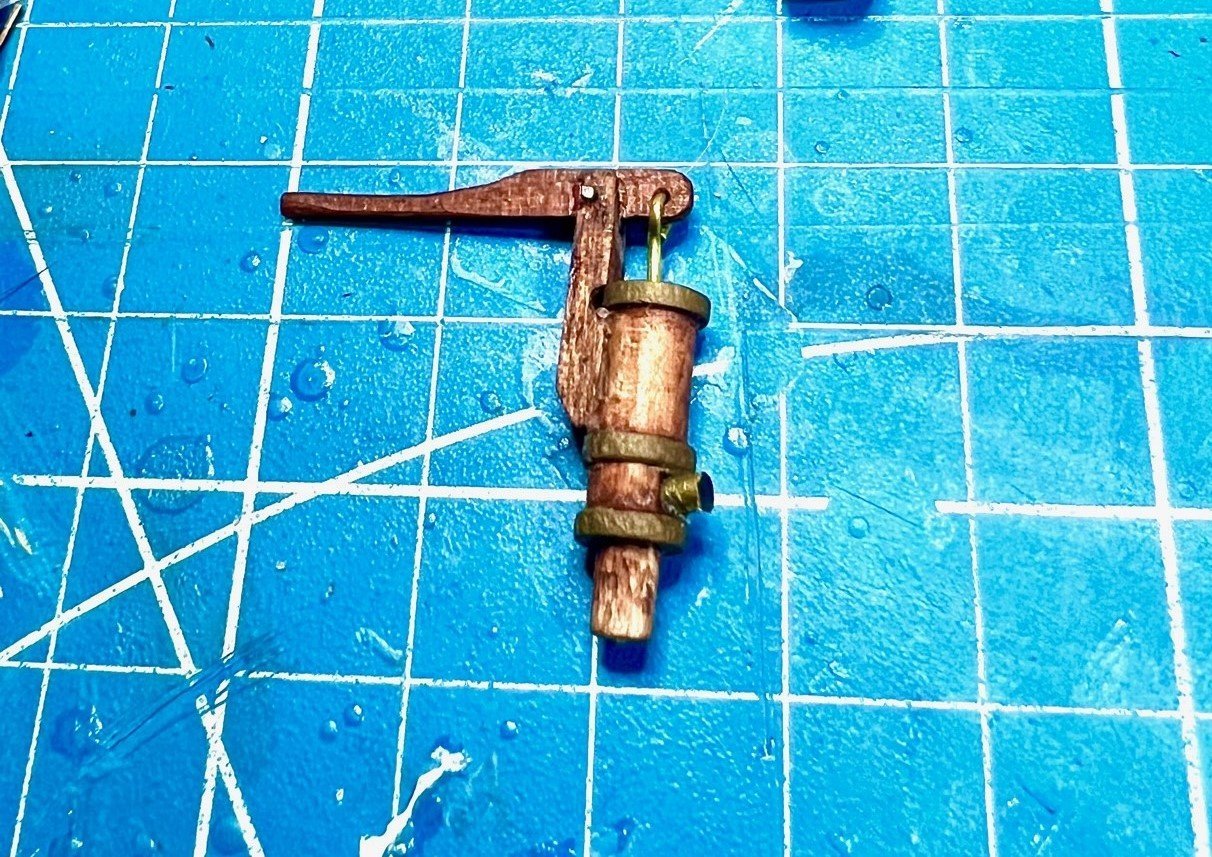
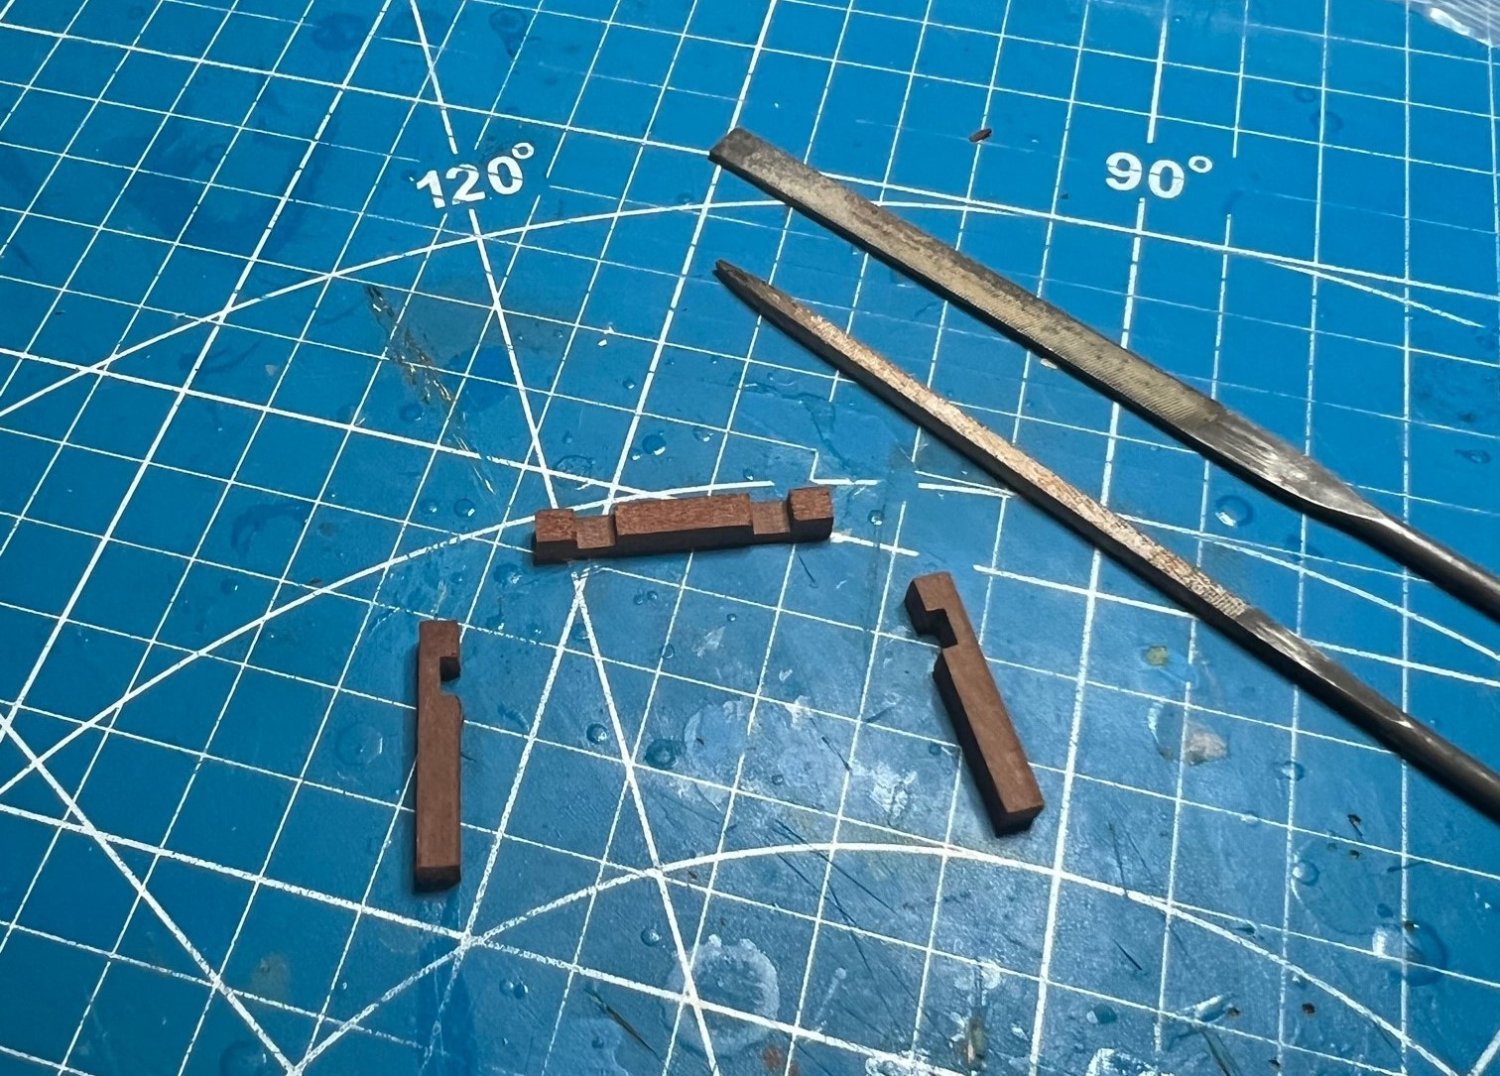
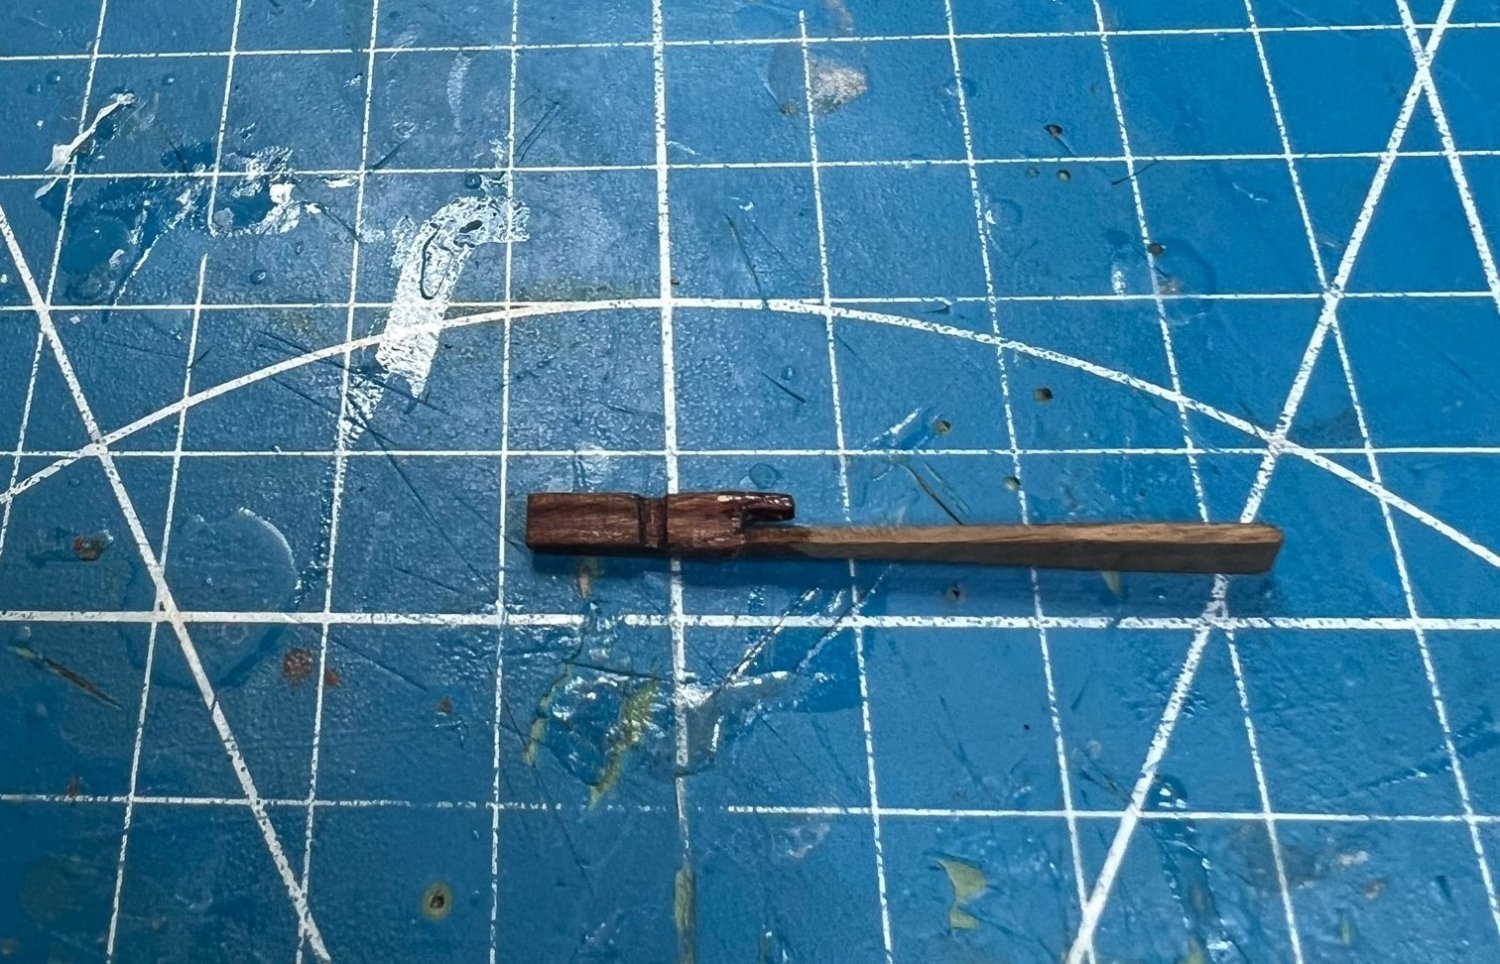
Next came the tricky part of building the deck pump from very small, very fragile pieces of wood. Since I was going to stain with my favorite honey stain, I decided to go ahead a stain the little bucket too. The little ring of the brass piece had to be placed into the hole on the fragile pump handle which I had to go off and watch a jewelers video on how to connect little metal rings. I learned that you don’t pull them apart, but bend each end of the ring away from each other to create a gap. I didn't remember to anneal metal before you bend at this point in the build but got away with it this time, but not in the next chapter which is what led me to MSW where I found the solution. That came out ok after some fiddly nerve-wracking up-close work. It was during the next step disaster would strike. The upright part of the pump had a fork to go around the pump handle and had to be secured with a cut off pin at the axle. Somehow, I really don’t recall, one of the forks broke off leaving the broken off piece splintered. Probably due to my clumsiness. It was roughly the same color, width and thickness as the 3x0.6 mm walnut planking I had so I made a piece and glued it where the piece broke off. Only problem was, my pump wouldn’t function now but oh well, it didn’t really function before other than going up and down anyway (which is probably how I broke it by playing with it, lol). Anyway, got it glued and clamped up and you can see the finished pump.
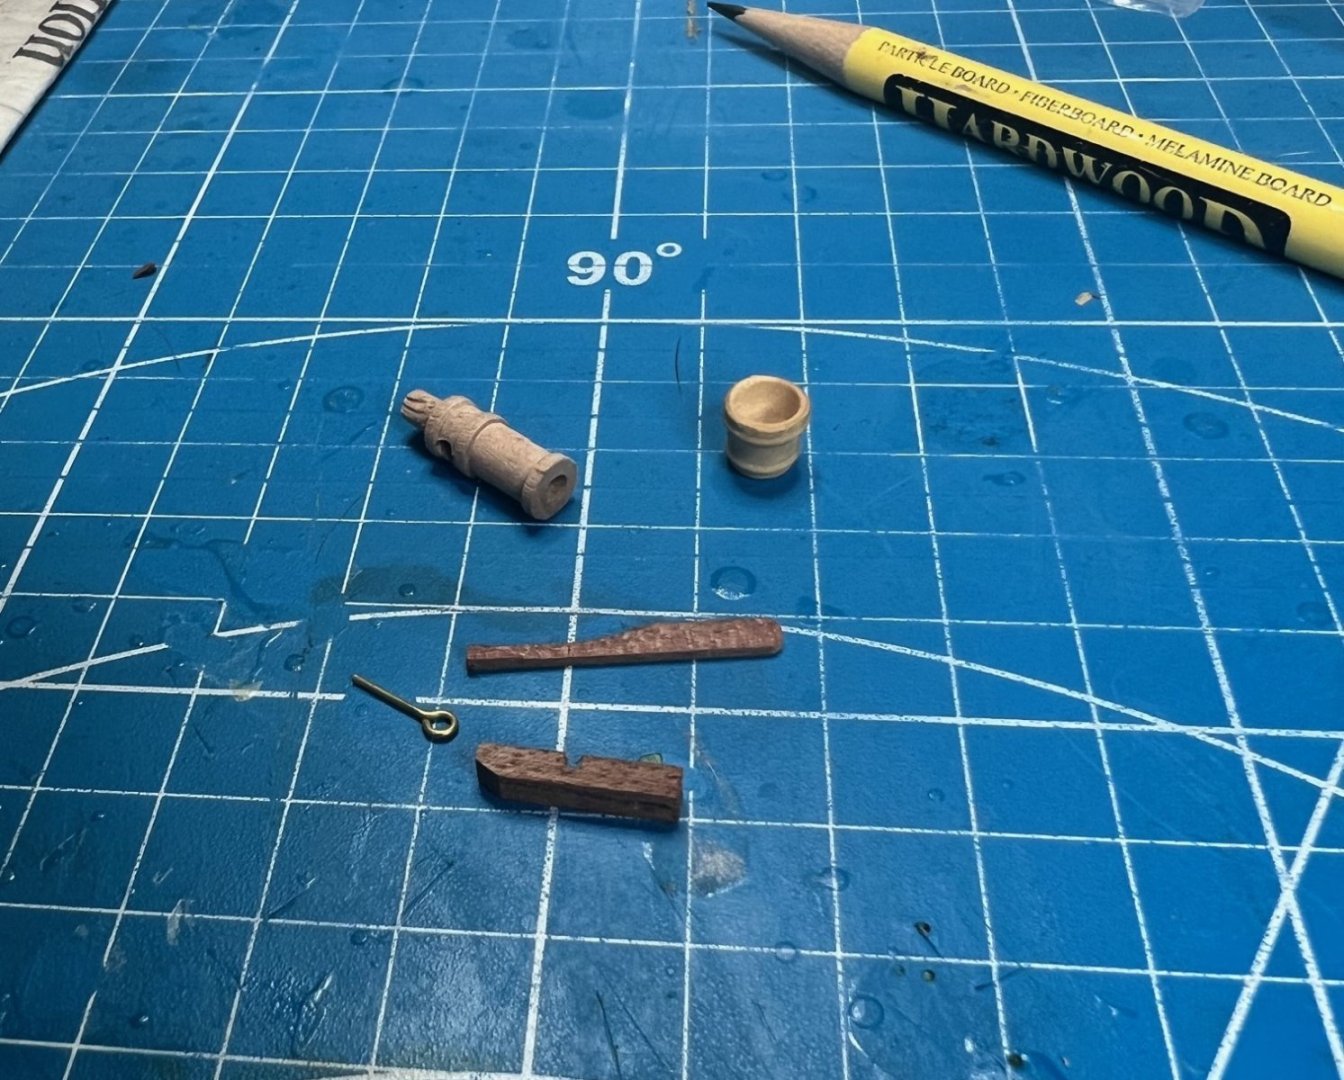
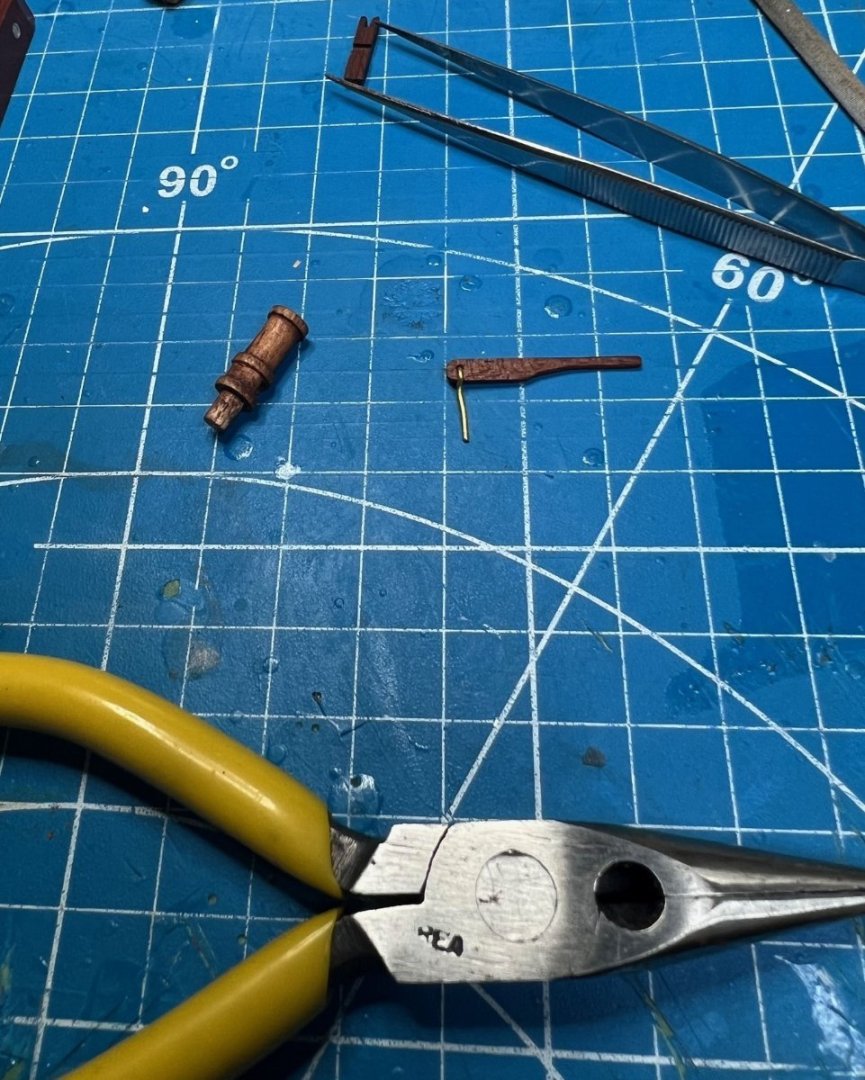
OOPS!


I added a piece of brass I had for the spout of the pump, made a nice touch at a distance.
Lastly, I gave the bucket the same treatment as the barrel with stain, gold marker, brown marker and pencil. I wanted a handle on my bucket but wasn’t sure how I could get the knots on the inside of the bucket with such a short piece of string but thinking more about it, I may be able to use pointy tweezers to get another knot inside the bucket on the other side. We’ll see, for now, the knots are outside the bucket where I could tie them. I might correct that later. Remember, I hadn't discovered MSW at this point of my build. Too bad.

Anyhow, a few more sub-assemblies done and this gets us to January 29, 2023. Next chapter we get into the masts and spars and lots of red sanding dust. Thanks for reading! Until next time, happy shipbuilding.
- Knocklouder, Keith Black, Prowler901 and 1 other
-
2
-
2
-
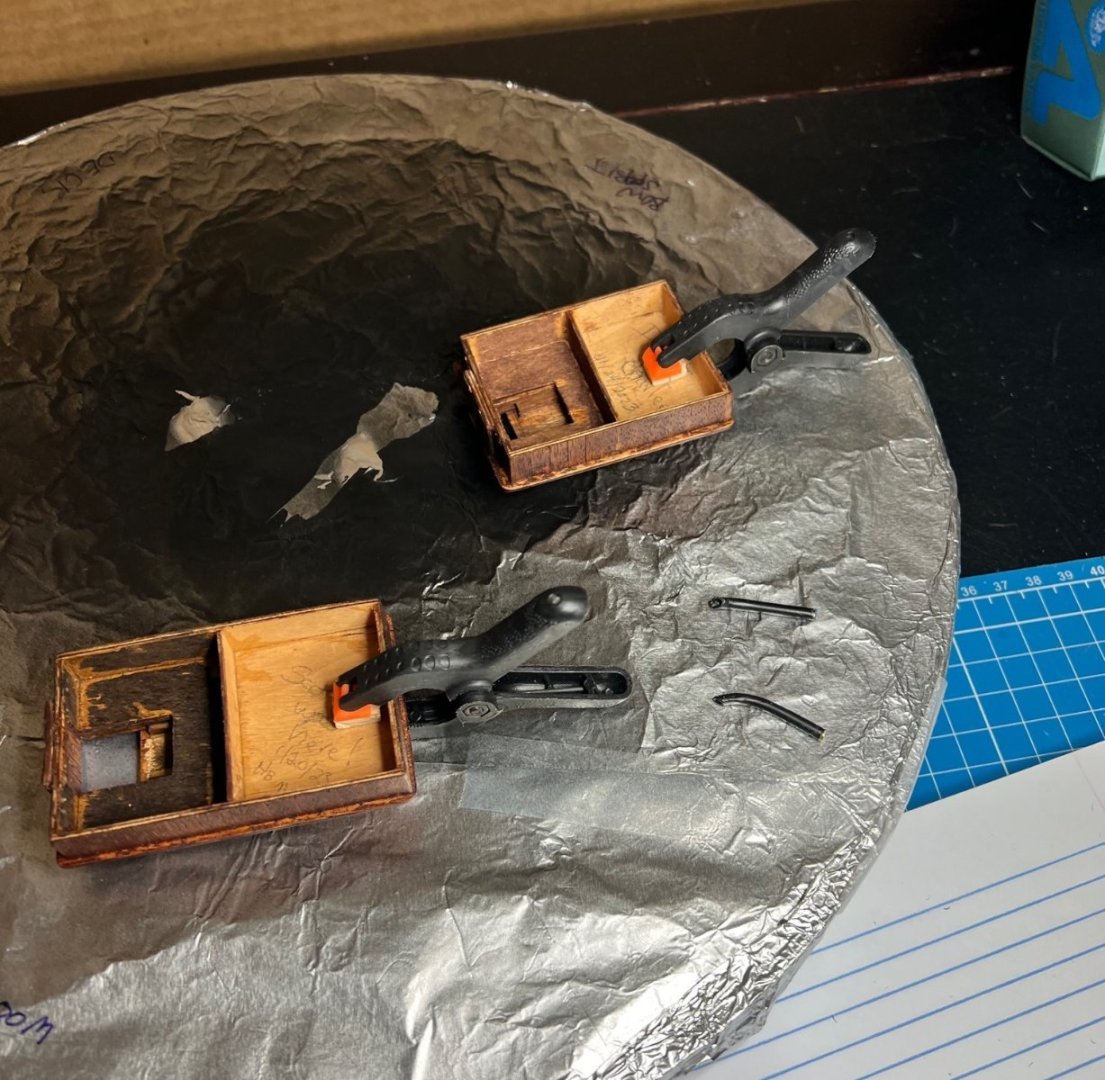
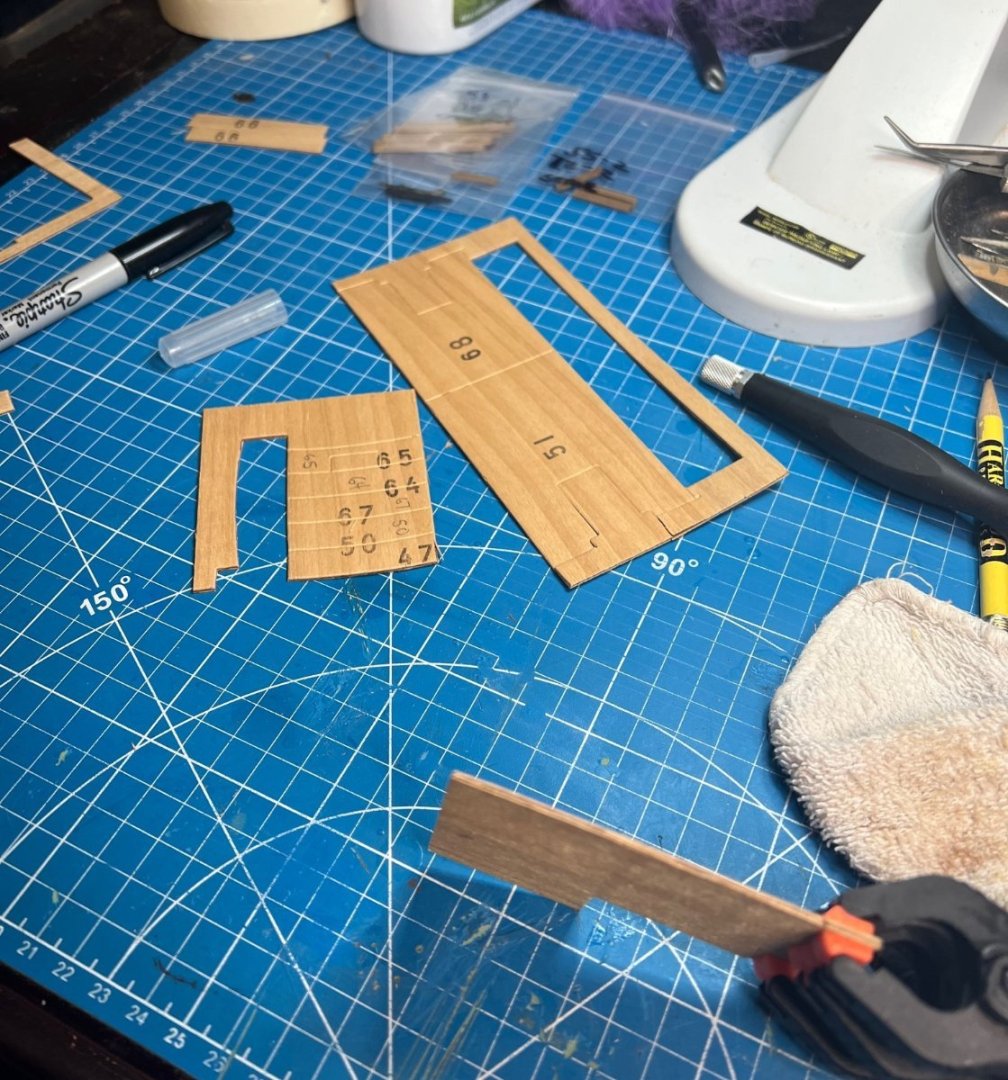
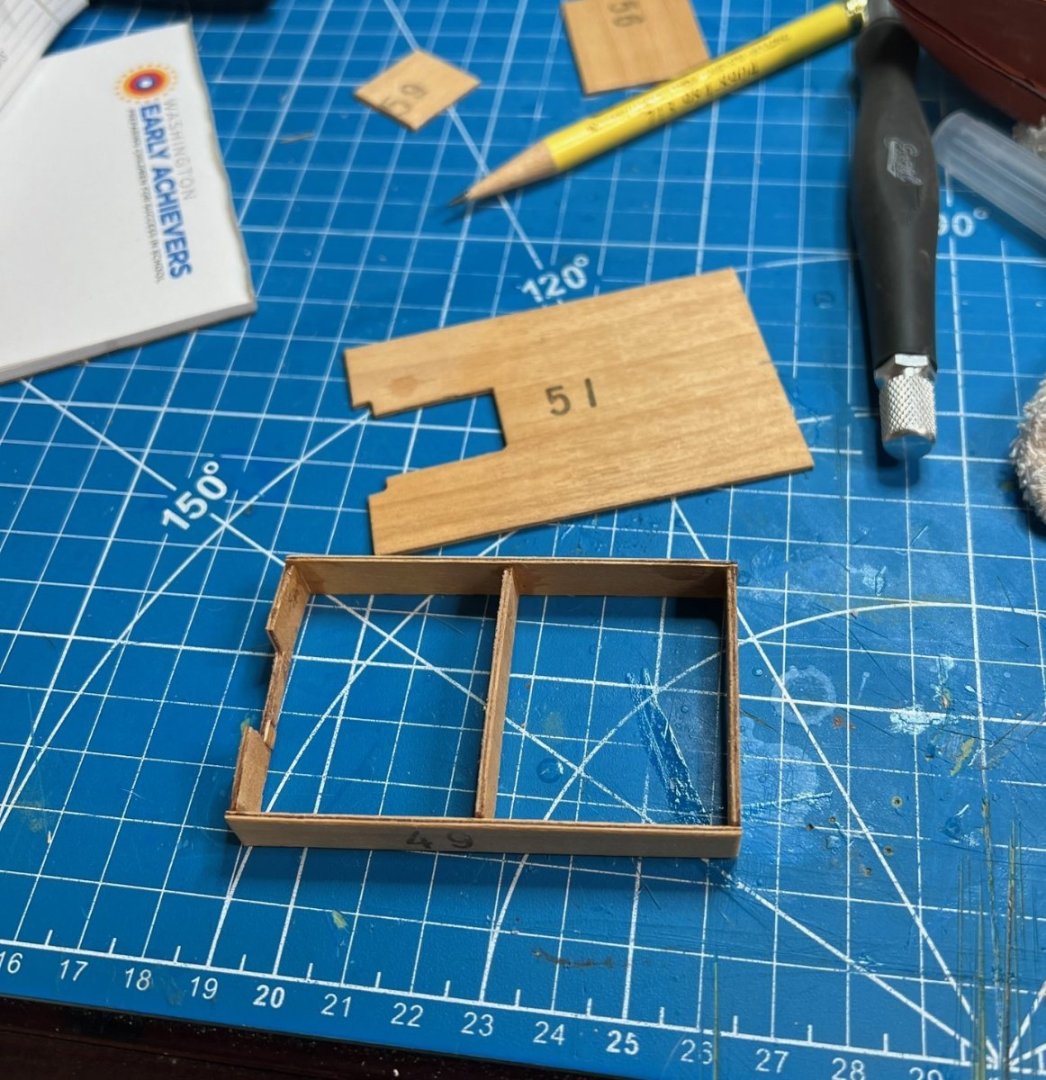
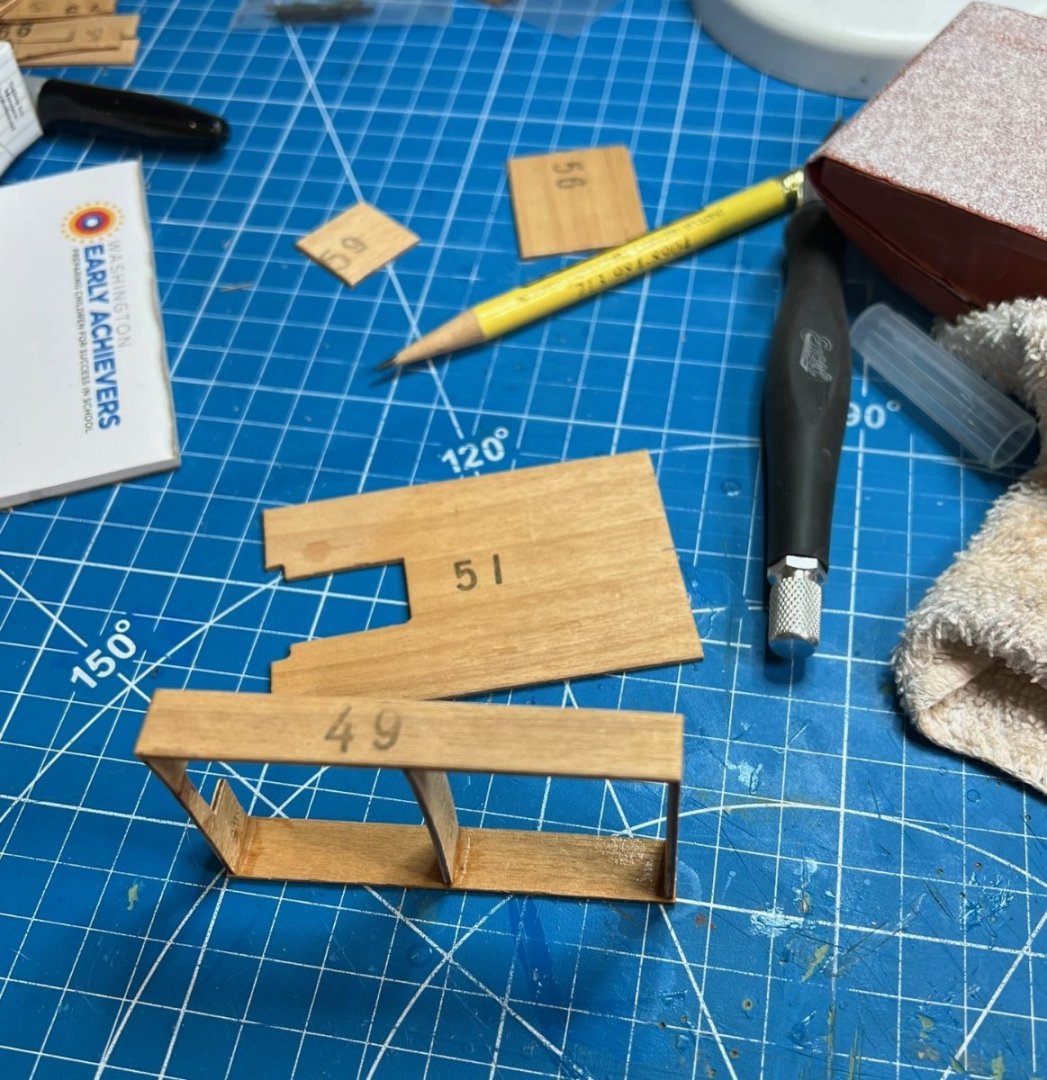
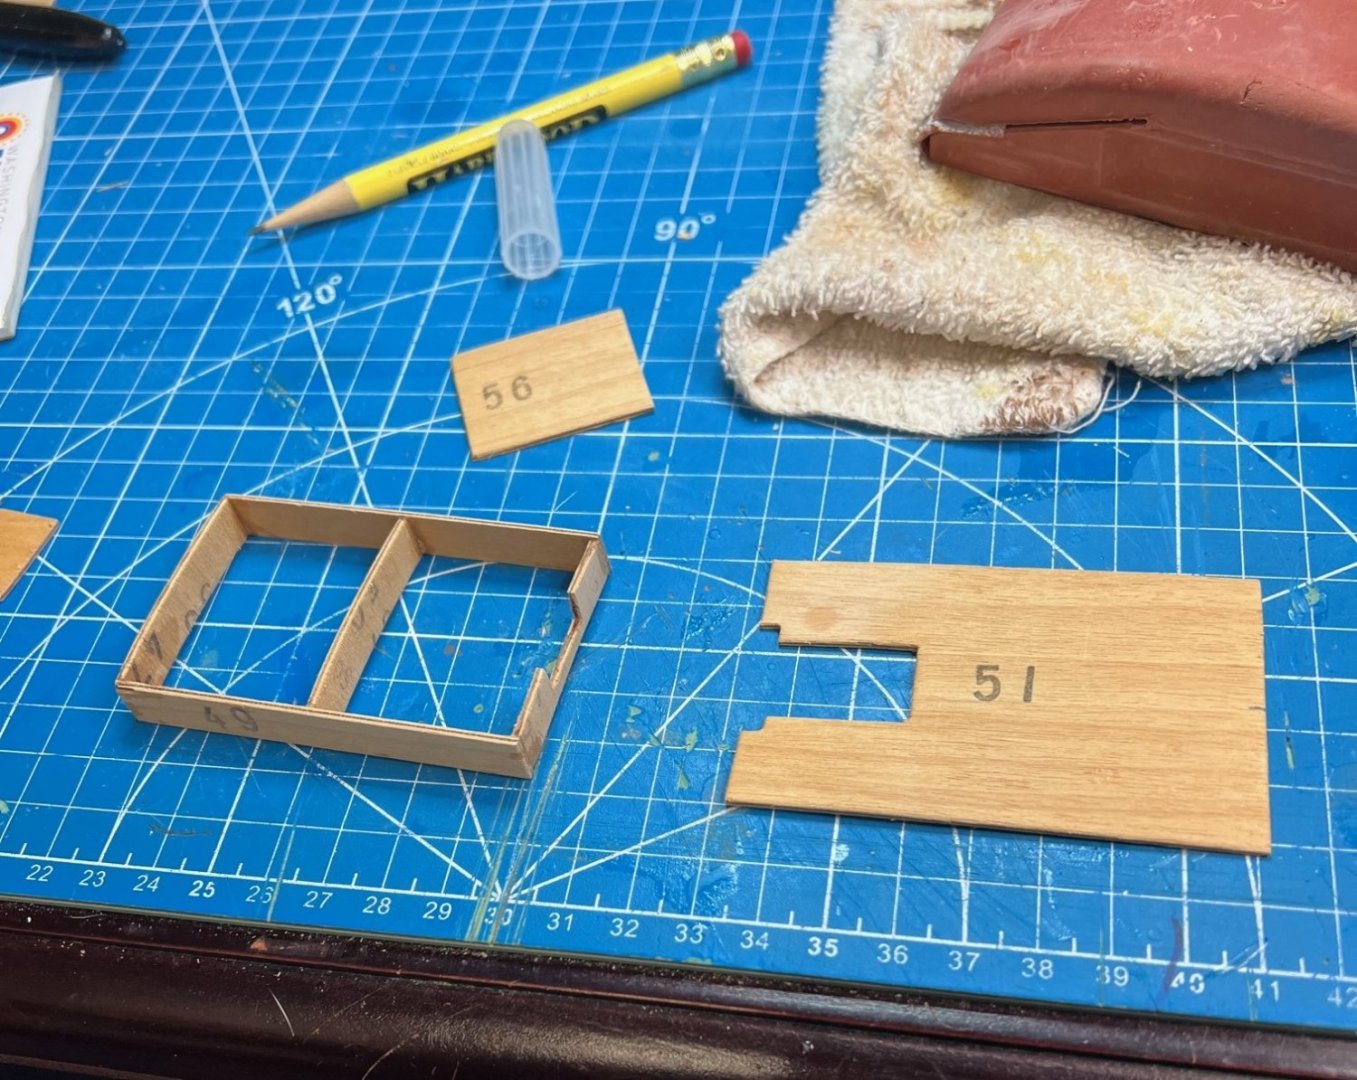
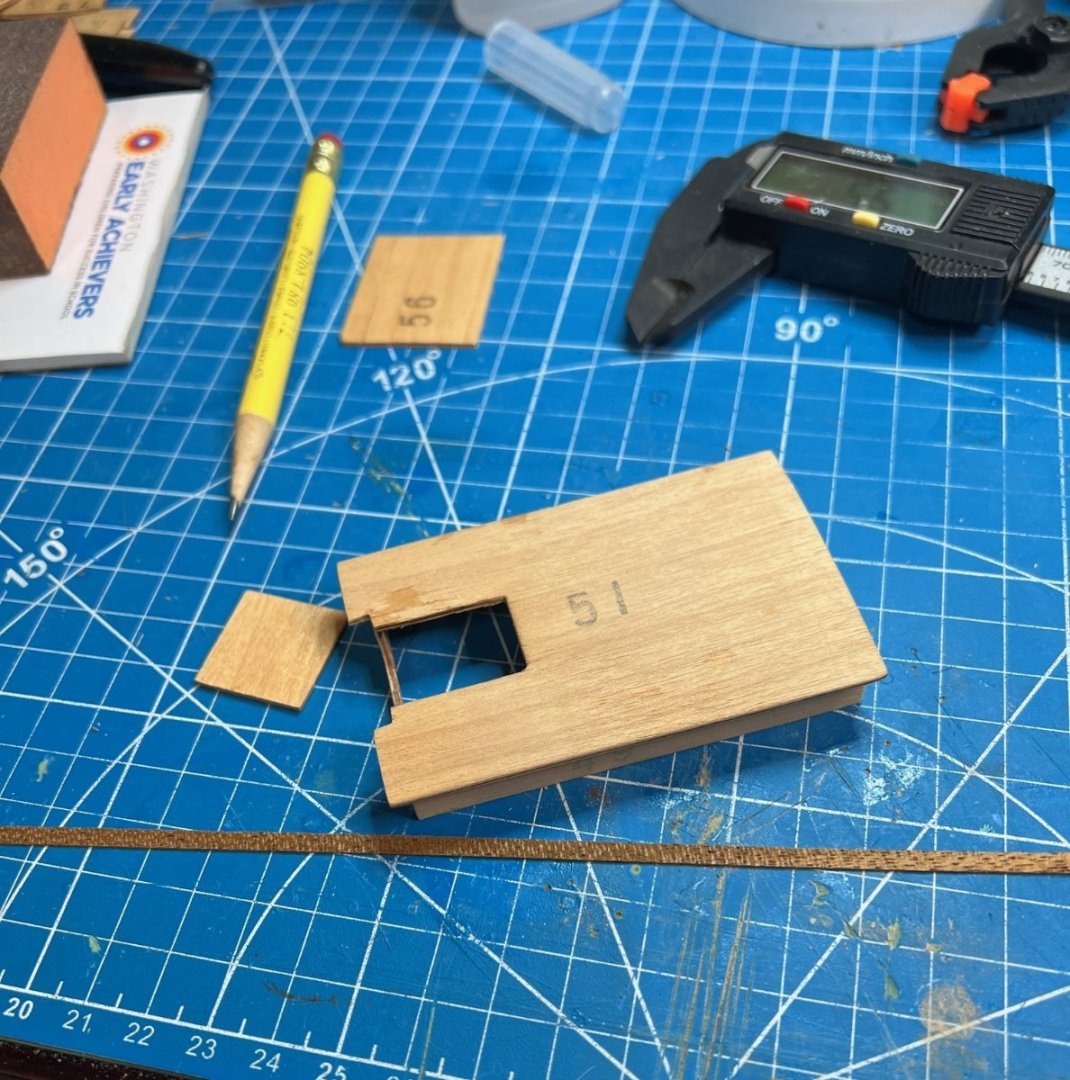
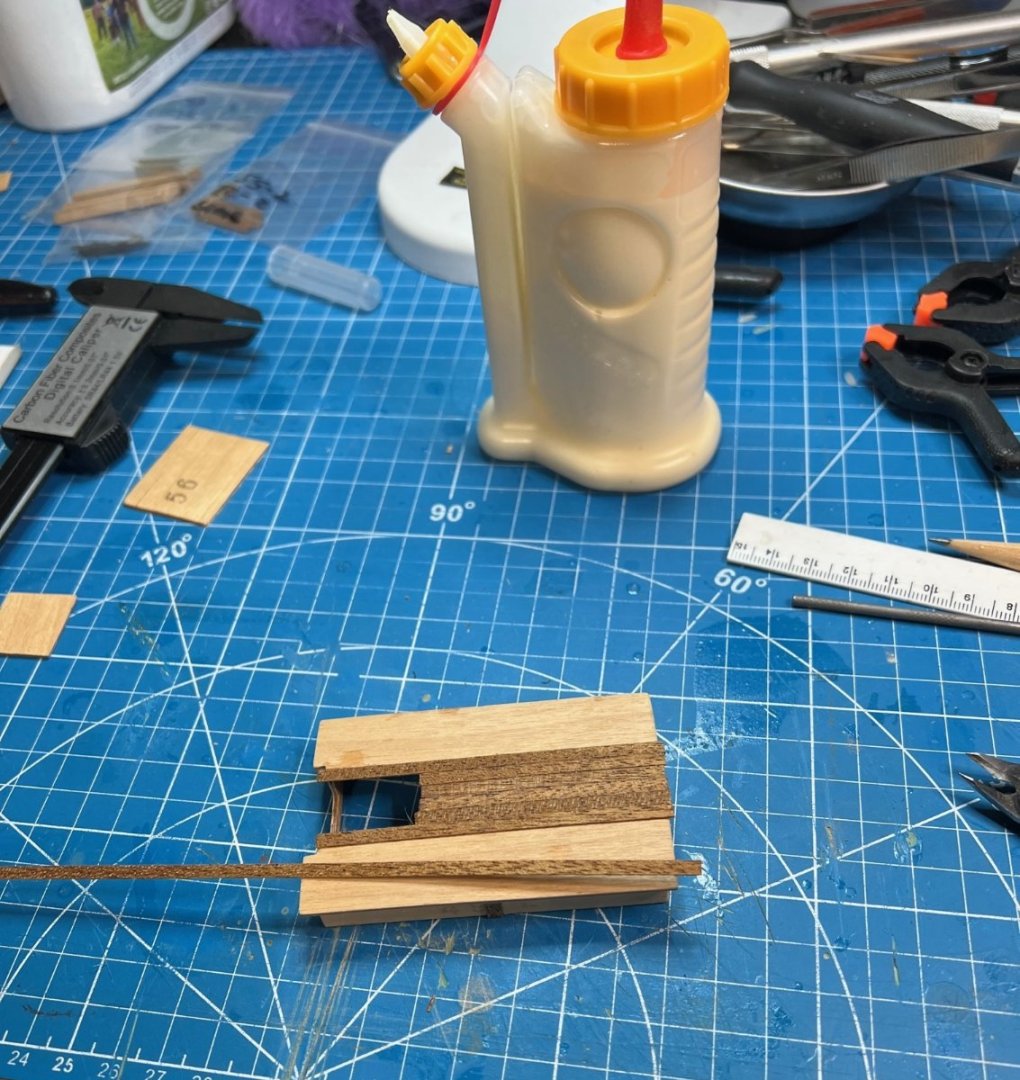
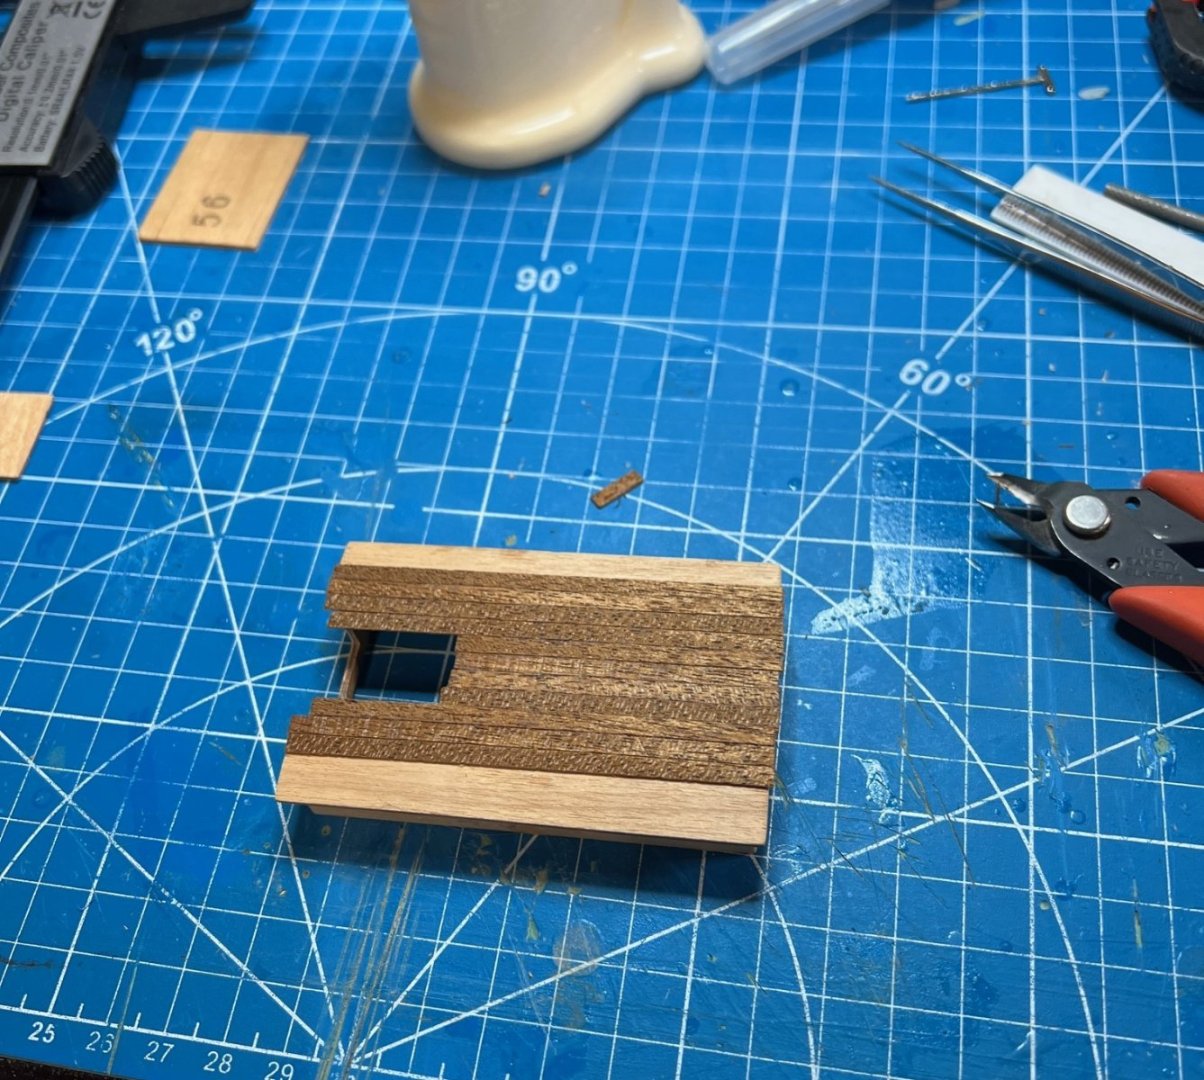
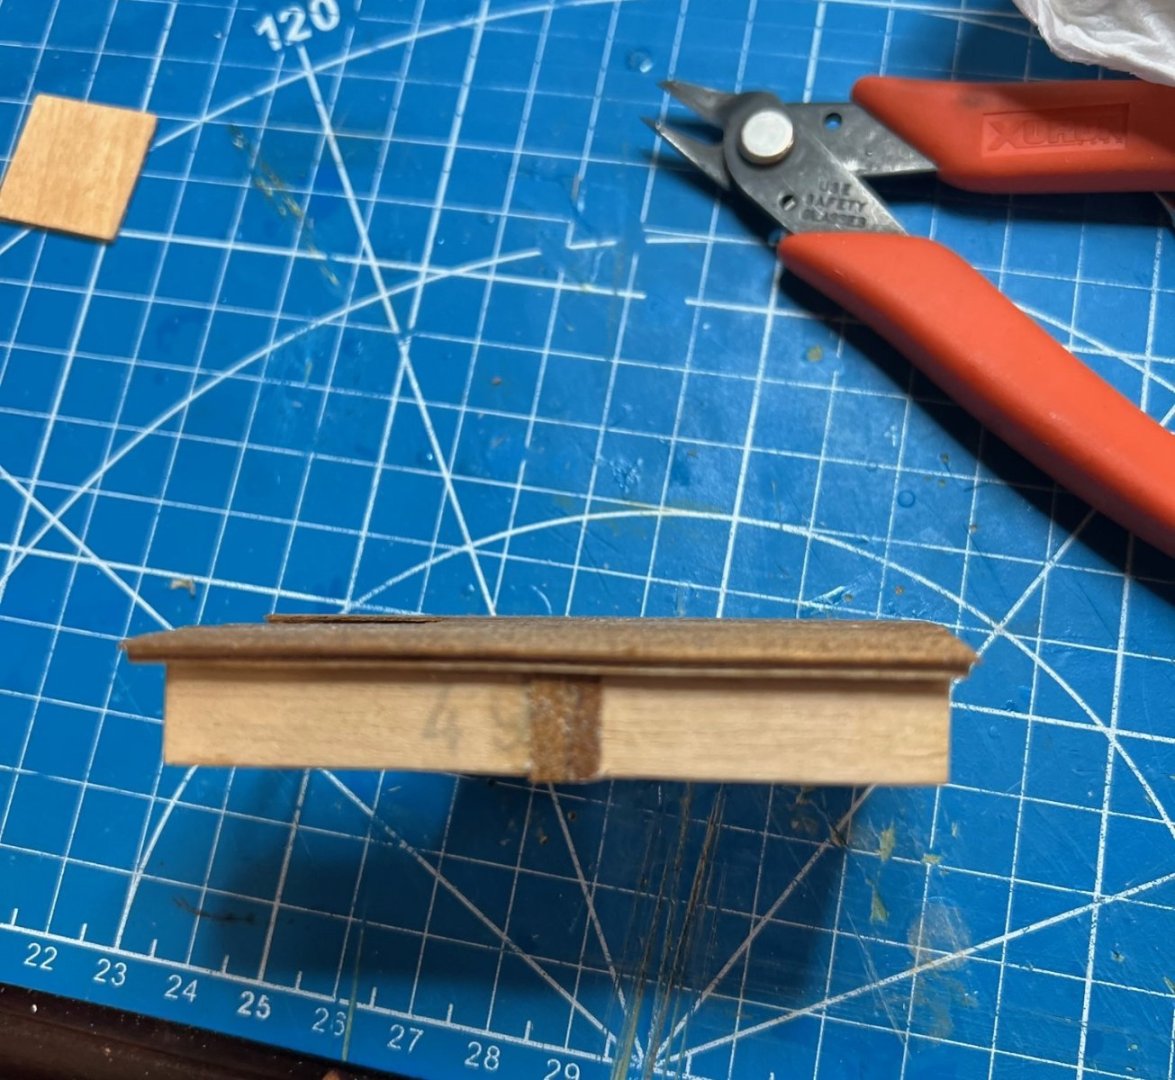
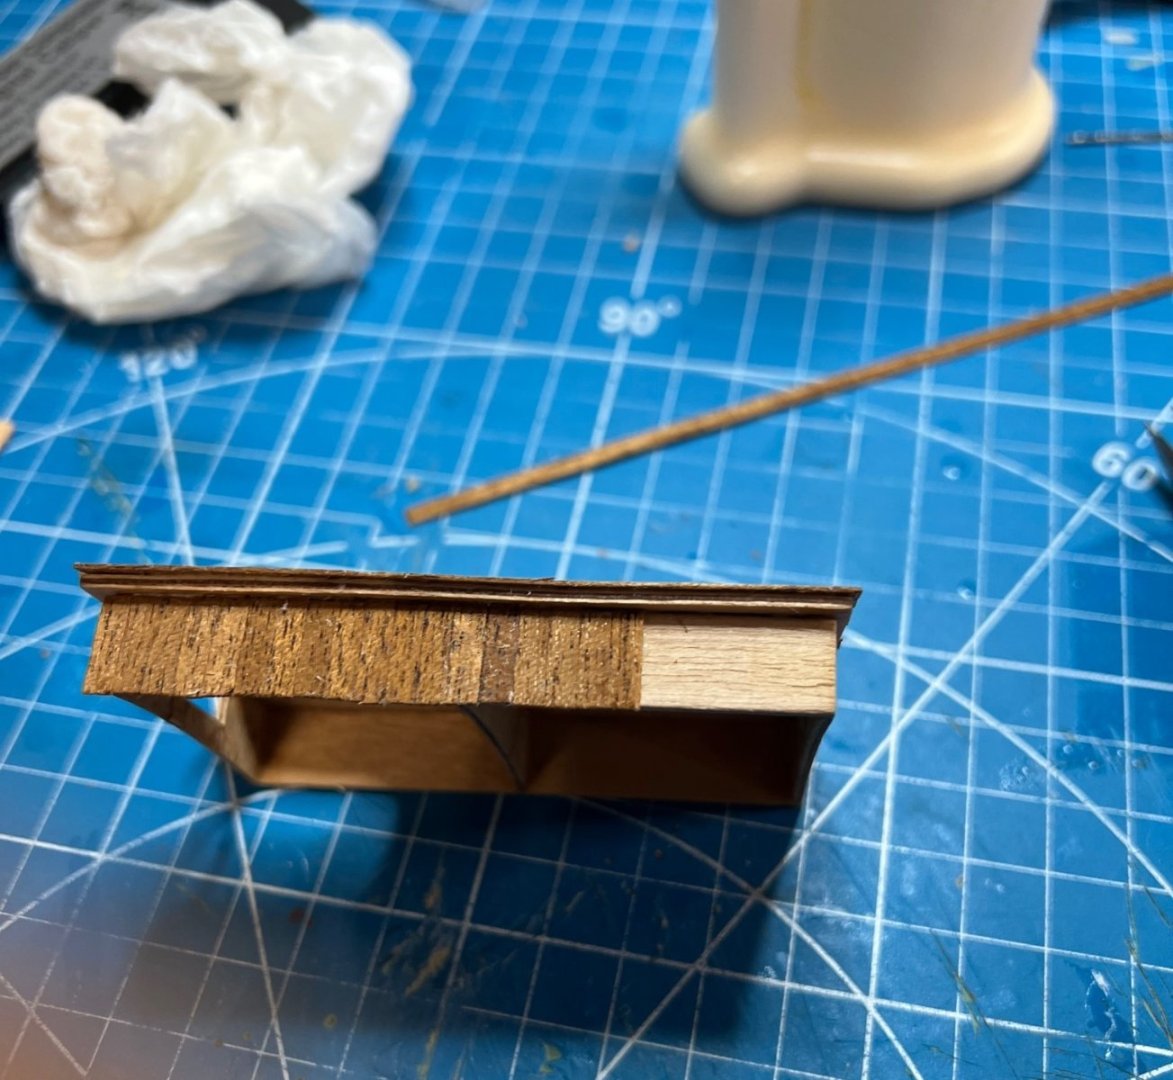
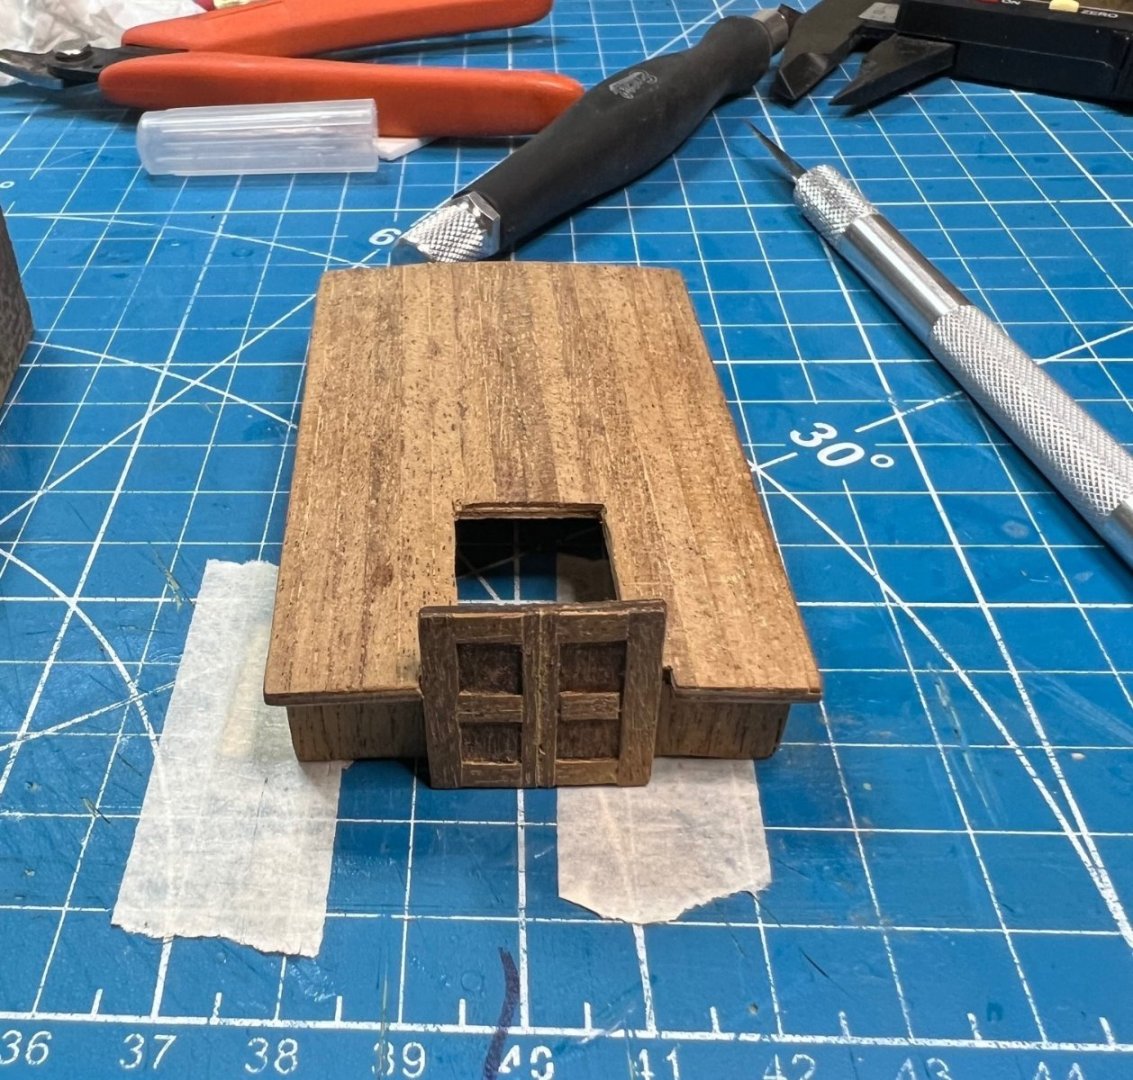
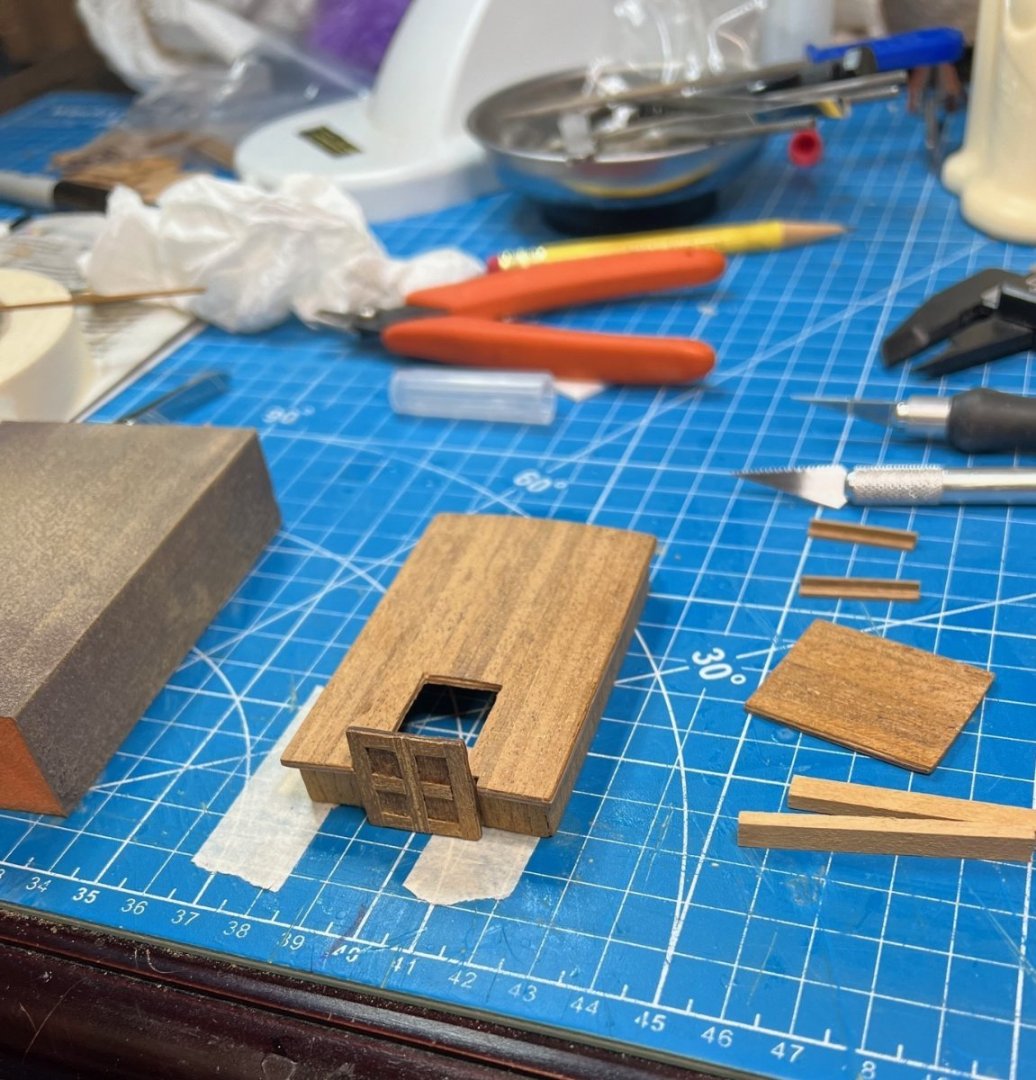
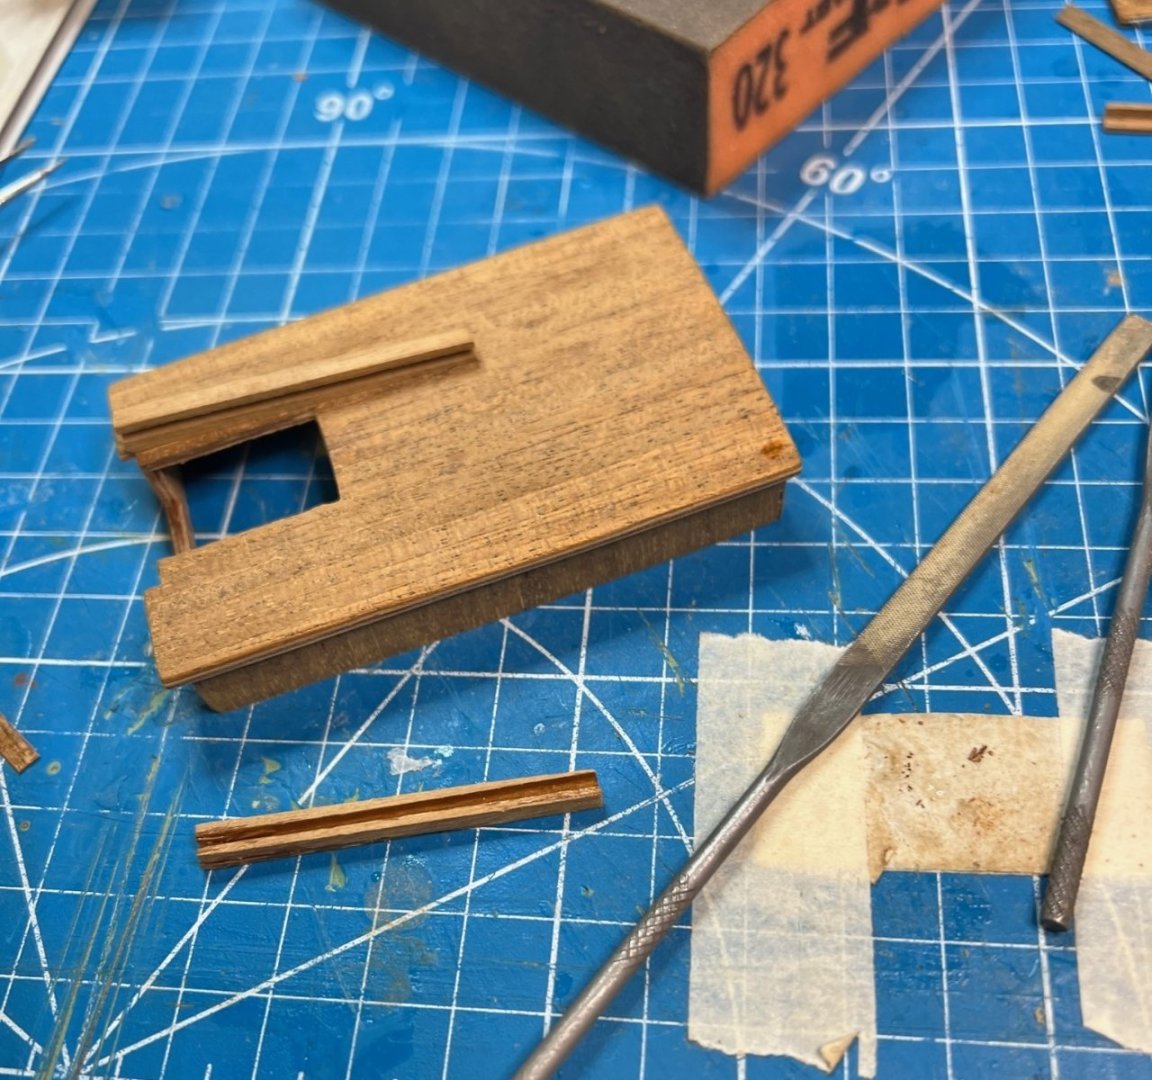
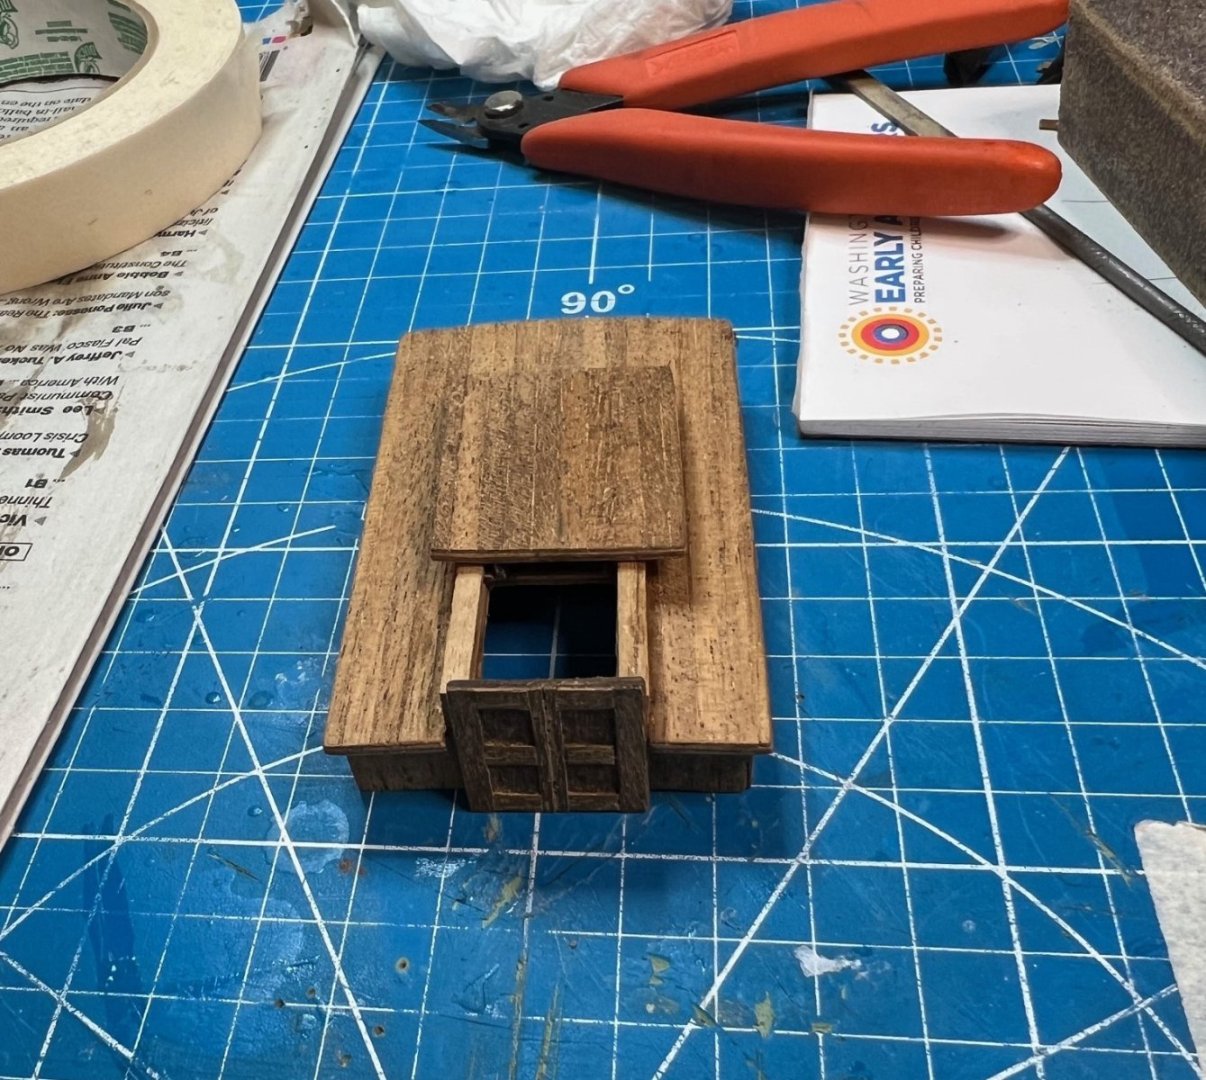
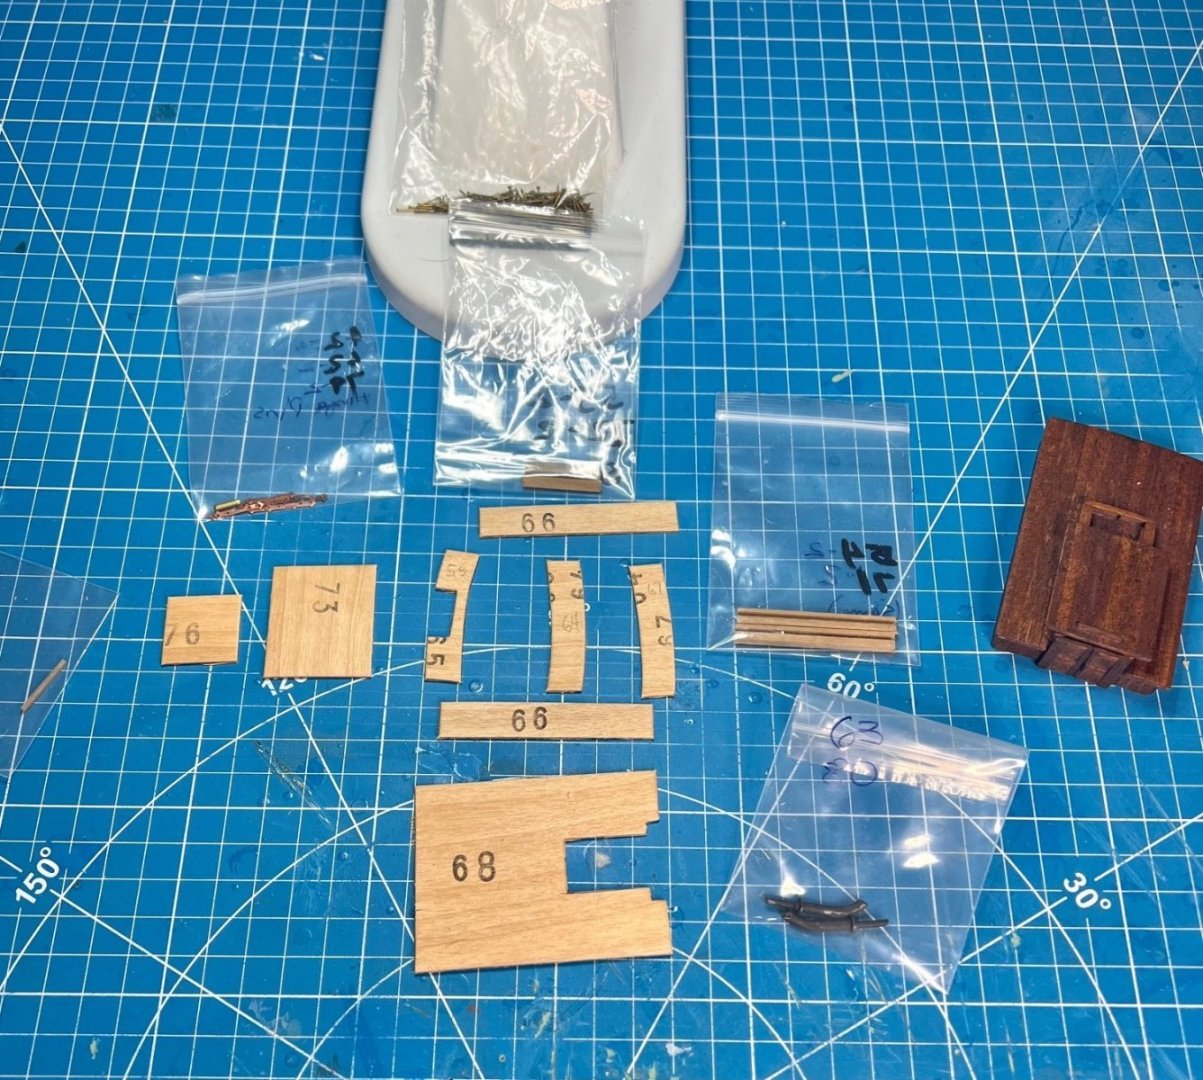
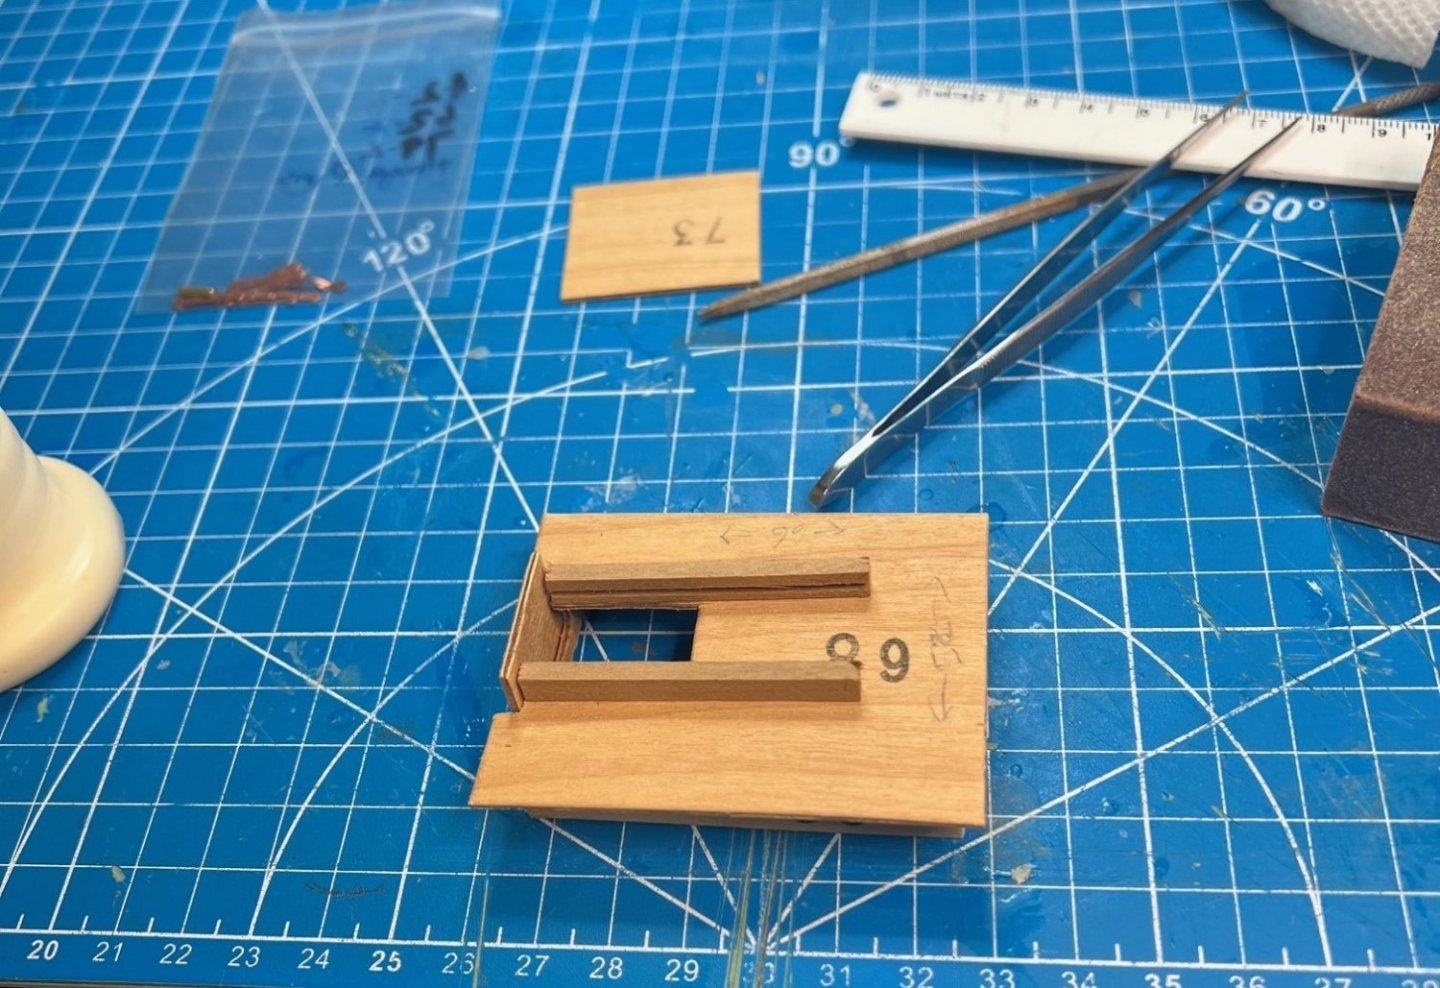
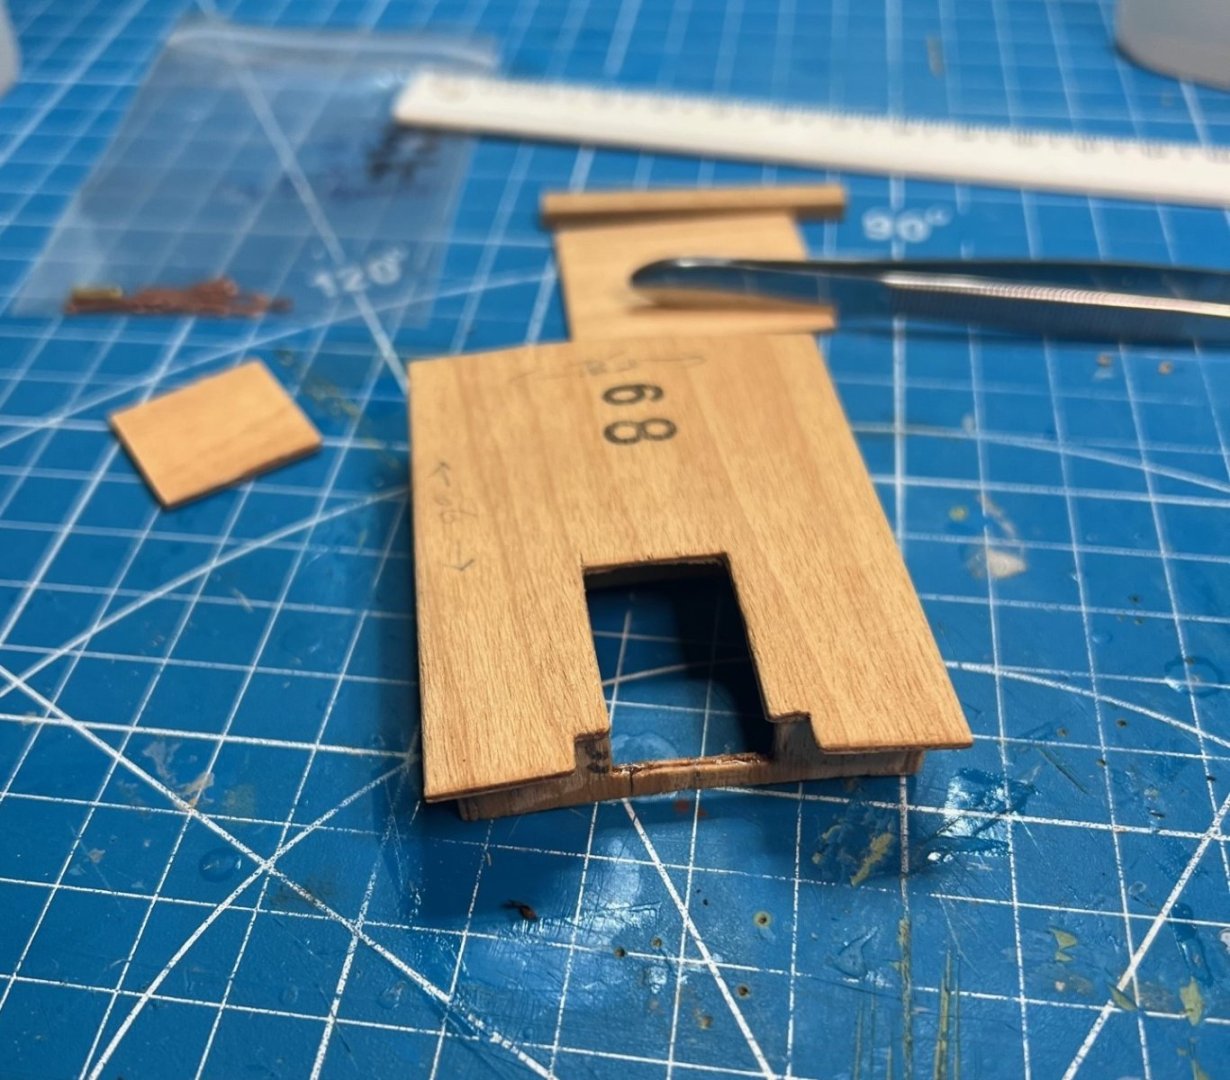
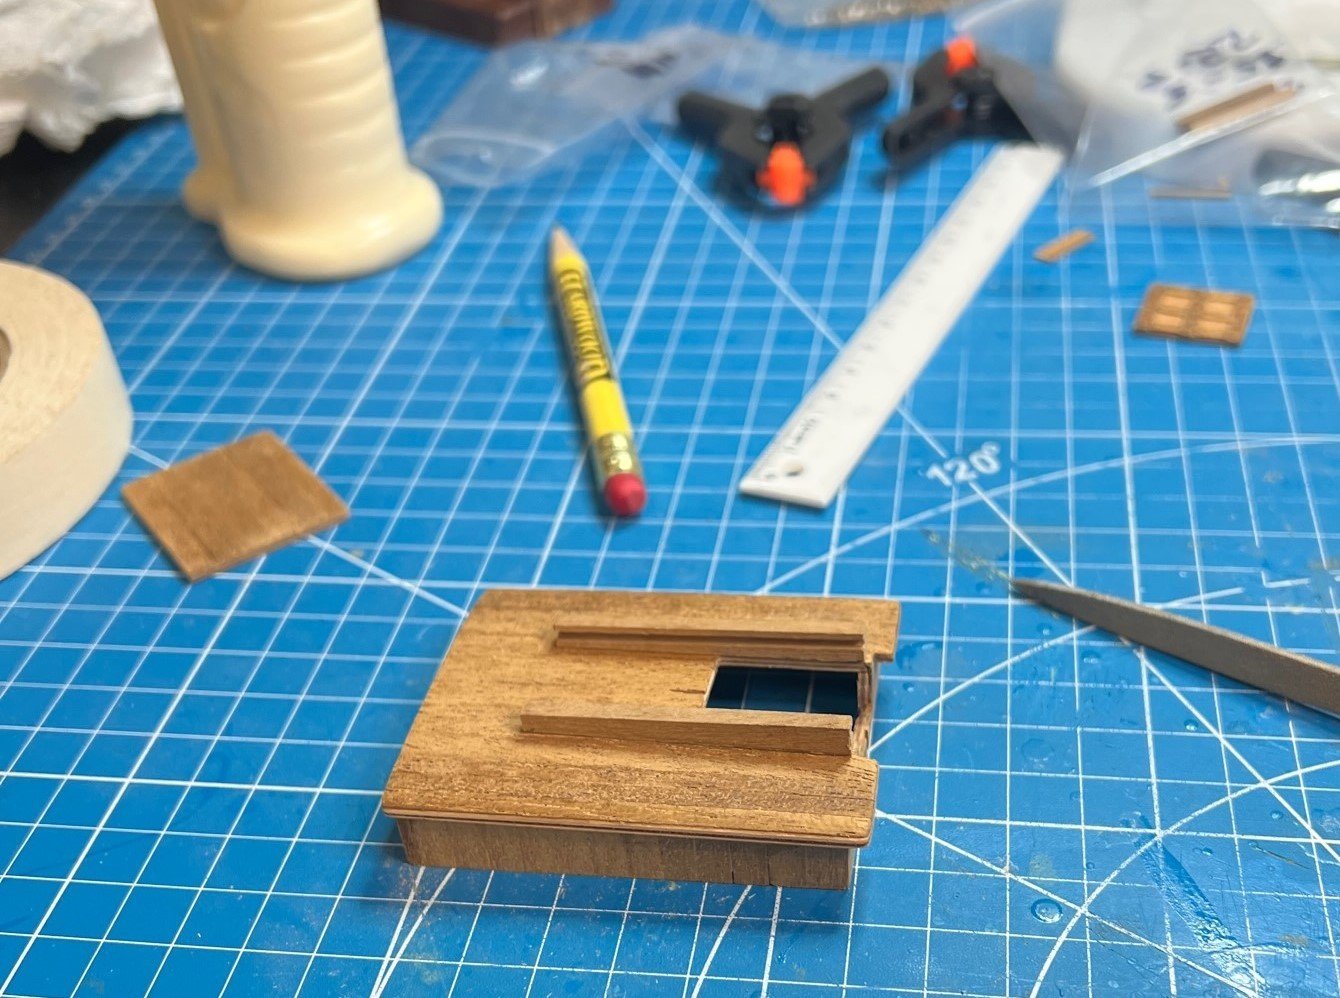
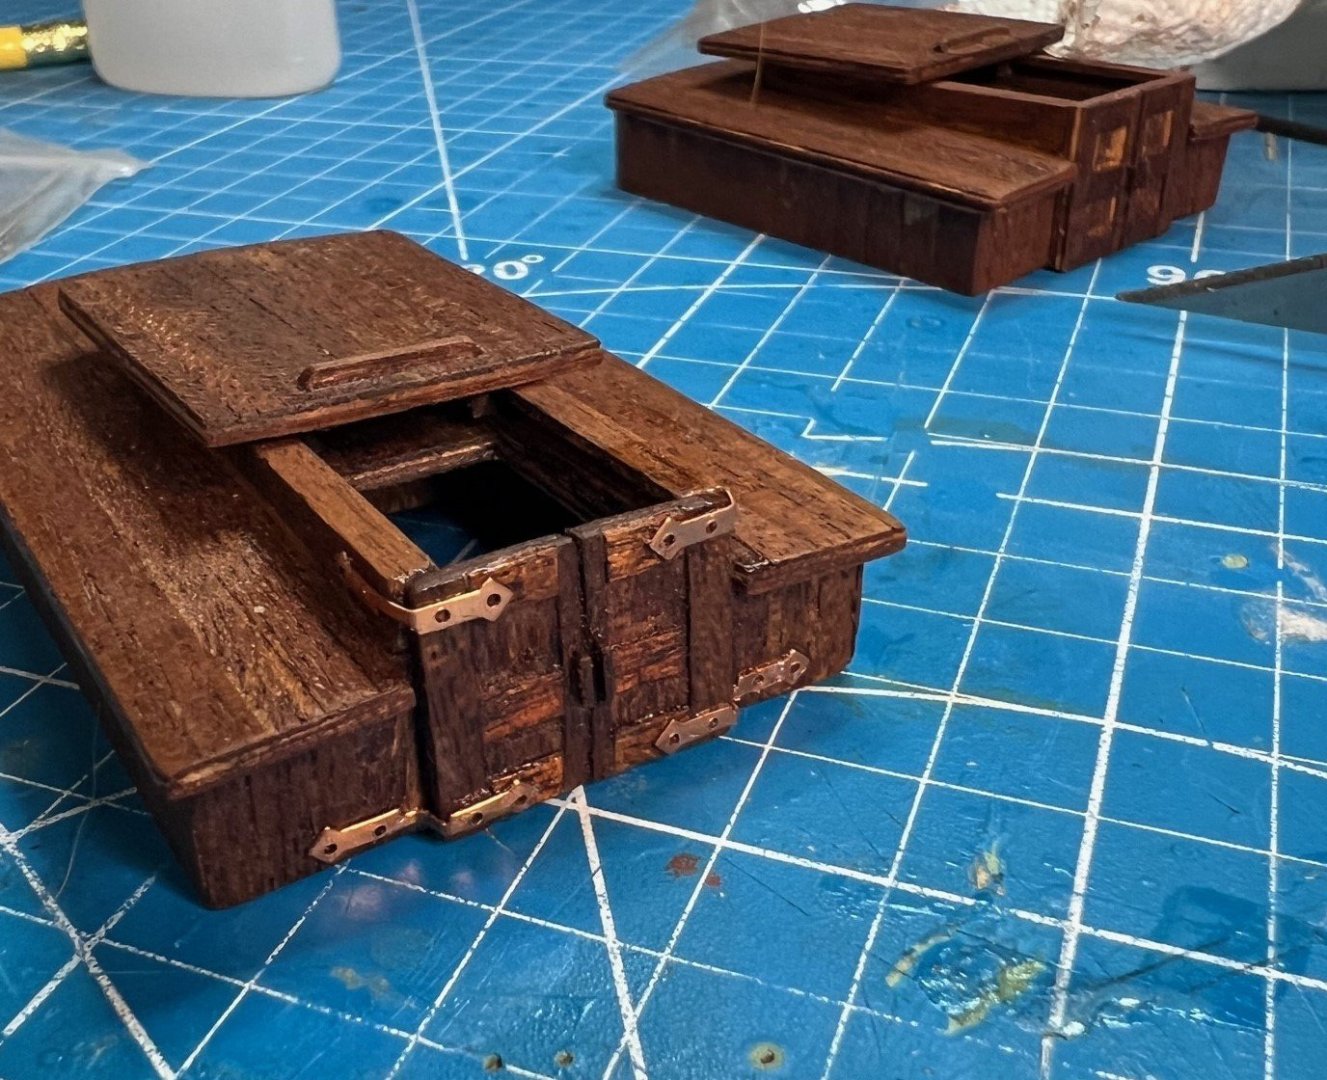
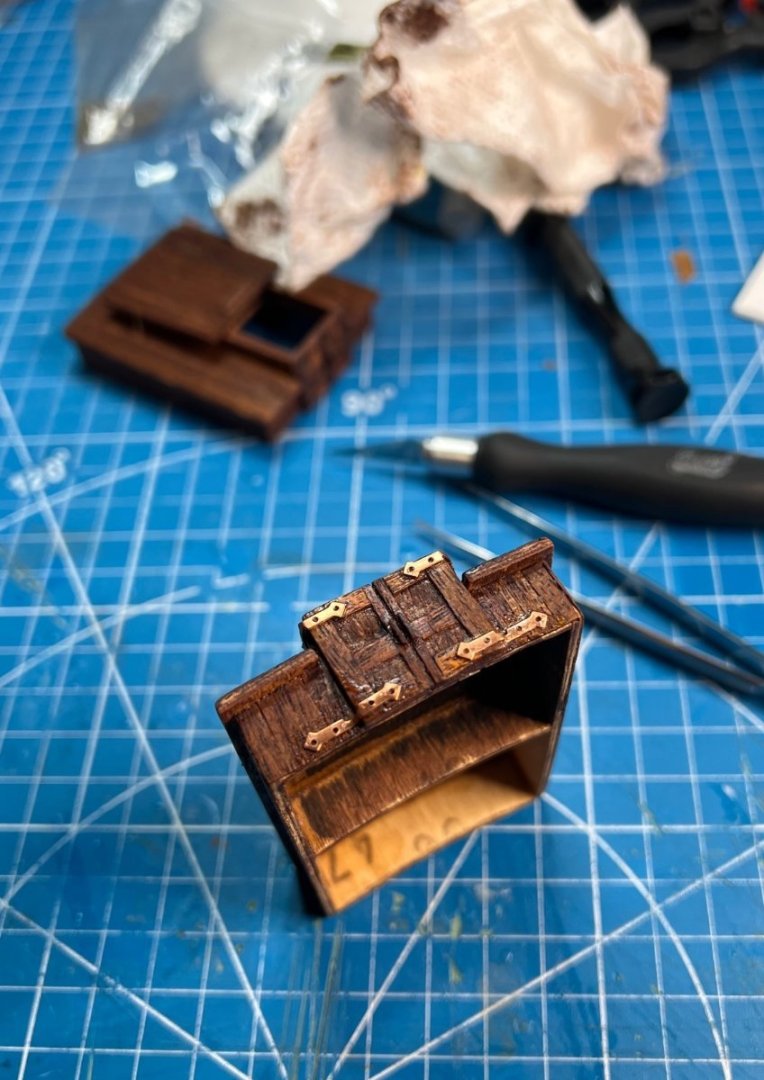
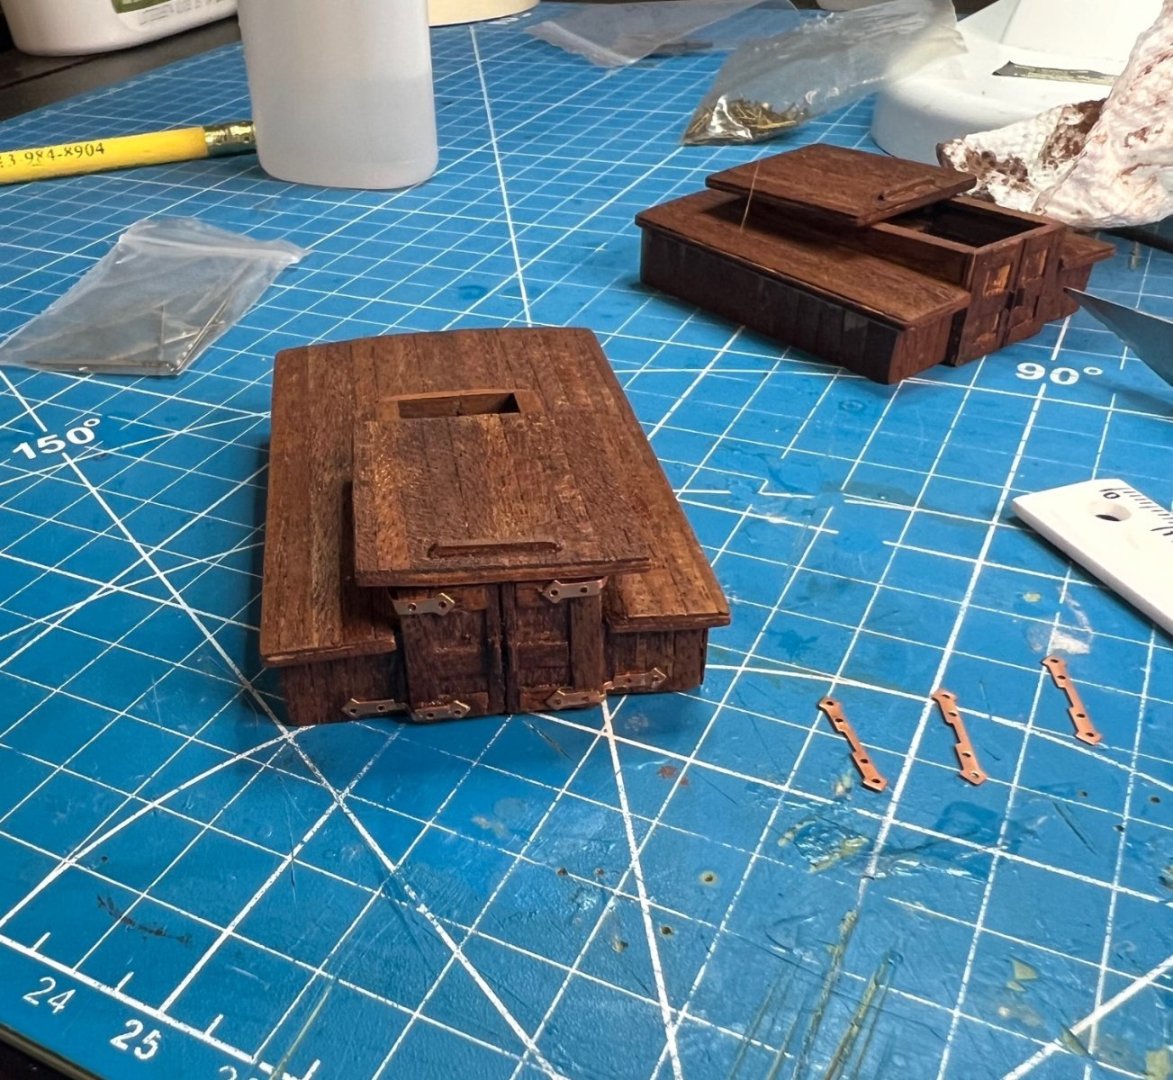
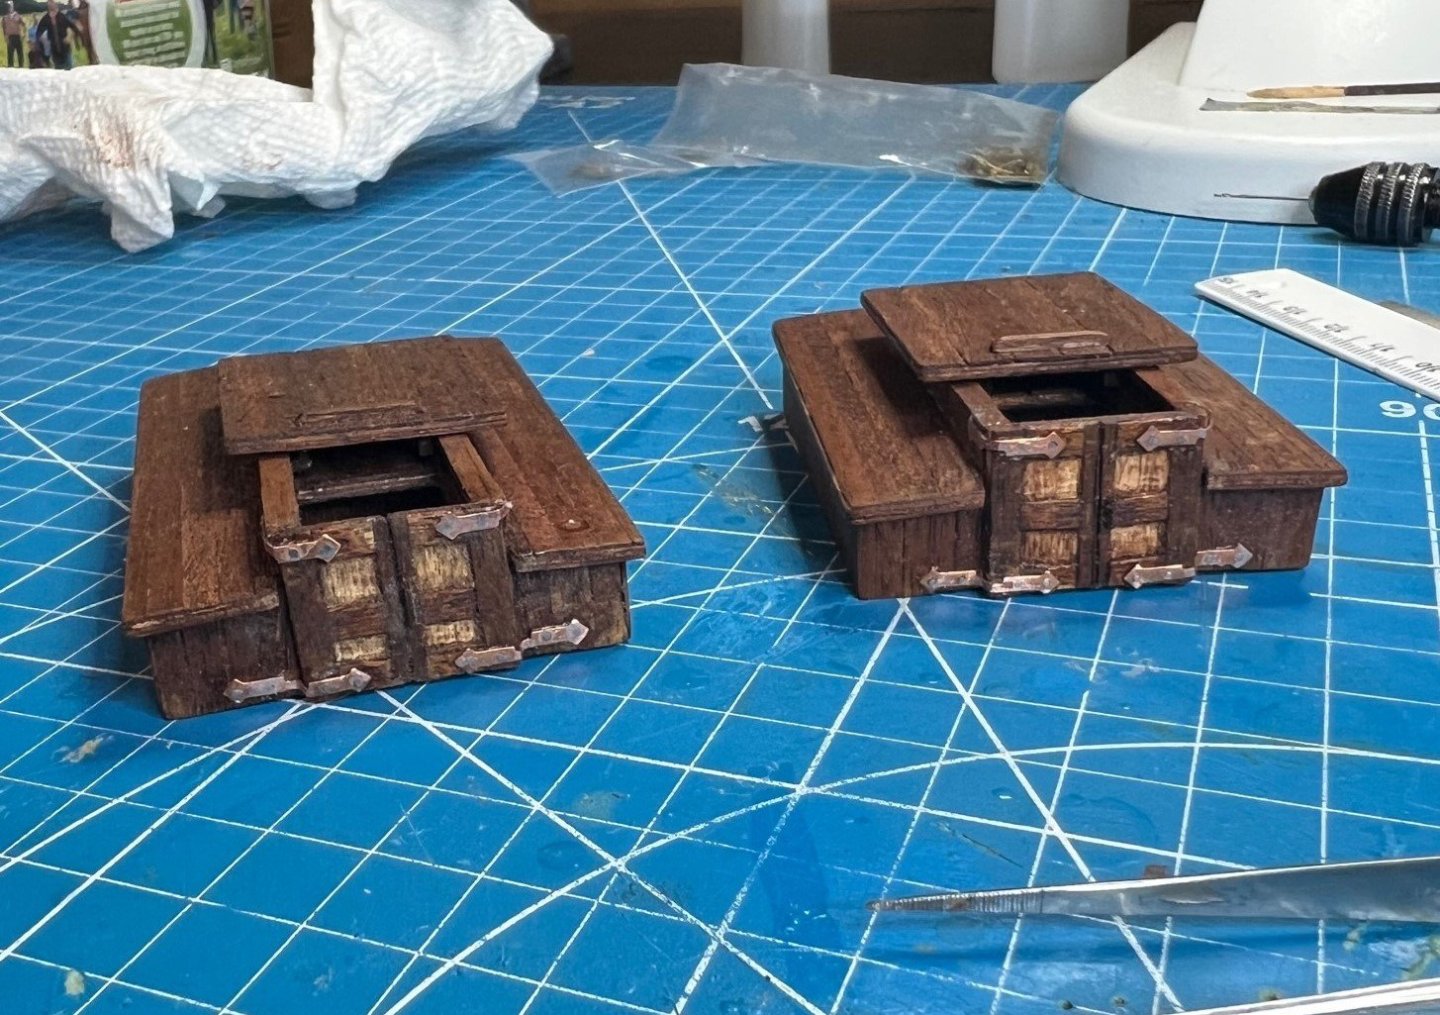
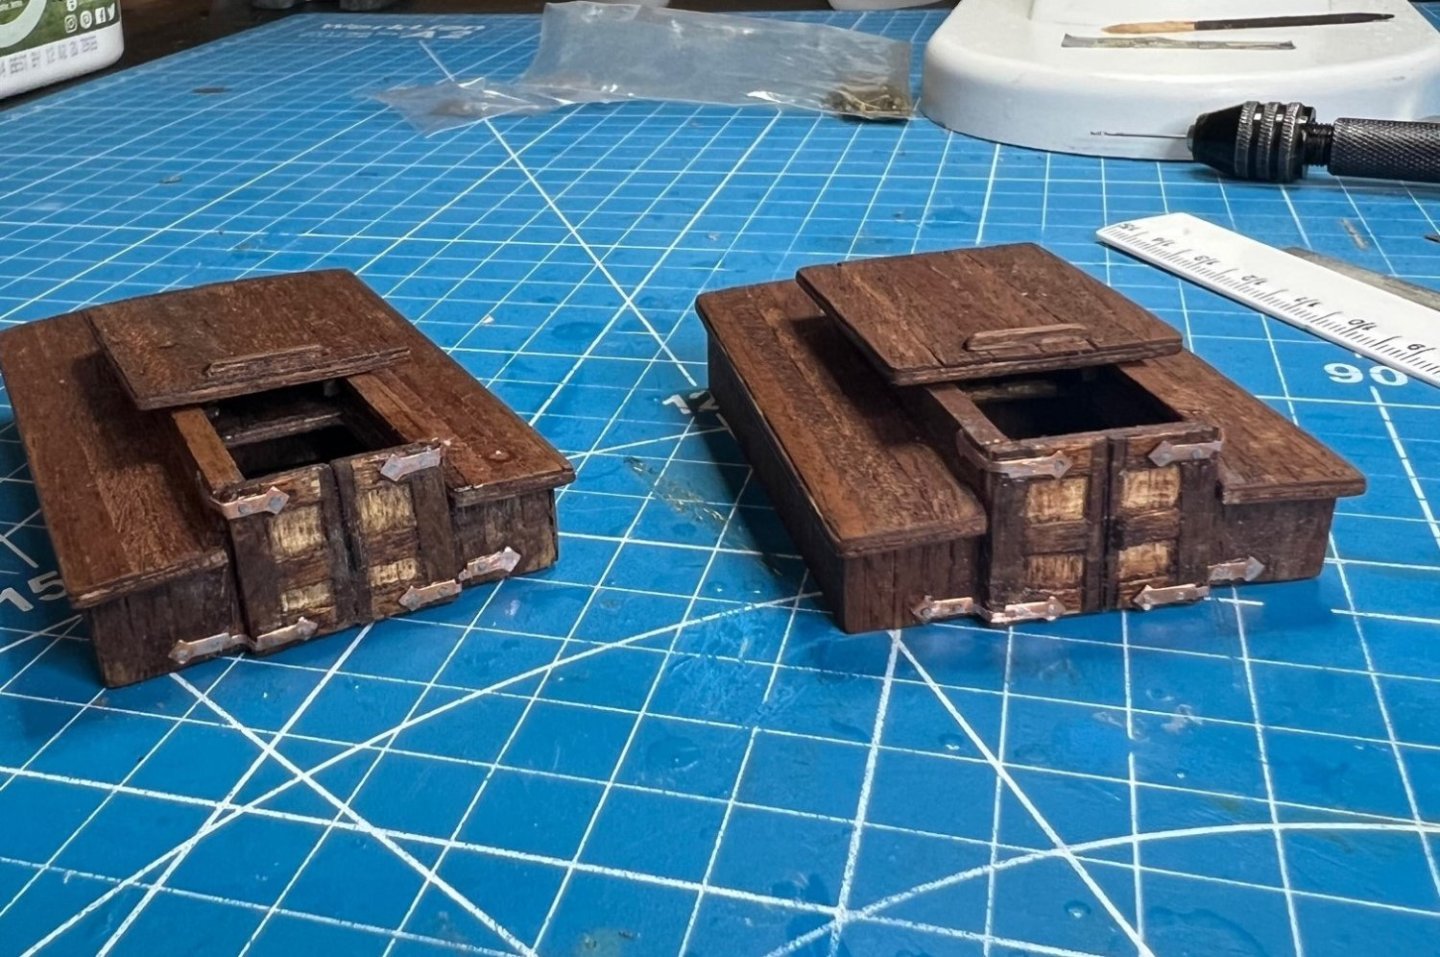
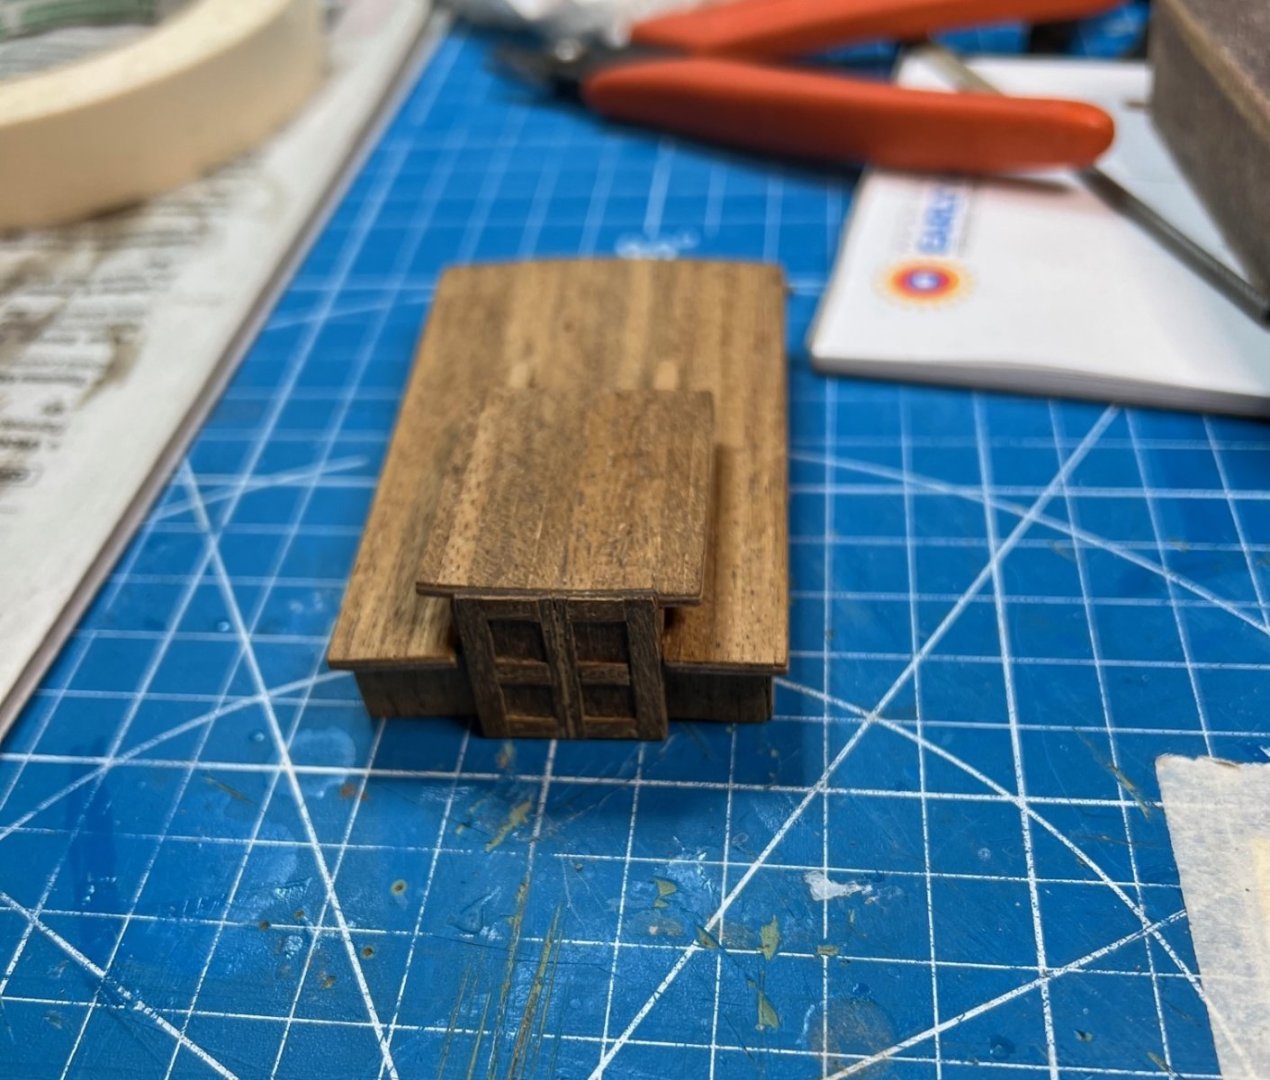
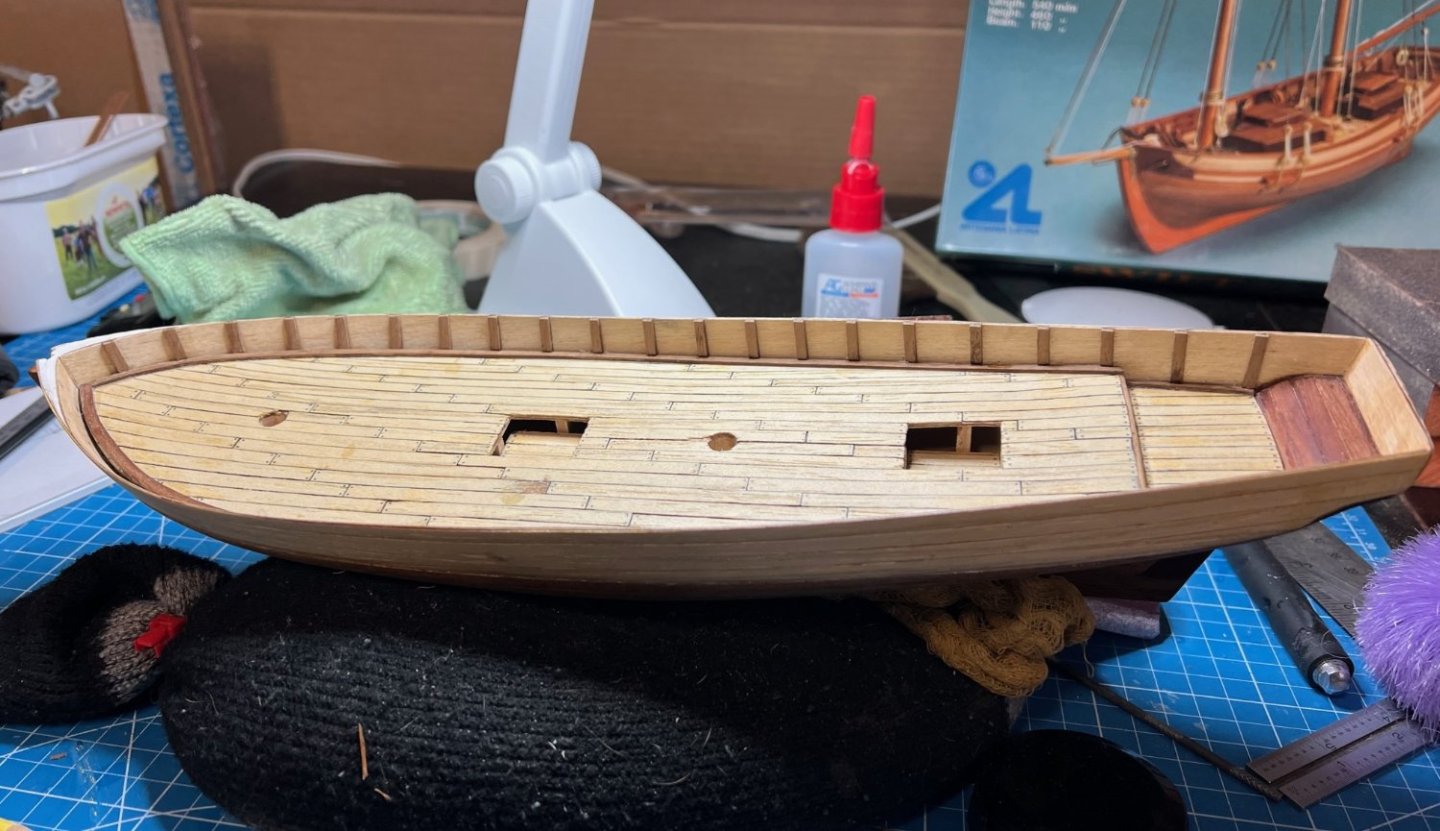
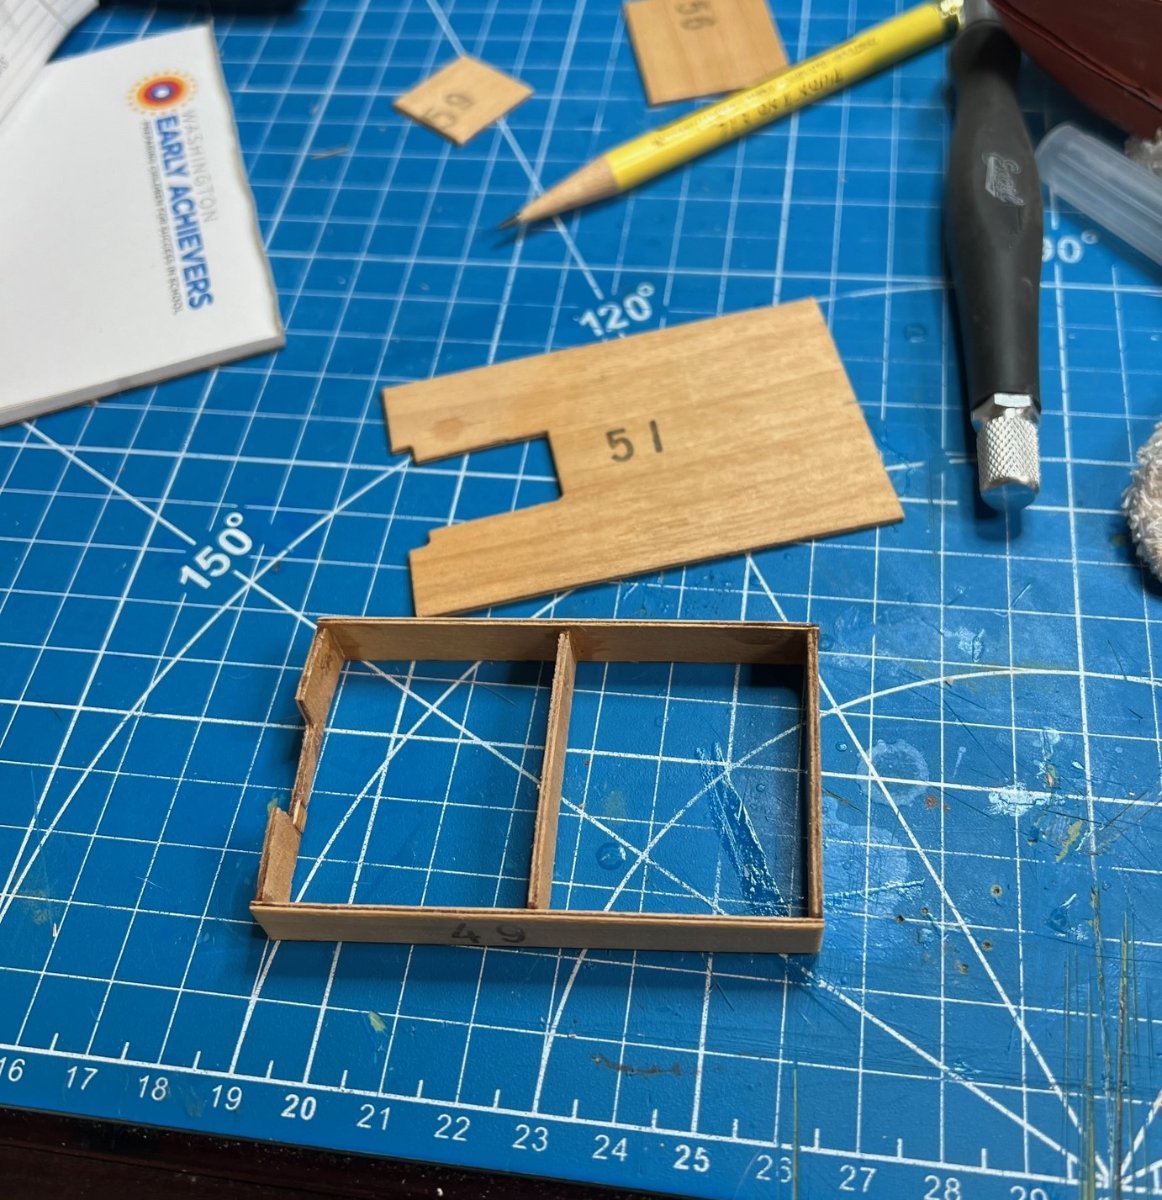
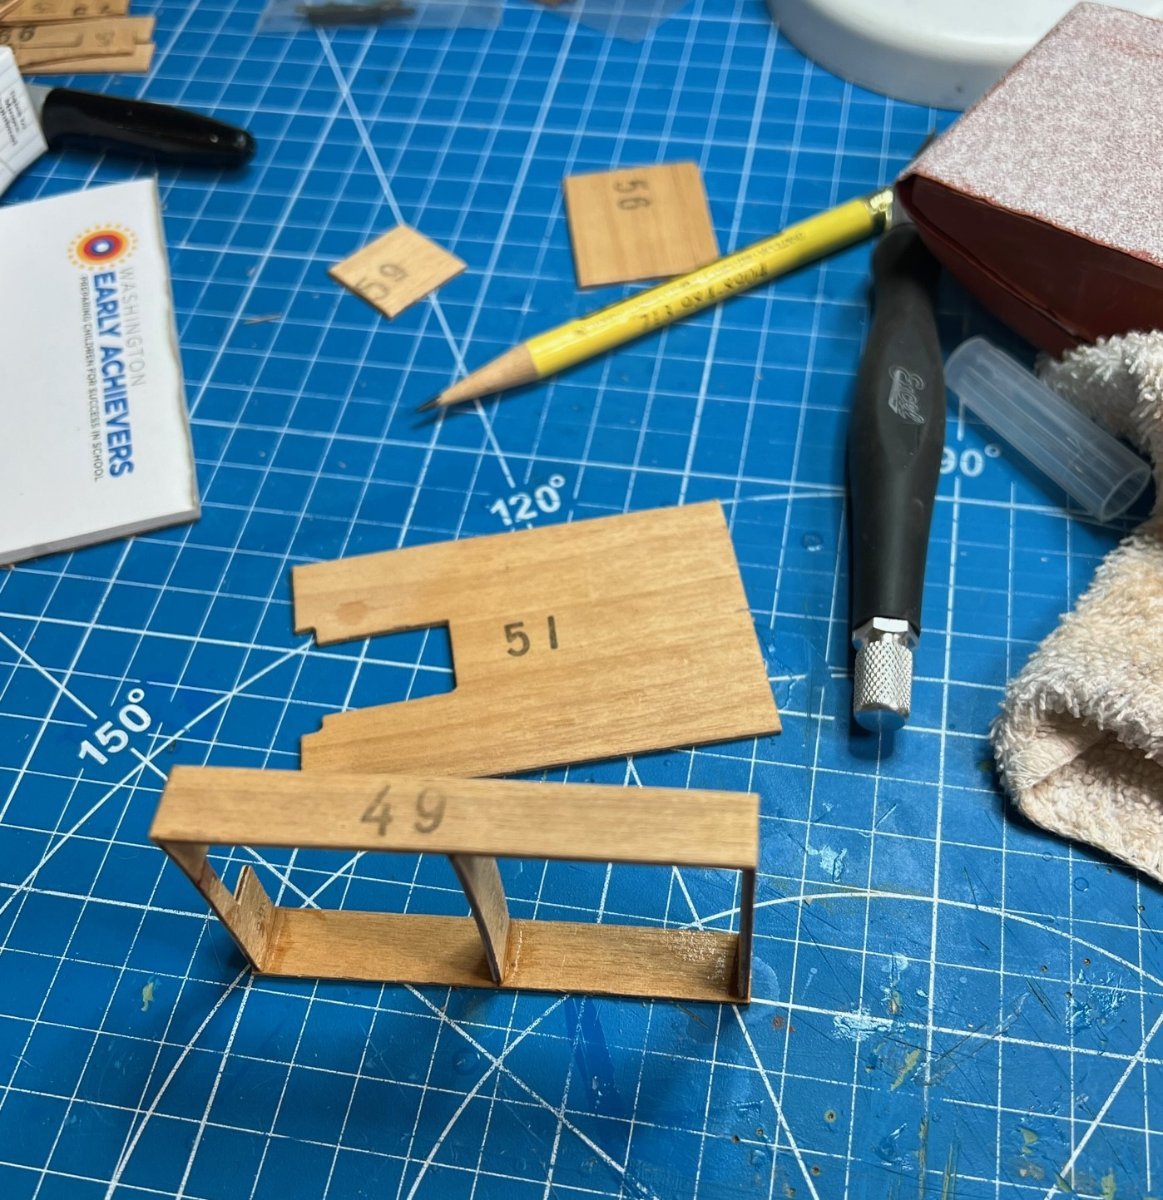
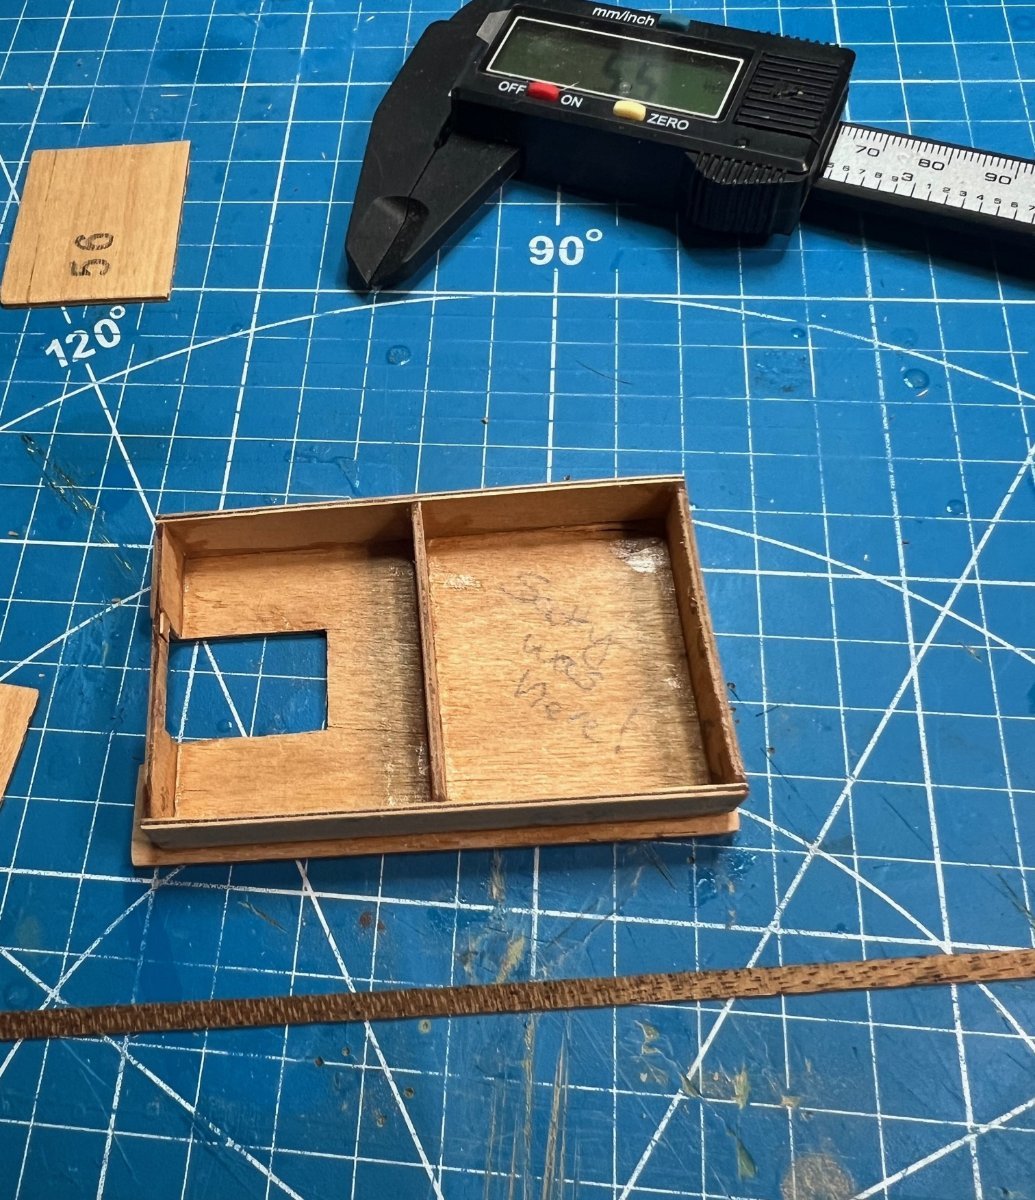
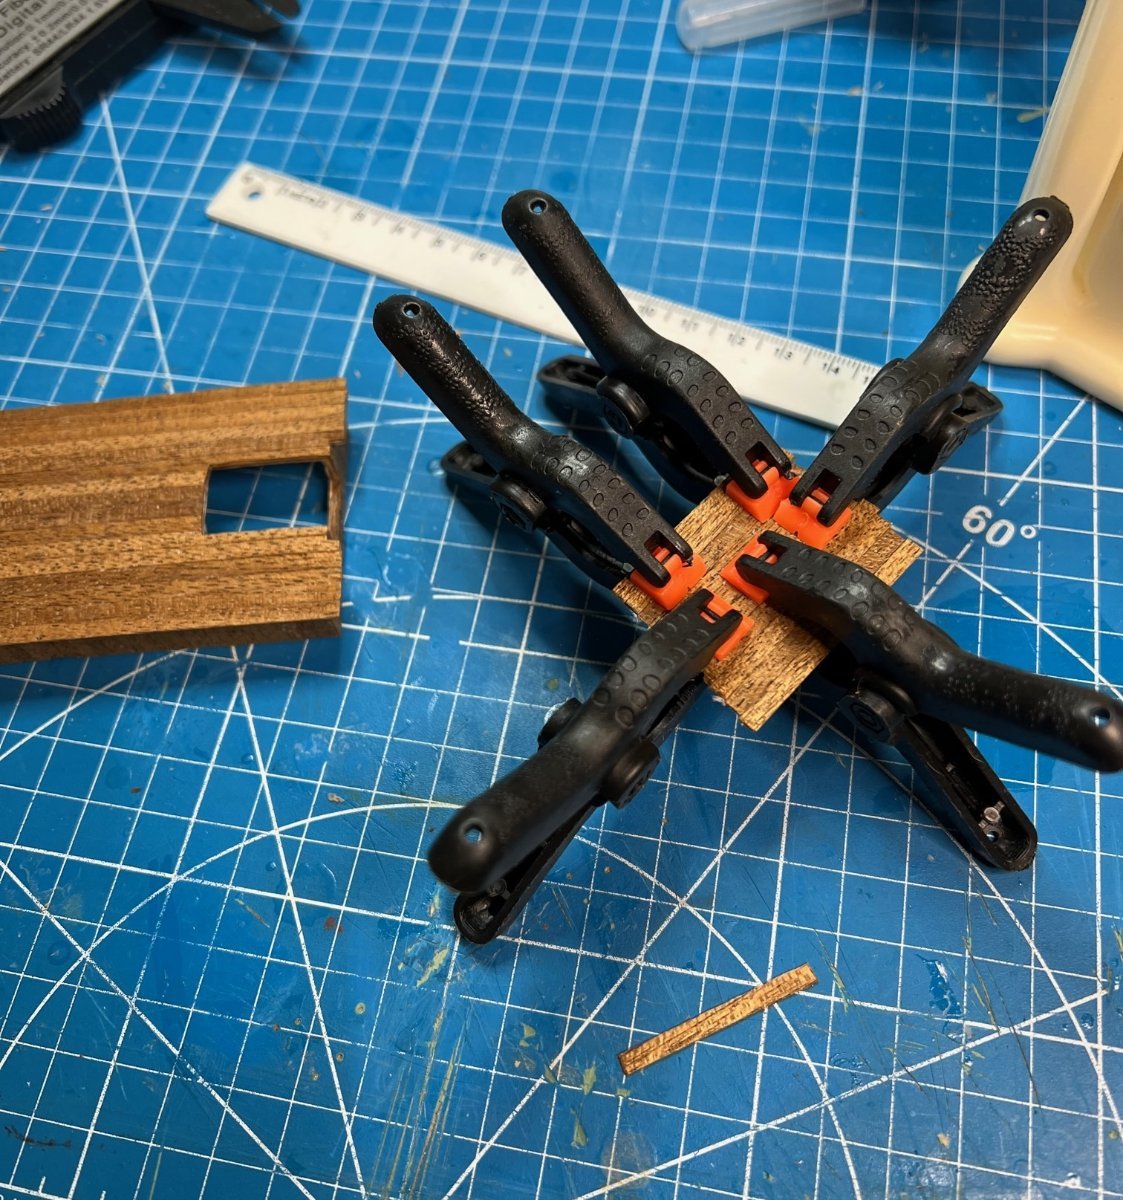
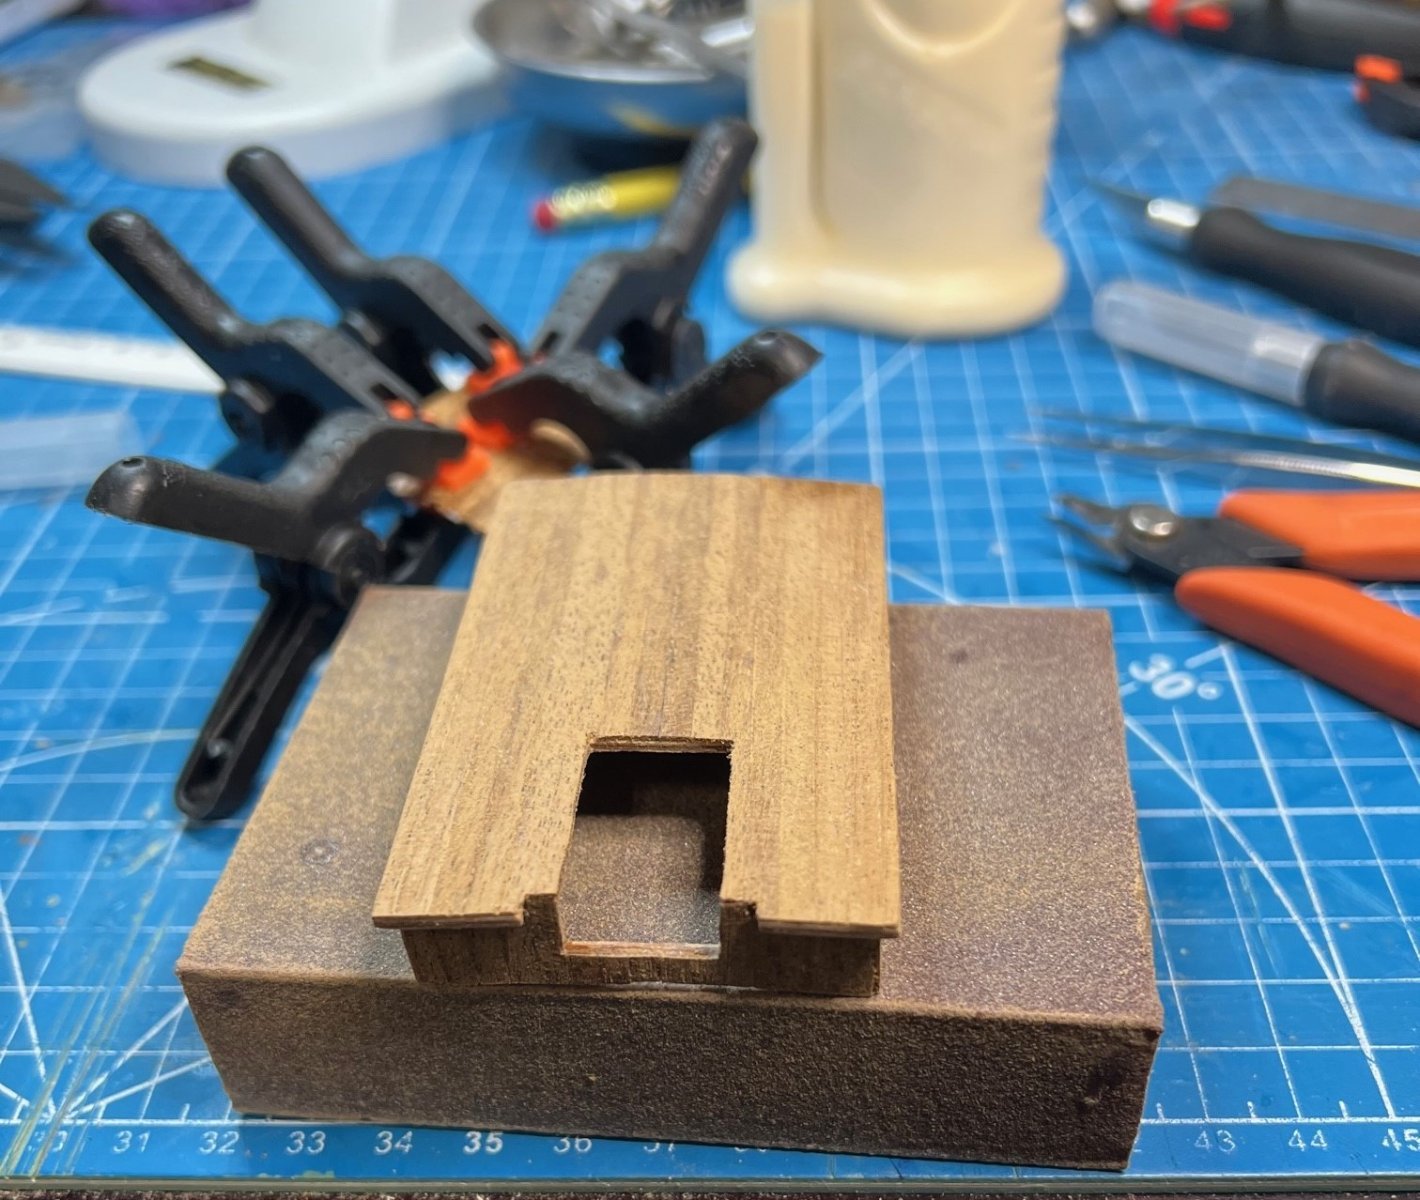
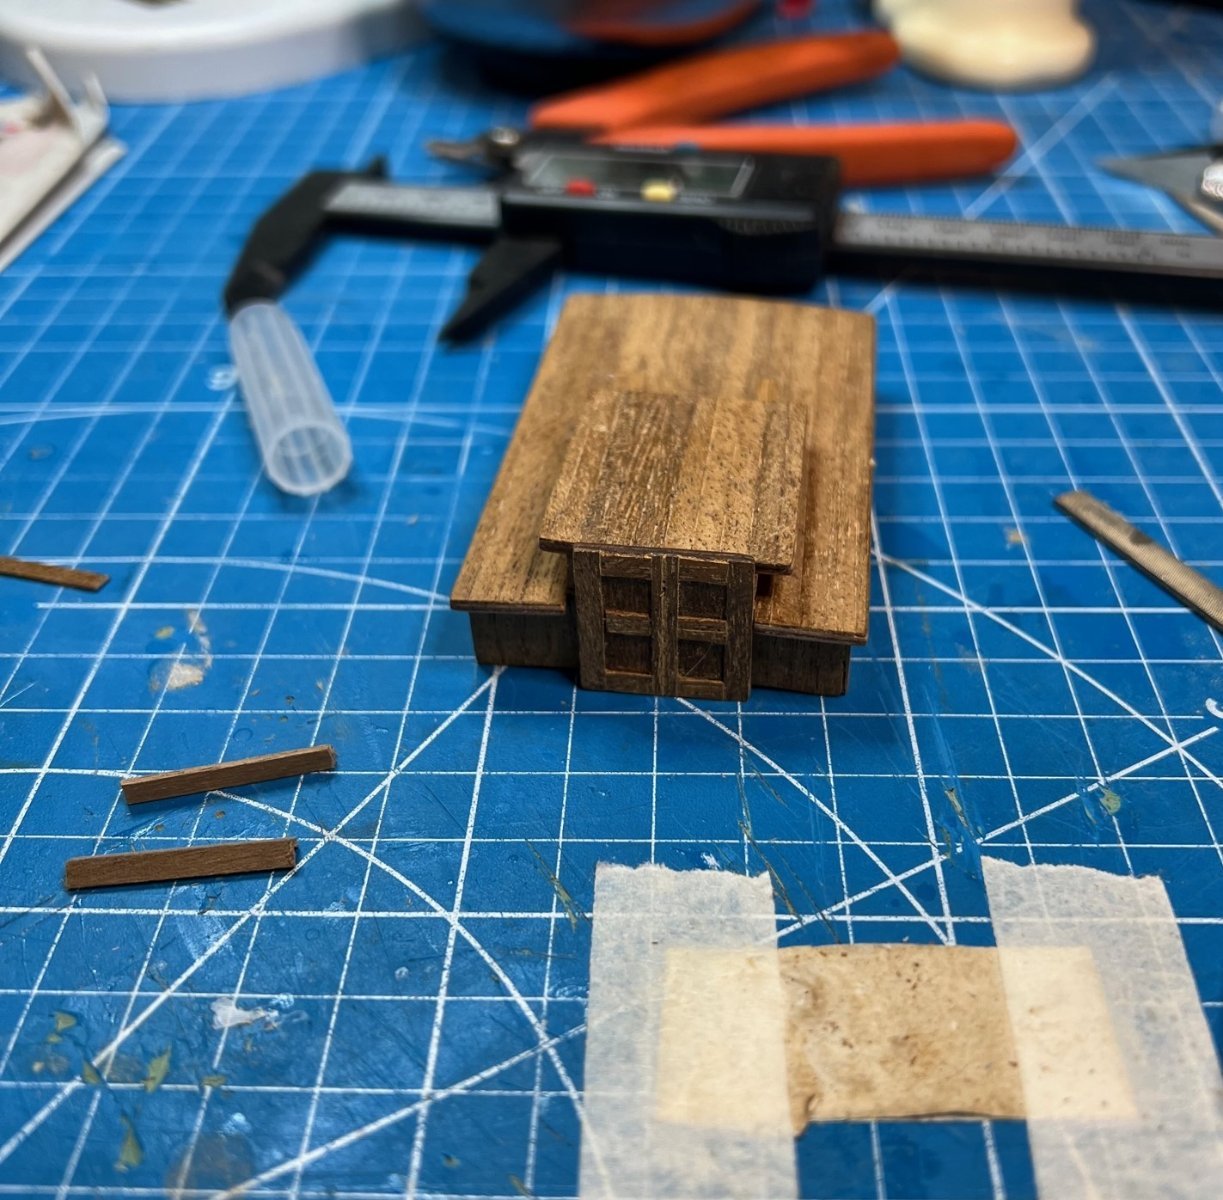
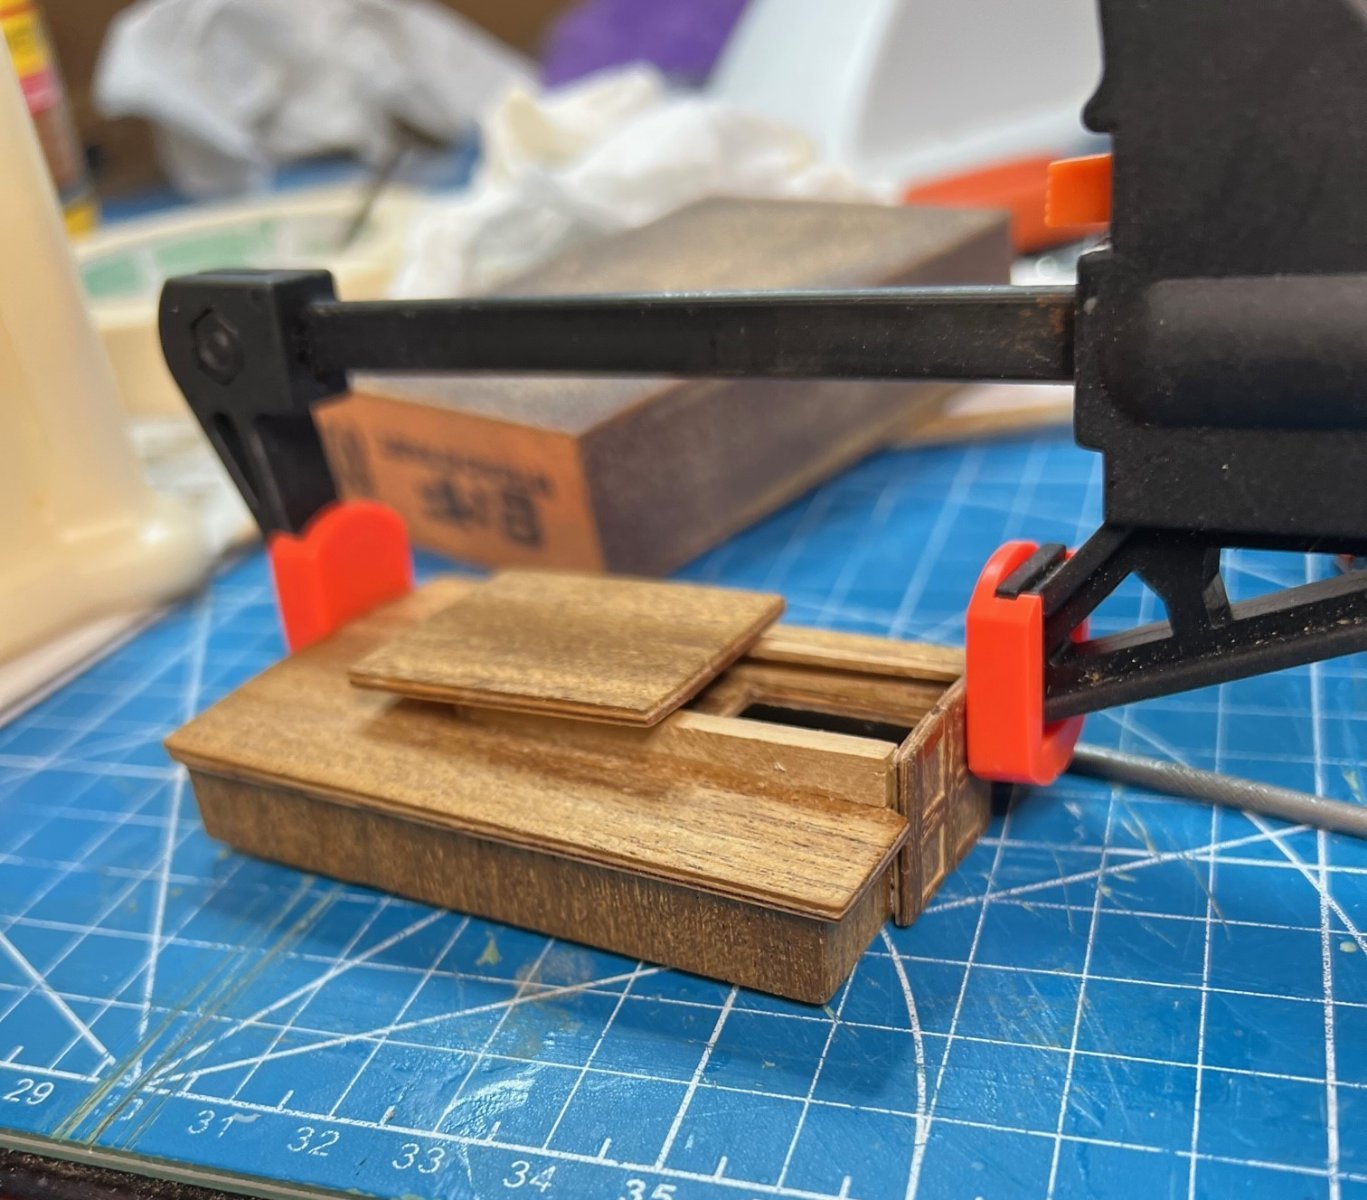
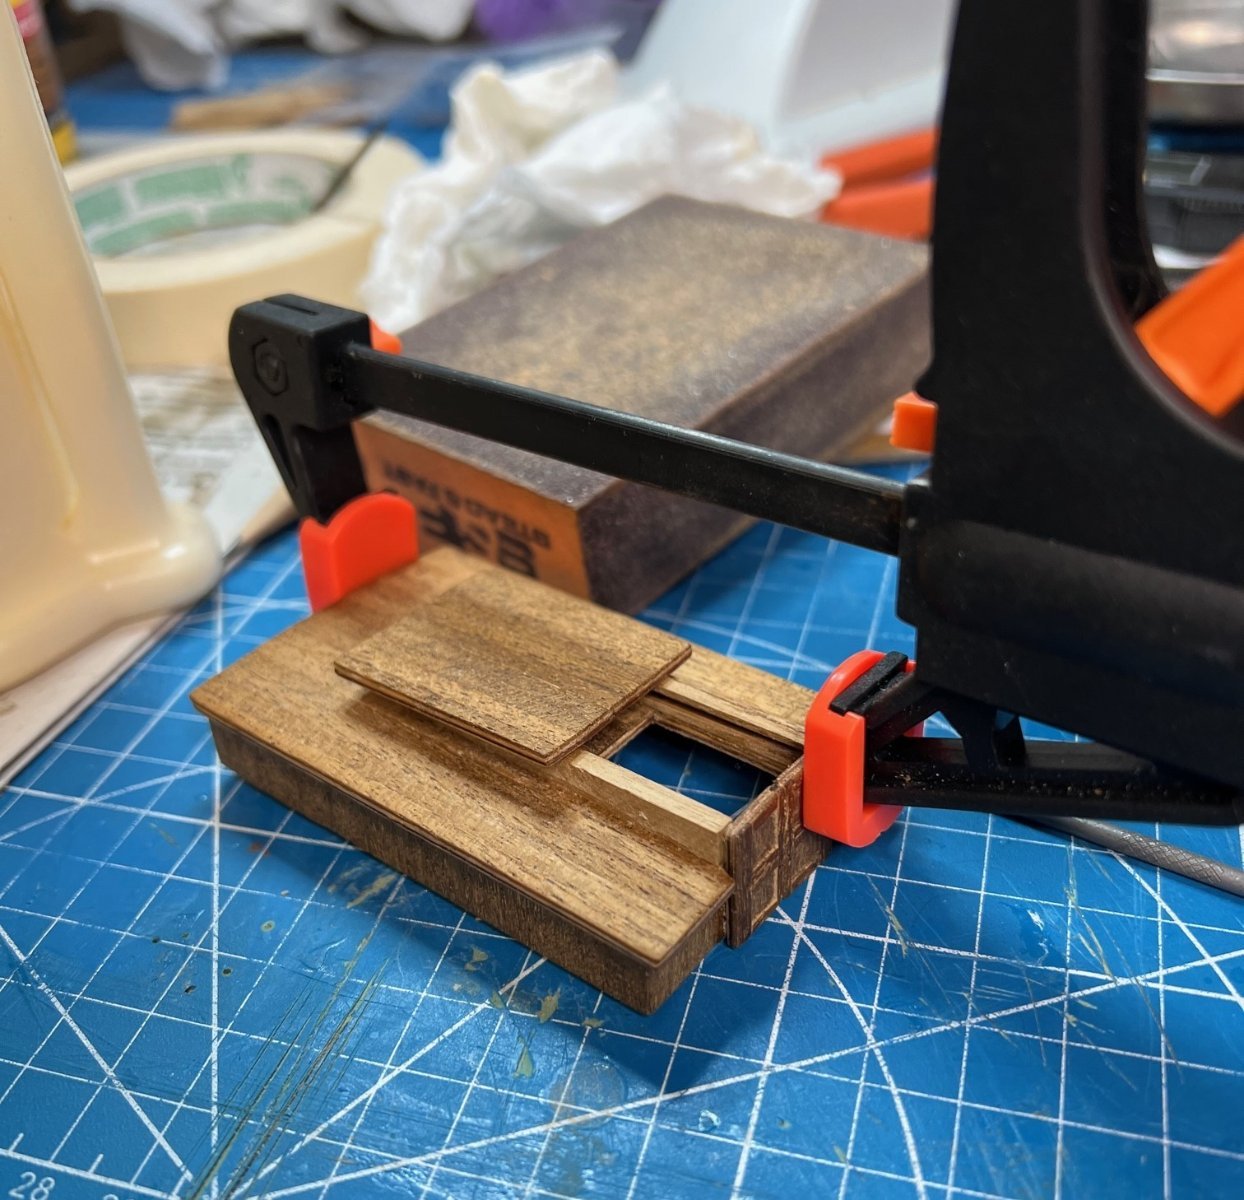
Cabins:
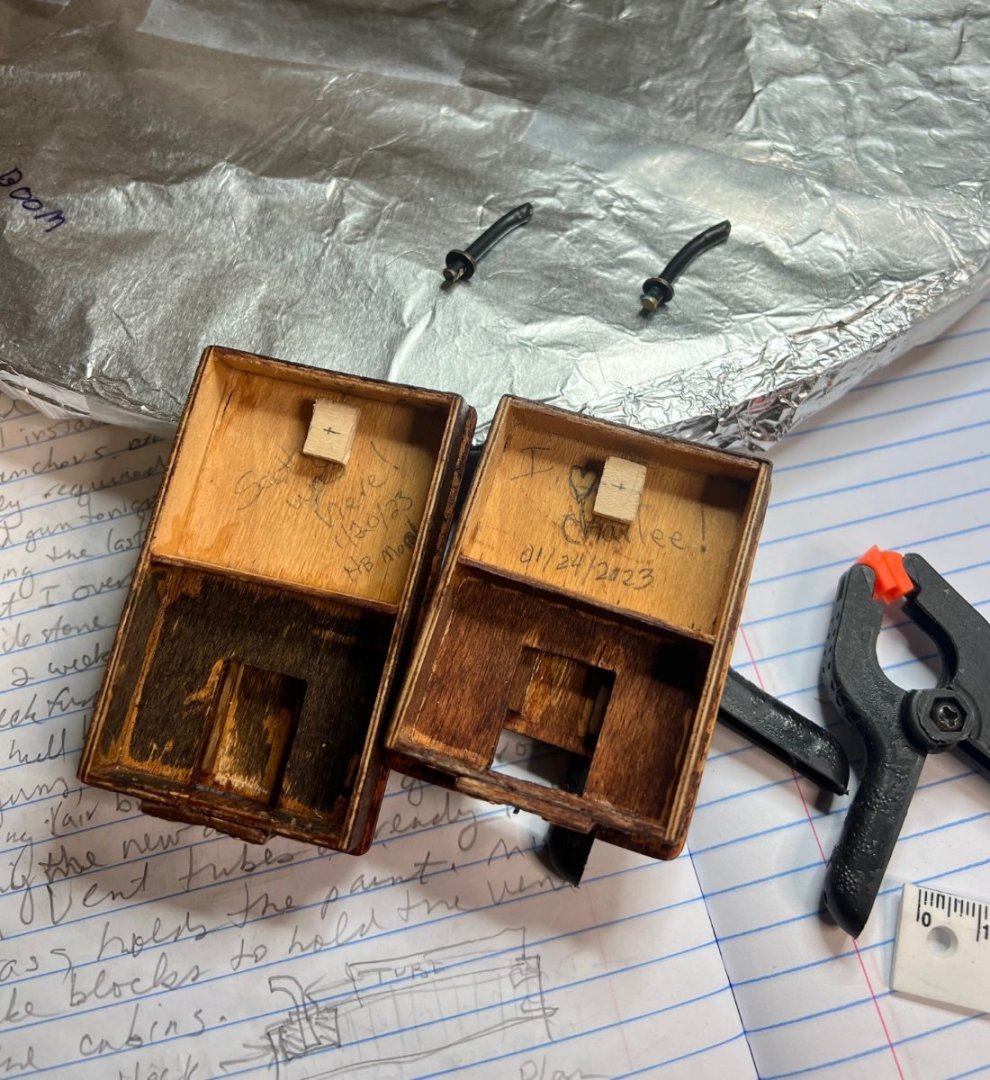
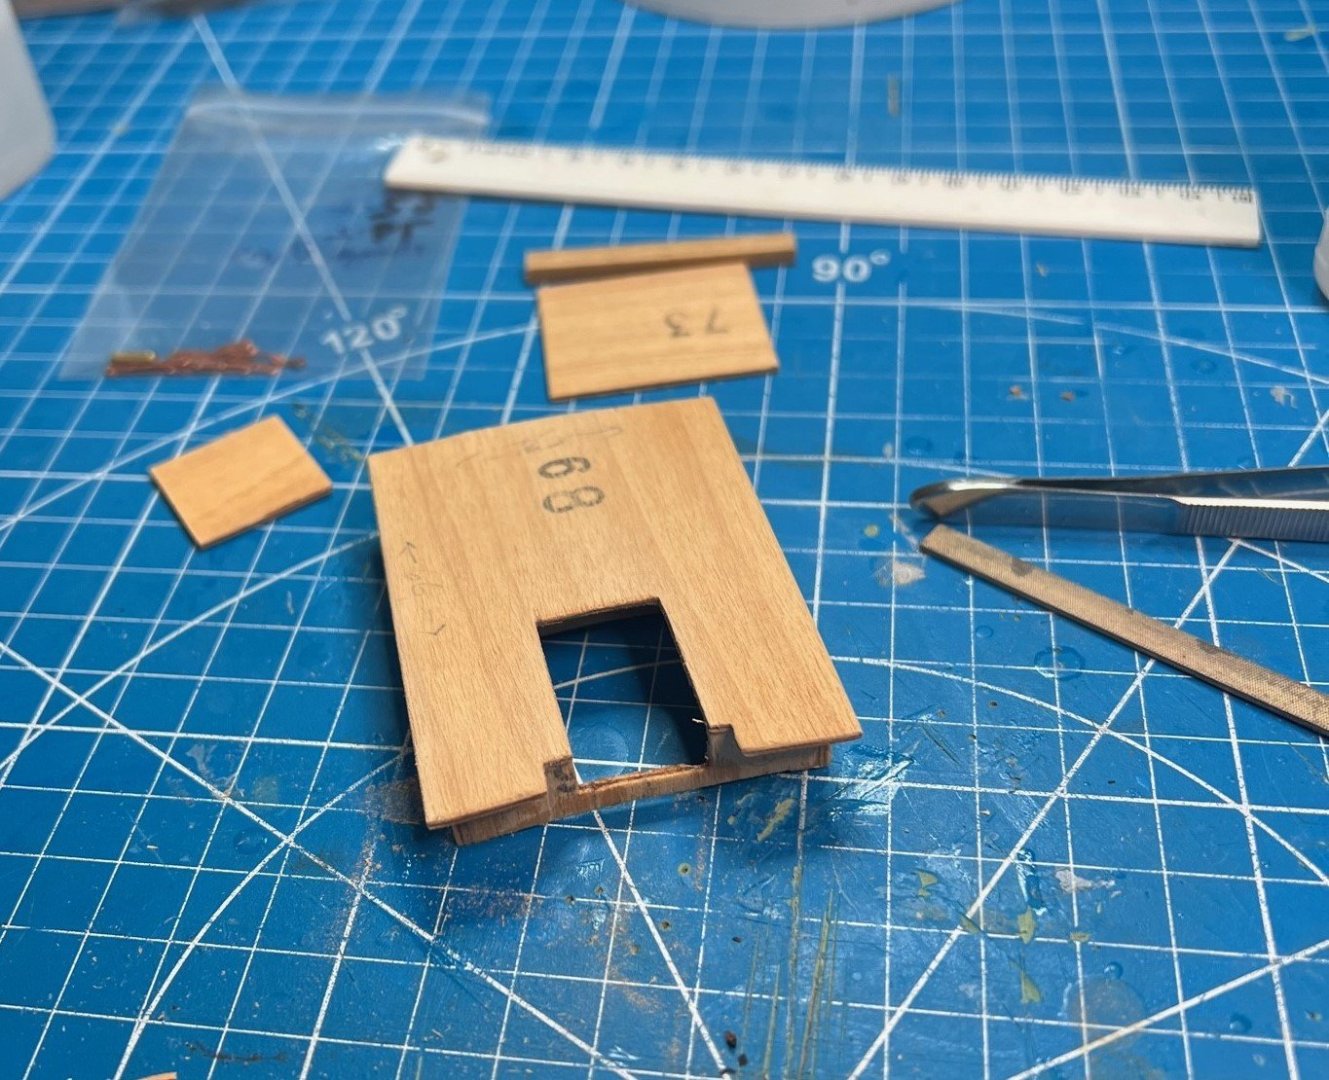
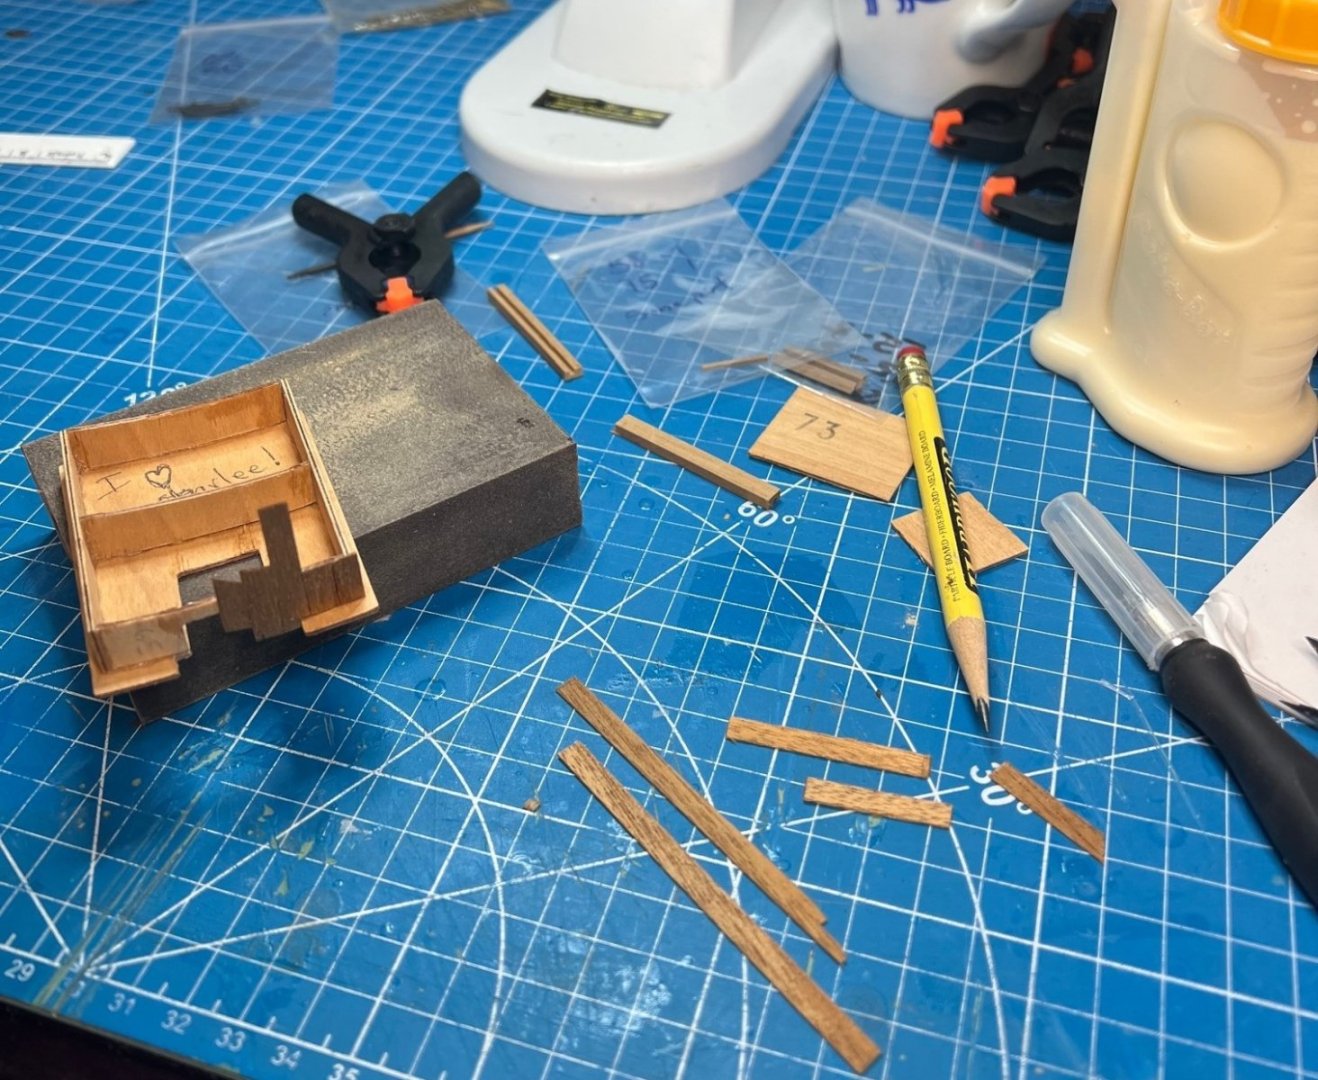
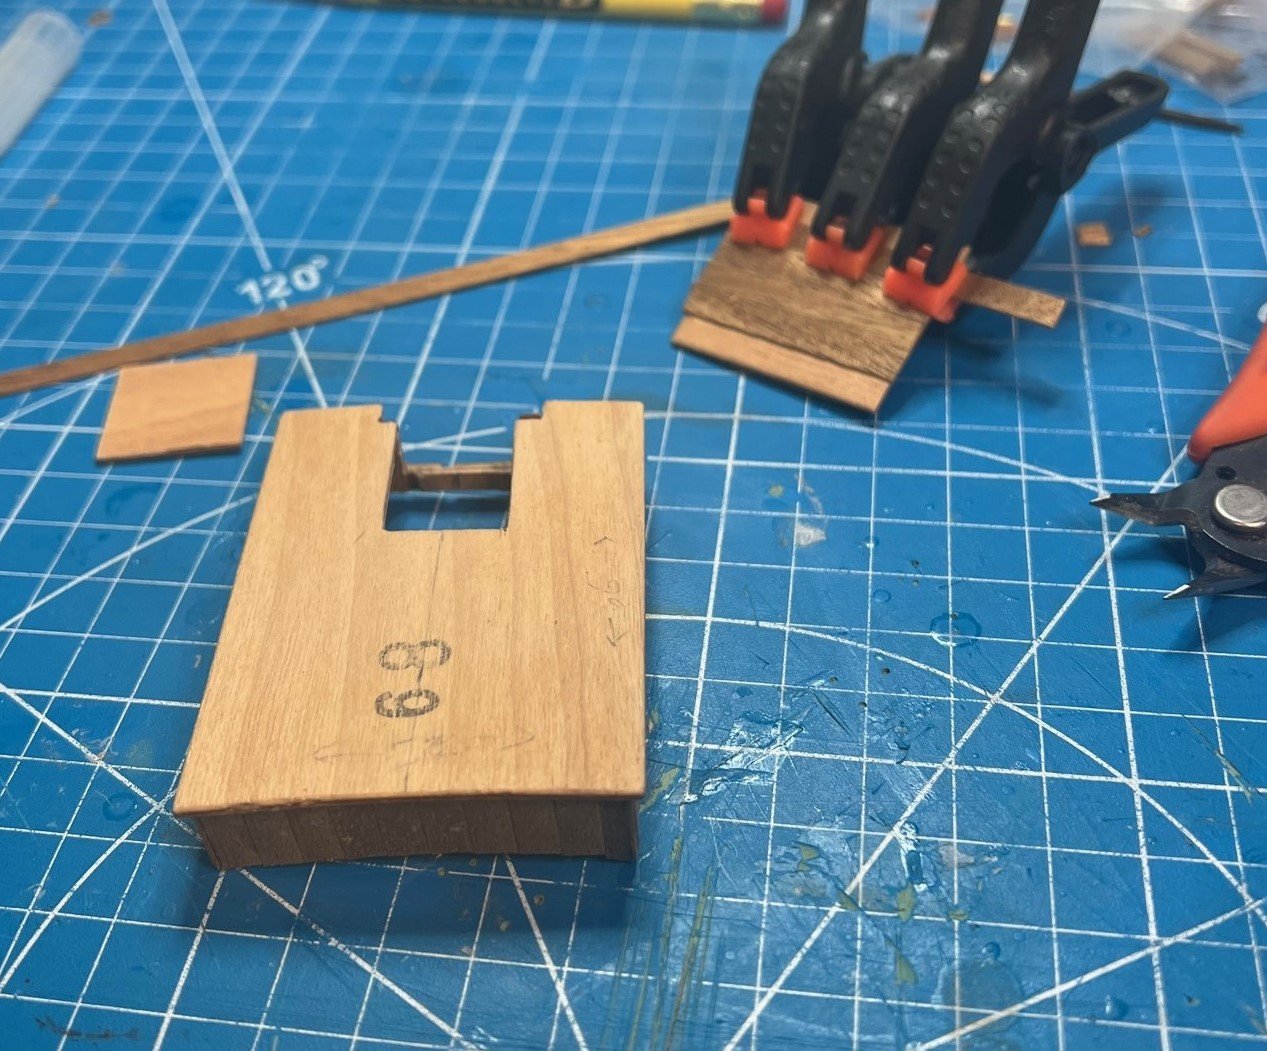
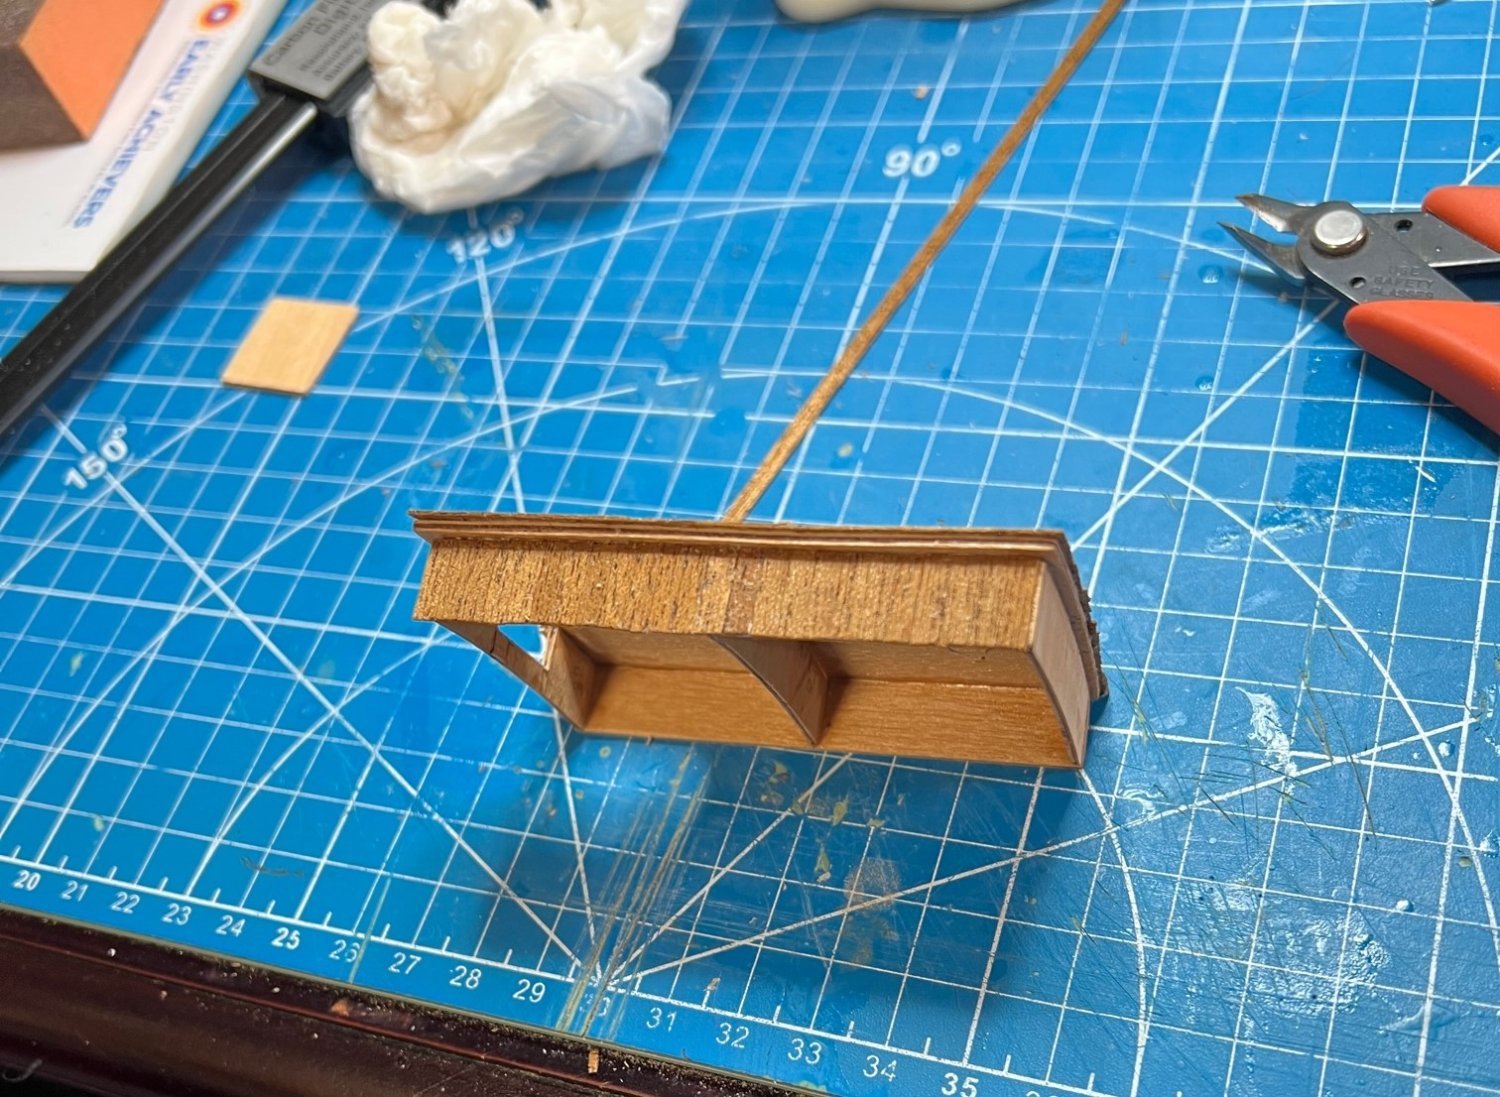
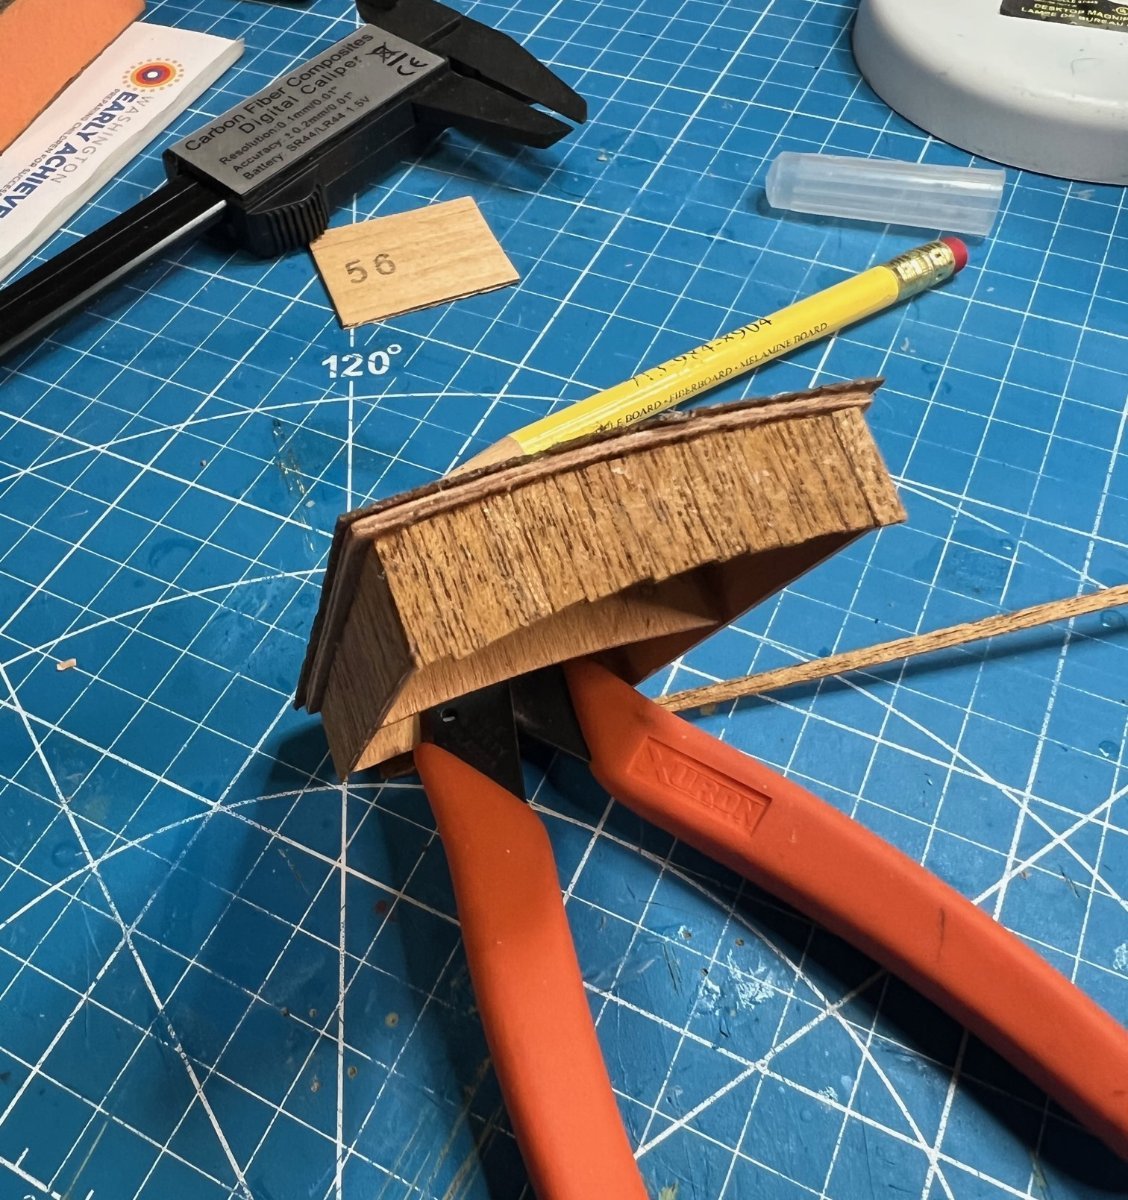
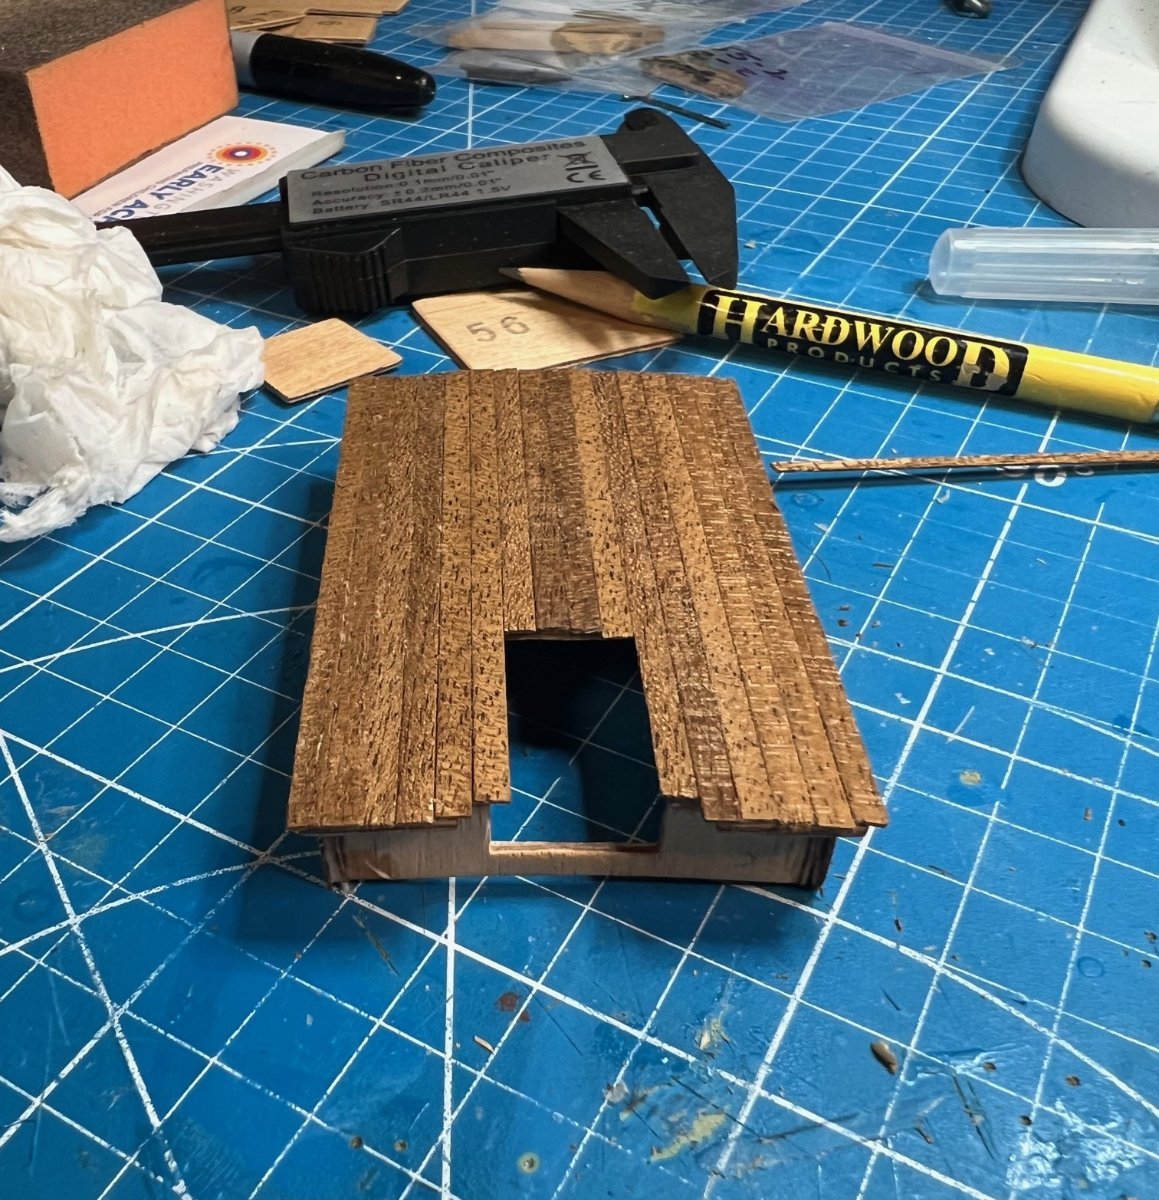
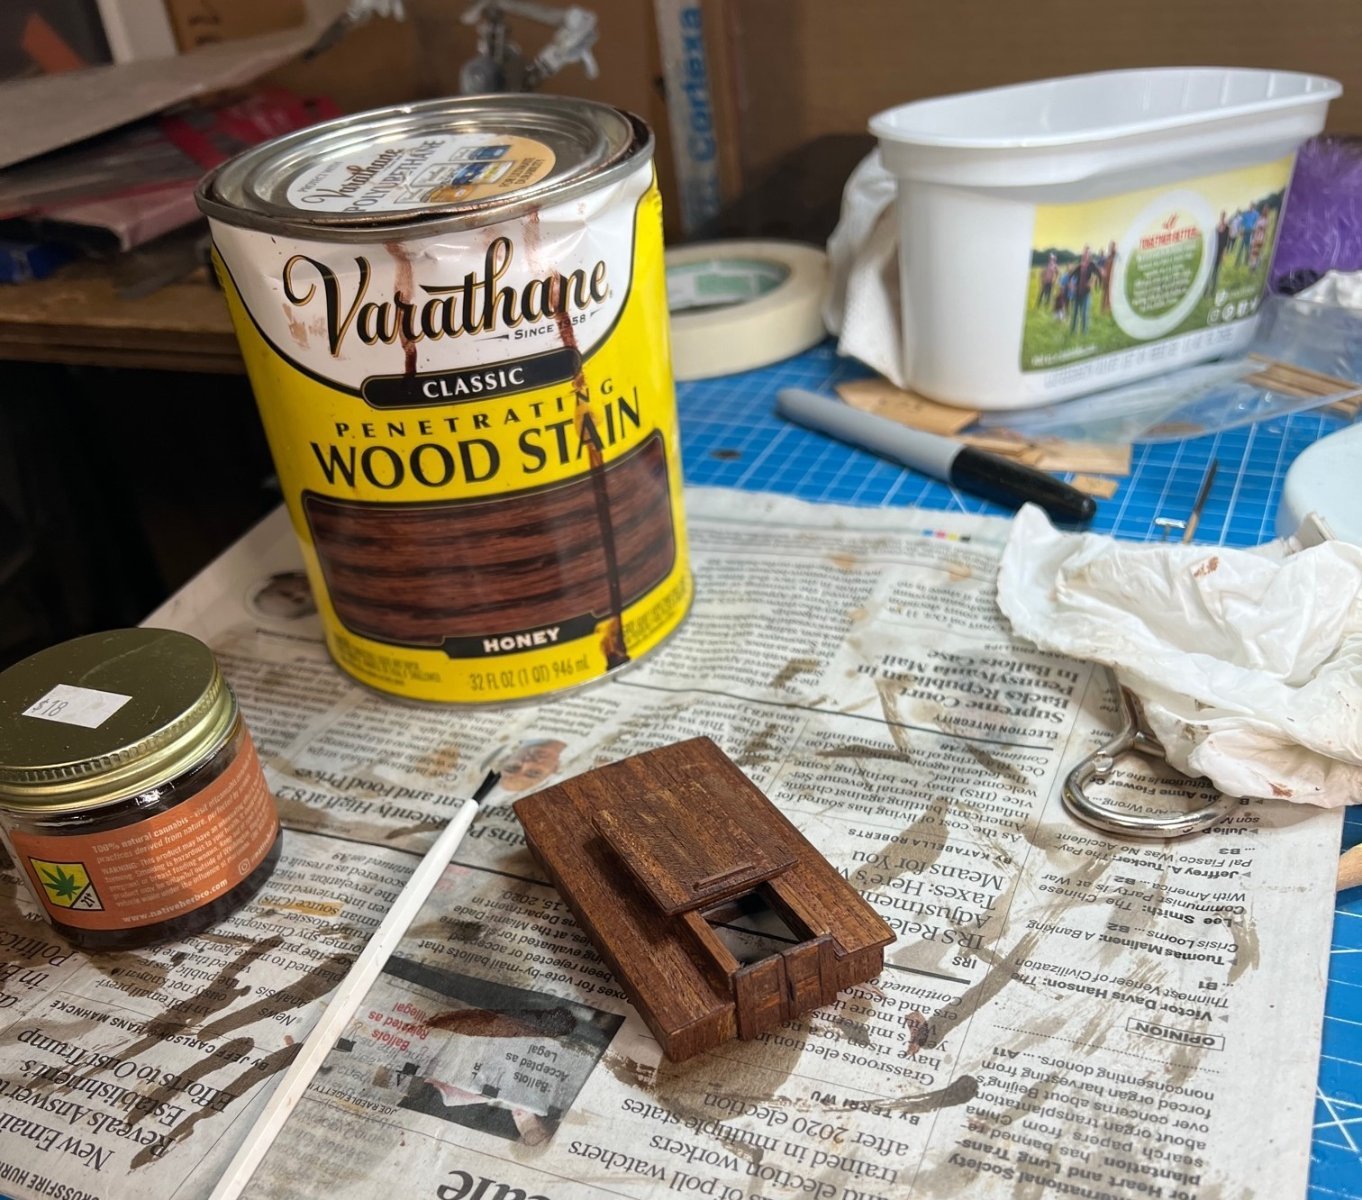
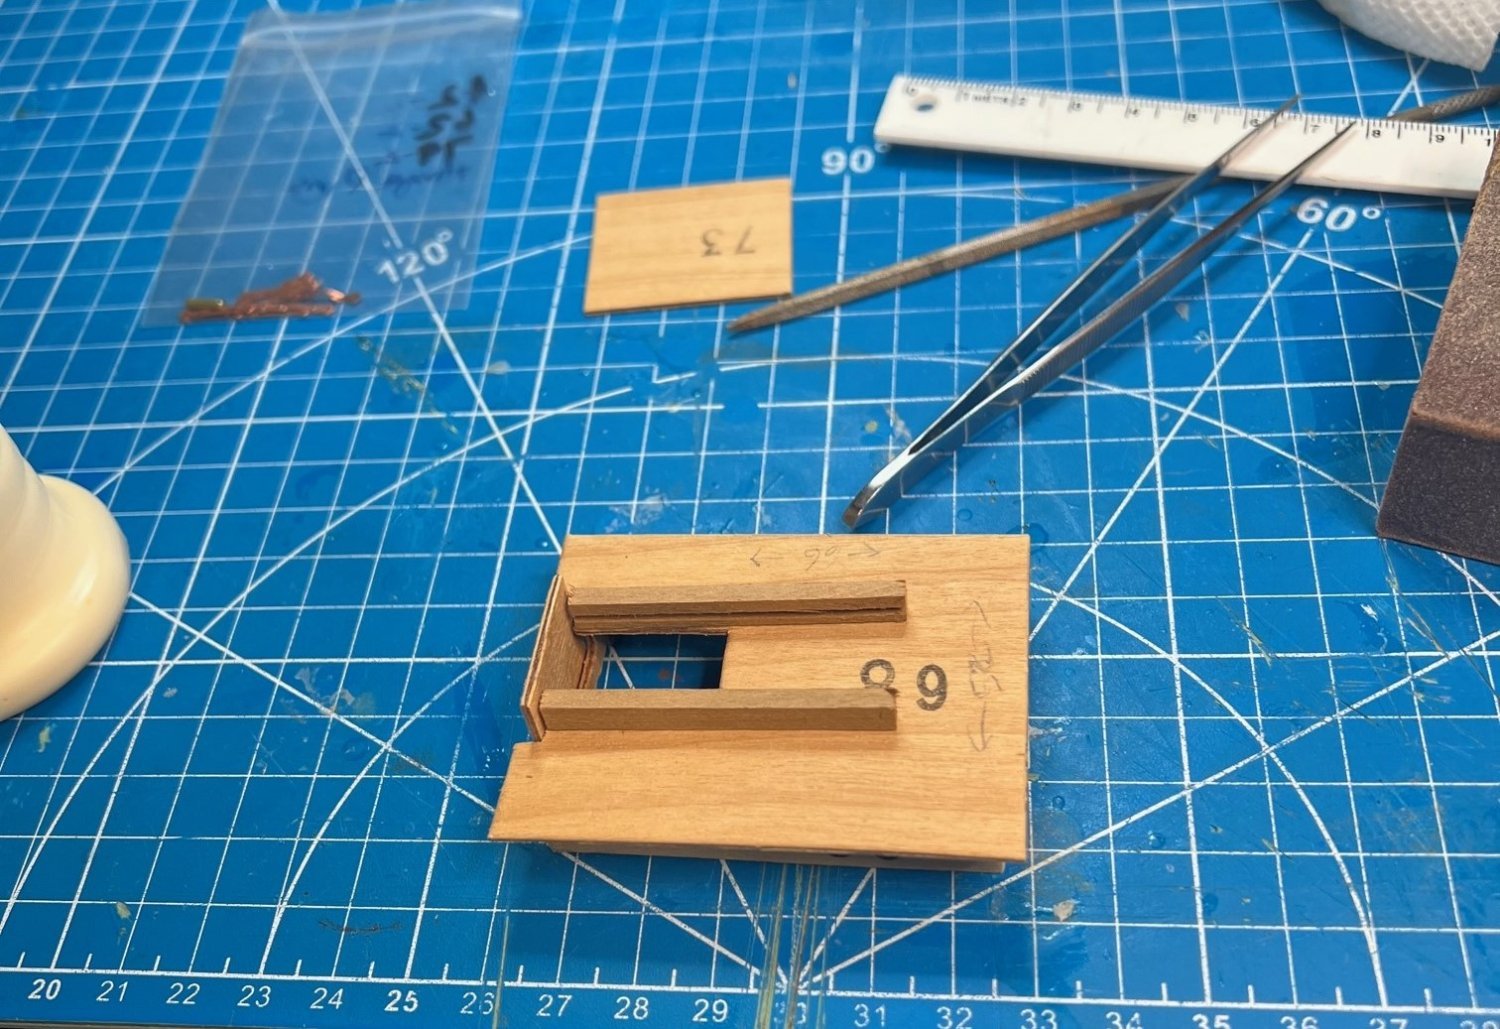
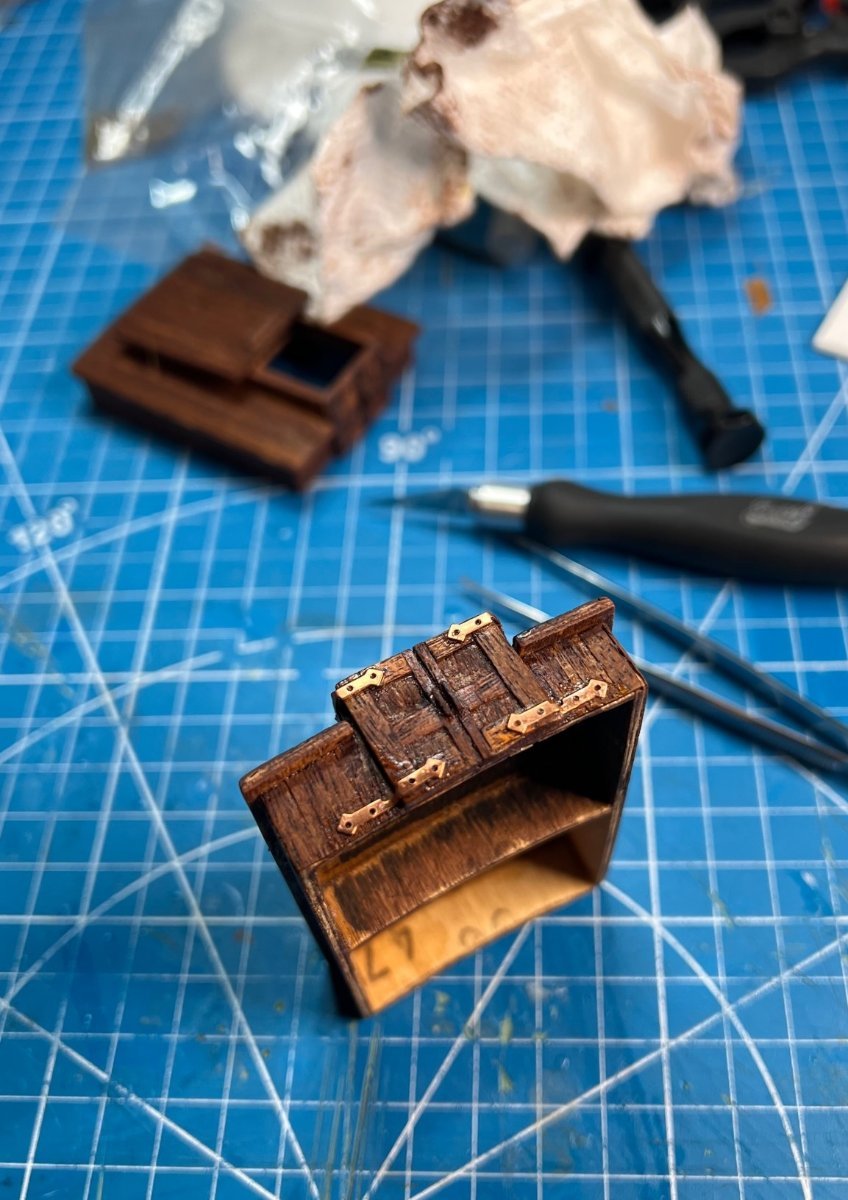
The cabins involved cutting pieces out of die cut plywood provided and gluing together. They were fairly easy to square up and glue. After drying I began planking the first one with the 3mm wide walnut strips. Some measuring against the plans showed me where to put the companionway slides for the slide top. As there was nothing but the cabin roof to stop the slide from going back too far, I added a stop to the ends of the slide paths and a small drain in the center. The doors came out ok but could have been better. I goofed on the second cabin and began planking it with the 5mm walnut used for 2nd hull planking. Oops. Once I noticed, I just kept going with it and until now, I was probably the only one who knew. After getting the second cabin together, I stained both in the “Honey” stain. I didn’t like how the doors looked so I scraped the stain off the plywood centers not paneled to make it lighter colored for some contrast. The hardest part was coming, installing the tiny little simulated hinges the kit provides with cut off pins. I had to use a brown marker on the edges of the plywood cabin rooves because it wouldn’t take the stain well.
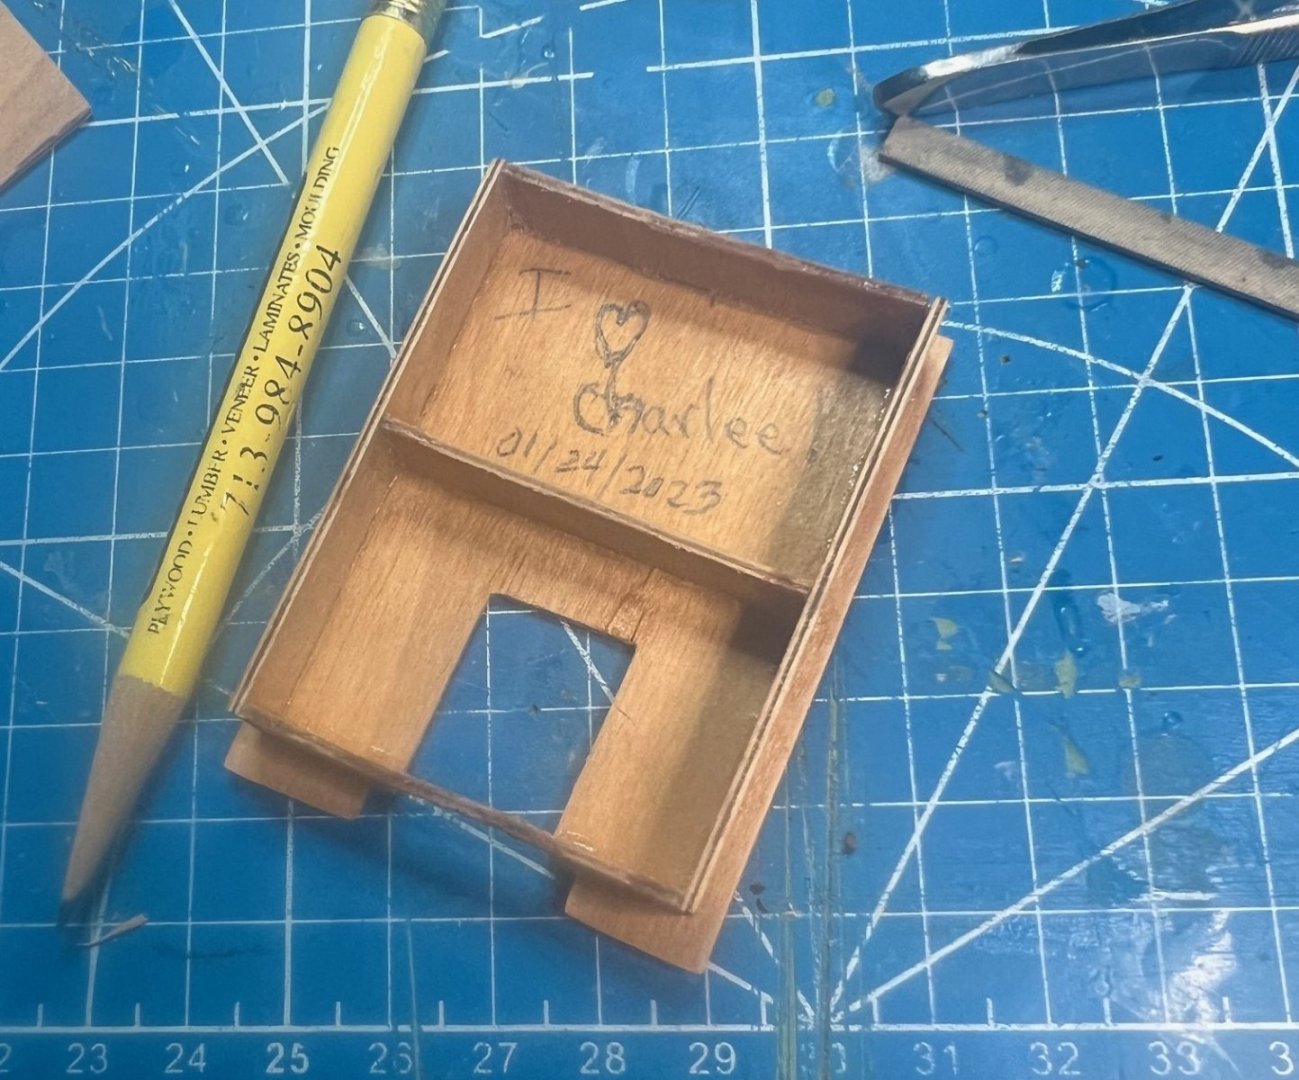
Leave a secret message or two.


On to the second cabin.
You can see here that I had to glue the edges of the old plywood as it was deteriorating by gluing and clamping.
More hidden messages, Charlee is SWMBO.
Wrong size planking, oh well.
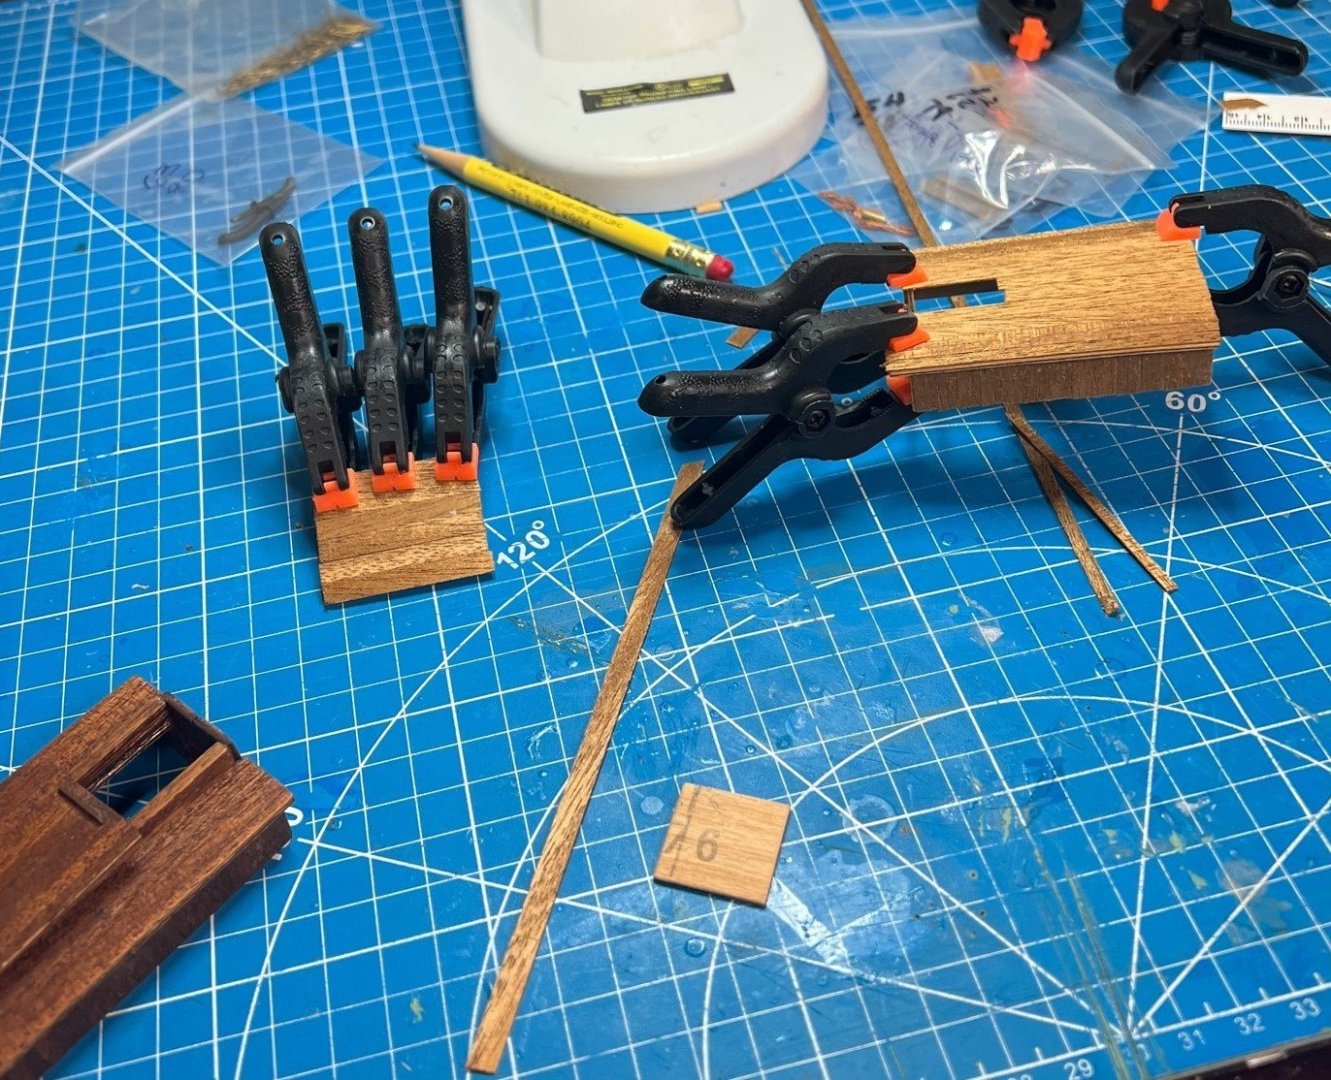

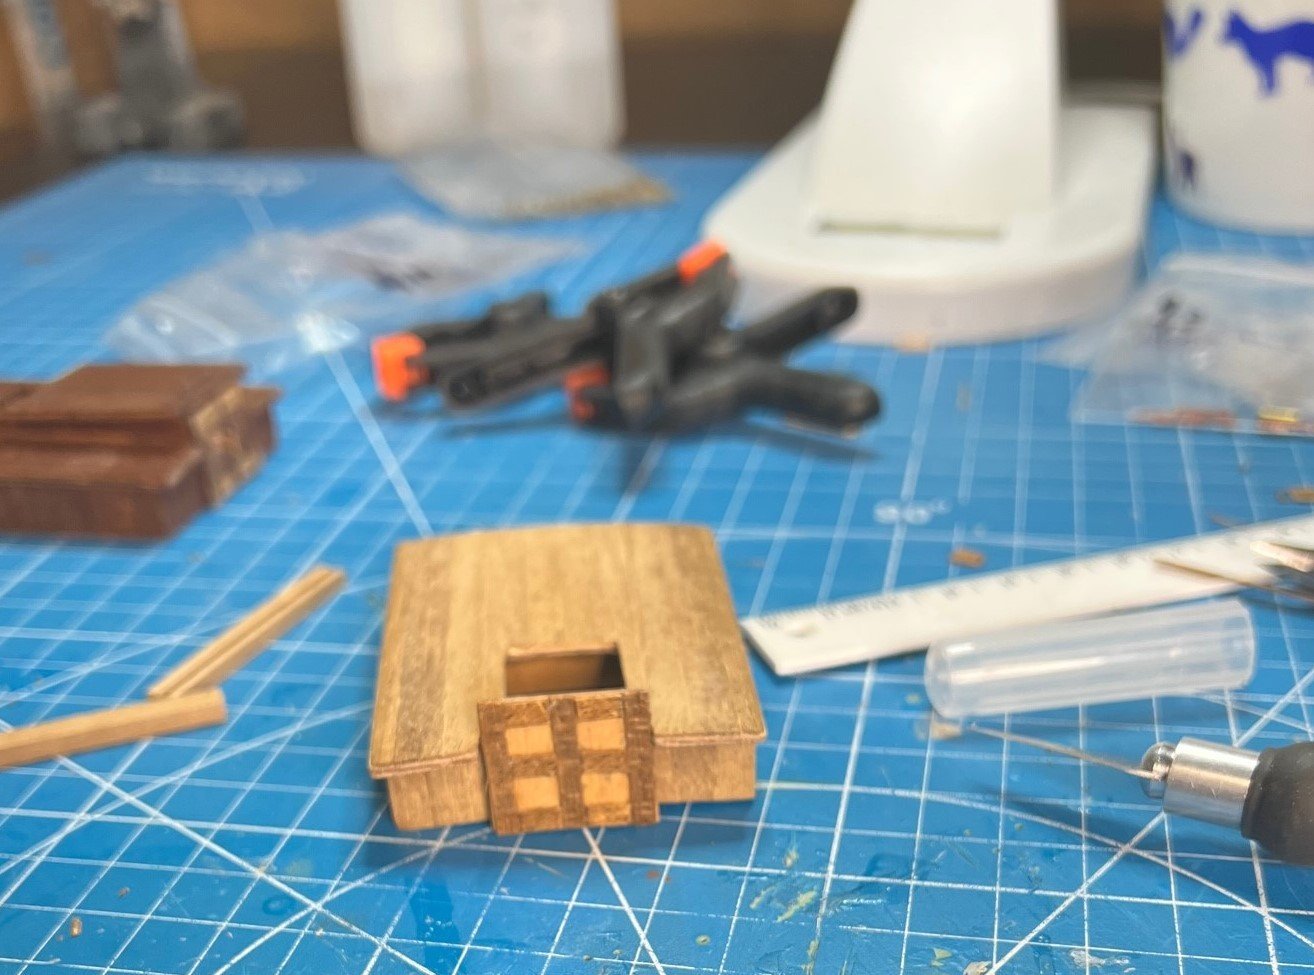
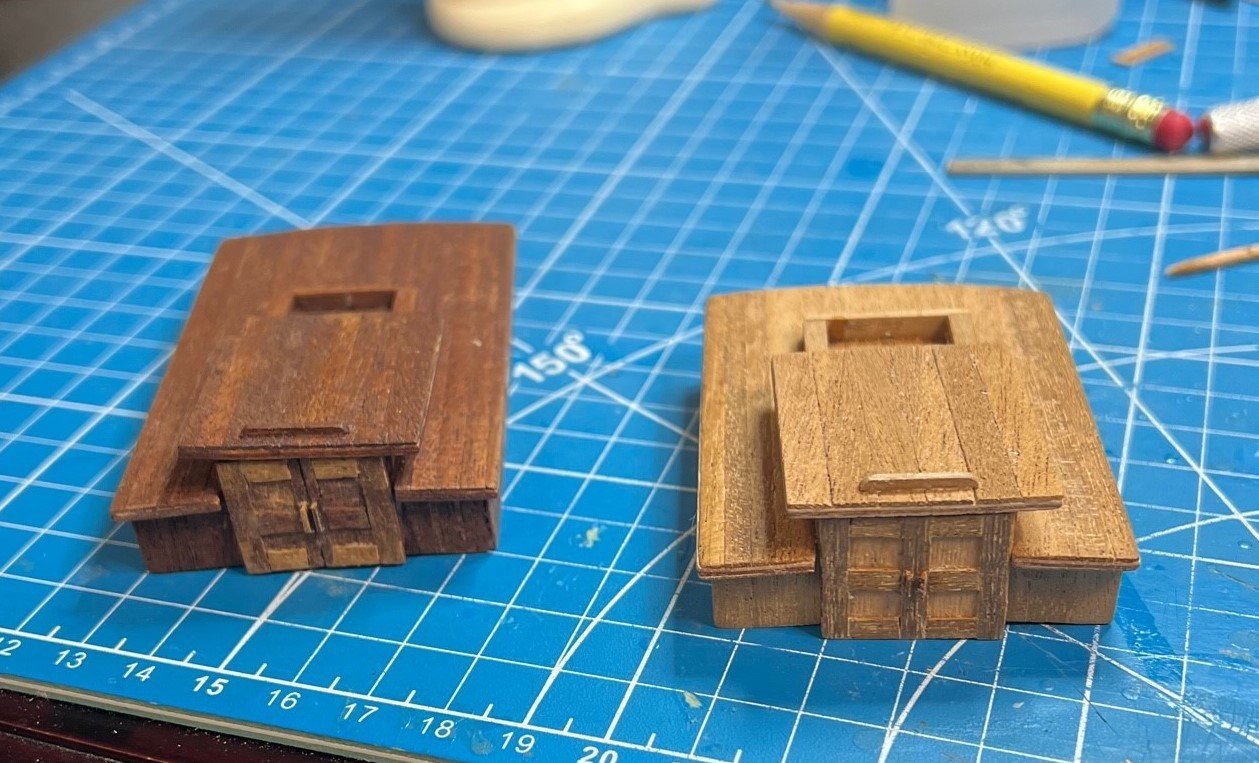
The Saga of the Little Hinge:
Each cabin used 4 of the little simulated hinges. This was before I had any brass black and wasn’t even planning to burnish any of the brass. Remember, this is my first timber ship. I burnished them later right on the model after changing my mind which apparently doesn’t effect the wood. After getting one cabin done and fighting with the cut off pins which had to be cut almost completely to the head as they interfered with the sliding hatch if you didn’t. It was very difficult for me to pick them up with tweezers and get them into the .6mm holes with CA glue on the tip. I had to make many more pins than I needed because every third one I grasped in the tweezers would disappear to the parts gnomes as I was about to install it. It would go ZING! Gone, followed by a lot of colorful language. I tried various tweezers to prevent them from vaporizing into the ether if I squeezed a little too hard and found the flat tip, not pointed, seemed to work a little better for me but still did not find a perfect solution. I tried tacky putty on a toothpick but it wouldn’t let go without help once the pin was in place.
After getting one cabin done, I had to get away from the meticulous fiddly nature of working in this realm of tinyness and rest my eyes and patience. I had the four teeny weeny hinges for the other cabin ready to go on my mat behind where I was working. I have a habit of dragging and knocking stuff off my worktable regularly. When I returned to the shipyard the next day to begin, there were only three teeny weeny hinges on my mat. Imagine my joy in this discovery. It was an oddly shaped stamped piece of brass about 2 x 5 mm. I grabbed my powerful little flashlight and started hunting (and cussing). Two hours later on my hands and knees under the table and everywhere in my cluttered workspace I had nothing to show from my search. That little part had literally vanished like a fart in the wind. I went as far as reach out to Artesena Latina online to try to get a replacement and even uploaded my original receipt from 1984 to them. I could just hear their contact person say in Spanish, “Hey guys! You gotta see this!” After laughing they sent me a message saying they haven’t produced that kit in years and years or something to that extent and suggested I buy the newer version of the Pilot Boat which I was not going to do.
Next, I started plotting how to scratch build a replacement since I had some extra brass. I believe the hinges are actually copper but brass would have to do. Wasn’t sure how to cut those details into such a small metal piece with the tools I had. Anyway after sweating it for 2 days while waiting for AL to get back to me I returned to the shipyard to try to figure out how to fabricate that part and decided to look again around my workspace for the hinge focusing on places I had not looked yet. I picked up a towel I use for wiping extra glue off things, etc and when I did, the little hinge fell out of it onto the floor. The clouds parted, the sun shined down and I heard “Hallelujah!” playing in my head. After getting the part back on the mat reuniting it with the other three, I joyously ran to tell SWMBO who was concerned what that missing part was doing to me. She was happy for me and suggested I be more careful with where I keep my parts until I need them. I agreed and got some little bitty ziplock bags and spent the next couple of days packaging all my parts from the kit bags to the little zip lock bags, labeling each with the part numbers in the bags. I wouldn’t lose another part until I got to rigging my guns weeks later where a 3mm block zinged out of my tweezers to be lost until last night real time. I lost a brass hoop off my replacement anchors and when searching for it, I found the block I had lost which forced me to use a less than perfect block instead of this good one. Lots of colorful language followed but I digress.
The ventilation tubes supplied didn’t look too bad until you got to the flange at the base which was a mess. One was tilted and the other had half broken off. I tried to fix them but just made them worse. I would later fabricate two out of brass tubing which I’ll cover in another episode as we get closer to the present. This gets us to January 27th, 2023. Much more to come.
Next up will be the Knightshead and some detail painting on the barrel and bucket and I’ll also build the deck pump, break the deck pump and repair the deck pump. Fun fun! Thanks for reading, sorry I’m not a good writer. Until next time! Cheers!
- Knocklouder, Keith Black, Prowler901 and 1 other
-
4
-
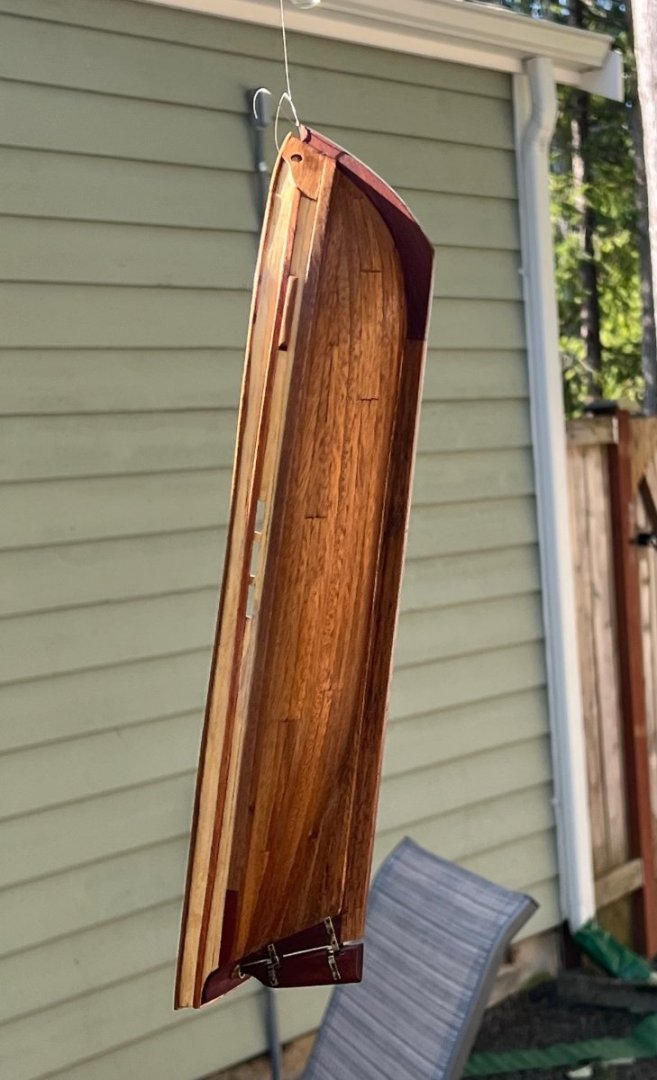
Varnished with Minwax Satin Verithane Spray today, finally reached 62*F. Got some fuzz to remove but turned out ok. Hung it with a spent guitar string. Masts and spars done too but didn’t photo, sorry. How best to remove fuzz from surfaces? Scotchbrite? Suggestions needed. Thanks.
-
Enjoyed that! Hope my Swift ends up half as nice as yours. I’m adding the guns they included in my 1982 kit.

-
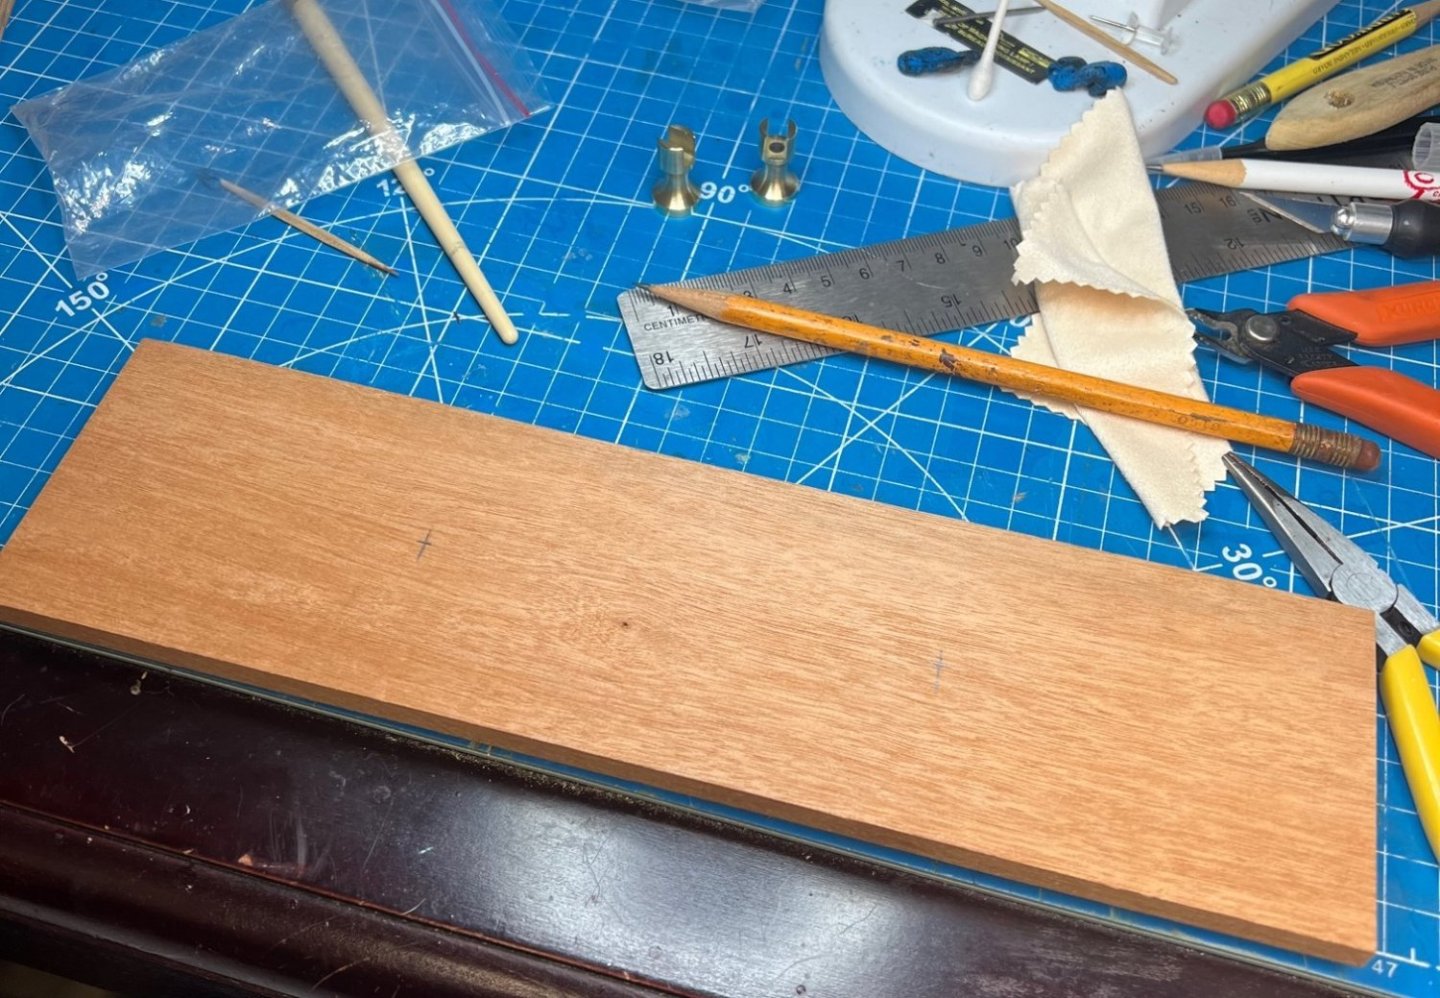
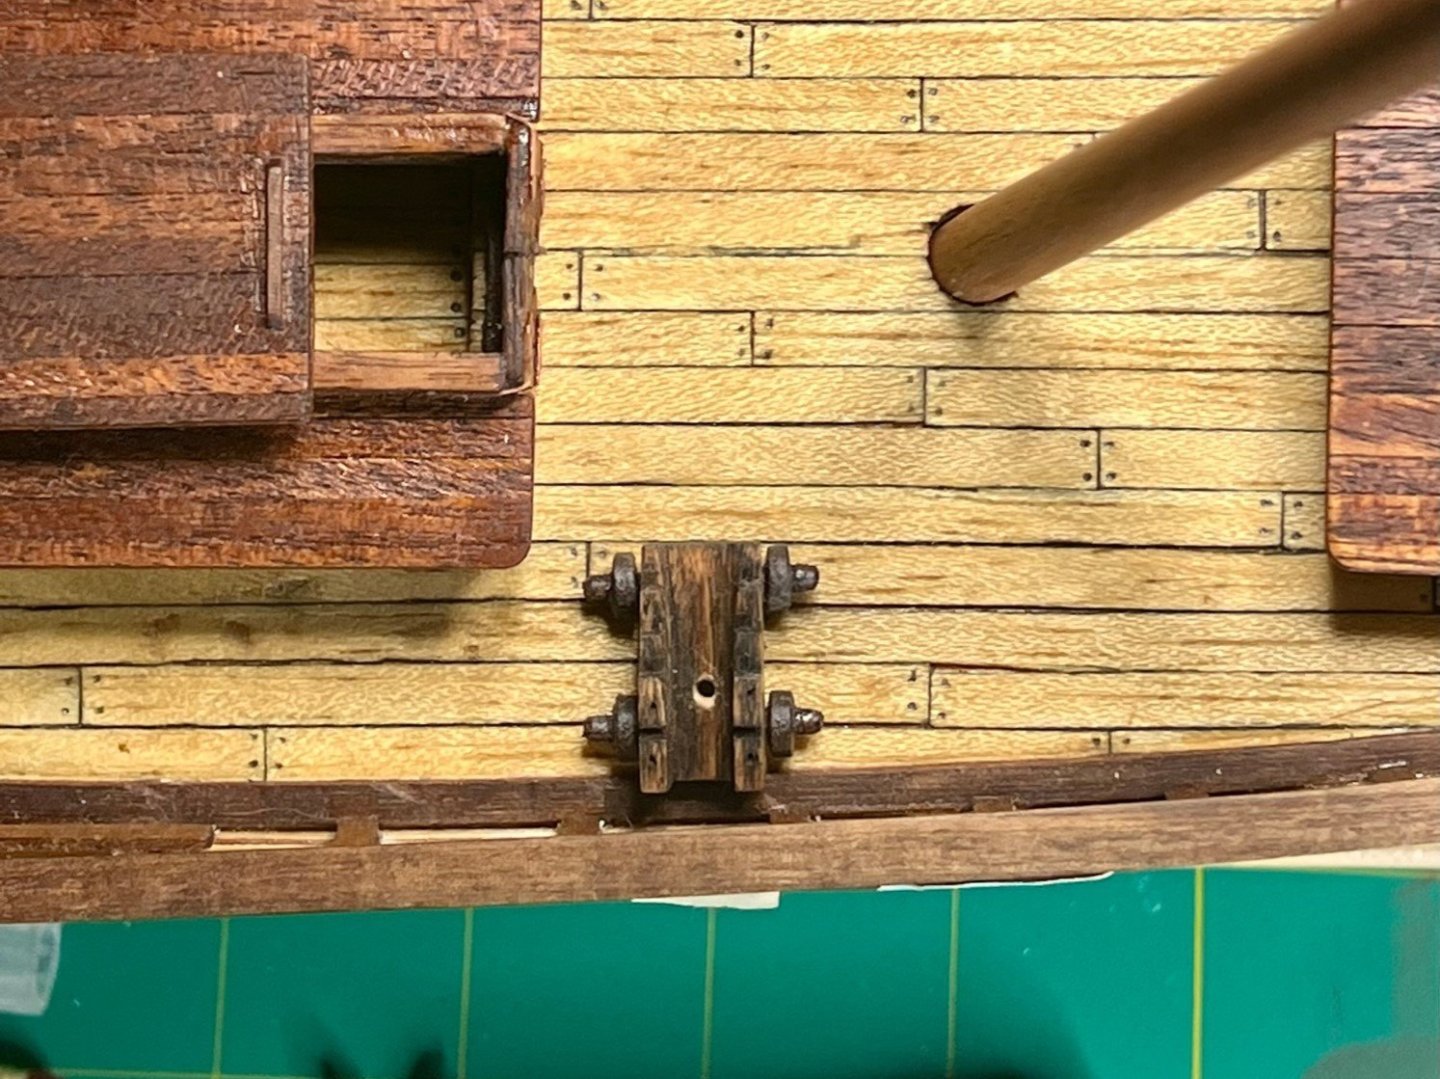
Mooring Bits, Original set of anchors and Rudder
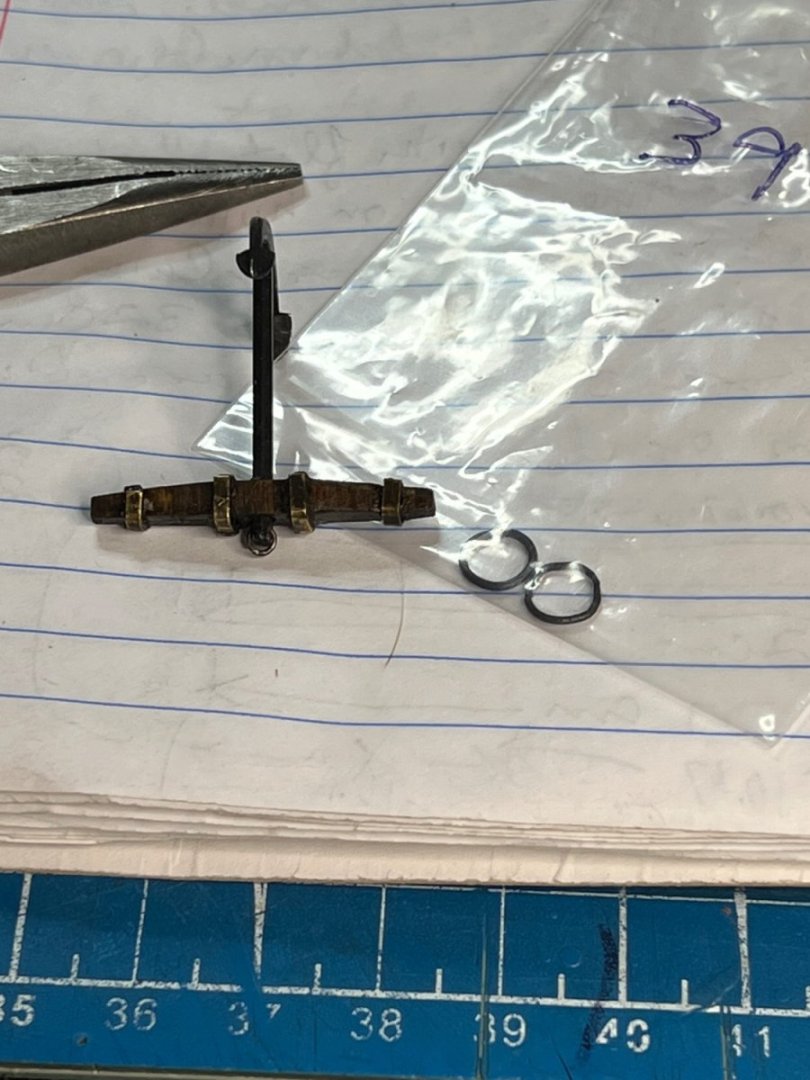
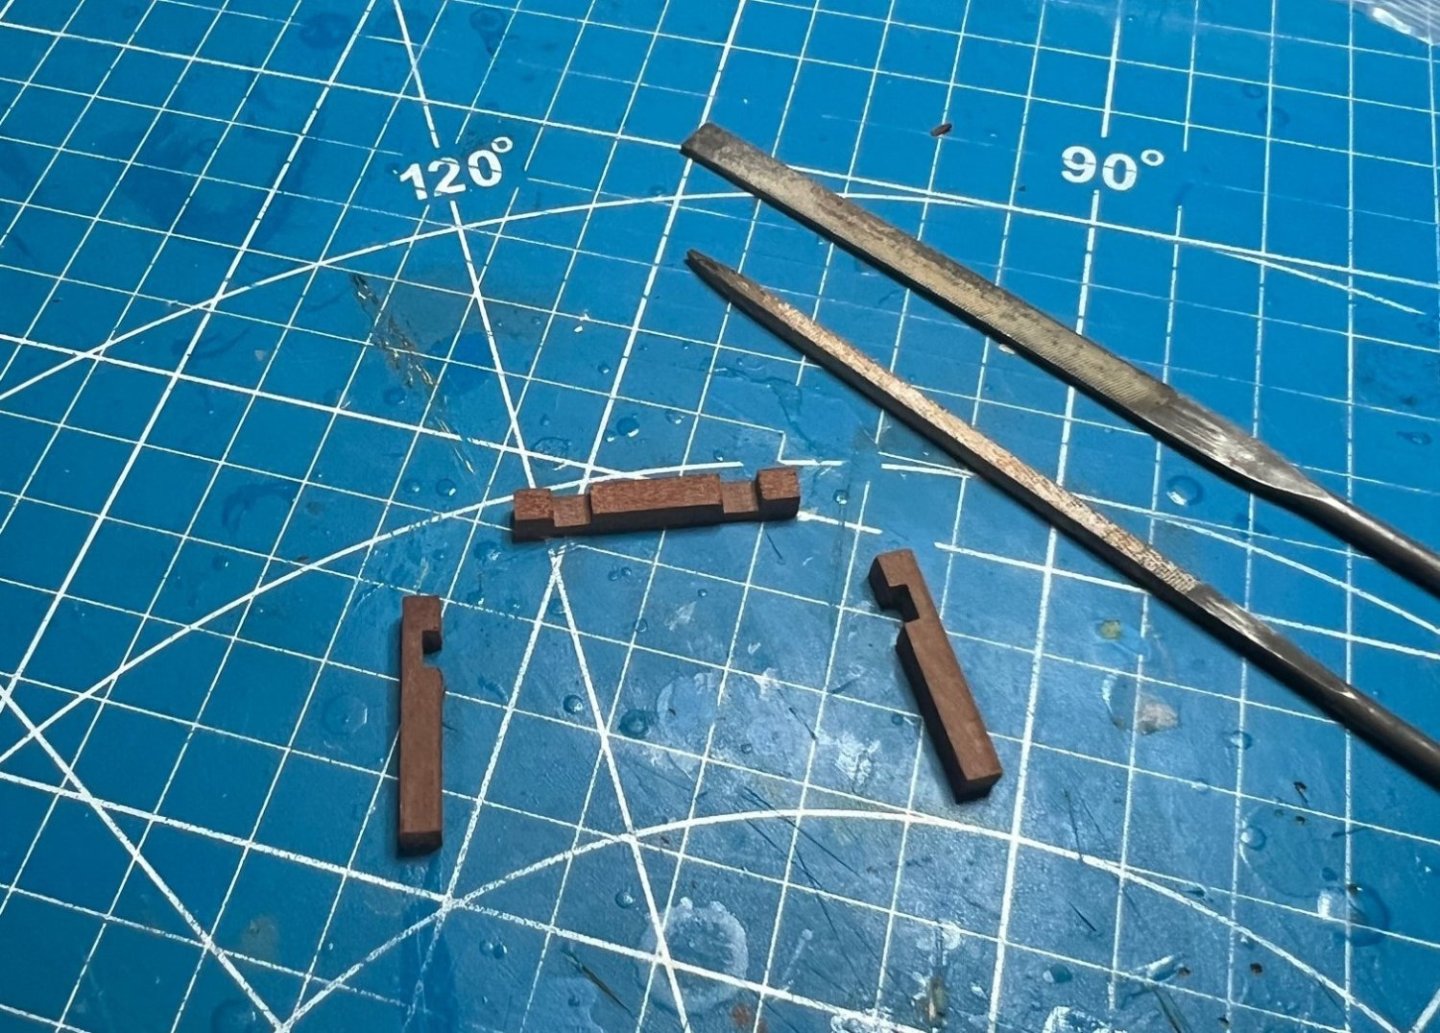
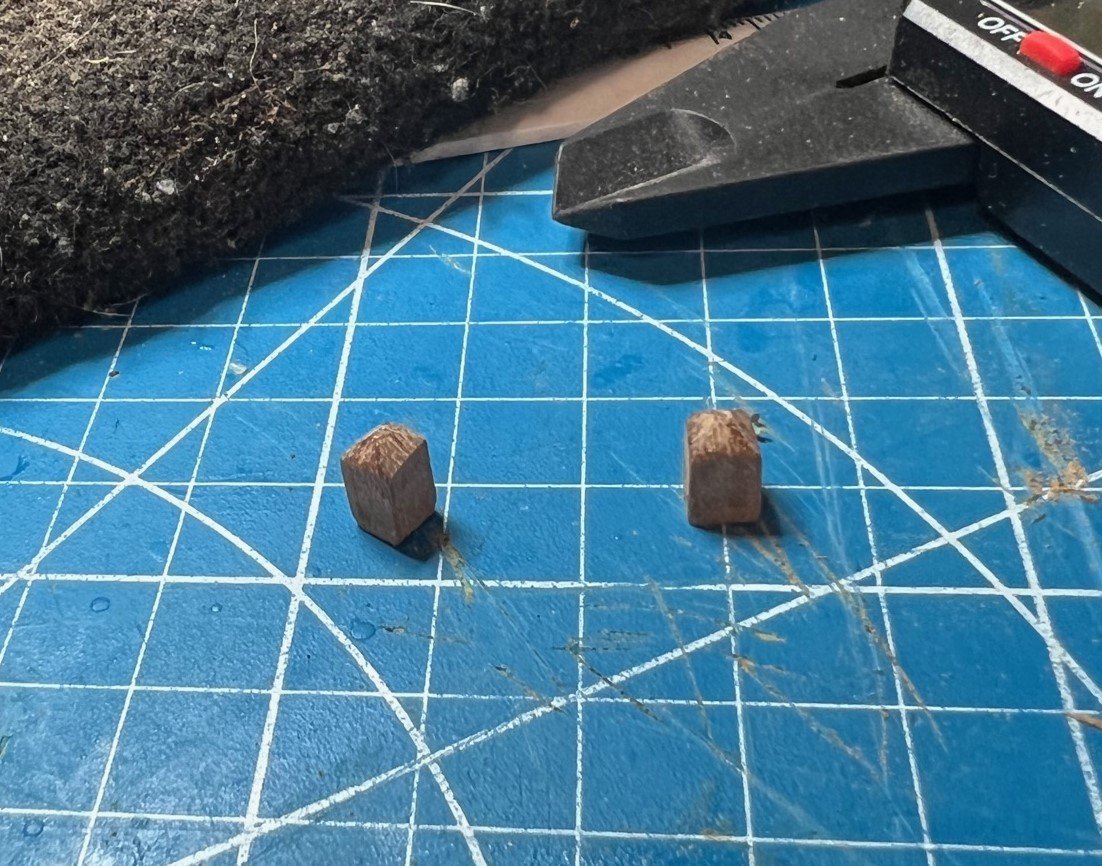
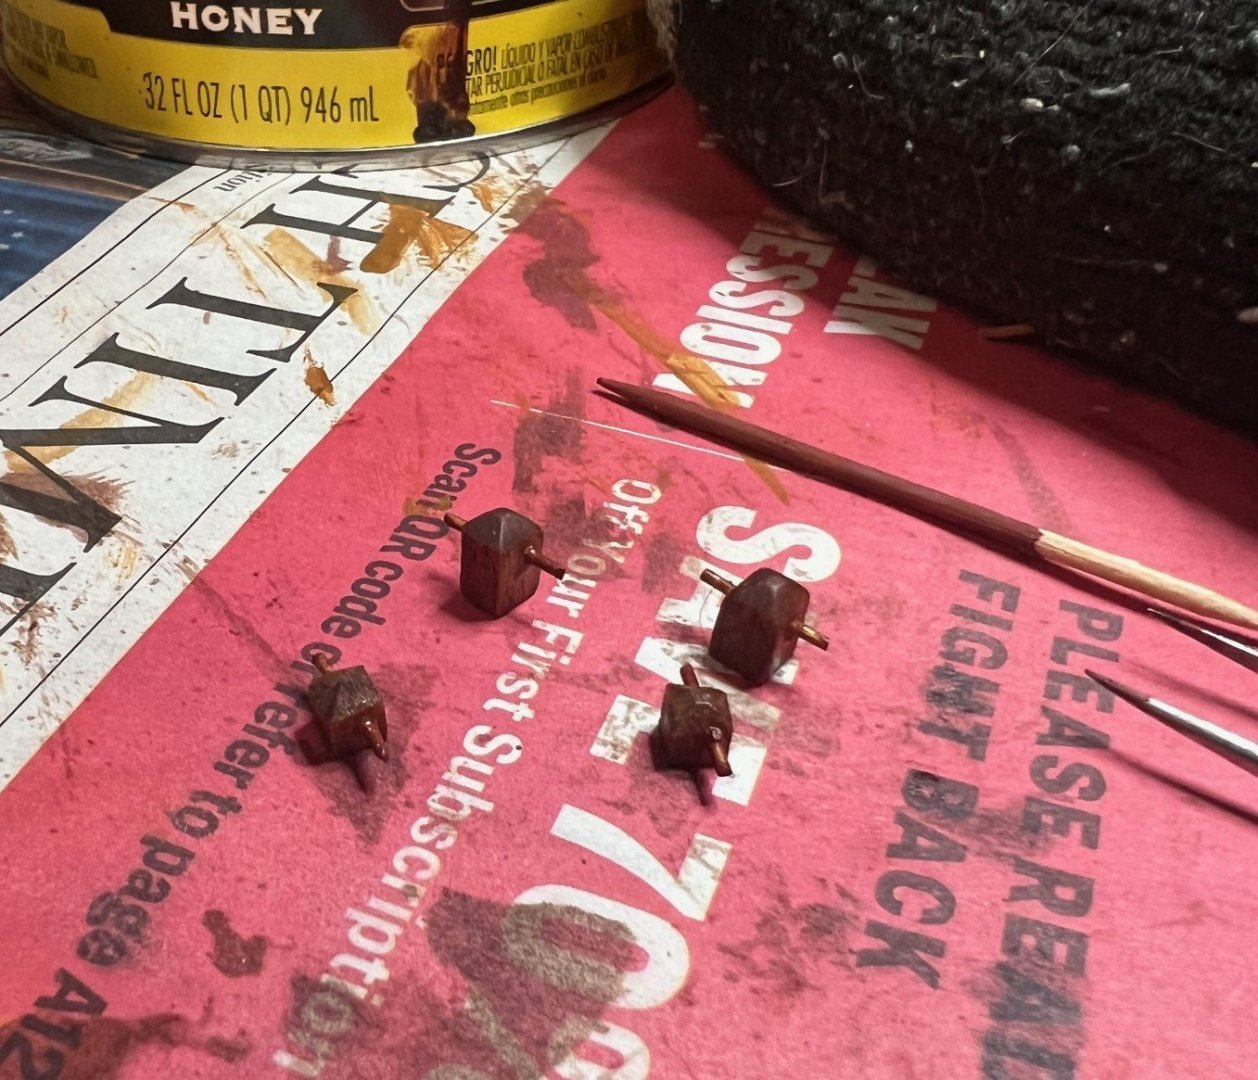
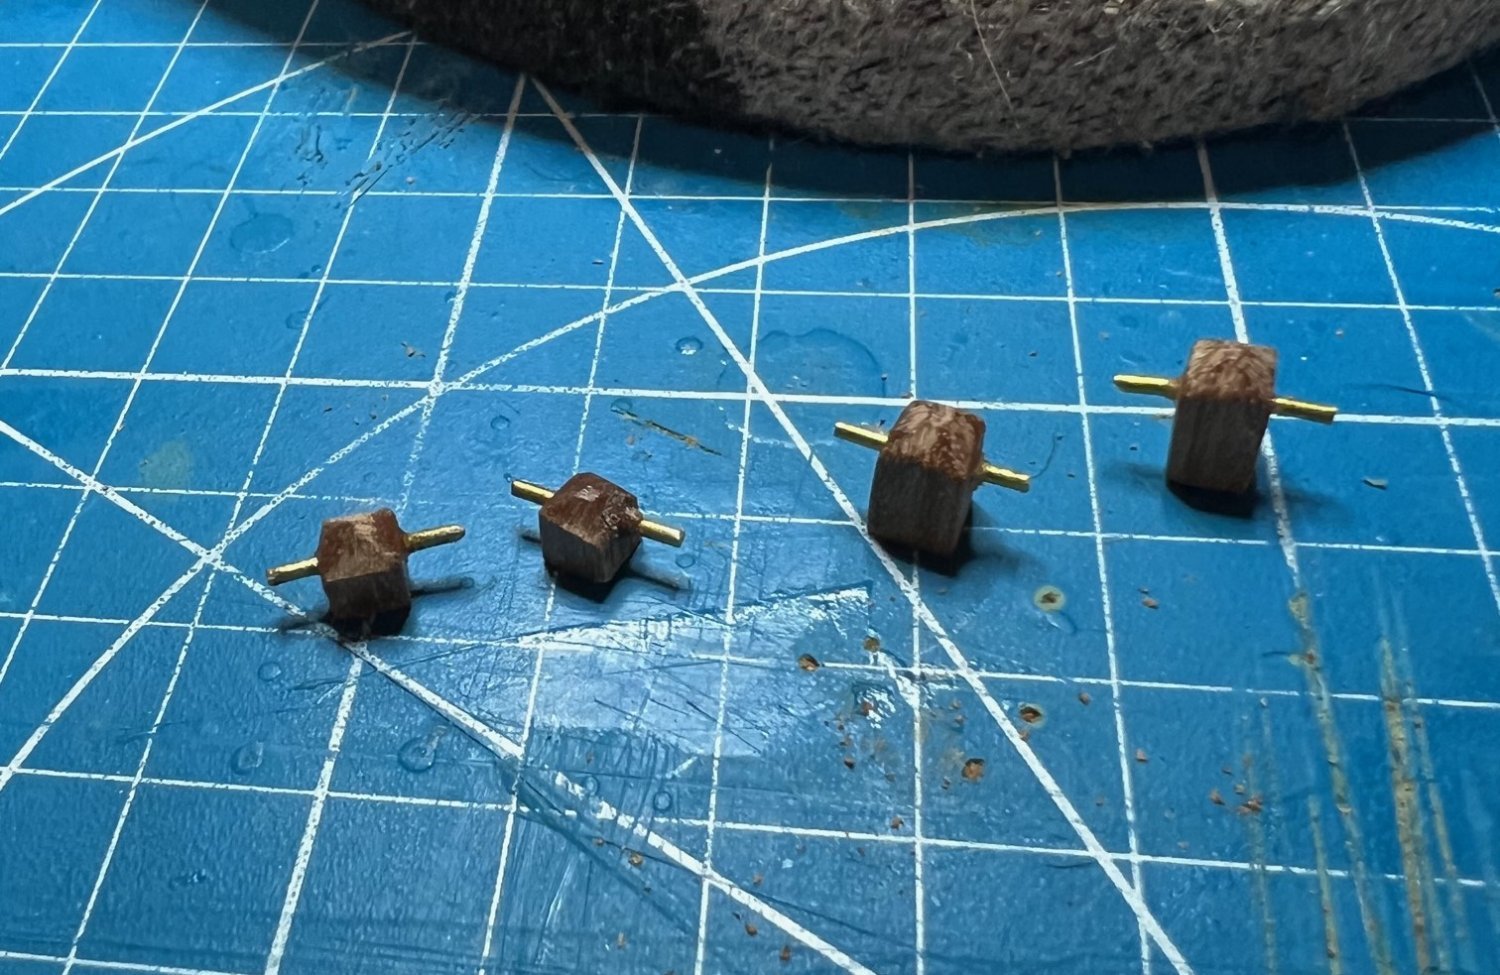
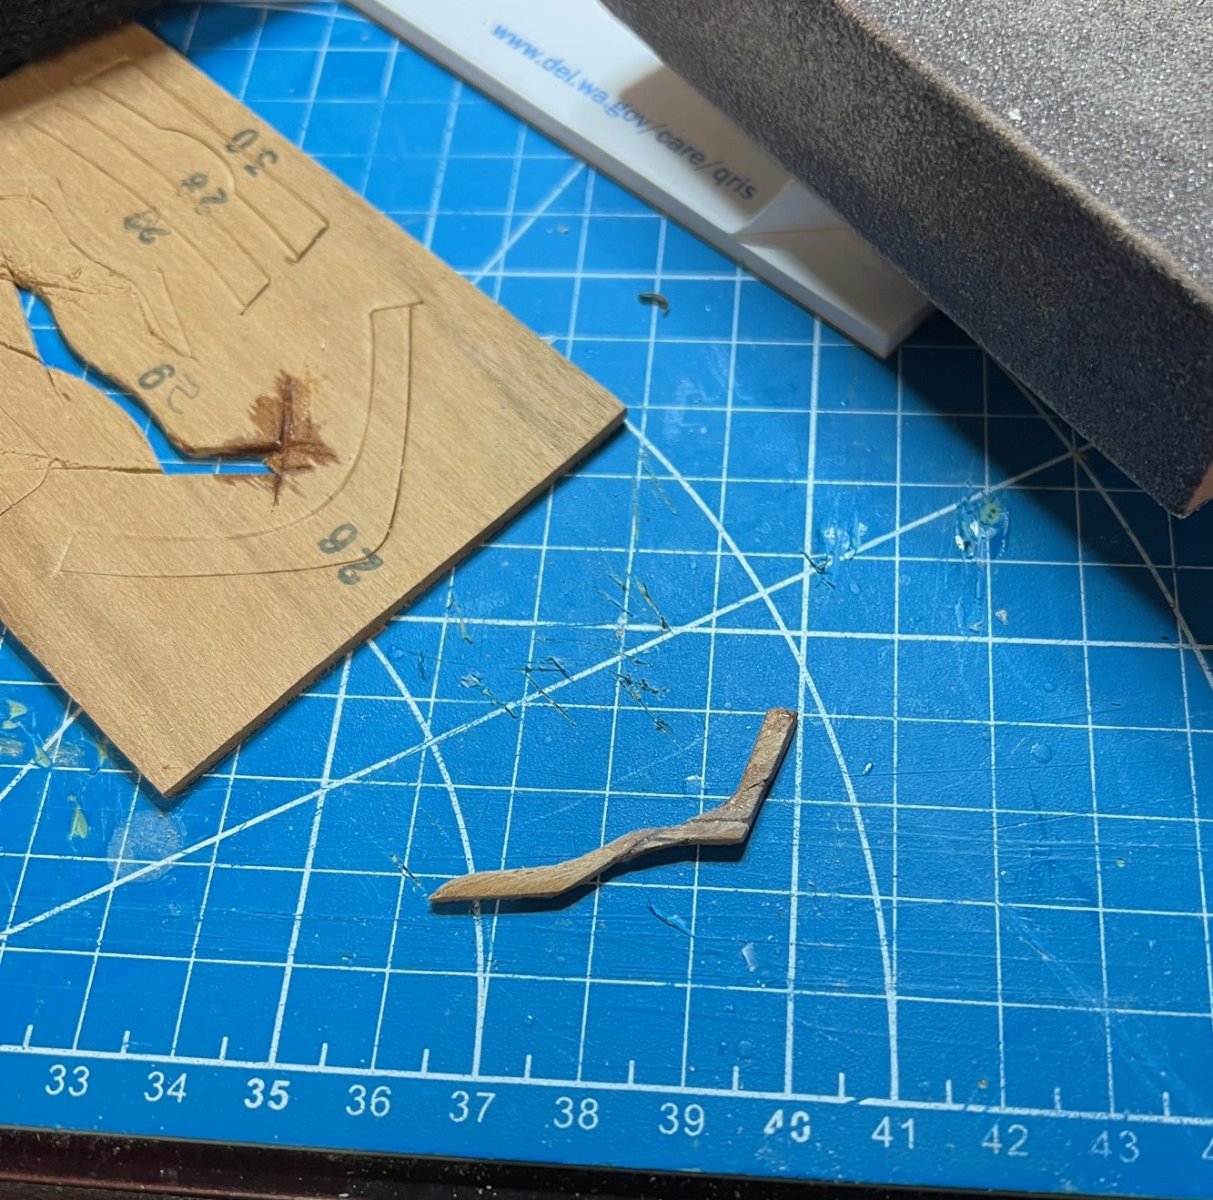
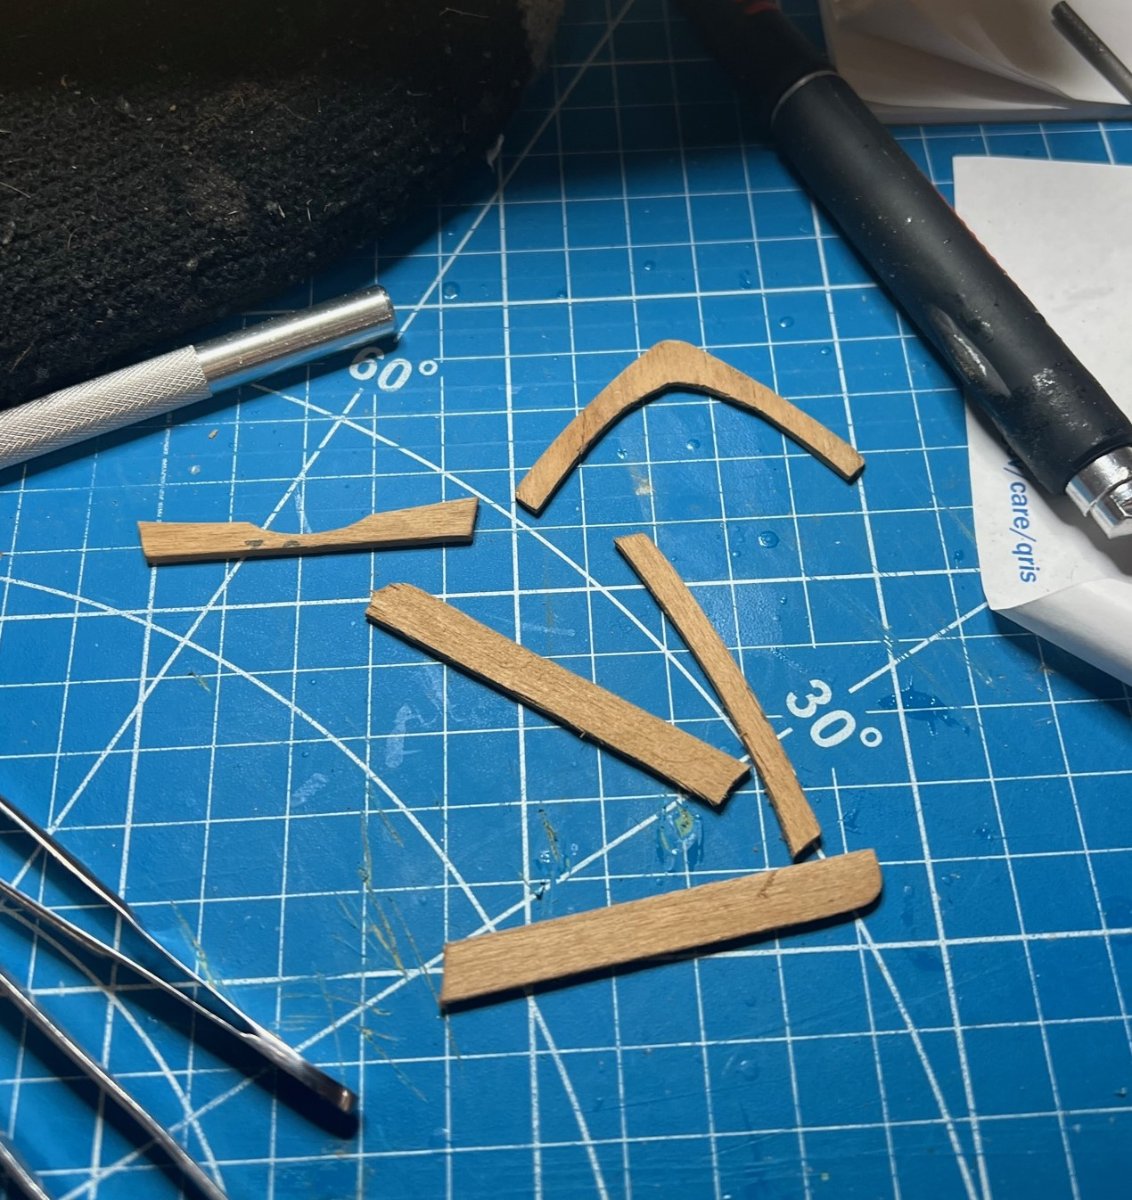
Preparing the mooring bits wasn’t particularly difficult. I just cut four pieces from the stock they provided for them and used my new tabletop disk sander to shape the top of them into a pyramid pattern. I ended up with two longer ones and two shorter ones due to trying to match what was on the plans, but I let it go. Next, just drilled holes through them and inserted the little brass wire pieces. Staining was next and I didn’t have brass black at the time nor even had heard of it so I decided to paint the brass to resemble rusty iron. Meh, it’s ok I guess. I could sand the paint off and properly burnish the stems but I was just experimenting with the enamel paints I still had from way back when.


Moving onto assembling the crappy cast anchors provided in the kit. I glued the stocks on and painted them gloss black, the only black I had at the time and set them aside not really being thrilled. A month later I revisited them to try to file some of the overcast off of them and it didn’t end well for one of them. Stay tuned for that fun to come later.
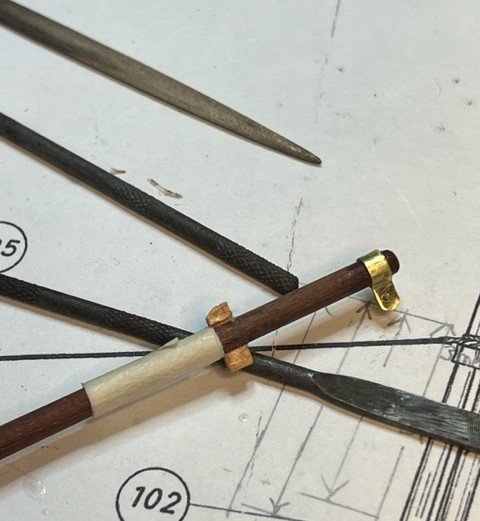
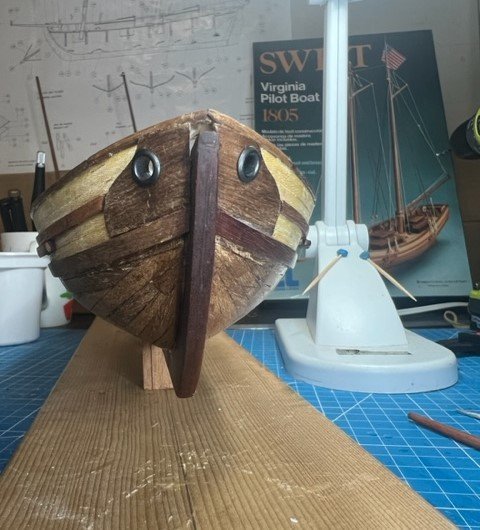
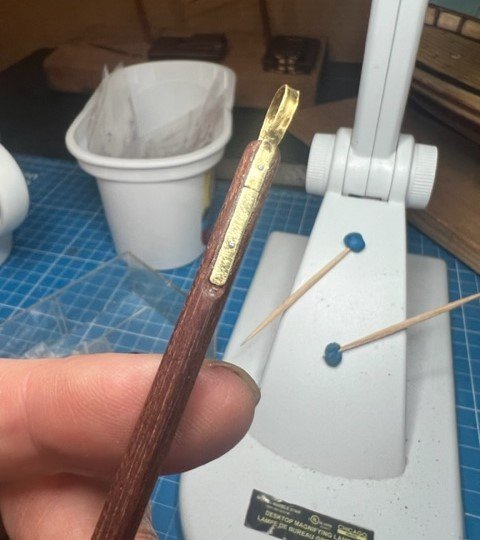
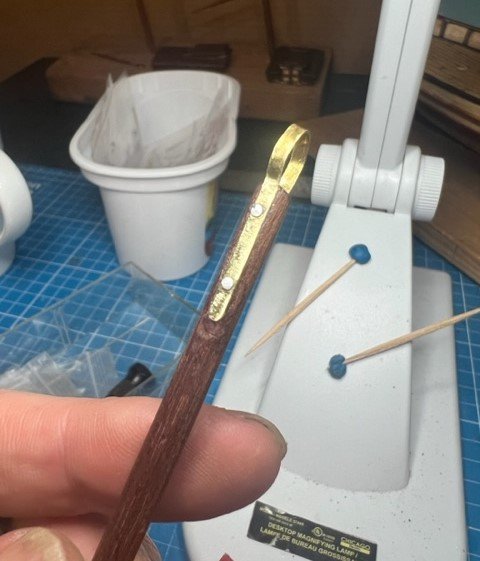
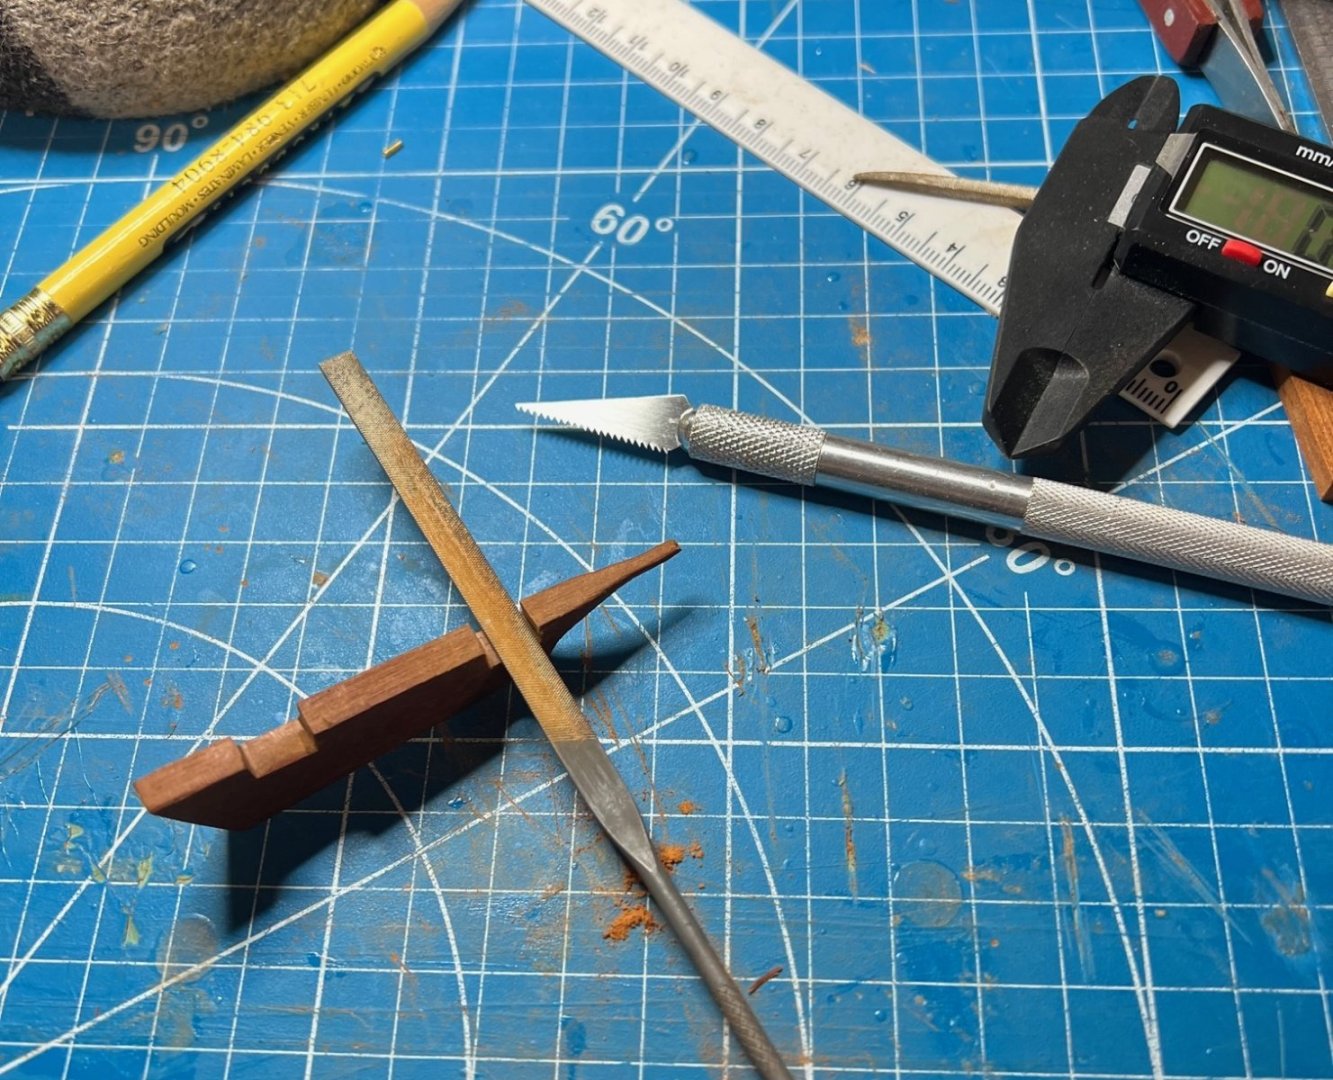
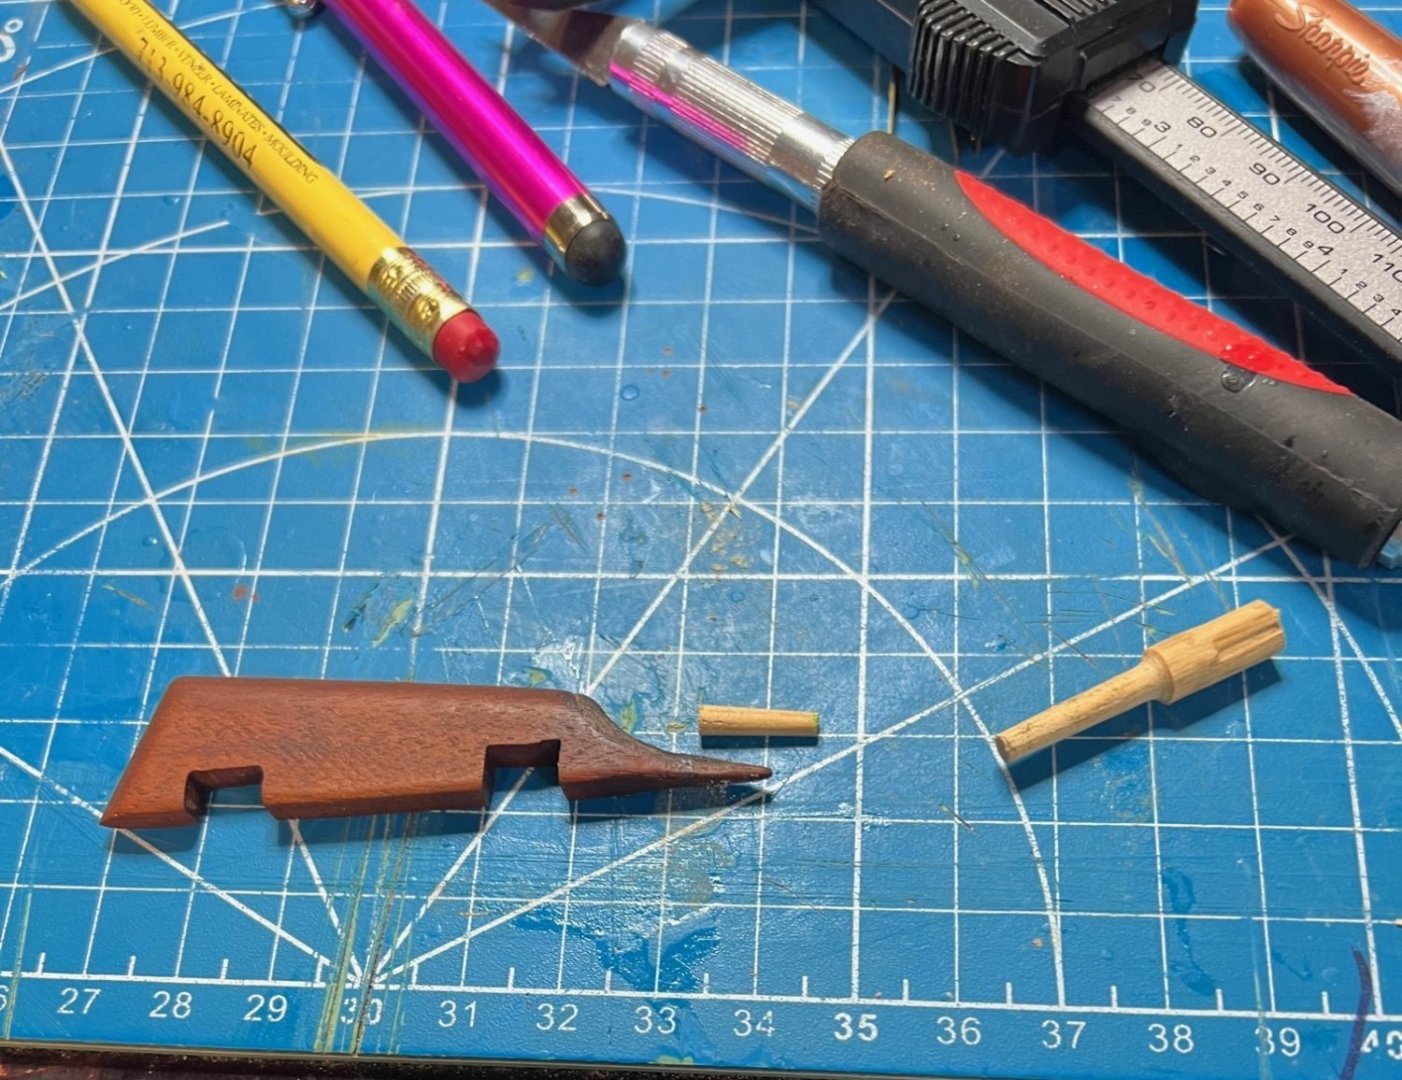
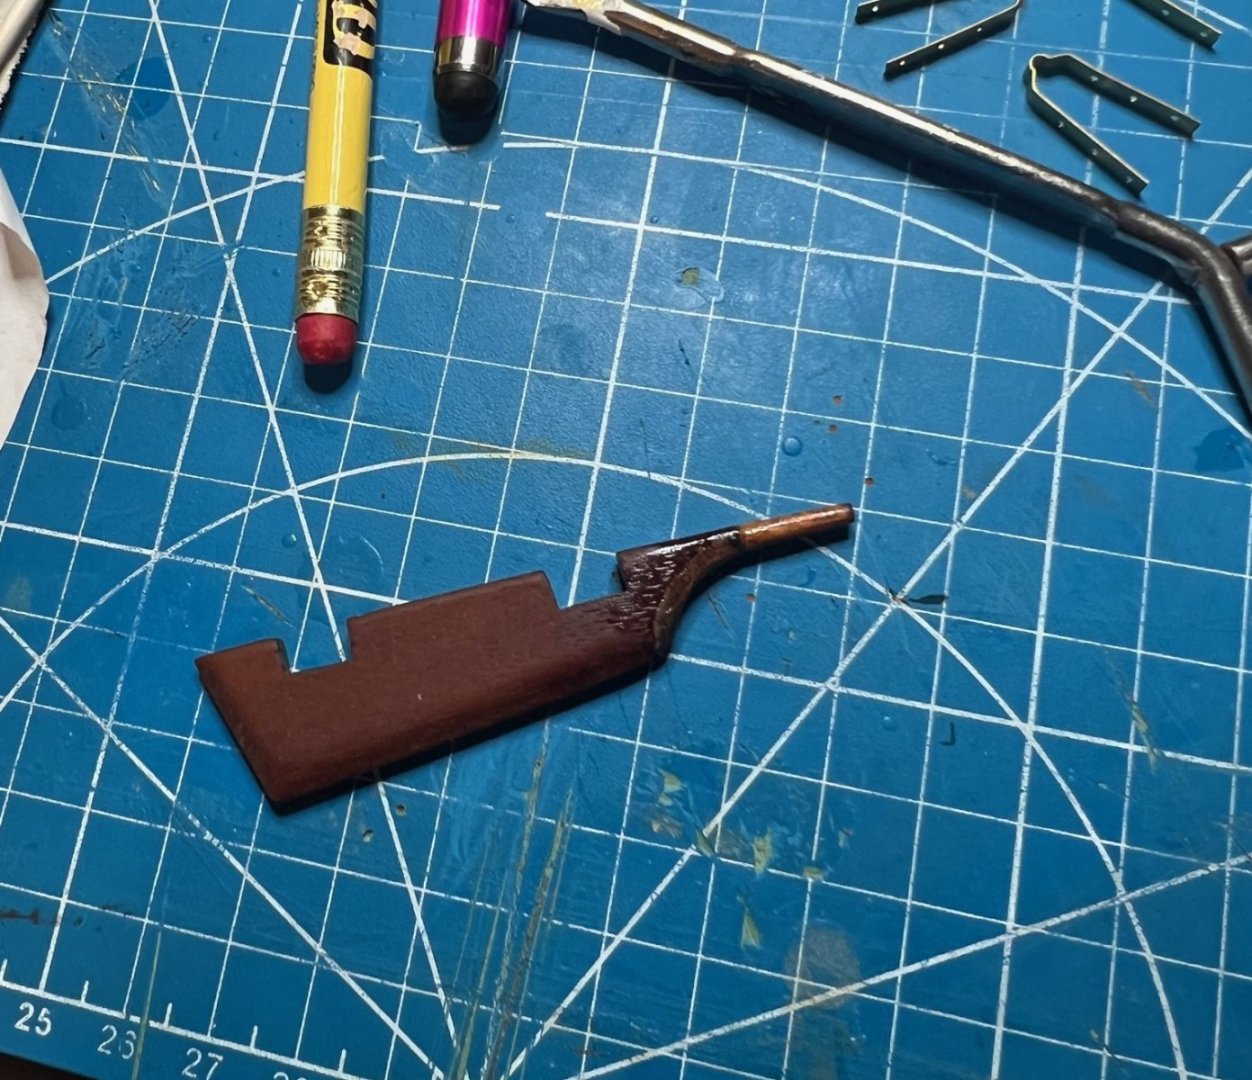
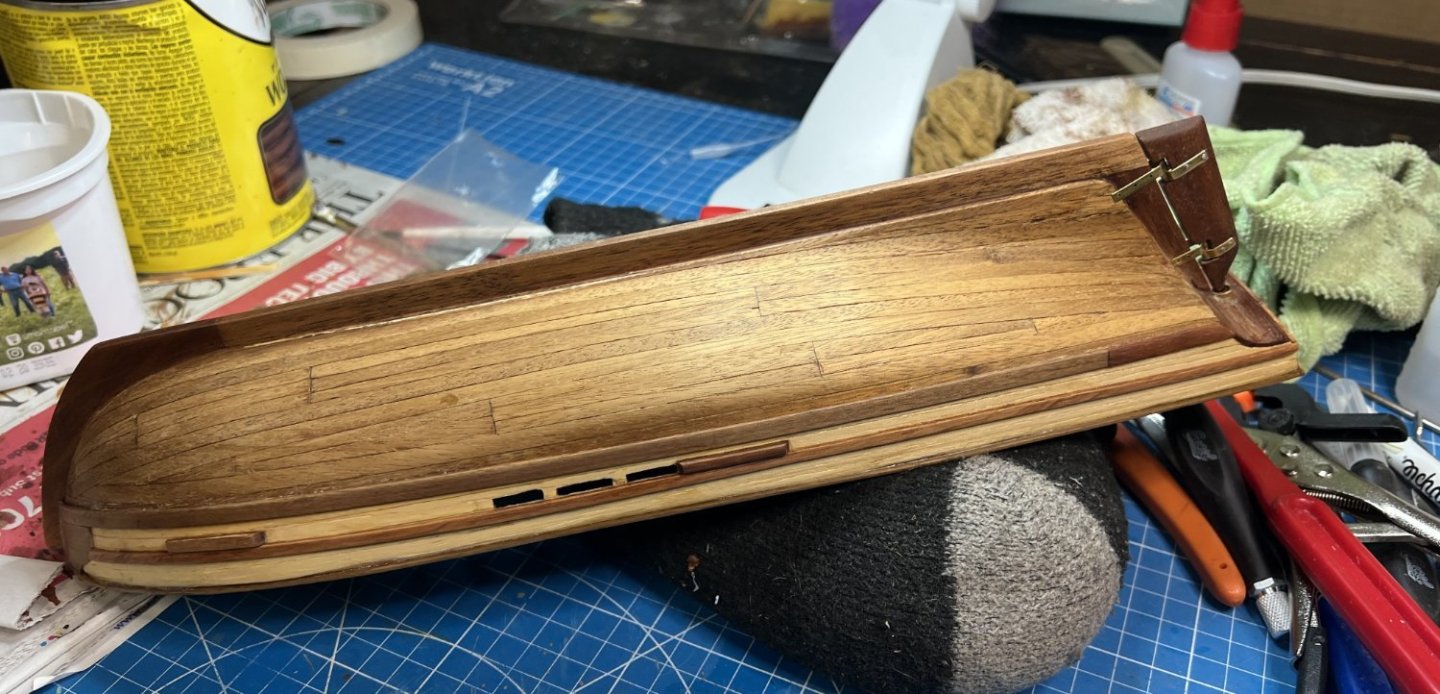
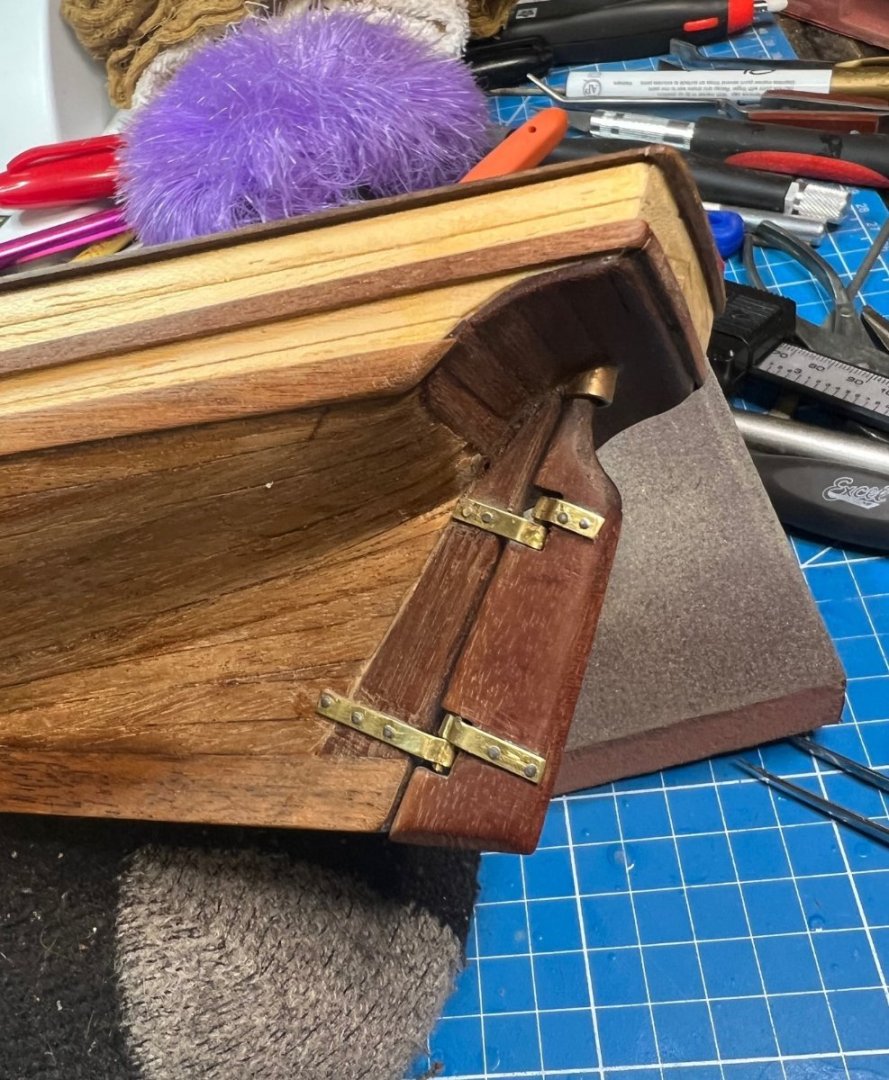
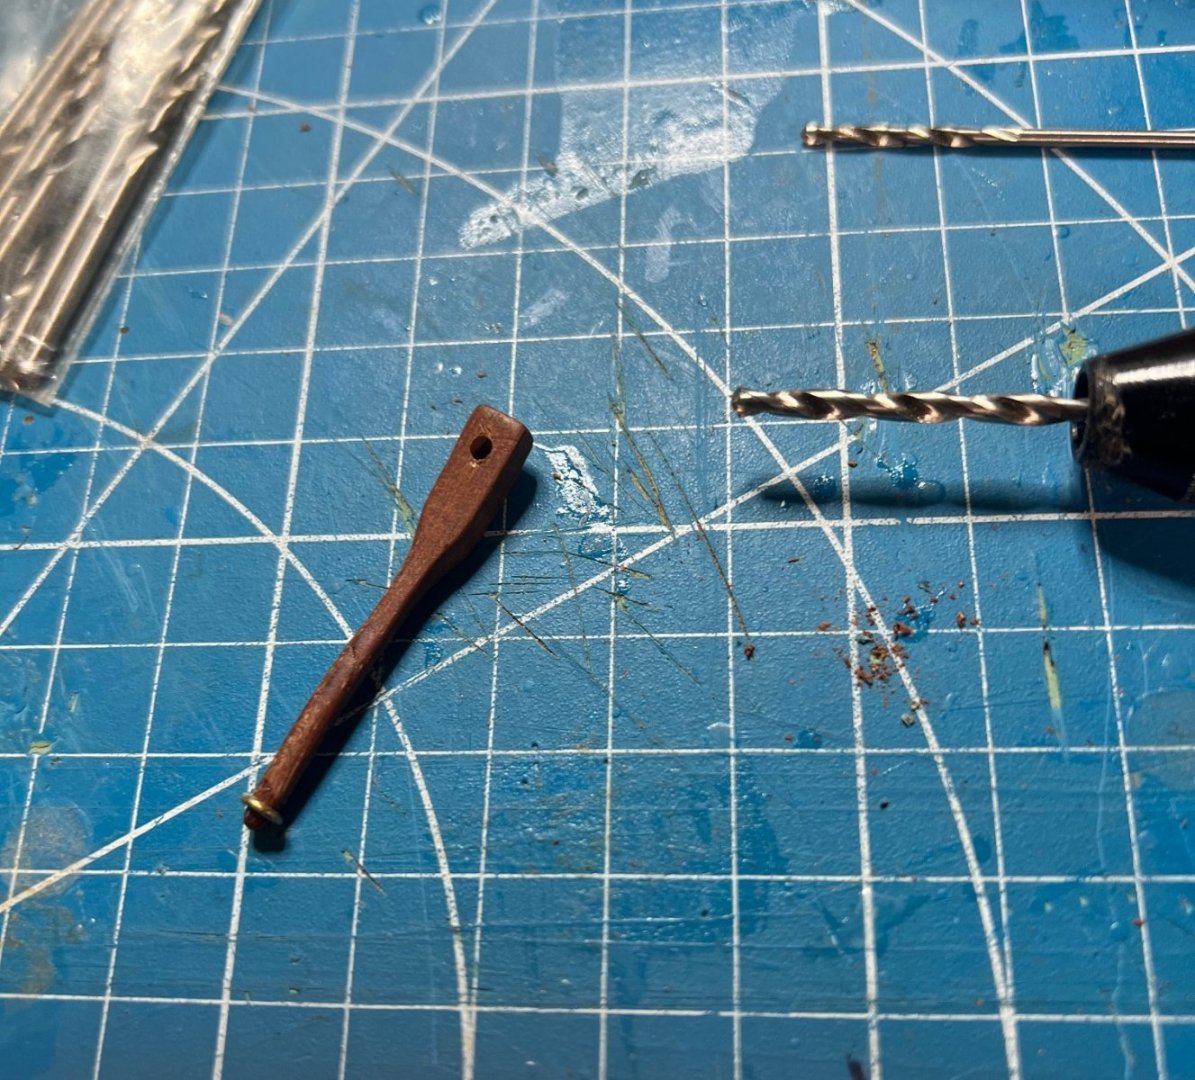
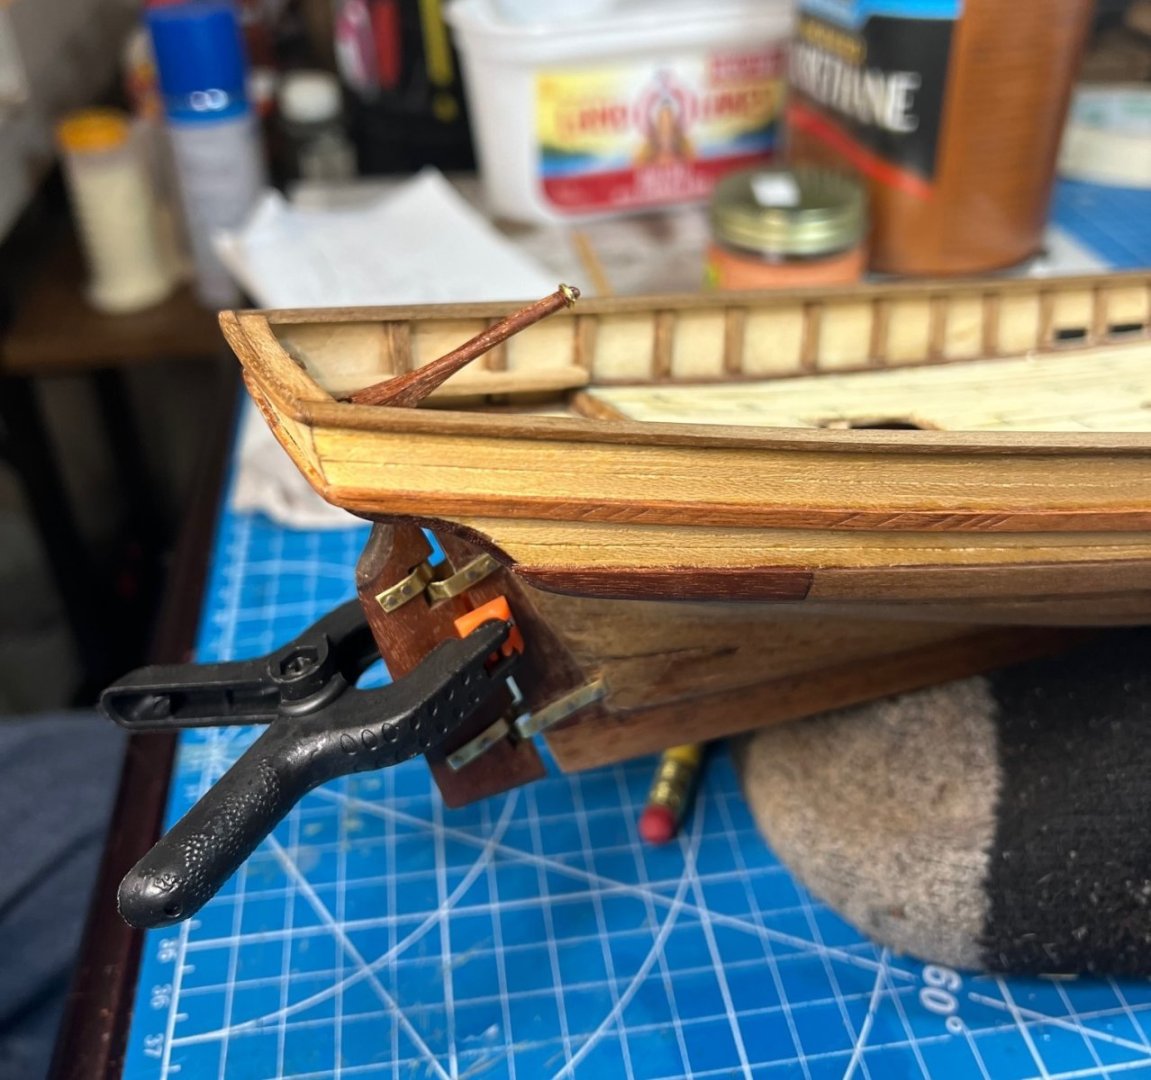
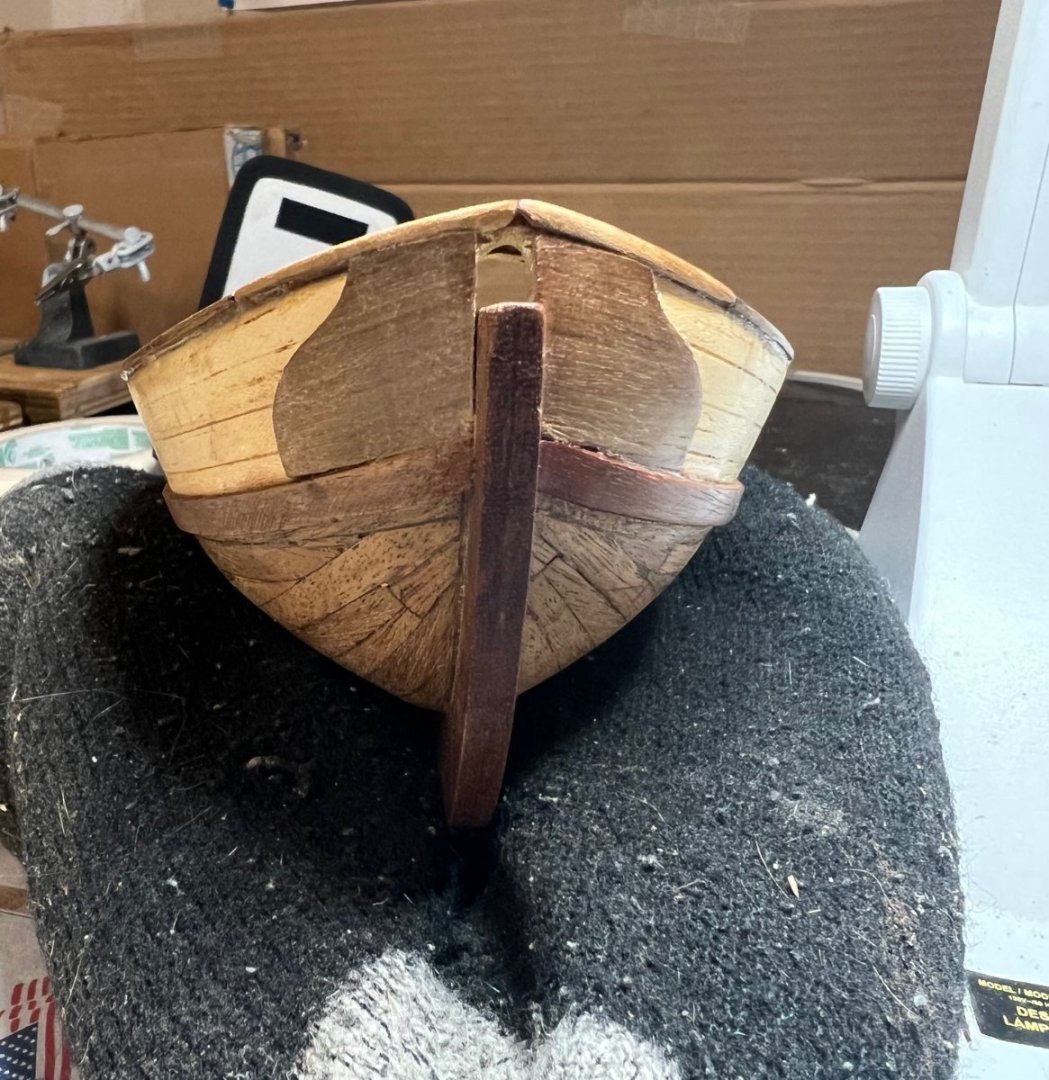
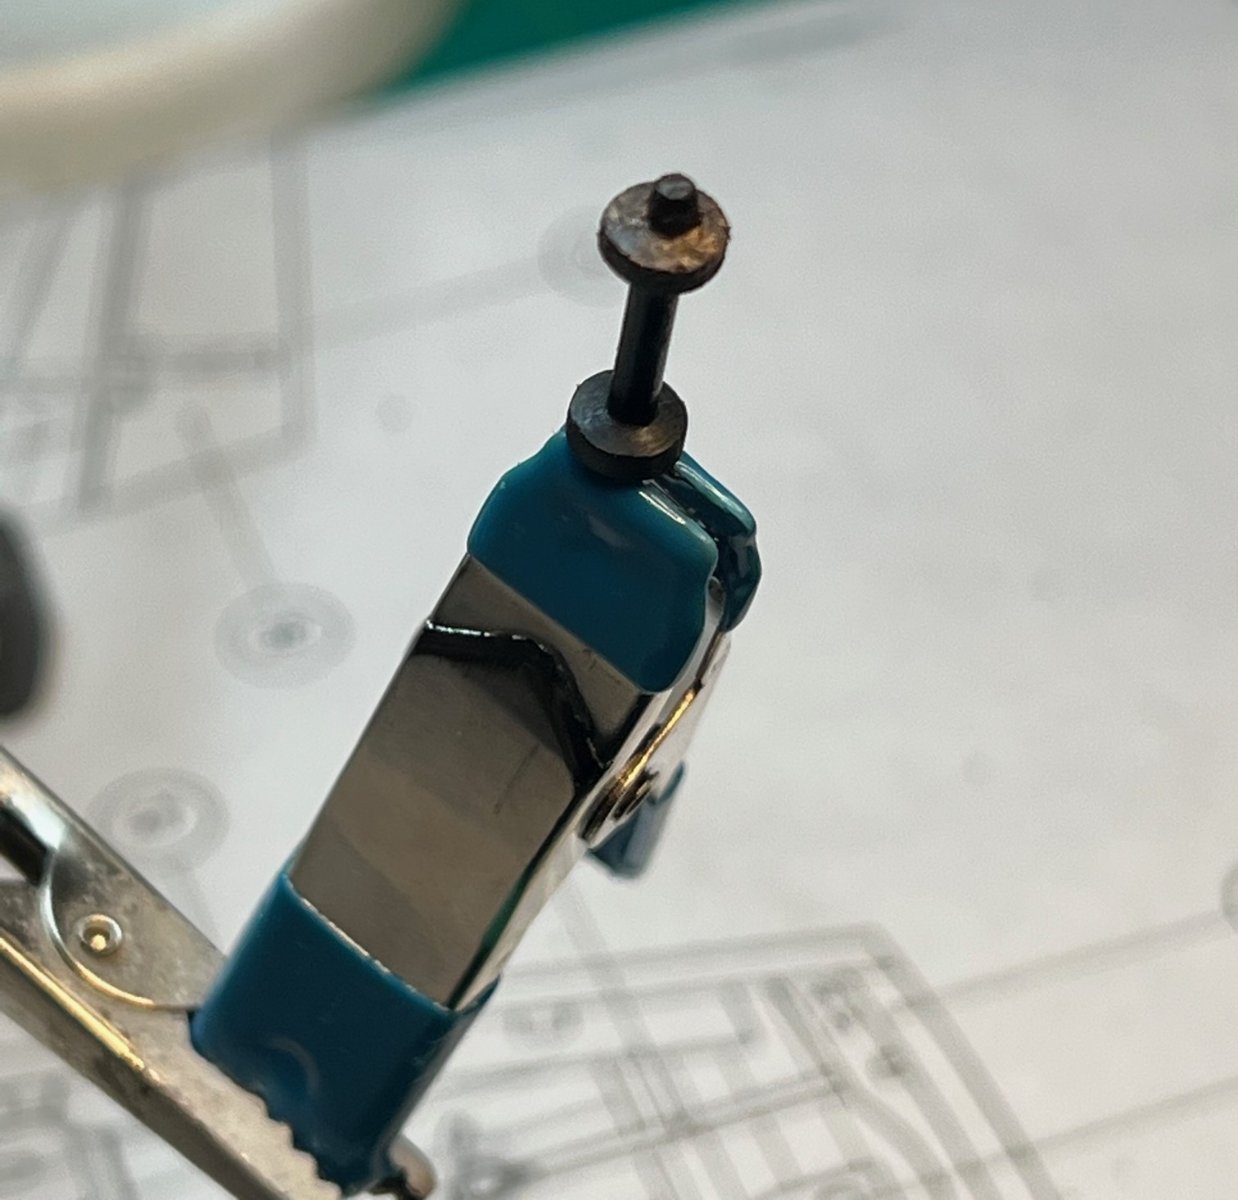
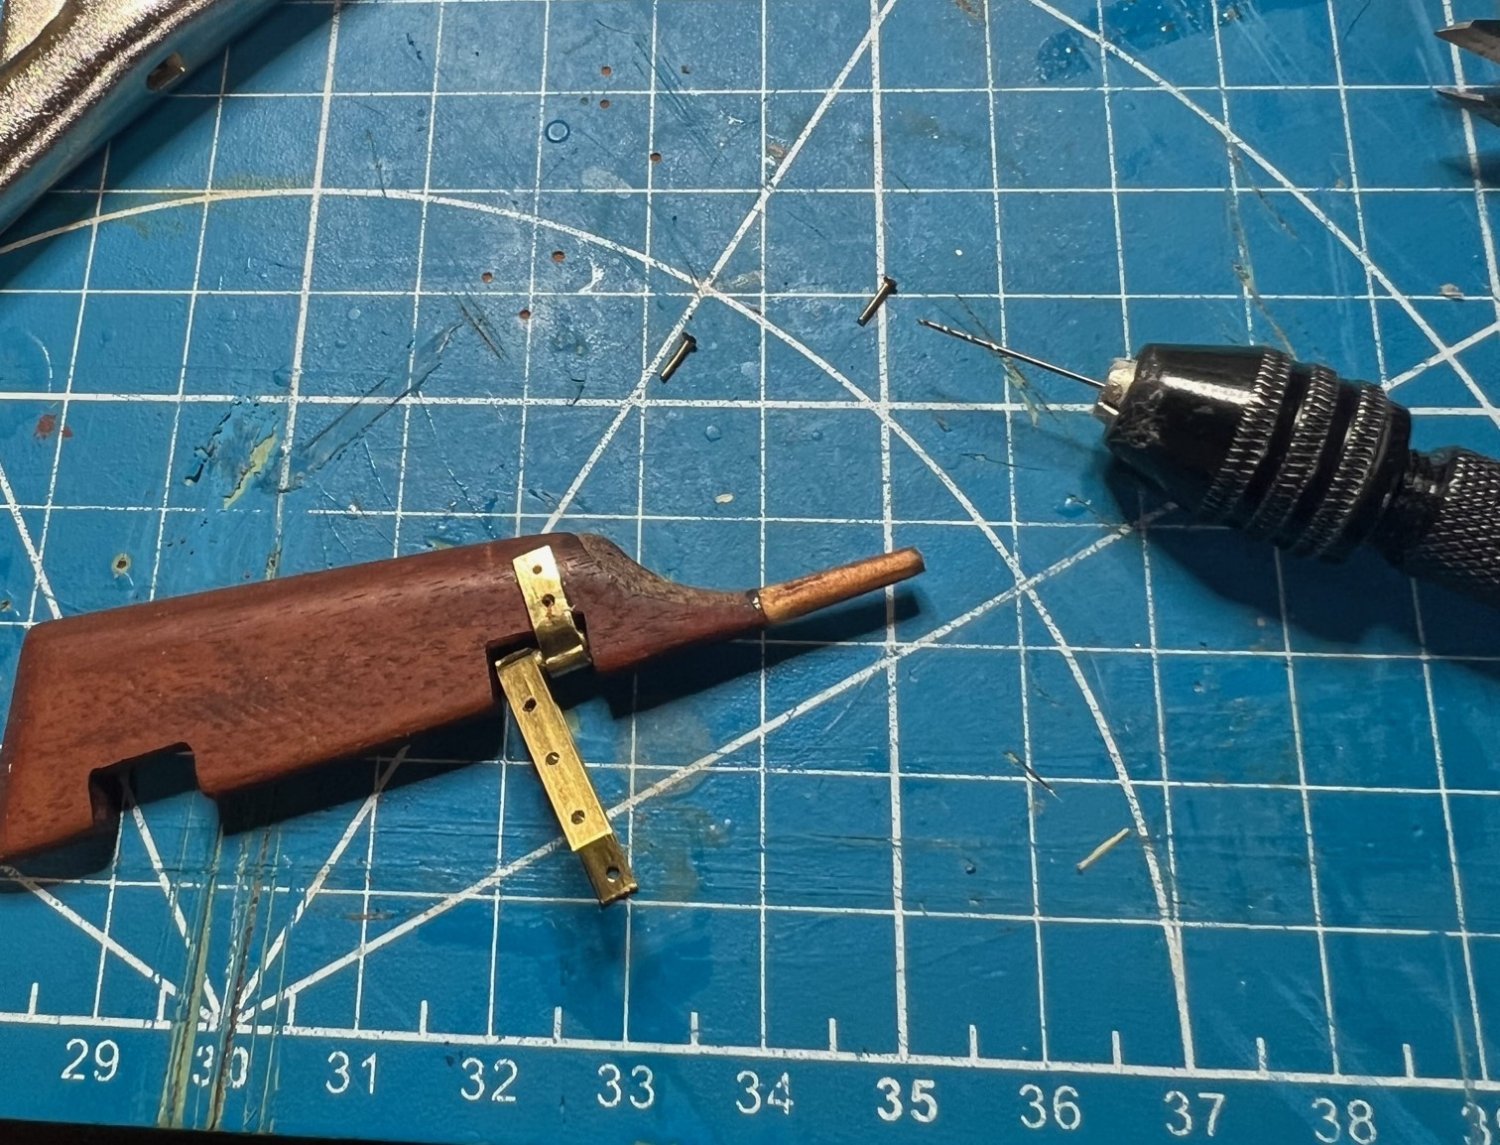
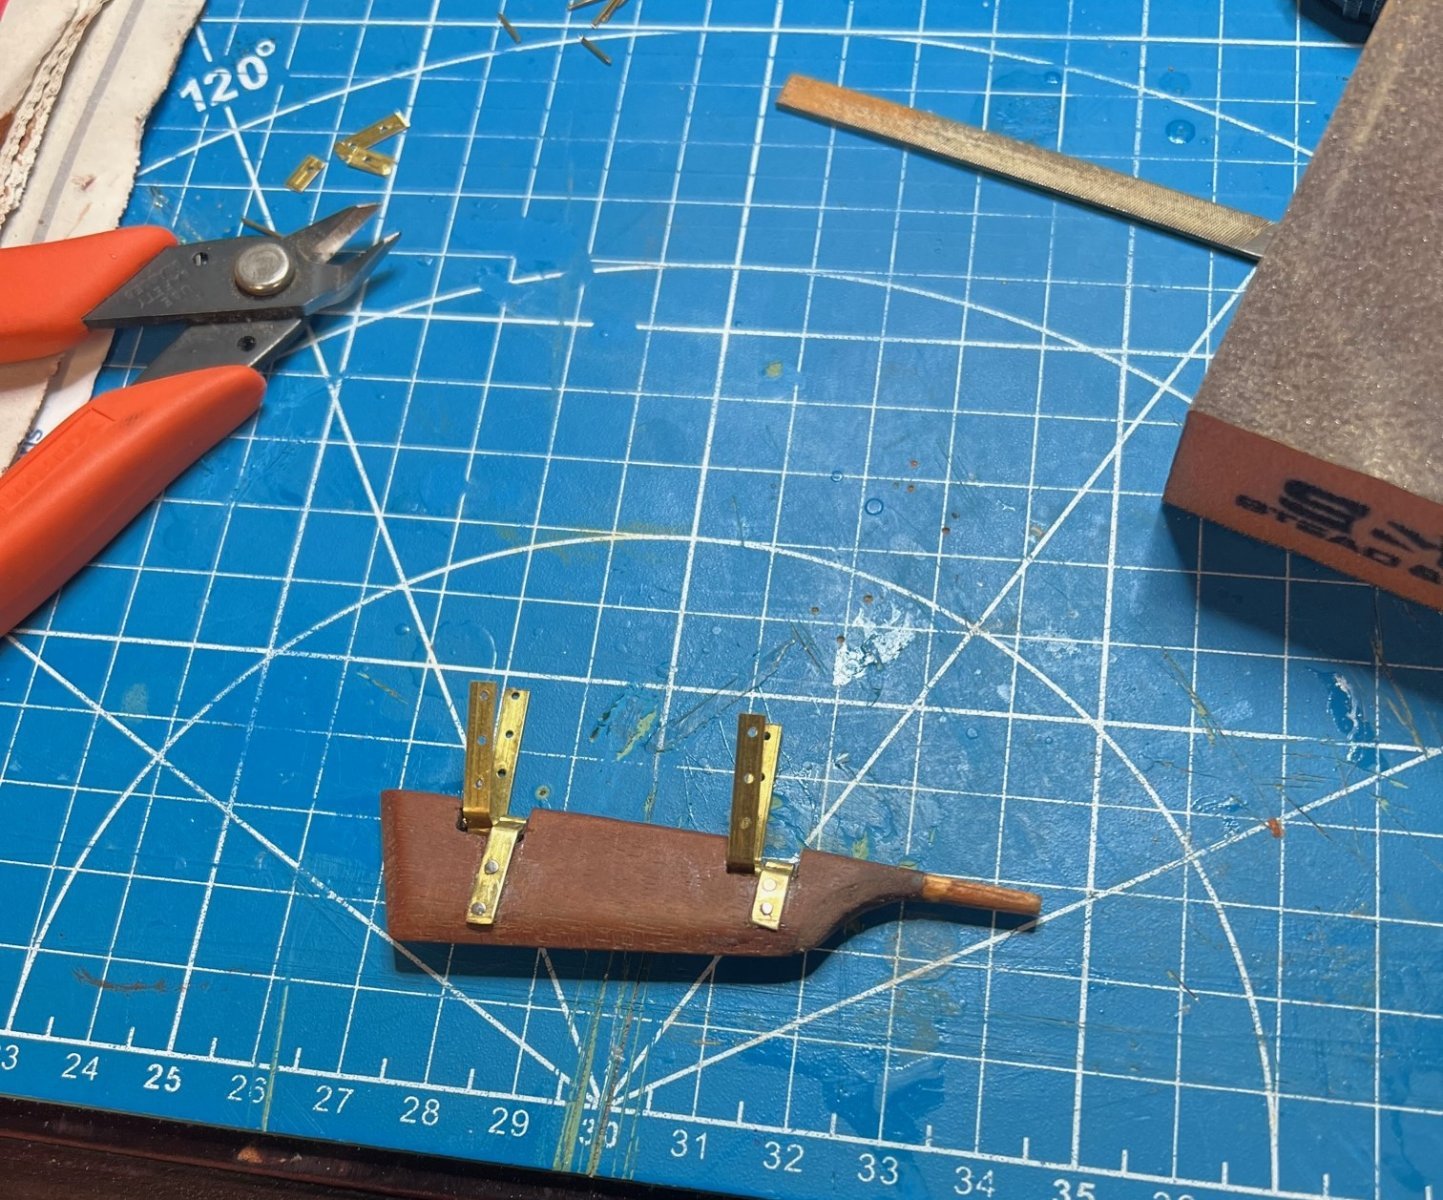
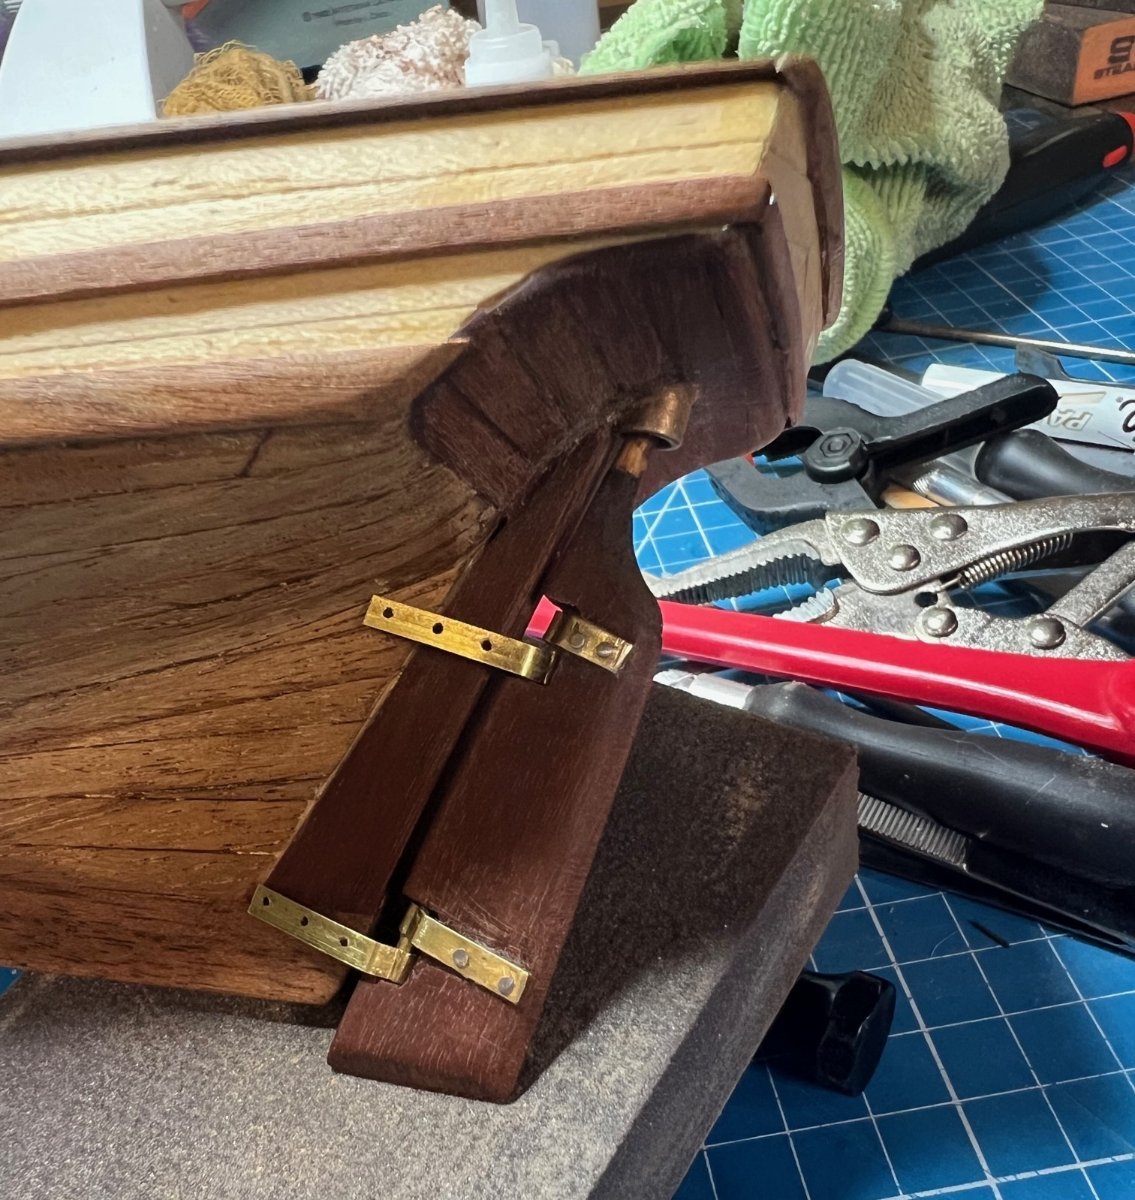
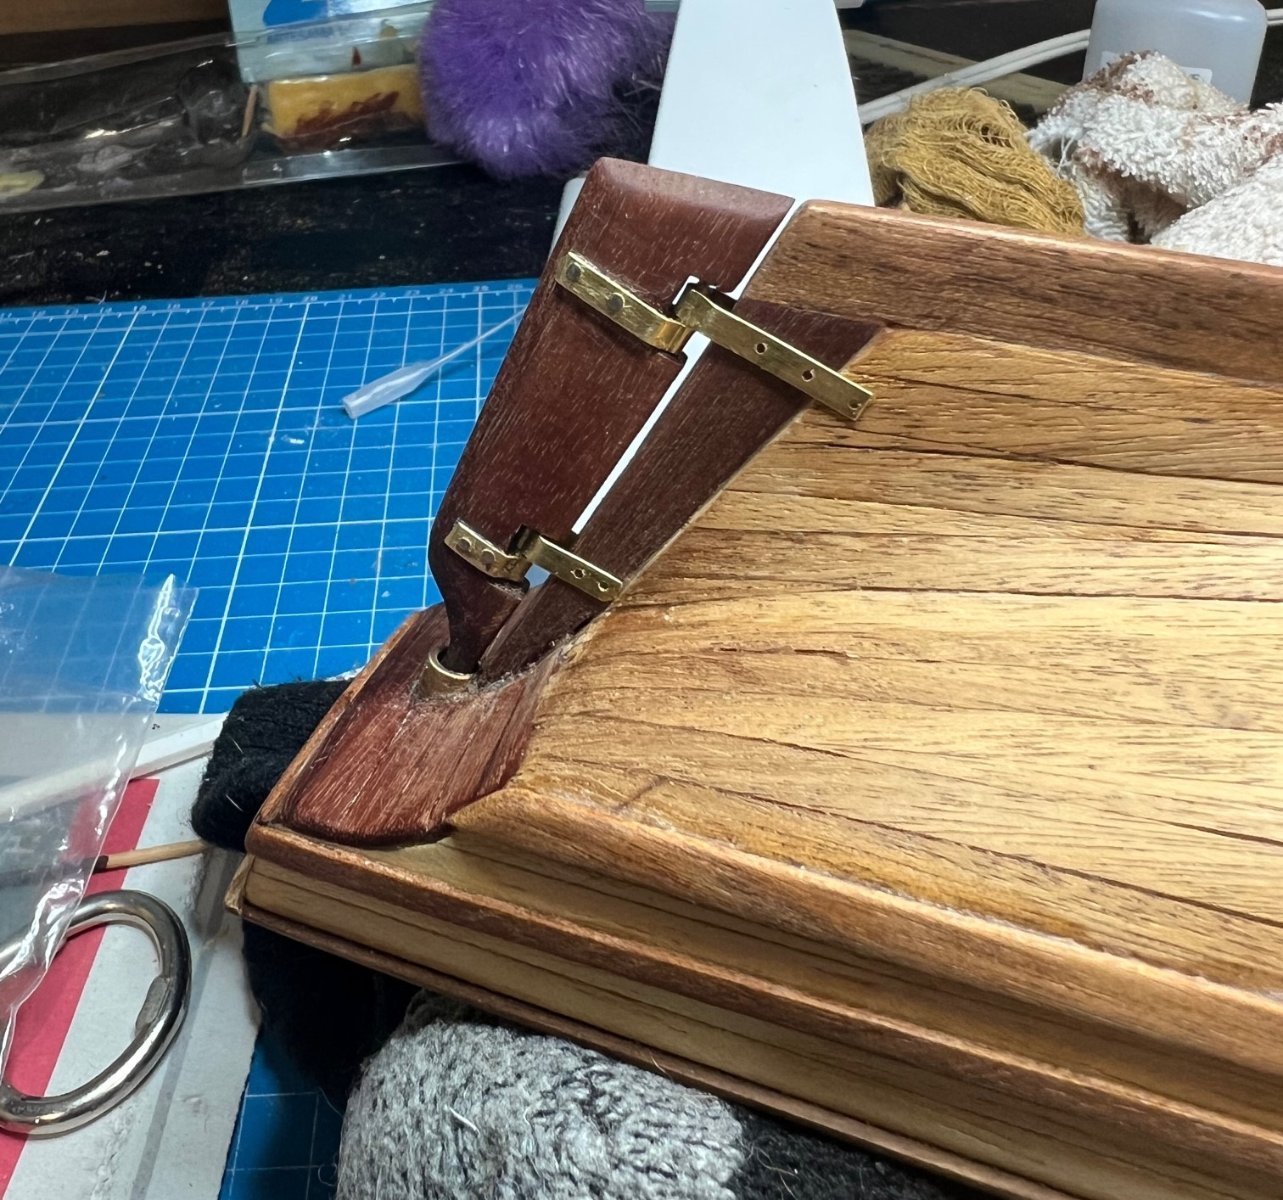
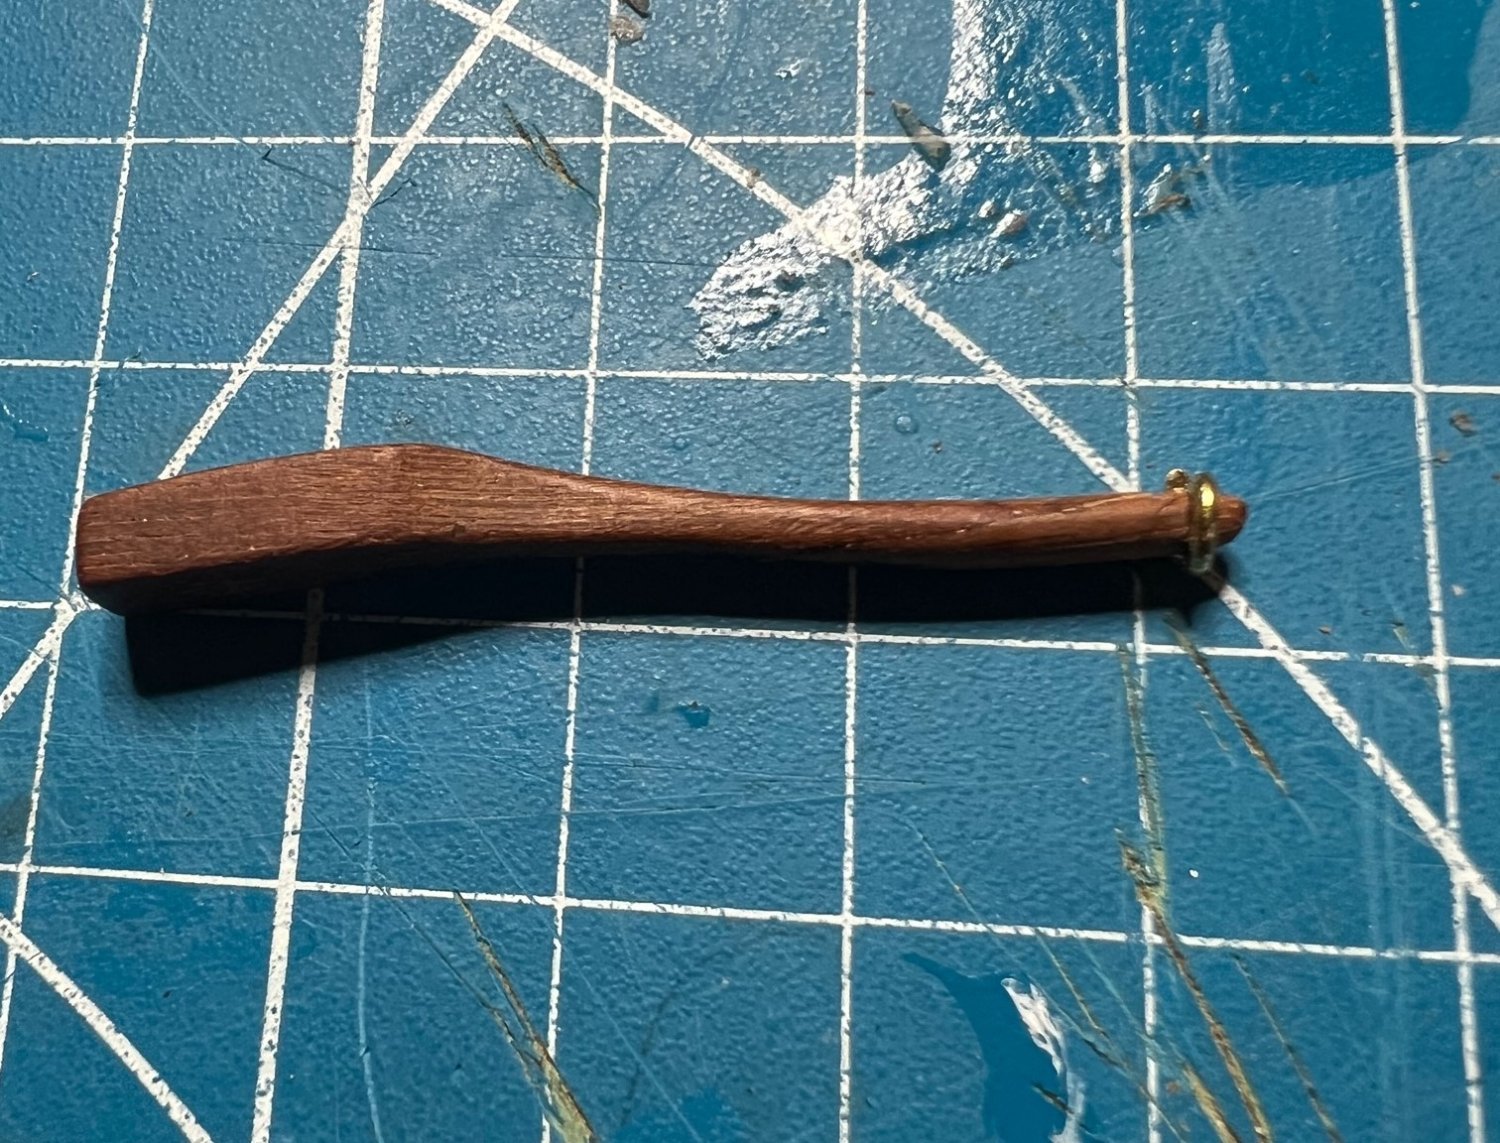
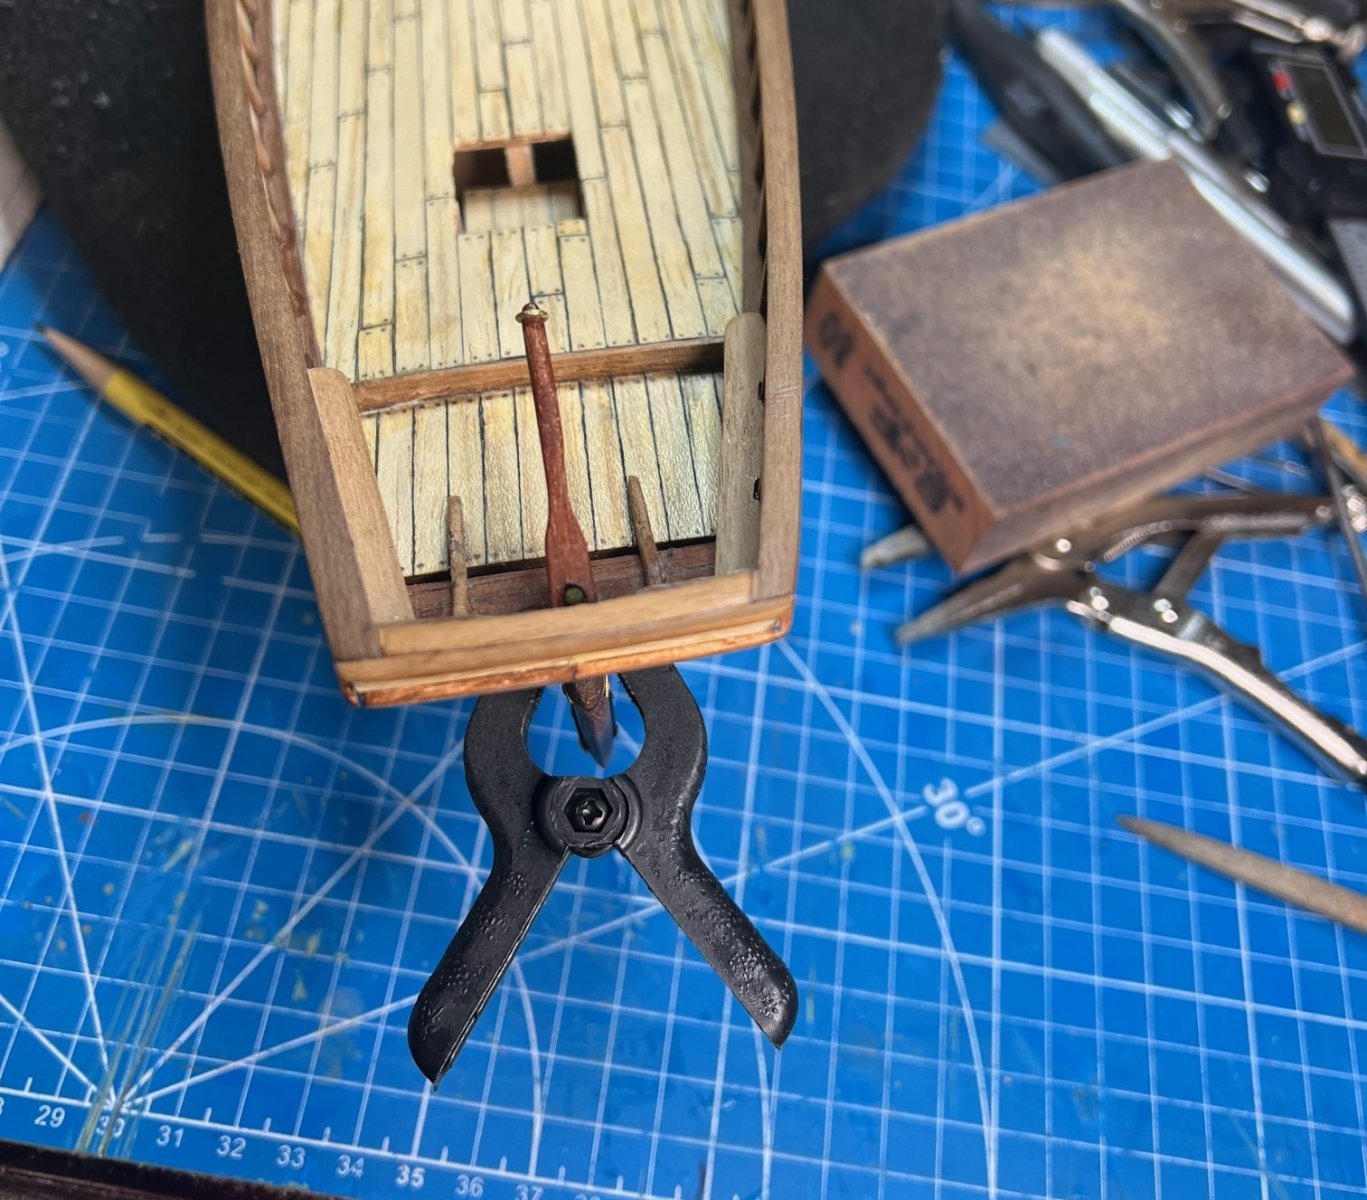
Onto the damn rudder, lol. I call it that because it frustrated me so getting it shaped correctly going only from the plans and there was no rear view on the plans, only top and side elevations. I shaped and I shaped and I shaped but getting the top to fit in that brass tube they had me glue into the hole I cut in the stern for the rudder was ridiculous. I had taken too much off the top and had to splice a custom made piece to it to repair the damage I had done. The piece I spliced on was not the same wood or color so I tried to stain it to match unsuccessfully. So I have a two-tone rudder but most goes up to the tiller so it partially hidden. Then came fiddling with bending the little brass rudder hinges and the little pins that they hinge on. This was before I knew to anneal the brass before bending but I got away with it this time, this time. My rudder would move a little side to side but something in my first hinges ever was catching so it moves but only about 15 degrees either way. Either way after fighting with getting that on, I shaped the tiller, glued it on and put the little brass ring on the end as instructed to do. All in all, given the chance to start over, I would but I was happy with the look of it after filing the little nail heads down a little bit. I would later use the brass black on all the brass to take the toy boat shine off of them.


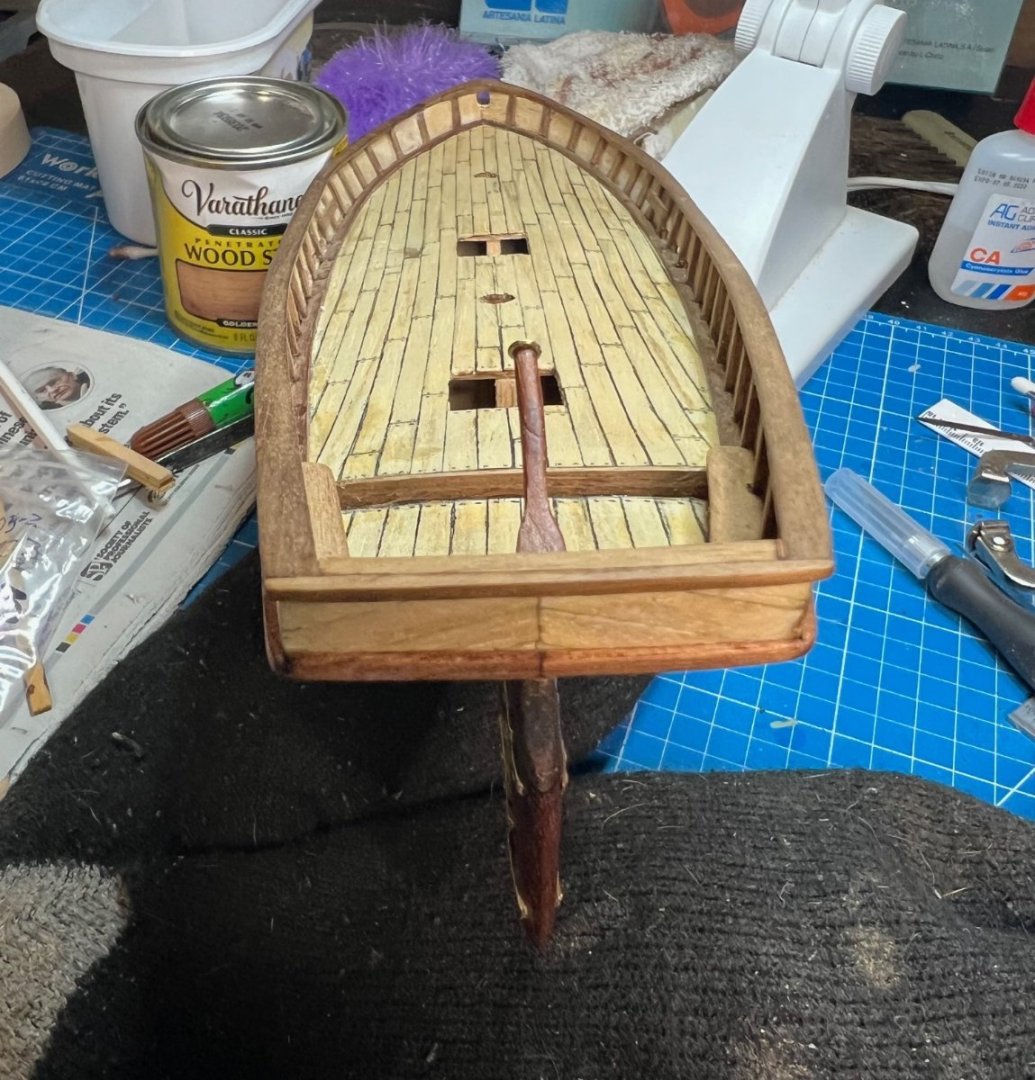
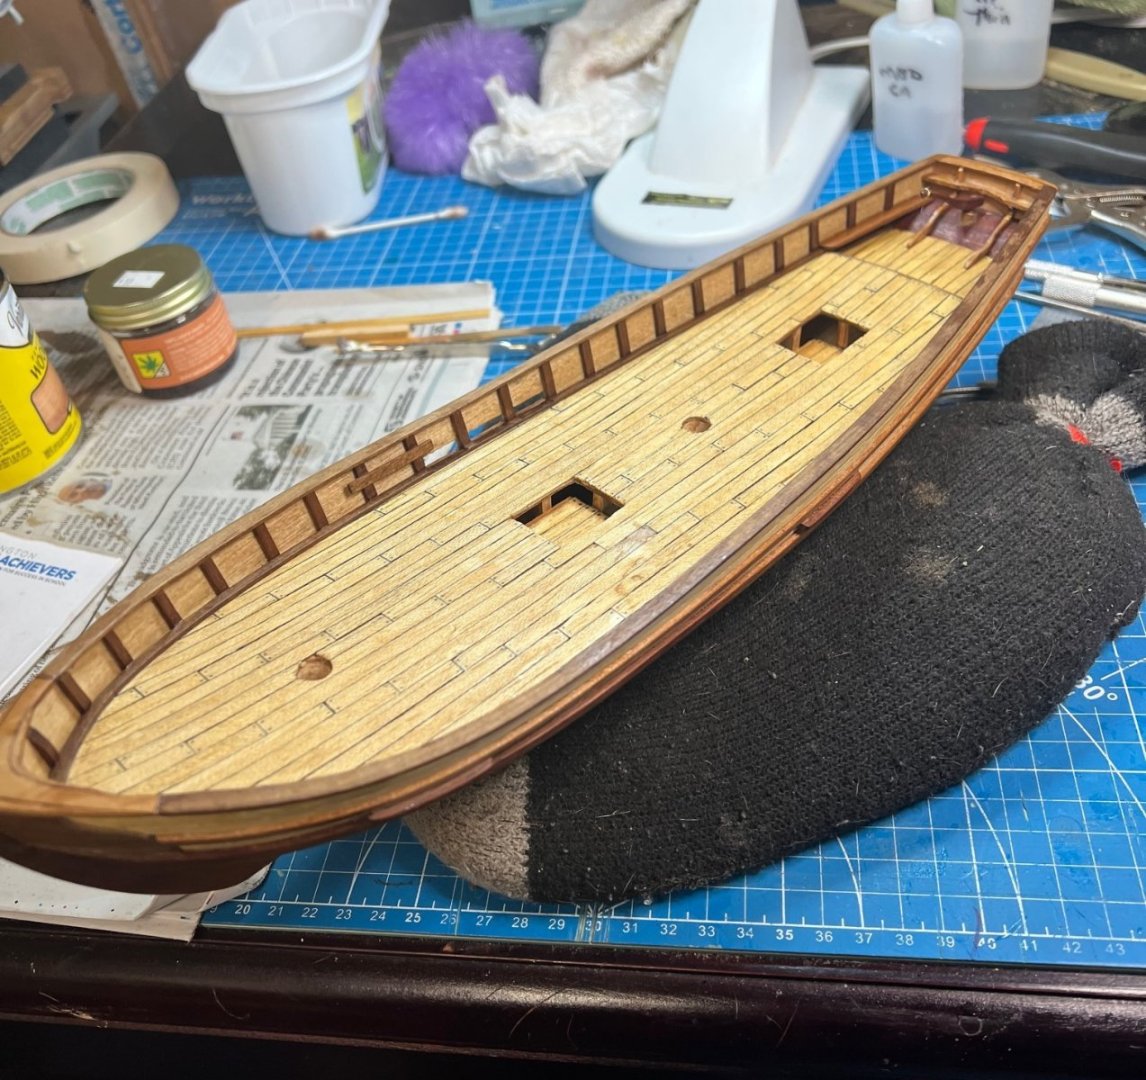
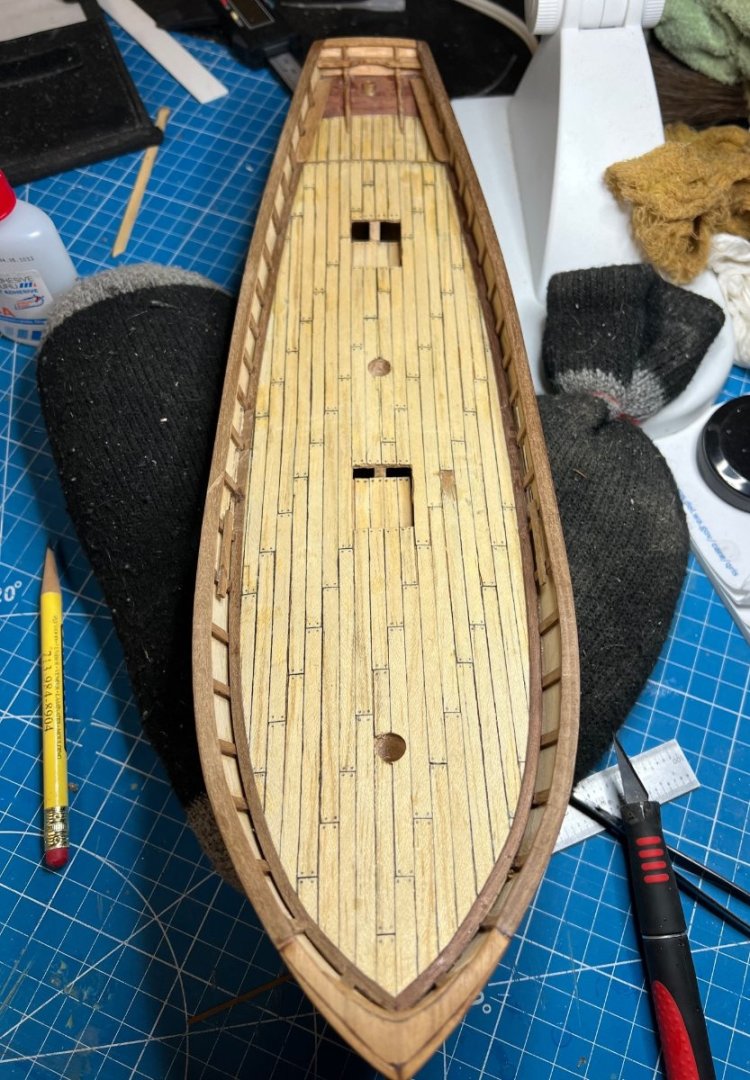
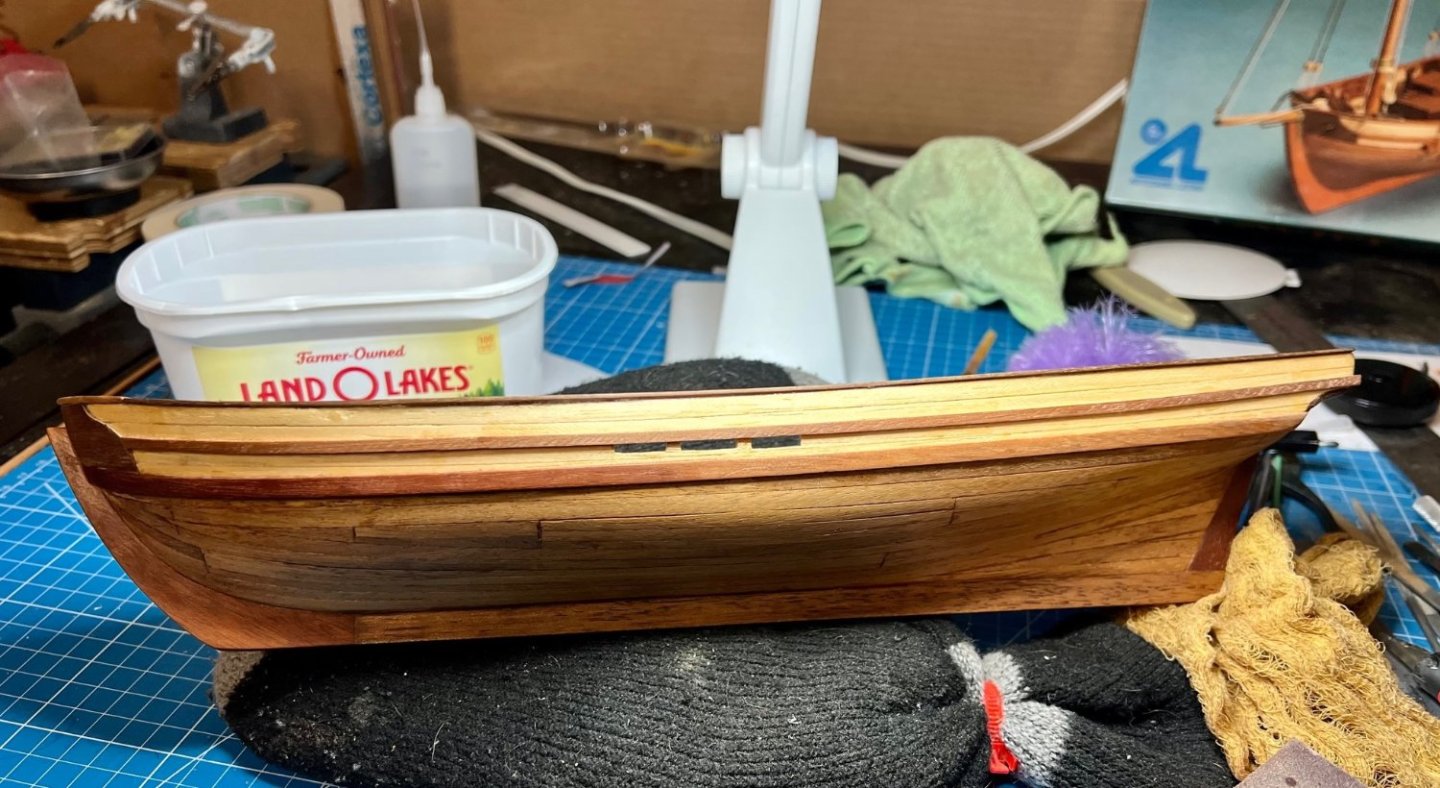
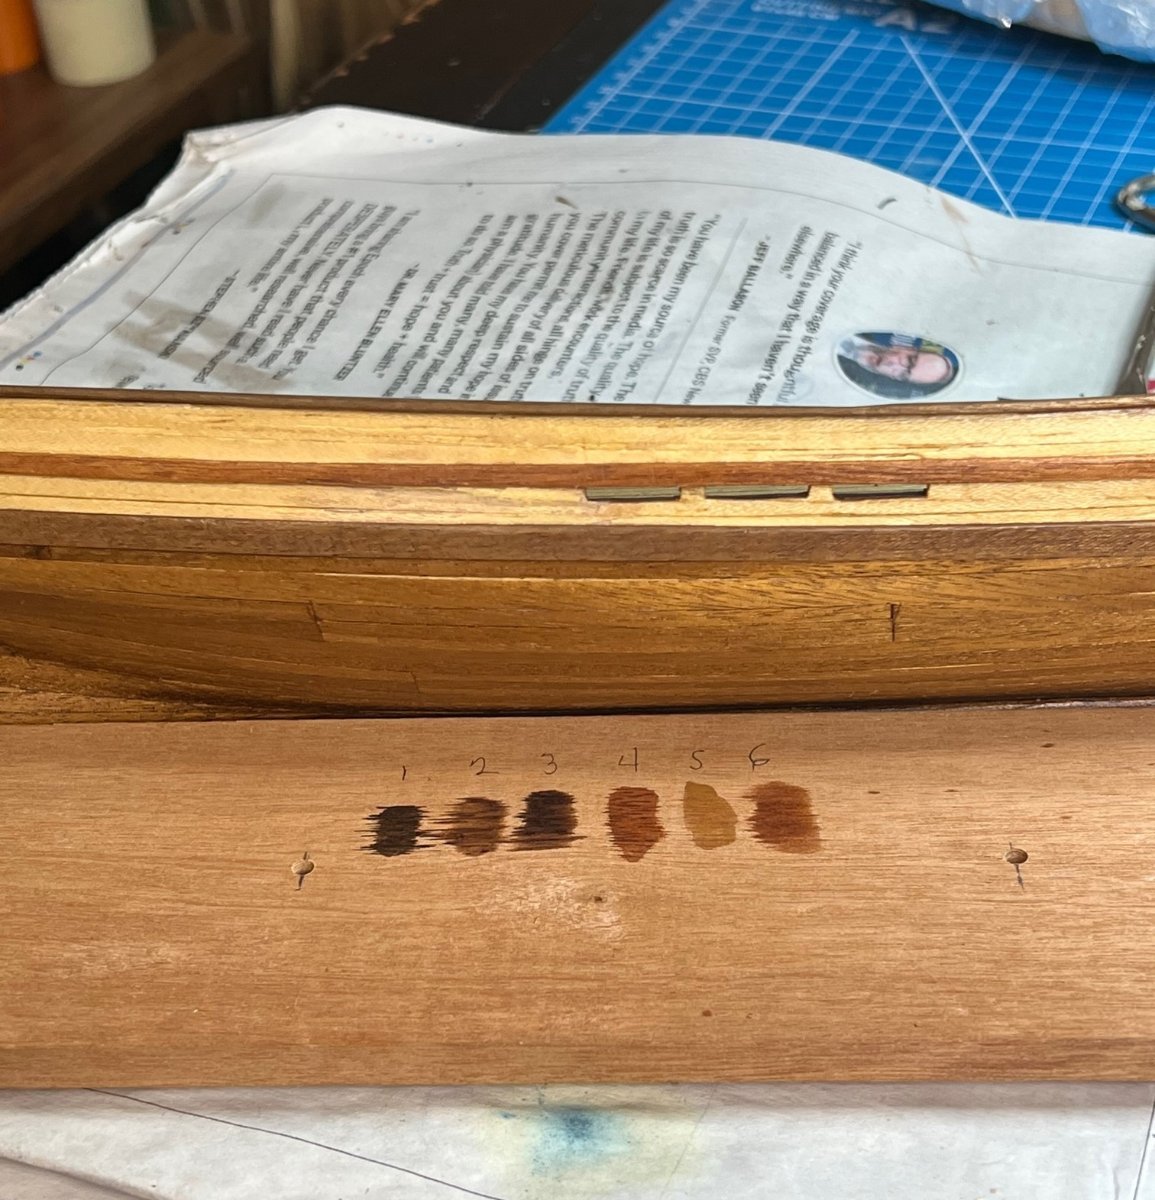
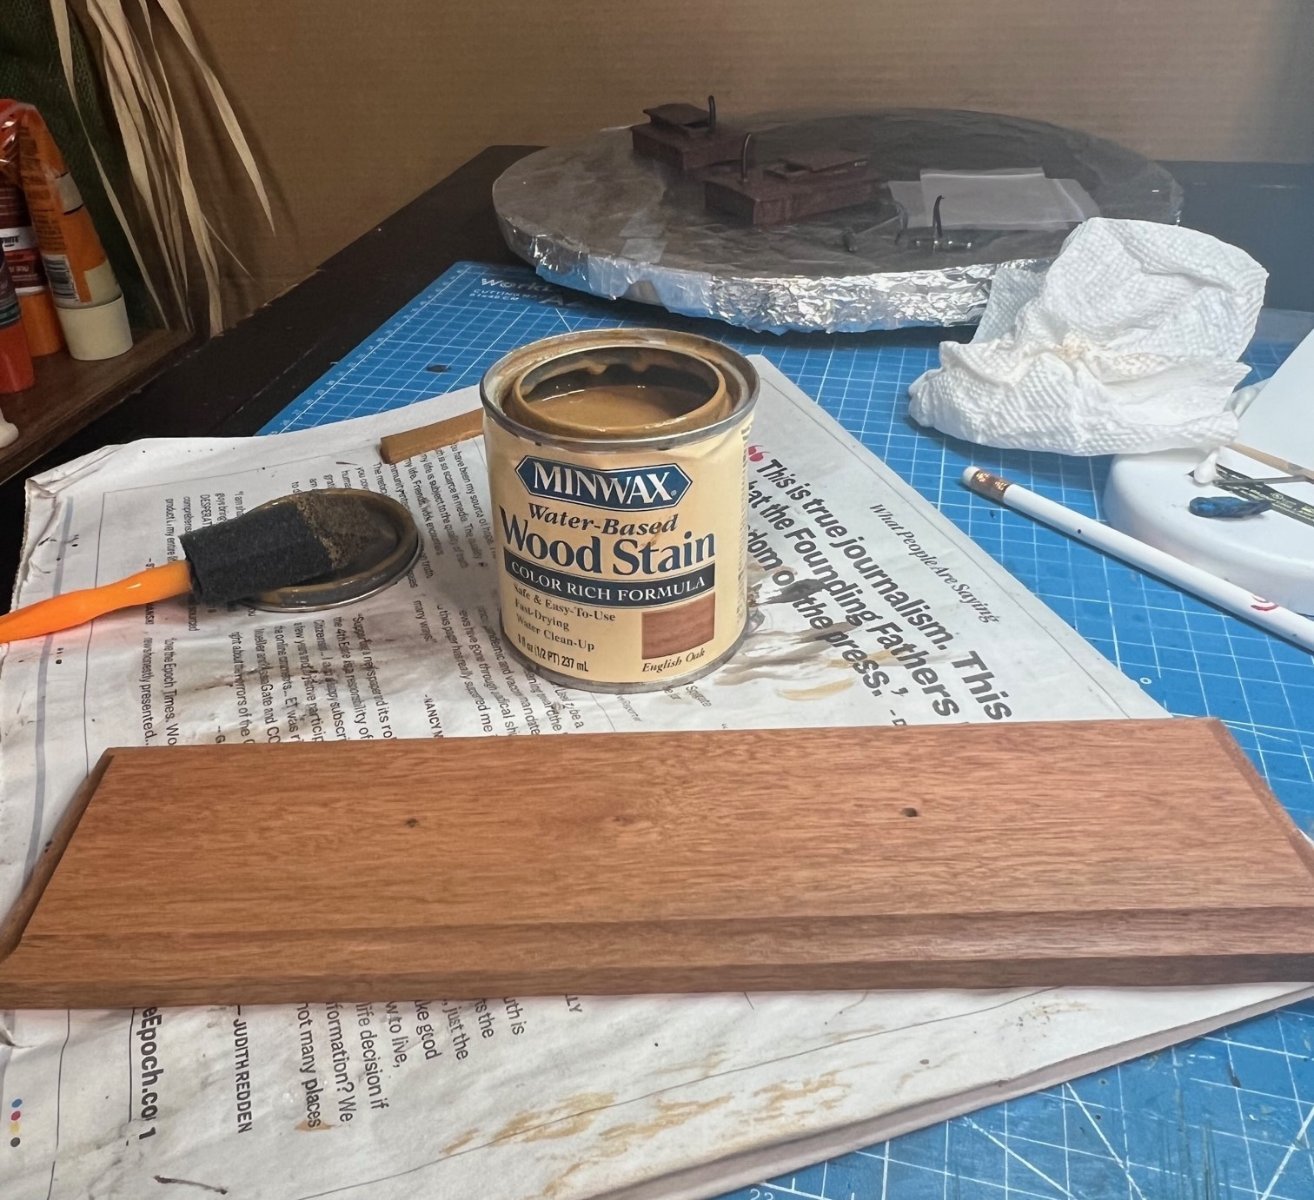
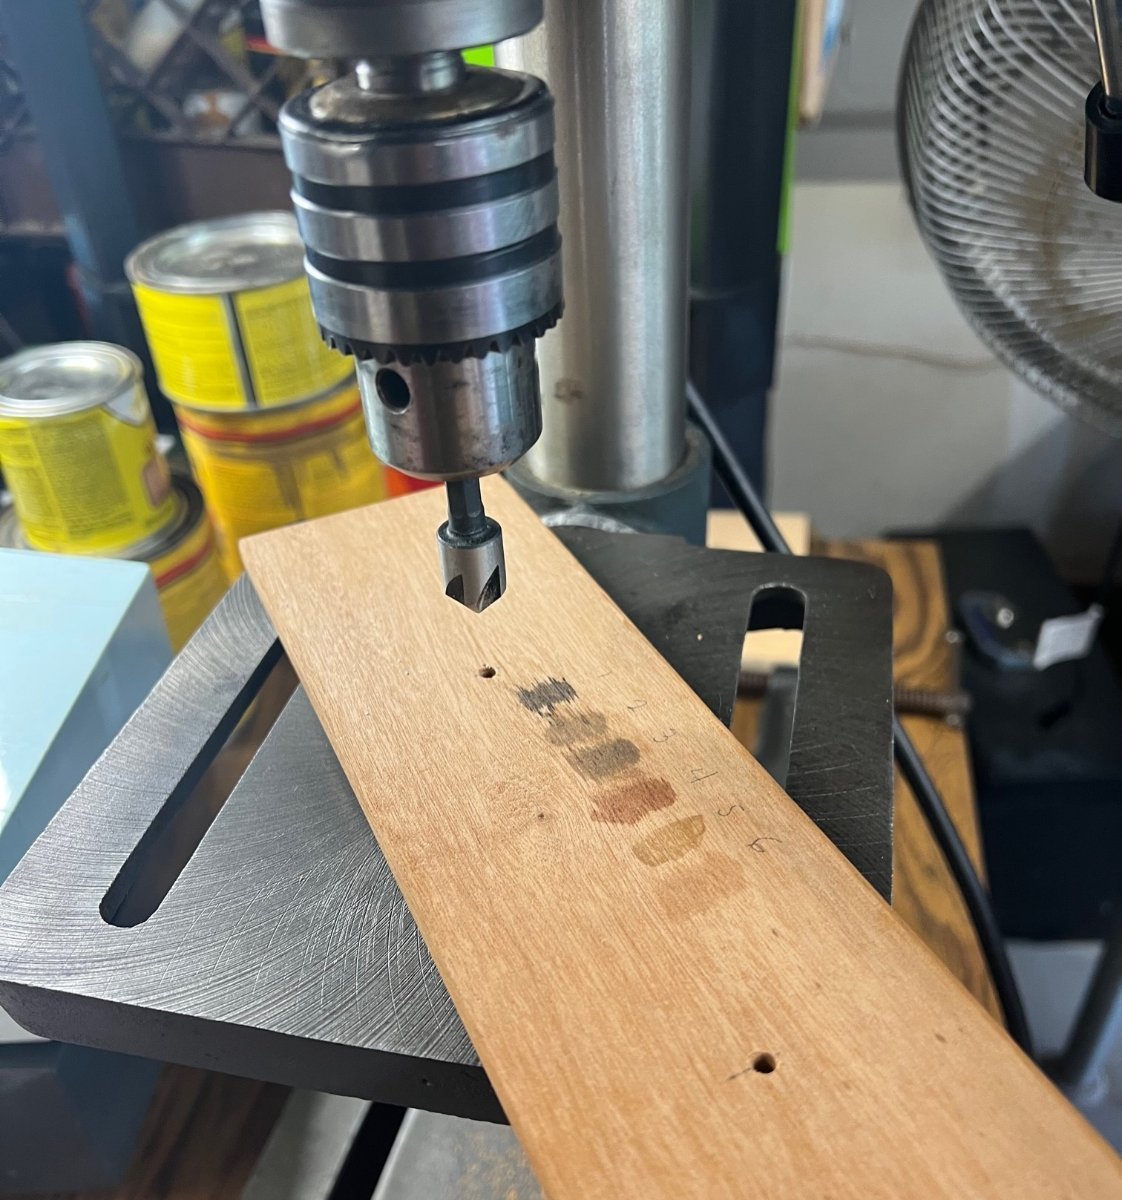
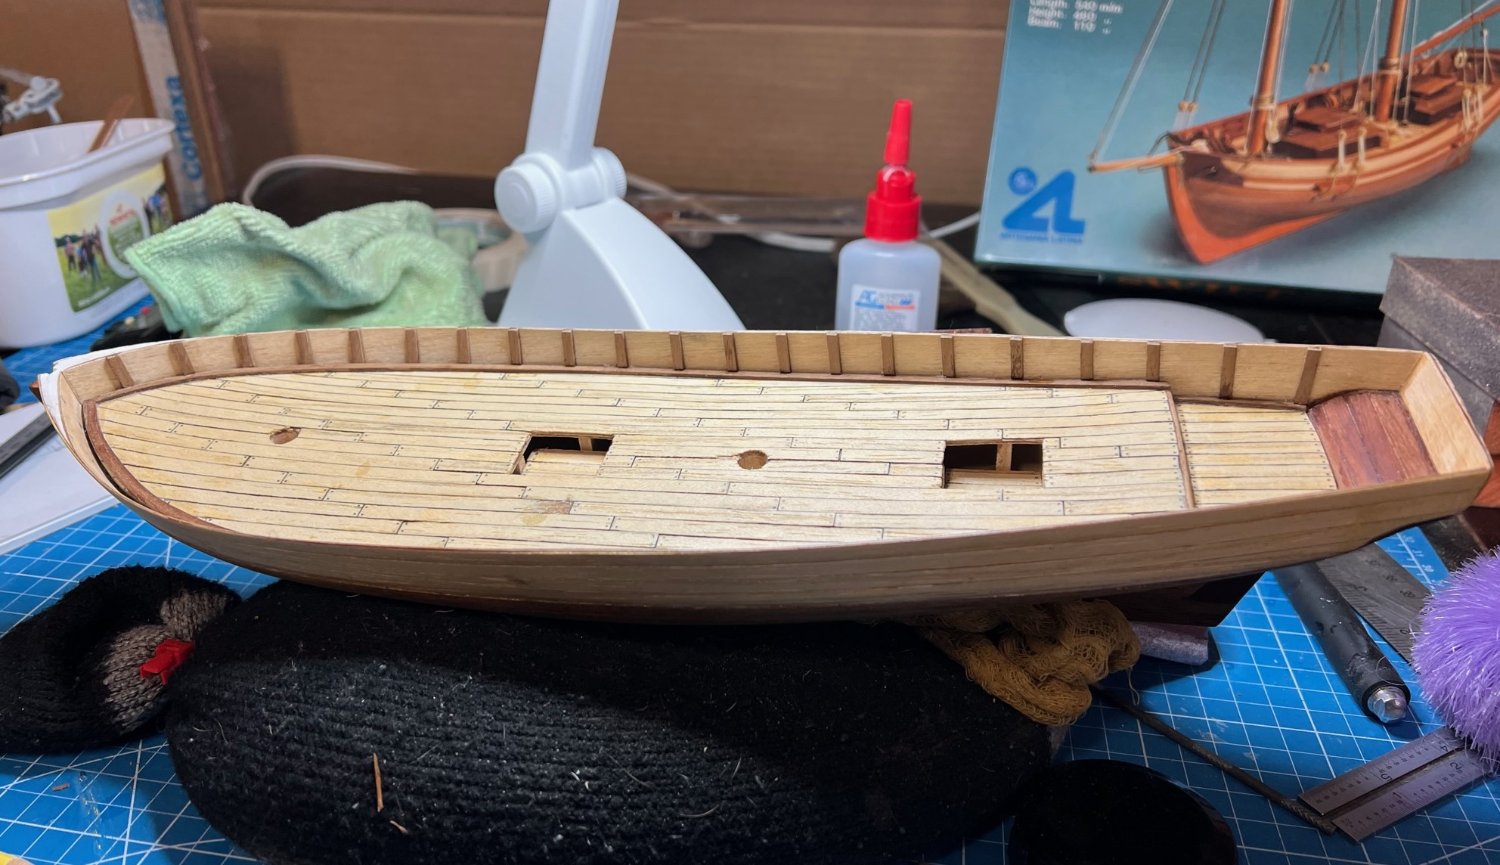
Lastly, I stained the deck and inside of the bulwarks with a nice Golden Pecan finish which I thought looked great.

This gets us to Jan 20th 2023 and I’ll post more when I can. Next I get into deck furniture including the fore and aft cabins and the saga of the lost hinge. I make the knightshead and paint the barrel and bucket, adding a cork to the barrel and a rope handle to the tiny little bucket. I assemble the deck pump, break the deck pump and repair the deck pump, lol. Thanks for reading thus far, I hope you are getting something out of it, even if its comedy.
-
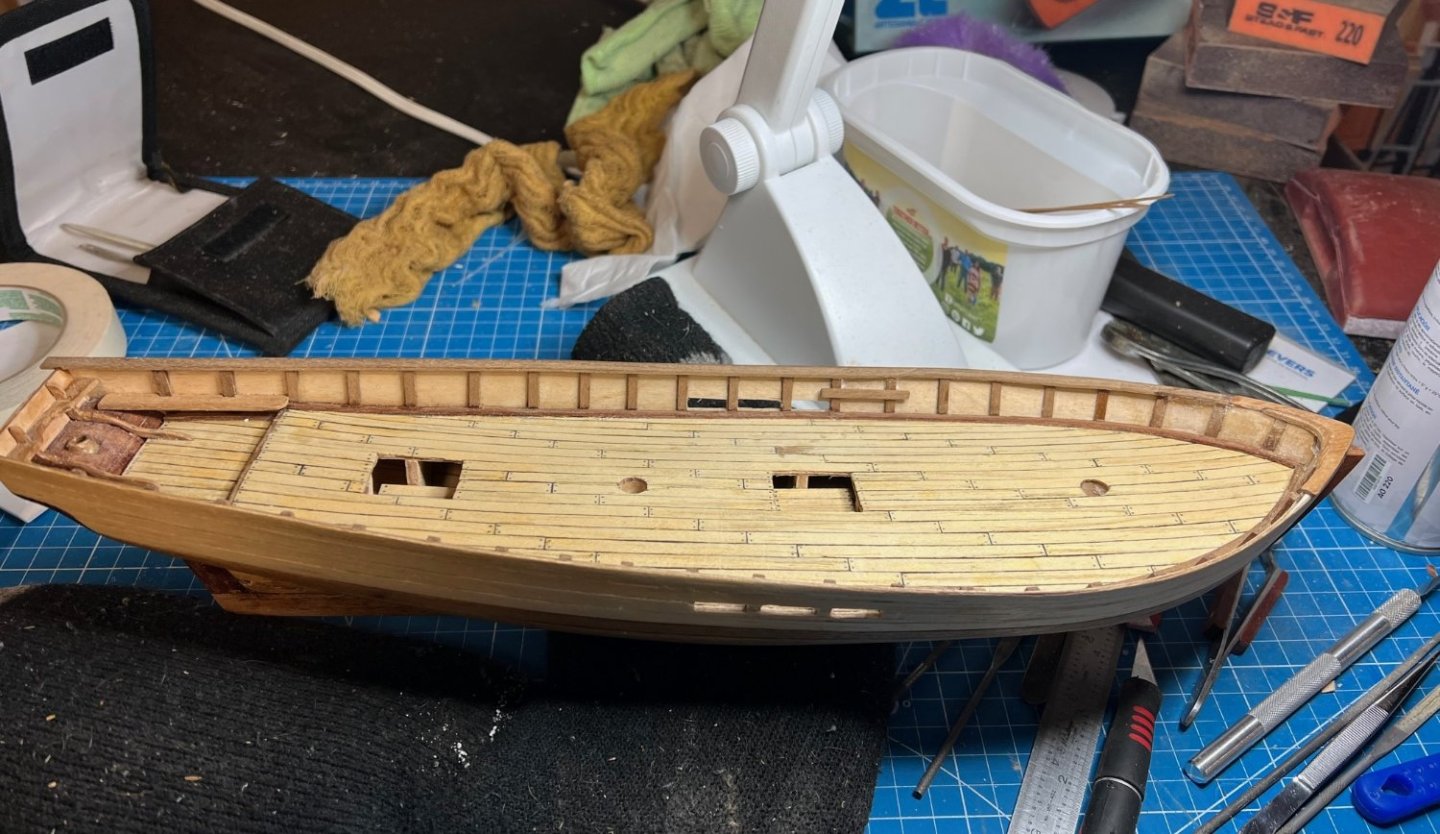
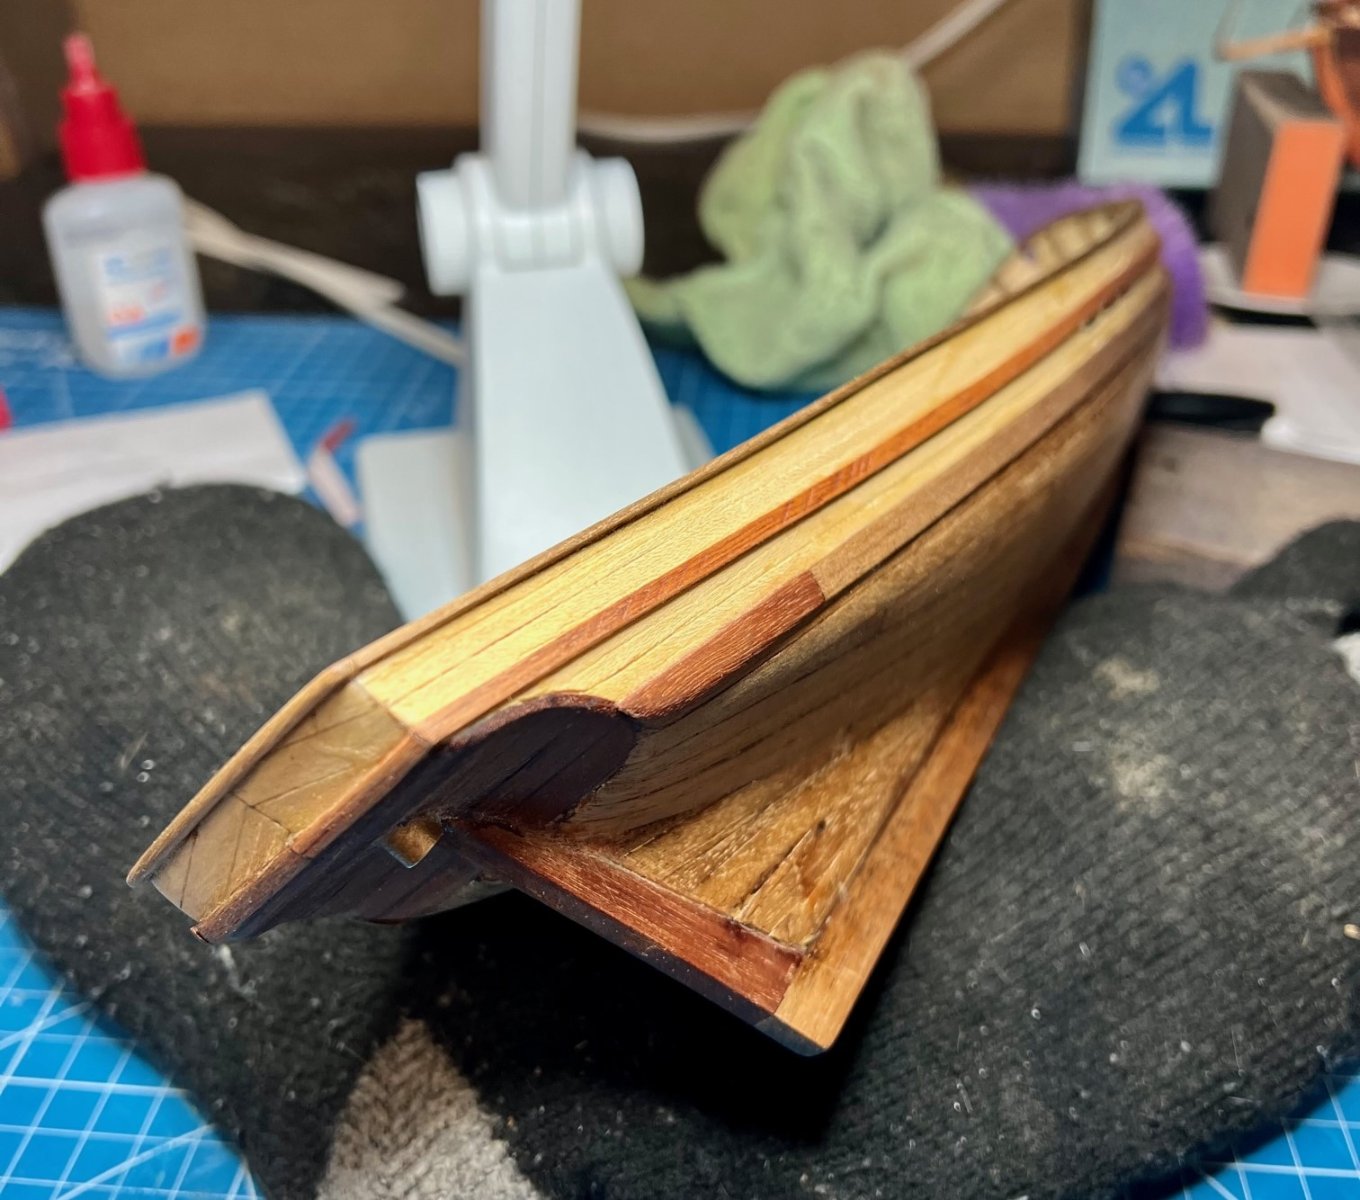
Bulwark Stanchions and Dressings and More:
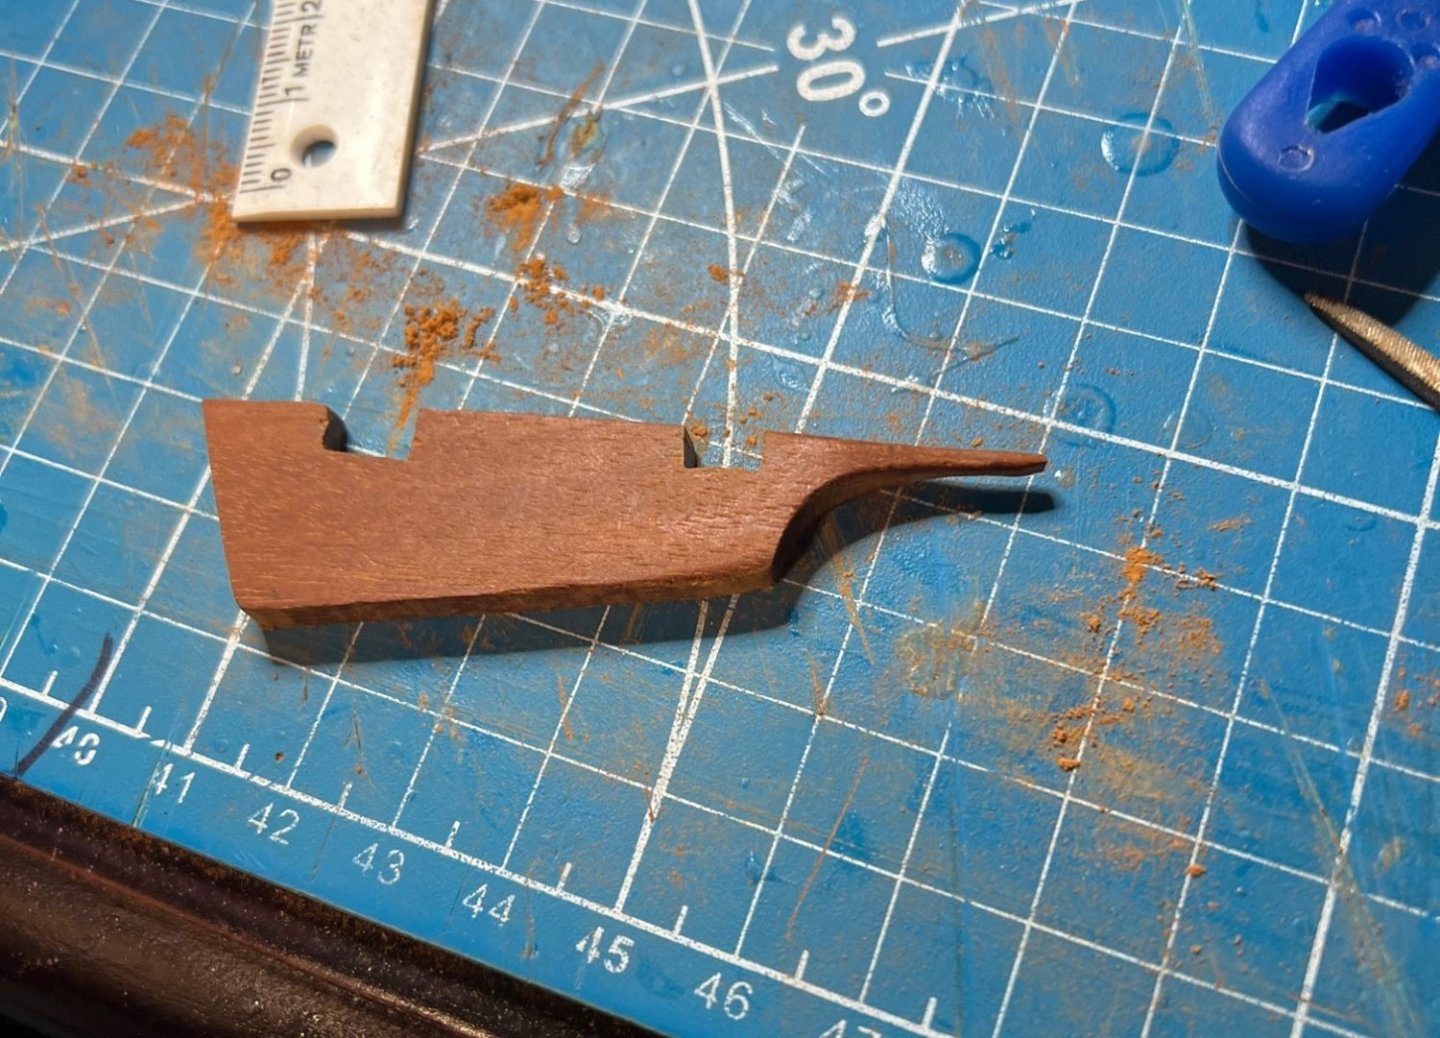
This part of the build seemed to go much better with no major problems but plenty of screw ups. After measuring and marking where the stanchions would go, I cut and shaped the walnut pieces and glued them stern to stem.

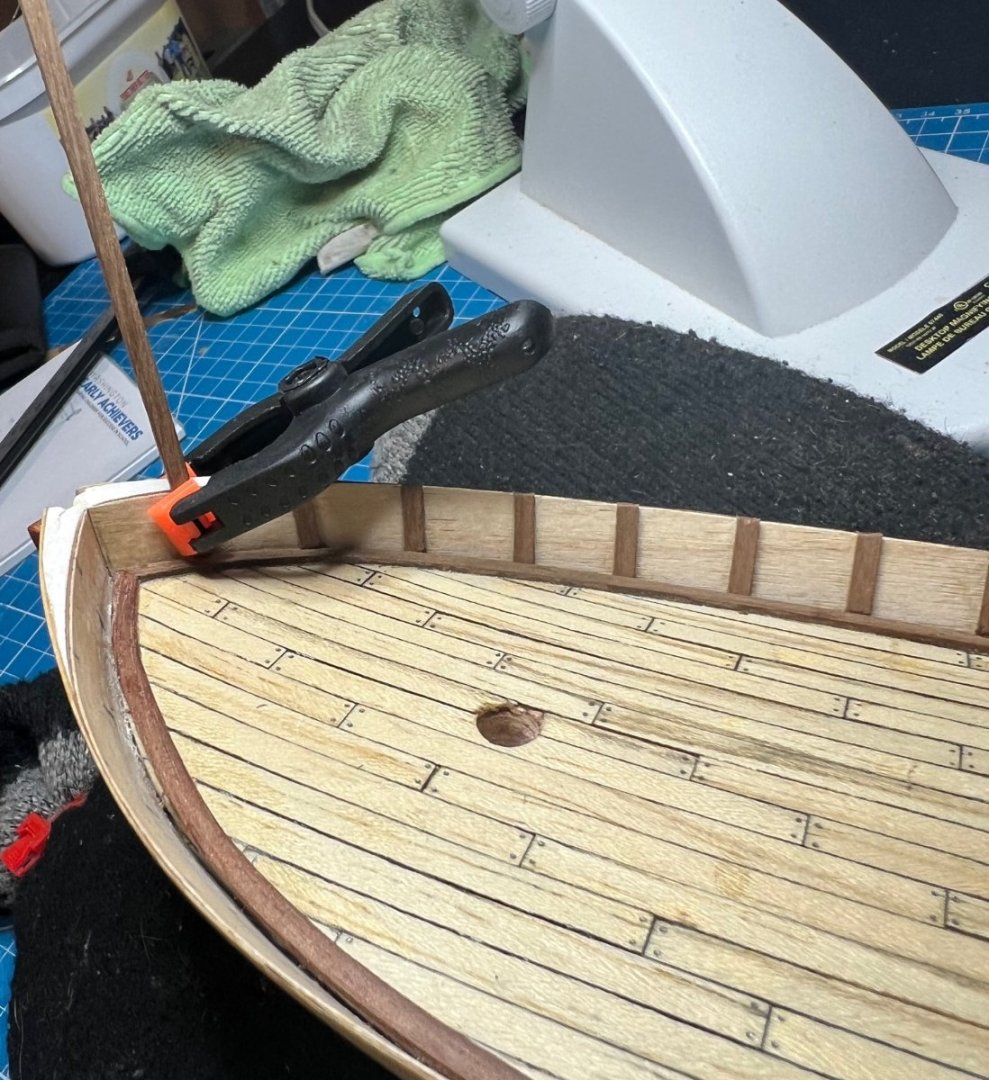

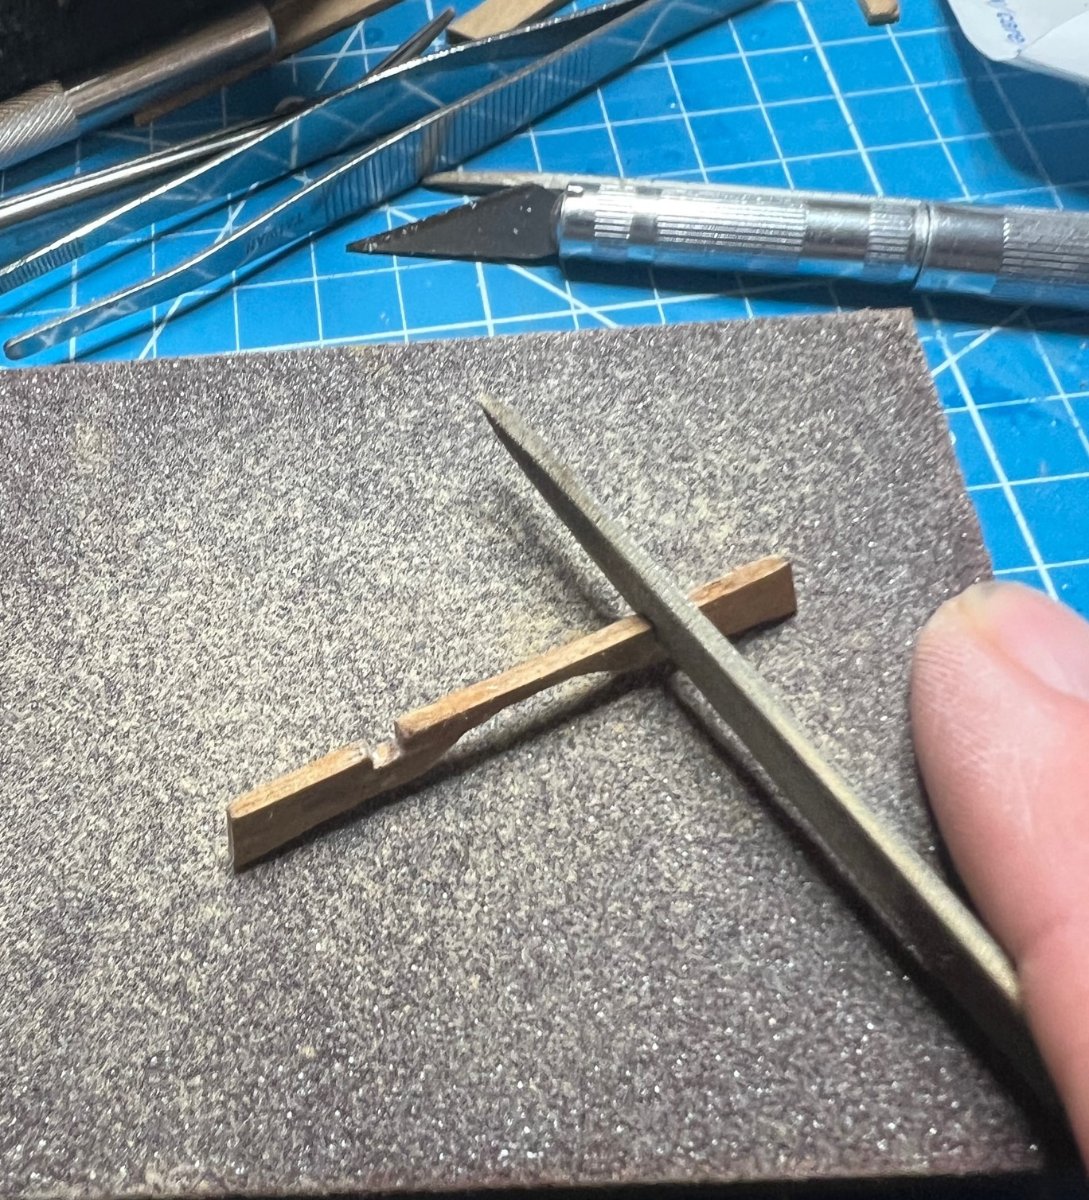
After cutting the die-cut pieces out, which would have been much easier on a scroll saw but I don’t have one so I used a saw blade on my exacto to hack through the plywood. The transom support would give me trouble because the part I cut out was way too long to fit my ship. I had to cut it and take out about 3mm from the middle and glue it back together to make it fit. It was tricky but after a couple of days, I finally got them to fit. Belaying pin rack would go in next after some shaping. Next the seats went in and a couple of cleat boards up front, still not sure what these are for but sure I will find out soon I hope.


These two stern transom supports had to shortened to fit which meant cutting some out of the middle of them and gluing the two pieces back together. It was very challenging to make them look right.
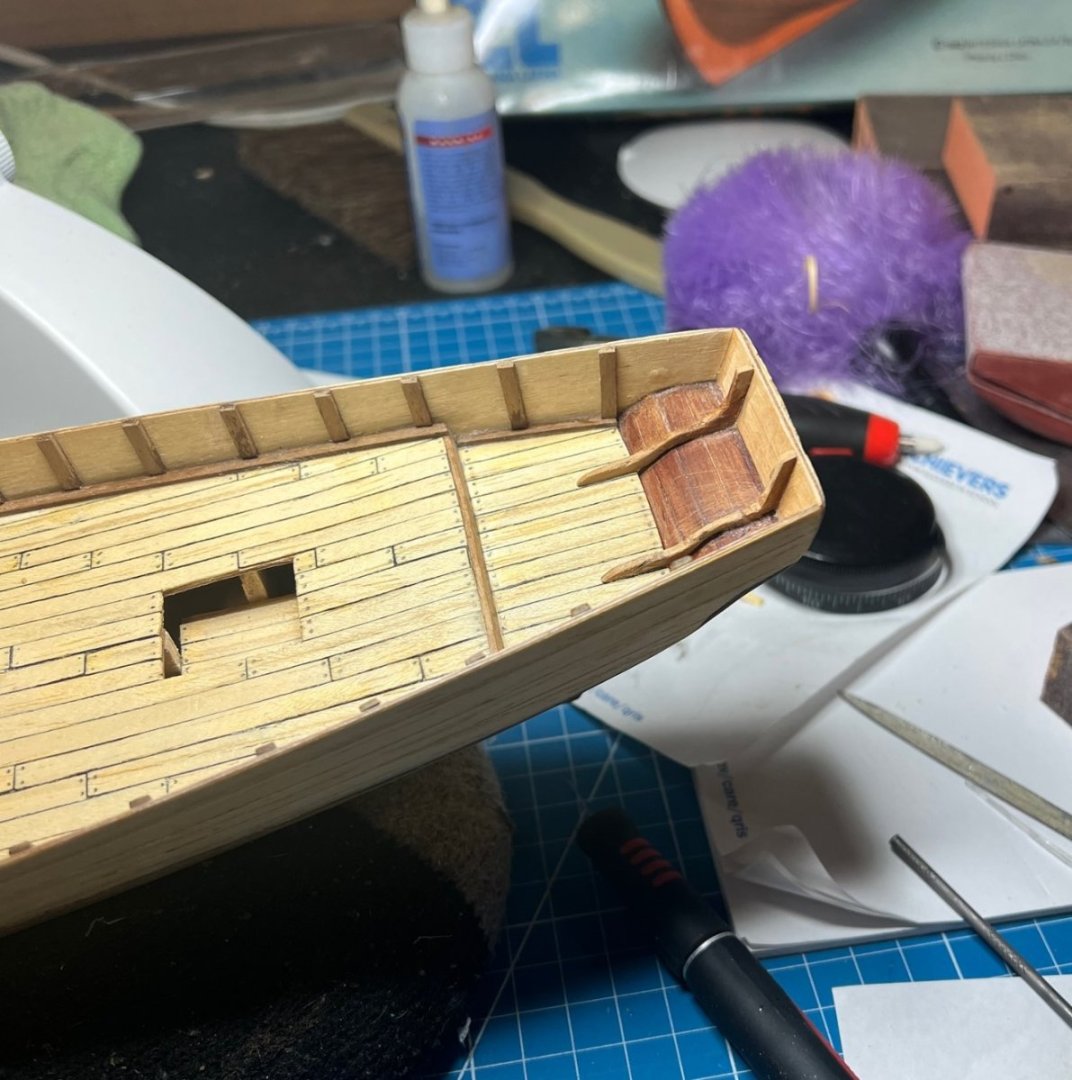

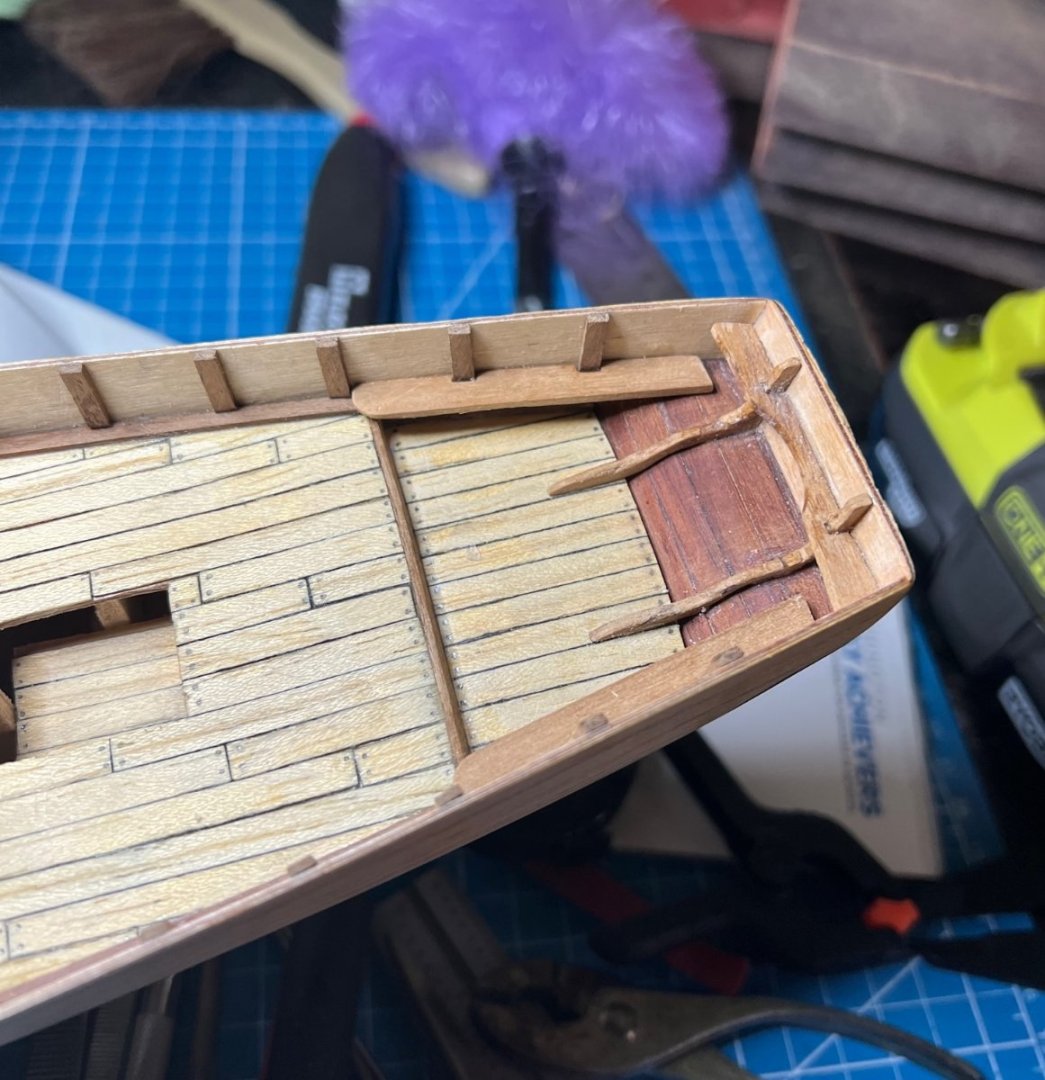
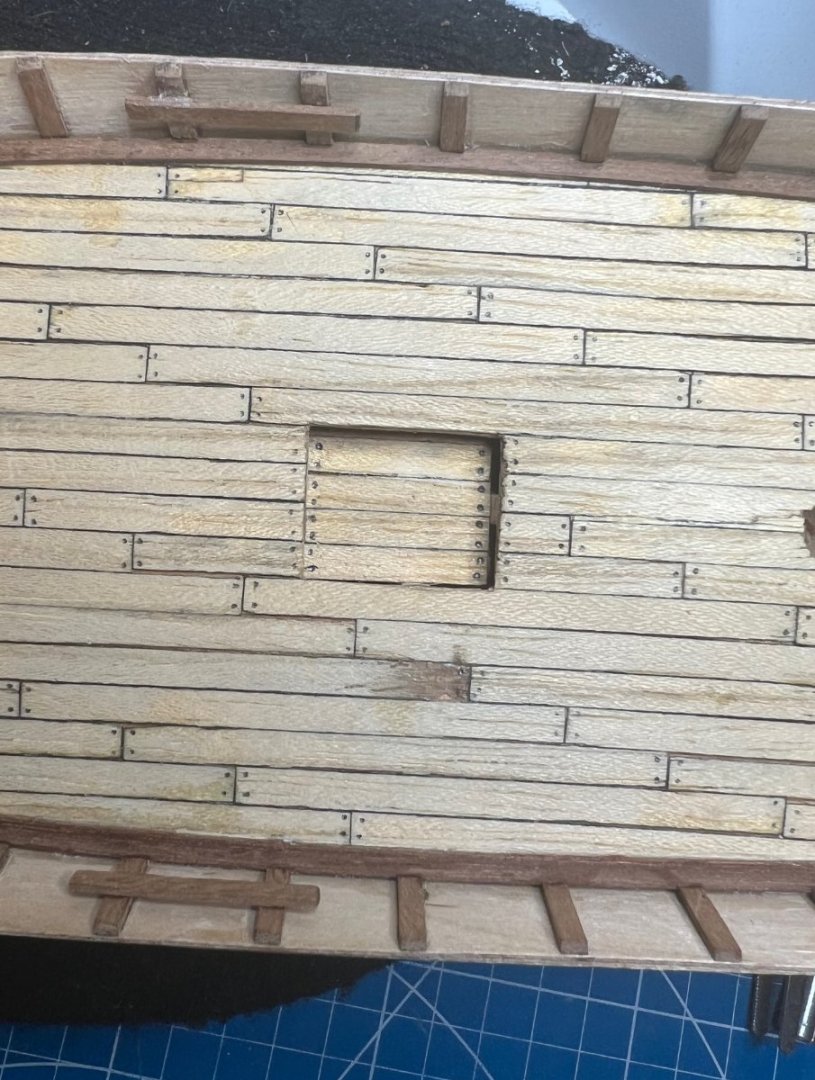
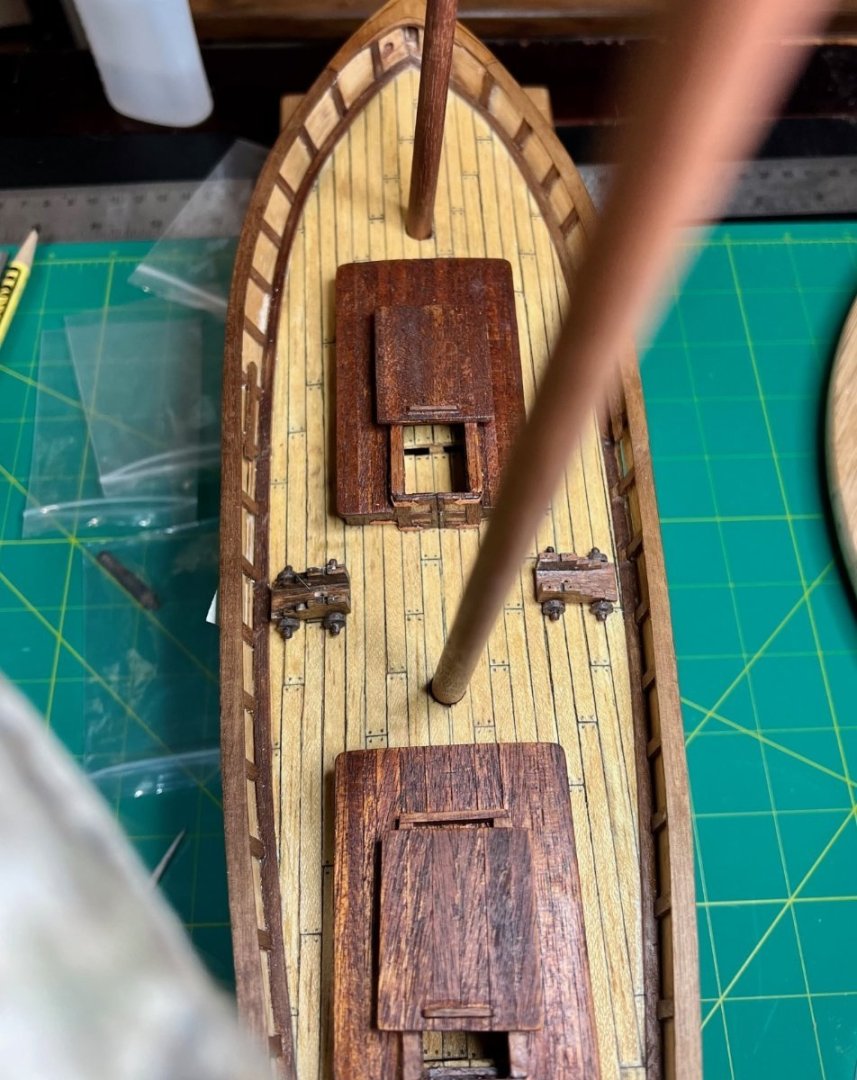
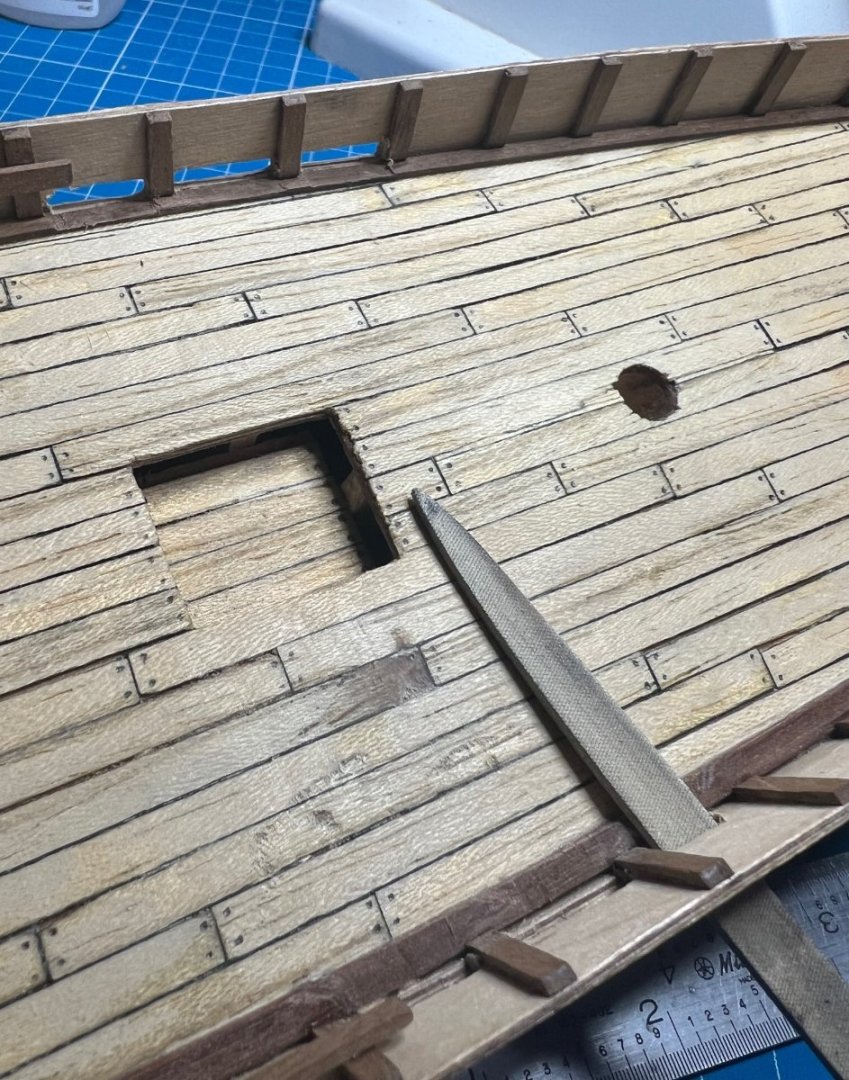
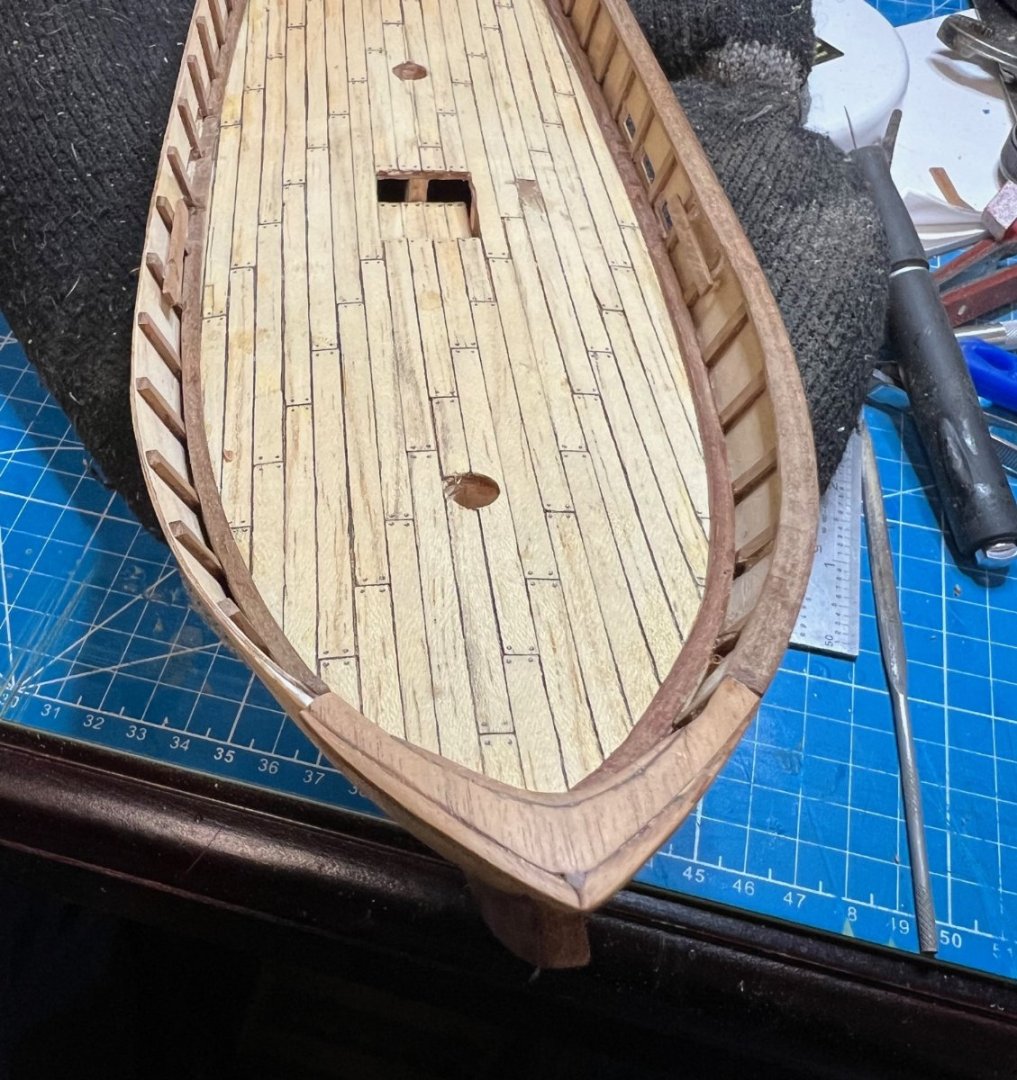
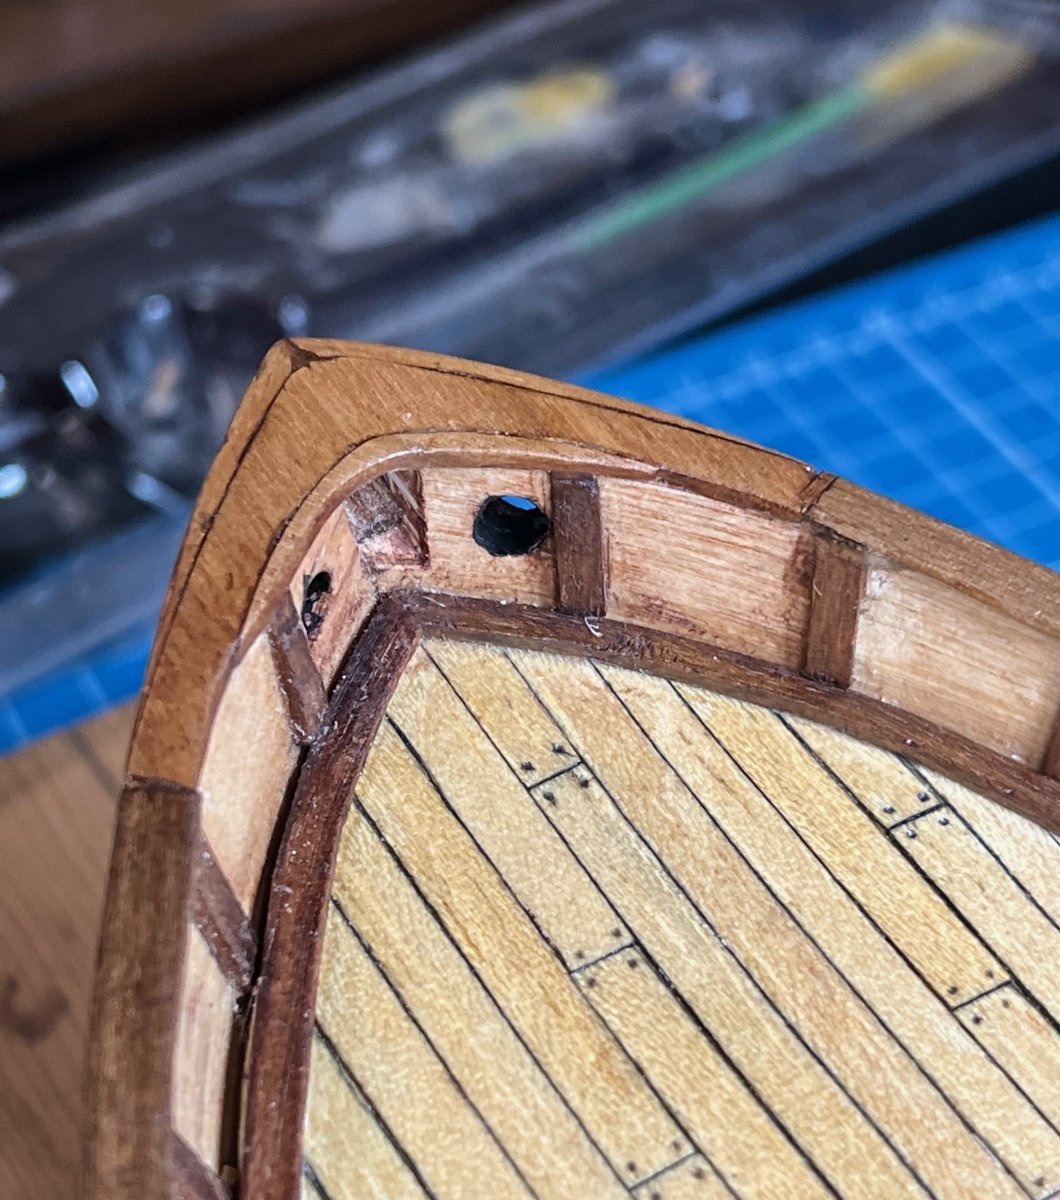
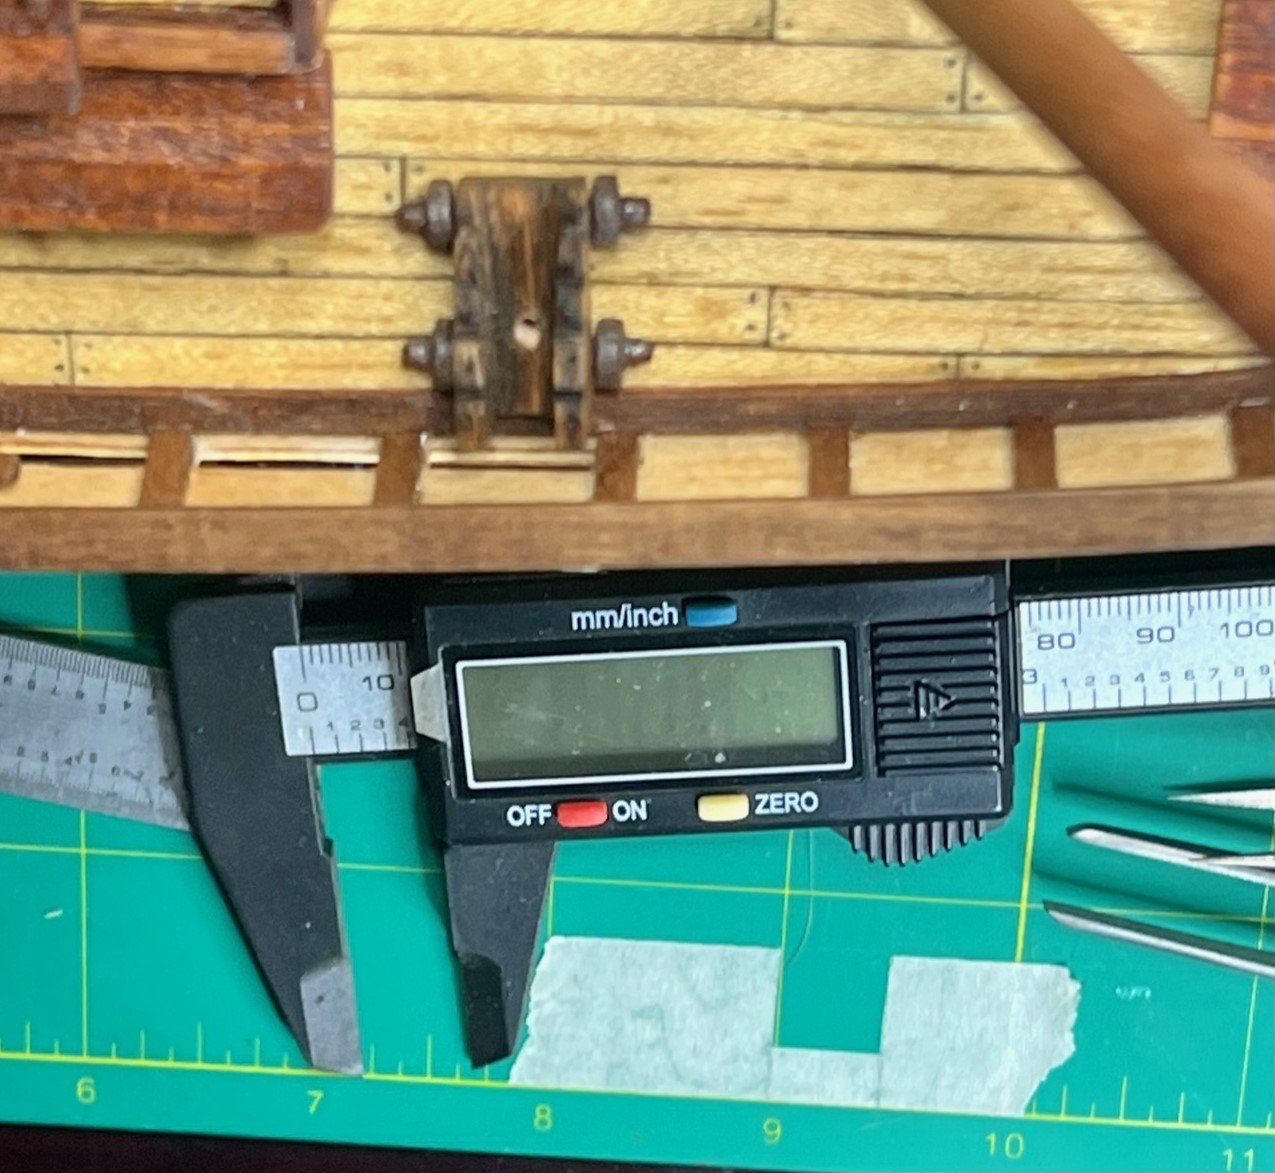
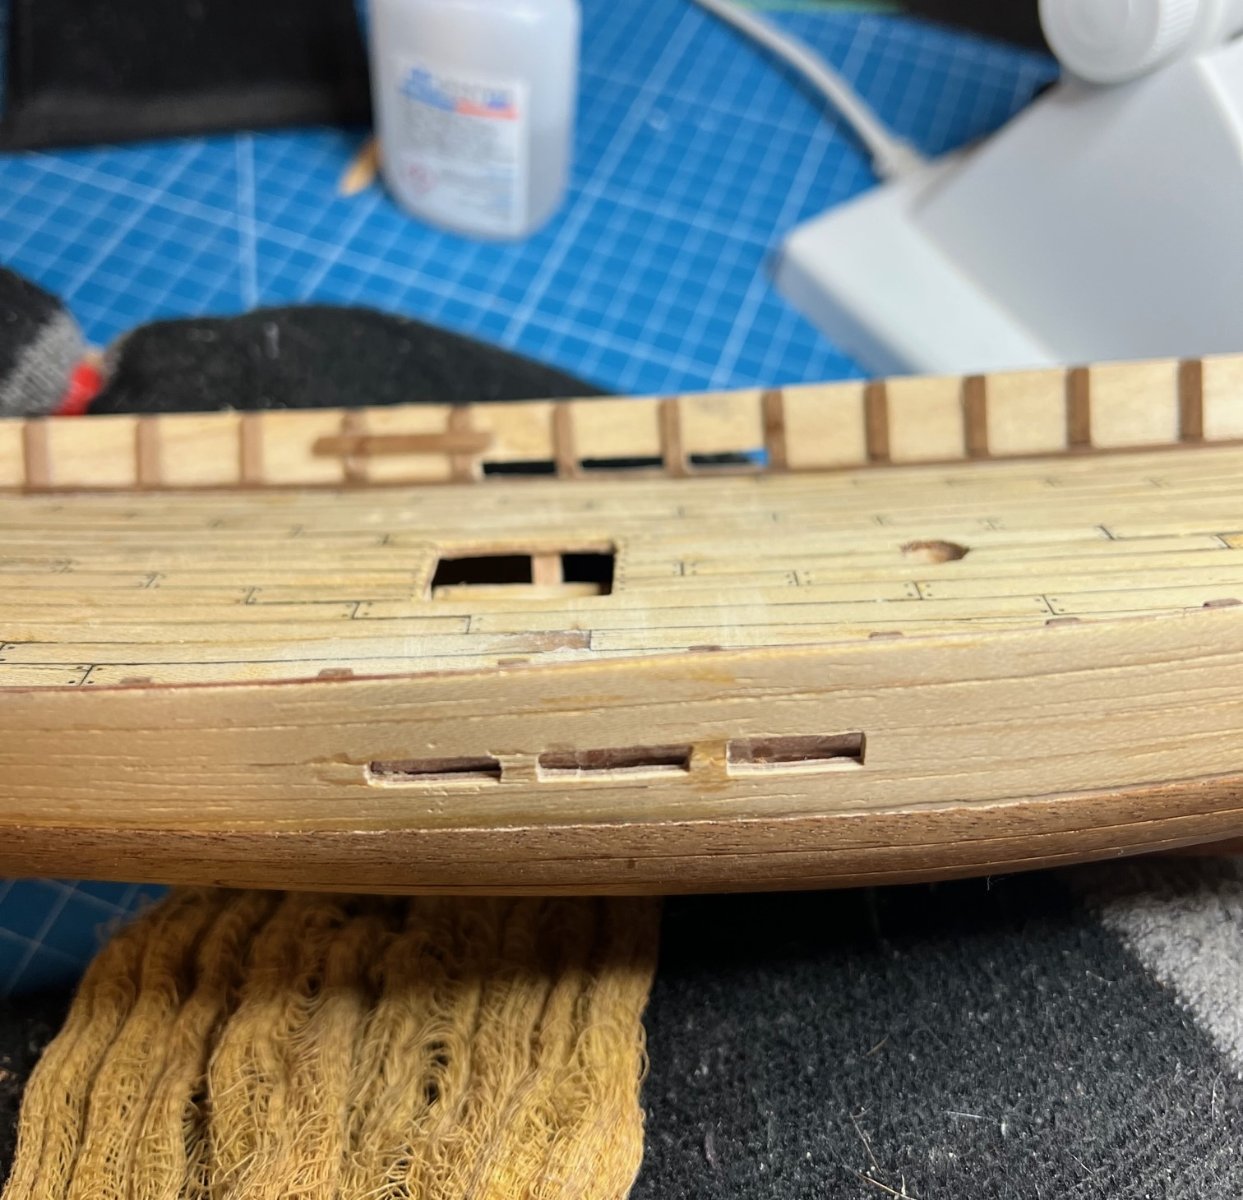
The instructions then had me start poking holes in my ship that was nerve wracking. After drilling holes where the scuppers would be, I used needle files to shape the openings. Turns out later I would be putting guns in where the stern most scupper was located and would have to fill back in the material removed for the scupper to complete the gunport covers. Oh well, another lesson learned to lack of planning.
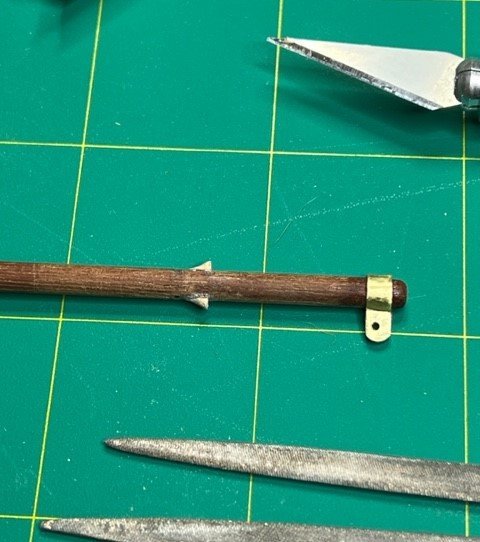
The instructions then led me astray again, and this one still bugs me. They had me drill through the stern and glue in the brass rudder ring which upon researching, actually should be attached to the top of the rudder, not glued to the ship. That will give me a rough time later when I get to the rudder.

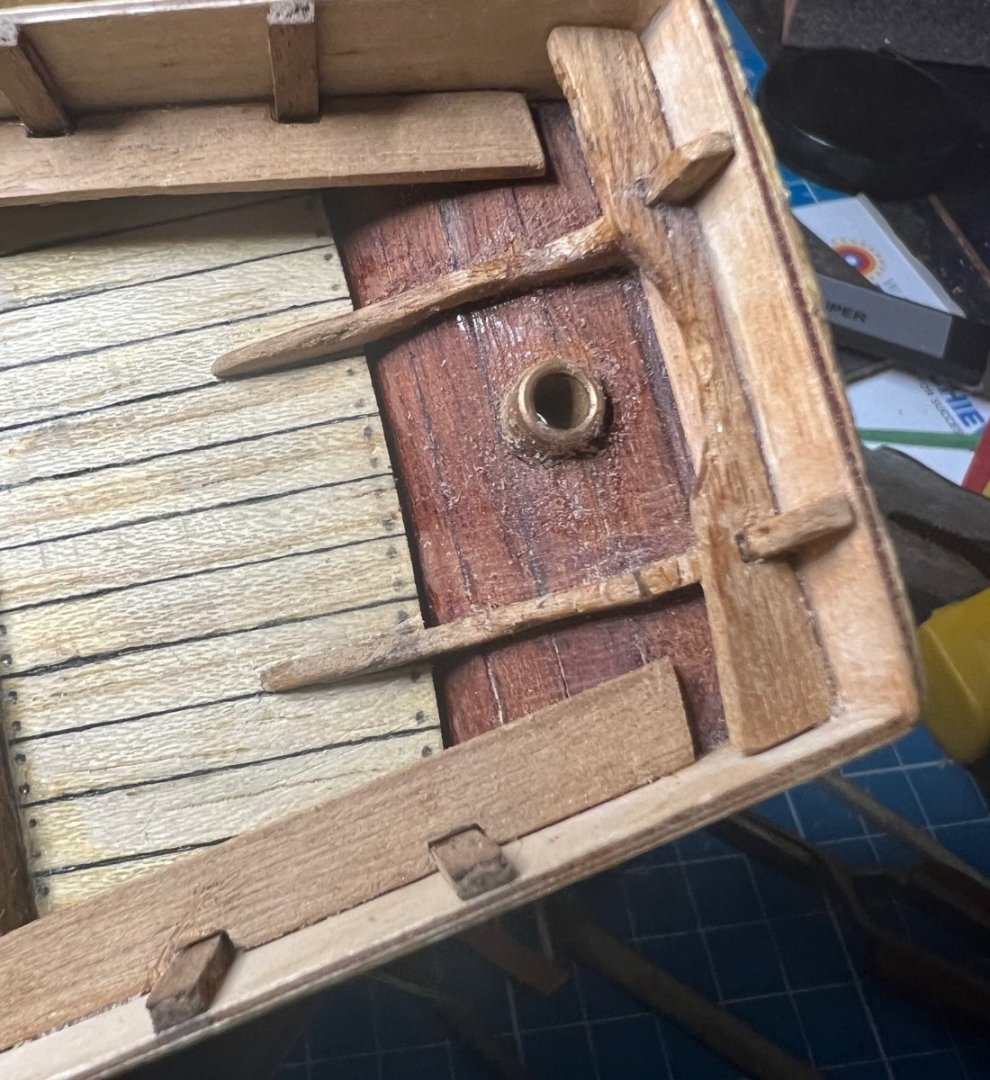
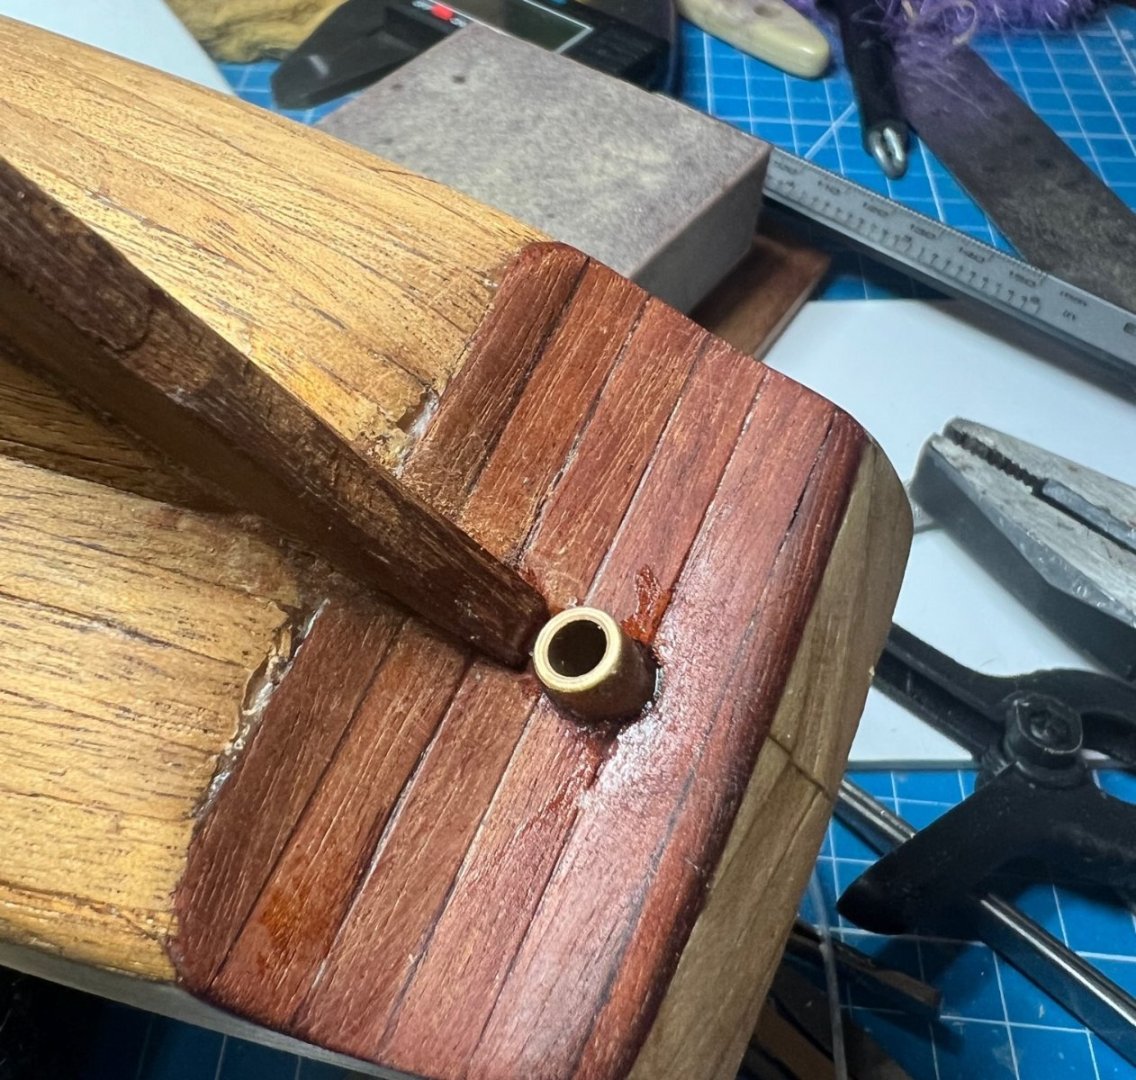
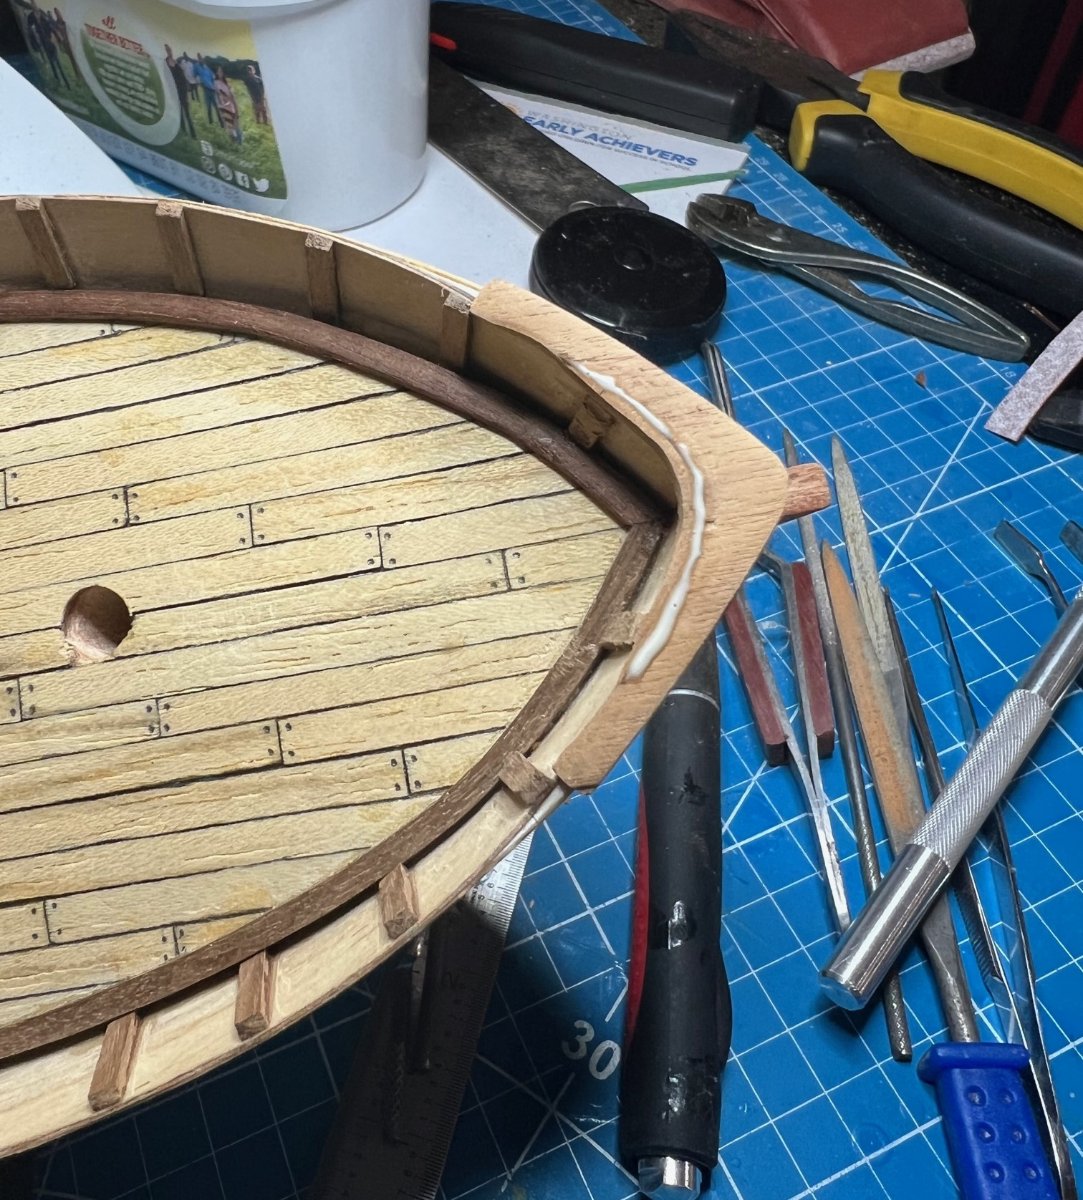
The bowsprit hole was drilled next but would have to be further filed and drilled later when fitting the bowsprit for its exact location and angle. That railing on the bow will have to be customized later after realizing it was too thin with the cut-water reinforcements installed.
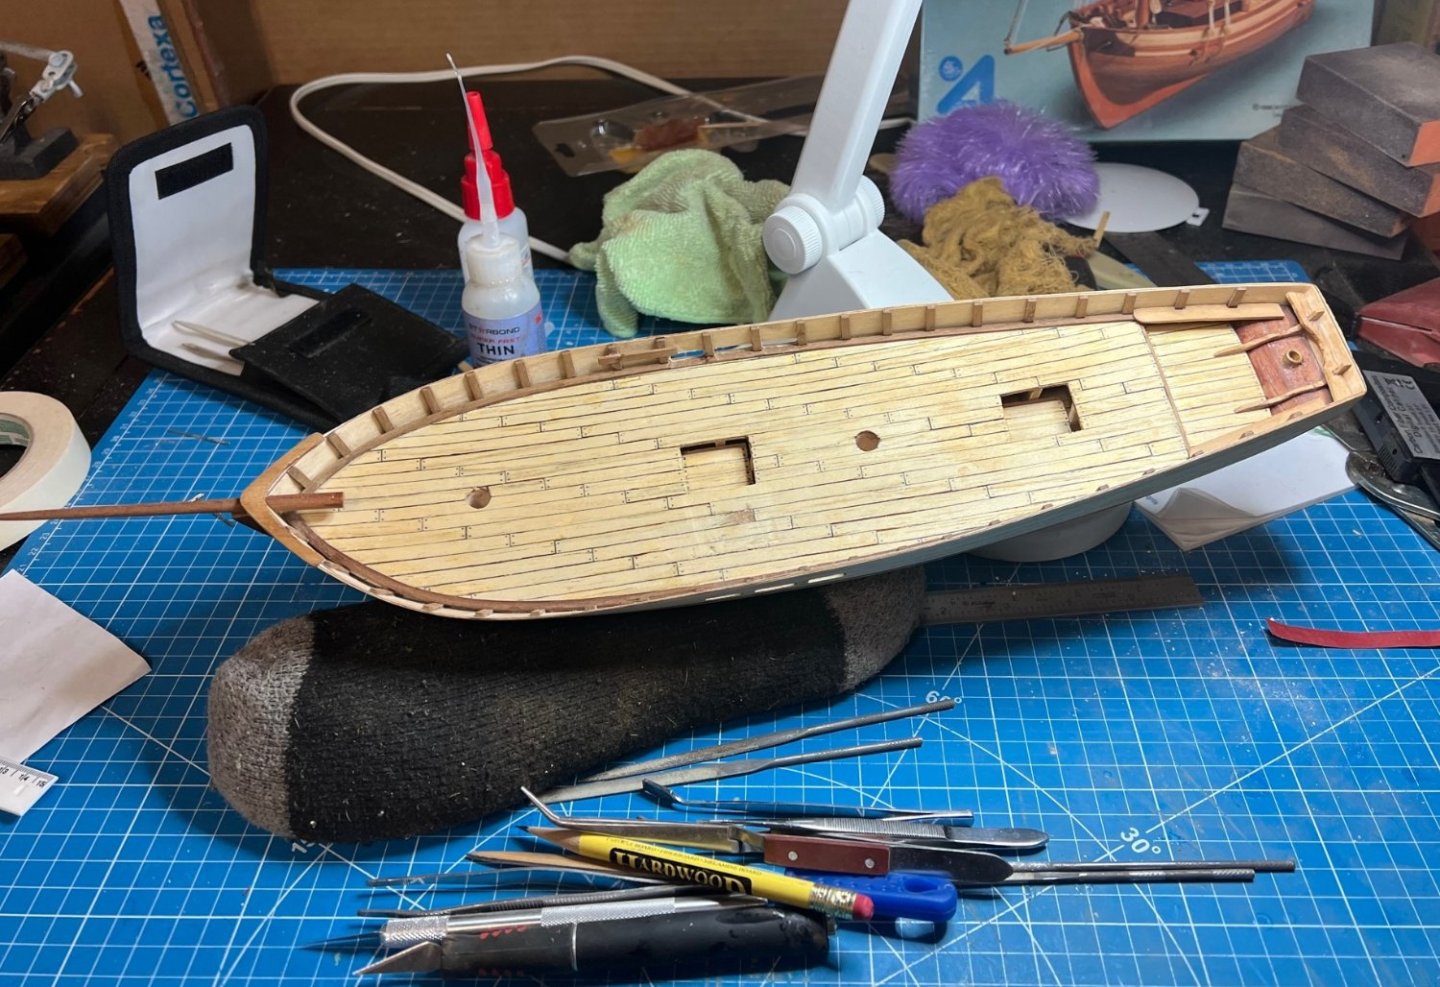
Using the same jig and ammonia I bent the deck stringers on, I bent and installed the top rails. I ended up adding slivers to widen the rails where needed to clear the width of the bow and across the stern. That was tedious but I felt necessary.


Next I shaped and bent the Cut-water reinforcements to the bow. The fenders had to butt up nicely to these so I had shape and bend them to fit the curve.


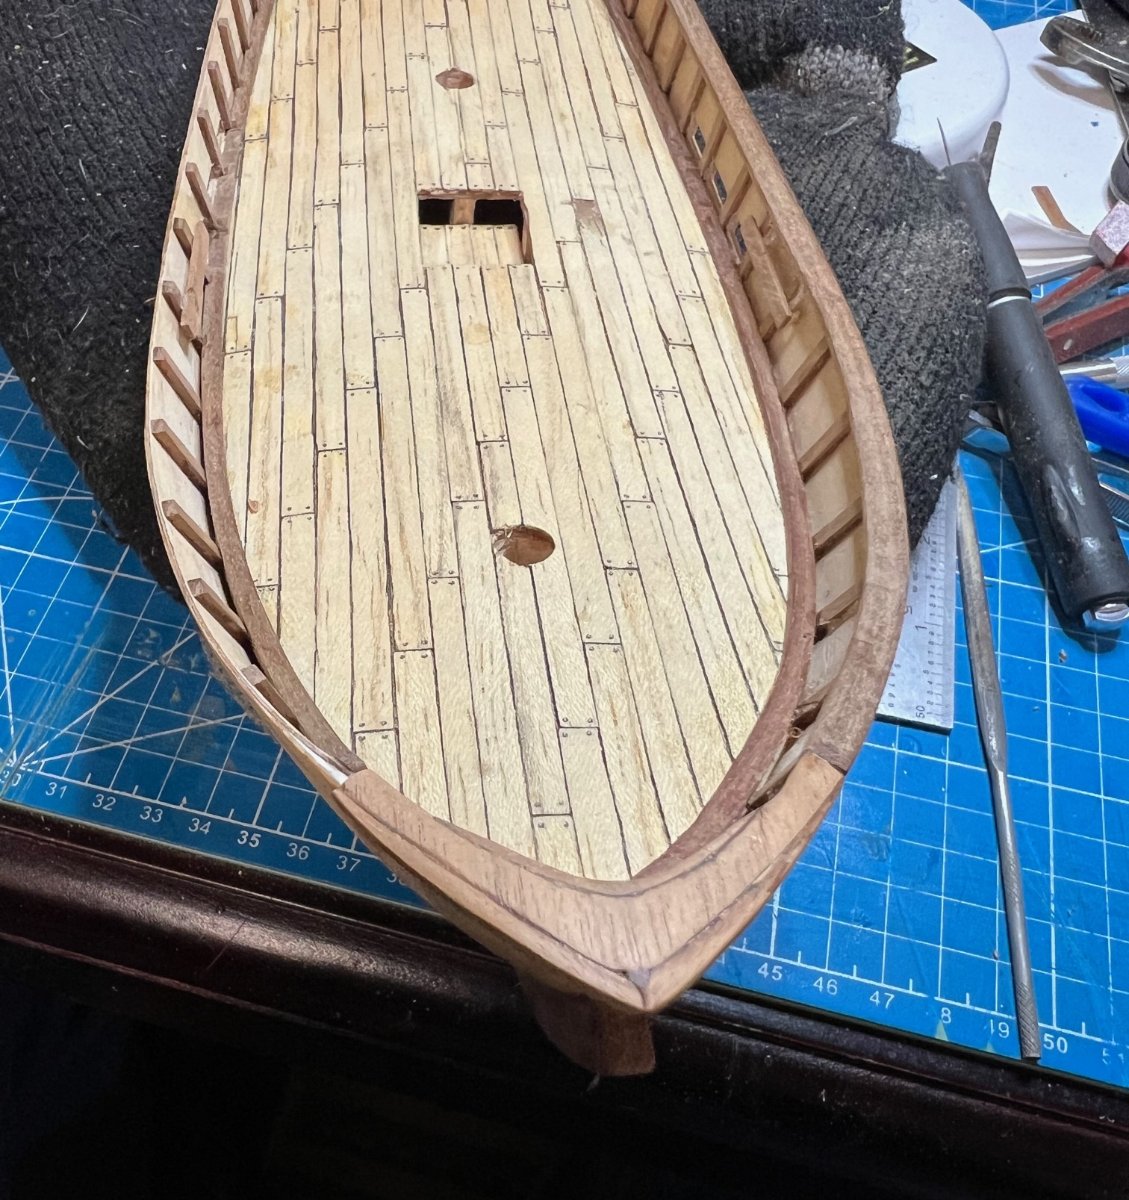
I had to splice two pieces to make the starboard fender, not sure how I ended up without a full hull-length fender but I did. Too bad the color was so different but all I had since I couldn't find my plank-stretcher. lol

The hull is basically complete now. This gets us up to Jan, 11th, 2023. Next comes mooring bits, my anchor disaster and the battle with the rudder. Thanks for reading! Until next time, cheers!
-
And she’s underway! Fantastic. I wish I had planked the inside of my bulwarks, too late now. Good luck!


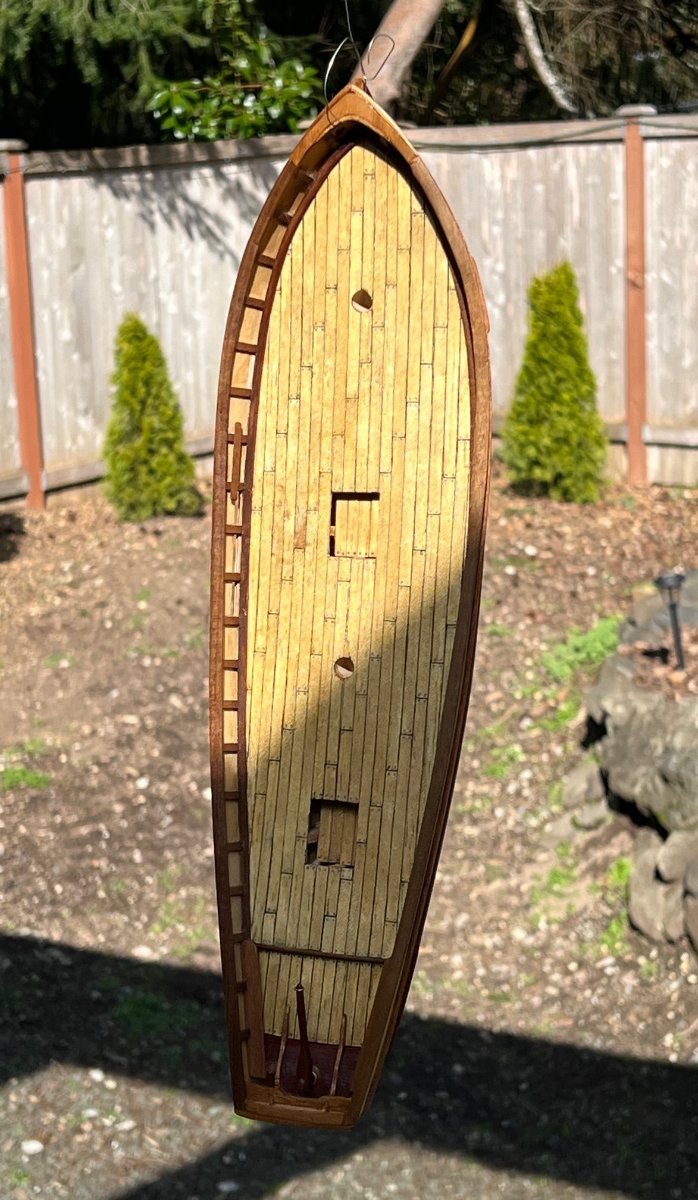


Swift 1805 by Scotty W - FINISHED - Artesania Latina - 1/50th scale - Virginia Pilot Boat
in - Kit build logs for subjects built from 1801 - 1850
Posted
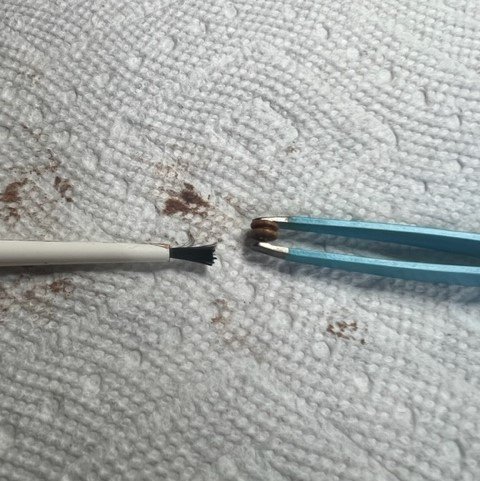
Puddening? Really? Puddening?
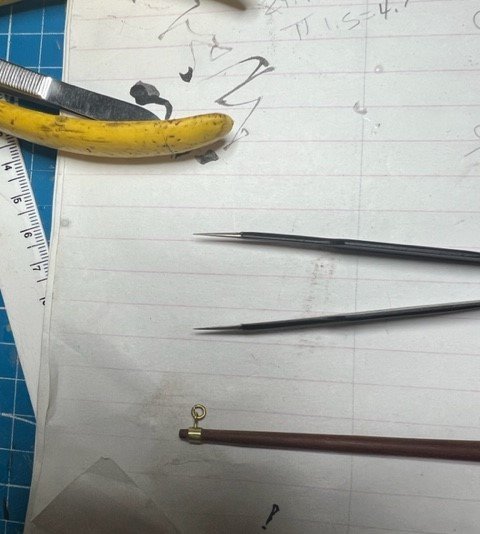
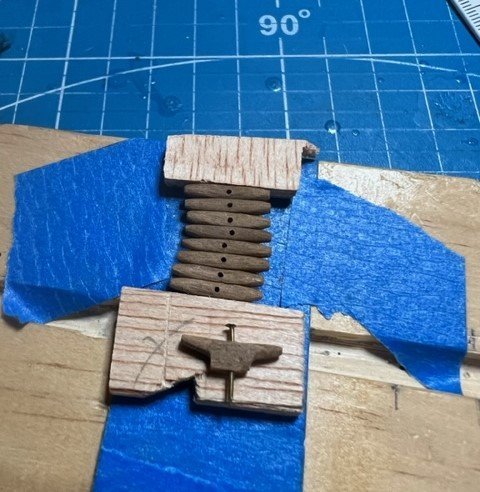
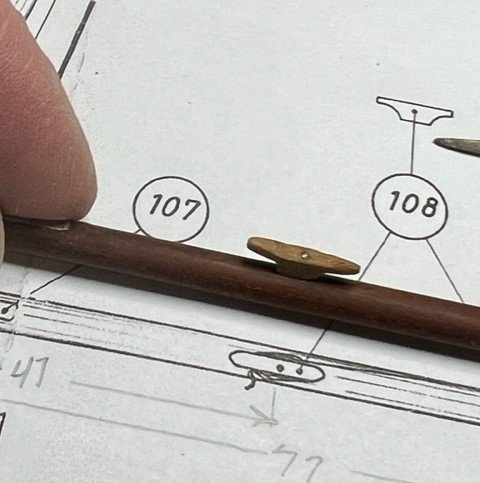
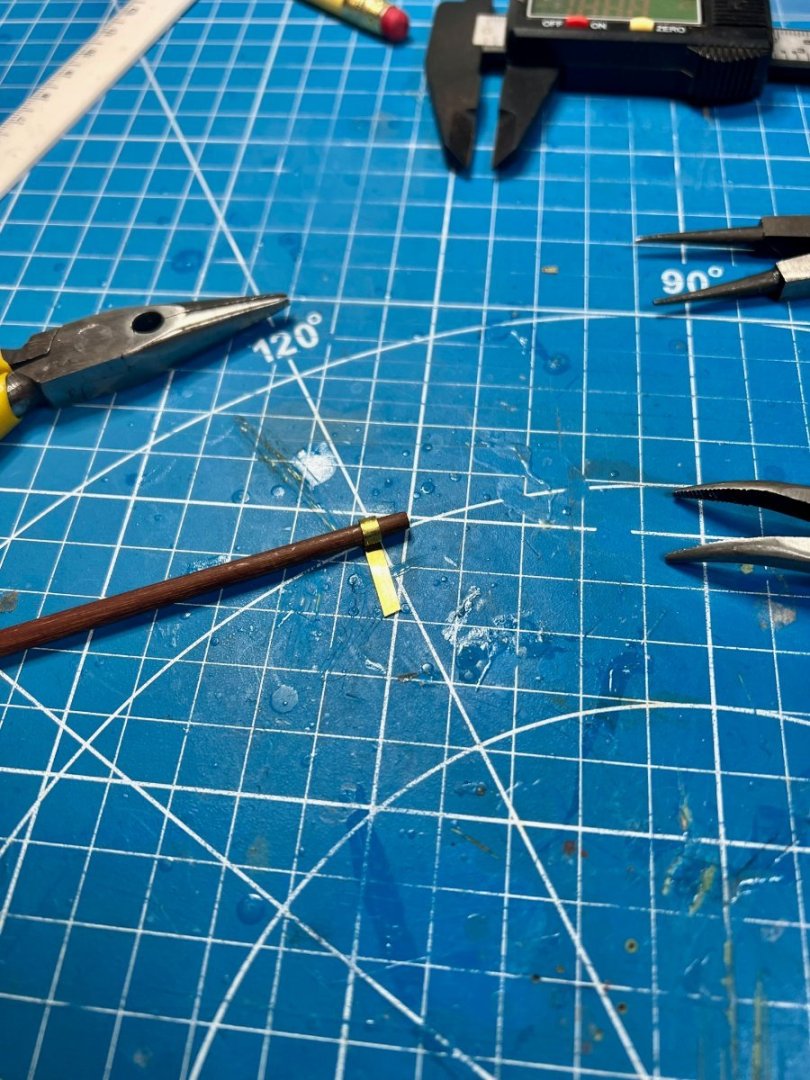
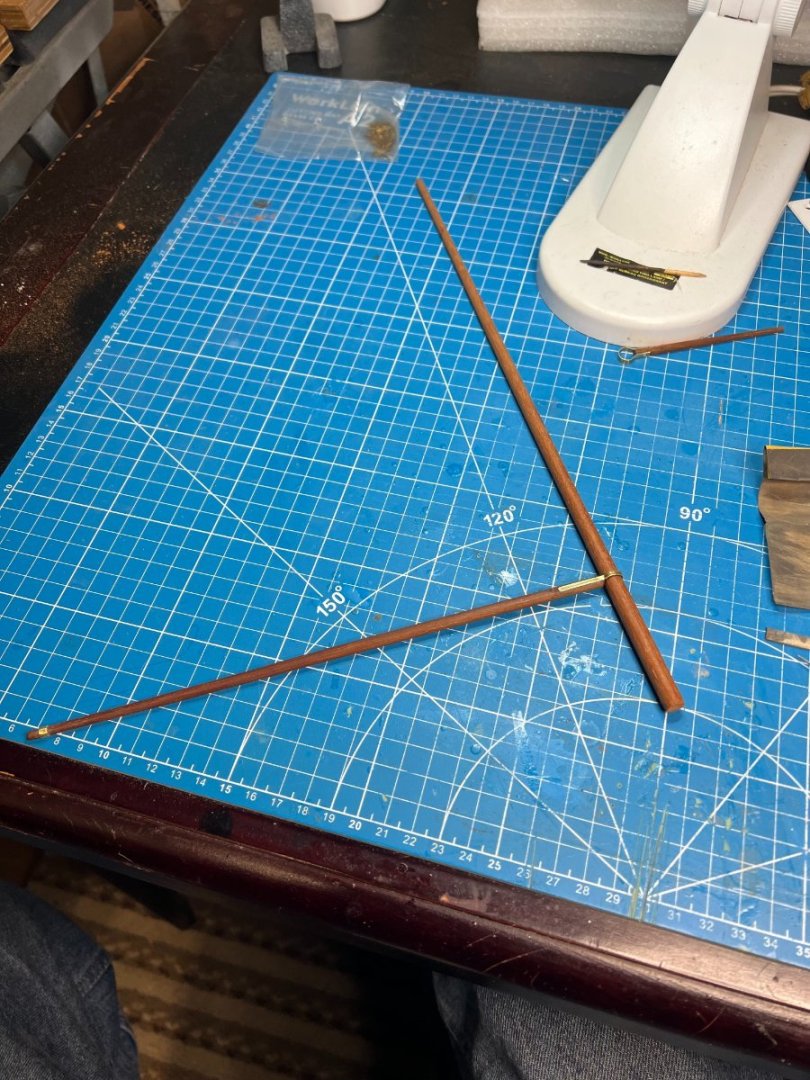
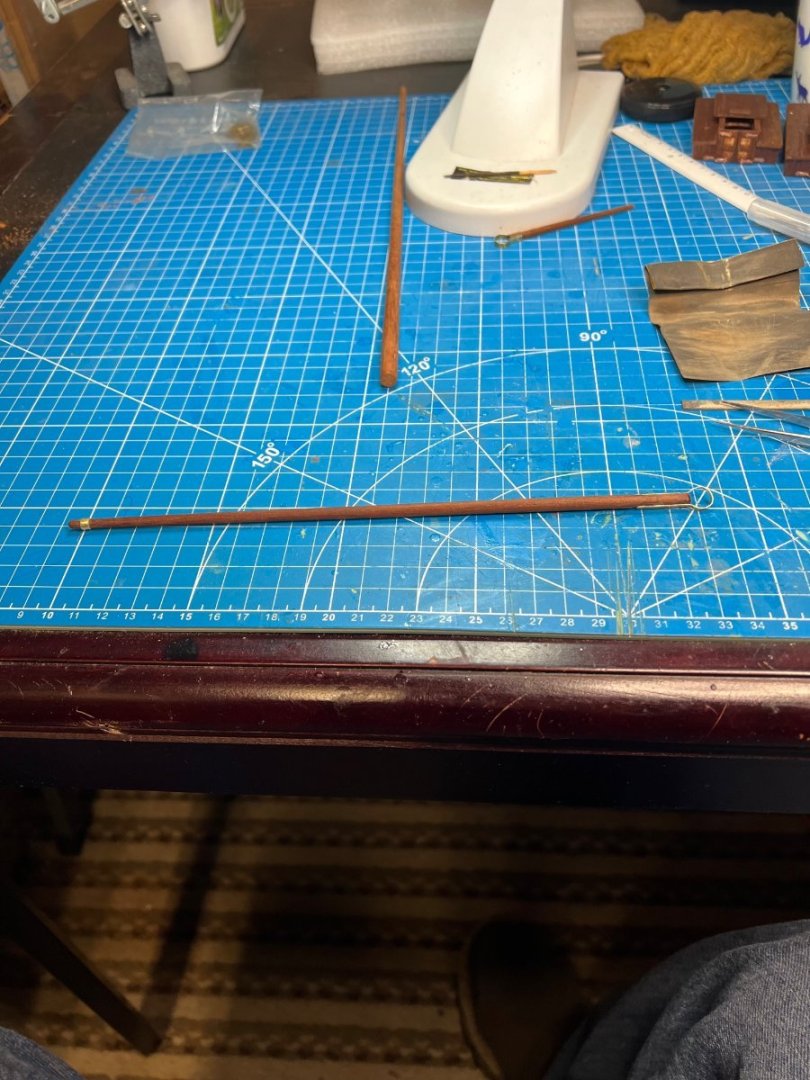
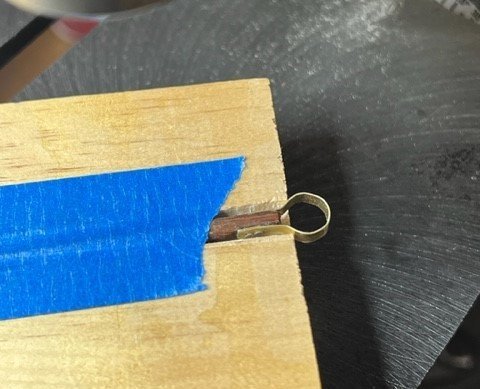
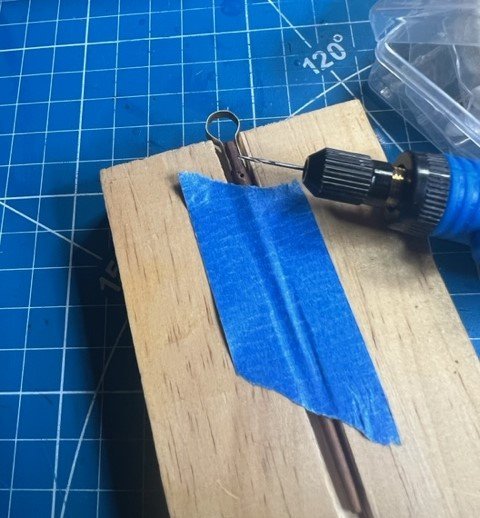
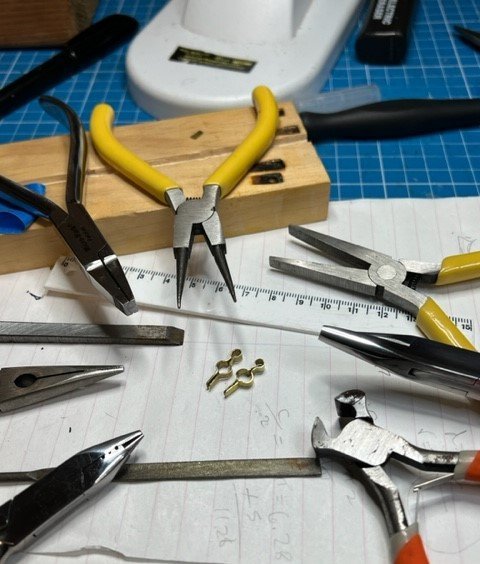
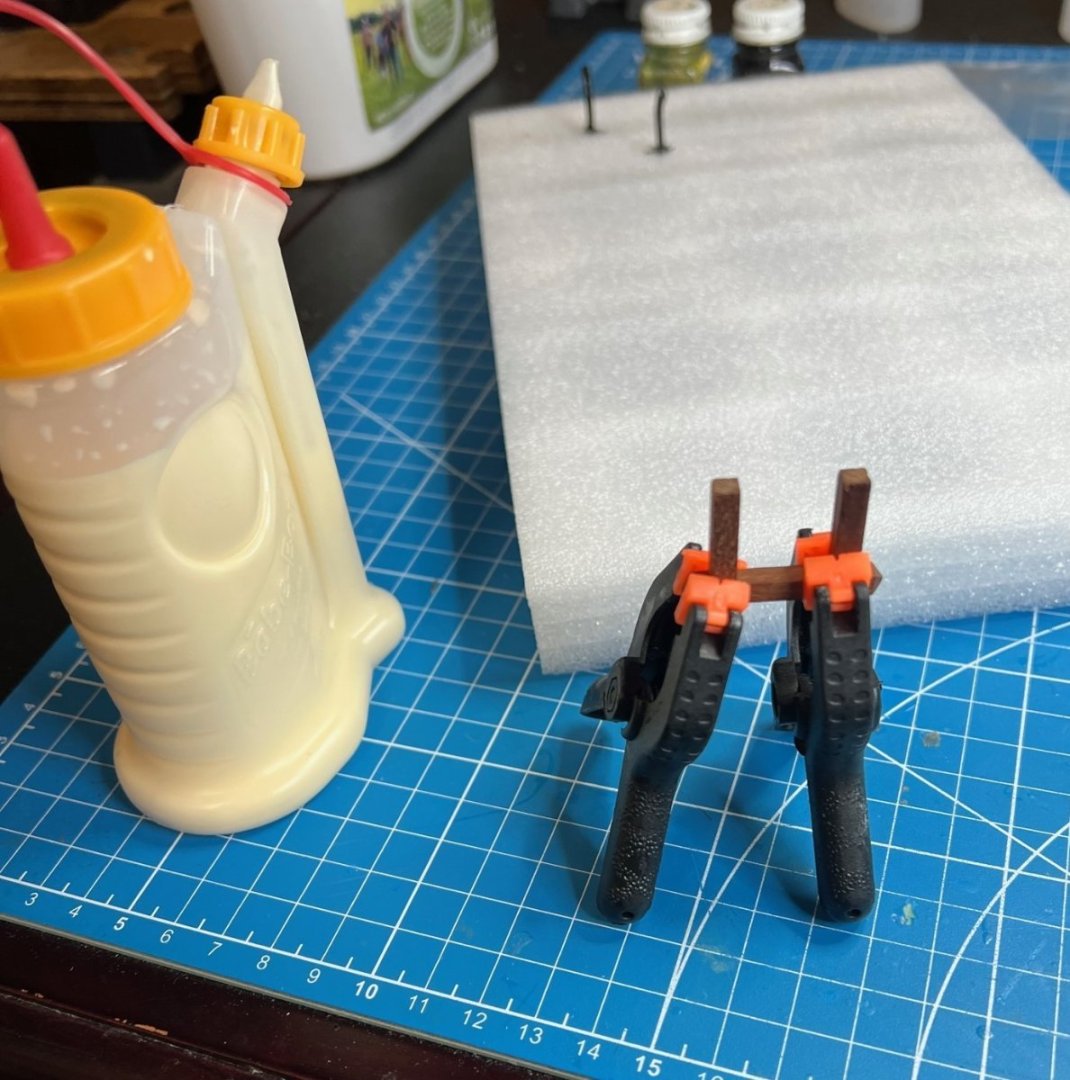
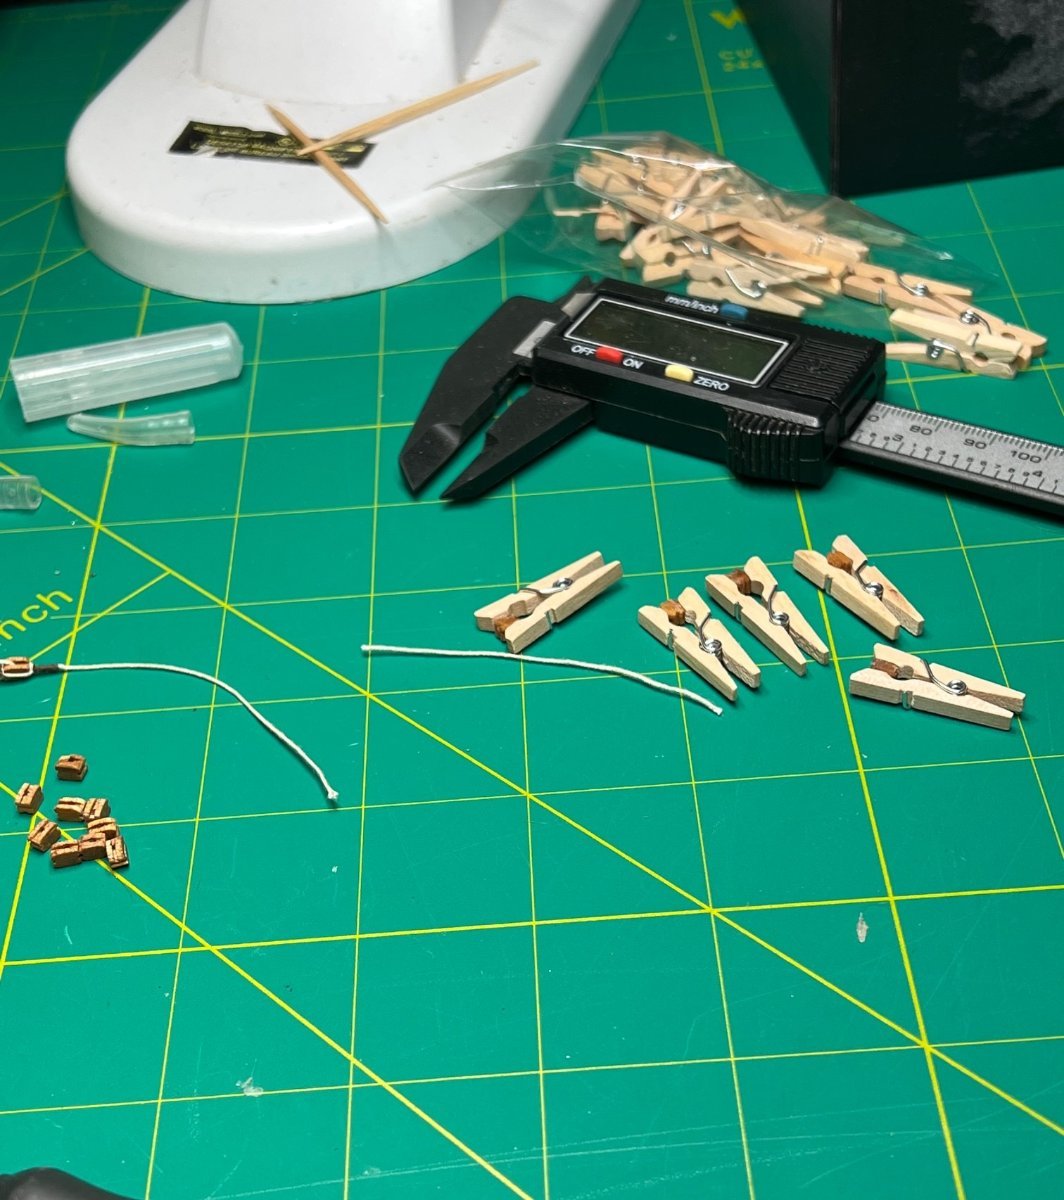
Last day of March and still waiting for the .4mm thread to get here to “pudden” the anchors. I made new anchor rings from .6mm brass wire because I didn’t like the ones included in the old kit. So I got both rings on the imported from Australia Amati anchors waiting for the thread so I could try my first go at puddening the anchors. Meanwhile, I pinned the two uprights of the knightshead to pin to the deck. I used taught tape over the pins to make a drilling template for the matching holes. Turned out I had to bend the pins I installed a little to get them to fit the holes but it worked out great. I also scratch-built the deck racks for my barrel of Kentucky Bourbon I made. I pinned the two deck racks and put them aside to install when I was ready. I was terrified to install anything not knowing if it would be in my way at some point of installing something else.
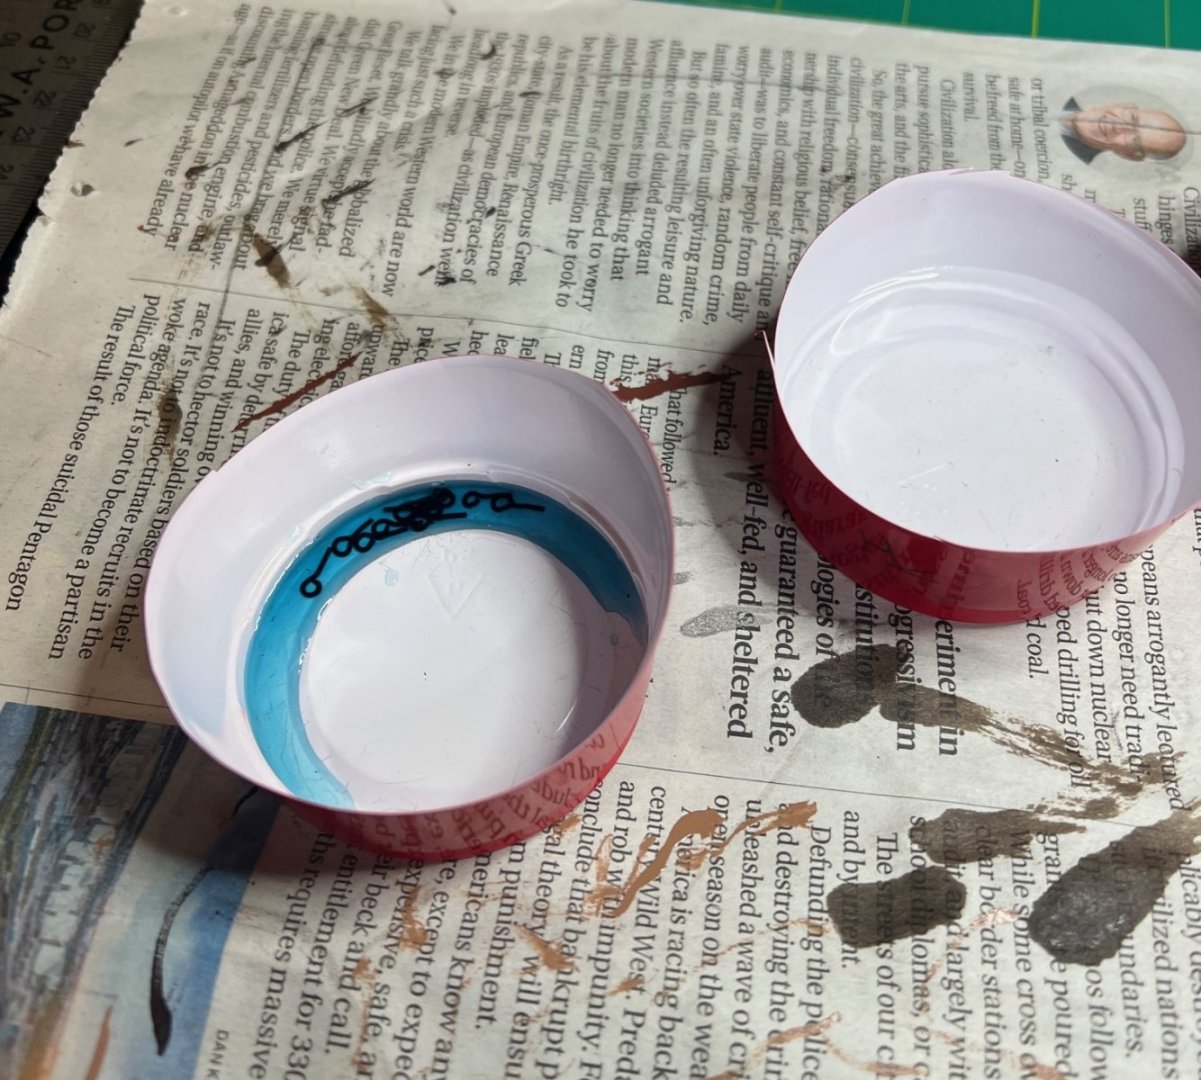
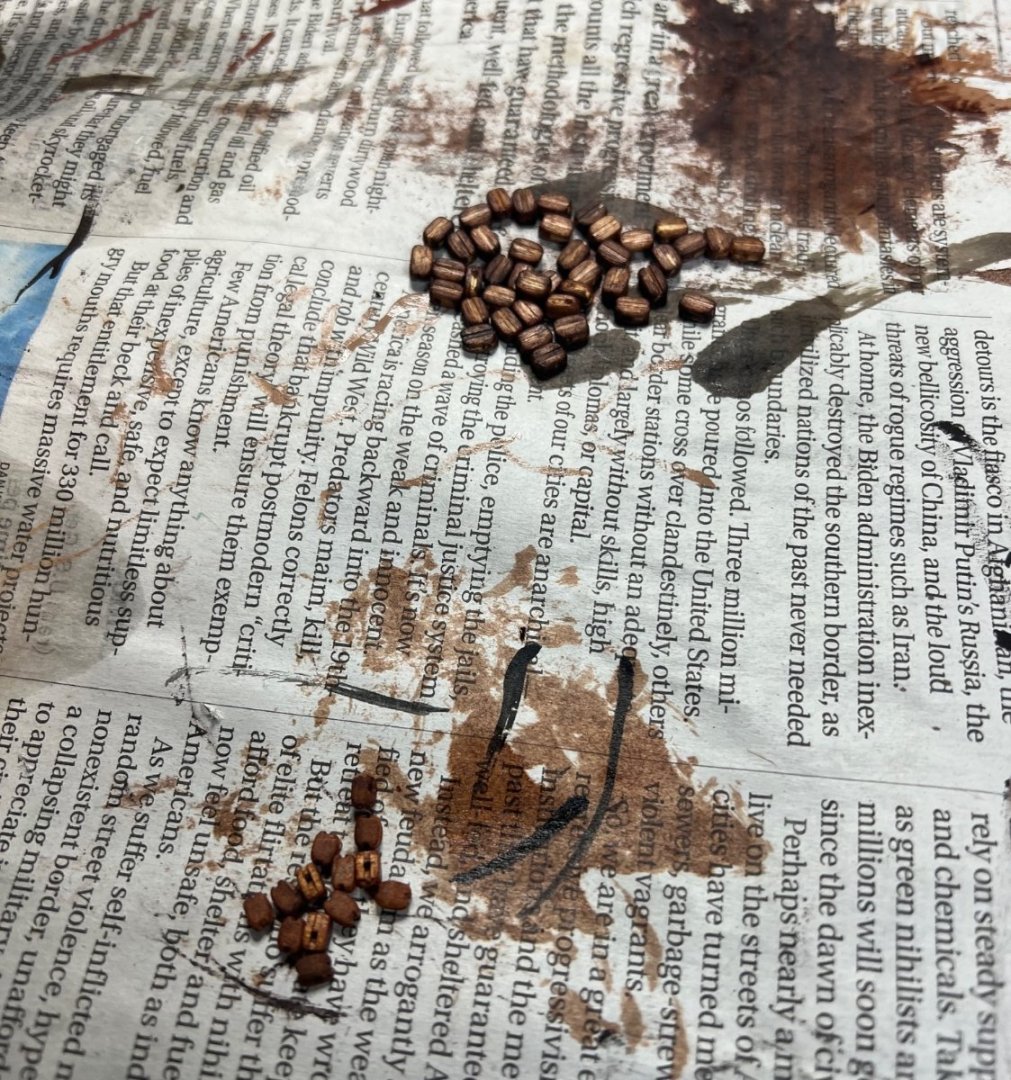
Today I received the new calipers with metal calipers instead of the cheap plastic one that failed for numerous reasons and it proves you get what you pay for. I ordered a mini-vice from Micro Mark today to help with upcoming rigging. It’s time for me to stop and plan out exactly what order the details on the ship need to go on. My masts and spars are still sticky from the satin spray varnish so I can’t handle those yet. Been a few days so I’m wondering if they just stay sticky or what? I leave for a Mexican Riviera cruise in a week for 9 days total so I have to find a stopping place I can pick up when I get back. I will miss working on the ship but will take my notebook so I can plan things, in between cruise ship cocktails lol. Got the stainless balls today to use for my bullets but my plans to burnish them with brassblack didn’t work because, uh, they’re stainless, duh. So I used black paint in a jar lid to keep rolling them around until they were covered and it eventually worked out and I had black cannonballs (bullets) for my guns.
Turned out I had to bend the pins I installed a little to get them to fit the holes but it worked out great. I also scratch-built the deck racks for my barrel of Kentucky Bourbon I made. I pinned the two deck racks and put them aside to install when I was ready. I was terrified to install anything not knowing if it would be in my way at some point of installing something else.
Today I received the new calipers with metal calipers instead of the cheap plastic one that failed for numerous reasons and it proves you get what you pay for. I ordered a mini-vice from Micro Mark today to help with upcoming rigging. It’s time for me to stop and plan out exactly what order the details on the ship need to go on. My masts and spars are still sticky from the satin spray varnish so I can’t handle those yet. Been a few days so I’m wondering if they just stay sticky or what? I leave for a Mexican Riviera cruise in a week for 9 days total so I have to find a stopping place I can pick up when I get back. I will miss working on the ship but will take my notebook so I can plan things, in between cruise ship cocktails lol. Got the stainless balls today to use for my bullets but my plans to burnish them with brassblack didn’t work because, uh, they’re stainless, duh. So I used black paint in a jar lid to keep rolling them around until they were covered and it eventually worked out and I had black cannonballs (bullets) for my guns.
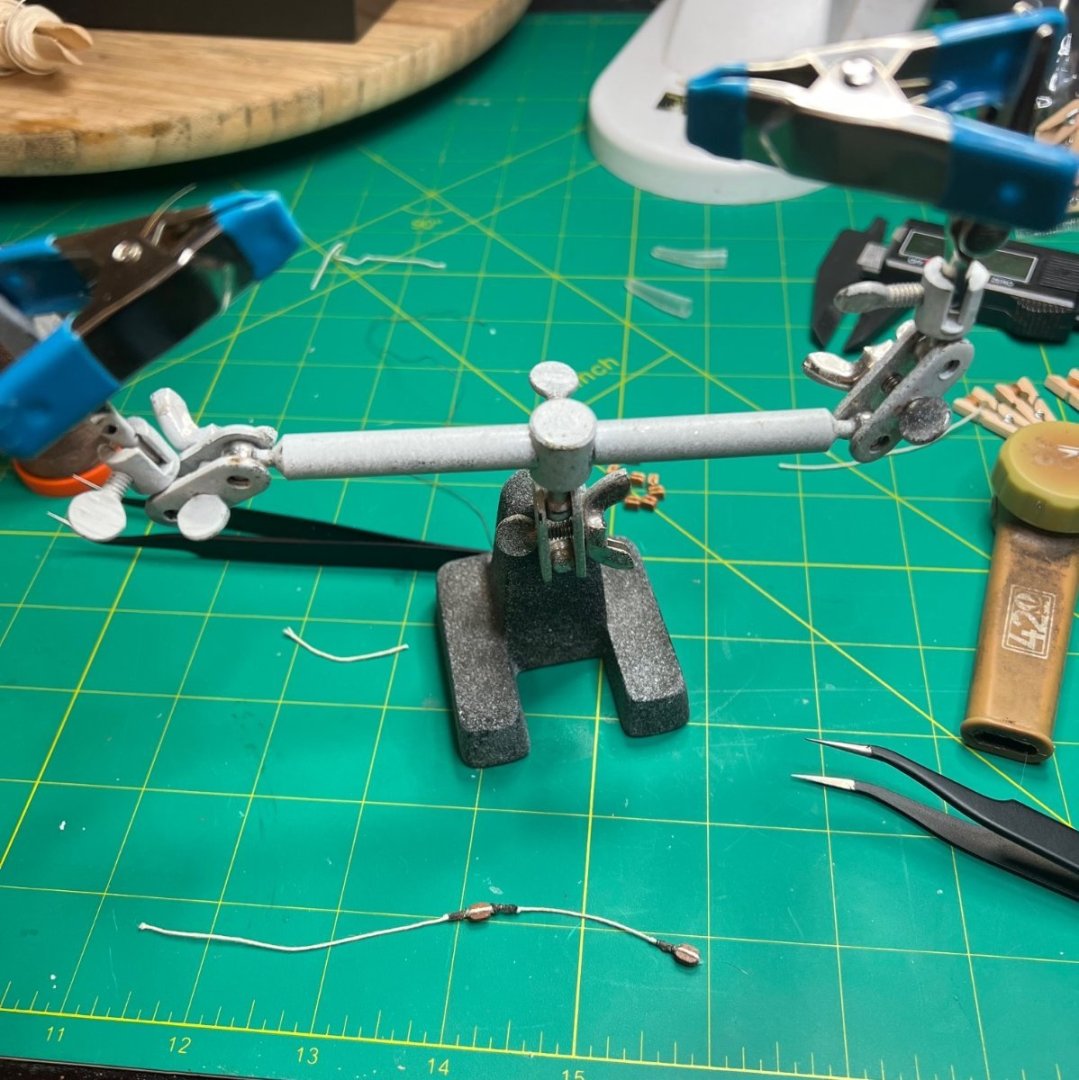
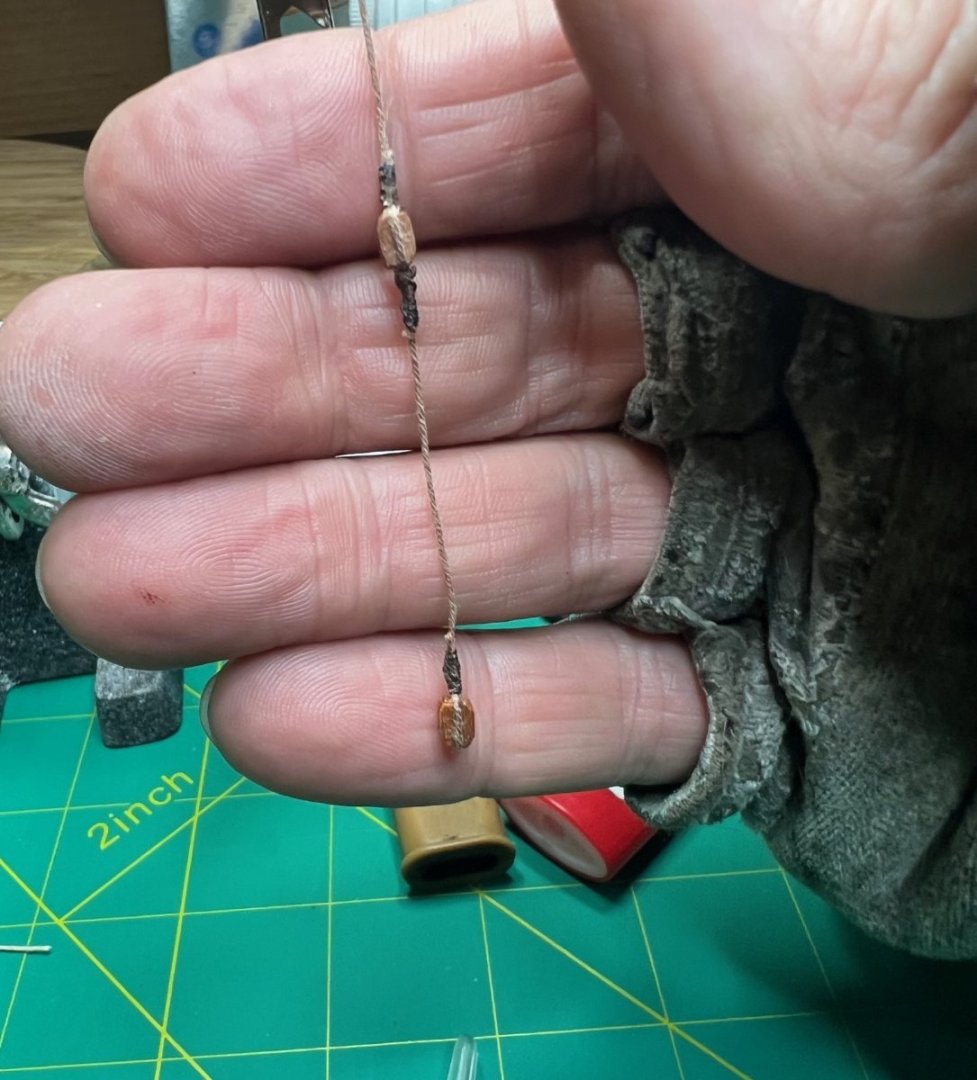
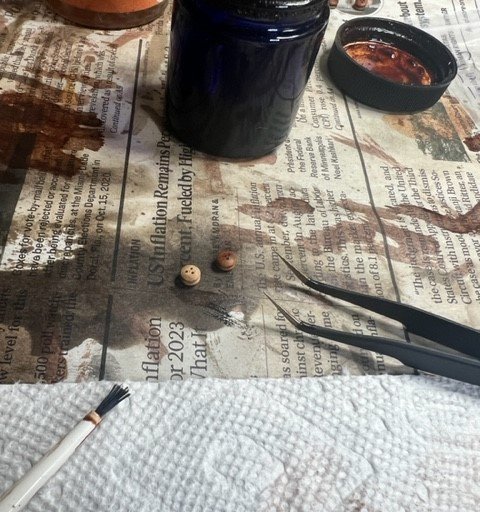
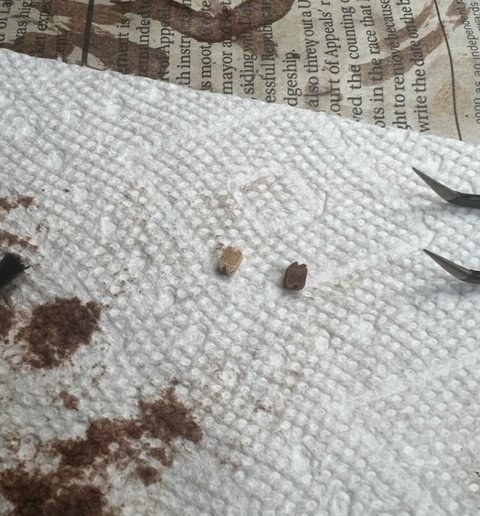
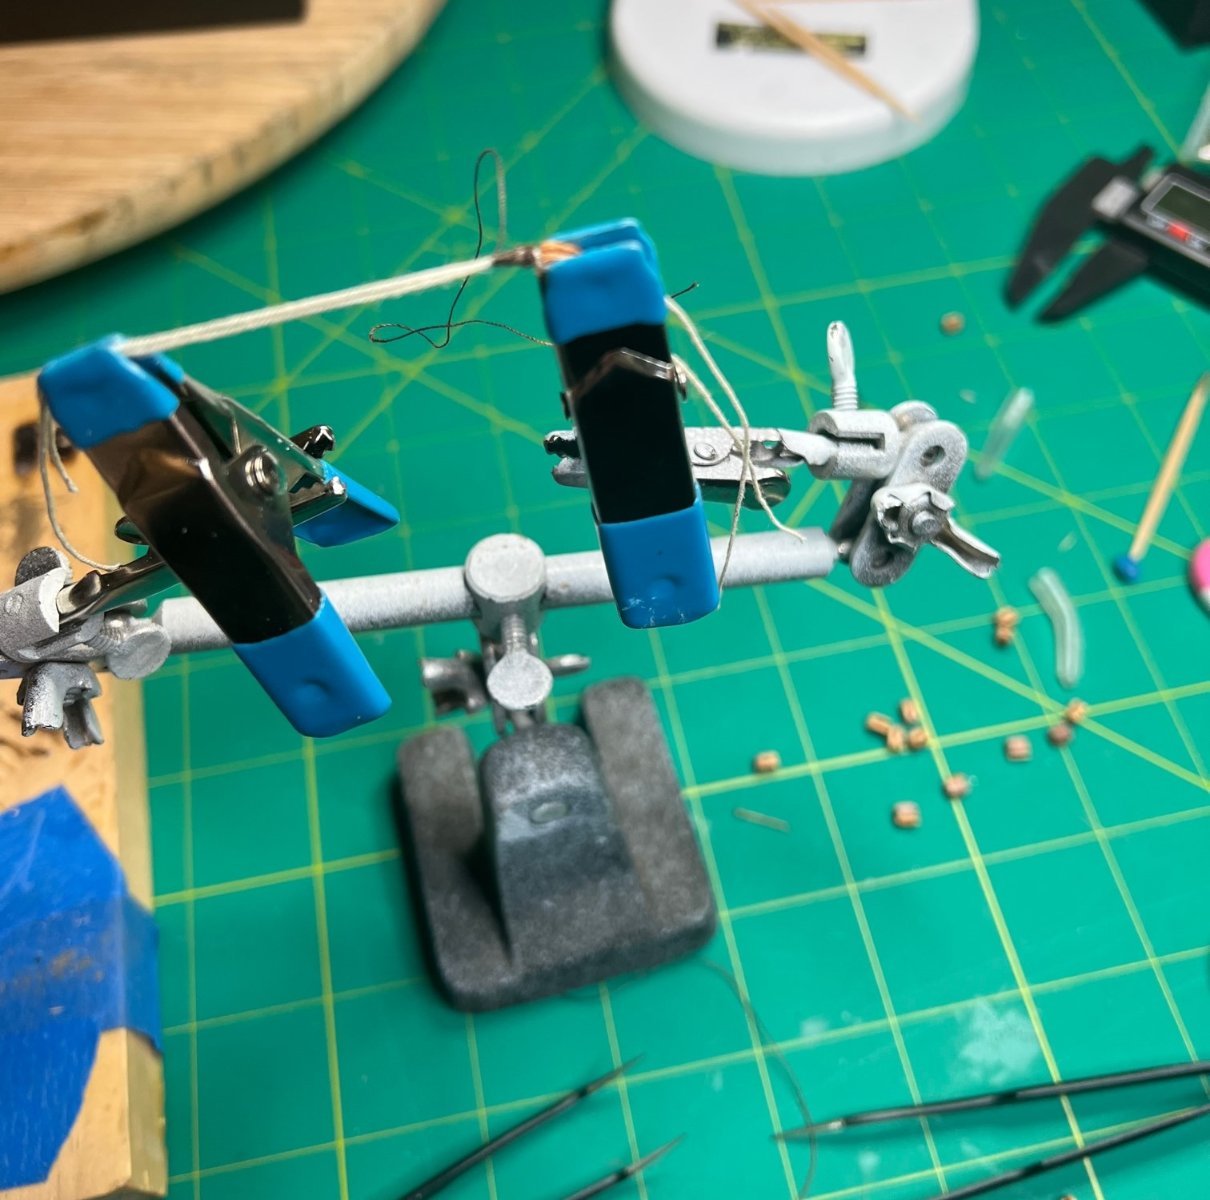
I received my .4mm thread today, 4/4/23, to put the puddening on my anchor rings. I served both the anchor’s rings and was happy with the results. Next I had to seize white thread around the serving in 4 places equidistantly spaced. It came out great after having to start over several times. Just had to stay with it until it was done and looked good. The next day, I received the mini-vice from Micro Mark. It was rusty and instead of sending it back, I got the WD-40 and a brass brush after it and made it work. Disappointing for an expensive Micro Mark tool but I didn’t want to wait for the replacement. I made a base for it from scrap wood. I lubricated all my tools since I was leaving for our cruise tomorrow and didn’t want to start the next job of rigging blocks to the spars until we return.
This will be my last post before our 7 day cruise to the Mexican Riviera so bon voyage for a bit.