Der Alte Rentner
-
Posts
1,018 -
Joined
-
Last visited
Content Type
Profiles
Forums
Gallery
Events
Everything posted by Der Alte Rentner
-
 Not quite. The Imagine feature provided with Grok 4 (X aka Twitter's A/I assistant), It will animate a still photo. Below is an example of a still photo of Conny that Grok animated. I asked it to dial back the animation to simple zoom in on one of the carronades. But you can get some really interesting results if you tell it to have "fun". I'll gladly remove theses, if you feel they are cluttering up your build log. Conny Video.mp4
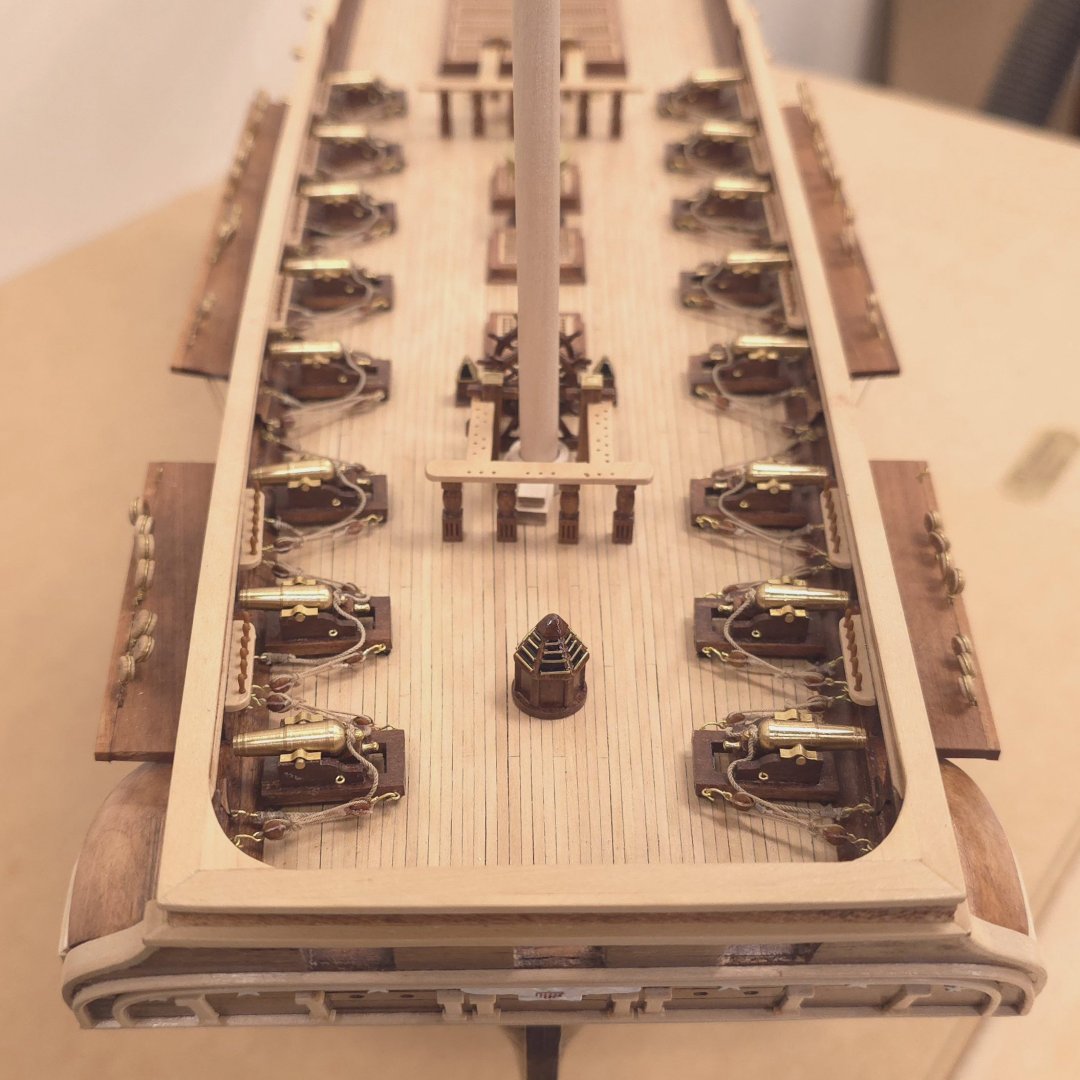
-
Geez, comparing your head supports to mine, I bow my head in shame. What exceptional workmanship. Nice touch with the video. I've been experimenting with a feature called Imagine, which is included with Grok 4, and may post the results of one of those attempts.
-
Now, THAT'S!! a true friend. Sadly, in my experience, a loan usually ends up becoming a "gift".
-
Picture yourself holding the channels in place while gluing them in, or fitting and gluing on the caps. The problem is that your fingers tend to curl around the rails while you're working in the vicinity. As careful as you think you're going to be, when one or more of the pins snap, you realize that, Doh! I forgot again.
-
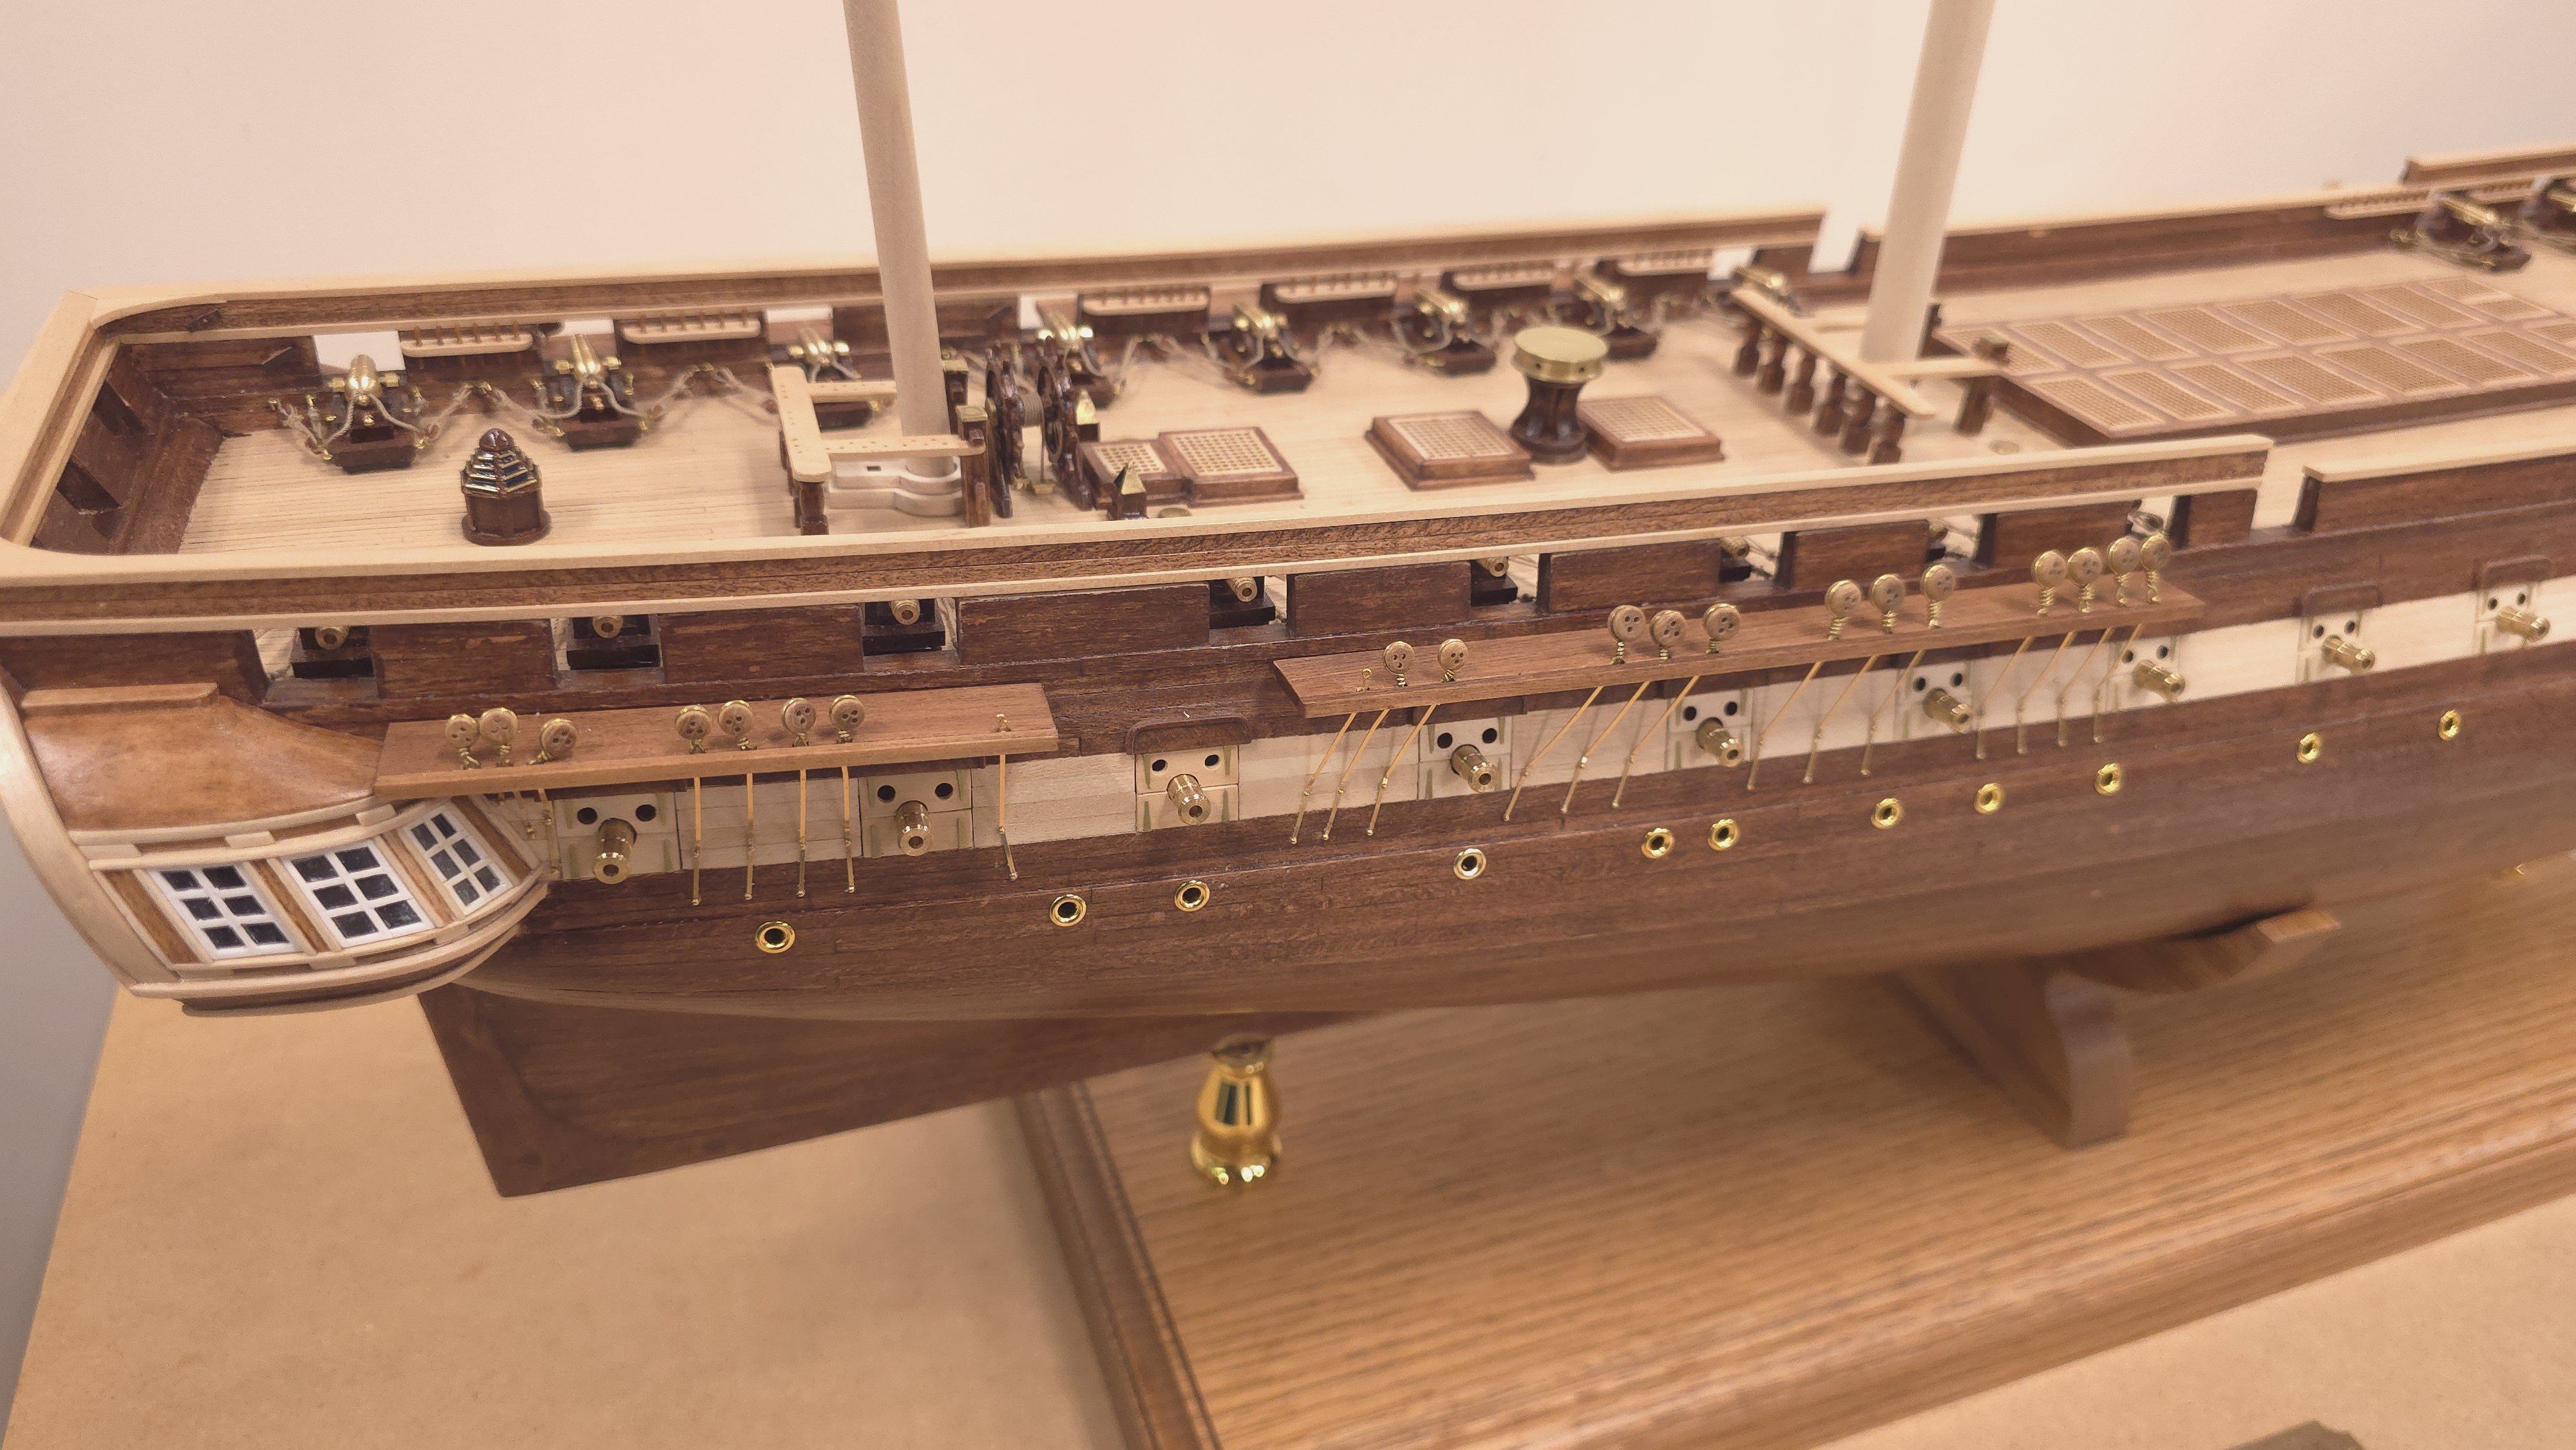
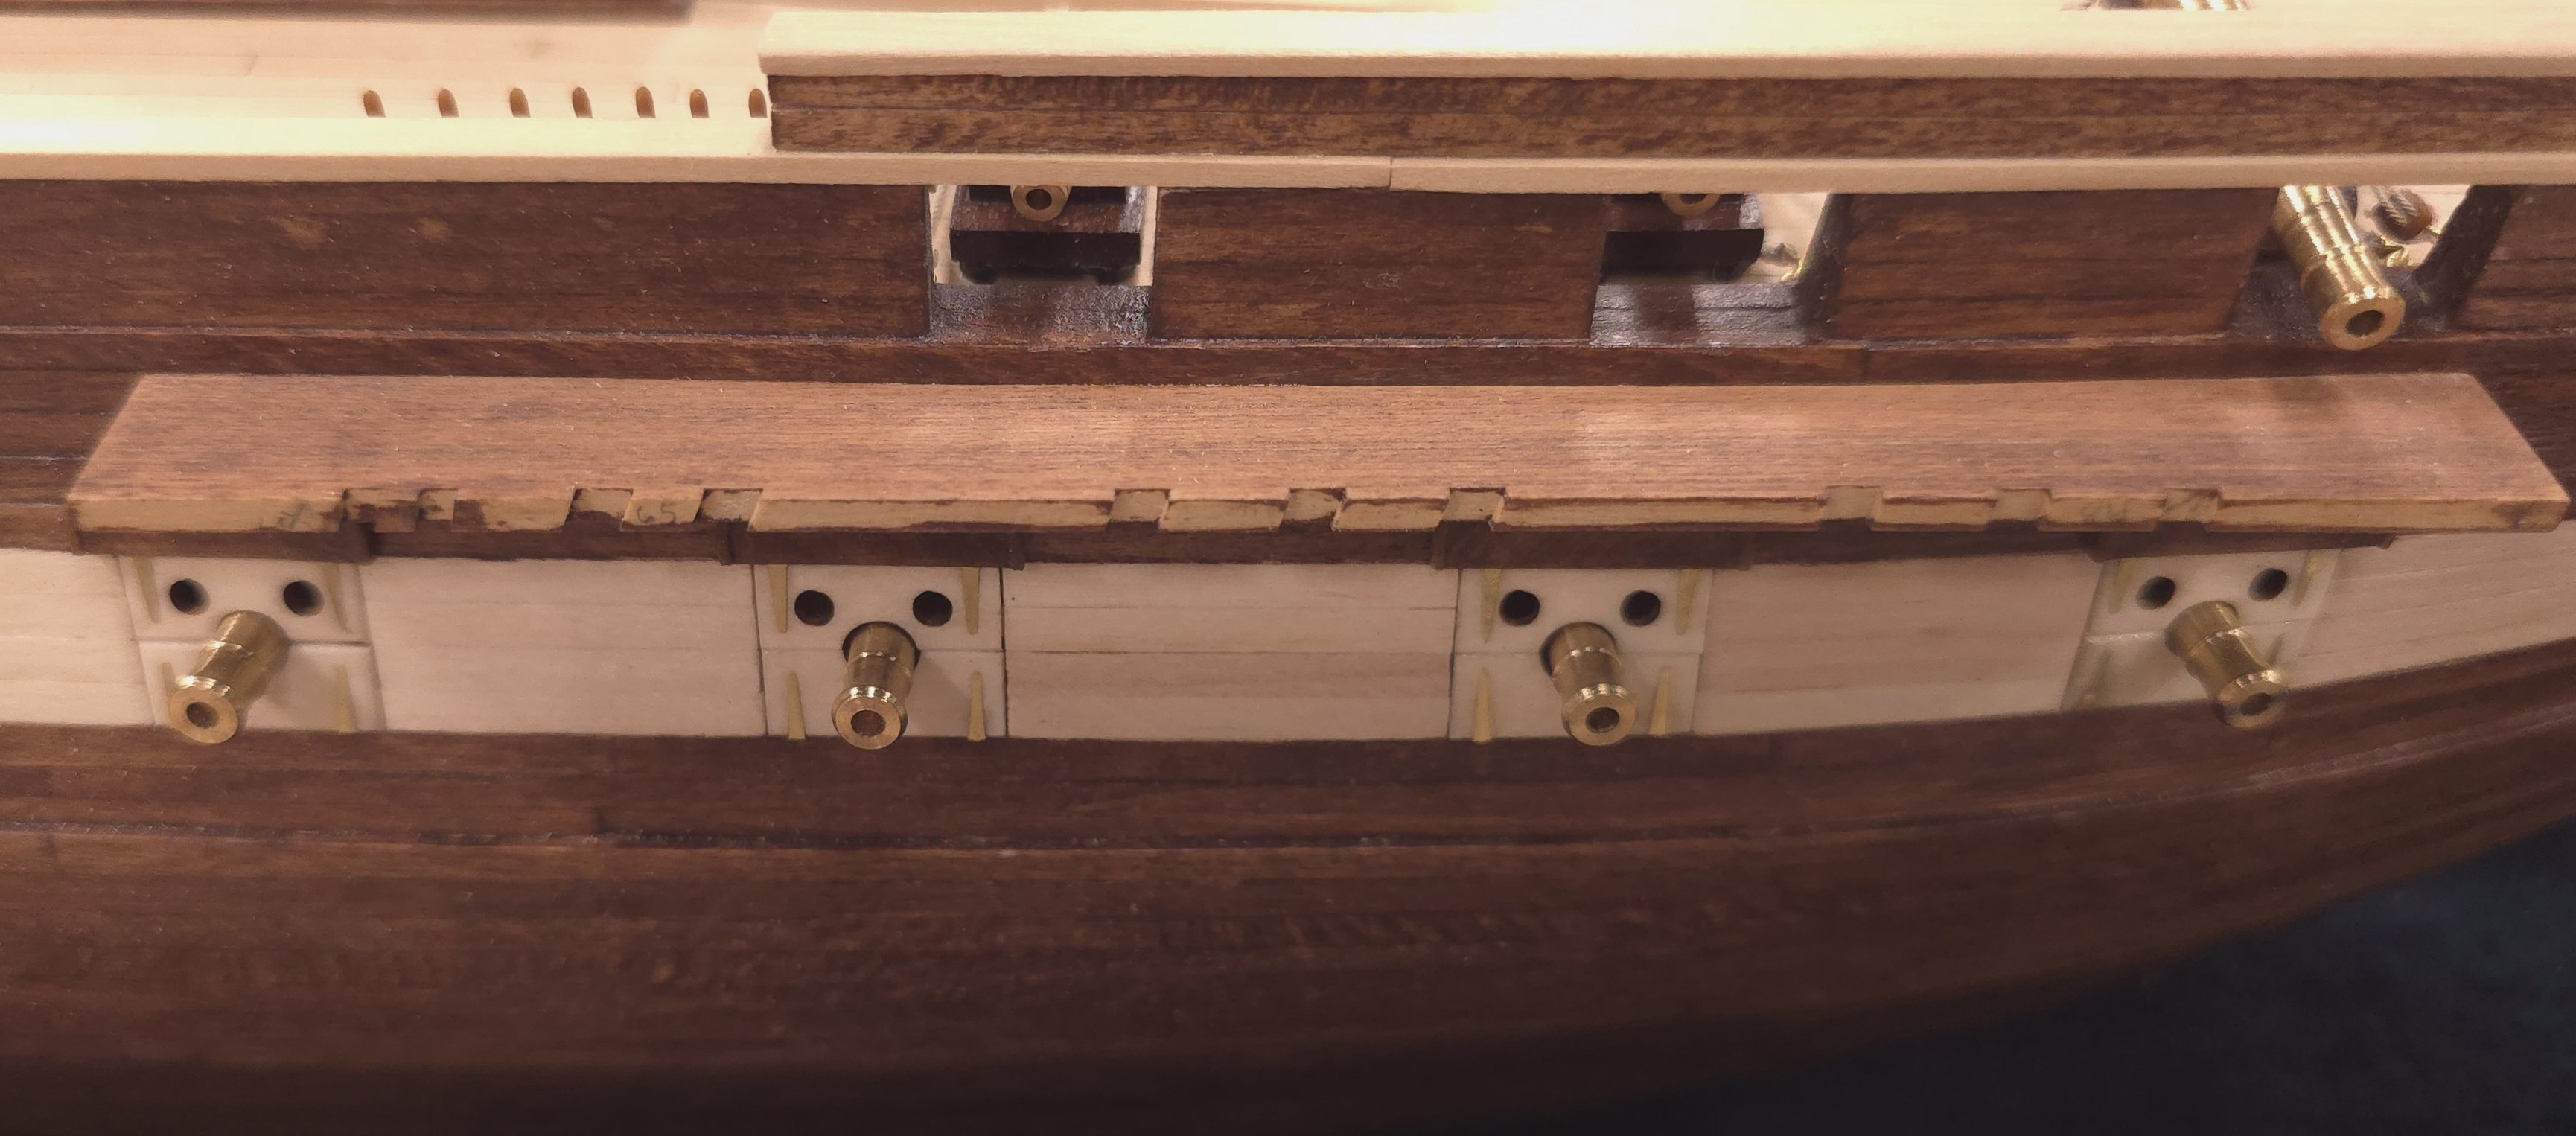
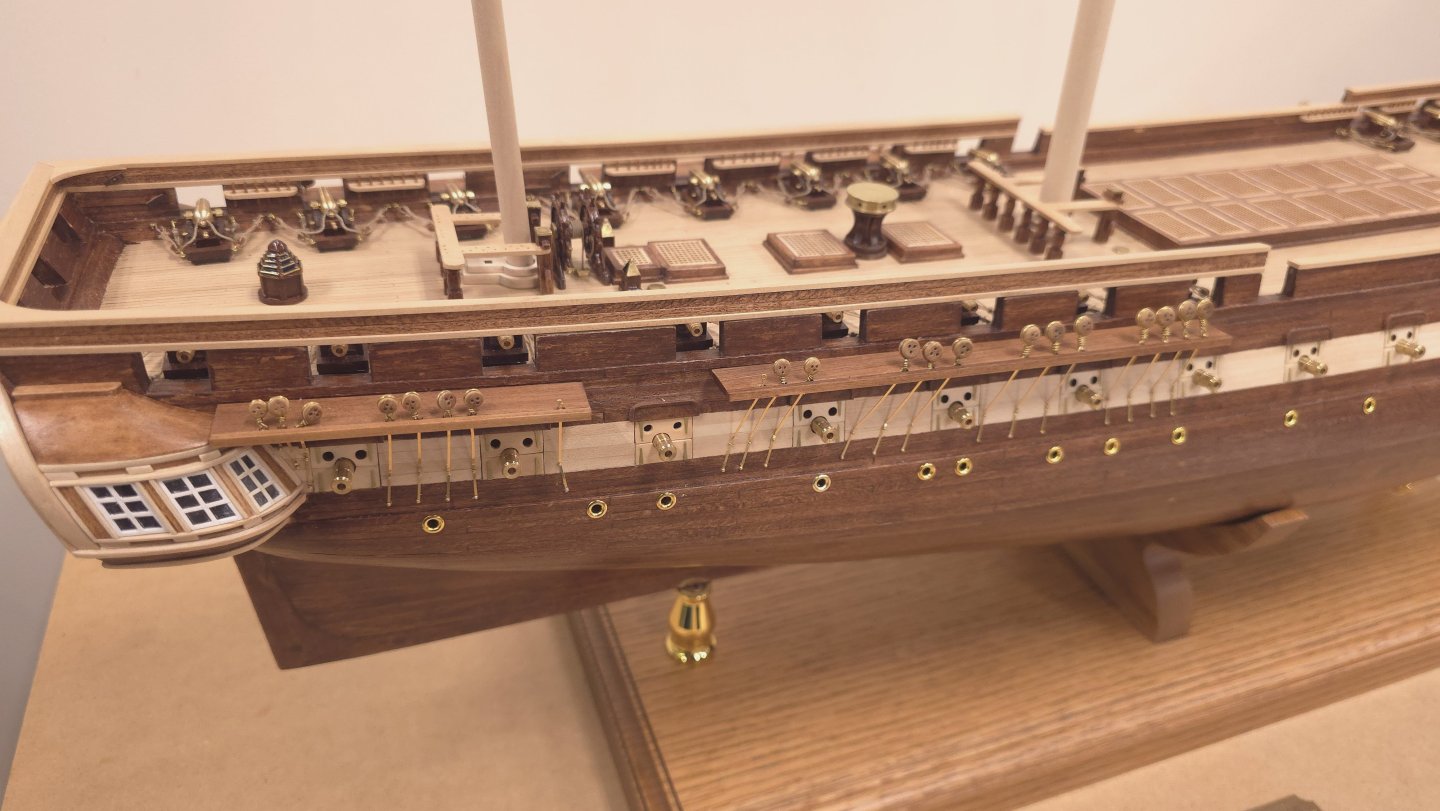
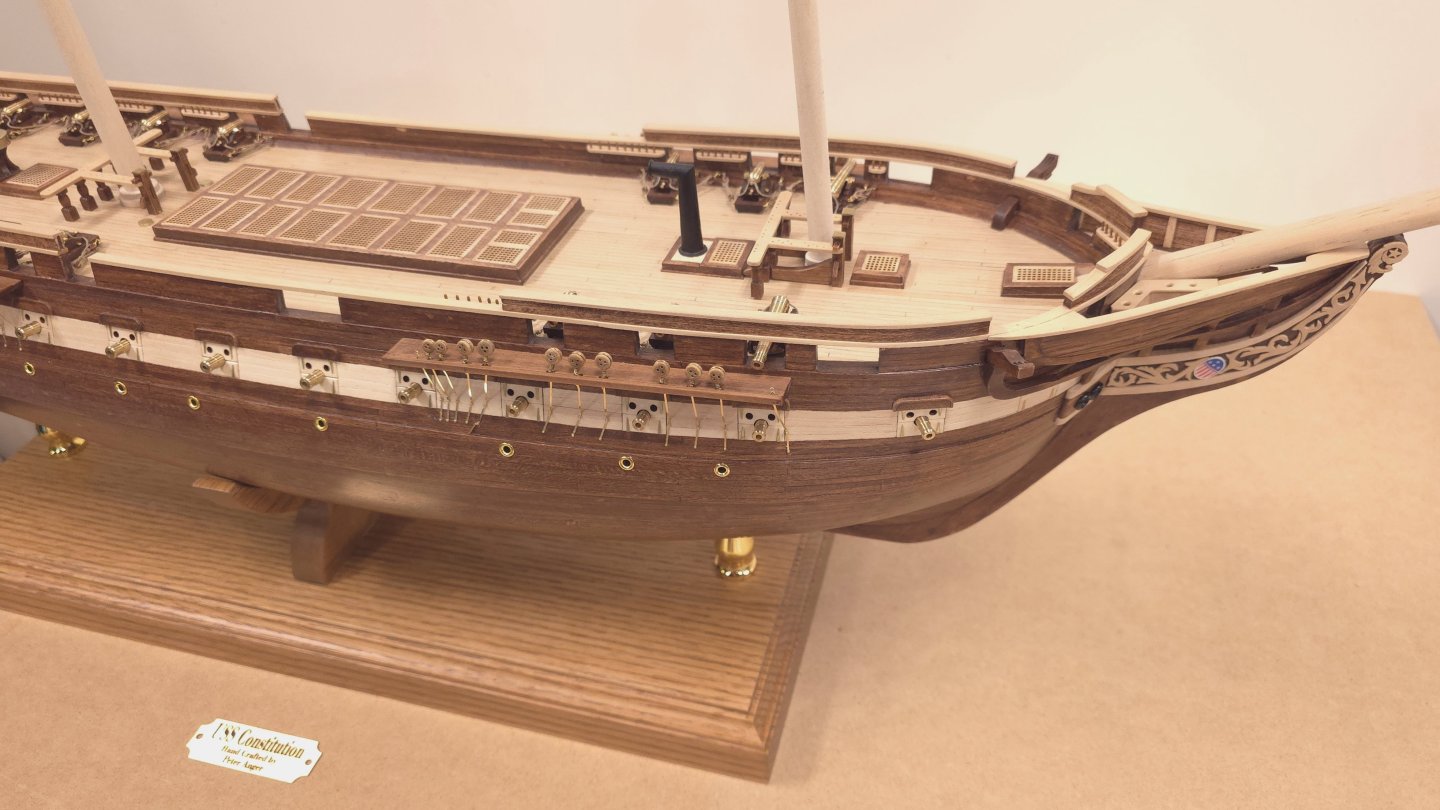
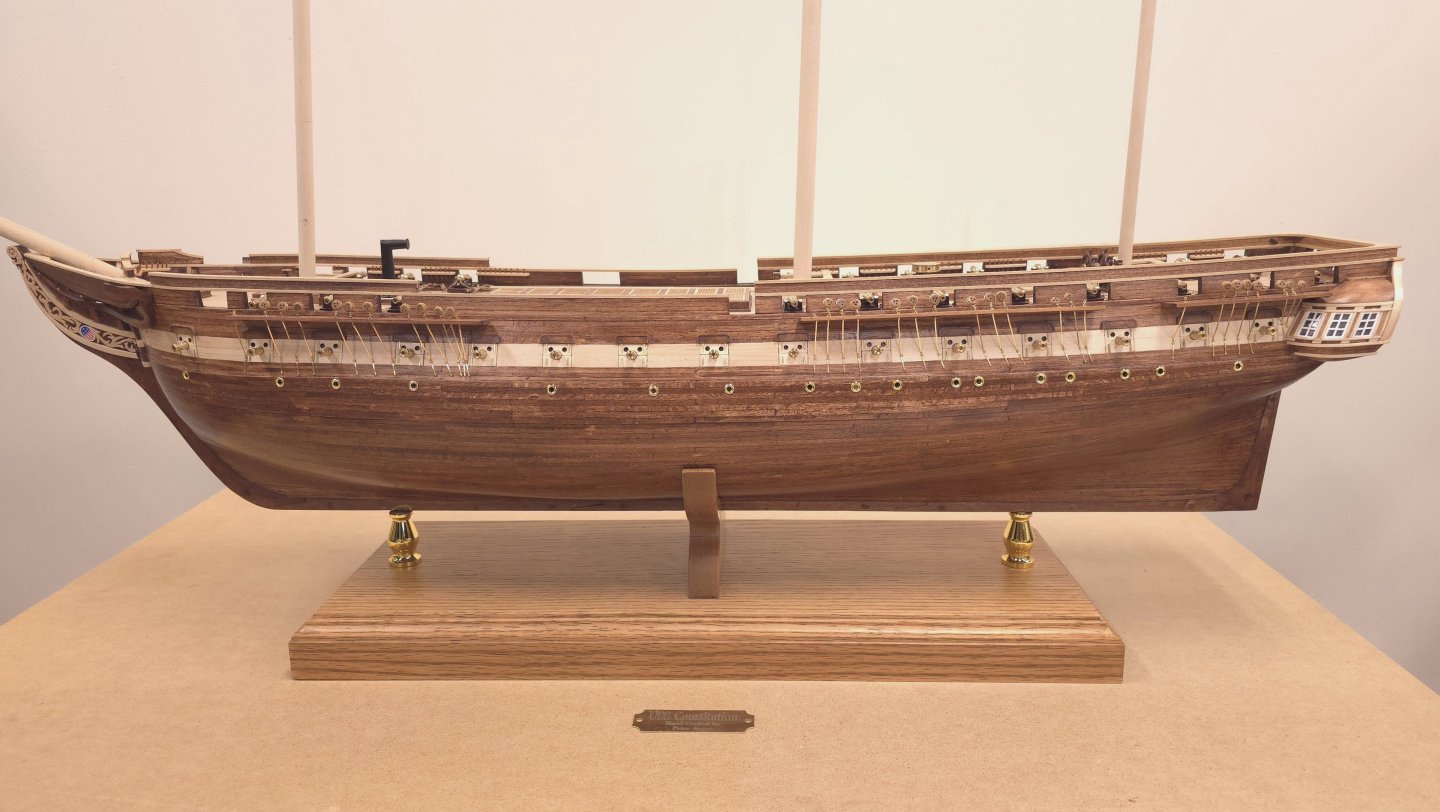
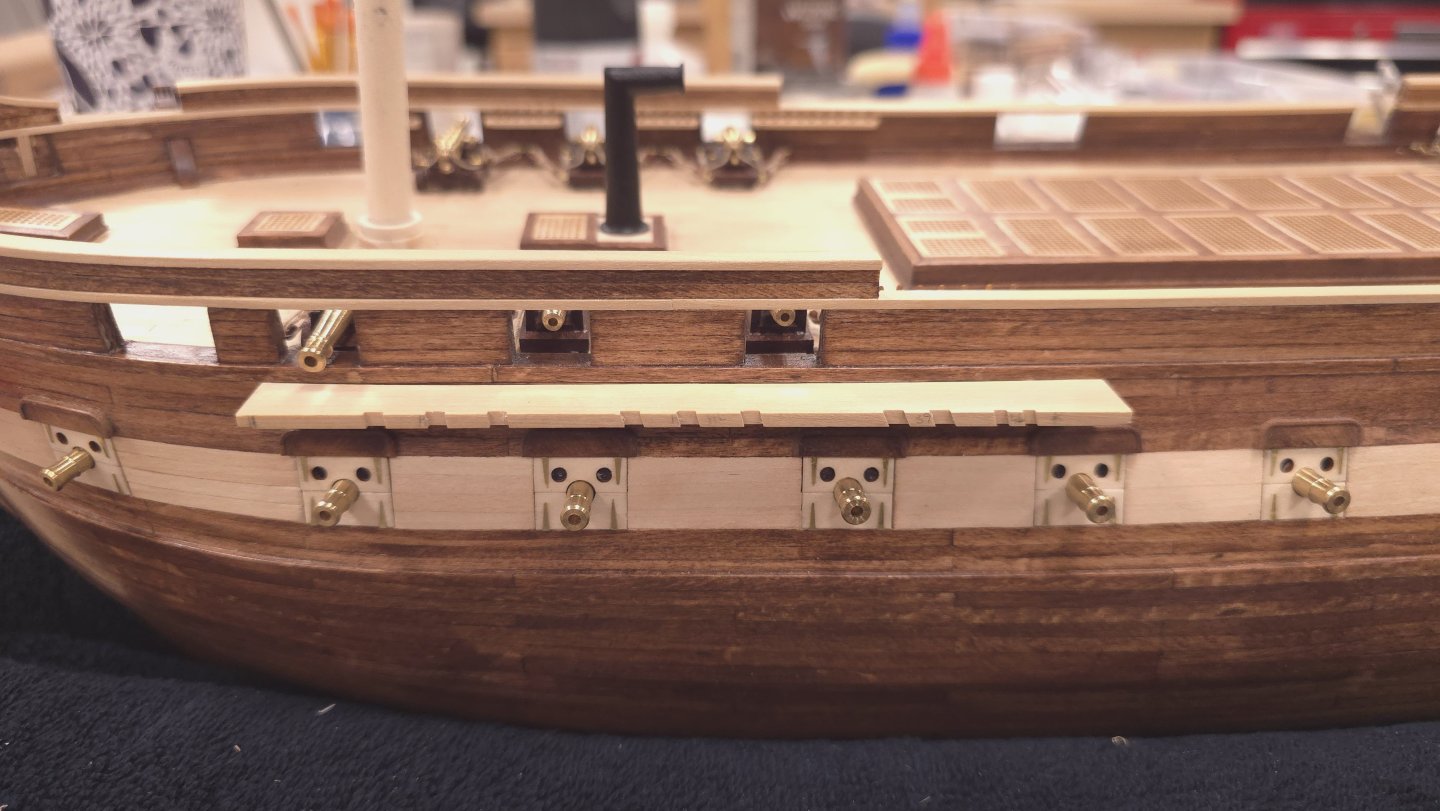
I finally finished the starboard side channels and chain plates. Well, almost.. I had to do a little trimming on the channels, which required a little touch up with stain, which in turn requires 24 hours to cure. So, putting a couple of coats of matte poly on them will have to wait a day or so. While I contemplate next steps, (the remaining three items in chapter 12 of the practicum - steps, anchors and rudder), I'll update the build log with a few new photos. By the way, the belaying pin replacement count was an even dozen. I repeat my earlier advice, don't glue in the belaying pins until you're ready to use them. There's almost no way to work on chain plates and channels without taking them out.

-
Very nicely done. Amazing result, especially given that you had to manufacture your own planks on a table saw. Even more impressive is the that you didn't ruin your plane blades on that aluminum plank plaining jig. I never in a million years would have considered using the plan to level and shape the planks once they were on the hull. (Fishtail chisel would have been my choice). Kudos to you Haiko!
- 233 replies
-
- 2
-

-
- Model Shipways
- constitution
- (and 5 more)
-
USS Constitution by mtbediz - 1:76
Der Alte Rentner replied to mtbediz's topic in - Build logs for subjects built 1751 - 1800
I do not plan to add stanchions to my model, but I took great interest in your use of jigs to manufacture yours. Were I to add stanchions to my model, I wouldn't have the luxury of soldering on the extension, leaving me with the mental exercise of figuring out how to modify your jig to also factor in the extension. You're leaving me in the dust Mustafa! The good news is, I'll have plenty of fresh new references to help me in the coming years to help me finish my Constitution. Great work as always. -
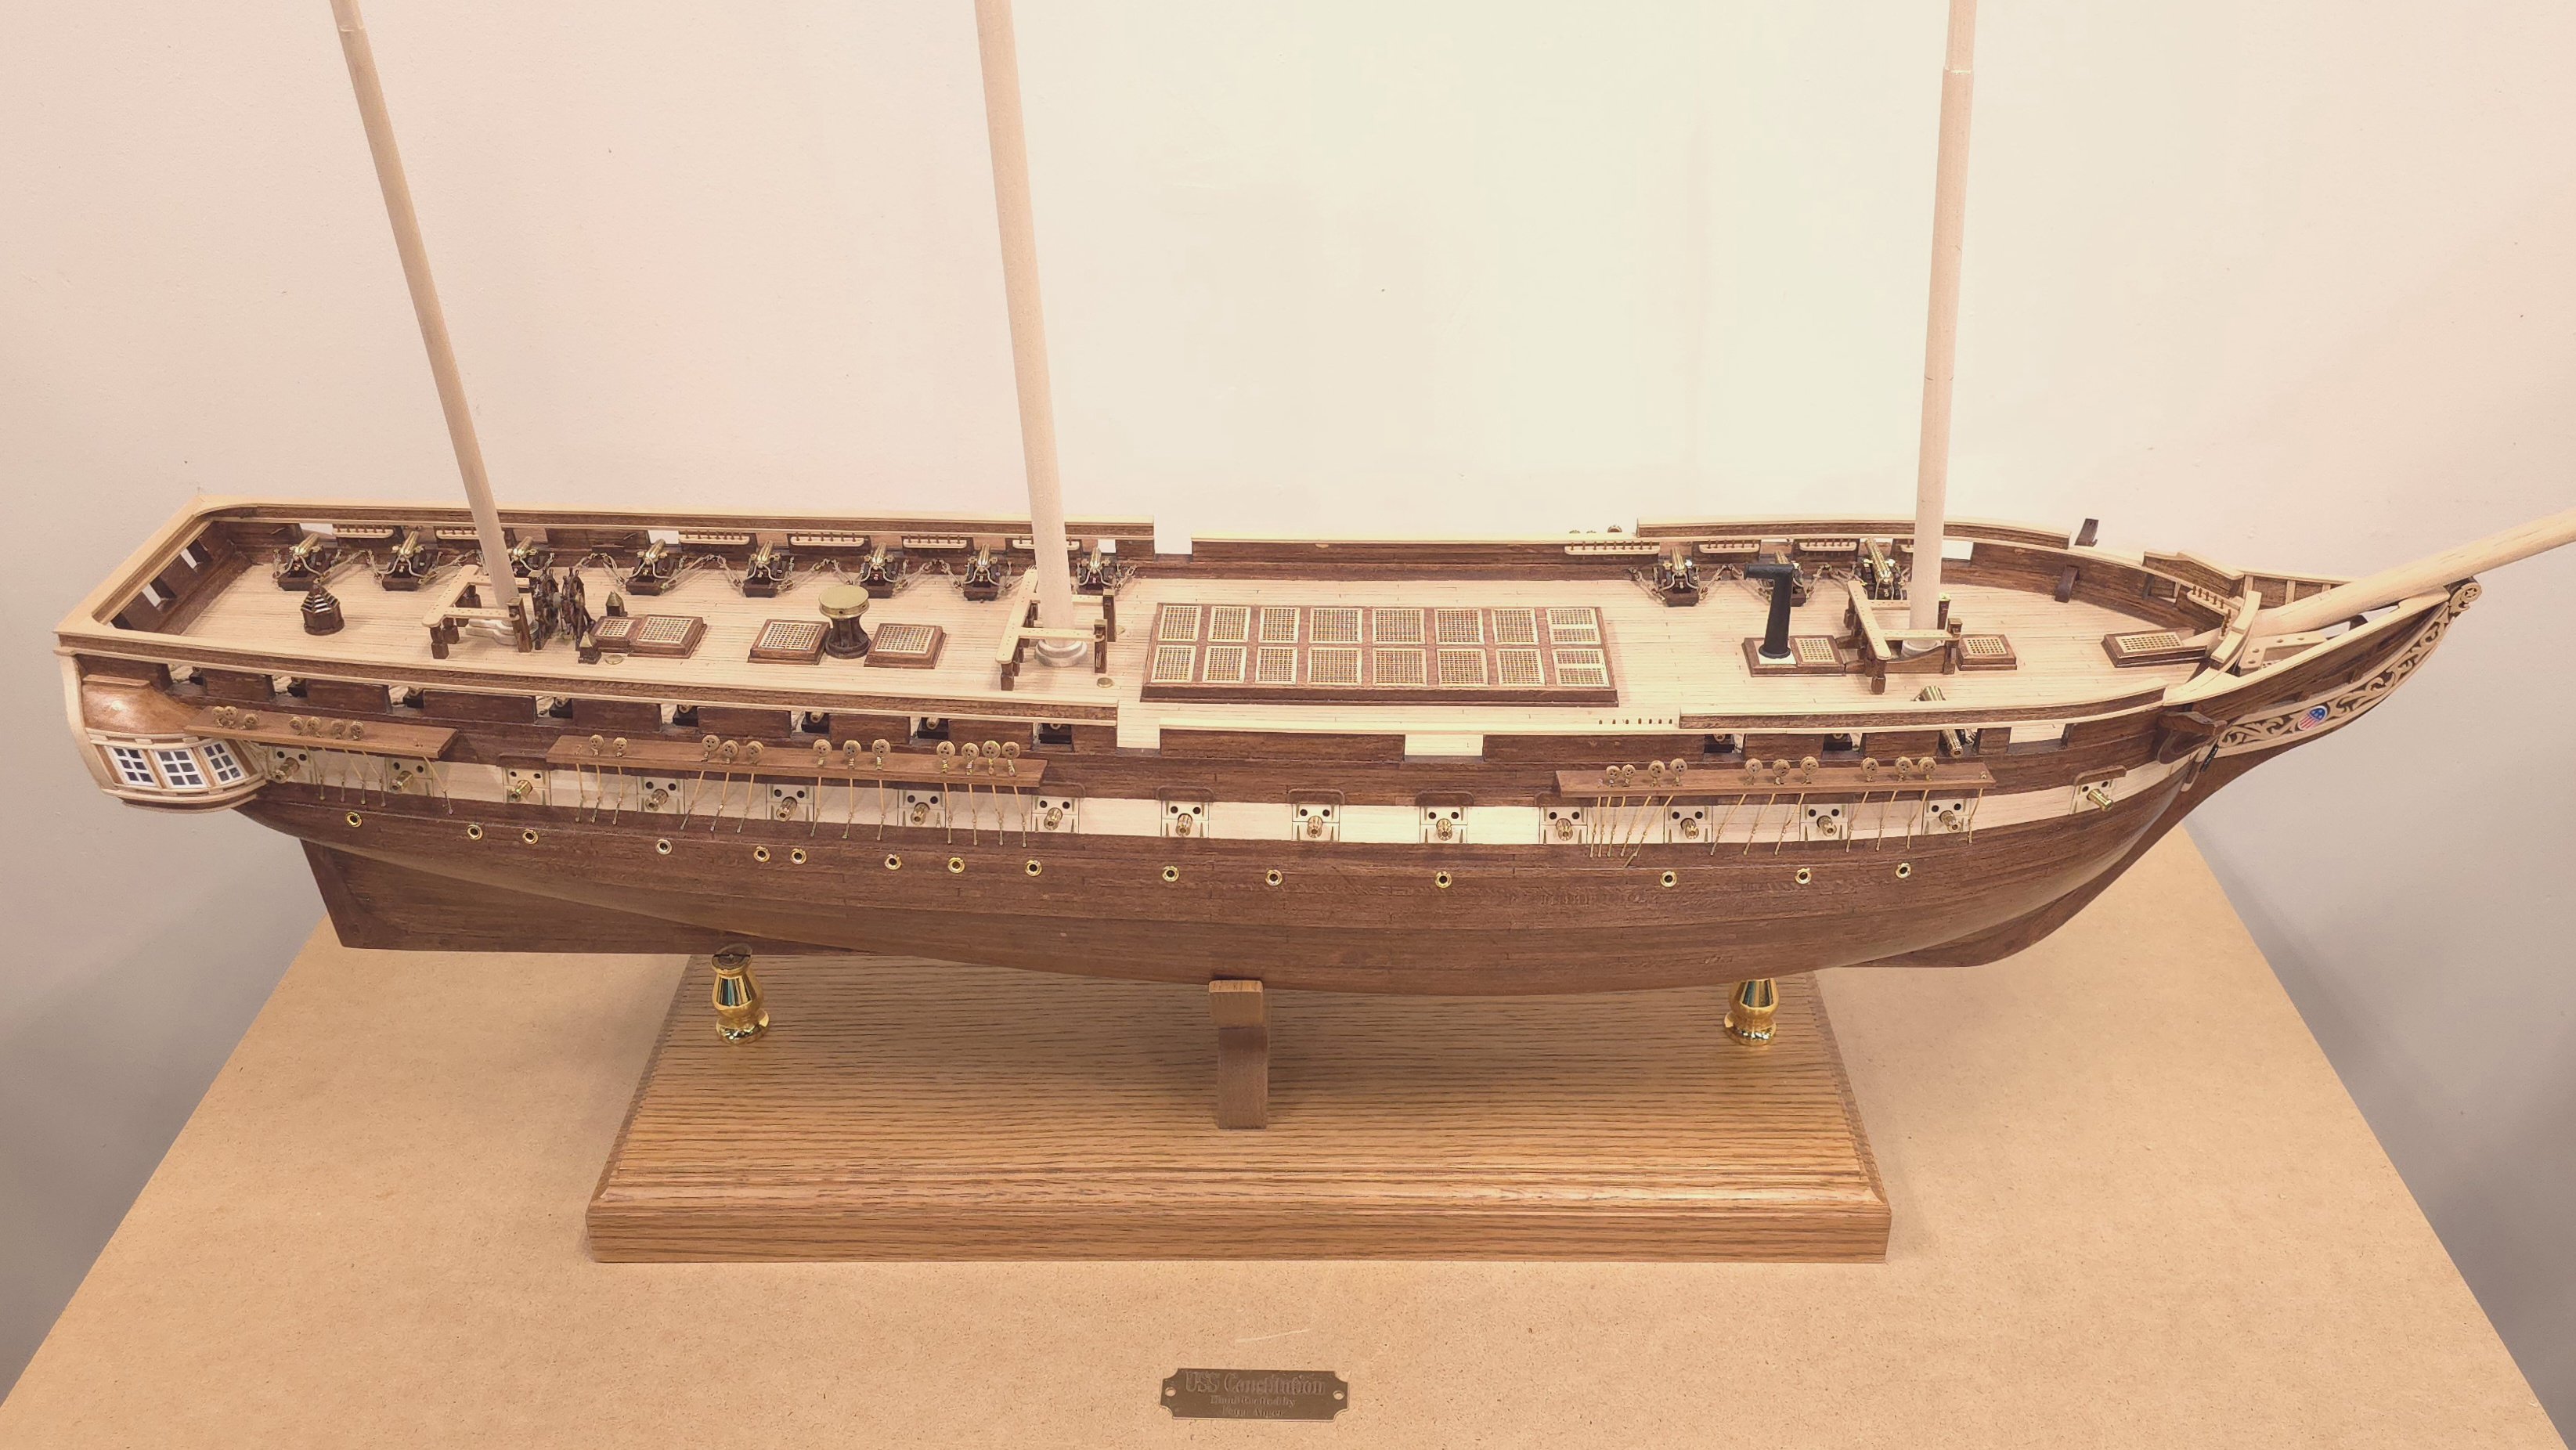
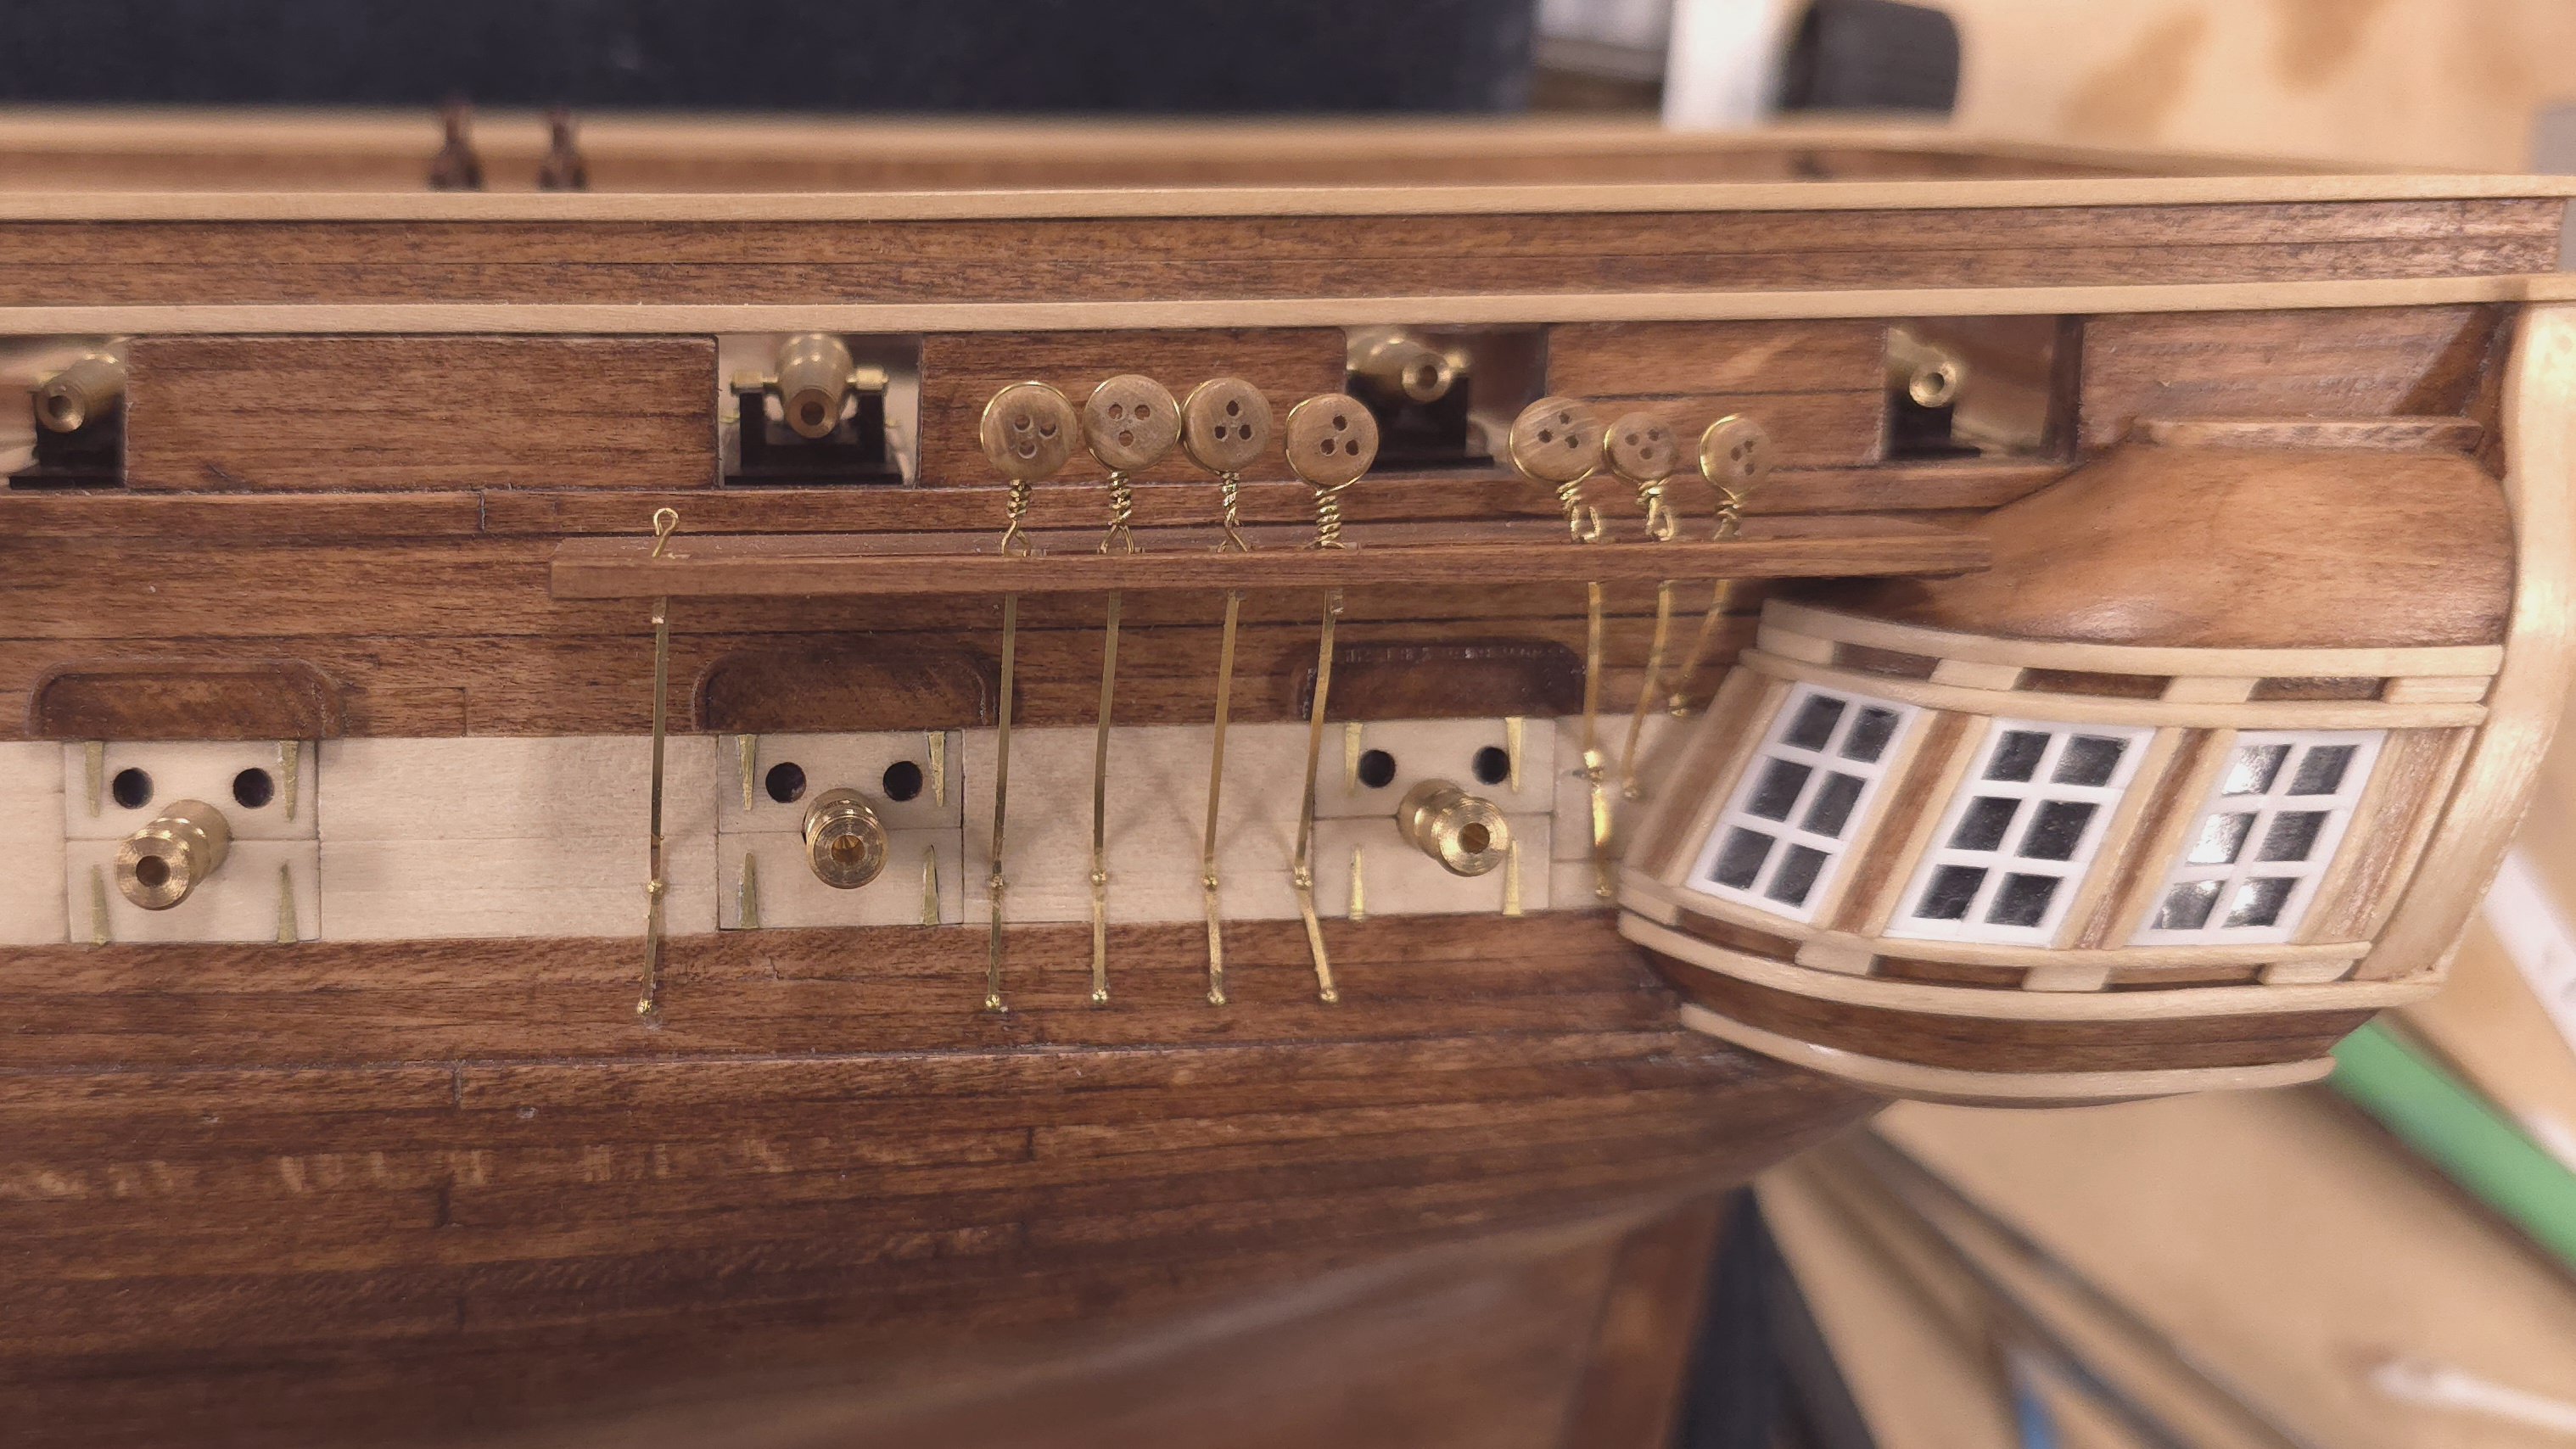
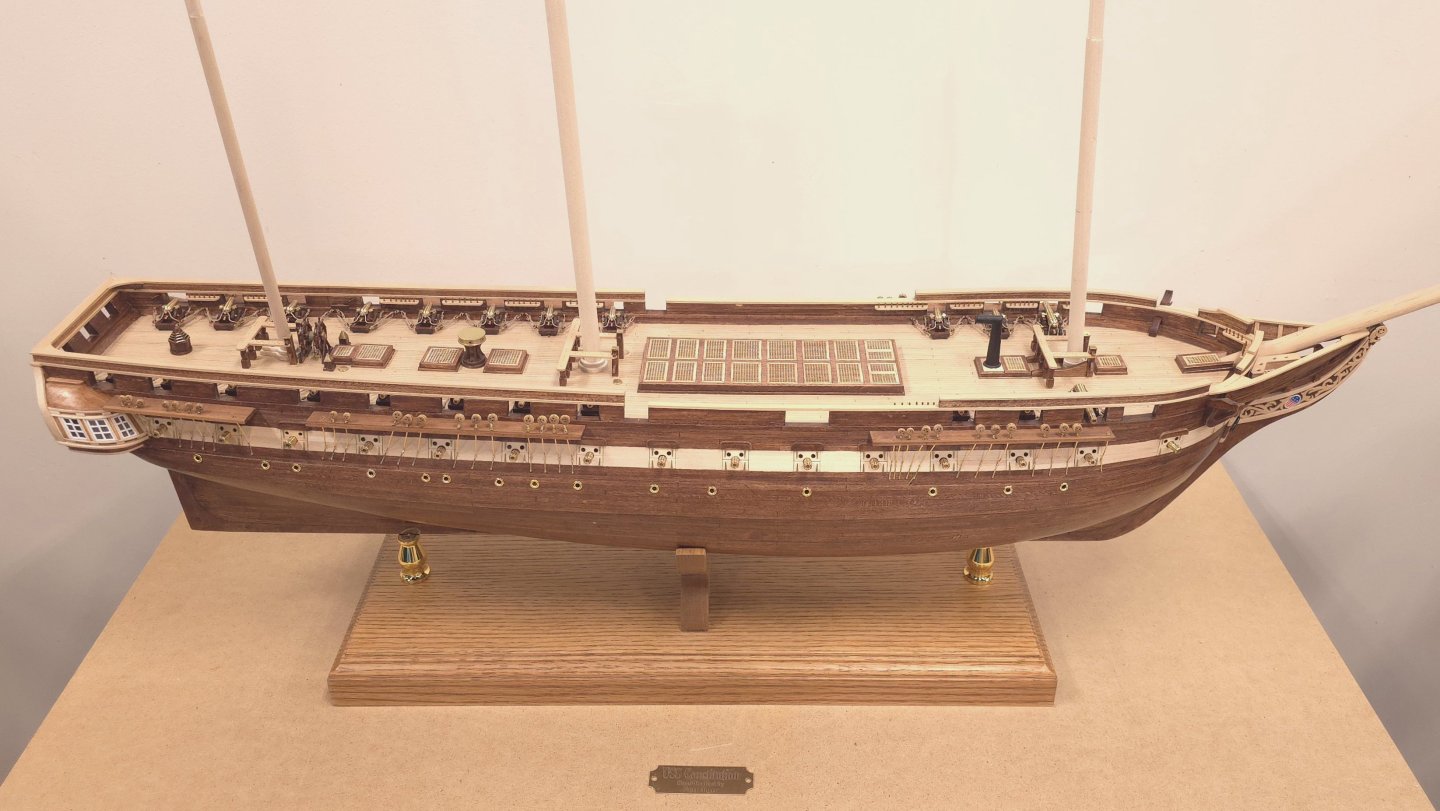
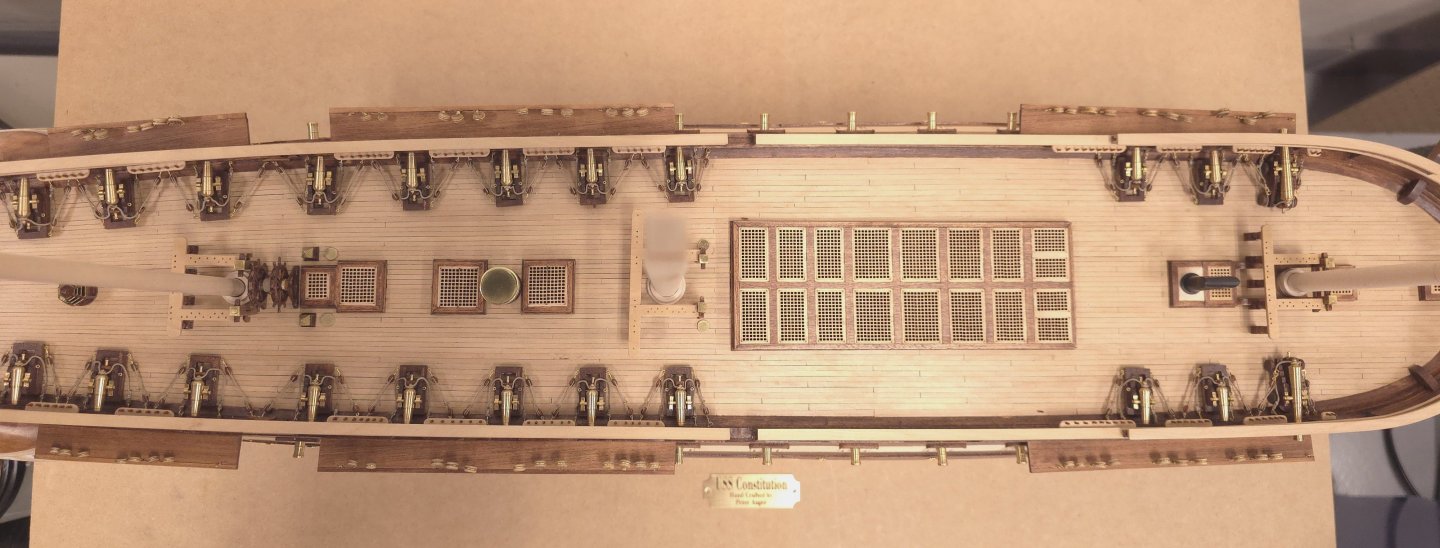
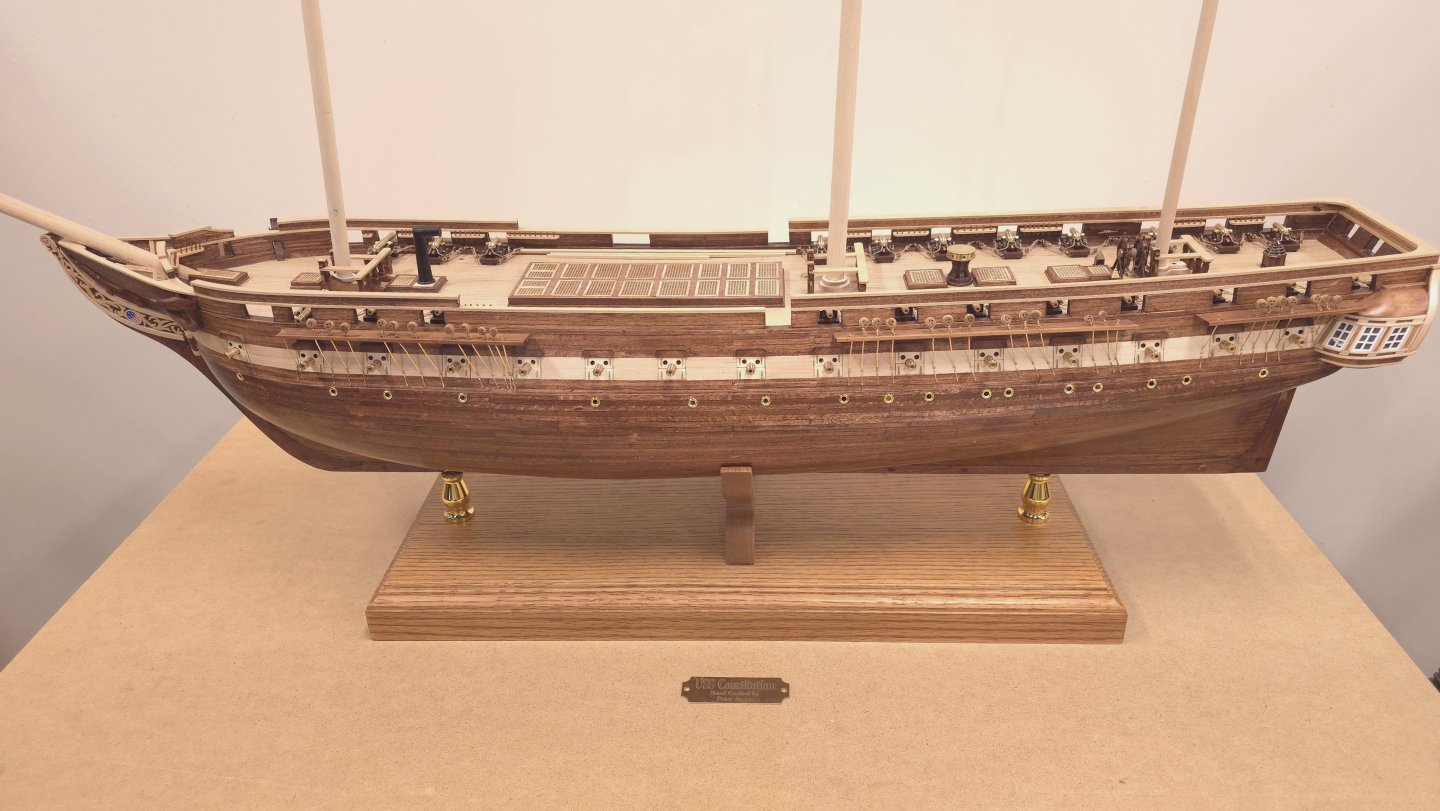
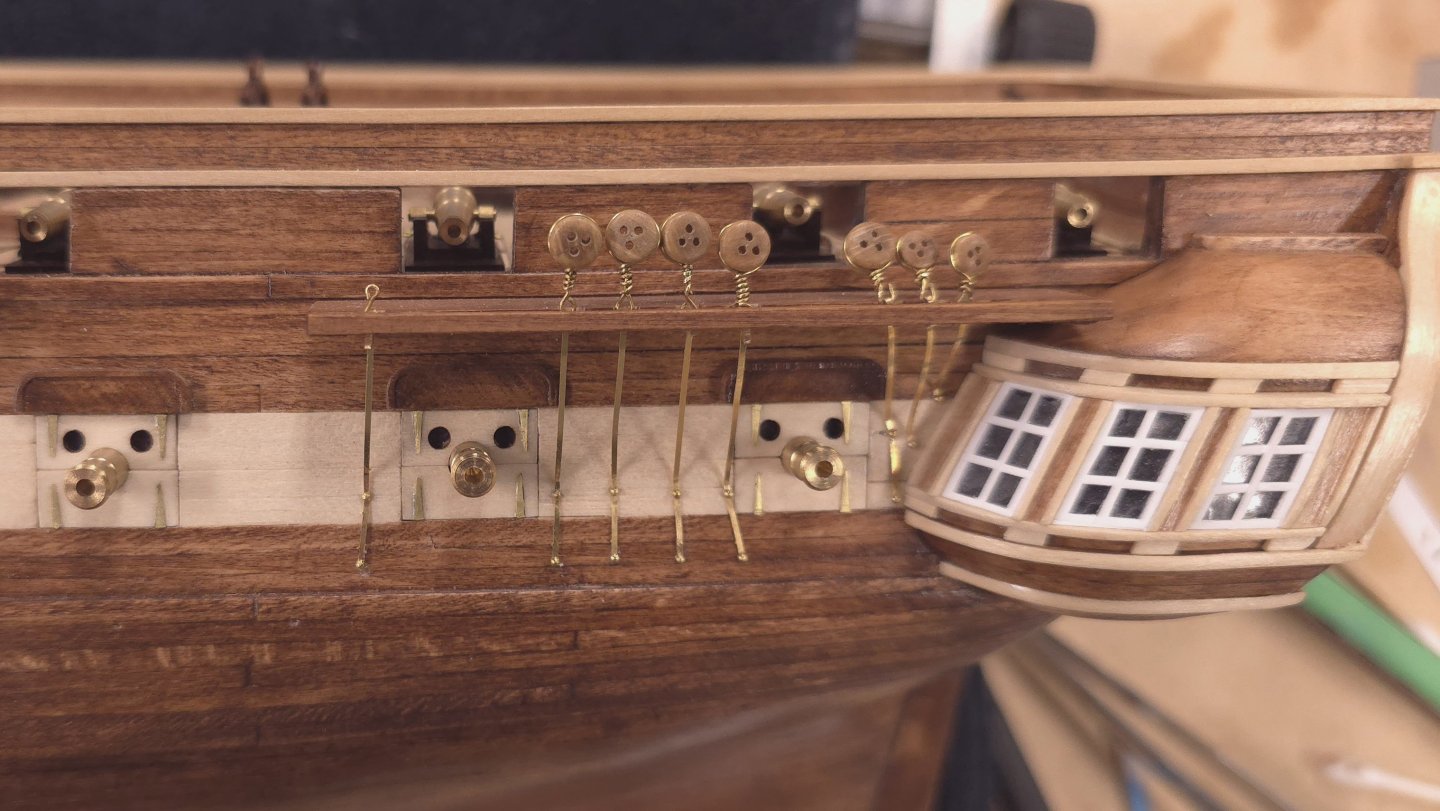
Port side channels, chain plates, deadeyes, and portlights done. After a brief pause to enjoy a photo op, I will turn my attention to the starboard side.
-
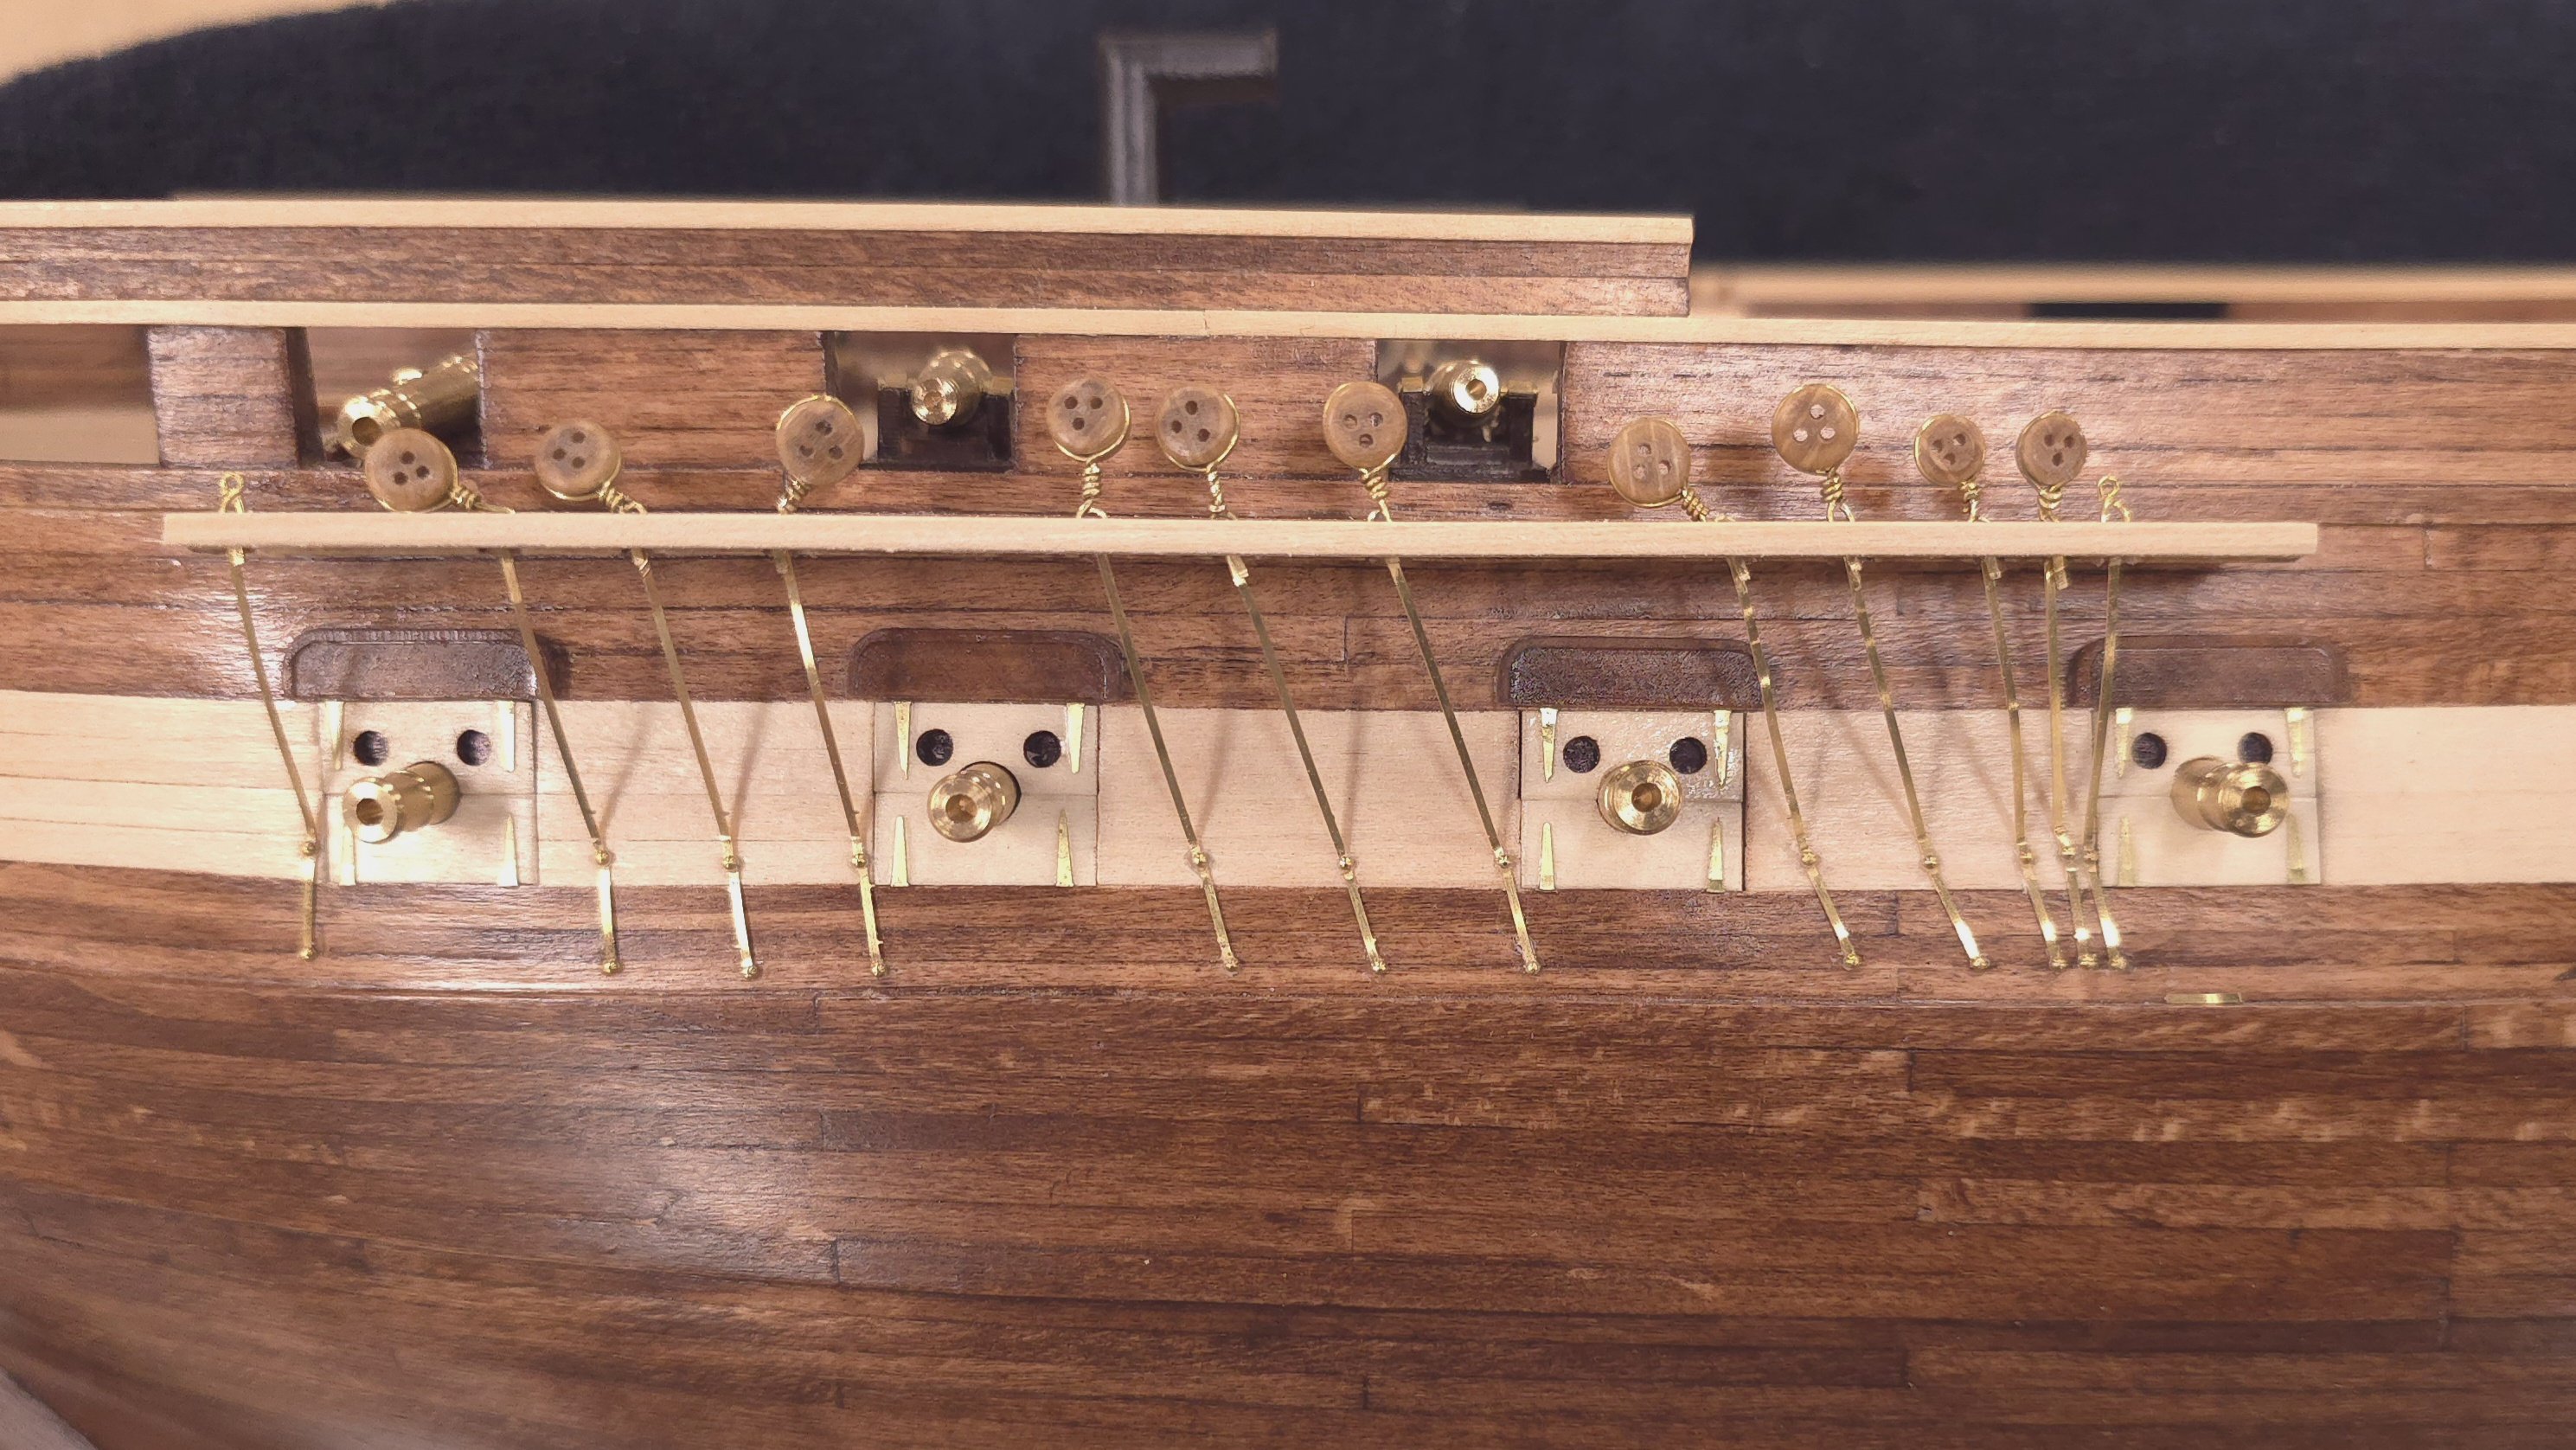
Slow going here, but save for stain on the fore channel cap, port side channels and chain plates done. Pro tip for other builders, do not glue in any belaying pins. You're going to break a number of them when you're gluing in the caps and messing around with the dead eyes and chain plates. Also, be aware that mizzen channel sports the two smaller deadeyes (5/32" and 1/8" vs 3/16" and 5/32" on main and fore mast channels). I was wondering why I was running low on the 3/16" deadeyes, and noticed only too late, that I screwed up on the mizzen channel. My mistake was that I referenced the kit's plans instead of the Hunt practicum specifics in chapter 10.2 - pages 28 and 29. I guess too many days had elapsed between construction of the dead eyes and that of the chain plates and channels. Oh well. (How many times have I said that over the course of this build? 🤔) I'm going to live with the difference rather than try to pry off the mizzen cap. It would appear that I will be making more dead eyes in the immediate future.

-
Glad to see you didn't make the mistake I made on the waterways. Your carronades may yet poke through the gunports on the spar deck. Happy swimming..
-
I love a perfectionist. Simply magnificent.
-
Shall I throw you a life preserver? 😁
-
USS Constitution by mtbediz - 1:76
Der Alte Rentner replied to mtbediz's topic in - Build logs for subjects built 1751 - 1800
So, How are the deadeyes attached to the fighting tops? There wasn't a single view of the tops of the tops.. -
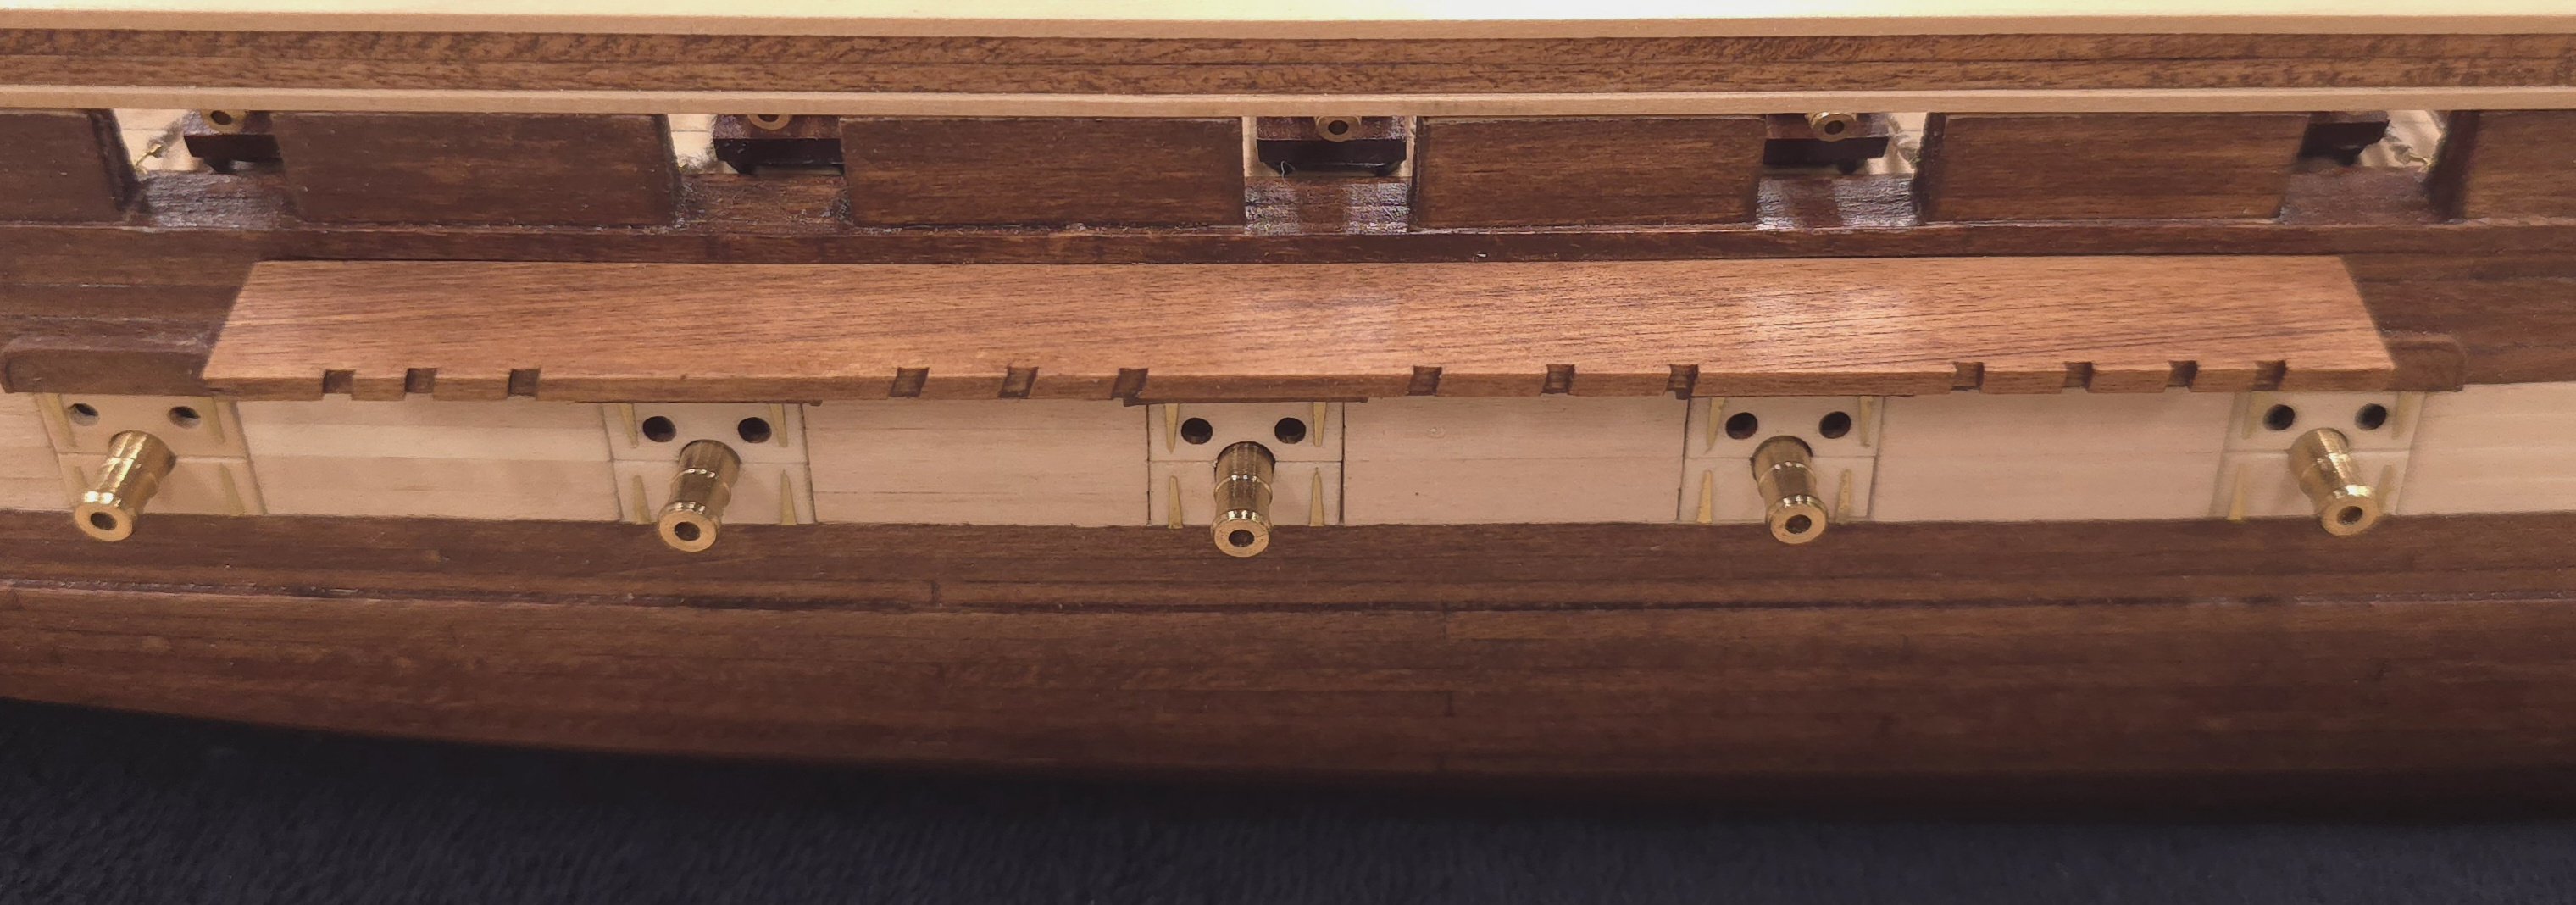
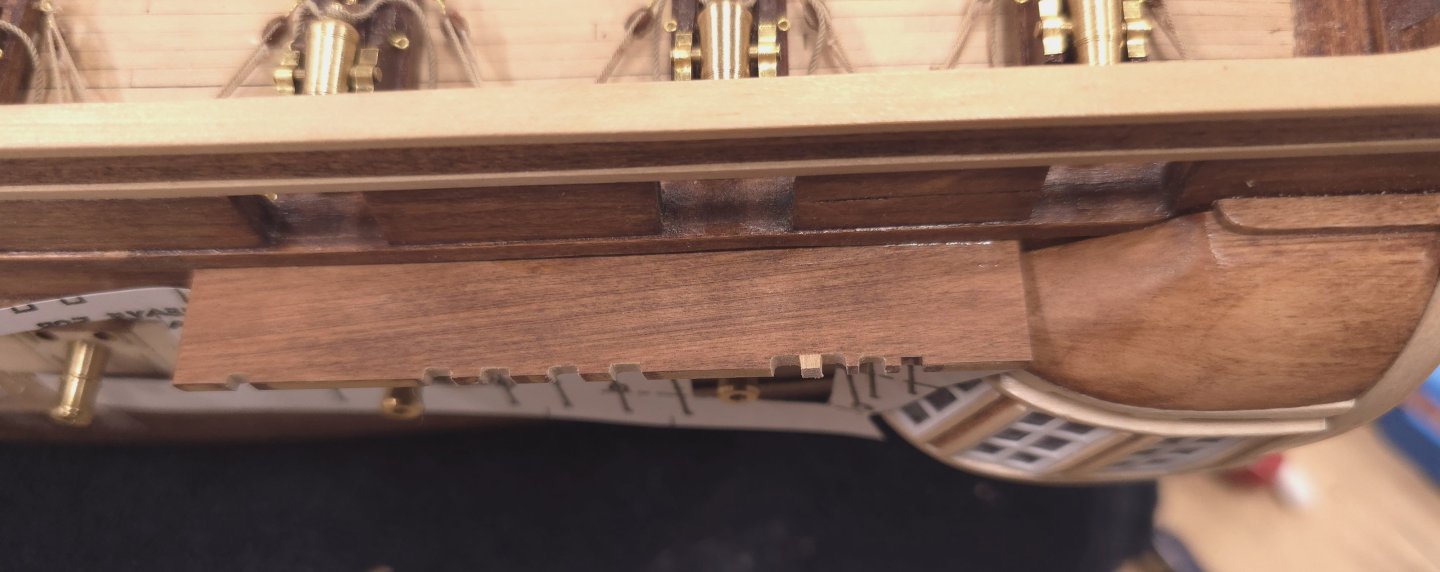
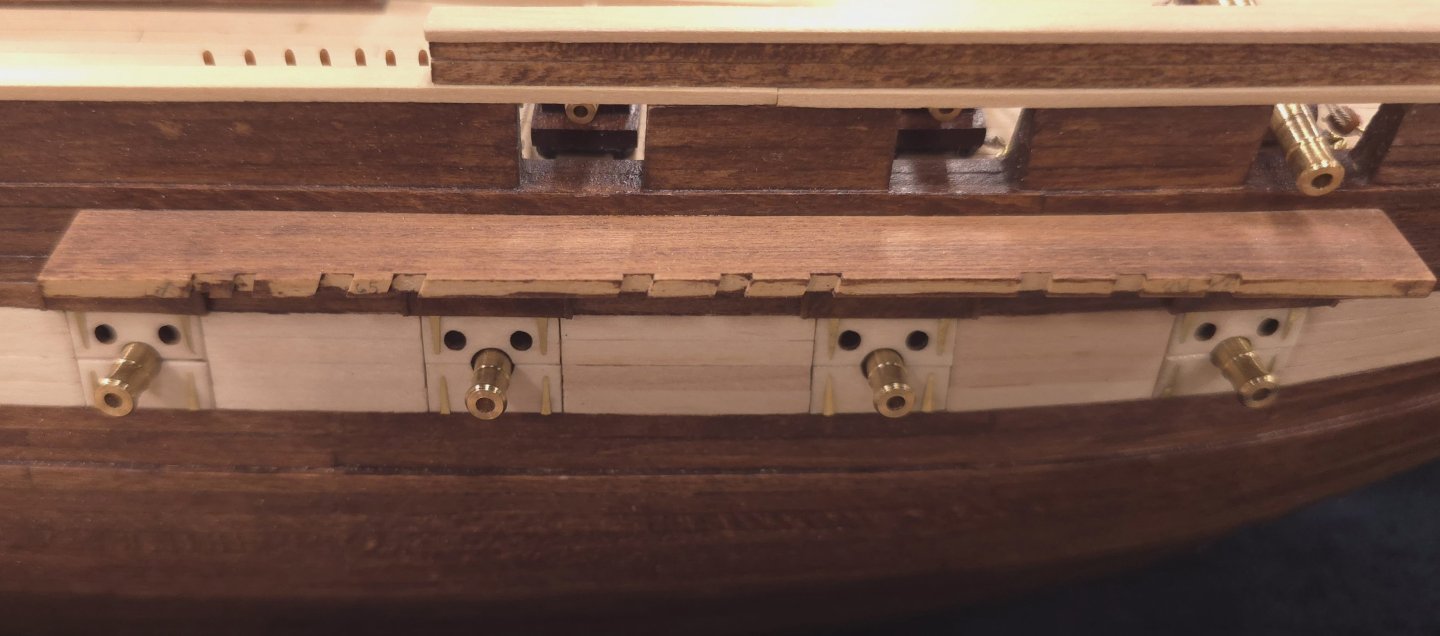
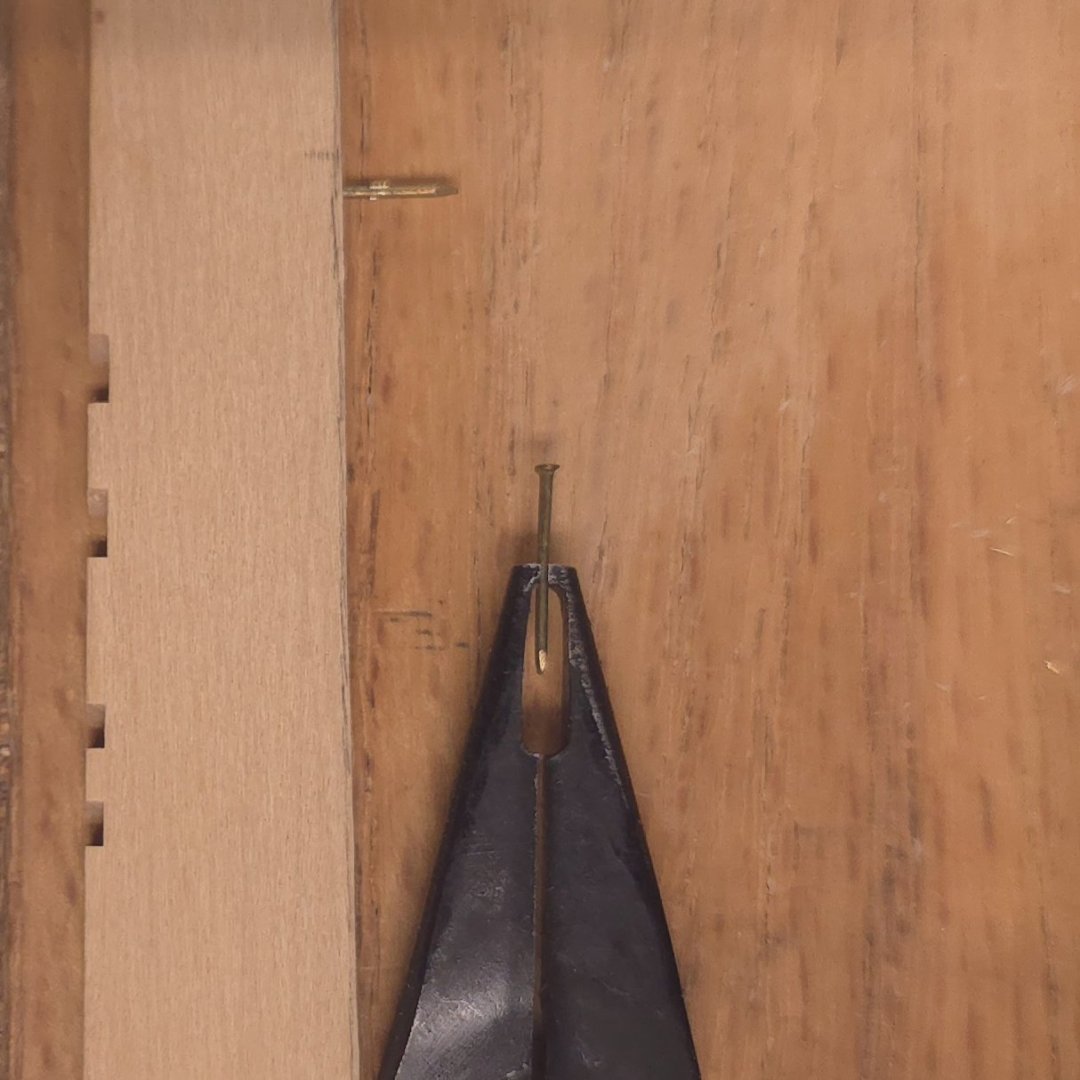
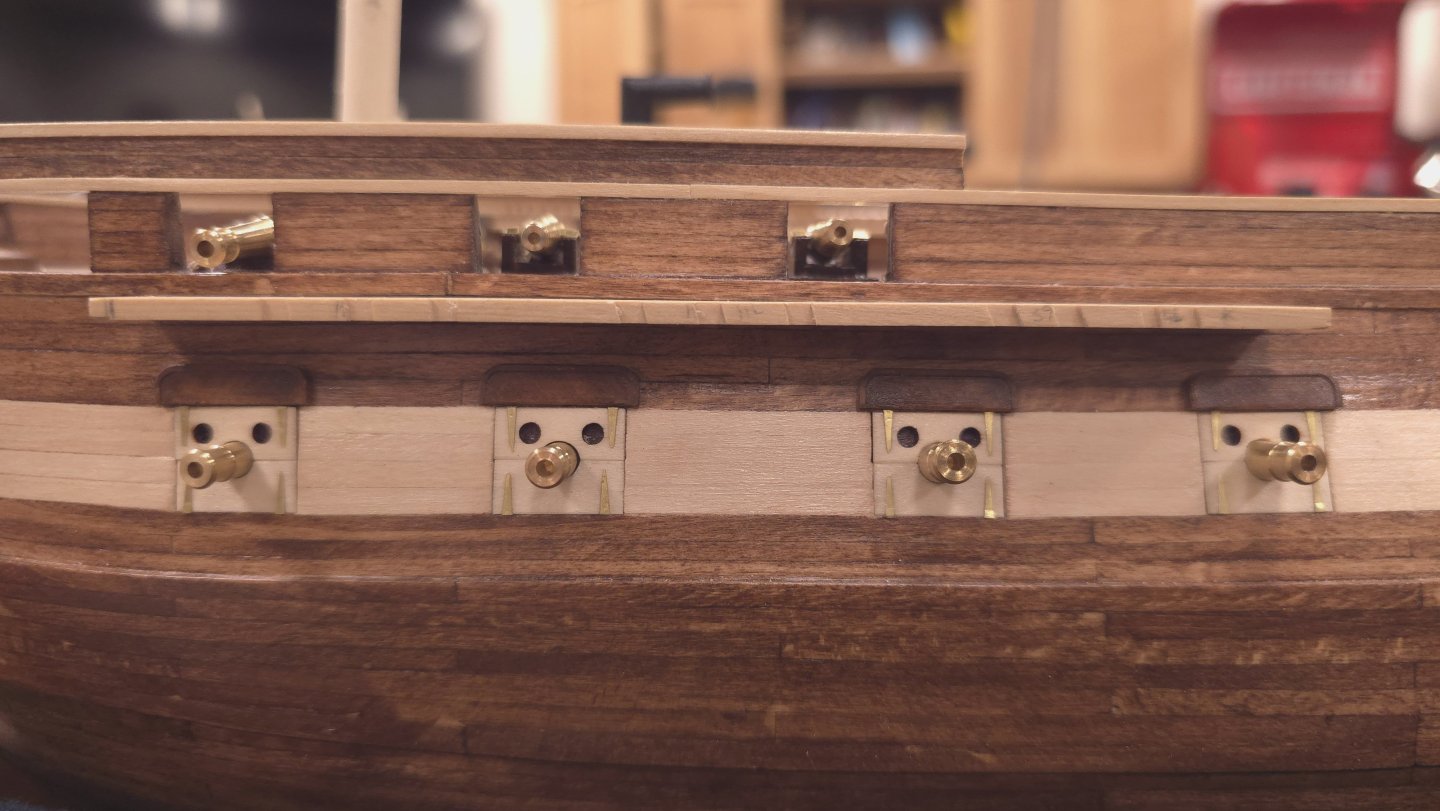
Gregg, Where you need to be careful is when you construct the galleries. It turns out that mine are a little too long from stern to bow. As a consequence of my not catching that much earlier, I have to move one of the cutouts for the chain plate/deadeye combos forward. Of course, in attempting to simply carve out an extra slot, I broke part of the channel. You can see the repair clearly in this photo. I need to get back home to deal with some maintenance people, so further repairs here are postponed, at least until tomorrow. Again, my advice to you, be very careful where the forward end of your galleries meet the hull when you construct them.
-
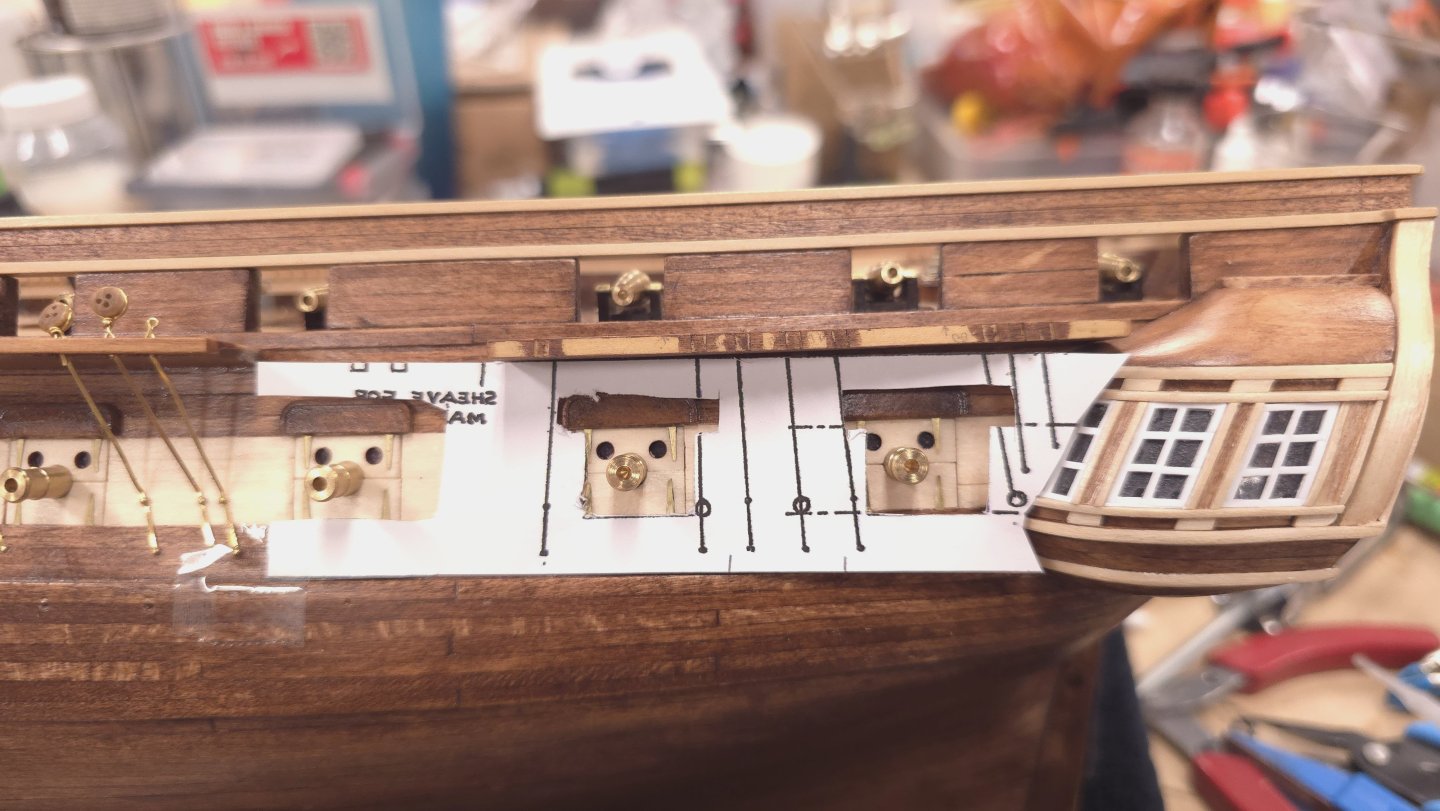
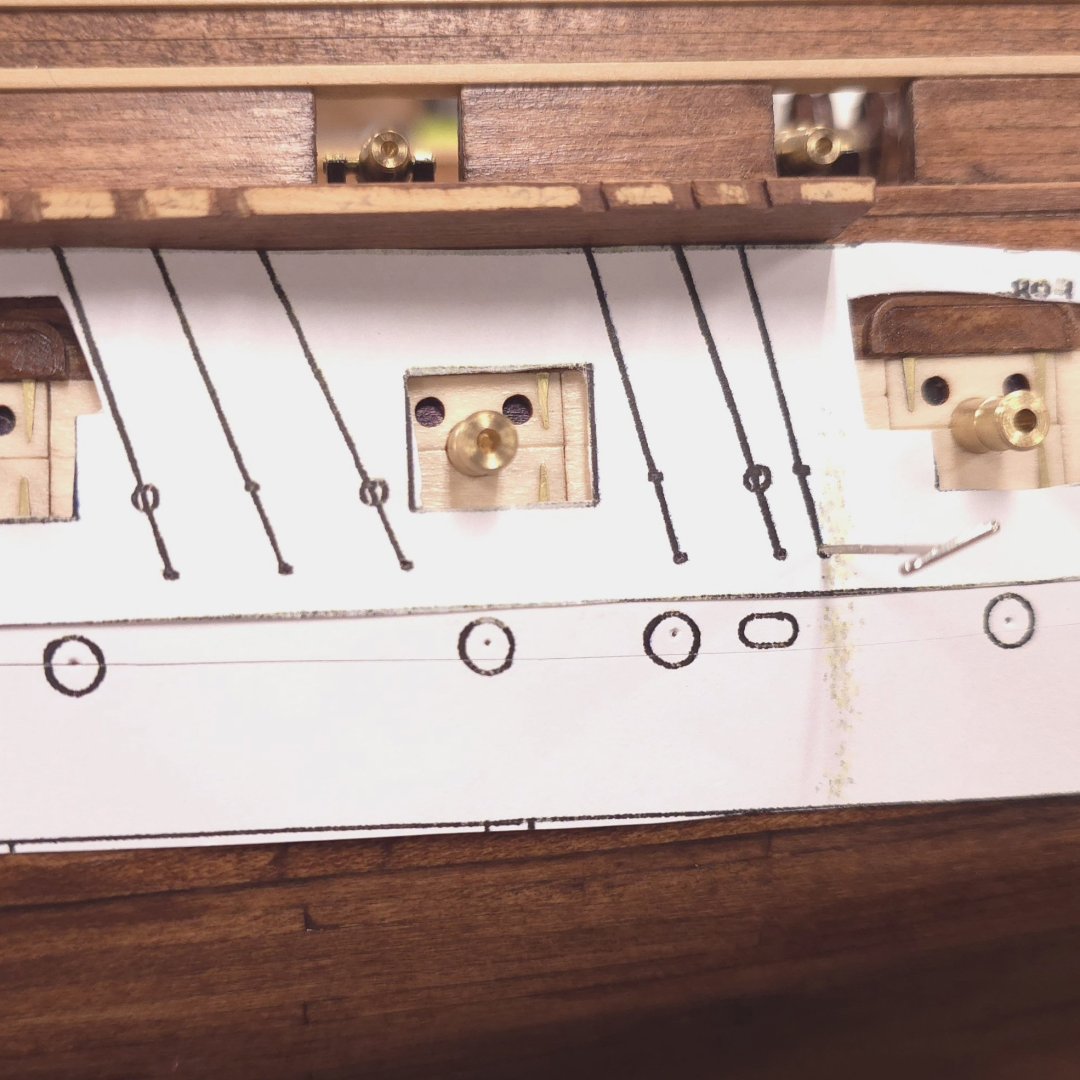
Gregg That first picture is actually of my ship. What I did was cut a copy of the plans and taped it to the hull so I knew where to place the holes for the chain plates. Sounds like a great plan, yes? Not so much... here's the picture of the port side stern chain plate pattern. If a picture is worth a thousand words, I can think of just two that describe how I feel about this Here's a third, more civilized, word Sigh
-
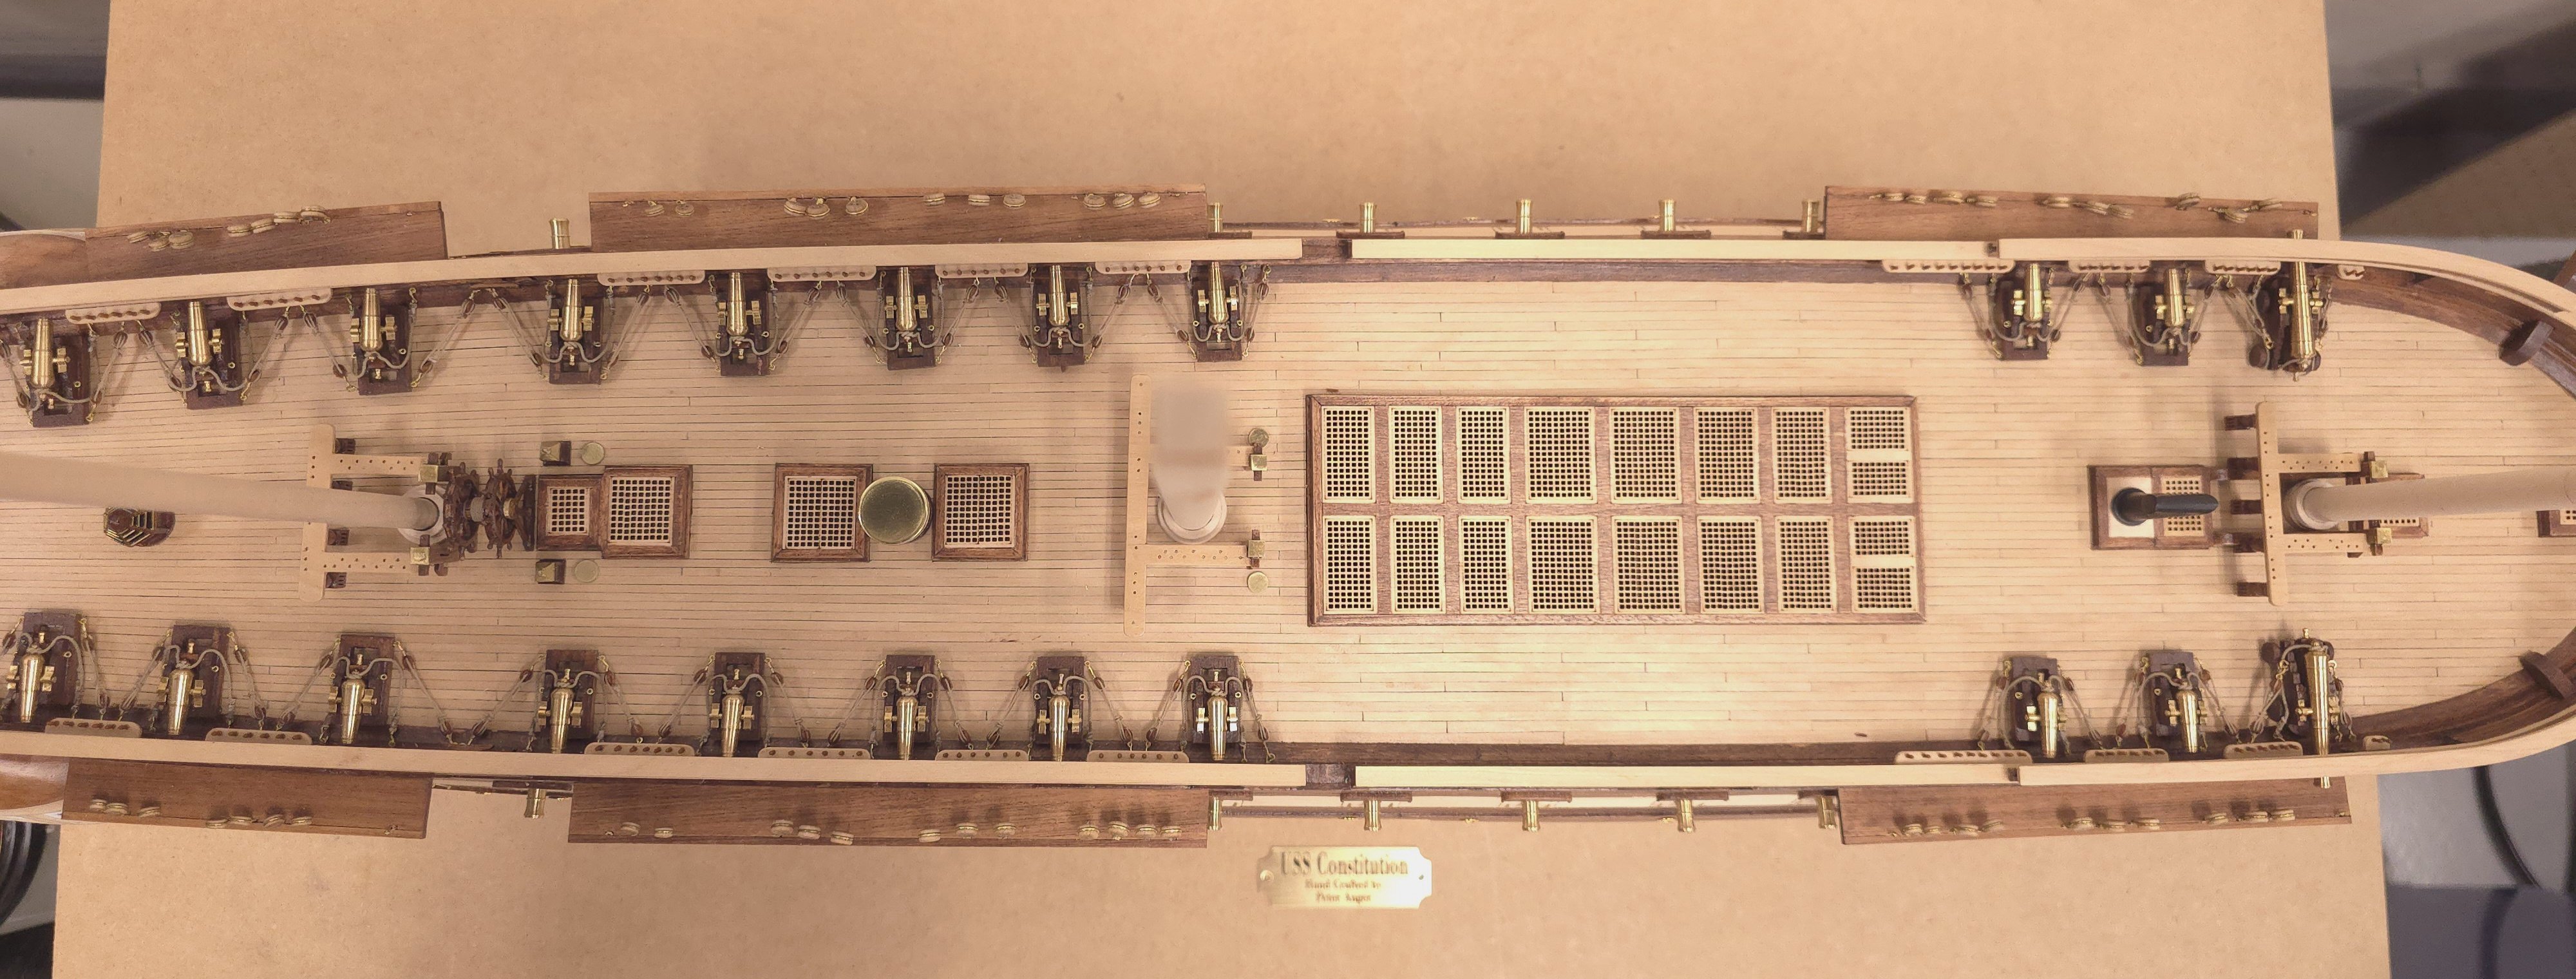
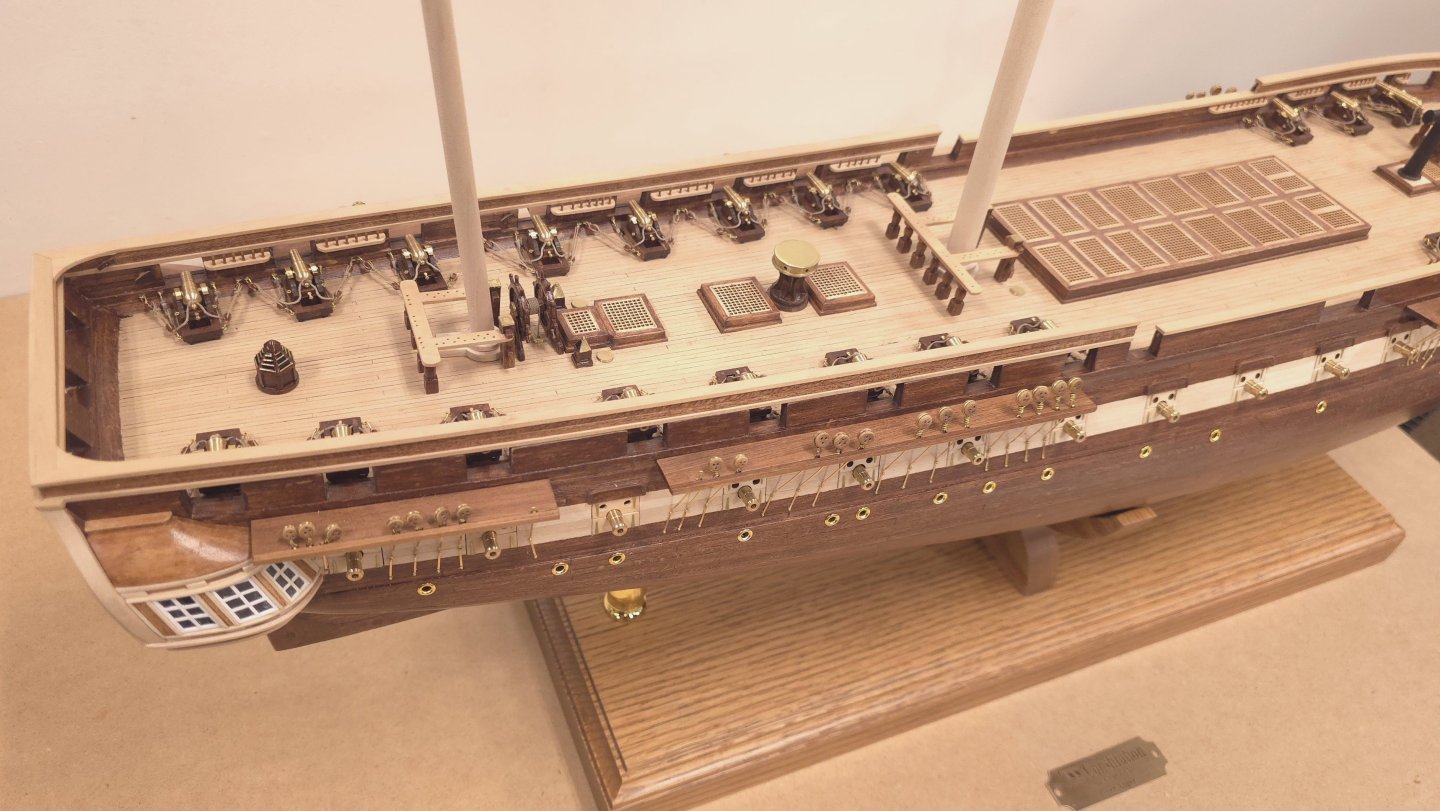
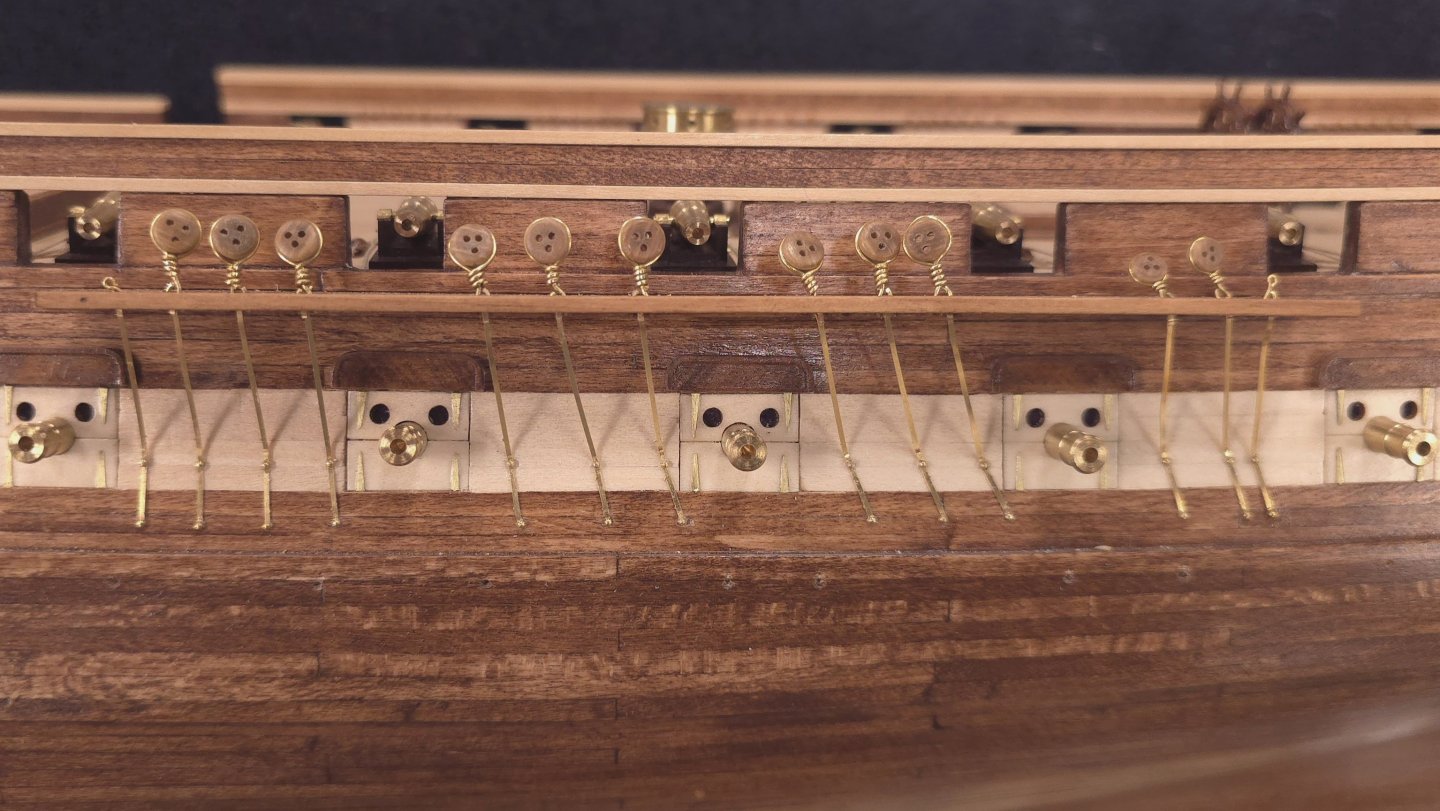
Port side main channel chain plates, deadeyes, and eye bolts installed... Mistakes were made but I managed to recover from them. The lessons learned should result in smoother sailing for the remaining five channels. I also marked the locations for the port holes.


-
USS Constitution by mtbediz - 1:76
Der Alte Rentner replied to mtbediz's topic in - Build logs for subjects built 1751 - 1800
Oh snap! My bad. I just double checked the Hunt practicum and learned that I misread that portion of the instructions. The channels are tapered, yes, but only by 1/16" of an inch at their fore and aft edges. Sorry abut the miscue. -
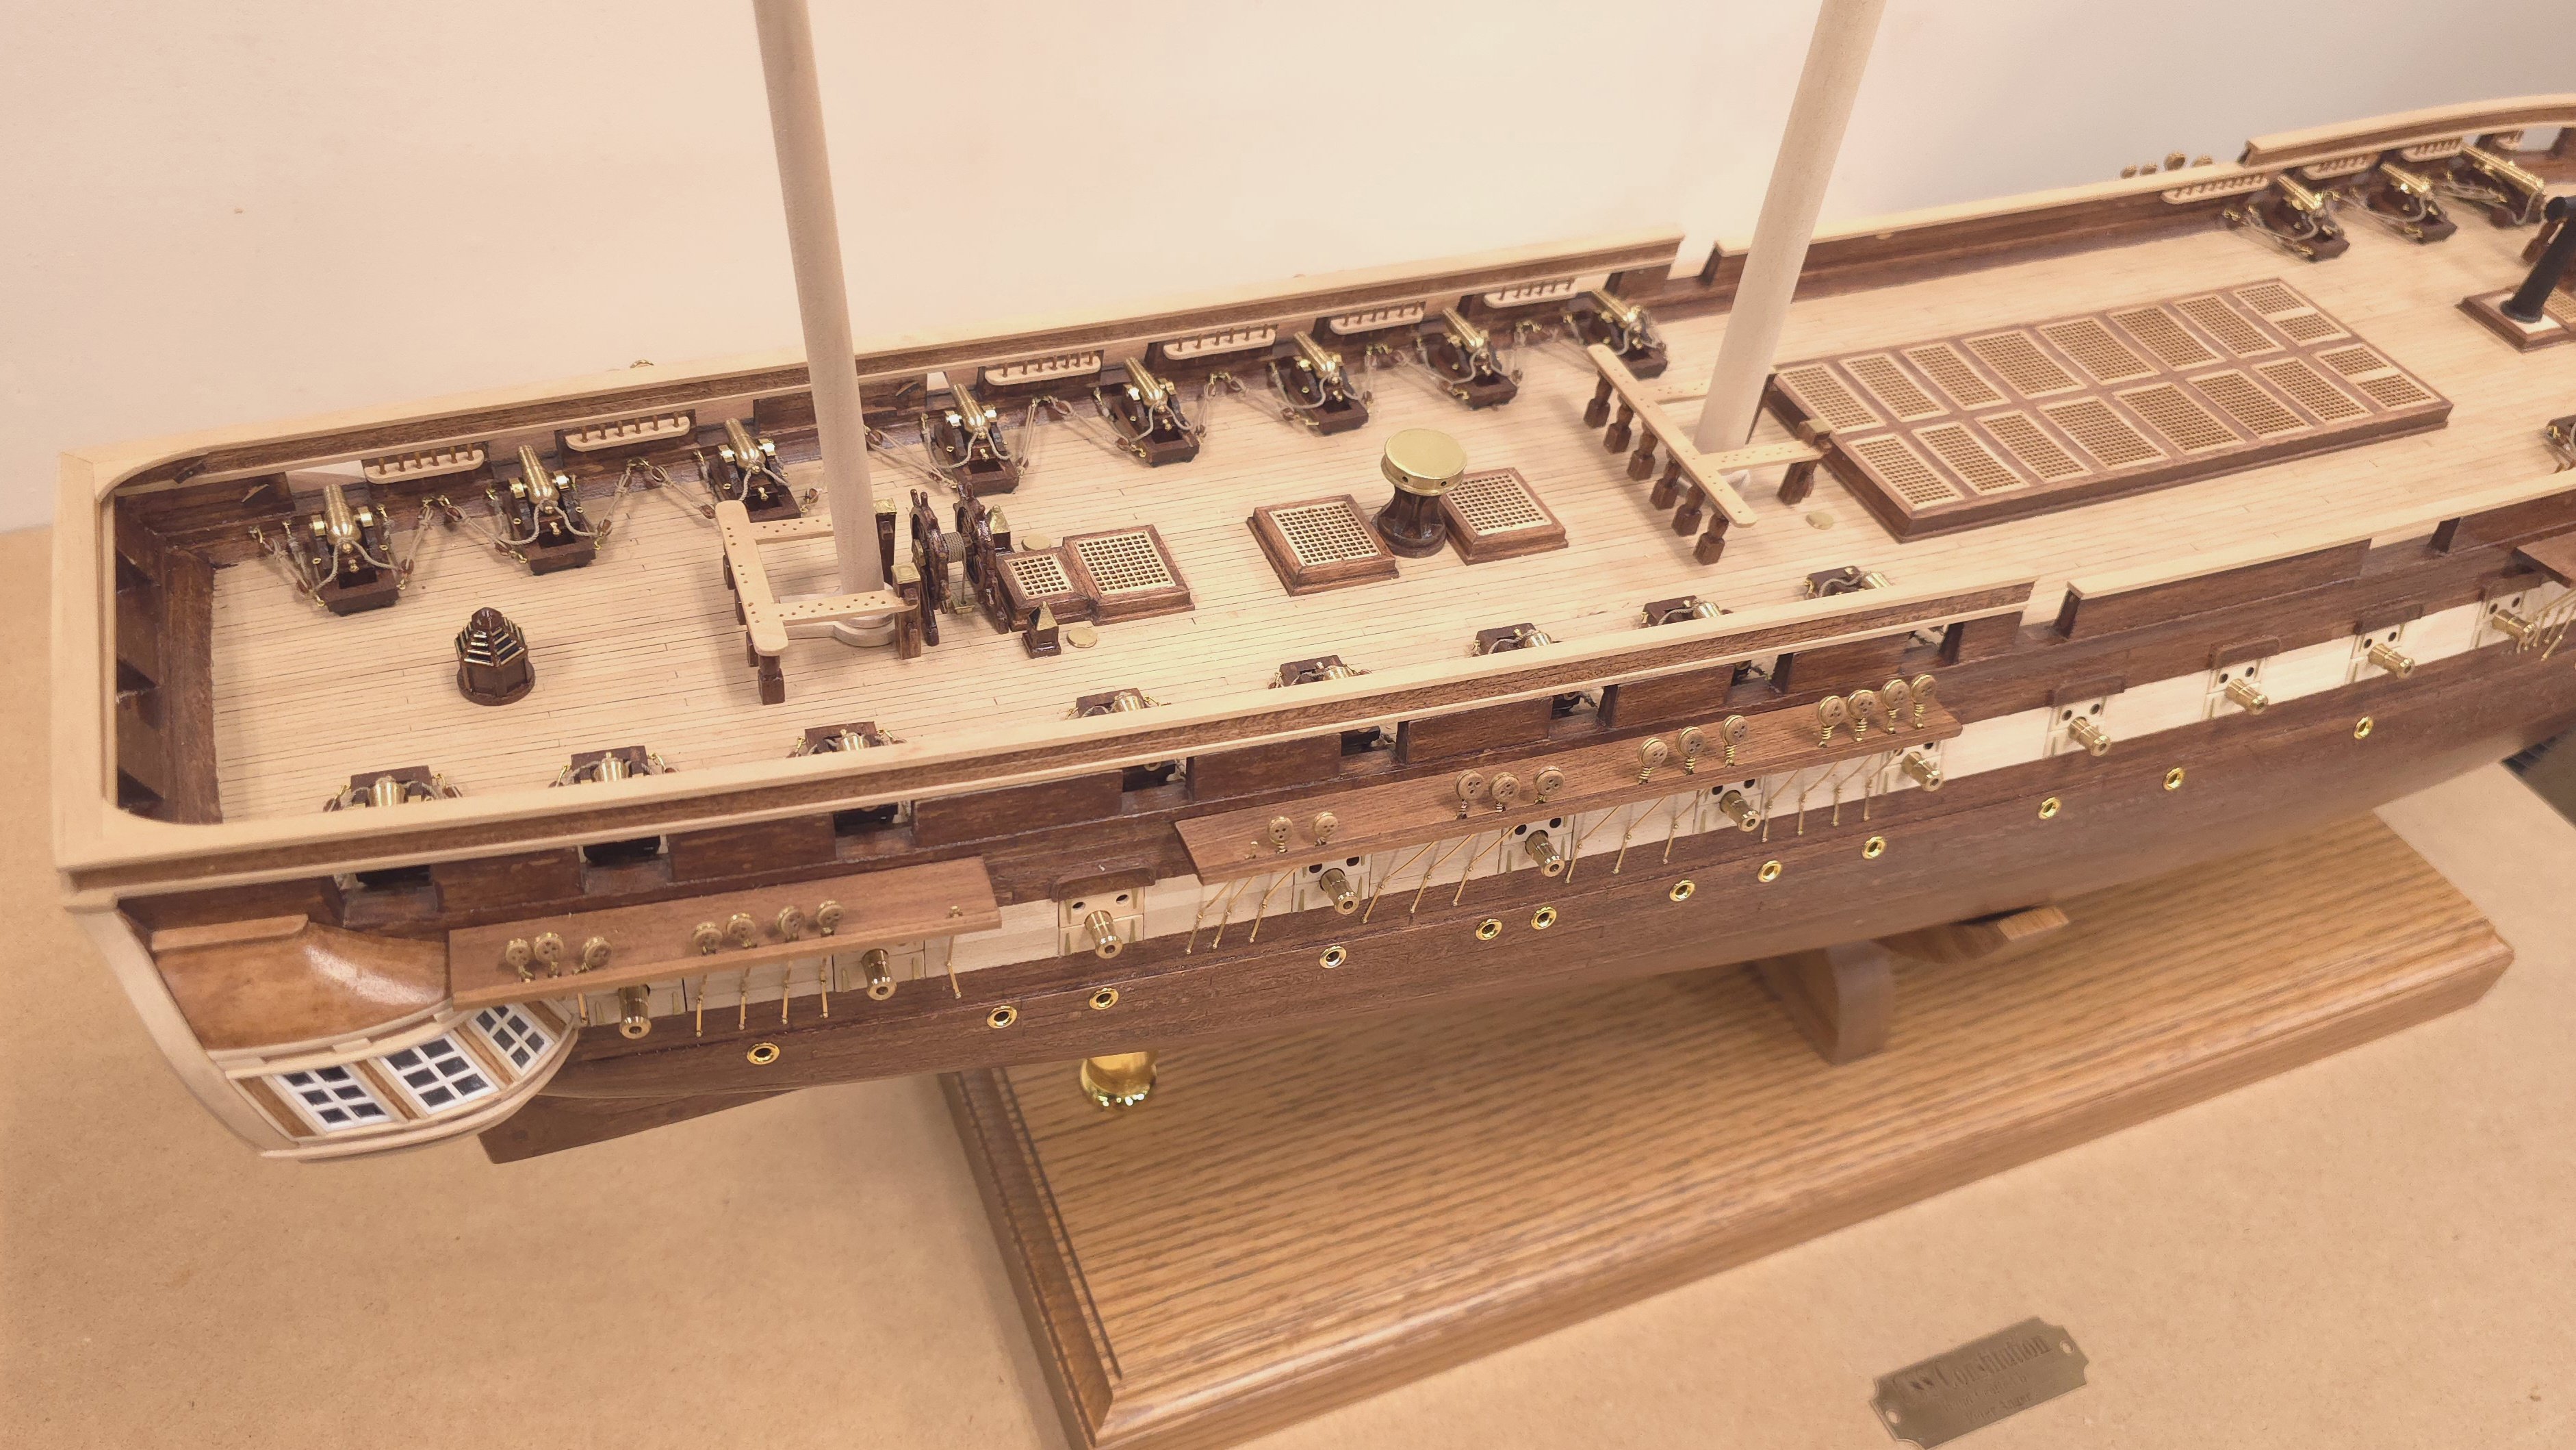
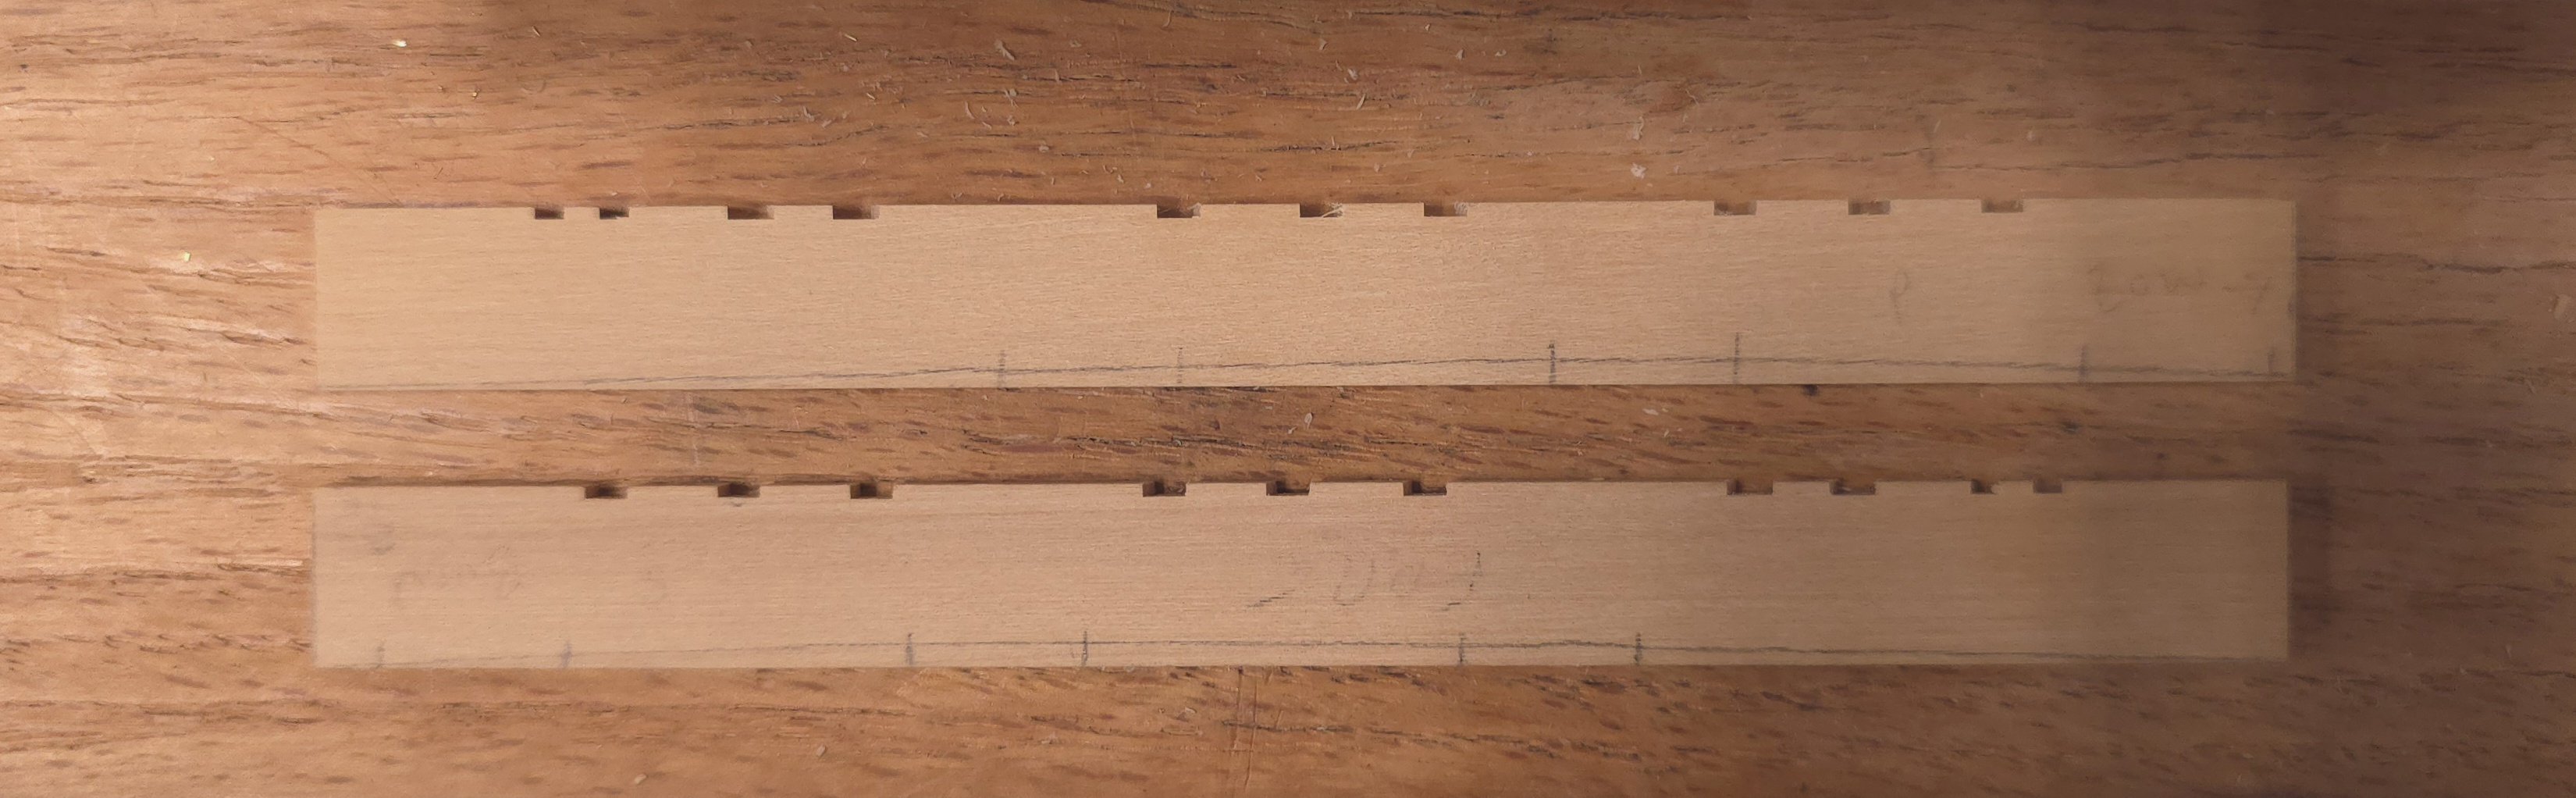
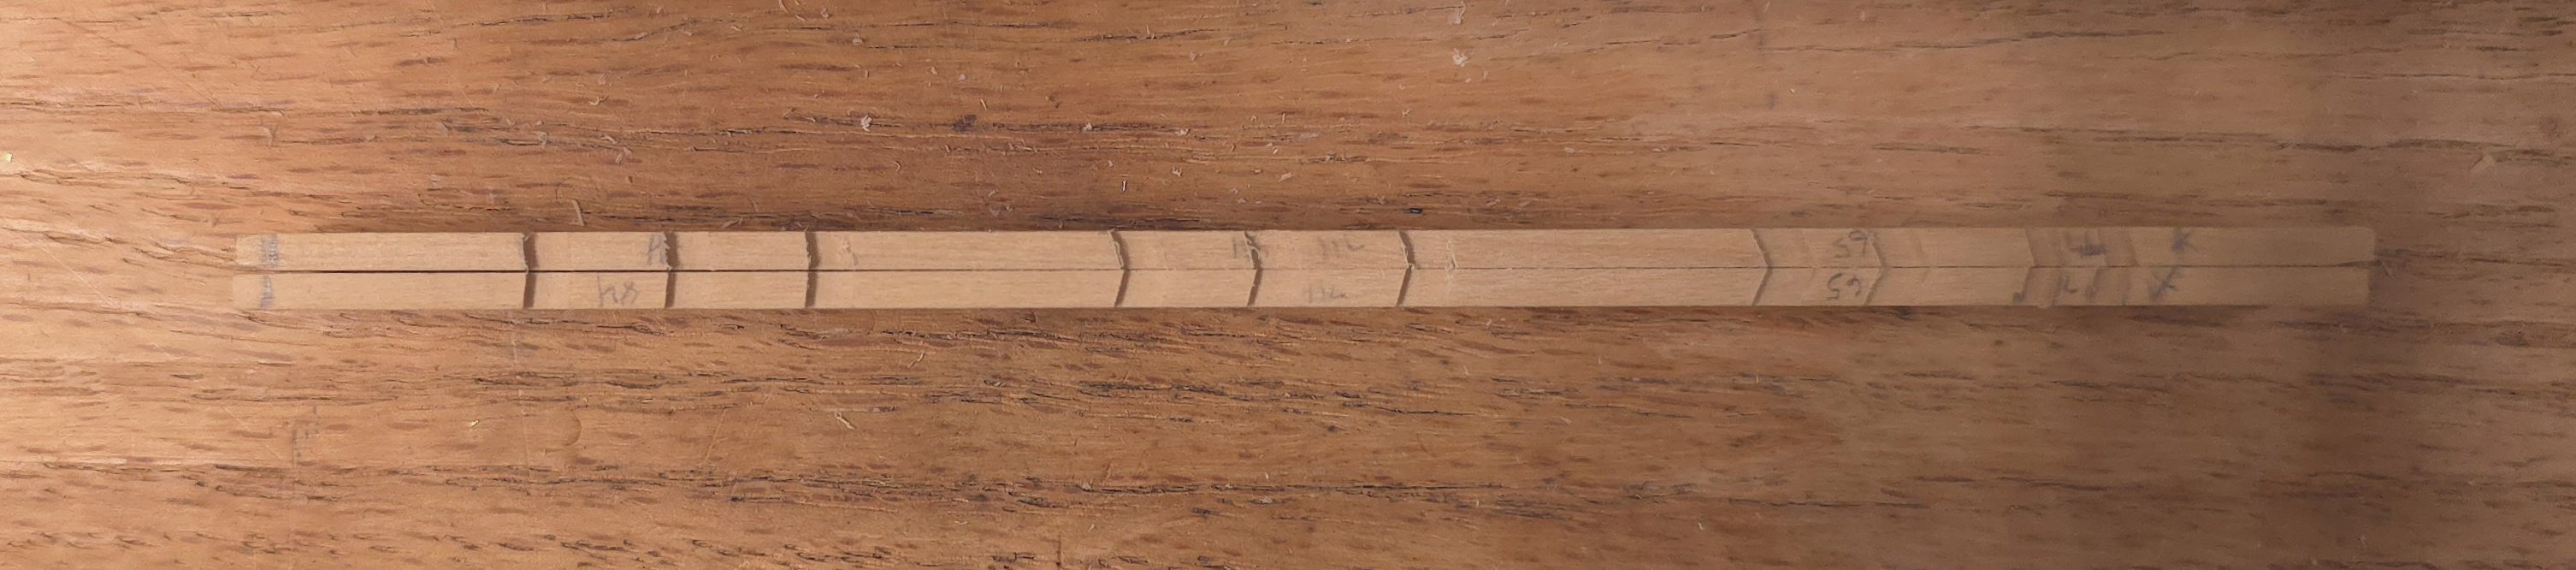
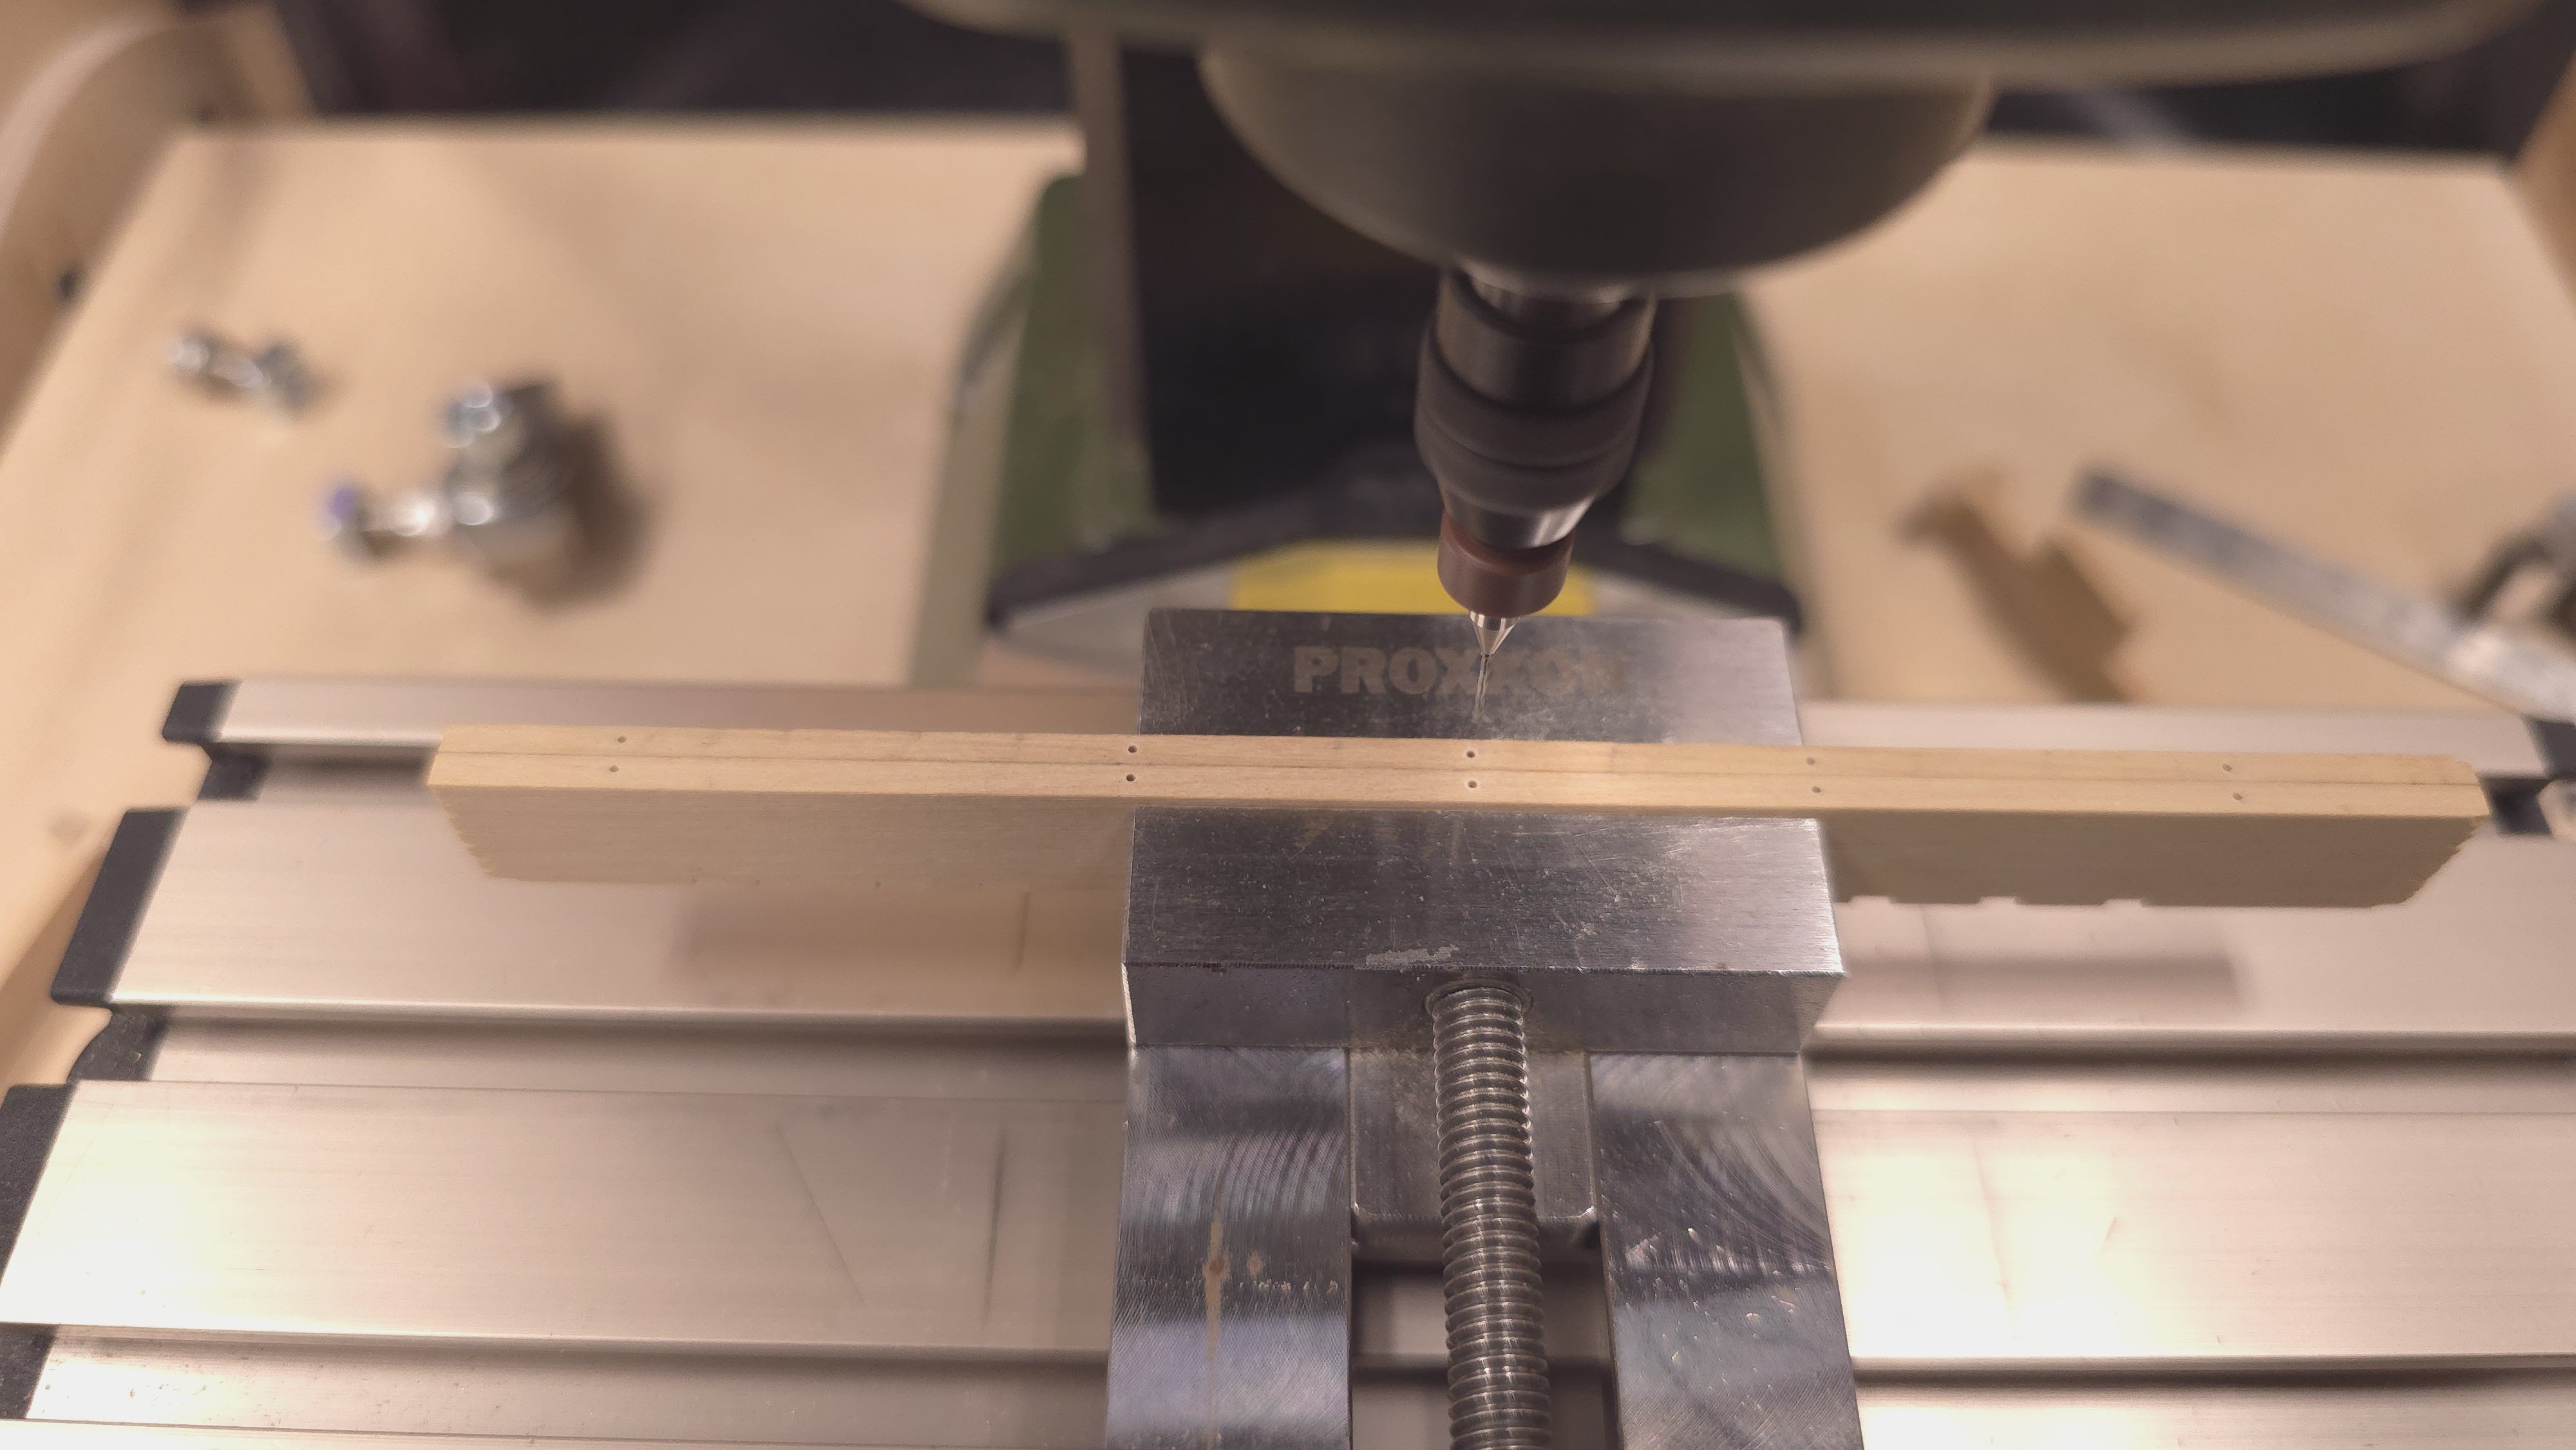
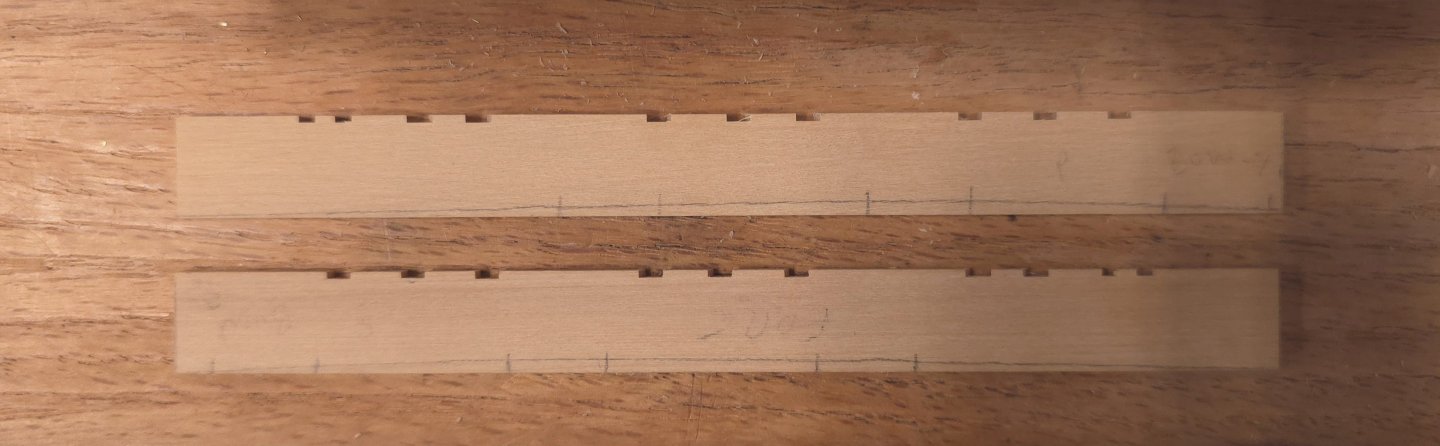
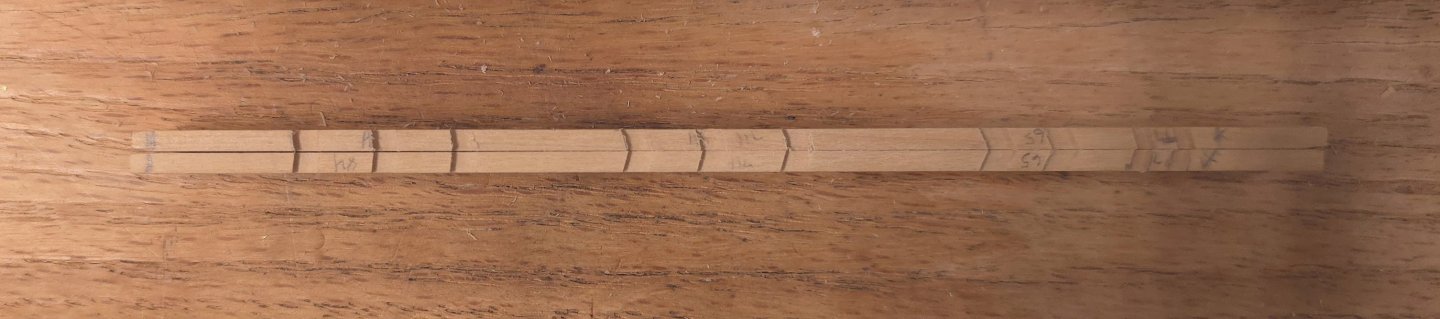
It's been a while since I've posted. I feel like I've been busy, but I don't have much to show by way of results. The fore and main channels have been fabricated, and installed. The hardest part of this was not breaking belaying pins, rails or disturbing the carronades while holding the channels in place long enough for the 5-minute epoxy to dry. Try as I might, I could not find a way to clamp these in place with the tools I have at hand. So my hands were the clamps. A close second in terms of difficulty was marking the holes for the pins correctly, so that the channels rode evenly below the outer planksheer.


-
Jon is correct, the transom is one of the first major obstacles to overcome on this build. I've seen several builders bail at this point. You complicating the process by going for the 1812ish 6 window configuration is going to make this even more challenging. I look forward with eager anticipation to your progress in this endeavor. I'm pretty sure you're already following Haiko, aka the Bitter End, in his scratch build. If not, here's a link to the post that talks about his choice to go with a 7 window transom. Maybe you can pick up some tips and techniques to help you in later stages of the construction effort. Excellent progress to date. Congrats and keep up the good work.
-
USS Constitution by mtbediz - 1:76
Der Alte Rentner replied to mtbediz's topic in - Build logs for subjects built 1751 - 1800
Hello Mustafa, I didn't want to copy the photos from your post after you installed the channel caps and clutter up your build log, but I have a question. Did you taper the channels from the hull to the cap? It doesn't seem to me that you did, which is perfectly fine by me. I'm just looking for justification to follow in your footsteps. Since I can't cover up mistakes with black paint, I have to very carefully consider the steps involved in attaching the channels, chain plates, dead eyes and caps. If you did taper, it's hard to see in those photos.. Thanks in advance. -
looking good Jon!
-
Pretty much what I thought. Thanks!
-
I just checked my accounting records and online purchase history. While I do have notes in the memo fields for belaying pins, cleats, single and double blocks, rope and wheel kit purchases from Syren, I have no record of having purchased deadeyes. I struck out searching for deadeye as well. So, barring a "senior moment", these are most likely Model Shipways components. (Umm, unless I pilfered them from the Constructo kit?) Next time I'm in the shipyard I'll check to see if they came from Constructo. If so, I'll let you know. For now, assume Model Shipways standard component. For what it's worth, I'll save you the time - I just checked Syren site, and their's are not the ones I'm using.
-
USS Constitution by mtbediz - 1:76
Der Alte Rentner replied to mtbediz's topic in - Build logs for subjects built 1751 - 1800
Seems to me those numbers are inverted. Looks more than 75 by my count. Yikes! -
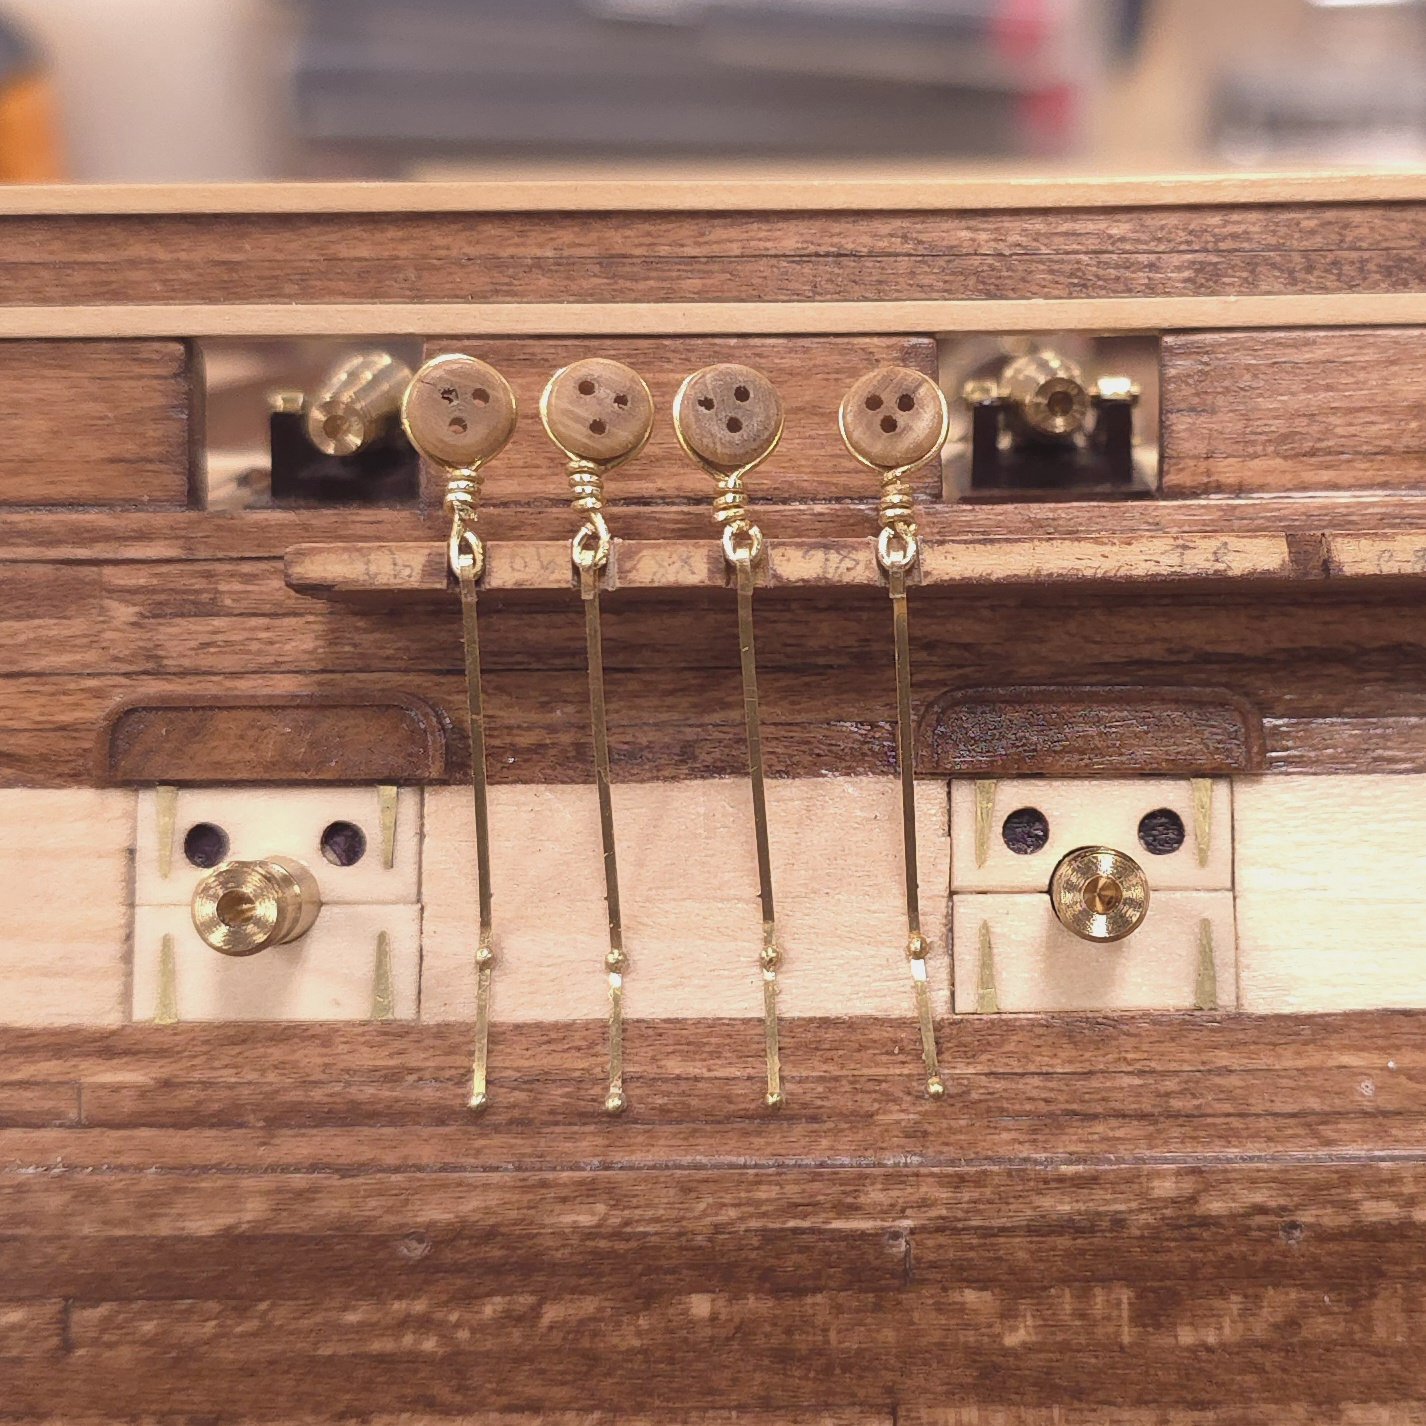
very good point. I'll see what I can do about that. ..and, the photo above clearly shows that the chainplates attach to the deadeyes above the channel. I may have to both angle and widen the slots so the attachment point is in the channel, assuming I don't redo the stropping - eliminate a couple of wraps and shortening the distance between strop and chainplate.