Der Alte Rentner
-
Posts
1,045 -
Joined
-
Last visited
Content Type
Profiles
Forums
Gallery
Events
Everything posted by Der Alte Rentner
-
 Does anyone want to venture a guess as to how much anchor rope the Constitution carries per anchor? Where is this rope stowed? And how is this anchor deployed? Looking at the picture that Mustafa provided, I don't see how this anchor could possibly be used effectively given the scant amount of rope evidenced in the photo.
 -
Wow that is absolutely incredible! Kudos to Chris for designing a kit where the PE and acetate windows fit so well. How much easier the Constitution would have been with that level of planning on the part of the kit makers. Your laser focused attention to detail in the execution of the build raises the bar several levels and sets the new standard. Your Sphinx is simly Gorgeous.
-
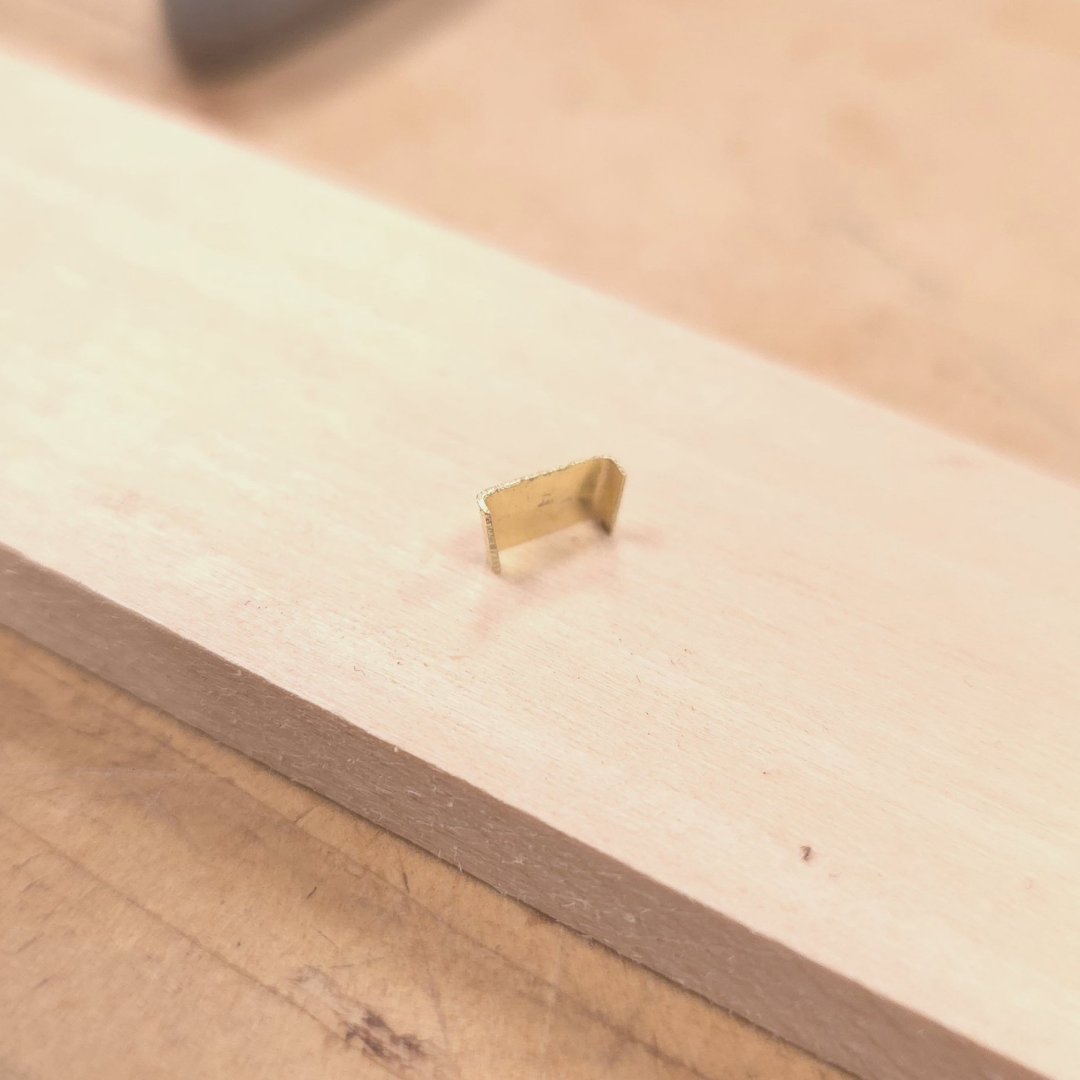
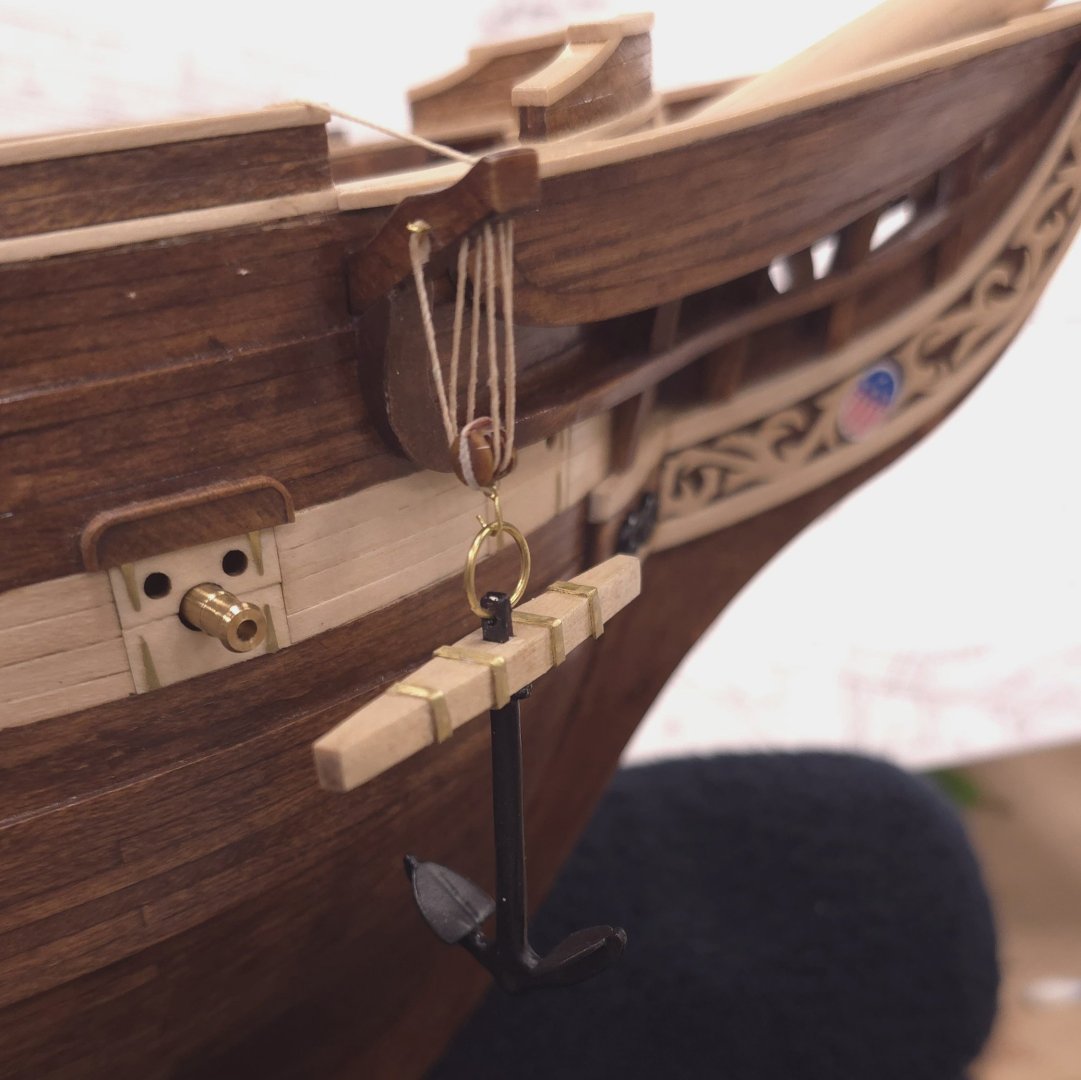
Port side waiting for poly to dry on brass plate before tying off the anchor rope. That can wait until tomorrow. I'm going home to update my personal build log. I'm about 6 weeks behind on that.

-
USS Constitution by mtbediz - 1:76
Der Alte Rentner replied to mtbediz's topic in - Build logs for subjects built 1751 - 1800
I love that last photo that shows the scale with the men standing on the fighting top. As always, I can't help but be impressed by your skill and expertise in rigging. I'm still a ways from getting there, but hope to come close to your Sterling example. Speaking of photographs, I noticed you changed your profile photo. Nice to see you without the sunglasses. 😎😉 -
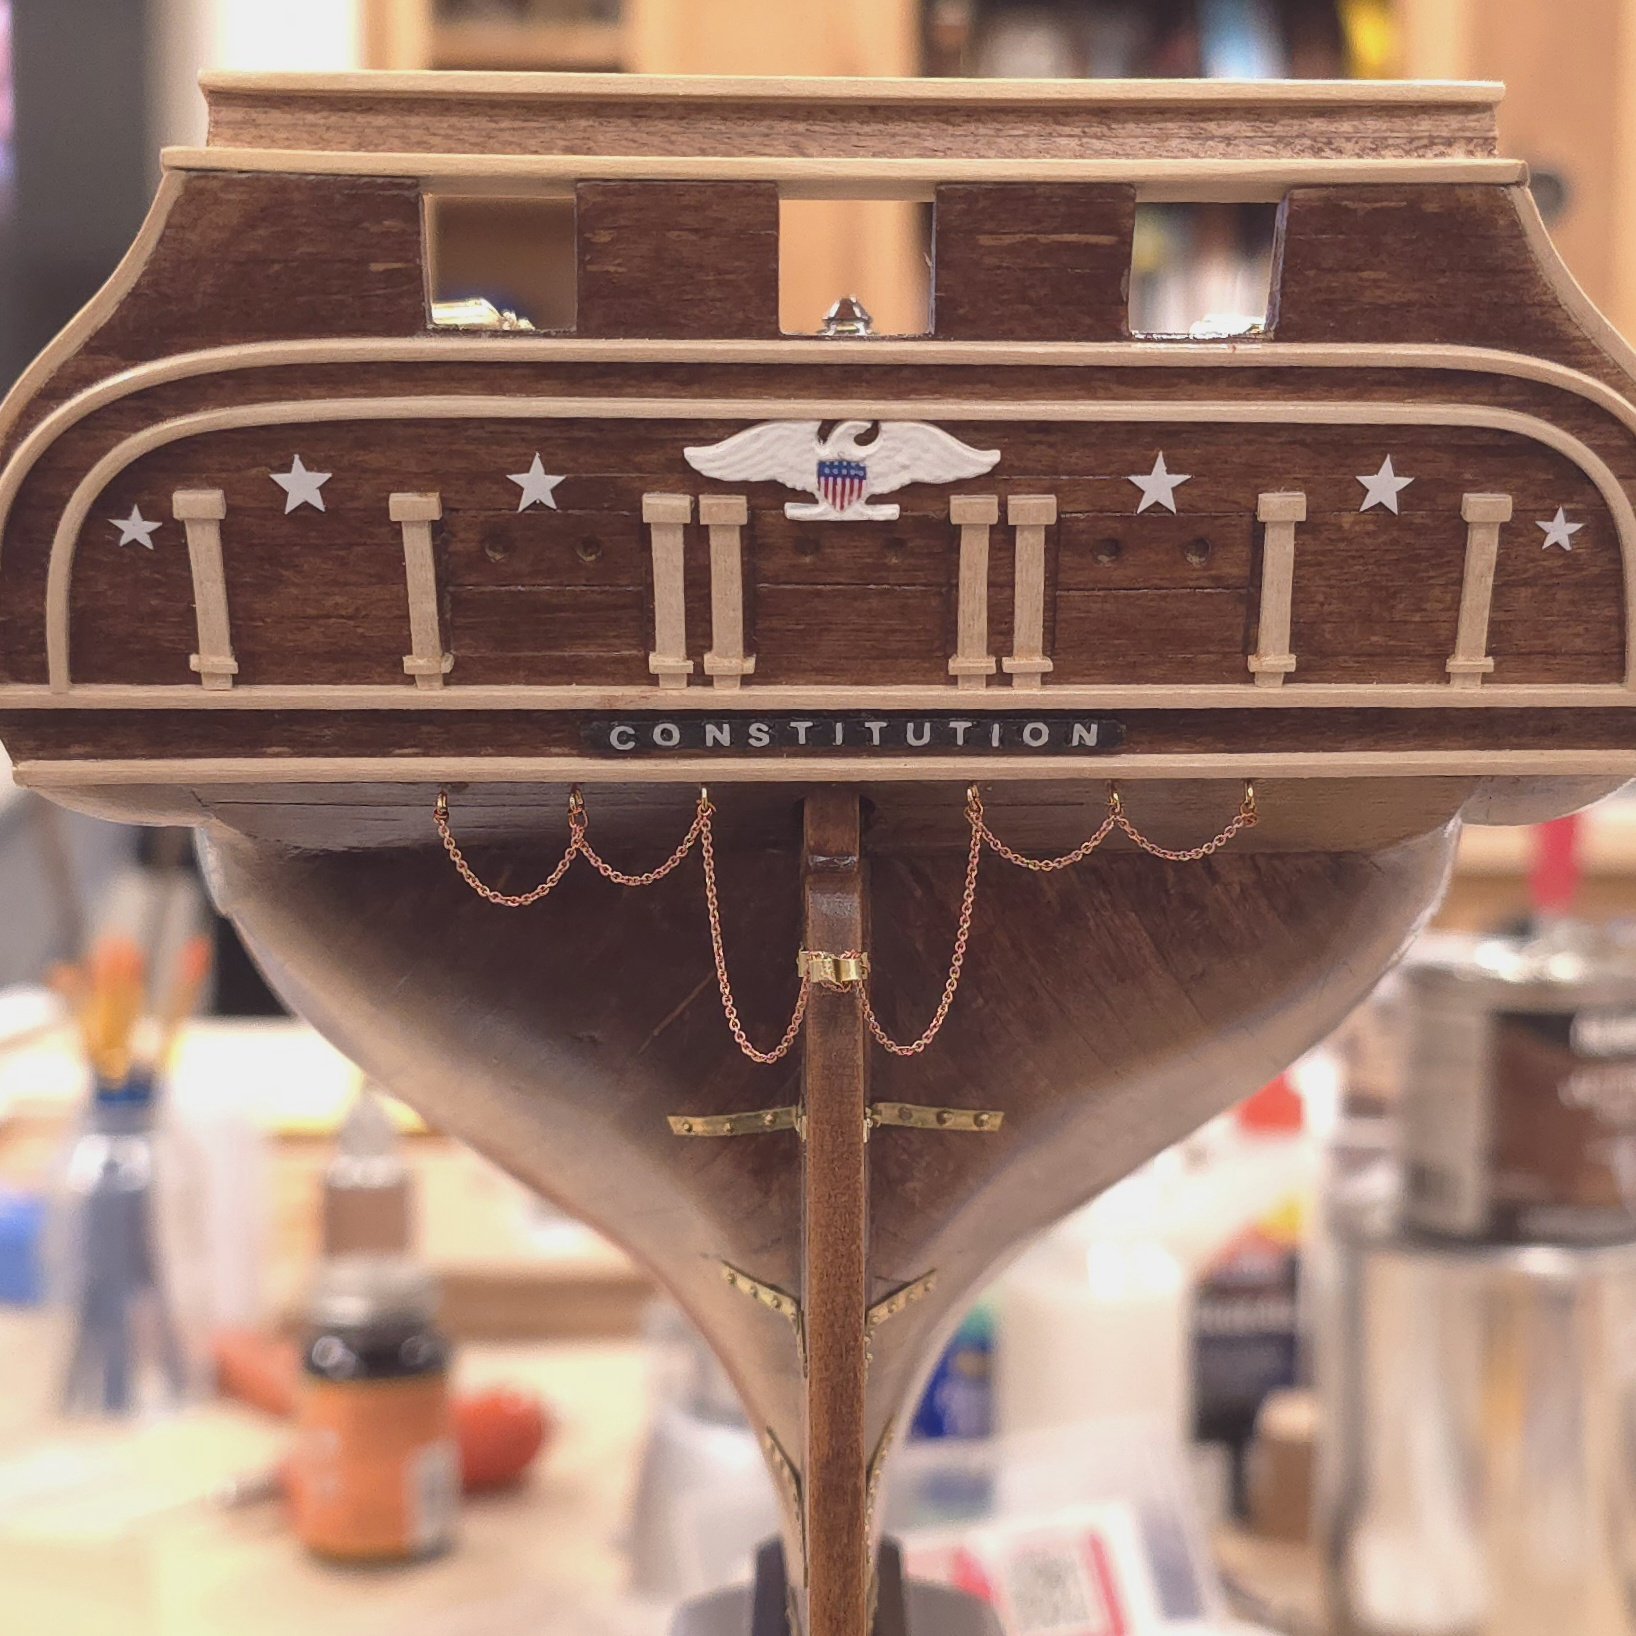
Drat! You responded before I could modify the previous post, Gregg. Decisions made, construction underway. I opted to use the undecorated gangway boards. But I will be skipping the AFT star. Moving on to the port side now.


-
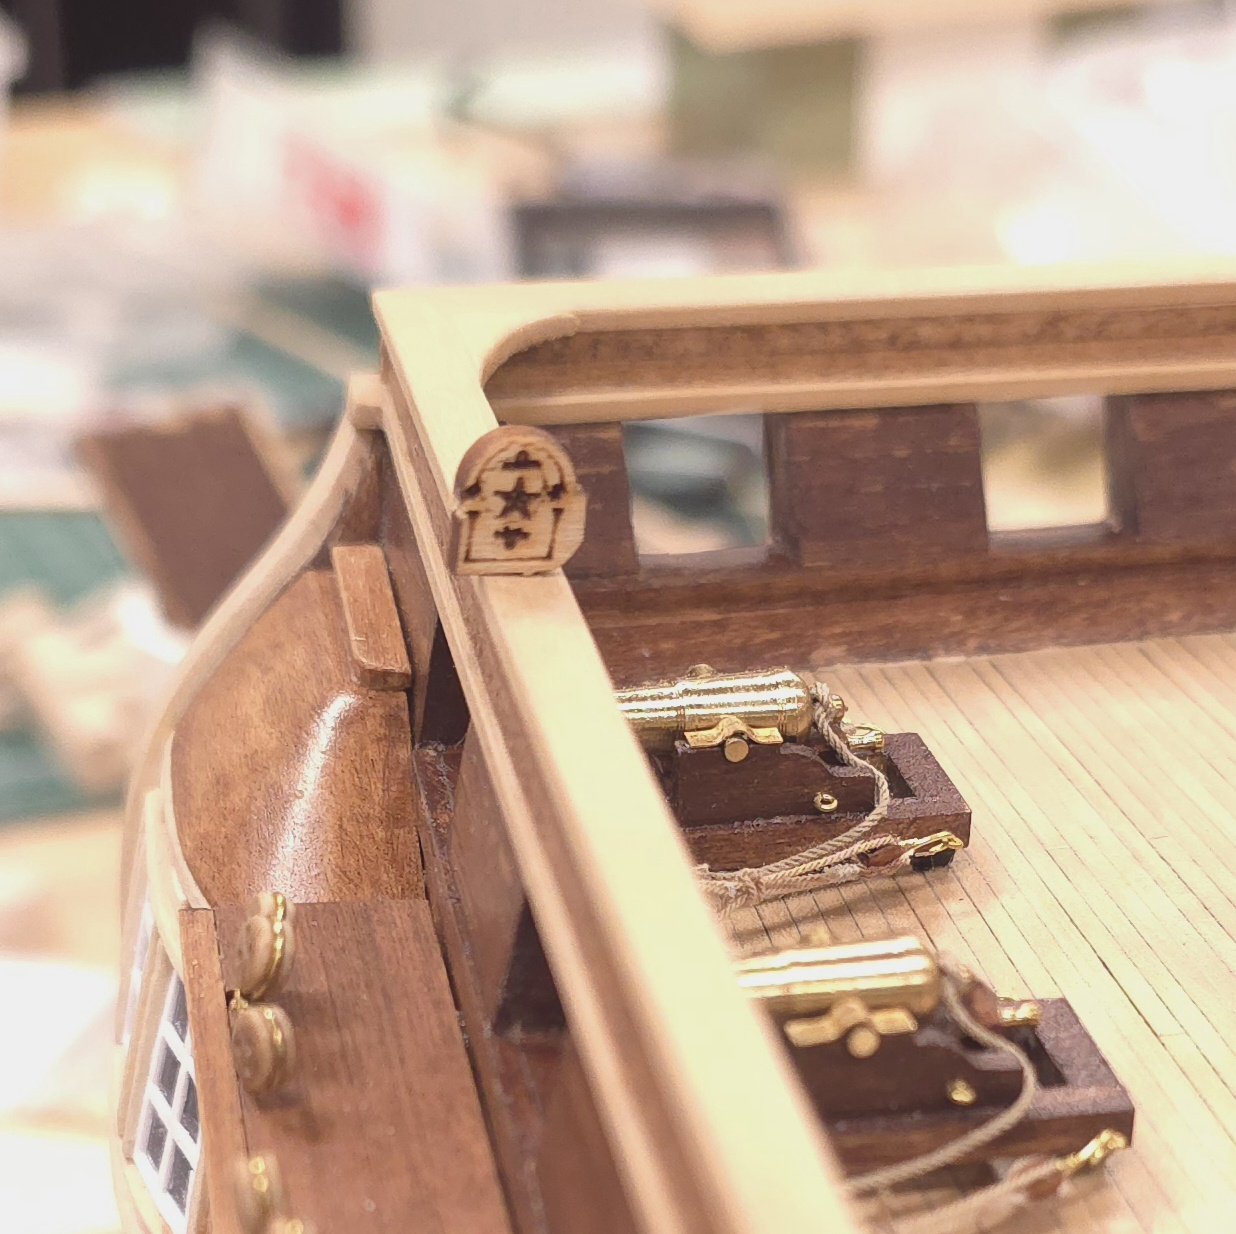
Thank you Gregg and may you be blessed with a joyous and productive 2026. Today is day two of that new year and I came to the shipyard with the intention of dealing with the anchor rope issue. But as I stared at the forward end of the topgallant rail, knowing that the gangway board needed to be dealt with first, I started pulling parts from the laser cut panels and scouting out where they belonged in the plans. It was only as I was about to post this entry with a half a dozen photos asking where a particular part went, that I found my answer. Unfortunately that answer prompted a new question. Given that I will not be adding the hammock netting, do I even need the decorative gangway boards? Once I found where the "aft star" belonged, I had to ask myself, why? Absent the stanchions and hammock netting, this particular piece of decoration seems out of place - there for no particular purpose. I can make the case that the pair of gangway boards at the waist makes sense, but I am leaning toward eliminating the aft star and the forward oak leaf, which is problematic anyway. It's not easy to tell from the photo below, but the forward oak leaf gangway board is too wide for the rail. (By the way, so is the aft star above.) I can't use the decorative piece. Yet, I don't think I can simply not cover the rail ends. Boy, do I wish I had not installed the topgallant railing in the first place. Oh well.. but no, I'm not going to be removing them. I'm debating between modifying the undecorated gangway boards, that came with the kit, and simply filling the gap in the bulwarks beetween the rails. And, yes, I do intend to move the anchor rope by adding another cleat.


-
You have been quite busy, very productive, and exhibiting excellent workmanship! It is a pleasure to watch your progress unfold.
-
USS Constitution by mtbediz - 1:76
Der Alte Rentner replied to mtbediz's topic in - Build logs for subjects built 1751 - 1800
Since I will be away from the shipyard for 3 weeks in february, I'll be looking for something I can work on while in a hotel room. I think there are many examples for me to choose from above. As always, thanks for the inspiration. -
Unfortunately, it's the latter. I need to refer to my nautical Funk and Wagnalls to decipher the lingo. Frankly, the angles involved in this solution seem as bad as what I've got now. But I still have a couple of days to ruminate over this, we'll see what the new year brings. Thank you Jon.
-
I like the idea of it, especially the part about being able to look away from what you're working on and having that in focus. But it seems to me that if you are moving between areas that you're working on, you've got to move the magnifier. Also the box does not indicate the level of magnification. I know in my case I'm using pretty strong magnification on my Mr Magoo glasses. Still worth investigating. I'll look it up. Let your fans know how it works for you.
-
All of this is giving me a headache.. I suppose I could simply not dangle the anchor, securing it to the spar deck as shown elsewhere. I had hoped to be back at the shipyard today, but to add insult to injury, I literally do have a headache, along with a bunch of other cold/flu symptoms, so I'll have a few more days of rumination before me before choosing between the options. Absent even a hint of where in the mast rigging the anchor could be fastened, I'm going with the option Mustafa recommended at the top of the page.
-
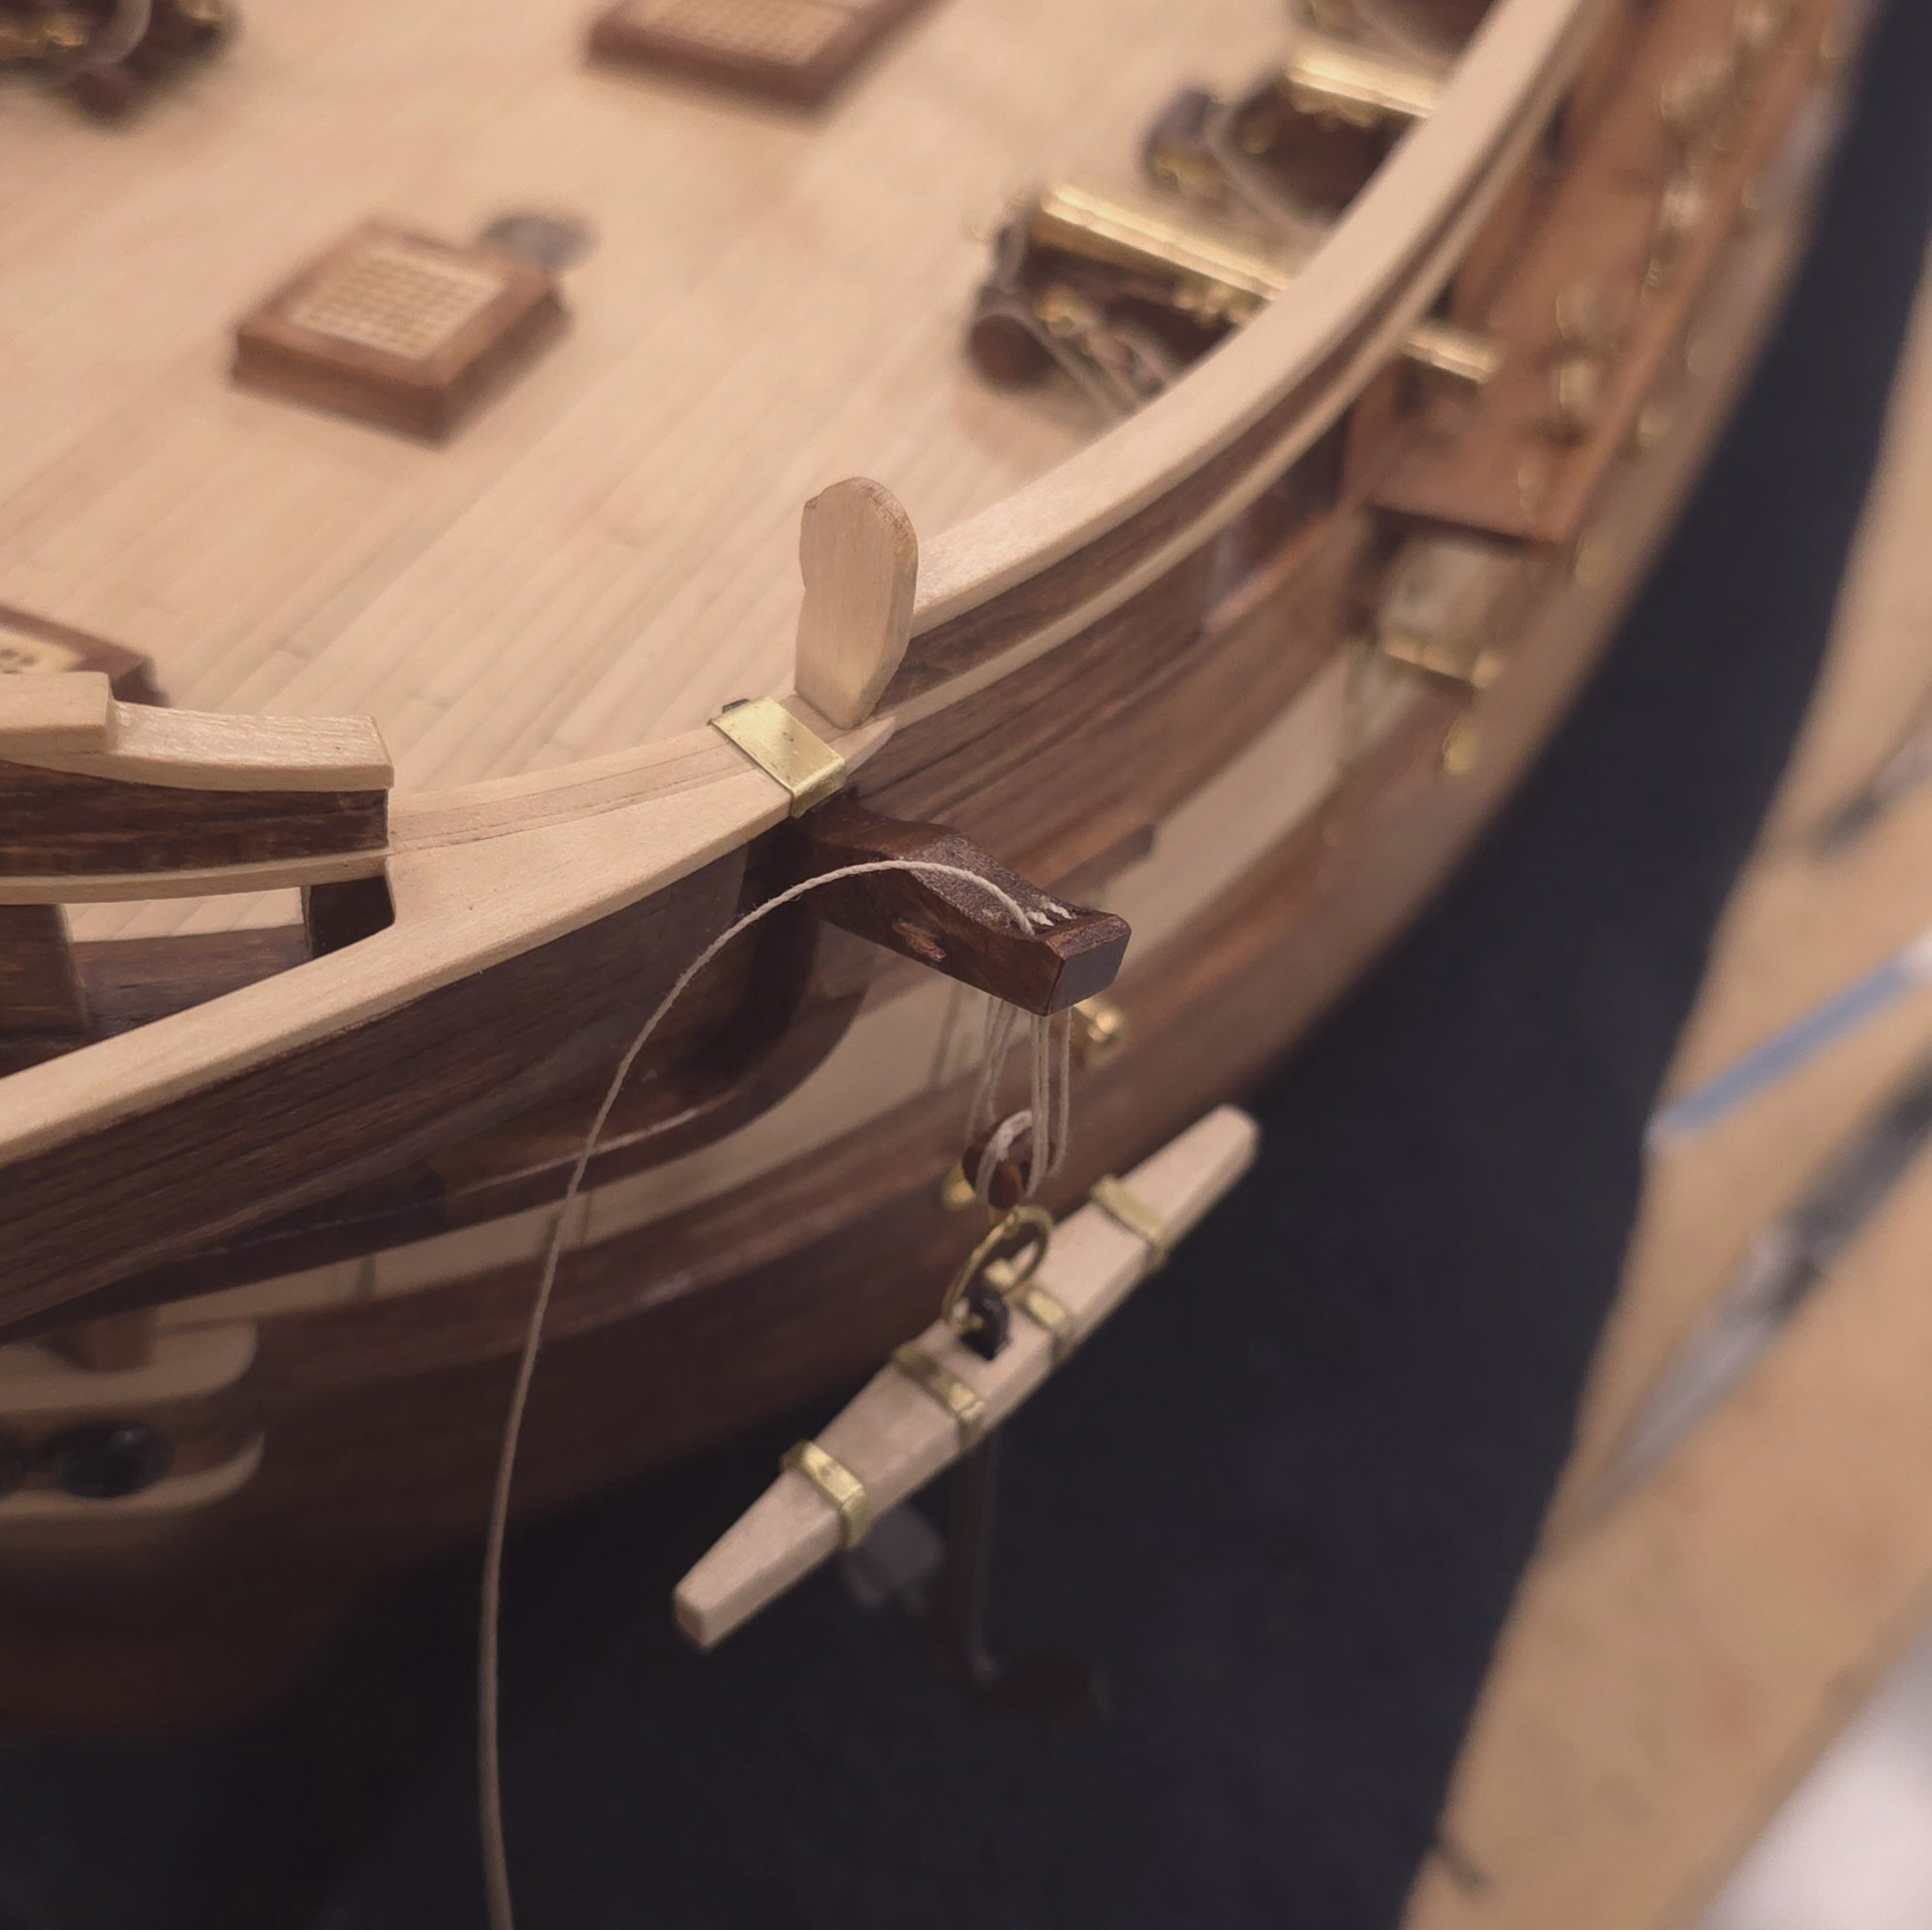
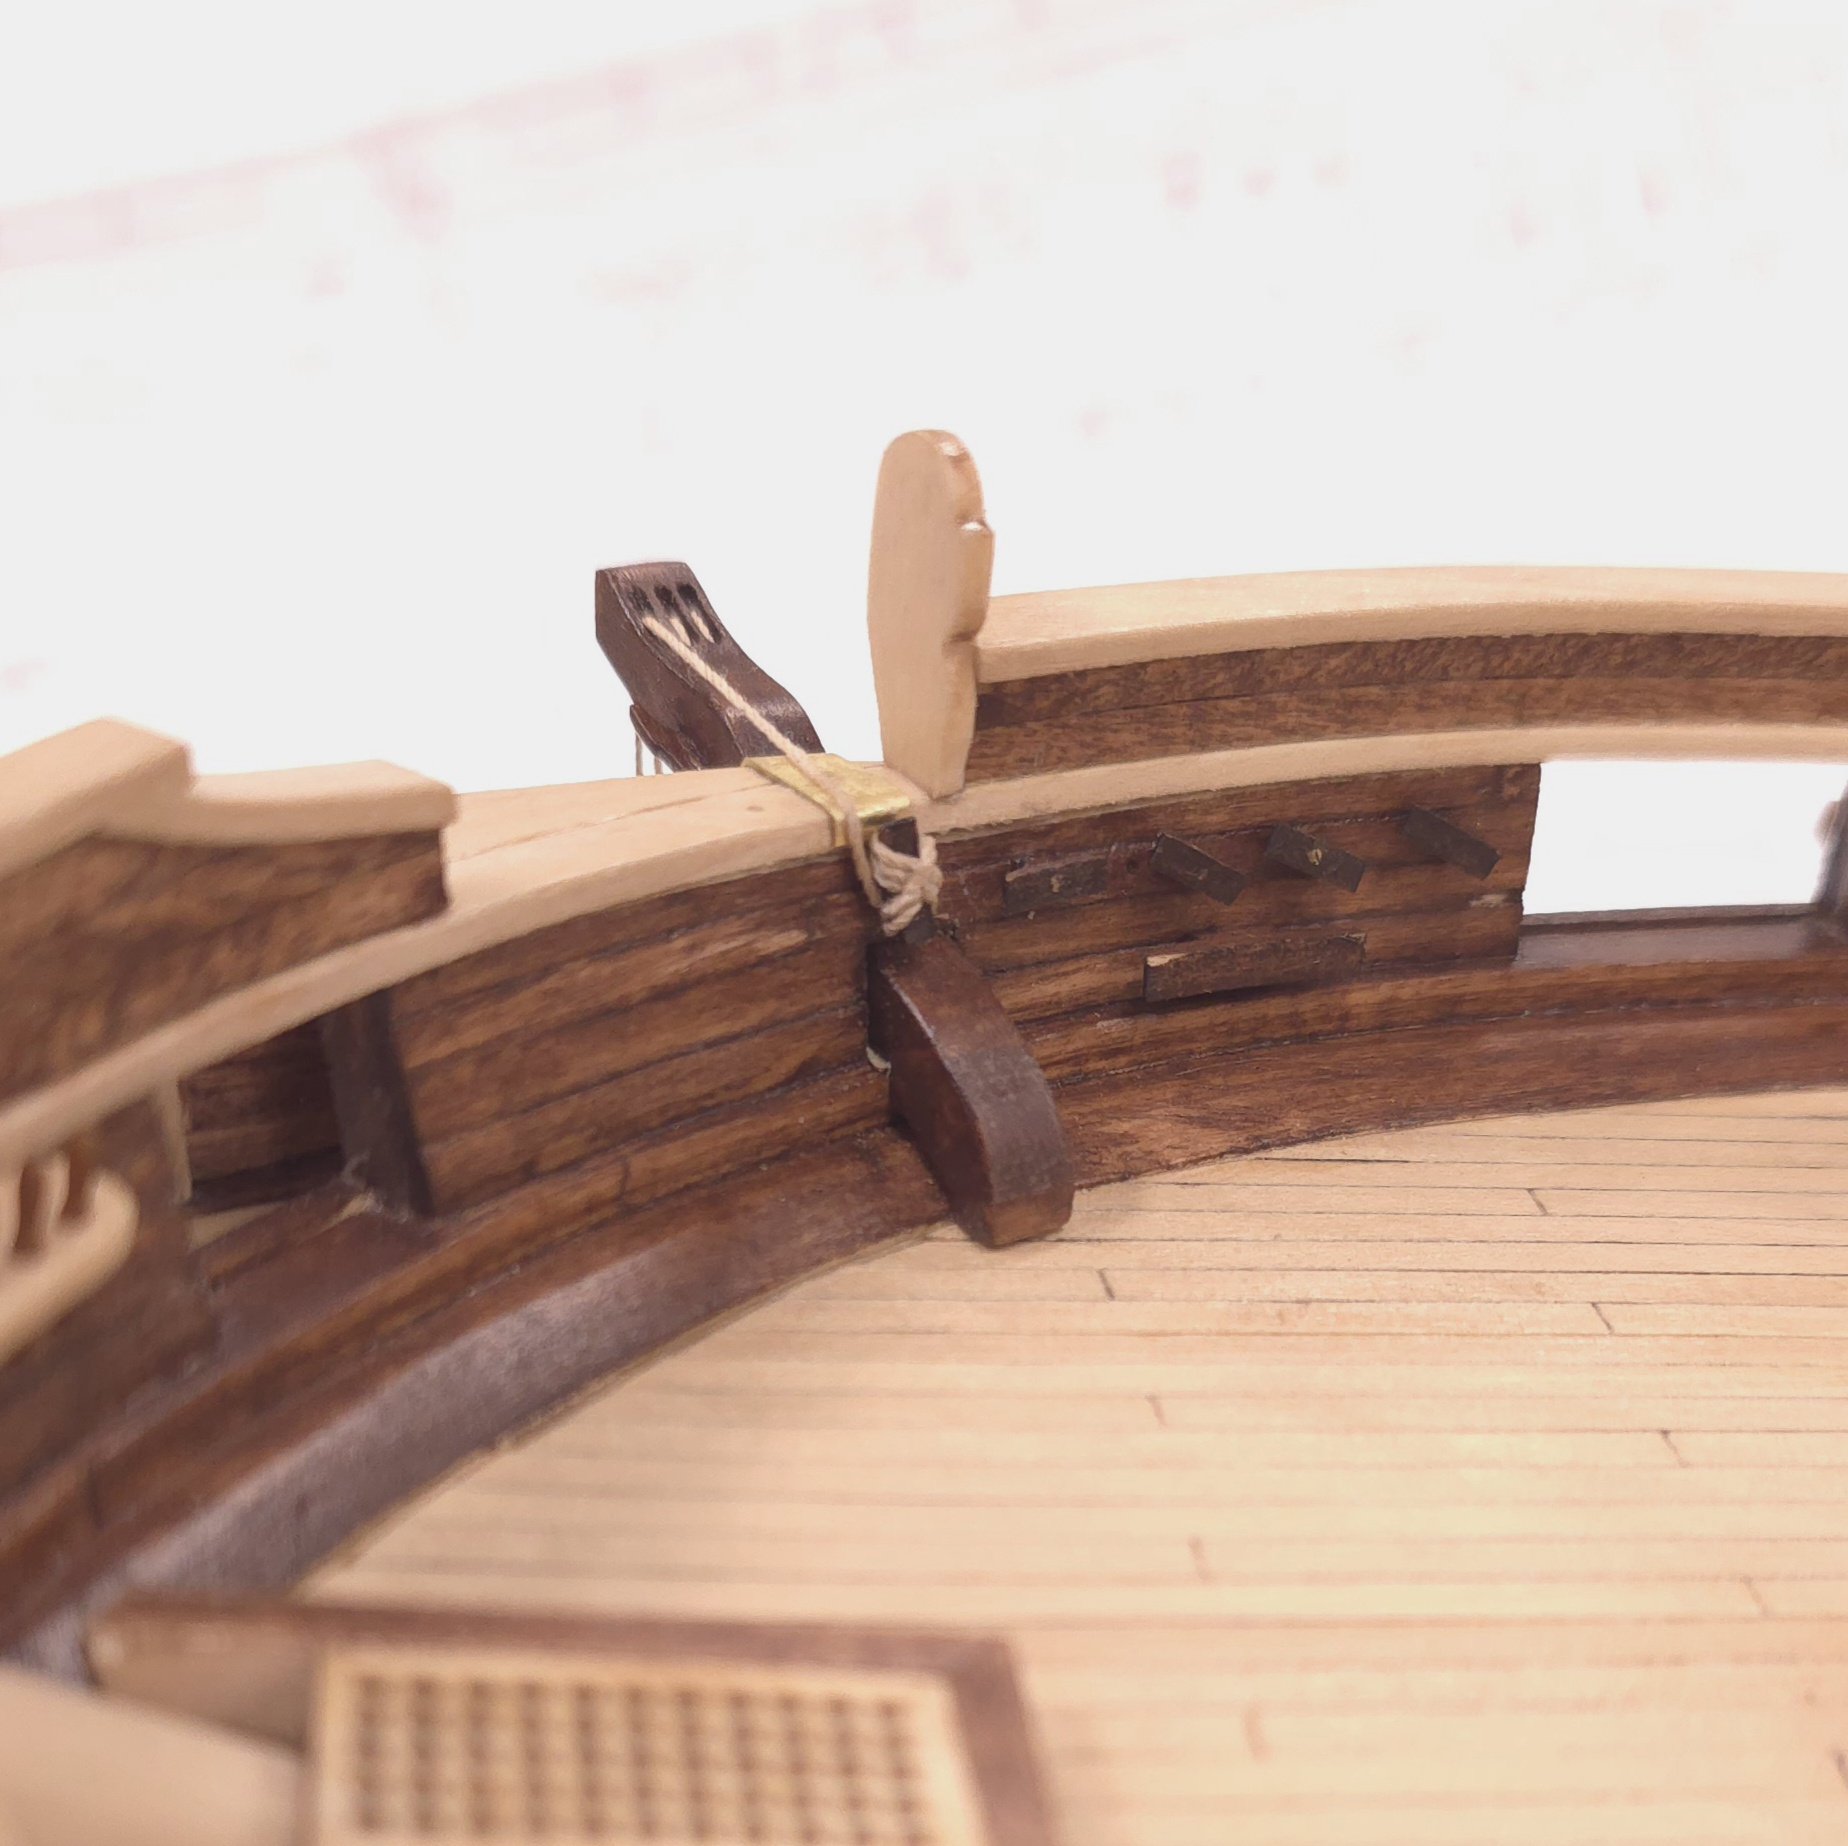
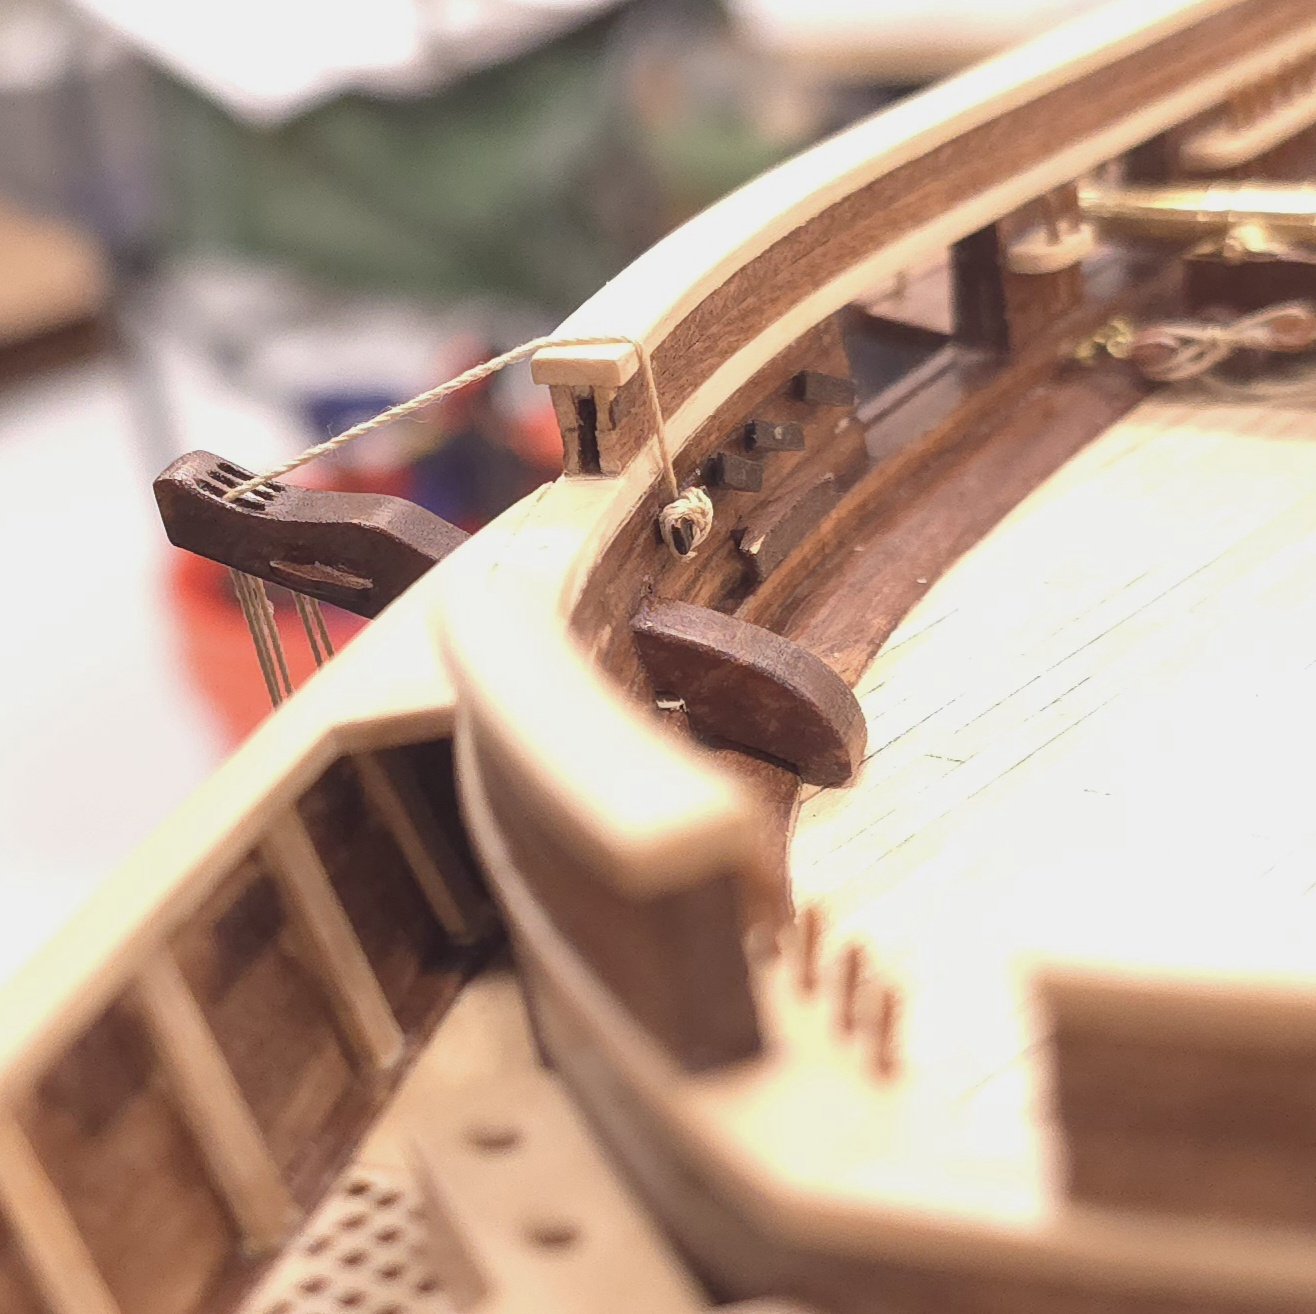
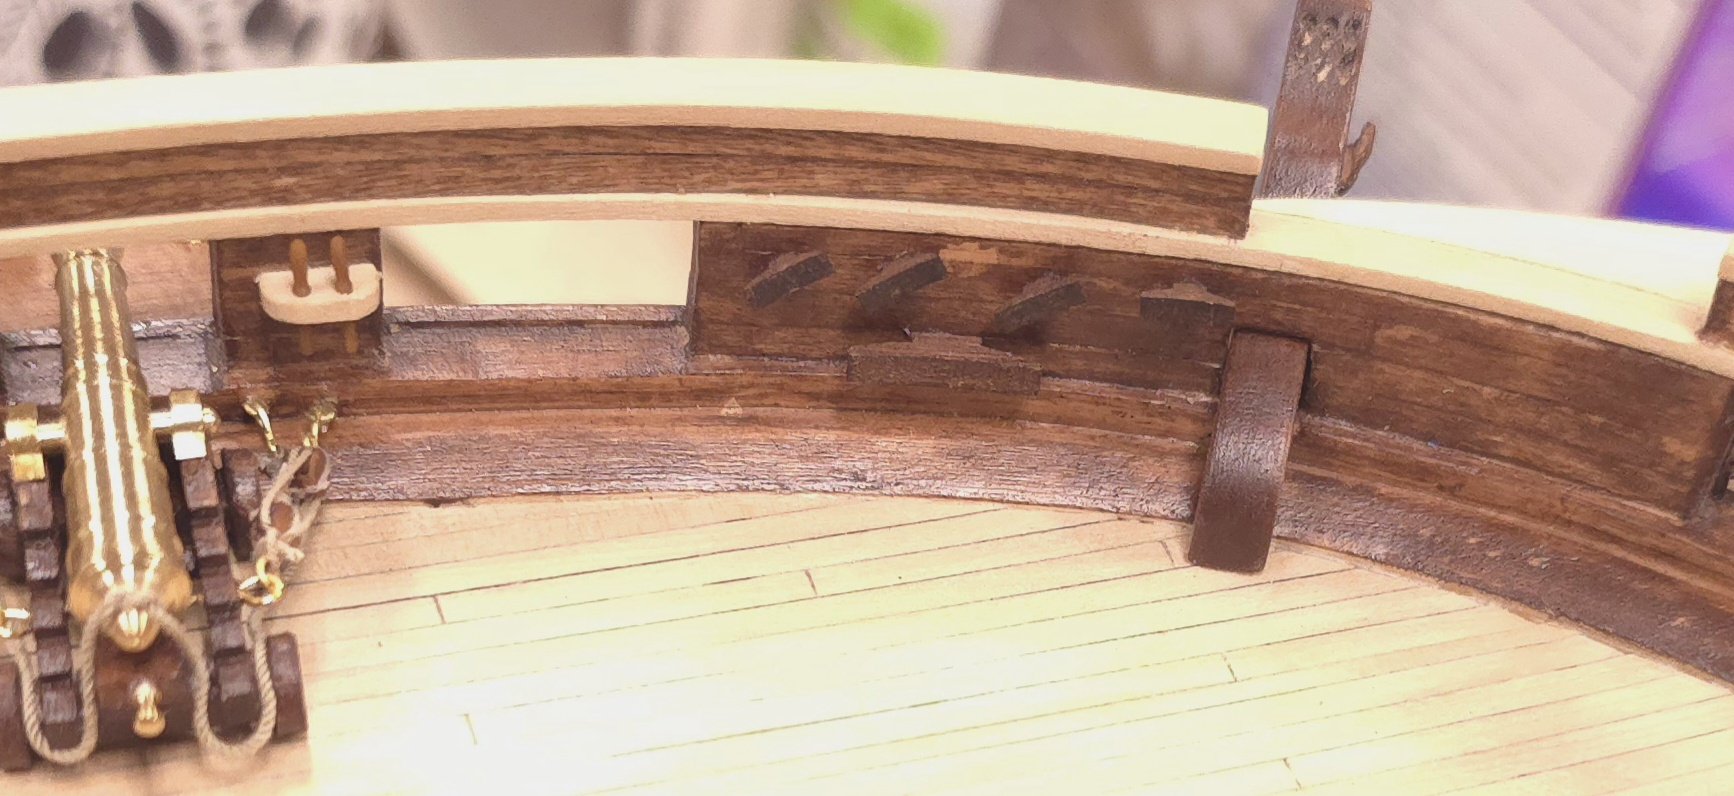
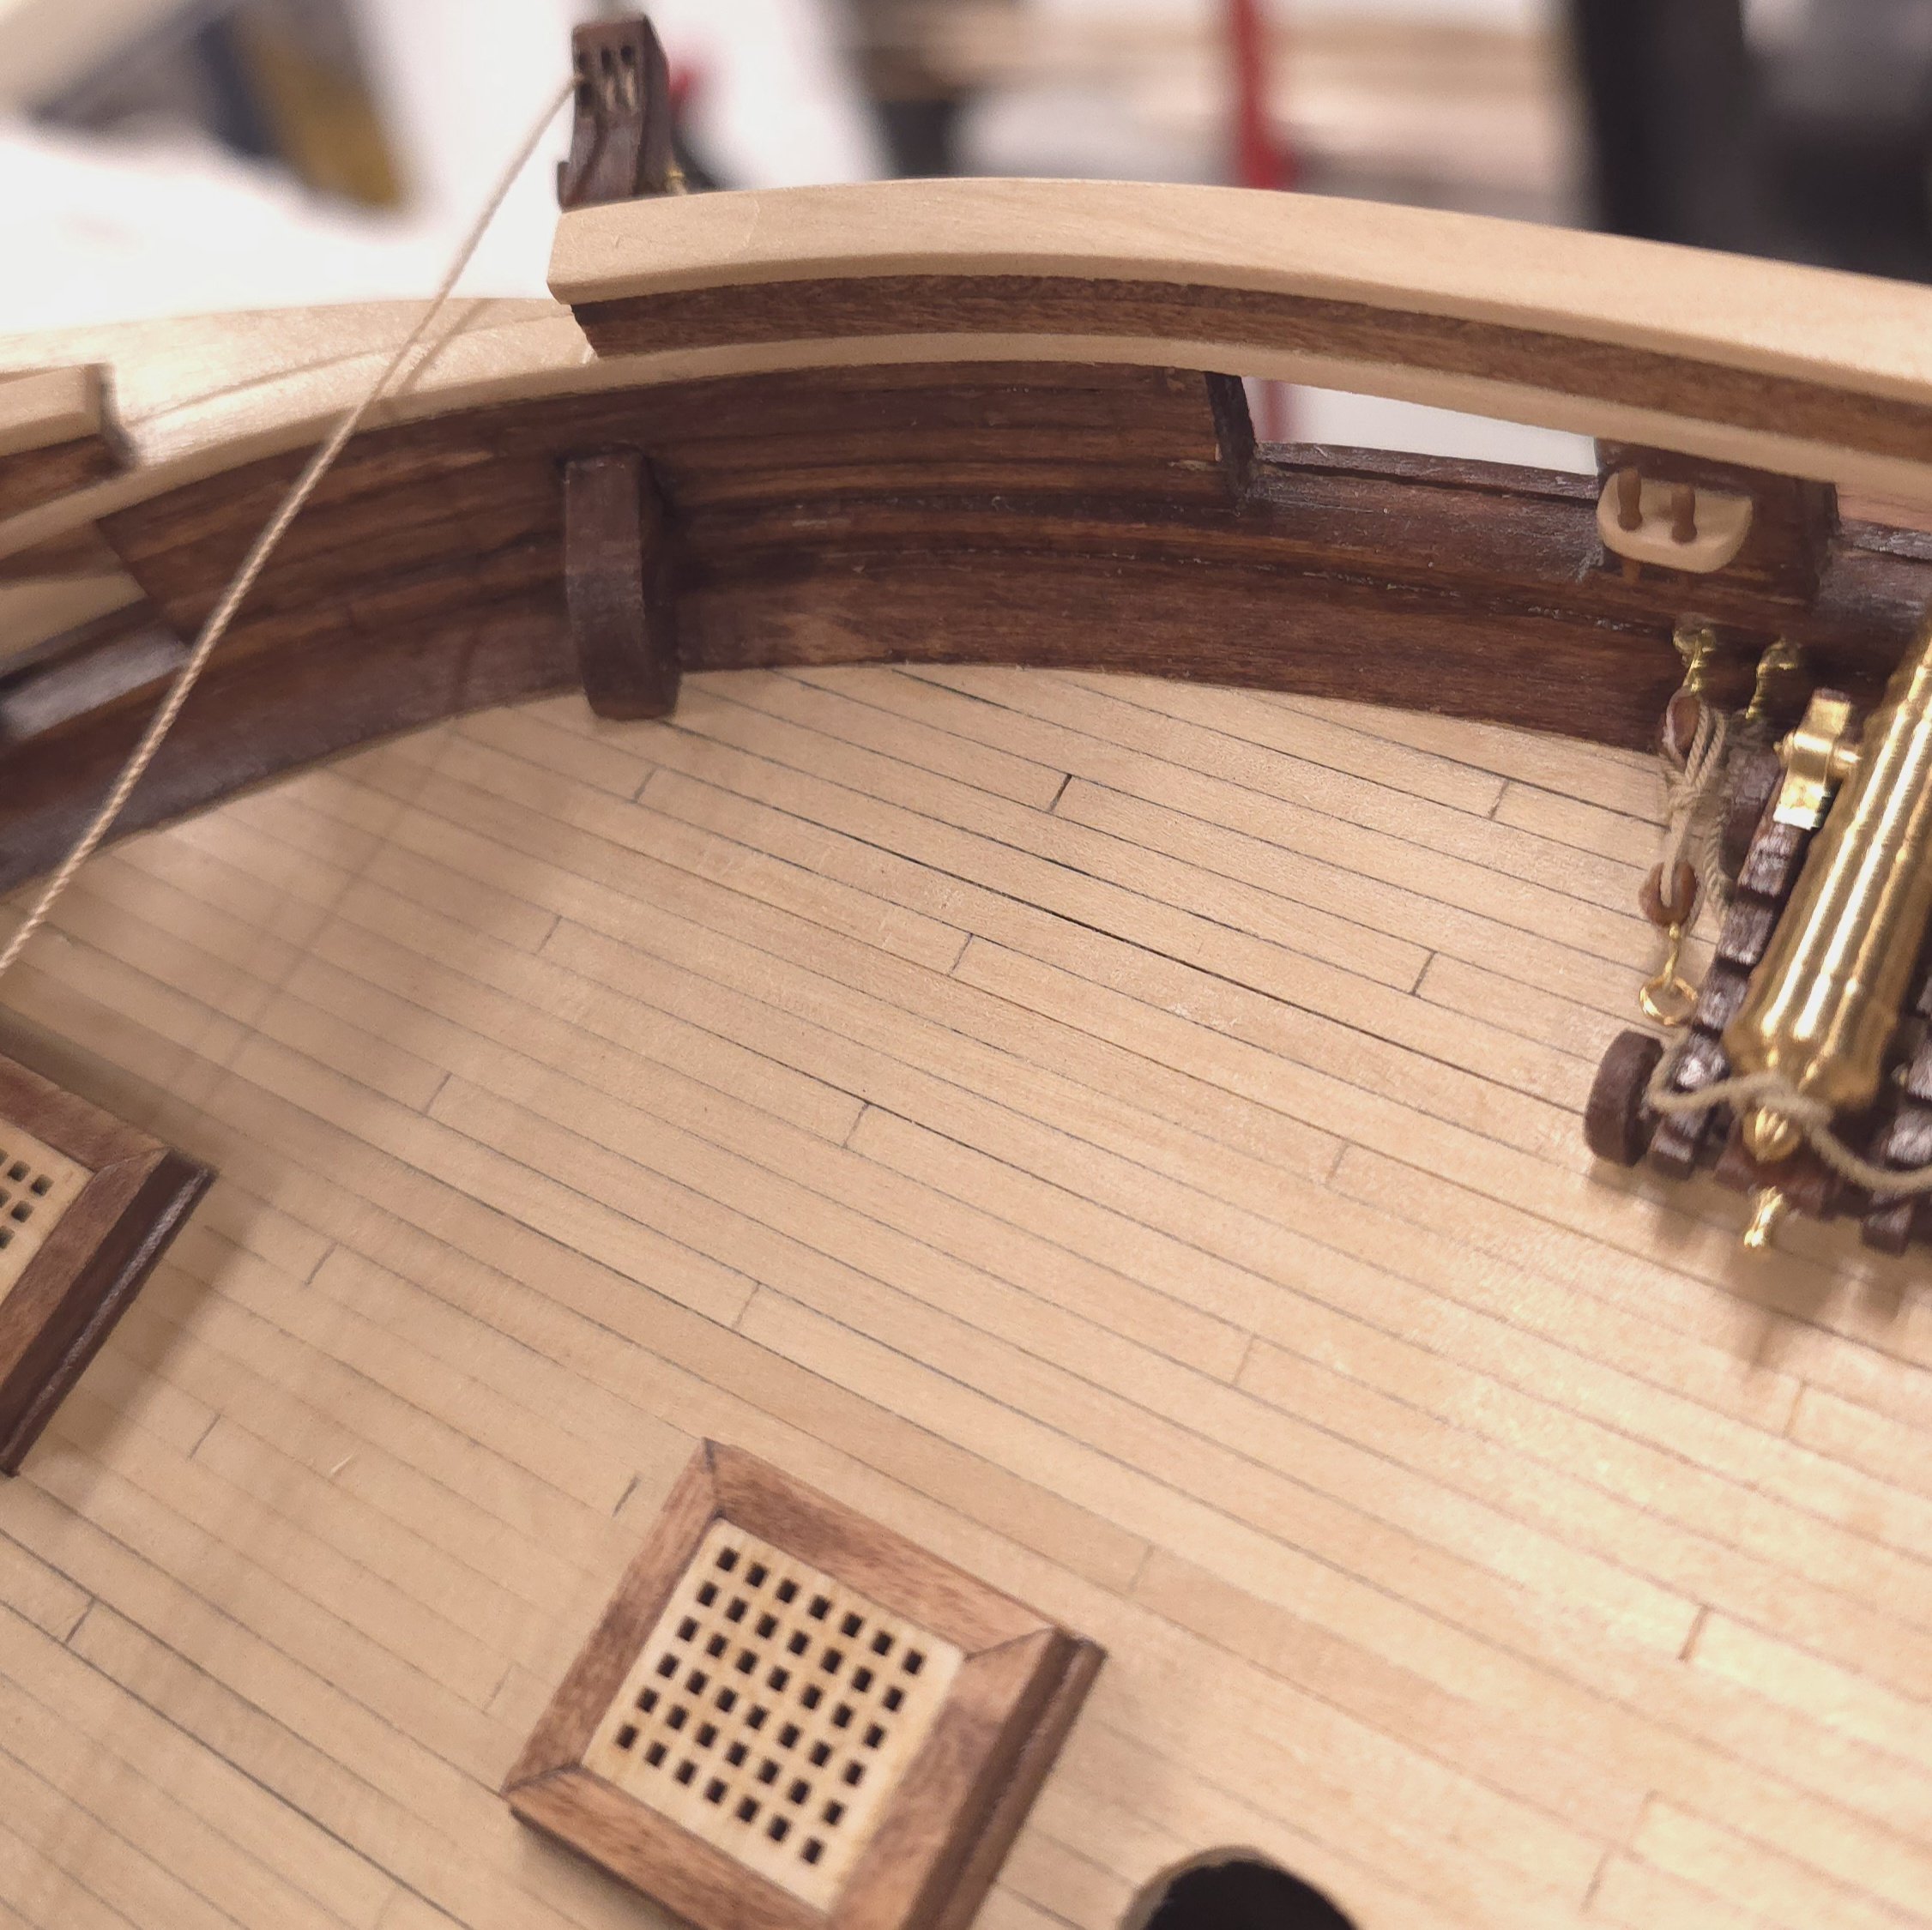
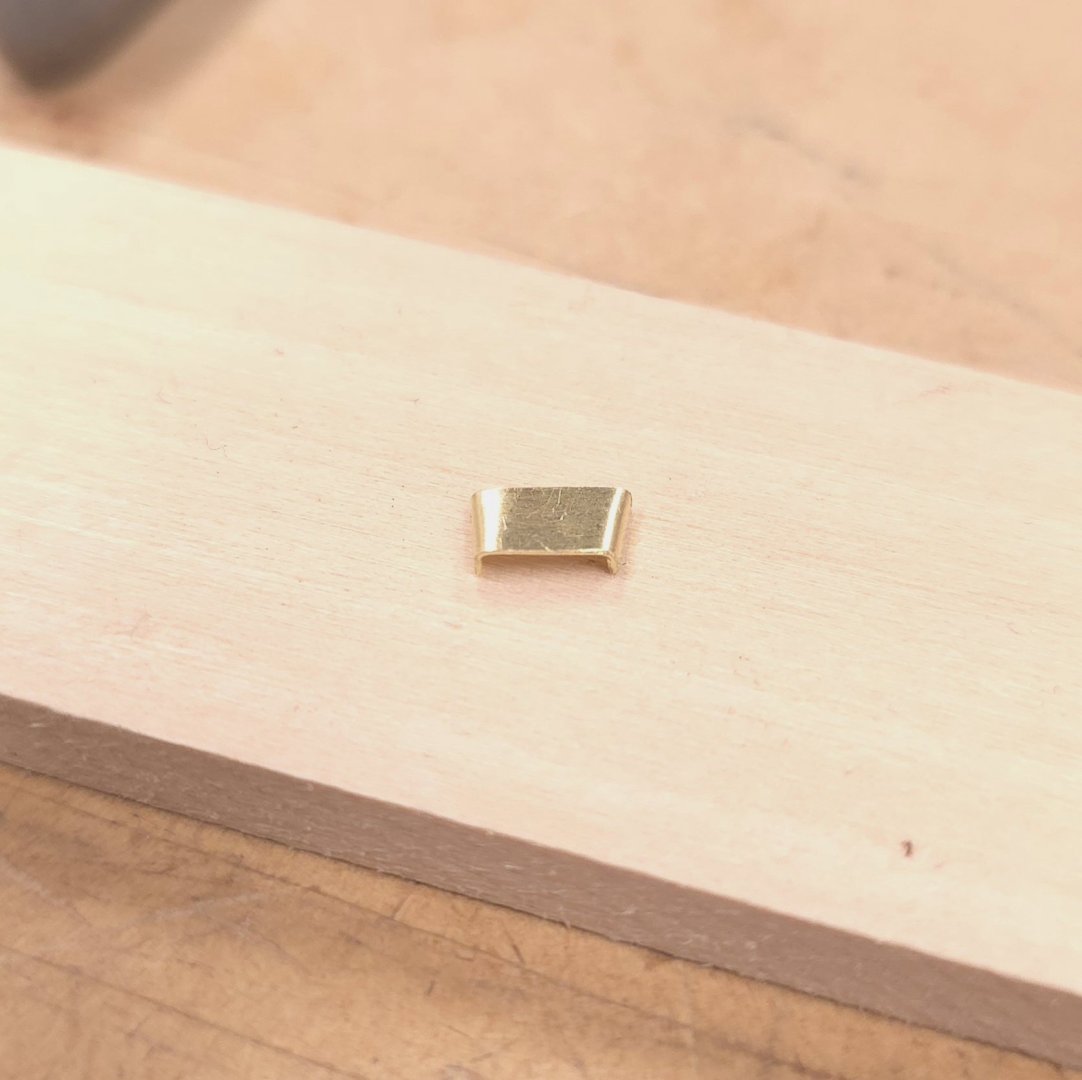
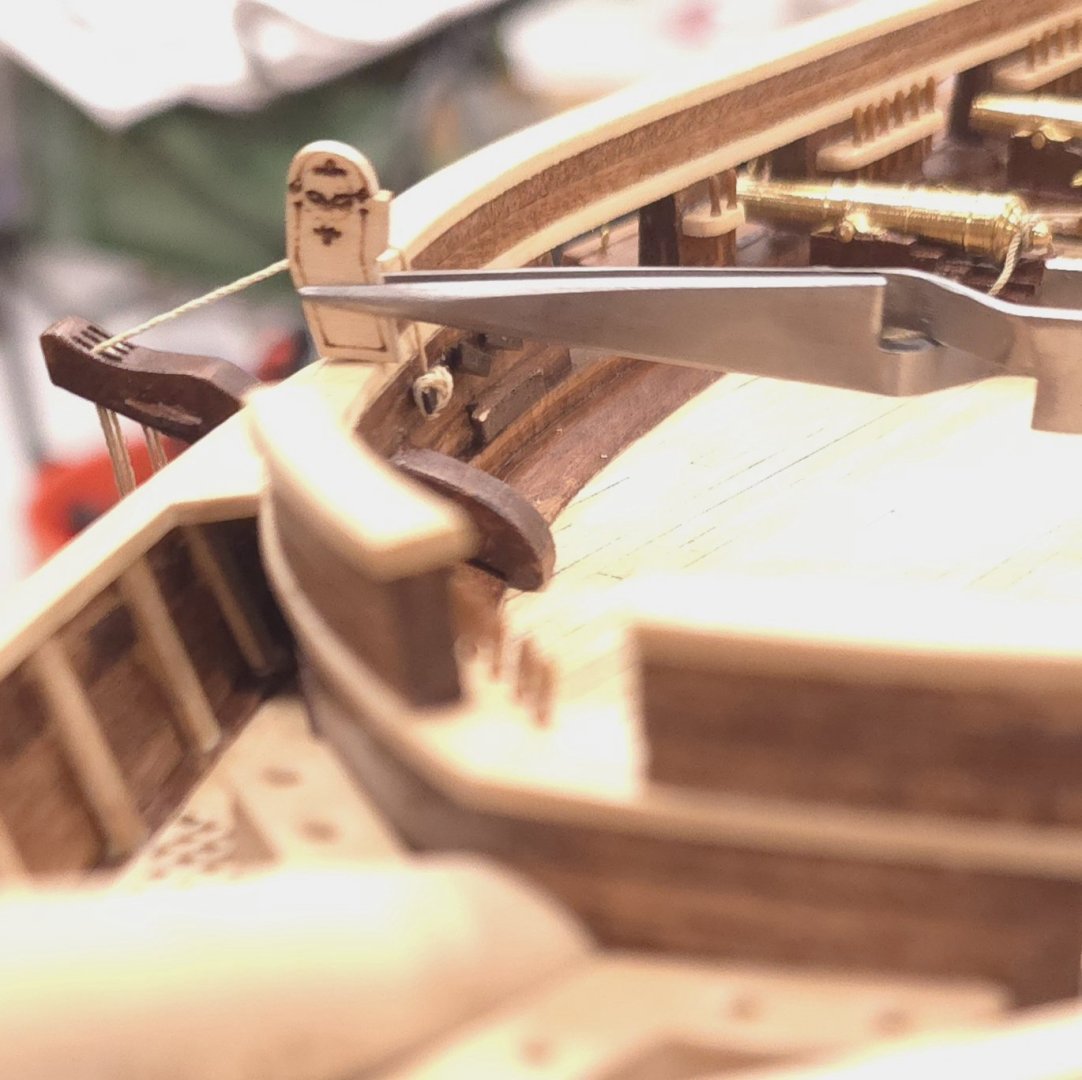
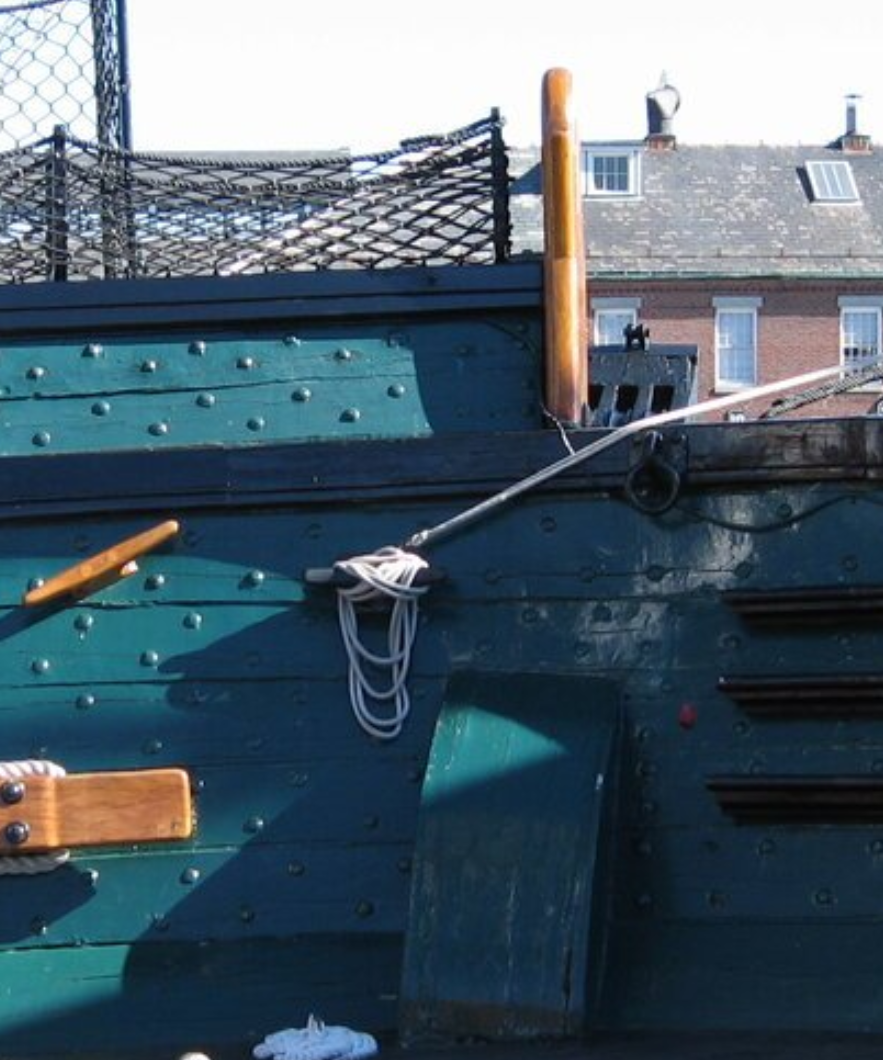
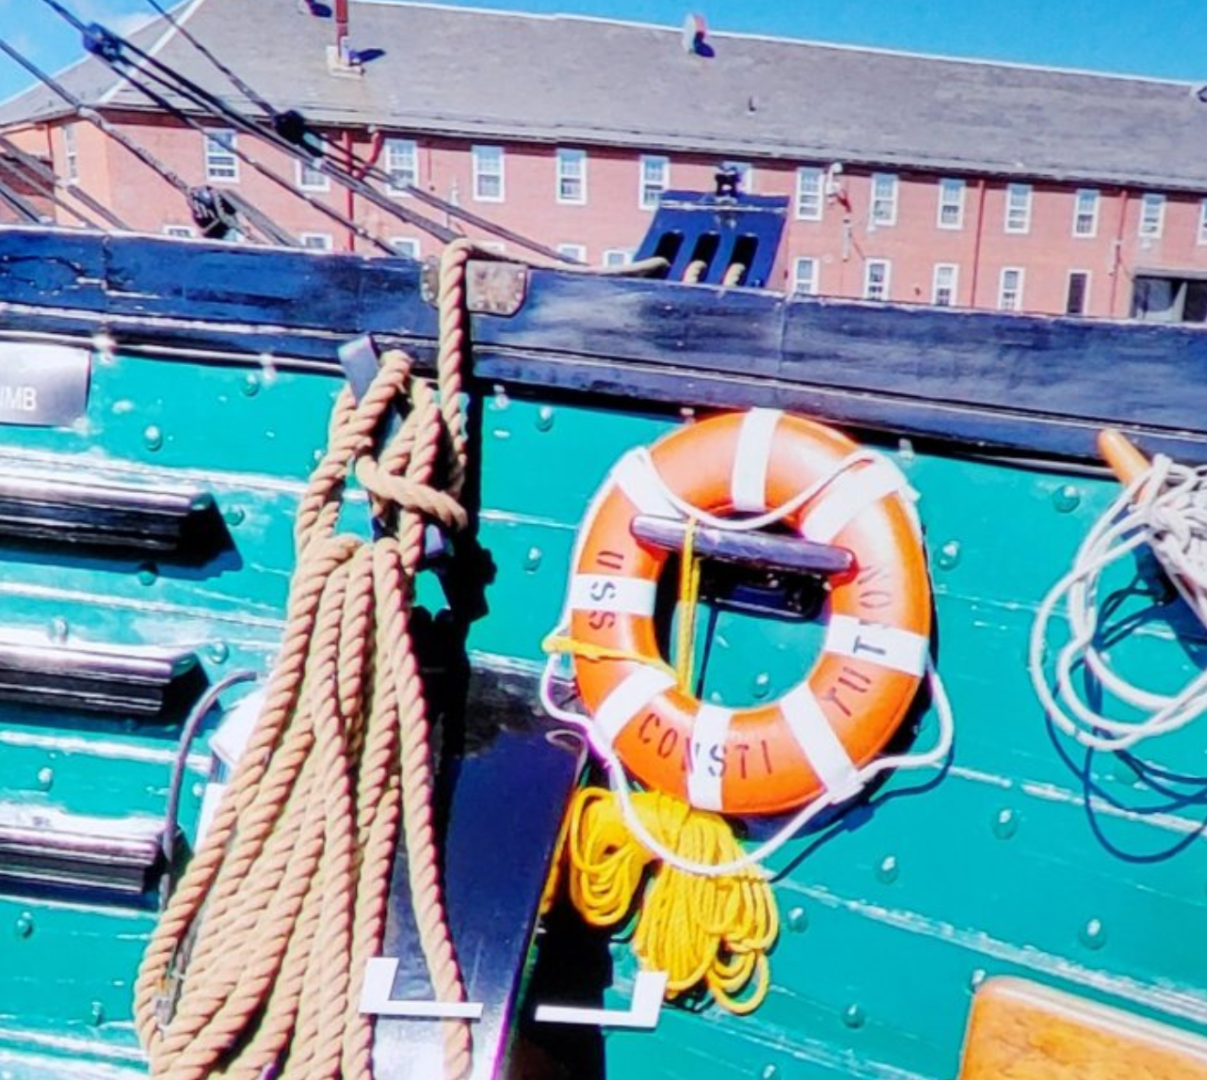
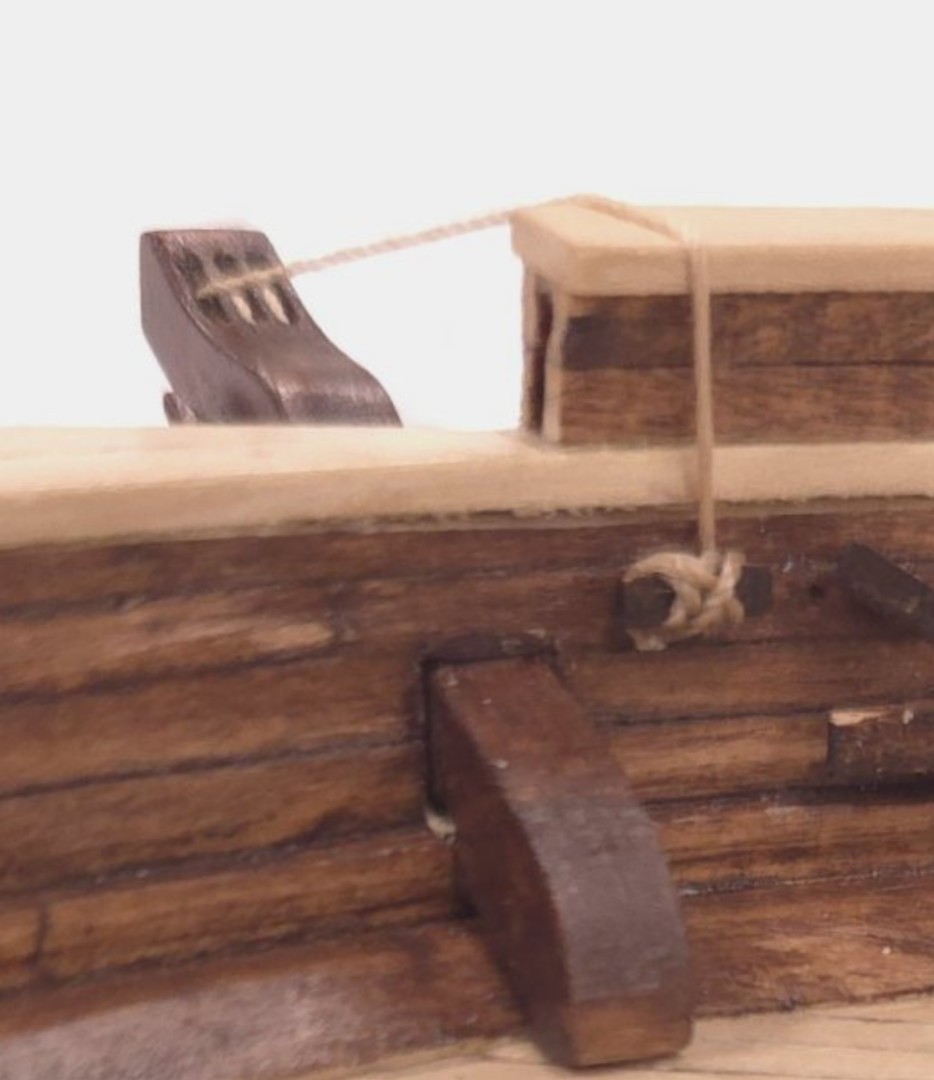
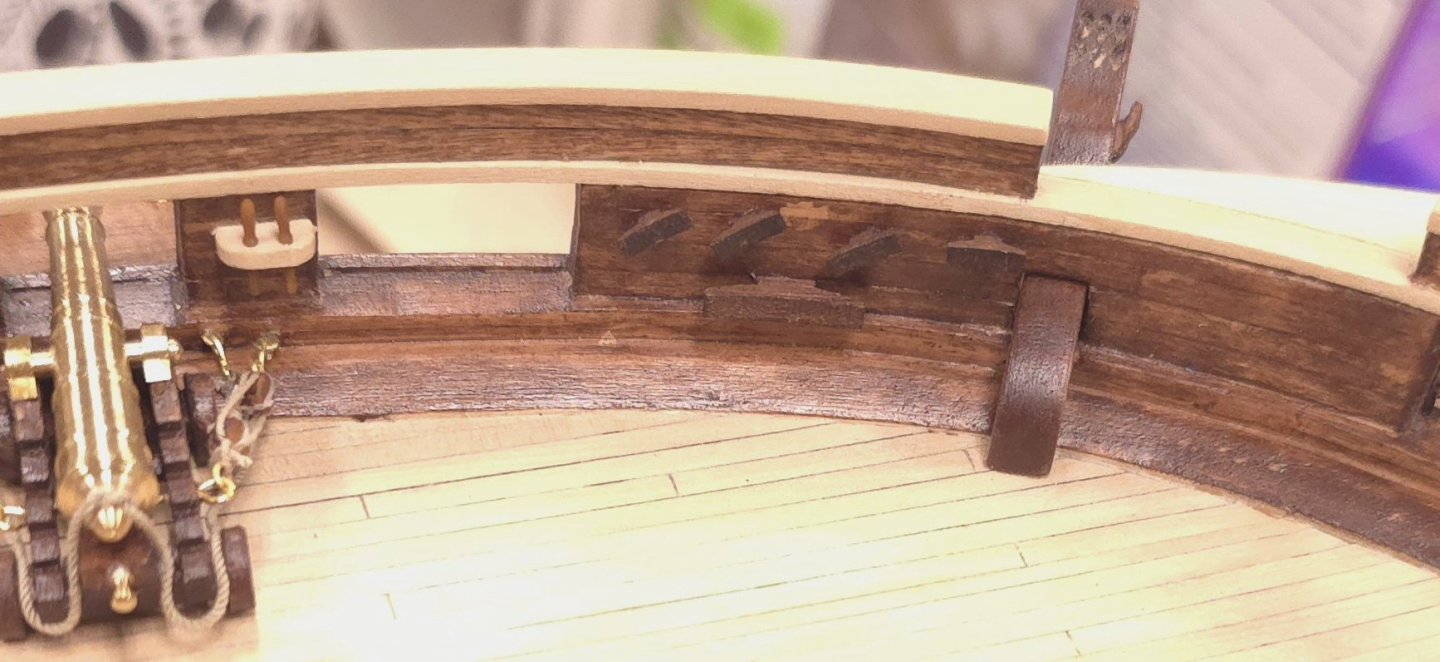
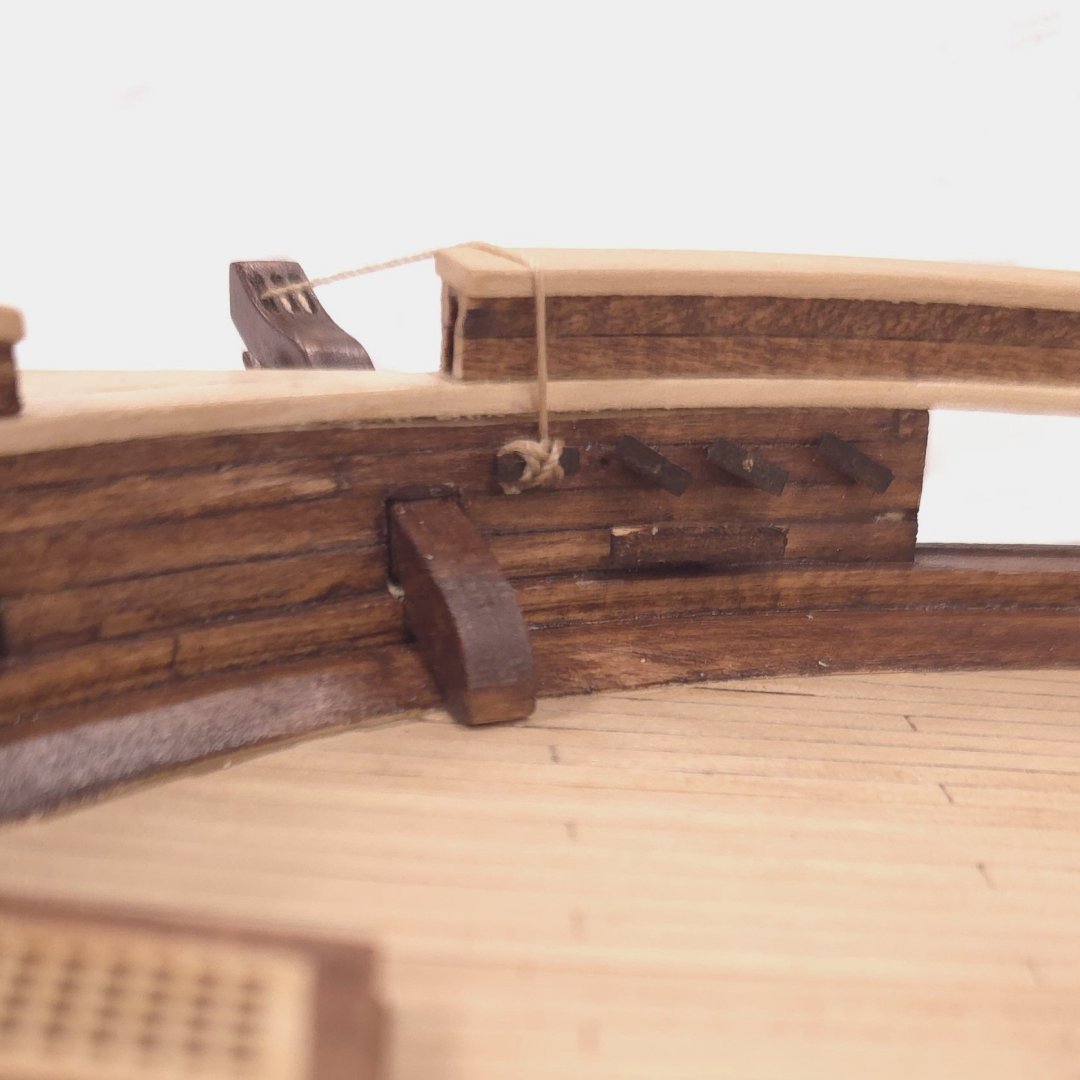
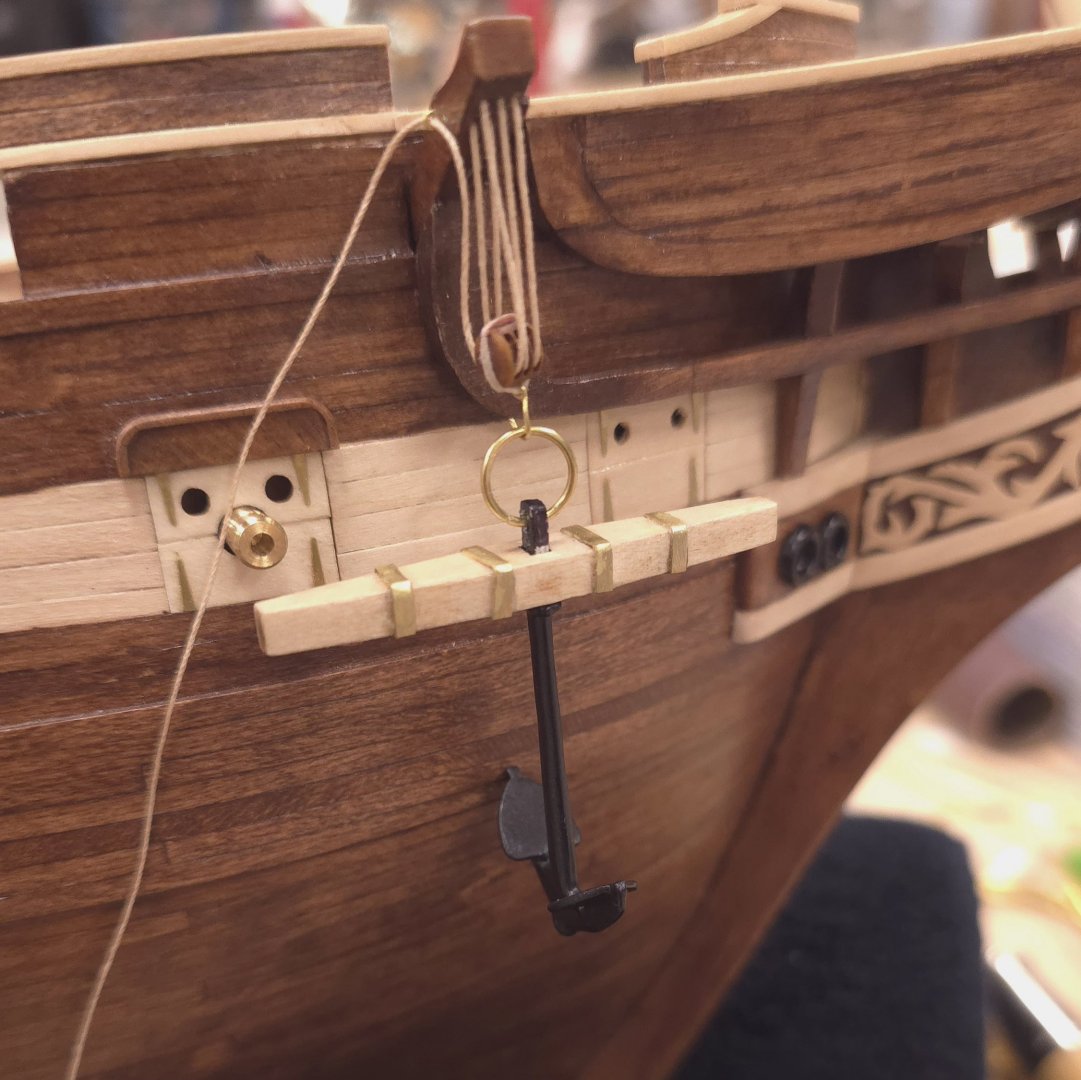
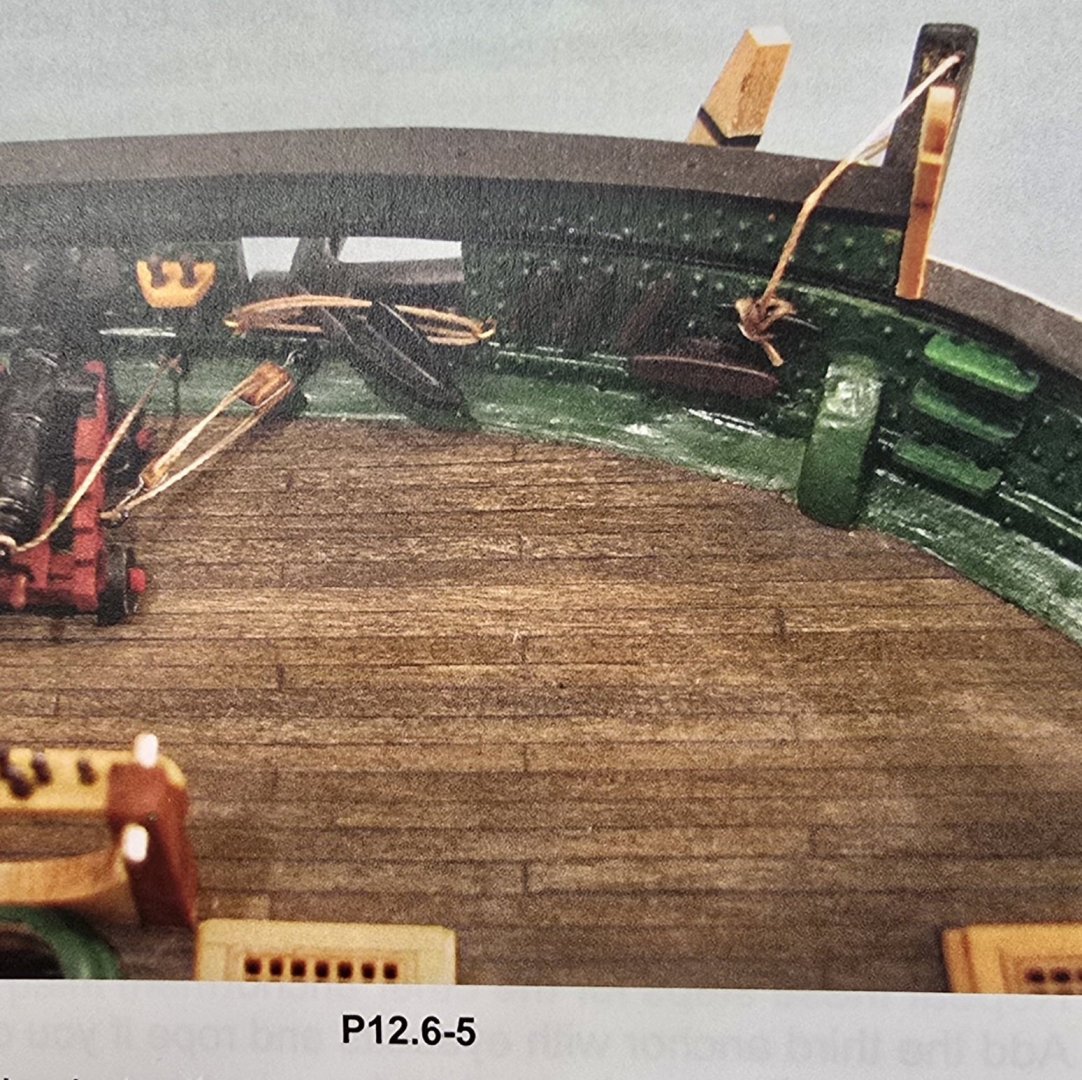
Jon, and Mustafa, Thanks for your invaluable comments and feedback. I went back to have a second look at where the end of my topgallant rail was in relationship to the plan and compared that to where Hunt ended his. You are 100% correct, Mustafa, to point out Hunt's extends well forward of the cathead. Mine actually conform to the plans and coincide with the photo Jon contributed to the conversation above, as do the placement of my cleats - despite the fact that the scale is waaaaaaay off. But they came with the kit (though, evidently not the metal one that the anchor line is supposed to be secured to), so I used what I had. Looking at this photo (Photo 1) from Jon, I'm wondering how the anchor line should run from the cathead to the cleat. Mustafa rightly points out that, in this case, the hammock net would interfere with the line coming over the top of the topgallant rail. Even allowing that the gap just forward of the hammock net might provide a path for the line, it seems the angle from that gap to the cleat is a tad extreme. There doesn't seem to be a plate in that gap, where one would expect the line to rest on, were the anchor line routed that way. I won't be adding the hammock nets, so this could render the point academic. The angle is even more extreme if the line were to run forward of the rail cap (end?) to the cleat. That option simply can't be correct. Notice that there's no cleat directly above the inboard part of the cathead! In this photo (Photo 2), supplied by Mustafa, there's an extra cleat! and a metal plate for the anchor line to rest on. But no topgallant rail and no hammock net. Looking back at the photo of my build (Photo 3), It appears that I do have the room to add that extra cleat, exactly where it appears in photo 2. Of course then I'd have to add a metal plate to protect the main rail. As an aside, and before anyone points out the obvious, I also have to add the end caps for the topgallant rails. Unfortunately, when fitting them, I discovered that my main rails aren't the required 3/16" width there. So, the laser cut caps with the engraved artwork can't be used. To get them to fit, I'd be trimming into the engraving. So, no art work for me, unless I get creative.. Plenty to ponder over the remaining holidays. and that includes figuring out how to rig the anchor line as it appears in Photo 2. Thanks again gentlemen!
-
I thought the exact same thing, but that's the way that Bob Hunt rigged it, so I assumed there was some good reason for this. Also, I have the top gallant rails, where you do not. It makes less sense to route the anchor line just forward of the rail. I tried that first. I think in a previous post, I asked myself whether I should remove the top gallant rails, since they were not present on the current day Constitution. For good or ill, I chose to follow (for the most part) the Hunt method. If I ever build another one, the lessons I've learned on this one will go a long way.. Thank you. By the way, I just looked at your build log again, you continue to amaze.
-
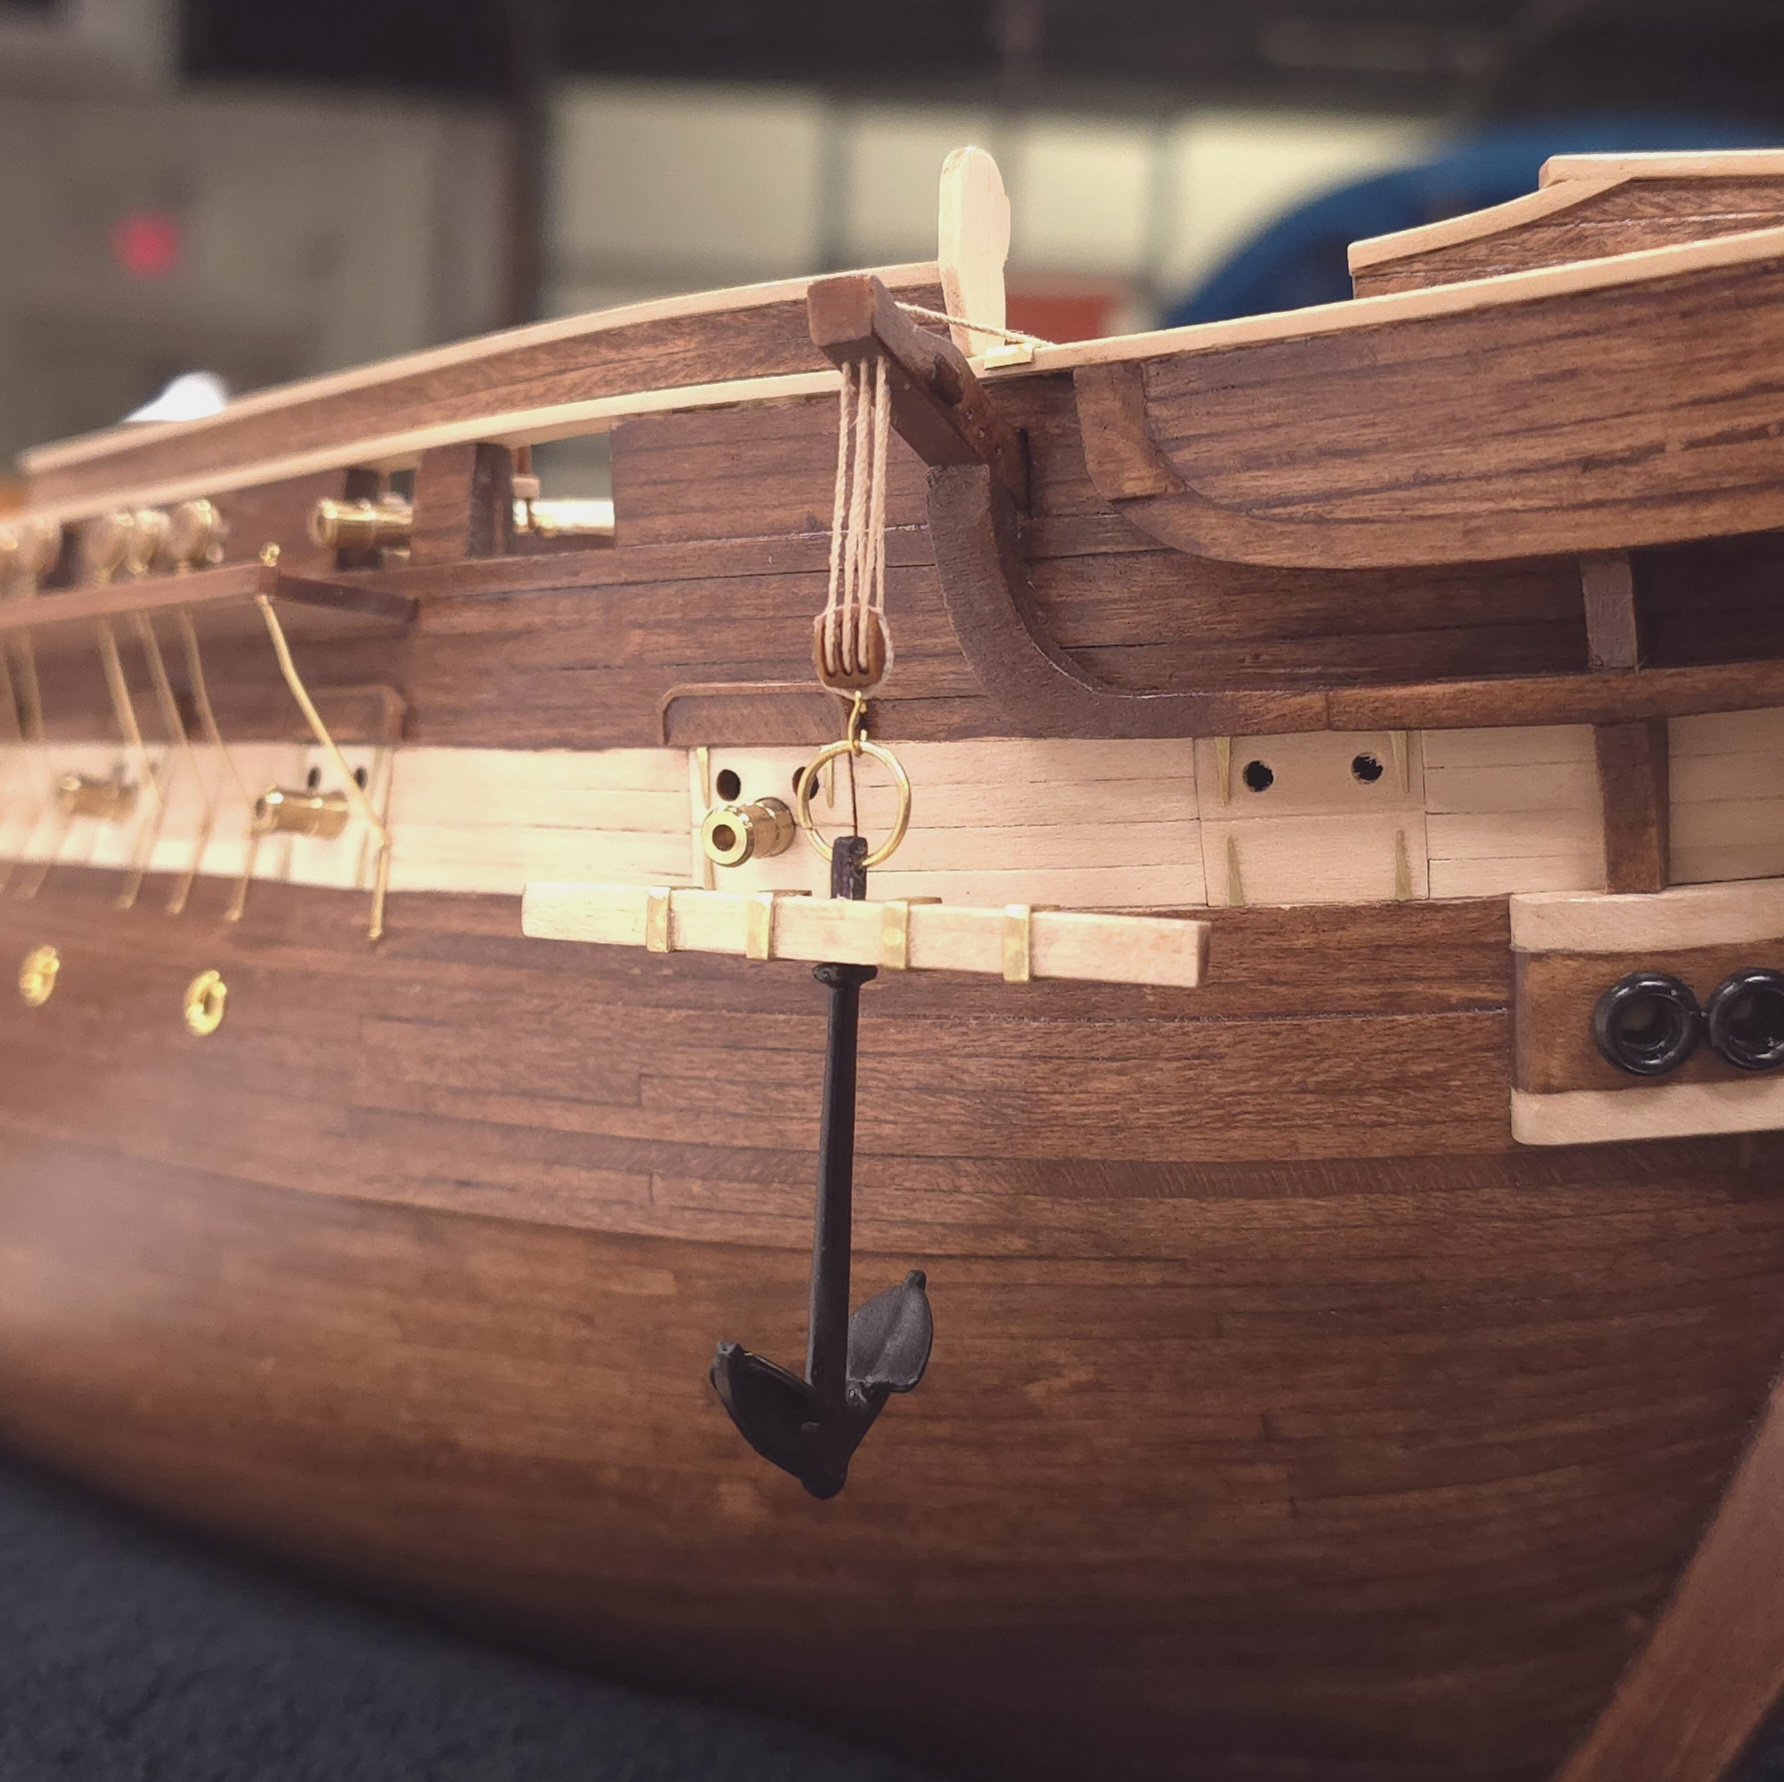
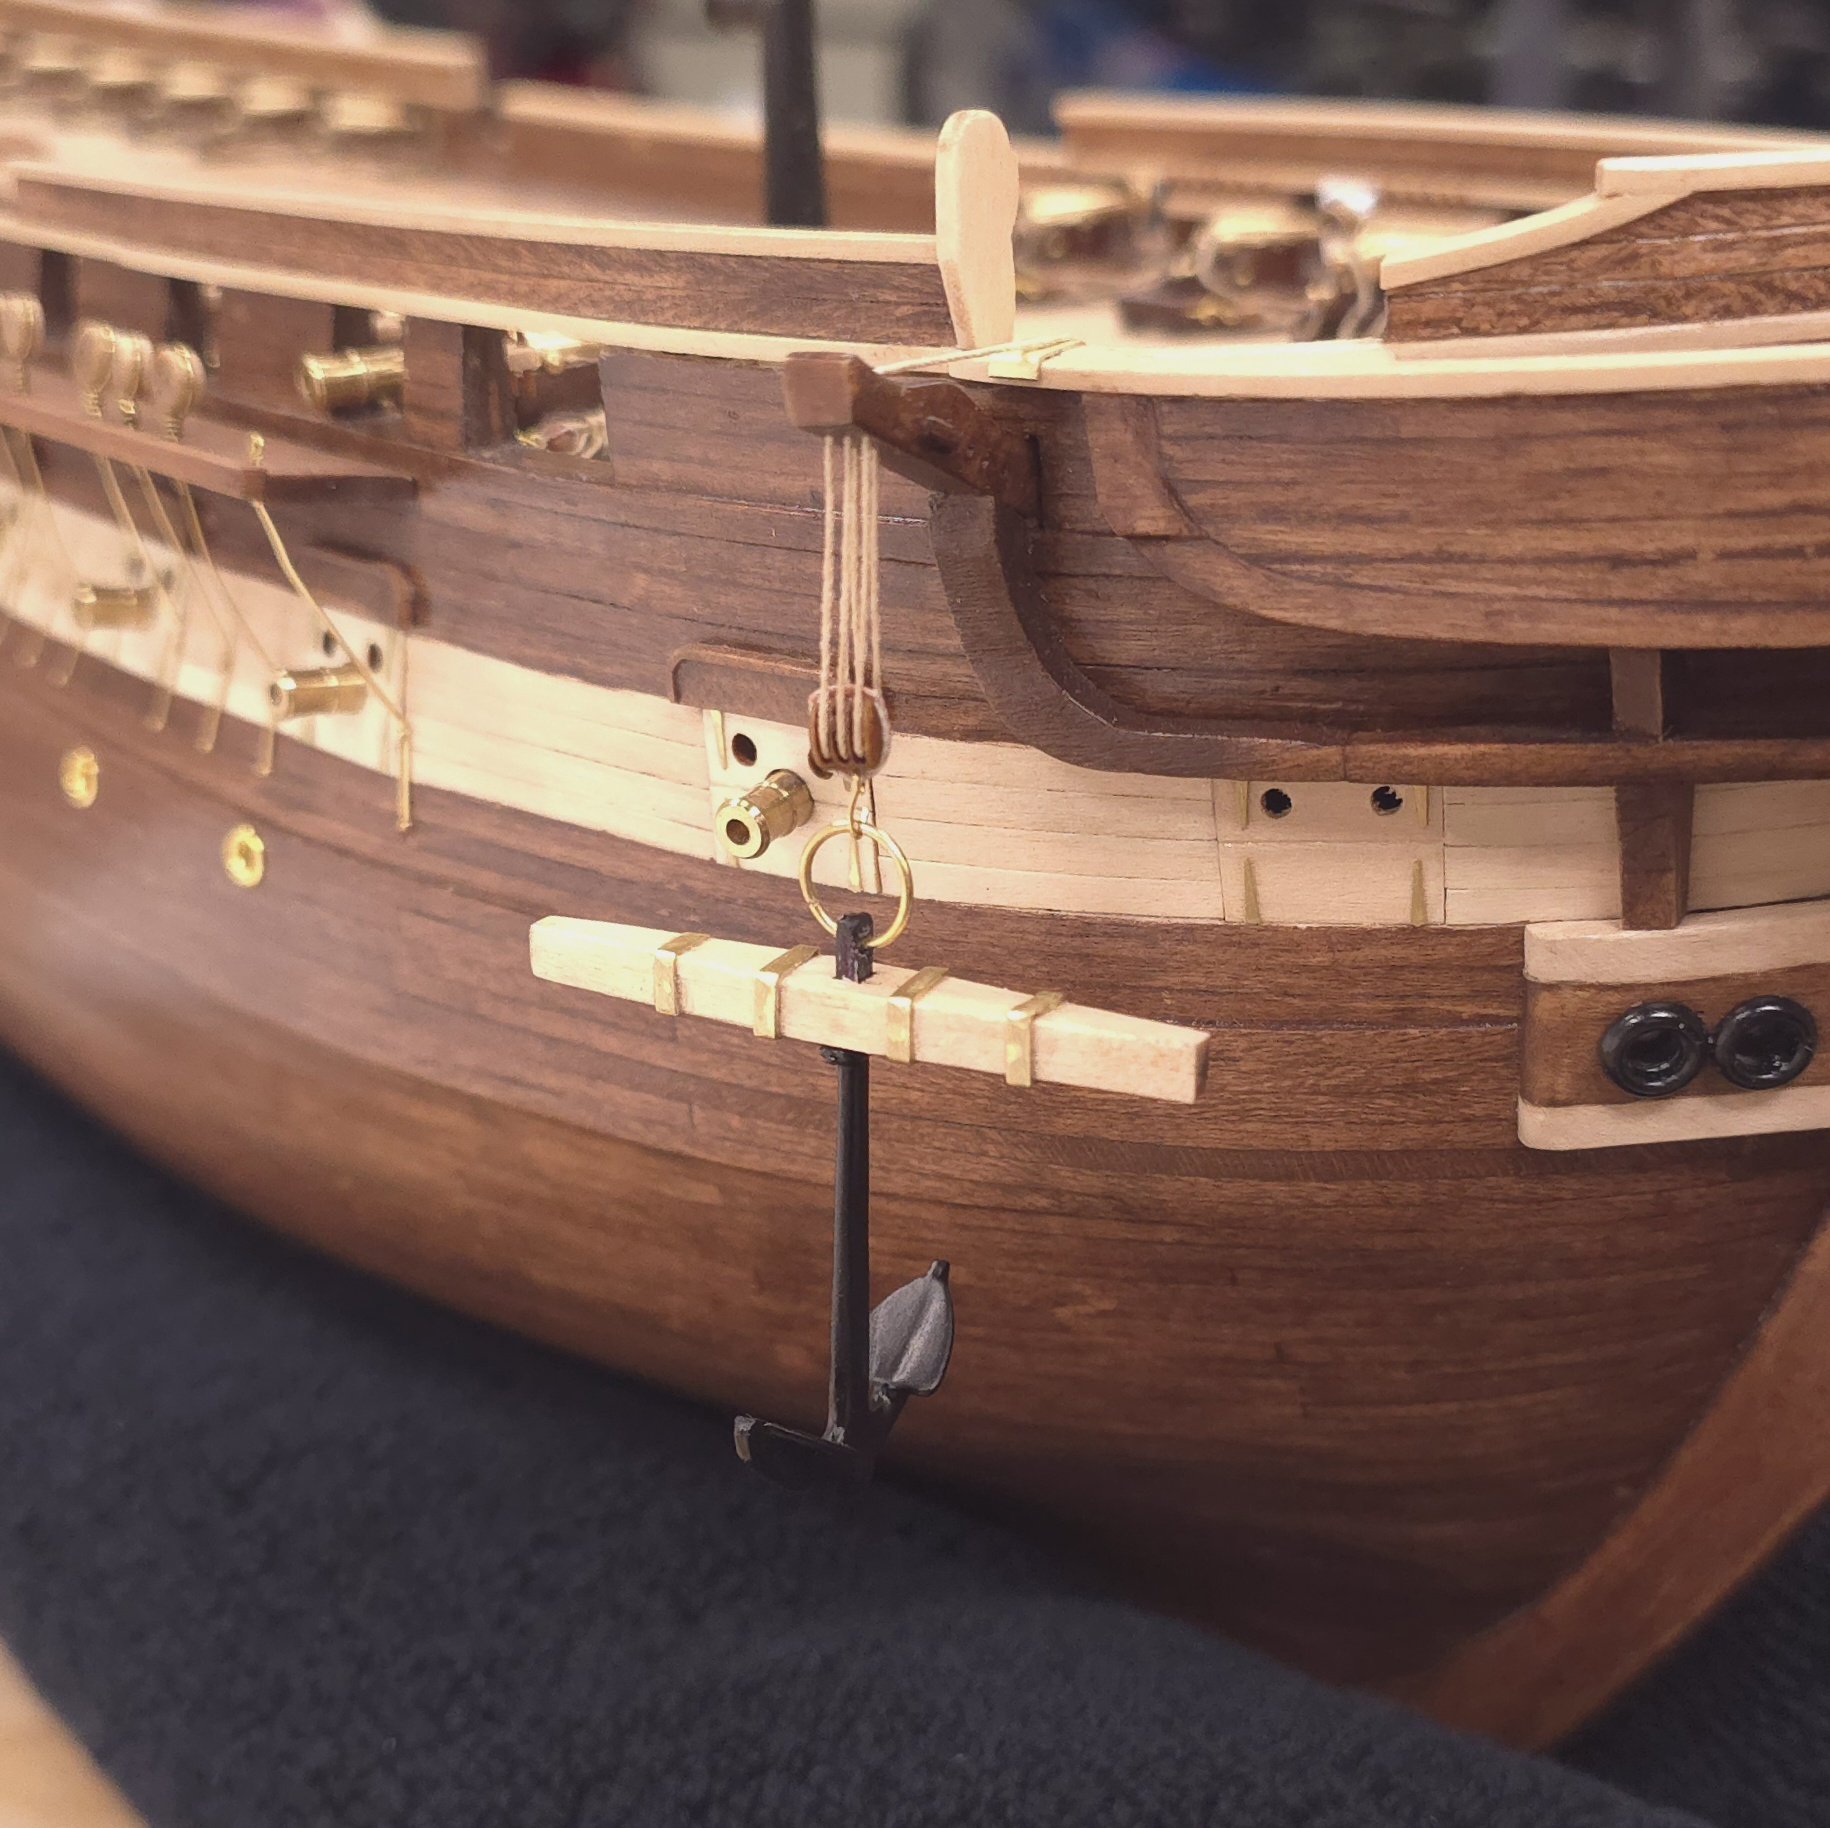
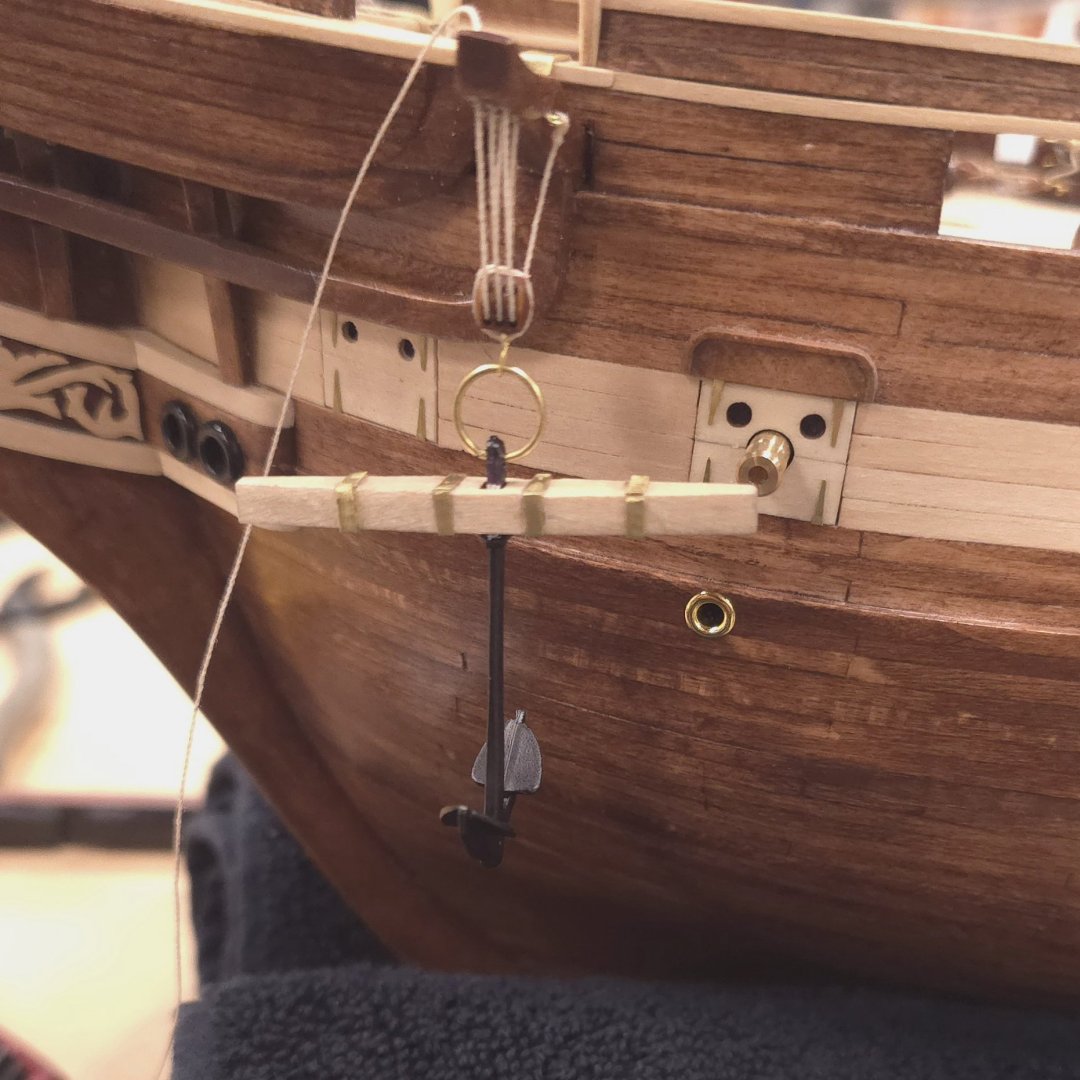
Starboard anchor rigged, after adding the overlooked cleats.


-
Excellent advice!
-
USS Constitution by mtbediz - 1:76
Der Alte Rentner replied to mtbediz's topic in - Build logs for subjects built 1751 - 1800
All, I can say is, Wow! -
Man - oh - man! I wonder how many days it would take me to clean and organize my shipyard. I love your, a place for everything, and everything in its place approach to your workspace. In particular the small hand tool organizer you have on the wall above the bench. I'm tempted to take a few days off to follow your lead. Thanks for sharing and the inspiration.. Merry Christmas and Happy New Year
-
Gregg, Was the wow because I was baking Christmas cookies for the Admiralty? 😁 Either way, Thank you! and Merry Christmas to one and all, Peter
-
The old gray cells, they ain't what they used to be. It wasn't until I was looking for the cleat to tie the anchor rope to, that I realized I didn't have any. Somehow, I only installed cleats at the stern half of the model. So, yet another delay in finishing up the hull. I did sort of enjoy stropping hooks to two triple blocks, nothing like a stroll down memory lane.. But, I'm calling it quits for now, going home to bake Christmas cookies. (In part, because I also learned that I forgot to stain the bulk of the cleats. I remedied that just now. Since it will take a while for those to dry as well, I'm off to do help the Admiralty with holiday preparations.)

-
Greetings Mustafa, I returned to my post of April 30, 2024 after someone “reacted” to it today. I was reminded that it was with your encouragement I chose to paint Conny. Thanks again for the nudge in the right direction.
-
What a wonderful Christmas tradition! Thanks for sharing, and of course, Merry Christmas to you and yours as well. Best DAR
-
Hi Jon, Shifting my attention to the anchors, and having overlooked your methodology on the installation of rudder chains, I perused your build log first in my research on rigging ideas for the anchors. I seem to remember in another conversation, that you plan to employ three methods of displaying them. Will one of them be XKen’s approach for the bow anchors - lashing them to two brackets just forward of the channels? There seem to be as many options as builders on this. I’m not keen to strop hooks onto Syren triple blocks, so there is some appeal in omitting these altogether. just curious..
-
Now that I’m looking at the photo, I think I’ll remove a few links from the chain on the port side to even things out. Thanks, Jon
-
Found the chain, and used copper wire to fashion links with which to affix the chain segments to the eyebolts.

-
USS Constitution by mtbediz - 1:76
Der Alte Rentner replied to mtbediz's topic in - Build logs for subjects built 1751 - 1800
Agreed!