Der Alte Rentner
-
Posts
1,018 -
Joined
-
Last visited
Content Type
Profiles
Forums
Gallery
Events
Everything posted by Der Alte Rentner
-
 Jon, Too late for creating layer cakes from scratch, mine are already baked, and the only option I have is slice into the cakes that're already done. 😁 BTW, I did check XKen's build. He seems to have used a thin saw blade, cutting three parallel grooves up from the bottom of the stanchion. I suppose, I could use a scroll saw to do the same, but I'm not confident I could get clean parallel cuts - and I certainly don't want to make another batch of stanchions. The band saw would be a better bet, if I had blades anywhere close to a workable thickness. I don't. Skip? Or find a novel approach.. TBD For what it's worth, not even XKen used these sheaves for his rigging, begging the question, why bother with holes at all..
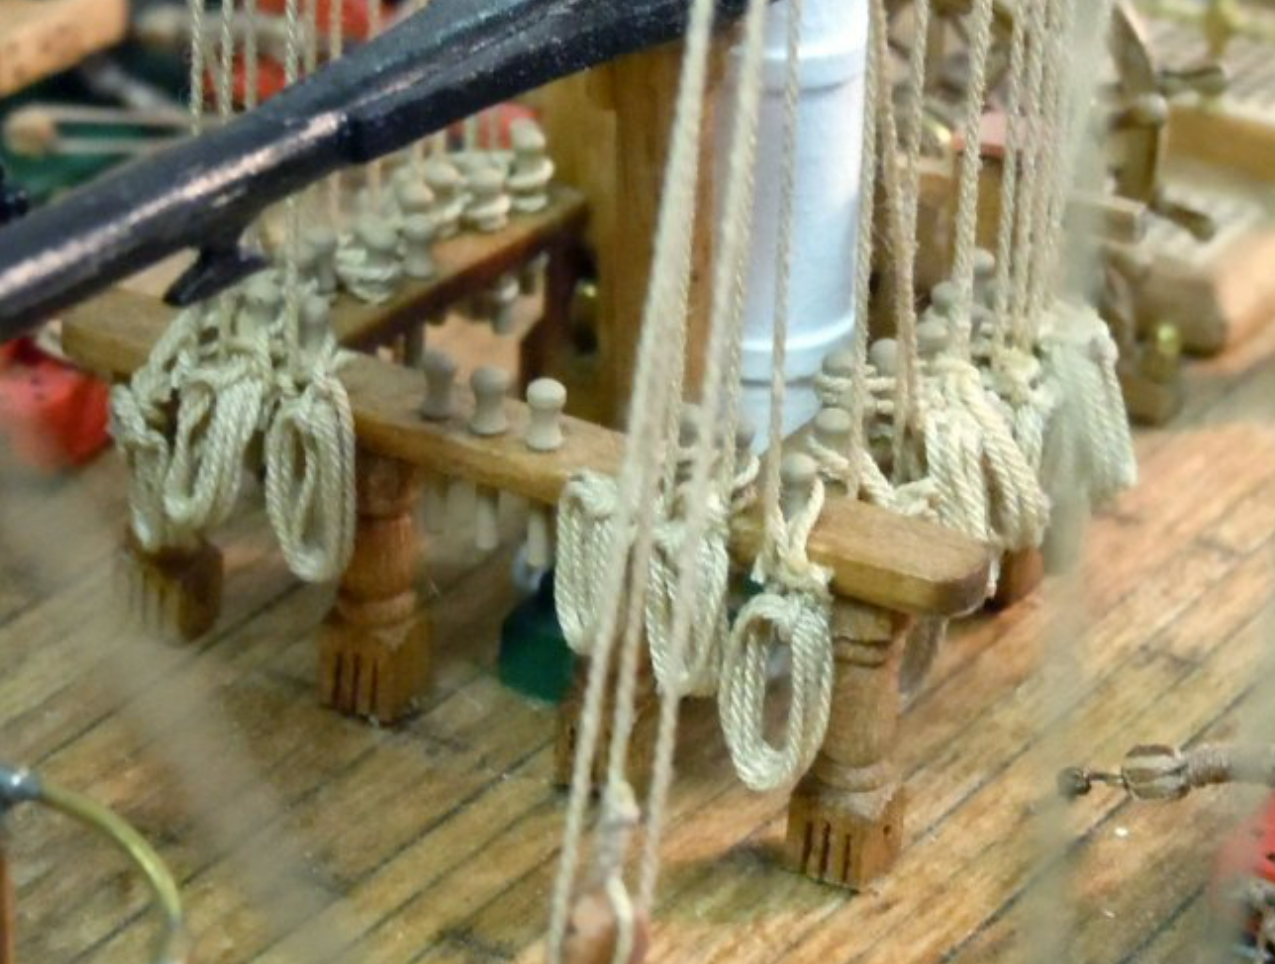
-
I'm looking at adding the three sheaves to the bottom section of the stanchions. These are 4mm square. The smallest milling cutter I have is 1mm in diameter, leaving .25mm between the sheaves and the sides of the stanchion. I'm not sure it's worth the effort. They look nice (great job on yours, Mustafa), but I'm going to have to figure out some other way of simulating them. Drill smaller holes and chisel out the space between them? That sounds like fun. 🙄 I checked back to see how I did this on the cathead - yes, 1mm drill, 1mm mill cutter, but I had a wider face (5mm vs 4mm) onto which to space the grooves. Mustafa, what tools did you use to make your sheaves?
-
I was thinking the exact same thing! Thanks Jon
-
I thought the kit supplied belaying pins were too large. So I bought into the to-scale syren alternative. In for penny in for a pound. By the way, aren't the kit's belaying pins brass? I believed I use some of them for the Carronade quions.. I also seem to remember asking some of the builders here which to go with, and the majority sided with syren.
-
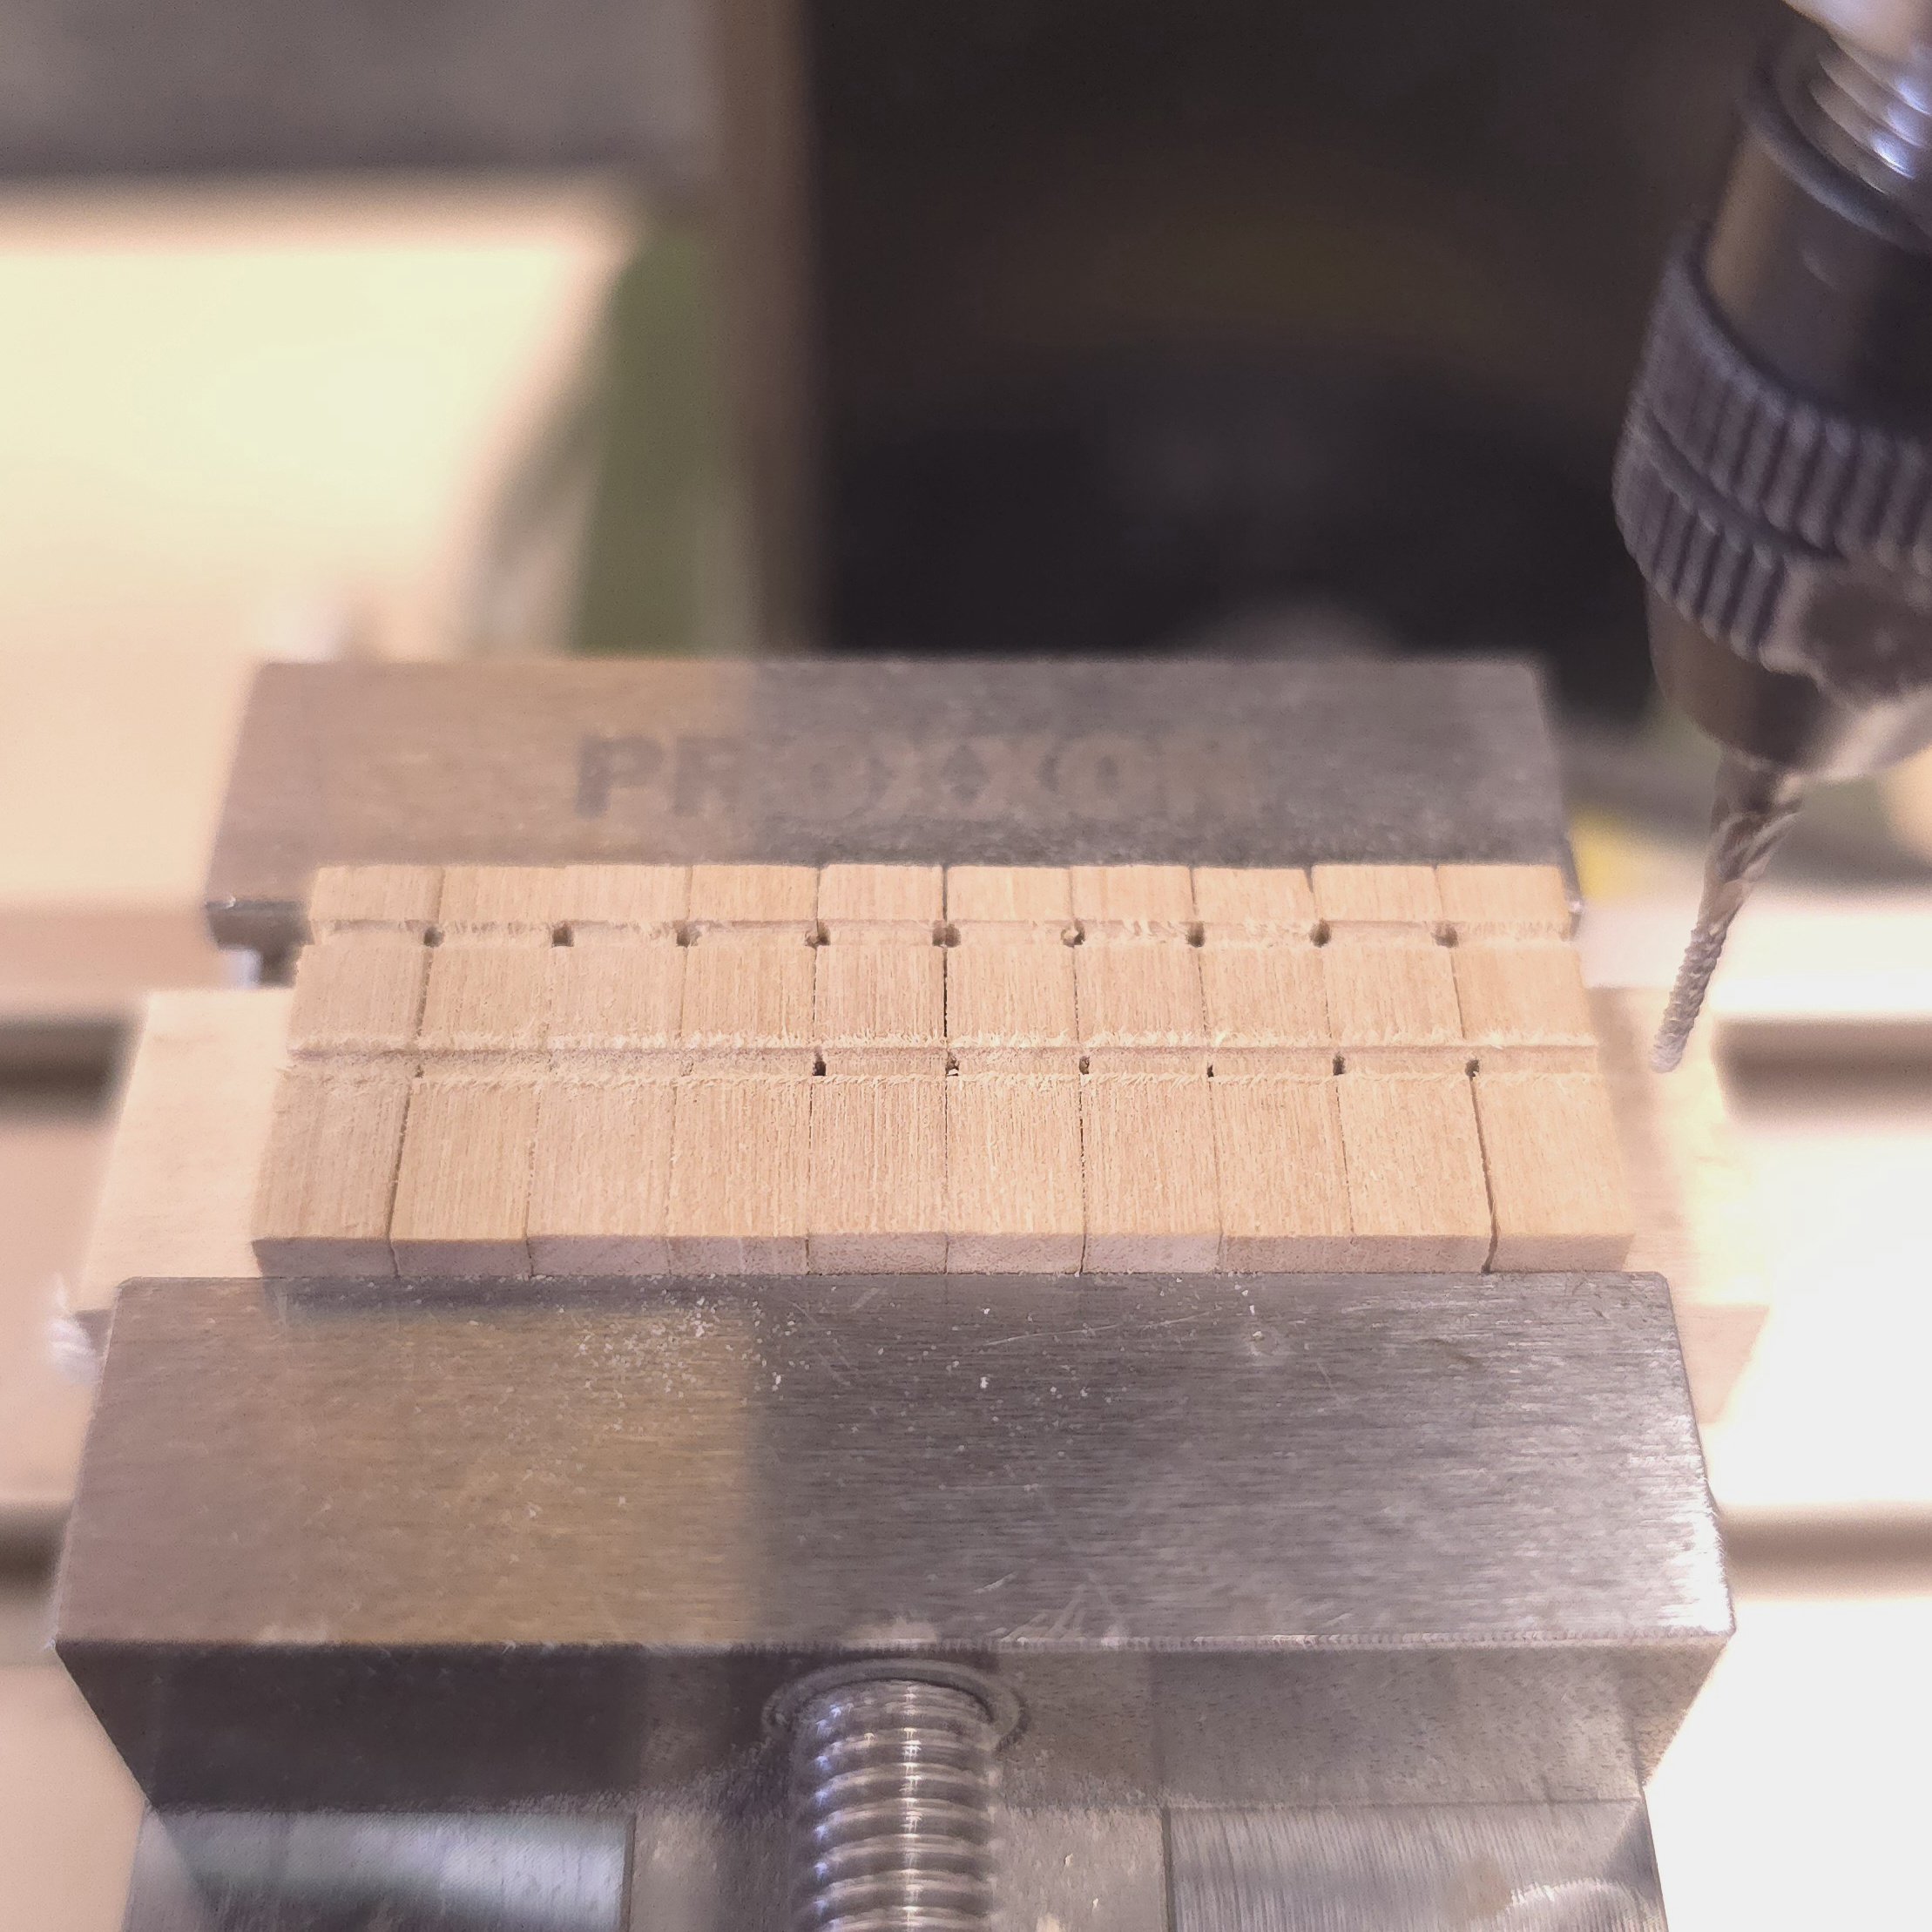
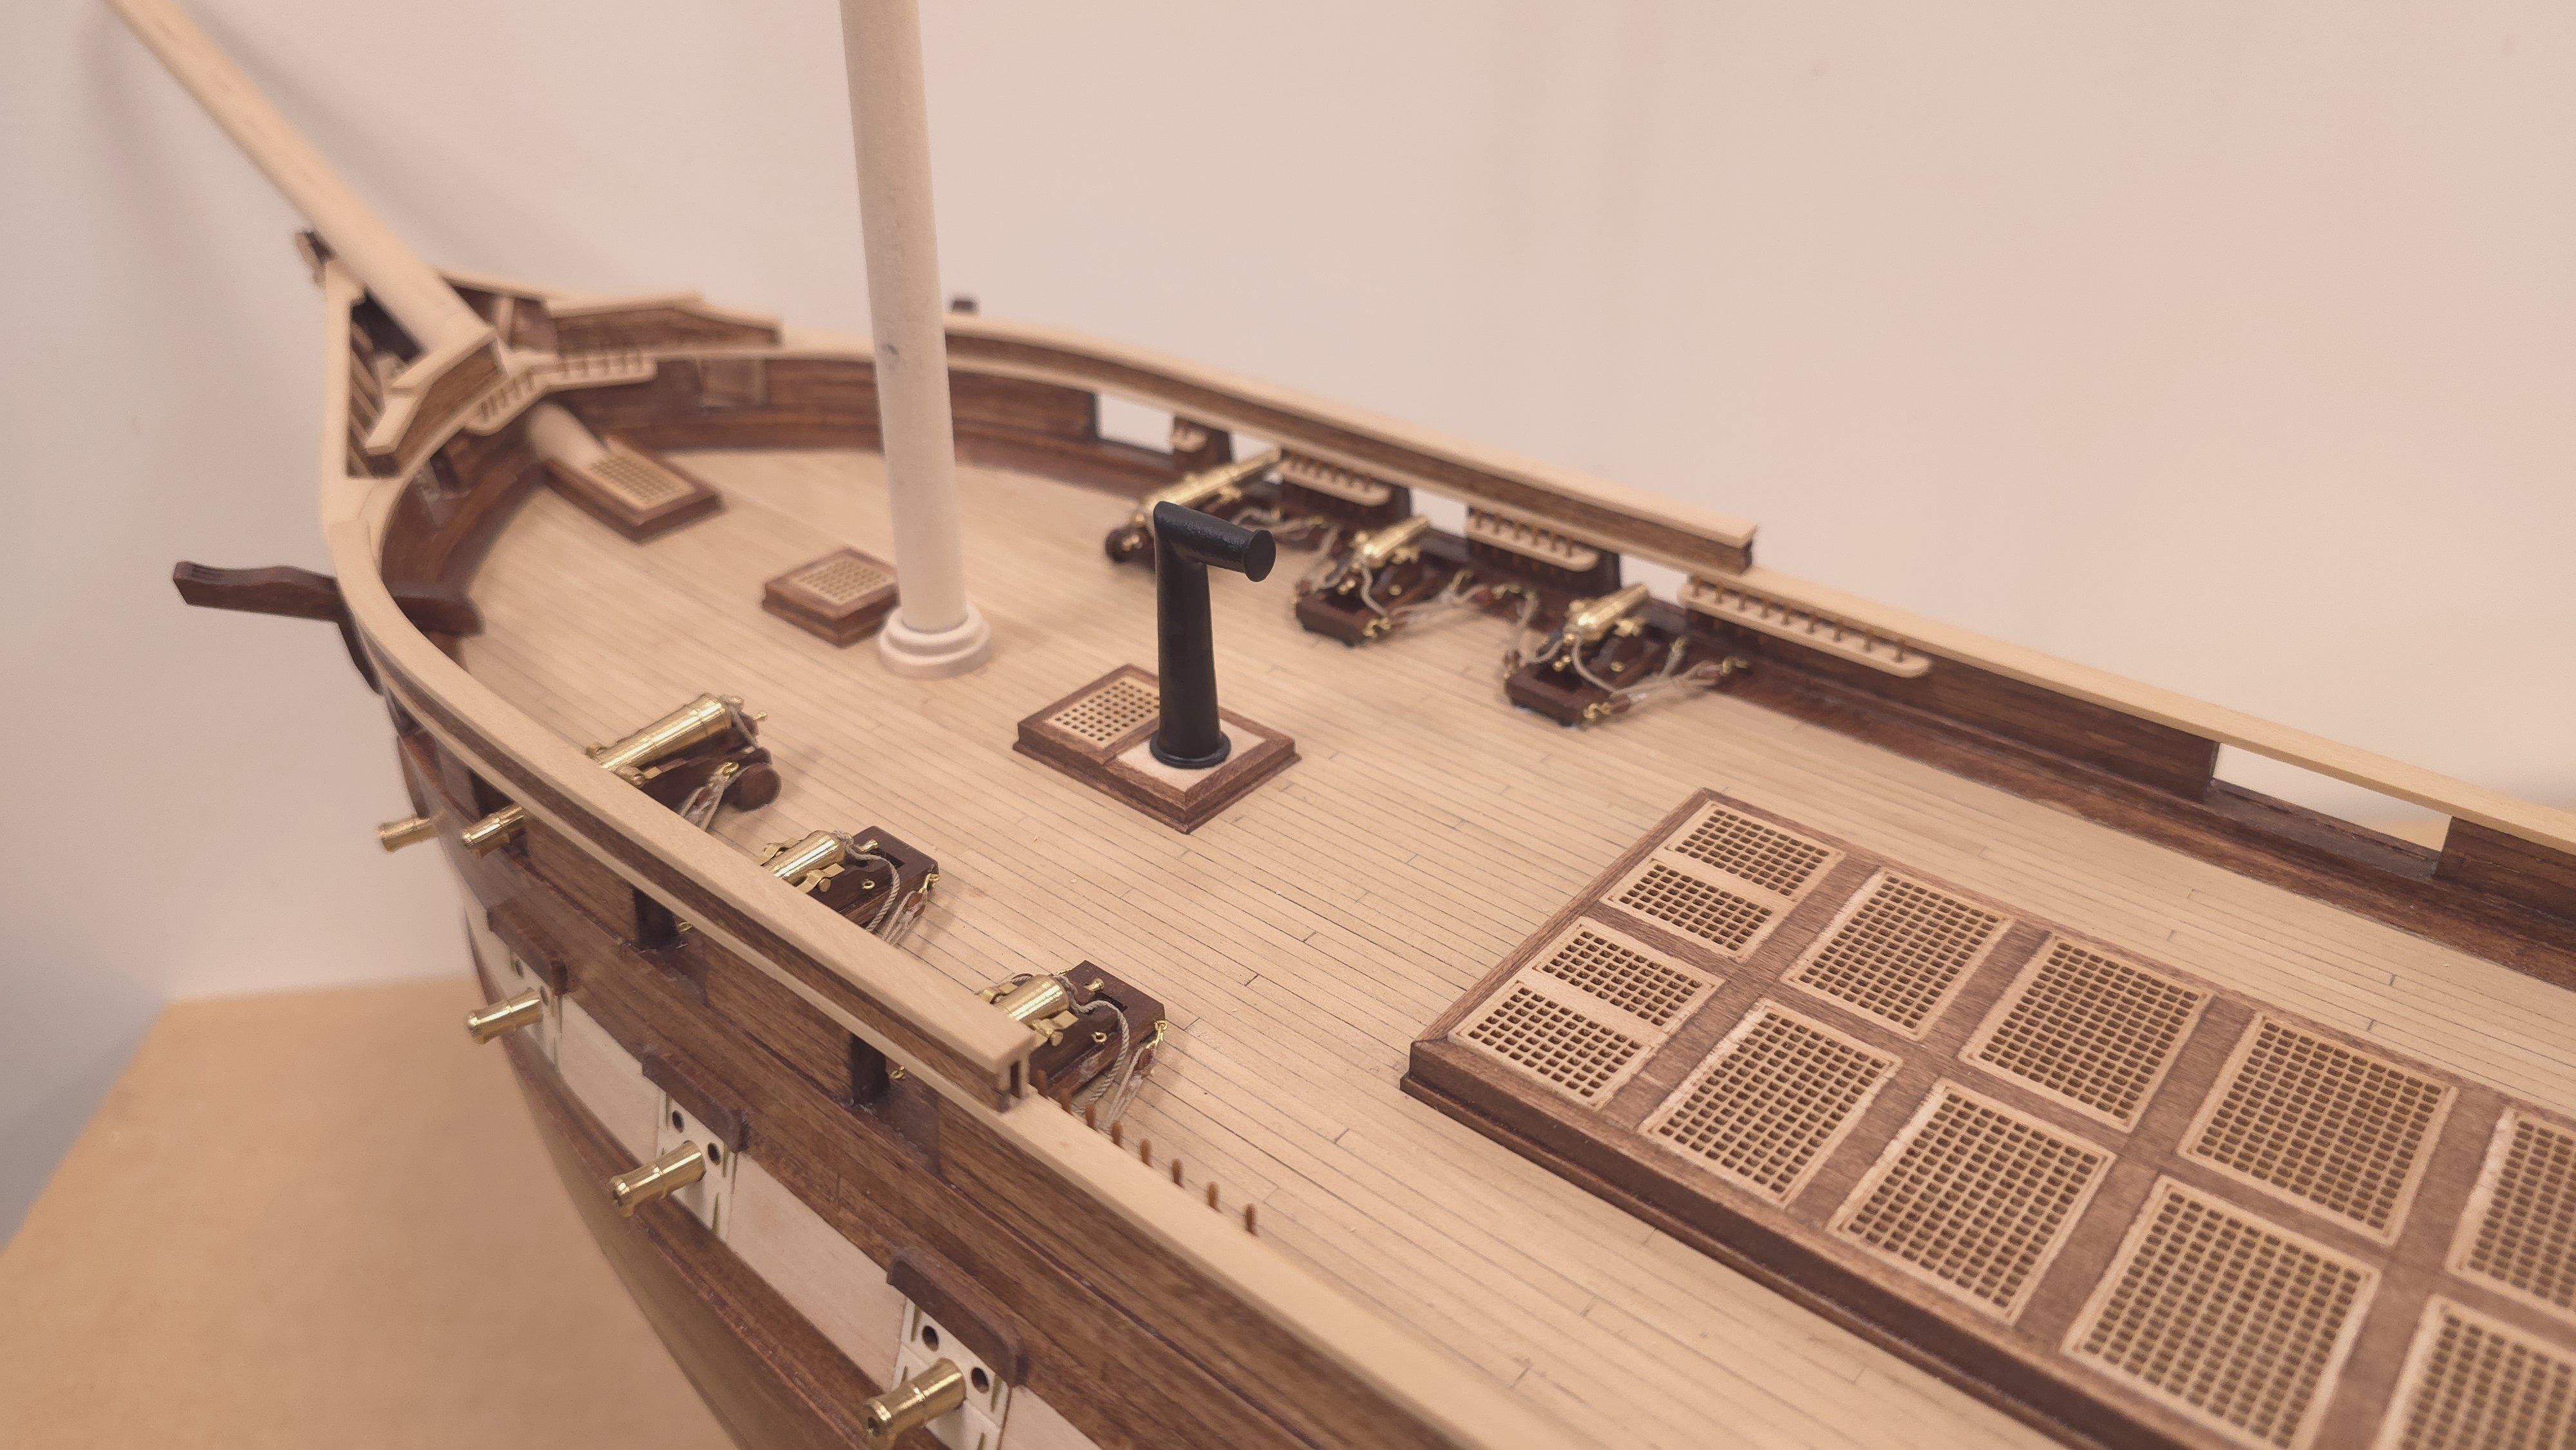
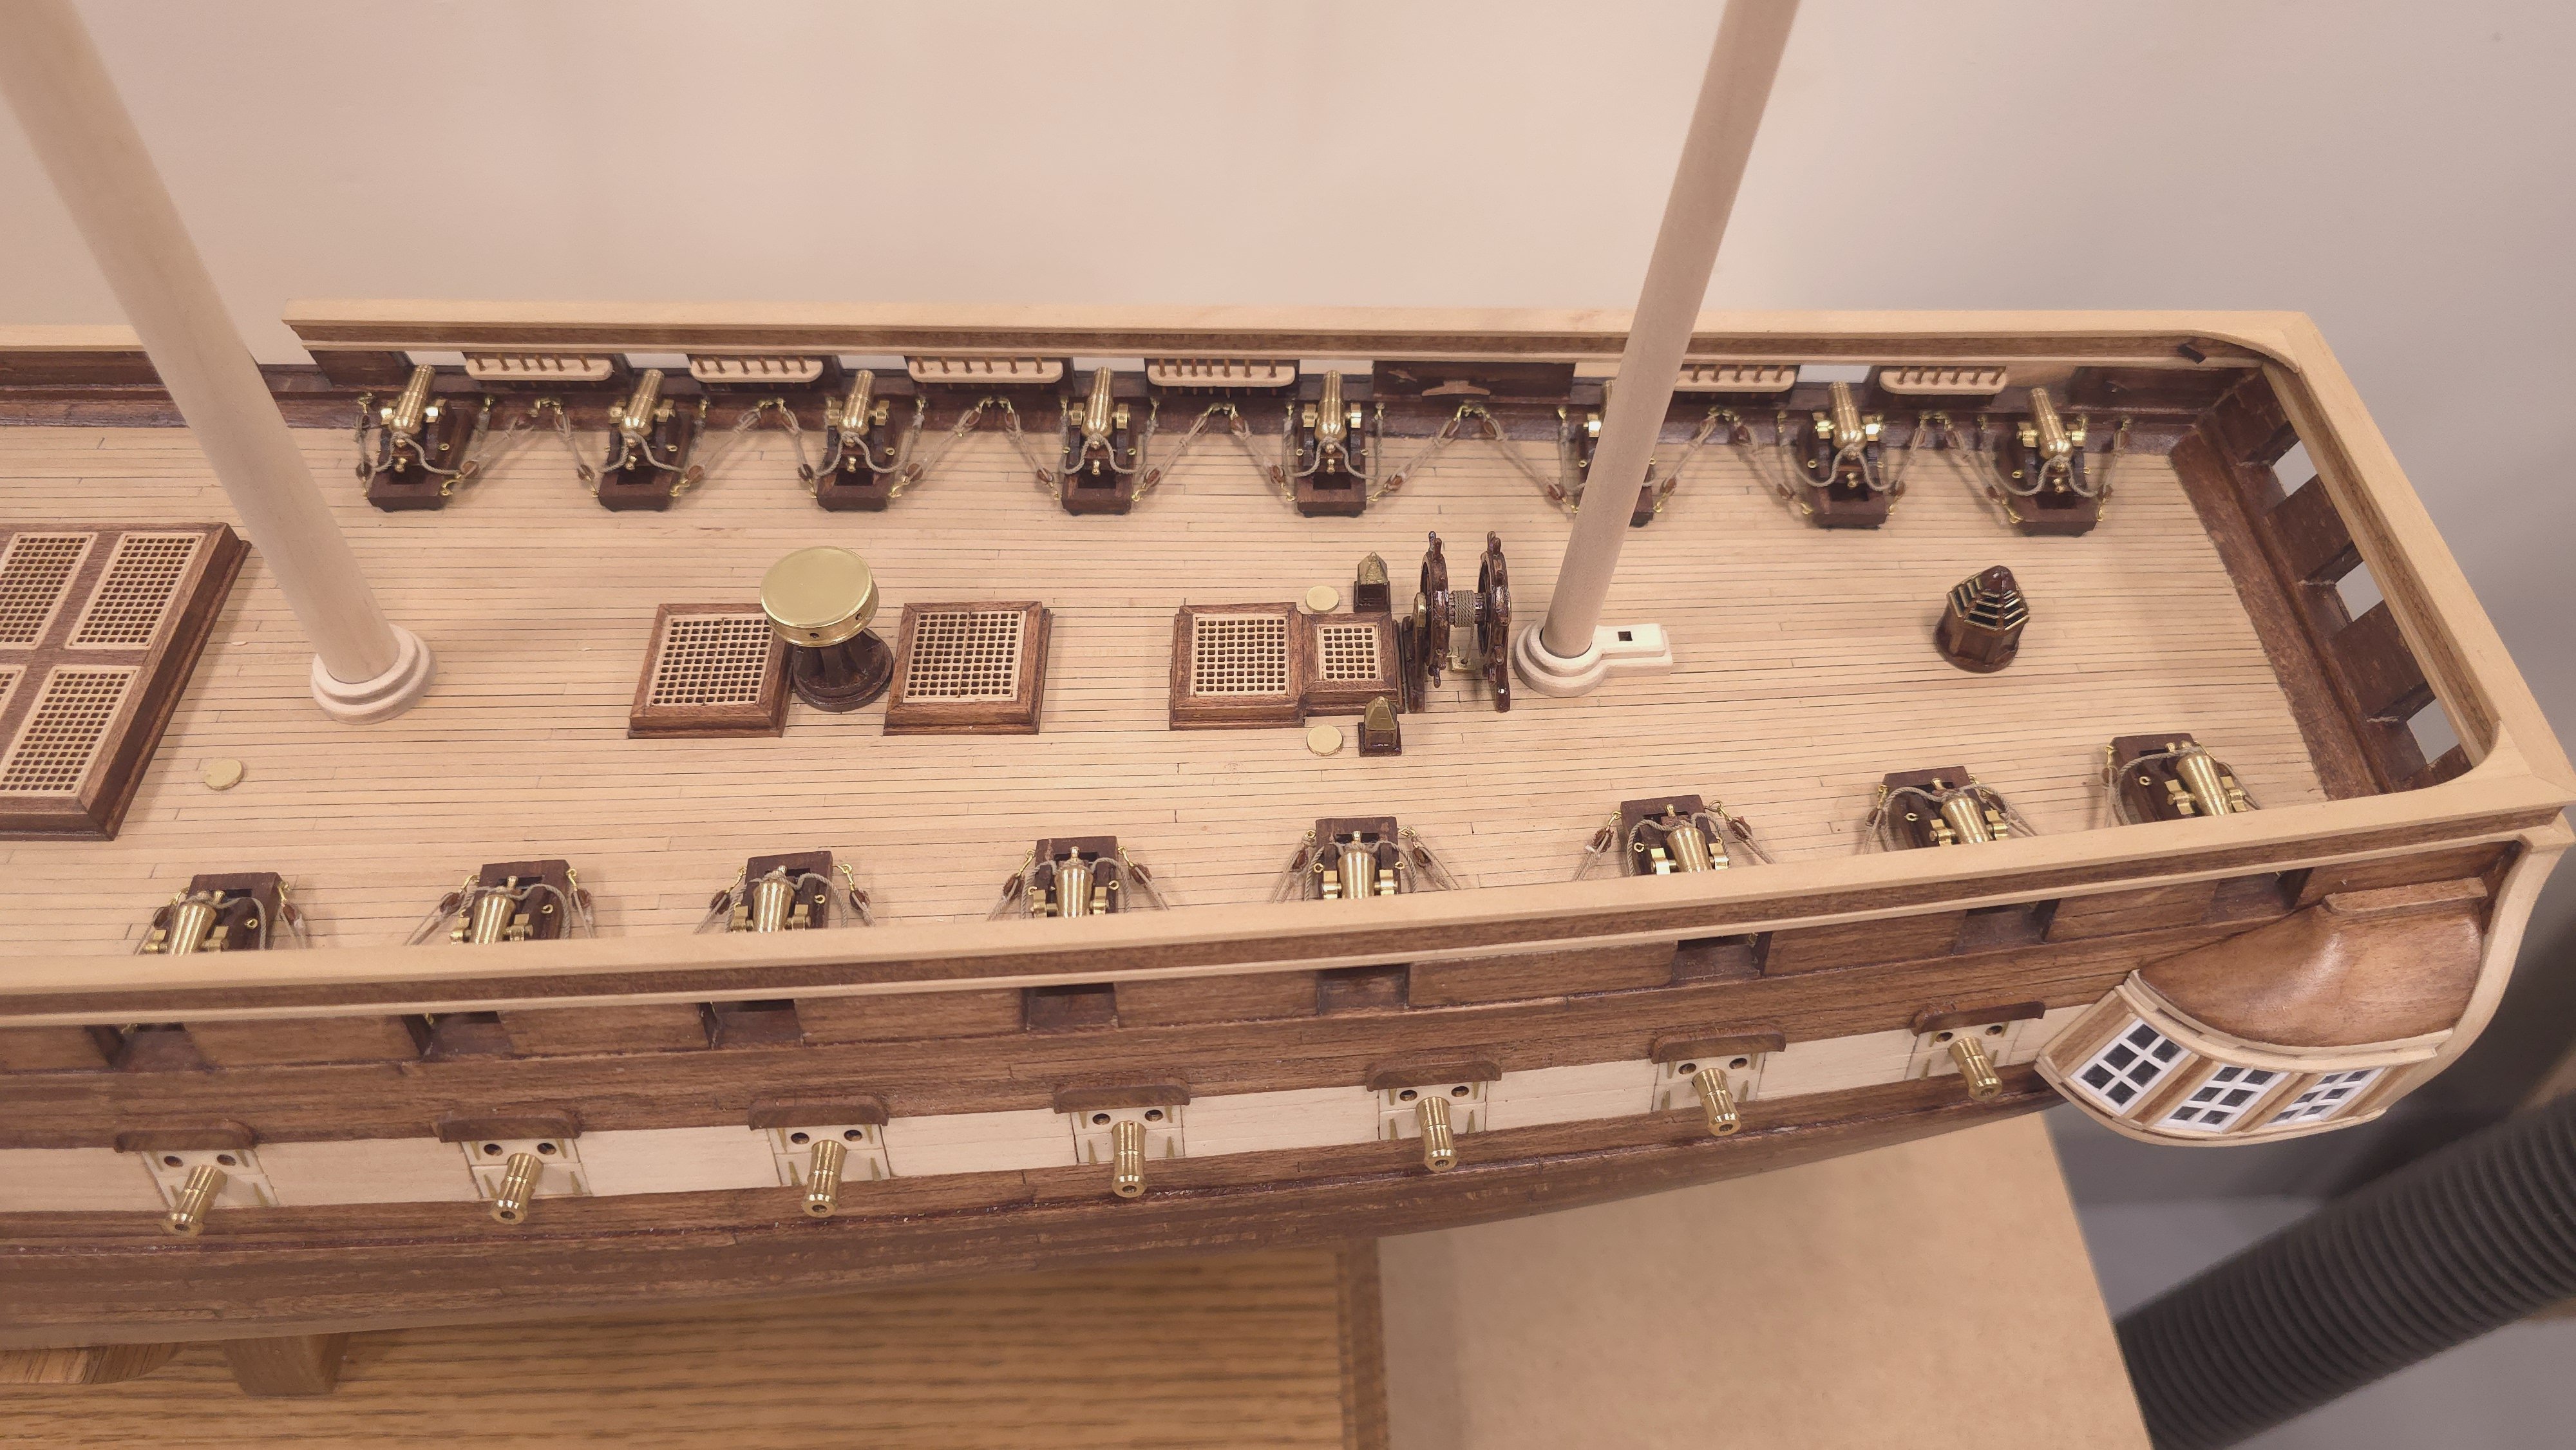
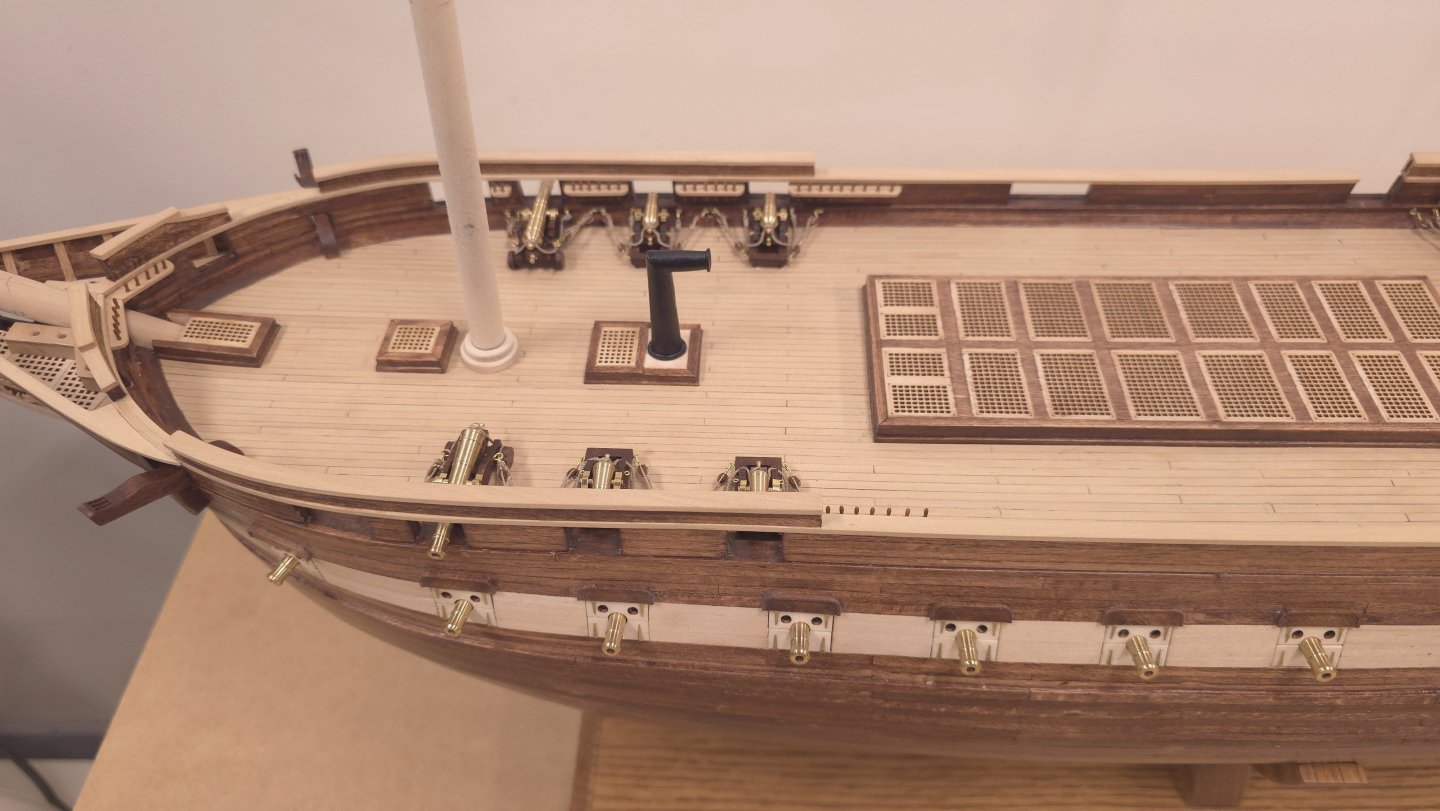
A double dose of Naproxen and I'm back at the shop making things. I really did not like the look of the laser cut versions of the fife rails in the kit, so I made my own out of boxwood. FYI, that's a whole lot of holes to drill with a pin vice. (Before anyone asks, I tried drilling one or two holes on the milling machine, but found it was easier to do by hand. Maybe if I had made the fife rails out of three pieces each, I could have used the vise on the milling machine and easily drilled the holes. But I made these fife rails in one piece. Positioning the rail under the drill was problematic.) I also cut the blanks for the ridding bitts. I think I'm on the home stretch with this part of the build. My next visit to the shipyard should cover the base. Counting the holes in the fife rails, I realize I need more than the 50 belaying pins I just received from siren.

-
USS Constitution by mtbediz - 1:76
Der Alte Rentner replied to mtbediz's topic in - Build logs for subjects built 1751 - 1800
I feel exactly the same way. As for the two sources for ropes.. Orders from Ropes of Scale, which is in Canada, take a while to receive. Having said that, an order of belaying pins I purchased from Syren took six weeks to arrive. It was not Syren's fault. Given where they're located, they only have access to the USPS, which IMHO has gone to heck in a handbasket in the last few years. But let me reiterate Gregg's sentiment about Mustafa's (and Greg Matson's) work making their own rope. I'm just not that good! I too will buying vs making my own. -
Getting old is not for sus They were the two cutters on the left in the photo below. I bought the set at Amazon. I use the second one in to dig a little deeper into the top and bottom ends of the carve out. The one on the end then cleaned up most of the middle. I did have to fine tune with those sanding sticks (post 888 above). Holding the tools steady didn't require much grip strength, but the pinching action between thumb and index finger to control the cuts is what did me in. I should probably see a doctor about this. Getting old is NOT for sissies. 😁

-
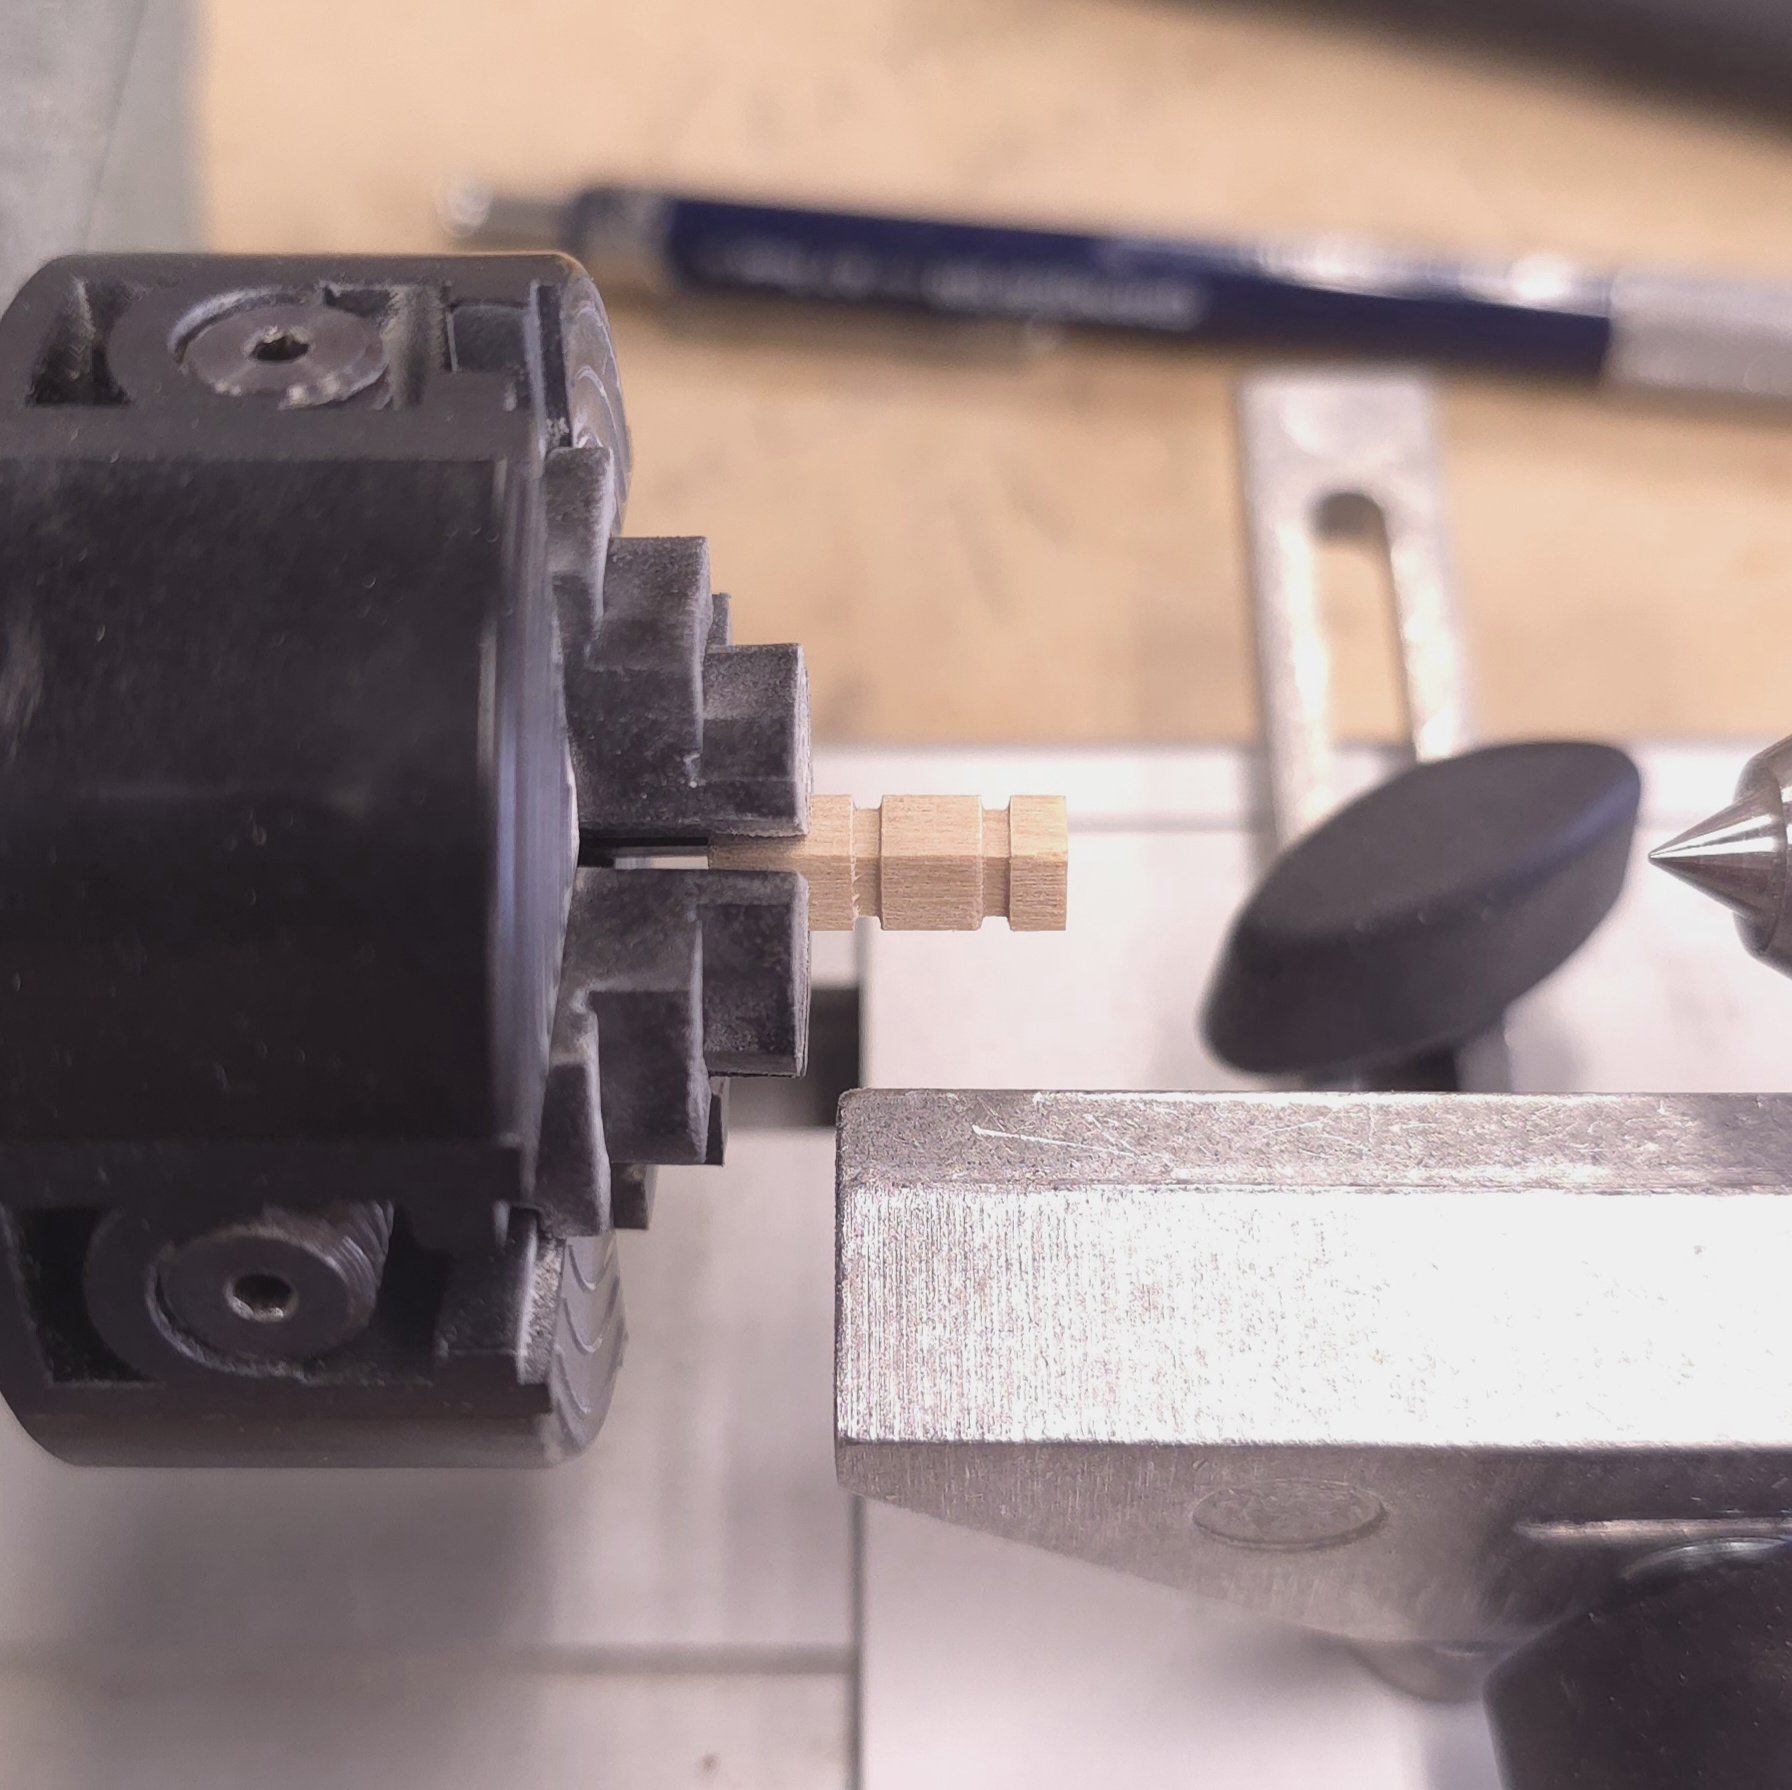
Mustafa, you are correct, I didn't need to make a shank. However I did need to go home and take some pain meds. Handling the cutting tools on that mini lathe was so painful, I barely got through making the remaining 15 stanchions (3 extras, just in case). This is the first time the arthritis has gotten to me to the point where I had to stop. Gregg, Thank you kind sir. On the home stretch now.. BTW. These sanding sticks proved to be invaluable.

-
USS Constitution by mtbediz - 1:76
Der Alte Rentner replied to mtbediz's topic in - Build logs for subjects built 1751 - 1800
Fantastic job! I can't wait until I've finished the fife rails so I can start on this fun aspect of the build 😁 -
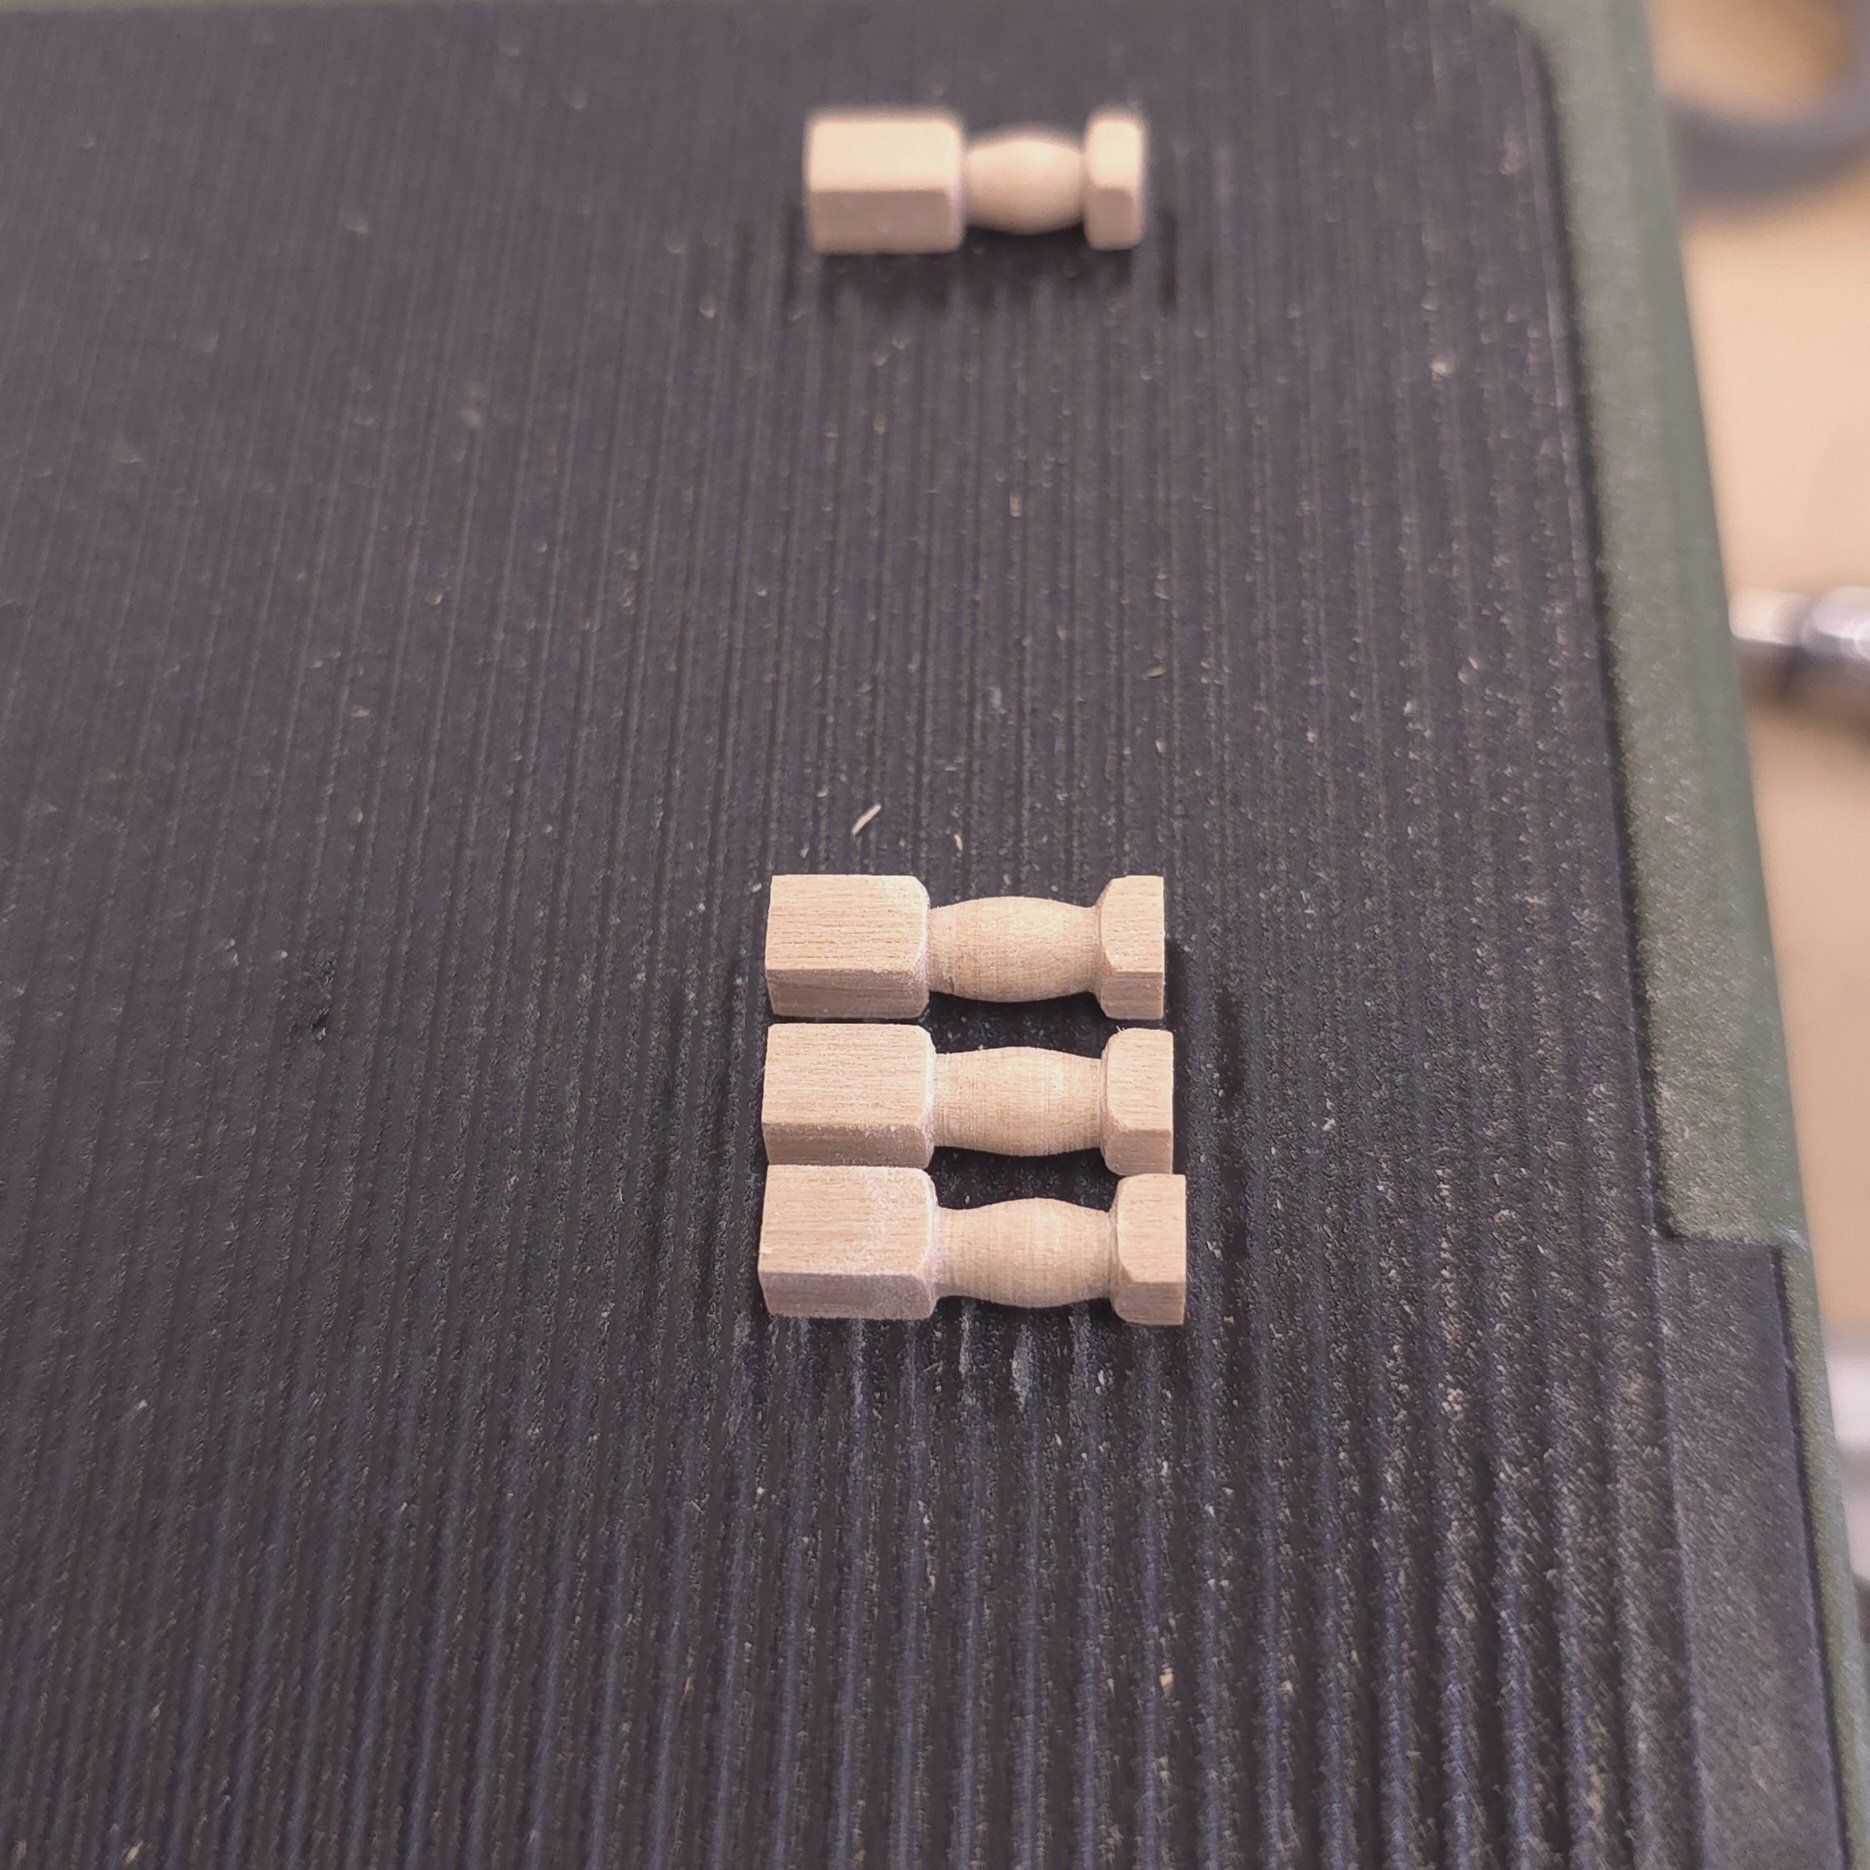
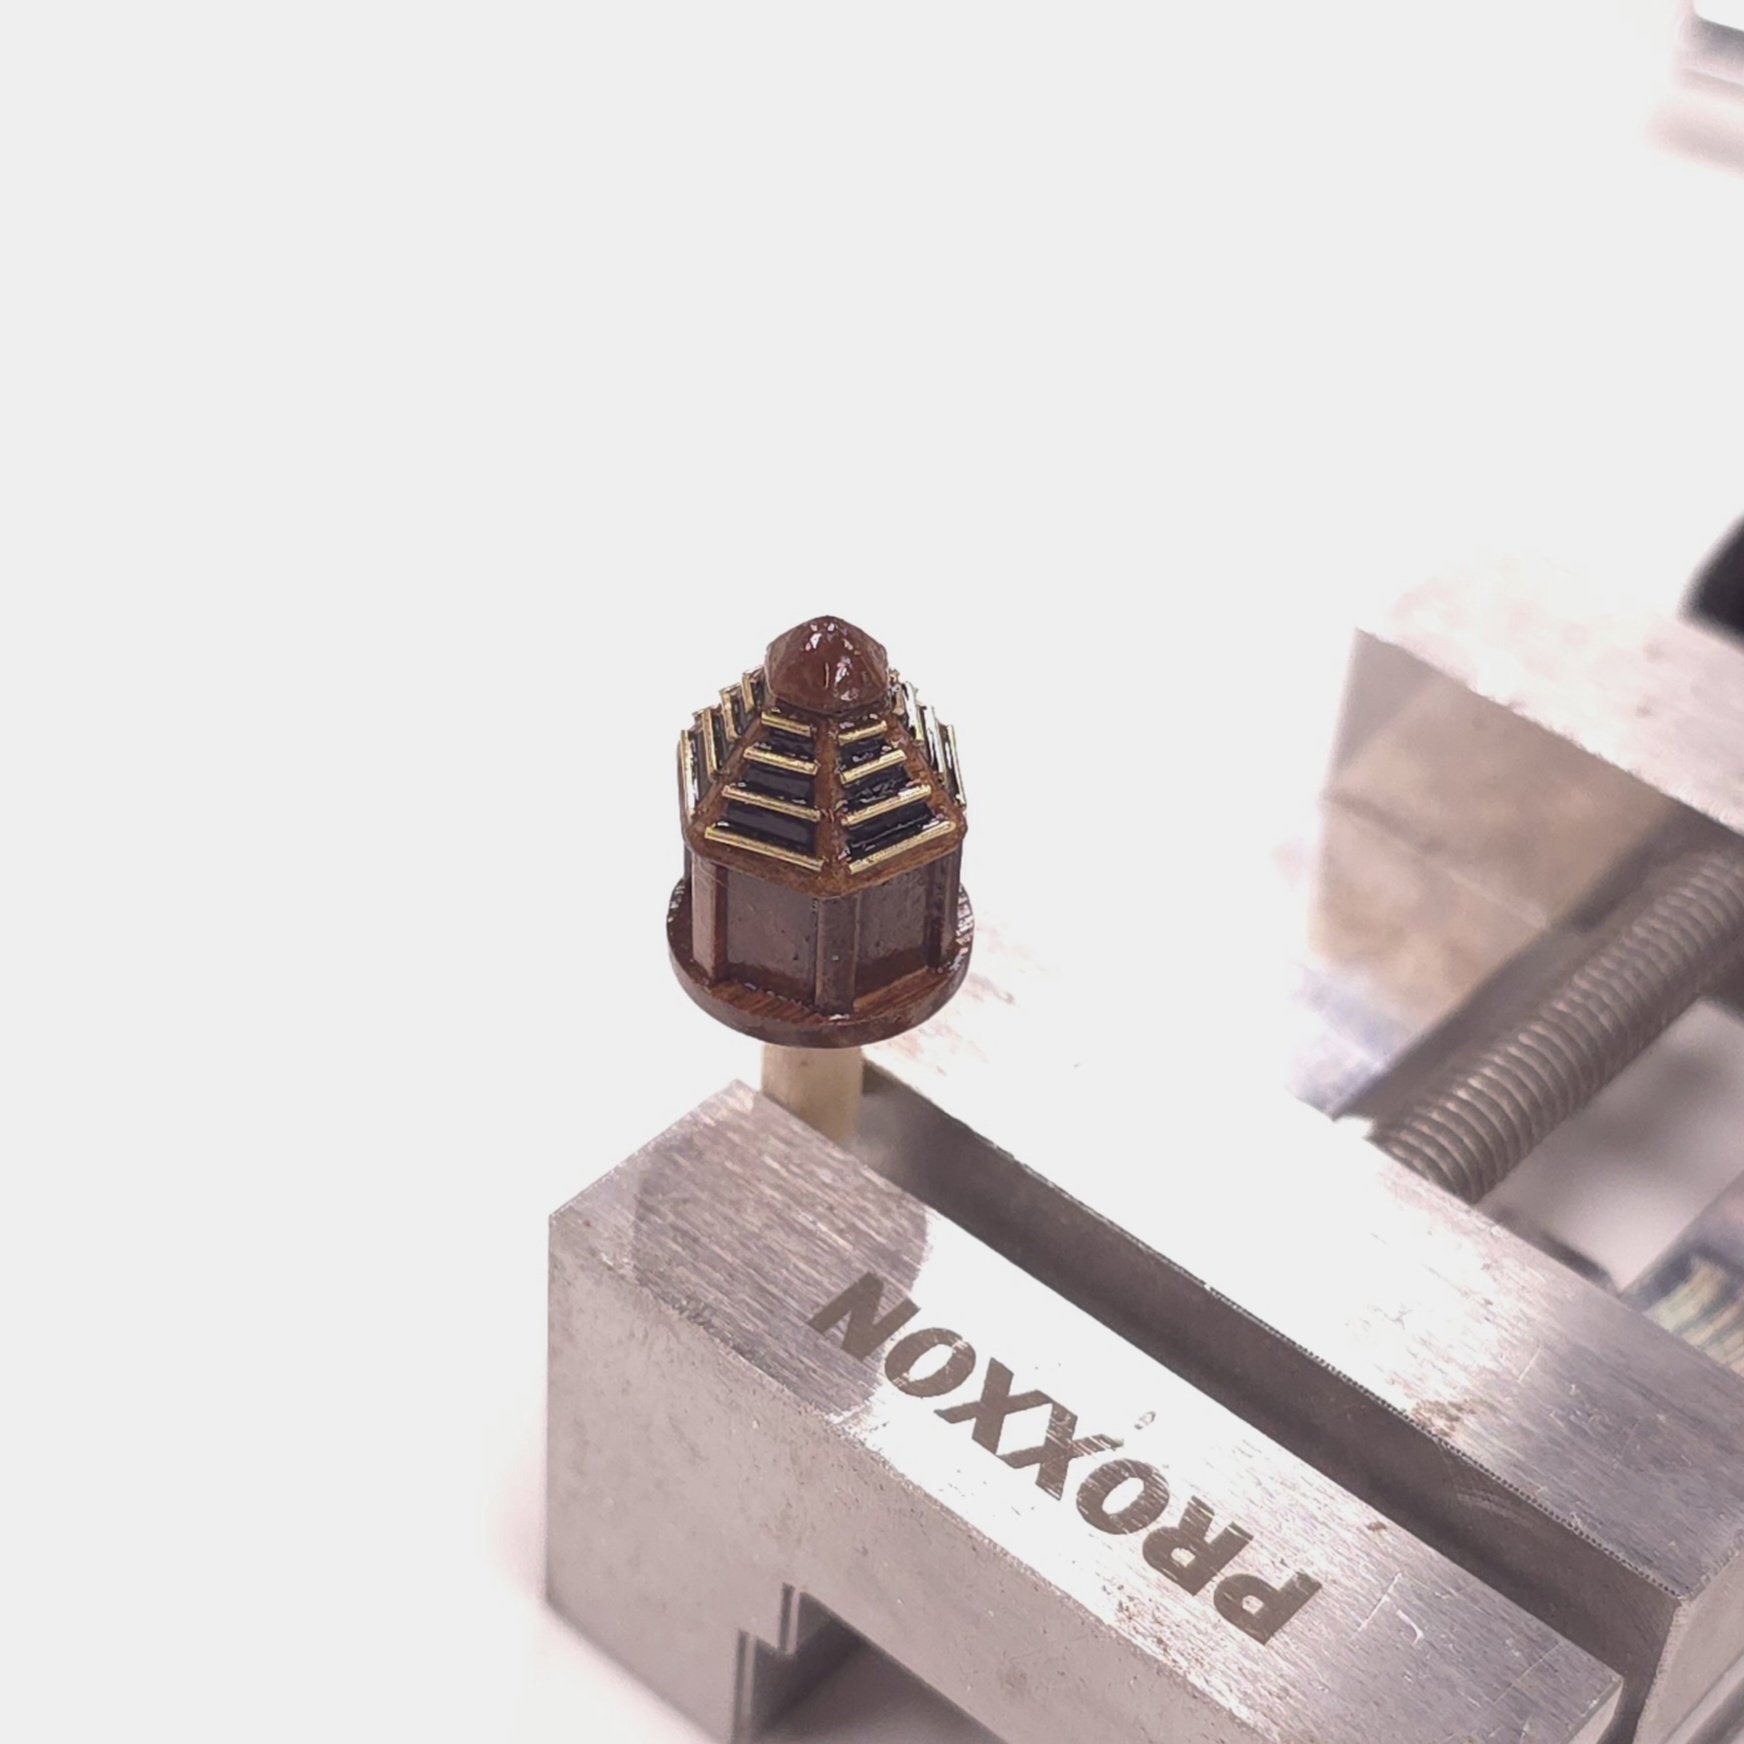
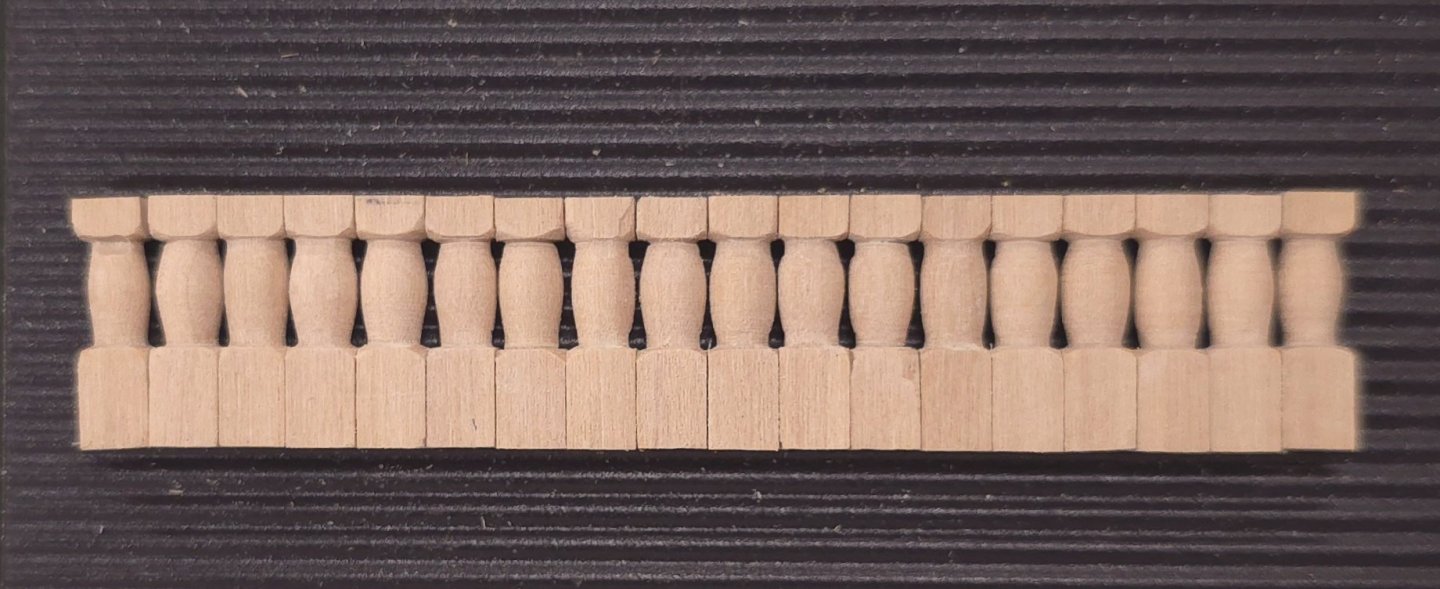
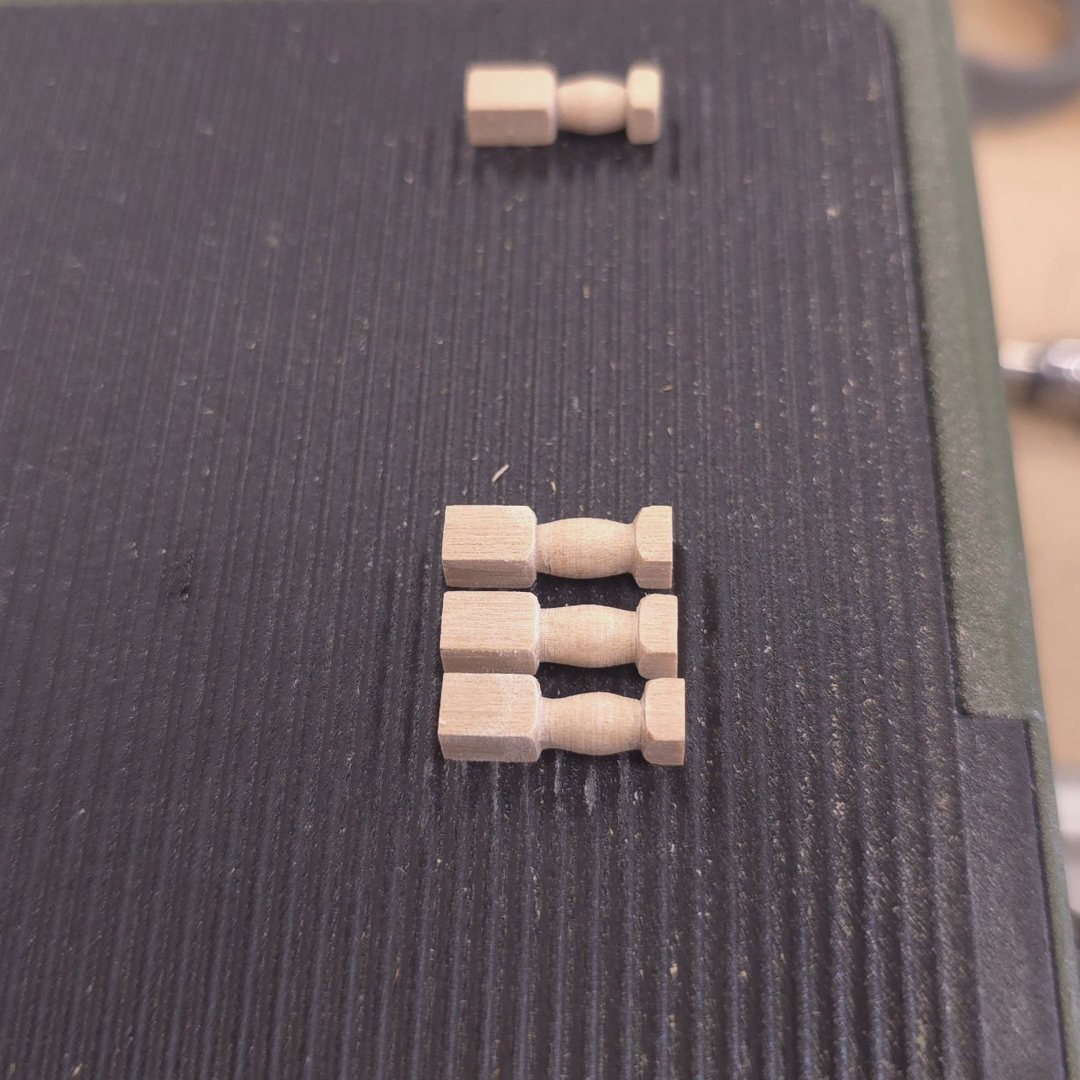
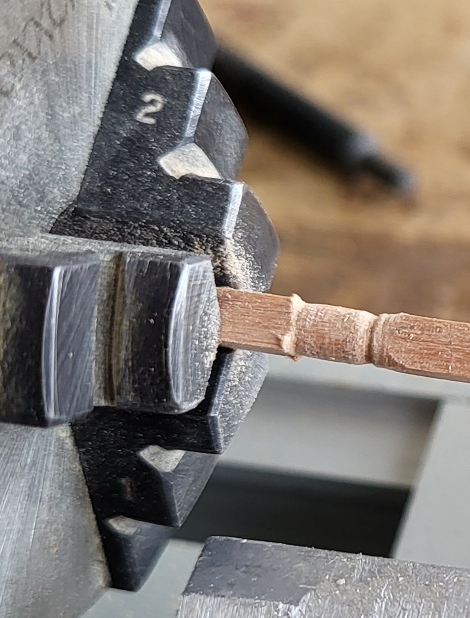
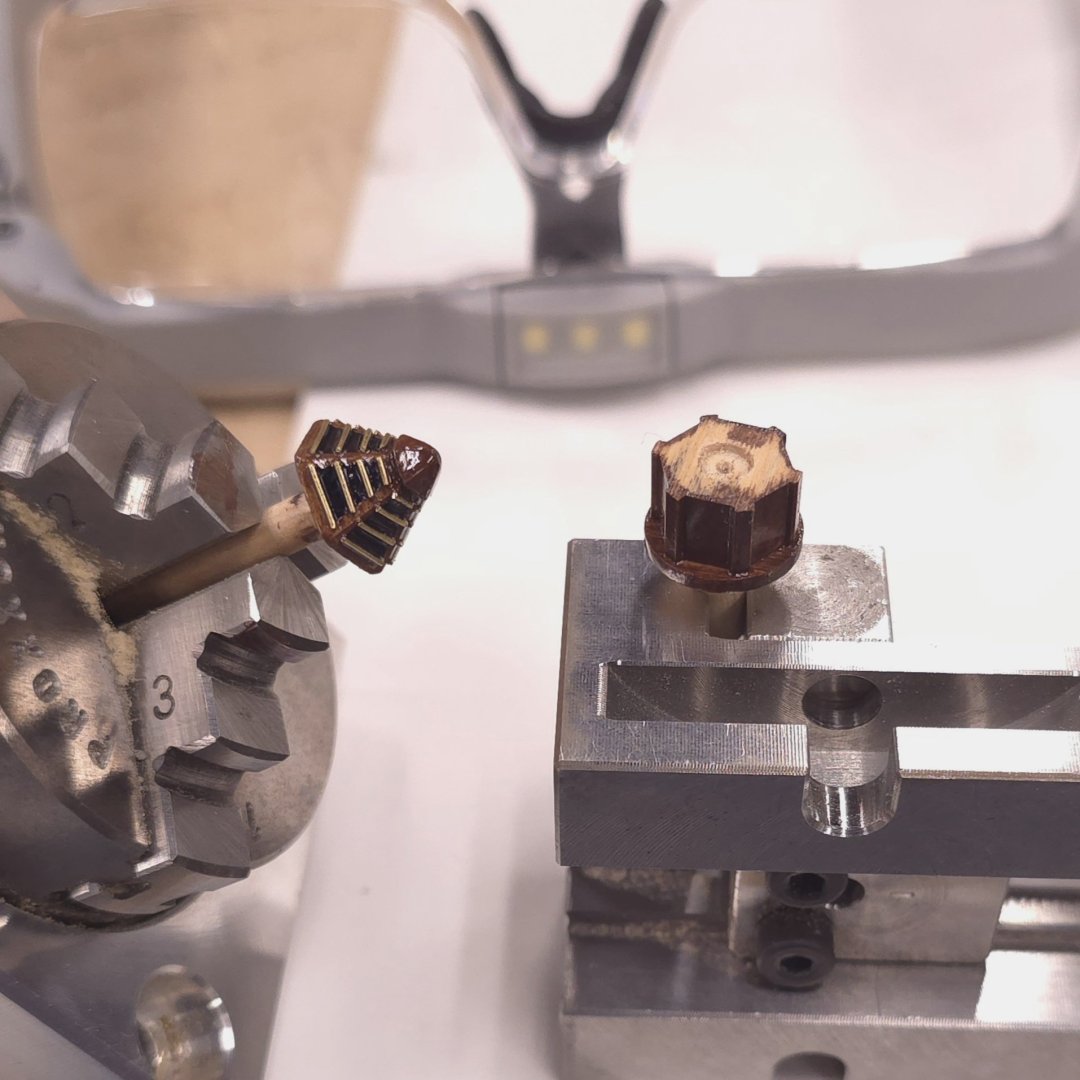
After several failed attempts to finesse these stanchions consistently on the lathe, I've taken to a hybrid approach. Using the milling machine, I made blanks, like Hunt did in the practicum, with grooves marking the top and bottom of the turned portion. Then, I mounted them one at a time on the proxxon lathe and managed to do a decent job of turning the decorative center. After completing three that looked nearly identical, I think I can manage the remaining dozen or so. This is a proof of concept. The stanchion on the right was one of the better outcomes prior to changing methods. It would be a lot easier if the 4-jaw chuck were self-centering. Close enough.


-
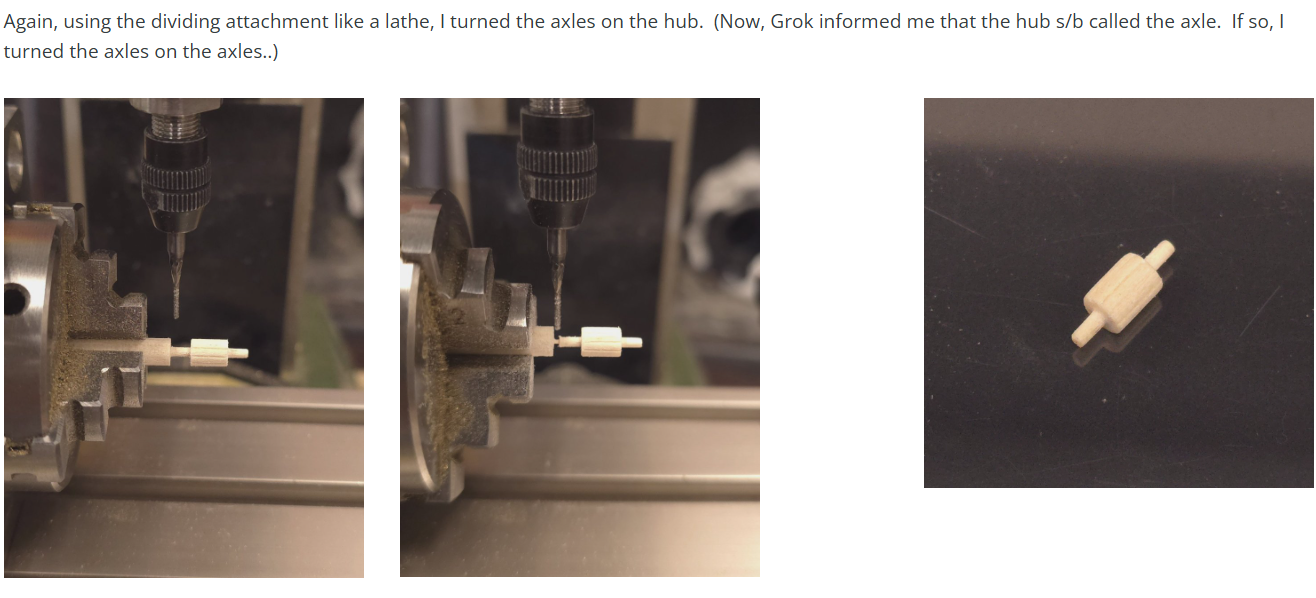
As noted on several occasions recently in my build log, I too have used the milling machine as a lathe - especially with the dividing attachment acting as chuck. (from post 828): Still, I think I'd prefer a lathe that had an adjustable cutter attachment. By the time you add all the extras to these Proxxon tools, you're really hitting the piggy bank hard. As much as I like Proxxon, I may take a look at some of the less expensive, feature rich lathes (and milling machines) available at Amazon.
-
Excellent idea! One I will indeed remember going forward. It seems to me, however, that you somehow managed to do without the screw when you made the stanchions on the lathe, no?
-
USS Constitution by mtbediz - 1:76
Der Alte Rentner replied to mtbediz's topic in - Build logs for subjects built 1751 - 1800
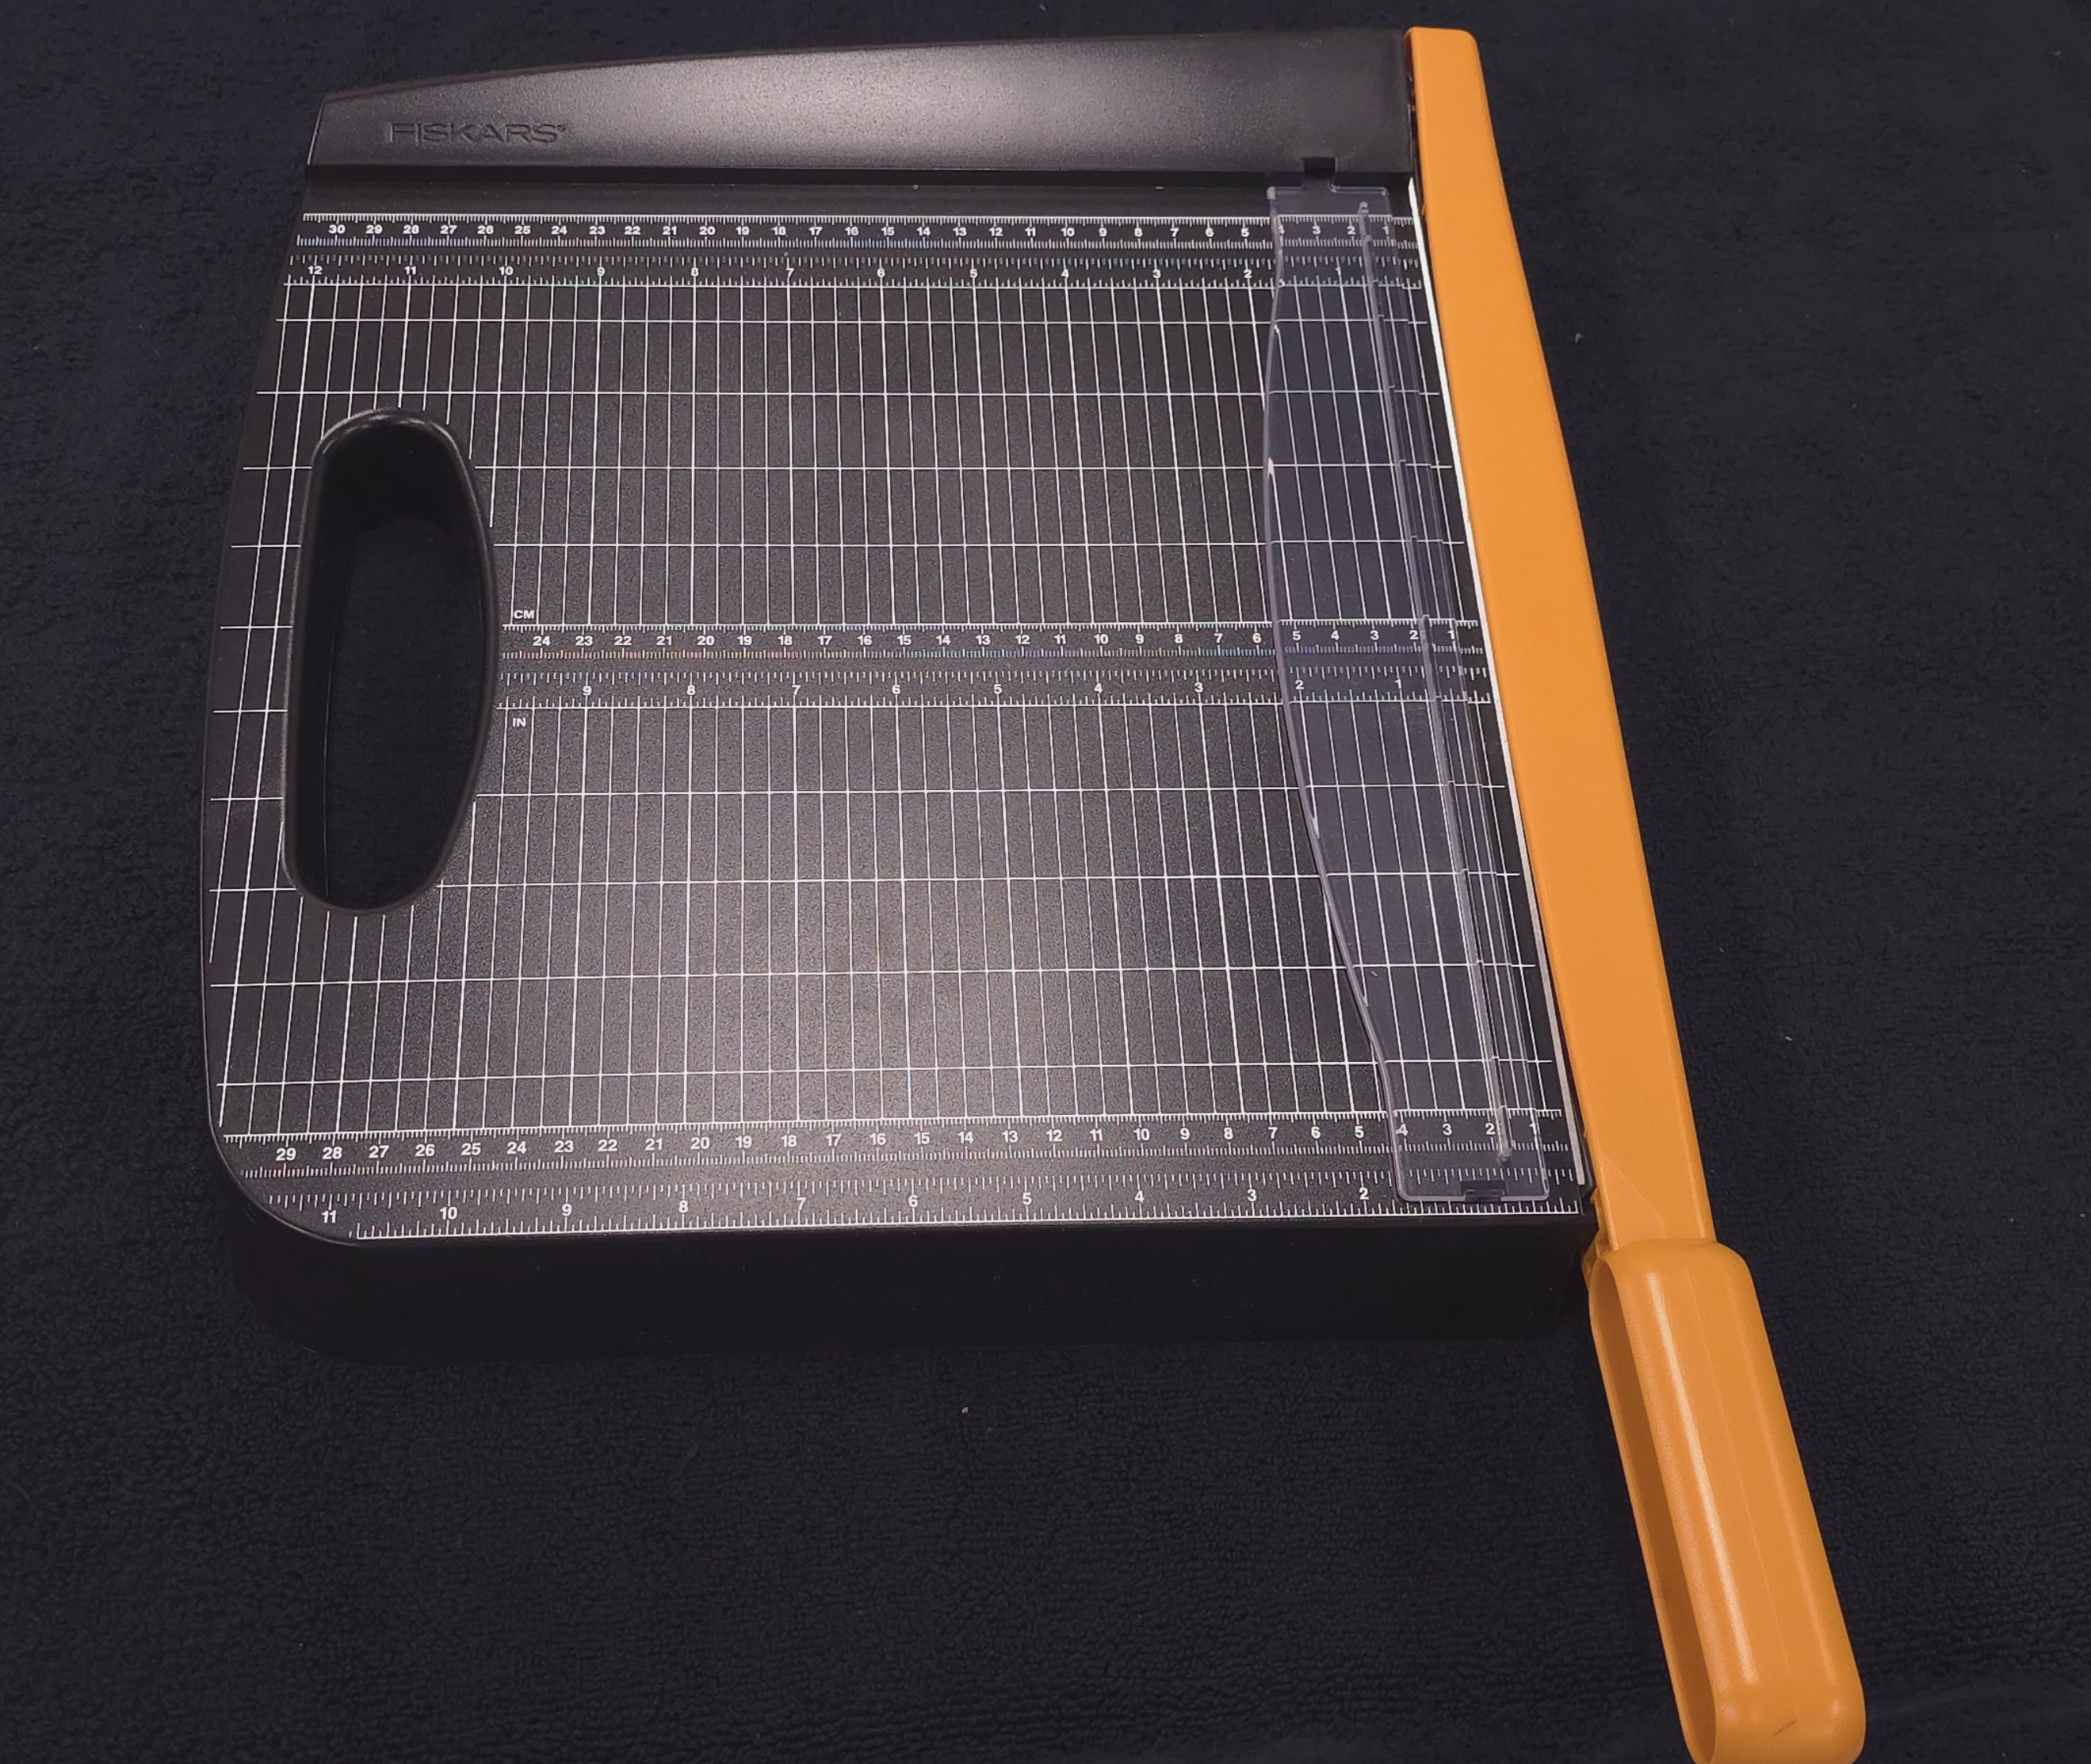
The sheet brass I have on hand is .28mm thick. I imagine the Fisker's cutter could manage a bit more material without difficulty. Woodartist is correct, Amazon is the easiest source to find these, but I think you can get them at any good office supply store too. -
No, I do not think I will. Perhaps, I'll change my mind before I start the rigging, but I don't see them as strictly necessary right now. Were I to add them, I'd have to find a way of assembling them without soldering, brazing, or welding. Given that all the other brass on Conny is pristine, I don't want to ruin the look with something that's painted over to hide the blemishes. (Right now, I've got my hands full trying to figure out how to "turn" the fife rail stanchions, in a way that I can produce 15 virtually identical ones. Square stock won't fit in the self centering 3 jaw chuck on the lathe. It isn't easy to properly center square stock in the 4 jaw chuck. Either way, the chucks would only be holding on to, at best, 3/16" (4.8mm) of material. This, to me seems, a recipe for disappointment at best. I think I will once again resort to starting with round stock (dowel), turning the vase like ornamental details, then squaring the stock off with the mill and dividing attachment. I really wish I'd purchased a better lathe. The Proxxon wood turning lathe really has very limited functionality.) I logged in to see how you made these, but got sidetracked with incoming notifications. I will now see how the master shipwright (you) solved this problem. 😁 Oh my! You used the three jaw chuck! Of course, it makes sense to use longer material - assuming you also used a tailstock to keep the piece stable while turning. Since I already prepared a roughly 4mm square piece of boxwood, I wll try to get a good result with the lathe, though I may prep the piece on the mill first - taking advantage of that machine's adjustability. Stay tuned.. Here's justification for the better lathe. Obviously XKen wasn't using the DB 250 wood turning lathe..
-
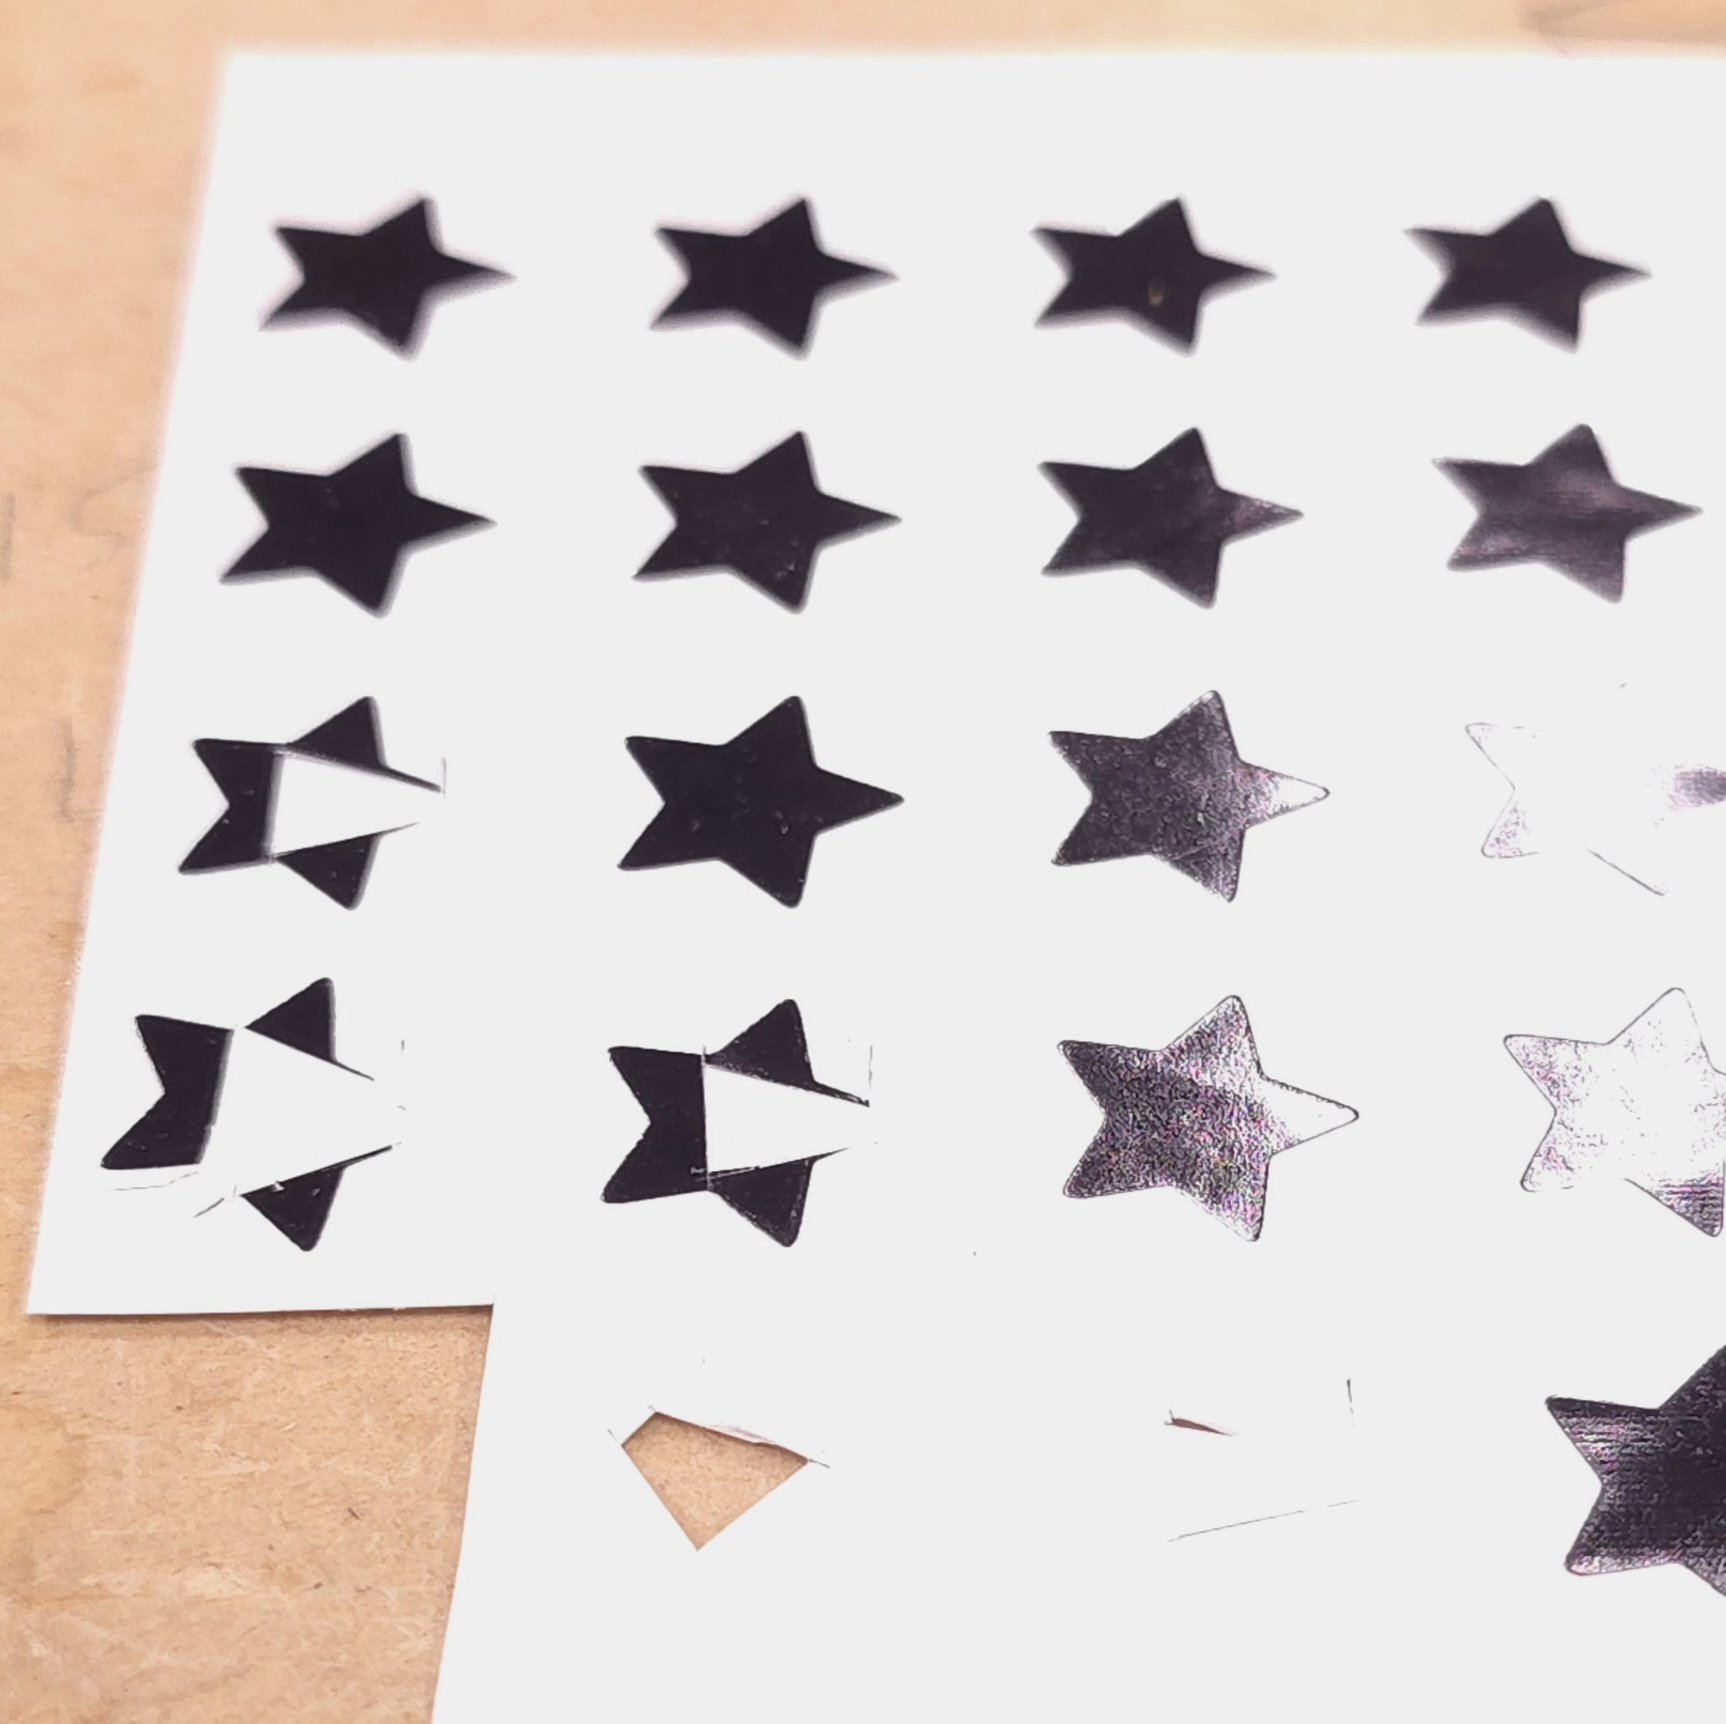
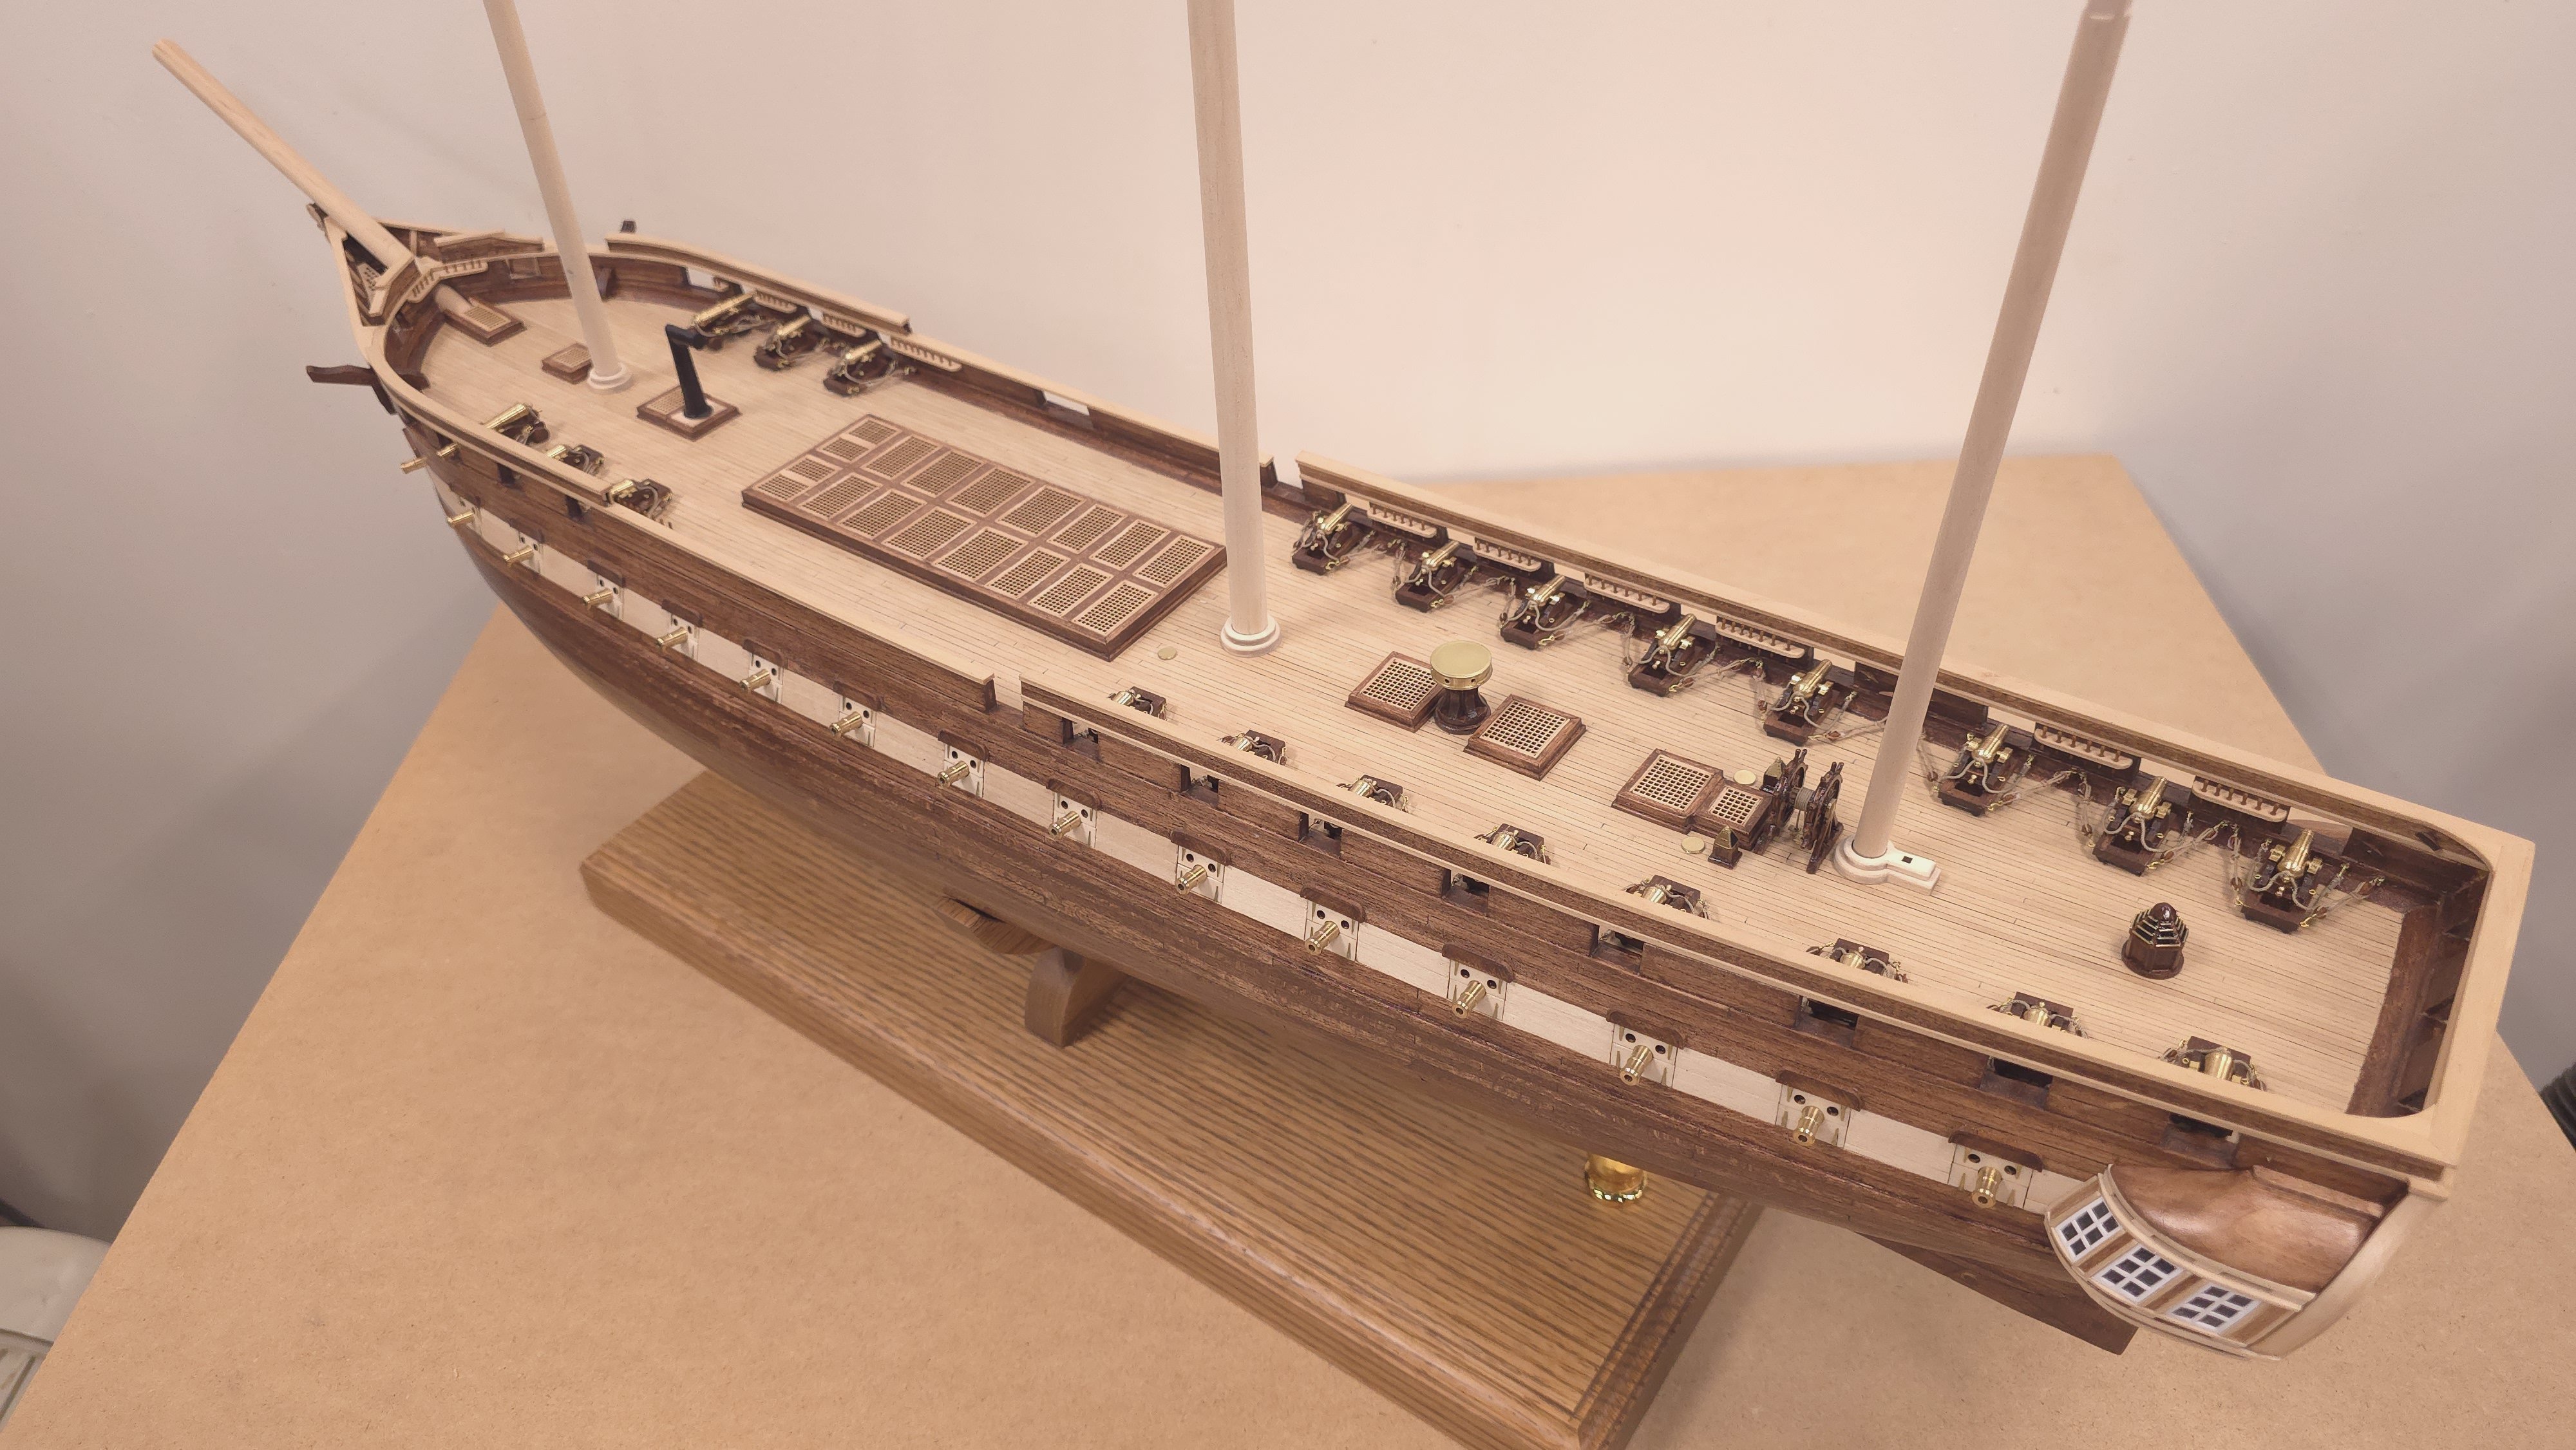
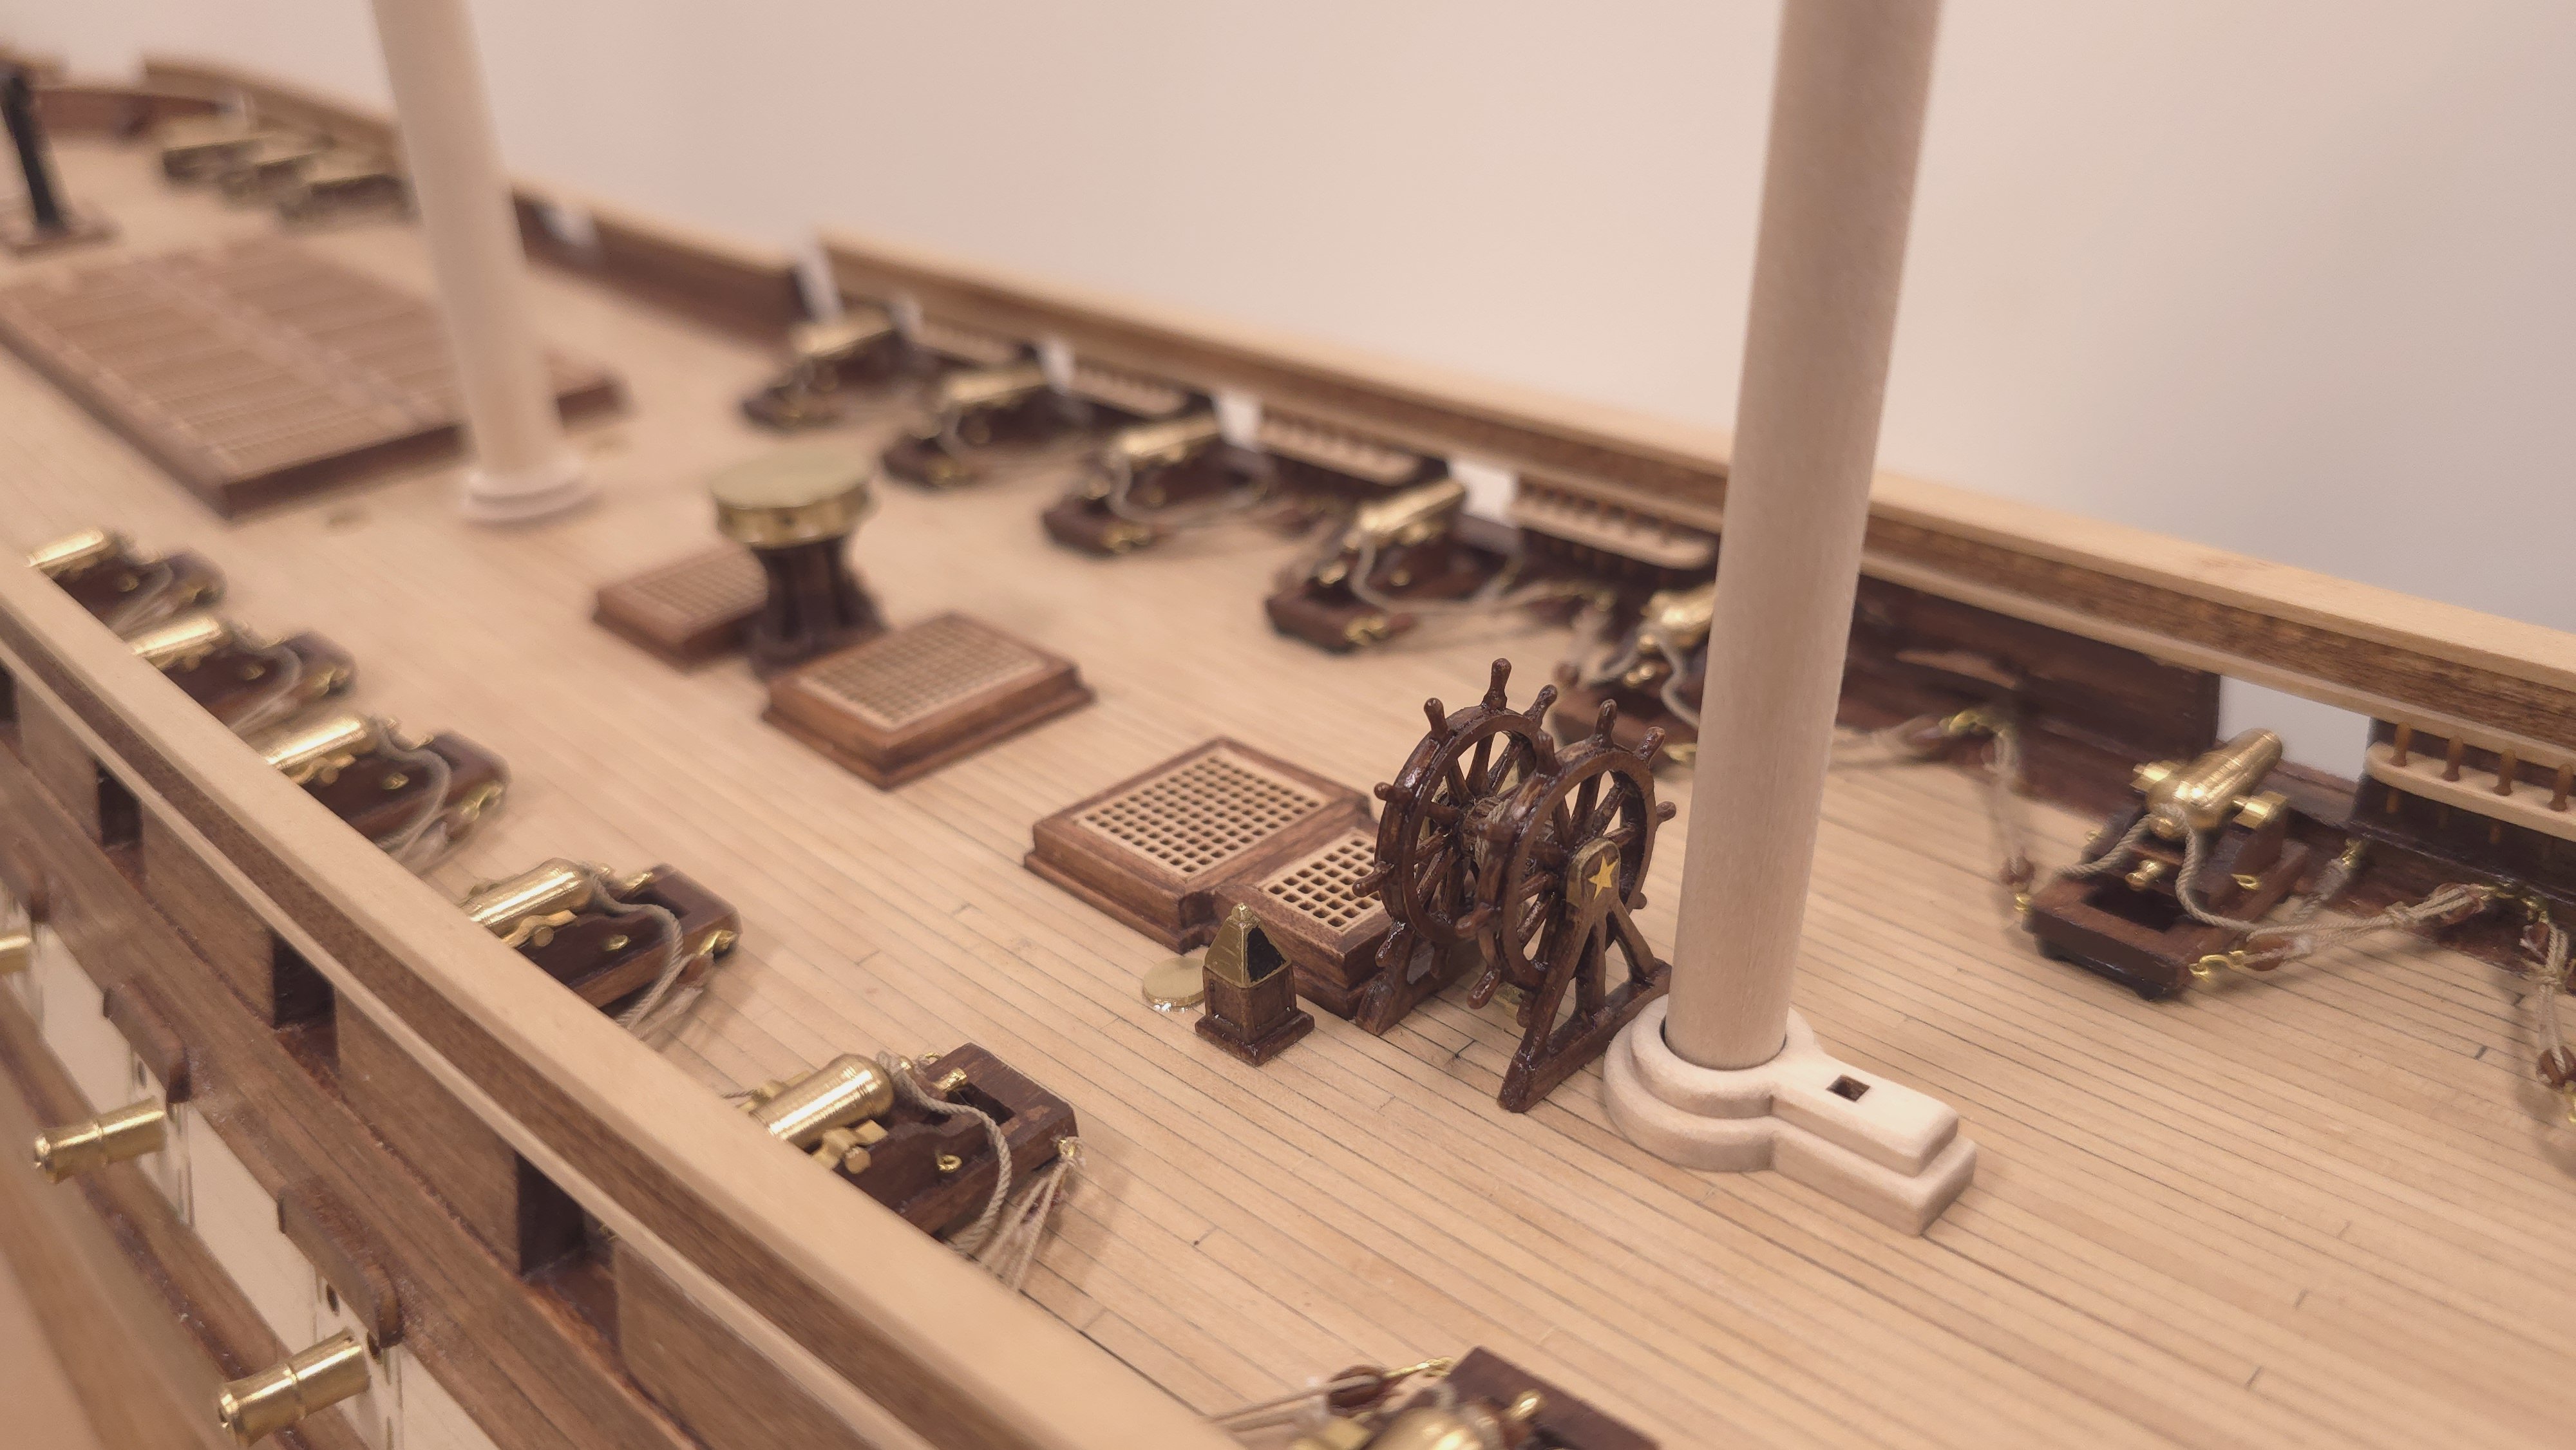
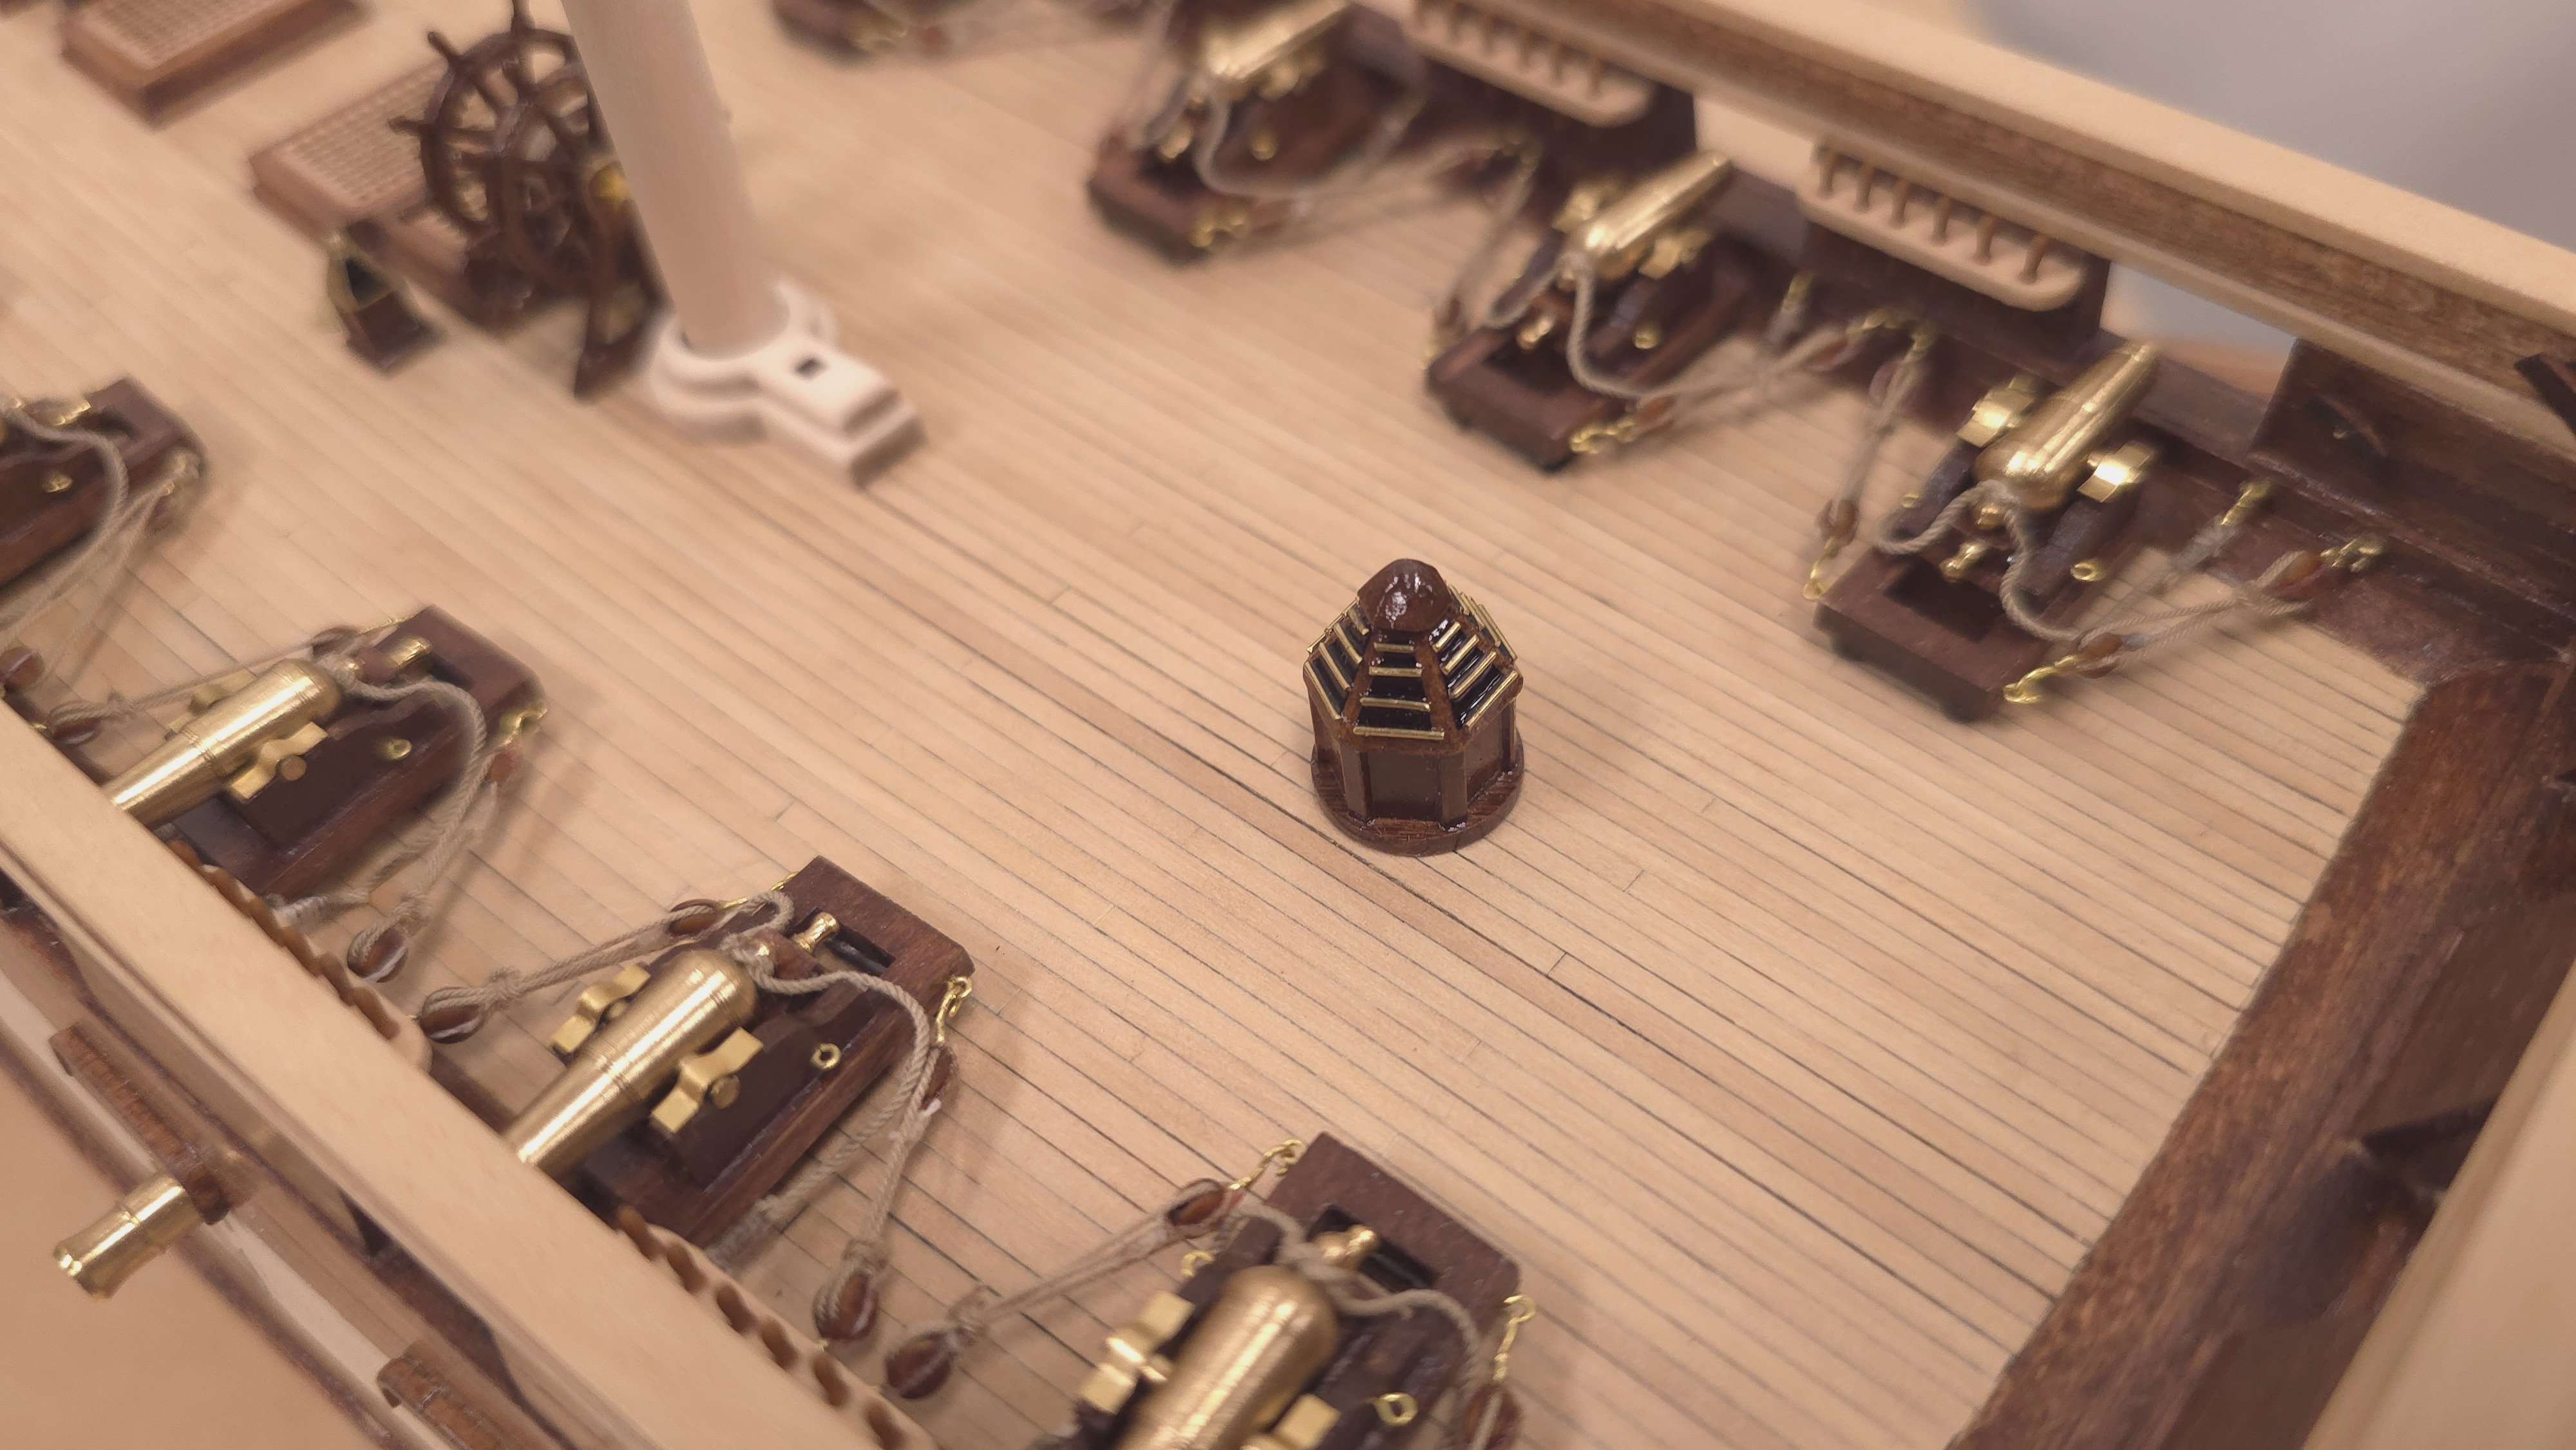
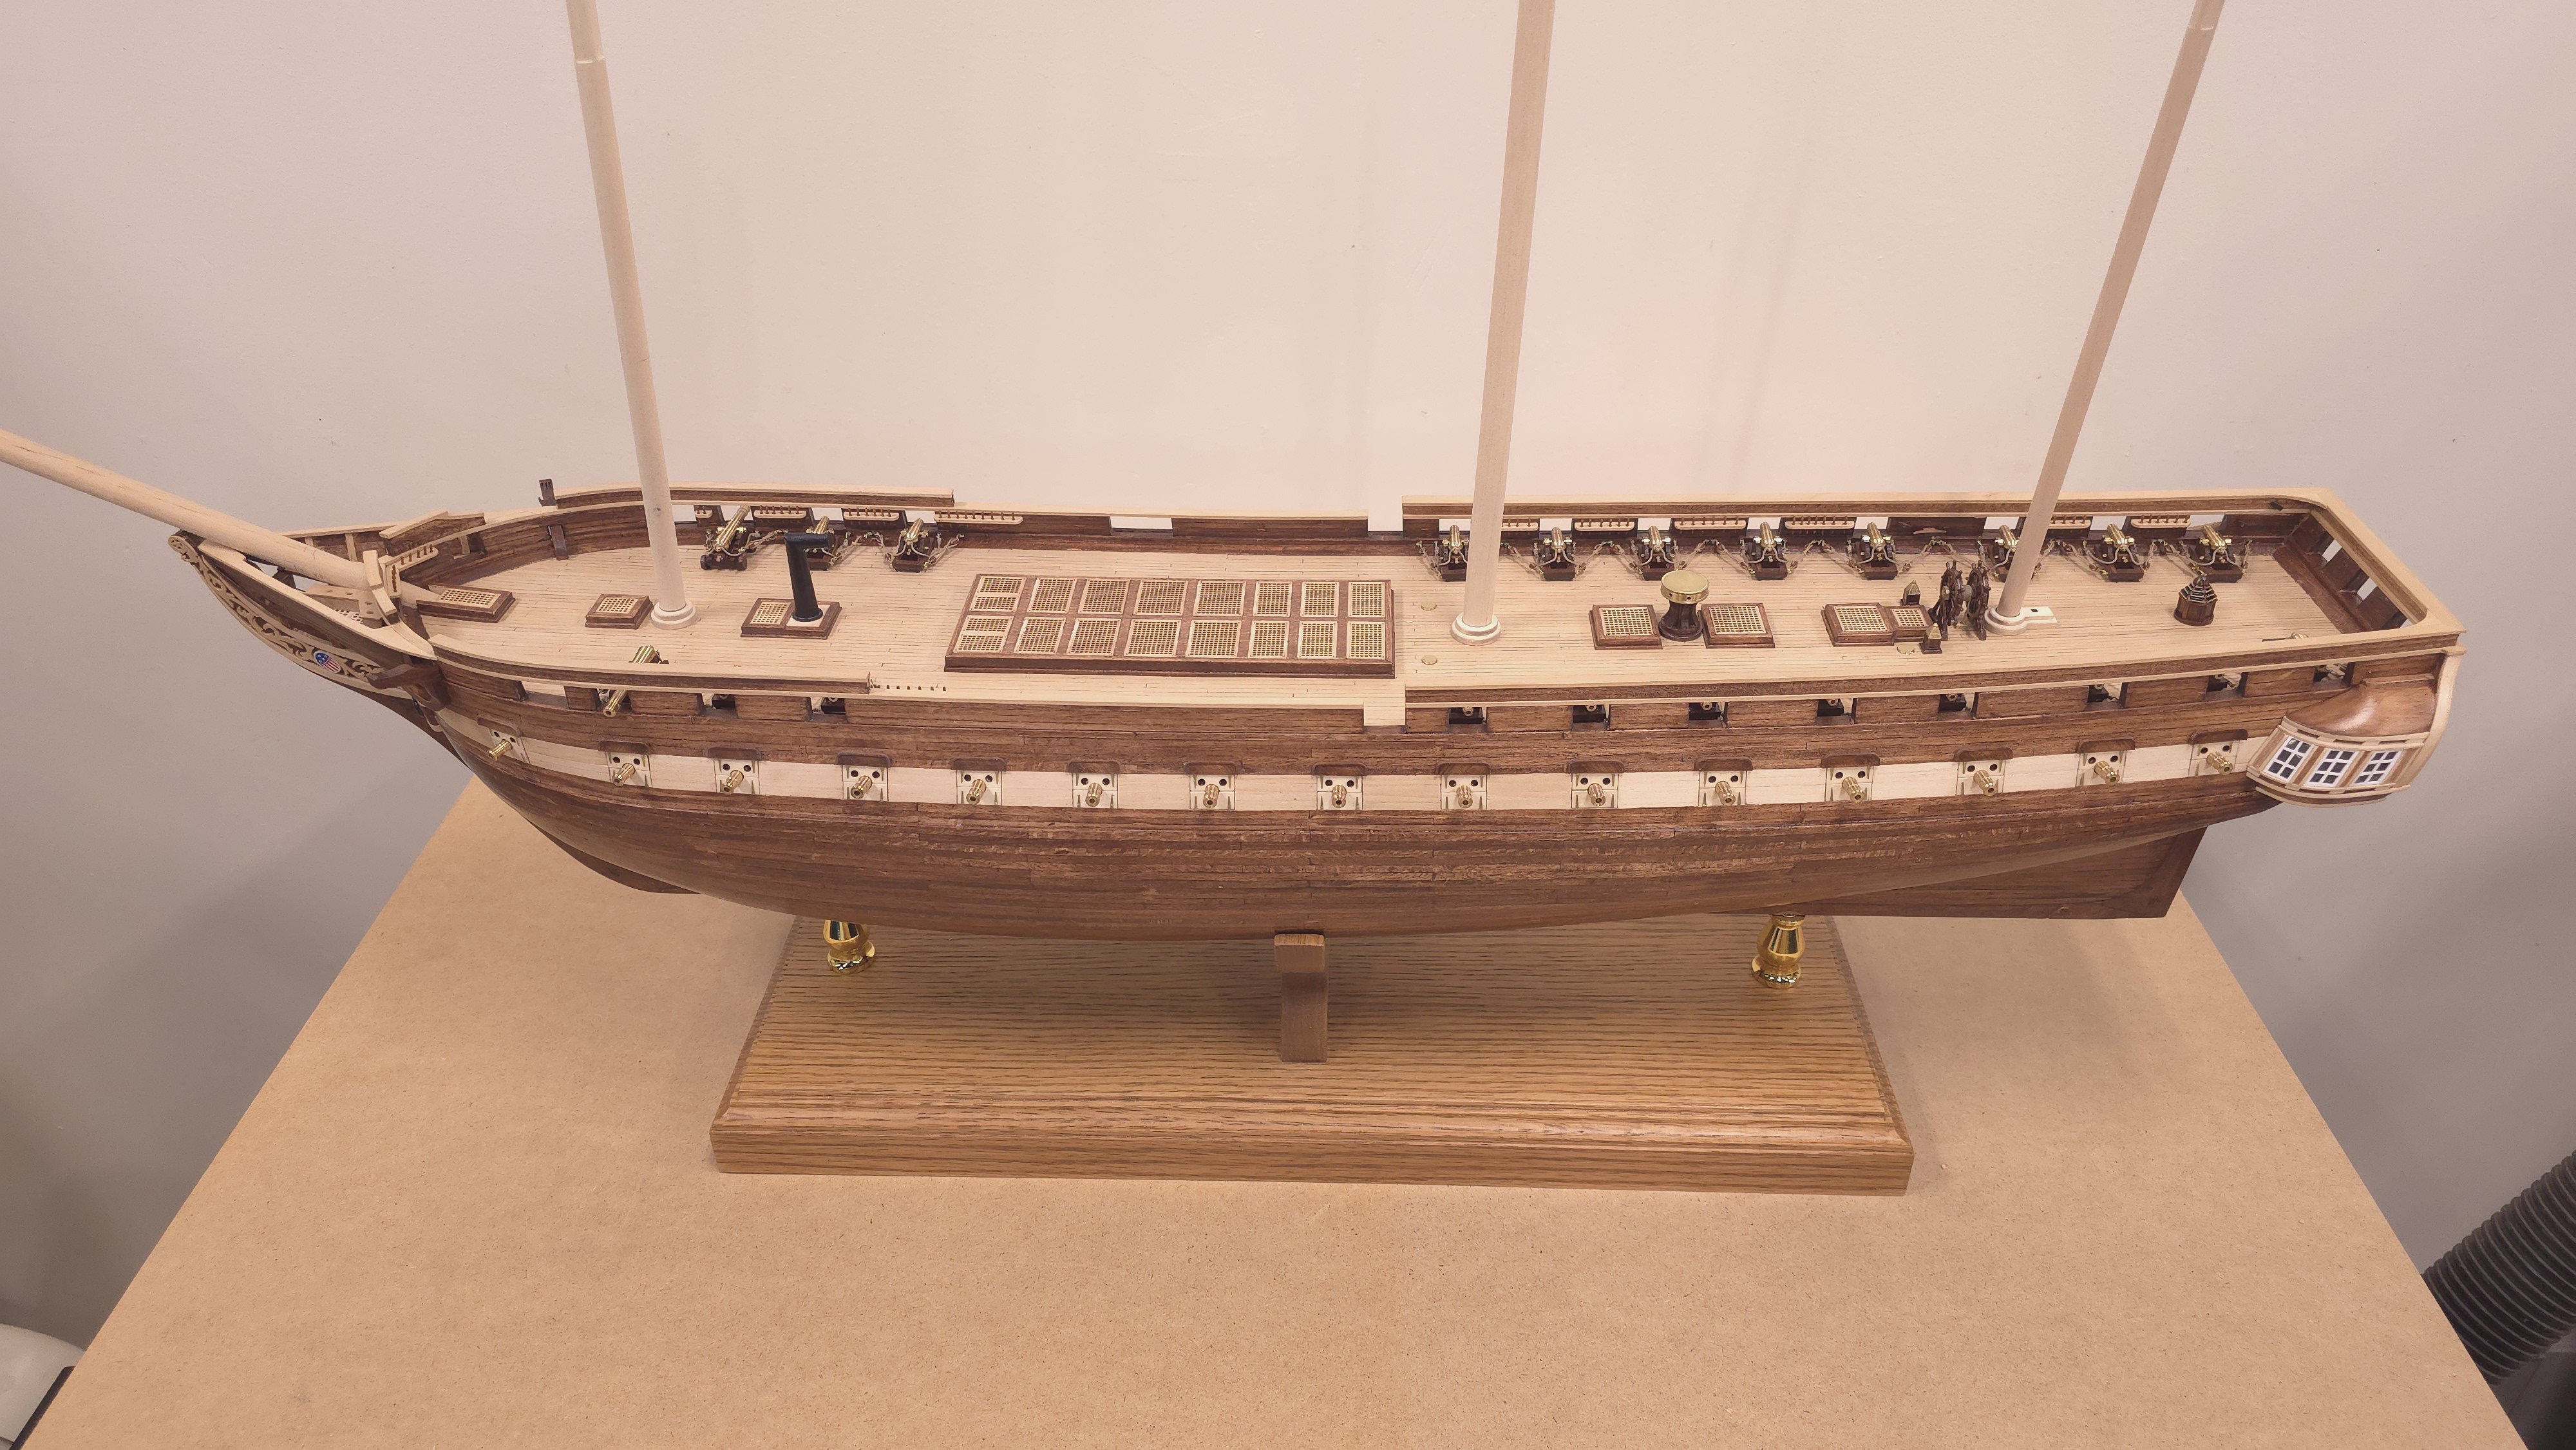
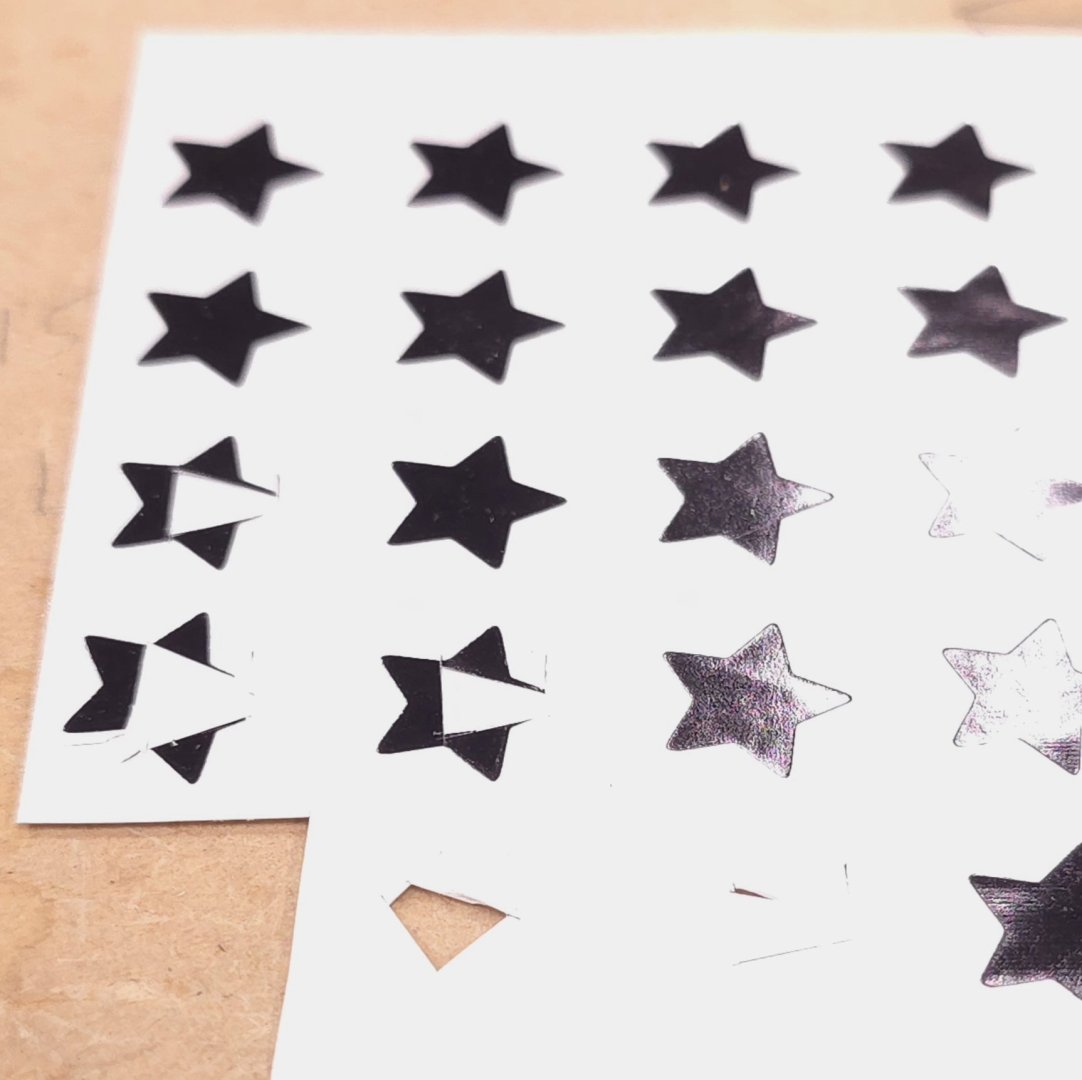
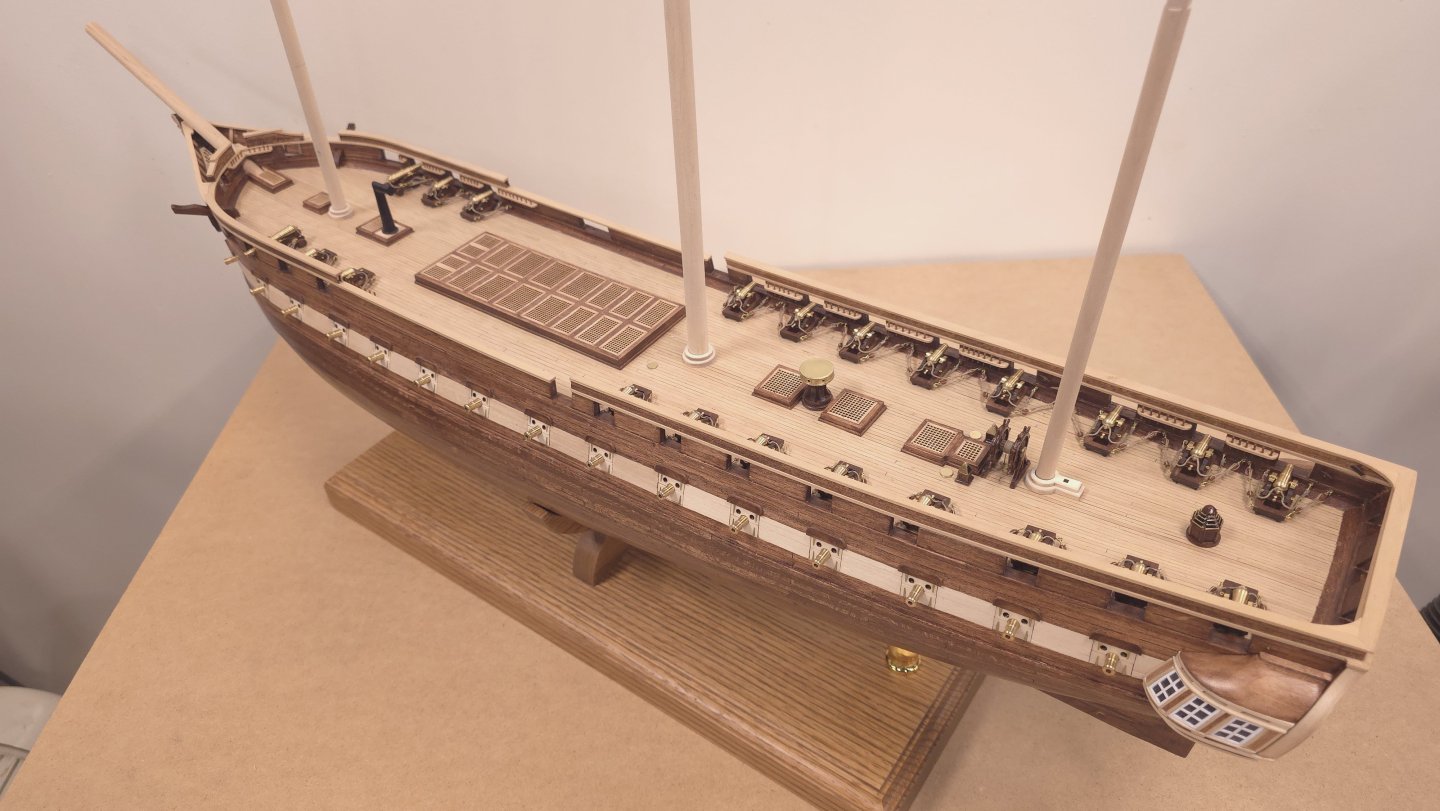
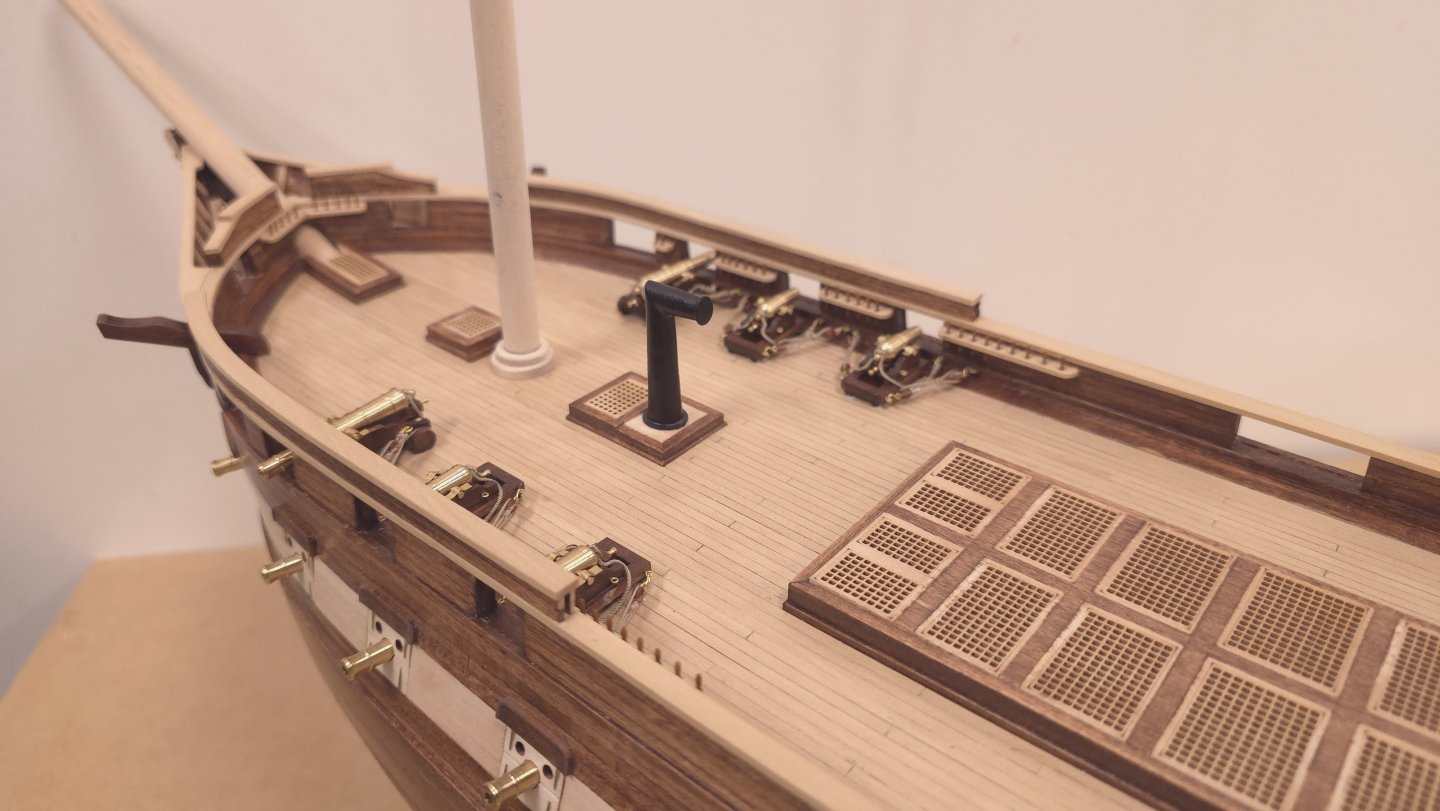
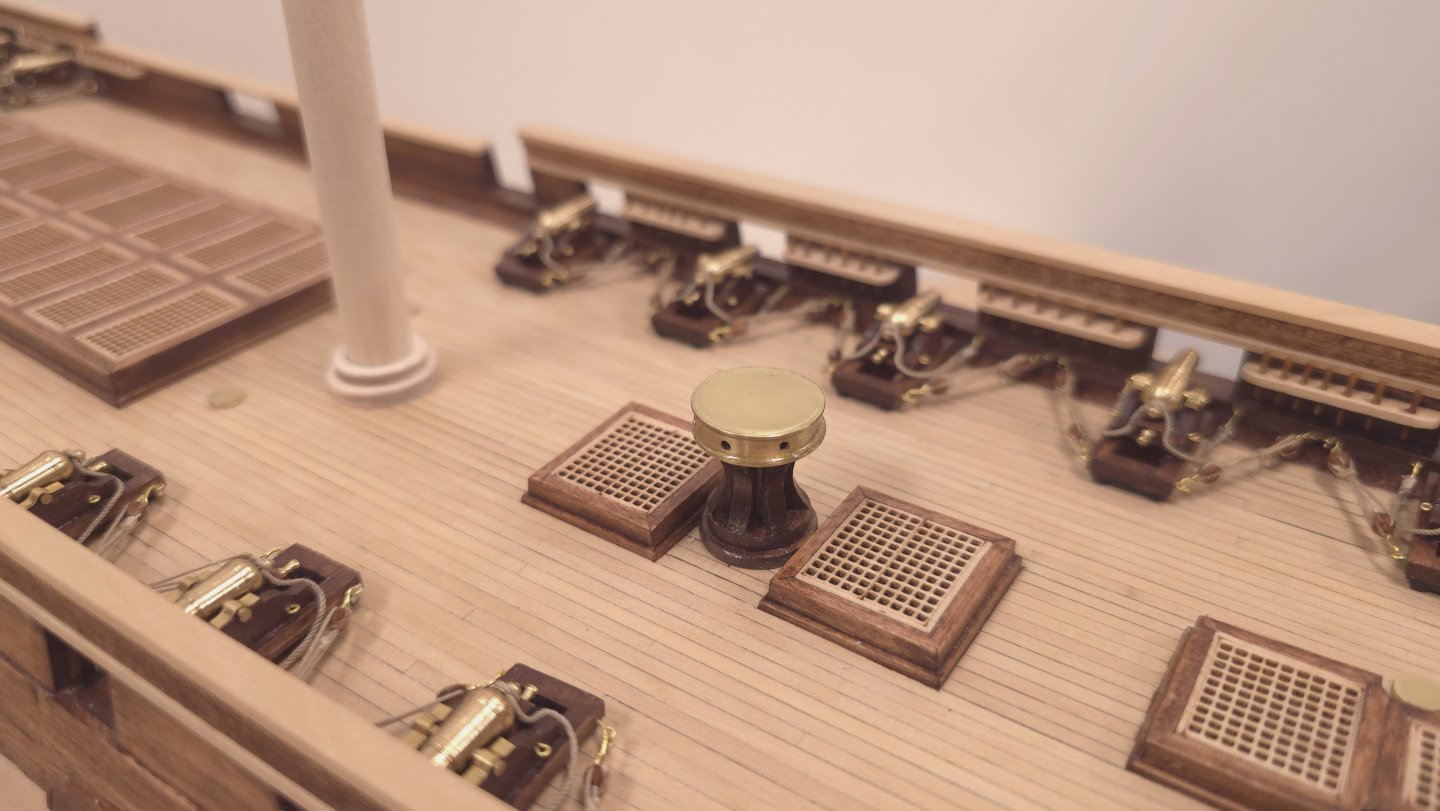
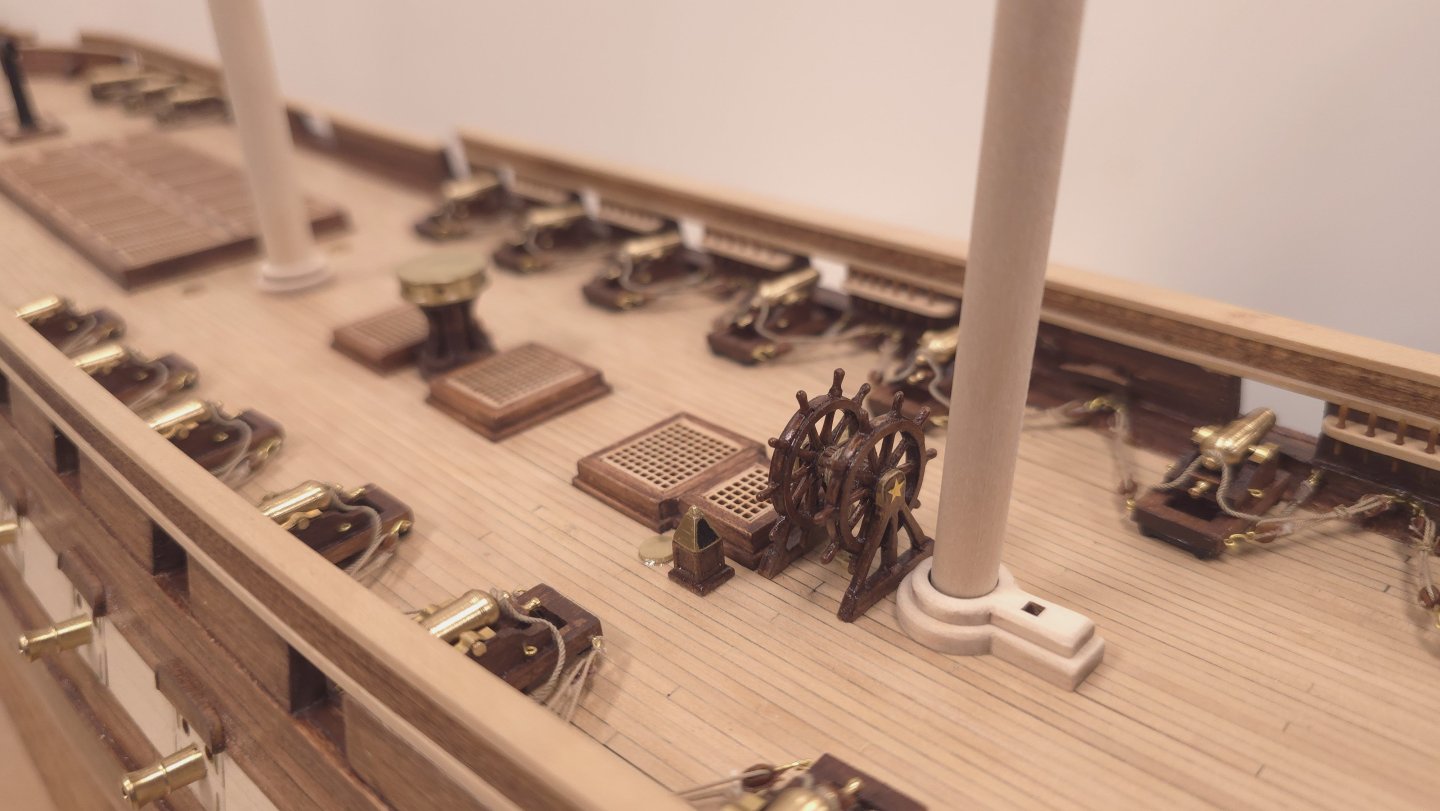
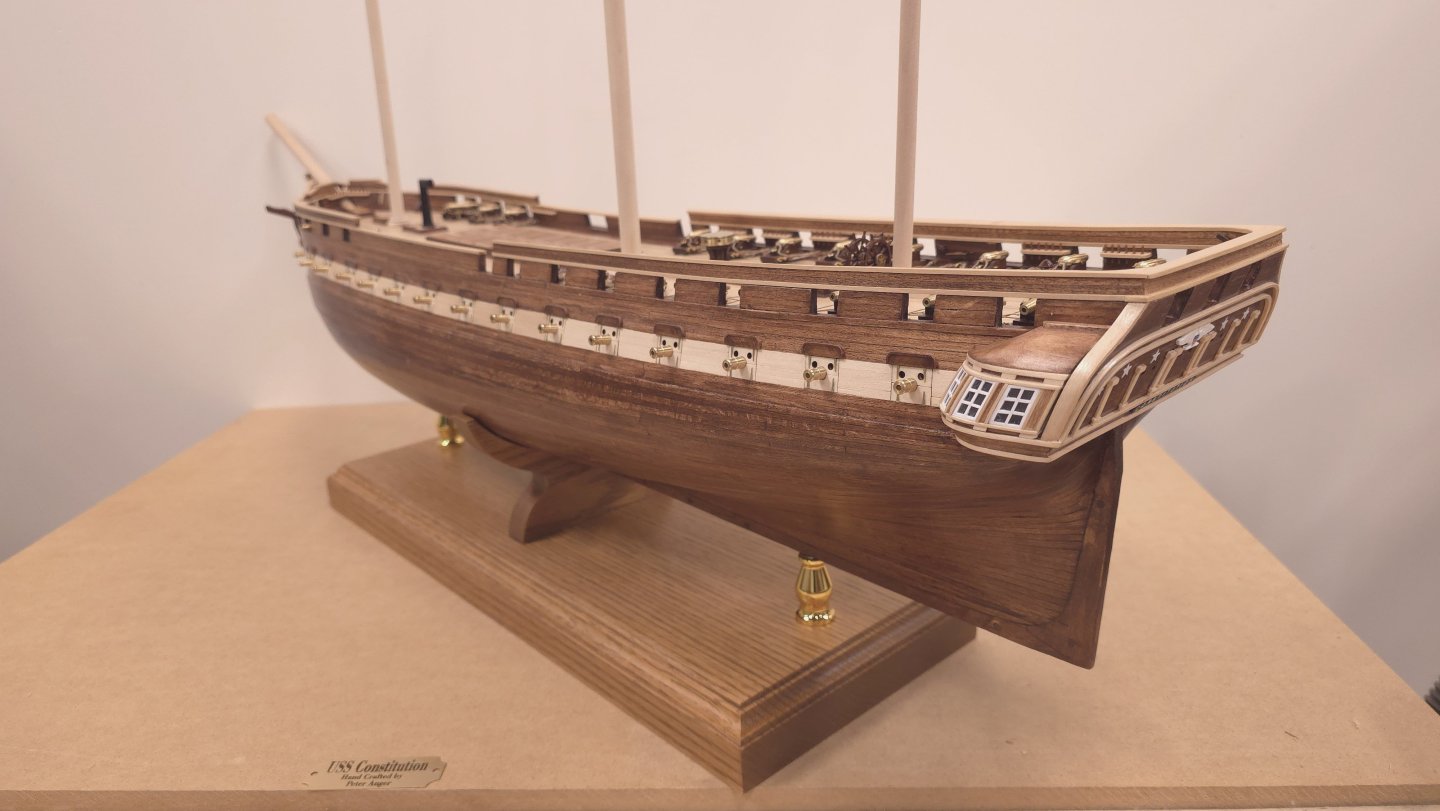
The skylight is finally done. Here are the latest pix. (Rather than attempt to paint the glass panels of the skylight, I thank my lucky stars I thought of this time saving idea. Yes, adhesive star stickers, which I trimmed into the shape of the windows.) That divider attachment proved handy for the dodgy business of attaching the brass strips that protect the "glass". No glue. I applied a coat of polyurethane, added the brass strips on one face, rotated 60° on the dividing attachment, rinse, repeat - five more times. I then added five more coats of poly on top of the brass strips to lock them in. With the face I was working on on top, everything was parallel to the table top making placing the brass strips fairly straightforward. As I was looking at these photos to post, I realized that I still have to do the fife rails. Unfortunately, I'm out of belaying pins. The last order from syren was lost by the USPS. So, two weeks or so until the next order arrives, assuming it too doesn't go missing..


-
USS Constitution by mtbediz - 1:76
Der Alte Rentner replied to mtbediz's topic in - Build logs for subjects built 1751 - 1800
Tom, If the brass sheet that you're using is fairly thin, this is an easier way to go about slicing off strips.. go back a few posts on my build log to see how I used it for the straps that hold carronades onto the gun carriages.
-
If you think the practicum is short on details up to the part you're working on, just take a look at the last two chapters in the Rigging portion of the practicum. In chapter 6, Hunt included a grand total of two photos, and they're not even from his build. I don't believe he ever actually finished the Constitution, and even chapters involving the hull don't include the final details of the build. While I, like many followers of Hunt, could not have gotten as far as I did without the practicum, I wish he'd have revisited the build, maybe starting from scratch, and republished a complete practicum. Having said that, experienced builders don't need the help, newbies to the hobby, like me, should probably start with something simpler - a Vanguard kit? Better than the practicum are the build logs at this very site. Were it not for the likes of Gregg, Jon, Mustafa, Unegawahya, (current builders), and Usedtosail, XKen (one of the best early sources for Conny detailed tips and techniques here at the site), and, to some extent, HipExec, I could not have gotten to the point I am with the Constitution - and when it comes to rigging, I hope Greg (Matson) publishes more relatively soon. That you managed to get this far with primarily hand tools is outstanding. Kudos and keep up the good work.
-
USS Constitution by mtbediz - 1:76
Der Alte Rentner replied to mtbediz's topic in - Build logs for subjects built 1751 - 1800
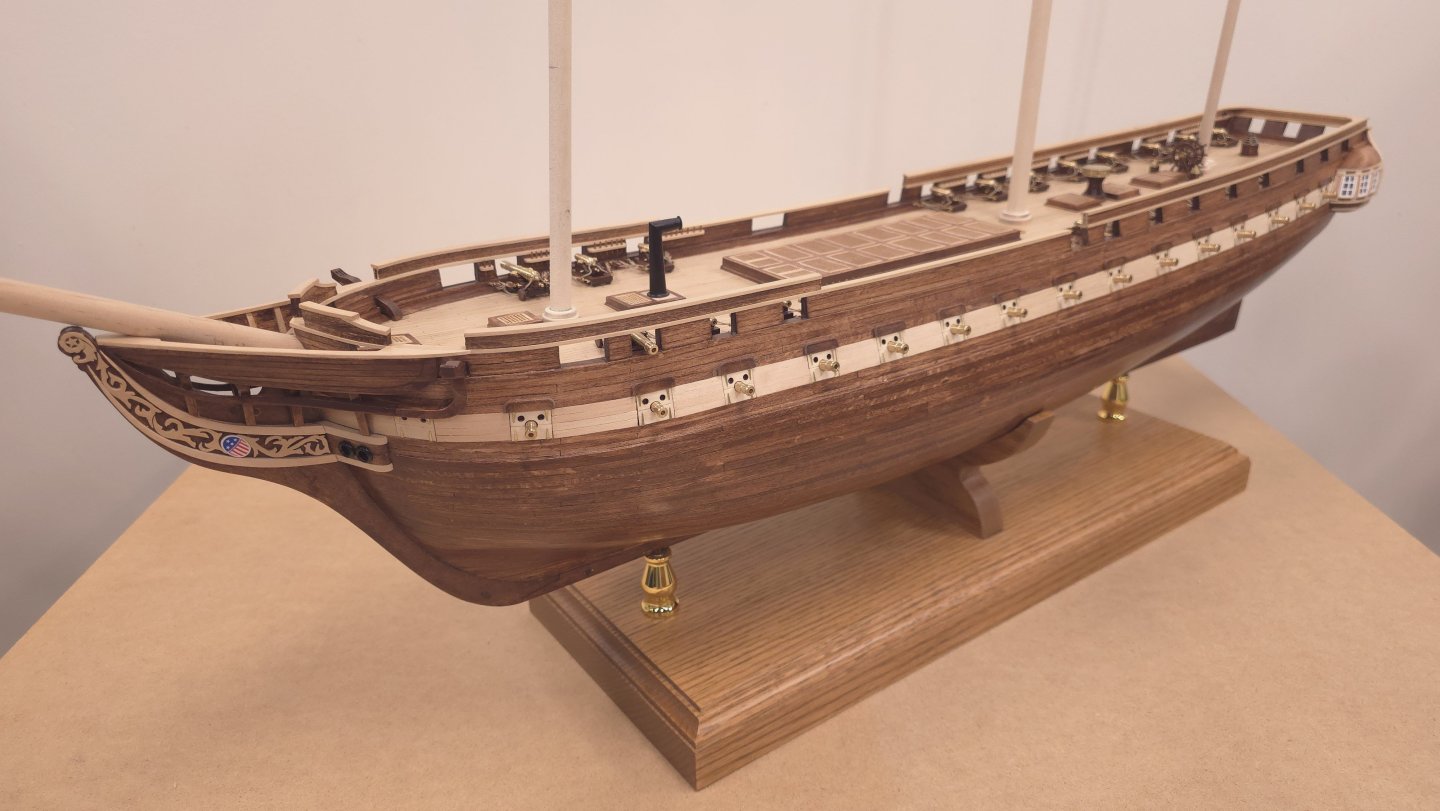
I'm watching VERY closely. I'm almost done with the furniture and fixtures on deck and the channels and chainplates are next on the agenda. -
Seeing how splendidly your planking turned out, I'm doubly upset that I didn't think to substitute better materials when I planked Conny. Next time for sure! 😁
-
USS Constitution by mtbediz - 1:76
Der Alte Rentner replied to mtbediz's topic in - Build logs for subjects built 1751 - 1800
I never had any doubt. 😁 -
Thanks for sharing that. I feel so much better knowing that I'm not alone. 😁
-
Mustafa is correct about the latter items being the truckles for the carronade carriages. I don't know what the rolling pins are for either. When I've found myself trying to figure out what's what with the kit, I consult the list of the kit's contents. This is a three or more page document that lists your kit's parts by material. Look up the Brittania components and by process of elimination, you should be able to figure this out. Were I at the shop right now, I'd check myself.
-
Nice work! and, I'm taking notes on stropping deadeyes and double blocks, which look to be nicely suited for portable busywork for my upcoming annual hiatus to FL. Best DAR
-
Wow! that is some absolutely spectacular planking work. I'll pop in from time to time to follow your progress.
-
USS Constitution by mtbediz - 1:76
Der Alte Rentner replied to mtbediz's topic in - Build logs for subjects built 1751 - 1800
My second thought is, how the heck does one get to it? There don't appear to be any stairs either above, or below.