HOLIDAY DONATION DRIVE - SUPPORT MSW - DO YOUR PART TO KEEP THIS GREAT FORUM GOING! (89 donations so far out of 49,000 members - C'mon guys!)
×

LoydB
-
Posts
85 -
Joined
-
Last visited
Content Type
Profiles
Forums
Gallery
Events
Everything posted by LoydB
-
 So absurdly tall. That looks great!
 -
I used basswood strips. I gotta say, having a labeled view off all of these lasered sheets would have added 2 pages to the instructions PDF and would have been immensely helpful.
- 45 replies
-
- 2
-

-
- Dory
- Lowell Grand Banks Dory
- (and 3 more)
-
Ahah. There's no actual picture, it's just on the plan sheet. I missed that completely, thanks y'all.
- 45 replies
-
- 3
-
-
- Dory
- Lowell Grand Banks Dory
- (and 3 more)
-
I don't see any outboard bands in either the instructions or in the various pix I've seen online, but I'm also a noob, so maybe I'm not looking for what I think I am. I'll email Expo when I'm back at the house later, thanks.
- 45 replies
-
- 1
-
-
- Dory
- Lowell Grand Banks Dory
- (and 3 more)
-
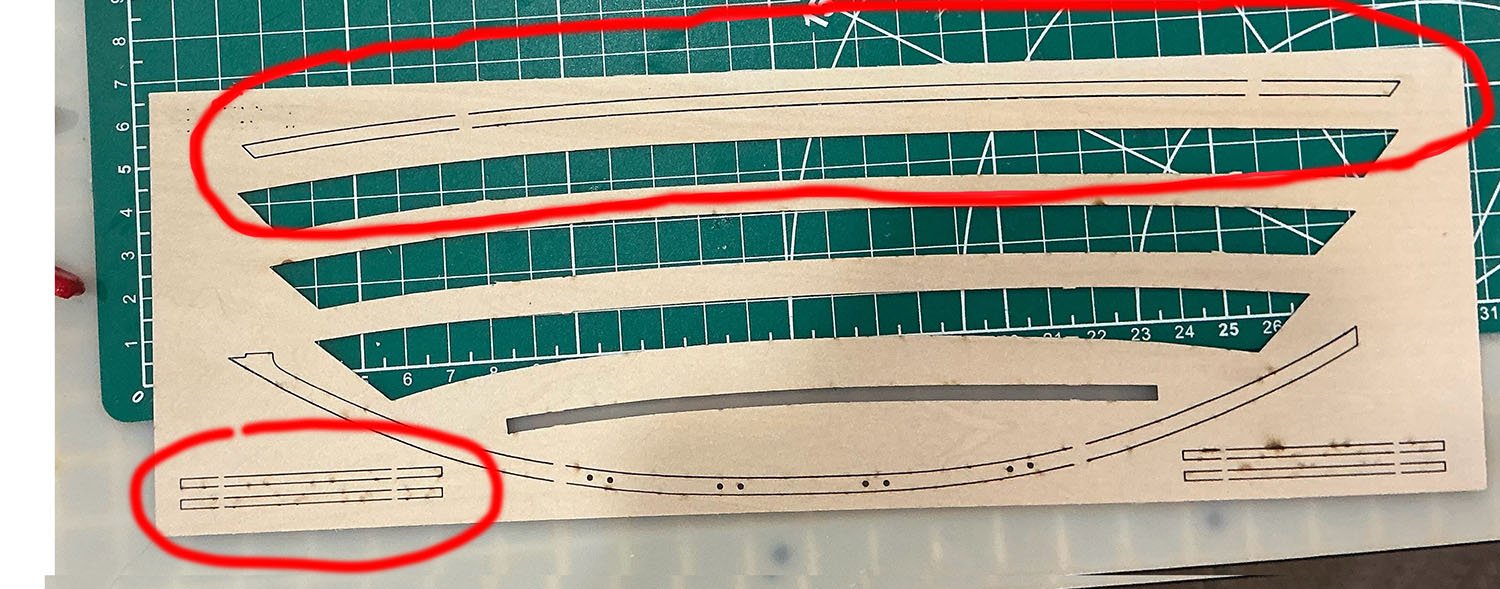
The seat risers have already been installed. In the instructions, the gunwales are made from 1/16" square stock. I have no idea what else it could be for.
- 45 replies
-
- 2
-
-
- Dory
- Lowell Grand Banks Dory
- (and 3 more)
-
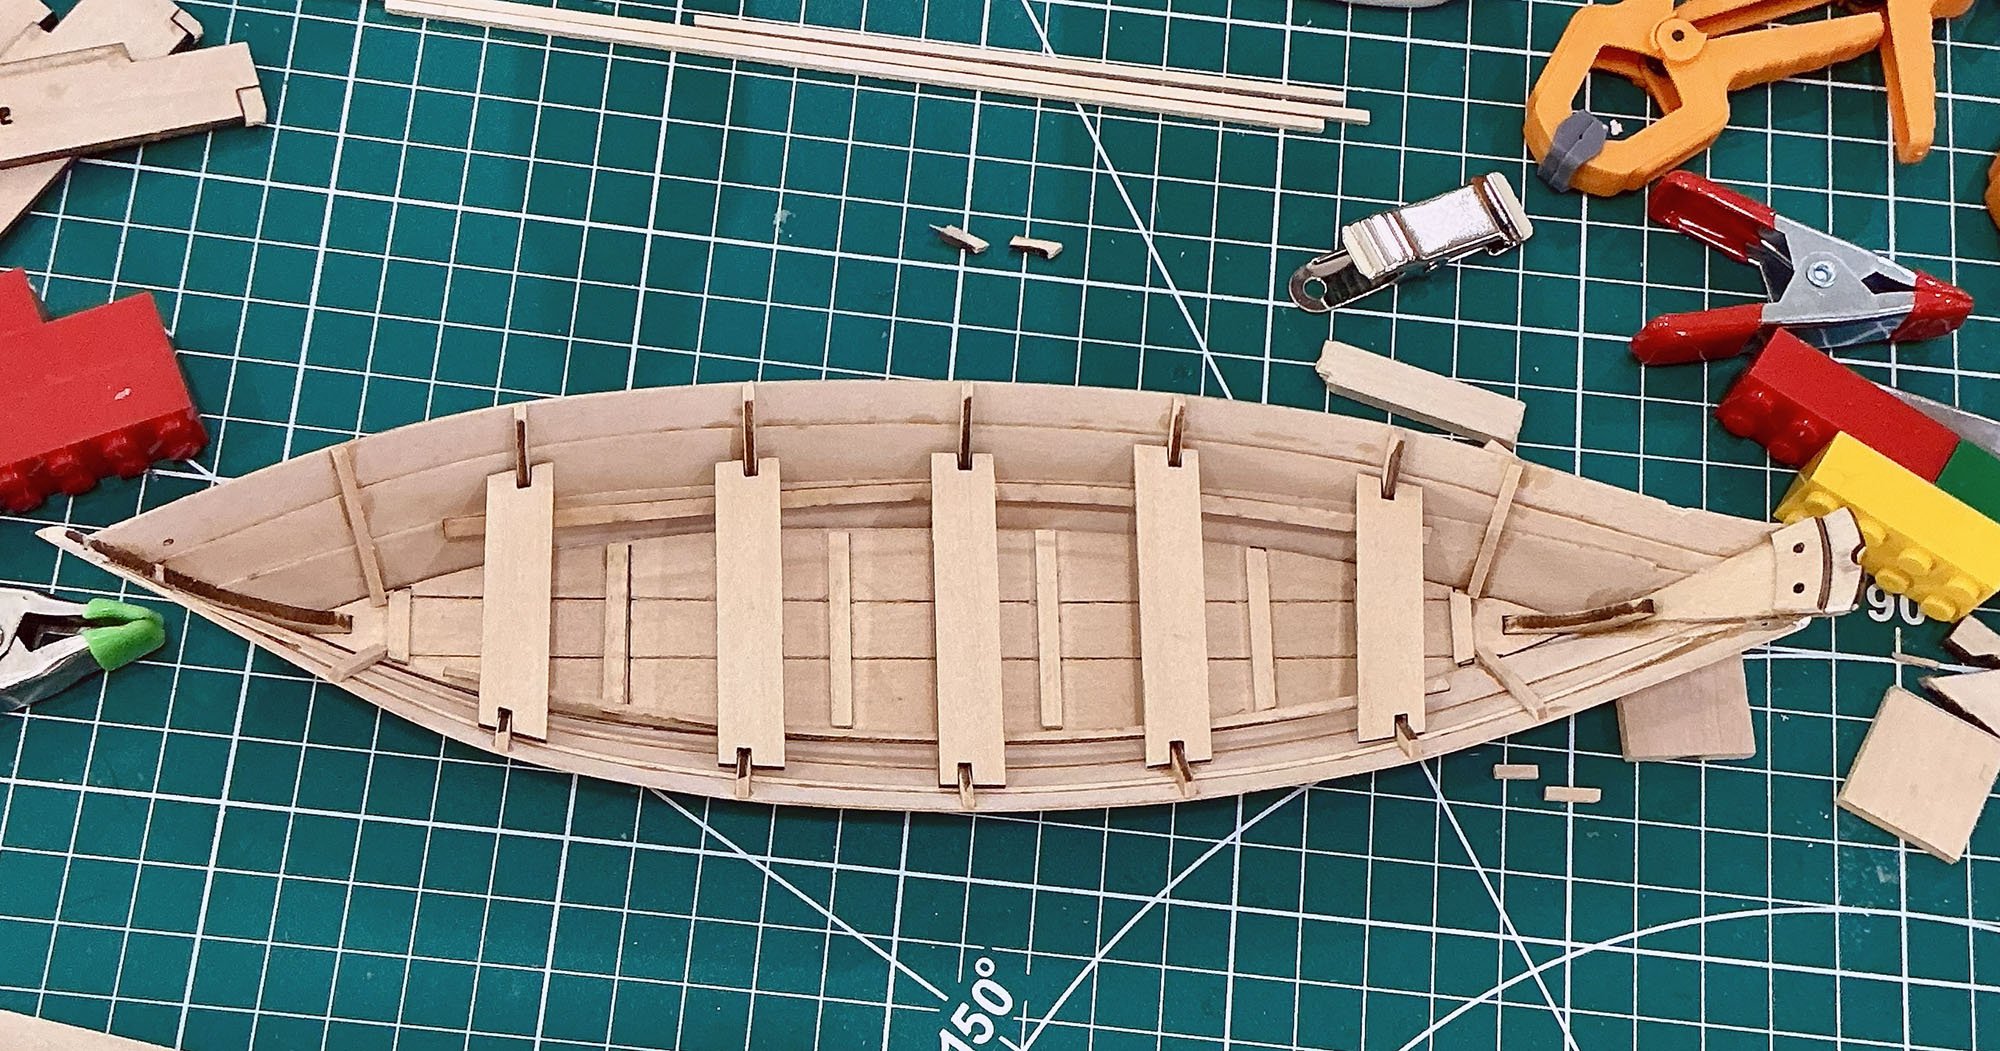
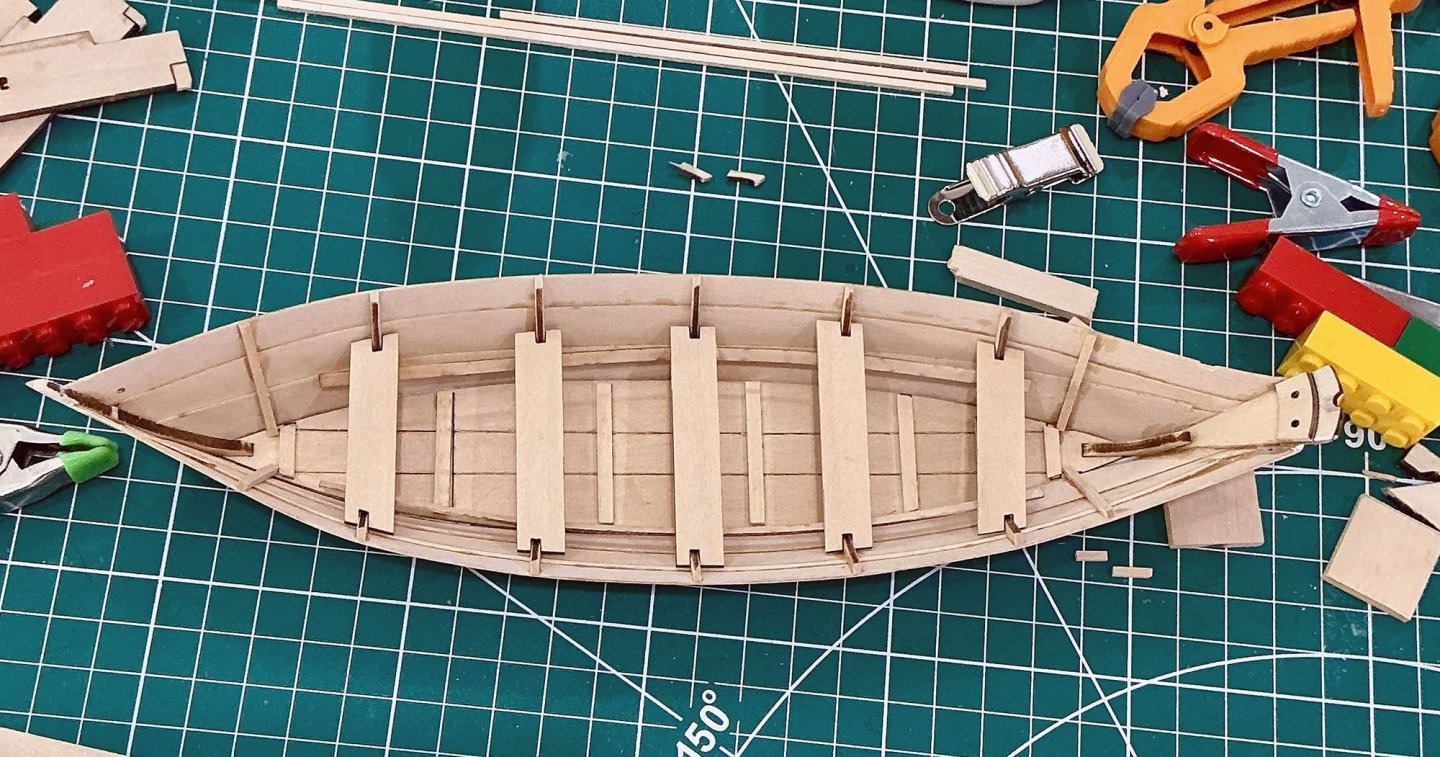
Finally back on this after the holiday season, hope everyone is doing well in 2026. I cleaned up the seats and added the seat risers, I'm closing in on it. Question though, what are the pieces circled in red? I'm starting to get 'Why are there leftover bolts?" after reassembling something vibes.

- 45 replies
-
- 2
-
-
- Dory
- Lowell Grand Banks Dory
- (and 3 more)
-
Cutters, Choppers, Guillotines, Slicers
LoydB replied to MintGum's topic in Modeling tools and Workshop Equipment
I have the DSPIAE one (and many of their other tools) and really like it. It's heavy and well-machined. -
I got their plank bending jig and like it. The only thing wrong with it is that I had to partially cover the peg slots on the bottom so the wooden dowels wouldn't fall through.

-
My shellac experience is also furniture + French polish. I can't really recommend any premixed shellac, as you are finding out. The good thing is, you can remove it easily.
-
I'm a huge Joe Walsh nerd. Your quote timing is on point. For only $25K+, you can own Joe's ARP 2500... https://www.juliensauctions.com/en/items/2103588/joe-walsh-arp-2500-synthesizer-and-barnstorm-wing-cabinet Sadly, I'm not bidding
-
Shaped the false stem, and attached the first two side cleats.
- 45 replies
-
- 6
-
-
- Dory
- Lowell Grand Banks Dory
- (and 3 more)
-
Half Hull Planking Kit
LoydB replied to DGraley's topic in Building, Framing, Planking and plating a ships hull and deck
This is my next kit, where are you seeing problems? Thanks. -
That came out really nice, great work!
- 90 replies
-
- 2
-

-
-
- Friendship Sloop
- bluejacket shipcrafters
- (and 1 more)
-
Starcraft Adjutant AI by yvesvidal - 1/6 - RESIN/PLASTIC
LoydB replied to yvesvidal's topic in Non-ship/categorised builds
Following, very cool project. I need to install a new extruder & hot end on my PLA printer, this is motivating. -
Good 'Hobby Quality' Metal Lathes
LoydB replied to tmj's topic in Modeling tools and Workshop Equipment
I love my Sherline. -
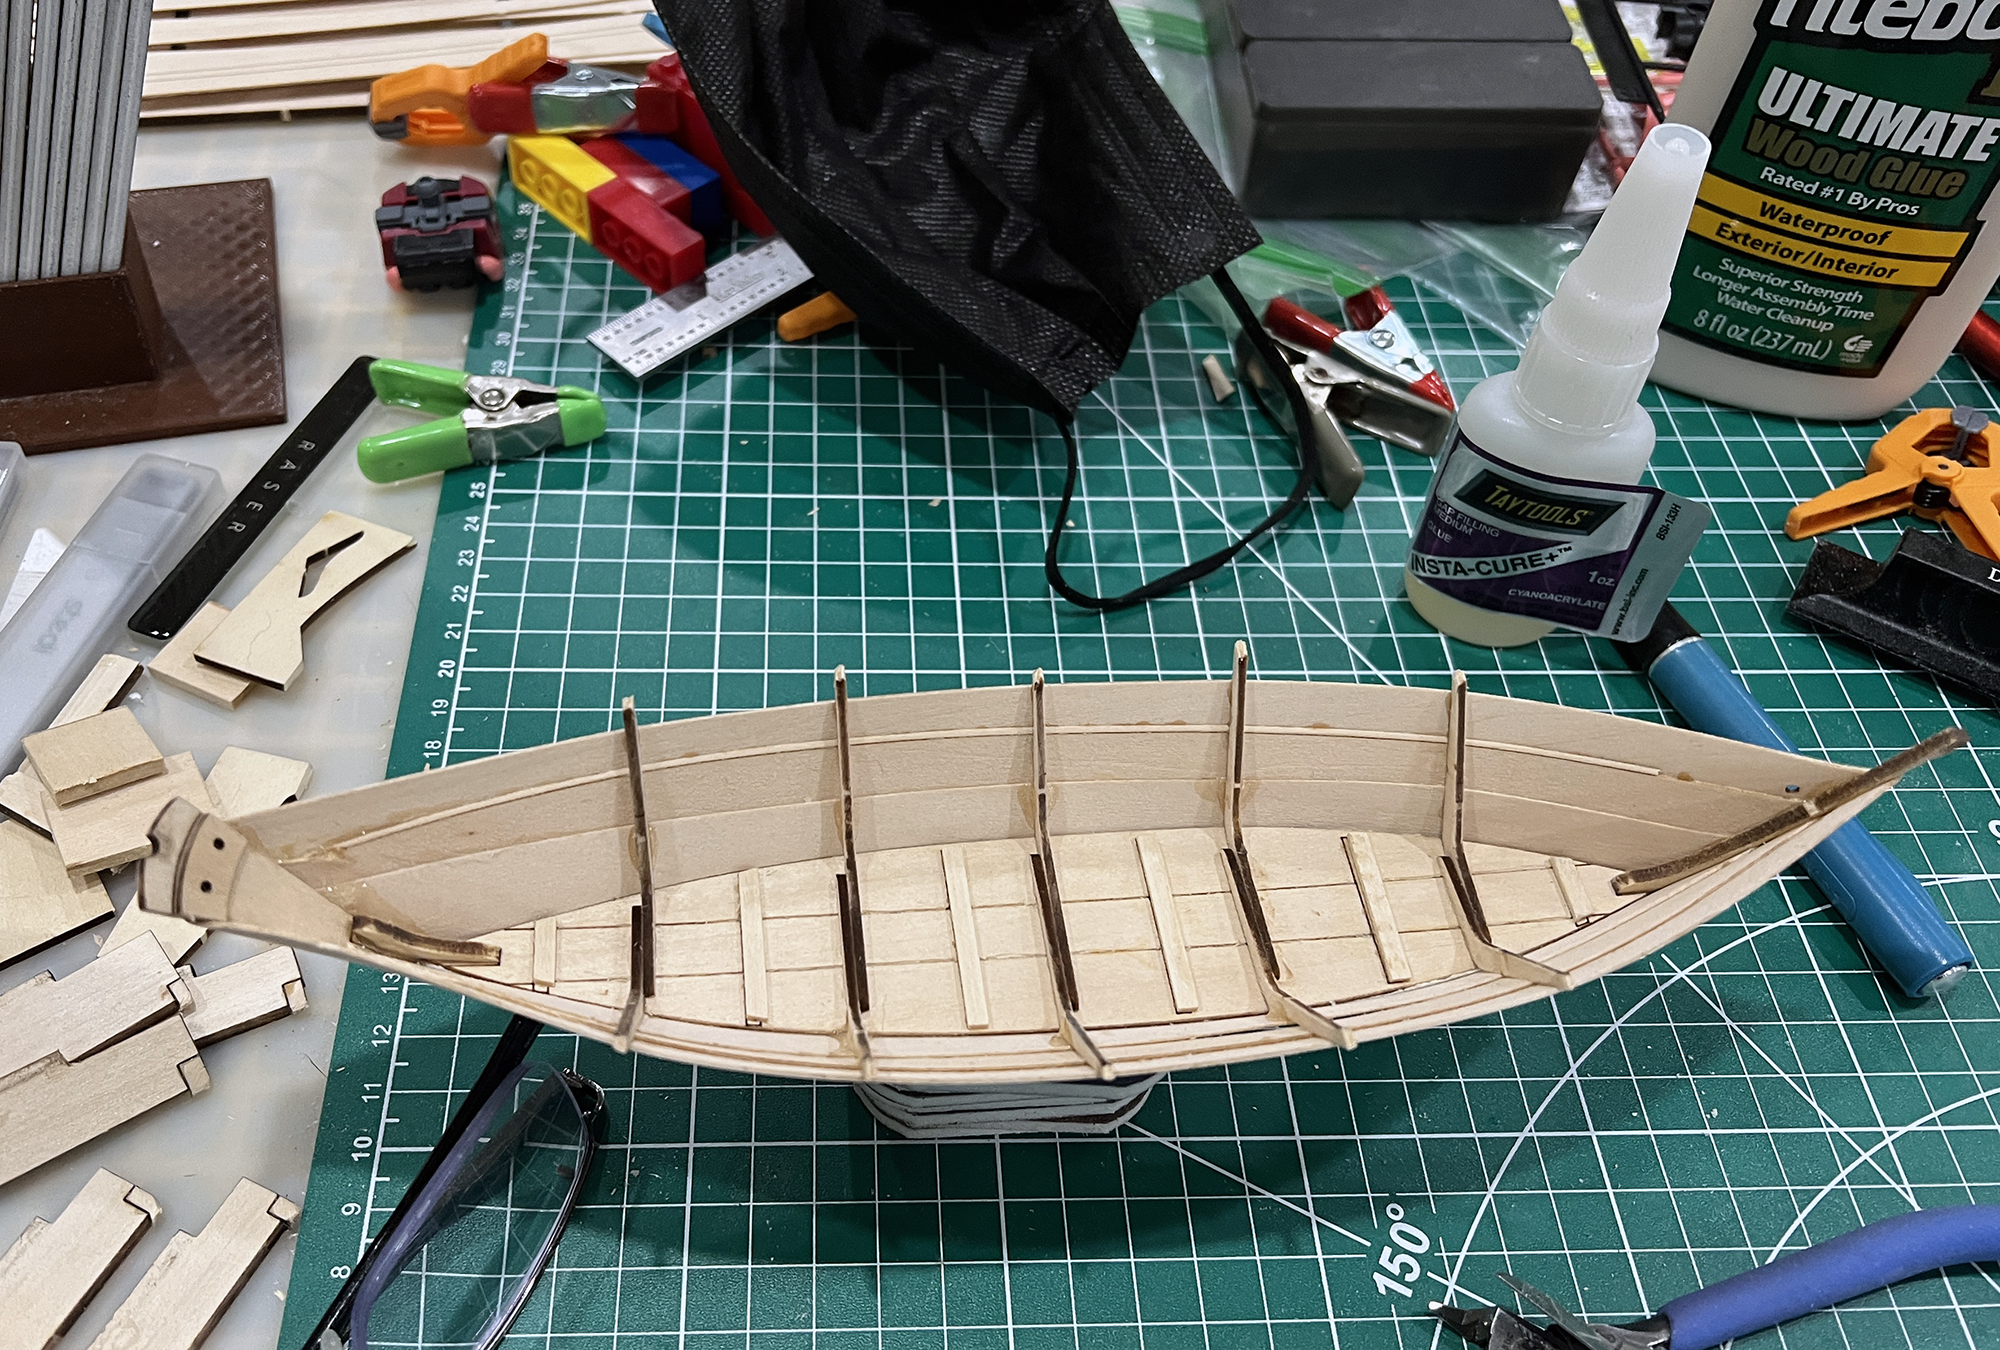
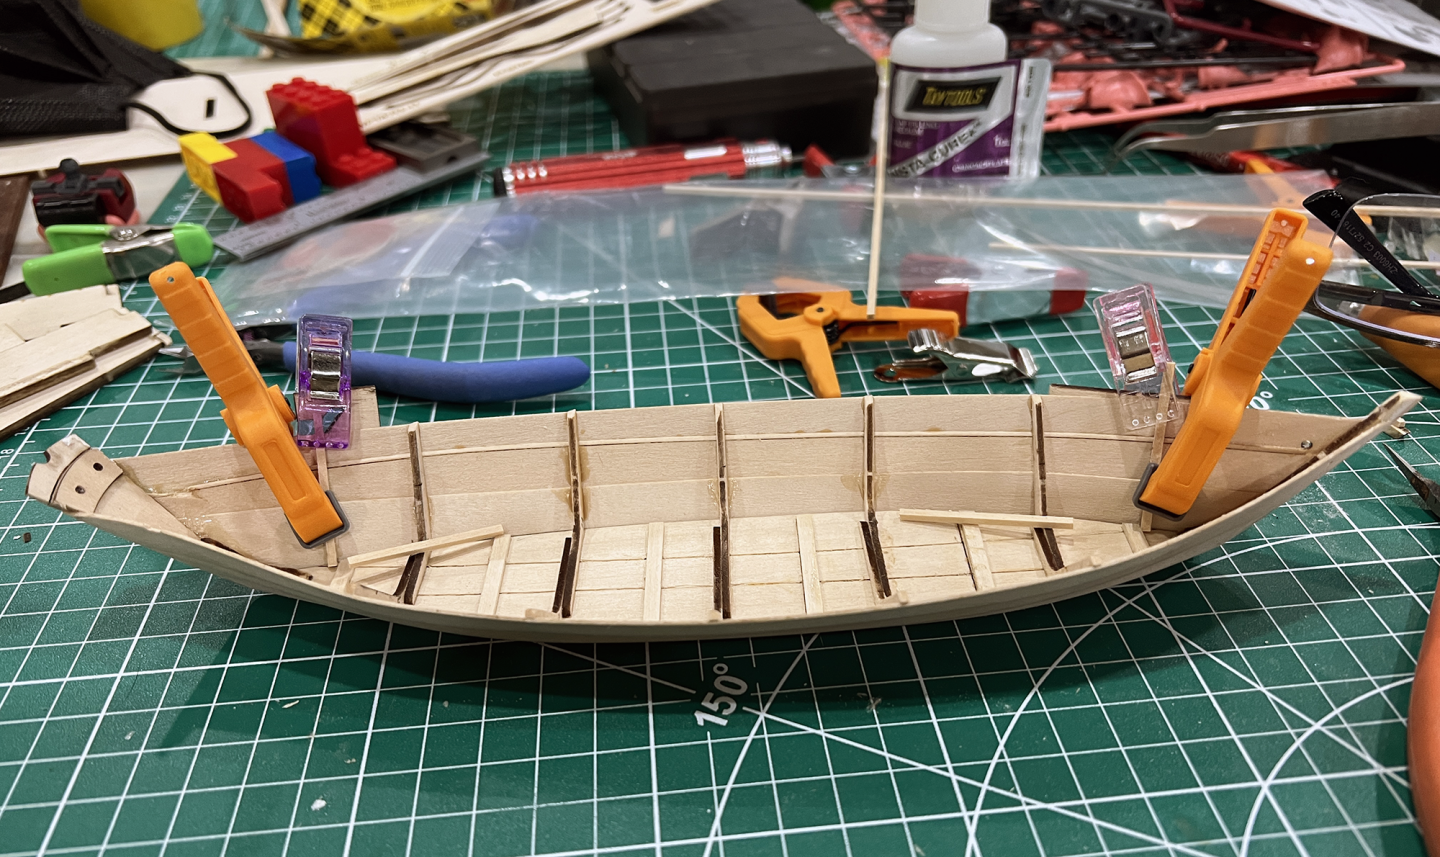
After getting it off the stand, realized there were a few places that the plank didn't completely touch the frame, so touched those up. Plus added the bow strip. I'm just guessing on which thickness of wood to use, as the instructions don't mention it and I don't see a plan view that specifies.

- 45 replies
-
- 5
-
-
- Dory
- Lowell Grand Banks Dory
- (and 3 more)
-
This is the main reason I'm not doing the Pram that is the next step of the Shipwright set, that crazy thin wood. I'm doing the NRG Half Hull instead, I think that it will be a better use of my time as far as preparing me for the Sherbourne.
- 45 replies
-
- 1
-
-
- Dory
- Lowell Grand Banks Dory
- (and 3 more)
-
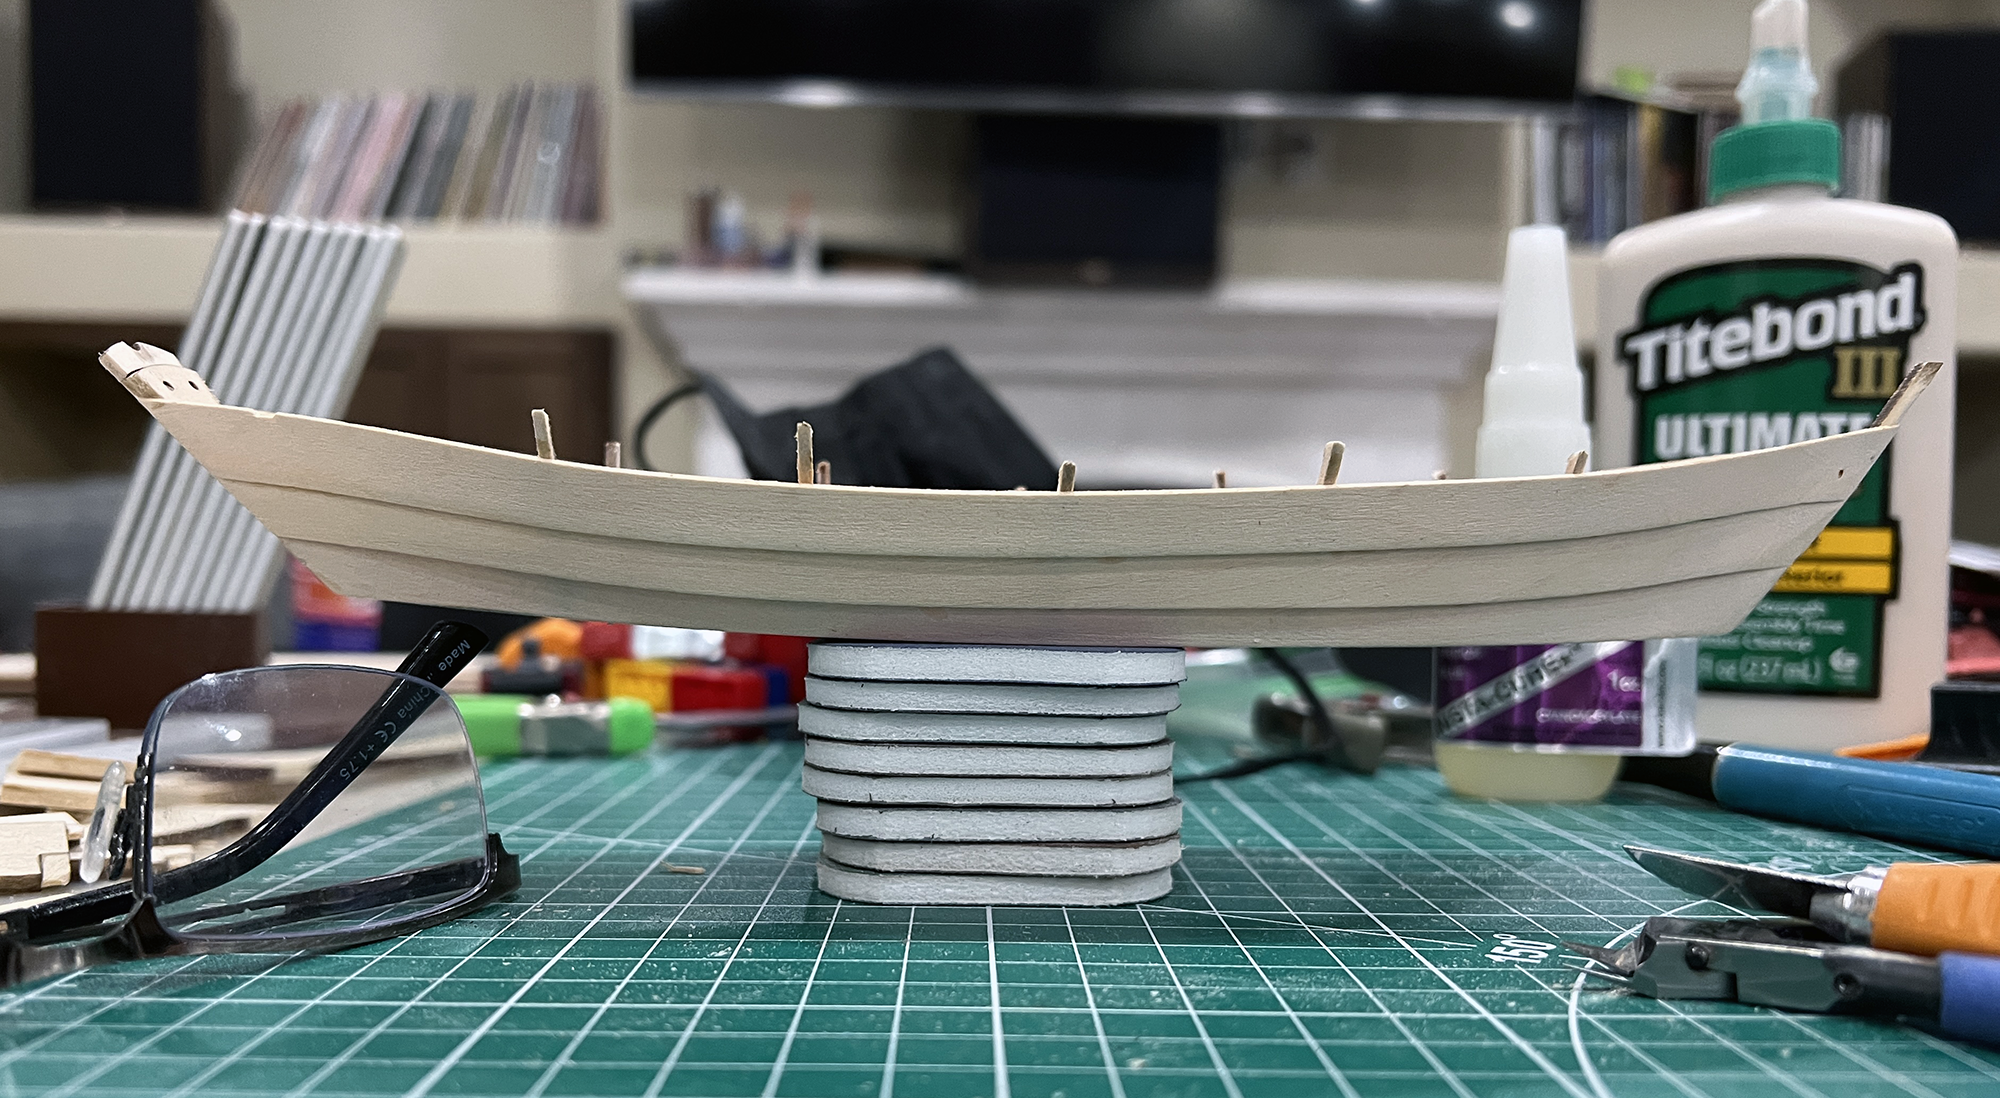
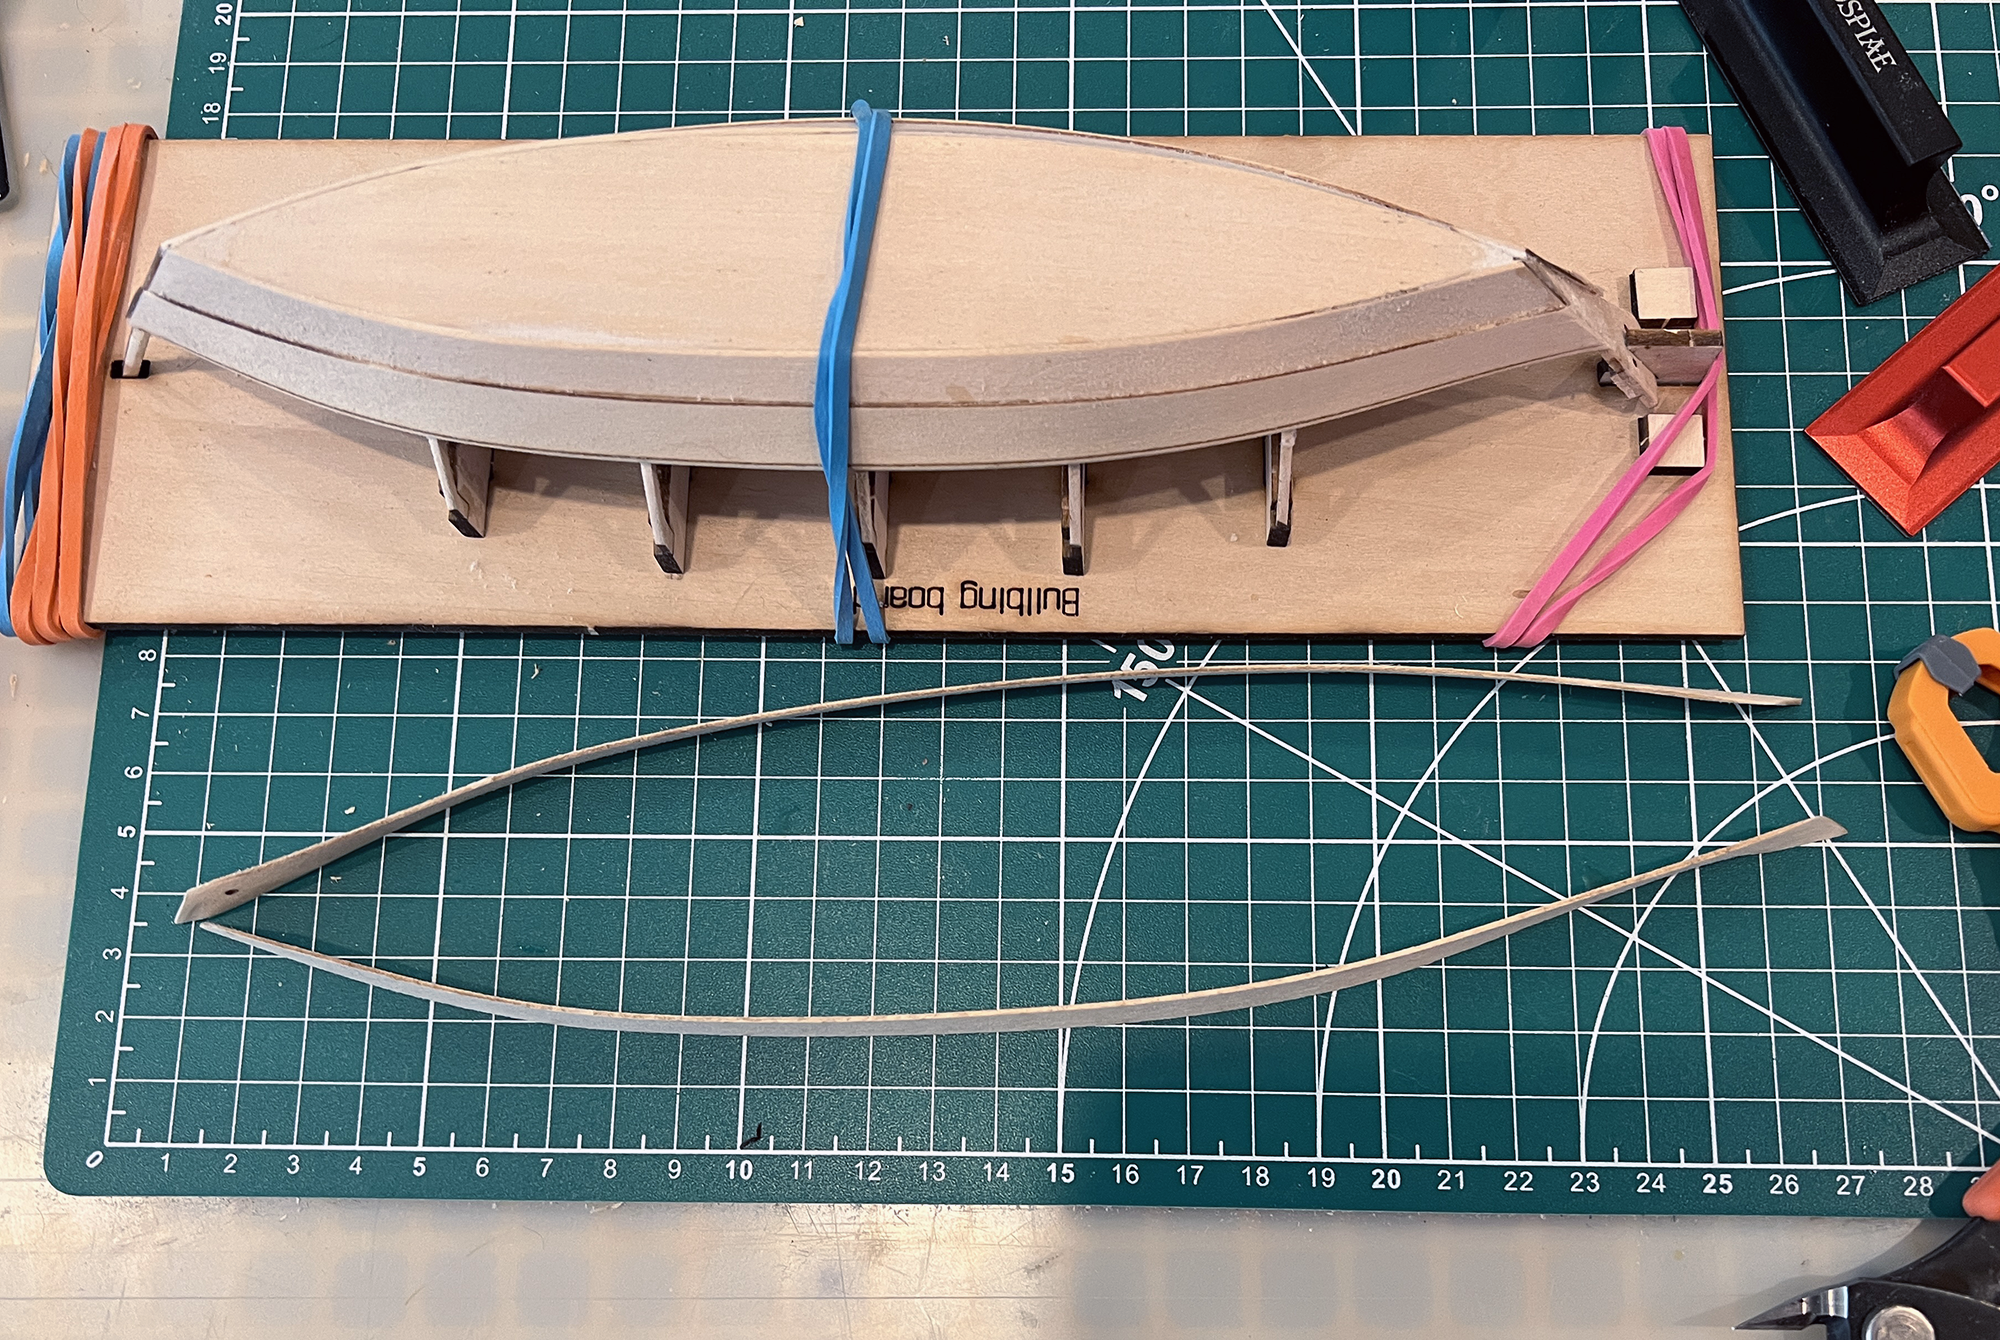
Ok, finished off the sheers last night and released from the frame. The exterior has been sanded through the entire micromesh set. ANYONE READING THIS LOG IN THE FUTURE PRIOR TO BUILDING: The planking is incredibly thin/delicate, and using clamps on it is a crapshoot at the bow and stern. It's mostly not visible from the exterior, but the interior view shows plainly where breakage occurred. What I eventually did was use superglue to tack down the plank on the bow, just using finger pressure to hold until it sets. Then wood glue for the rest, except the last one on the stern, which was back to superglue.


- 45 replies
-
- 9
-
-
- Dory
- Lowell Grand Banks Dory
- (and 3 more)
-
Thanks for all the detail on the planking.
-
HMS Beagle by Tecko - OcCre - 1:60
LoydB replied to Tecko's topic in - Kit build logs for subjects built from 1801 - 1850
That base really brings home how freaking huge that is. Following. -
That came out beautifully. Nice work.
-
I love the Indefatigable box in the background looming over everything else in a threatening manner.