brunnels
-
Posts
337 -
Joined
Content Type
Profiles
Forums
Gallery
Events
Everything posted by brunnels
-
 Fantastic result, your rope coils look really good. I like the cannons on the quarter deck, I have been tinkering around with the idea of adding a couple myself just to give some to look at since most will be covered with the boats.
- 422 replies
-
- 1
-

-
- Vanguard Models
- Sphinx
- (and 1 more)
-
Looking great, I also had to fix a few broken feet on my deck beams, they are much more fragile than they look.
- 422 replies
-
- 1
-
-
- Vanguard Models
- Sphinx
- (and 1 more)
-
Buying Filler Blocks
brunnels replied to mikiek's topic in Building, Framing, Planking and plating a ships hull and deck
I don't know if you all have Hobby Lobby's down there in SE Texas, but I was in my local Hobby Lobby and they had a pretty good assortment of basswood blocks that I thought would be perfect sizes for filler blocks. -
I just want to clarify my post, I wasn't trying to make any assumptions that you all were ripping anyone off. I just felt that at the current price it might turn some prospective buyers away, and shipping prices can vary greatly depending on who you ship through.
-
Apologies for the confusion, I don't always know the terminology. I am referring to the lower yards that attach to the fore mast channels. These are what I am referring to but on the fore mast.
-
Not sure if there are two versions of the kit but I know there are multiple versions of the instructions, I believe I have the earlier version as well because the instructions aren't as complete as what is on the Instructions on the Vanguard website. Yes I am referring to the yards that hook onto the fore mast channel.
-
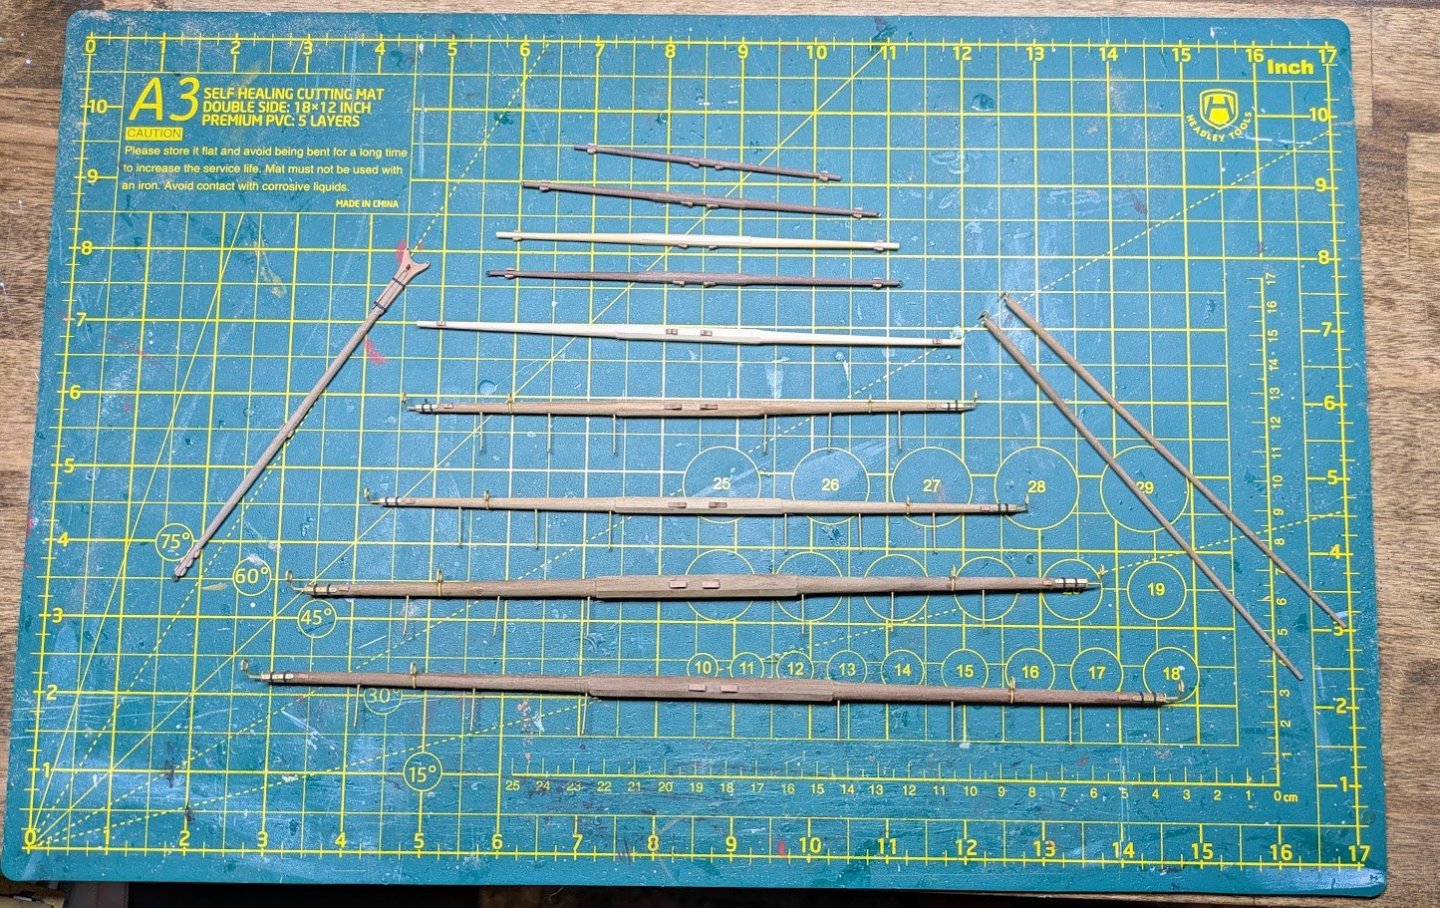
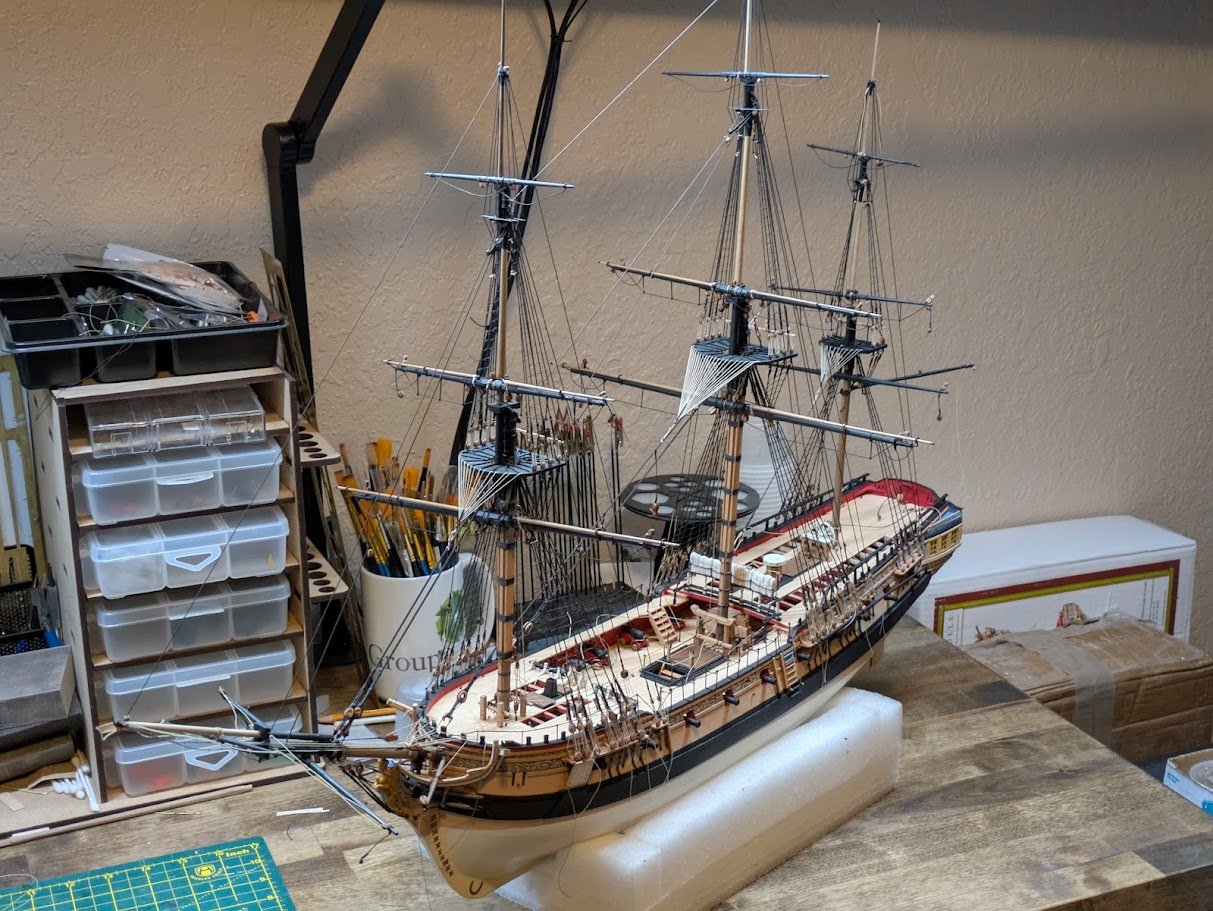
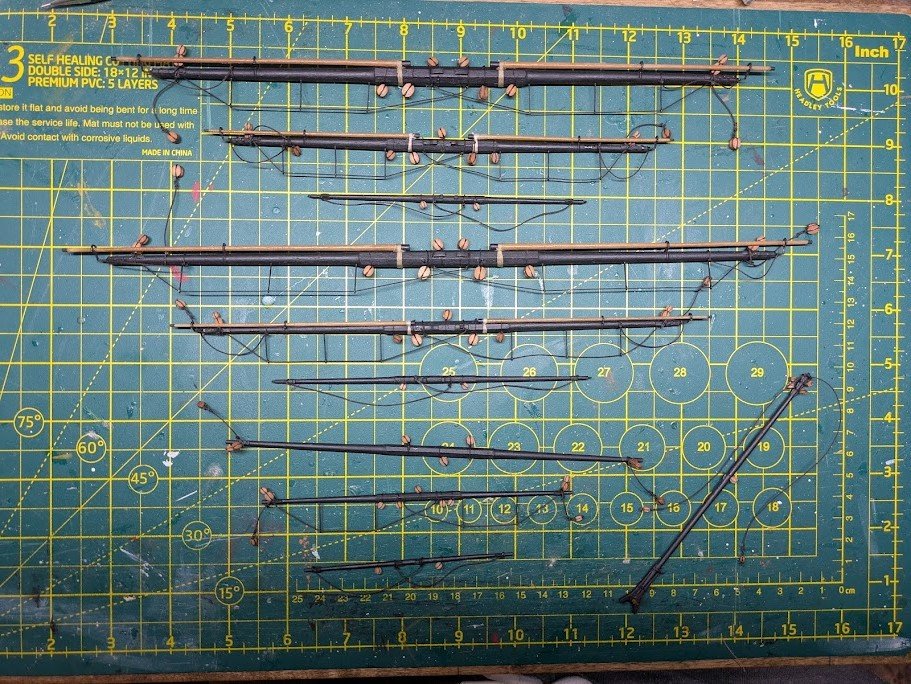
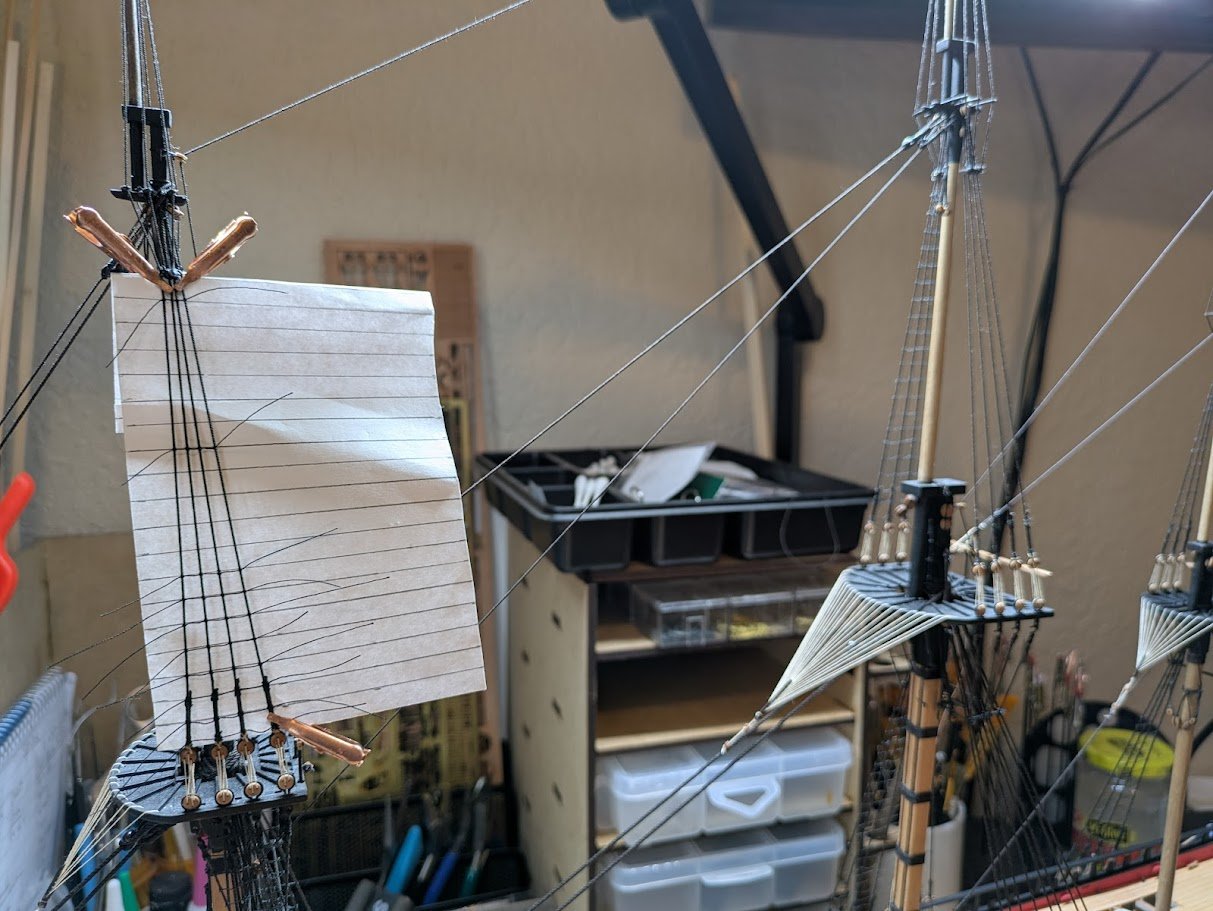
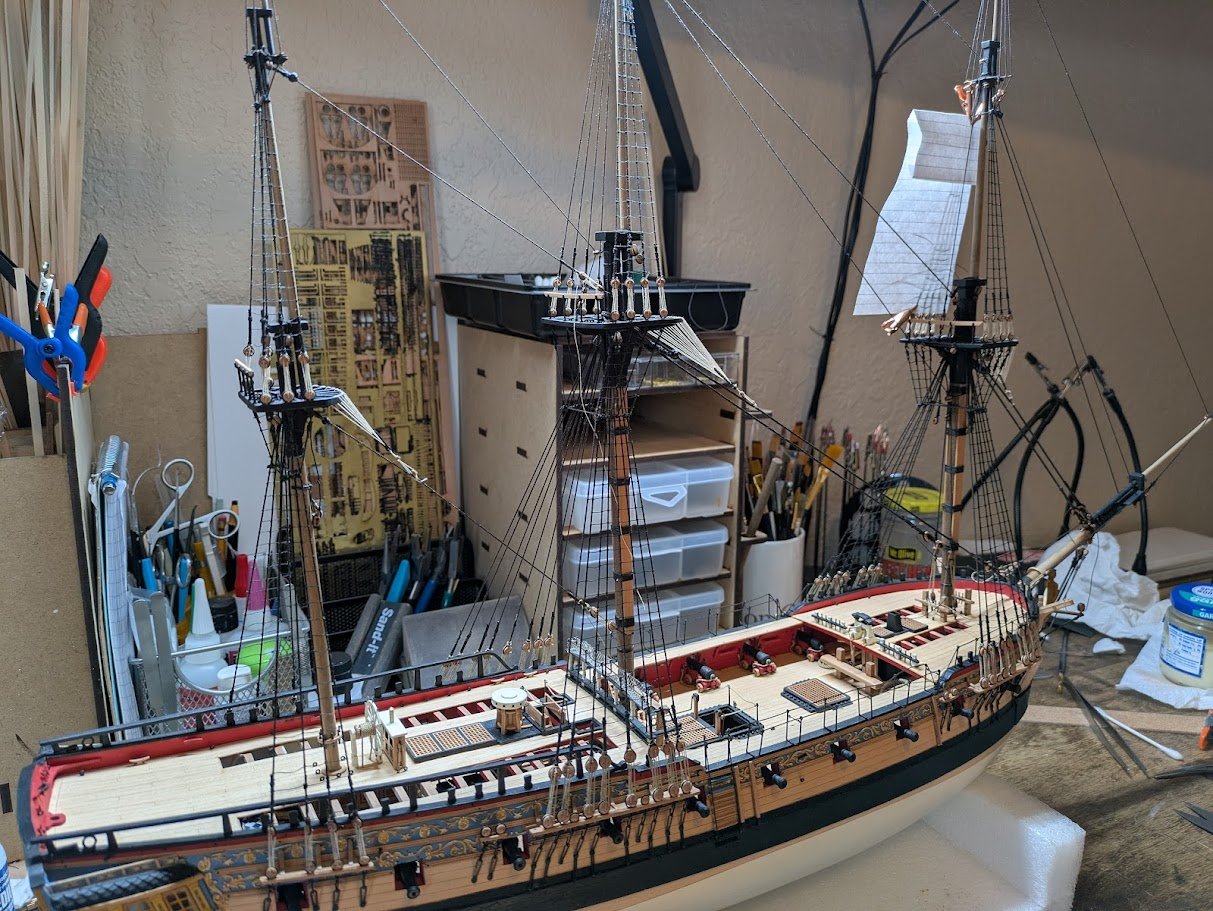
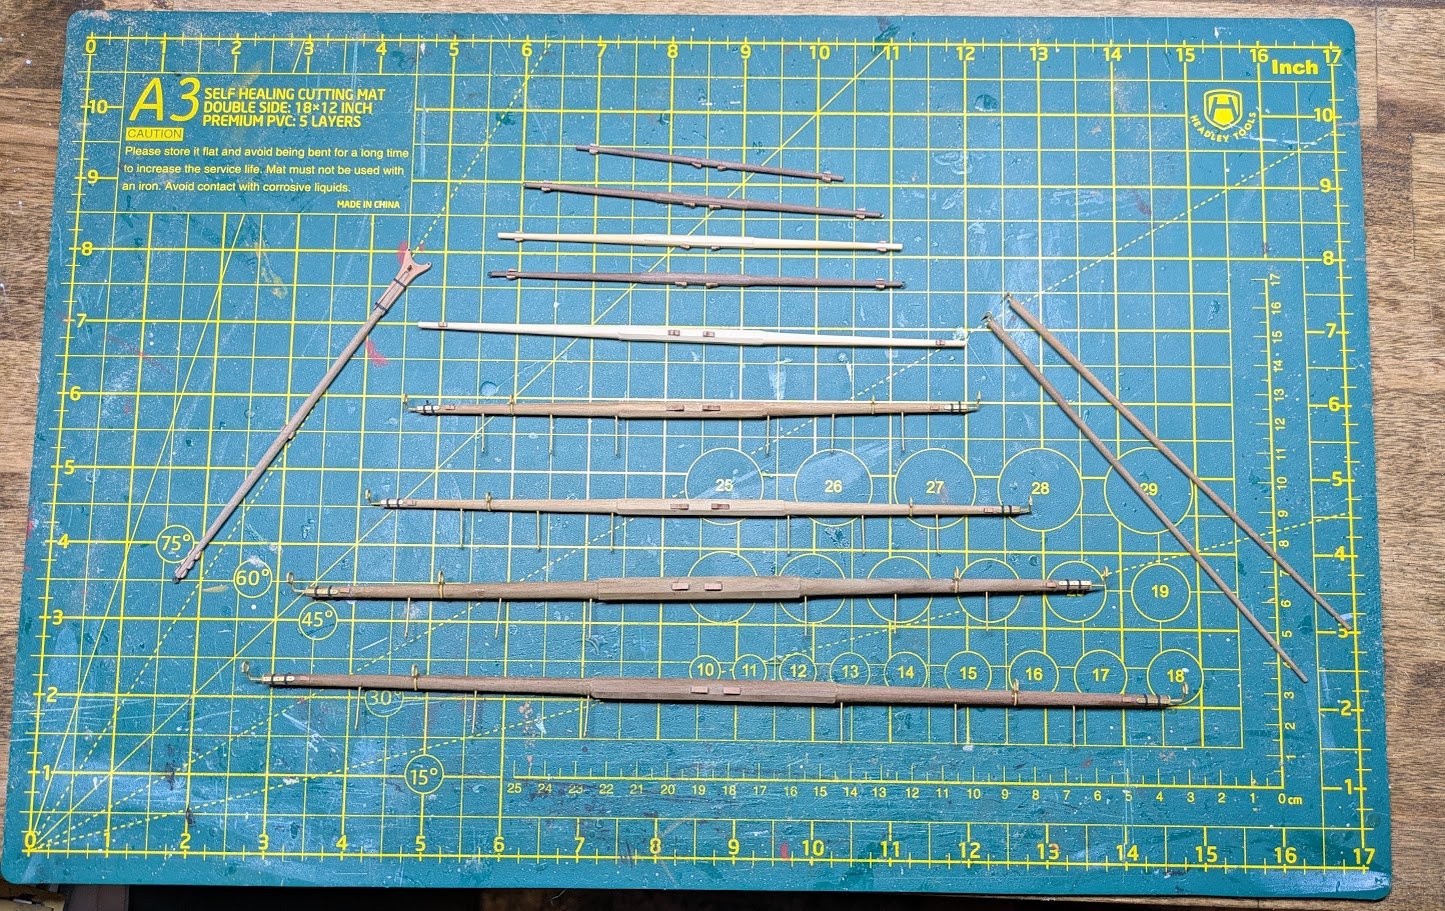
Yards I've been working on the yards for the last several weeks. Yards definitely took longer than I was expecting and my kit was short on a couple sizes of the dowel rods so my progress kept being halted. My local hardware store didn't carry walnut dowel, so I had to go with the basswood for a few which isn't a big deal as the yards were painted. Completed yards Yards are hung up, it took me the better part of the weekend to make the harnesses and get the yards on the ship. I started on rigging the lifts but my progress was halted as my kit didn't have enough of several of the blocks so I ordered some pear 3d resin blocks from Syren. Question on the fore studding sail yards The kit shows the dimensions and plans for the studding sail yards for the main mast, and comes with the hardware to install the main and foremast studding sail yards on the channels, but I don't see any dimensions or plans for the fore mast lower studding sail yards. Should these be on the ship? Am I overlooking them somewhere on the plan sheets? I don't see them on anyone else's build, but if the ship should have them I would like to put them on and will need to purchase more dowel.
-
I really don't want to make this thread too much about the shipping cost, I was just very surprised at the shipping price and nearly cancelled my order because of it, and others might consider doing the same. At that price the magazine is competing with actual reference books on my wish list. I decided to purchase to support the new magazine and NRG, but it might be hard to justify in the future. I know shipping prices are on the rise, but as a person who frequently ships stuff I can't imagine it costs that much to put a magazine in the mail in a envelope.
-
Ordered a copy, any way to lower shipping in the future? $8.50 is crazy high for mailing a magazine.
-
I guess it really depends on the subject, but personally I find weathering to look wrong on Military Age of Sail ships. Those ships were packed with men who spent the large majority of their work time on board doing nothing but maintaining the ship.
-
That yellow and black is starting to look really sharp, can't wait to see how it looks with the copper.
-
Always nice to see another Pegasus log, its a beautiful little ship that I always enjoy seeing.
- 16 replies
-
- 2
-
-
- Pegasus
- Victory Models
- (and 1 more)
-
My instructions say the lines should be black. Are yours different? I know mine is an earlier kit as the instructions don't have the rigging section in the instruction booklet like the New Instruction PDF online does.
.thumb.jpg.b9147902815aef905e53ec93b1e0c0c4.jpg)
- 422 replies
-
- 1
-
-
- Vanguard Models
- Sphinx
- (and 1 more)
-
I just left the pear as it came with some Wipe on Poly as a varnish.
-
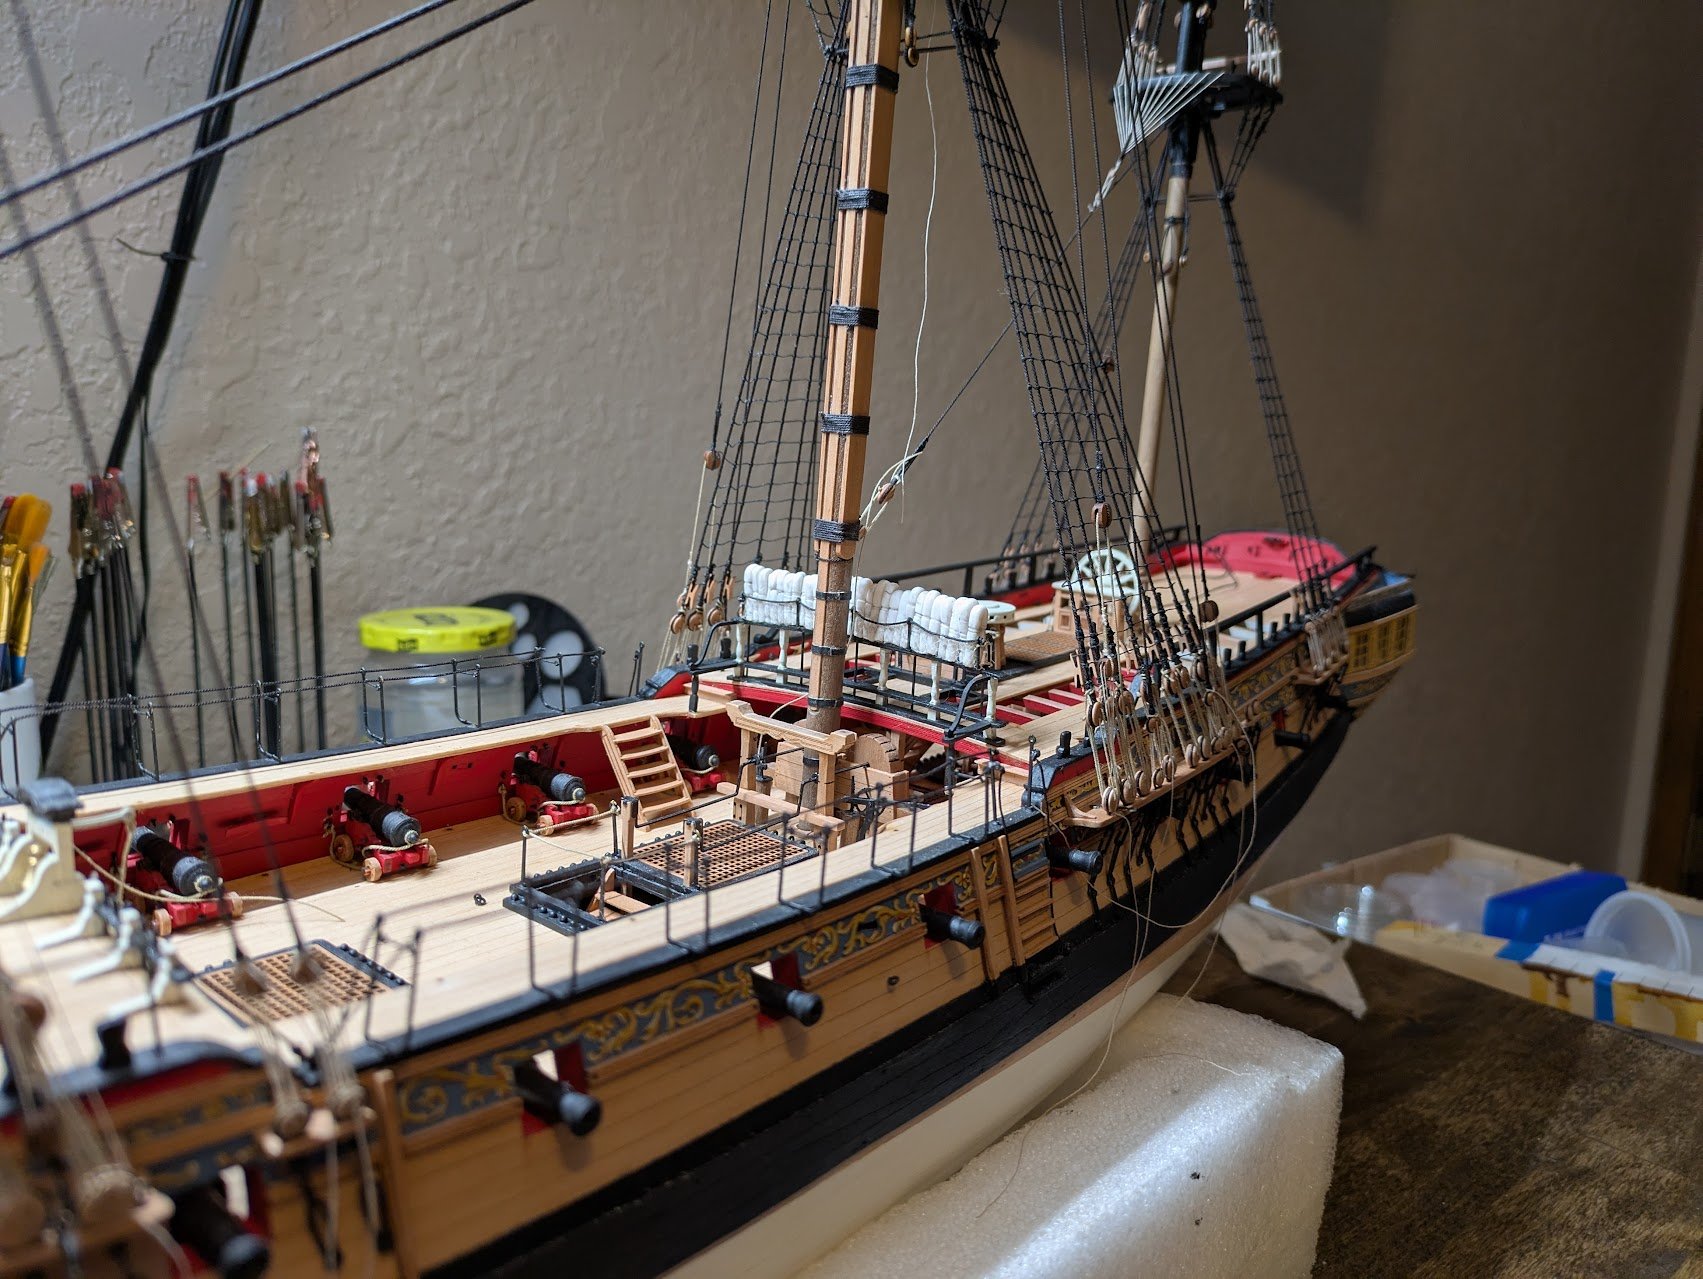
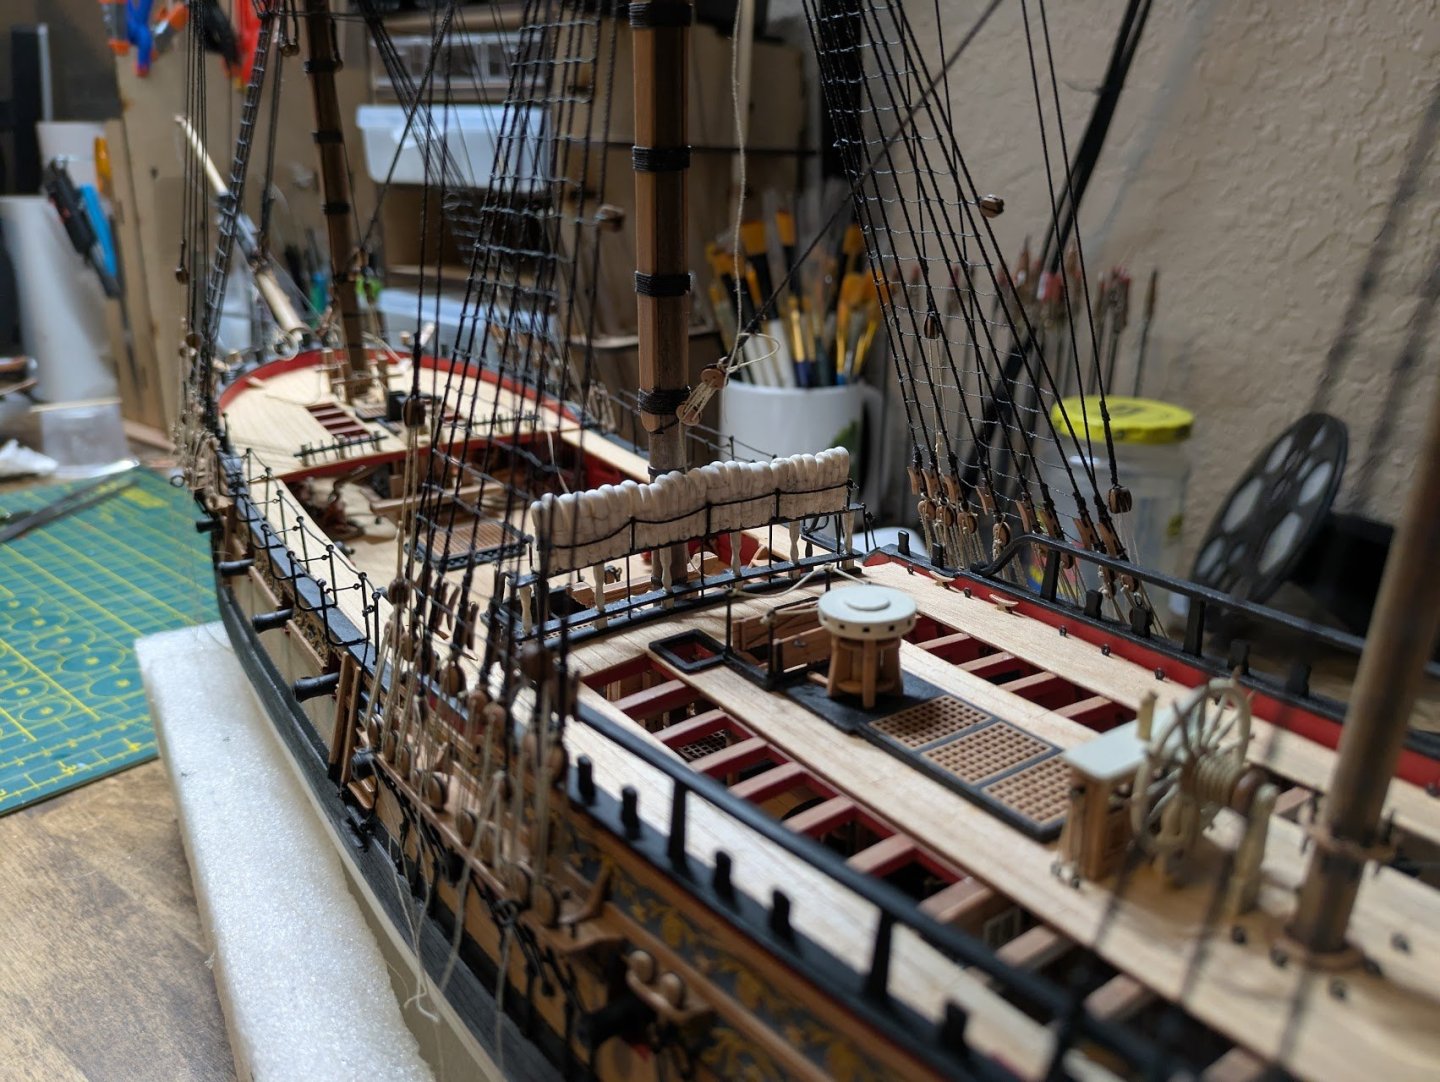
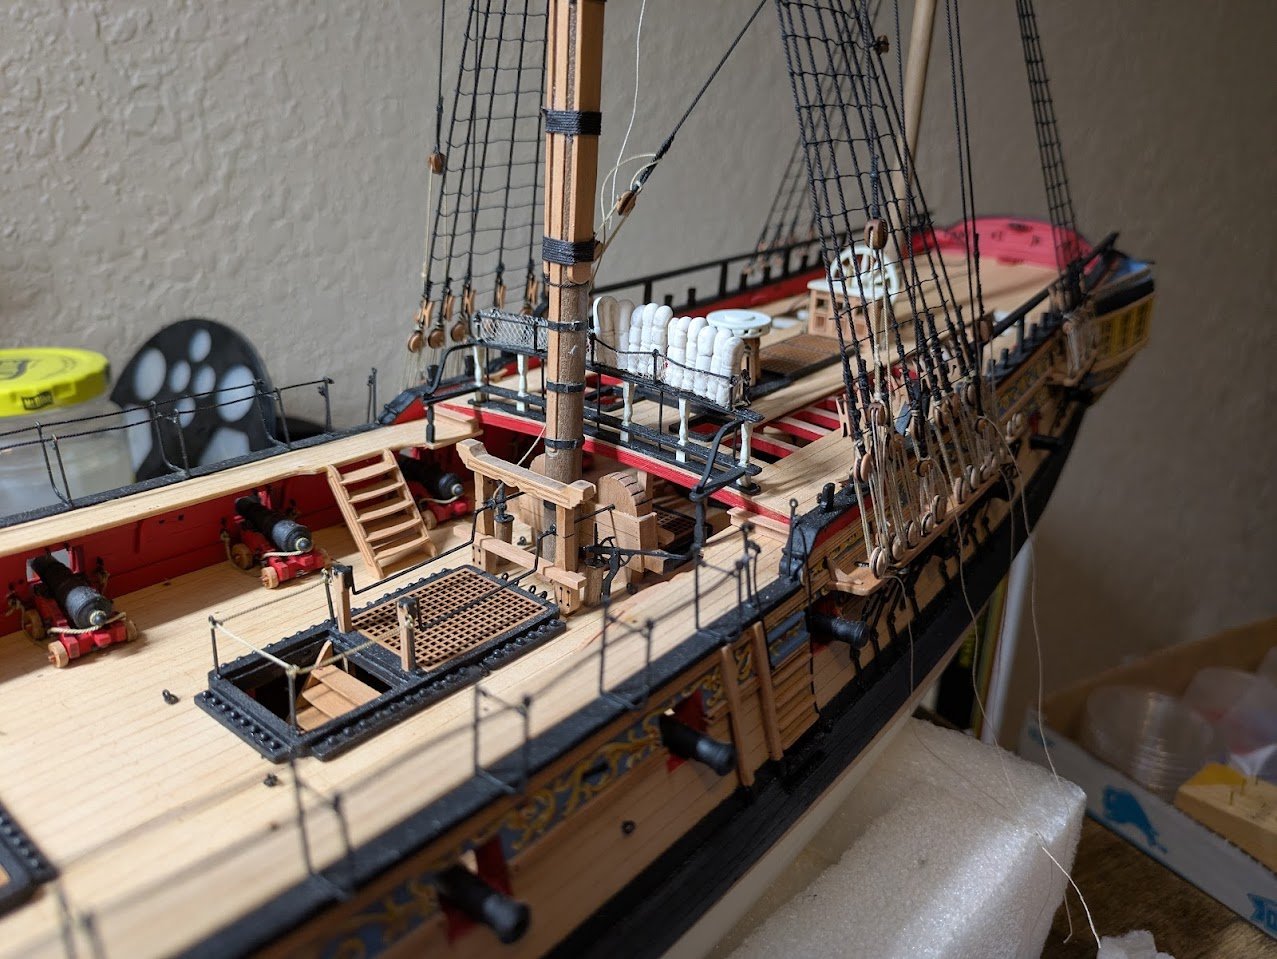
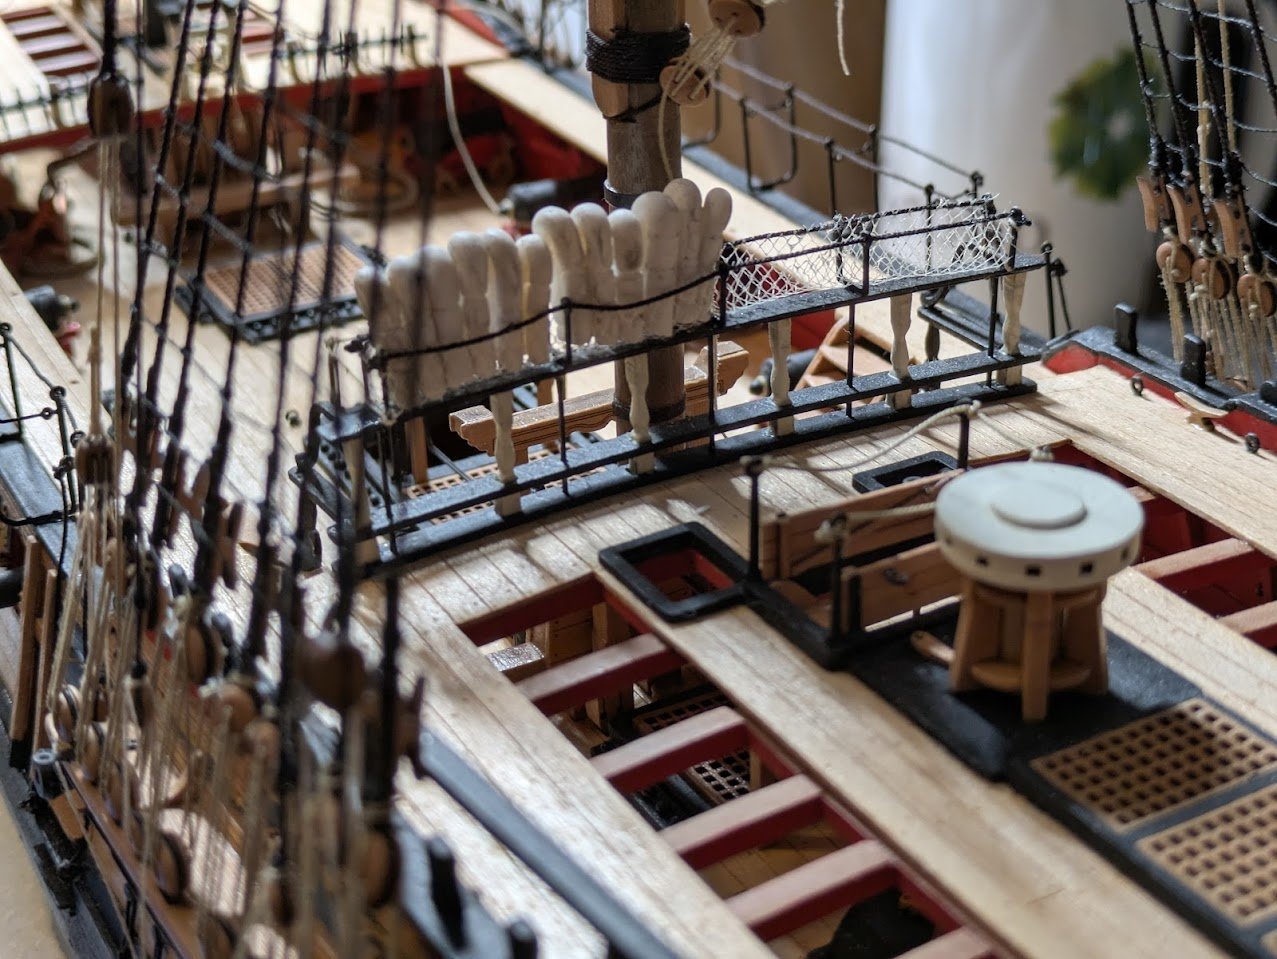
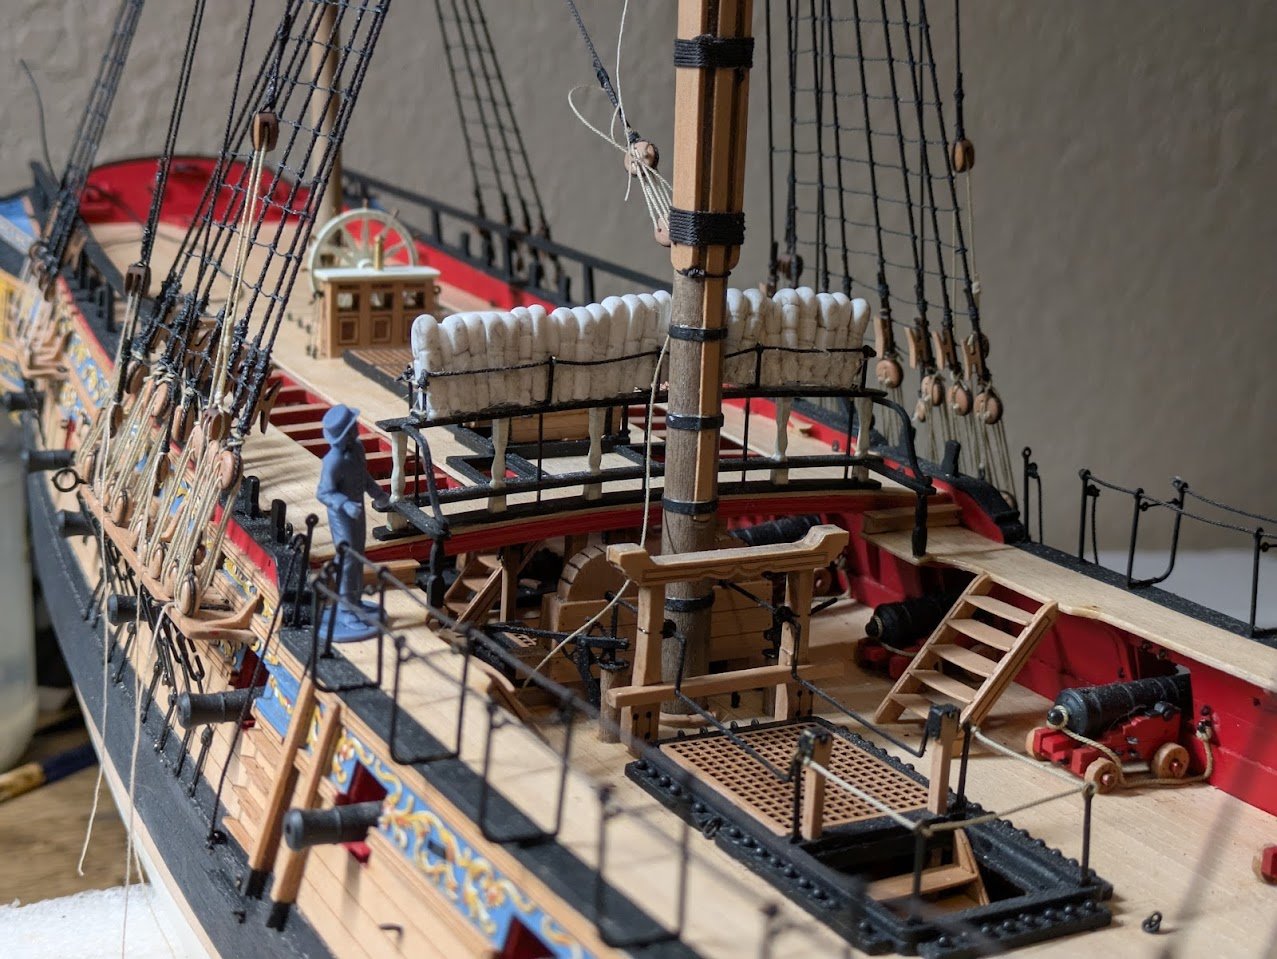
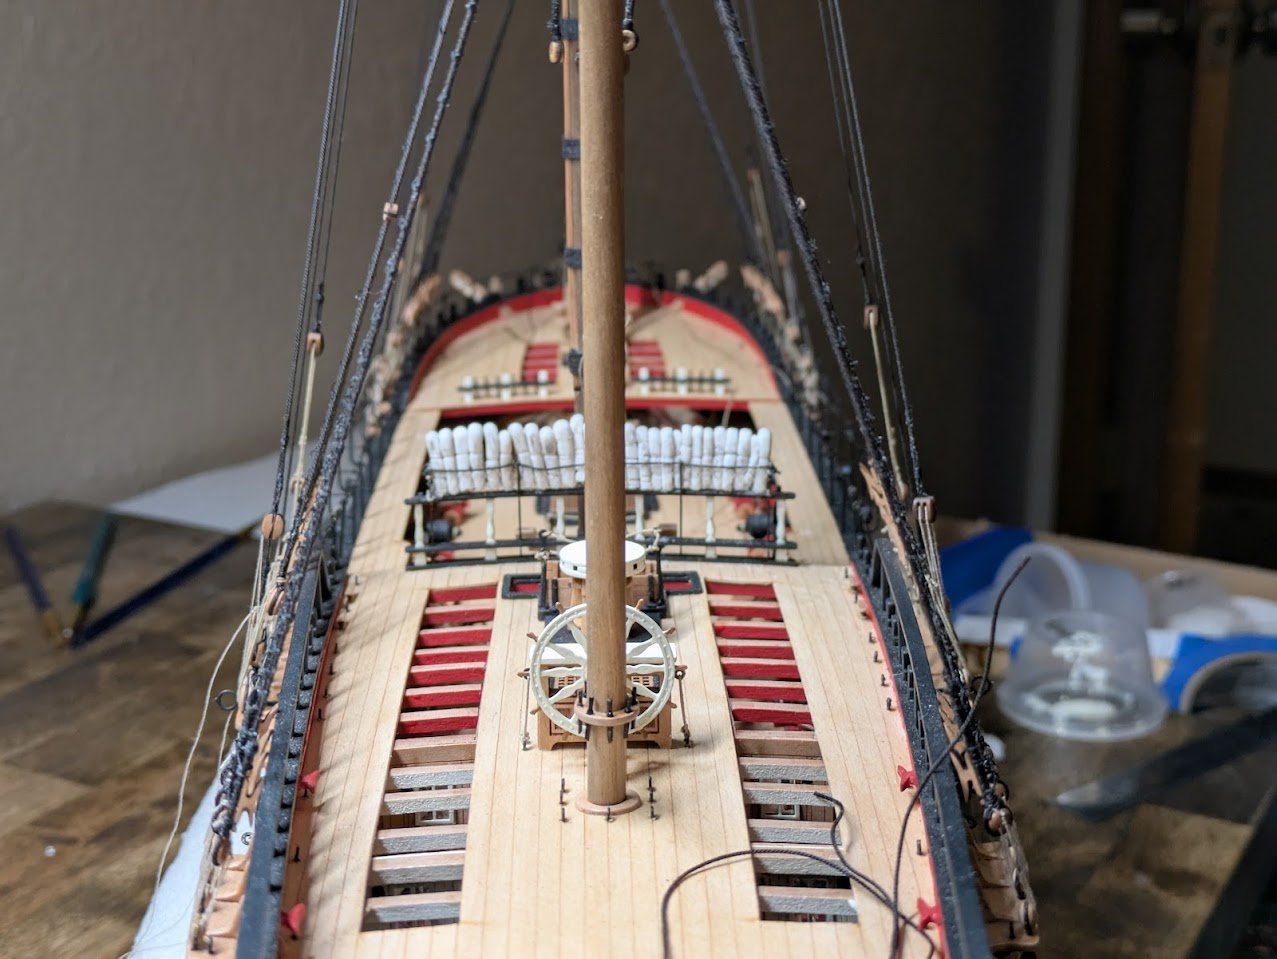
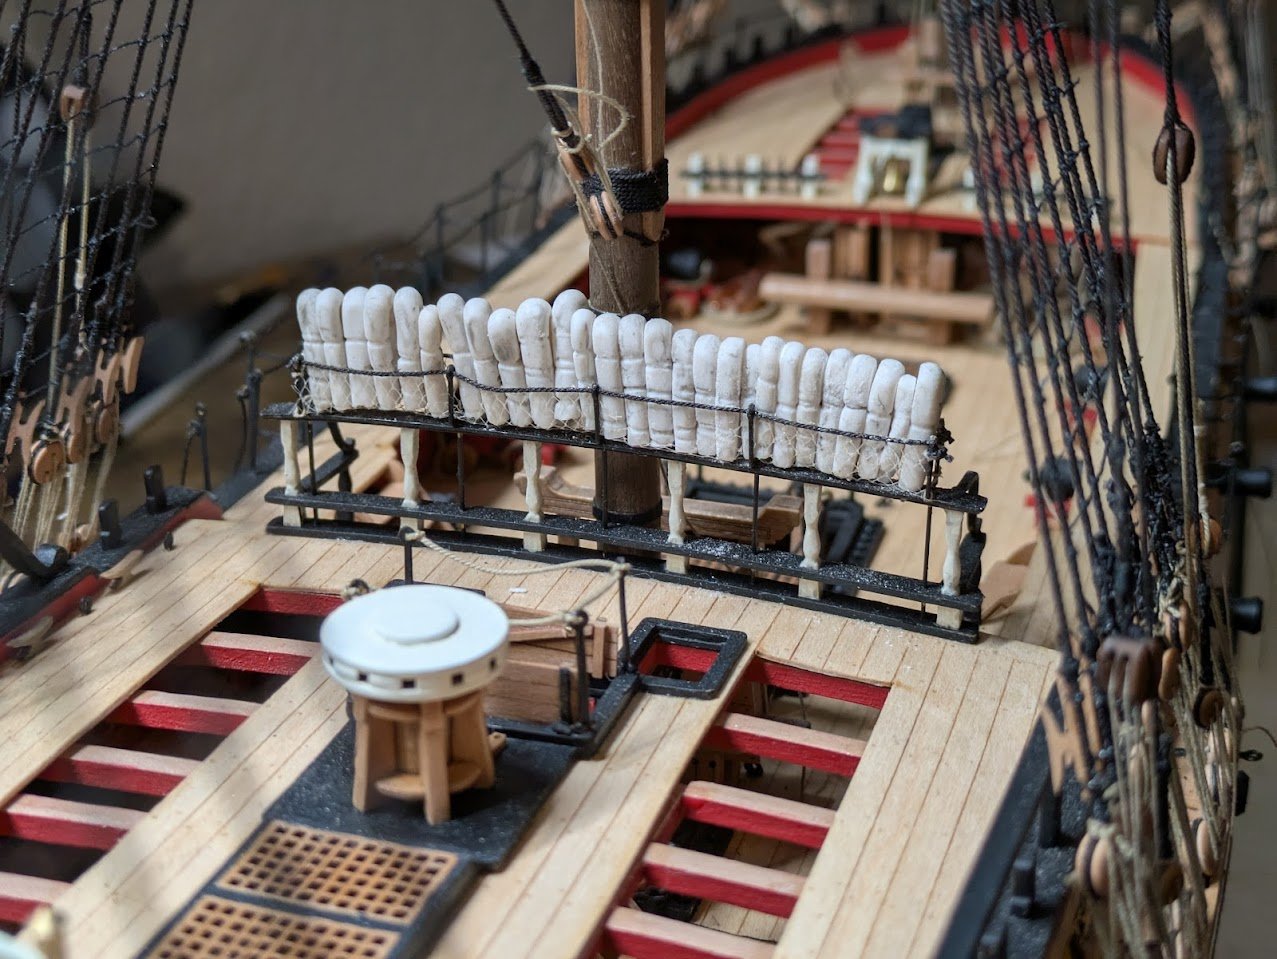
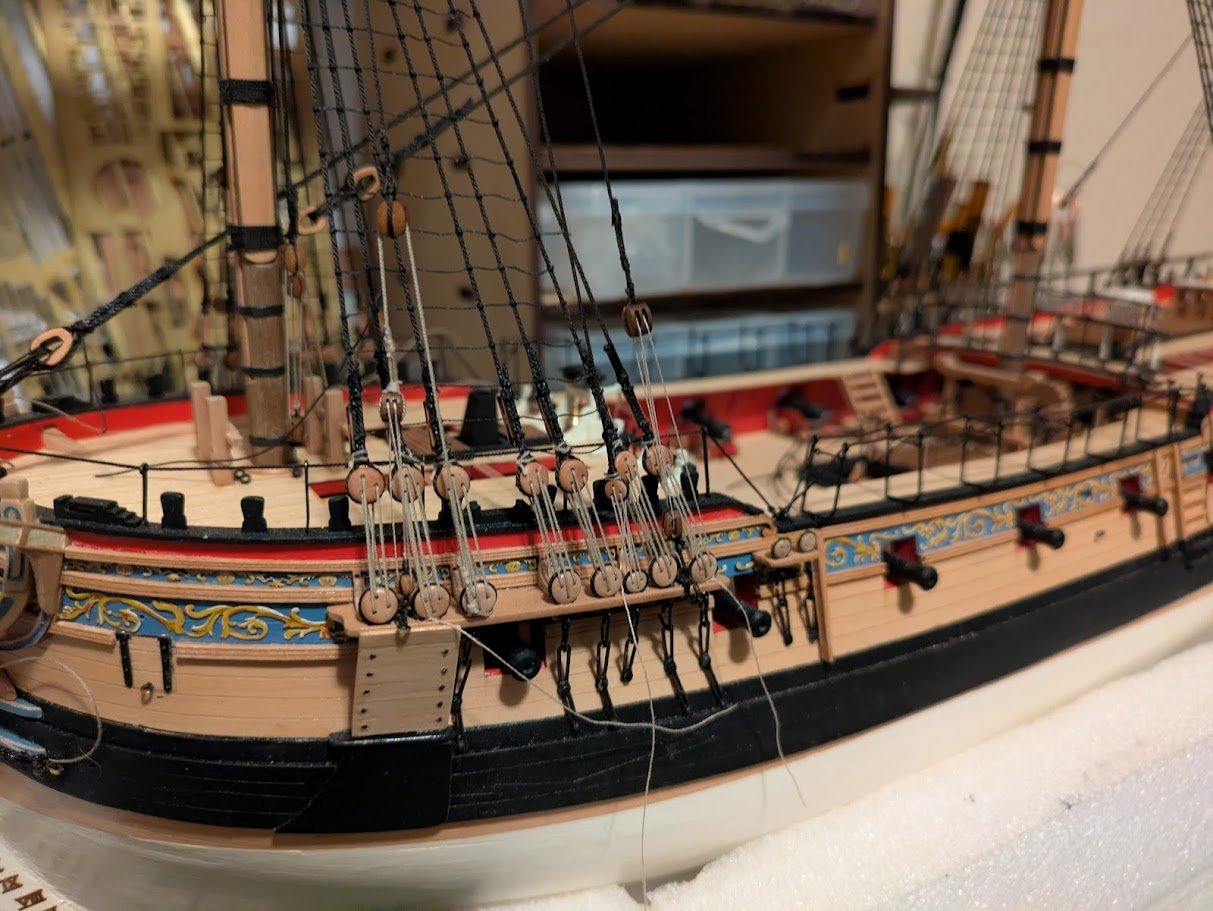
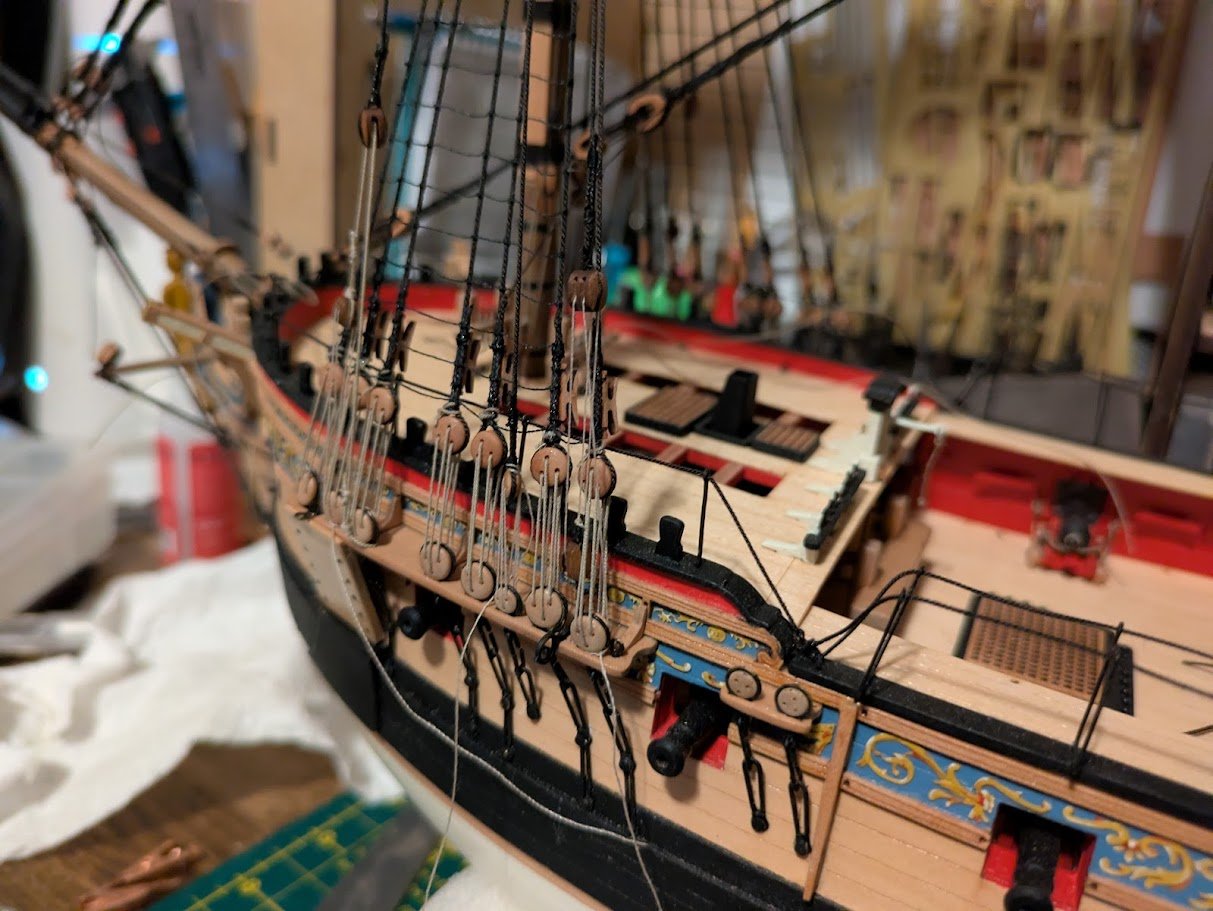
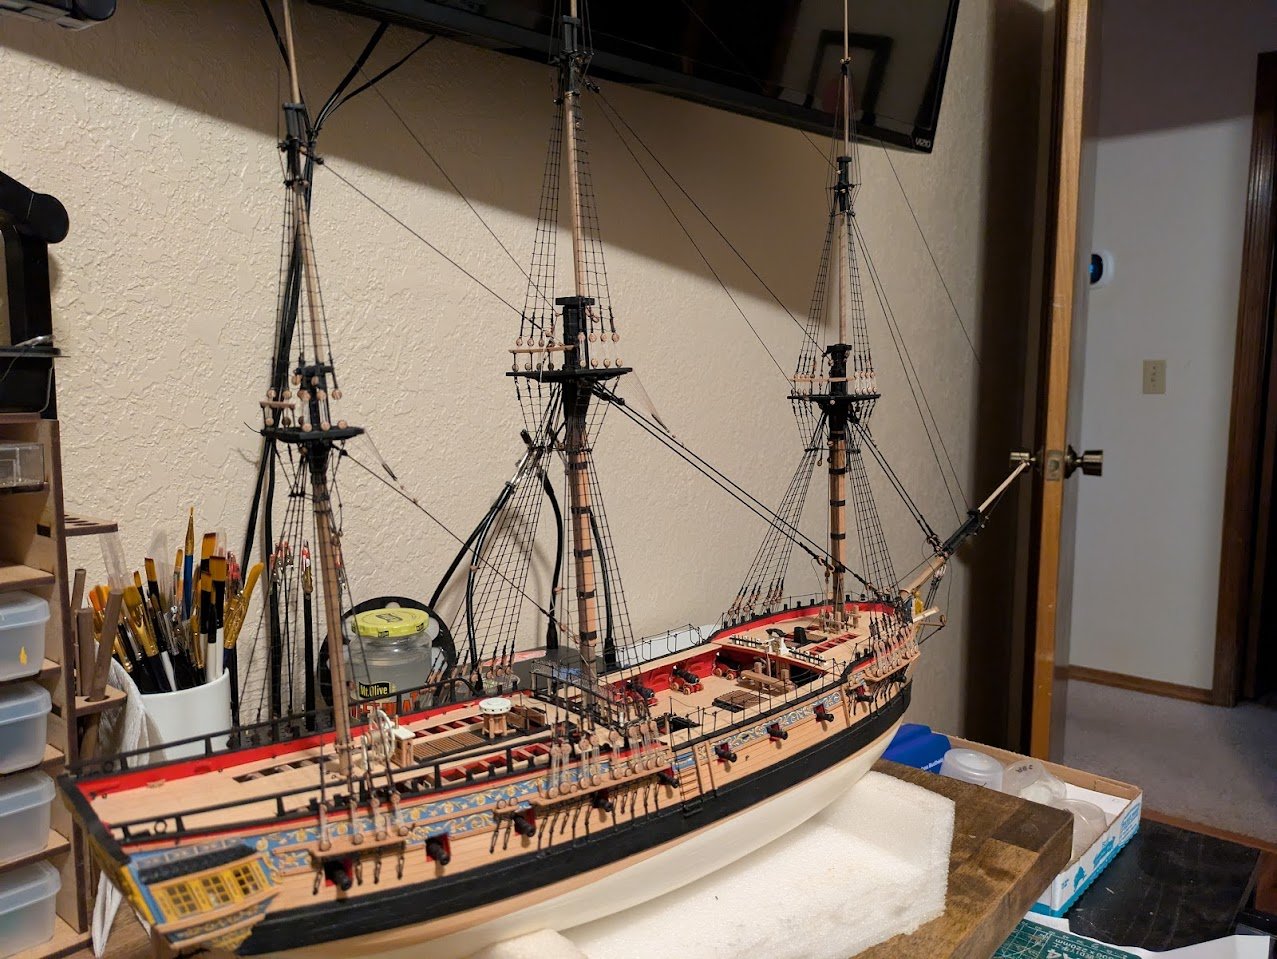
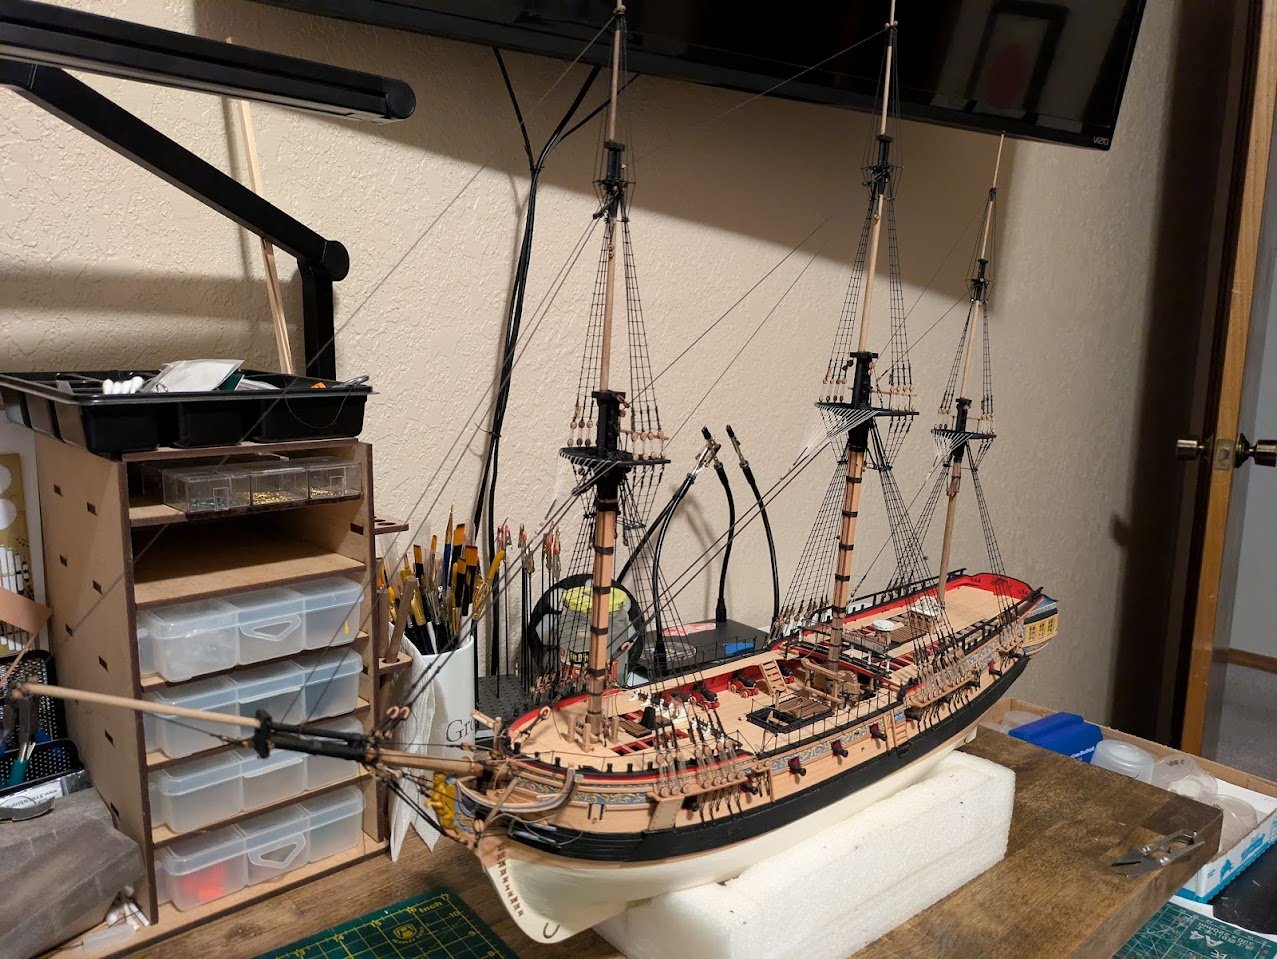
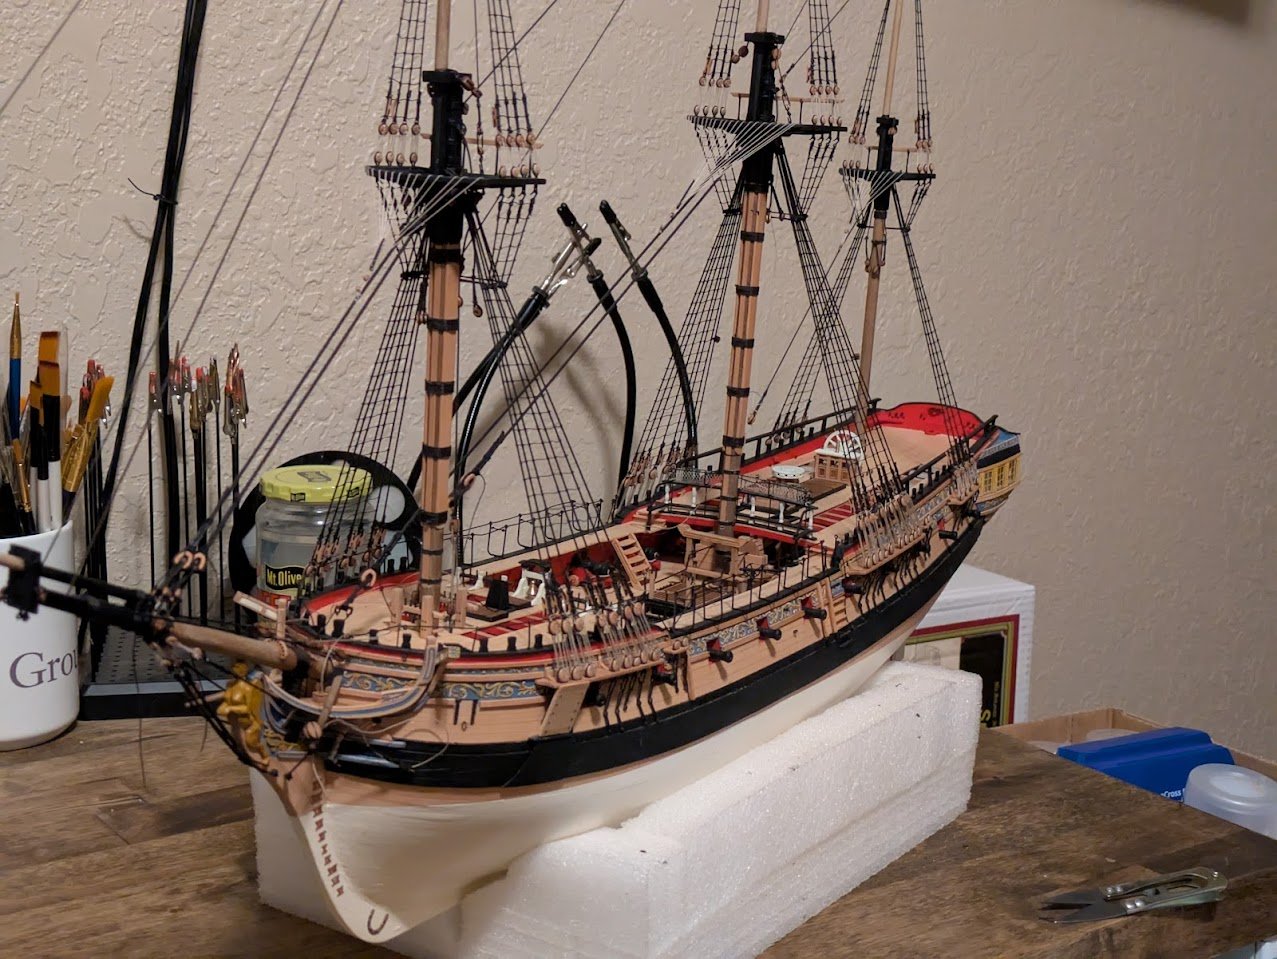
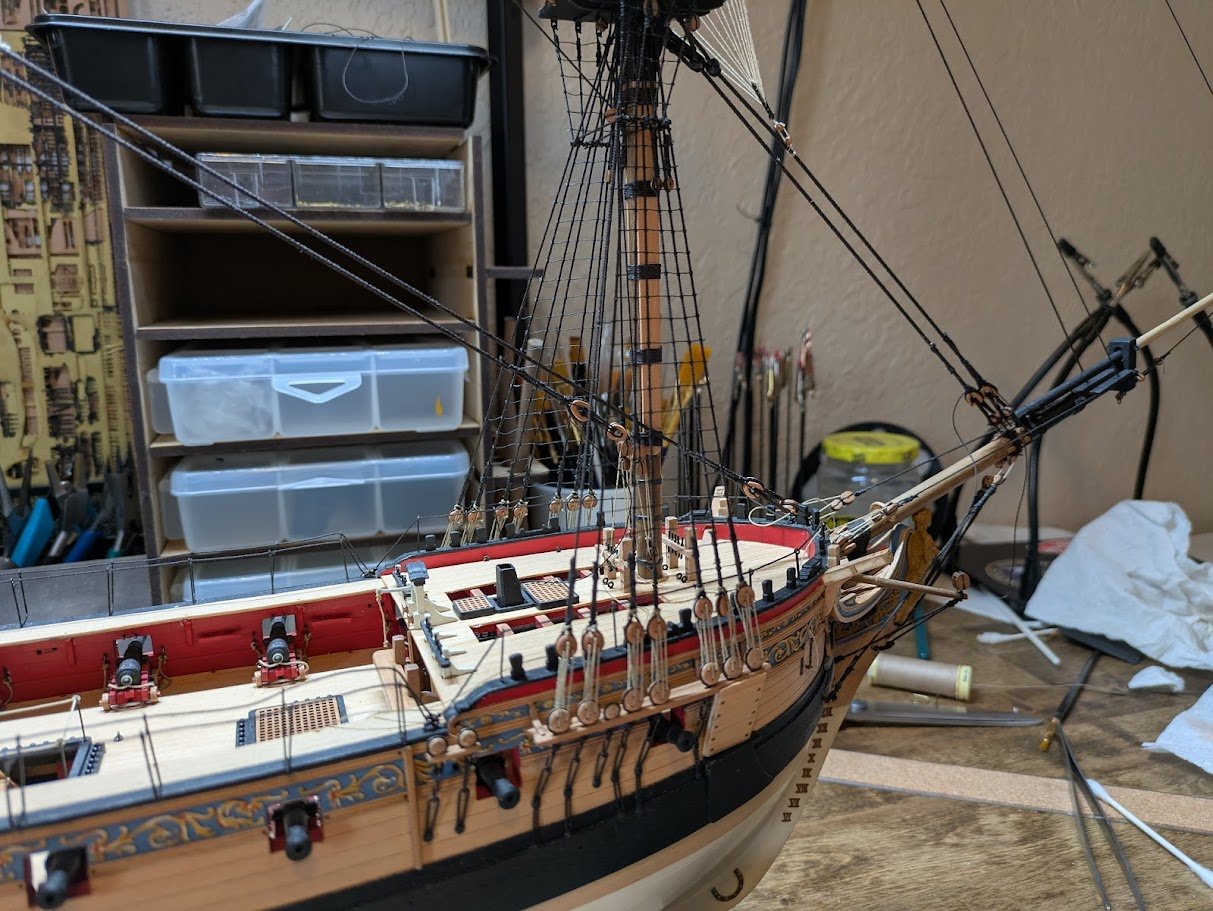
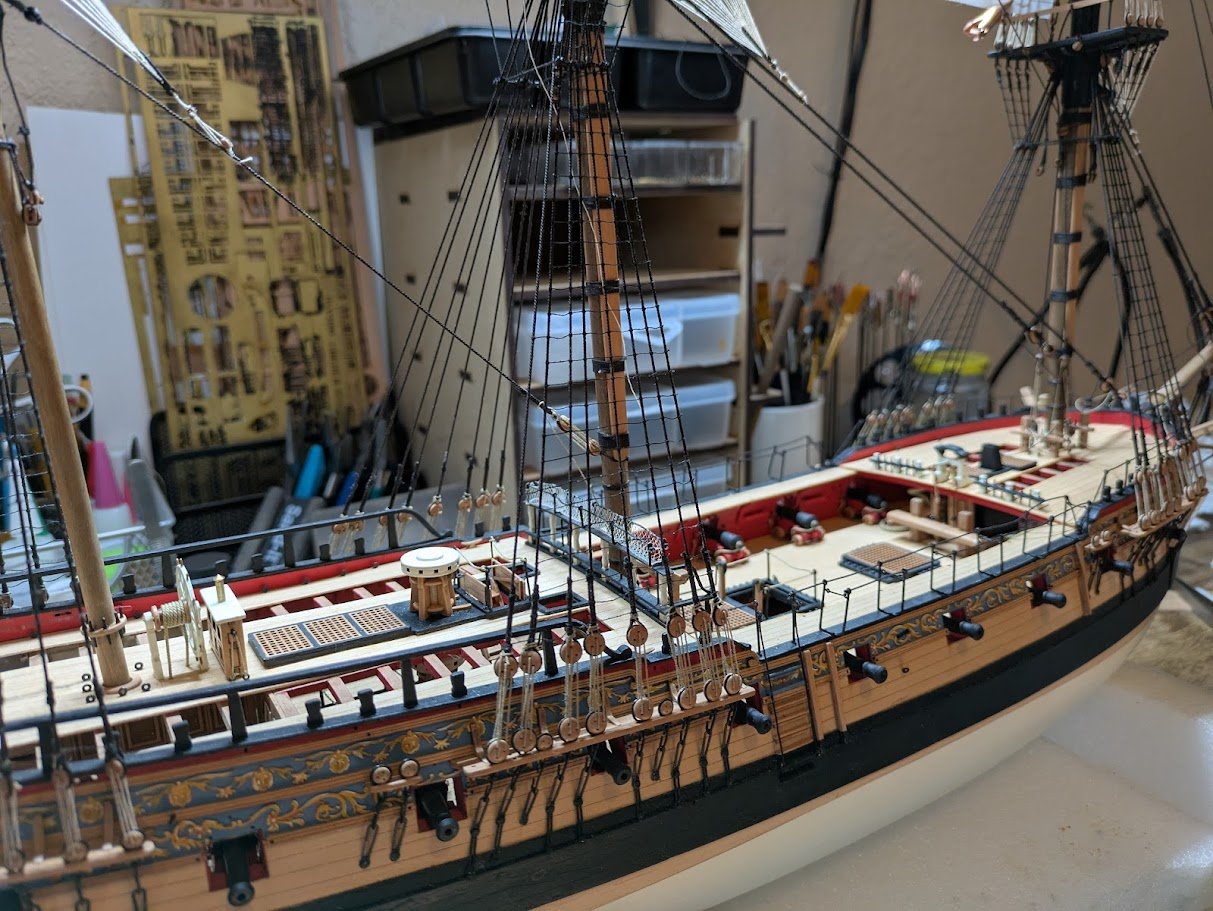
QD Hammocks: I finished sanding the sides of all the hammocks, after I removed a good majority of the gray wash that was blotchy. I think I am happy with the result and will probably move on. In the pictures they look much more grime ridden than they do in person, I think its the shadows from the masts and ropes making them look like that in the pics. As she now stands.

-
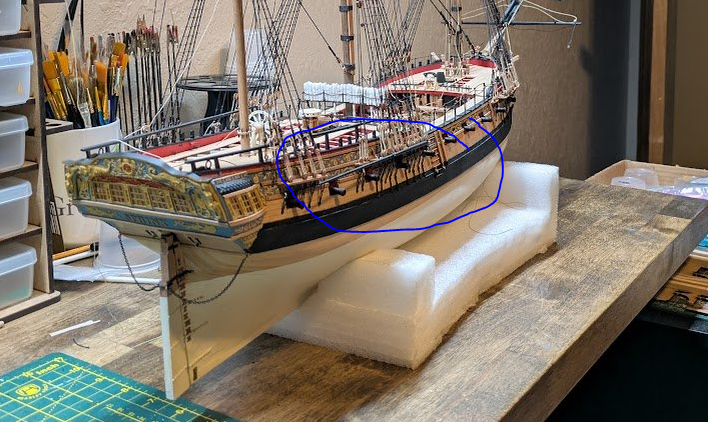
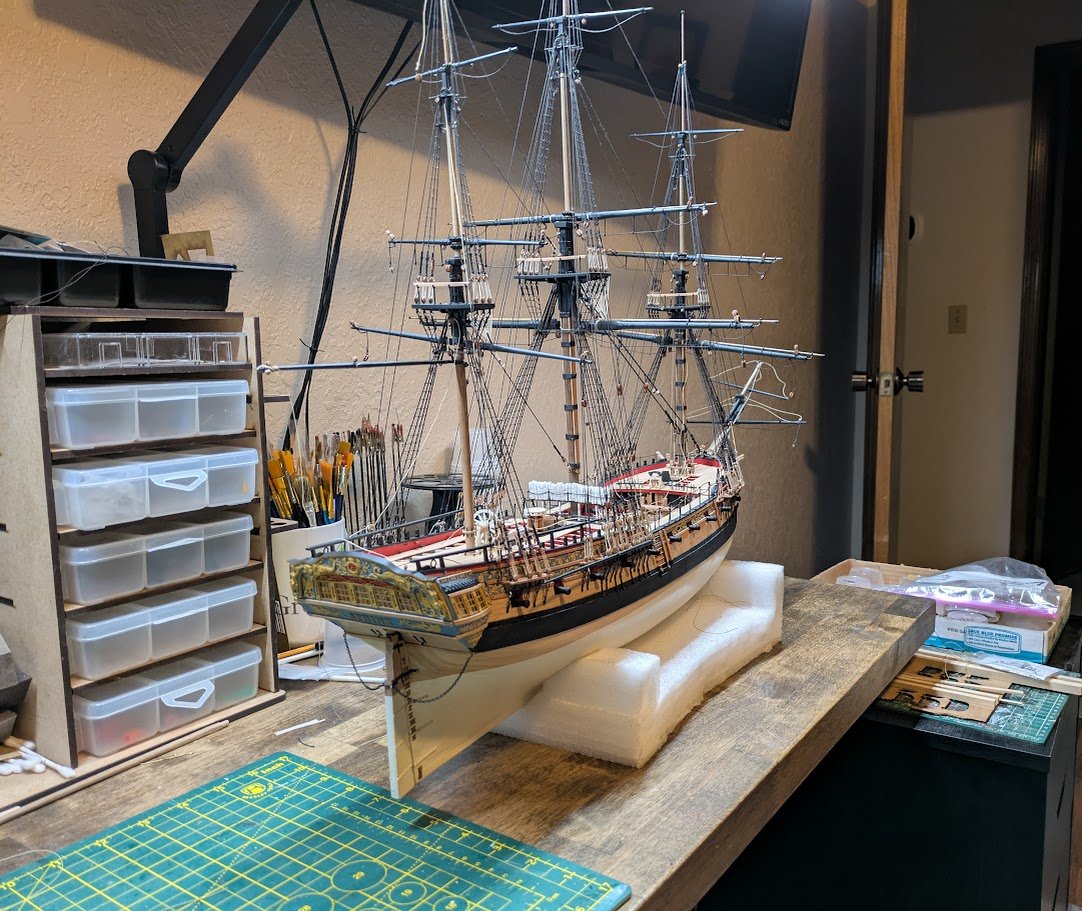
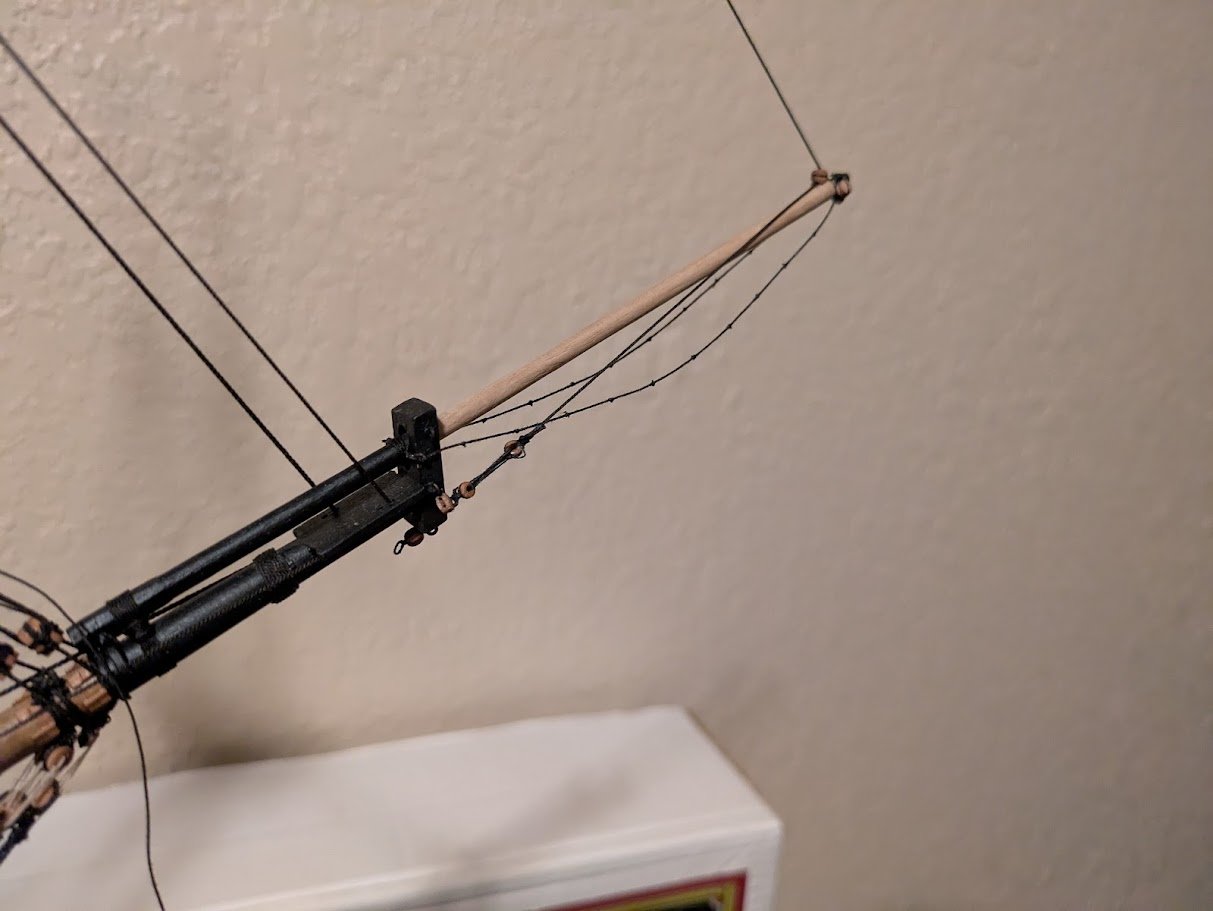
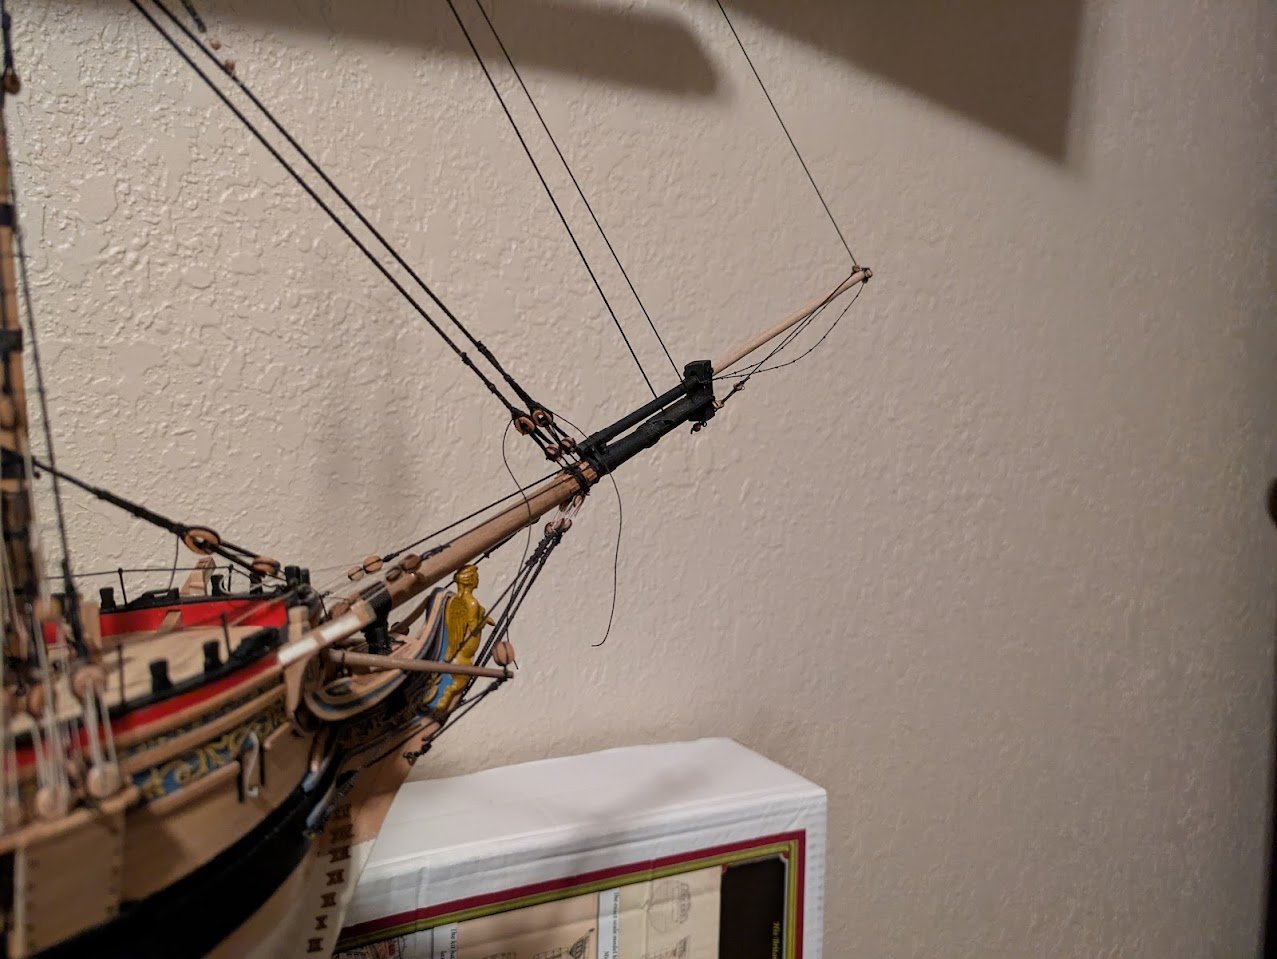
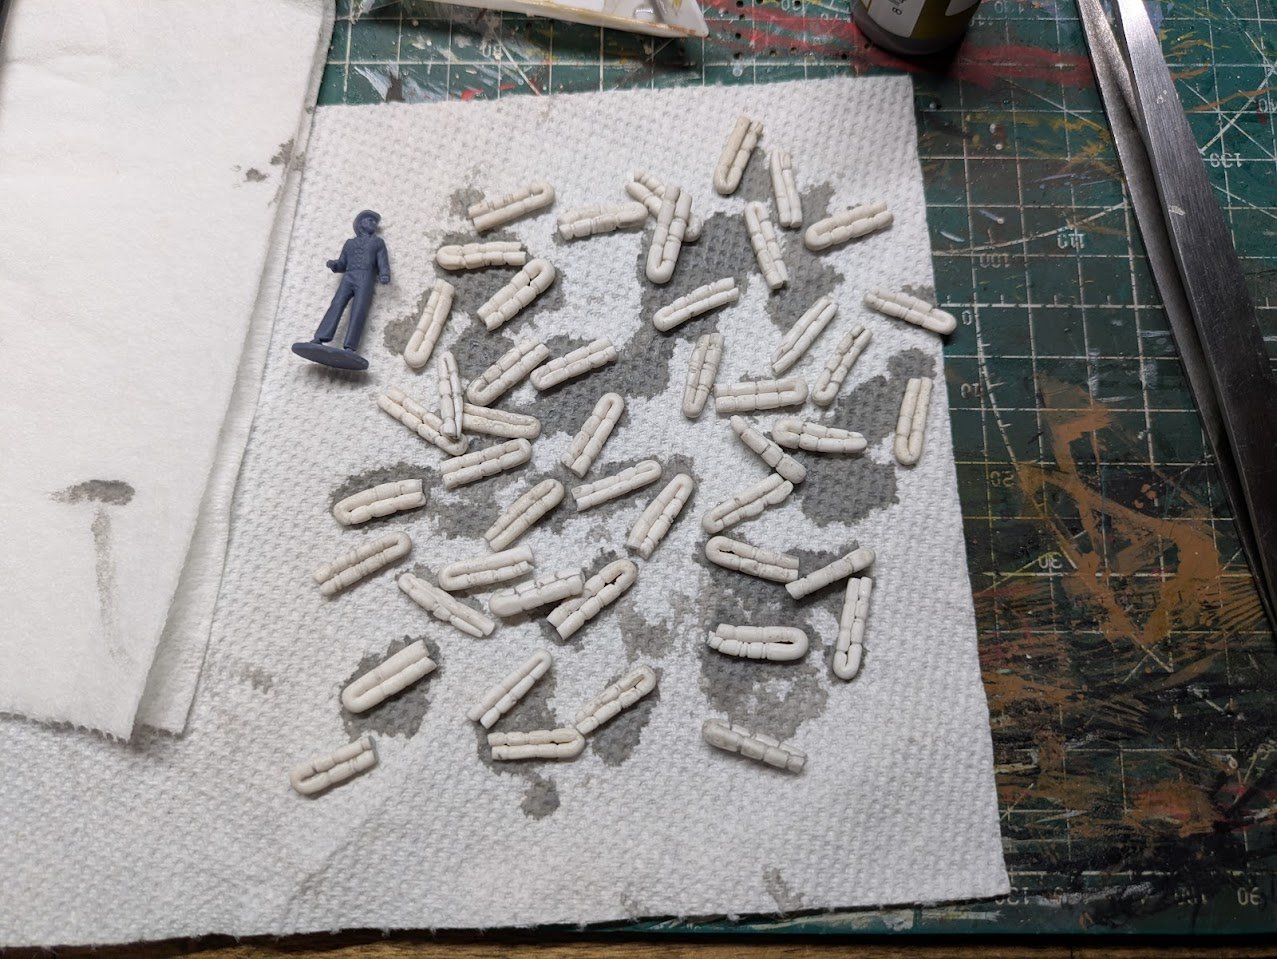
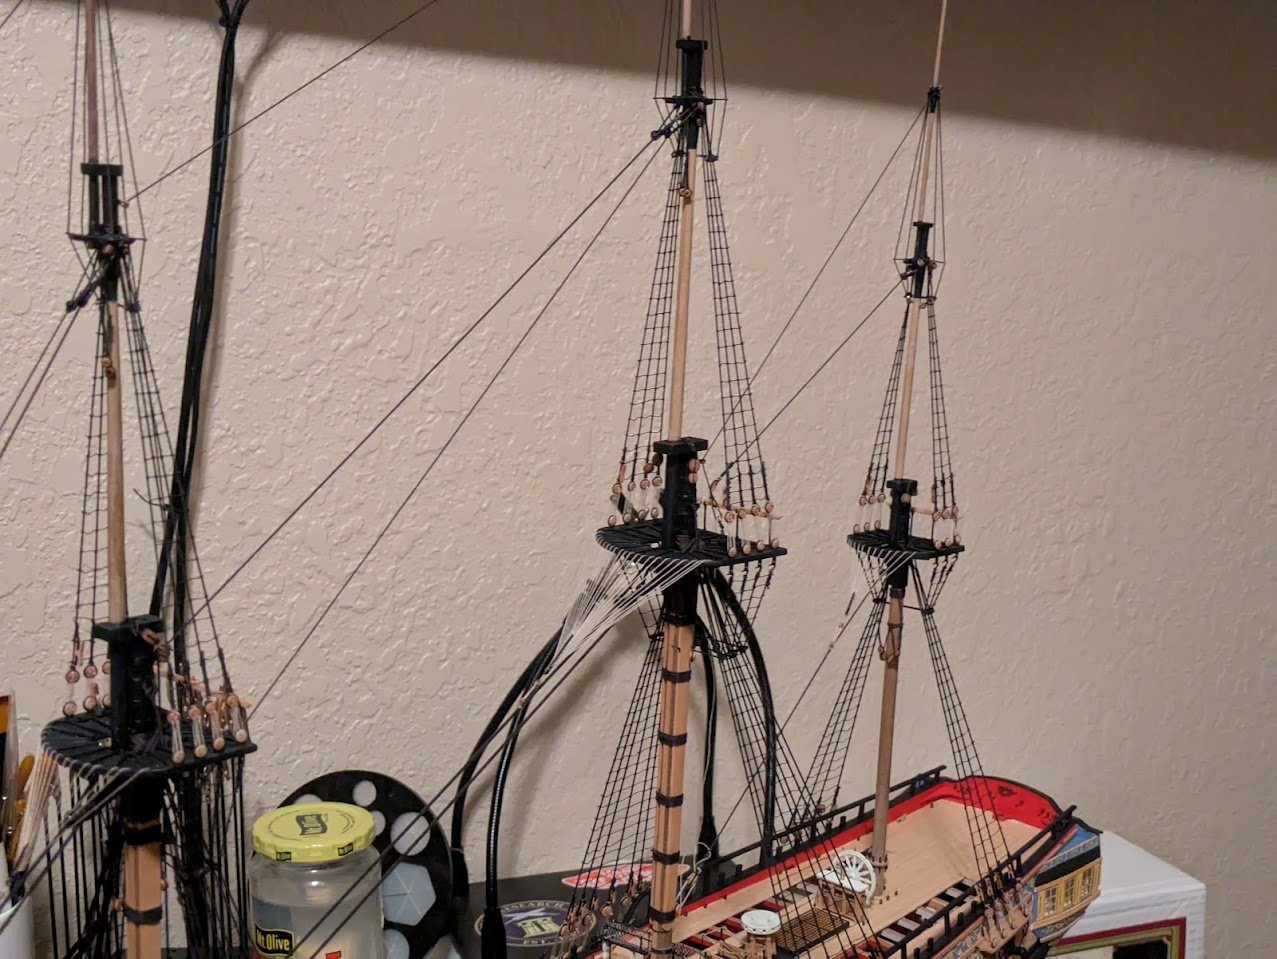
Main Mast Back Stays: Still working my way aft on the back stays. -I decided to stop at the main t'gallant stays to give me better access for the hammocks on the quarter deck netting. Quarter Deck Hammocks My plan on this model is to fill the QD and waist hammocks with netting and add hammocks. When I built my first ship the Beagle from Occre, I wanted to try my hand at making some hammocks. I used sail cloth to make the hammocks and I wasn't happy with how they turned out, the sail cloth was hard to work with and roll/fold into something that looked to scale, the finished result was super large hammocks that I wasn't happy with but I had sunk so much time into them I felt I had to use them, a sunk cost mistake many of us have probably made. When @Techtonic posted his Album of his Bellerophon model in the gallery section I was extremely impressed with his model and his hammocks really caught my eye. He pointed me in the direction of @tedrobinson2000 build log where he made a nice guide on making the hammocks in that style using FIMO Modelling clay. I won't go too much into the process as I pretty much followed tedrobinson2000's guide almost exactly. I was able to make up the hammocks pretty quickly, I made probably 50 in less than an hour. I used a Light Gray wash to try and tone down the white. These are still a work in progress some are blotchy in spots from me handling them, so I will go over the hammocks once more before I glue them in. I also wanted to make sure the scale looked correct, I like to use one of Vanguards figures to help me visualize the scale, sometimes thinks measure out one way and then look completely wrong at scale. Next came the test fit Here is my first test fit, nothing is glued down. After I had filled up half of the QD netting I quickly remembered that I had forgot to sand the sides of the hammocks flat. Here is how the hammocks look when the sides are flattened a bit with some sand paper. They fit much better, I was much happier with how they looked after sanded. With a figure to show the scale, I think as far as size they look alright, but please let me know if they look too large or small. I will probably have a few more tweaks before I glue them in, but I think i'm pretty happy with the result so far. Just need to tweak the wash a bit, and debate if adding any rope around the hammocks will be too large and out of scale. Jibboom Horses (Footropes) Deviating from the stays a little more, I decided to add on the Horses for the Jibboom. Between Lee's and David Antsherls Swan Class Rigging book I was able to come up with the dimensions of the rope, and how it might have been attached. I used an eye loop on one end to secure at the end of the Jibboom and the other end was wrapped and tied around the aft end of the Jibboom behind the Bowsprit Cap.

-
I appreciate all the likes and comments from everyone. Question on the backstays. Is there an order that the stays go on? I started on the foremast with the furthest forward backstay and working my way rearward while alternating between port and starboard pretty much in the same order the shrouds went on. But as some of the stays have deadeyes, while others have block and tackle setups, I wasn't sure if there was a distinct order they went on. Here is what I have done for each side of the ship on the foremast.
-
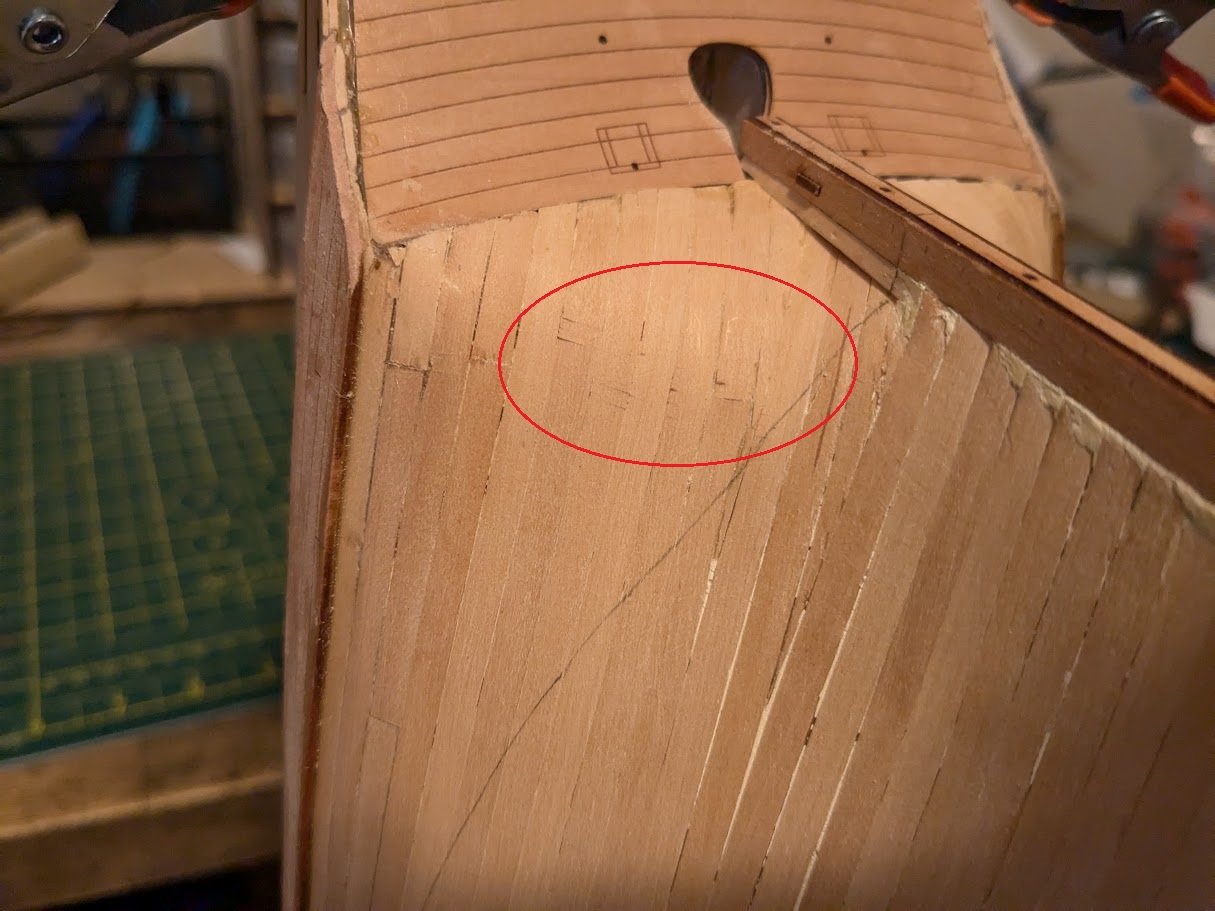
I tried out that cutting planking tool as well on my sphinx. Once I got the hang of the tool it worked pretty good for its purpose, I found that quantity and spacing of cuts matters more than the depth of the cuts. My biggest issue with the tool is if you sand too much the cuts start to show through the wood. I'm not the best at planking so I had to sand my stern quite a bit and a lot of my cuts started to become visible. I think the tool is fine for the first layer, but I won't use it beyond that on my next model. As you can see my stern still needed quite a bit of sanding at the time and the cuts were already starting to show through.
-
That AK Gold looks really sharp especially next to that red, I am going to have to order a bottle of that stuff.
- 36 replies
-
- 3
-
-
- Duchess of Kingston
- Vanguard Models
- (and 1 more)
-
Can't wait for this one, looks like the perfect next step up after my Sphinx kit is complete.
-
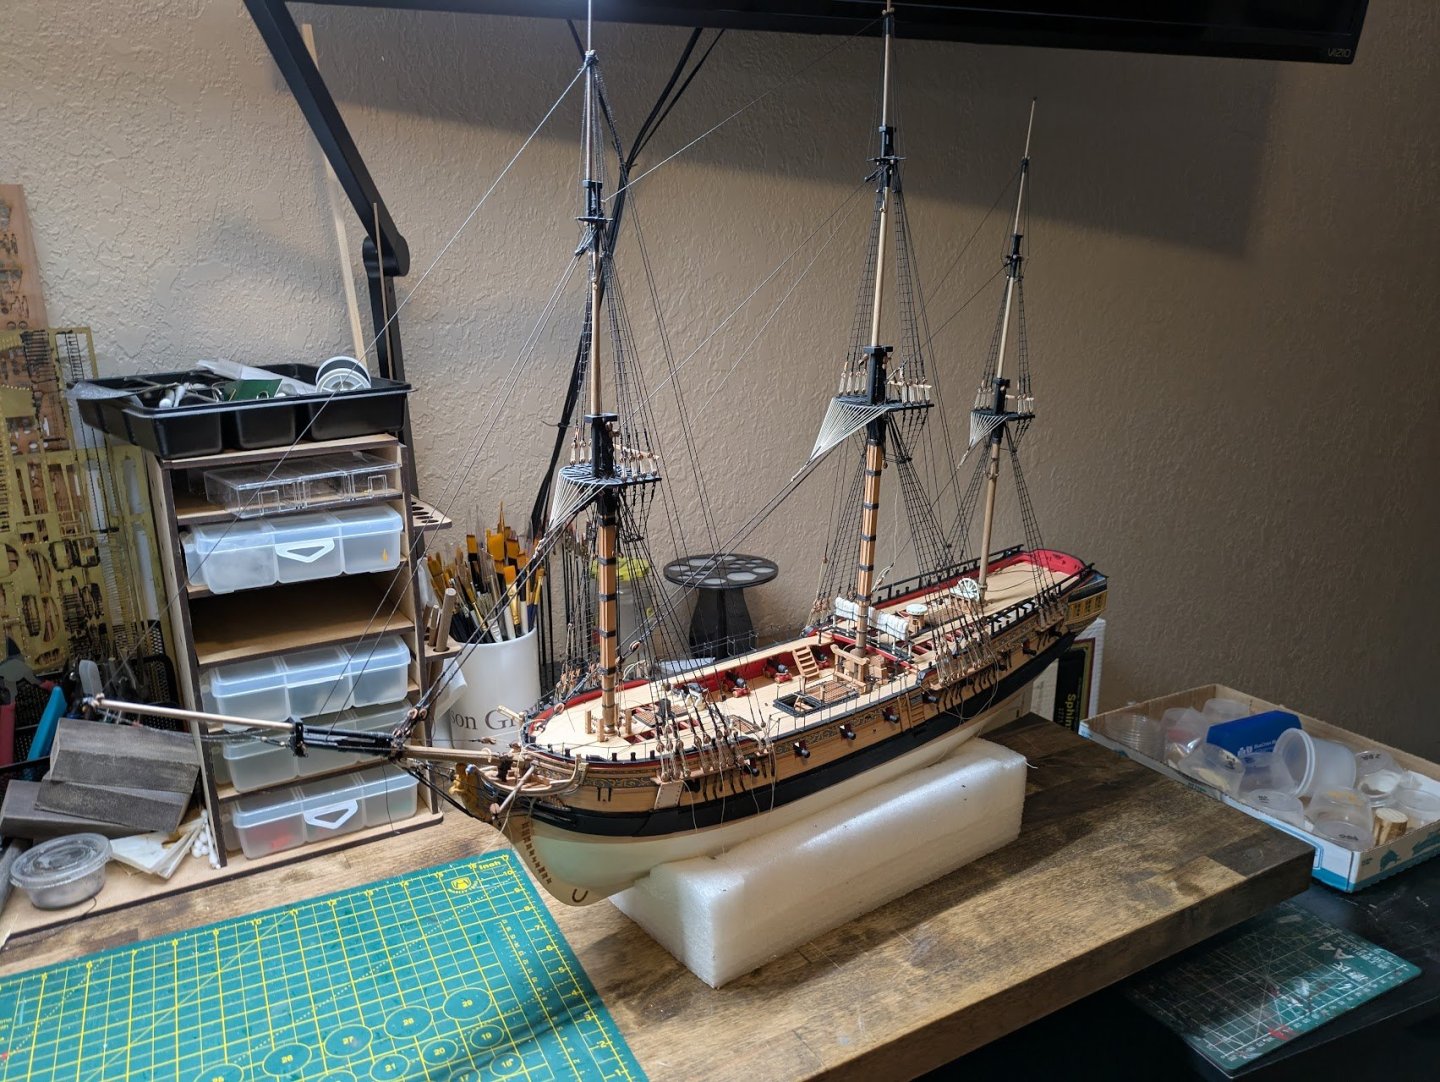
It's pretty versatile and super stable as well, this is the second model I have used this piece of foam on and I'll probably use it for my next one as well lol. I've tried to switch to a couple other bases to work from and I always end up switching back to the foam.
-
Was able to finish up the ratlines over the weekend. Then spent the last few days removing char and installing the shroud cleats. Next up will be the backstays.
-
What type of push pins are those, they look very useful for planking.
-
Ratlines: For the past week I have been at work on the ratlines. The ratlines on my previous model (Occre Beagle) turned out not so great, so I tried a different method this go around. My method this go around has been 1) Tie all lines with clove hitches. 2) Go back over all lines to ensure knots are tight and lines are where they need to be 3) Secure all knots with diluted PVA glue. 4) Snip excess rope. This process seems to have worked so far, none of my knots have loosened up on me like my last model. Template I am using, lines spaced 6mm apart. I still have to complete the Port shrouds on the main mast, and finish the port upper shrouds on the fore-mast, and then I will be finished with the ratlines.
-
Your model looks fantastic. I'm completely ignorant to card ship models, how much rope tension can they hold in the rigging process?

.jpg.4eb59ddde1fa09ff6a73bbda7e0dbc38.jpg)