


marktiedens
-
Posts
1,737 -
Joined
-
Last visited
Reputation Activity
-

 marktiedens got a reaction from GuntherMT in Vasa by marktiedens - FINISHED - Sergal - scale 1:60
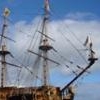
Hello all. another little update - fore & main yards mounted & rigged except for the braces - they will be last. Tried to get pictures with a dark background so the light rigging shows up better.The running rigging is a little too light colored but I am not going to re-do it.
/Mark
-
 marktiedens got a reaction from tasmanian in Wasa by marktiedens - FINISHED - Corel - scale 1:75 (Vasa)
I have decided to continue on with the Corel version of the Vasa which I started about a year and a half ago.I got as far as the first planking done & set it aside while I continued working on the Sergal kit. I have fixed a couple of things so far. I re-sized the upper row of gunports as I cut them too big to start with . Also I the slant to the companionway roofs - the kit had them flat. I also re-did the lower stern to be more square.One more thing I noticed after glueing on the false deck was there were no openings for the knighthead behind the main mast or the ladder behind the fore mast so I had to make them.
/Mark
-
 marktiedens got a reaction from JanV in Wasa by marktiedens - FINISHED - Corel - scale 1:75 (Vasa)
I have decided to continue on with the Corel version of the Vasa which I started about a year and a half ago.I got as far as the first planking done & set it aside while I continued working on the Sergal kit. I have fixed a couple of things so far. I re-sized the upper row of gunports as I cut them too big to start with . Also I the slant to the companionway roofs - the kit had them flat. I also re-did the lower stern to be more square.One more thing I noticed after glueing on the false deck was there were no openings for the knighthead behind the main mast or the ladder behind the fore mast so I had to make them.
/Mark
-
 marktiedens got a reaction from mar3kl in Wasa by marktiedens - FINISHED - Corel - scale 1:75 (Vasa)
I have decided to continue on with the Corel version of the Vasa which I started about a year and a half ago.I got as far as the first planking done & set it aside while I continued working on the Sergal kit. I have fixed a couple of things so far. I re-sized the upper row of gunports as I cut them too big to start with . Also I the slant to the companionway roofs - the kit had them flat. I also re-did the lower stern to be more square.One more thing I noticed after glueing on the false deck was there were no openings for the knighthead behind the main mast or the ladder behind the fore mast so I had to make them.
/Mark
-
 marktiedens got a reaction from NAZGÛL in Vasa by marktiedens - FINISHED - Sergal - scale 1:60
Hello all. another little update - fore & main yards mounted & rigged except for the braces - they will be last. Tried to get pictures with a dark background so the light rigging shows up better.The running rigging is a little too light colored but I am not going to re-do it.
/Mark
-
 marktiedens got a reaction from reklein in Vasa by marktiedens - FINISHED - Sergal - scale 1:60
A little more progress - all yards mounted. just a few more lines left like braces,anchors,flags,& a few misc.items.note the hooks & rings on the lower end of the mizzen lateen yard - I think this is correct.That light at the end of the tunnel is getting brighter...........
/Mark
-
 marktiedens got a reaction from GrandpaPhil in Vasa by marktiedens - FINISHED - Sergal - scale 1:60
FINISHED! I decided to add a stern lantern to finish it off. There are still a number of errors but I am fairly satisfied how it came out. I want to thank everyone for all the loos & likes during the build.The problem now is where to put it - it`s almost 4 ft long. An even bigger problem is deciding what to build next I will try to put a few more pics in the gallery.
/Mark
-
 marktiedens got a reaction from VonHoldinghausen in Wasa by marktiedens - FINISHED - Corel - scale 1:75 (Vasa)
I have decided to continue on with the Corel version of the Vasa which I started about a year and a half ago.I got as far as the first planking done & set it aside while I continued working on the Sergal kit. I have fixed a couple of things so far. I re-sized the upper row of gunports as I cut them too big to start with . Also I the slant to the companionway roofs - the kit had them flat. I also re-did the lower stern to be more square.One more thing I noticed after glueing on the false deck was there were no openings for the knighthead behind the main mast or the ladder behind the fore mast so I had to make them.
/Mark
-
 marktiedens got a reaction from NMBROOK in Wasa by marktiedens - FINISHED - Corel - scale 1:75 (Vasa)
I have decided to continue on with the Corel version of the Vasa which I started about a year and a half ago.I got as far as the first planking done & set it aside while I continued working on the Sergal kit. I have fixed a couple of things so far. I re-sized the upper row of gunports as I cut them too big to start with . Also I the slant to the companionway roofs - the kit had them flat. I also re-did the lower stern to be more square.One more thing I noticed after glueing on the false deck was there were no openings for the knighthead behind the main mast or the ladder behind the fore mast so I had to make them.
/Mark
-
 marktiedens got a reaction from fmodajr in Wasa by marktiedens - FINISHED - Corel - scale 1:75 (Vasa)
I have decided to continue on with the Corel version of the Vasa which I started about a year and a half ago.I got as far as the first planking done & set it aside while I continued working on the Sergal kit. I have fixed a couple of things so far. I re-sized the upper row of gunports as I cut them too big to start with . Also I the slant to the companionway roofs - the kit had them flat. I also re-did the lower stern to be more square.One more thing I noticed after glueing on the false deck was there were no openings for the knighthead behind the main mast or the ladder behind the fore mast so I had to make them.
/Mark
-
 marktiedens got a reaction from WackoWolf in Wasa by marktiedens - FINISHED - Corel - scale 1:75 (Vasa)
I have decided to continue on with the Corel version of the Vasa which I started about a year and a half ago.I got as far as the first planking done & set it aside while I continued working on the Sergal kit. I have fixed a couple of things so far. I re-sized the upper row of gunports as I cut them too big to start with . Also I the slant to the companionway roofs - the kit had them flat. I also re-did the lower stern to be more square.One more thing I noticed after glueing on the false deck was there were no openings for the knighthead behind the main mast or the ladder behind the fore mast so I had to make them.
/Mark
-
marktiedens got a reaction from NAZGÛL in Wasa by marktiedens - FINISHED - Corel - scale 1:75 (Vasa)
I have decided to continue on with the Corel version of the Vasa which I started about a year and a half ago.I got as far as the first planking done & set it aside while I continued working on the Sergal kit. I have fixed a couple of things so far. I re-sized the upper row of gunports as I cut them too big to start with . Also I the slant to the companionway roofs - the kit had them flat. I also re-did the lower stern to be more square.One more thing I noticed after glueing on the false deck was there were no openings for the knighthead behind the main mast or the ladder behind the fore mast so I had to make them.
/Mark
-
marktiedens reacted to mar3kl in Vasa by mar3kl - Billing Boats - scale 1:75
Here's a photo of a finished gun port, lined with thin veneer. Fred Hocker kindly gave me average dimensions for the upper and lower ports so I was able to get them more or less the correct size.
The gun port lids will be an interesting exercise too. The kit provides plastic lids. Each lid has a raised square center section with its lion head in the center. The lion head detail looks pretty good, and because the whole center section is painted, you won't know it's plastic. You get the benefits of nice detail and workability without it looking ugly. The outer edges are supposed to be wood though, and it's hard to paint plastic to look like wood.
I think I will cut the edges off the lids, leaving only the raised square center section. Then I can grind down the back until it's fairly thin, and simply mount each section on a wooden lid. Seems like it'll work, but I'm going to do the lids very near the end of the project since they will be fragile.
Once I had decided to fix the kit's gun port design, I needed a solution for mounting the cannon. I decided to make a set of false gun carriages, very low on detail since only the front will be seen. Those would then be mounted on strips of false decking attached at the ends to the bulkheads. Here are pictures of the pieces of false decking and the assembly of the false carriages:
And the carriages mounted to the decking...
And the decking mounted at the ends to the bulkheads.
And finally a couple of pictures test-fitting cannon on the carriages. The cannon supplied with the kit are not very detailed and seem out of scale to me, so I bought some Amati cannon that I thought looked better. I'll paint them black and then add bronze highlights.
-
marktiedens got a reaction from WackoWolf in Tungan wood
They might mean tanganyika,which is a light colored wood,but messed up the spelling in translation.
/Mark
-
 marktiedens got a reaction from testazyk in Panart San Felipe 1:75 Updated Version Review
I feel for you Salty - having built the old version of this kit a number of years ago it seems as though they have cheapened it up somewhat.Mine had no laser etched decking or balsa & although the instructions were sketchy the plans & materials were pretty good.It was a pleasure to build & made into a nice looking model right out of the box.The first planking was lime & the second planking was a honey colored "walnut".
/Mark
-
marktiedens reacted to fmodajr in Wasa by fmodajr - FINISHED - Corel - 1:75
I now added the safety lines to the rudder per Landstom's book. According to Landstrom, the lines were used to "lift the rudder into place and as a means of preventing it from floating away if its fittings suffered damage." Also, "the lines could be used if need be to maneuver the rudder."
View from starboard and port.
Thanks,
Frank
-
marktiedens reacted to fmodajr in Wasa by fmodajr - FINISHED - Corel - 1:75
Started working on the false cannon.
Painted them with a diluted black to match the deck cannon.
Then I sprayed on a coat of "Dull Cote" for handling.
Now installing the false cannon on the starboard side.
Previously, early in the build I milled a slot in the cannon housing and installed the false carriages.
Now, I just add some glue, slide in the cannon and lower onto the carriages.
Here are some pictures of the first side.
Now onto the port side.
Next up, I will start working on the anchor installation.
Thanks,
Frank
-
marktiedens reacted to fmodajr in Wasa by fmodajr - FINISHED - Corel - 1:75
Hi,
I continued by working on the figurines on both side of the ship.
I had to thin down the figurines, especially the large figures near the bow, in order to get them to fit above the gun ports. Then, as usual, I gold leafed them before mounting.
Large figurines (tight fit) on starboard and port sides.
I had to grind off some of the nails that were in the way for the smaller figurines.
Also, I inserted some wood shims to help support them.
I left some space below the top shim so that rigging line can pass thru this space later on.
Test fit of rigging line to make sure there were no obstructions
Installed figurines on port and starboard side
Added the chains to the rudder at this time. I blackened them before installation
Frank
-
 marktiedens got a reaction from Karleop in Vasa by Karleop - FINISHED – Billing Boats – reviving a poorly built model
Your rigging looks very nice - I know how difficult it is to rig those crowfeet. However,I may be wrong but I think those are the ropes to lift the upper yards.You can always ask Fred or Clayton at the Vasa forum mentioned in Ulises previous post - they are very helpful.
/Mark
-
marktiedens reacted to Mirabell61 in HMS Pegasus 1776 by Mirabell61 - FINISHED - scale 1:64 - 16-gun sloop
Build log part 57
have attached the burton pedants of the main top, which take the jeers blocks tackle of the lower mainyard later when the yards are made. Have to rig all the lines that go to between tops and lower mast caps first, before the caps and topmast parts are (dry)- fitted
I`m showing here some of my ladderway hatch openings, not doing them too narrow, so a mediun sized Crew member can enter up and down in upright Position giving attemntion, but without bumping his head.
These Swan Class vessels are rather small and the deckbeams therefore quite low, but I did my best to provide Standing height (without hats) on all decks, at least between the deckbeams, based on the contures of the modified Amati plan Frames.
Will have to do the ladderway hatch stachions I have forgotten to place, now before I move on, Need to look for a good solution. (I saw some inspirations here at MSW already)
Nils
-
marktiedens reacted to mar3kl in Vasa by mar3kl - Billing Boats - scale 1:75
And back to the bulwarks. The instructions call for thinning down the part of the bulkheads that rises above the deck, so their thickness matches the thickness of the false rib crenellations. I dutifully thinned down, then added the false ribs and the waterways:
After looking at the result for a while, I didn't like it. First, the bulkhead extensions looked odd mixed in with the false ribs. Second, the crenellations on the bulwarks serving as guides for placing the false ribs were not well aligned with the gunports, meaning some ribs were cut in two, or had odd curves in them. Finally, the inside of the bulwarks was a solid expanse of wood rather than a stack of planks, which just didn't look right to me.
I ended up removing the bulwarks and false ribs and planking my own bulwarks. I removed the bulkhead extensions and fabricated temporary support pieces to hold the planks as they were stacked up. I used the original bulwark pieces as templates to get the proper staggered height of the bulwarks as they rose up the stern castle, as well as the location of the round gunports and approximate placement of the false ribs.
The result looked much better to me. No more bulkhead extensions messing up the look of the false ribs, and the ribs were spaced correctly such that they weren't located in the middle of a gunport.
During this process I decided to use mahogany strip wood for the bulwarks and the rest of the hull, in a slightly narrower width than the kit supplied strip wood for the hull, so the plank width was more in scale with the actual ship.
I don't have photos of the bulwark construction process, but here is one of the result. Note the window cut into the side of the hull.
-
marktiedens reacted to mar3kl in Vasa by mar3kl - Billing Boats - scale 1:75
I like the fact that they are plastic - good, crisp detail, and easy to thin down or bend. The accuracy is probably as good as your going to get without carving the sculptures yourself.
Here are a few more photos, these of the deck planking and the hutches for the doors on the after decks. The deck planking in the kit was scaled correctly; all I did was rub a lead pencil along one side to simulate caulking, and stagger the butts using a pattern that is no doubt incorrect for the baroque era, but which looked OK on the Bellona I did 15 years ago.
The hutches marked the first phase of painting things. I use various kinds of paint, all matte finish acrylic and designed for models, so they have finely ground pigment that flows well in small amounts. The red and pale yellow were a pretty close match to the 1:10 scale model of the Vasa in the museum in Stockholm. I wish that model had been there when I visited, but that was back when they were still spraying it constantly and you had to look at the ship while wearing rain gear.
The kit had a fun way of emulating the carved moldings around the doors - you take thin copper wire, twist it together, and hammer it flat, then shape it to the exterior. I planked the doors and added blackened hinges. In these photos you can also see the scratched bulwarks and false ribs in more detail, as well as the hatches.
The hatches provided by the kit were plastic (!?), so I used Amati pre-cut gratings instead, and I think they look much better. Apparently later versions of the Billing kit have wooden gratings, and my instructions made oblique references to them, but they were nowhere to be found in the kit.
-
marktiedens reacted to Mirabell61 in HMS Pegasus 1776 by Mirabell61 - FINISHED - scale 1:64 - 16-gun sloop
Build log part 56
have been busy doing the lower shrouds for mizzen and main, as well as their stays.
The ratlines will be done later on. In order to get the right Tension to the shrouds is was unfortunately not possible to Keep the shroud deadeyes 100 % in horizontal line.
But I`m very happy that the alignment angles of shrouds and chainplates correspond very well to the measures I had taken with help of a dummy mast and and a string, like shown earier in this log (Kester would say "a sigh of relief" was brought out)
The Standing rigging so far is quite tight and the masts are in alignment. Shall move on to the foremast next.
I fitted some wedge protectors to the bow rail contact area of the main stay. The wooden "mouses" for the stay slings are made from bamboo rod
-
 marktiedens got a reaction from md1400cs in Wasa by md1400cs - FINISHED - Corel - 1:75
I like the G-S glue also except it seems to be a bit "stringy". Very nice cannons by the way.
/Mark
-
marktiedens reacted to md1400cs in Wasa by md1400cs - FINISHED - Corel - 1:75
Hi Mates,
Installed carriages now just need to clean up the ropes. I will leave that for now and move to an other area TBD. Thanks for looking in (:-)
PS: first pic, is self explanatory, but found it easy to position carriage then drill a small hole in deck for installation.
MIchael