fifthace
-
Posts
498 -
Joined
-
Last visited
Content Type
Profiles
Forums
Gallery
Events
Everything posted by fifthace
-
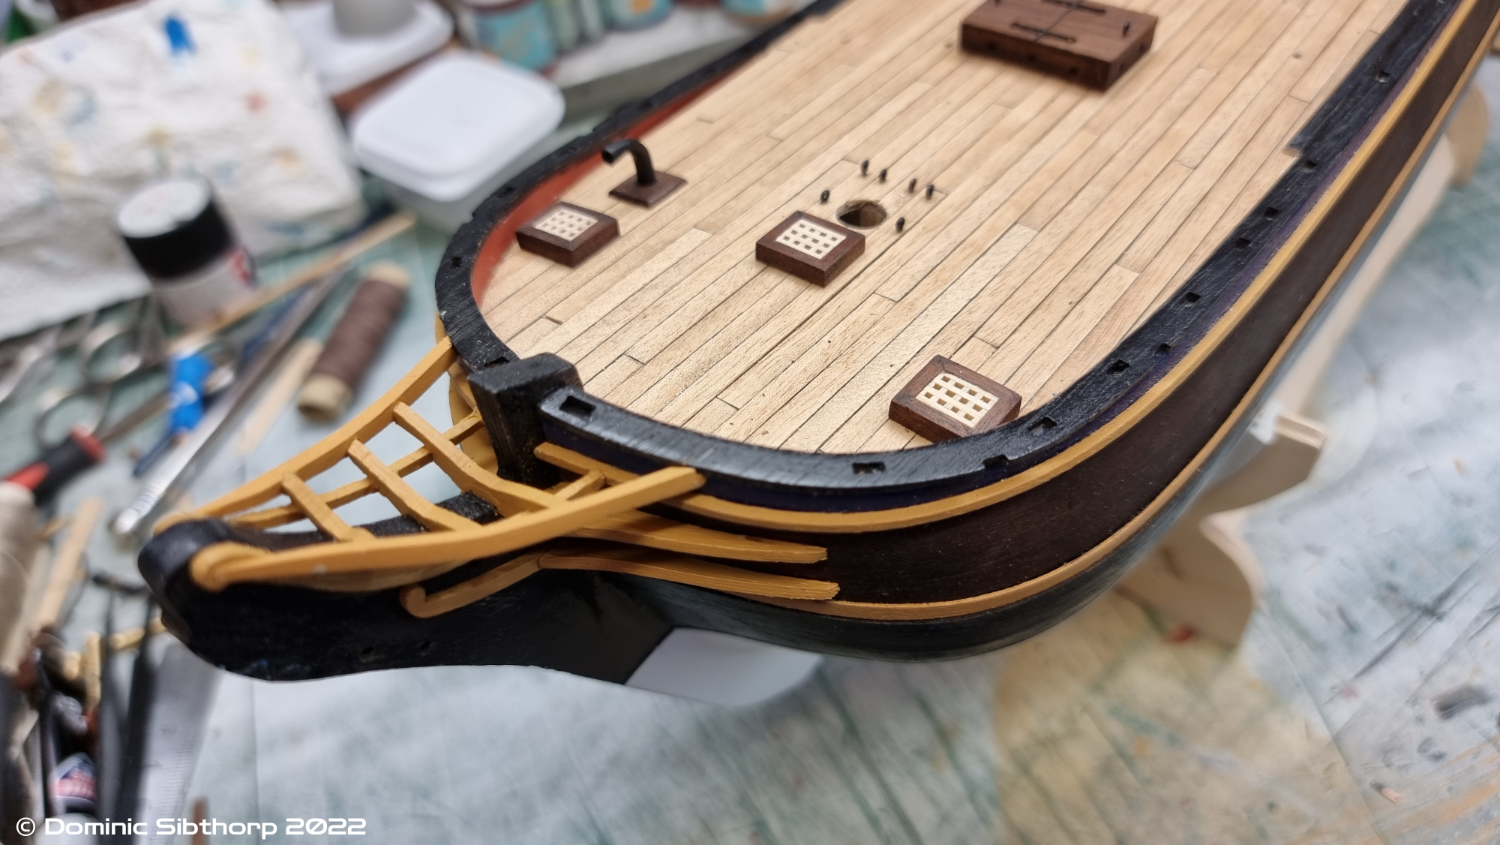
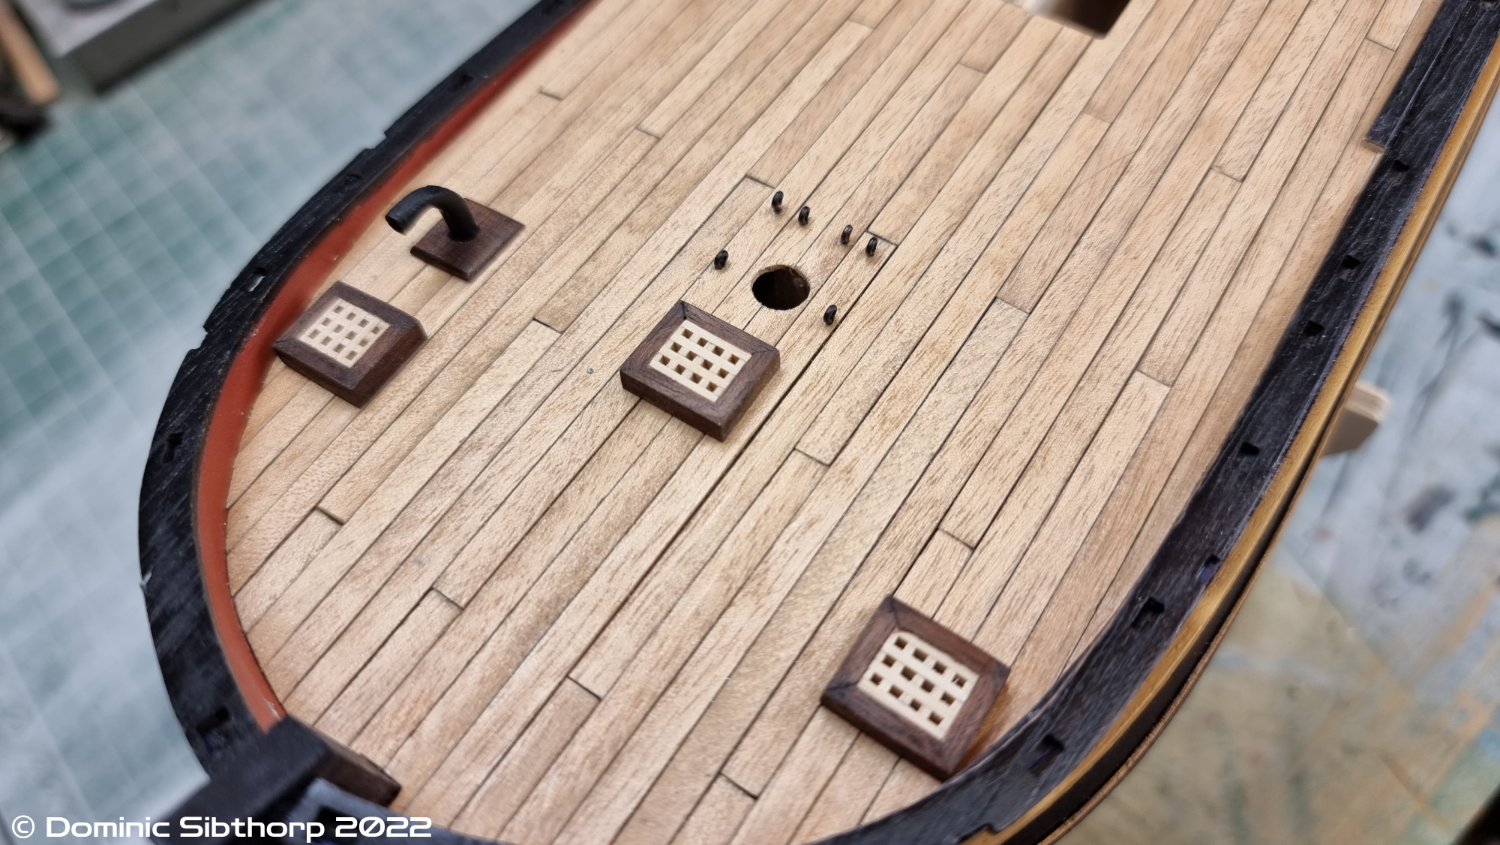
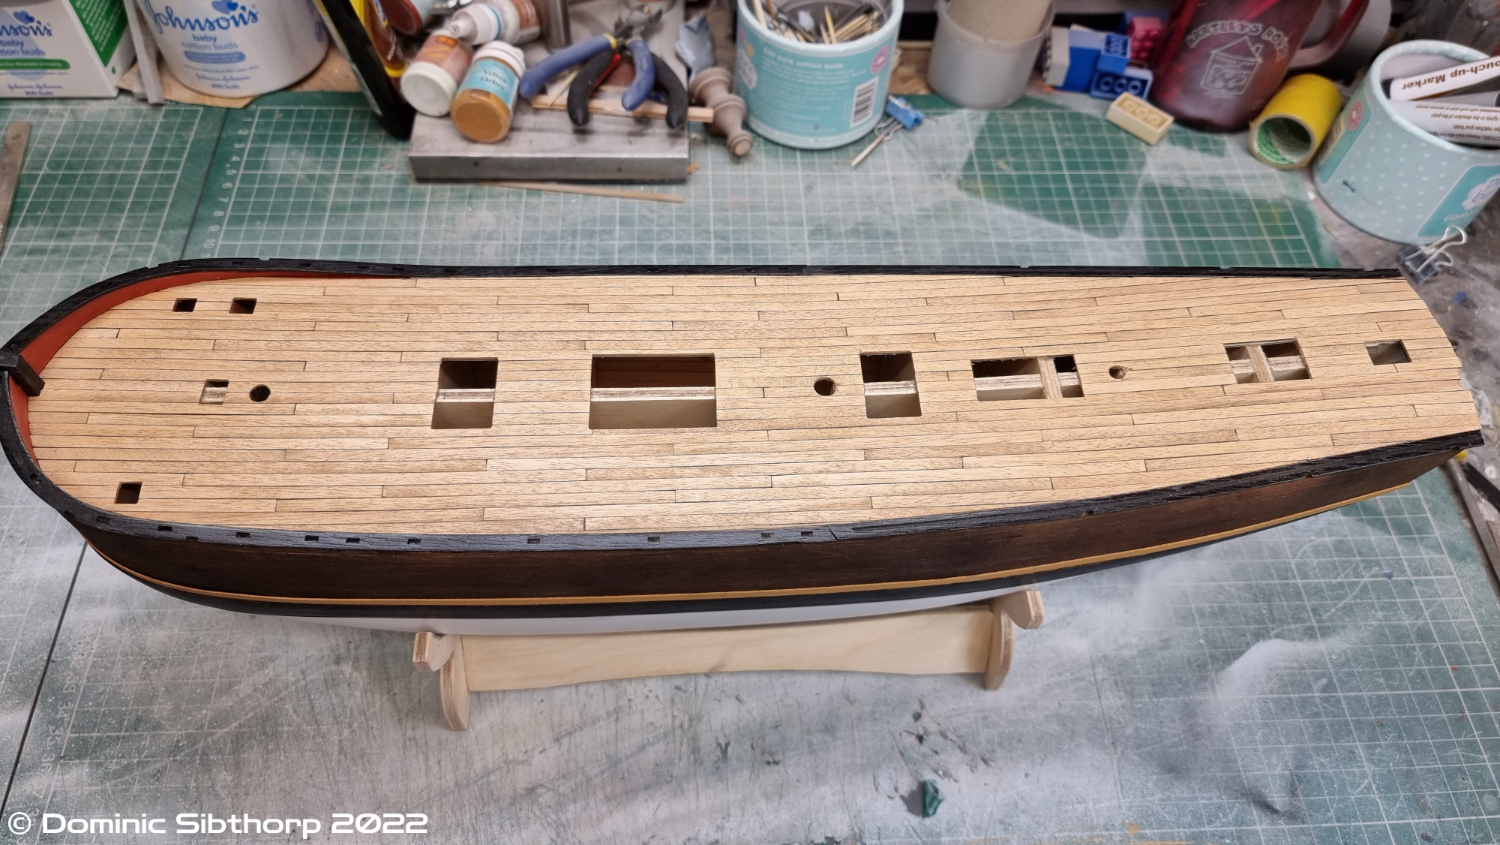
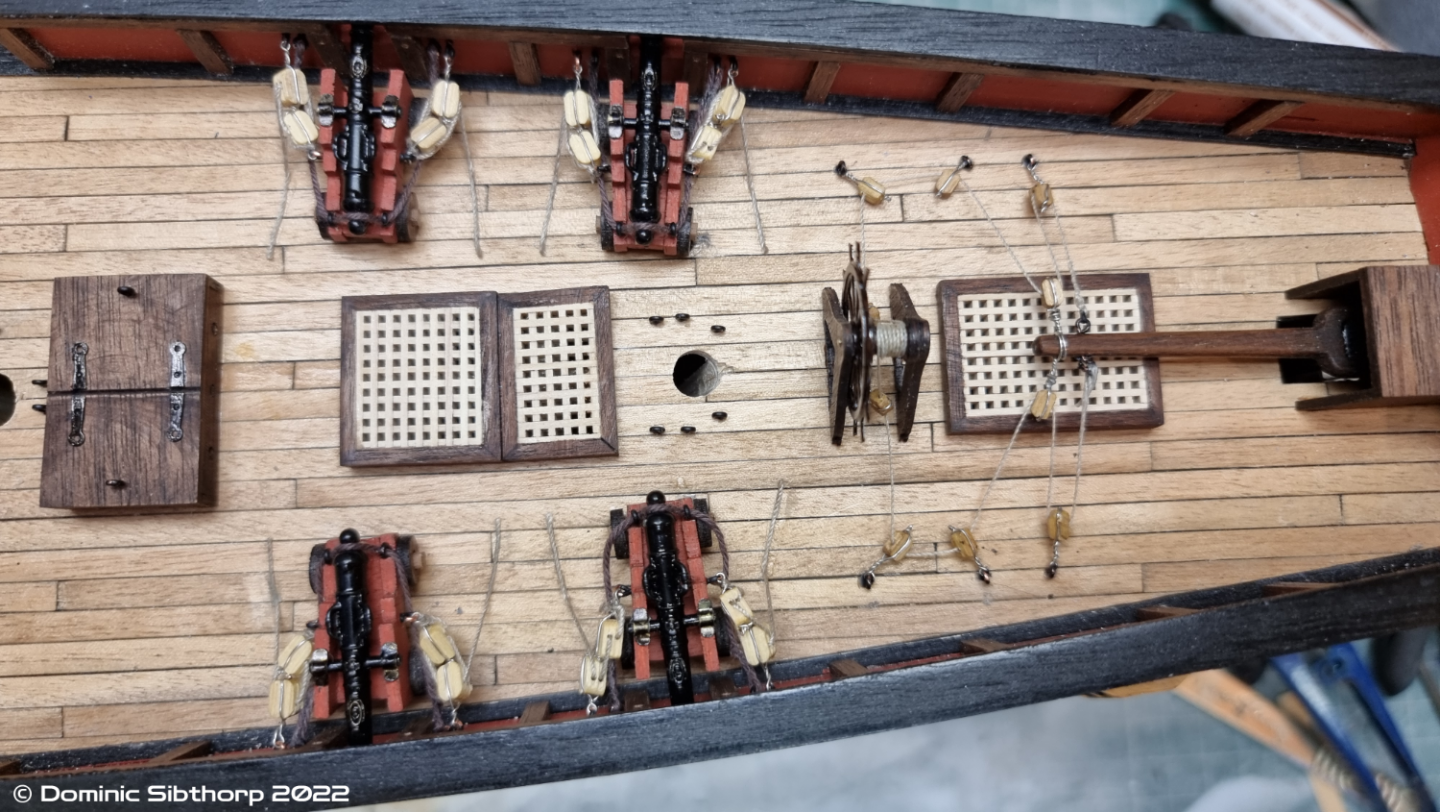
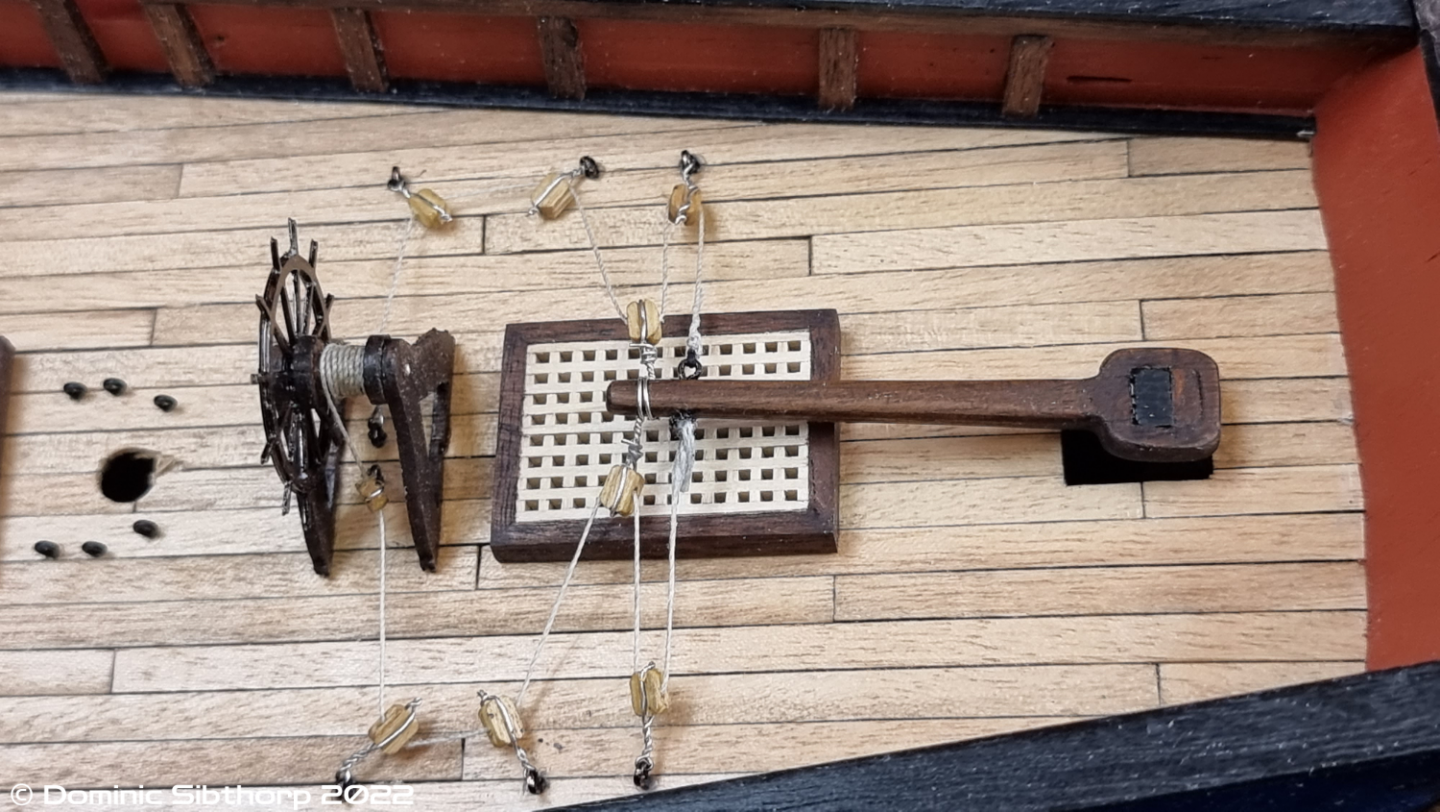
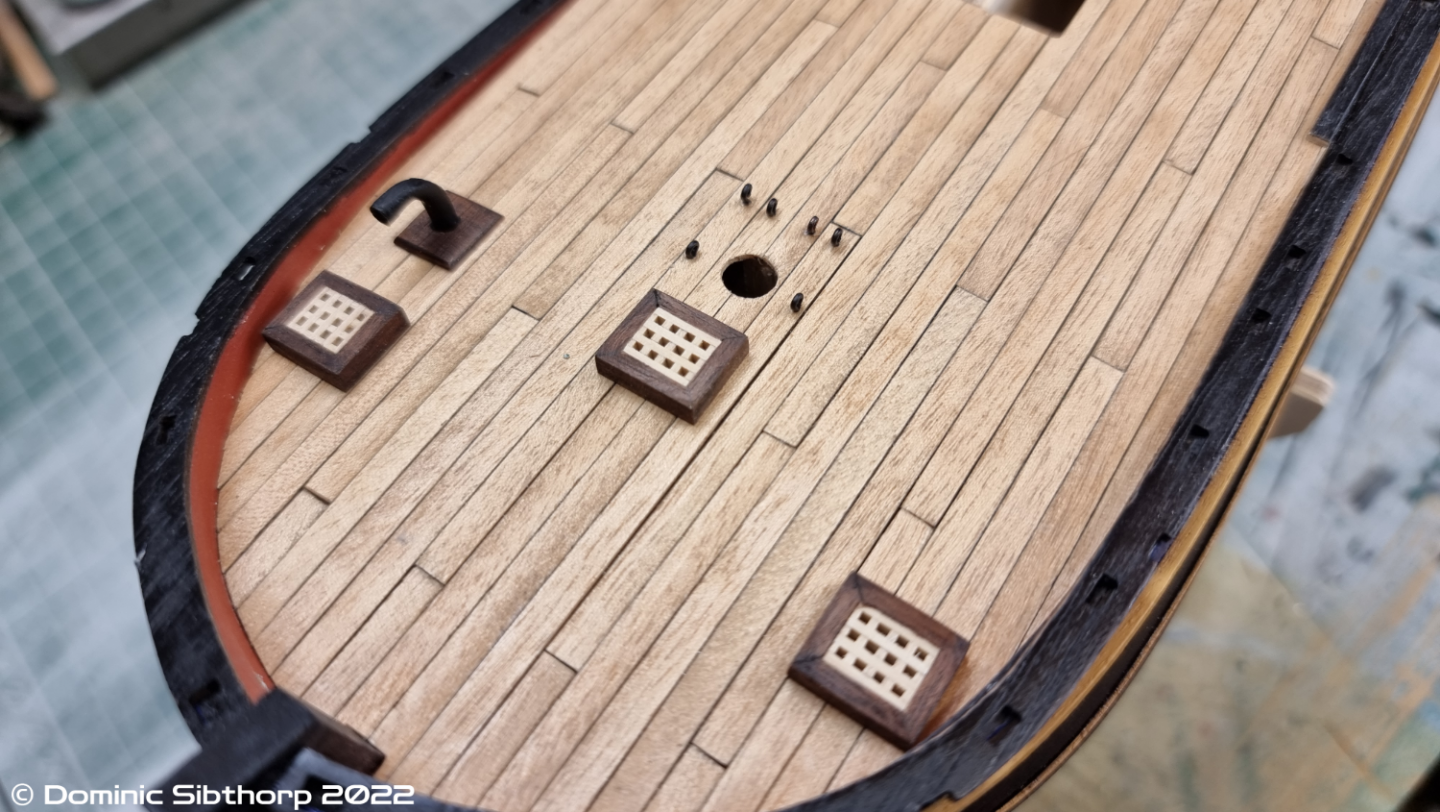
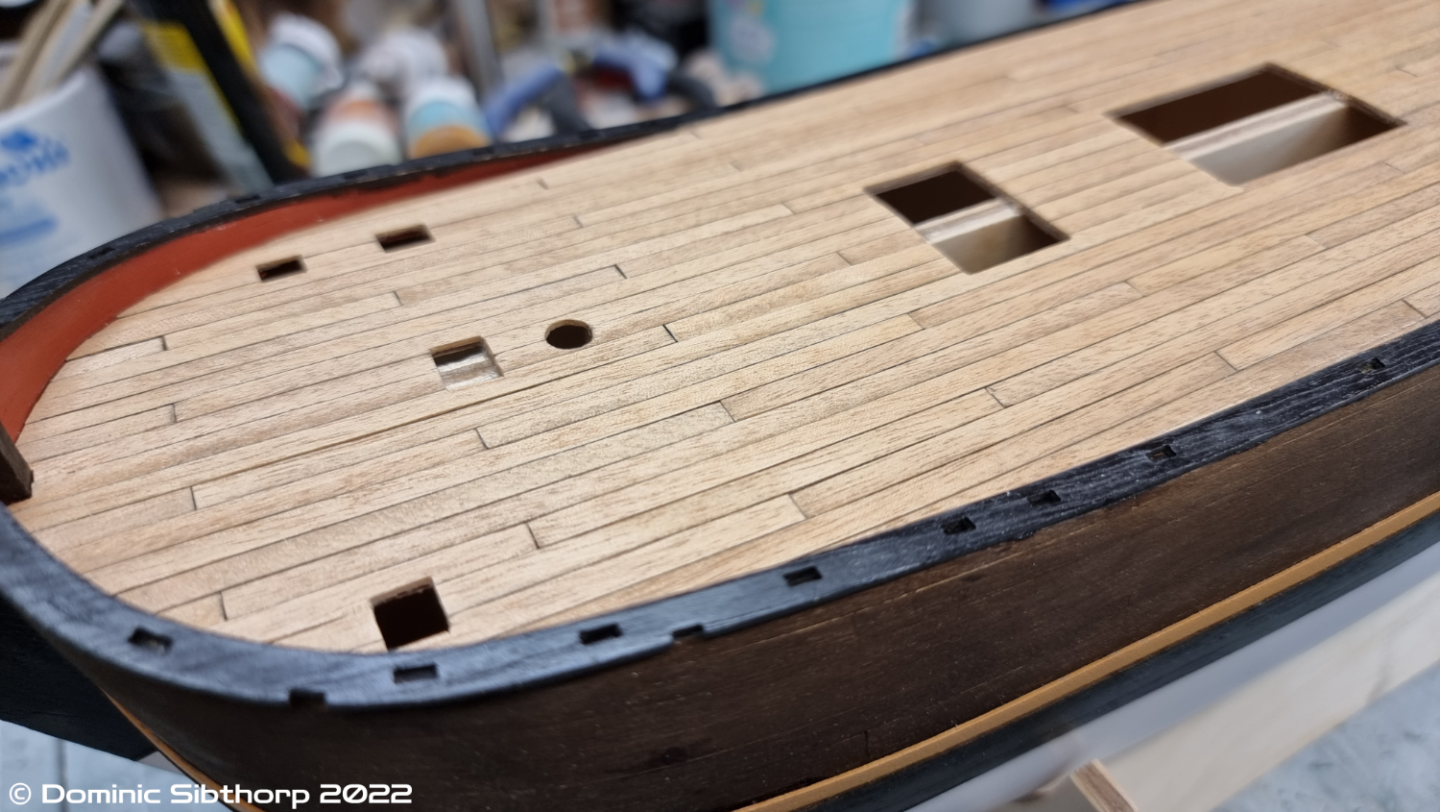
 Howdi, I've made a little progress with this. Some work at the bow, and made the various hatches on deck, and finally made, fitted and rigged the cannons. The blocks are a little oversized, they were all I had to hand as the kit doesn't provide to rig them fully. Thanks
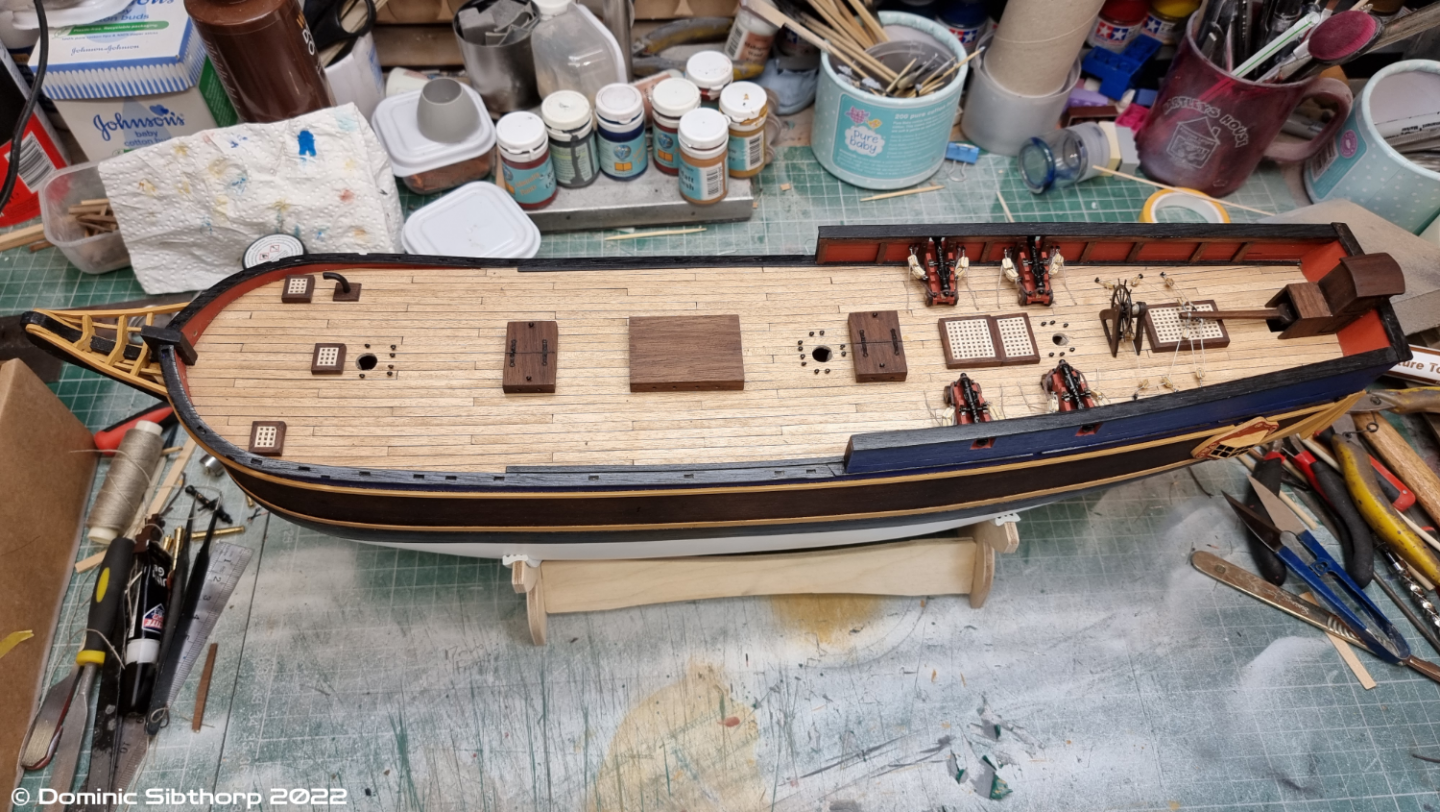


-
That turned out to be a stunning build Mike, nice work.
-
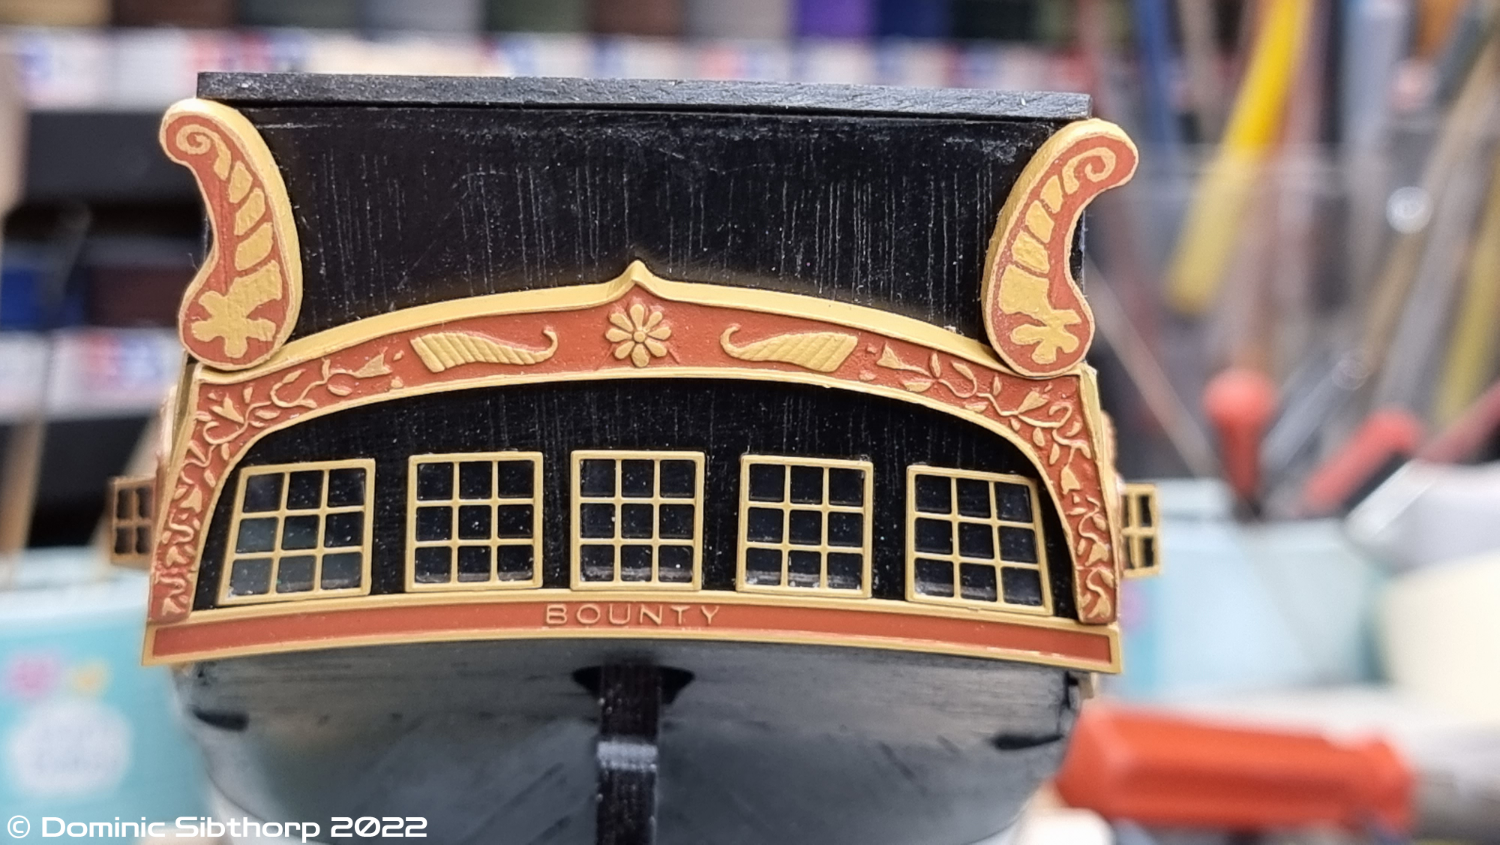
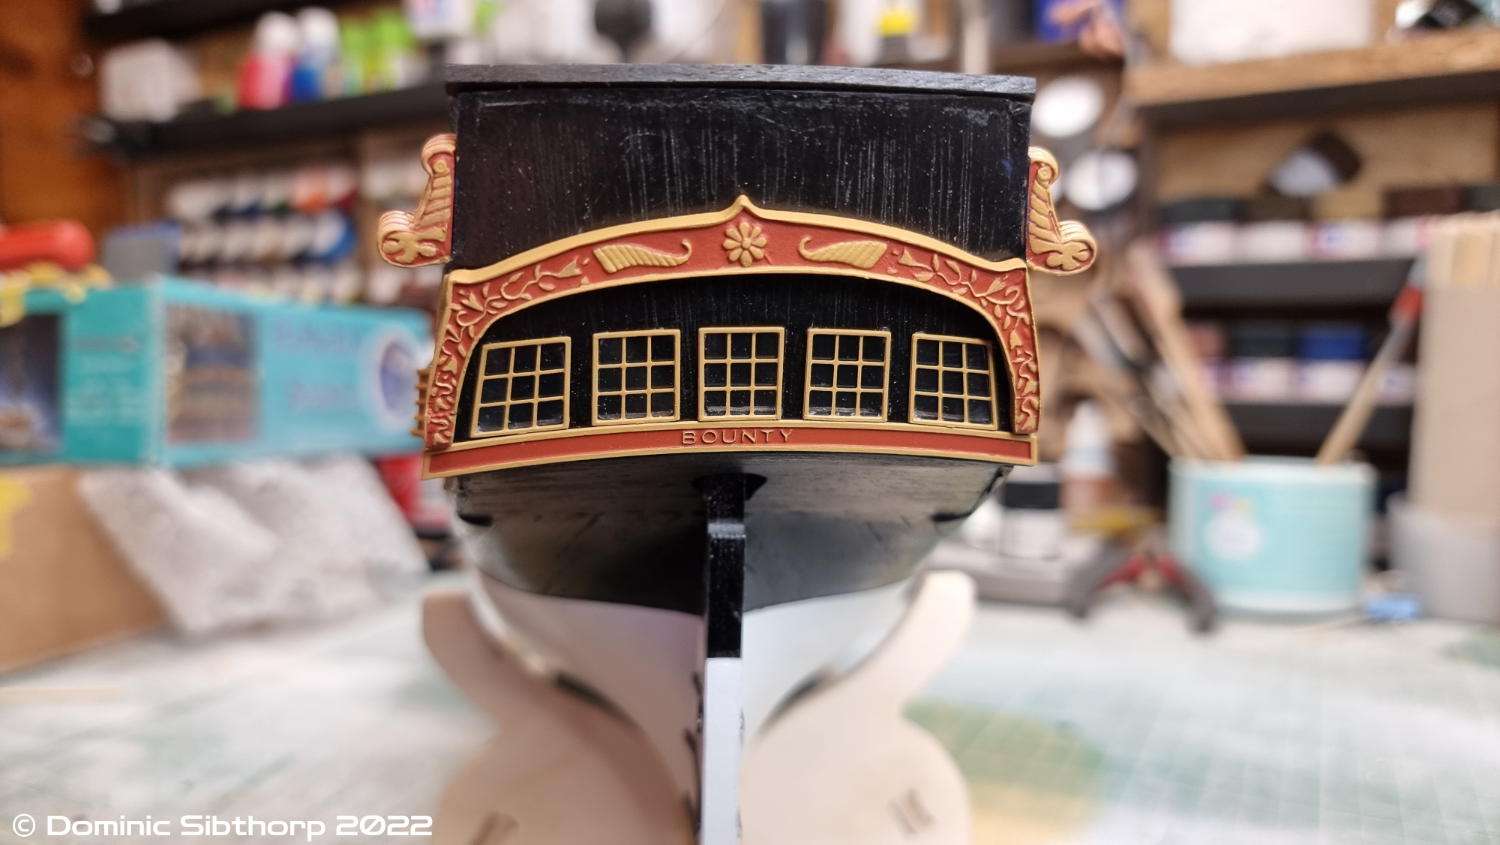
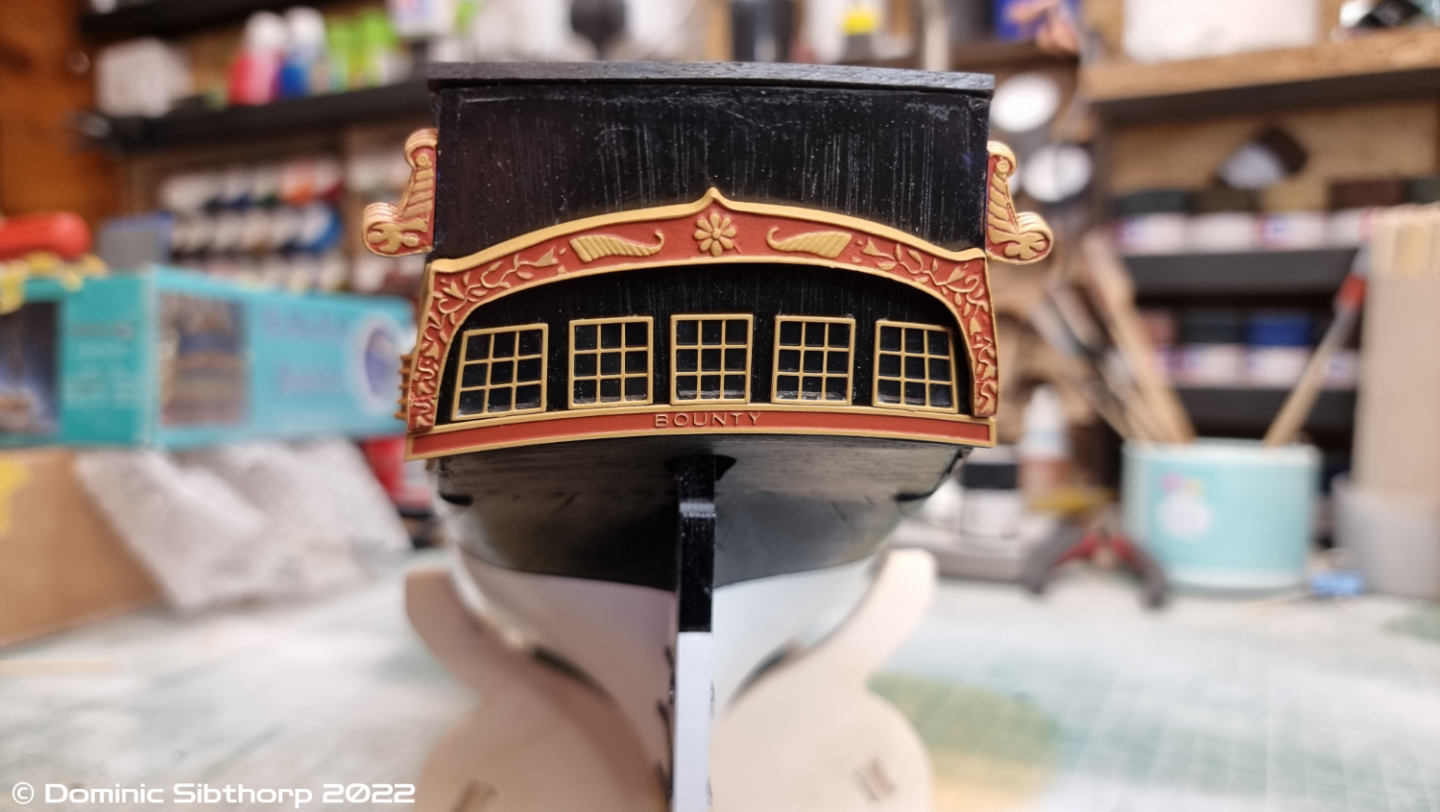
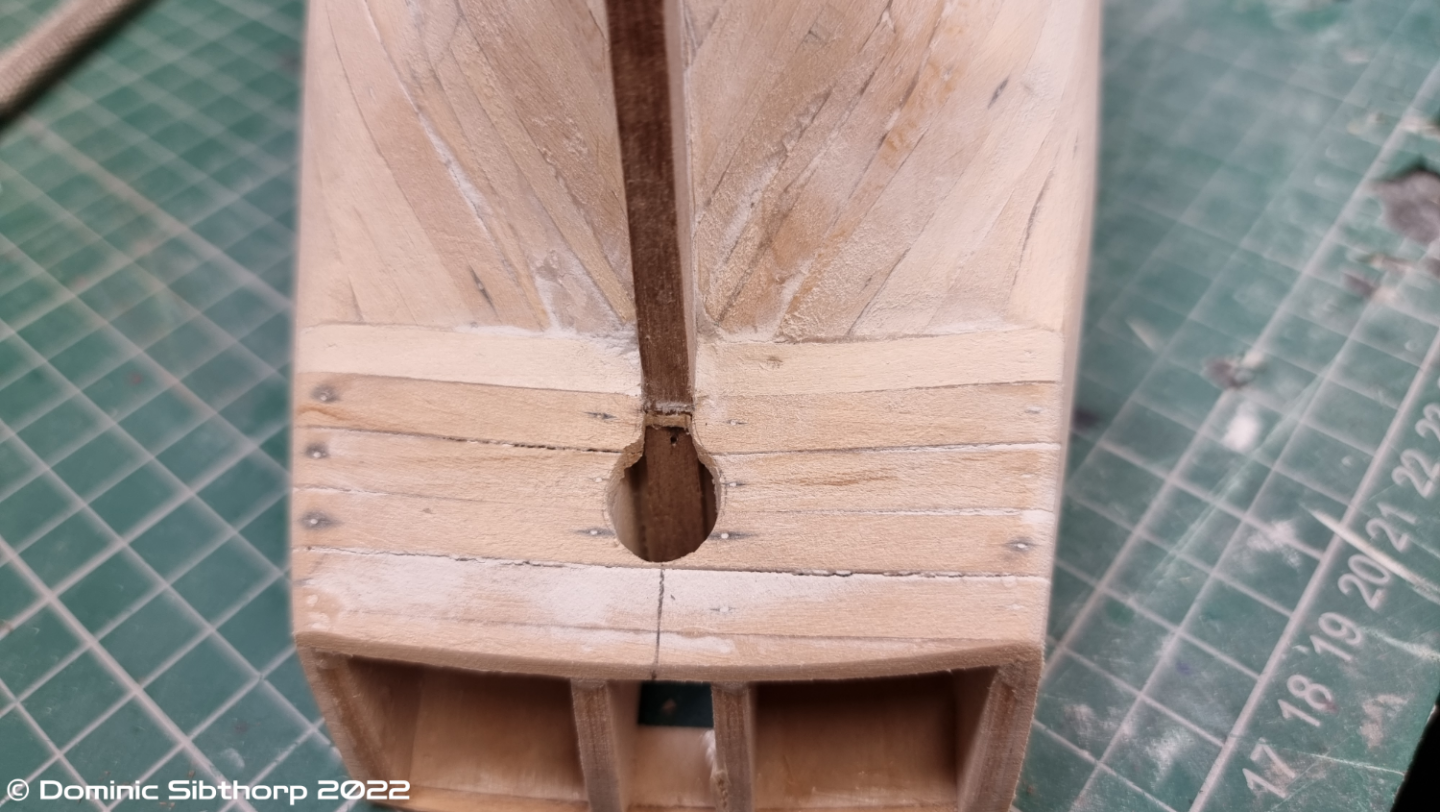
Hiya folks, Very quick update on this. I decided I agreed with Gregory and went about fixing the stern decorations. Initially I tried thinning down the kit ones but it became clear very quickly that wasn't going to work, and they were too short anyway. So I made my own from some scraps of wood and did my best to hand paint the swirls. I am absolutely appalling at brush painting by hand so these didn't turn out amazing, but I think overall they look ok. I also went back to the kit gallery windows, which now need some touching up. In between all of this, I got the rudder rigging into place. Thanks


-
I like the way that looks, hmm. I'd have two choices for doing that. I could either hack into the wood and sort of embed it, or, cut the castings in half so they are thinner and just fix them onto the back... Looking at the drawing you posted, the CC has a much greater curve to the base of the transom and the windows as well, so which is right?
-
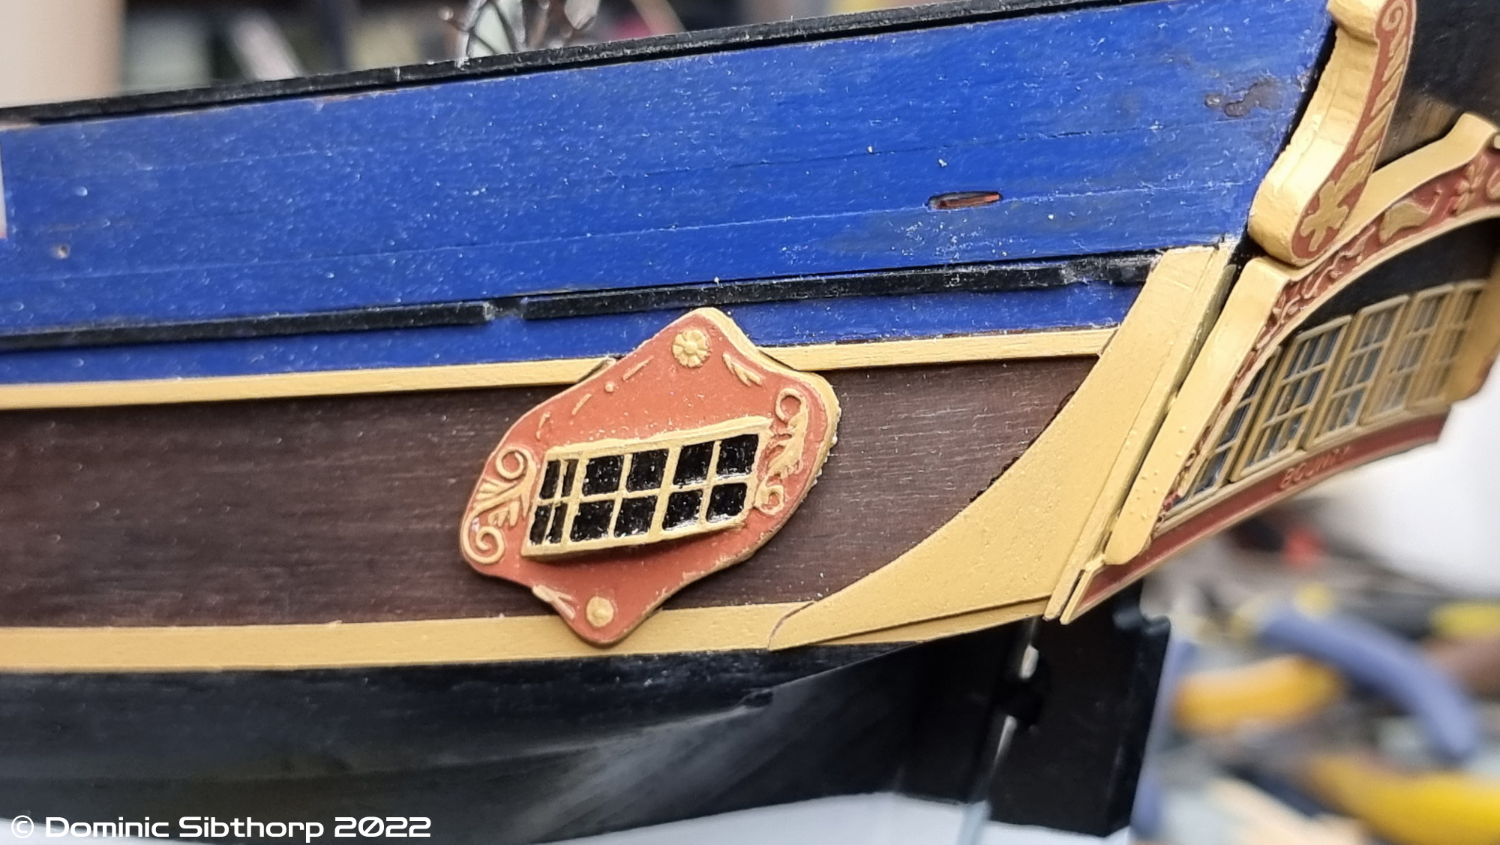
Thanks. The issue with the photo you picked is it is an American recreation of the Bounty, which is quite different to how she actually looked. For instance, there were no gaps in the bulwarks, and the name was below the stern windows and not above, and a flatter top with no trim. (as shown in this 1790's painting by Robert Dodd). I actually don't personally like the two side decorations at all, so I am in two minds whether to remove them. The QG's as I said in my post were an attempt to replace the kit castings, which in this kit were pretty bad, although I think mine had too many divisions, I think it was 2x2x2 not 4x4x4. Personally I prefer them over the kits.
-
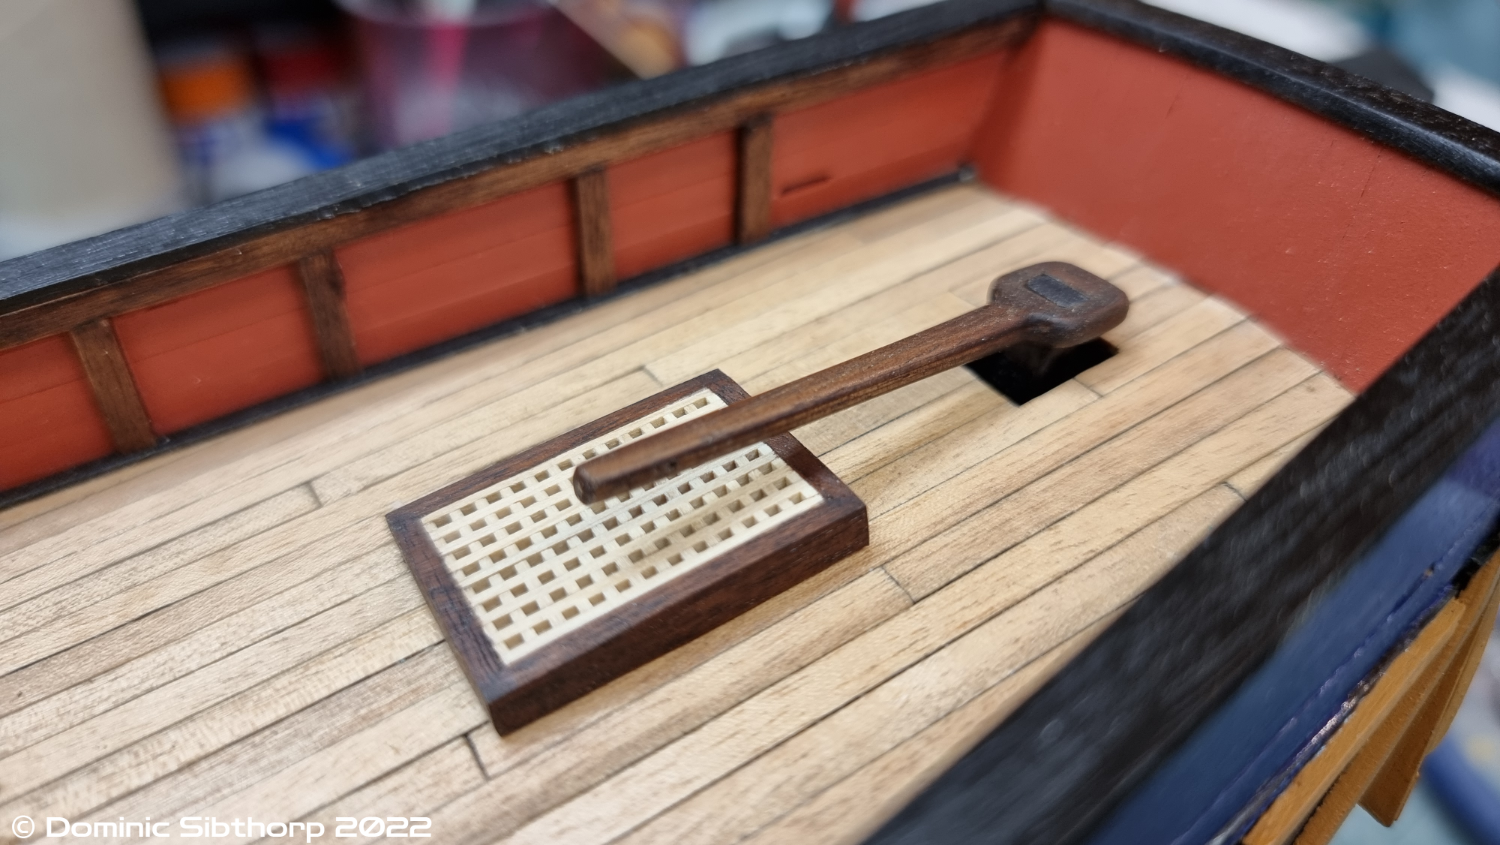
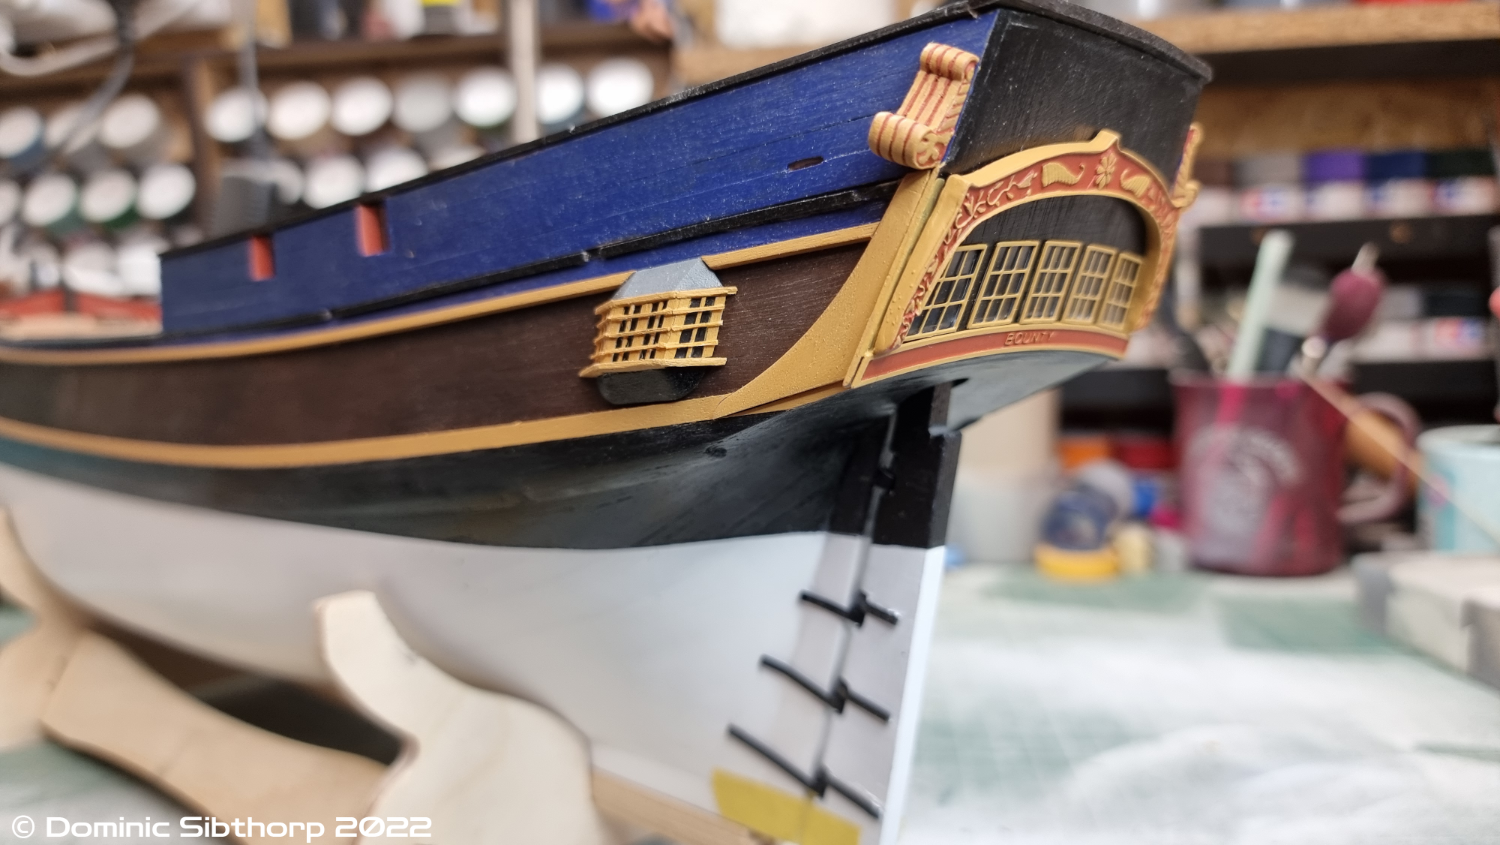
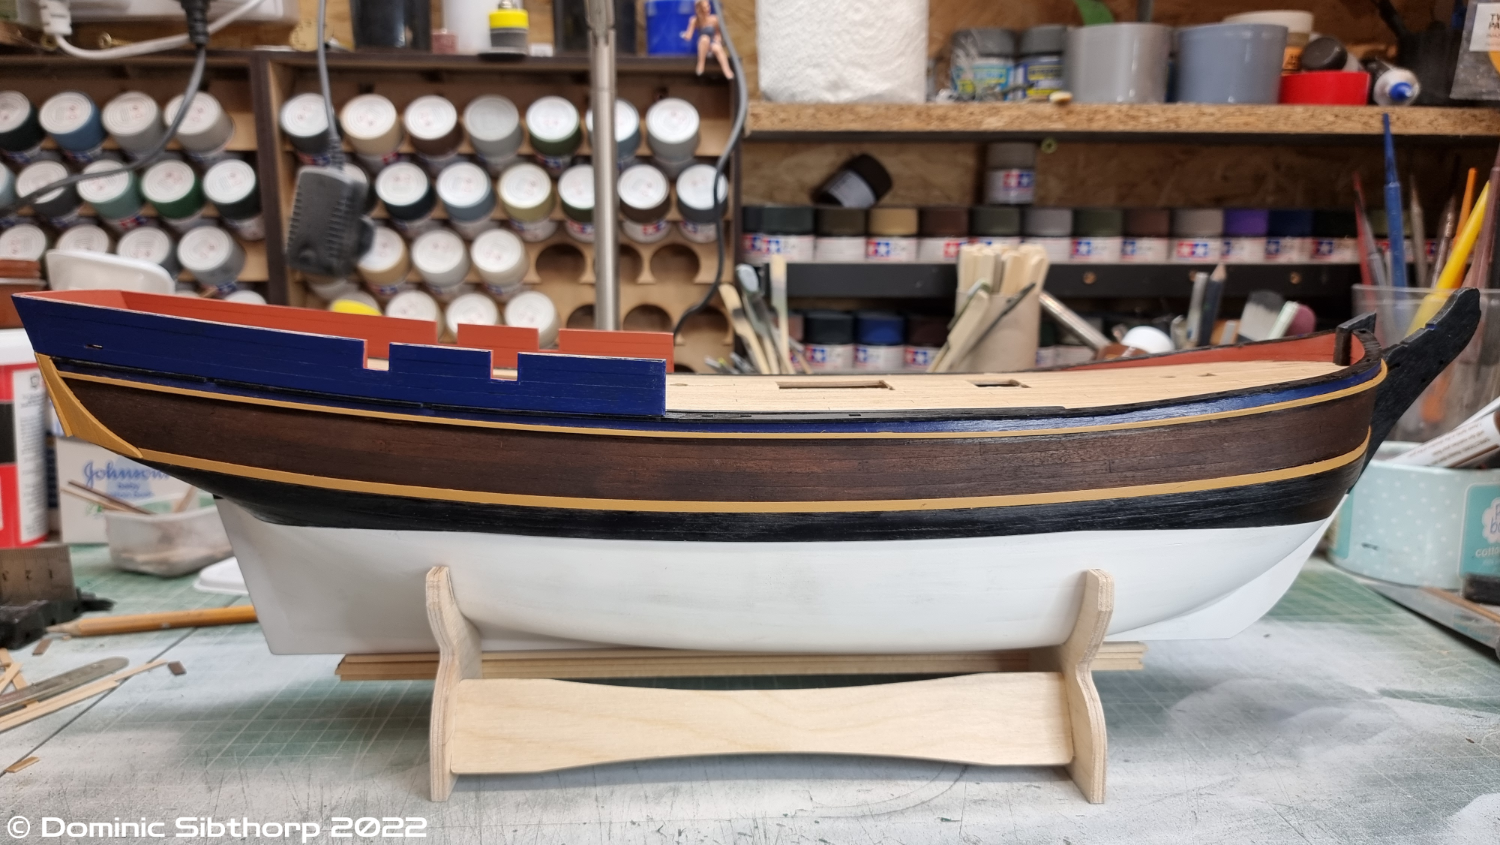
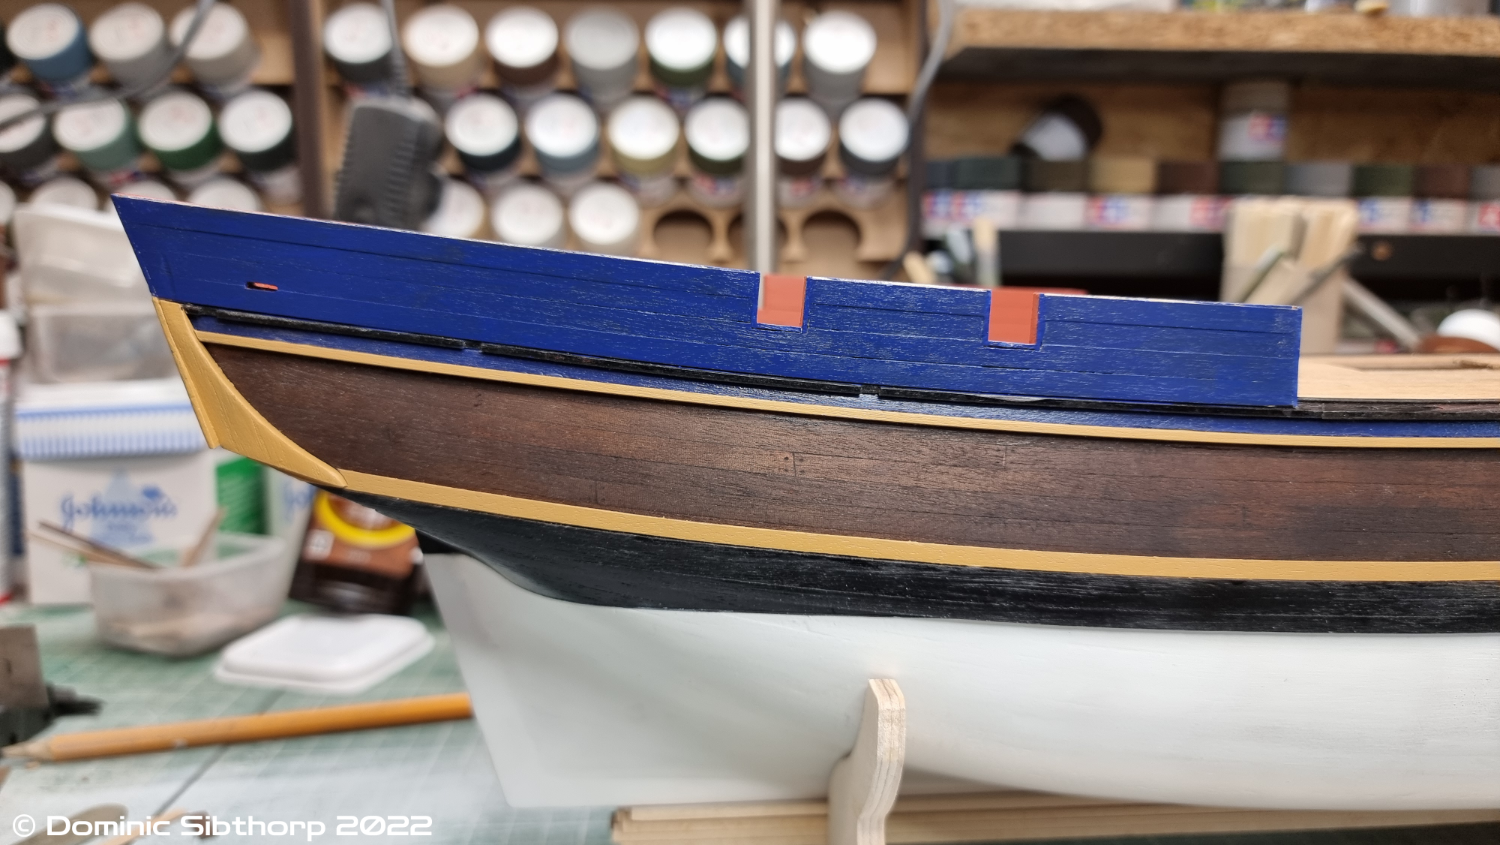
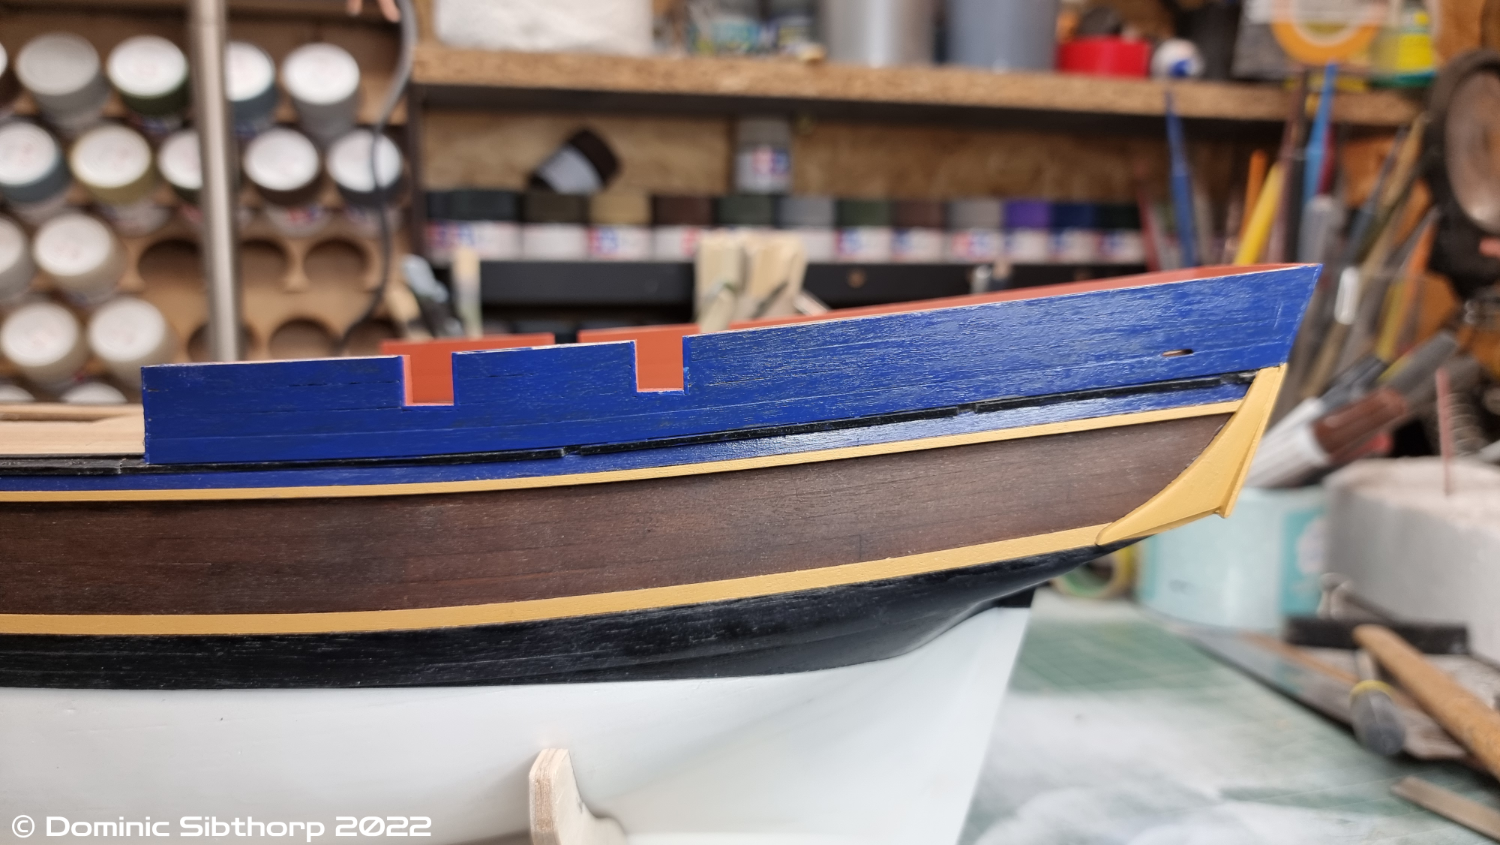
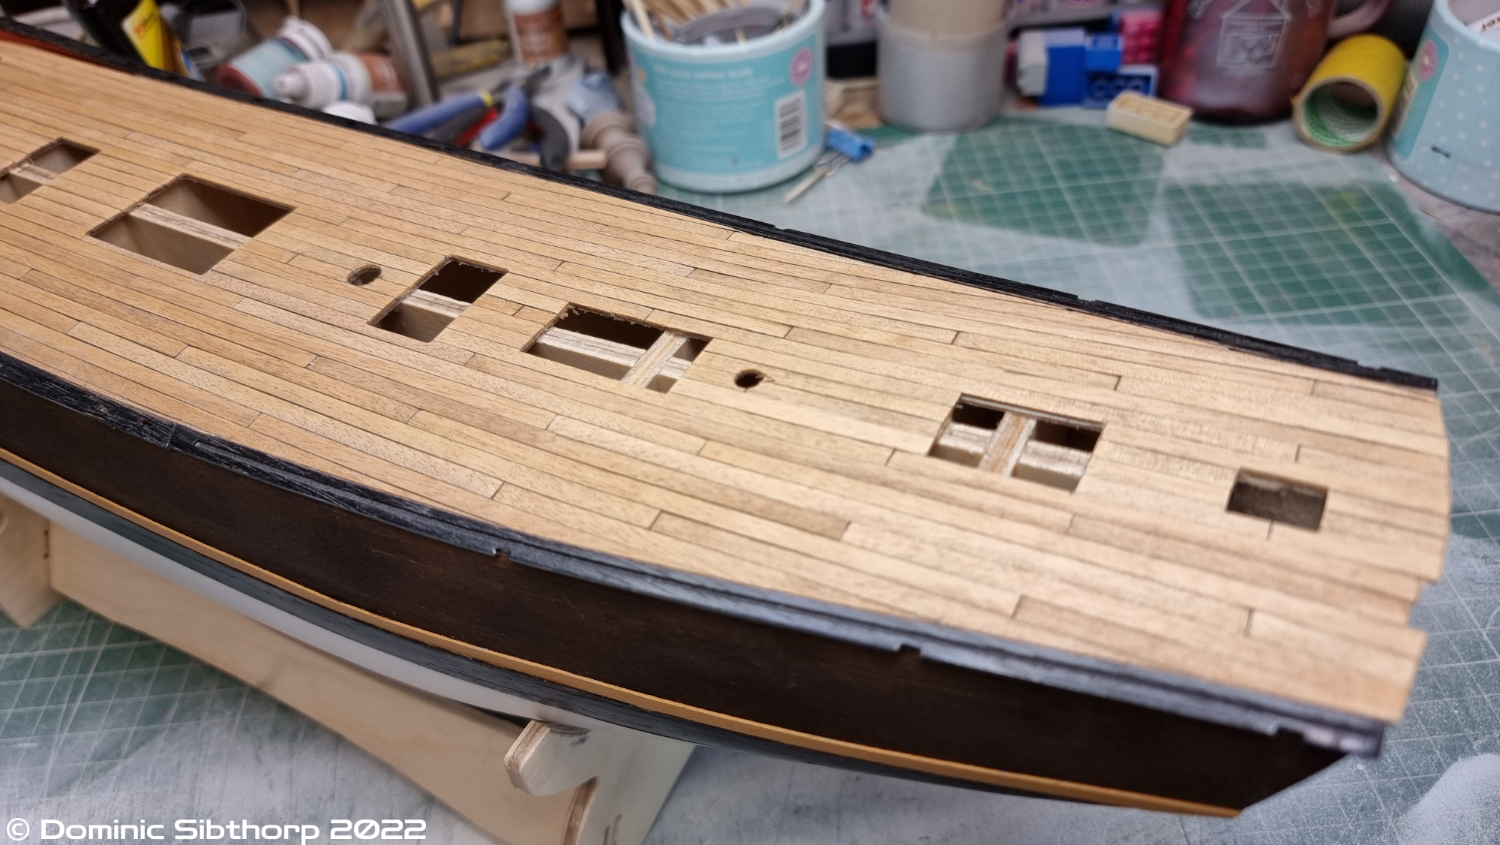
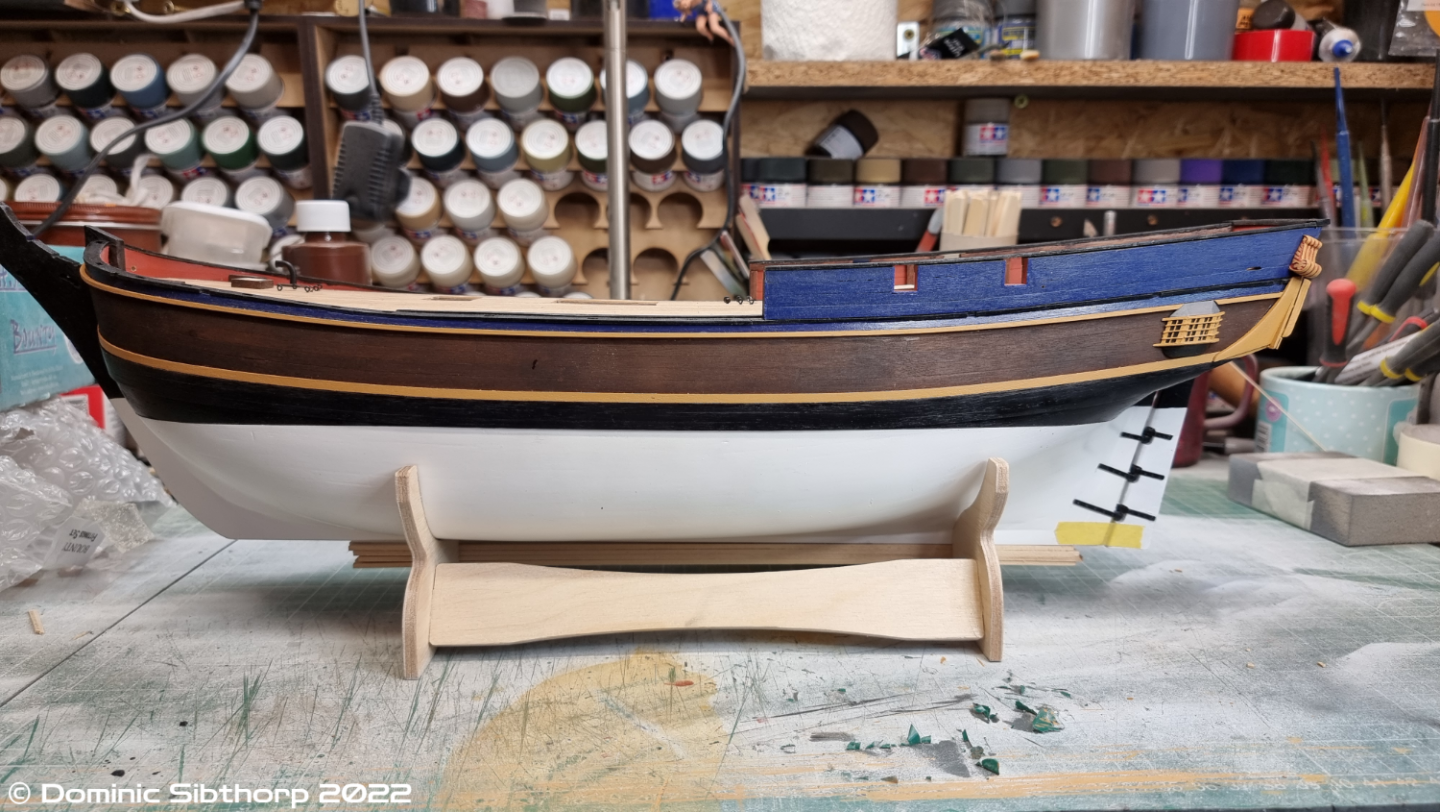
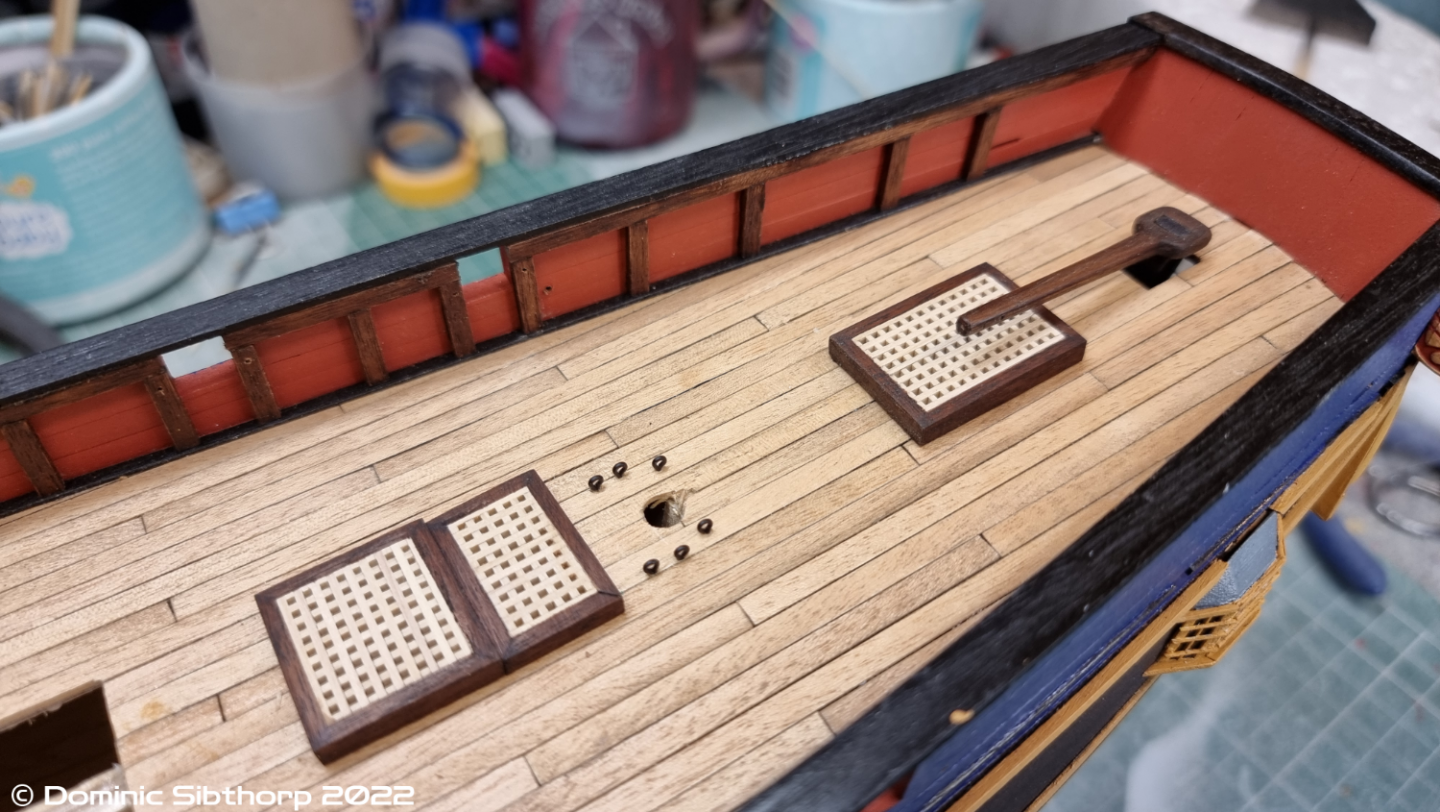
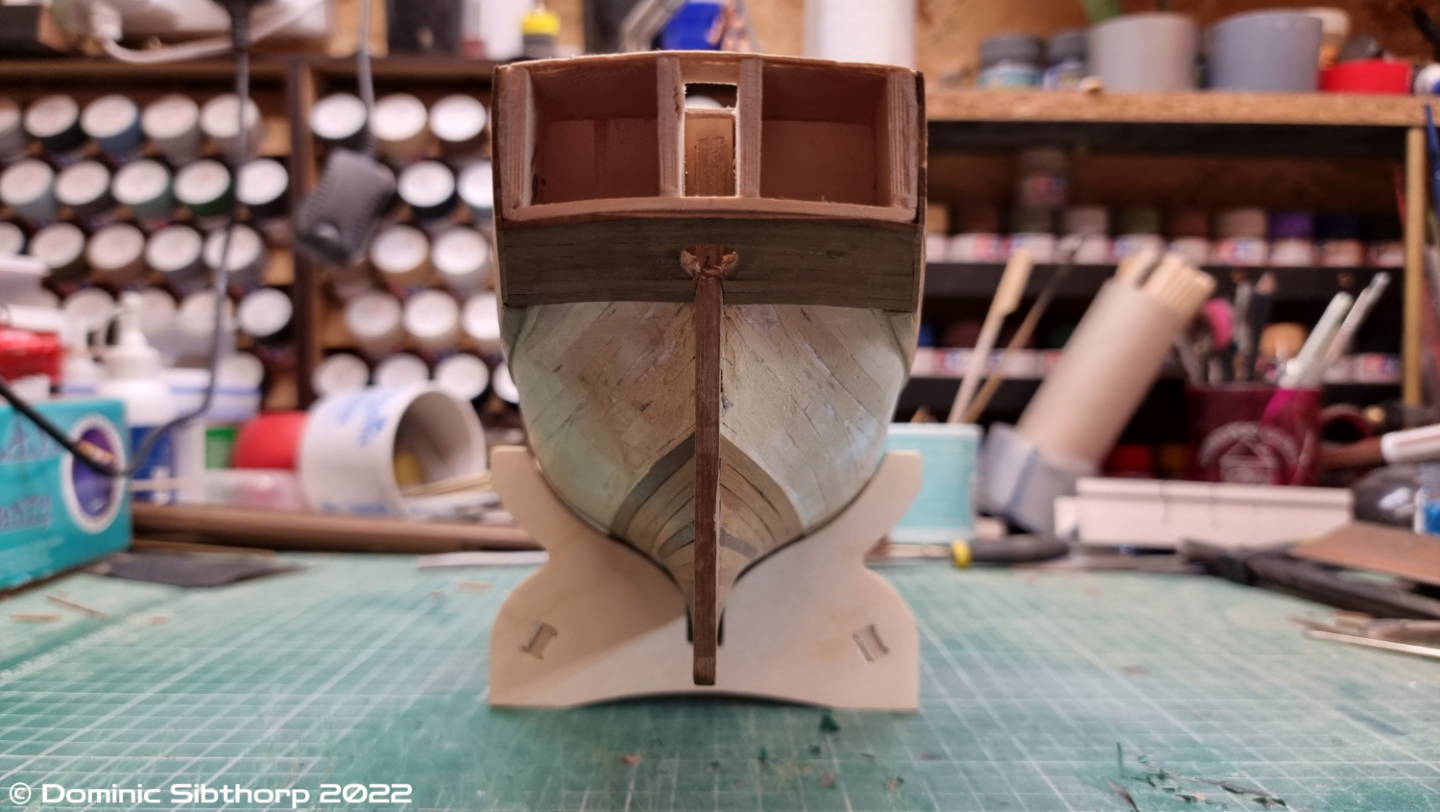
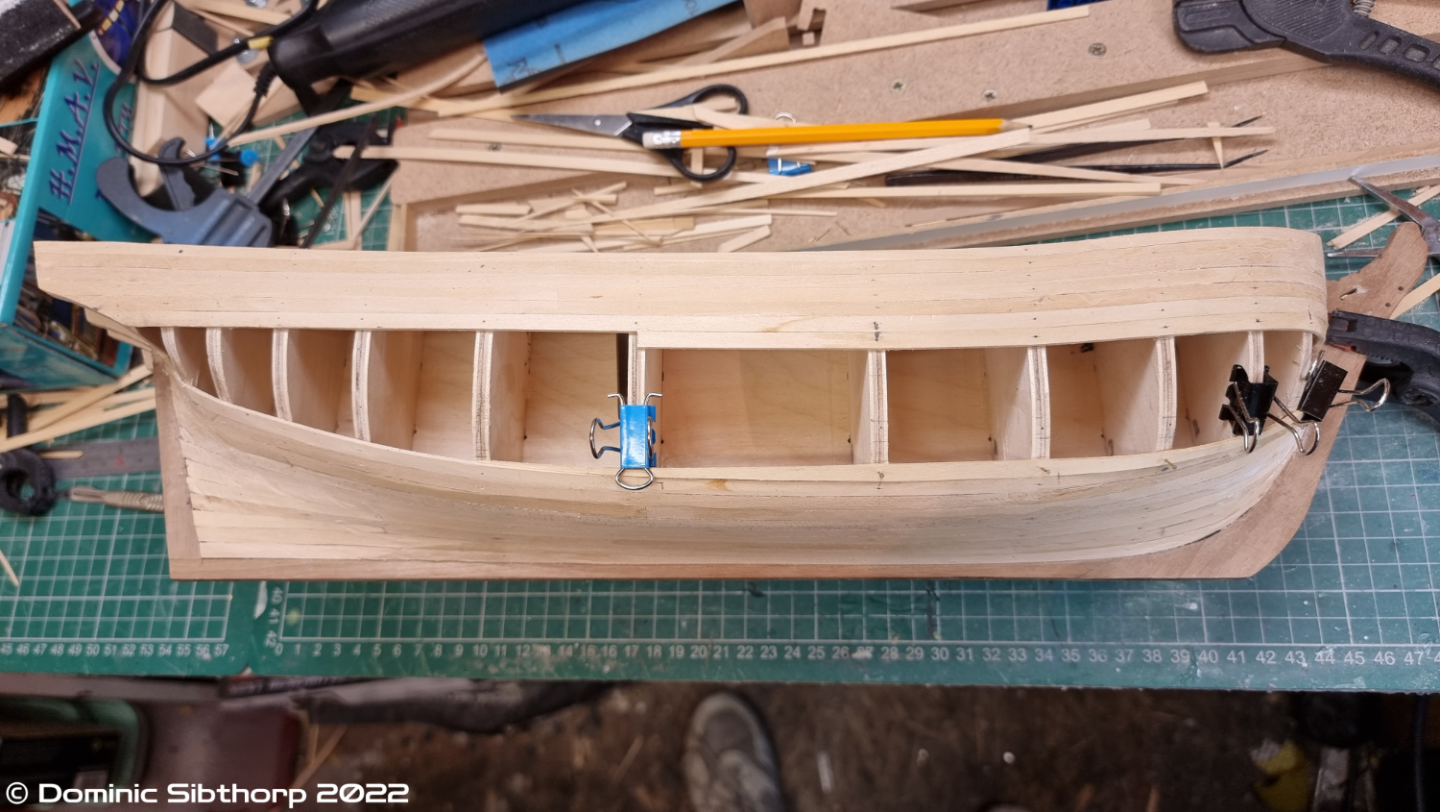
Good evening. I've made a little progress with this over the last week. Added: Bulwark frames. Stern windows and decoration. Side galleries (I decided I didn't like the castings that came with the kit so I fashioned my own. Not amazing but I prefer them better than the kit ones). Grating hatches. Fitted the rudder. That's all for now, thanks.


-
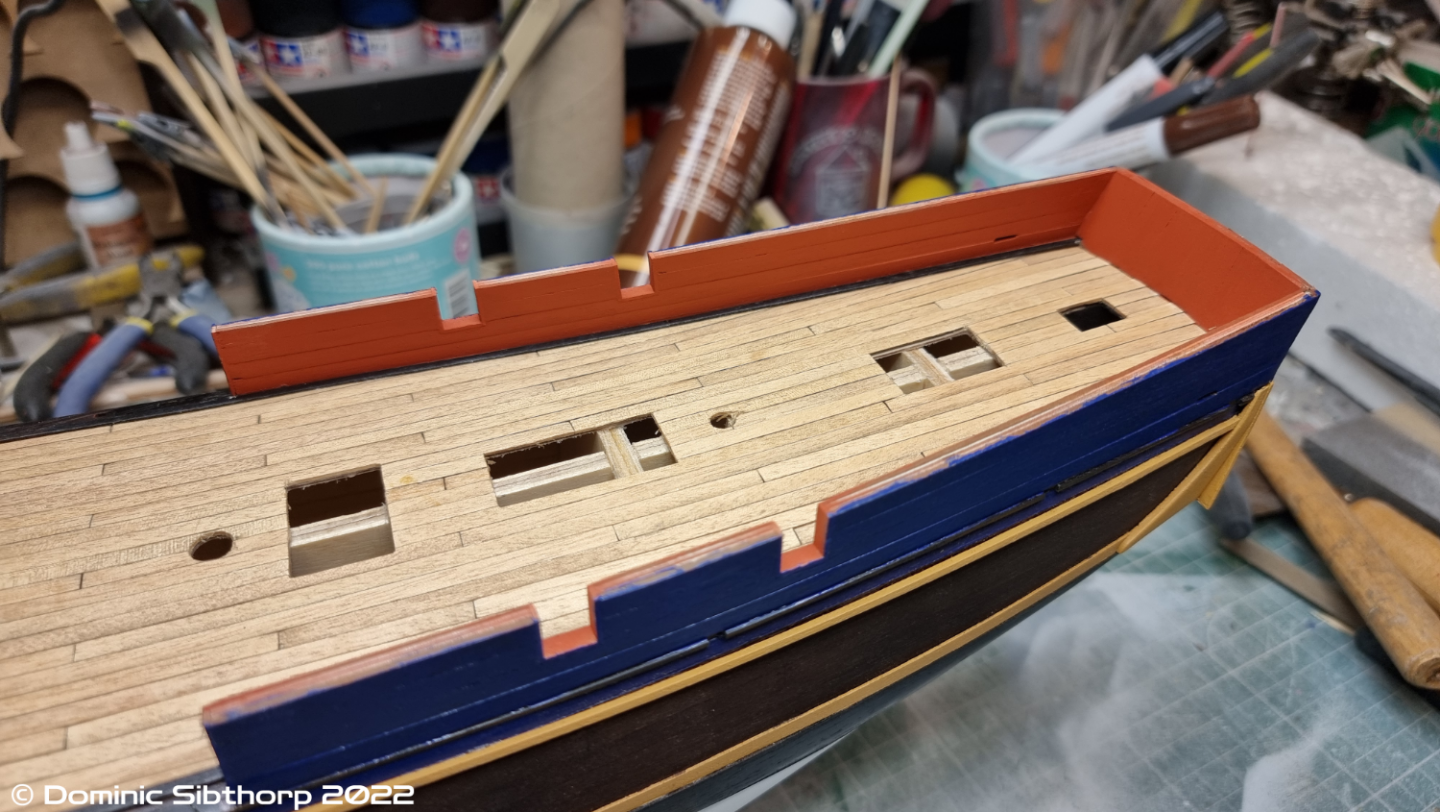
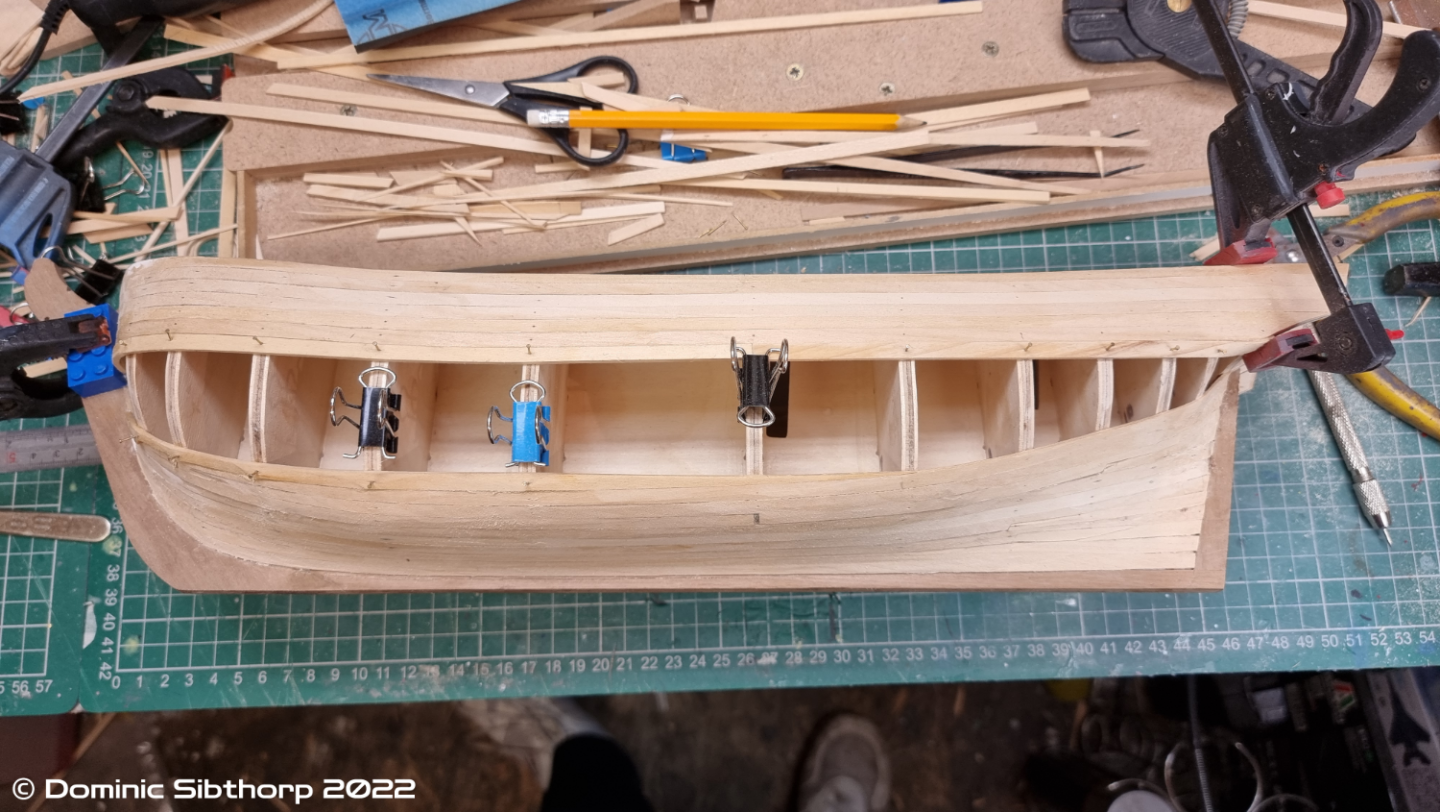
Morning folks. Small update. Well smallish. Rear bulwark patterns fitted and planked inside and out. Stern gallery pattern fitted and painted. I was going to plank this as well, but decided against it. And the rear trim/combings (not sure their term) fitted and blended to match the angle of the stern pattern. I was able to get this to look much better than my previous attempt where it just look stuck on as an afterthought, this time it looks like part of the ship. I also lined the gunports and the exposed leading edge of the bulwark. Thanks


-
Thanks Most of it is Tamiya. They are a few years old now and are fine. I airbrush 90% of the time anyway so I just thin as needed, but I haven't noticed any of it thicken up with time. The few Admiralty paints you can see in the background of my last post are a good 5 years old now, and they are all still perfect.
-
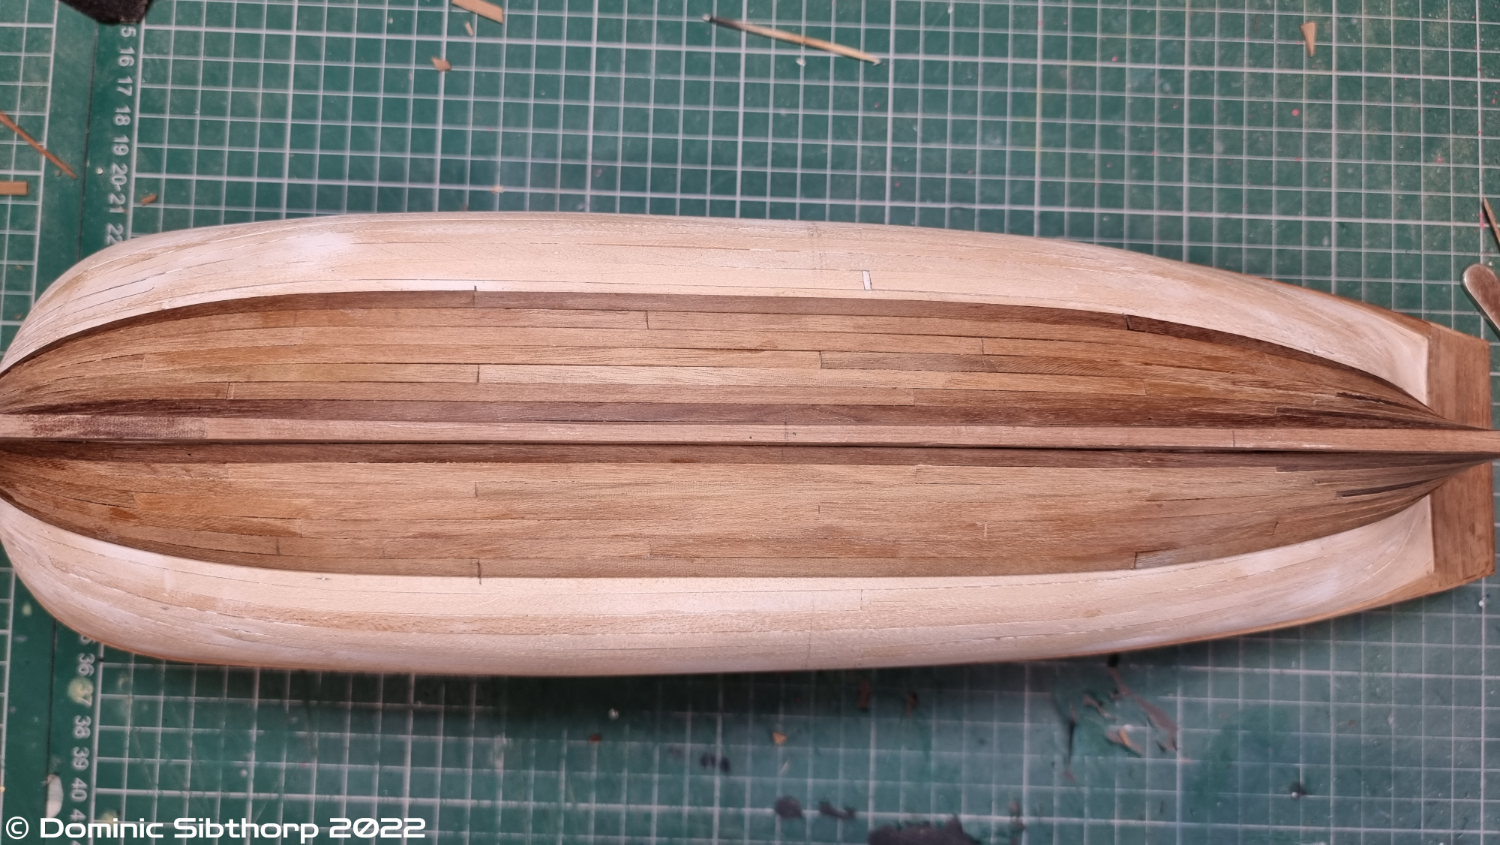
Hello. Main deck now done. I know in reality the deck planks would have most likely been laid in one single length, but I like the look of a 4 shift pattern. I used a graphite pencil for the simulated caulking, and after sanding smooth with various grades, I sealed it using a rattlecan Halfords Clear Lacquer which soaked into the wood, bringing out the grain and leaving it butter smooth. Why did I use a lacquer? Because it works. (This is where someone tells me it will look ok now but in 10 years time will turn purple with yellow spots lol) I will still polish with beeswax as soon as it arrives, once I ascertain if I will still be able to use adhesive for the deck furniture as not sure how that works. I also have some Danish Oil on order for a future build.


-
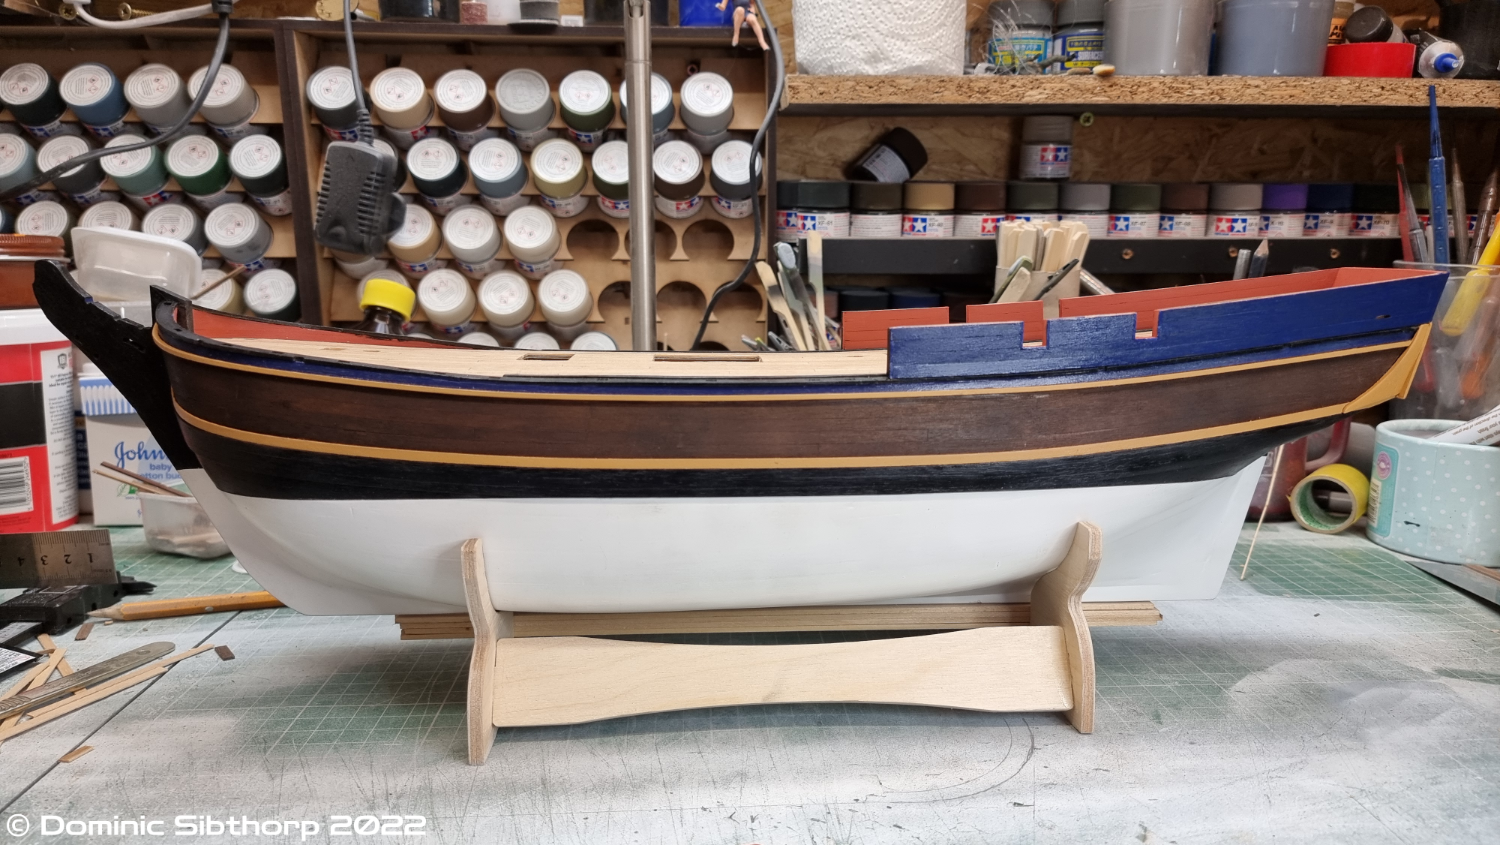
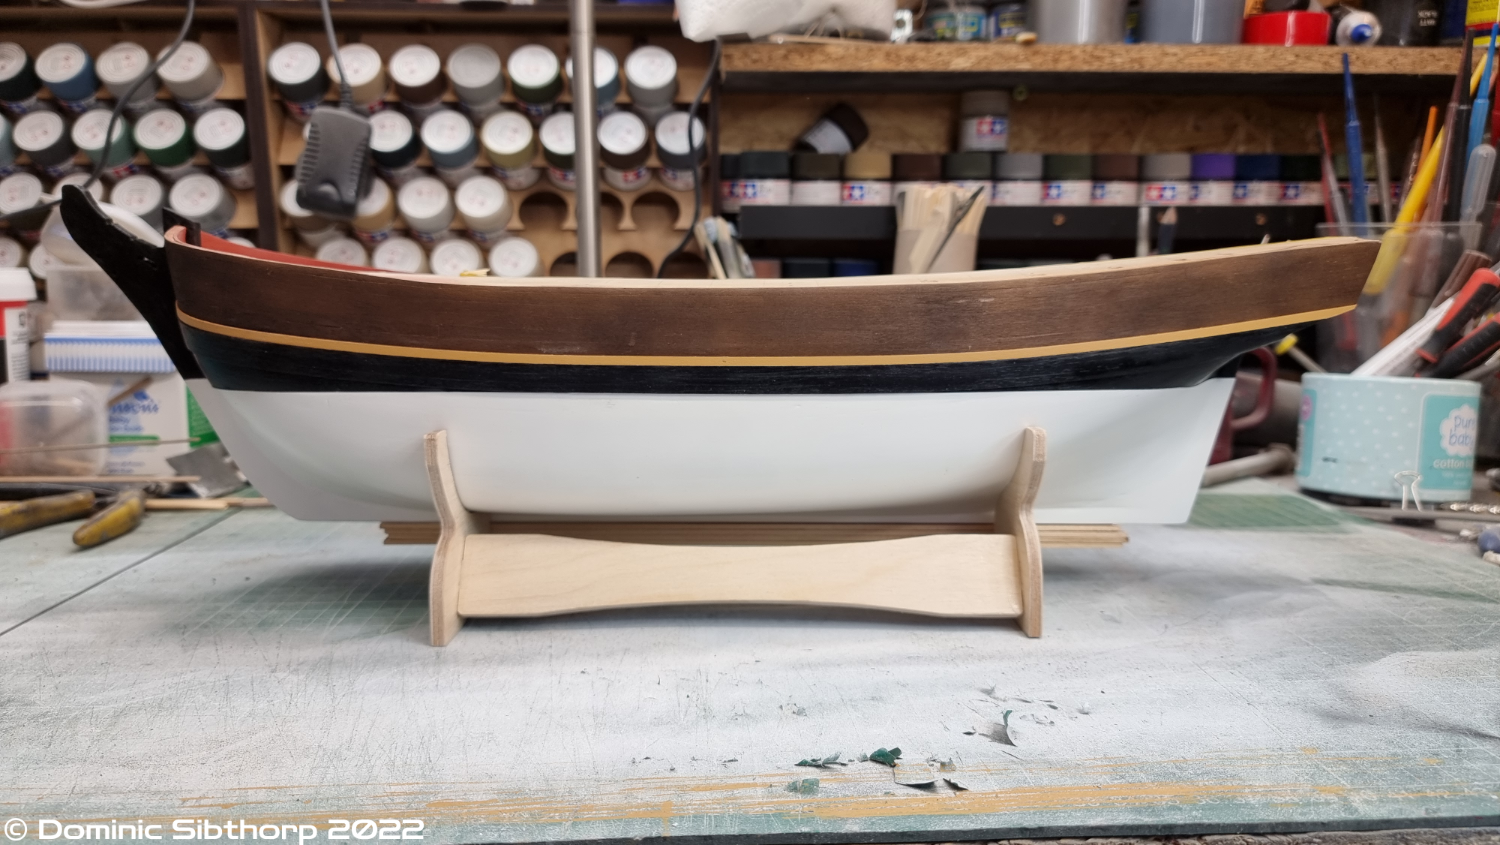
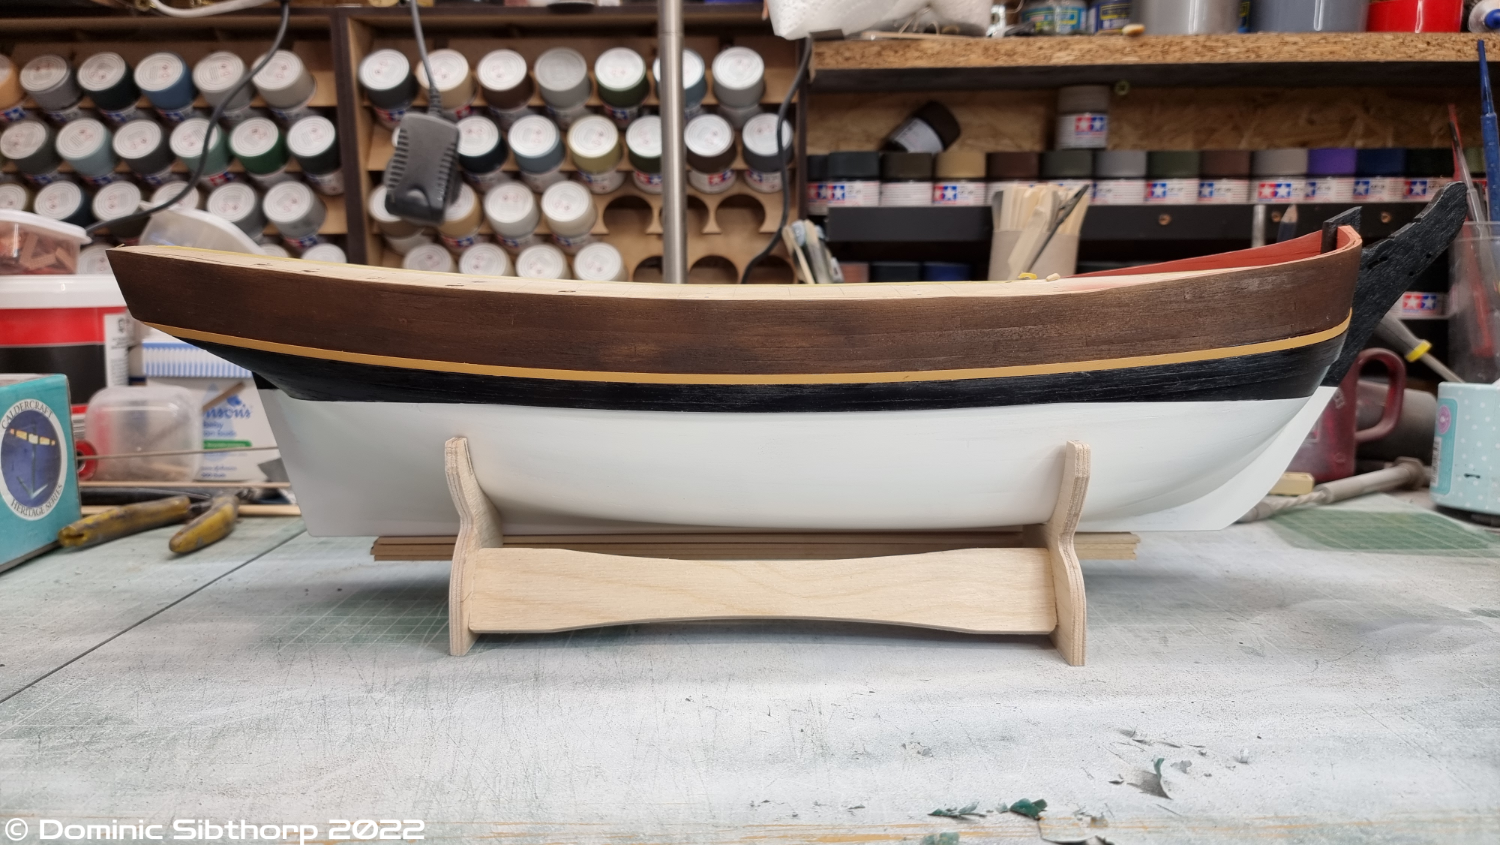
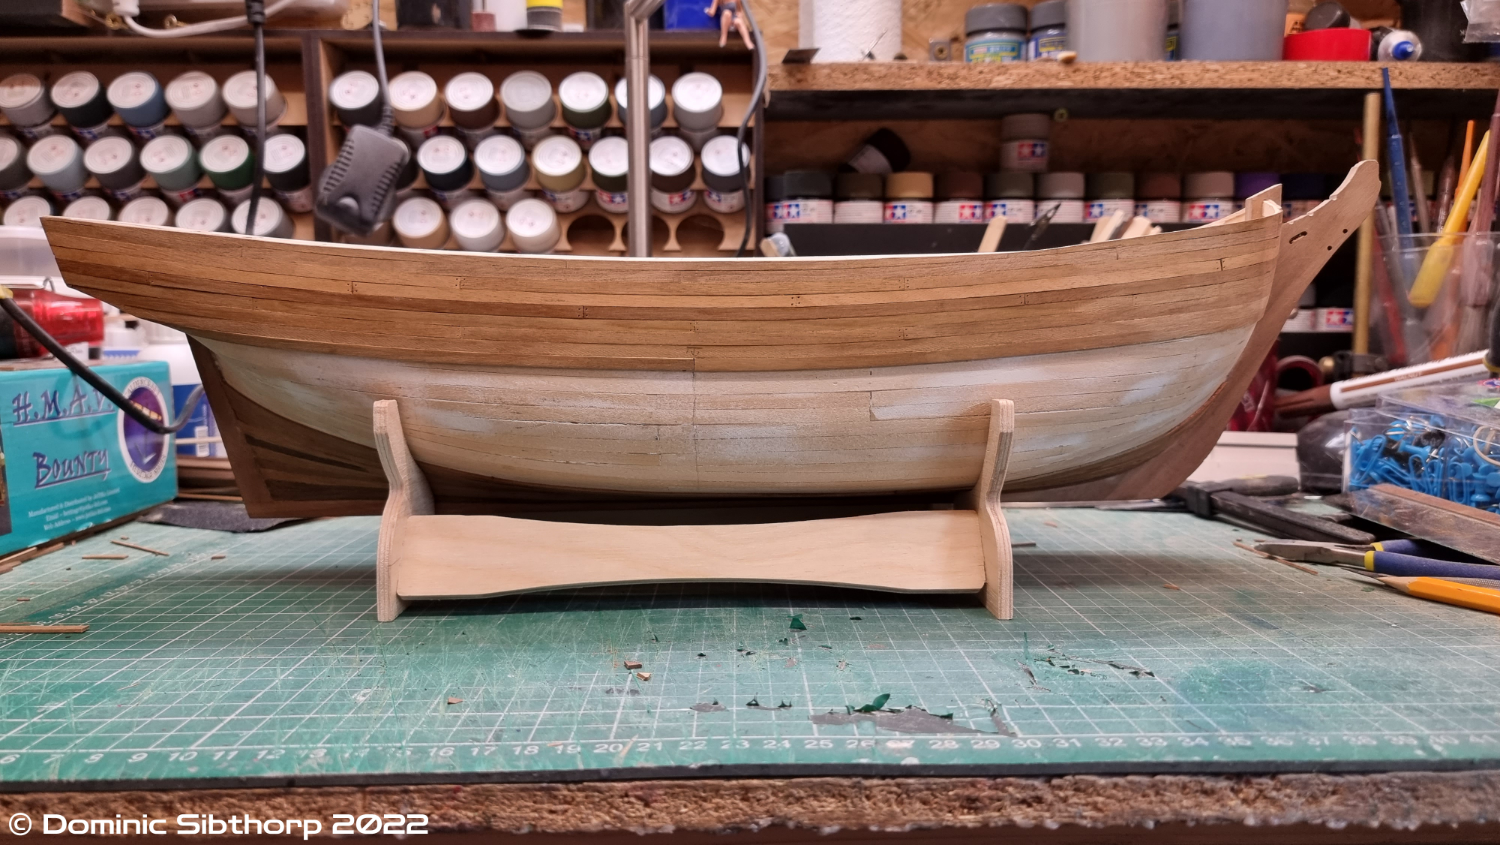
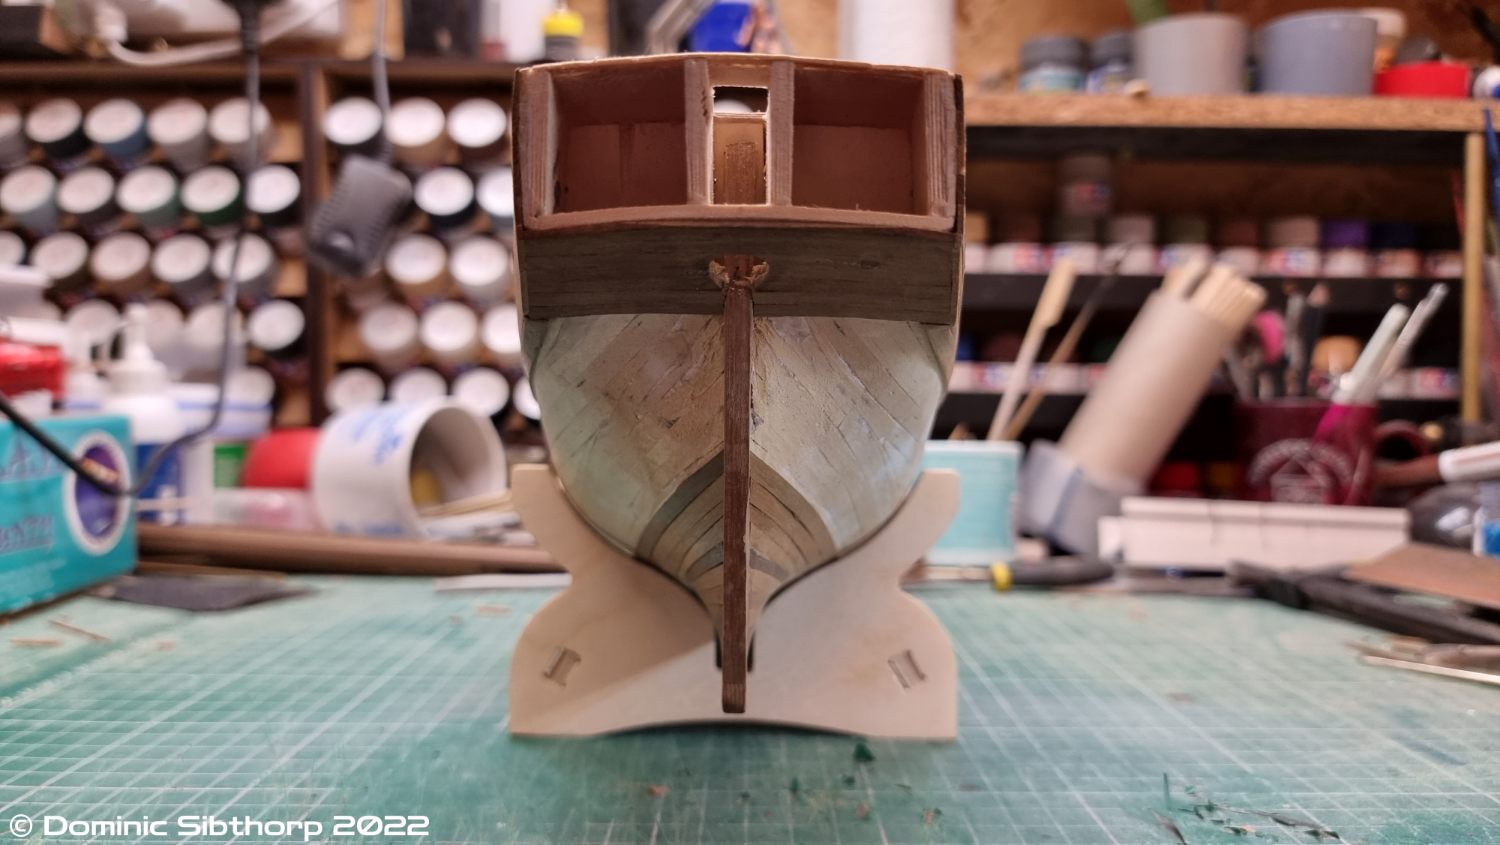
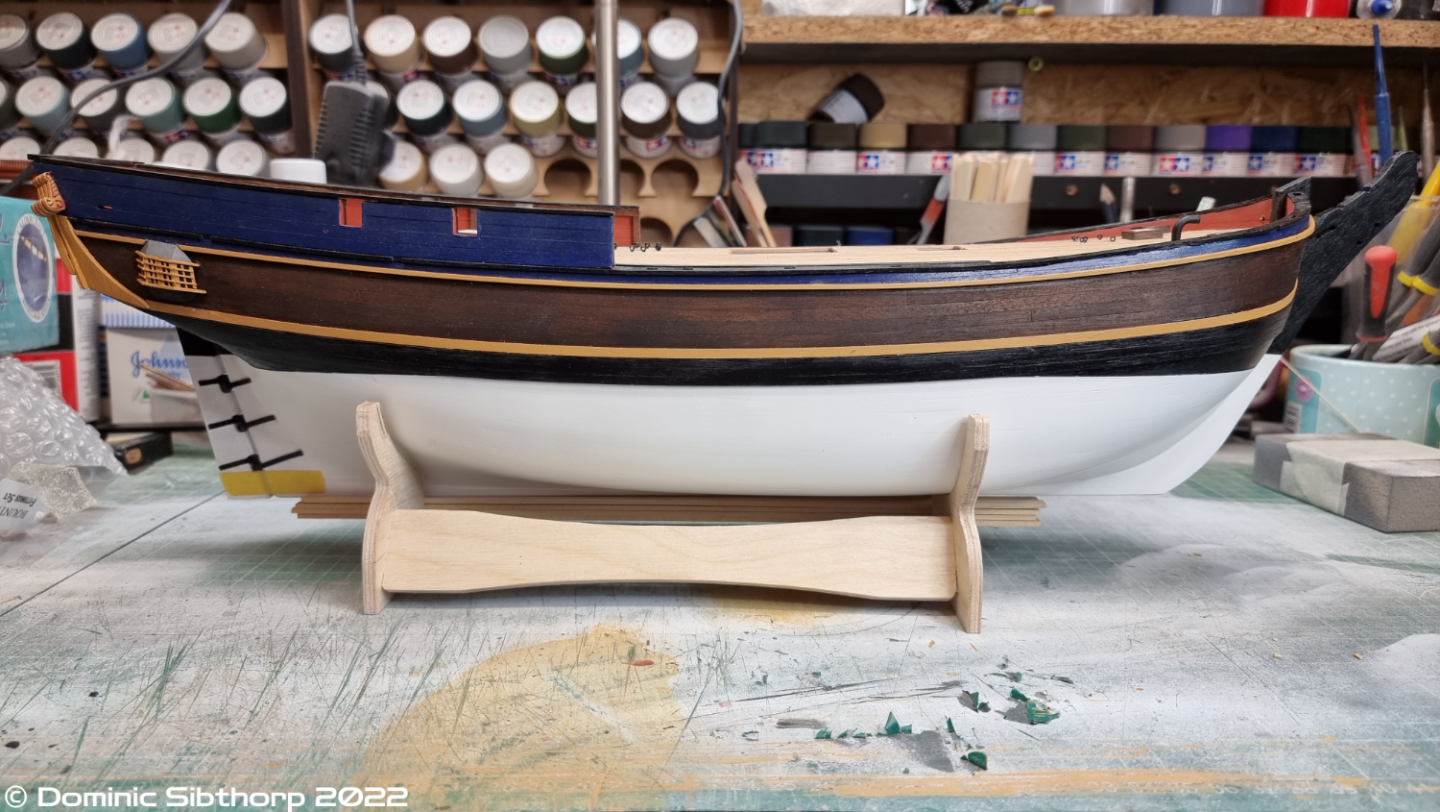
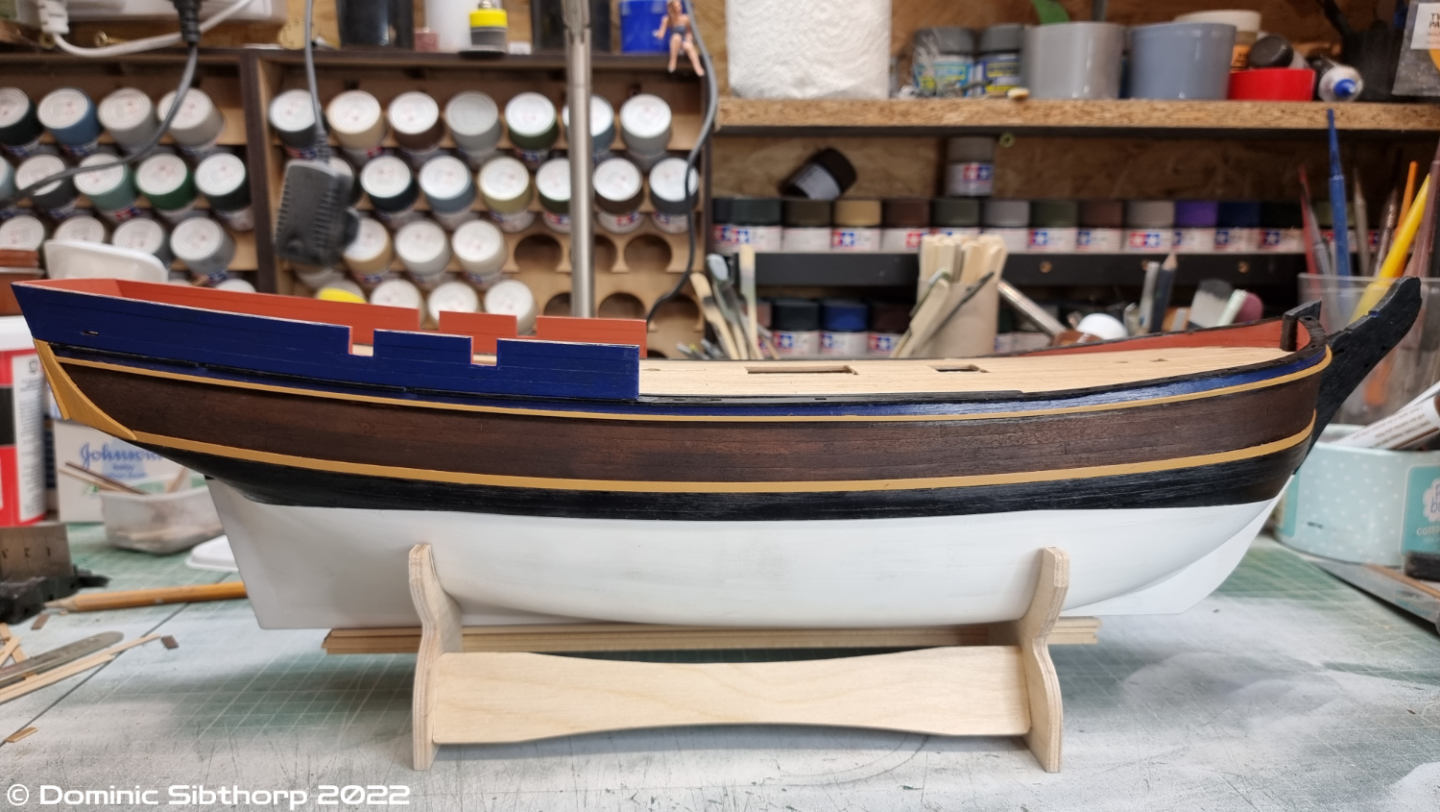
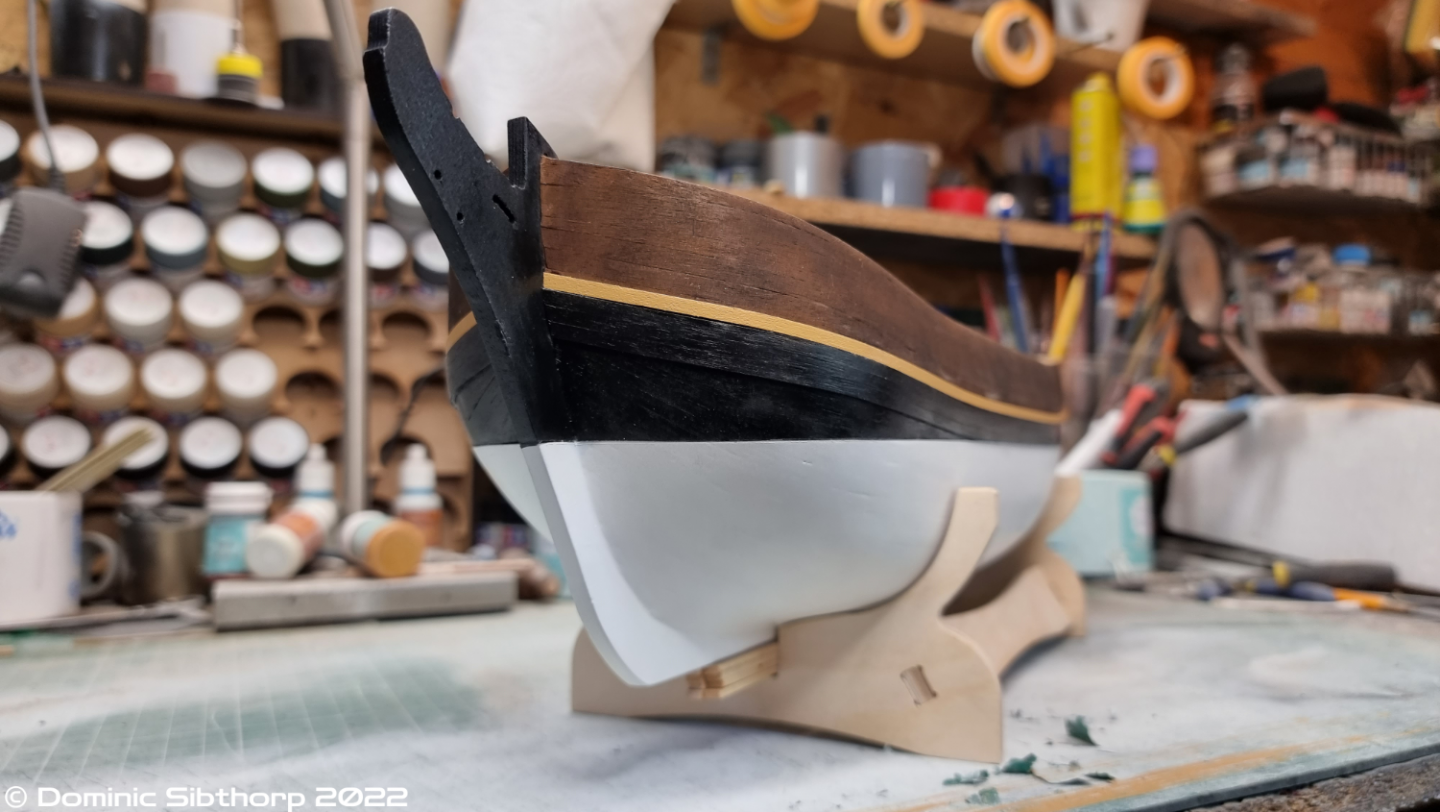
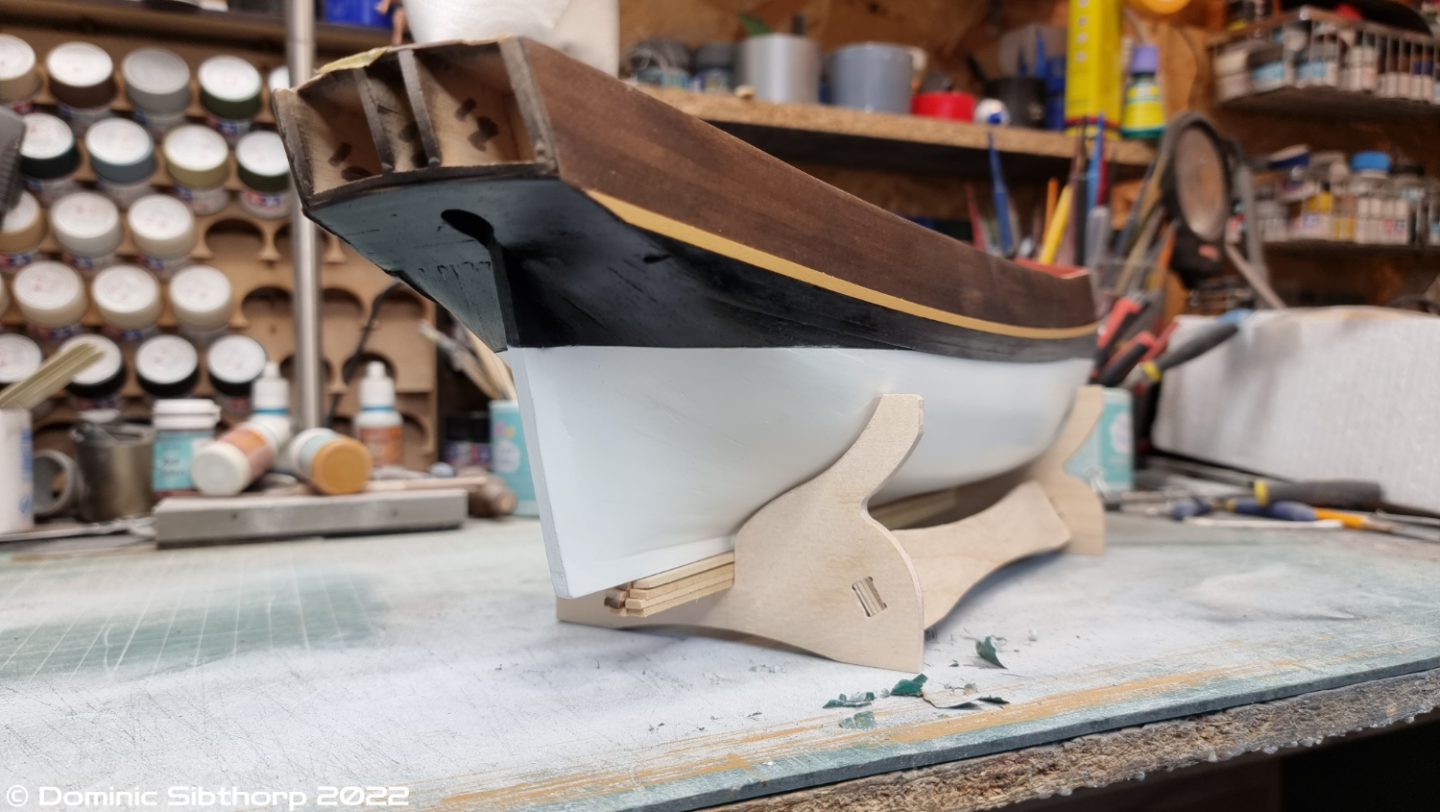
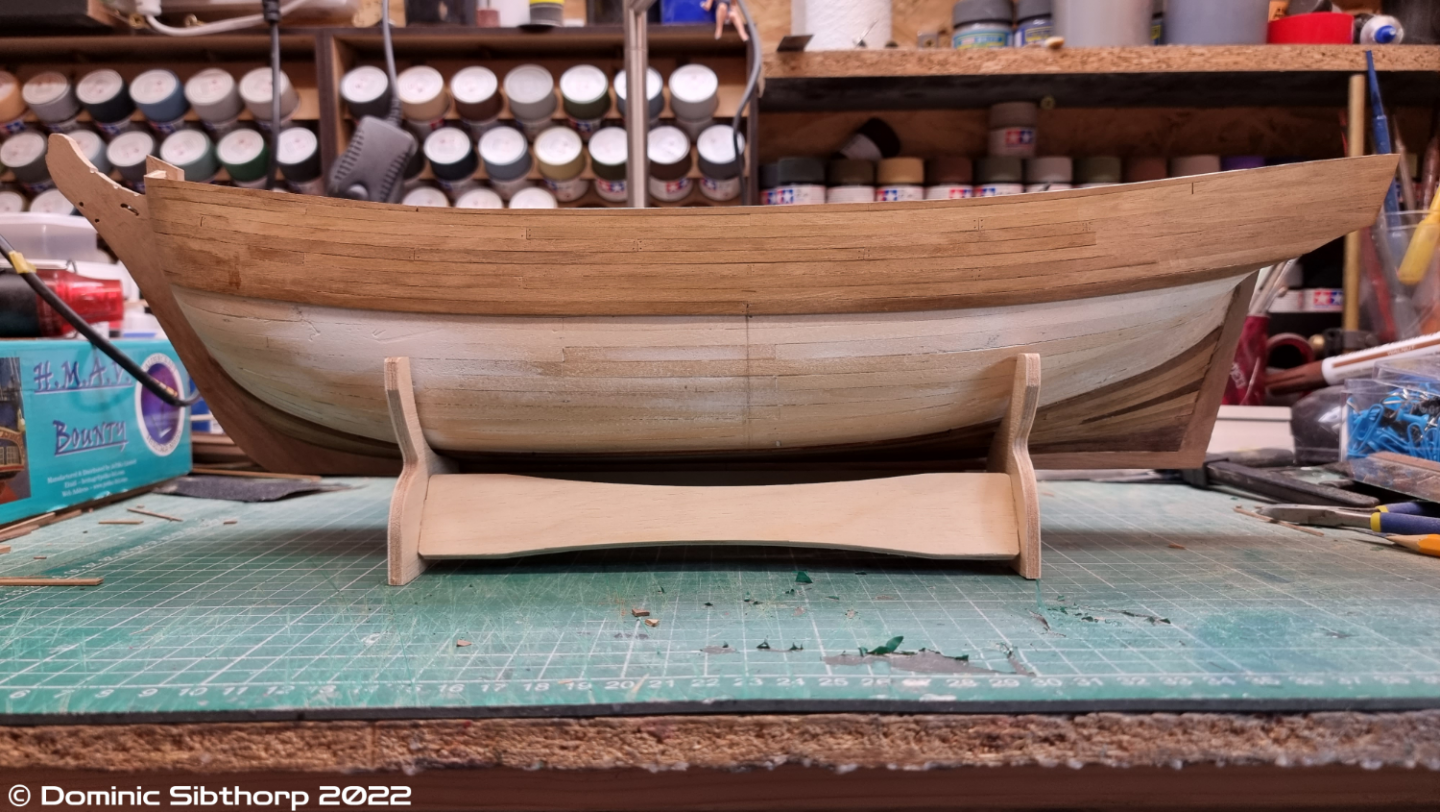
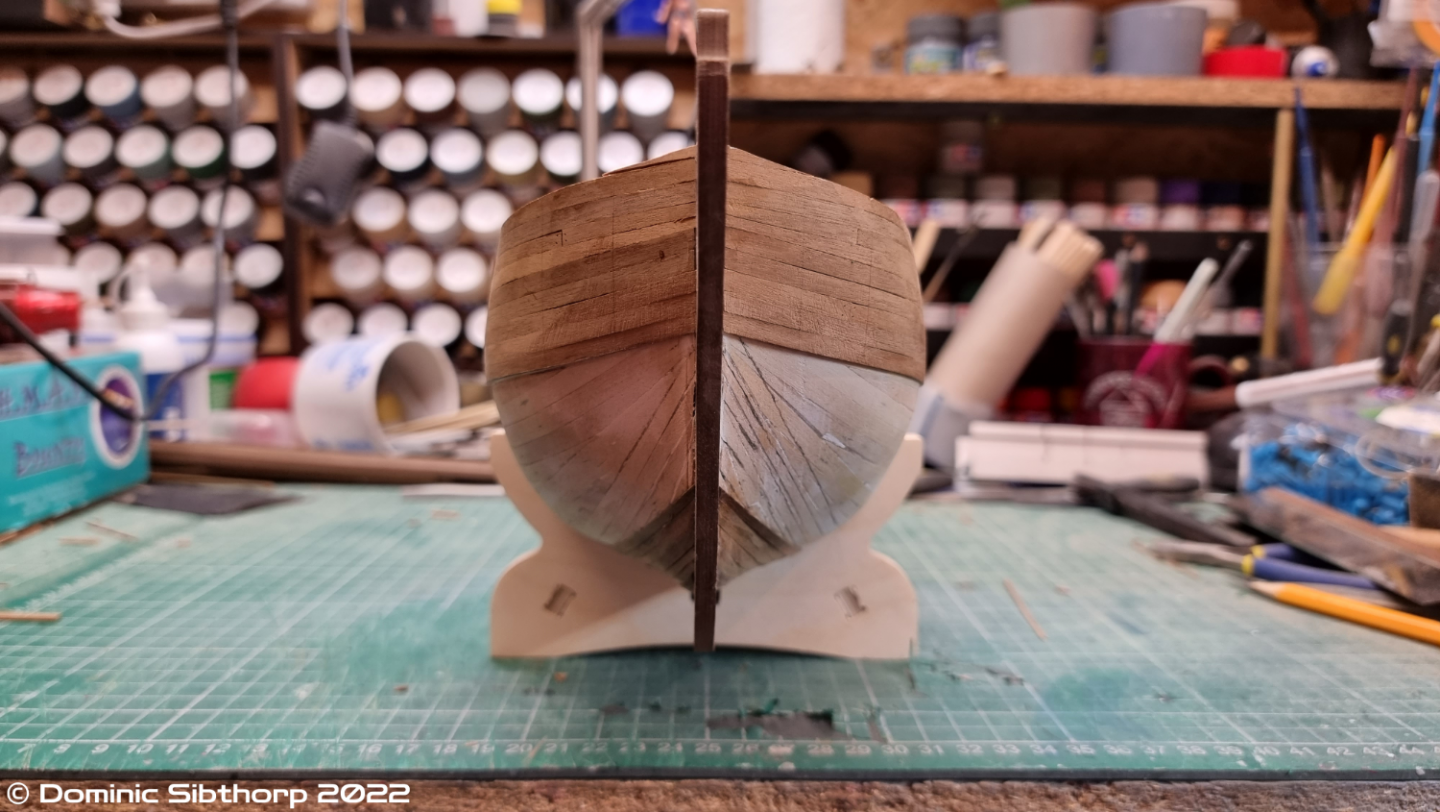
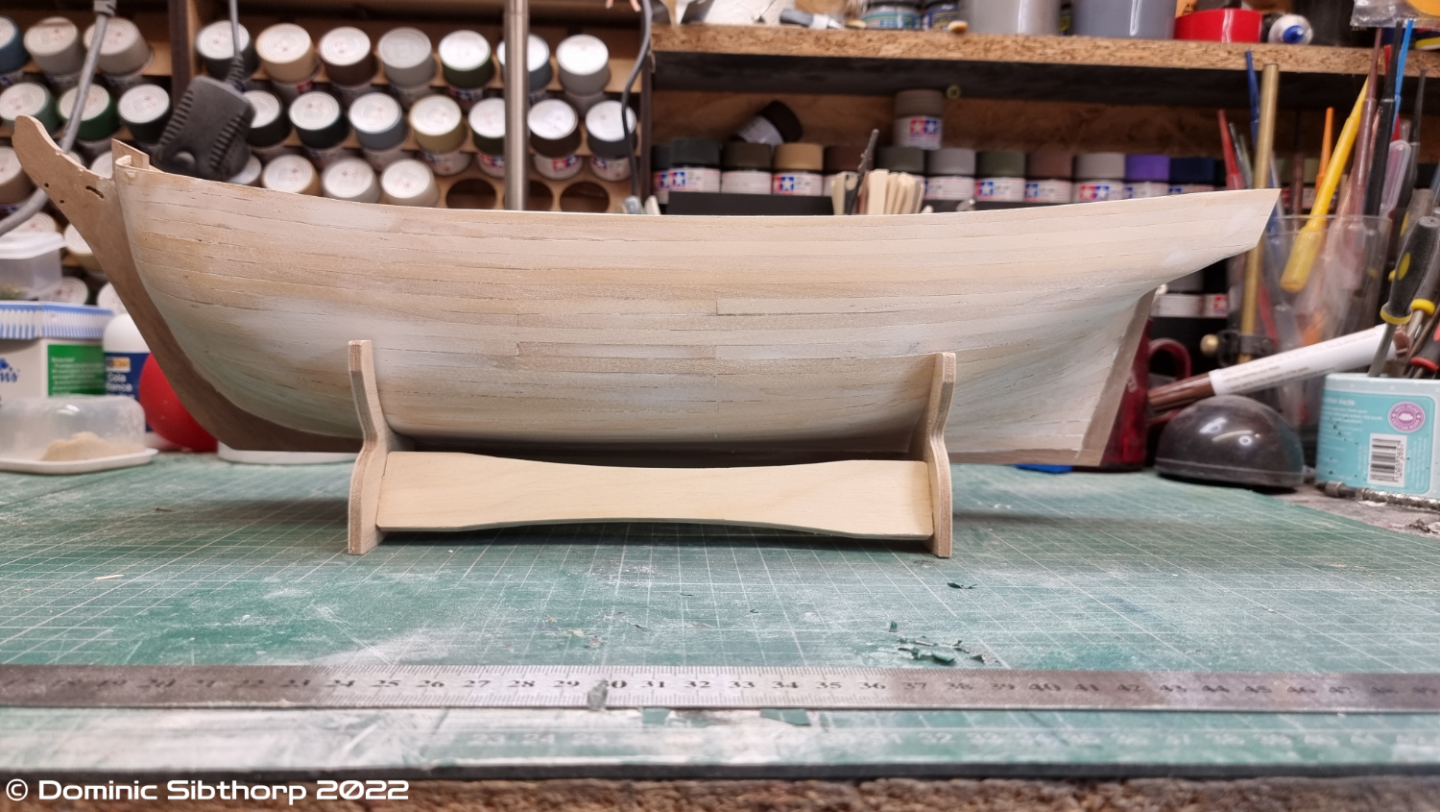
Update: I decided in the end to go with a white hull rather than copper it, although that remains an option for the moment. I had a battle with the white. For some reason I had half a dozen individual planks on each side seeming to leach colour through, despite being sealed beforehand. After a few coats of white I decided to use an automotive grey primer first and voila! No more leaching. Well, until I started with the white again anyway and there it was, old friend came back. In the end it took 6 light coats with an airbrush to get it to cover properly. I managed to get the main wale into the right place this time, although the yellow ochre trim has ended up slightly lower at the stern on one side, but nothing I can't fix later. I stained the upper section with walnut as the colour had faded with all the sanding and it was very light beige. Just a couple of minor waterline issues to fix at the bow.


-
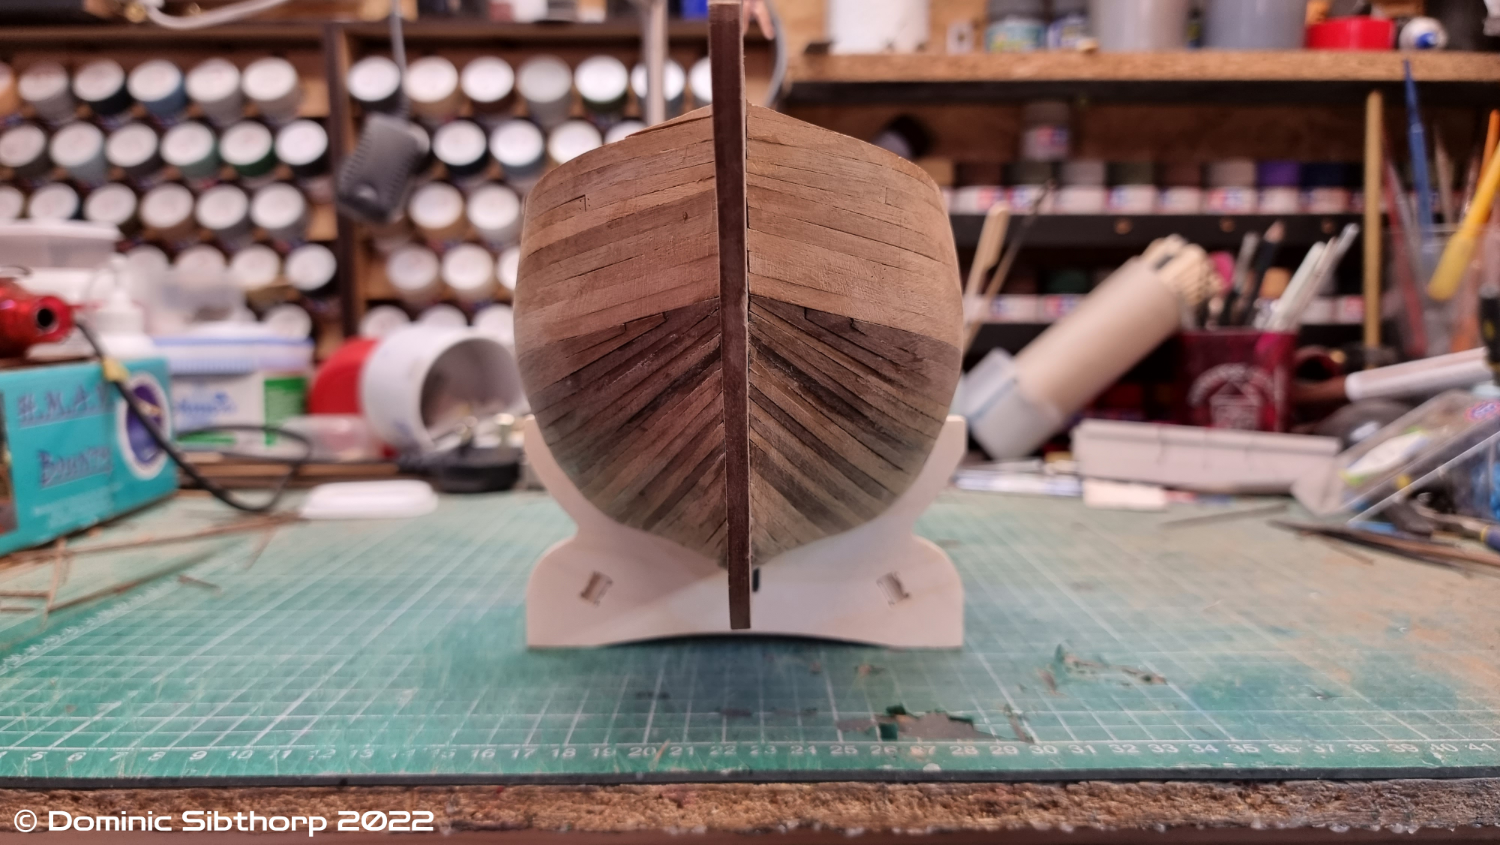
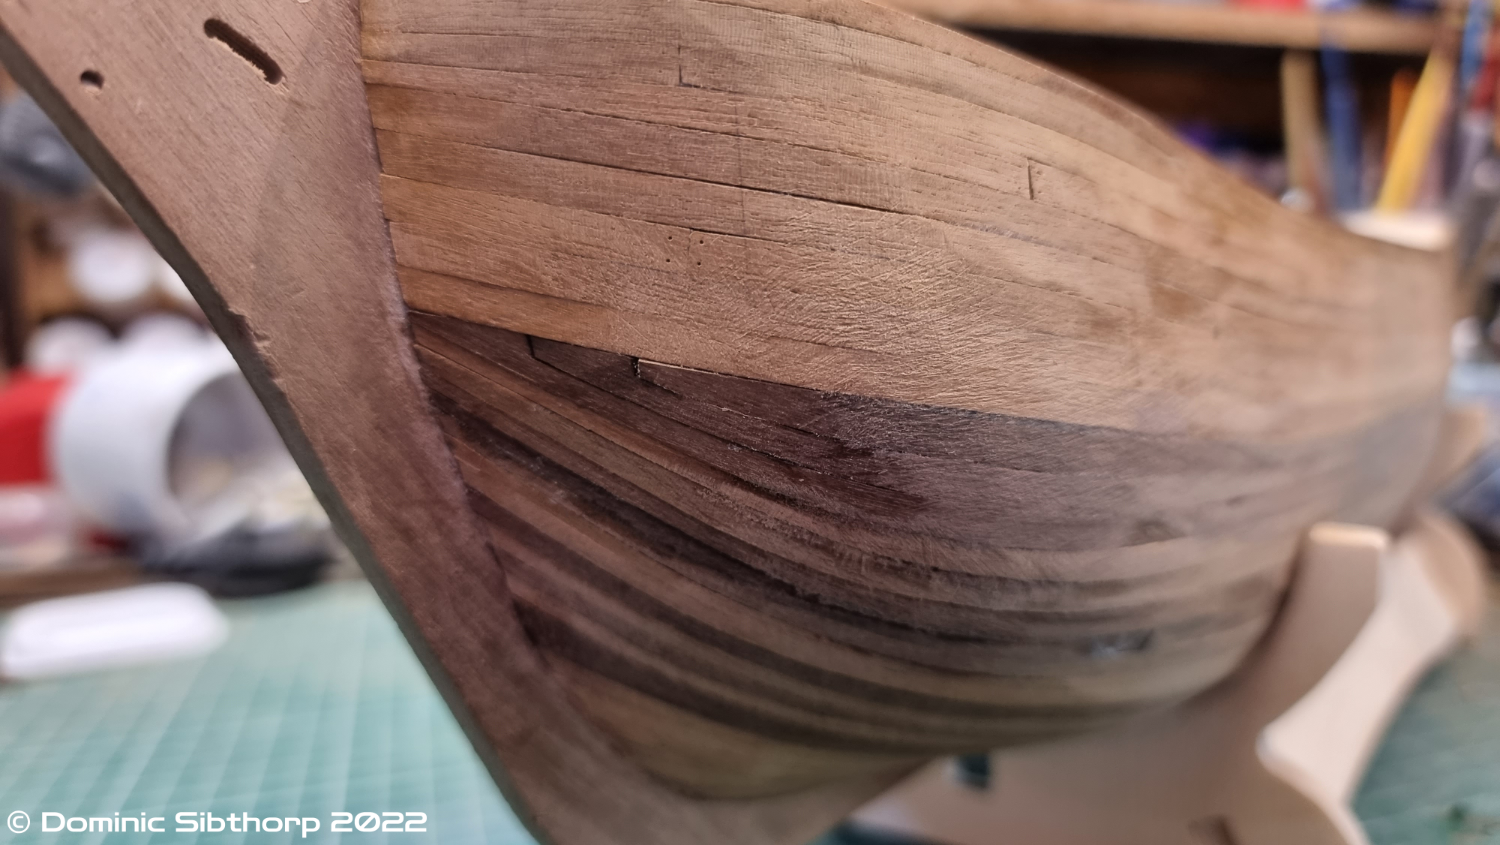
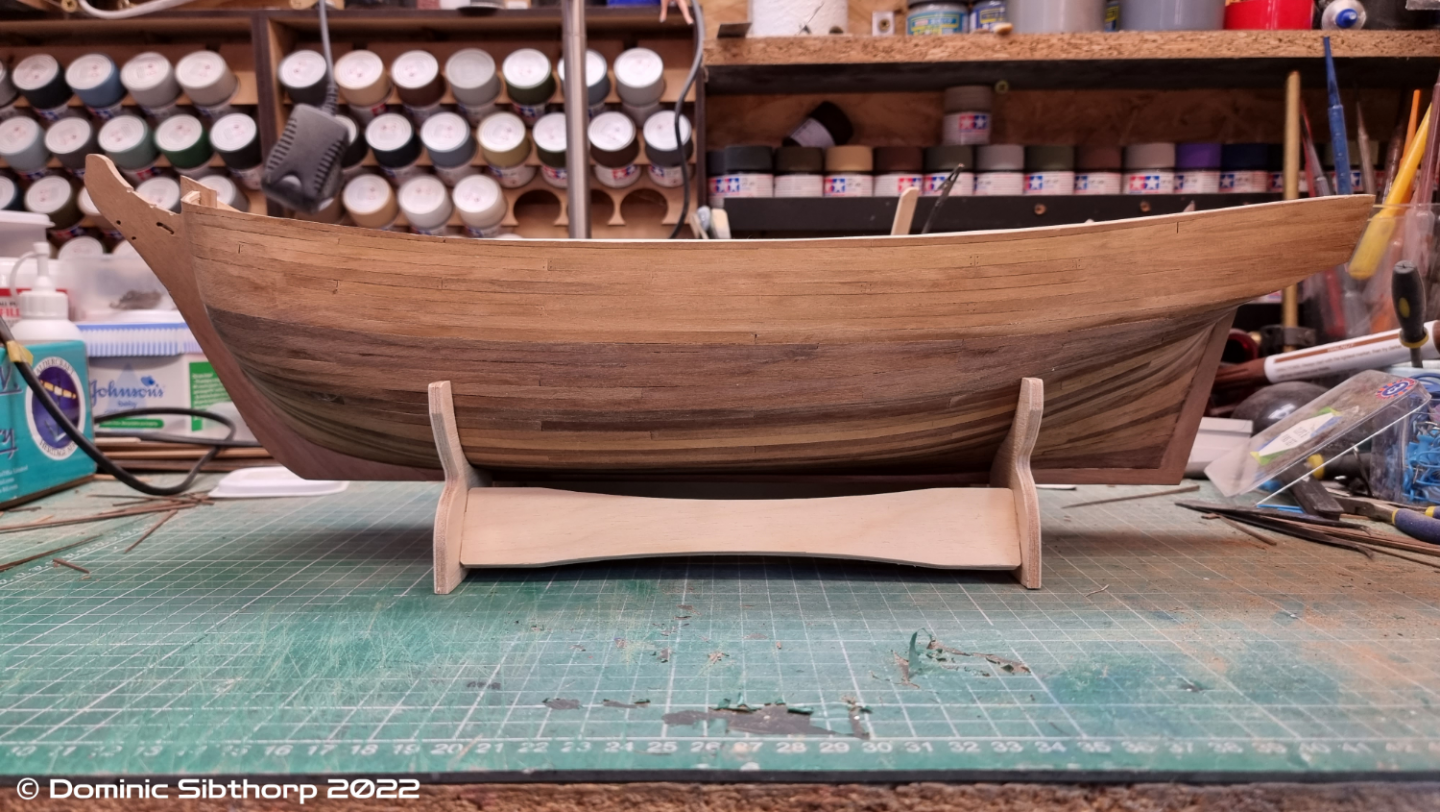
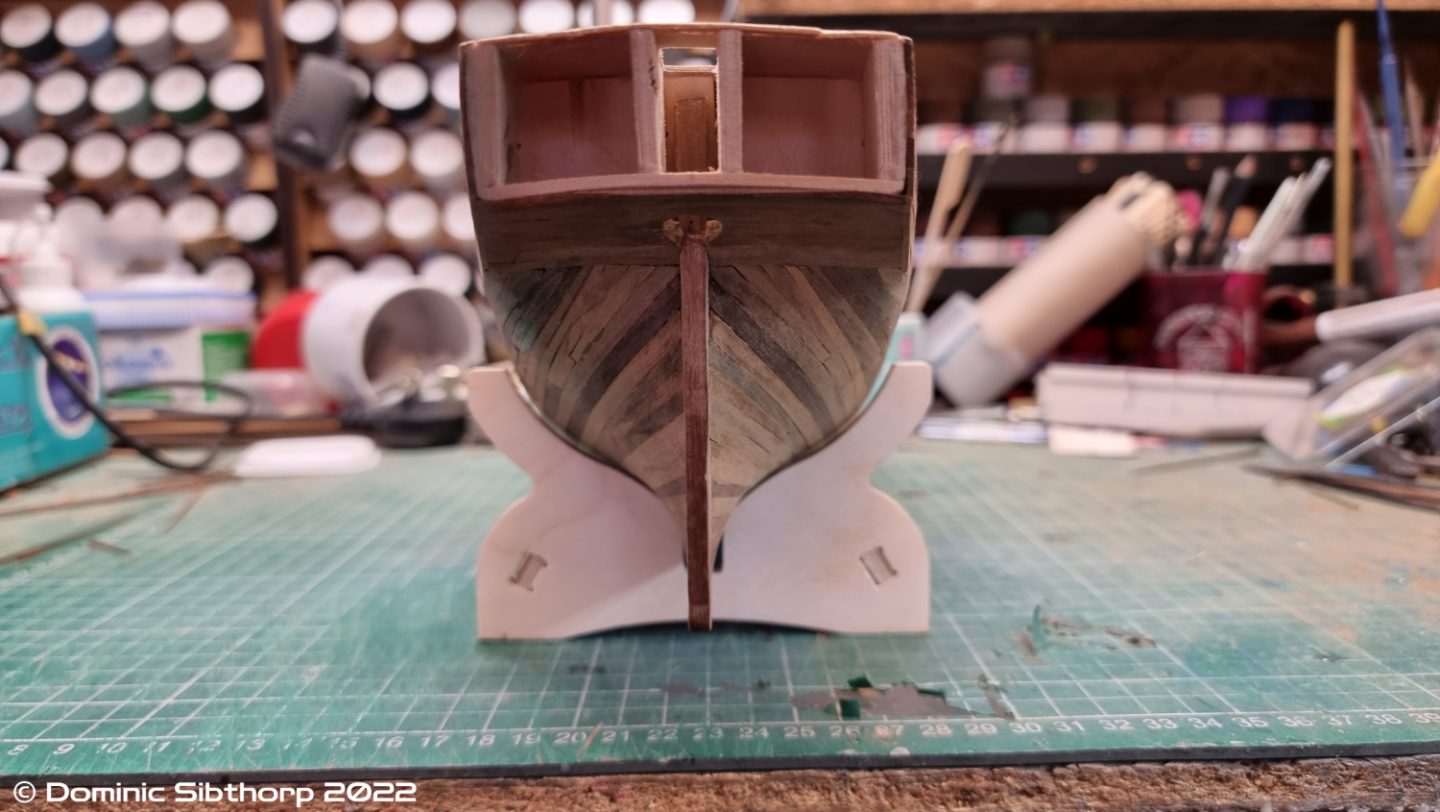
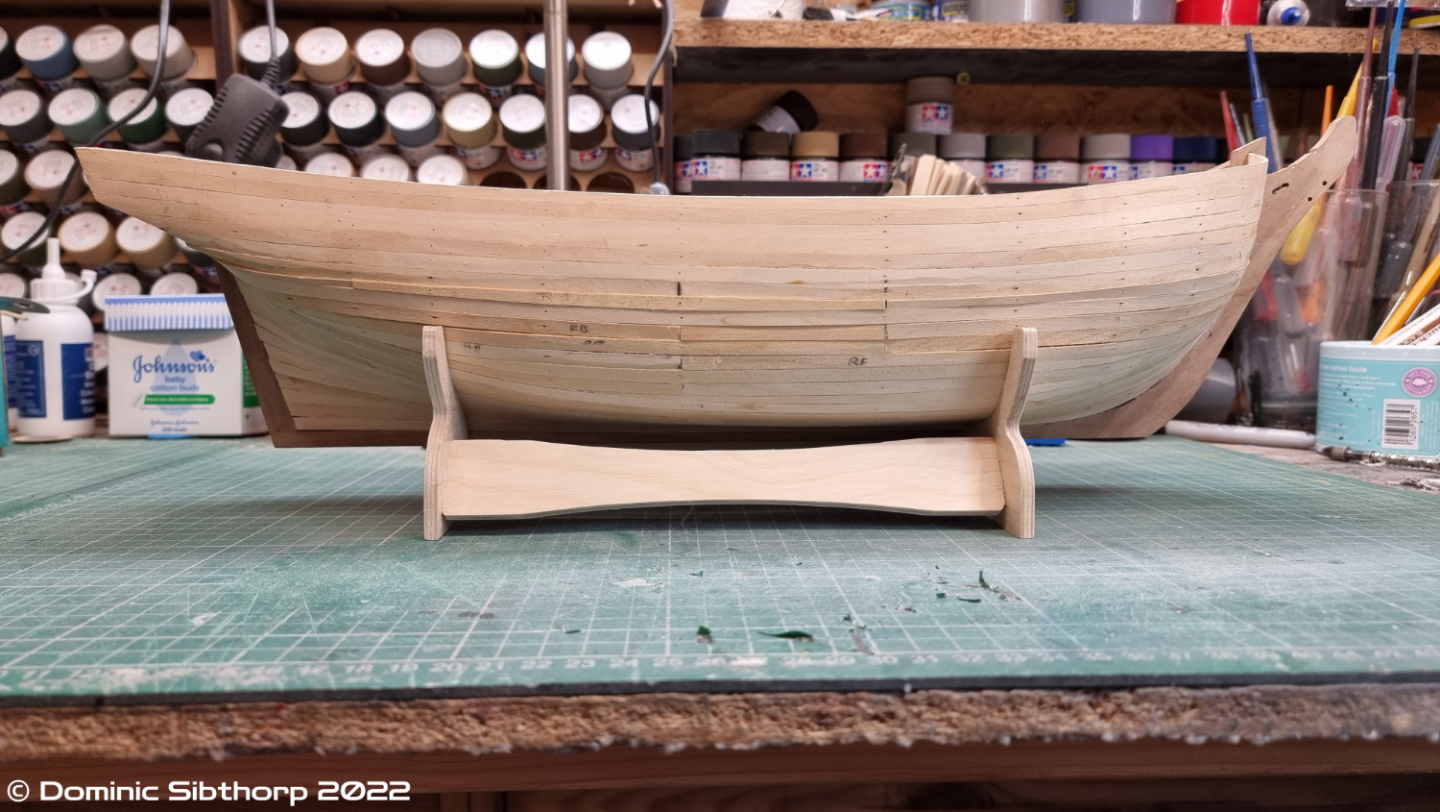
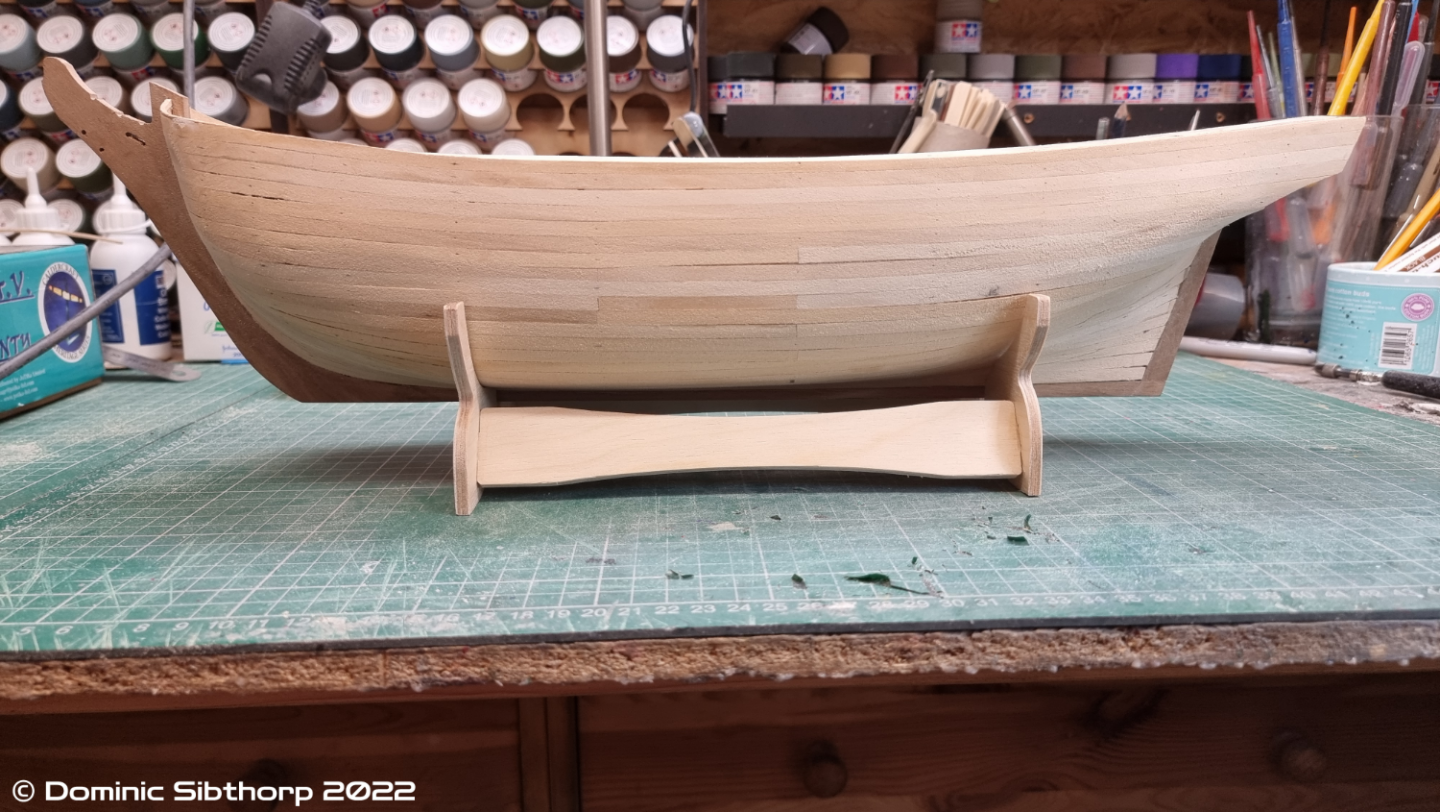
Hello. Very quick update. Second planking is finished, now time to sand it and try and make it look like I didn't do such a half assed job on it haha. 2 Drops at the bow, 3 at the stern.


-
Stunning work. Really thinking about getting this one myself now.
-
Morning. I've made a start on the second planking. Had a few issues with things I forgot to do/didn't know how to do, but thanks to some help on here I think I am back on course. Garboard was too far forward. I didn't know how to edge bend planks (which I now do). Not the greatest job in the world compared to some who have been doing this for years, but certainly an improvement for me.


-
Yes, that makes more sense actually. The upper planking I've done stops at the bottom edge of the wales, so none of those above were tapered at all. I've also just came across this: How to do a Bluff Bow Planking Job. This shows a real life example with quite a lot of drops used. Whether or not this is how it was done historically is for others far more knowledgeable than me to debate, but it does give me hope that I can still rescue this. Thanks for this, this was what I was hoping to achieve in an ideal world.
-
If that is the case, then my garboard is bang on ? On the remaining planking, I've done the math, albiet it a bit late, and the remaining planks need to be 25% wide, which is 1mm. Way too narrow. In order for me to keep them at 50%, I'd need half of them to be drop planks. 18 planks at midship, that's 9 drop planks...
-
Yes absolutely this. Knowing that single piece of information makes so much I previously couldn't grasp and thought I was just being dense, make sense now. Thanks everyone, I have enough info to move forwards with this now.
-
Thanks, sadly I remembered that too late, but will keep it in mind the next time. I was under the impression planks shouldn't be made any narrower than half their width? I had a look at Chuck's video on bending, I didn't even realise you could bend planks in that manner. I just tried a very quick and dirty experiment with that and have to say I am very impressed!
-
No, I didn't see this one, I'll go take a look now, Thanks
-
Thank you. I've been tapering up to 50% of the planks width. Quite possible the garboard plank was too far forward, but unless my head really can't wrap itself round this, if it was further aft it would just make my current issue worse? After reading everything above, I am thinking that a drop plank (2 into 1) is needed as my next plank at the bottom, to decrease the upward curve? No, that previous bit is wrong, I need to add a wide to narrow plank, wide at the stem, narrow towards the stern into one planks width? My only other option is a crude one, and that is seeing as the hull will be coppered, is to plank from the wale down correctly , until I reach the waterline, then continue my current planking from the bottom up. As that area won't be visible it won't really matter. The annoyance of this is spiling solves the problem, but I am not sure how to do that from the stock I have.
-
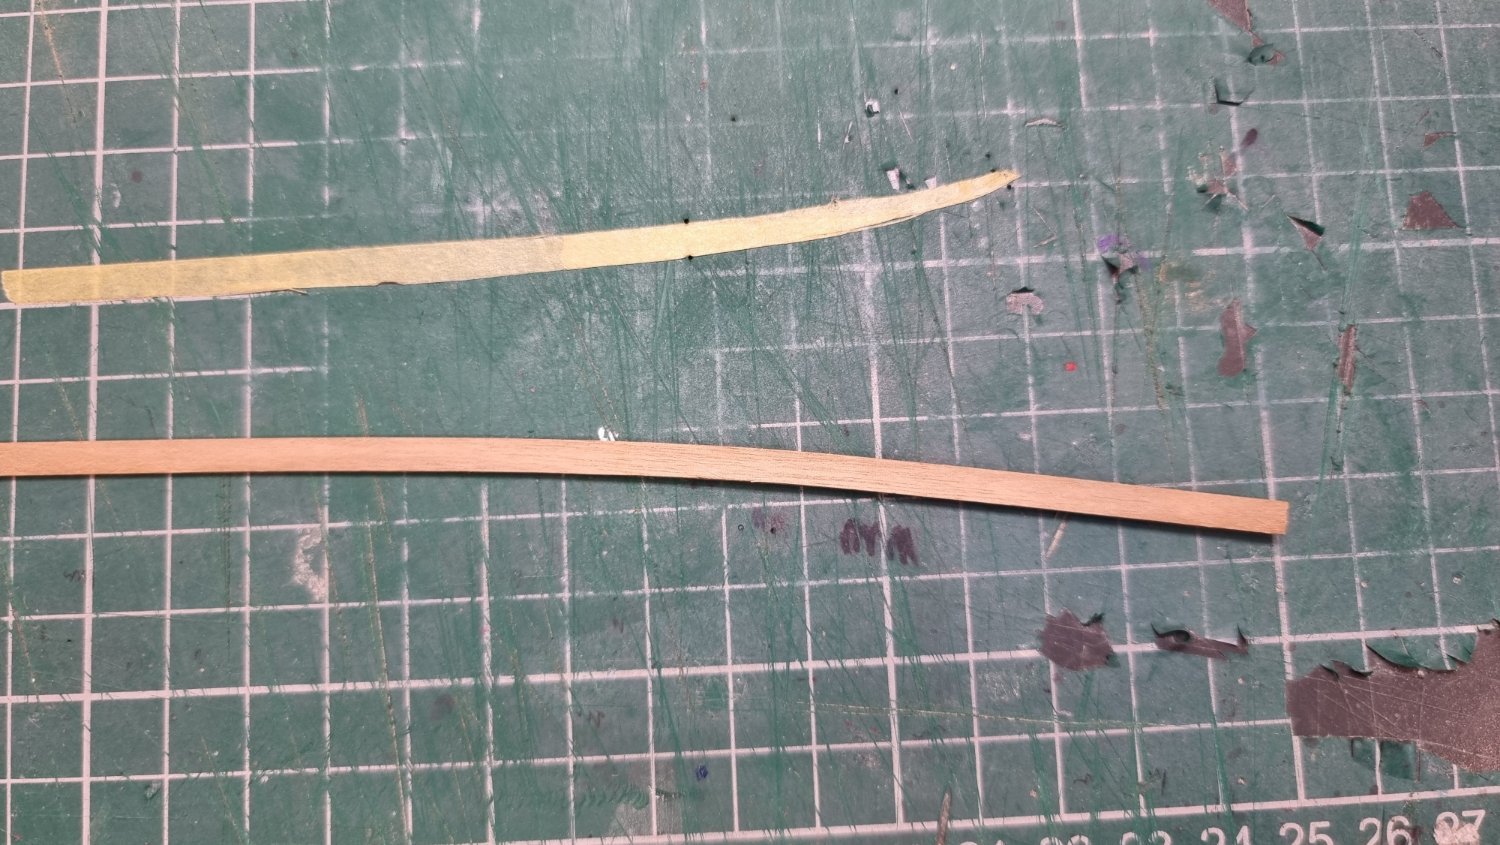
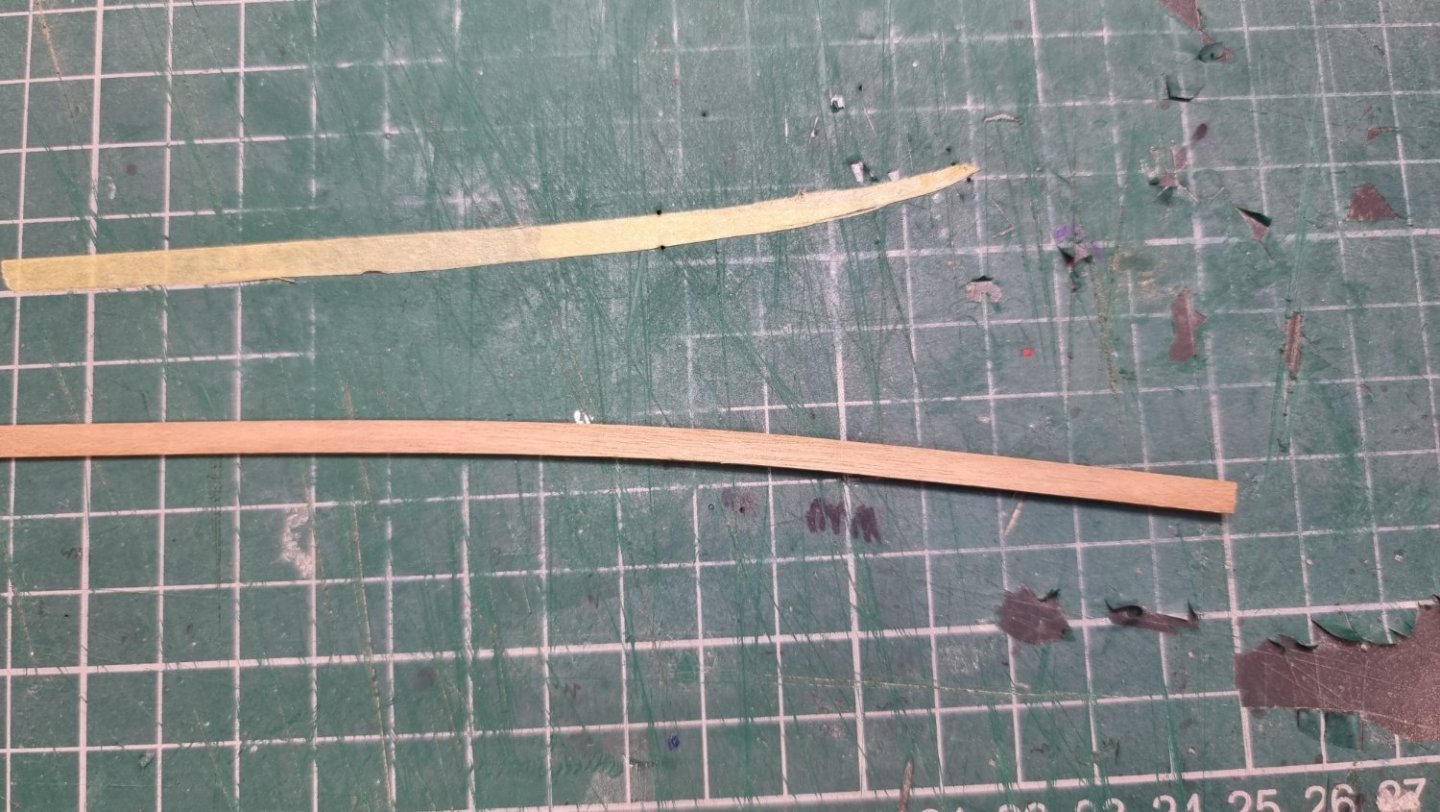
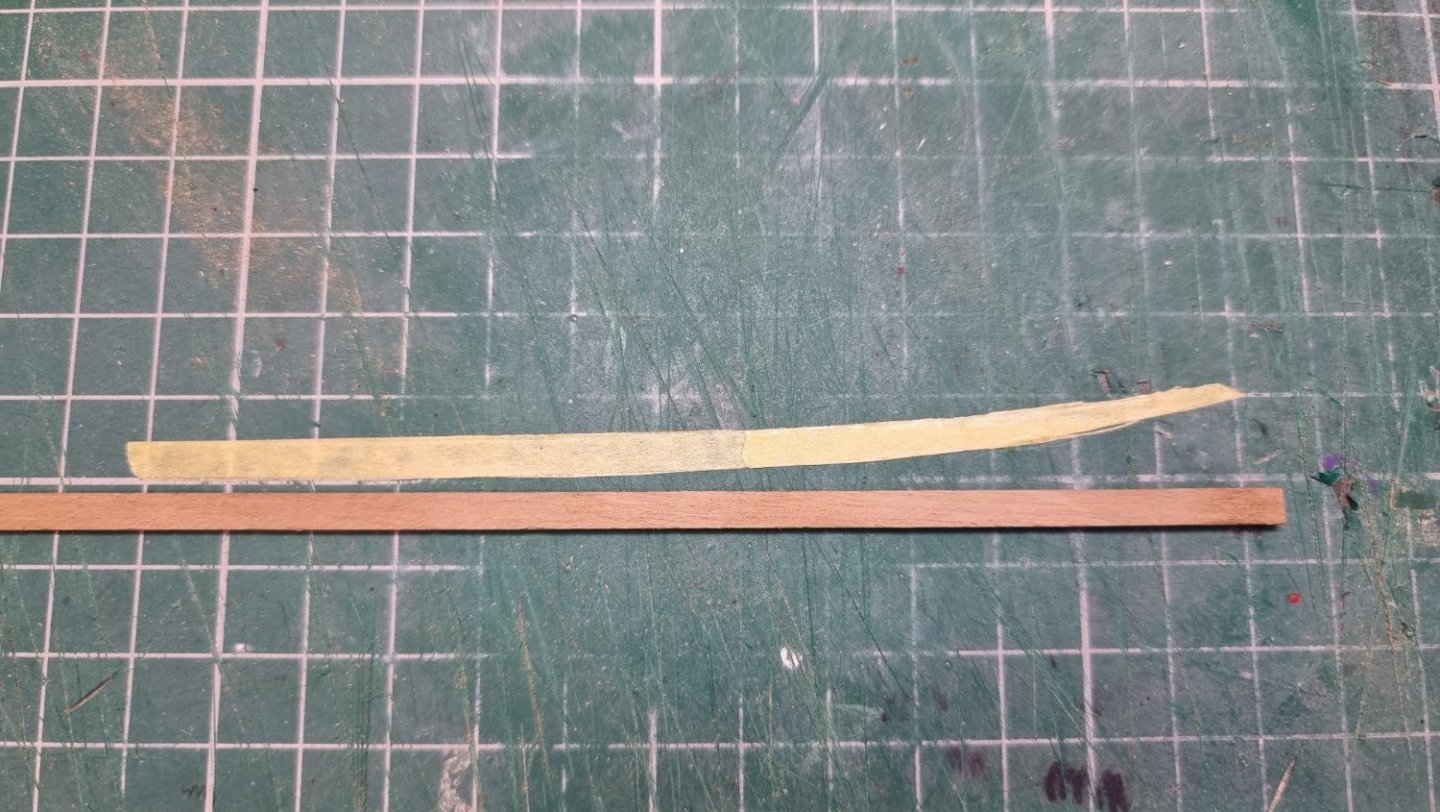
Thank you both. I had already reviewed the various subjects on here regarding planking, I understand the basic principles. What I need to do is spile a plank as the masking tape in this photo, but as you can see from the plank below it, the stock I have does not allow me to achieve this.
-
Hello. I was wondering if I could get some advice, as I am not entirely sure how to proceed here. Hopefully, the above animation should work, it's at 2 second intervals. Red: This is how I have been planking at the bow up until this point, tapering the planks to reduce the width going forward. At this point, the planks are starting to require a lateral twist to get them to sit against the previous plank. Yellow: This is without tapering the plank, but still requires a lateral twist. Blue: This is again with no taper, but how the plank wants to lay with no lateral force. Green: This is where the planks would meet the lower edge of what will be the main wale (when later fitted), if I allow the planks to lay where they want to. Ideally, I'd want to continue with the Red option, to try and avoid the result of the green option. I'm really lost with how to move forward as everything I've read about correctly planking says to avoid any lateral force on the planks...? Thanks in advance.

-
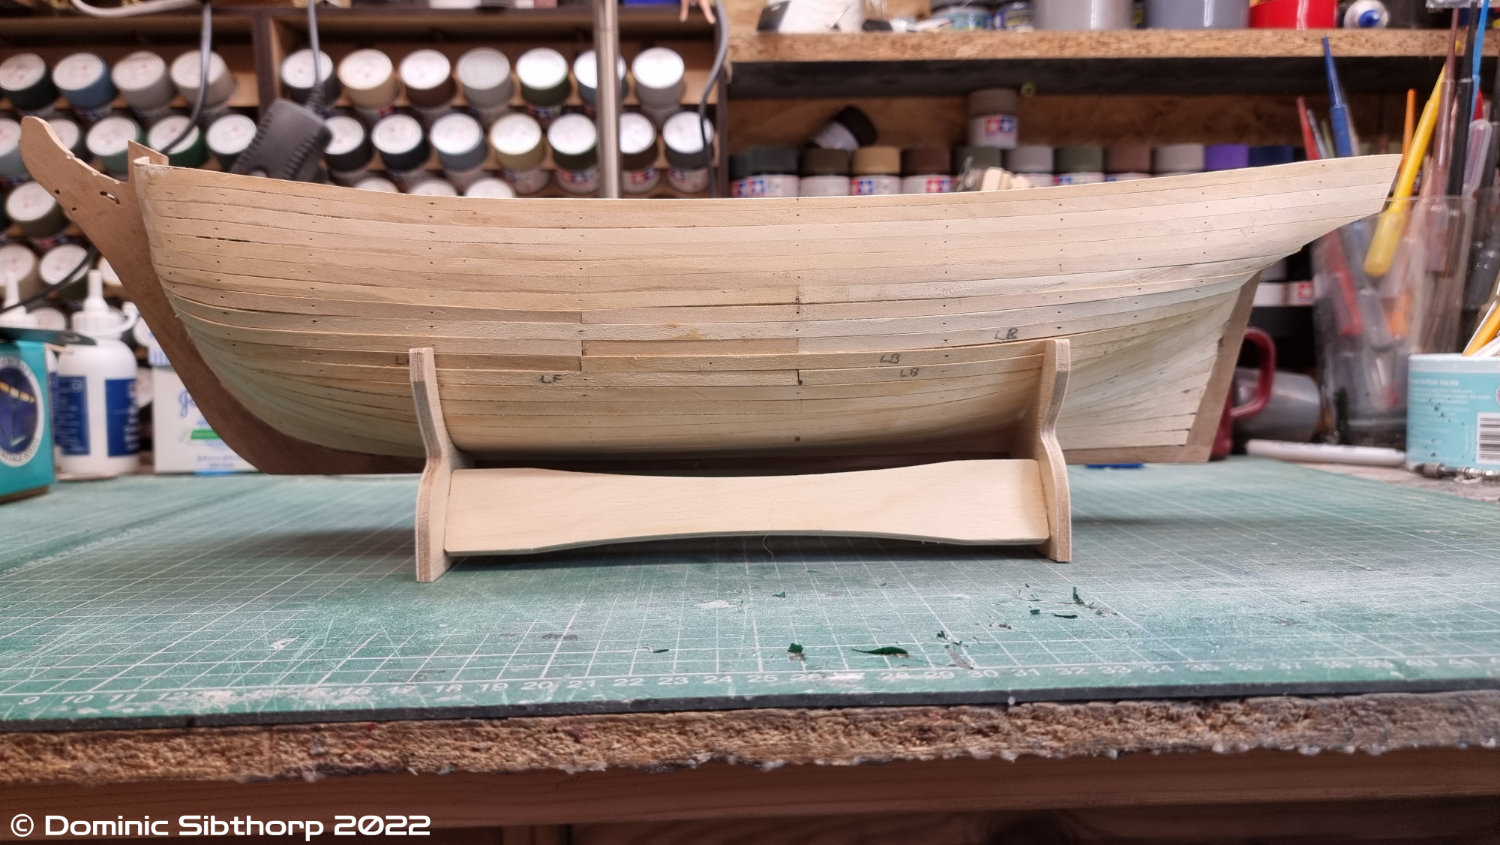
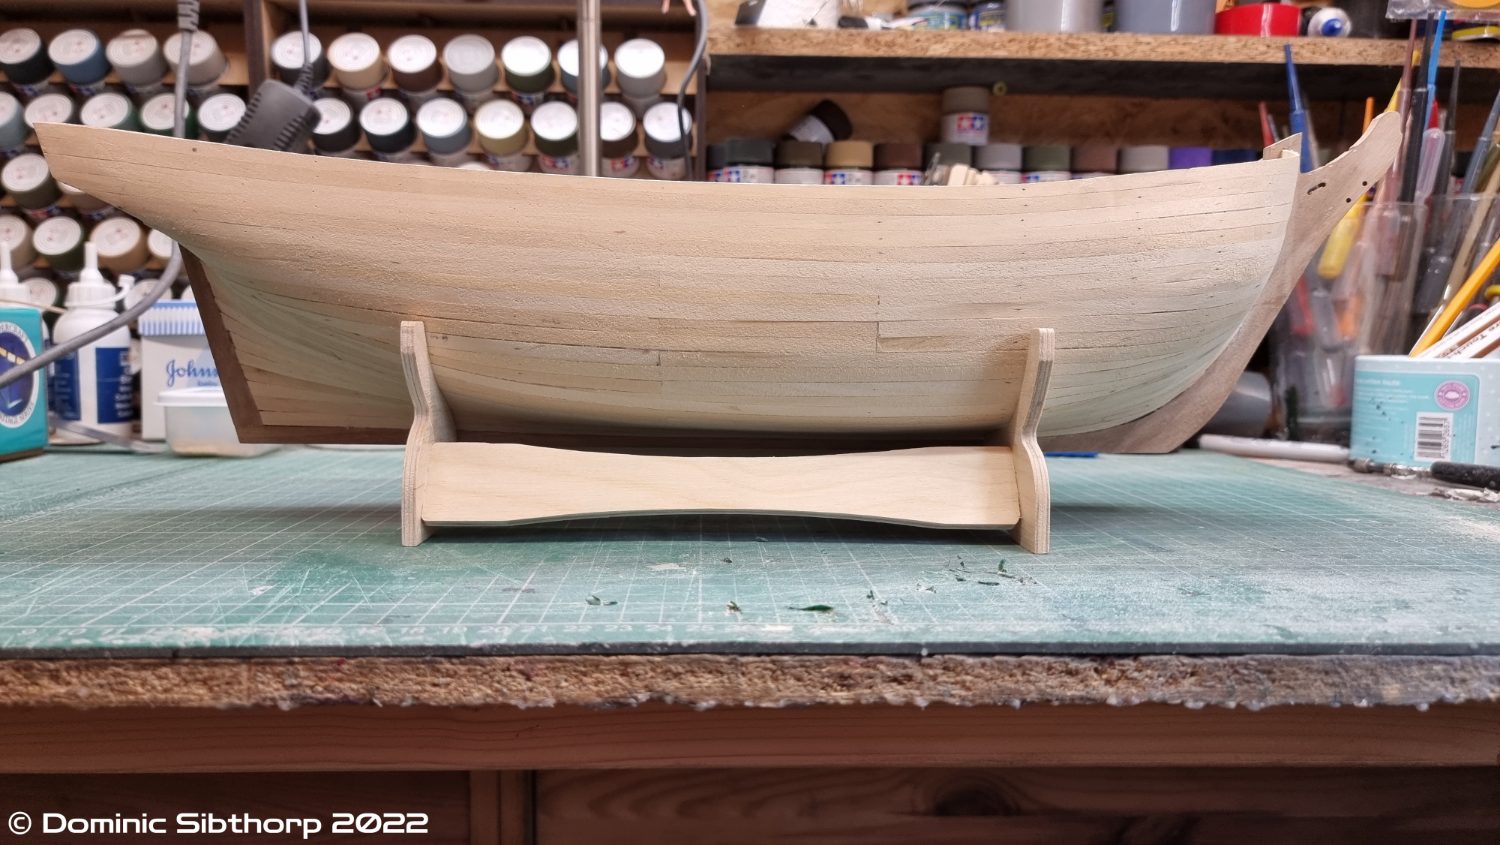
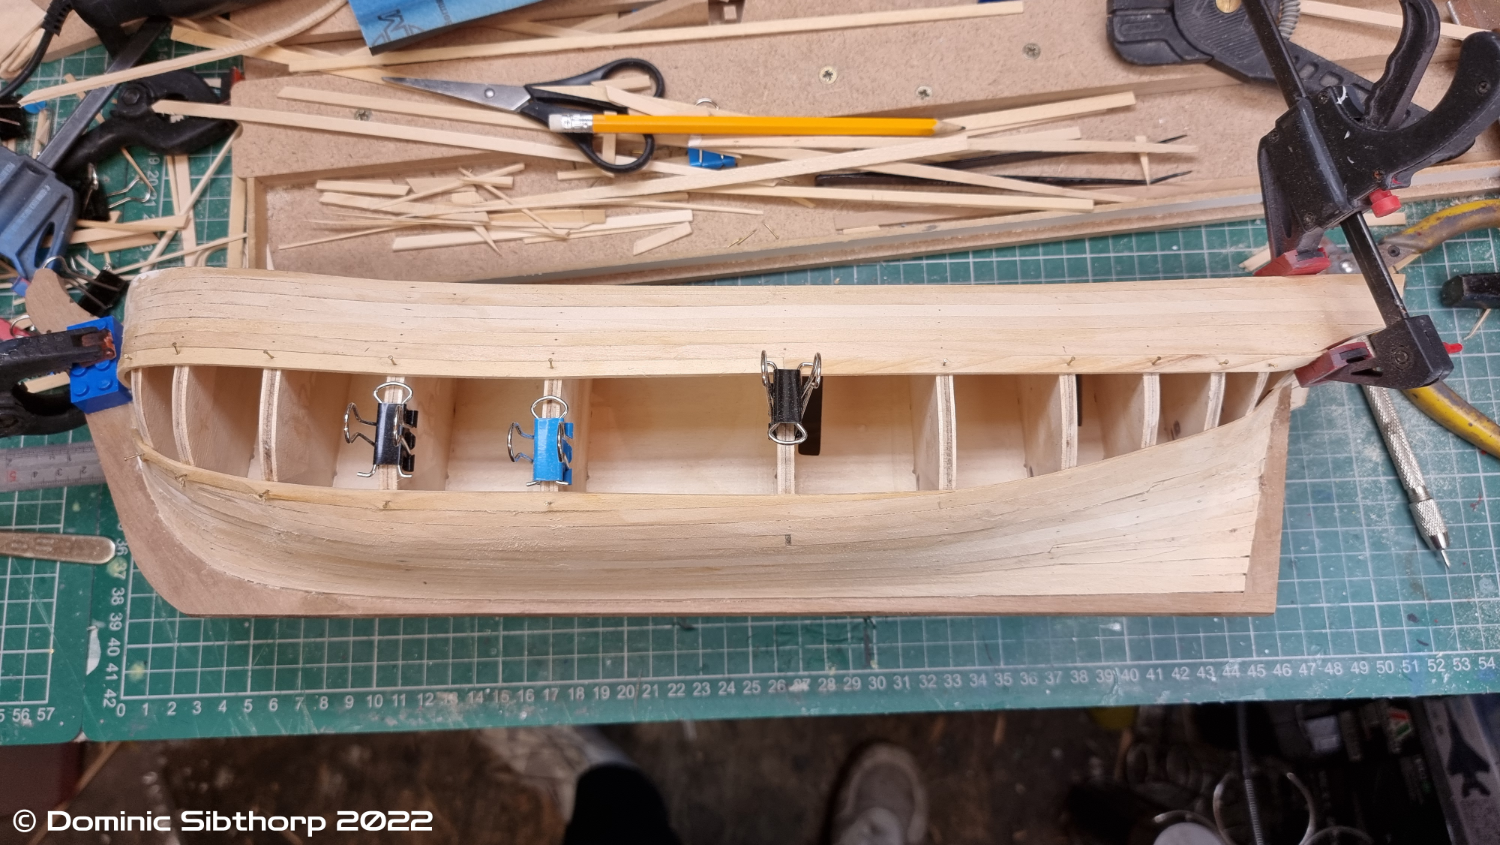
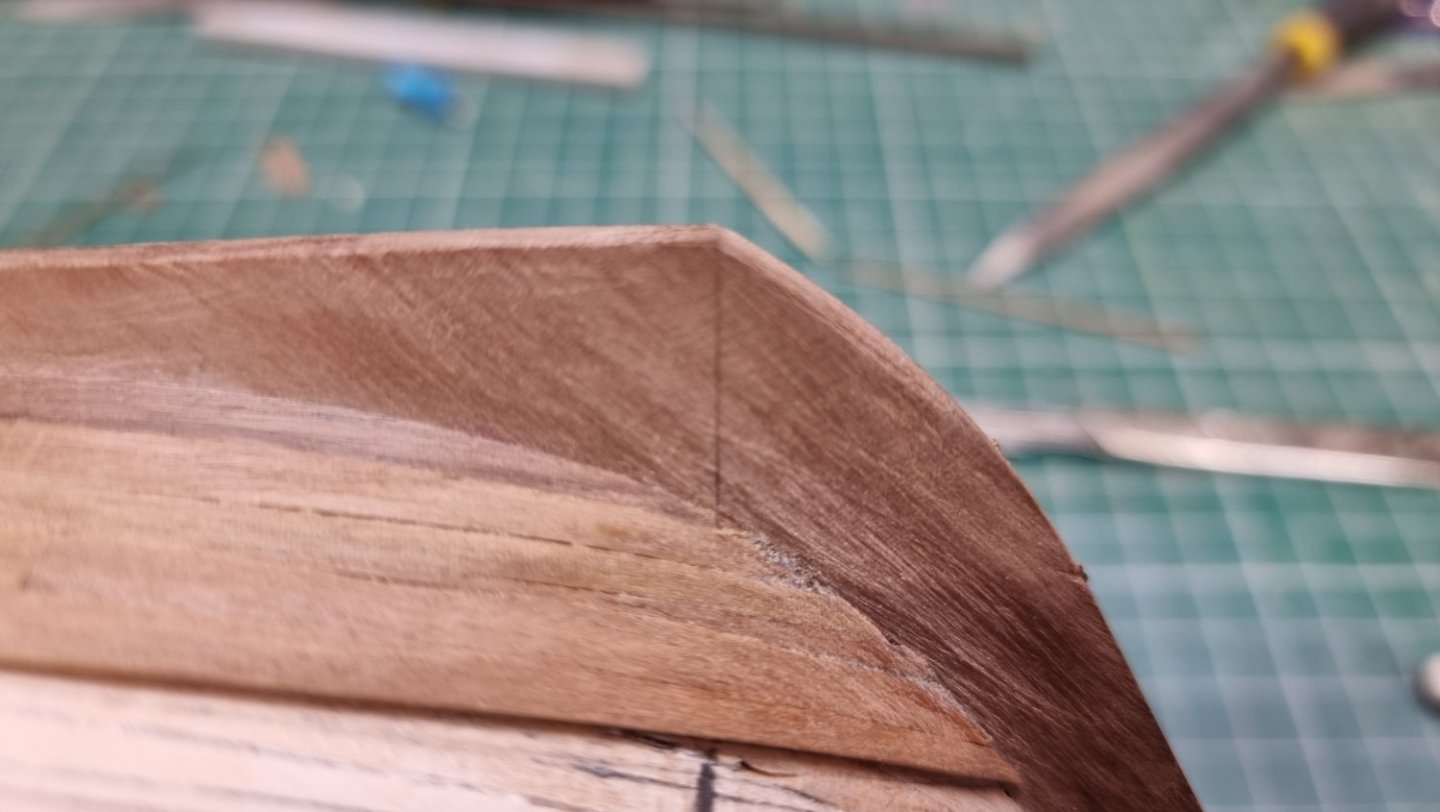
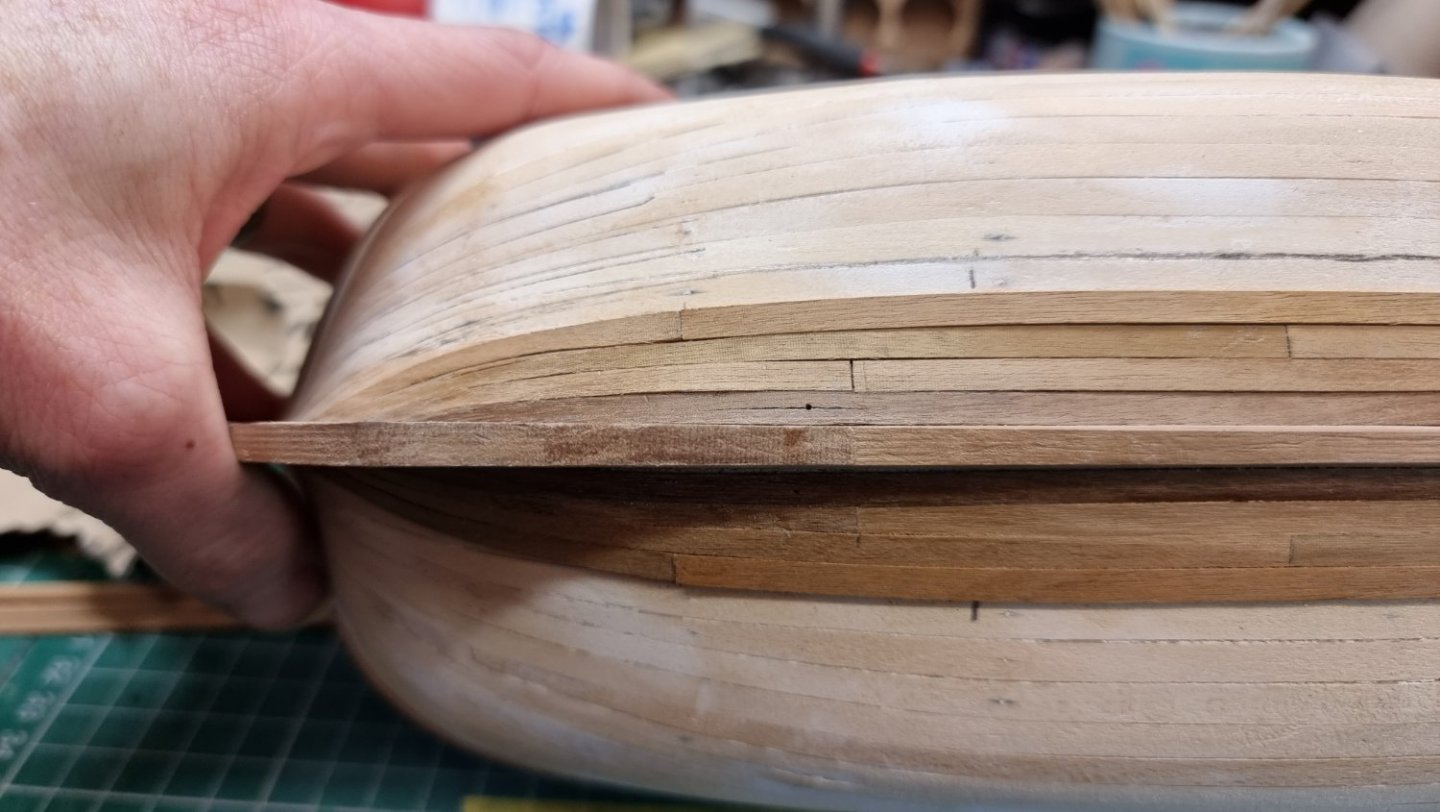
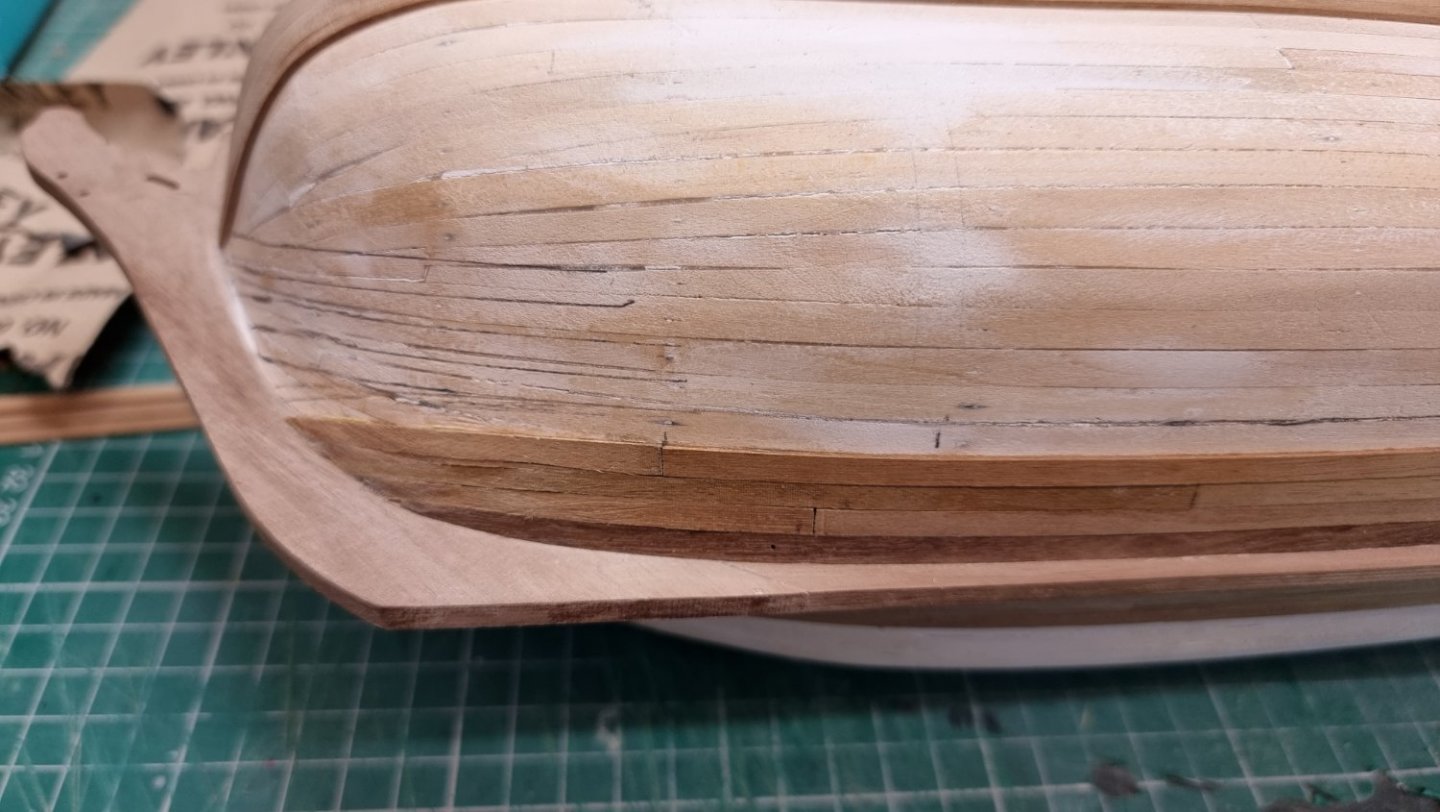
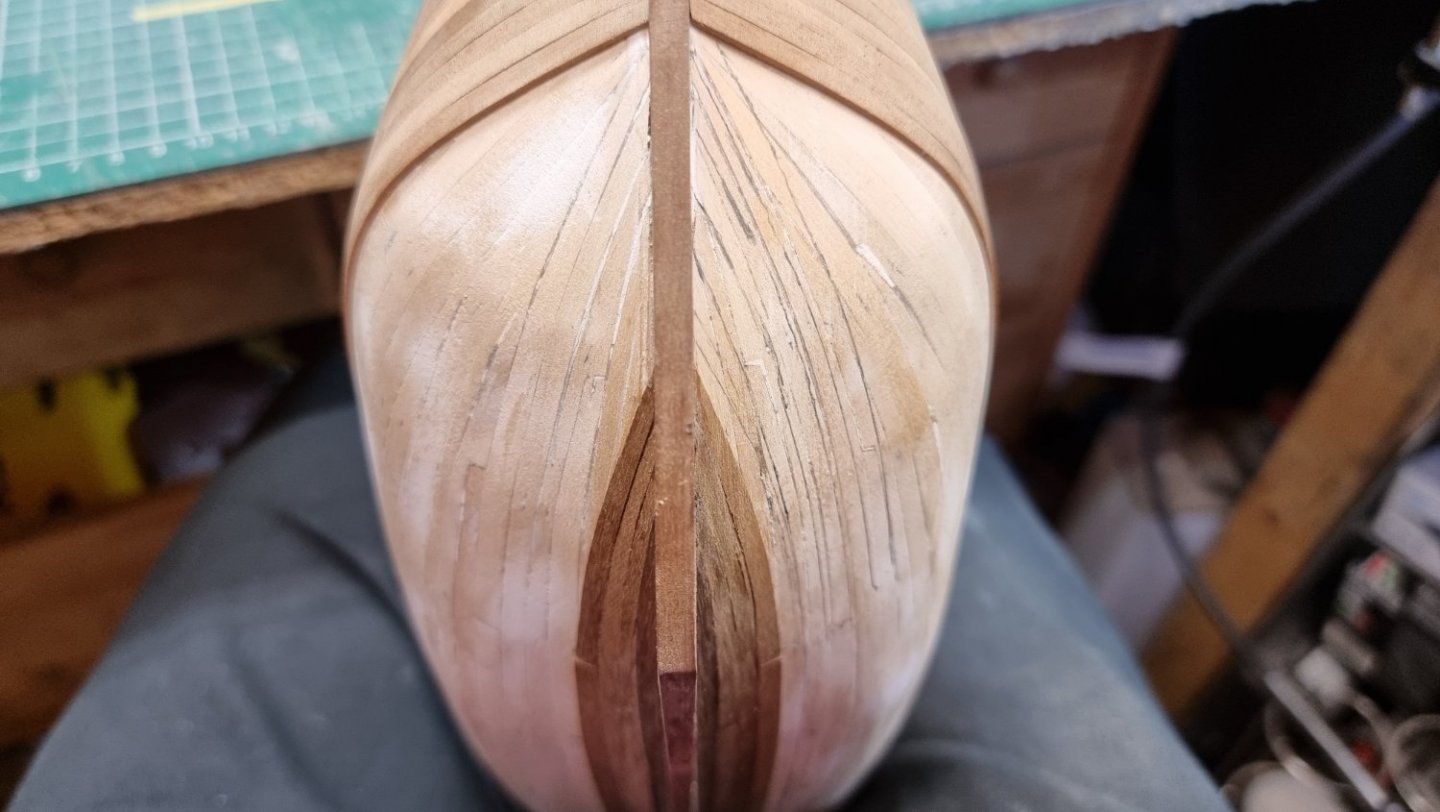
Greetings. So, 1st planking is finished. Wasn't as much as a chore as I remember, despite me breaking just about every rule there is when it comes to planking. It's done nonetheless, and won't be visible after anyway. It's solid, smooth and the correct shape which is the main thing. Initial planking: After basic sanding: And after filling and further sanding: I also planked the transom, rather than use the walnut false piece: And finally, I added a filler to correct Caldercraft's short cut on the false deck, so it butts up directly to the stern gallery piece: My next task is to try and work out the correct shift pattern for the second planking. Caldercraft just says to plank in full length. I did that last time and I didn't like the result. I am not having much luck working out what the shift pattern is however, any info would be appreciated... Thanks


-
I am making a god awful effort on this first planking, I was much more out of practice than I realised. It's like I forgot everything I learned. However, I know where I went wrong, this is the first planking so doesn't matter so much, as long as the contours and general shape is right, which it is, and it's smooth, which it will be, I can make sure I get it right with the second layer. Anyway, for shame, here is the monstrosity I have created thus far...
-
Ahhh, riiight, now I am with you. Yes, the disc you buy are purposely made by Dremel for the ezclic system, and have a metal lug on the underside.
-
Hey, welcome back! Believe it or not, I am building this again! I took a 5+ year break from wooden ship building, and decided recently to get back into it, I picked this kit because I remember from last time I had very few issues with it, and wanted to correct a few things on my previous attempt. Let's just say, it's NOT going well. I am more out of practice than I thought. The first planking is turning out to be an absolute hash. Thankfully it's nothing that will matter with the second planking. Yours is coming along nicely, well done.