fifthace
-
Posts
498 -
Joined
-
Last visited
Content Type
Profiles
Forums
Gallery
Events
Everything posted by fifthace
-
 Not at all Mike. I grab maybe half hour to an hour between my eldest leaving for school and my youngest going to nursery and in afternoons maybe another hour and half, in total, and sometimes a little time in the evening.
 -
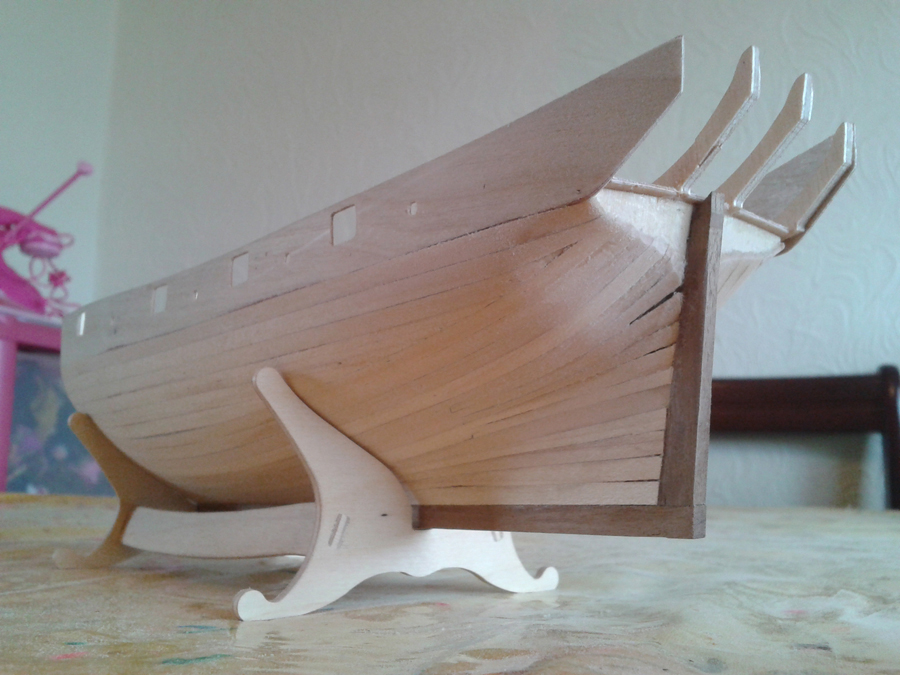
With the bulwarks fitted I could get the insides planked, at least the lower section anyway. I will plank the upper sections once the quarter/poop decks are in place. I decided I could plank the quarter deck before fitting as it only has a very slight curve and wouldn't need any pinning to hold in place, besides there was nothing to pin to anyway.
-
Thanks Keith. They will now they're fitted. But I'd much sooner had planked right up, cut to shape, cut the gunports...etc.
-
Looks good Keith...but what is that monster behind her ?
-
The second one. They had enough flex in them to hug the curve of the frames/decks. Had to be pinned on each frame to hold in place but they went on quite easily
-
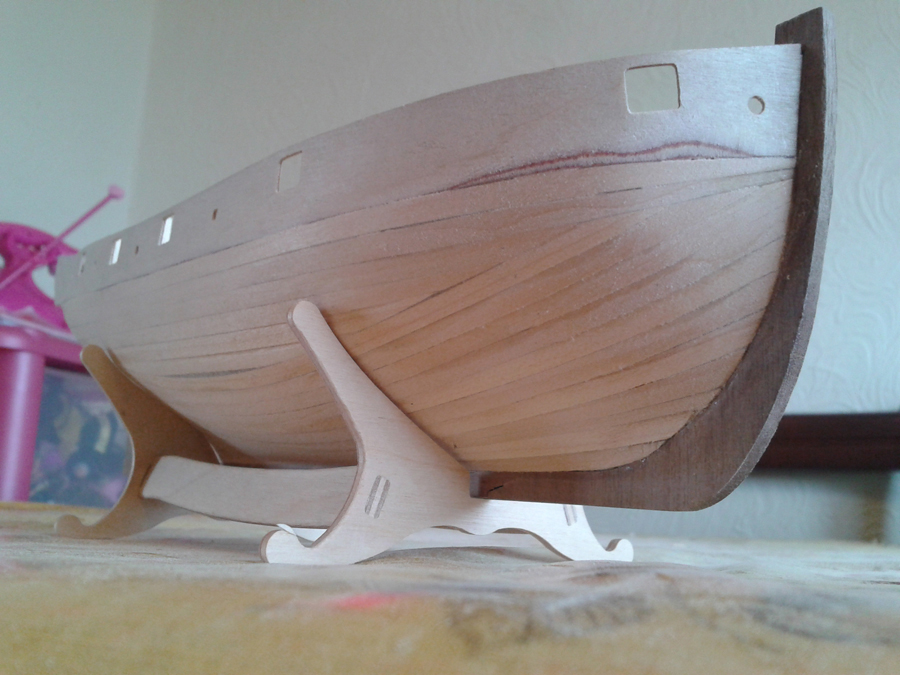
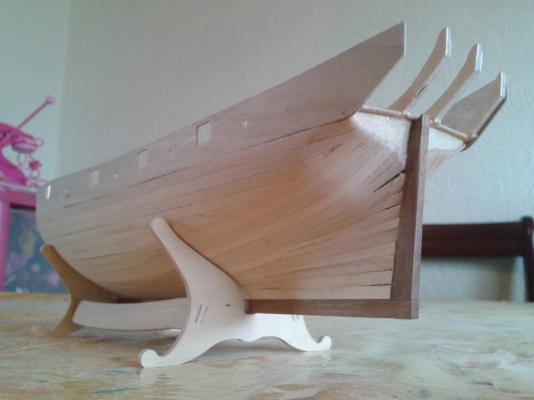
lol Mike...no idea what you're talking aboot! I've finished the main deck and added the treenailing. Next I planked the bow wall with African Walnut veneer, very nice wood. After that had dried I trimmed the excess and then set about adding the single piece bulwarks. I bloody hate these things...I'd much sooner PoF the entire side walls. Still, they went on much better than I expected, and a novelty for me is I got them both on evenly!
-
Yep Steve all done. Simulated though, not got enough cocktail sticks to hand lol.
-
Thanks No idea why...wish they had though. I hate solid bulwarks. I'd rather PoF the whole lot.
-
I started the deck planking today, at least for the main deck anyway. It's meant to be planked all the way to the stern but I worked out that a lot of that wouldn't be visible so I marked out the area that would be seen and planked that only. I finally found a wood/marker combination that doesn't bleed, so I tried a different method of caulking, using a marker instead. Seems to have turned out quite well. The deck is meant to be planked in single lengths but this would mean simulating the joints between planks which if I did as normal with a pencil wouldn't match the longditudal caulking, so I decided to cut the planks into 7cm lengths, done intentionally so I would end up with a 1cm stagger ever 4th plank. Don't ask me why I just think it looks better, slightly less uniform. (I build for asthetics, not accuracy...within reason). Progress so far:
-
I've finished attaching all of the frames to the keel and fairing them as needed. She has quite a pointy bow so quite a lot had to come off there. Not so much at the stern, more just to ensure the planks have 100% frame to lay against. I marked out the locations of the frames on the false deck and pre-drilled a series of holes for pins. I fitted the deck in place and partially pinned, allowing still a gap for me to apply PVA into, then I pushed the pins fully in. Not my original intention but I was using some nice flat topped pins that I knew would sit flush with the deck and not foul the decking later. This also allowed me to correct a very slight twist from the last but one frame at the stern, however I was able to persuade it go go into line and the pins helped keep it there as the glue dried. Now everything is perfectly square.
-
Cheers Keith. Yes would be good to have all three being made. I do the more finer acurate sanding afterwards as well, just the first/last few frames I take the bulk of the wood off before as I find I have more control and less chance of breaking a frame. Done that once or twice
-
Me again! I bought this as a gap filler as I knew I would end up waiting for partworks to arrive and so on. This was also the first model I ever looked at when thinking about taking the plunge into wooden ship modelling years ago. Another good reason for this one is I've nver built a ship with sails, and this is quite simplified so will be a good way to get some experience. If this one turns out ok I might think about building the Nina and the Pinta to go with her. I've not done a great deal yet, just working my way down the keel to about half way so far. I've been bevelling the frames as I go, I personally find it just makes things easier, even more so as I can do the bulk of the removal before fixing the frame in place using a Mouse sander. Yes sort of cheating I know but it works. Progress so far:
-
I think any chances of building accurately with OcCre's Bounty is well out of the question anyway.
-
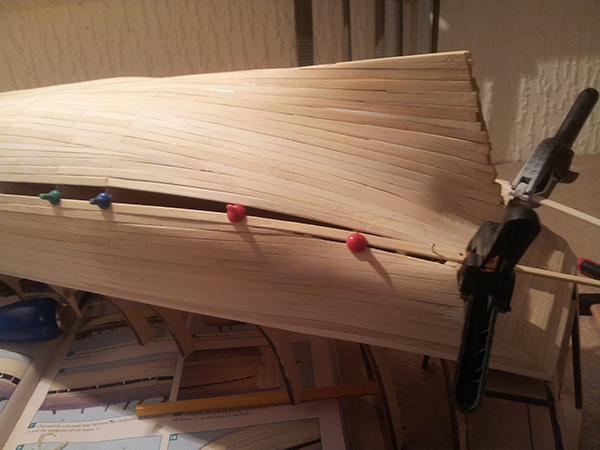
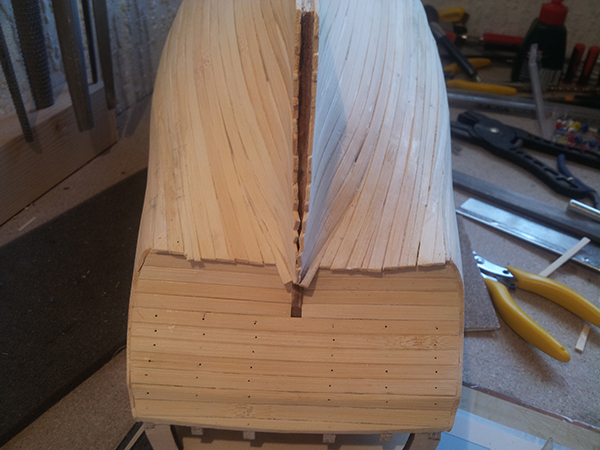
Hiya Mike, I've dug out a few in-progress photo's of the various ships I have planked so you can see the general idea of how the planking is put together. They show the use of stealers/drop planks, tapering the planks at the bow/stern etc


-
haha Mike I'd say it even if you were joking or not I'll have to dig out your email...and peek at it from behind the couch!
-
If it were me...inline with the top deck, following it's curve, (in the Bounty's case sweeping up at the bow a little greater a curve than the deck)...and go from there. (here we go again ) Dare I ask...what does the instructions show?
-
What's the news sailor? Any progress...
-
Looking good. I have the Santa Marie in my stash to do. Quick question...why do you store your tinlets upside down?
-
Danny can I ask how using pins would complicate fixing a deck in place? I have found they can help to hold the deck in position laterally while the weights hold it down against the rib tops. Unless you have perfectly aligned rib tops and corrosponding slots in the deck piece this can only be a good thing no ? Obviously I've not built this version myself so can only yeild to your experience, but as I am planning on building this one later in the year any information on why certain things are to be avoided would save me mistake time when I do come to build her.
-
If you can avoid doing so, don't hammer the pins all the way in. As long as they are tight enough to hold the deck in place while the glue cures that's the important bit. You can then use side snips to nip the heads off so they won't foul the planking later.
-
Best way is to drill your holes as you said, but use a diameter one size down from the size of your pins. Then you can sit the pins in the deck ready then hammer them into the beams after you get it in place. The slightly smaller holes should hold the pins enough to allow this.
-
Hiya Al. PVA tends to allow you a good few minutes before it begins to bond, ample time to get everything held down before it starts to dry. What I would do is mark with a pencil the centre line on the deck of each beam, and pre-drill this. The dryfit the deck and drill a little into each frame as well. Then apply the glue, put the deck in place and use a pin pusher or jewelers/pin hammer to put the pins in place. If you work fluidly and smooth enough you shouldn't have too much trouble getting everything pinned/weighted down before the PVA starts to set. Then leave it a good 24 hours and it should all be ok. A tip, if you are short of weights, then large empty coffee jars filled with water, or even better sand, make great weights!