HOLIDAY DONATION DRIVE - SUPPORT MSW - DO YOUR PART TO KEEP THIS GREAT FORUM GOING! (Only 13 donations so far - C'mon guys!)
×


jim_smits
-
Posts
653 -
Joined
-
Last visited
Content Type
Profiles
Forums
Gallery
Events
Everything posted by jim_smits
-
 Fantastic work there Jason. Your detail on the rigging reminds me of Gil's Victory build. Looking to improve the detail on my regging with the next build. Can I ask which Lever book you are referencing?
- 800 replies
-
- 1
-

-
- snake
- caldercraft
- (and 1 more)
-
Great looking detail Jason. I may be setting the pace but you are most certainly setting the bar for quality. Keep it up!
- 800 replies
-
- 1
-
-
- snake
- caldercraft
- (and 1 more)
-
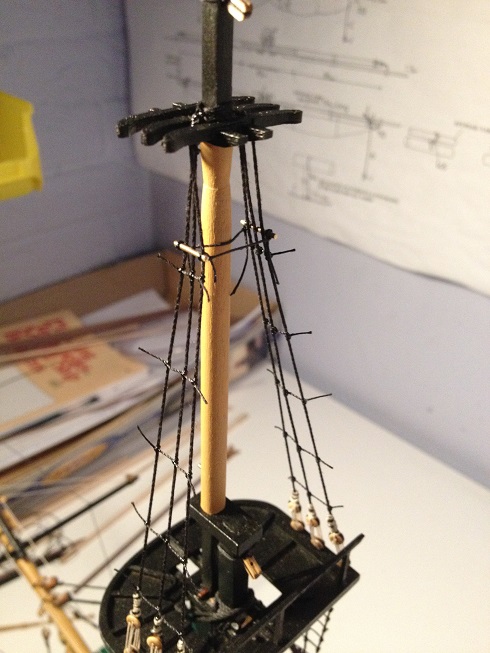
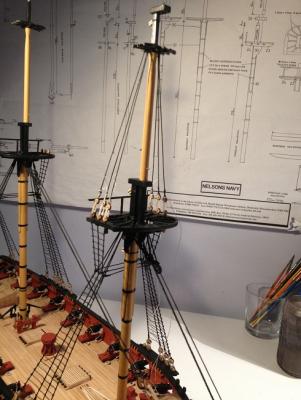
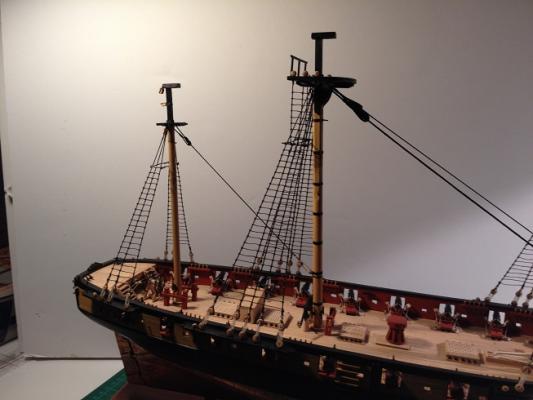
Ratlines continuing on the Fore Top Mast. Also fitted the staves and catharpins. Starting to get really fiddly down at these small cramped areas. More ratlines tomorrow.....

- 412 replies
-
- 1
-
-
- snake
- caldercraft
- (and 1 more)
-
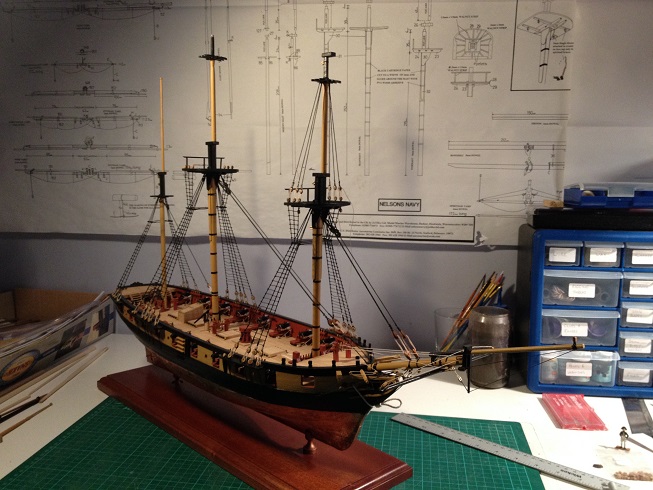
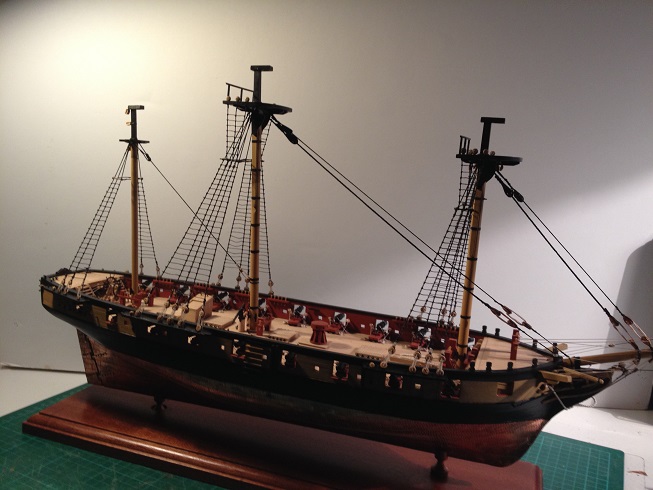
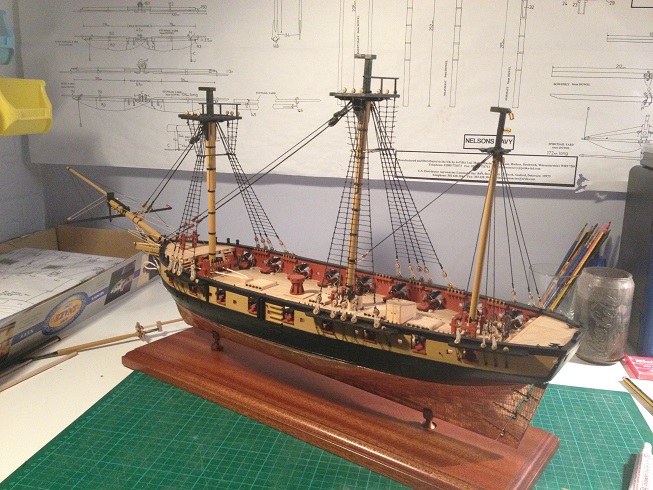
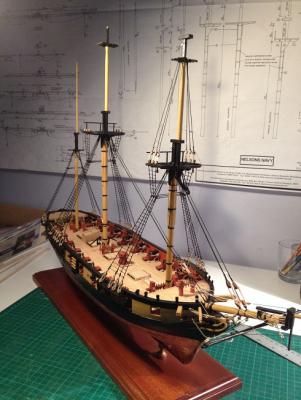
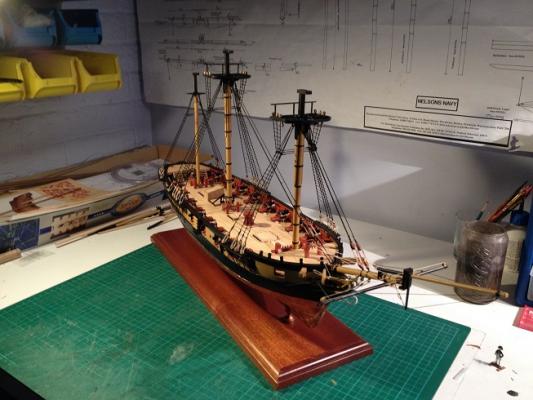
Now that I have finished the shrouds on the Fore Top Mast, it is time to get back to my favourite task..... Tying ratlines...! Going to try and break the ratline chore up by doing a mast at a time, then finishing the stays and then moving onto the next. The fact that there are less knots to tie this time will also help. Only tied a few so far but the difference it makes in having to work 12 inches higher up is slightly annoying. I find myself stretching more o having to stand up whilst working. On the positive side, each new addition to the ship is really bringing it to life, and the addition of the top masts has really created a feeling of near completion, even if I do have a load of spars and running rigging to do....!
-
After a busy week at work, inevitably having to catch from a week away, I have managed to get back to the build this weekend. Finished carving out the three top masts. Nothing more technical than a 15cm steel ruler, a heavy duty scalpel, some sandpaper and a lot of patience! Fitted the top masts in place and have started work on the shrouds. Fore Top Mast shrouds have been fitted and almost finished fixing the lanyards in place. Just when I thought I has finished doing ratlines, I sense some more in my immediate future.......
- 412 replies
-
- 5
-
-
- snake
- caldercraft
- (and 1 more)
-
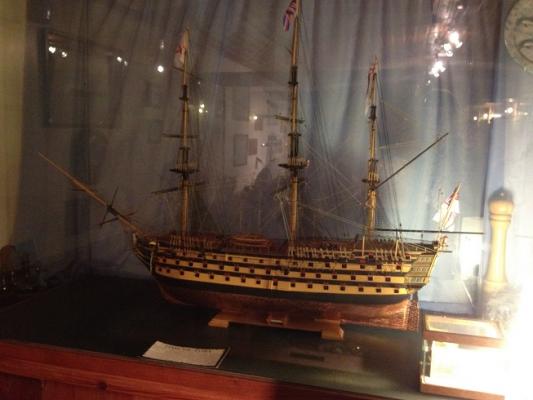
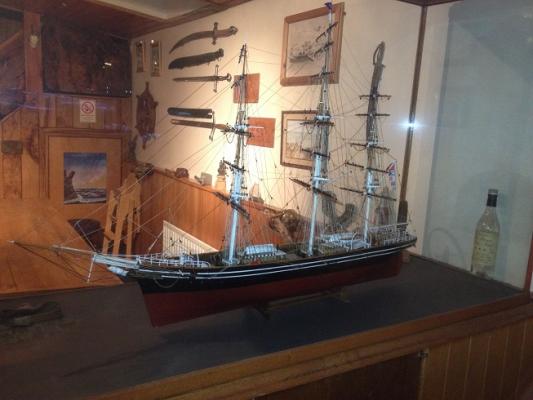
Hi all, Safely back from sunny(!) Scotland. It's a long old drive from the Highlands back to Bristol, but helps when split into two days with a stop off in Manchester. Anyway, here are the models we saw in the Eagle Barge Pub on the Caledonian Canal. Great little pub full of different pieces of furniture and decorations with their own stories.
- 412 replies
-
- 2
-
-
- snake
- caldercraft
- (and 1 more)
-
Tried a few times but my phone reception refuses to let me upload any images. I will try when I am back home this weekend. It was good to see the models though. Even though I knew how big the Victory was from quoted measurements from CMB and Caldercraft, it is interesting seeing the actual size in real life. Puts my Snake in the shade! Gives added impetus to push on when I get back. Top masts, stays and more(!) ratlines. I am going on the assumption that it is best to fully assemble the masts and stays before adding the spars and running rigging?
-
I have the faintest if internet signals on my phone so I can still keep up with events. Found a floating pub converted from a Dutch barge just by the cottage we are staying in. Very pleasantly surprised to discover a completed Victory and a Cutty Sark in glass cases. Rather funny as these are the eventual goals for my self and AJM77 respectively.
-
Hi all, This will be my last post for a little while as I am off to Scotland for a weeks holiday with my significant other. I have however just about managed to finished the first set of ratlines. I still need to touch up some of the lines that aren't nice and taut but the vast majority of the work is complete. It feels like it's been a bit of a slog but it looks great with the ratlines added. When I return it will be onto the top masts and stays.....

- 412 replies
-
- 4
-
-
- snake
- caldercraft
- (and 1 more)
-
http://www.cornwallmodelboats.co.uk/cgi-bin/sh000001.pl?REFPAGE=http%3a%2f%2fwww%2ecornwallmodelboats%2eco%2euk%2facatalog%2fmantua_fittings%2ehtml&WD=mounting&PN=amati_display_bases%2ehtml%23aA5685_2f04#aA5685_2f04 Here is a selection of items available at CMB.
-
Looks like a good start to the build. I was considering the Grenado as a second build myself, so I keep an interested eye on your build. Anymore of your build bases going? It looks fantastic and I'm sure I echo a few people who would be very interested in purchasing one from you.
-
I'm doing the ratlines from 0.25mm black thread. Already on my third roll.....
-
There were some pre-cut parts in the kit, which were a tapered shape, and also the instructions mention cutting extra from 4x2mm walnut I think. I'm at work at the moment. I'll try and take a picture when I get home.
-
No worries. My main issue is that my strops and chains aren't soldered and so are a potential weak point. Fortunately only one had failed whilst rigging the shrouds. Managed to fix with black rigging thread and is unnoticeable.
-
If I were to do this section again I would pin and glue the channels in place, solder all the strops and chain assemblies together and then fix in place in the channels. Finally once secured, start pinning the chains to the hull. Hope this helps.
-
Best glue for rigging: CA & GS-Hypo
jim_smits replied to Beef Wellington's topic in Masting, rigging and sails
I've been using GS-Hypo for my ratlines and it works very well. It dries very quickly and it is ever so slightly pliant so shouldn't cause any of the issues with brittleness that CA does. This also makes it easy to cut through when correcting a mistake. My only issue is that the tube it comes in is quite 'tight' and the stuff tends to seep out at a fair rate even when there is no pressure being applied. -
Looks like the colour is consistent within each size bracket. Hopefully will be fine as all I need is stuns'l booms all from 4mm stock. I will wait and see what turns up though! Fortunately nice and cheap for me in UK. Thanks for the heads up Jason.
-
Cheers Jason. I've bought a couple of lengths of walnut dowel from CMB, so I will see how they turn out.
- 412 replies
-
- 1
-
-
- snake
- caldercraft
- (and 1 more)
-
Couple of questions concerning stuns'l booms. The plans aren't brilliantly clear, but should the rings be installed at an angle of around 45 degrees ie between horizontal and vertical forward of the spar? Also, plans call for the booms themselves to be left as natural but to me this seems a little light in colour (sanded dowel). Would a light stain work? Any recommendations?
-
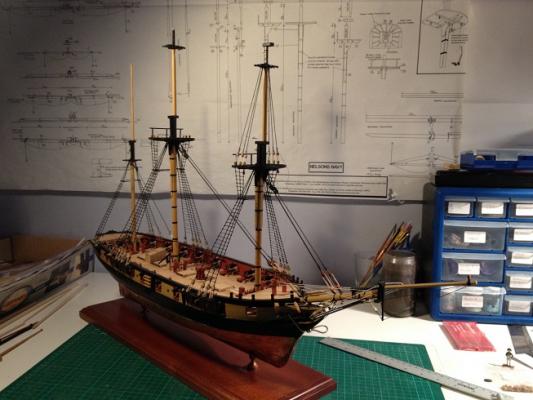
Fortunately I think it is purely cosmetic. I only noticed myself when I was looking at the plans to check the mizzen ratlines. On the home straight now, definitely makes coppering look like a minor chore! Then onto top masts and stays and the model will really start to look big!
-
Mainmast ratlines completed. I have however discovered a bit of a boo-boo I've made. The catharpins I've installed on the Foremast and Mainmast are a bit too low and should be two 'rungs' higher in each case. Not disastrous but slightly annoyed I made the error. Never mind. Onto the mizzen mast, which has no ratlines added as of yet. So I suspect it will be a week or so before completion.

- 412 replies
-
- 1
-
-
- snake
- caldercraft
- (and 1 more)
-
I'm not Jason but you'll want pages 2-7 for the channels and shrouds.
- 800 replies
-
- 1
-
-
- snake
- caldercraft
- (and 1 more)
-
I've also learned to accept that not all the ratlines will be perfect and that there will be some variation in sag......
-
Finally feel like I am making some progress with my ratlines. It's been a pretty steep learning curve but I think I am getting on top of it. Slow and steady is the of name of the game. So many ways in which to tie a bad set of lines. Found that I could do the following: 1) Tie the line to taut and sag other nearby lines 2) Tie too loose and look awful 3) Natural tendency of the clove hitch is to rotate the shroud line clockwise looking down, so end up with twisted lines Ended up tying the majority of lines and then having to re-adjust lines that were (usually) initially too loose. Finally completed the Foremast section, and well on the way with the Mainmast. Only the Mizzen to go after that and then onto the top masts....!

- 412 replies
-
- 2
-
-
- snake
- caldercraft
- (and 1 more)