
HOLIDAY DONATION DRIVE - SUPPORT MSW - DO YOUR PART TO KEEP THIS GREAT FORUM GOING! (Only 24 donations so far out of 49,000 members - C'mon guys!)
×


Patrick Haw
-
Posts
416 -
Joined
-
Last visited
Content Type
Profiles
Forums
Gallery
Events
Everything posted by Patrick Haw
-
David, Thanks for the advice and tips on coppering on my log. Your coppering technique is one I followed closely and helped me decide how I'm going to approach the coppering. As Phil said above, only 2500+ tiles to go. That can't take longer than, what...a couple of hours? Patrick
-
Derek- That's too bad about your channels, but at least you were able to fix it. I did read that part of the manual that sys it's an easy mistake to make...so I will probably make it too when I get to that point! Are you going to pin as well as glue the channels in place? I've found that when you put the rigging up there's a lot of pressure on the channels, so having them pinned into the hull as well as glued is good insurance. David - I'm going to apply primer to the hull and mark out the coppering lines as others have done, then start from the waterline and work down several bands before starting to work upwards from the keel. I'm going to use contact cement as that seems to have worked well for others and you don't get CA glue on the plates or your fingers! I went to the hobby shop today and got some 1mm x .5 mm styrene strips for the waterline as Derek did. Of course I left the shop with a bunch of other neat stuff too...some brushes, paints, mitre box and saw, X-acto keyhole saw blades. Most of the paint work will be Admiralty paints but I bought a couple of Testors matt black which I think will work better for gun barrels.
-
Hi Rosmarie, Glad to see you back, haven't seen you here for a while. Glad the heat is back on and hope you receive your wood supply so you can get back on Victory and give us more pictures of your progress. Patrick
-
Well, I'm at a bit of a standstill at the moment. I've finished and sanded the second planking and have a nice smooth surface for coppering and painting. I need to re-line the gunports before moving on to anything else though. Since I already lined the gunports once and then had to knock them all out I've used up all the 1mm x 16 mm walnut that came with the kit. I've ordered some more but it hasn't arrived yet and I don't want to put in the upper gun deck before I line the middle gun deck ports. I suppose I can mark the waterline and put some primer on the coppered area of the hull and then make a start on coppering - my nemesis! Of course, the weather is starting to get better so maybe I'll just go and stain the fence I built last month while I wait for my supplies to arrive! Will update when I decide what to do. Patrick
-
Thank you David & Derek for the information on the styrene strip at the waterline, it's just what I was looking for. Sjors, Thanks for your kind words. This is the second planking so no more to put over it. I just finished filling and sanding it and the filler will reveal that it's not as great a job as the pictures make it seem! But it will all be covered up with paint and coppering. Patrick
-
Thanks David. That's what I was looking for.
-
David, I've been going through the various Victory logs looking for a tip from someone regarding getting a straight edge at the waterline for the coppering. I think it may have been you who said to put a 1mm x 1mm styrene (or other material?) strip at the waterline to get an edge for the copper plates. Am I right, or do you know whose idea it was? Cheers Patrick
-
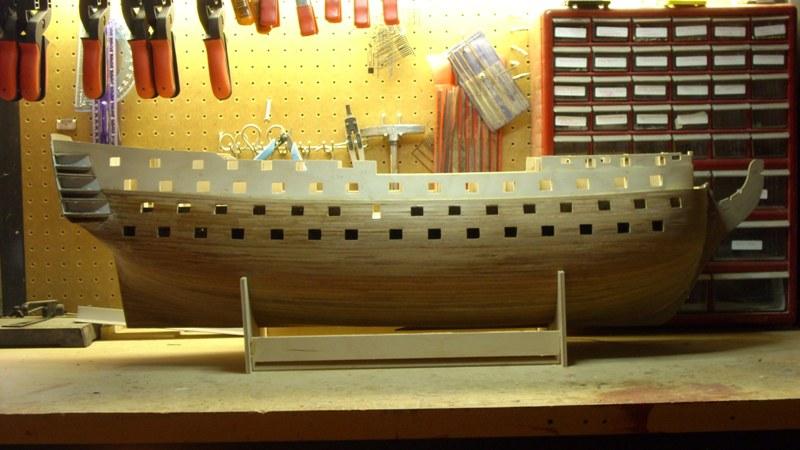
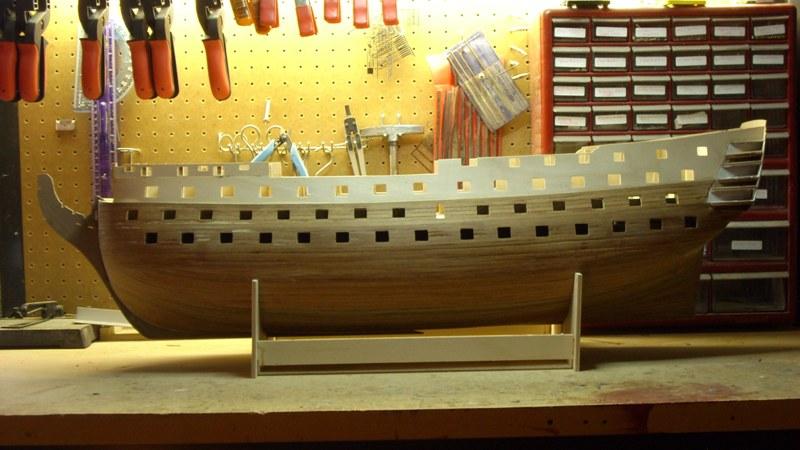
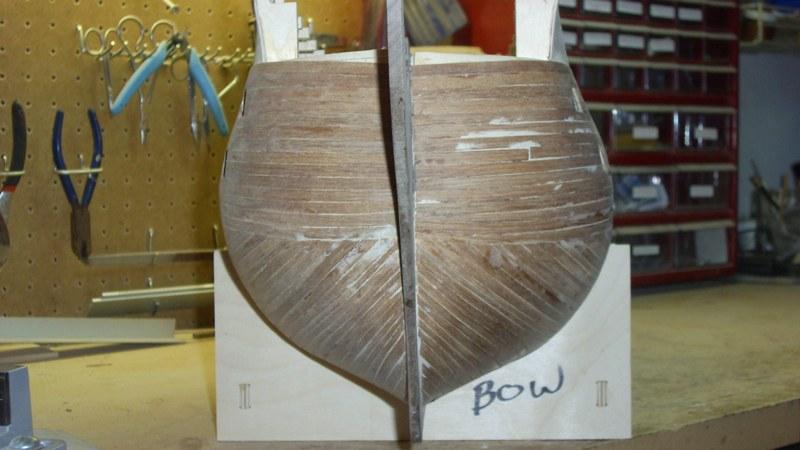
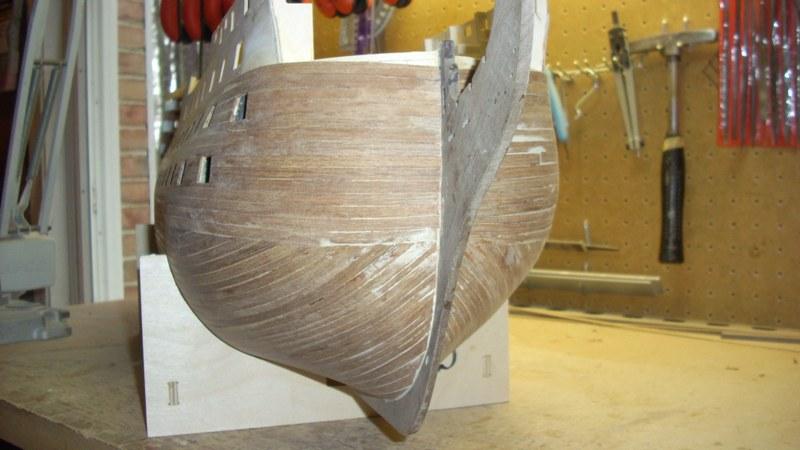
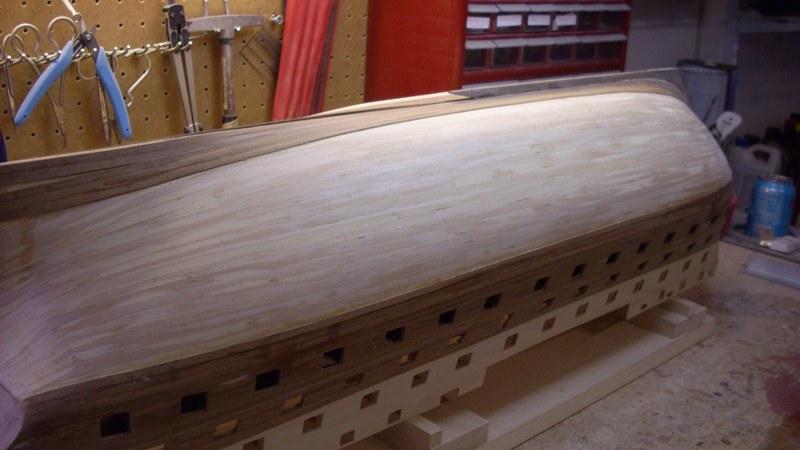
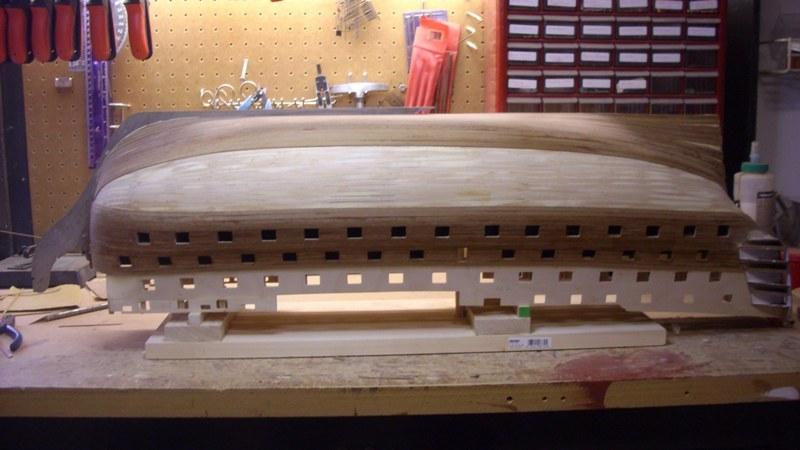
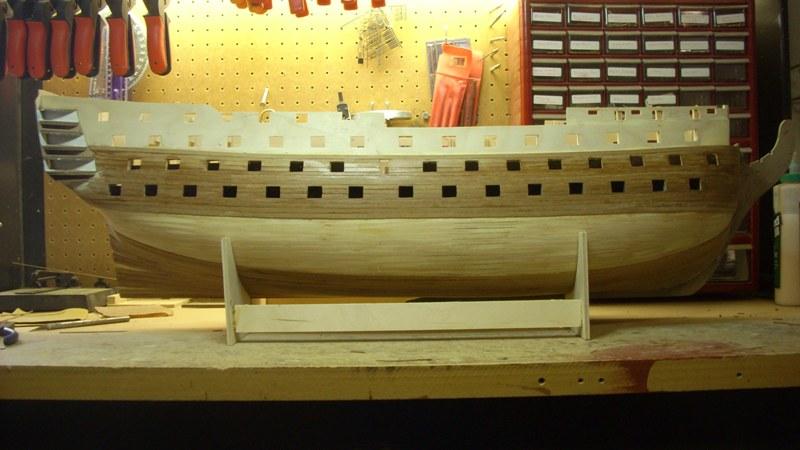
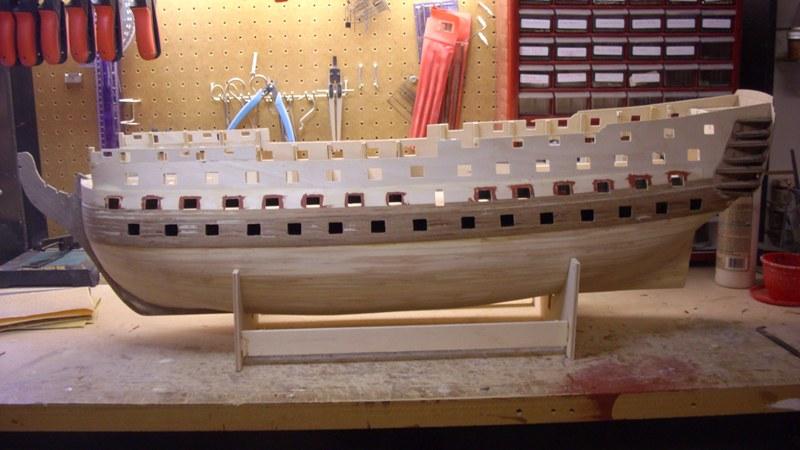
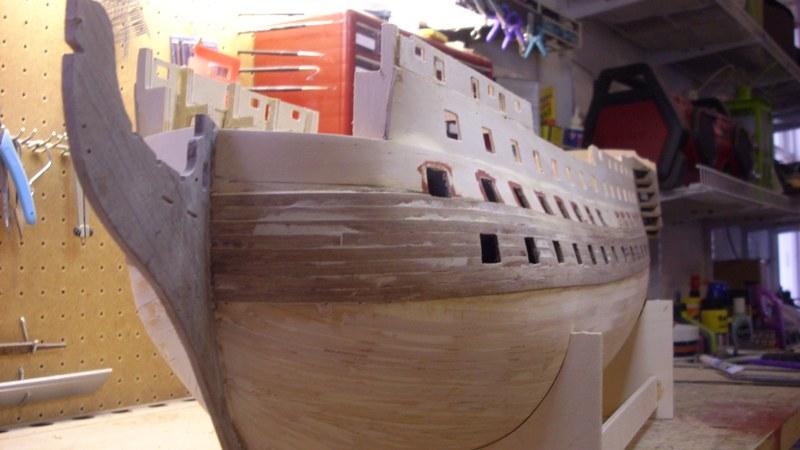
Woo-hoo! Second planking is finished, well at least as far as I can go at this time. I think it came out pretty well and I got the look I was after. Actually I think this was the easiest second planking I've done in any of my models. It's not perfect but that's what paint and copper are for! Here are some pics before filler and sanding. I'm about 9 weeks into it and have built a fence in the garden and painted the sun-room during that time, so I'm happy with the progress so far. Patrick
-
David, Great...just great! Patrick
-
Hi Derek, Nice work on your stern there and good job on painting the taffrail decorations. Hope you get you eye problem sorted out soon so you can get back to work on the ship. Thanks for your comments on my log...and for reminding me that there are only 2600 copper tiles to put on!! Patrick
-
Mobbsie, Just found your Agamemnon log. She's looking good. Your upper gun deck looks superb and I love the idea of the cant frames in the boiw rather than balsa blocks. I started to build Agamemnon 7 years ago but between work and travel never got very far, but cutting out the gun ports was the worst experience! Anyway, my Aggy is in storage in the attic while I'm working on my Victory. Thanks for your comment on my log and I'm sorry you split some wood around your gun ports, but we're all here to learn from each other so I'm sure they'll all come out great. Keep up the great work! Patrick
-
Yon, Brilliant job with the bows, the netting is a really nice touch and adds reality to the model. All these great ideas from everyone that I'm filing away for future use. I think your guns look great, as does the whole deck...very clean, nice work. Enjoy Barbados! Patrick
-
I'd say you have far more than just an "aptitude" for this ship building lark! Your precision and attention to detail are very impressive. I'm looking forward to following your build, and especially seeing what you do in the cut-out, that has great potential for some excellent detail. Great work! Patrick
- 62 replies
-
- 1
-

-
- victory
- deagostini
- (and 1 more)
-
Thanks for the comments Rich & David. I haven't decided exactly when I will put the quarter gallery skins on. I will definitely be glazing them so I want to wait until at least I'm done with the major sanding tasks (second planking, deck planking) as sanding dust will inevitably work its way inside the quarter galleries and onto the inside of the glazing and will be impossible to get rid of. I should have the second planking completed this week then will decide what to tackle next...probably gun port linings again and then decide whether to get the upper gun deck in or start with coppering. Coppering intimidates the heck out of me, but with all the guidance from the other Victory builders here who've got through it unscathed and still reasonably sane, I have more confidence. Patrick
-
Druxey, Also don't forget that the shipwrights who built the actual ships had no power tools or equipment. That these amazing ships were built entirely by hand is an awesome thing.
-
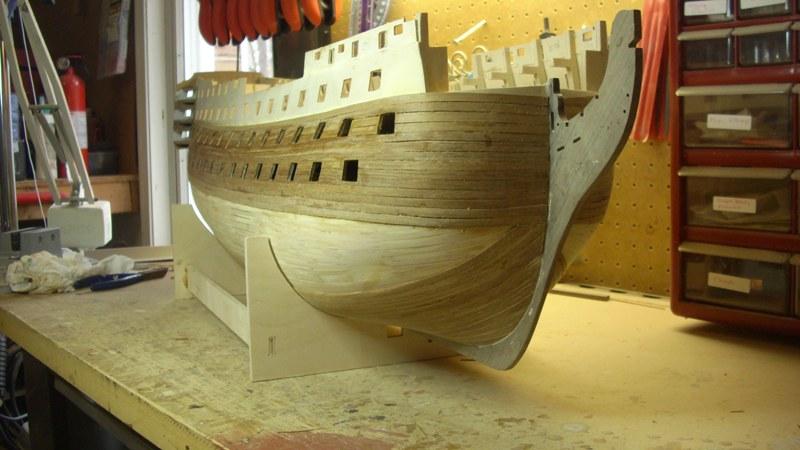
Well the second planking is going pretty well once I got past cutting the gun ports out as I planked over them. I decided to take the approach of planking downward to about the waterline and then start upward from the keel as I like the effect when it's completed. Not sure what this technique is called. Never done it this way before so I hope it turns out ok. I figure if it doesn't it'll all be coppered over anyway! Still have to put stealers in at the stern and a bunch of sanding to do. I've been doing preliminary sanding as I go and so far not too much filler needed. That's not filler, it's caulk...yeah that's what it is! Patrick
-
David, Your gunport lids are looking good. It must be a great feeling to be at the stage of adding these sorts of details and bringing the ship to life. Makes me realize how far I still have to go. My second planking is coming along well though and I should have some new pics to post soon. I agree with you on the lazy susan idea and was thinking the same thing as I plan ahead. I'm going to need to get creative as the work bench I'm working on isn't deep enough to turn the ship around on and darn the thing is getting heavy to pick up and turn! Looking forward to more of your progress. Cheers, Patrick
- 439 replies
-
- 1
-
-
- victory
- caldercraft
- (and 1 more)
-
Hello David, Your rudder assembly looks great to me, and thanks for the gun port lid jig idea...it's filed away for sometime in the next couple of years when I get there! I think Gil had a system for making sure all the lids are positioned at the same angle (doesn't he have a system for everything?) on his old log, but not sure if he's put it up on his new one. Still plugging away at second planking on my end. Patrick
-
Rob, It's really great to see your log back up and running. Your work is just terrific. I'm way behind you, on second planking right now, but logs like yours are an inspiration to take my time and get it right! Look forward to seeing more of your progress. Patrick
- 295 replies
-
- 1
-
-
- victory
- caldercraft
- (and 1 more)
-
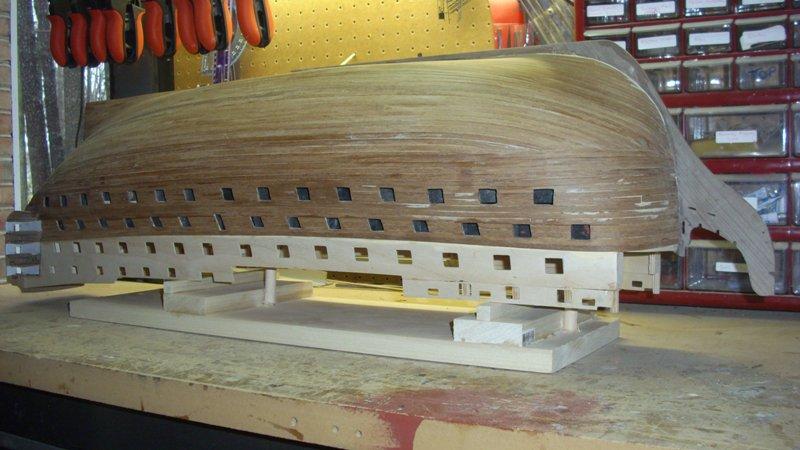
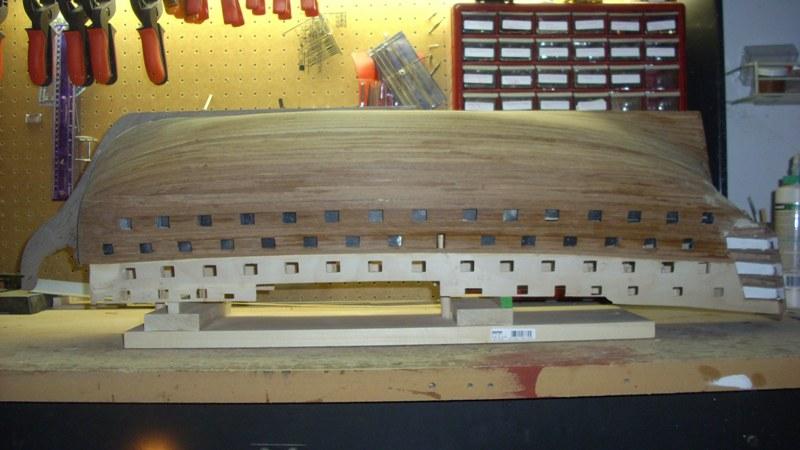
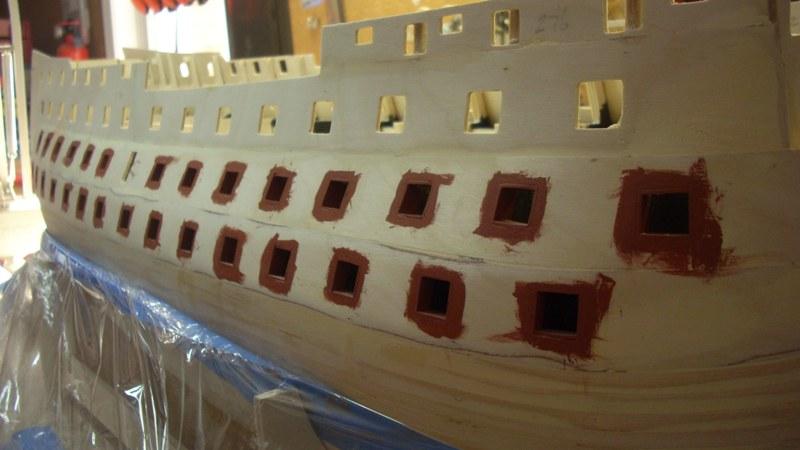
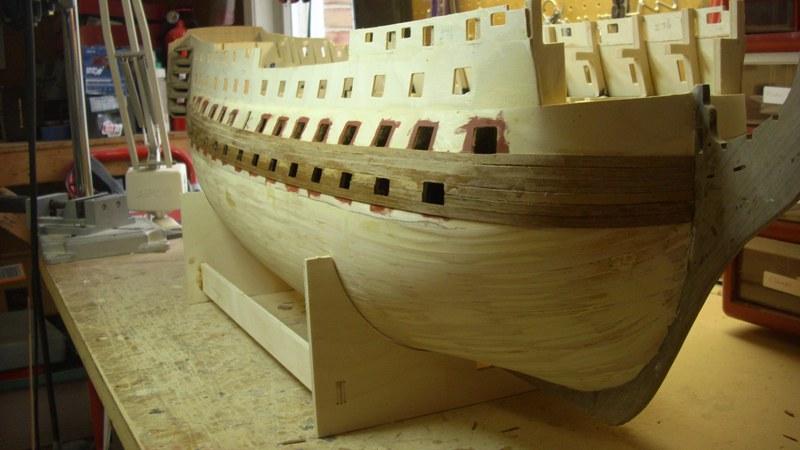
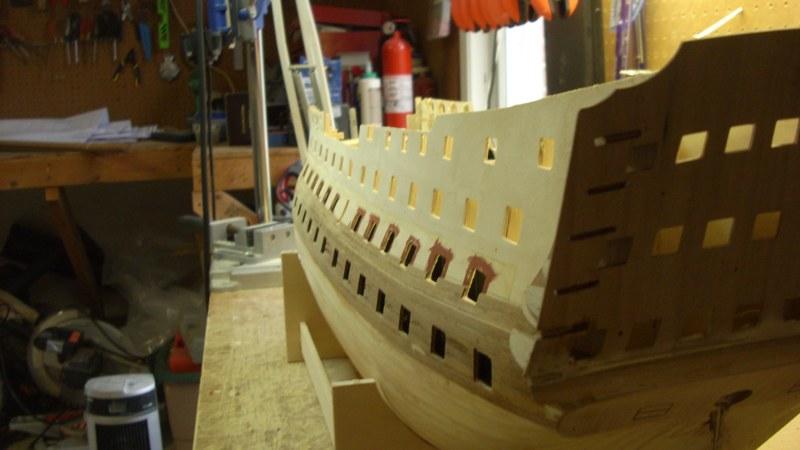
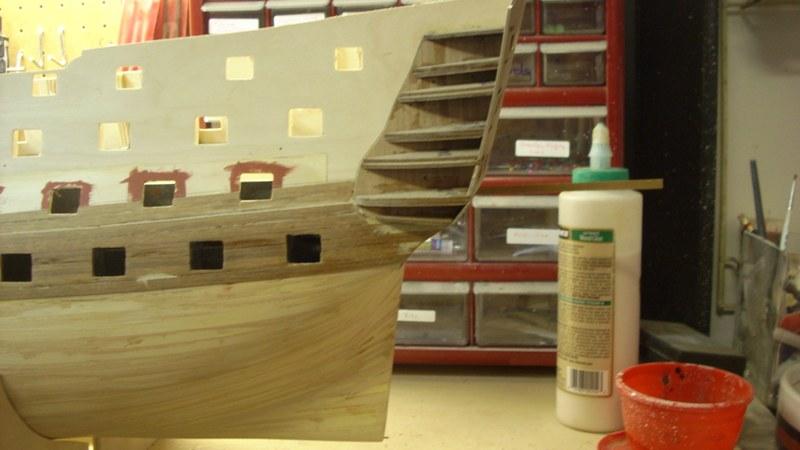
After the demolition of my lovely gun port linings I've been back at the second planking and cutting out gunports as I go. I'm pretty pleased with how it's going although there were a couple of mistakes, mostly from planks splitting, that needed a bit of filler, but not bad overall and it's all going to be painted anway. Critical lesson for anyone else embarking on cutting out the gunports through the second planking - put some super glue on the area to be cut, let it soak in, wipe it off, then make your cuts. This will prevent the walnut strips from splitting at the cut. Here's the work to date. First pic is of my gun port inserts...all gone now! Patrick
-
It's going to be great having a new dedicated modelling area. It looks good so far. Can't wait to see your Victory in there and your work progressing. Patrick
- 1,319 replies
-
- 1
-
-
- caldercraft
- Victory
- (and 1 more)
-
Hi Rosmarie, May I add my best wishes for your birthday. Hope it's a happy day with many more to come! Patrick
-
No pictures with this post...I'm too embarassed! I've been making good progress and then took a big step backwards. I finished with all the quarter gallery patterns and the stern fascia and dry fitted all the quarter gallery skins then removed them and put them away for later. Pretty happy with the result. So I moved onto beginning the second planking, that's when I had an "uh-oh" moment. Those of you who read my log on the previous MSW version may recall that I elected to line the gun ports prior to doing the second planking as I'd seen someone else do, figuring it'd be east to plank up to 1mm from the lined gun ports with the second planking. It isn't! Trying to make the cuts in the second planking exactly 1mm back from the port linings is just about impossible and the results were U-G-L-Y! Luckily I'd only partially planked over maybe six gun ports and learned from my mistake early. The solution? Knowck out all of the gun port linings and planks right up to the gun port openings, then line the gun ports again after second planking. Just ordered more 1mm x 16mm walnut strips for the job. I just finished taking out all the linings and cleaning up and squaring the port openings and I'm back to working on the second planking. I have to say that I was pretty proud of how well fitted and glued the linings were, they were a pain to take out!! Of course most of the lower gun deck linings fell down into the hold and when I move the ship it sounds like a baby's rattle - I just hope nobody decides to pick it up and shake it when it's done! I have to thank many of the other Victory builders here for the inspiration to accept a mistake, undo a lot of work and re-do it. If it wasn't for others willingness to do this and share their trials and tribulations with everyone else, I'd probably still be trying to make those ugly gun port cuts! Cheers, Patrick
-
Thanks MJD. It's an intimidating project for sure, but the problem solving is all part of the "fun"! Besides, I have all the experiences of the other Victory builders here to fall back on when the going gets tough. A few years ago I attended the Patrick O'Brian weekend at the Royal Navy Museum in Portsmouth. The highlight of the week end was a formal dinner on Victory's lower gun deck. I was in heaven! Patrick
-
Gil, So very happy to have you back, and even happier that your photos of your Victory survived. I'm sure I join many others here in saying that your Victory is the quintessential Caldercraft build. Looking forward to your pictures being back up and your future progress. Patrick