HOLIDAY DONATION DRIVE - SUPPORT MSW - DO YOUR PART TO KEEP THIS GREAT FORUM GOING! (Only 24 donations so far out of 49,000 members - C'mon guys!)
×


Patrick Haw
-
Posts
416 -
Joined
-
Last visited
Content Type
Profiles
Forums
Gallery
Events
Everything posted by Patrick Haw
-
HMS United?
-
OK Garward, thanks for the input on bituminous varnish divorced with white spirit. I'll file it away...somewhere. David and Kevin, thanks for in. You guys are an inspiration. Patrick
-
Thanks Garward, I looked at the site you sent, unfortunately I don't speak or read Russian so it's hard to follow Patrick
-
Thanks Garward. Not sure of the picture you included. It doesn't look like any of the decks on the Caldercraft Victory, unless I missed something seriously badly on the plans!! Patrick
-
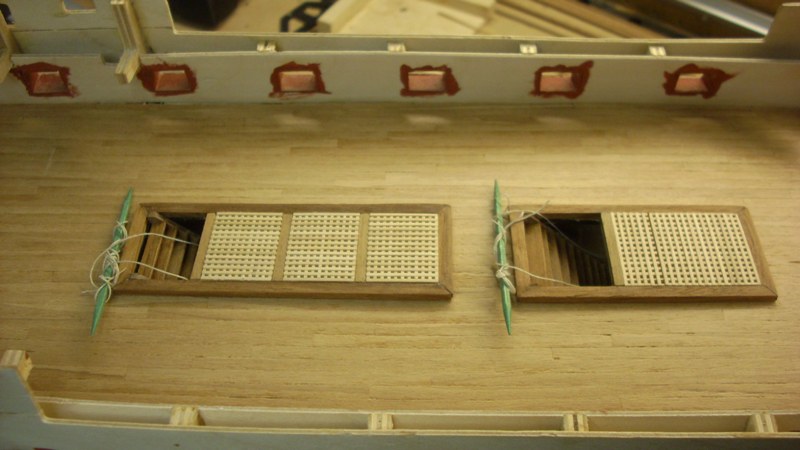
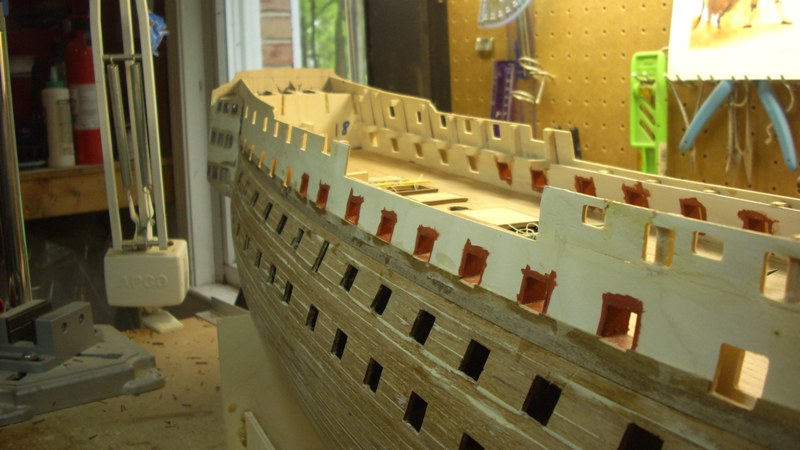
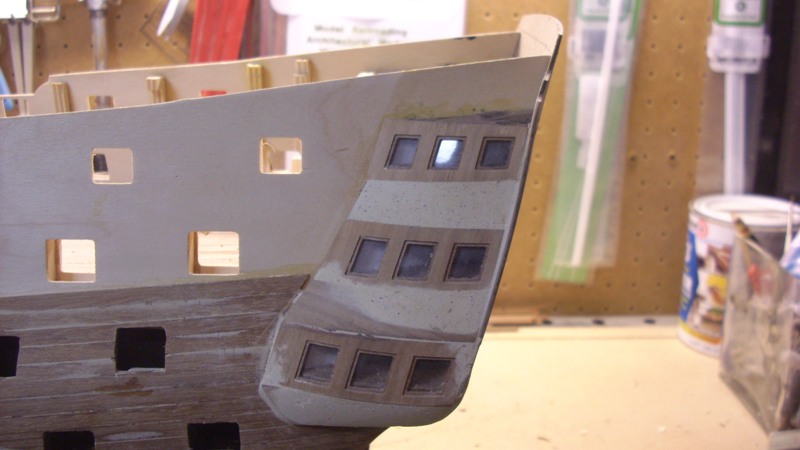
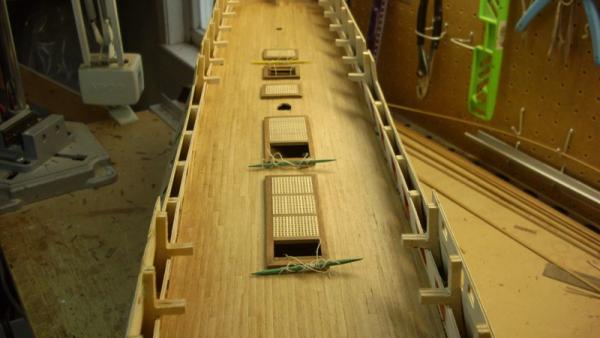
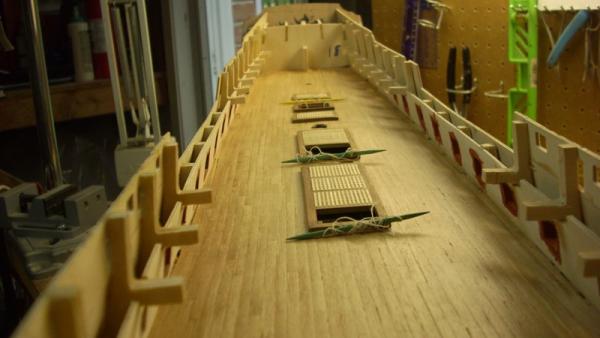
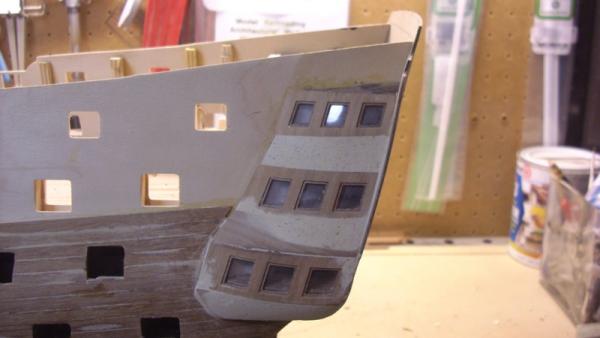
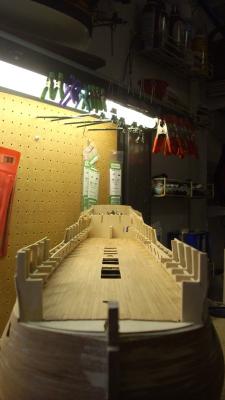
I haven't posted for 3 weeks, but things have been progressing slowly but surely. Between getting the pool open, cleaning the deck and getting patio furniture and everything sorted and doing various outside tasks I have not had a lot of time for Victory but have got some things done and foresee being able to spend more time on her now. Having sorted out my own problem of the deck openings by simply widening them, I got the upper gun deck gratings and companionways in place and am quite pleased with them. (Toothpicks are temporary and just stopping the companionway hand rails from disappearing down onto the middle gun deck). My long wait for replacement 16mm x 1 mm walnut for the gun ports is over and I got the lidless gun ports lined and have started to work on the second planking where I left off. I decided to put the quarter galleries on at this point too. I must have done something wrong fitting the gallery templates and wound up with fairly large depressions in the skins between the window sections. But my friend Mr. Woodfiller came to the rescue and I think they're ok. Will need to fill any gaps once I get the second planking complete. So things are moving, although not quite a fast as I'd have liked. But still having fun. Cheers Patrick

-
Welcome to the community of Caldercraft Victory builders here at MSW Jerry. You're off to a great start. I started mine at the beginning of January and you're already a bit ahead of me! I need to get back out there and you're giving me the inspiration! Looking forward to following your build. All the best, Patrick
- 900 replies
-
- 1
-

-
- victory
- caldercraft
- (and 1 more)
-
Hi Erik, and welcome to the community of Caldercraft Victory builders here at MSW. I'm glad you got such a good response from Jotika on your concerns about the wood strips. I received My Victory at the end of December and discovered that the box did not contain the 1mm x 4mm Tanganyika strips for the deck planking. I notified Jotika and they said they'd send them, told me they shipped in early February. When I hadn't received them by early March I contacted them again and they said they must have gone missing and would be re-sent. That was six weeks ago...still haven't received the wood! I just e-mailed them again earlier today, so we'll see what happens. There's been some discussion in the community lately about the quality of Caldercraft's instruction manuals, so it'll be interesting to see if your opinion of the excellence of the manuals changes as you progress! Anyway, you're off to a good start and I'll look forward to following your build. Patrick
-
Hi Rosmarie. Great to see you back here again. Sure looks like you've been busy though. Looking forward to seeing you get back to work on Victory. Patrick
-
Nice bit of improvising there Kevin. Scrap wood and wood filler are our friends! Filed away for when I get there if I have the same problem! Work's progressing on my Victory, just haven't had time to post any pics lately. Will get to it soon.
-
Kevin, Your catheads and bows look fantastic. Really great work. I'm enjoying your build so much. Those bits down in the hold aren't mistakes, they're ballast and carpenters stores! Ptrick
- 1,319 replies
-
- 1
-
-
- caldercraft
- Victory
- (and 1 more)
-
Hell Frank, Firstly, I'm glad your surgery went well. Second, I just checked your build log and your Supply is excellent. Looks like a real working ship. It's always so great to see how creative other builders can be. Well done! Patrick
-
Very nice work on the lids Derek. There are so many tedious tasks in the build but I guess it's our therapy! Patrick
-
Hello Neale. Just checked your log for the first time in a while and I like the progress you've made. Very clean and nest work. I have a feeling she is going to be a beauty. Yard work and prepping for spring & summer has interrupted my own building the last few days, but hope to get back on it by the end of the week. Keep up the great work Patrick
- 62 replies
-
- 1
-
-
- victory
- deagostini
- (and 1 more)
-
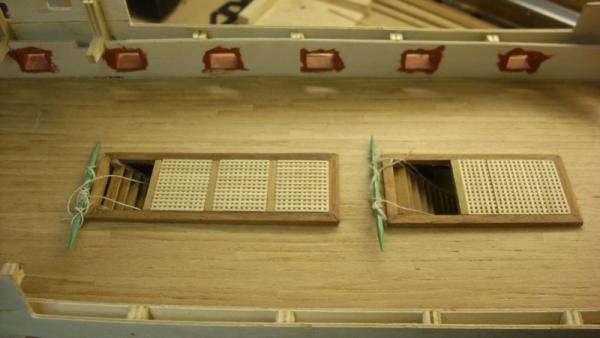
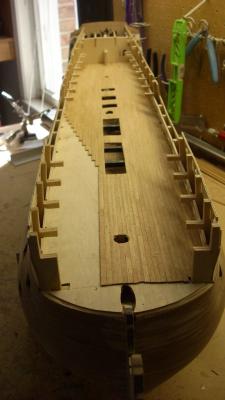
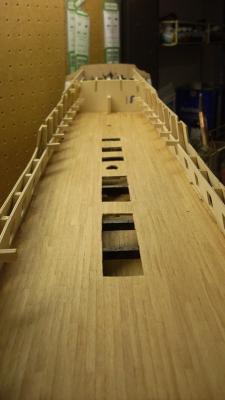
Solved my own problem...and it was my mistake, not Caldercraft's, so I take back any bad mutterings about them. What happened was that when I put down the upper gun deck template there was no way it was going to fit without breaking, so I did what I've seen a lot of people do and cut the deck down the centerline to make it fit easier. I doing so, I shaved off a couple of millimeters along the centerline, filled any gaps and got on with planking, not realising that I'd actually narrowed the deck openings by a couple of millimeters. Everything - mast openings and grate and companionway openings - are exactly on the centerline still so it's a simple matter of widening the deck openings by a millimeter or two on each side. I thought it went too easily when I put down the deck! But, no harm, no foul and everything will be ok. Thanks for everyone's help. Patrick
-
Thanks Kevin and David. I can see the sense of building the coamings first,according to plan sheet 3, and then I'll have to widen the deck opening to meet the inner edges of the coaming and then make the ladder to fit the newly widened opening. Just don't get why Caldercraft didn't make the companionway opening wide enough in the first place! At least it's the same length as on the plans! Patrick
-
Help! I need help from you other Caldercraft Victory builders! I finished planking the upper gun deck and just for something different to do started making the gratings and ladders going down to the middle gun deck. I made a ladder that fit perfectly inside the opening in the deck but when I started to build the coaming around the companionwayI noticed that it came out much narrower than the gratings (which I made to the exact size as shown on Plan sheet 3. When I put the ladder up against the plan sheet it's obvious the ladder is much narrower than on the plan...but it fits exactly in the opening that Caldercraft cut in the deck. I just checked the opening in the deck and it's a tad over 4mm narrower than the opening on the plan sheet. What am I missing here? Did anyone else run into this? Are we supposed to widen the deck opening ourselves? That's the obvious answer, but why did Caldercraft even bother putting the opening in the deck if it's the wrong size? Patrick
-
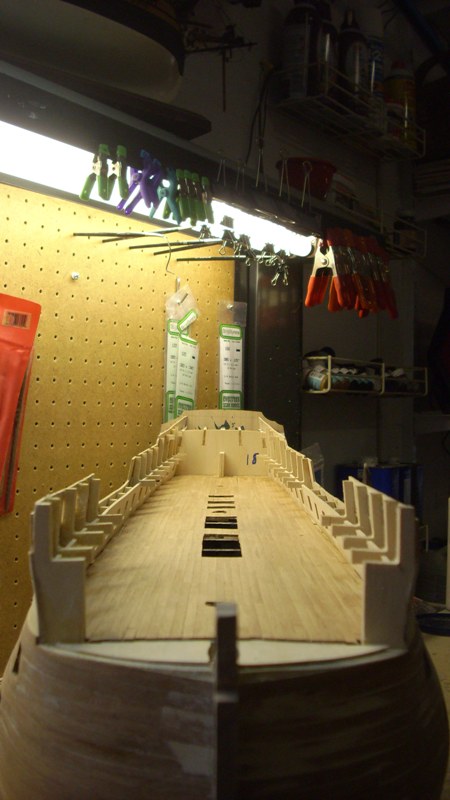
Time for another update. In between going away for Easter, doing yard work getting ready for spring and summer, changing oil, filters and blades on the lawn tractor, I've been making progress planking the upper gun deck and got it completed today. It seems to have taken forever but I sanded the deck and put on a coat of matte polyurethane and I'm pleased with the result. If you'll recall, my Victory was shipped without the Tanganyika wood strips for deck planking and I've been using some left over Tanganyika from another build, but am almost out of it. Jotika clamins they shipped the missing wood on Jan 29th, but when it hadn't arrived by 1st week of March I got hold of them and they said it must have gone missing and they'd send more right away. It's now been a month and I still haven't received it. I'm getting a bit frustrated. Well, I don't have anymore planking to do for a while, but stronger worded e-mail on the way to Jotika today. Here's my progress Patrick
-
HMS Foudroyant?
-
Good work Kevin, your chain plates look really good now. Patrick
-
Wow David! Fantastic progress. She's coming along great and your port lids look really, really good. Patrick
-
Looks a lot like the Willy T. Floating Bar & Grill in the Bight at Norman Island, British Virgin Islands!
-
Hi Kevin, Good to see you back to building and making progress so quickly. Who need's Jotika's instructions when we all have each other? One question I have on your latest photo. The plans show the chain plates attached directly to each other and then to the plate that affixes them to the hull. In your picture you seem to have an additional "tab" beteween the chain plates and the piece at the bottom, and it looks like the completed chain plates are longer than those shown on the plans? Patrick
-
Wow Jan, that was fast! And you're correct. Later converted to the aircraft carrier USS Wolverine used for training US Navy pilots on advanced carrier landings on Lake Michigan.
-
Apologies for the delay. Back home from the Easter weekend now, so here it is. Good luck
-
Look for my challenge on Monday. Happy Easter