
Sjors
-
Posts
5,536 -
Joined
-
Last visited
Reputation Activity
-

 Sjors got a reaction from Mr Whippy in San Ildefonso by gsxdent59 - OcCre - 1/70
Better my friend 😄👍
-
 Sjors reacted to gsxdent59 in San Ildefonso by gsxdent59 - OcCre - 1/70
Tank you my friend. I will look the manual again..i have fix it....is that ok?
-
 Sjors got a reaction from Obormotov in HMS Indefatigable 1794 by Kevin - Vanguard Models - 1:64 - Feb 2023
Enjoy Kevin,
It will be a long journey so i’m looking over your shoulder to see what you are doing! 😀
Sjors
-
Sjors reacted to Kevin in HMS Indefatigable 1794 by Kevin - Vanguard Models - 1:64 - Feb 2023
good evening everyone
thank you for comments and likes
day 4, build nearly finished (well not quite)
the orlop deck was finished off with a couple of hatches and a ladder
the inner bulkheads were sanded down to make putting the inner bulkheads on, more work required on this
the main deck was test fitted and tonight half has been glued on
-
Sjors reacted to Kevin in HMS Indefatigable 1794 by Kevin - Vanguard Models - 1:64 - Feb 2023
good evening everyone
thank you for comments and likes
day 3
the build up of the bulkheads continues, but not a lot more to do on that part, sanding the inner frames over the weekend and laying/planking the main deck
its been a dream to put together,
intentions are at this stage is to let the wood do the talking, after all a lot of it is going to be boxwood, so unless i completely mess up the hull planking, there will be no added colour, just varnish
-
Sjors reacted to Kevin in HMS Indefatigable 1794 by Kevin - Vanguard Models - 1:64 - Feb 2023
good evening everyone
Thank you for comments and likes
day 2
im still buzzing, up at 0200 adding more, just gone 1900 and im ready for bed
internal bulkheads and deck beams
bow and stern assy these are made away from the build and then added after a rough fairing
a lot more to come off,
upper and lower gunport sills
-
 Sjors got a reaction from Old Collingwood in HMS Indefatigable 1794 by Kevin - Vanguard Models - 1:64 - Feb 2023
Enjoy Kevin,
It will be a long journey so i’m looking over your shoulder to see what you are doing! 😀
Sjors
-
Sjors reacted to Kevin in HMS Indefatigable 1794 by Kevin - Vanguard Models - 1:64 - Feb 2023
day 1
the bulkheads are MDF and just slot into place, no glue at all has been used in this update
this is real clever
the keel assembly is added to from both sides, and as it drops in, ensures the bulkheads are in place, and then locked into position with tabs, these will be glued ate some time
locking tabs, hold everything in place
l
the orlop deck goes into place (forgot to photo, after which the lower deck just drops into position, a couple hours work, no dramas or issues at all, very well thought out
-
 Sjors got a reaction from Alex K. in Duyfken by Sjors - Kolderstok - scale 1:50 - VOC reconnaissance yacht
I just told you that it is a slow build.
After two tuesdays of building at the club, all the frames are done 🙂
I think I have to build more instead of watching other projects and not so much talking
Sjors
-
 Sjors got a reaction from Beef Wellington in Duyfken by Sjors - Kolderstok - scale 1:50 - VOC reconnaissance yacht
I just told you that it is a slow build.
After two tuesdays of building at the club, all the frames are done 🙂
I think I have to build more instead of watching other projects and not so much talking
Sjors
-
 Sjors got a reaction from GrandpaPhil in Duyfken by Sjors - Kolderstok - scale 1:50 - VOC reconnaissance yacht
I just told you that it is a slow build.
After two tuesdays of building at the club, all the frames are done 🙂
I think I have to build more instead of watching other projects and not so much talking
Sjors
-
 Sjors got a reaction from ccoyle in Duyfken by Sjors - Kolderstok - scale 1:50 - VOC reconnaissance yacht
I just told you that it is a slow build.
After two tuesdays of building at the club, all the frames are done 🙂
I think I have to build more instead of watching other projects and not so much talking
Sjors
-

 Sjors got a reaction from Aa-schipper in Duyfken by Sjors - Kolderstok - scale 1:50 - VOC reconnaissance yacht
I just told you that it is a slow build.
After two tuesdays of building at the club, all the frames are done 🙂
I think I have to build more instead of watching other projects and not so much talking
Sjors
-
Sjors got a reaction from GrandpaPhil in Duyfken by Sjors - Kolderstok - scale 1:50 - VOC reconnaissance yacht
Last tuesday it was the first evening at the modelclub.
Because everybody wanted to see what i was doing i only glued 3 frames.....
The rest of the time was giving information about the proces of building.
A few things I'll be doing at home like painting.
There are two doors.
One is going behind a deck and the other one is going on the back of the stern.
That's the one with the white color on it.
Sjors
-
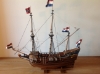
Sjors got a reaction from GrandpaPhil in Duyfken by Sjors - Kolderstok - scale 1:50 - VOC reconnaissance yacht
Here is a new build.
I will build this one at a hobby model club.
So it don't go fast!
Between 1997 and 1999 a replica of the Duyfken( Little Dove ) was built in Freemantle ,Australia to commemorate the first discovery of Australia.
When she was in Holland I was visiting her and I always want to build her.
And Kolderstok make a kit so at least her she is.
Length 650 mm
Width 250 mm
Height 550 mm
And then a few pictures of what was in the box
Sjors
-
 Sjors got a reaction from gjdale in Duyfken by Sjors - Kolderstok - scale 1:50 - VOC reconnaissance yacht
I just told you that it is a slow build.
After two tuesdays of building at the club, all the frames are done 🙂
I think I have to build more instead of watching other projects and not so much talking
Sjors
-
Sjors reacted to Henke in HMS Agamemnon by Henke - Caldercraft - 1:64
Dear friends,
Poop deck, planking and some varnish added.
Best regards
Henrik
-
 Sjors got a reaction from Jack12477 in Duyfken by Sjors - Kolderstok - scale 1:50 - VOC reconnaissance yacht
Say hello to the Duyfken from me if you are in the neighberhood 🙂
On vacation? Then enjoy!
Sjors
-
Sjors got a reaction from Beef Wellington in HMS Victory by Sjors - Caldercraft - 1:72
While i'm waiting for the plates i have done a little bit more.
Painted the stern fascia, windows and ornaments.
Also the trophy of arms.
You really need a steady hand but i'm happy with the result.
Sjors
-
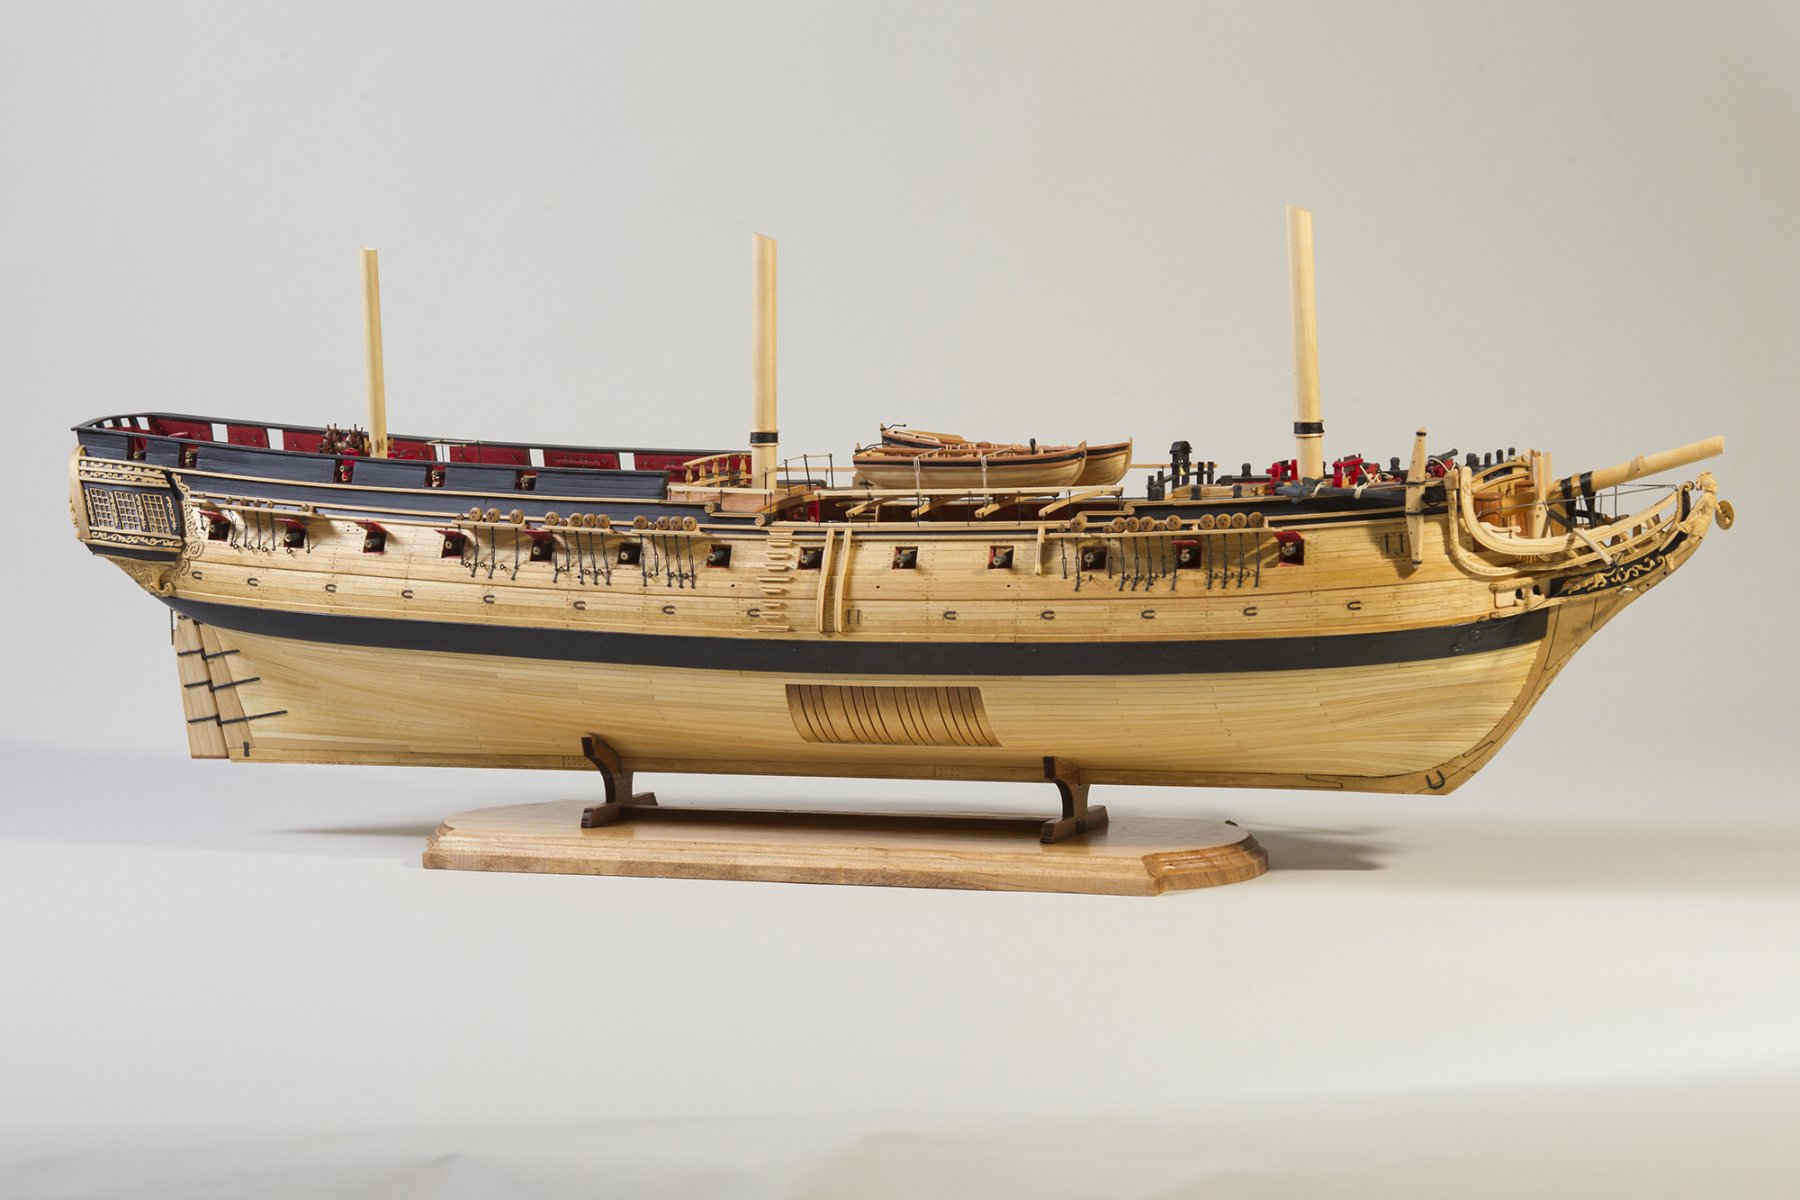
 Sjors got a reaction from AJohnson in HMS Snake 1797 by Sjors - FINISHED - Caldercraft - Scale 1:64
Hi Mike,
I have not give up only make no pictures or give a update here.
Sometimes you just wanna build and not do the writing stuff like on a forum.
But then the blood goes where it should be.
And i come back!
-
 Sjors got a reaction from Barbossa in HMS Victory by Sjors - Caldercraft - 1:72
While i'm waiting for the plates i have done a little bit more.
Painted the stern fascia, windows and ornaments.
Also the trophy of arms.
You really need a steady hand but i'm happy with the result.
Sjors
-
 Sjors reacted to Mike_H in HMS Snake by Mike_H - FINISHED - Caldercraft - 1:64
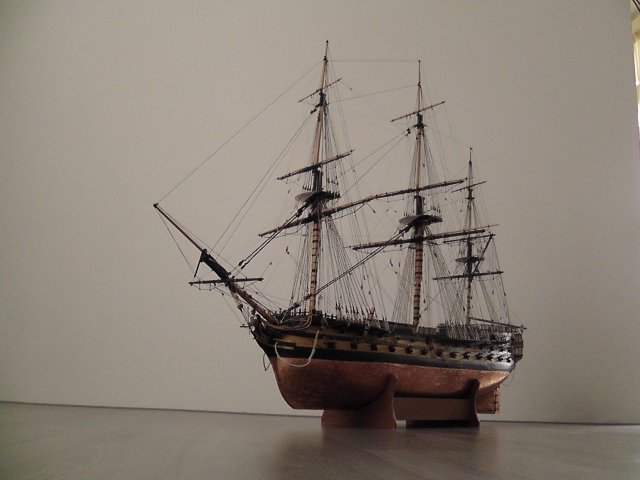
And yes, my Snake is FINISHED!. There are some tings I could fix - though I won't - and I will build a display case, but that is it! I have created a (large) album of photographs of the finished article, you can find here. And show just a few below:
I am more than delighted by the finished article - in fact truly amazed. All it took was patience and a willingness (very reluctantly) to see small advances as proper staging posts. And if I were to offer anyone as green as I was a piece of advice it would be just that - take time to recognise an achievement, and enjoy it. Which is a segway to another piece of advice (only one more after this): use Model Ship World! Use it because it's full of advice, encouragement and experience. But use it because it's a place that you can mark your (small) achievements. And the final piece of advice? Something about skills. It was going to be about CA glue (use tiny drops), but on reflection the most important skillI acquired and used hundreds, perhaps even thousands, of times was this gem about how to seize or whip a rope. Finally the best, or perhaps happiest, piece of advice I received was to get hold of a copy of Modelling the brig of war "Irene" by E.W. Petrejus. It is not only a beautiful book about a very similar vessel, but displays a depth of appreciation for such a vessel that I now find I have myself
A few words on the kit. On the whole it's very good. I found the materials very good most of the time, and the design convincing with lots of detail. The plans varied from excellent to fair, and in fact the only real criticism I would have would be about the instructions - they were worse than poor - risible would be a better description. In scope I think this is essentially a challenging build for a relative new comer, but the absence of instructions makes it much harder. I'm glad in retrospect that I self-educated myself through the weeks and months of challenges, but for quite a lot of that time I felt distinctly bitter that just a few sentences of guidance would have made life much nicer. So my words of caution would be: you will need many skills, and quite a bit of knowledge; your'e on your own there.
But somehow, the whole thing is more, and better than, the sum of its parts. I have a profound appreciation of the business-like lines of the hull, the crowded war-like deck, and the absence of ornamentation. This was a working, fierce small ship. Yet above that nearly brutal gun platform towers a pyramid of slender spars and silk-like ropes to create a thing of beauty and a article of mechanical near perfection. I probably spent about 1000 hours bringing forth this glory - it was worth every one of them.
So what next? I do not know - something small. Or large? Something more modern, or not. Something military or commercial. But something!
With that, thanks for your company. See you again.
-
Sjors reacted to Mike_H in HMS Snake by Mike_H - FINISHED - Caldercraft - 1:64
Rigging
This has been quite a journey, for much of which I felt quite lost. It was only towards the end that, to carry on with the metaphor, I could see the wood for the trees, and understood where I was going.
The kit plans show pretty much all the rigging that needs to be added, identify the blocks (with about 95% accuracy) and numbers the belaying points (nearly all of them). But what was missing was a narrative e.g what are all these lines for? It was only when I worked that out, that I understood what I was doing. It should be said, though, that I only think I understand. If you think I might not quite, please do comment and say so. I and any readers would be very grateful.
Essential in this process of discovery was Lennath Petersson’s Rigging Period Ship Models. It shows exactly how a particular three-masted, square-rigged ship, the Melampus of 1785, was rigged. Snake is both younger by 12 years and smaller, but Petersson’s rigging plan matches those provided with the kit, so well, that I suspect that is no coincidence. But even so, I had to create my own narrative before I felt that I knew what I was doing. I have used Petersson’s naming and spellings, and also opted to capitalise most rigging-specific names, essentially for clarity, if not grammatical correctness.
When I started this build log, I claimed that
“ I plan to show other novices the process of climbing the learning curve”
I cannot say that for the last 6 months I have been a good guide, but I will now attempt to record my rigging narrative.
The standing rigging is, I think pretty self-explanatory. The shrouds support the masts laterally, and to an extent fore and aft towards the stern, the stays support fore-and aft either towards the bow, or in the case of back-stays, towards the stern. The standing rigging around the bowsprit creates a set of triangles or diamonds to give both lateral and vertical (downwards) support.
Moving on to the less obvious, but things I think I knew.
The lower yards (Fore, Main and Cross Jack) are not intended to be raised or lowered in normal use, though the upper – topsail and topgallant – are. Not all the running rigging is present, since there are no sails The sails, were they present hang from their respective yards and are secured to the yard beneath them (but wait!)
Two crucial things that I could have known but didn’t seem to
Two of the lines that are shown for all the square sails, the Sheets and the Clue Lines, would normally be secured to the lower corners of the sails (the Clues). Since there are no sails they cannot be! Instead they are secured to each other and hauled tight. The lower sails, while hanging from the lower yards, clearly cannot be secured to yet-lower yards. Instead a set of substantial lines running forward – the Tacks – are secured to the Clues so that the Sheets, Clue Lines and Tacks provide a triangle of forces. Once again, in these absence of sails, these three lines are joined.
With that, the narrative for the square sails is straight forward. There are lines to:
1. Secure the yards to the mast and hold them aloft – Slings, Jeers, Trusses and Parrals
The Slings are substantial loops of rope around the Fore and Main yards that in each case loop over the lower mast cap, holding the yards permanently aloft.
The Jeers are substantial blocks with lines made fast on deck, used for raising the two largest spars.
The three lower yards are made fast to their masts with Trusses with pendants brought down to deck. The yards are not intended to move vertically when the Trusses are hauled tight.
Finally all of the upper yards are able to be raised and lowered so are attached to their masts with a kind of set of wheels (Trucks) held together by Ribs, to create a Parral.
The Fore Yard, and Fore Topsail Yard
2. Raise and lower the yards, and square them up – Halliards and Lifts
Each of the upper yards can be raised or lowered by hauling on one or two Halliards (belayed on deck) with suitable mechanical advantage via sets of blocks.
The angle a yard makes to its mast is controlled by Lifts - lines extending from the mast above the highest point to which the yards can be raised, out to the ends of the yard. The Lfts also support the yard when the crew are working on it.
Fore Topsail and Topgallant Yards
3. Rotate the yards – Braces
In order for the square sails to catch the wind, the yards must be rotated – braced – in a horizontal plane. The Braces are long lines belayed on deck running to blocks which in turn are connected to the yard-ends by stout brace pendants. The Braces have a standing part frequently made fast to a stay.
Fore Topgallant Brace
4. Set and reduce sail – Clue Lines, Sheets and Tacks
Hauling on the Sheet pulls the corner (the Clue) of the sail down from the yard. For the upper yards, the Sheet runs from the deck where it is belayed, up to blocks on the yard beneath the sail, near the mast, and then out along that yard to blocks at the yard end and then up to the Clue. On the upper yards the Sheet pulls the Clue out to the end of the yard below. On the lower yards it pulls the Clue aft.
Conversely the Clue Line hauls the Clue up to its yard thus largely taking the wind out of the sail (cue Jack Aubrey shouting “clew up! clew up” when Surprise is caught in a squall). The Clue line is belayed on deck, runs up to a block on the sail’s yard near the mast, and then diagonally down to the Clue. On the model, without sails, the Sheet and the Clue Line are joined by means of a loop and toggle (which is far from obvious on the plans).
Finally the Tack is a heavy line that is coupled to the Clue Line and Sheet on the Fore and Main sails and then taken forward to the Boomkin for the Fore sail and near the Fore Chains for the Main. The couoling of the lines is very elegant with the Sheet and Clue blocks both being stropped with a loop: the loop from the Sheet passing through the loop from the Clue and the Tack passing through the loop from the Sheet. The Tack is prevented from pulling through by a large stylised Tack Knot. The Sheet runs directly aft.
Main Brace, Sheet, Tack and Clue Line (see picture under 2. for upper yard lines)
Bowsprit
The running rigging provided on the bowsprit are the Spritsail Lift, The Spritsail Braces and the Spritsail Halliard, all playing much the same role as their equivalents on the yards (though in planes lifted up by 20º). The Spritsail Boom is made fast to the Bowsprit by a Truss. While not part of the running rigging, Fore Topgallant stay comes down to the end of the Jib Boom via a block at its outer extremity to be made fast on the Bowsprit.
Bowsprit Running Rigging
Spanker
The Spanker, or the large fore and aft sail abaft the Mizzen, is well described in the kit’s plans, and is just like the gaff-rigged dinghies I sailed as a lad. But to name the parts, the Boom is equipped with a pair each of Sheets and Guy Pendants (one each to port and starboard, all belayed on the after-deck), and a Topping Lift taken from the outboard end of the Boom up to the Mizzen Masthead and then belayed via a purchase to the starboard aft Pinrail. The Gaff has a Peak Halliard running through two blocks to give a 3:1 purchase and belayed on deck. A pair of Vangs run from the outboard end of the Gaff to the afterdeck.
Spanker Rigging
Belaying
The kit provides a numbered Belaying Plan with the numbers shown on the rigging diagrams. It’s not always easy to identify which number on the plan belongs to each line, and it’s absolutely impossible to look at the model and identify what each of the nearly 100 lines does. In the attached PDFs I have annotated the Belaying Plan with the names of the lines, and produced a list of all the Belaying Points with the Points named and numbered.
Snake Belaying Plan.pdf
Snake belaying points.pdf
So that's what I think I know about rigging - do correct, advise and comment.
And from these last two posts you might guess I'm pretty-well finished. Just a decent cleaning and then some final photographs I think!
-
Sjors reacted to Mike_H in HMS Snake by Mike_H - FINISHED - Caldercraft - 1:64
That's the standing rigging done. Took quite some effort - in part because there are more backstays than I thought, but to an extent because of kit issues. There are no instructions on the rigging - actually, one paragraph - but the drawings are reasonably complete. But they miss out a great deal of detail over how to belay the backstays, and incorrectly label the double blocks as singles. Turns out I was missing a significant number of blocks and small deadeyes. Caldercraft were very helpful in shipping me what I needed - at no charge. So marks off for instructions, but bonus marks for customer service.
Anyway, to the results. I had a go at making rigging mice from thread, but had no success at all. Decided to makes them from dowel, turned down to an appropriate size and shape and then painted. I don't think I got it quite right, but it the results was far better than anything else I produced, and from any kind of distance look fine.
In the pics below you can see that there are now a few belayed lines, so the next, indeed current, project is making hanks to put on the pins and cleats.
-
Sjors reacted to Mike_H in HMS Snake by Mike_H - FINISHED - Caldercraft - 1:64
So, 7 months later I'm back - 3 months downunder, a month cycling and then a kitchen to build. Re-engaged with some anchors and some stays.