
Mike_H
-
Posts
228 -
Joined
-
Last visited
3 Followers


-
 rcweir reacted to a post in a topic:
HM Cutter Alert by Mike_H - Vanguard Models - 1:64
rcweir reacted to a post in a topic:
HM Cutter Alert by Mike_H - Vanguard Models - 1:64
-
mugje reacted to a post in a topic:
HM Cutter Alert by Mike_H - Vanguard Models - 1:64
-
Glen McGuire reacted to a post in a topic:
HM Cutter Alert by Thukydides - Vanguard Models - 1:64 - first build
-
KARAVOKIRIS reacted to a post in a topic:
HM Cutter Alert by Mike_H - Vanguard Models - 1:64
-
Dave_E reacted to a post in a topic:
HM Cutter Trial 1790 by AJohnson - Vanguard Models - 1:64th
-
ccoyle reacted to a post in a topic:
HM Cutter Alert by Mike_H - Vanguard Models - 1:64
-
What great progress since Christmas - and magnificent painting. Rigging for small guns is always a challenge - I chose to do none on Alert. Best of luck!
-
Thukydides reacted to a post in a topic:
HM Cutter Alert by Mike_H - Vanguard Models - 1:64
-
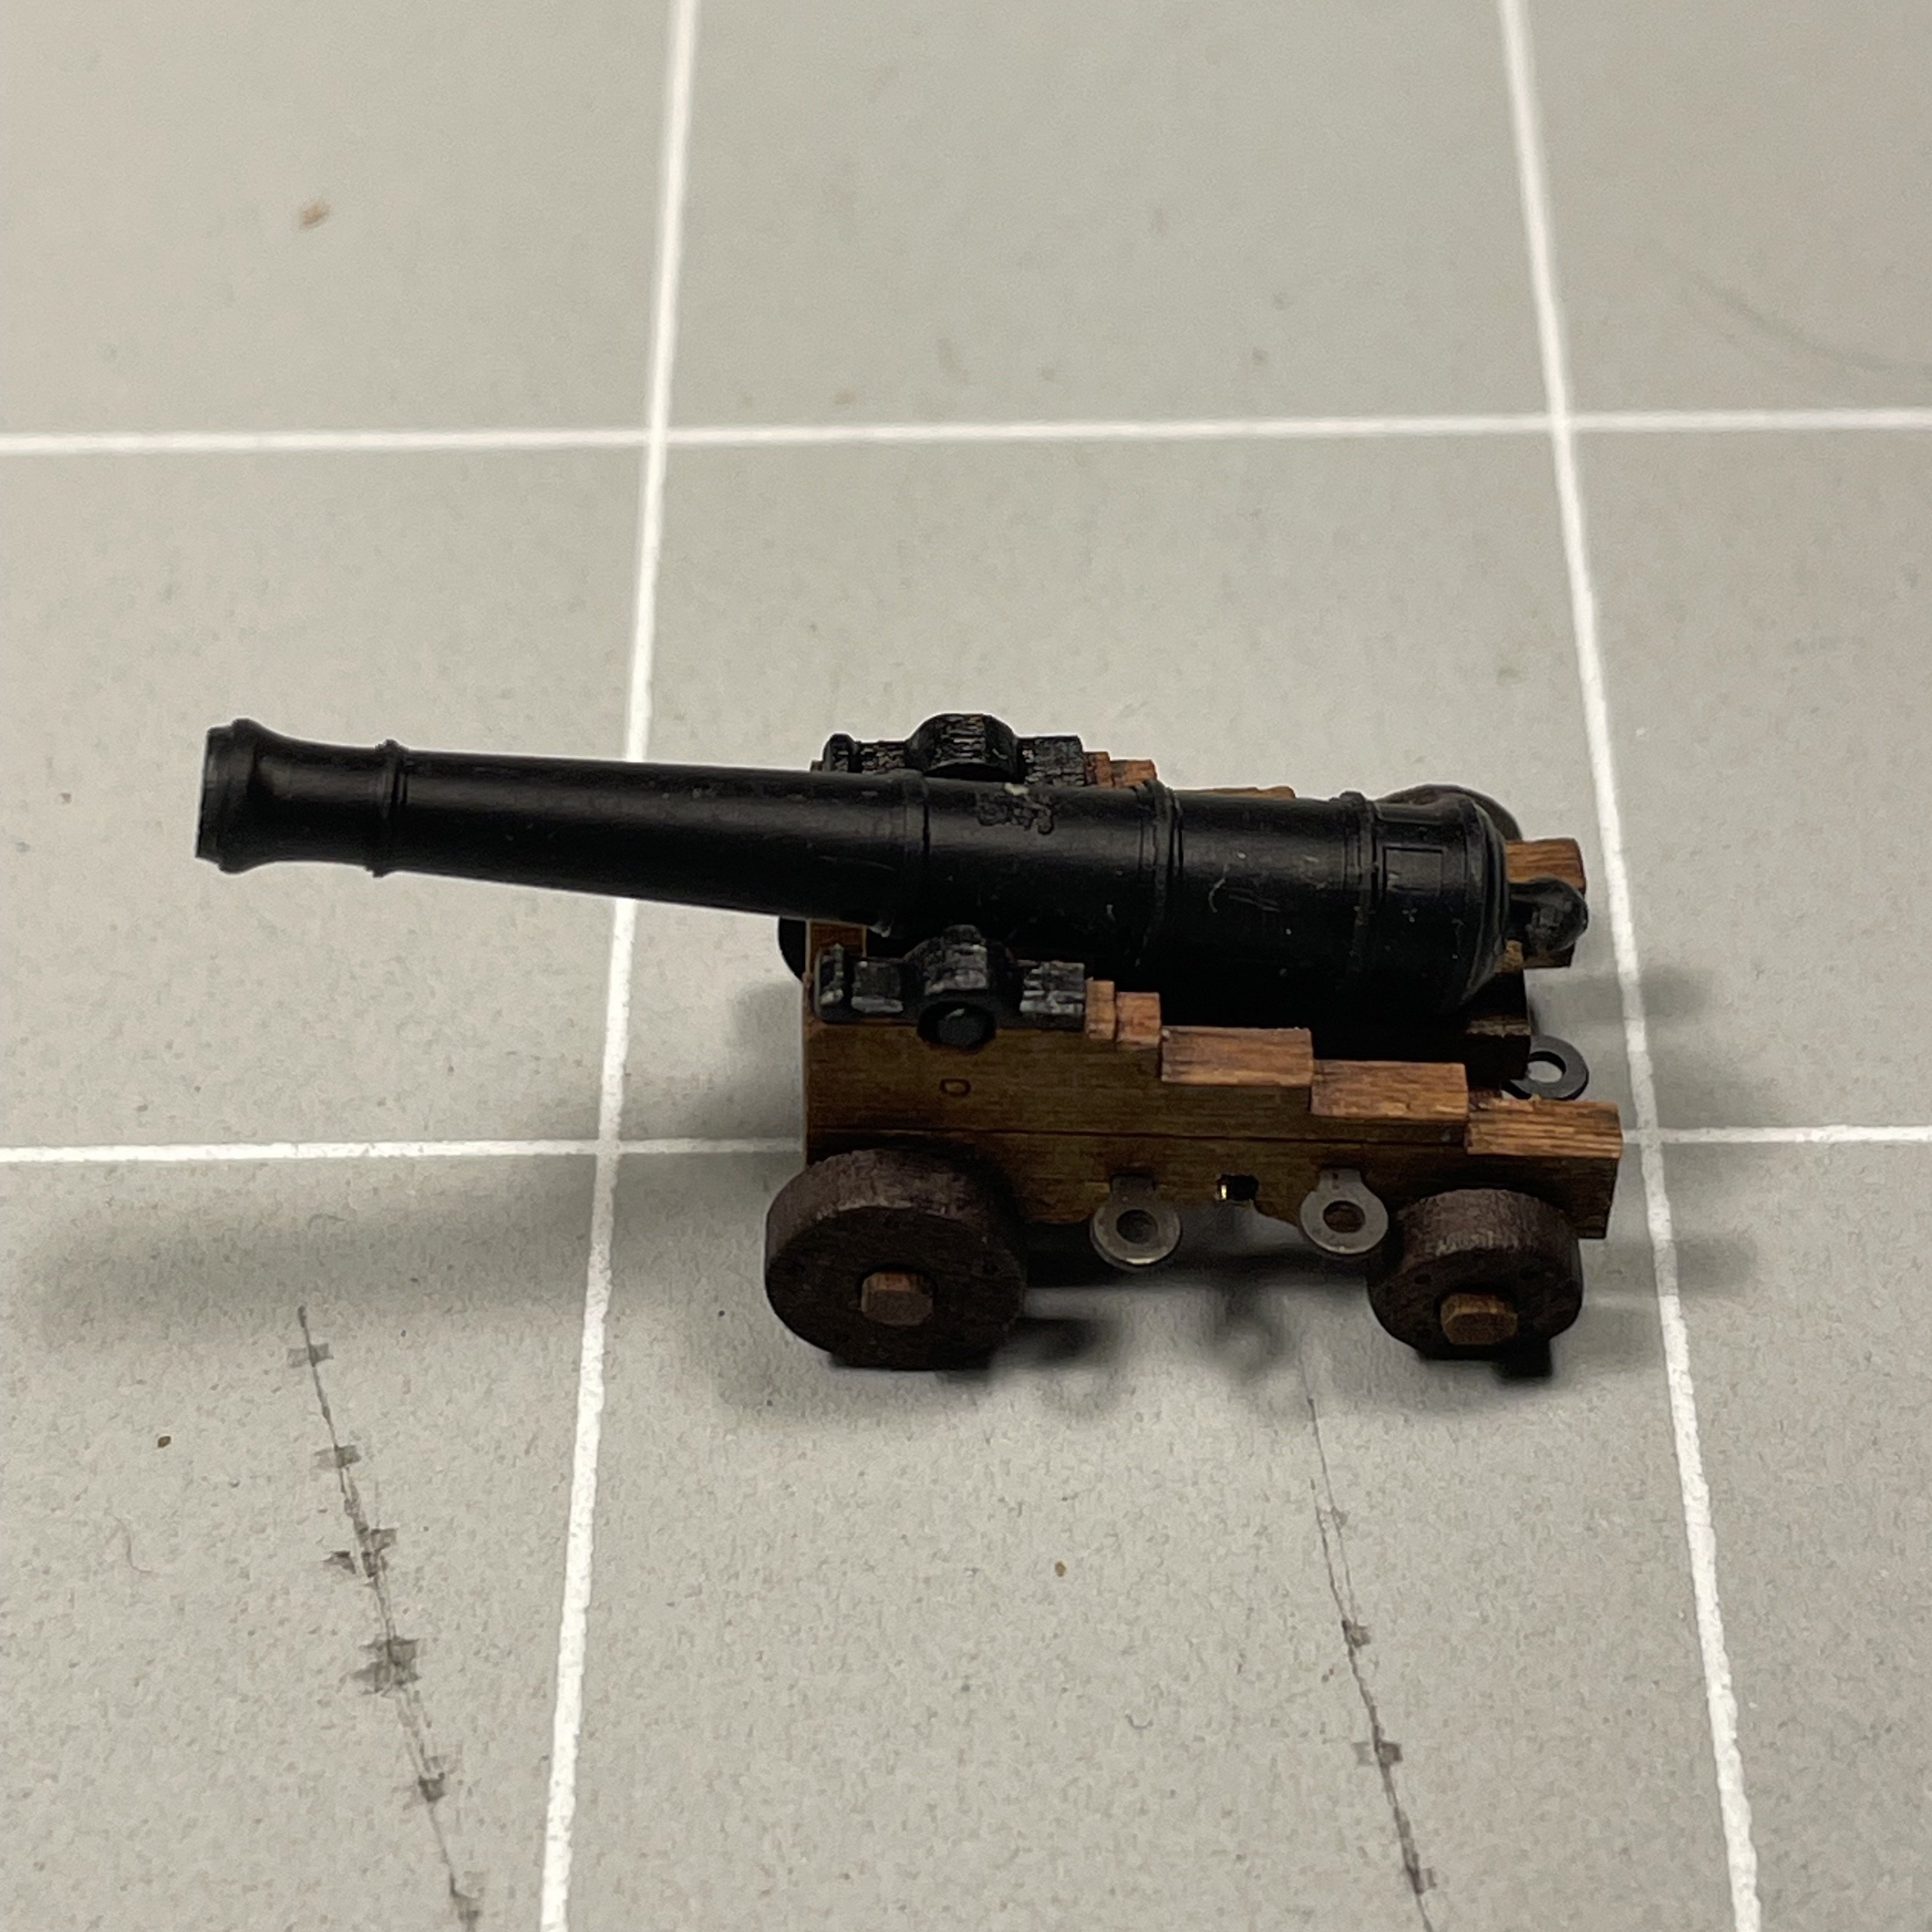
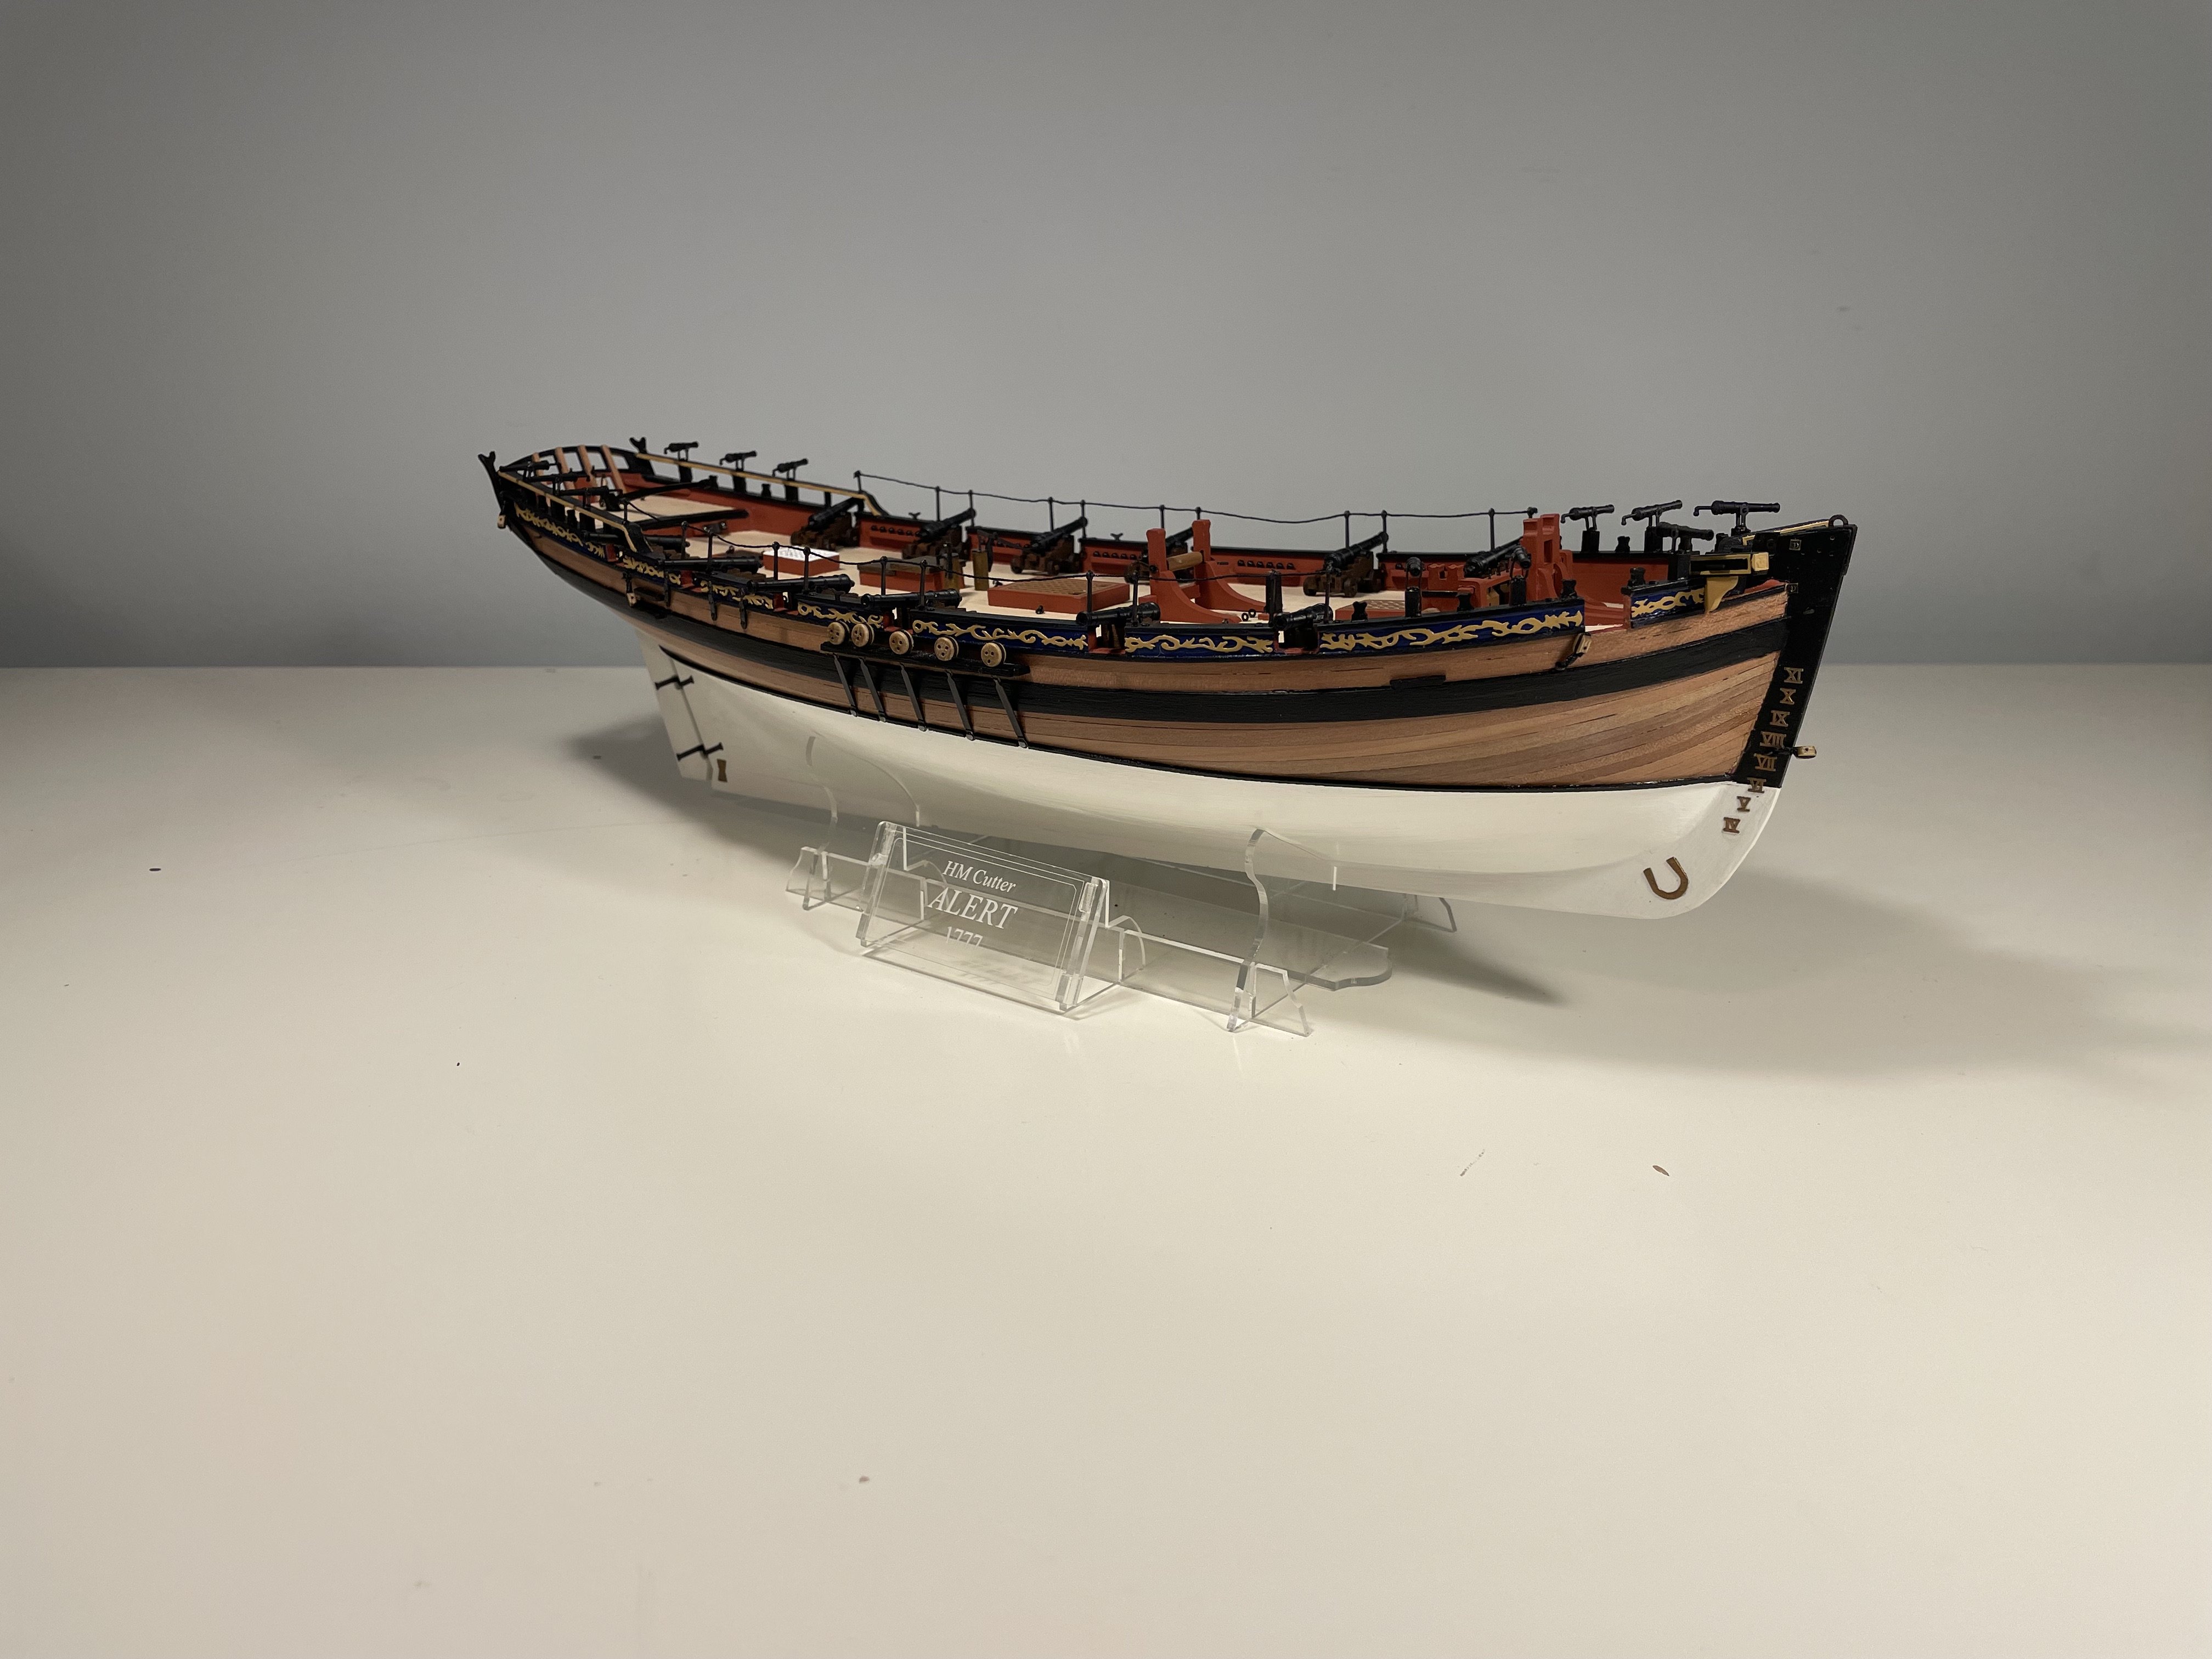
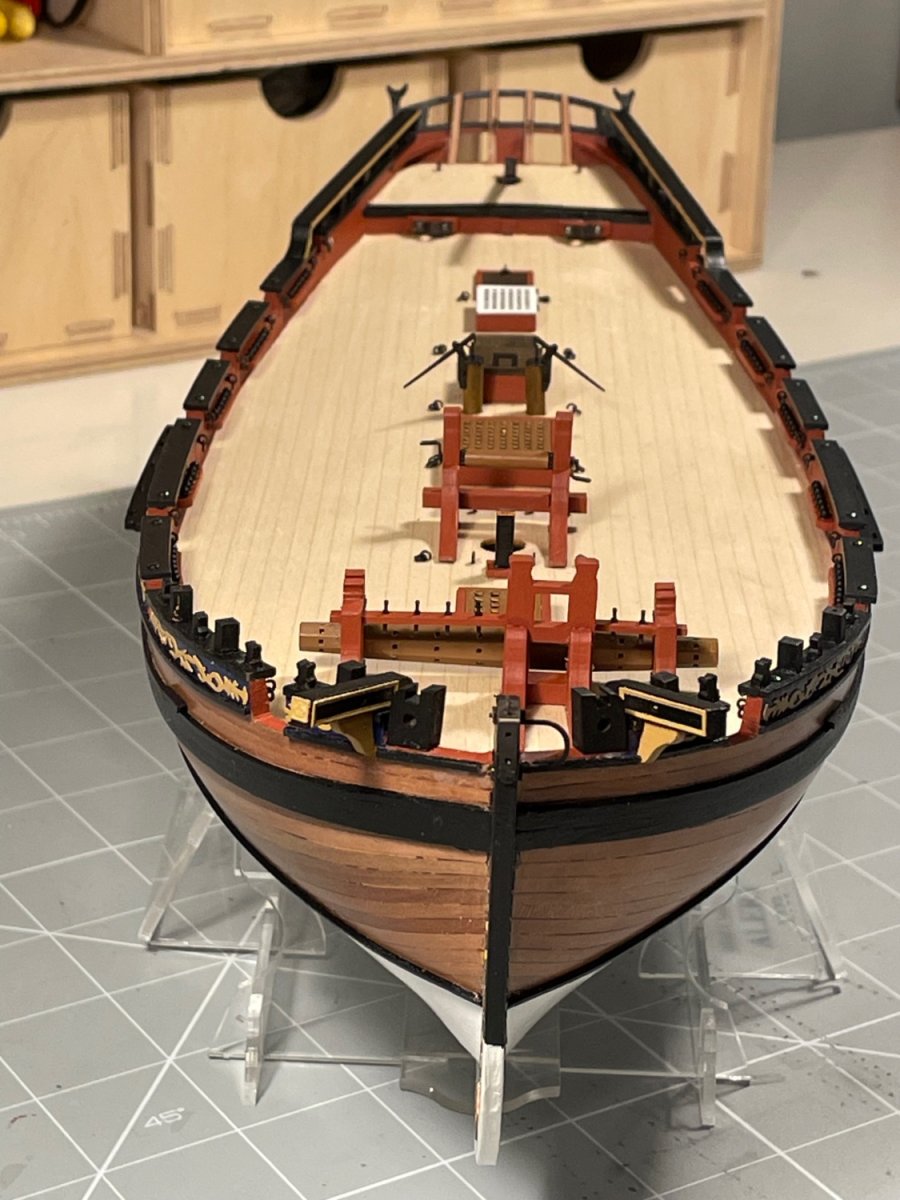
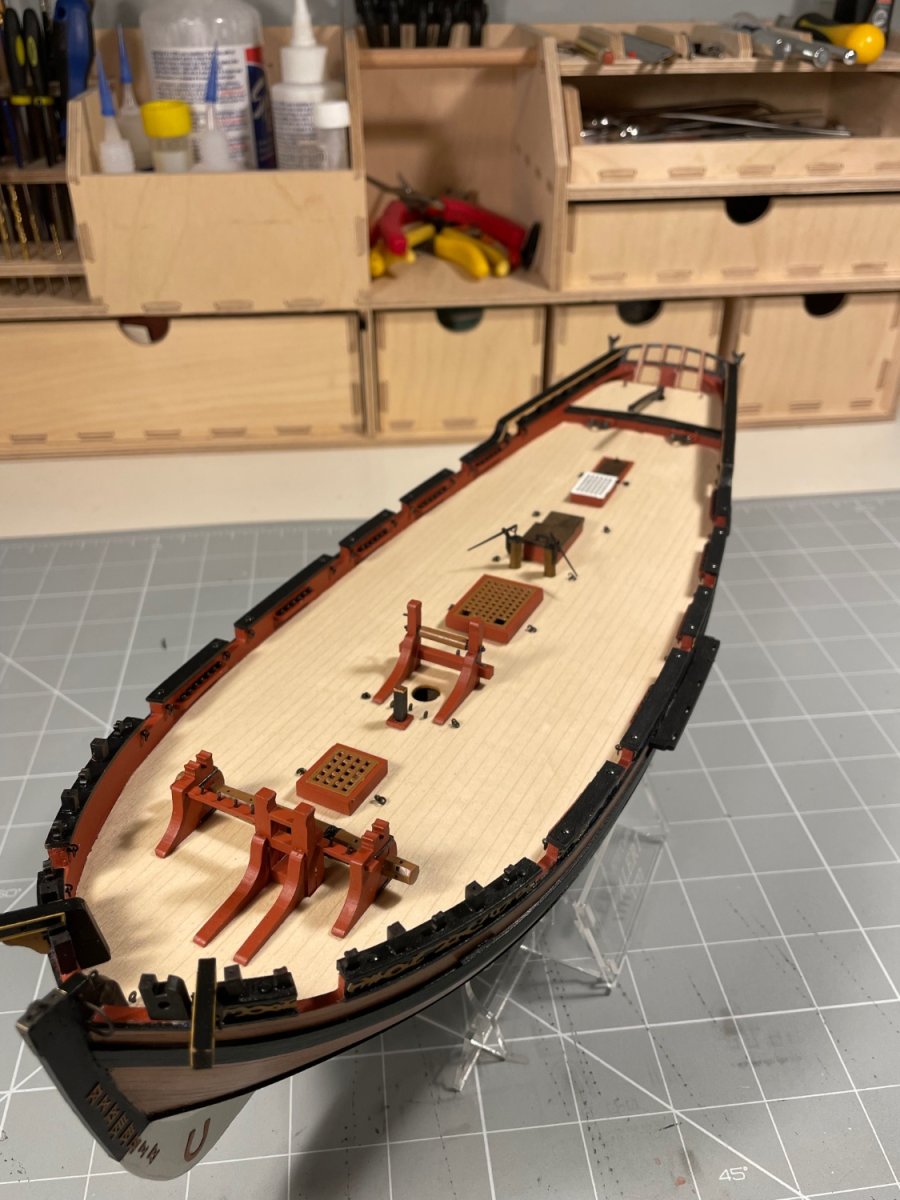
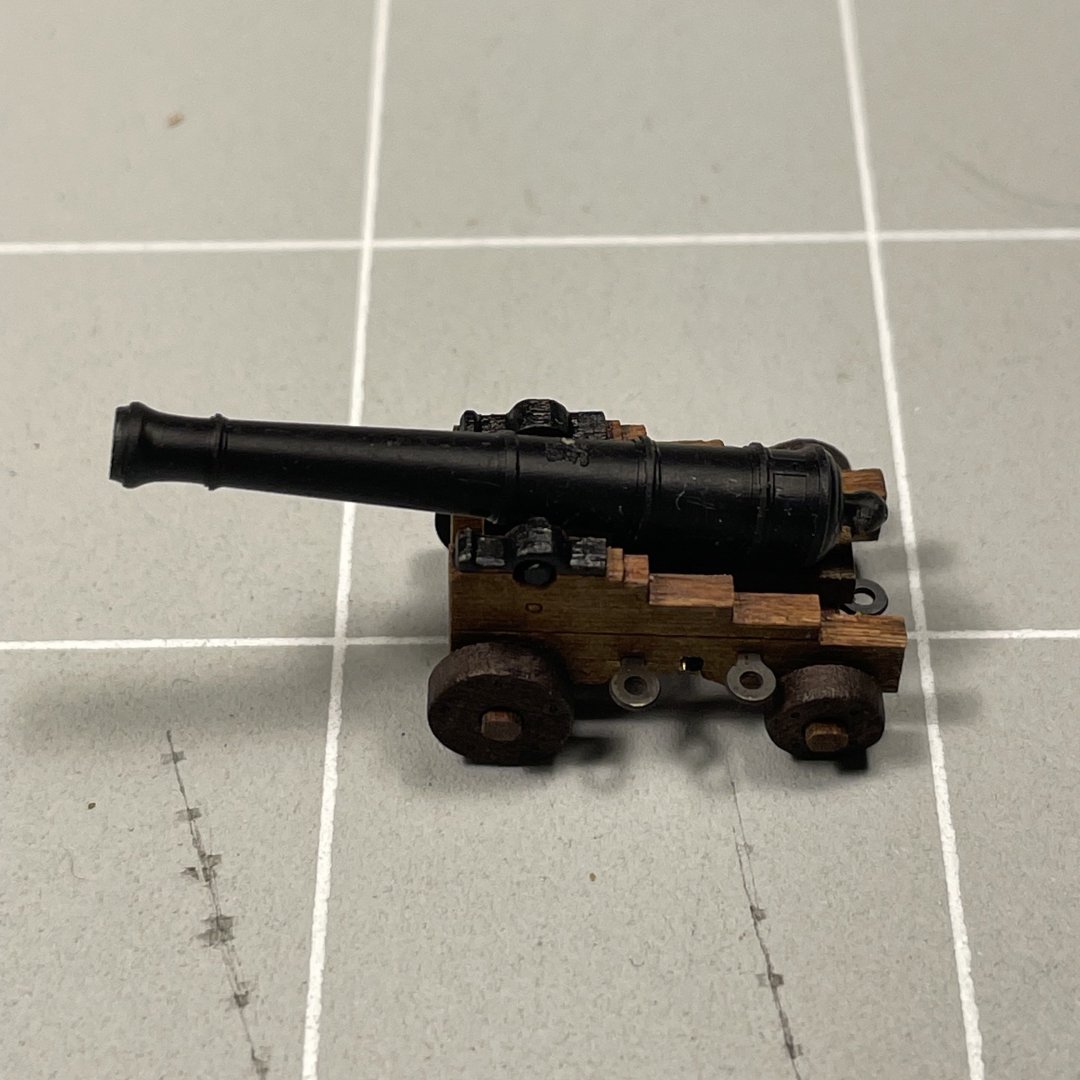
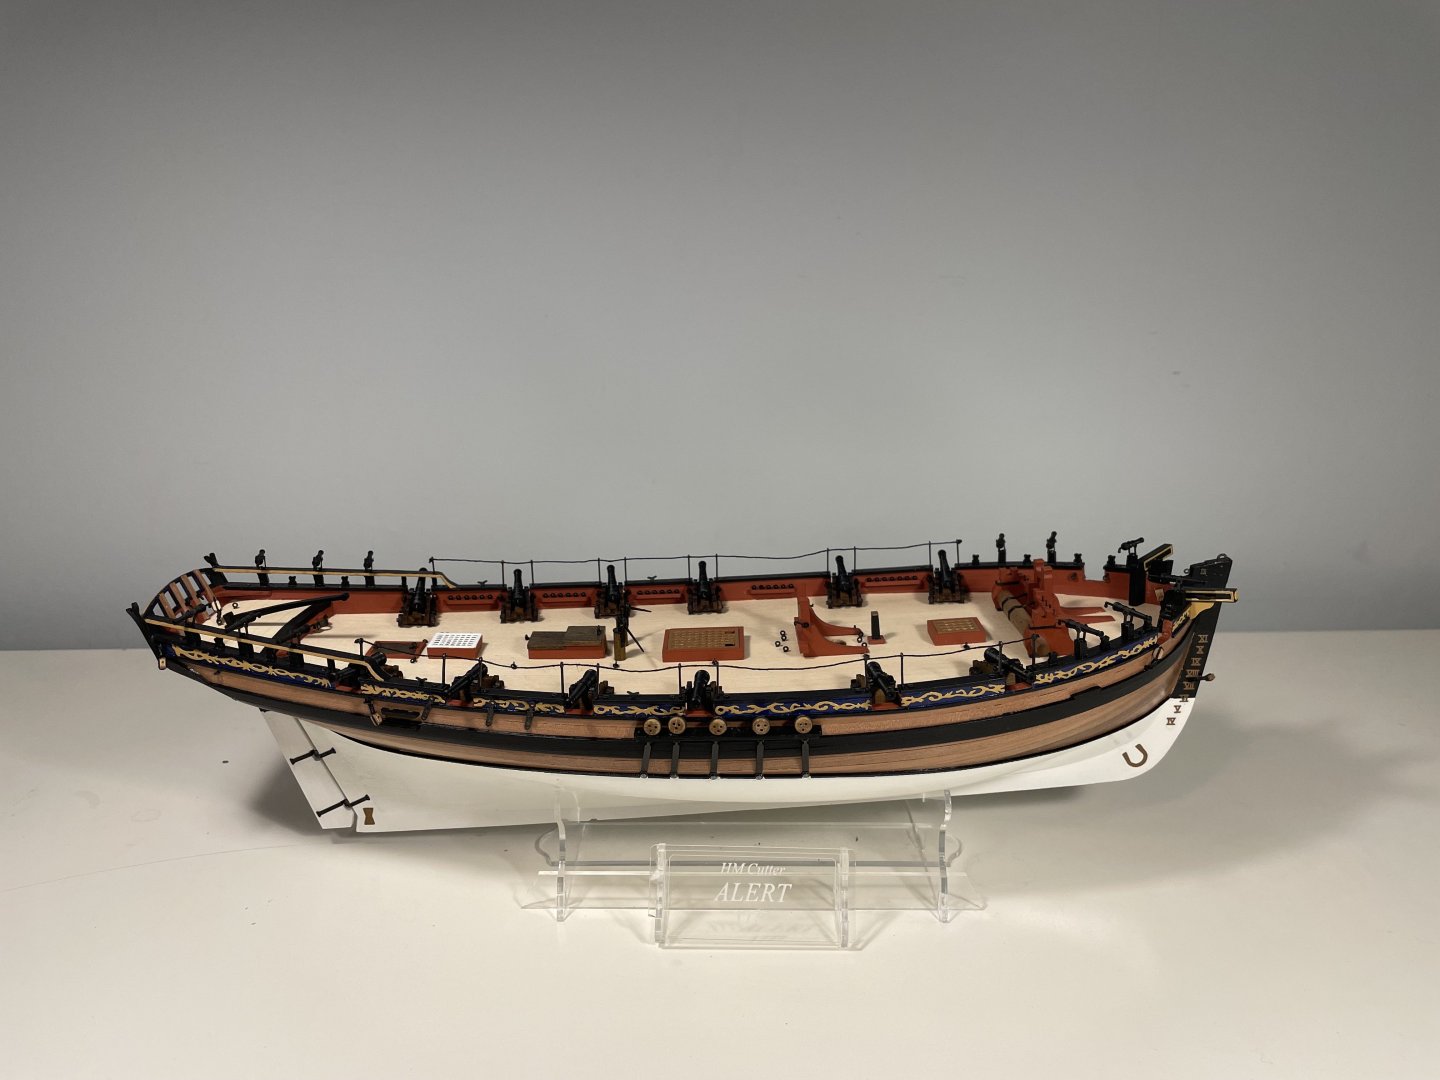
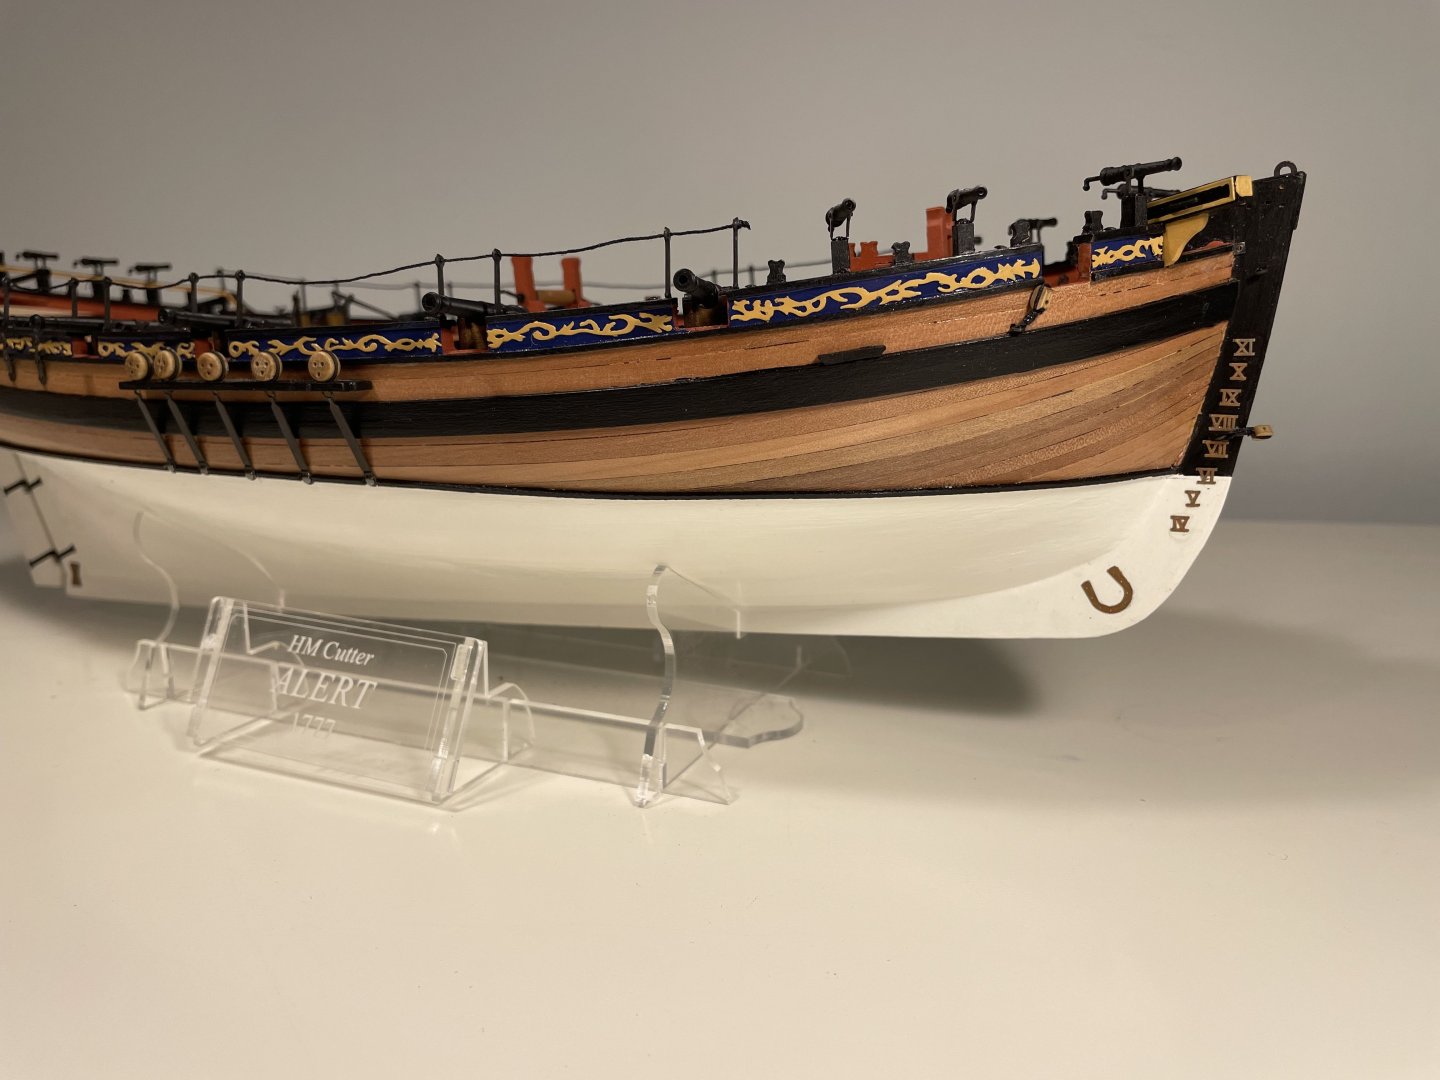
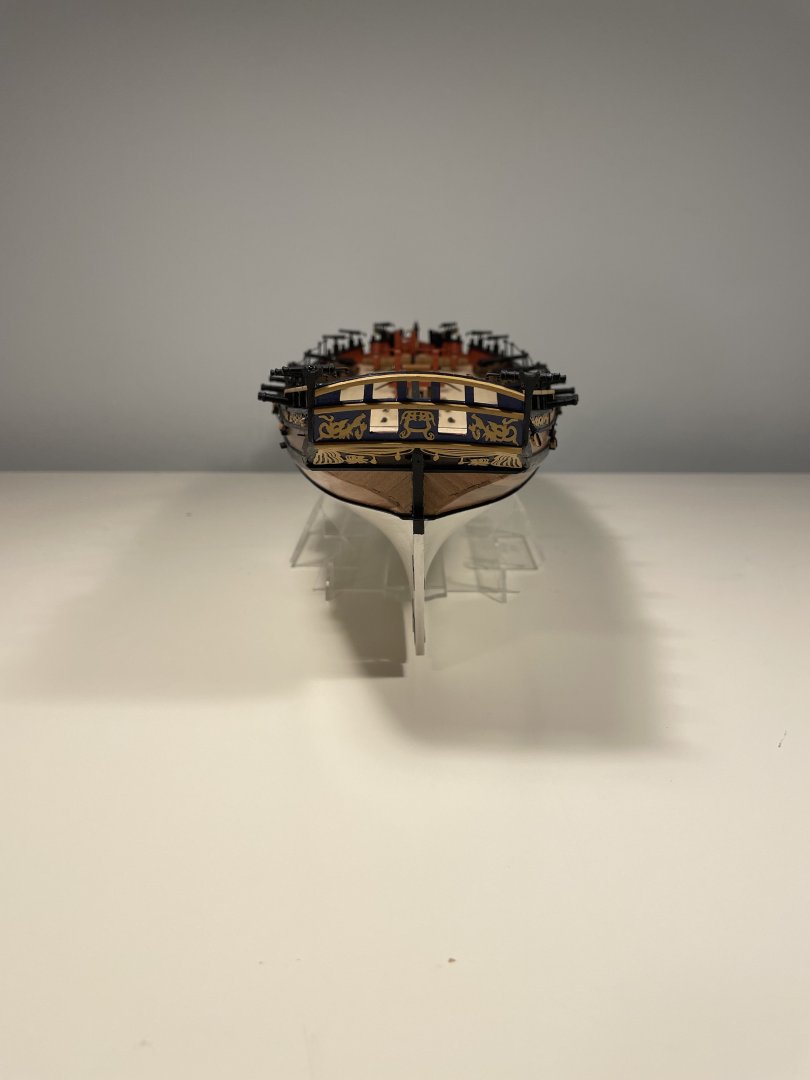
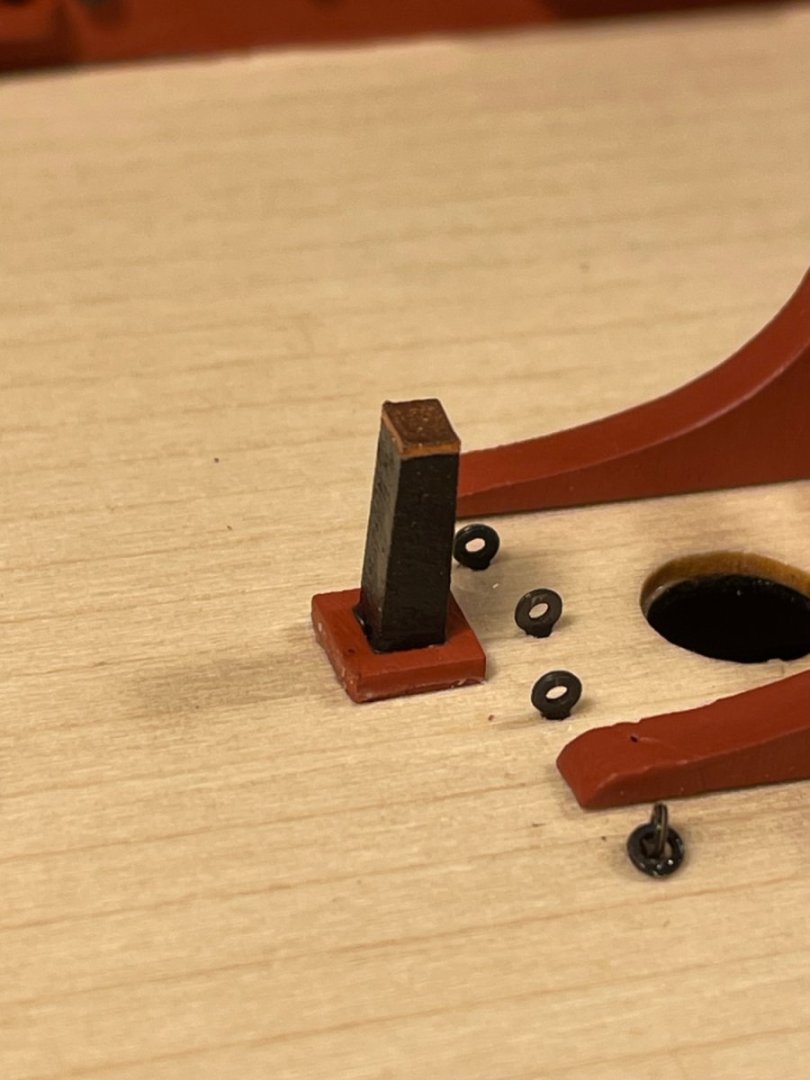
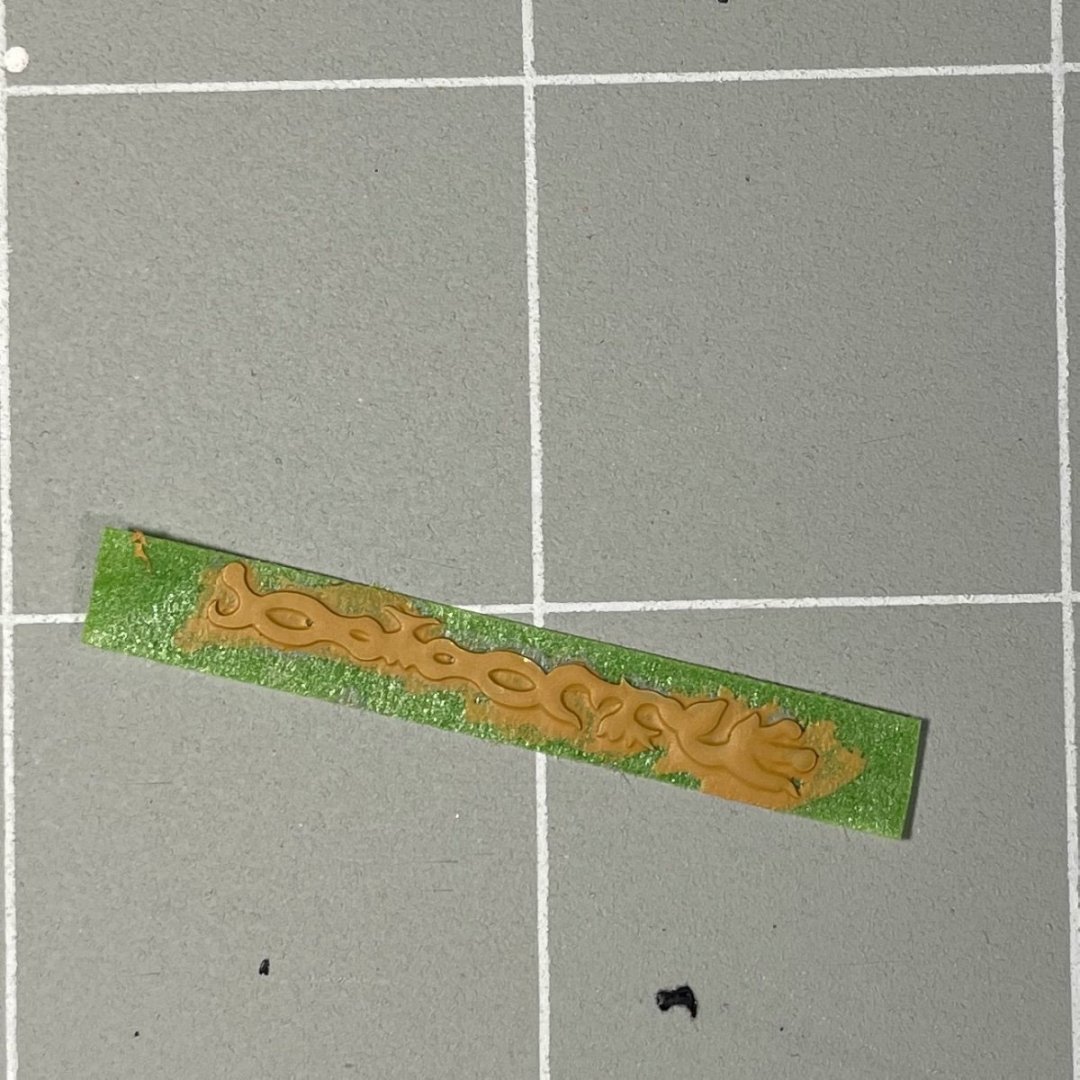
Well, it has been a while... But we've been home for about three weeks, and after 10 weeks of marvellous sunny, dry warm wether in Australia we have returned to truly abysmal spring weather here: 6ºC, constant northerly wind and nearly continuous rain - interrupted by sleet and hail. So perfect modelling weather! The hull is now finished, with scarcely a problem - beyond periodic lapses of competence. This iteration of the Alert kit has some documented, and perhaps some less-documented differences from the manual. The first I noticed in recent work is that the cap squares are provided as small PE parts, but are also laser-cut into the sides of the gun carriages. The laser-cut detail is astonishingly high resolution so I wanted to use it, but that means the build order of assemble and glue carriage, paint carriage, add gun barrel, won't work since the barrel needs to be included before the gluing. I felt that painting the components and then assembling would not work well as the tolerances on the carriage are very fine and the paint would mess that up. But in any event, I was inclined to stain the carriages oak-brown, so I did. The results, I think are remarkable. Note the detail of the laser-cut cap square - including the tiny rebates that mean that it takes paint without it running all over the place. For scale, the lines on the cutting mat are on a 1 inch grid. A less-pleasant experience was the discovery that the chain (plates) sit lower than shown in the drawings - indeed they sit exactly on the water-line, which is not all that plausible IRL, and very inconvenient in that I had added a waterline batten. A simple lesson learnt: where relative positions are going to be important, measure the parts! But anyway, she looks OK! I've got the mill and the lathe set up, so mast and spars, here I come.
-
 Thukydides reacted to a post in a topic:
HM Cutter Alert by Thukydides - Vanguard Models - 1:64 - first build
Thukydides reacted to a post in a topic:
HM Cutter Alert by Thukydides - Vanguard Models - 1:64 - first build
-
My word, this is beautiful work! I must commit to giving this much attention to detail (on some future model!)
- 487 replies
-
- 2
-
-
-
- vanguard models
- alert
- (and 1 more)
-
Beef Wellington reacted to a post in a topic:
HMS Jason by Beef Wellington - Caldercraft - 1:64 - Artois-class frigate modified from HMS Diana 1794
-
Beautiful to behold. Just beautiful.
-
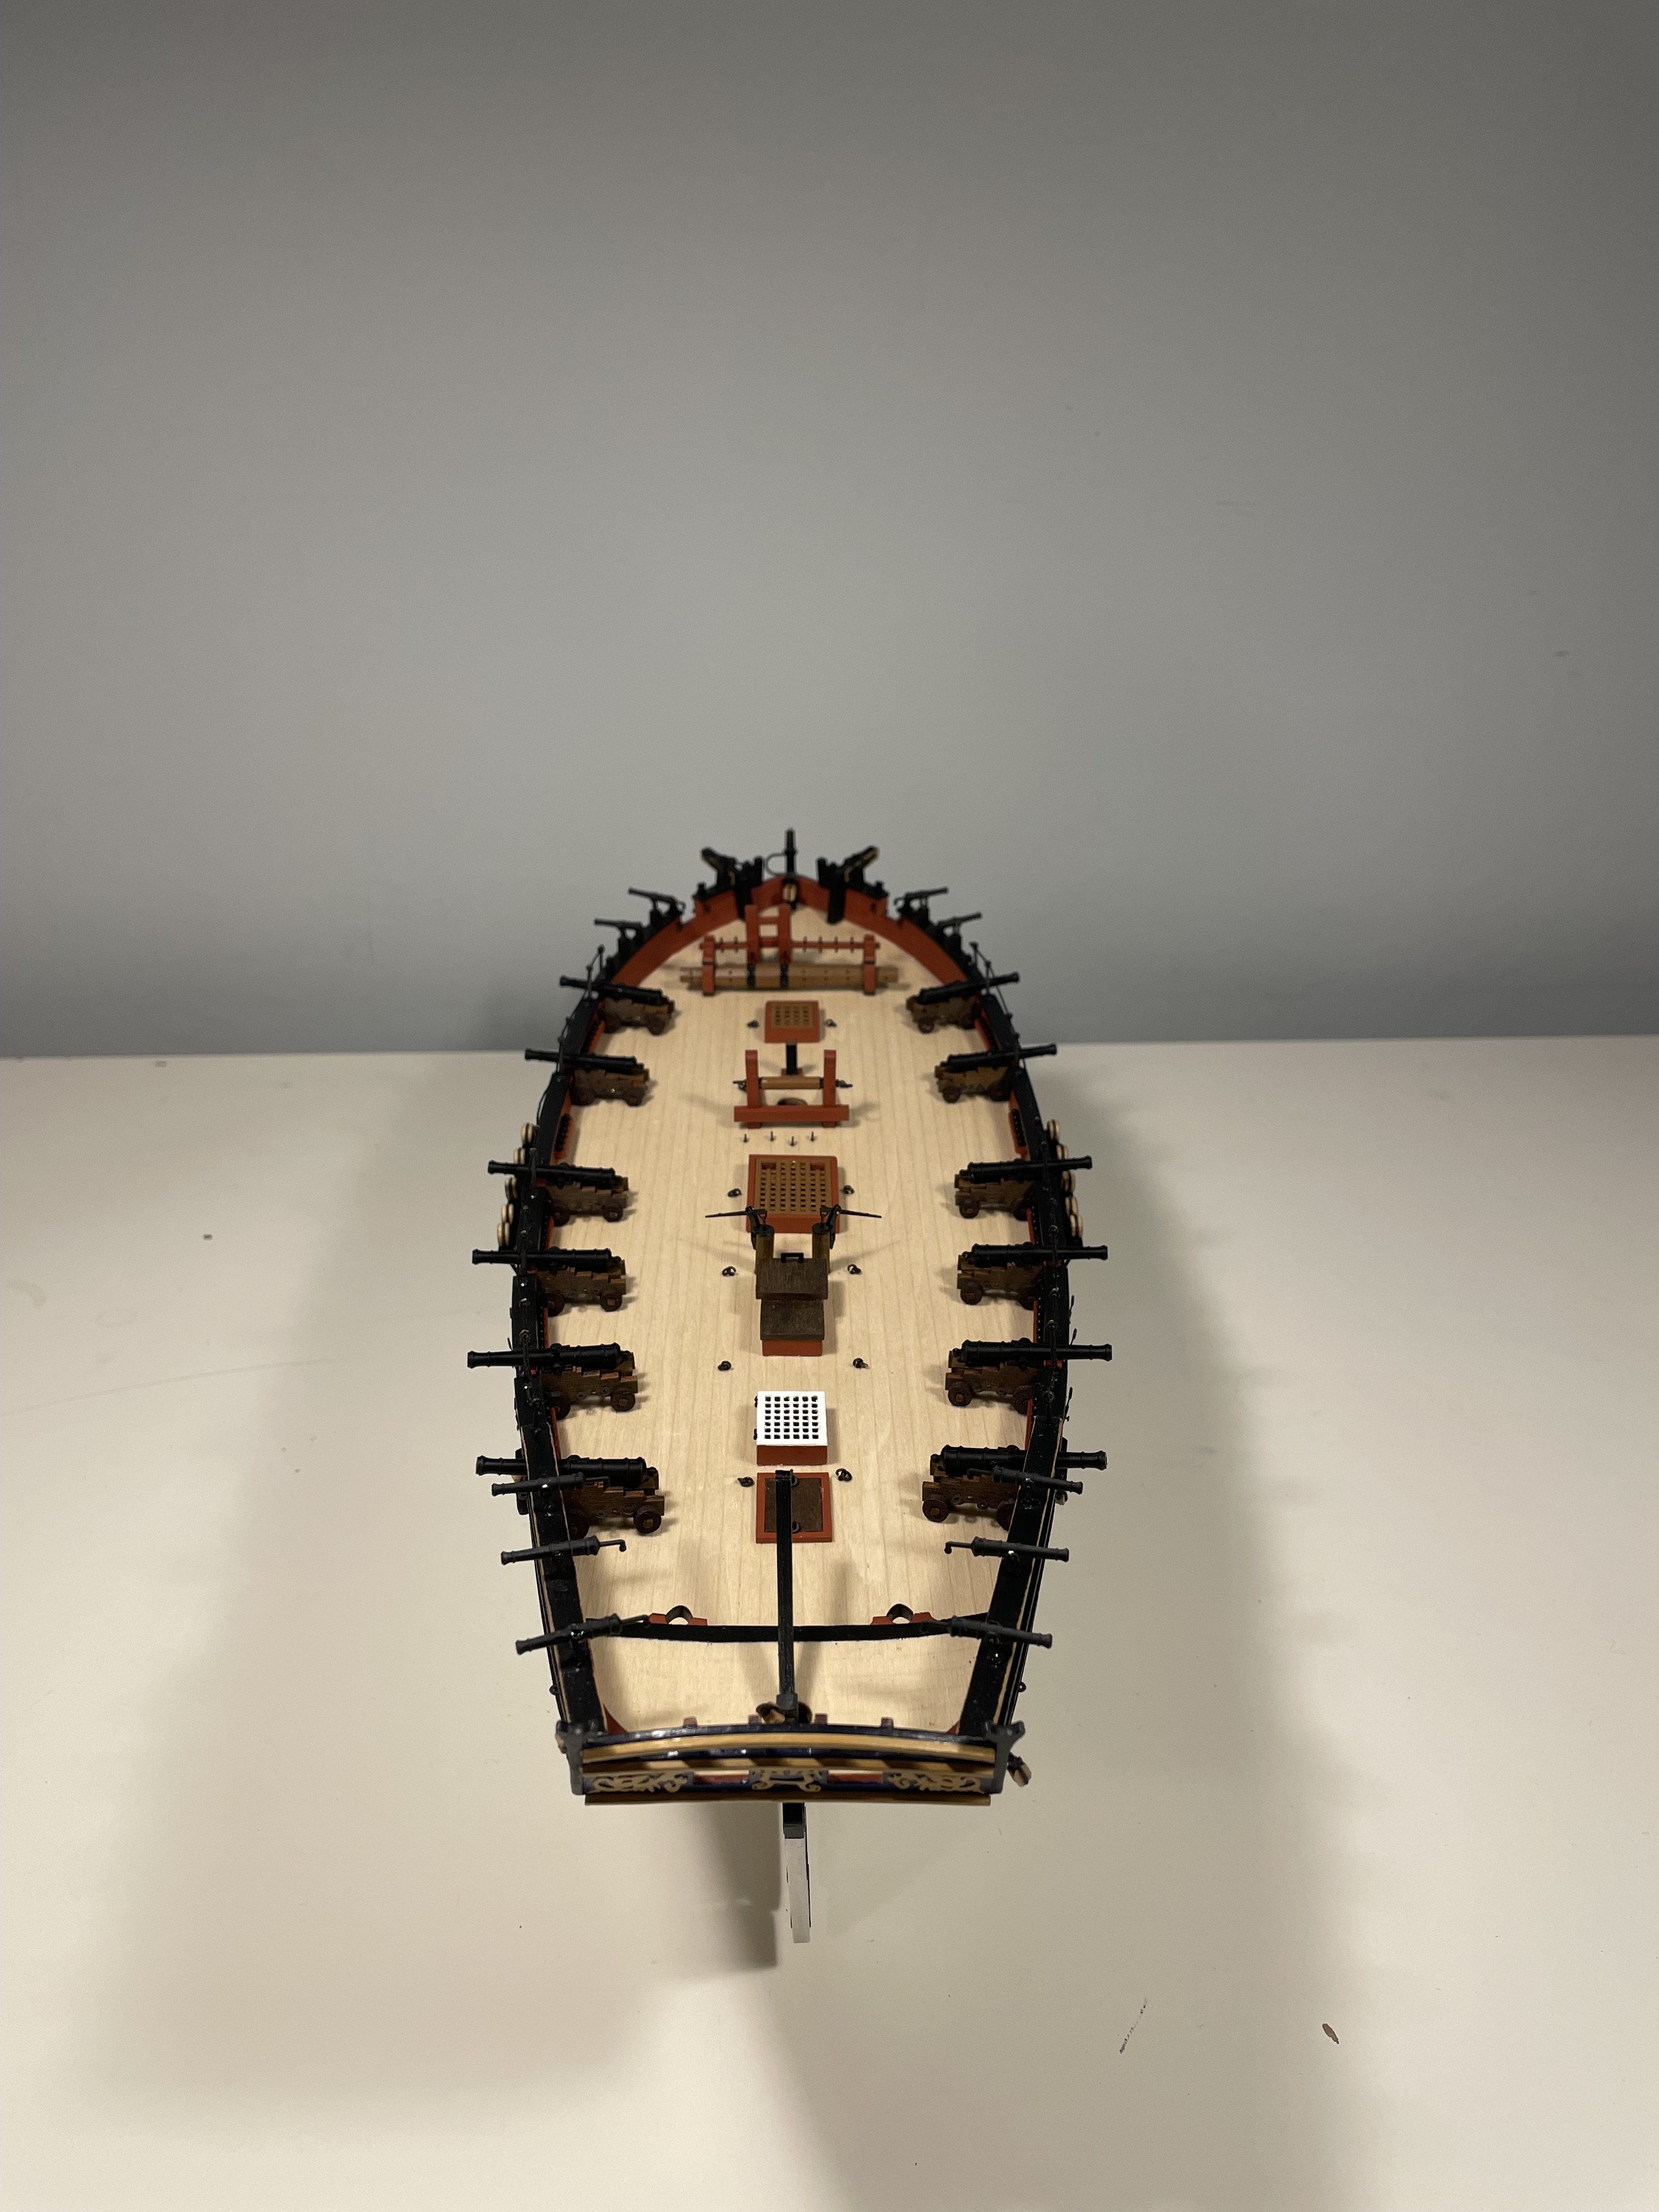
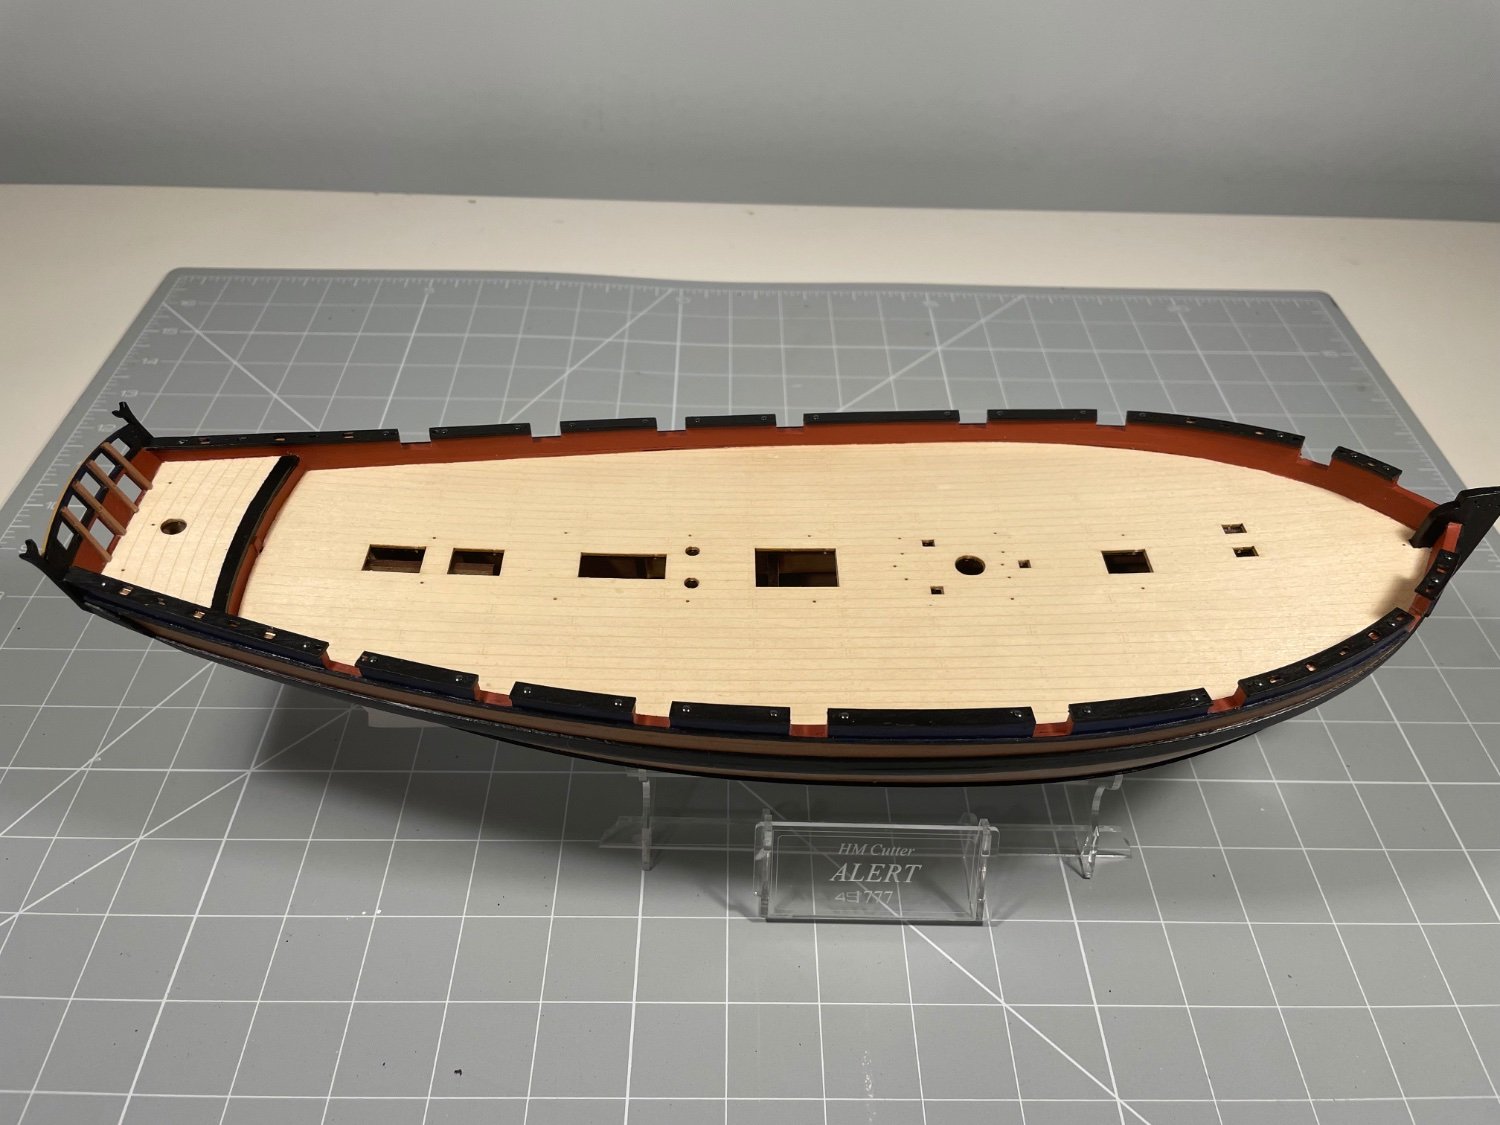
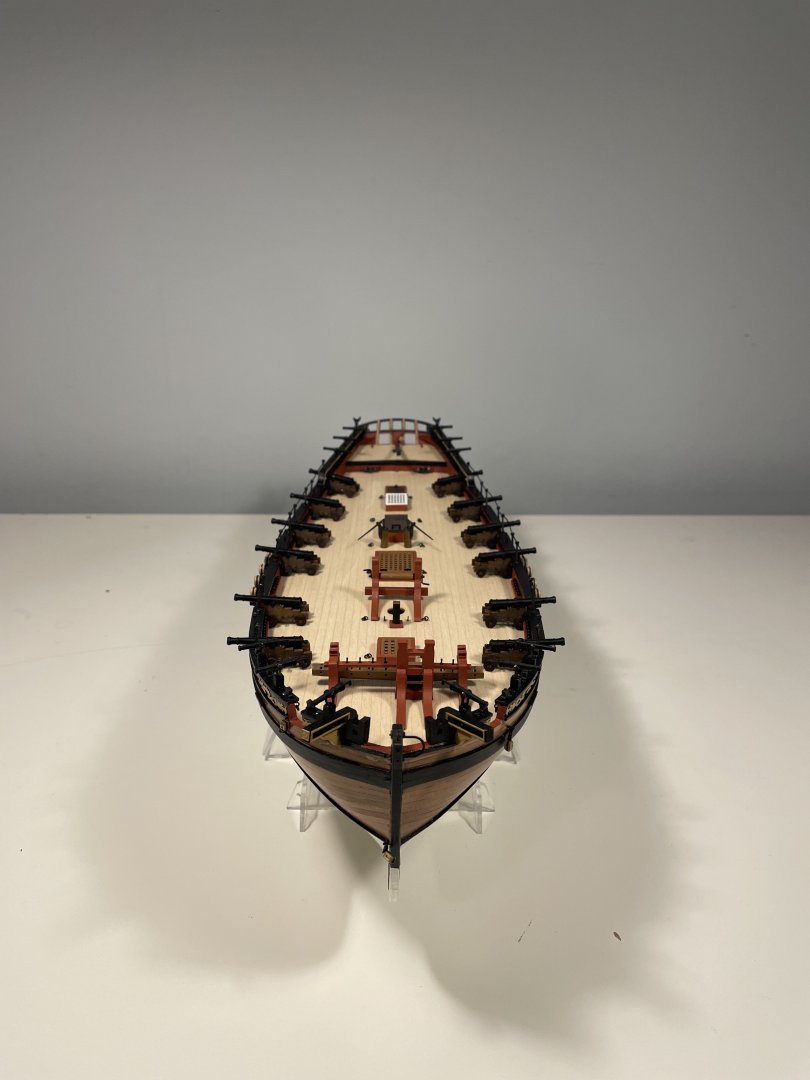
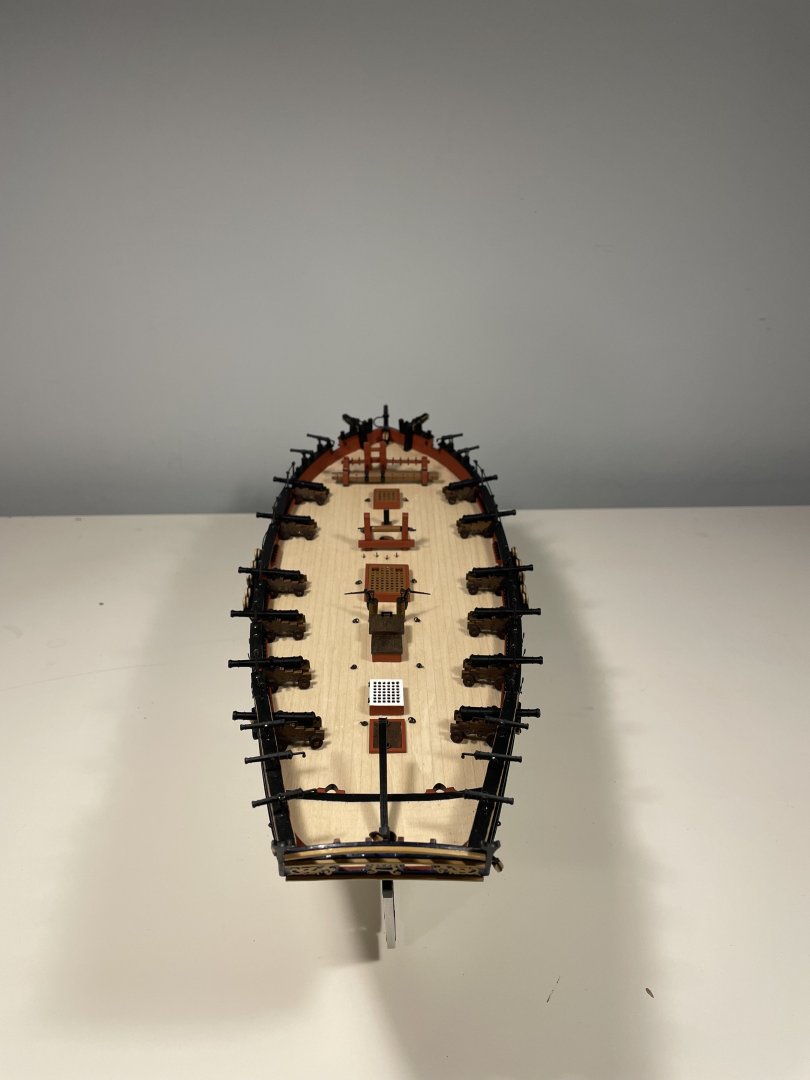
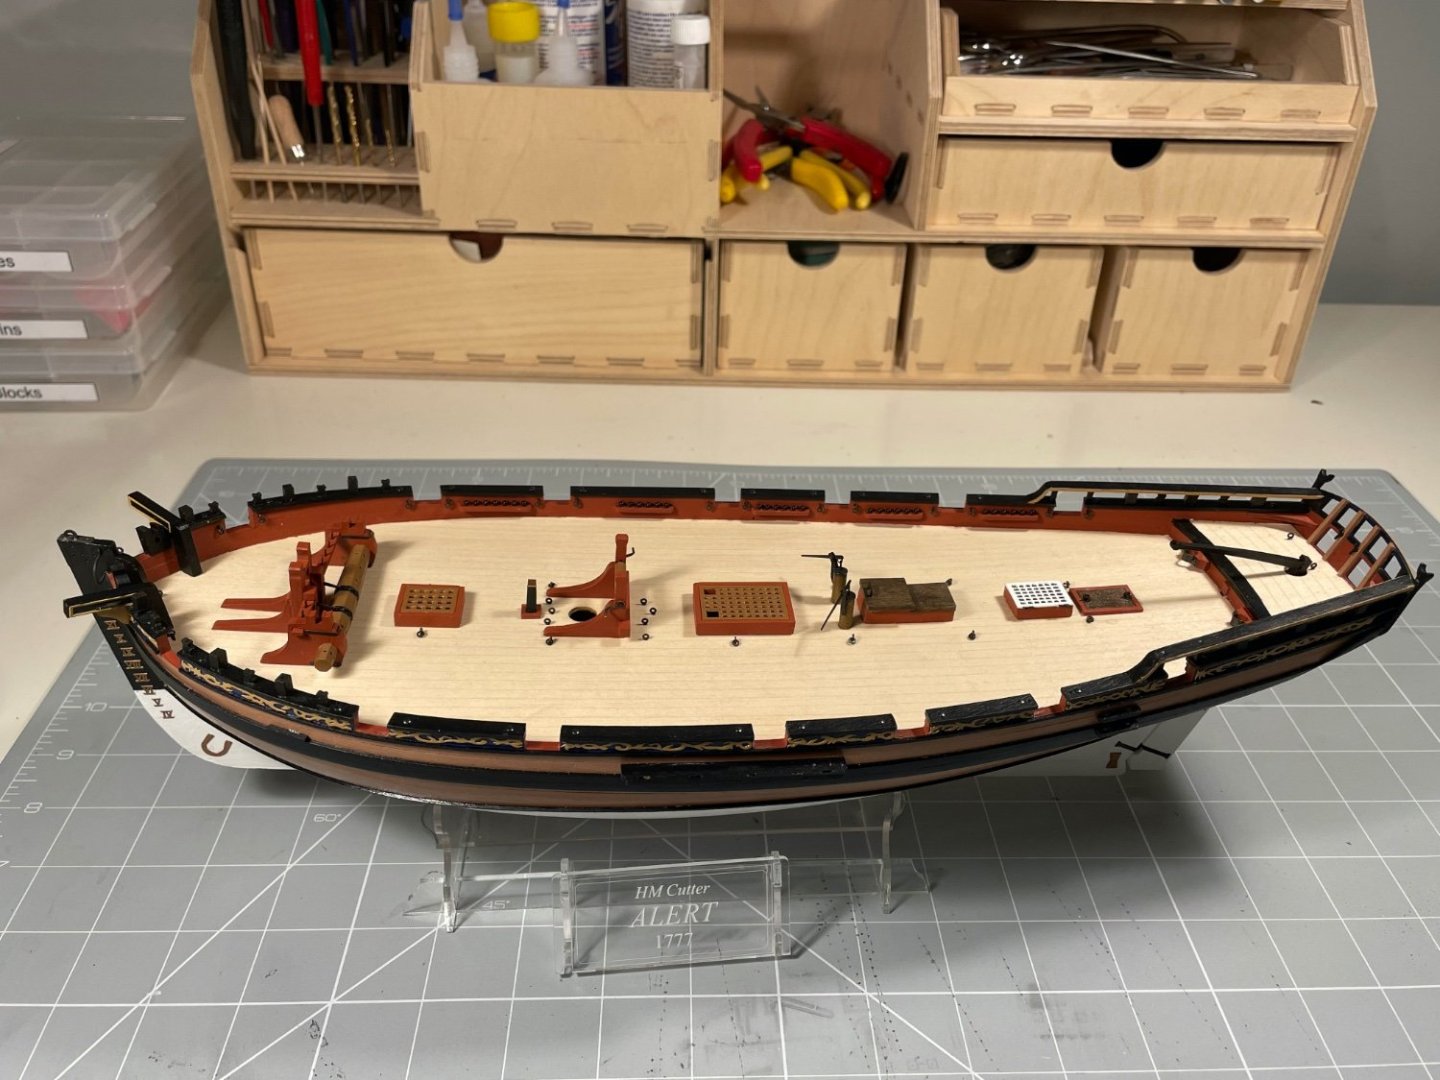
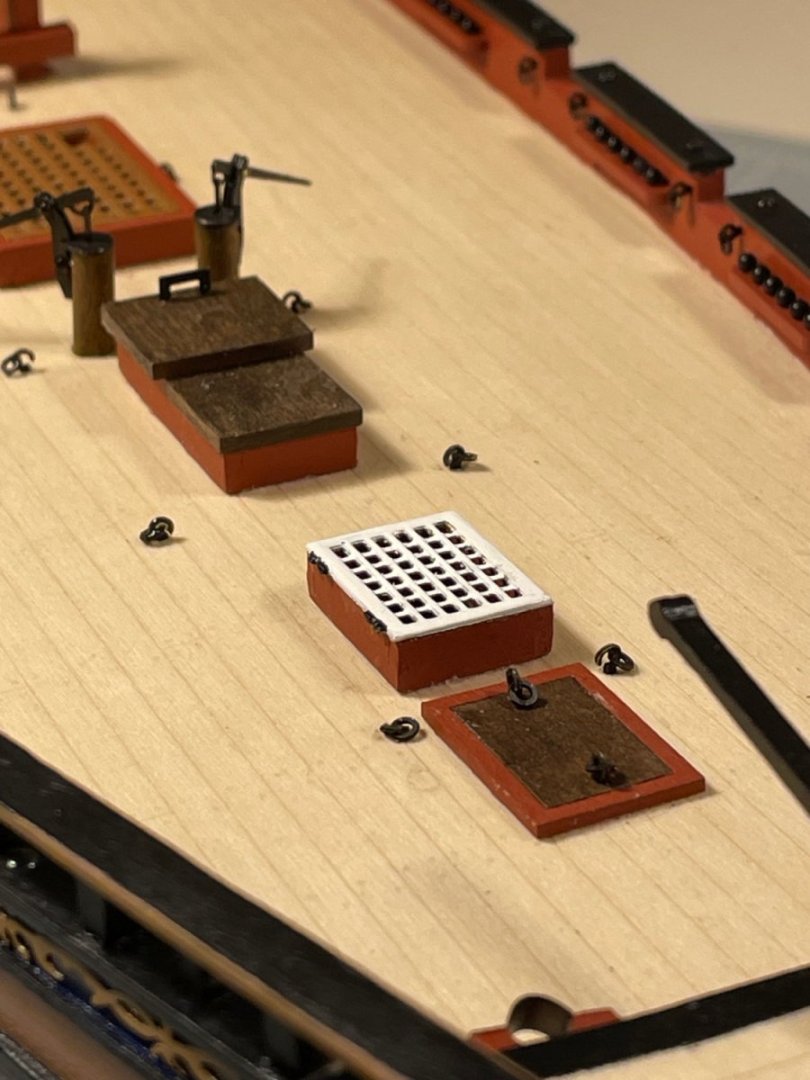
Final post for a while while I, the Admiral and one of my bikes seek a couple of months of winter sun. The hull and deck furniture are pretty-well complete - apart from guns, channels and one or two other things. No major traumas (that I can remember). Opted for the PE gratings, as the rebates in the coamings were sized for them, rather than the laser-cut pear wood. As a piece of painterly whimsy I decided the sky-light is glazed and the glazing bars are painted white. And as I have before, I fitted a copper rain cap on the galley flue That's it for now. Back in the spring.


-
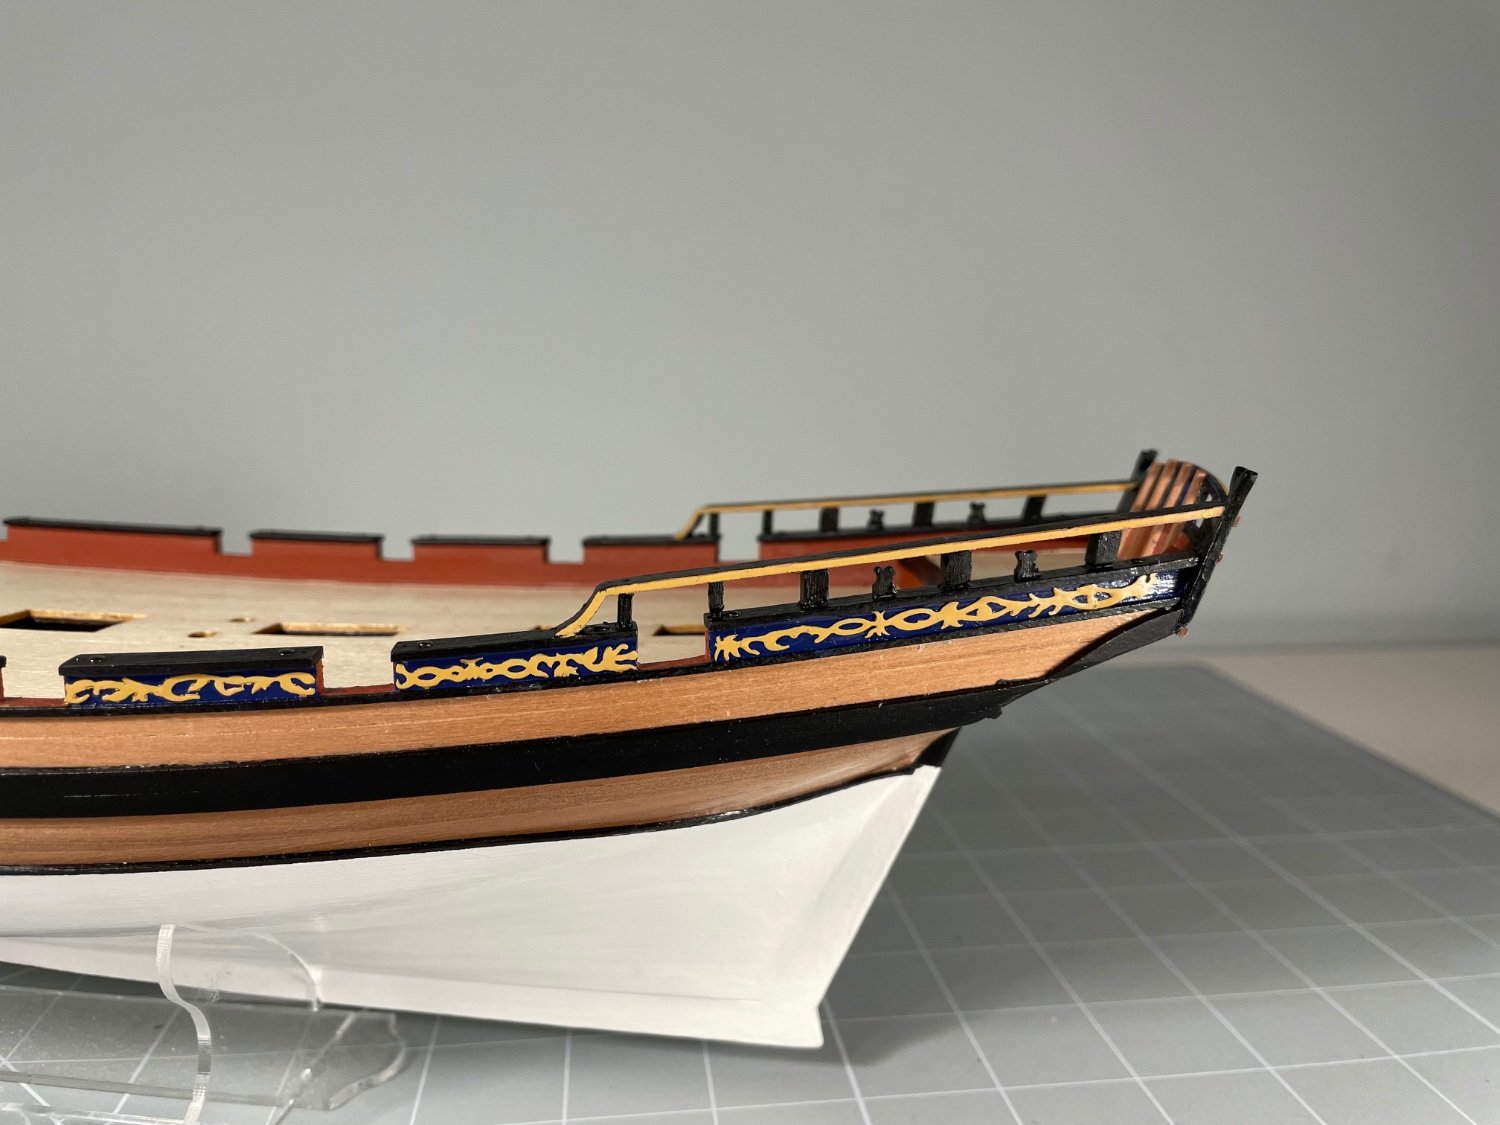
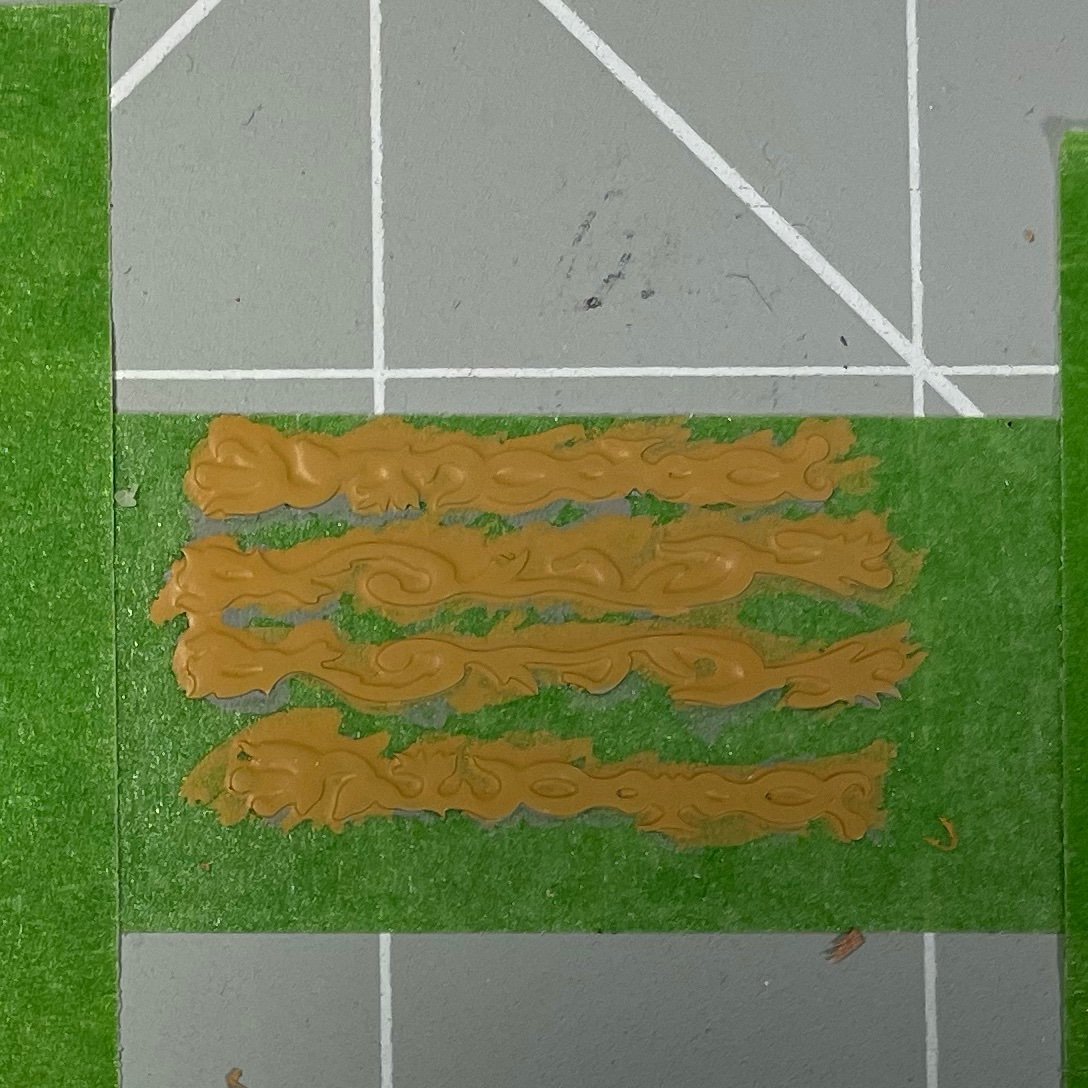
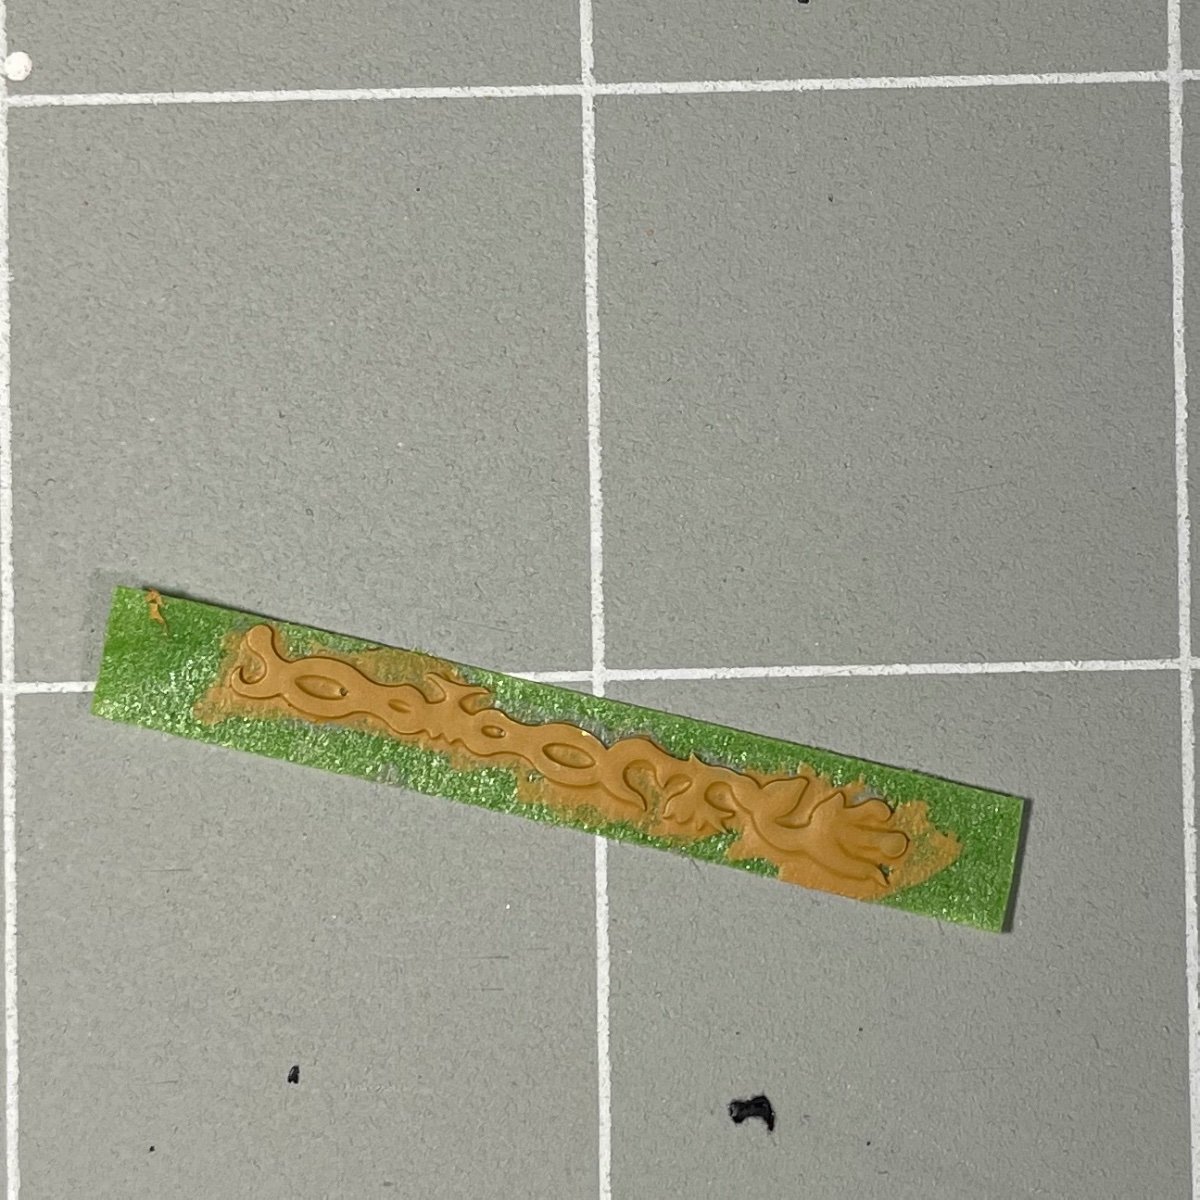
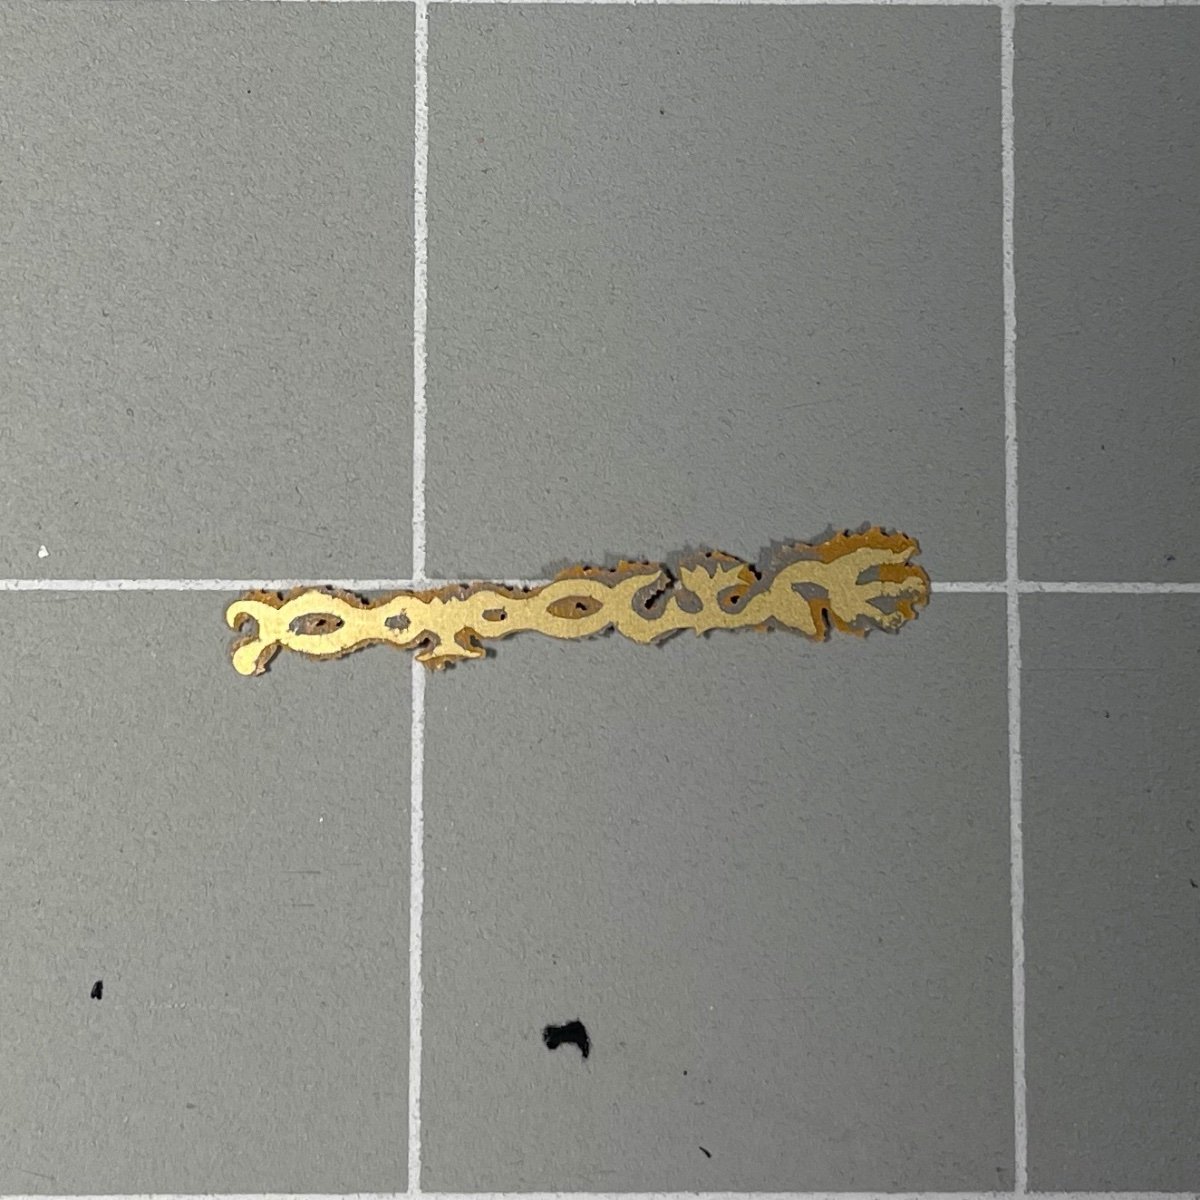
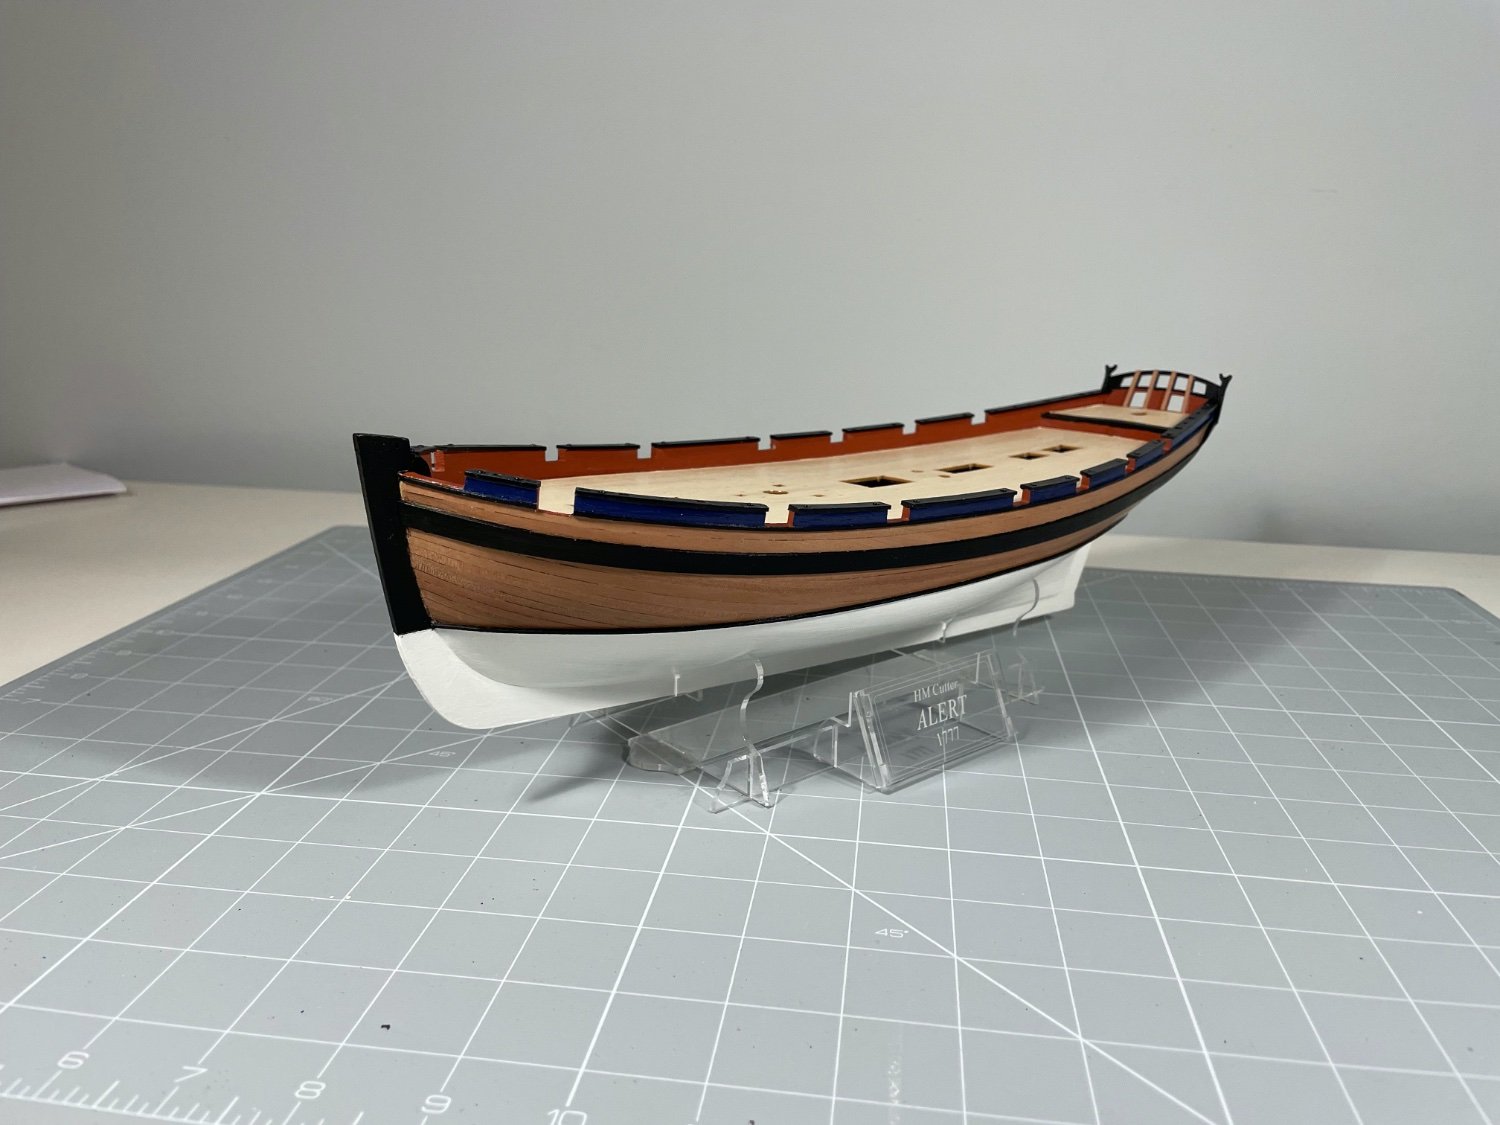
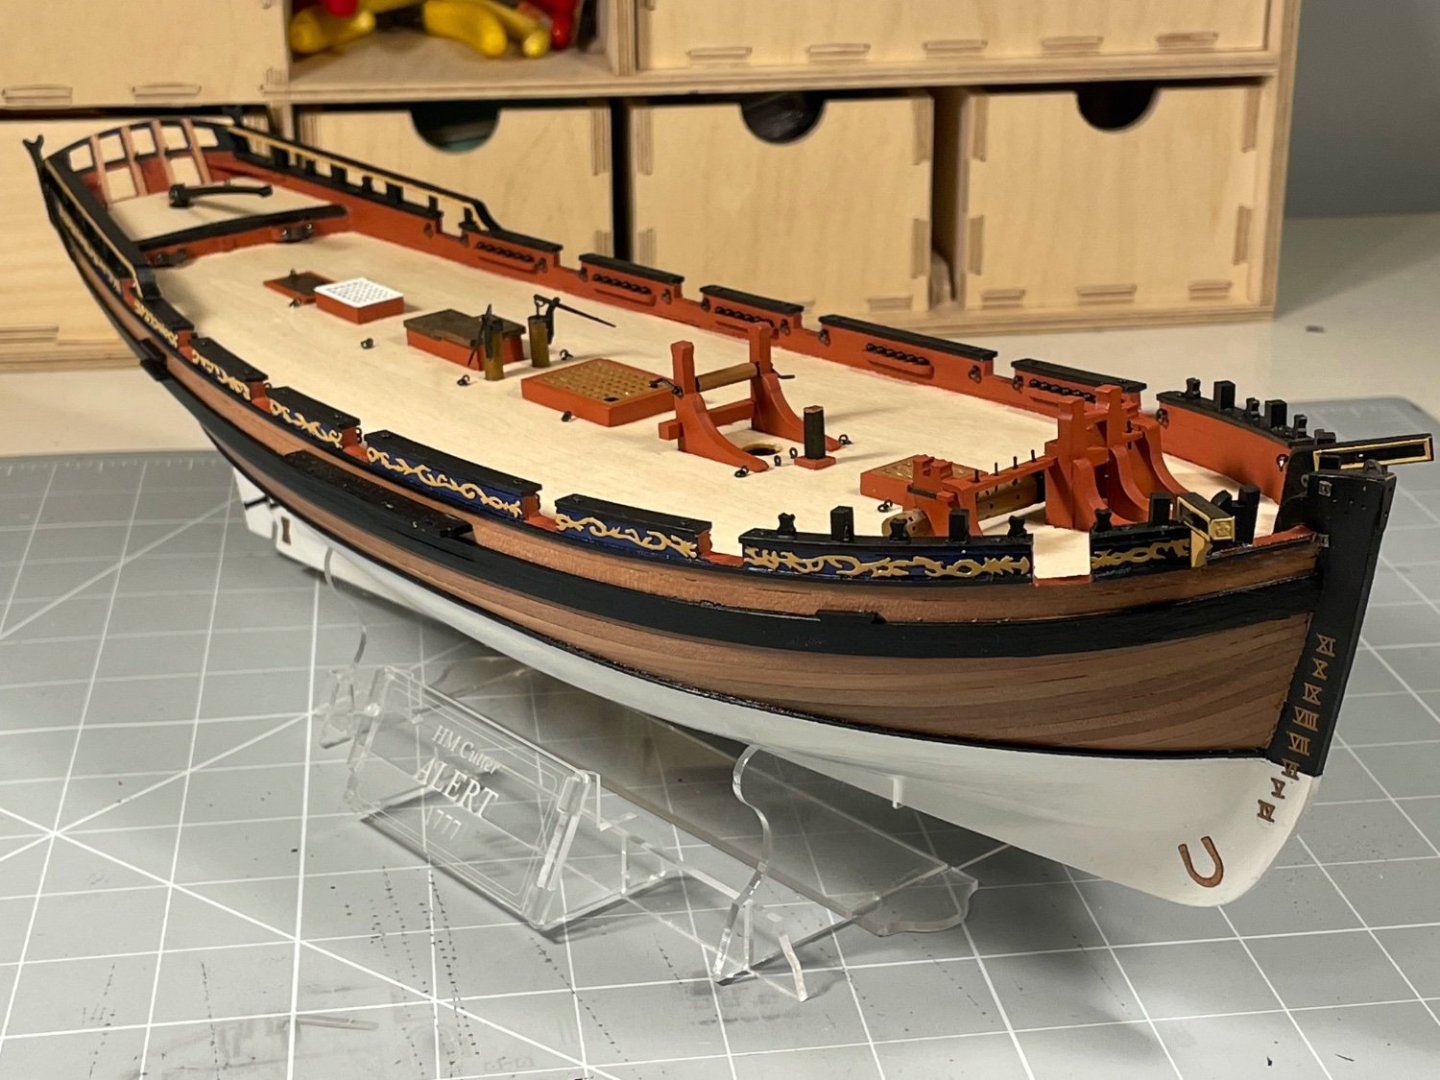
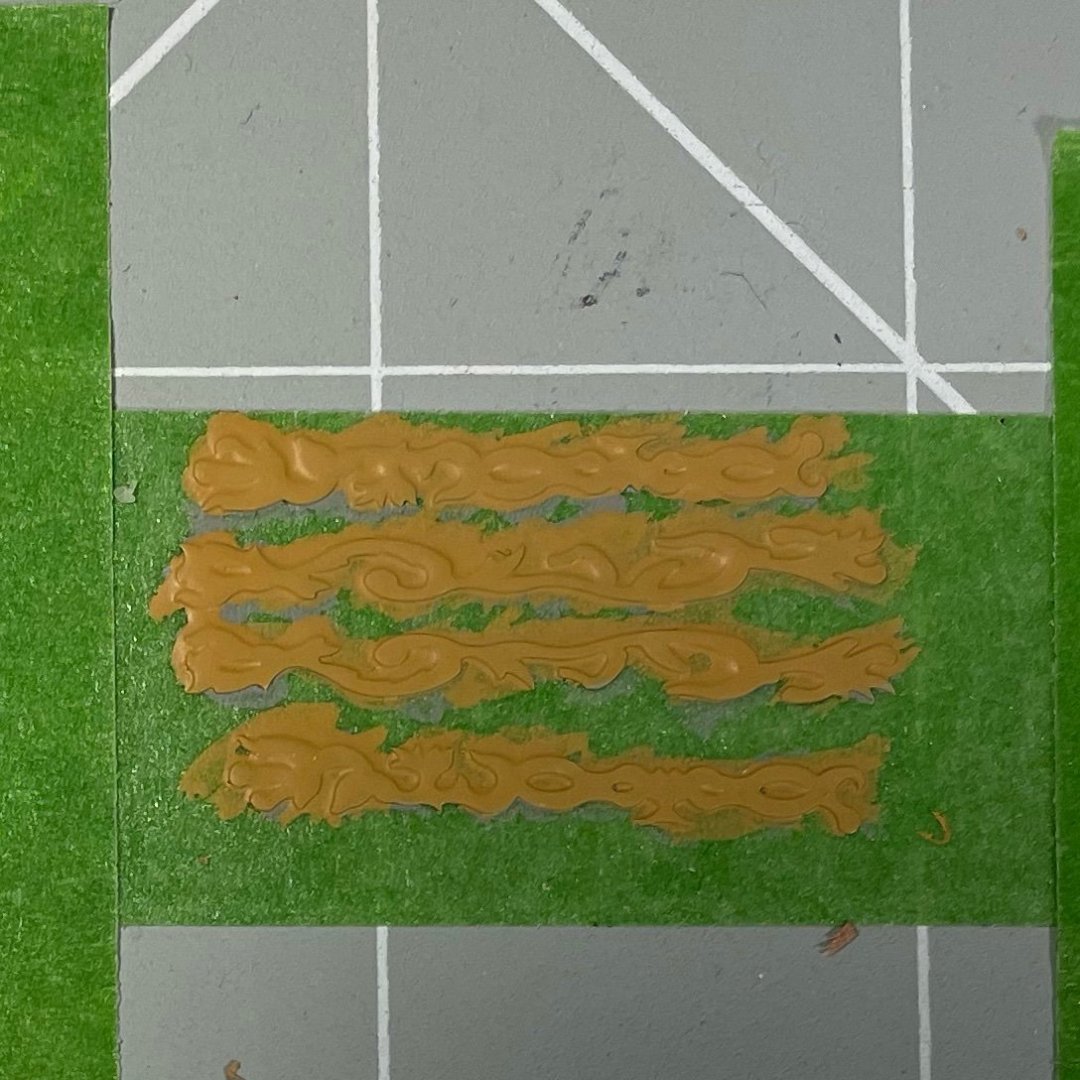
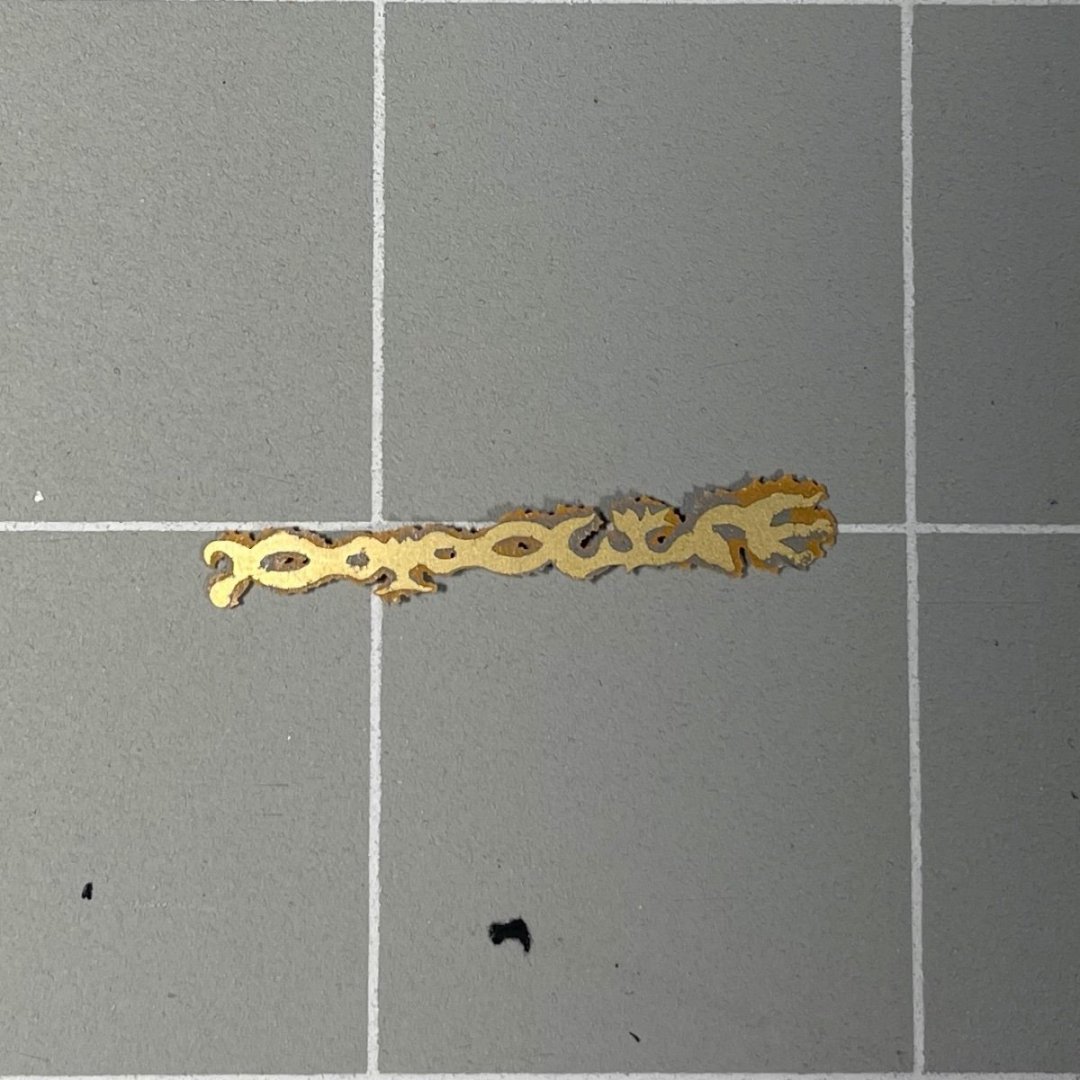
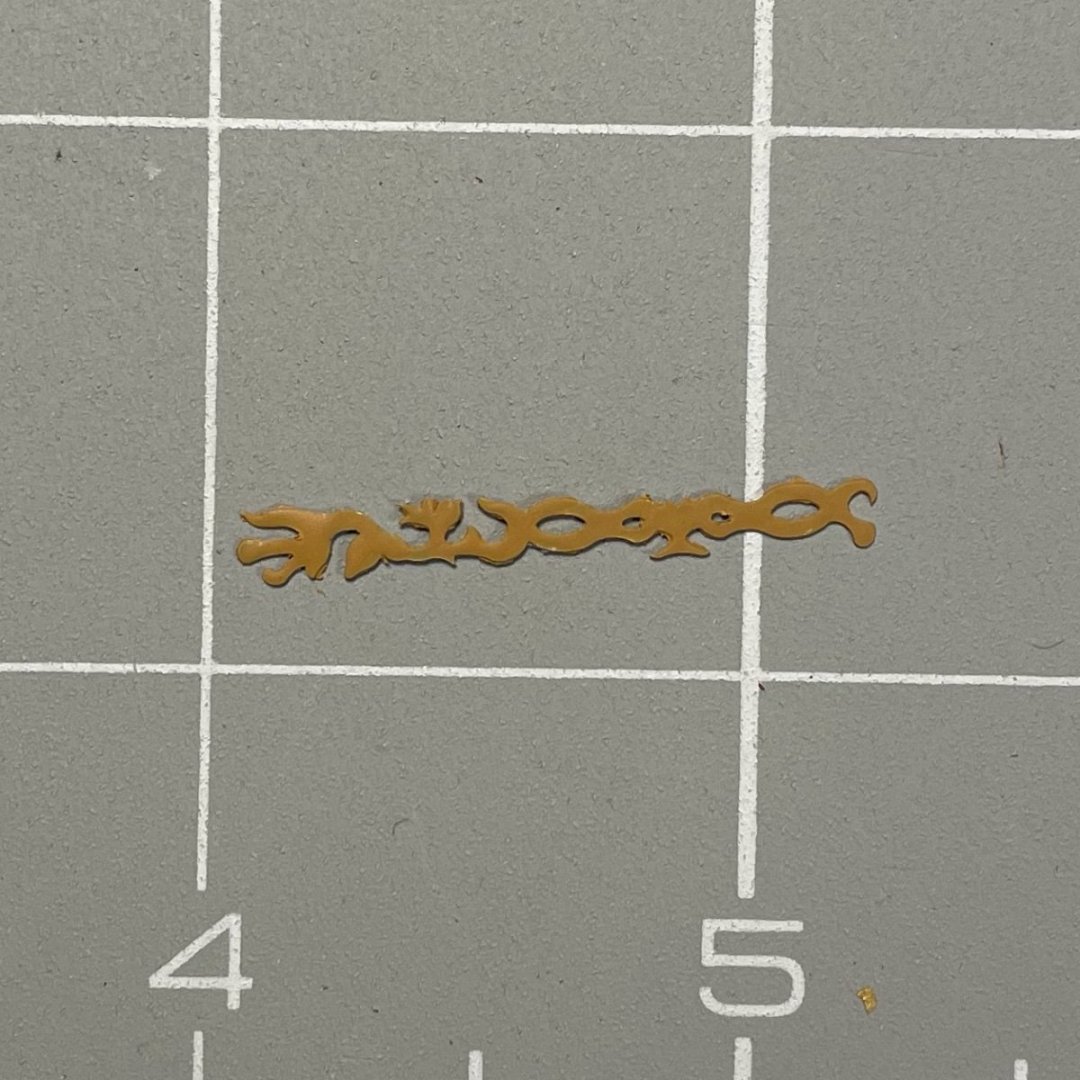
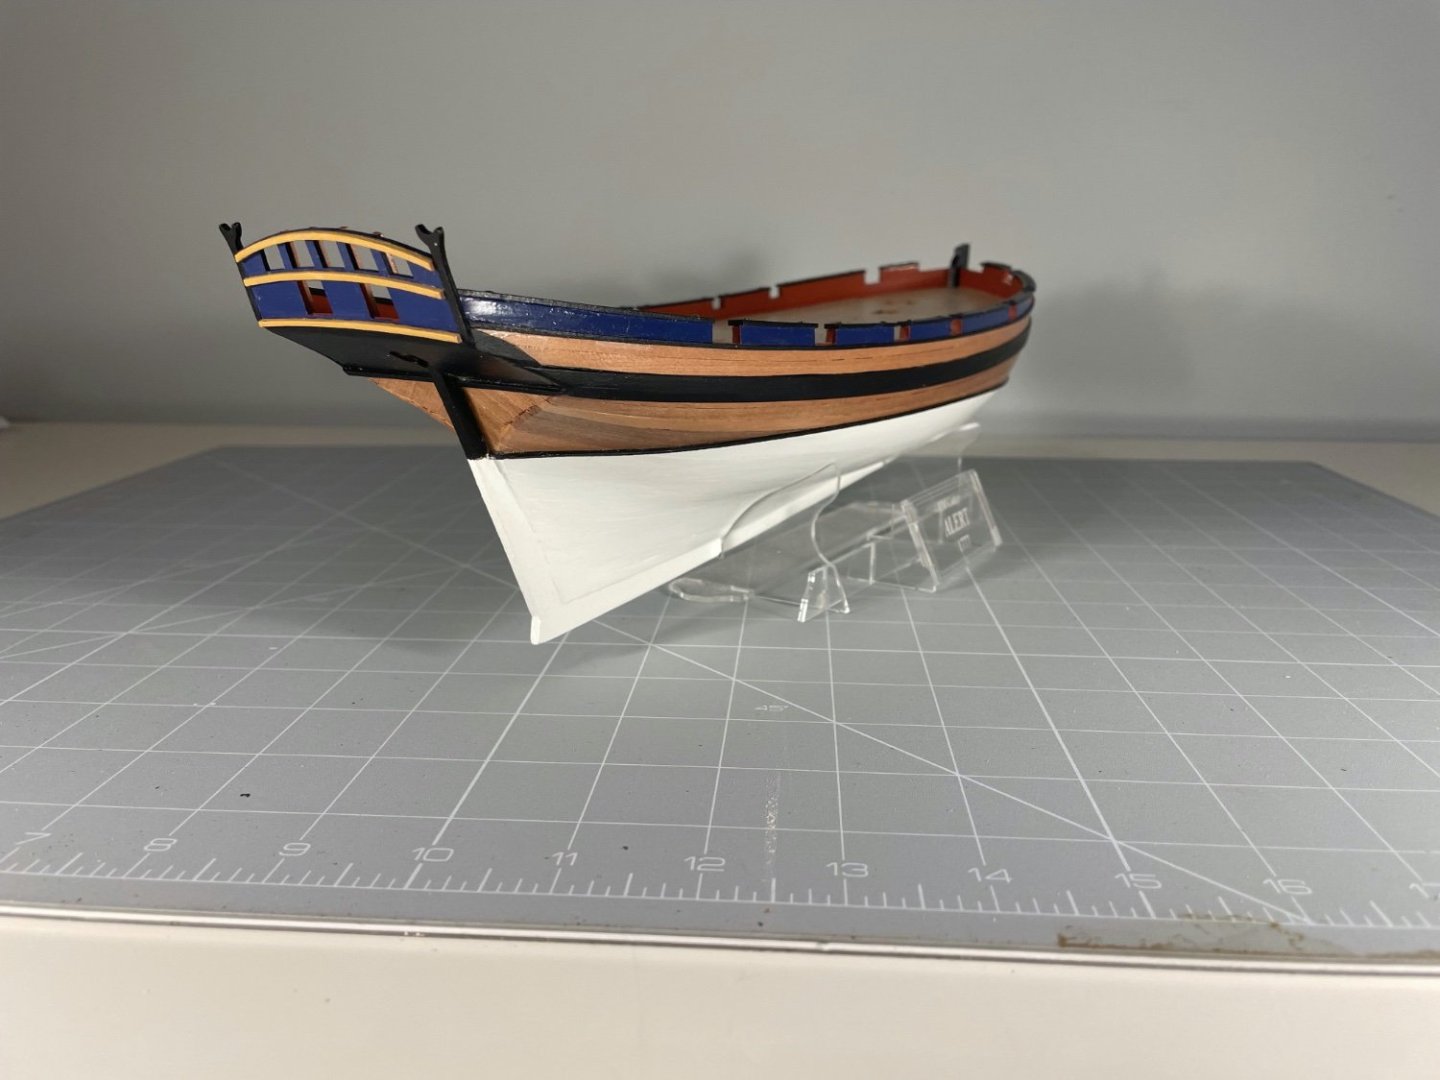
Done some decorating - of the hull that is. Fitted the rough tree rail, and the rather beautiful scroll decorations. As an original act, I chose to paint the outboard edge of the rail in yellow ochre to match the other embellishments. To good effect, I think. I found the rough tree rail rather challenging - mainly because the cut-outs in the capping rail were smaller that the size of the various inserts. I thought I could just trim these latter with a scalpel, but it ended up a bit rough and ready. Should have used my Proxxon mill. Installing the decorative scrolls was time consuming but went well. The manual suggests spraying the paint on while the parts are still attached to the PE sheet to avoid getting dobs of paint on the reverse. Spraying paint in the the spare bedroom was never going to happen, so I did as follows Stuck the unpainted PE parts on masking tape, painted the PE pieces, sliced the tape around one piece, pulled that tape off (revealing the unpainted reverse - success!), trimmed the paint with a small scalpel I attached the PE to the hull using @James H's floor polish method. Works astonishingly well.


-
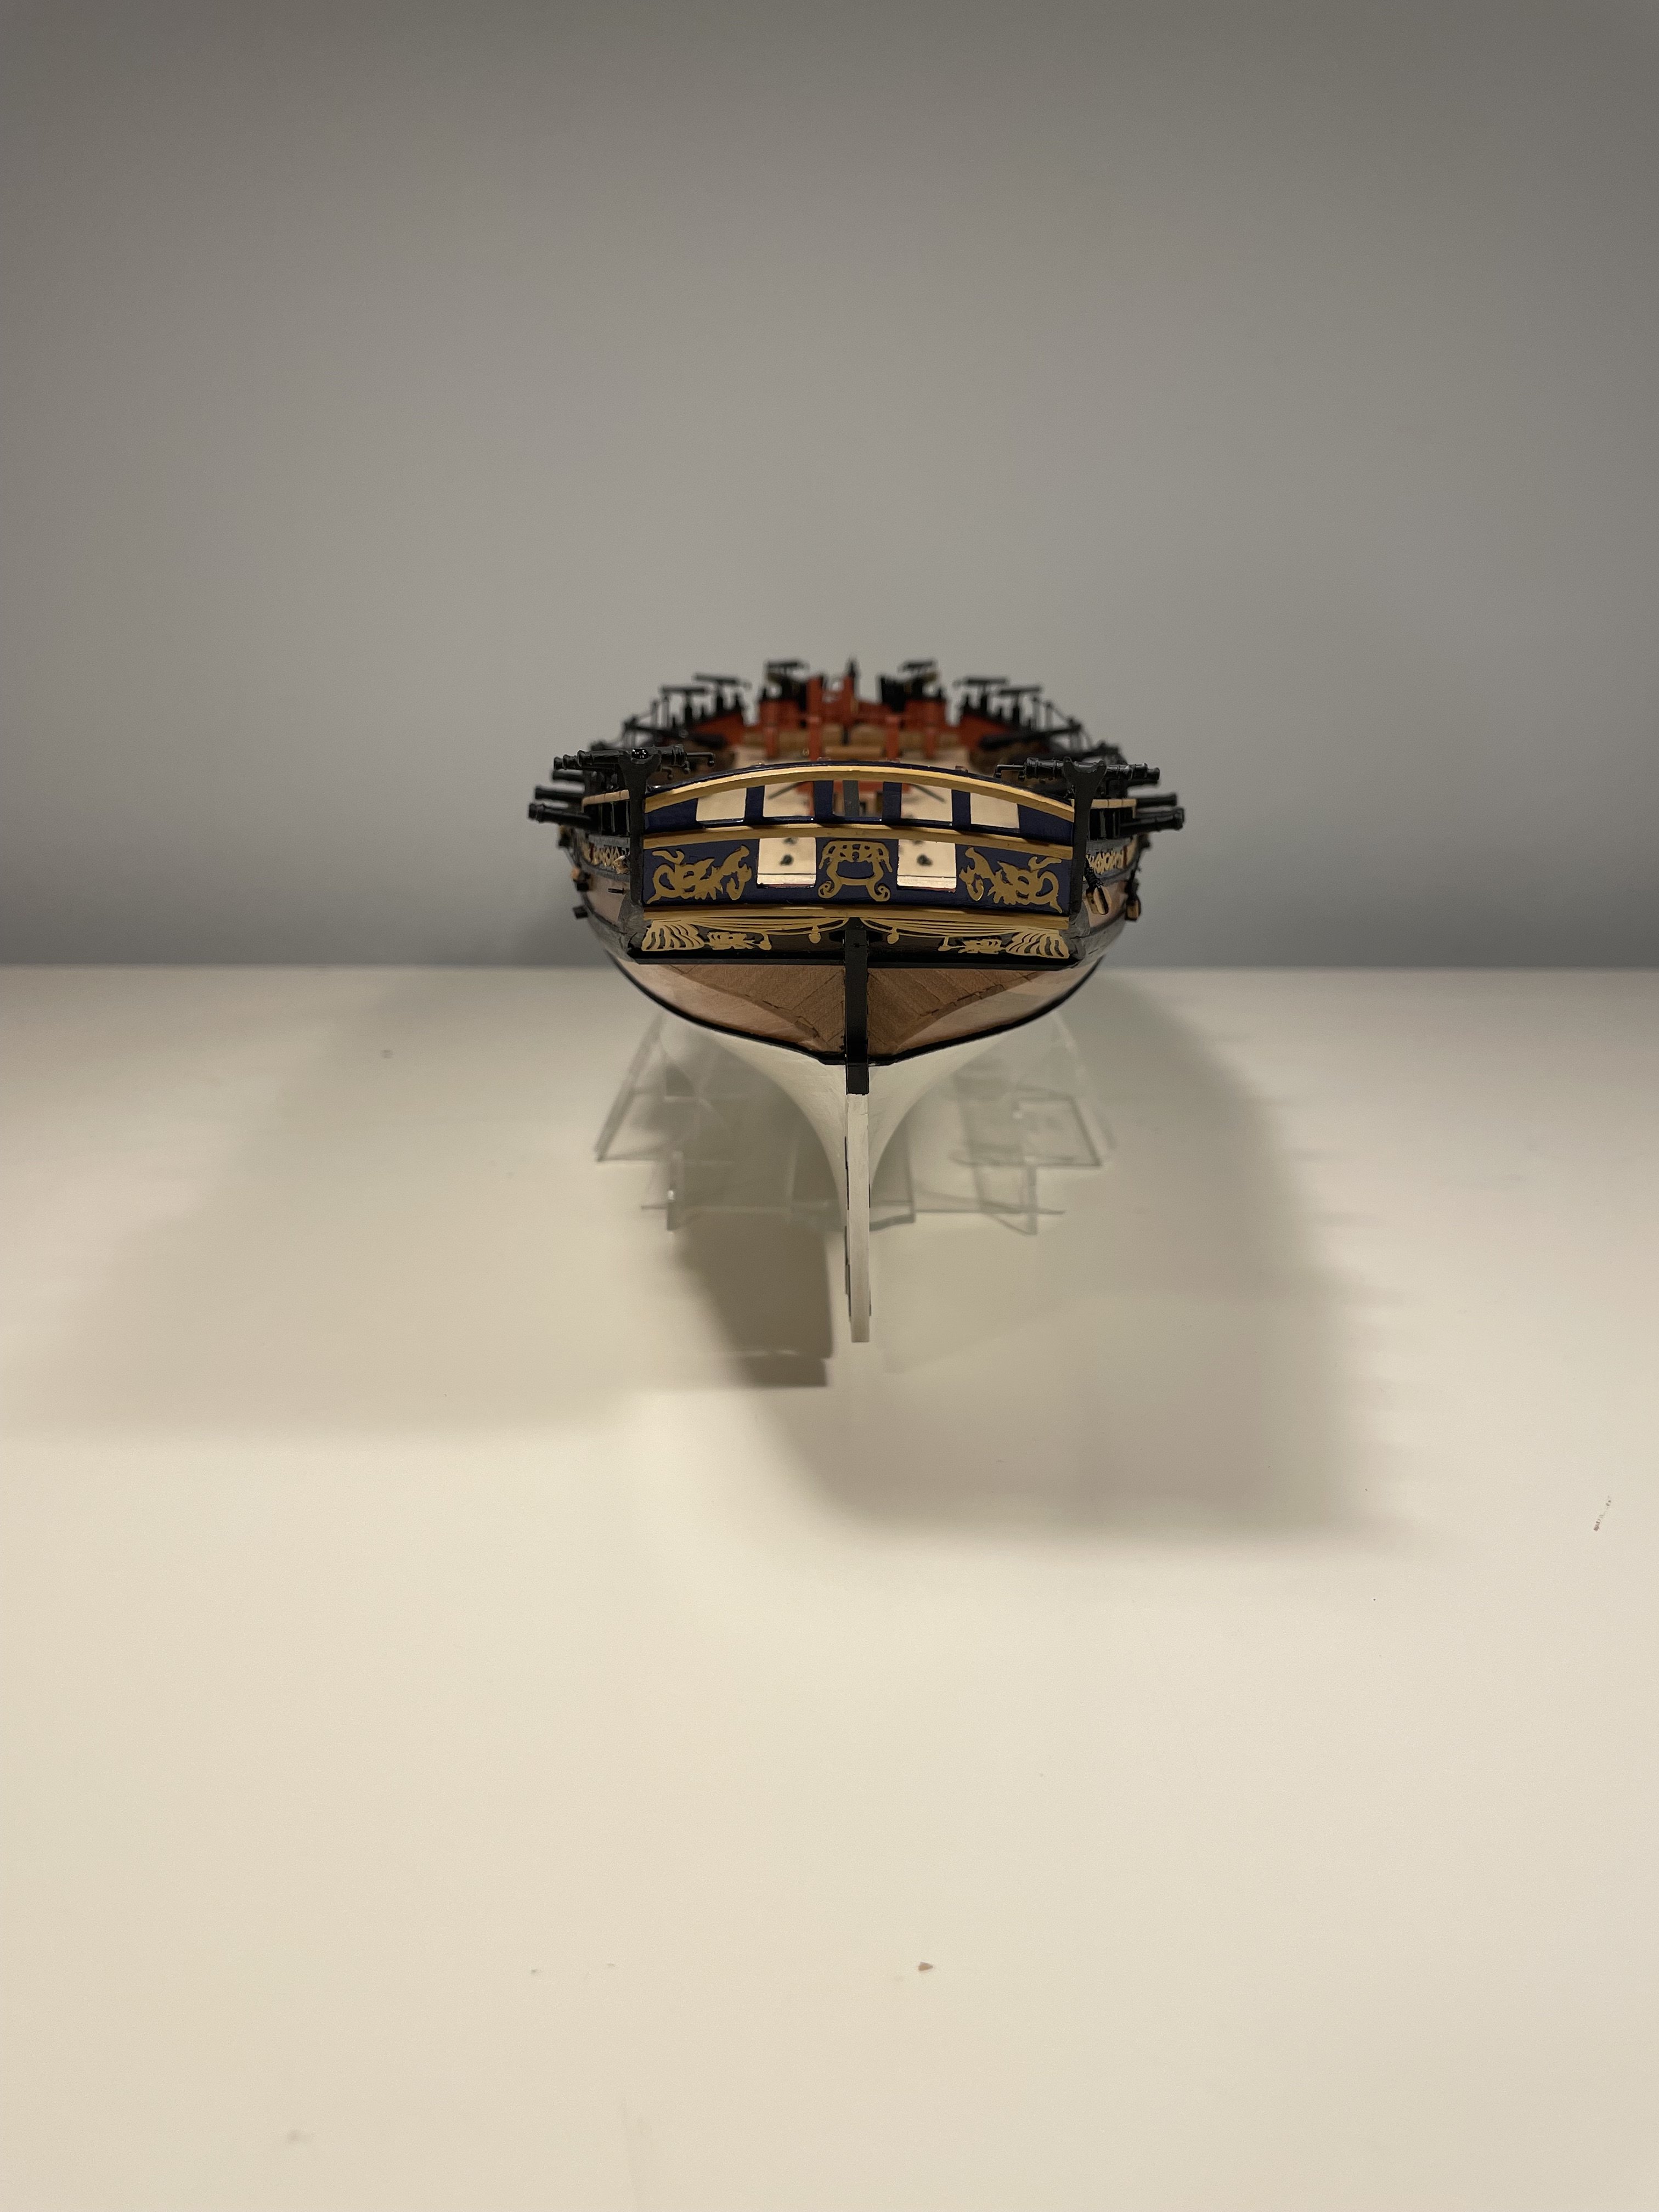
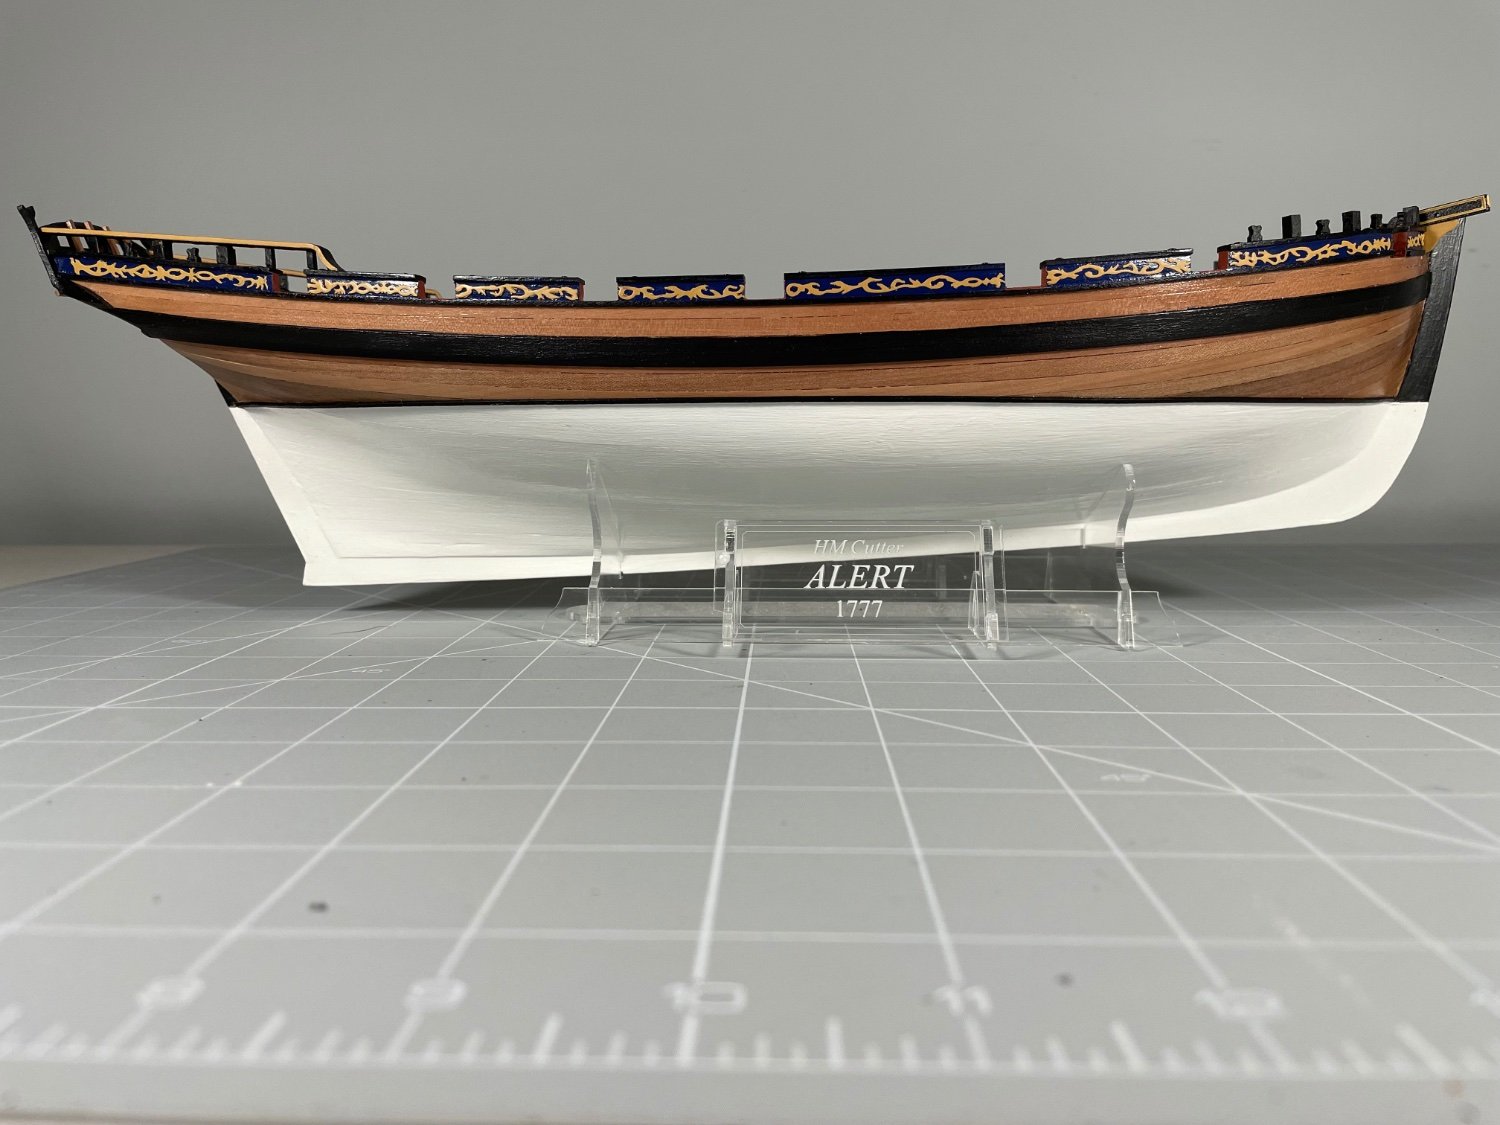
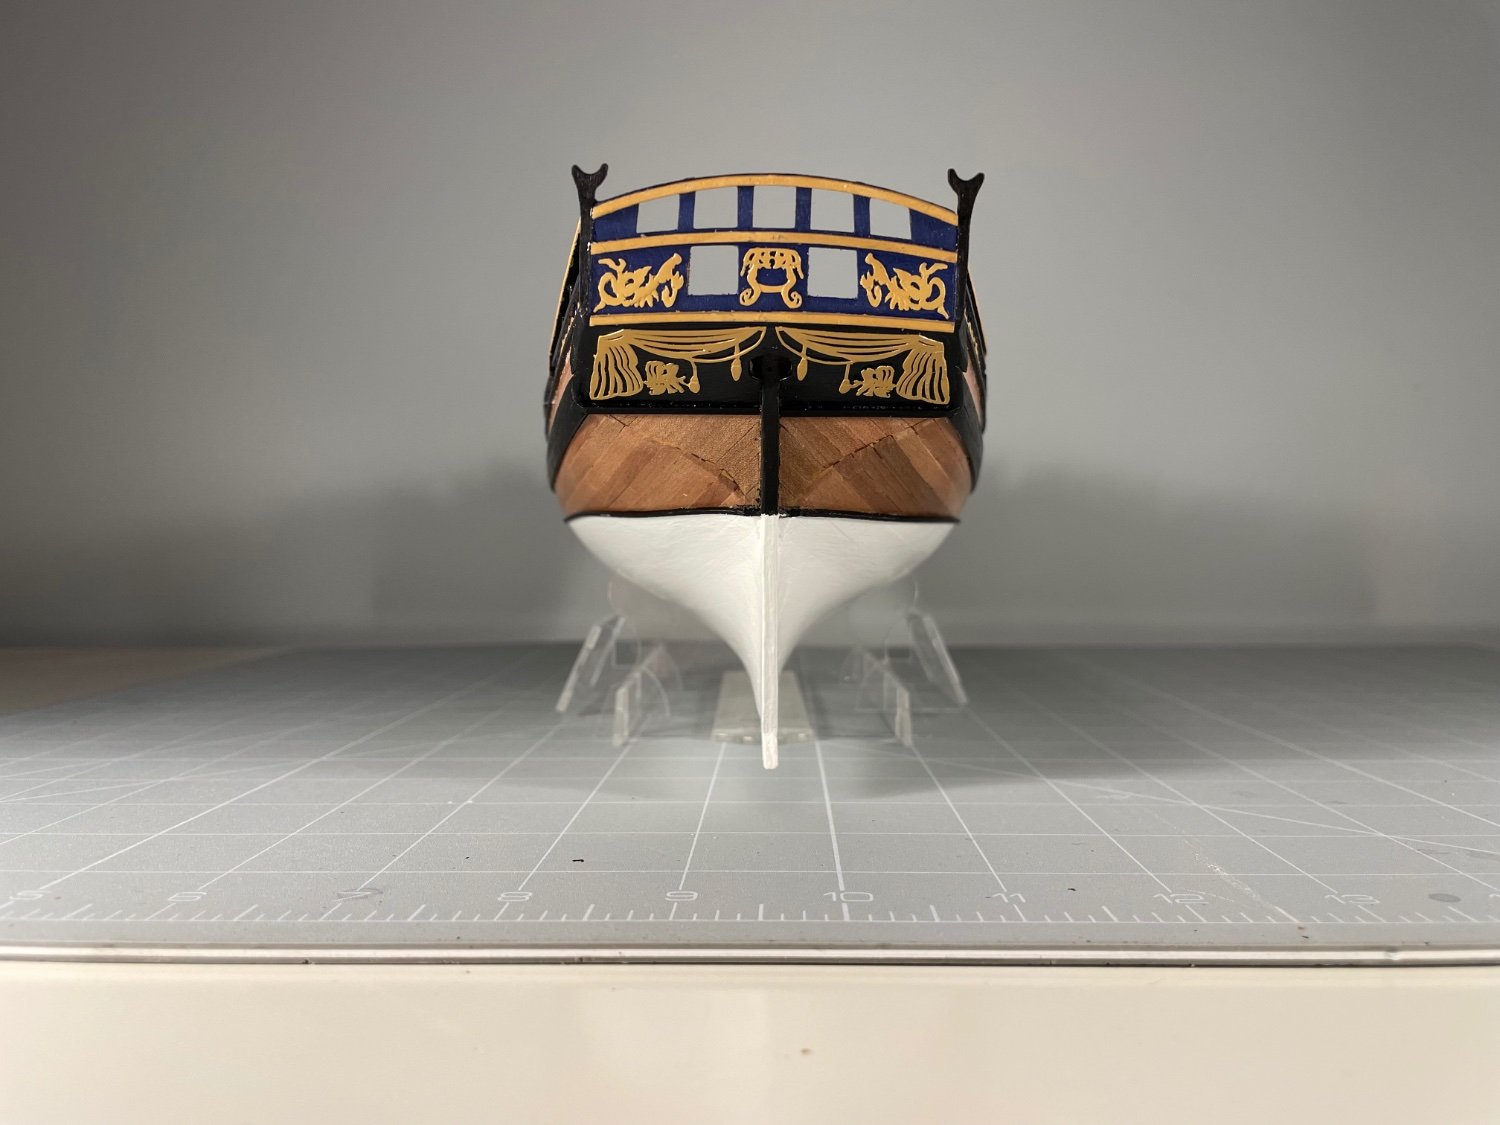
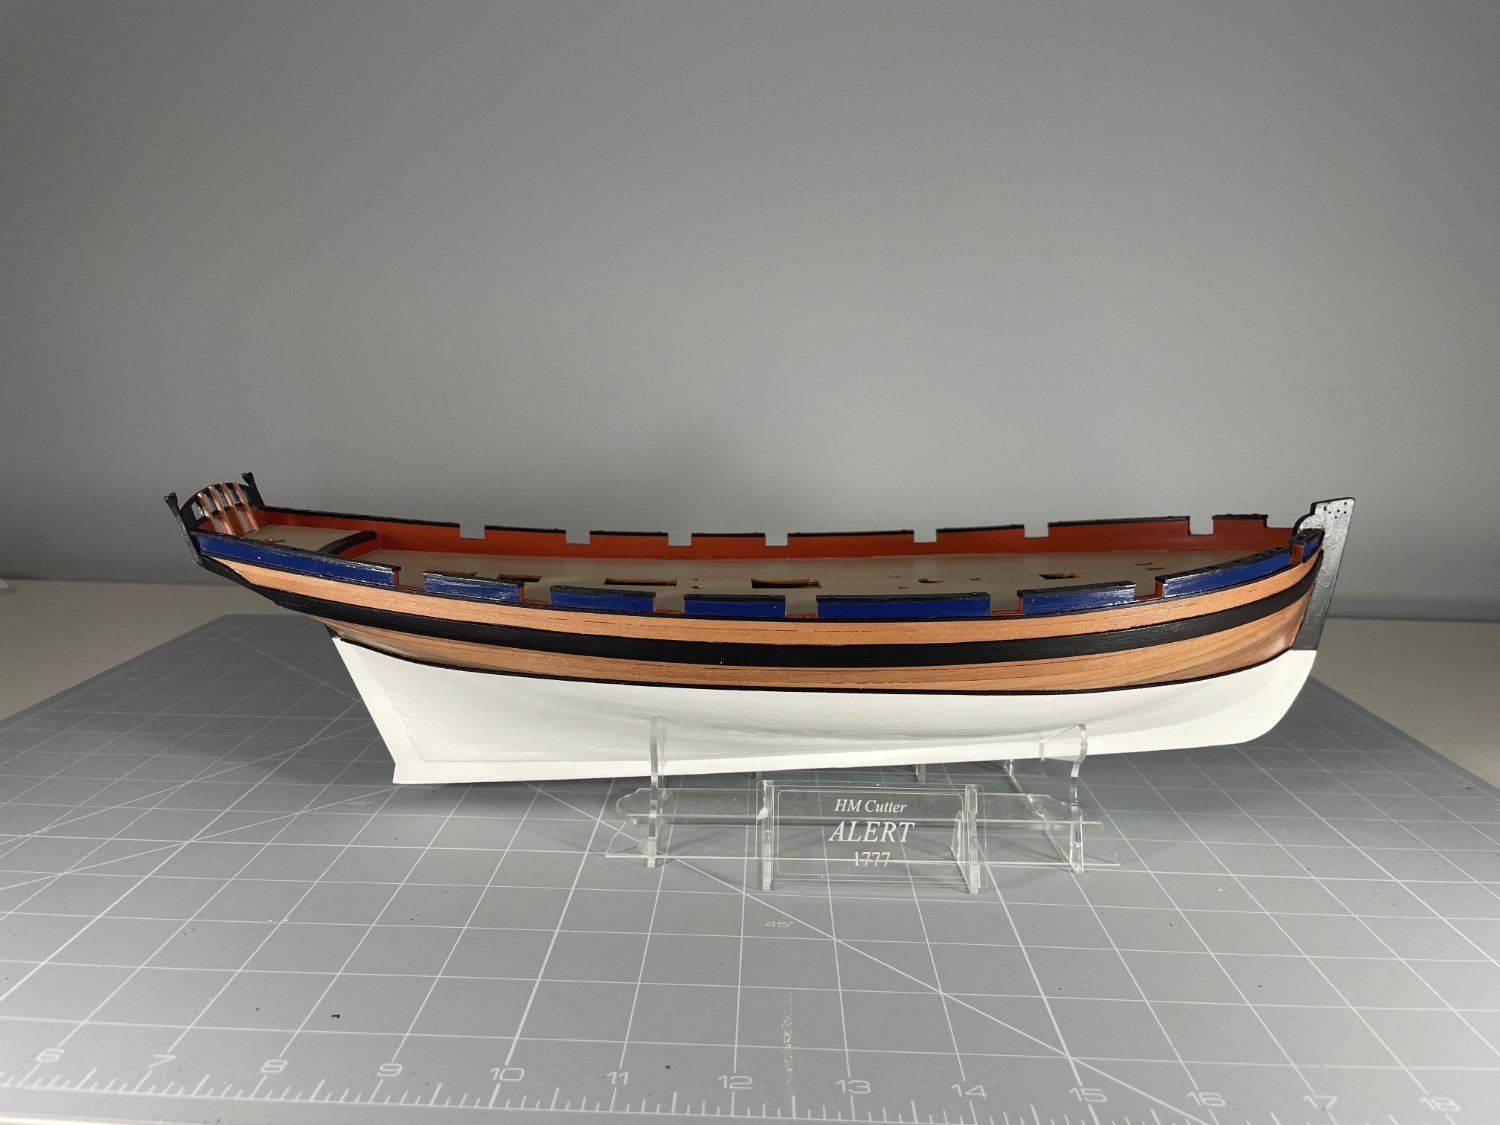
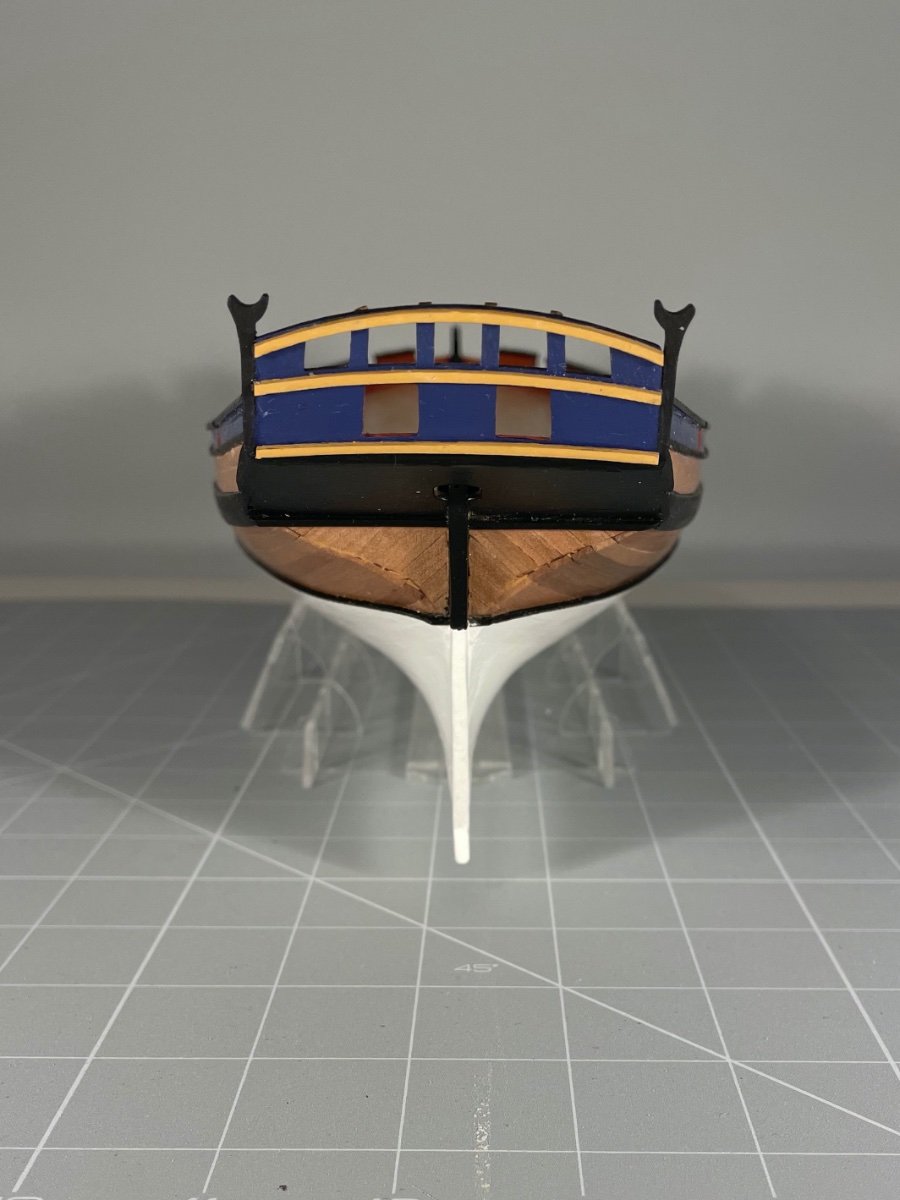
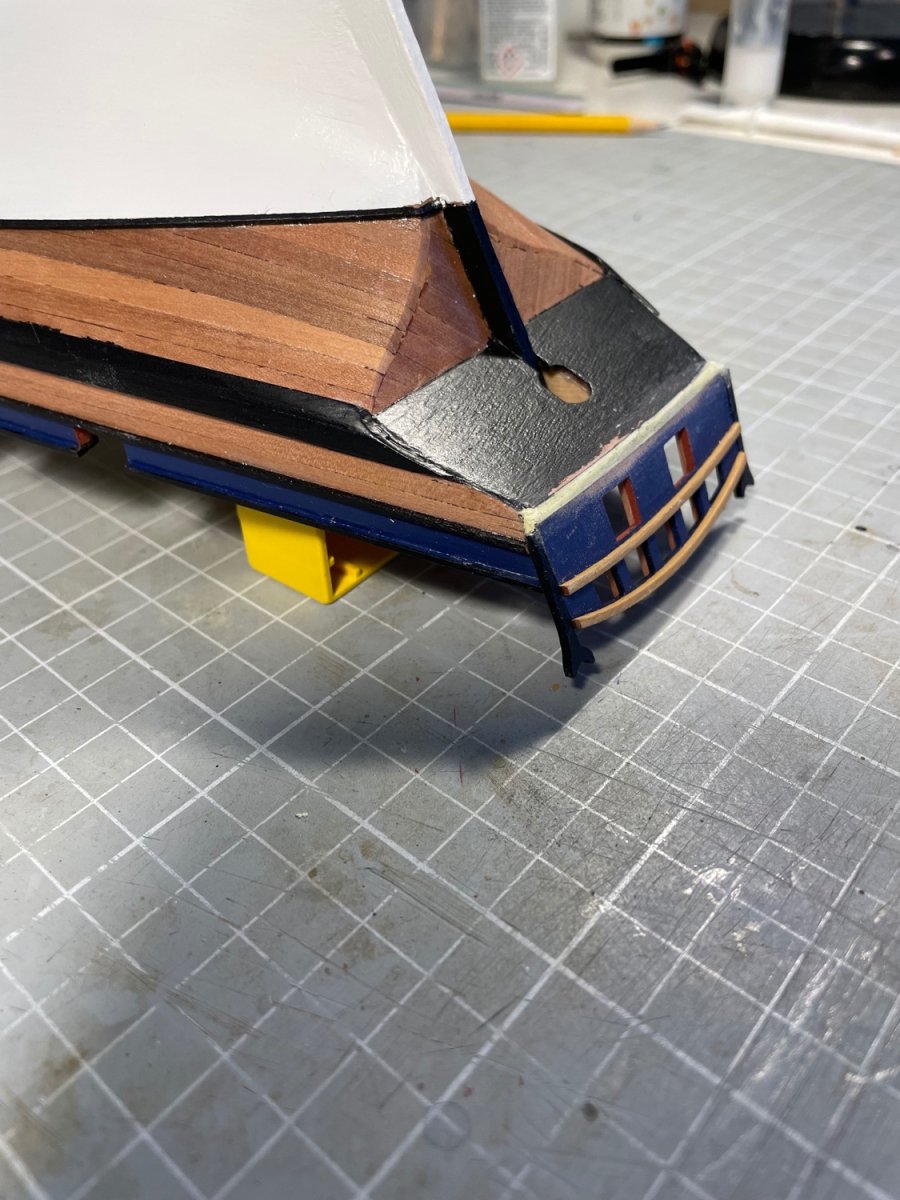
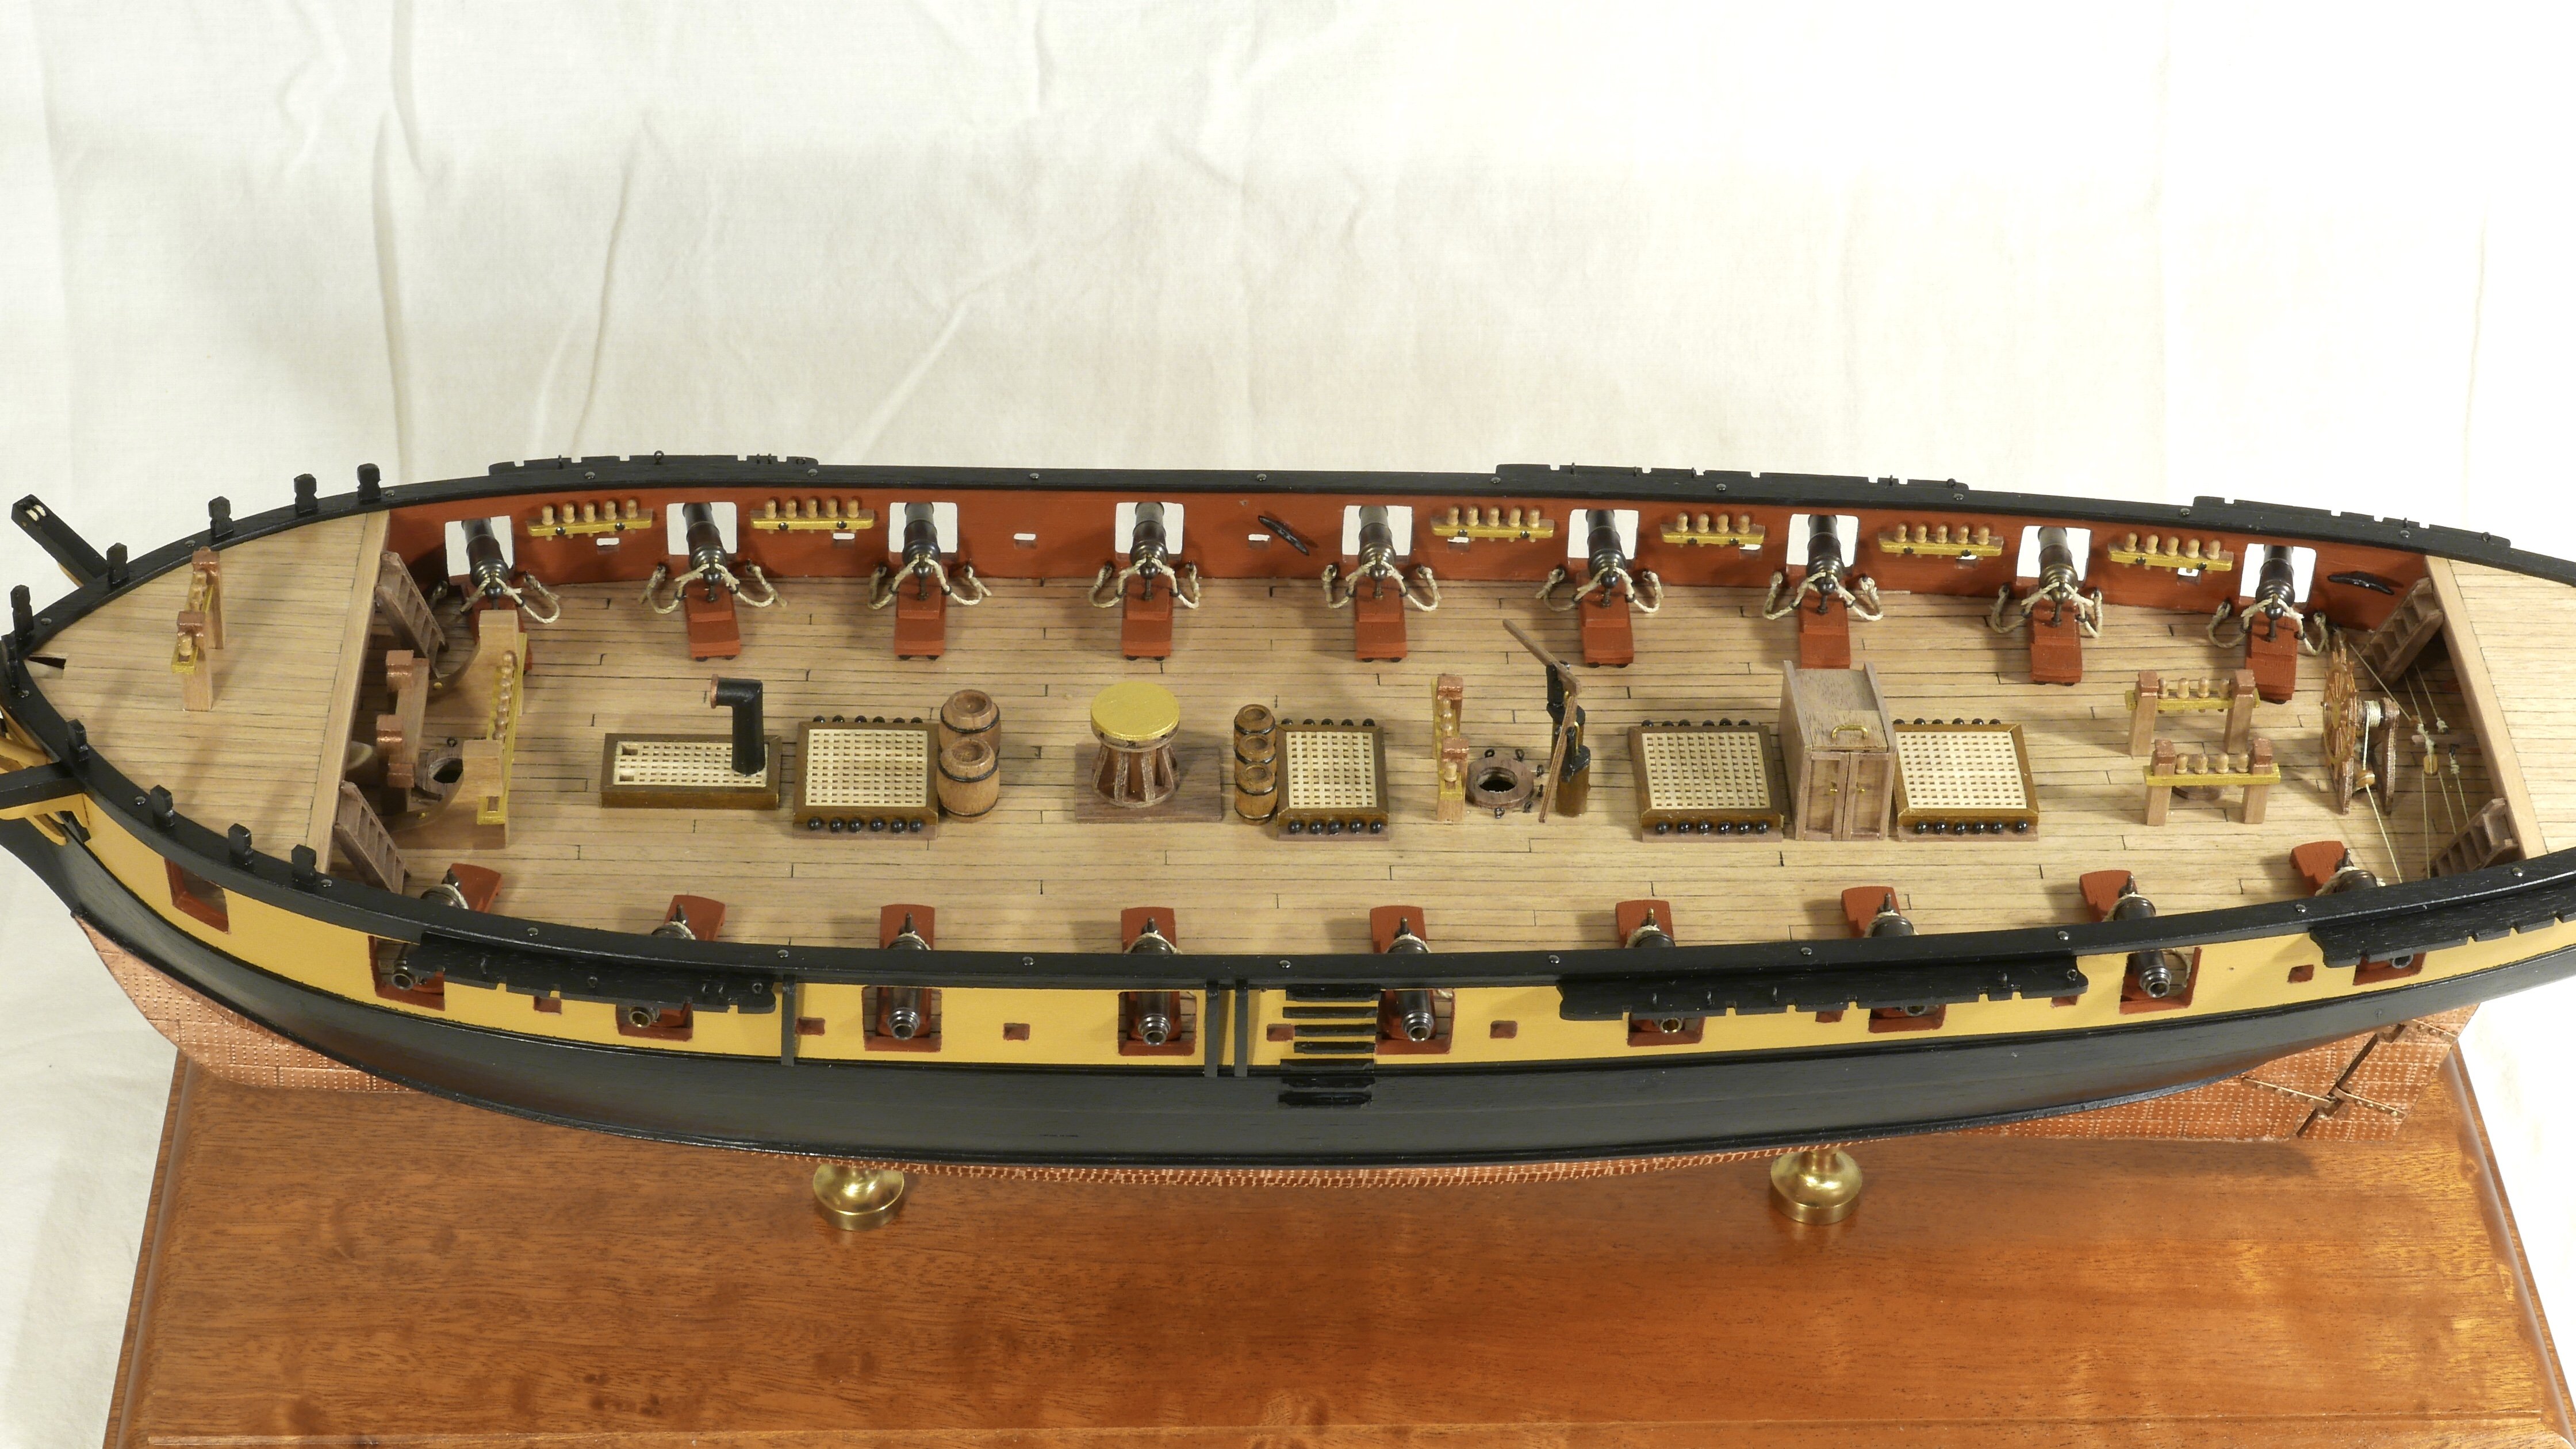
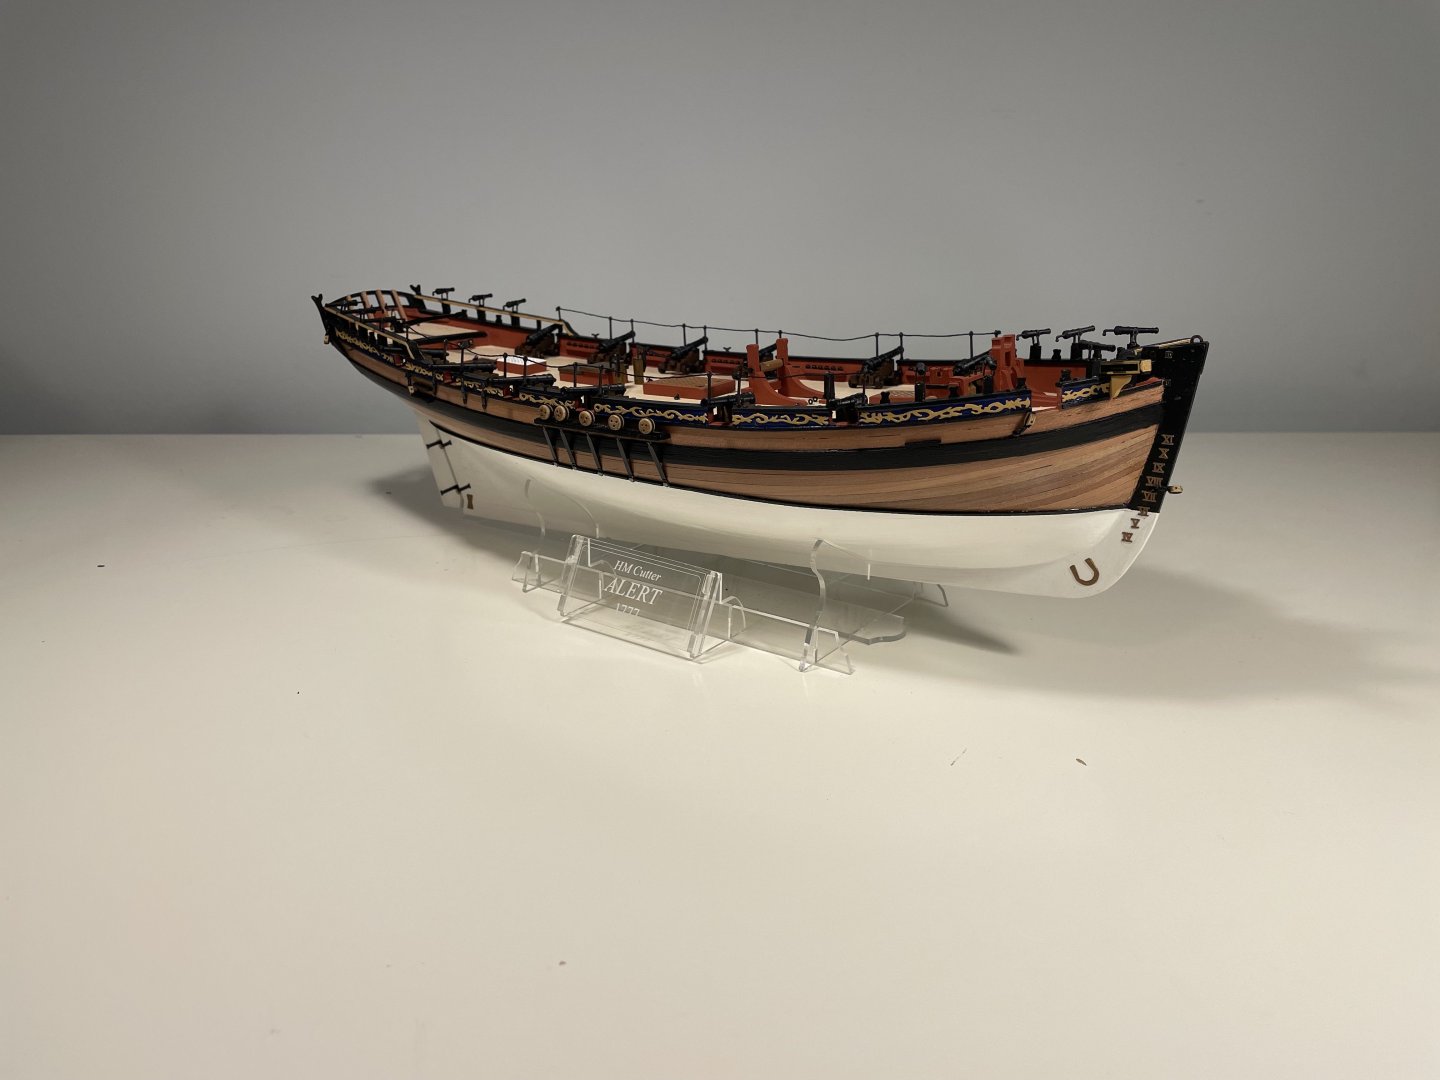
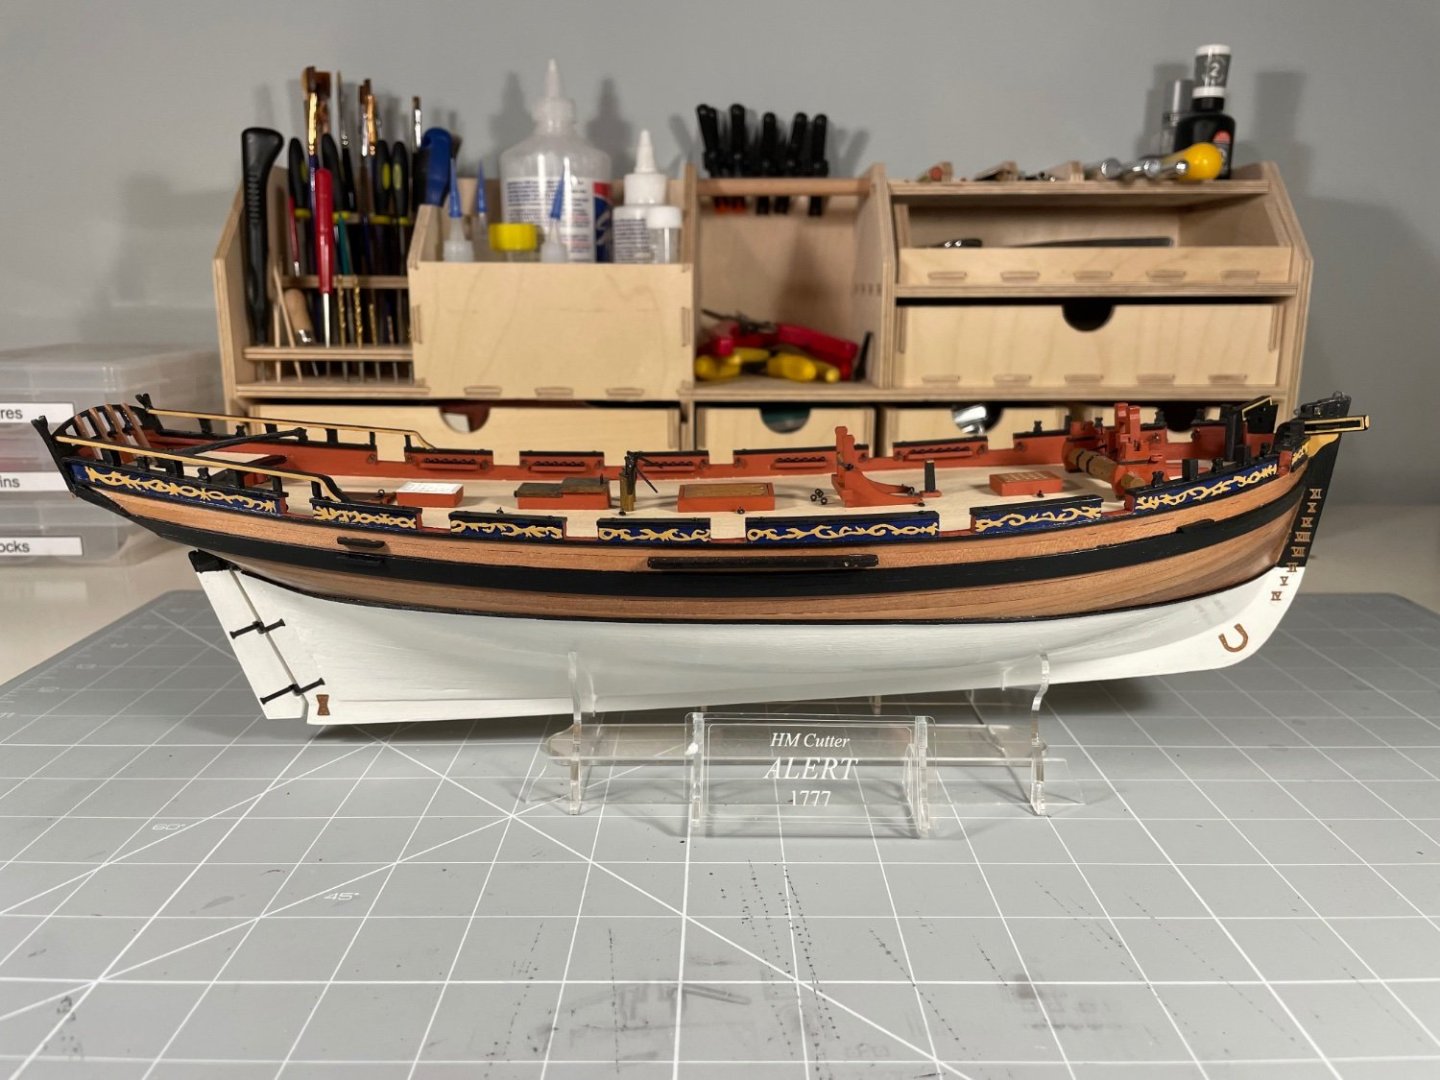
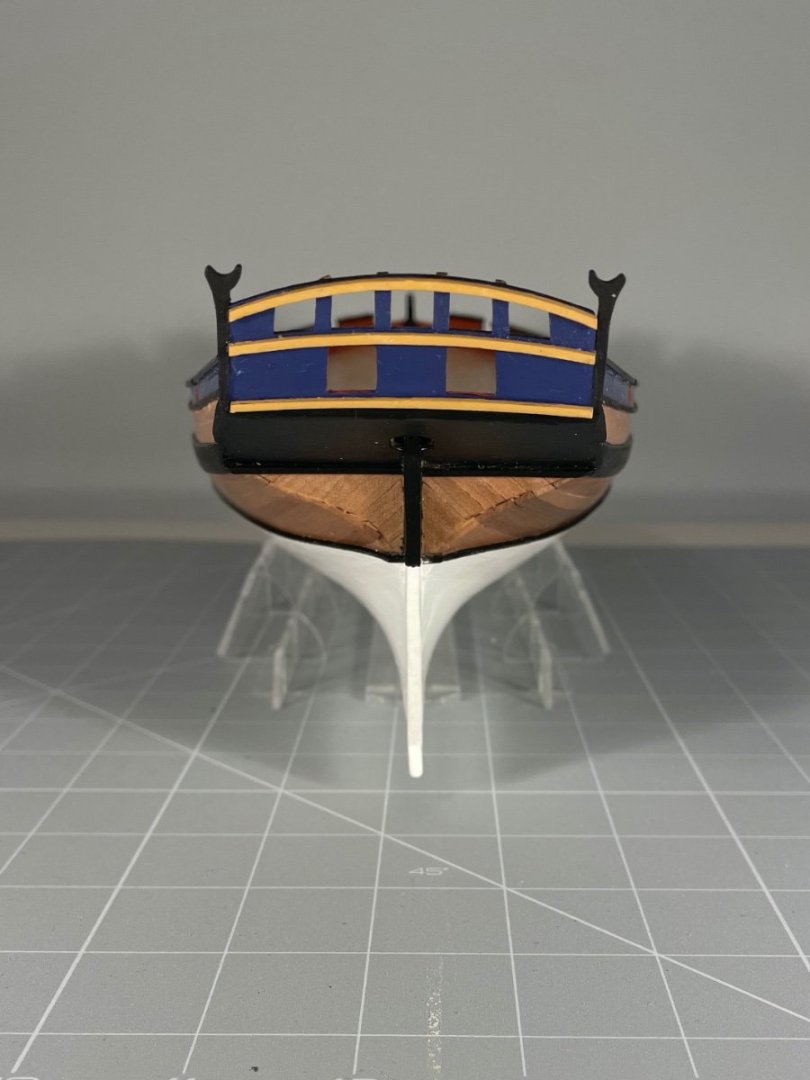
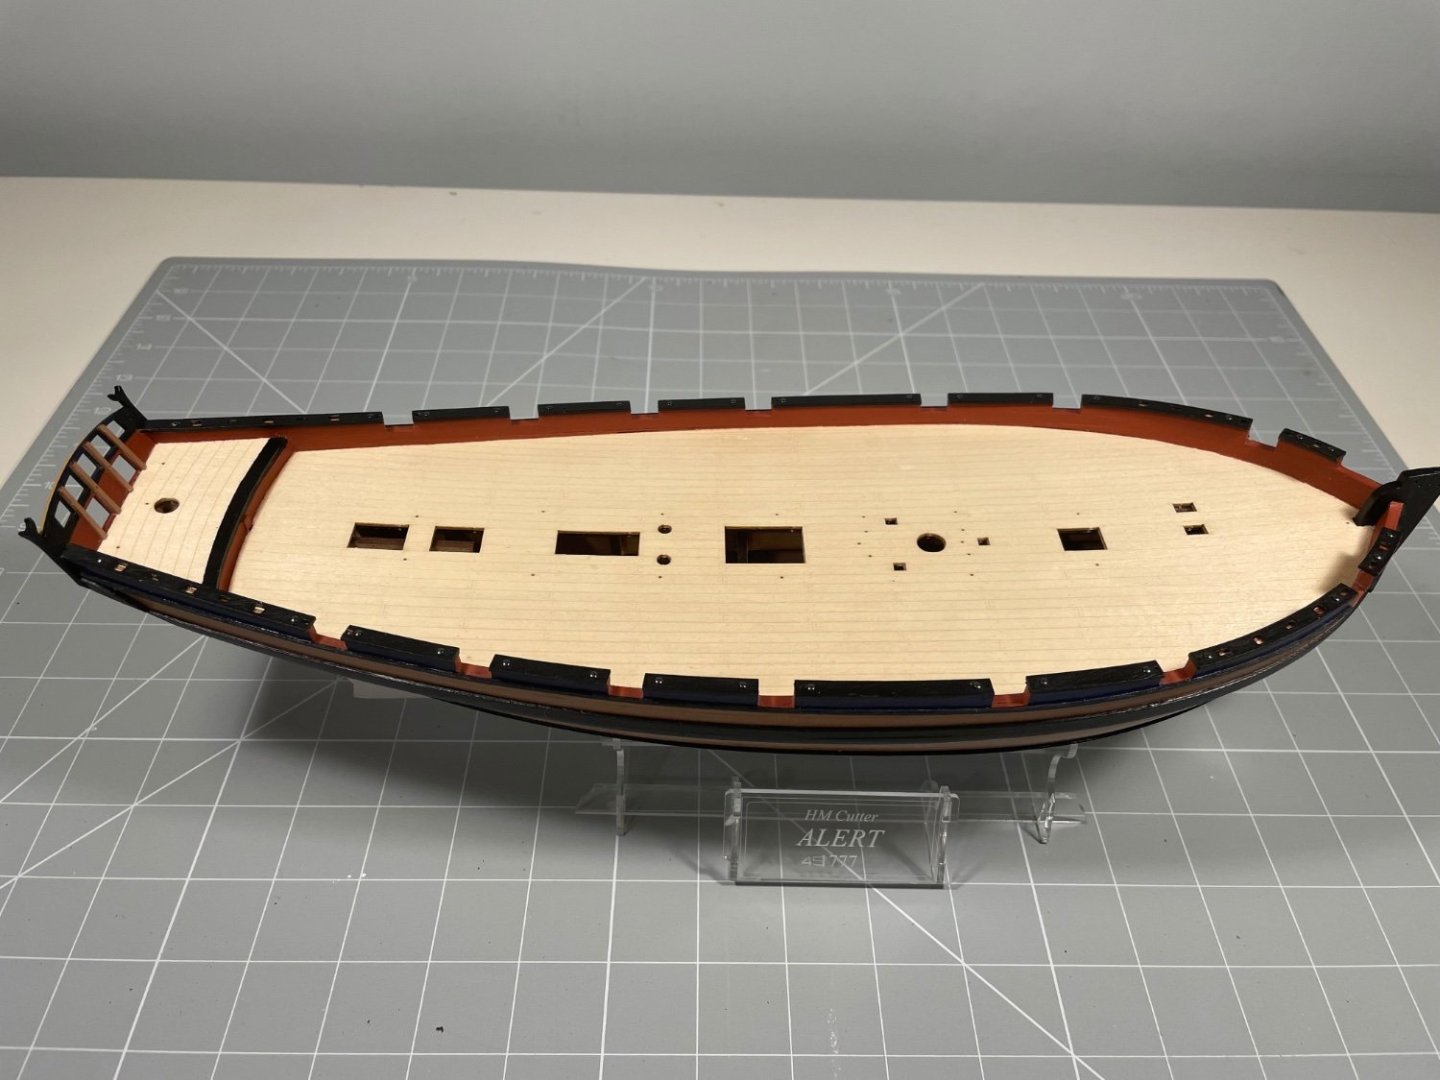
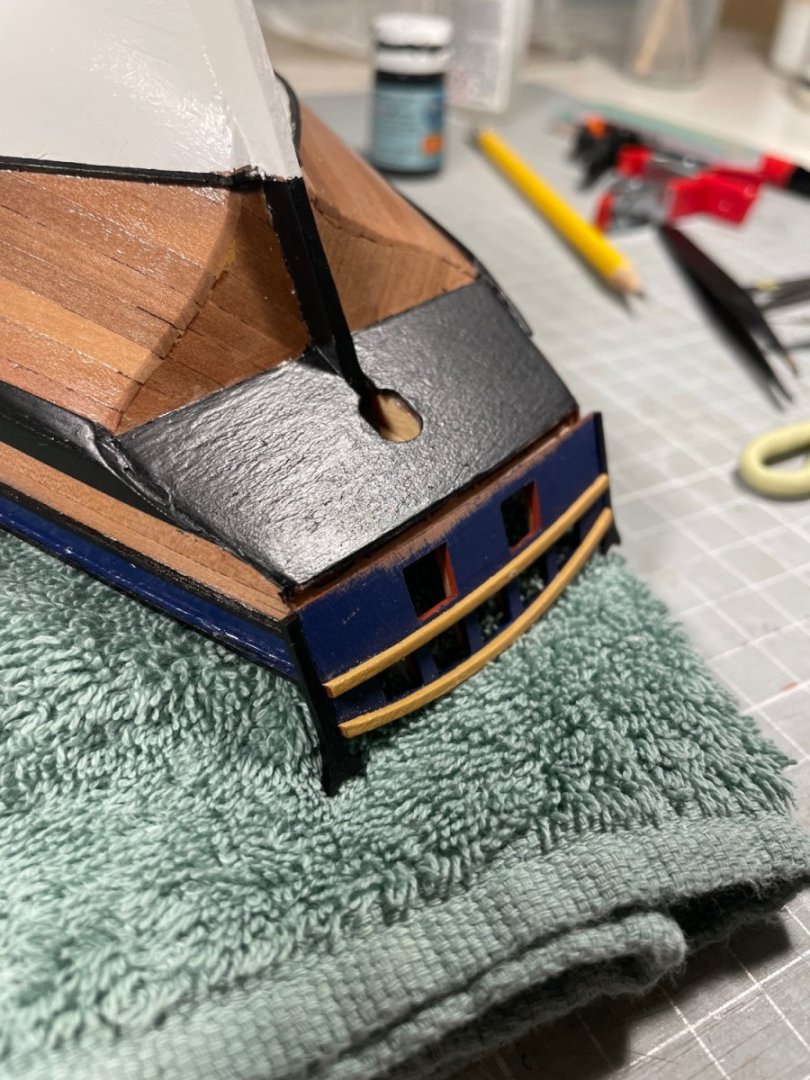
And so, I have progress to report. Let me show you where I am up to. As you can see, the hull is painted and substantially complete. Given how many blunders and the odd challenge, I'm amazed how well she passes the "30cm test" - in fact I think she looks drop-dead gorgeous with beautiful lines and very fetching paintwork - all credit to the designers. In the blunders camp, despite the clear instructions to the contrary, I used satin varnish to seal the the woodwork, having done so in all my previous models, but then neglected to either scratch or sand it when gluing further components - they fell off - a lot. I also discovered subtle variations in the shape of the hull which meant fitting the transom proved a right royal pain. I think those arose because I didn't quite get the sanding of the frames right, and because I chose minimal bending of the 1st and 2nd planks, I ended up sanding a lot of planking off. Essentially I rushed. Still, lesson worth learning. The biggest challenge can be seen here: There is a gap between the counter (attached weeks ago) and the transom attached just before the first photo (I knocked it off about 30s later - learnt my lesson and stuck it on properly). I cannot work out what, if anything I did wrong, but a little seam of Milliput sorted things out. When sanded and painted, the stern looks fine. I was also rather perplexed over where to fit the side counter timbers. The fig on p24 (and later) of the manual, and the photo on p 32 show different things. I opted for the latter, as can be seen in the opening pics. Had I known I was going to do that, I wouldn't have tapered the main wale at the stern, but I think I will leave it as it is, now. Hope to get a little more done before Christmas, but the full Admiralty Board will be in residence, with a supernumerary flag officer arriving this week, so that might slow the work of the shipyard (not to mention make it off-limits to all those below the rank of captain), and have the shipyard Matey too busy swabbing and knuckling his forehead to get any useful work done. So Merry Christmas one and all - or Happy Holidays, if you'd rather.


-
Mike_H reacted to a post in a topic:
HM Cutter Trial 1790 by AJohnson - Vanguard Models - 1:64th
-
Mike_H reacted to a post in a topic:
HM Cutter Alert by Mike_H - Vanguard Models - 1:64
-
Mike_H reacted to a post in a topic:
HM Cutter Alert by Mike_H - Vanguard Models - 1:64
-
Mike_H reacted to a post in a topic:
HM Cutter Alert by Mike_H - Vanguard Models - 1:64
-
There is some beautiful rigging to be seen here. Will certainly study it in due course.
- 487 replies
-
- 2
-
-
-
- vanguard models
- alert
- (and 1 more)
-
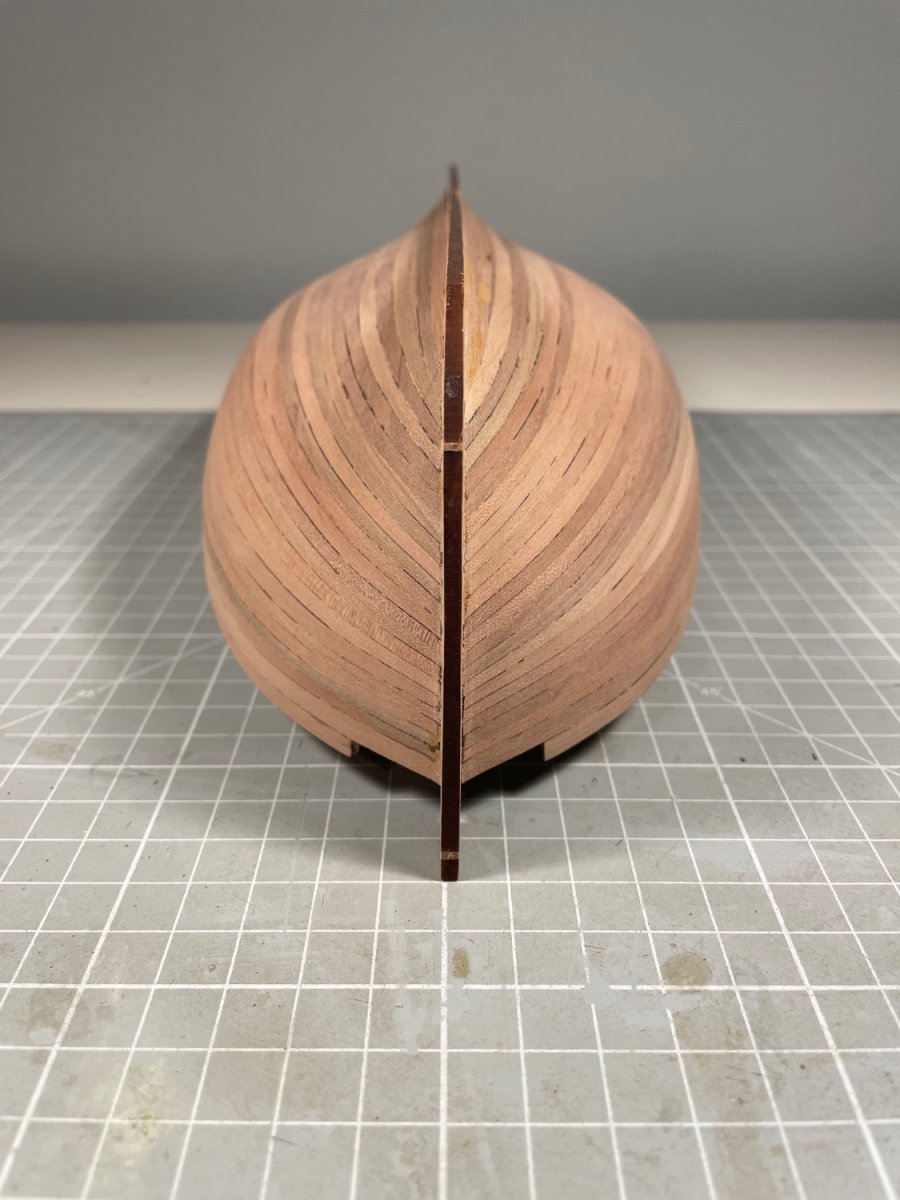
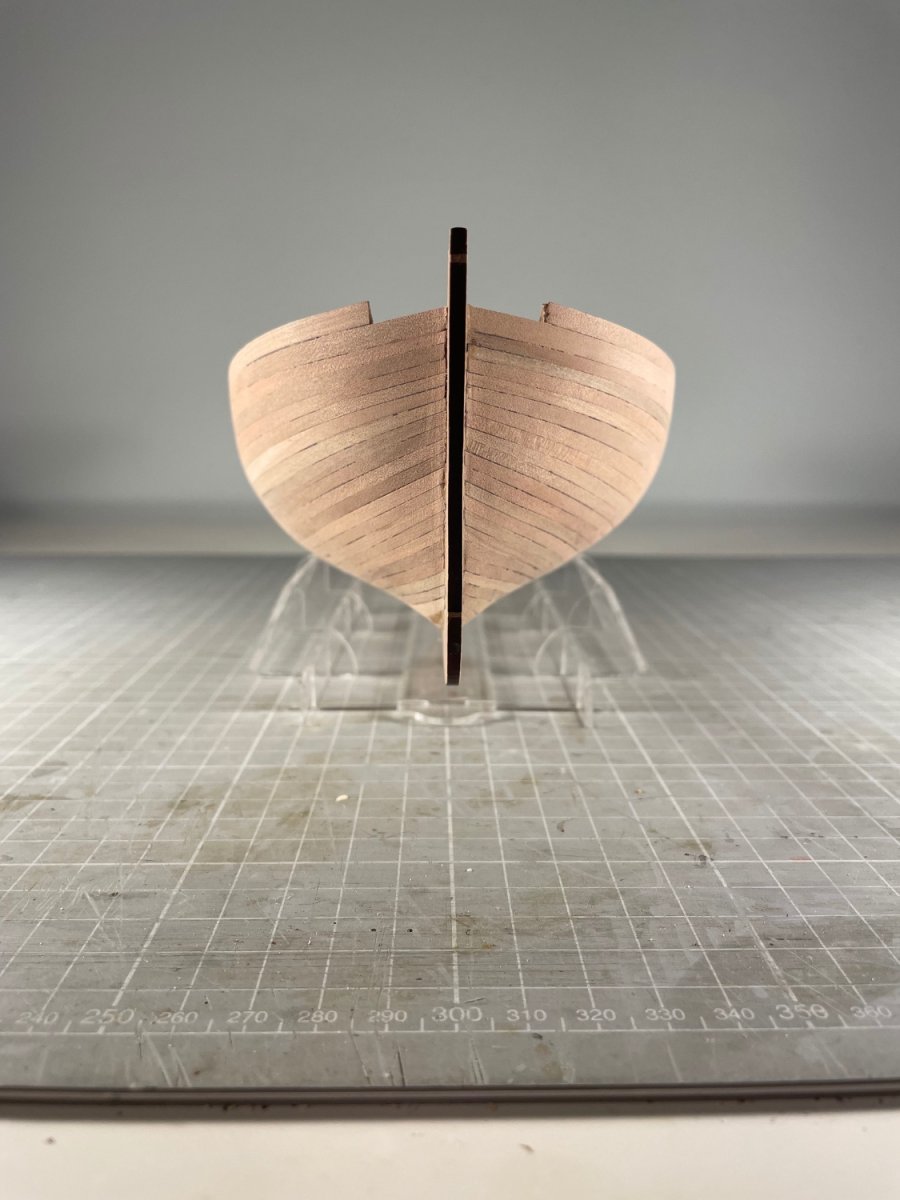
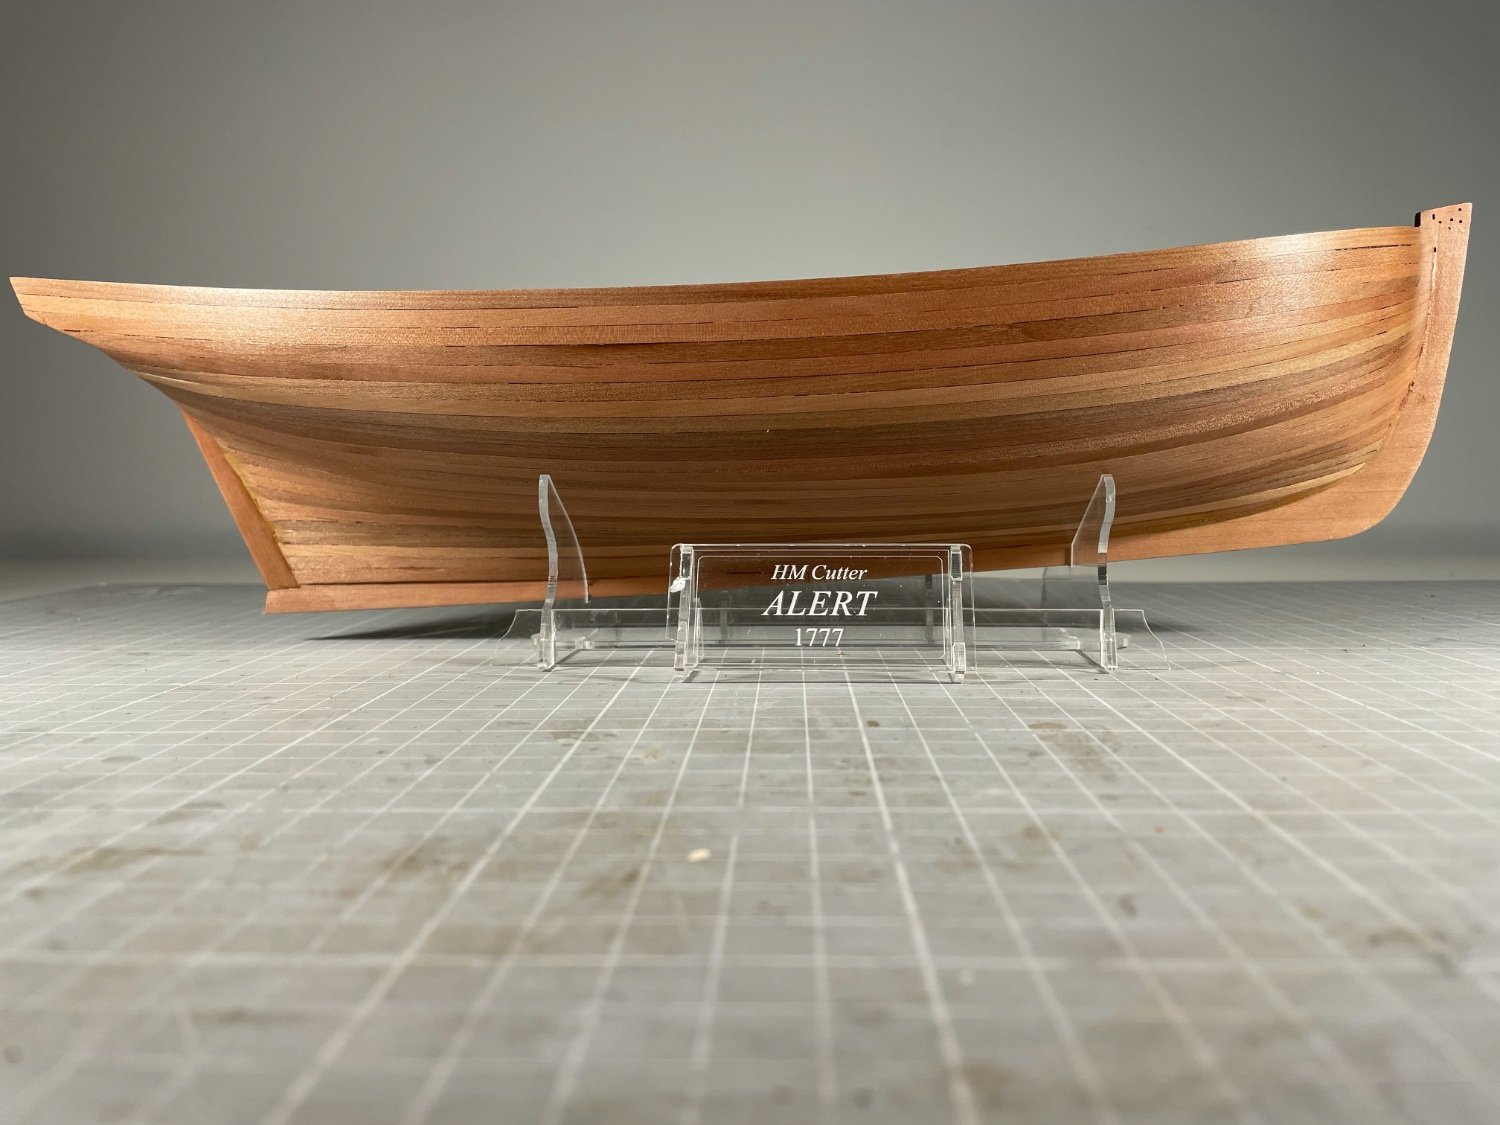
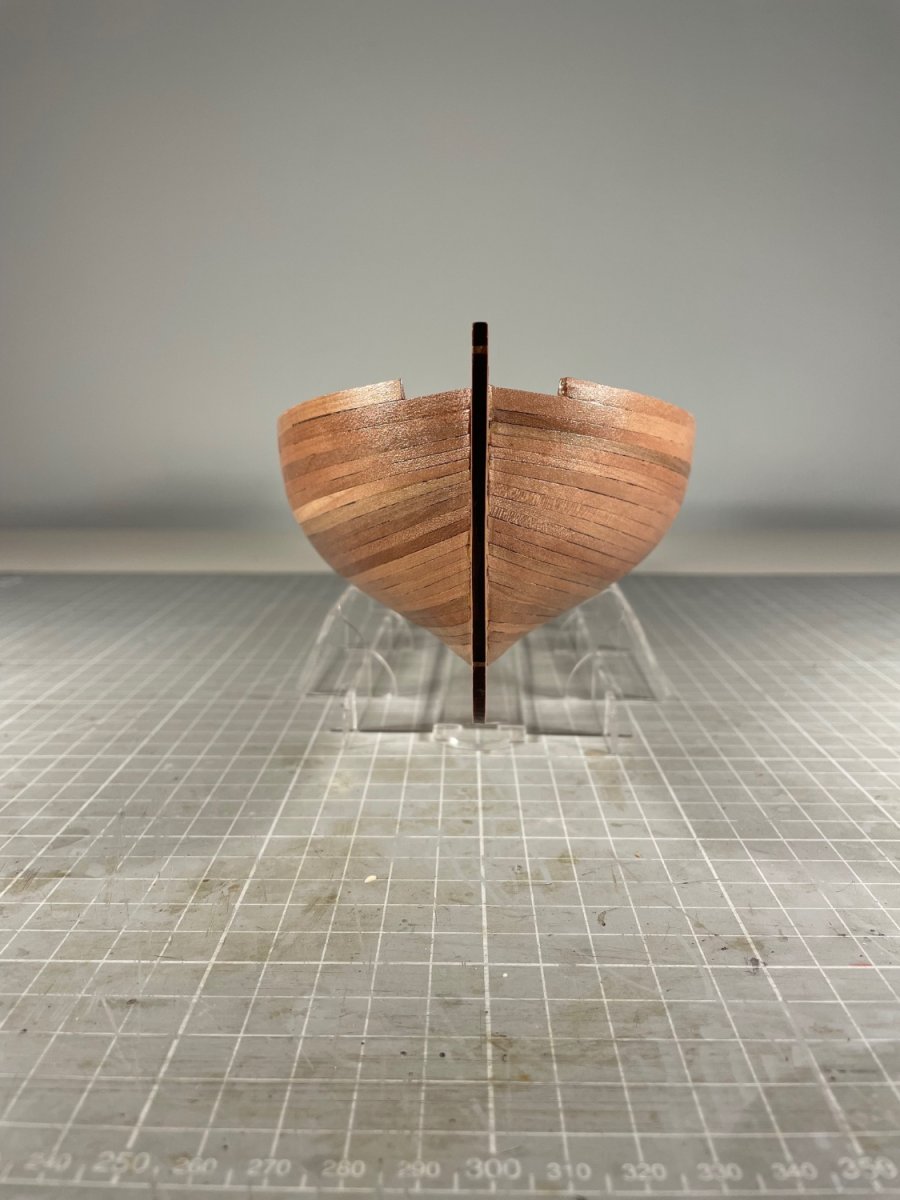
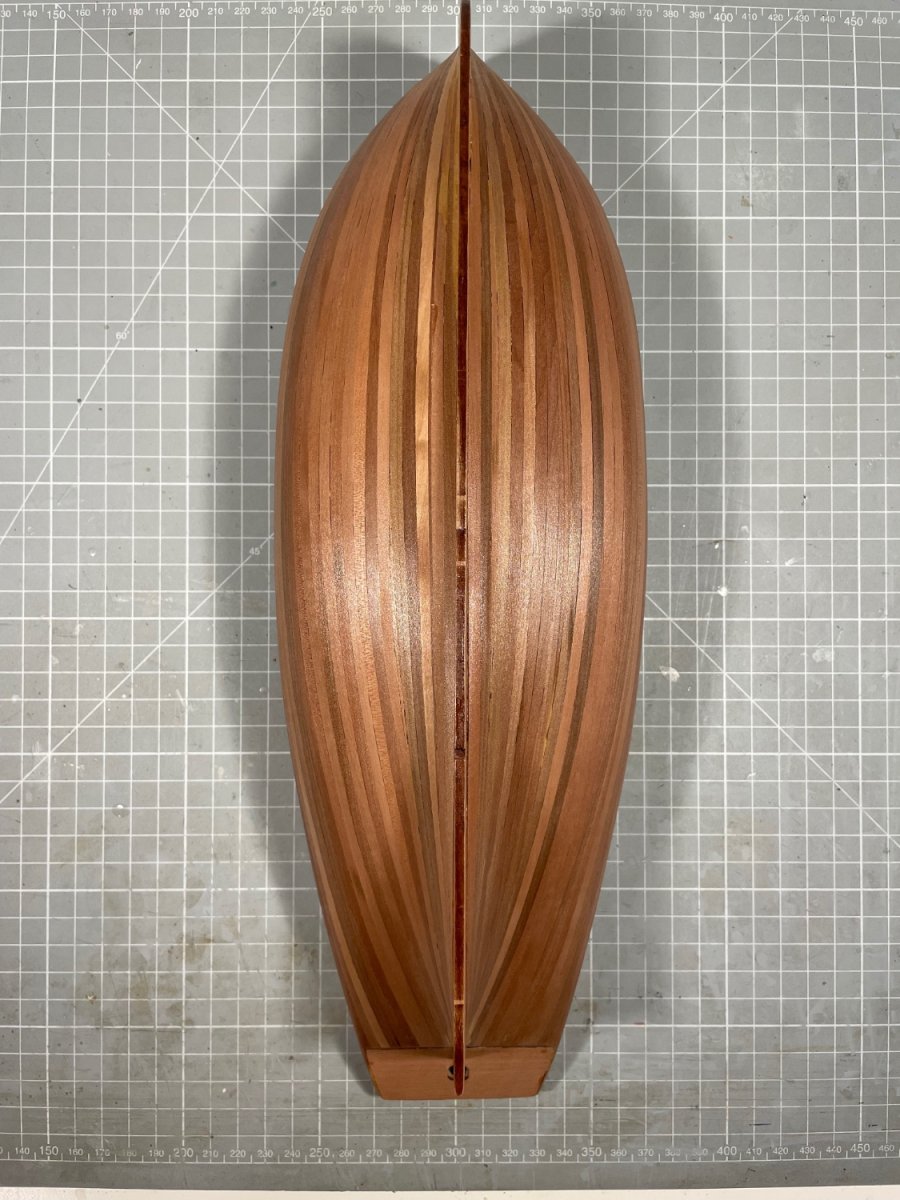
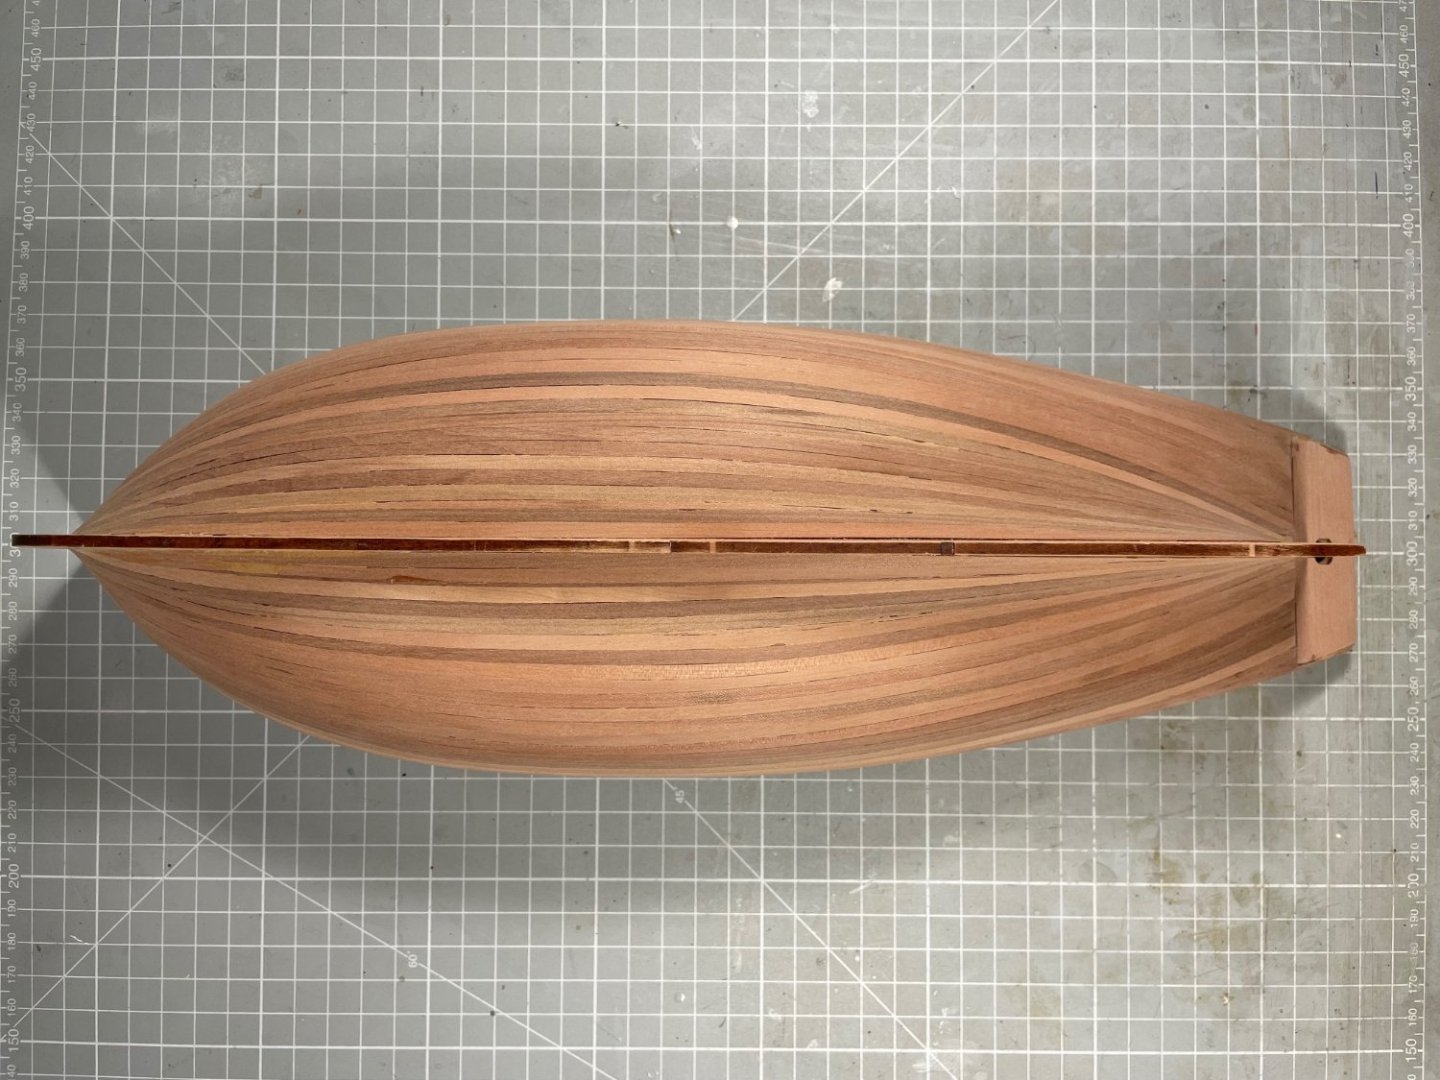
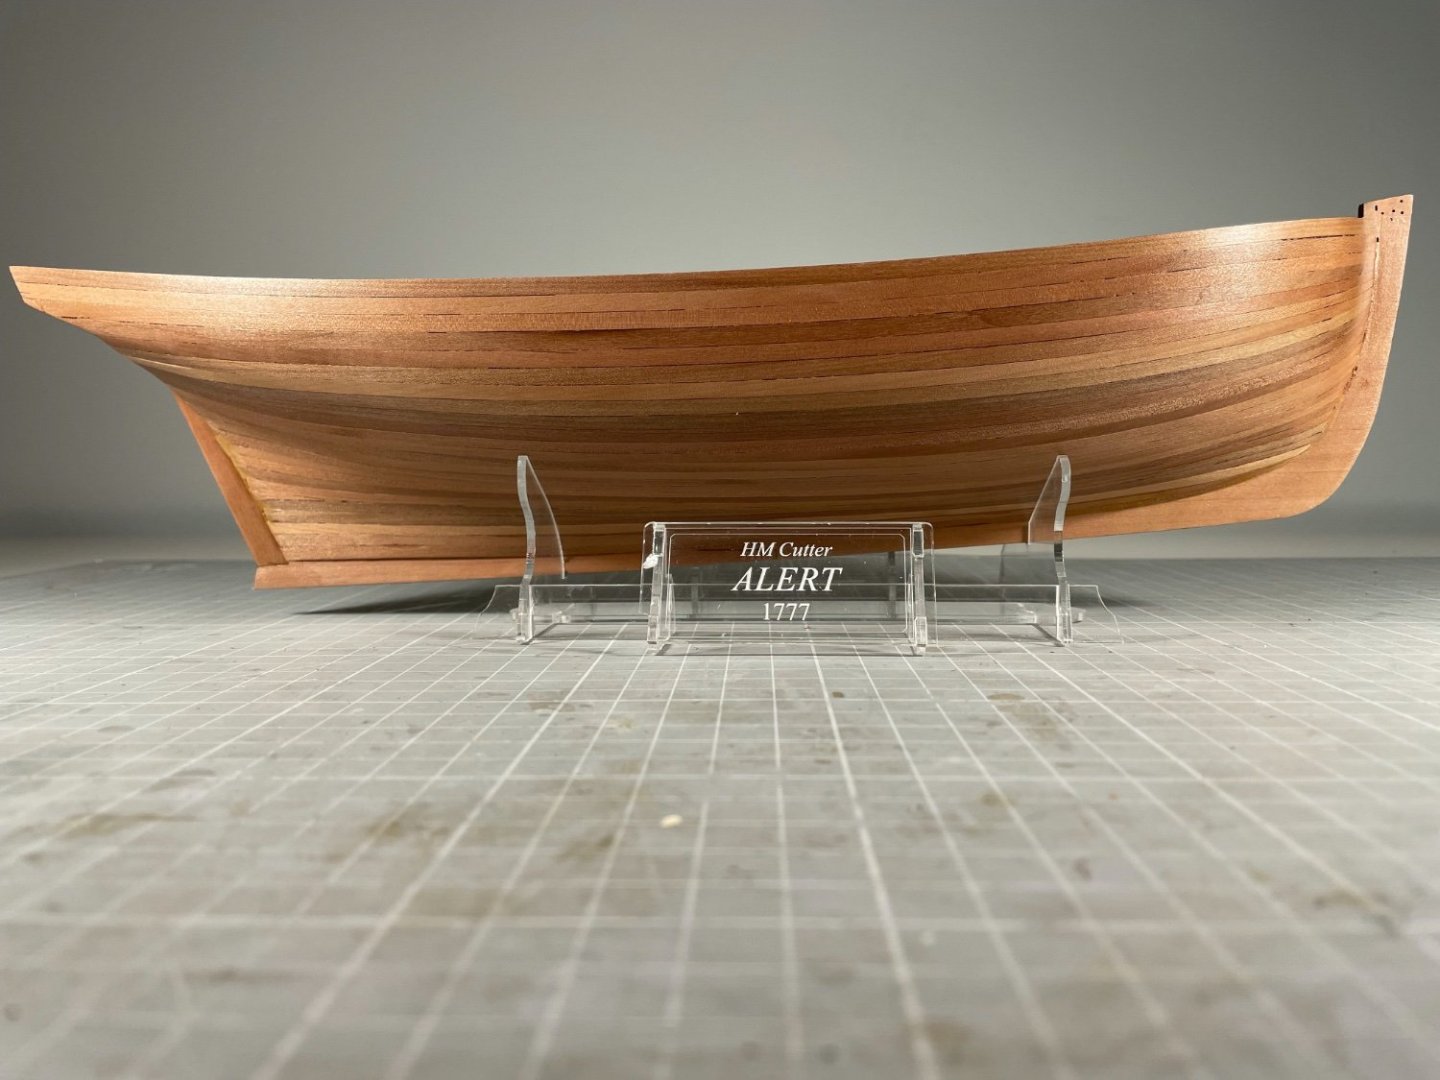
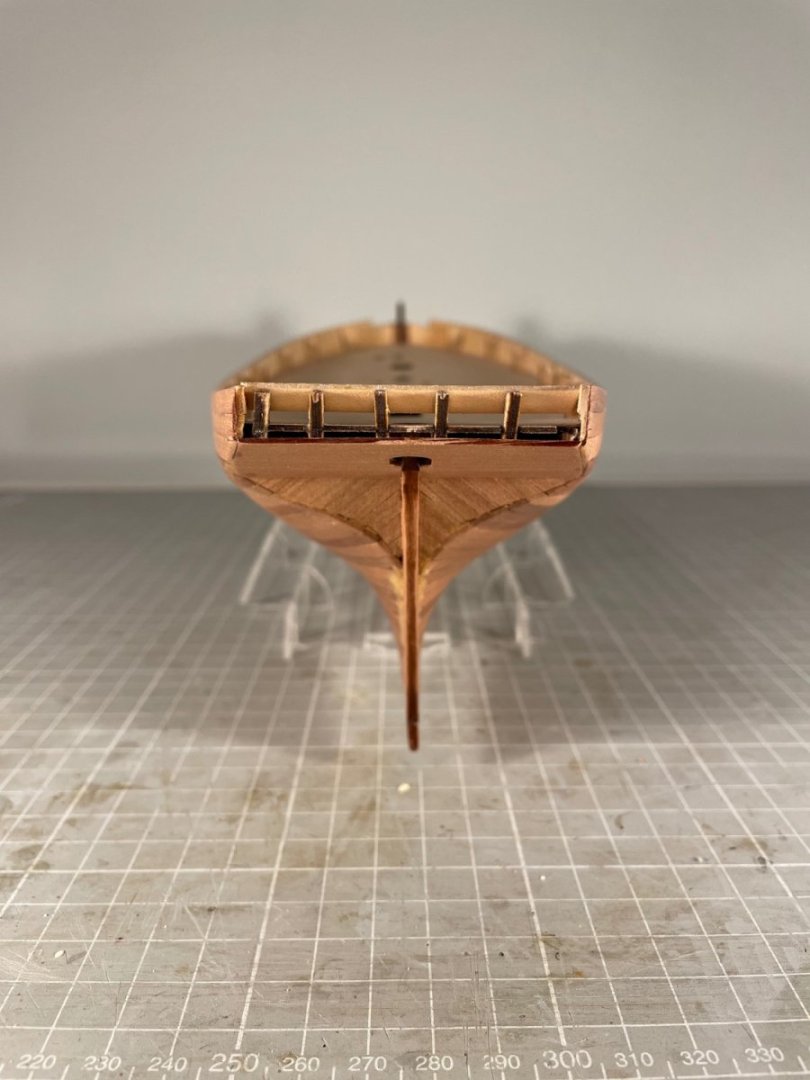
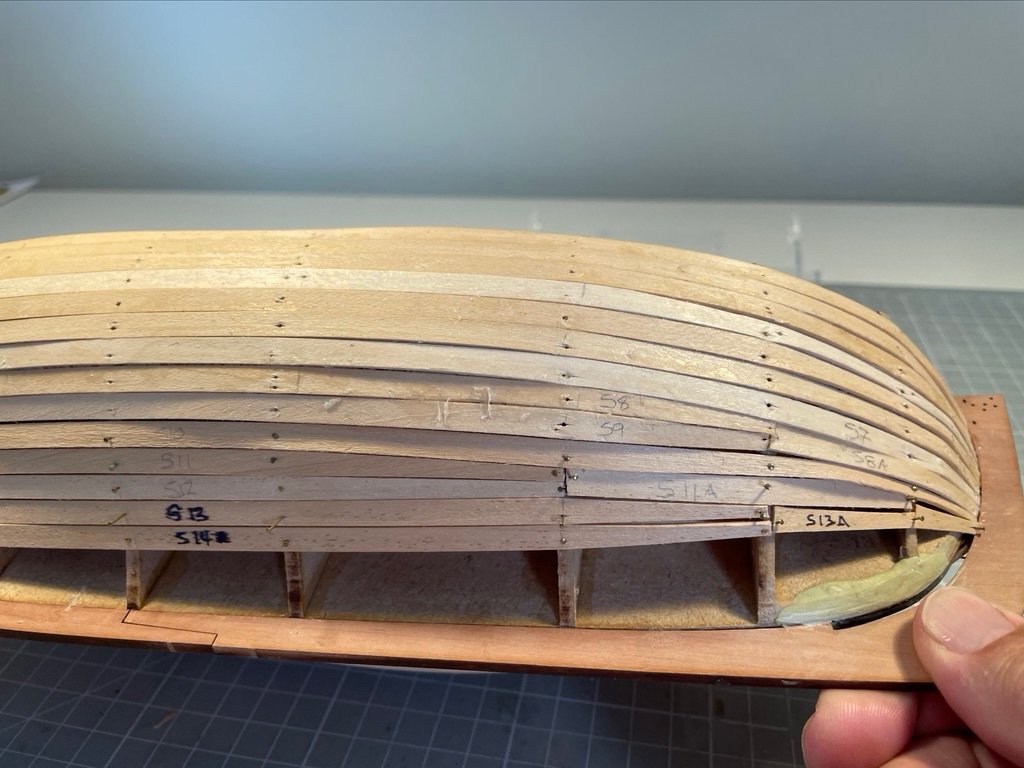
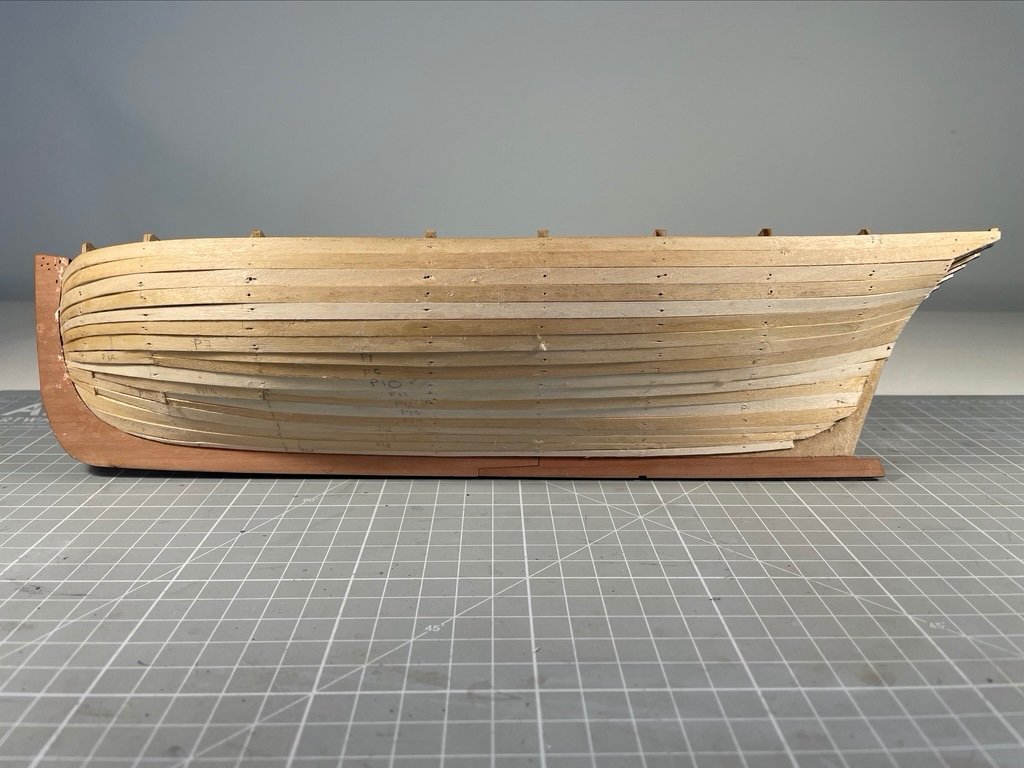
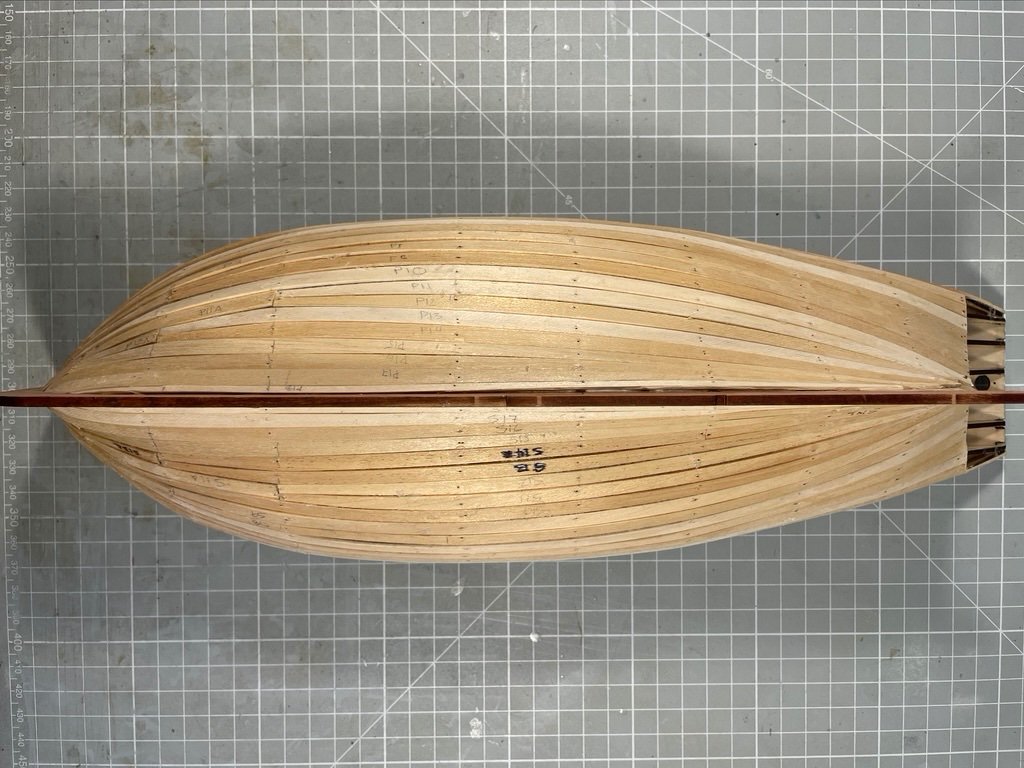
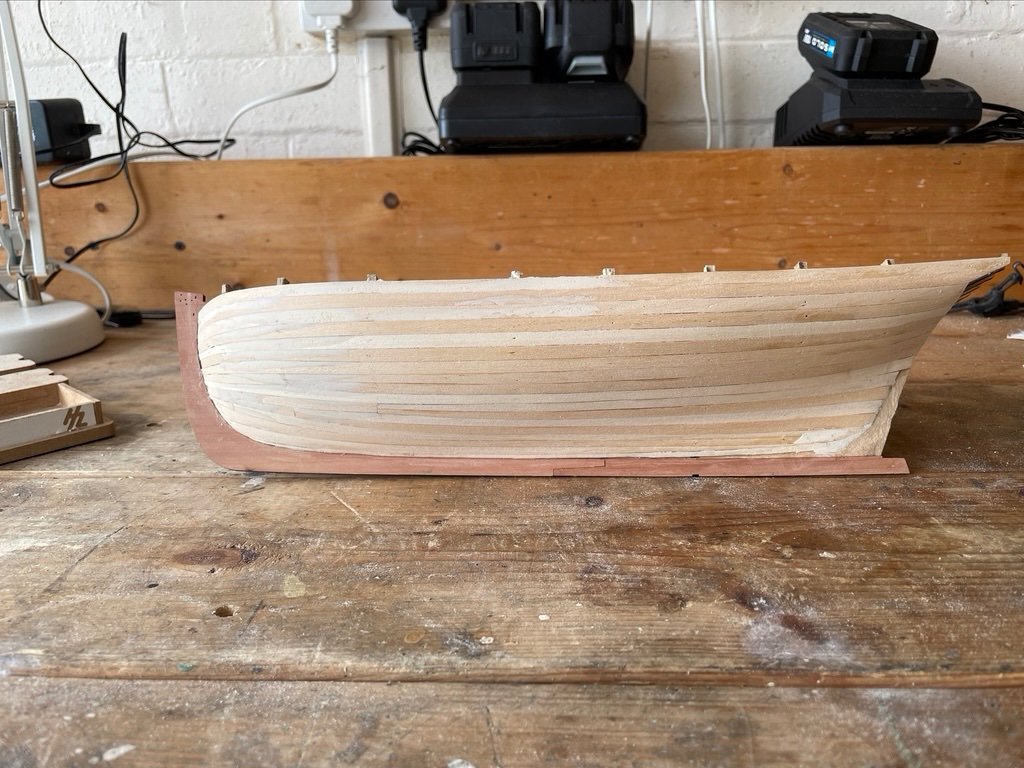
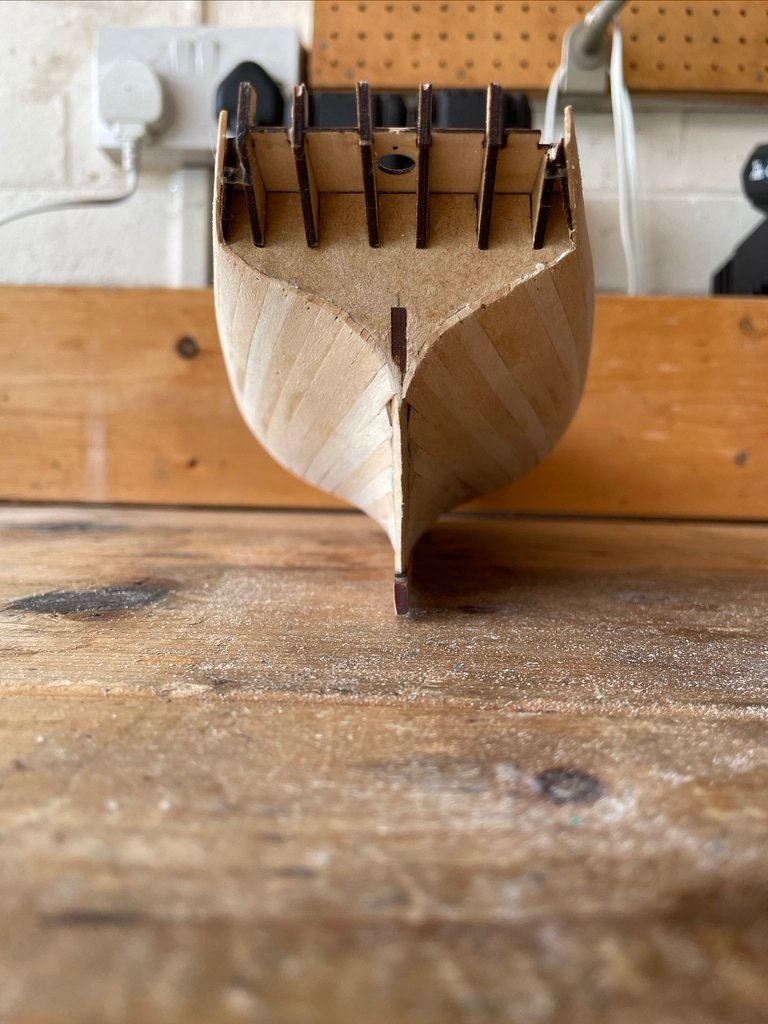
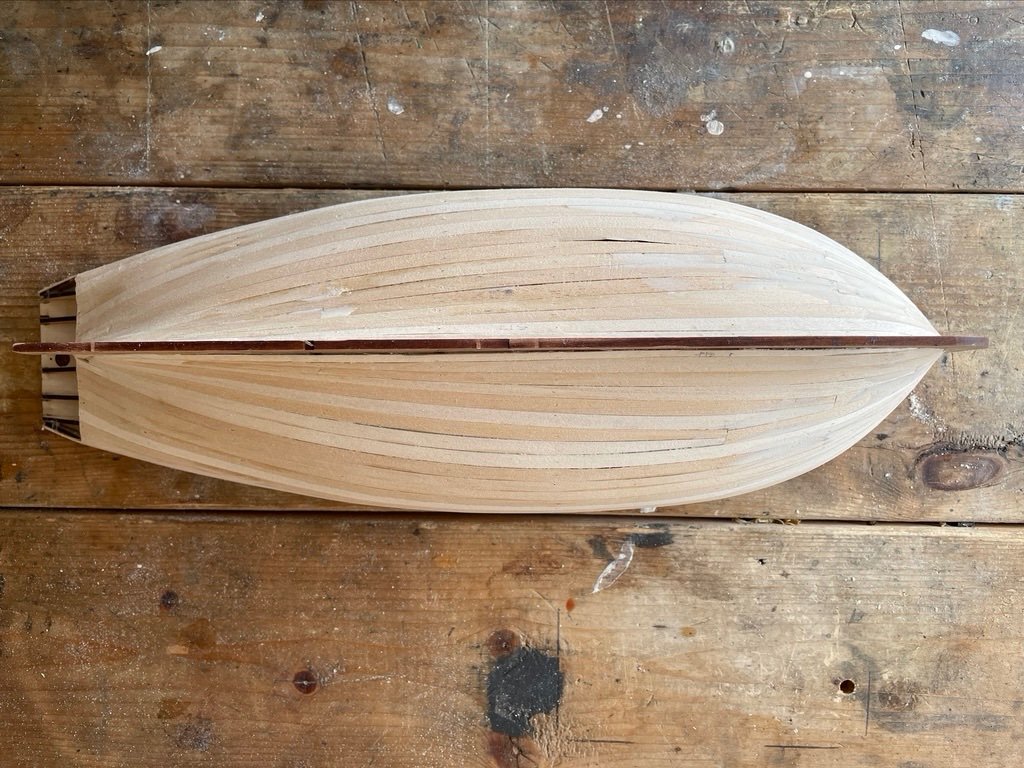
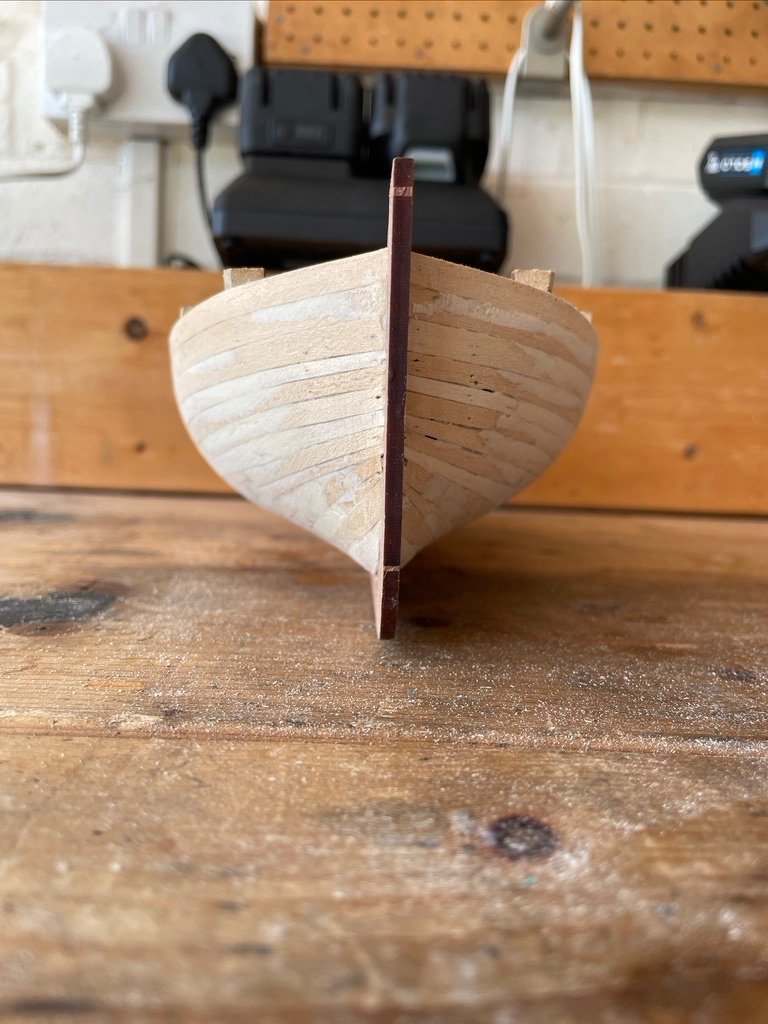
It's been a while. But I have some progress to share after a fantastic late summer of travel and cycling (sometimes combined!) Anyway, I've finished the second planking (give or take a rub-down with some 320 grit, and another coat of varnish). I set myself the challenge of getting a respectable result with no soaking/heating of the pear strip wood, or use of pins. The test being: would I be will just to varnish the hull, and not paint most of it (though I do plan to paint her)? I followed the usual advice and divided the hull into three zones - two initially and then a third - built myself a spreadsheet and shaped the planks as I went. I find shaping the planks with a knife and a ruler very hit and miss so instead marked up the cut lines and then held them in a plank clamp with the cut lines aligned with the tops of the jaws. I then simply planed off the waste - typically at the forward end and at the aft. I could clamp 6 strips together so shaping was relatively quick (once I got the hang of it). I chamfered each plank on one edge by mounting the strip in the clamp and then inclining the plane. Annoyingly I forgot to do this bit for the first few planks. Holding the planks in place while the CA set was 80% trivial, 10% challenging and 10% near impossible. Got better at it but future projects will require a bit of thought. For sanding the hull, I started with 80 grit paper using a set of Occre sanders. Slow process. I happened to be in B&Q and saw they had Black and Decker "Mouse" palm sanders for £11!! I recalled @James H saying that @chris watton had talked him into buying a palm sander, so thought I could risk £11 on (yet another) power tool. It was transformational! Particualrly after I had finished the first cut and then applied a small amount of acrylic filler - which, as I have said before, sets rock hard. After that second sanding at 80, I went up through the girts to 240 just using the Occre tools. And here she is after that sanding I struggled to get the planks to fit well at the prow and the stern. Almost inevitably getting a good fit at the prow and then cutting them short at the stern. If you zoom in on the last pic, above, there's quite a lot of filler on show. A rather greater challenge arose with the top planks at the stern. They are essentially unsupported and one of them was not well attached to the first planking beneath. Some overzealous (hand) sanding knocked it loose. A little very thin CA reattached it, and I then put in a bracing strut, visible athwartships at the stern here, that I will remove shortly. While sanding I noticed the familiar protruding-plank-that-doesn't-sand-down. That is, a plank not attached to the 1st planking beneath it. Fortunately I noticed this before I sanded it through and could anchor it using the very thin CA again. Turns out that there was a handful of such defects, all on the port side. Perhaps I held the planks differently on port and starboard sides while gluing them And so here she is with one coat of varnish applied And so would I be willing to display this varnished and unpainted? No, not quite. There are two flaws that annoy me but I could live with : first, and most annoyingly , not bevelling some of the upper planks, resulted in some noticeable gaps between planks (filled with CA and so not now fillable) and second, the lay of some of the planks is not quite as natural as would be desired. But the real killer is that I needed to colour the filler and made the rookie error of matching that colour to dry, unvarnished planks. As the aft view shows, that's not great. But when all is said and done, I'm pleased with the overall job.


-
By an extraordinary coincidence, I finished the second planking on Alert today. So I can say with fresh expeience under my belt - well done. That's a neat job!
-
I will follow with interest, Andrew. We are both doing VM cutters and both intending to add sails! Enjoy your holiday. Mike
-
Mike_H reacted to a post in a topic:
HM Cutter Trial 1790 by AJohnson - Vanguard Models - 1:64th
-
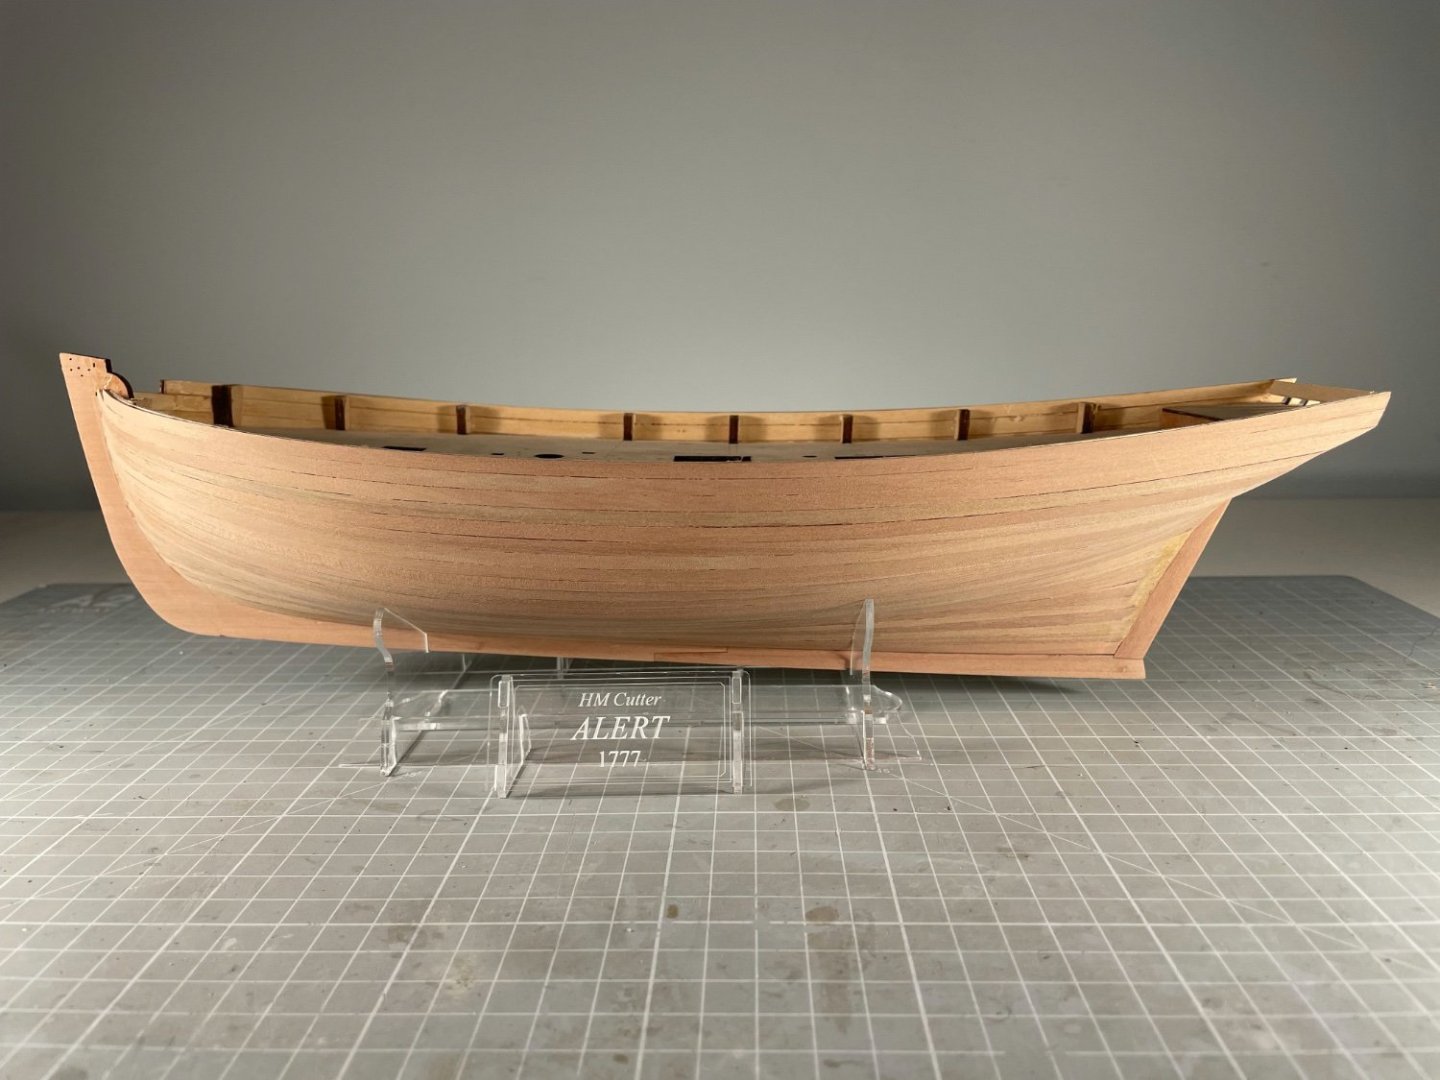
I undertook the 1st planking with medium care. Planks were soaked in water, for 4+ hours, roughly trimmed and then pinned in place while wet. After drying overnight they were removed and then glued and pinned in place. I typically did 3 or 4 planks to starboard and to port, at a sitting The end result, prior to filling and sanding, was a little rough, but well-within acceptable bounds, I thought. I had only intended to use a little filler, but the nozzle on the tube was blocked, so I slit it open and then had mountains to use or throw away. I've lived in Yorkshire too long to throw anything away, so I thought: more must be better. It's not! Acrylic filler sets rock hard, so sanding it down is a pain. It takes a long time and it's easy to sand off timber and leave filler behind. So it was out to the garage where there's an abundance of power tools. Just about avoided sanding off too much timber - but it's close!


-
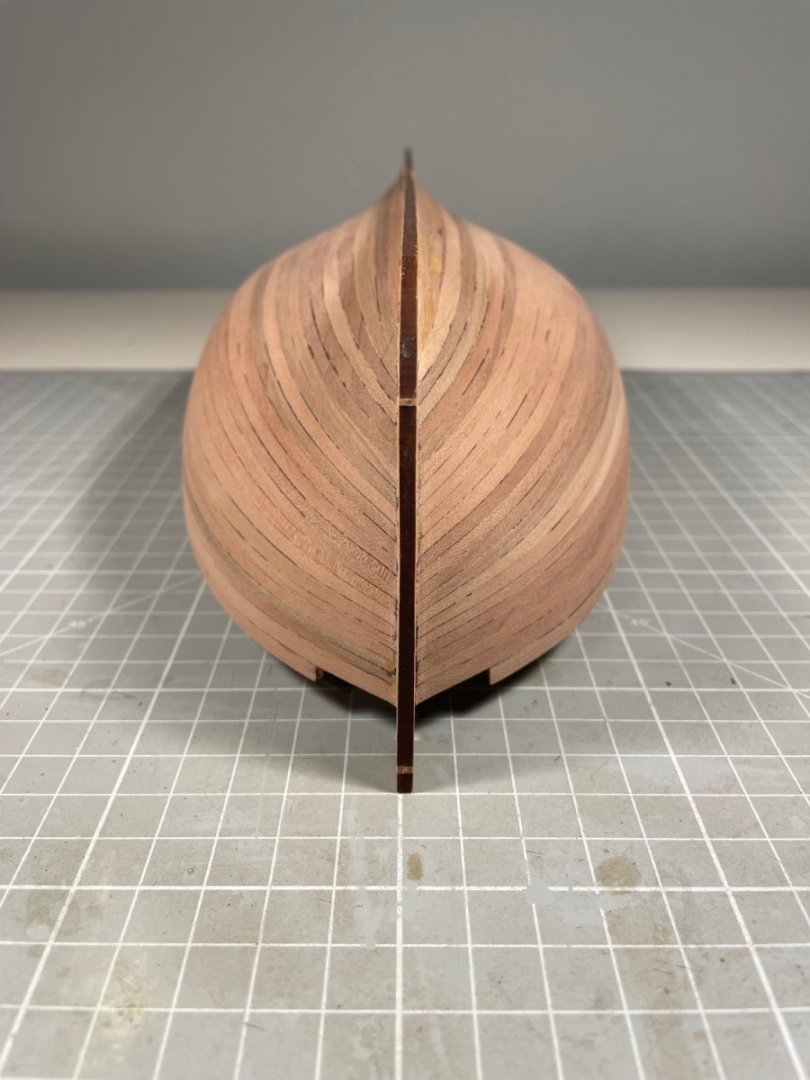
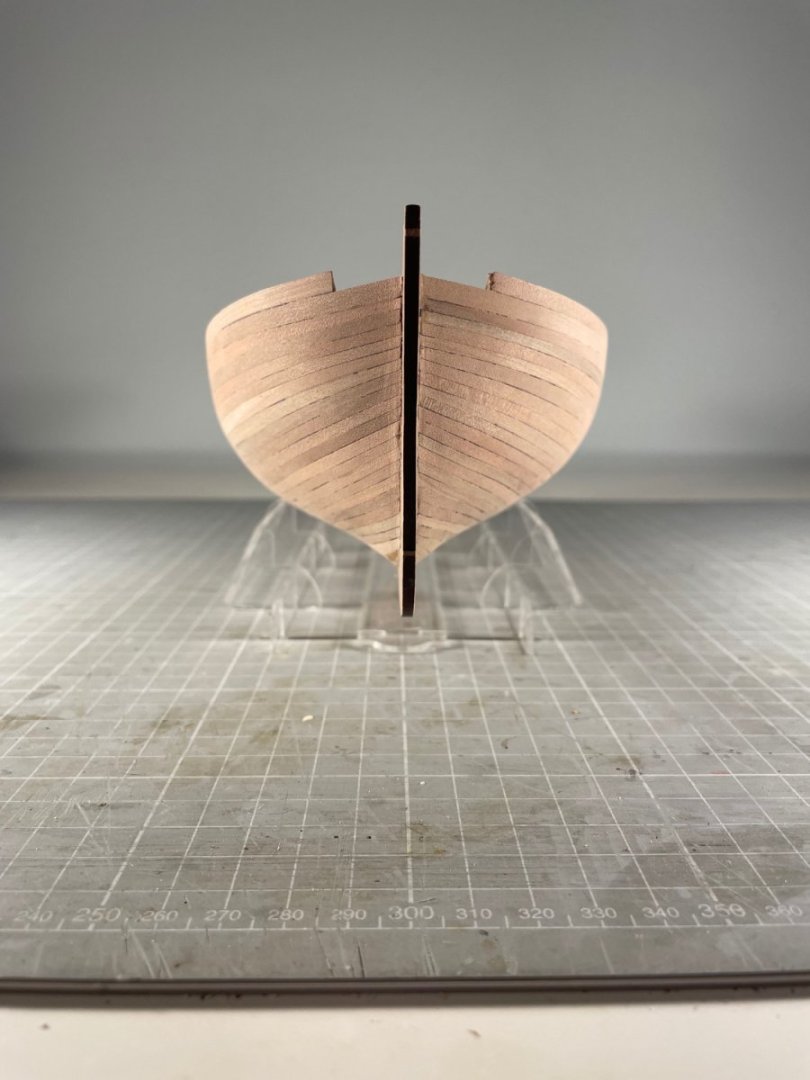
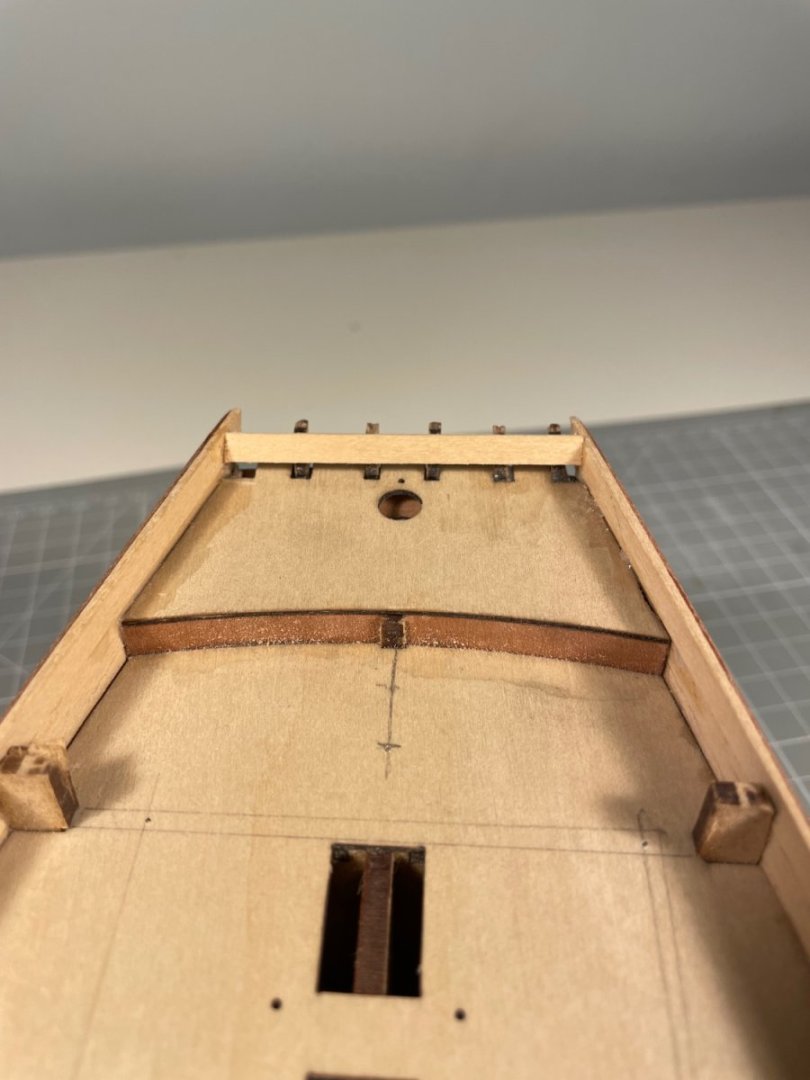
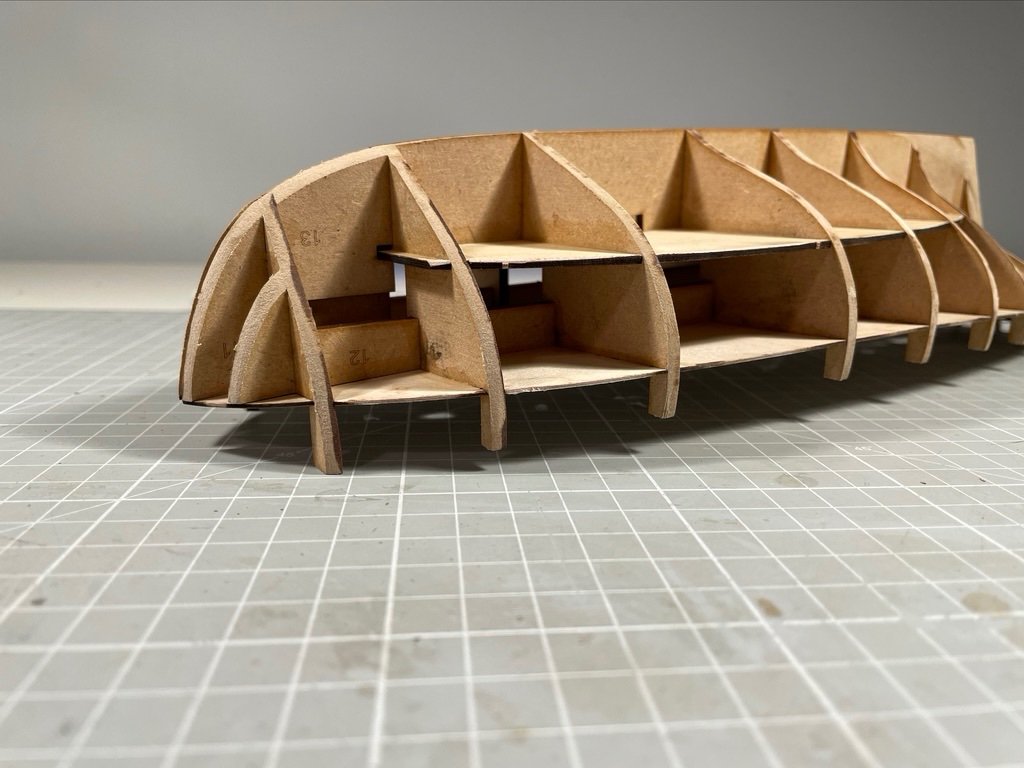
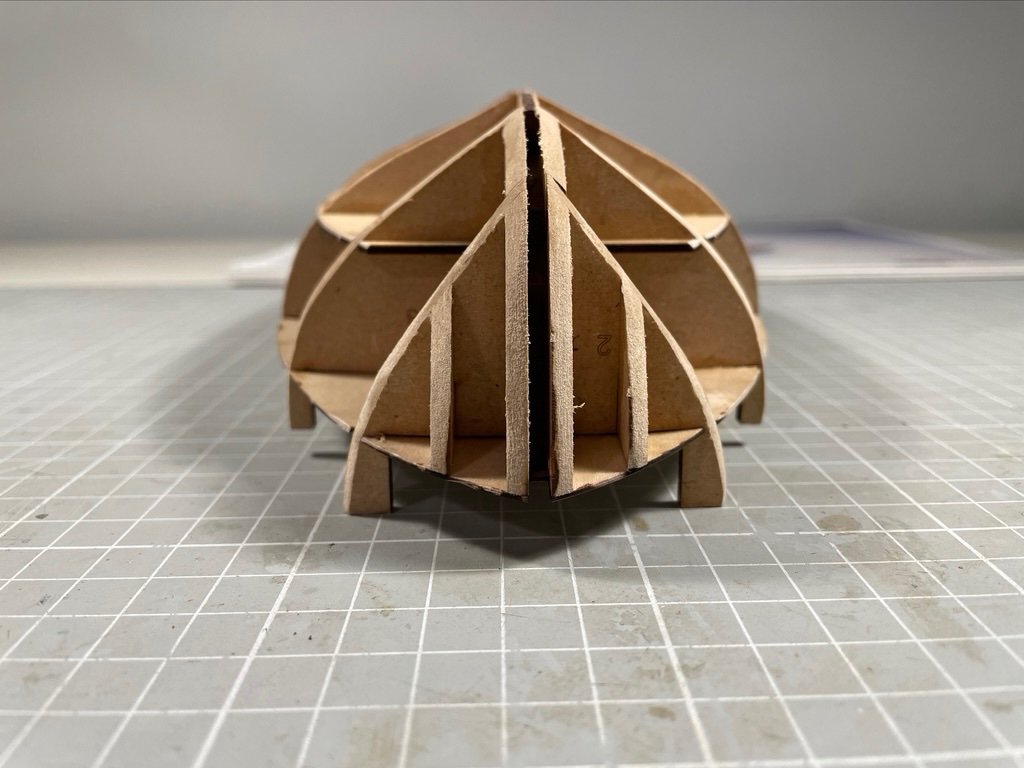
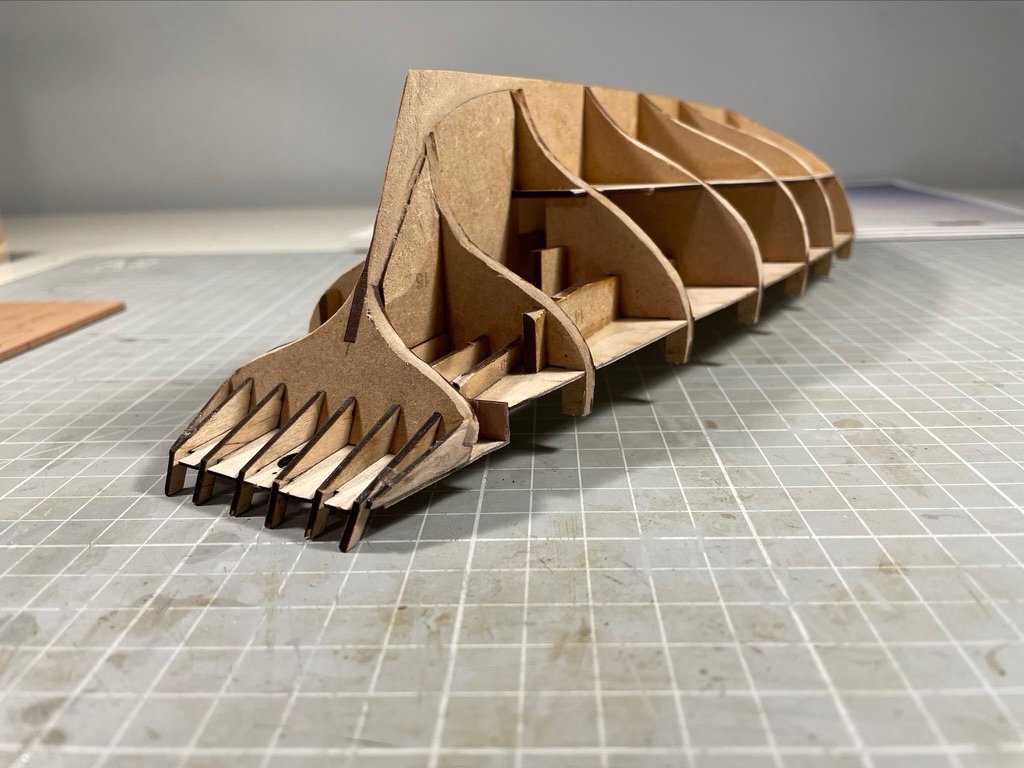
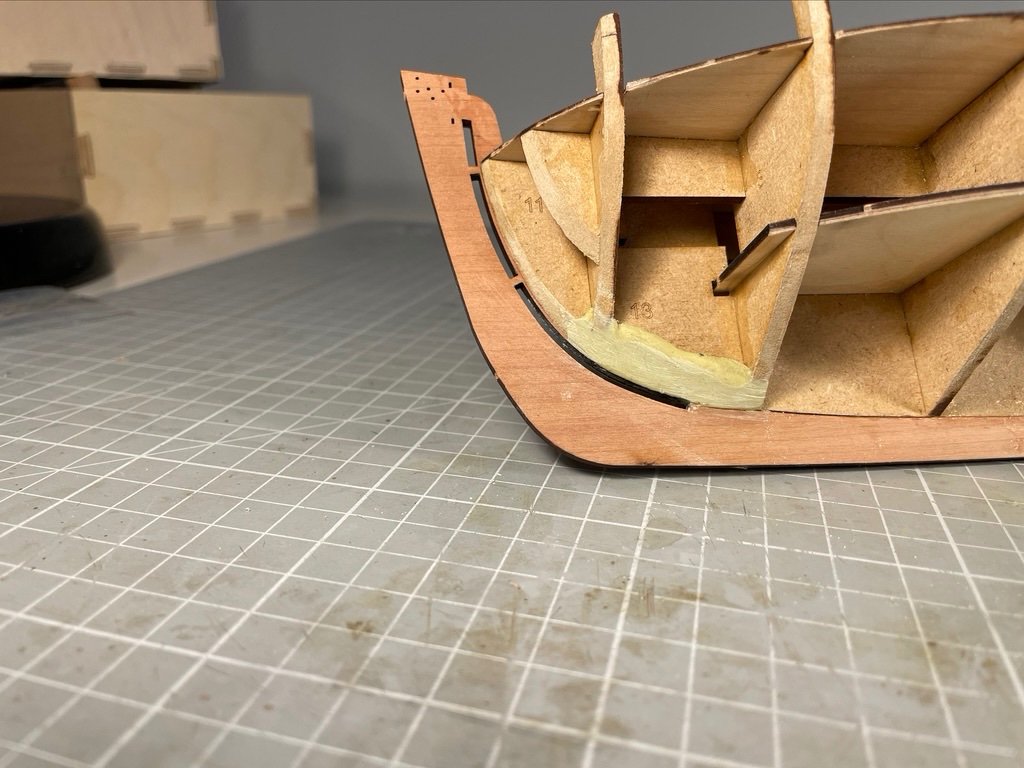
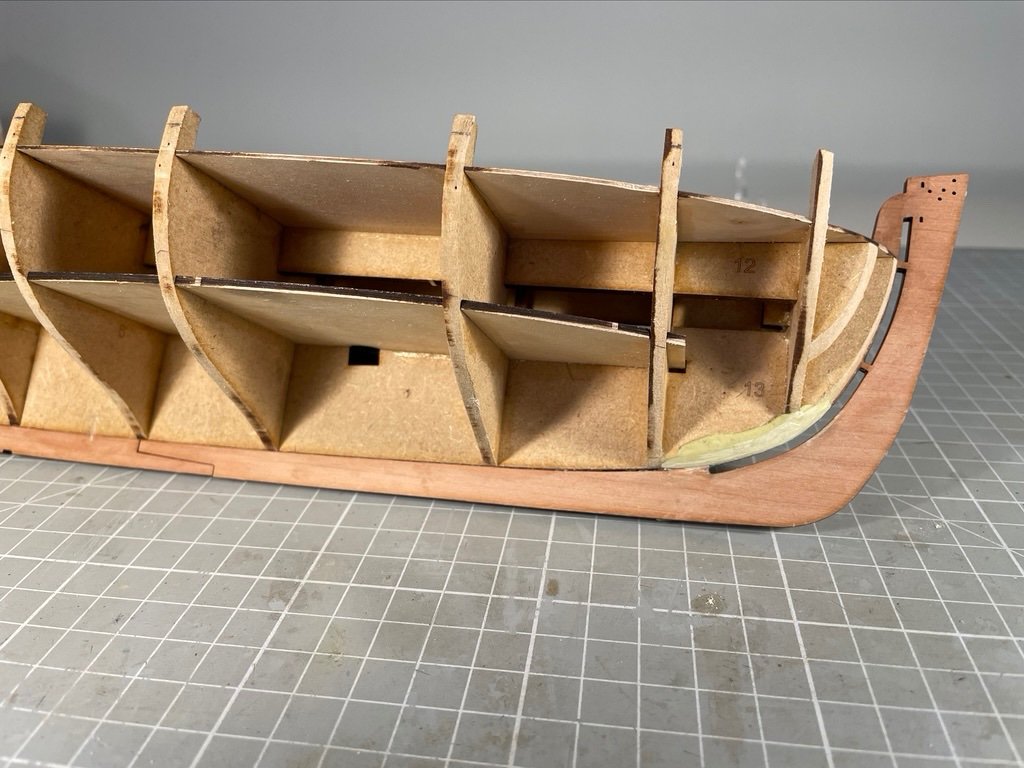
So, to progress. High-quality kit design and documentation mean that the last couple of weeks have been pretty smooth sailing. The odd bit of sunshine means that modelling has not been top priority, and my capacity to rush at things means there have been one or two minor issues My warm feelings towards MDF bulkheads have grown: sanding them down takes minutes, not hours and simple hand tools are more than sufficient. Here are the end results However, I should have dry-fitted the keelson before ploughing on, and then I would have seen where the bearding line was with a little more precision. Never mind, a small amount of Milliput meant that I could put back what over-zealous sanding had removed. So ready for first planking.
-
Thanks Andrew. I just saw your Trial log when I opened MSW - will go back and have a look when I've finished posting here.