Jolly Jo
-
Posts
84 -
Joined
-
Last visited
Content Type
Profiles
Forums
Gallery
Events
Everything posted by Jolly Jo
-
 Nope, indeed I didn't. Thanks a lot sir!
 -
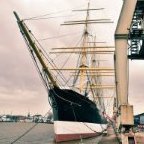
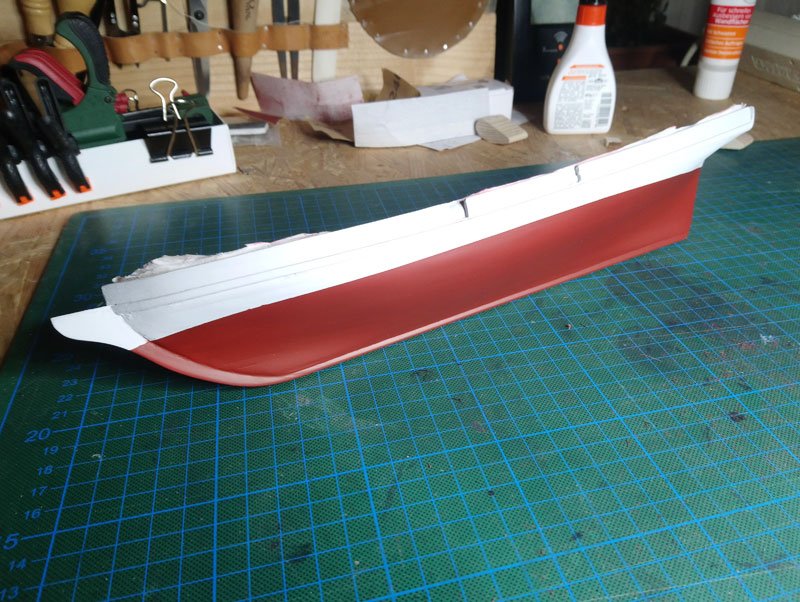
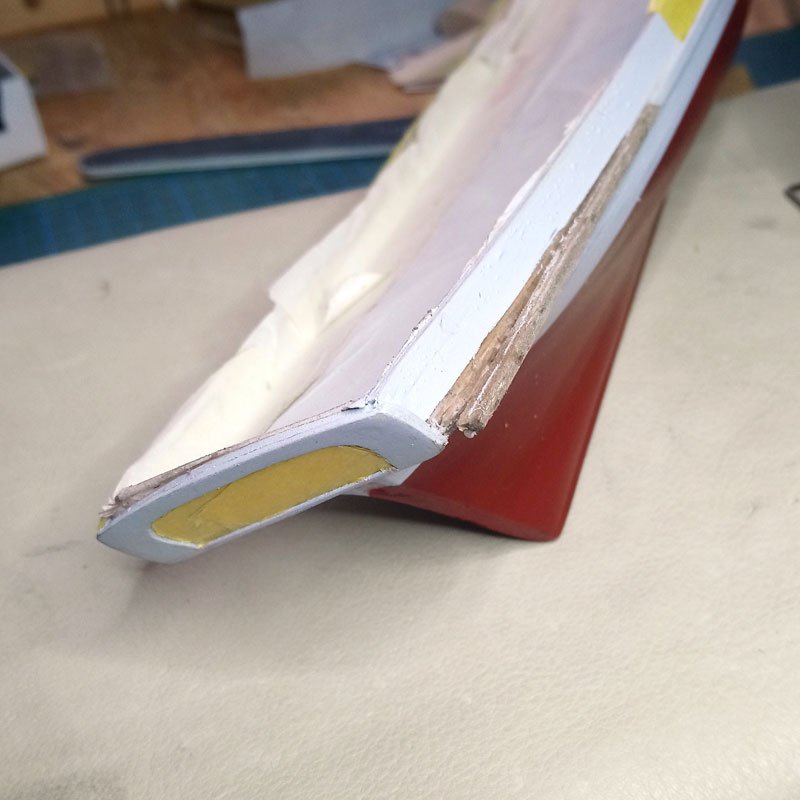
The PAINt job really is a bottleneck as I'm afraid to screw up so I take my time. After trial and error the first color came out well *phew That's when I realized the wale at the starboard side sat to high and wasn't flush with the lower end of the transom. I have no idea how this has evaded me so long or didn't I care? Anyway, last chance for a correction before applying the next color. Therefore I had to unglue the piece. First I slightly sanded the surface and then I applied water to scratch off the acrylic primer. I kept on watering the wale and its adjacent sides with a cotton swab for about half an hour, then applied heat with a heat gun. Moving the gun steadily along the wale, always applying water in between turns, it came off nicely. I then stripped away the layer of walnut planking where the wale had to sit and covered the empty space with scarp walnut I kept from tapering the planks. After spraying on new primer she is ready for the black layer.
-
At least it sounds like a happy ending. It is quite hard to step away when one is determined to finish something or make progress of some kind. Especially getting one's mind off the subject afterwards... Have a great new day! I'm looking forward to seeing how you progress.
-
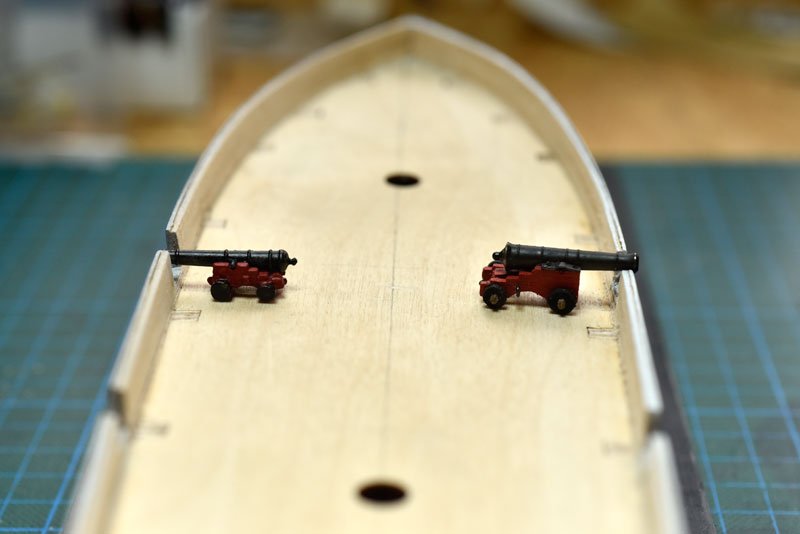
I would tend to run in as well. This way the proportions of the very the short gun and the carriage pushed together look best (at least to me). Run out shows a long empty carriage and an even shorter carronade as the barrel is hidden by the gun port. For all three positions picture 3662a looks like the best option. Anyway, very niceley done done so far!
- 332 replies
-
- 2
-

-
- Harpy
- Vanguard Models
- (and 1 more)
-
Keeping my fingers crossed. She looks very nice so far!
-
Yes sir, I will. The kit includes 4 swivel guns and I will mount one pair fore and aft.
-
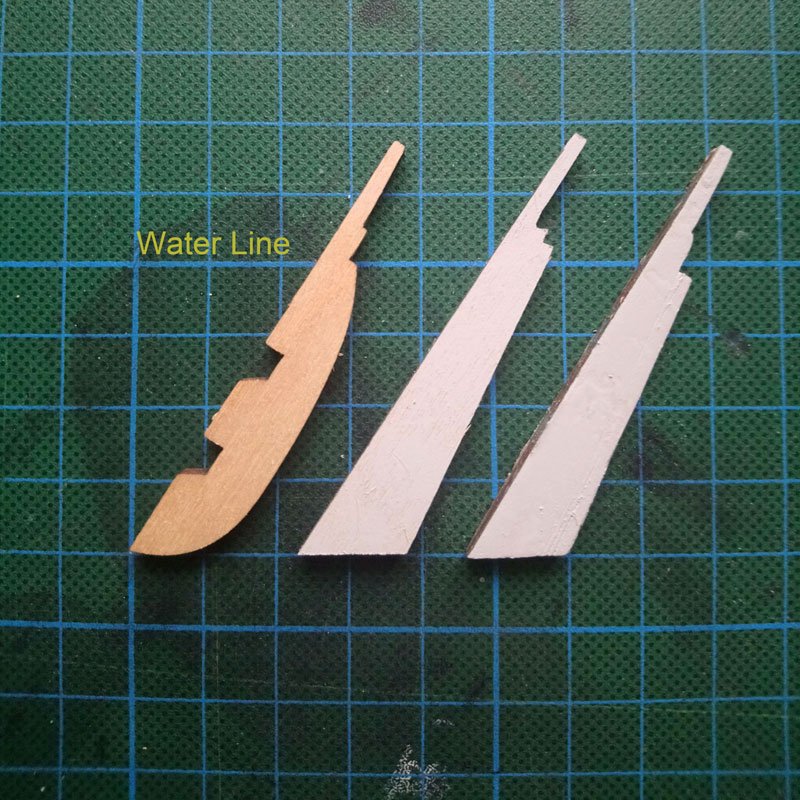
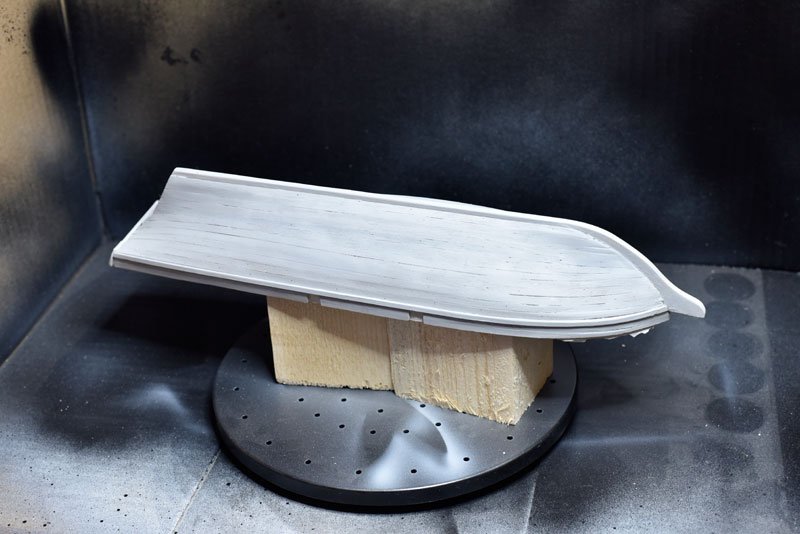
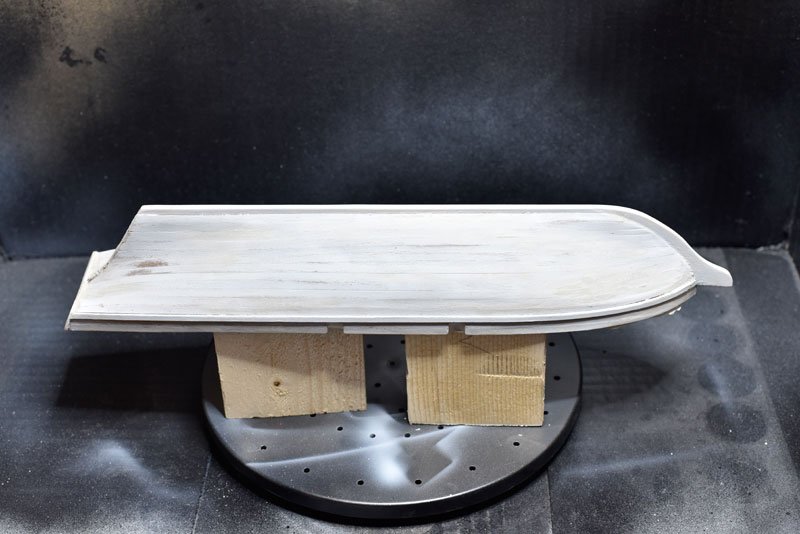
Hello fellow modelers, I had to pause posting as I messed up big time coloring the hull. Coating it in primer was relatively easy but putting on color not so much, especially as I had very little experience with an airbrush. The first paint jobs looked quite uneven and I didn't get the waterline correctly either. Meanwhile I received Chapman's “The Baltimore Clipper” and Marquardt's “The Global Schooner”, so I decided to take a step back, study the books and reconsider what I've done so far and how to proceed. First I had to figure out what to make of the model as it is not based on a particular ship. What could it have been, what makes sense and what doesn't. The way she is set up she lacks in firepower to be a commissioned vessel or privateer. To see if it would make sense to increase armament I built a canon labeled period correct 4 pounder around 1790 in 1:64 scale. Even though smaller in scale the 4 pounder looks too large for the ship and also doesn't clear the gun port. That's when I figured that the deck sits a little too high. I put the sheer strakes flush to the deck as indicated in the manual for the first planking. The cross section, shown for the second planking, indicated a position about 1.5 mm lower than the deck which would have been better. Too late... Therefore fighting Vessel was out of the question as was a slaver of course. The deck plan includes three gratings but she is a bit to lean for just being a merchant. Furthermore one grating has to go anyway as there is no companionway... So, in conclusion, she's a smuggler. Shipping a little less but more valuable cargo, fast, to outrun the coast guard and capable to defend herself if she has to. Maybe I rename her "Shiny Moon" Here's the final paint job for the underwater part. Murphy applied a speck of dust or so, arrgh. I deal with it later when the paint has dried. I also made some rudders to replace the one (on the left) from the kit. I guess I mount the one in the middle.

-
She looks really nice, well done!
-
A real beauty, nicely done, Mark ! 👌 I also love the stand!
-
Yes, I used a piece of wet cloth The filler I was using dries really fast so I had to wipe off the remainders right after filling
-
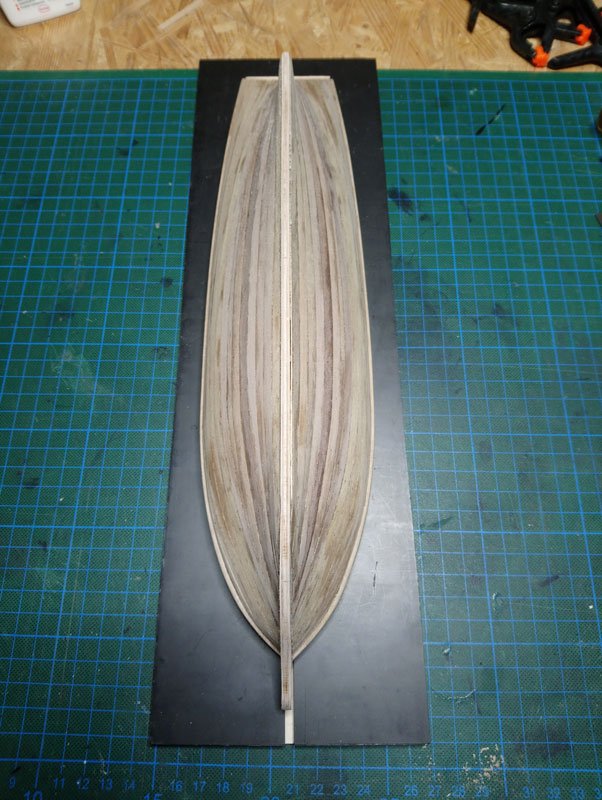
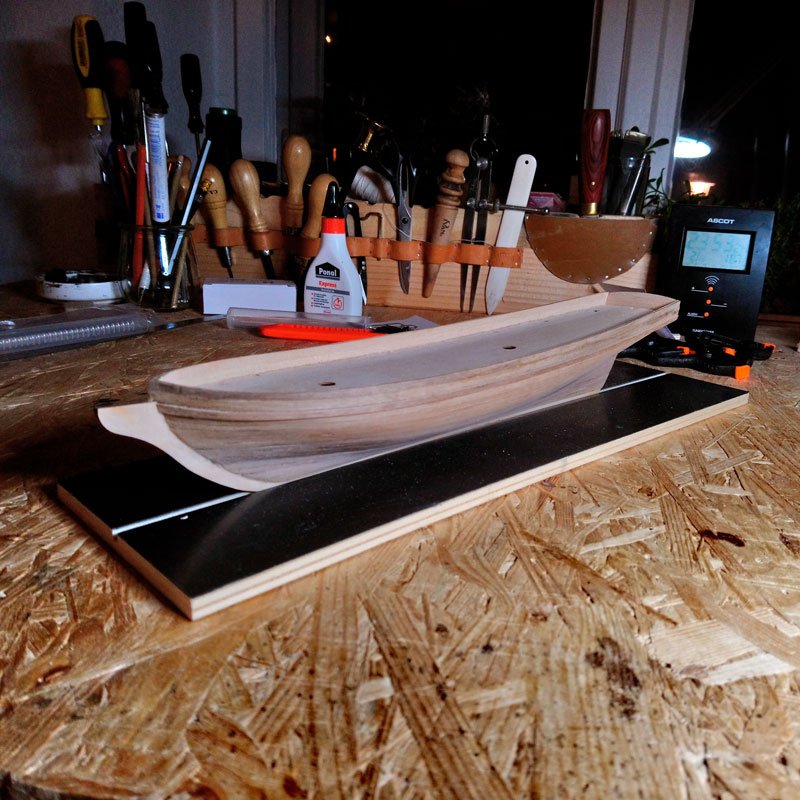
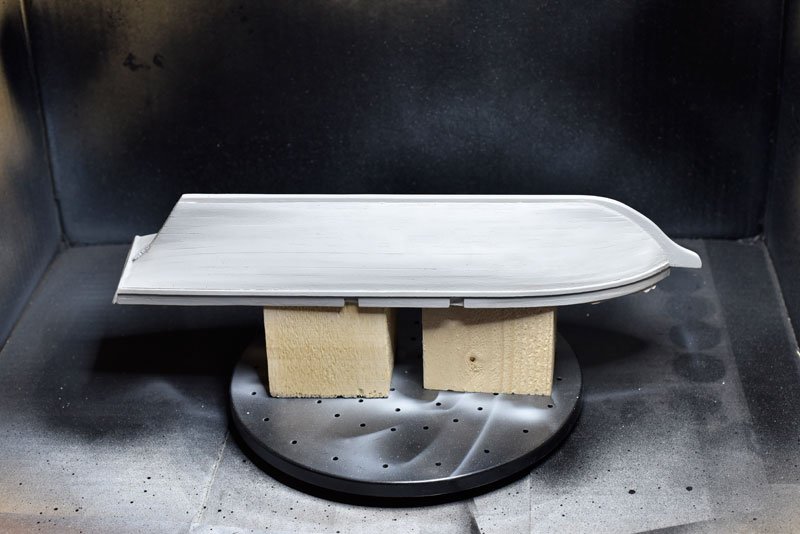
It was time to prepare the hull for painting. The first coat of primer was rather to show areas that need to be mended Oh dear... Closing gaps with wood filler, then sanding That's better
-
That is a very nice looking Boat, congratulations! Good luck with the next one. Mistakes may happen but it is important to have endurance
-
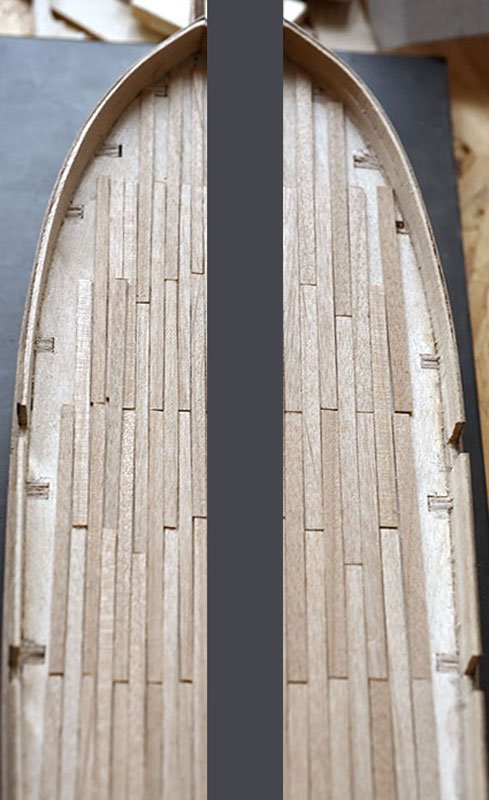
I thought about the width of the deck planks again. As 7" scaled down to 1:57 would be very close to 3mm I decided to look for 3mm stripes. The company I usually buy my stuff from sells batches of 10 but they are just 100mm long, so for 70 mm planks I would waste 30mm each and I also need to buy quite a lot. In consequence I build a jig to thin out the planks I had already cut before. It's made from spruce with a 3mm wide bar of oak as straight edge. The pins hold the plank in place and can stay when sliding in a new plank. After some cutting I loosely laid out both version of the planks for comparison and I think the thinner ones look just right.
-
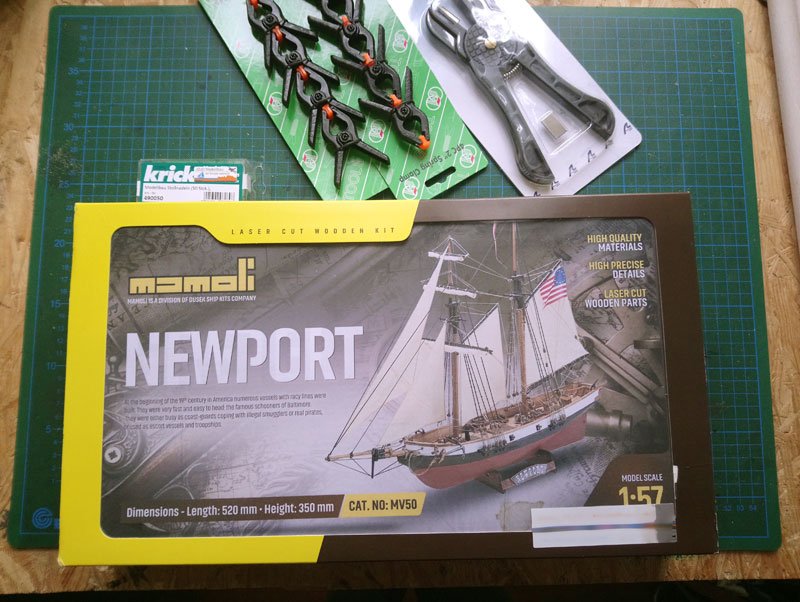
I am waiting impatiently for it's arrival... As the "Newport" is not designed after an existing vessel I have some leeway in the details. That's good for a beginner's project. Nevertheless I aim to get it as realistic as (for me) possible.
-
Mark, Thank you very much for your help and encouragement, vielen Dank! I once built a portable workbench I saw on YouTube. Being an inexperienced woodworker I bought the plans, acquired the tools step by step and even went to a carpenter's shop to get the large piece of oak cut as I was uncomfortable to do it myself on the table saw (safety first). Took me three month but it turned out beautiful. Making improvements, learning new skills and doing research is so much fun! I'm glad to have you aboard, sir! Jo
-
Phil, thanks a lot for the advice and information! I don't think I will or can be as accurate as Mark but rather then just going along with the plan and material provided to "just" learn the basics, my idea is to make improvements were I can to get a result I am still happy with in the years to come when I hope I'll be an experienced modeler.
-
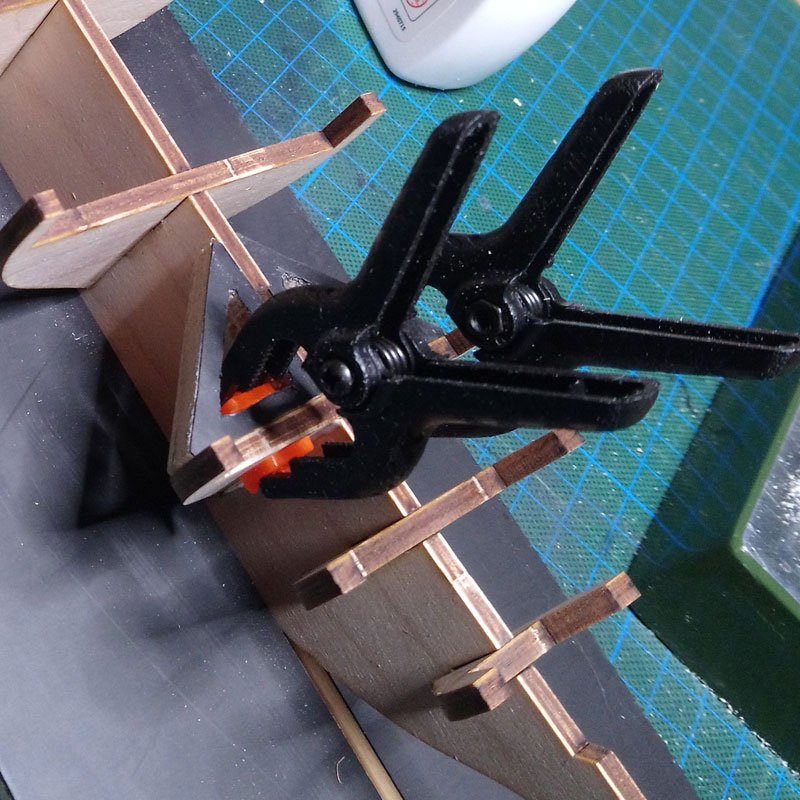
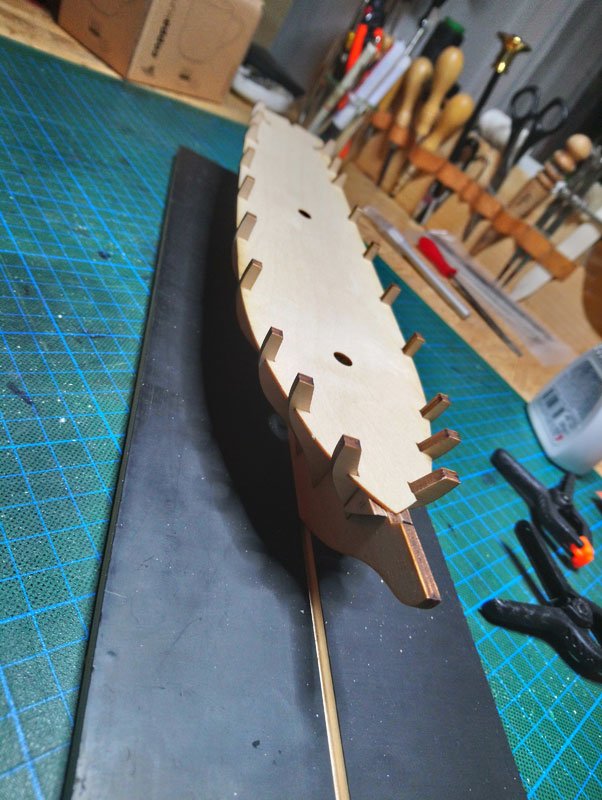
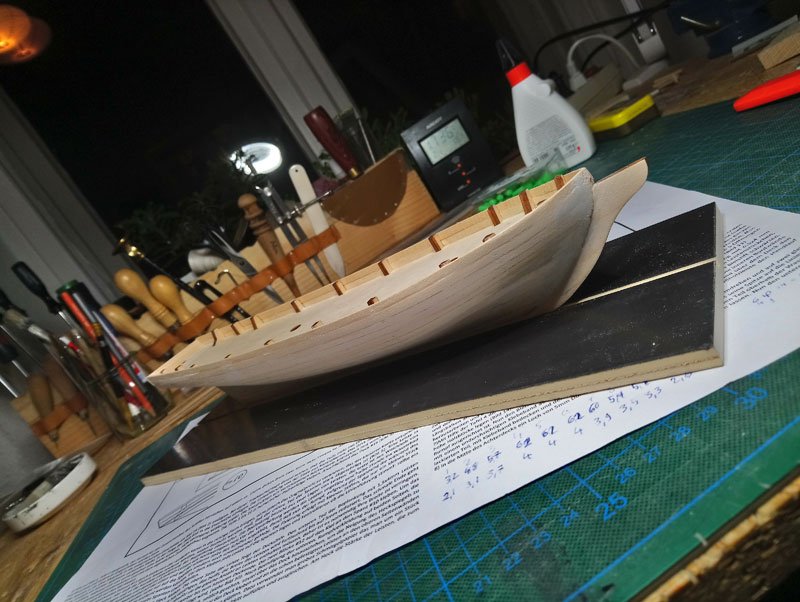
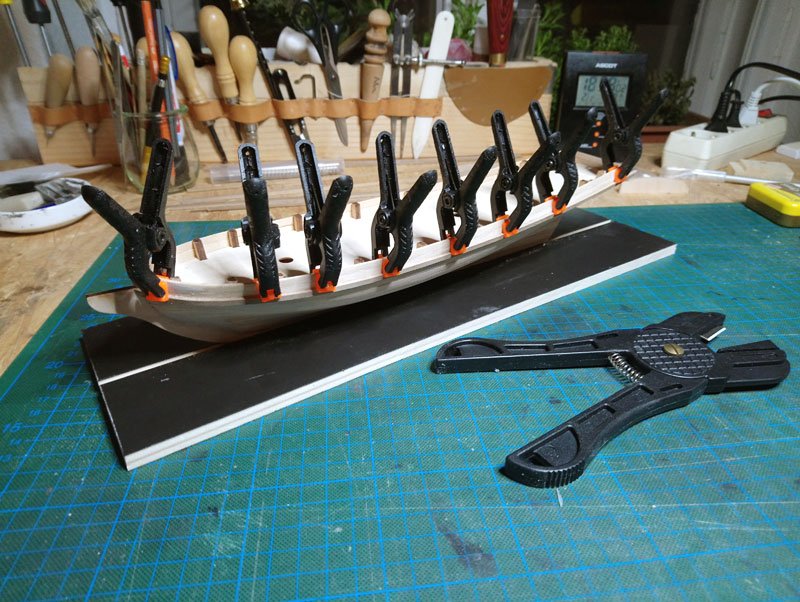
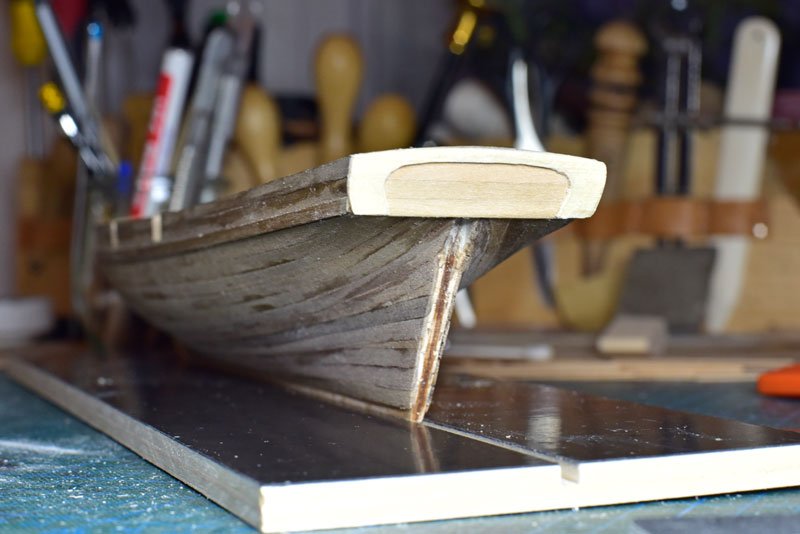
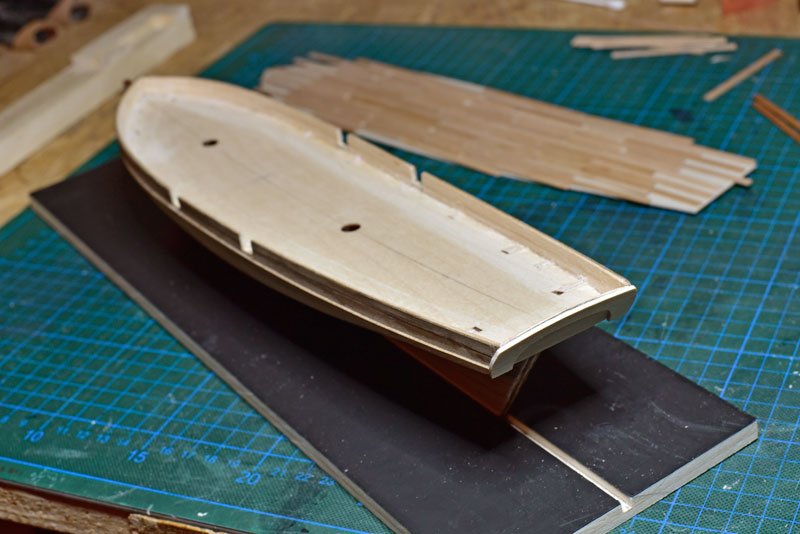
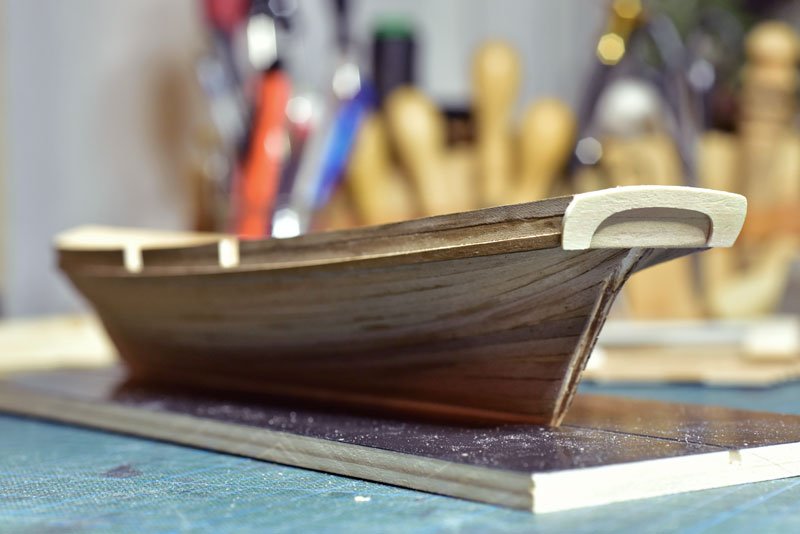
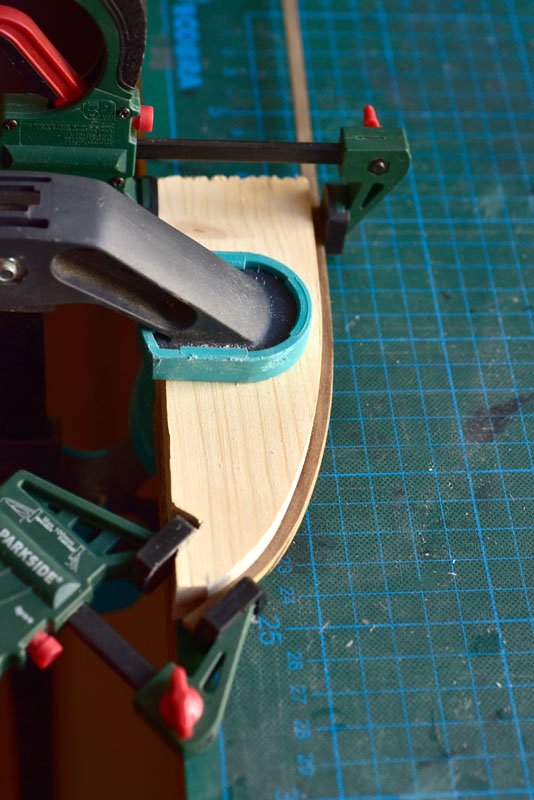
Fortunately I was able to glue the cracked caprail. But as I just went with the shape of the bow on the first piece, It isn't shaped right going aft (yet). So today I grabbed some scrap wood, shaped it like the complete side of the hull and glued it on a base plate so it doesn't bend. The caprail wood was soaked over night and held over a pot with boiling water. Then I did some gentle bending, clamped it on the sides with spring clamps, loosely fitted the F-clamps and carefully pulled them tighter. I also redid the "frame" on the stern. I thought it was too thick and bulky so I reshaped it and now I'm happy with it When I loosely laid out the deck planks I thought they are off in scale too much. A model plank is 4mm wide which would make 228mm on the real ship (although it's fictional, I know)... Thanks to the great literature post on Schooners SaltyScott started I've ordered Howard Chapelle's "The Baltimore Clipper" and Karl Heinz Marquardt's "The Global Schooner". Hopefully I can determine the correct width of the deck planks or at least a plausible range. Splitting my planks into 2mm would make for 114mm in reality. That sounds plausible... Also I would like to make cover boards.

-
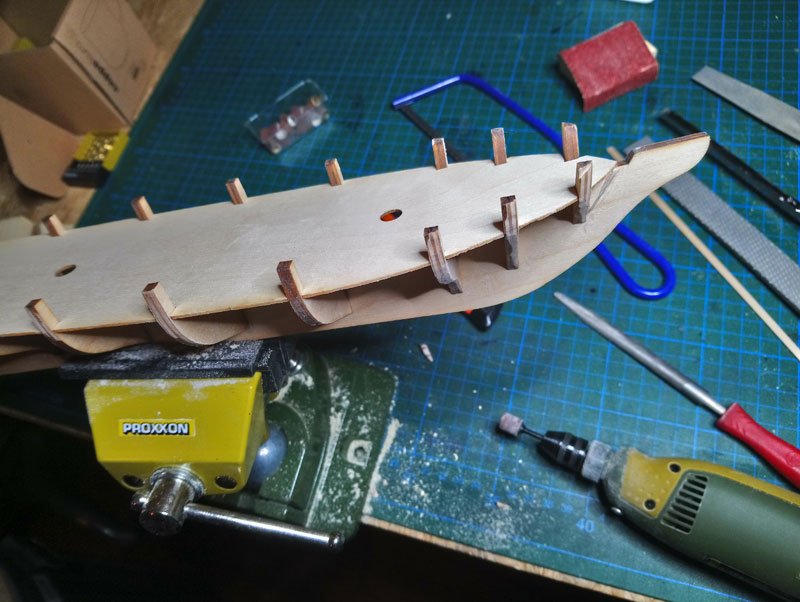
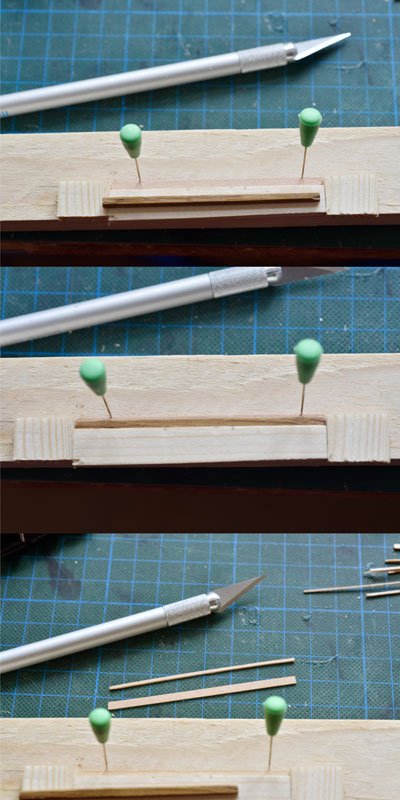
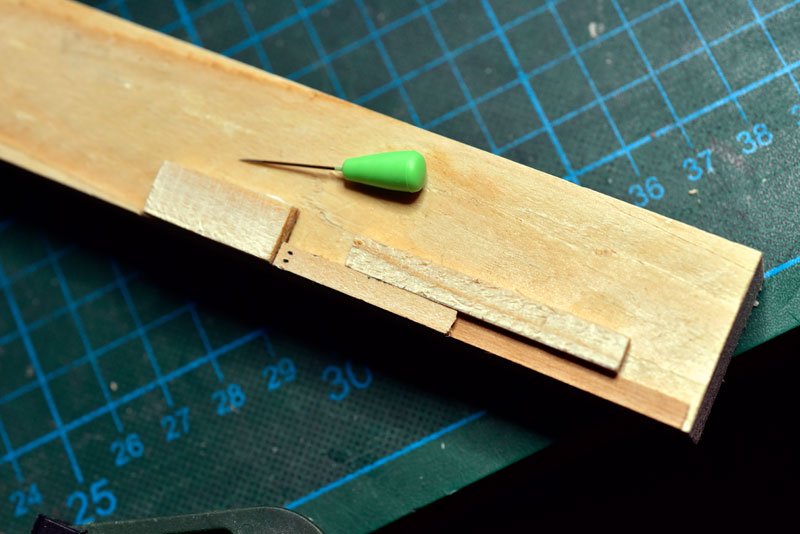
I made a jig to cut the deck planks Later I added another jig to poke the fake nail marks Then I cut out the gun ports and shaped a piece to add to the transom (the black line on top is left from tracing the shape with a pencil) Shaping the caprail didn't go that well because it cracked. I'll let it dry over night and hope to fix it tomorrow.

-
Great post, Mark, very much appreciated! It helps me too and I ordered Chapelle's and Marquardt's Books (Thank you for the list, Phil!). Marquardt also wrote a book about the rigging of schooners in German but I passed and bought "The Global Schooner". So not only do I learn how to rig my model correctly but the English terms as well (if I should join a German forum I will have to buy the other book too haha) Cheers One more Joachim LOL
-
Thank you very much for your nice welcomes, mates!
-
Thank you very much!
-
This is going to be an exciting build! I gladly follow
-
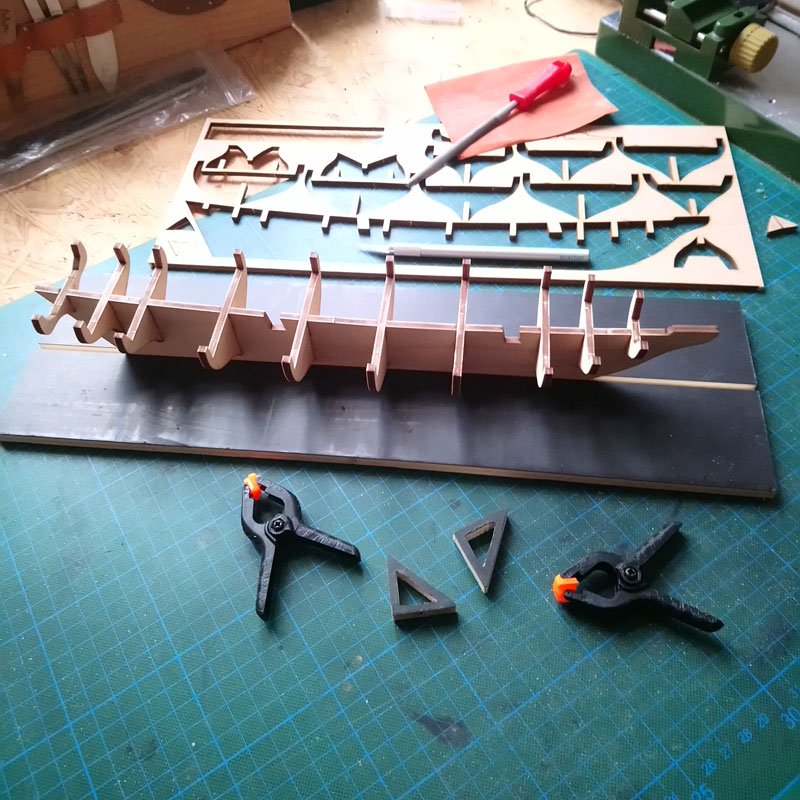
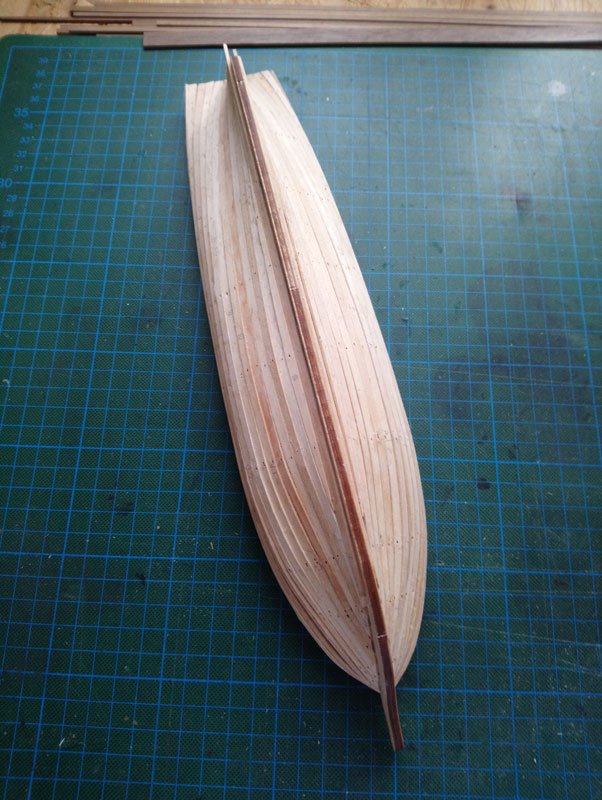
looked nice but not too simplistic and toy-ish. Something to learn the ropes, literally, before tackling a more serious build. In the end the ship should be displayed as a waterline model under full sail. Looking at the build logs of @theoracle09 and @maso and their Newport models (here and here) encouraged me to keep going and that I was doing okay so far (I think). As of now I finished planking the hull. The transom in picture 11 was just loosely put in place and as I didn't like the flat top I added another stripe and shaped it round. All the pictures I found of these vessels showed curved transoms. The Lynx/Mosquidobit schooner build of SaltyScott which I am totally excited about and all the wisdom posted there confirmed my resolution.