
vvvjames
-
Posts
168 -
Joined
-
Last visited
2 Followers


Recent Profile Visitors
581 profile views


-
 vvvjames reacted to a post in a topic:
Prince de Neufchatel by Coyote_6 - Constructo - 1/58 scale - American privateer
vvvjames reacted to a post in a topic:
Prince de Neufchatel by Coyote_6 - Constructo - 1/58 scale - American privateer
-
vvvjames reacted to a post in a topic:
Prince de Neufchatel by Coyote_6 - Constructo - 1/58 scale - American privateer
-
vvvjames reacted to a post in a topic:
USS Cape (MSI-2) by Dr PR - 1:48 - Inshore Minesweeper
-
vvvjames reacted to a post in a topic:
HMS Surprise 1796 (prototype) by James H - Vanguard Models - 1:64
-
vvvjames reacted to a post in a topic:
USS Tennessee 1869 by Keith Black - scale 1:120 - Wood Hull Screw Frigate - ex Madawaska 1865
-
vvvjames reacted to a post in a topic:
USS Tennessee 1869 by Keith Black - scale 1:120 - Wood Hull Screw Frigate - ex Madawaska 1865
-
vvvjames reacted to a post in a topic:
USS Tennessee 1869 by Keith Black - scale 1:120 - Wood Hull Screw Frigate - ex Madawaska 1865
-
vvvjames reacted to a post in a topic:
USS Tennessee 1869 by Keith Black - scale 1:120 - Wood Hull Screw Frigate - ex Madawaska 1865
-
vvvjames reacted to a post in a topic:
USS Tennessee 1869 by Keith Black - scale 1:120 - Wood Hull Screw Frigate - ex Madawaska 1865
-
vvvjames reacted to a post in a topic:
USS Tennessee 1869 by Keith Black - scale 1:120 - Wood Hull Screw Frigate - ex Madawaska 1865
-
 You and Maggie have my best wishes Keith❤️. I hope rehab goes well, and if a downsize is needed, I hope you find a lovely spot to settle. The weather will even out soon my friend. Fair winds and following seas.
 -
Ryland Craze reacted to a post in a topic:
Billy 1938 by Keith Black - FINISHED - 1:120 Scale - Homemade Sternwheeler
-
 Keith Black reacted to a post in a topic:
Billy 1938 by Keith Black - FINISHED - 1:120 Scale - Homemade Sternwheeler
Keith Black reacted to a post in a topic:
Billy 1938 by Keith Black - FINISHED - 1:120 Scale - Homemade Sternwheeler
-
Keith Black reacted to a post in a topic:
Hi everyone
-
Welcome:) I hope you enjoy your first kit, there's a wealth of knowledge here on this forum for you when you start!
-
Canute reacted to a post in a topic:
Billy 1938 by Keith Black - FINISHED - 1:120 Scale - Homemade Sternwheeler
-
Baker reacted to a post in a topic:
HMS Beagle by vvvjames - OcCre - 1:60 - Second Build
-
ERS Rich reacted to a post in a topic:
HMS Beagle by vvvjames - OcCre - 1:60 - Second Build
-
usedtosail reacted to a post in a topic:
HMS Beagle by vvvjames - OcCre - 1:60 - Second Build
-
 The Gimps Chimp reacted to a post in a topic:
HMS Beagle by vvvjames - OcCre - 1:60 - Second Build
The Gimps Chimp reacted to a post in a topic:
HMS Beagle by vvvjames - OcCre - 1:60 - Second Build
-
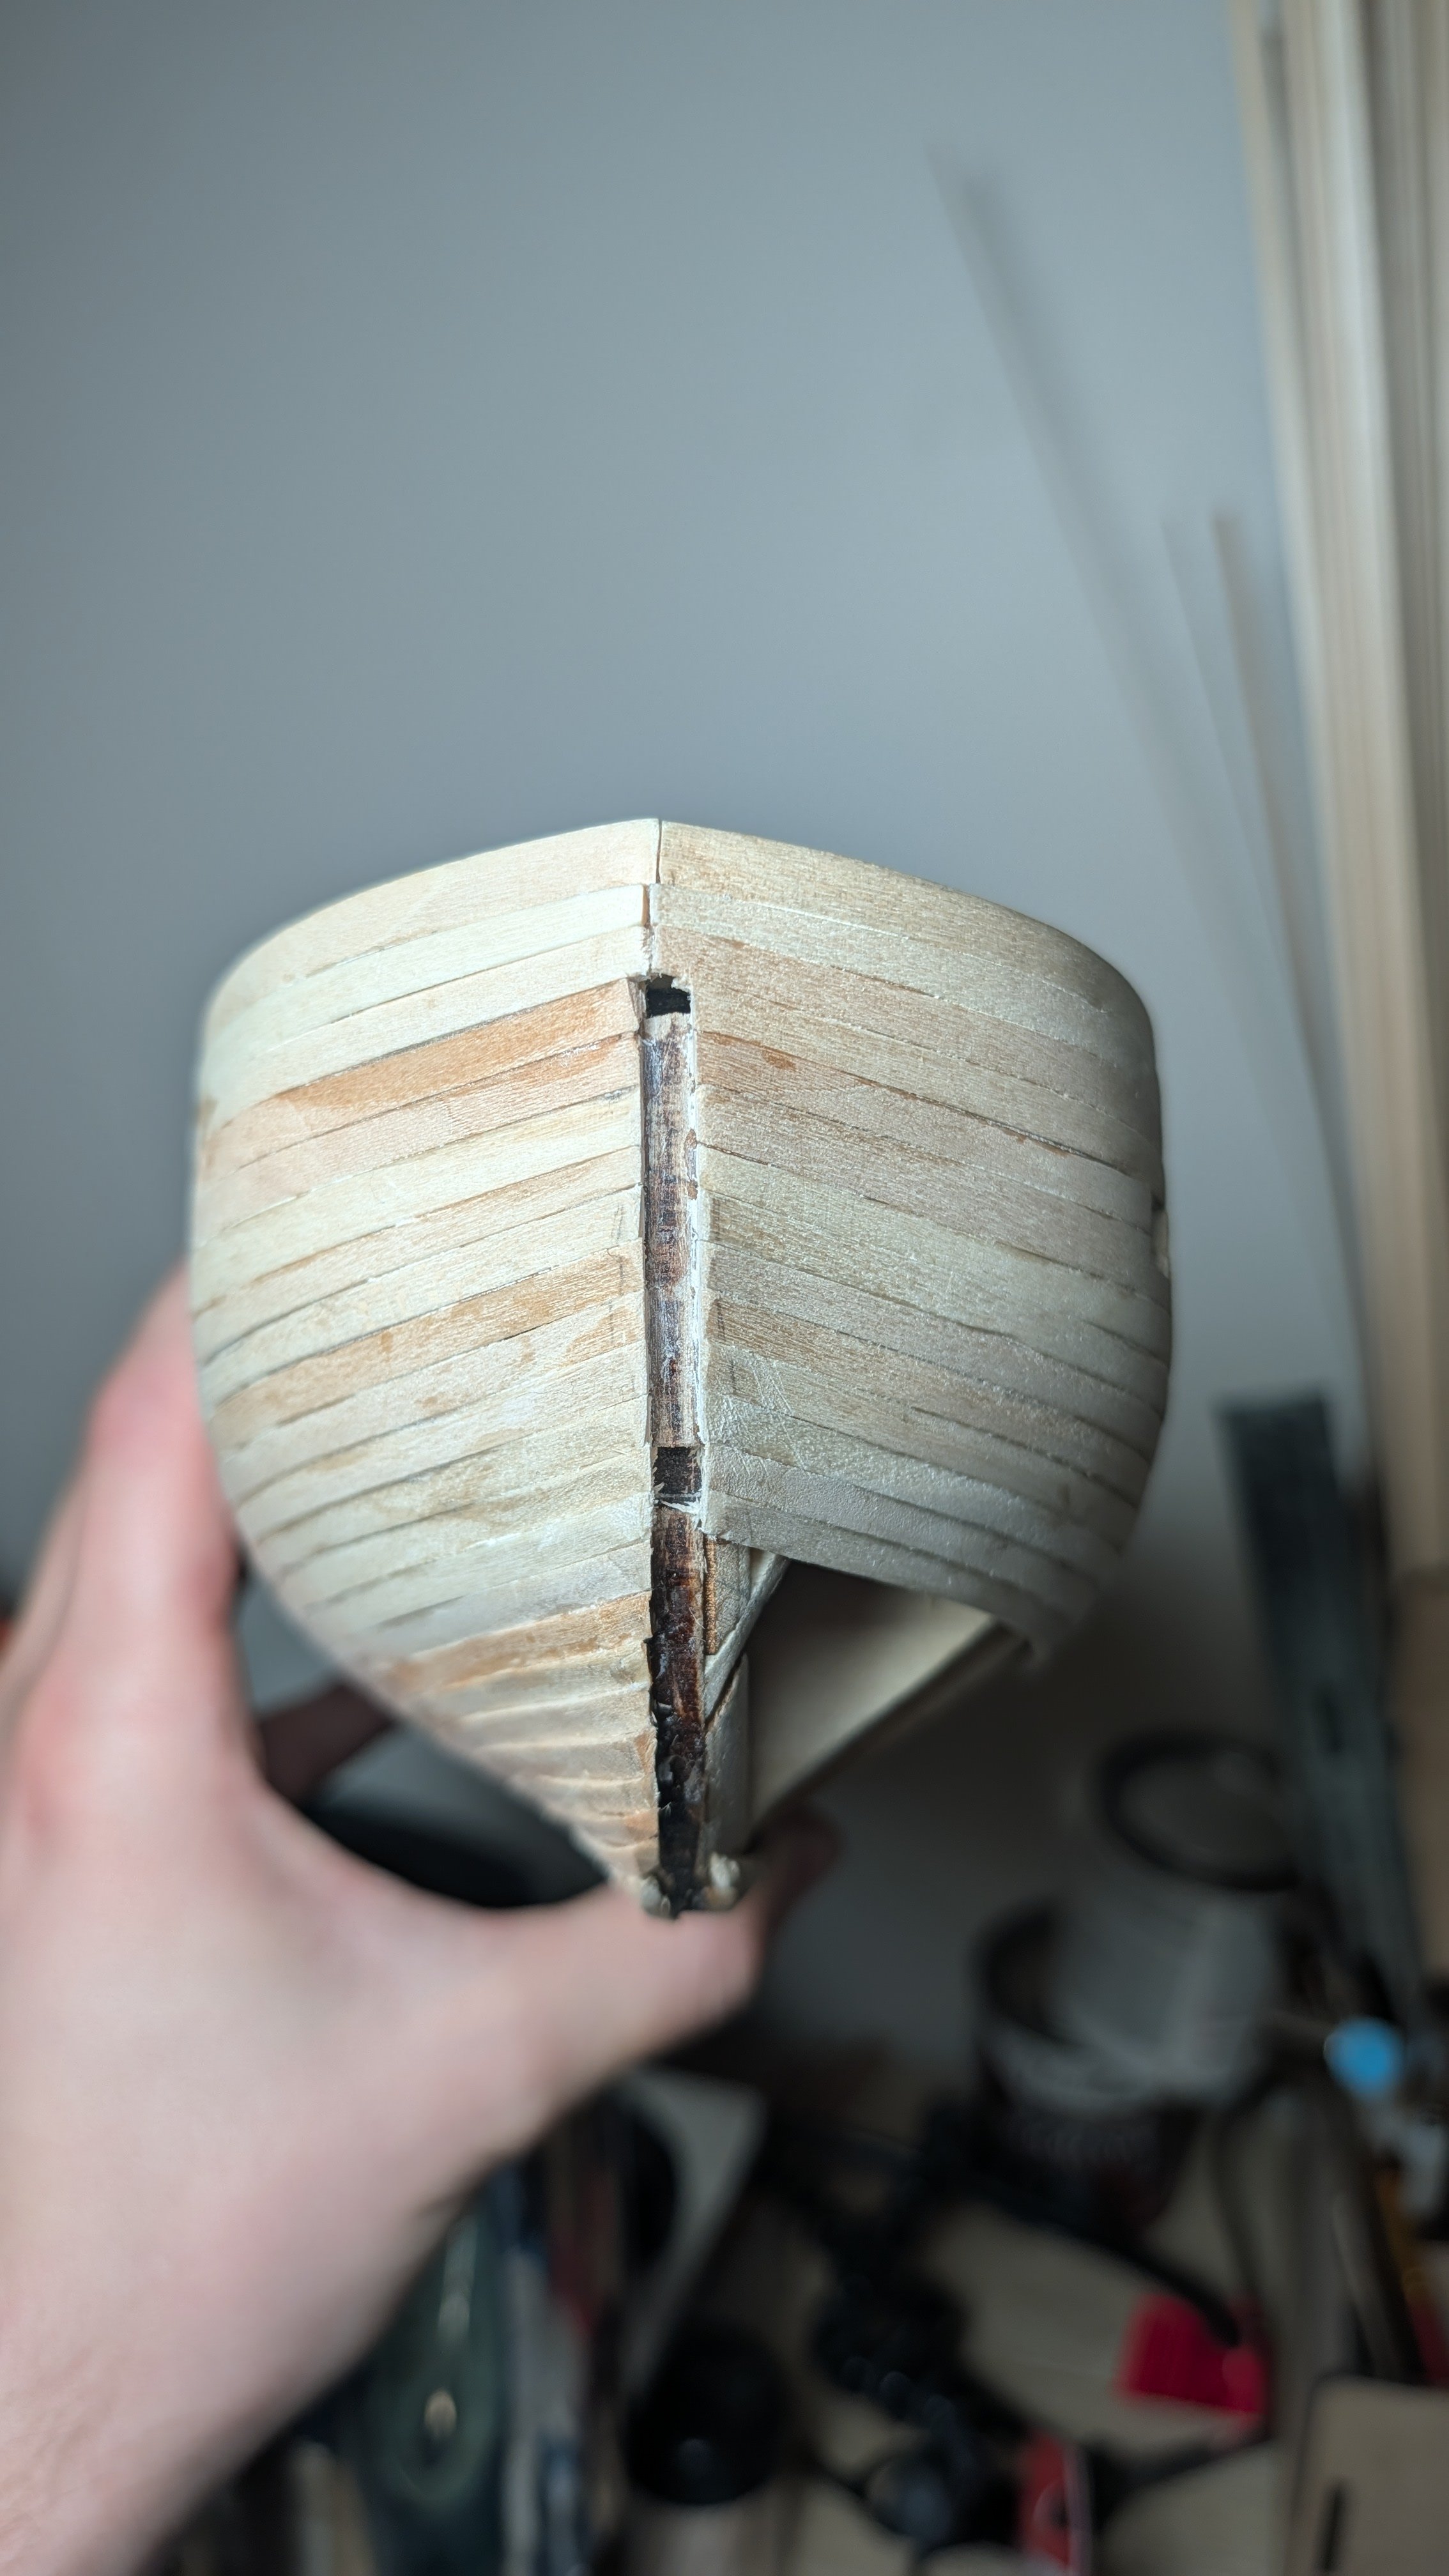
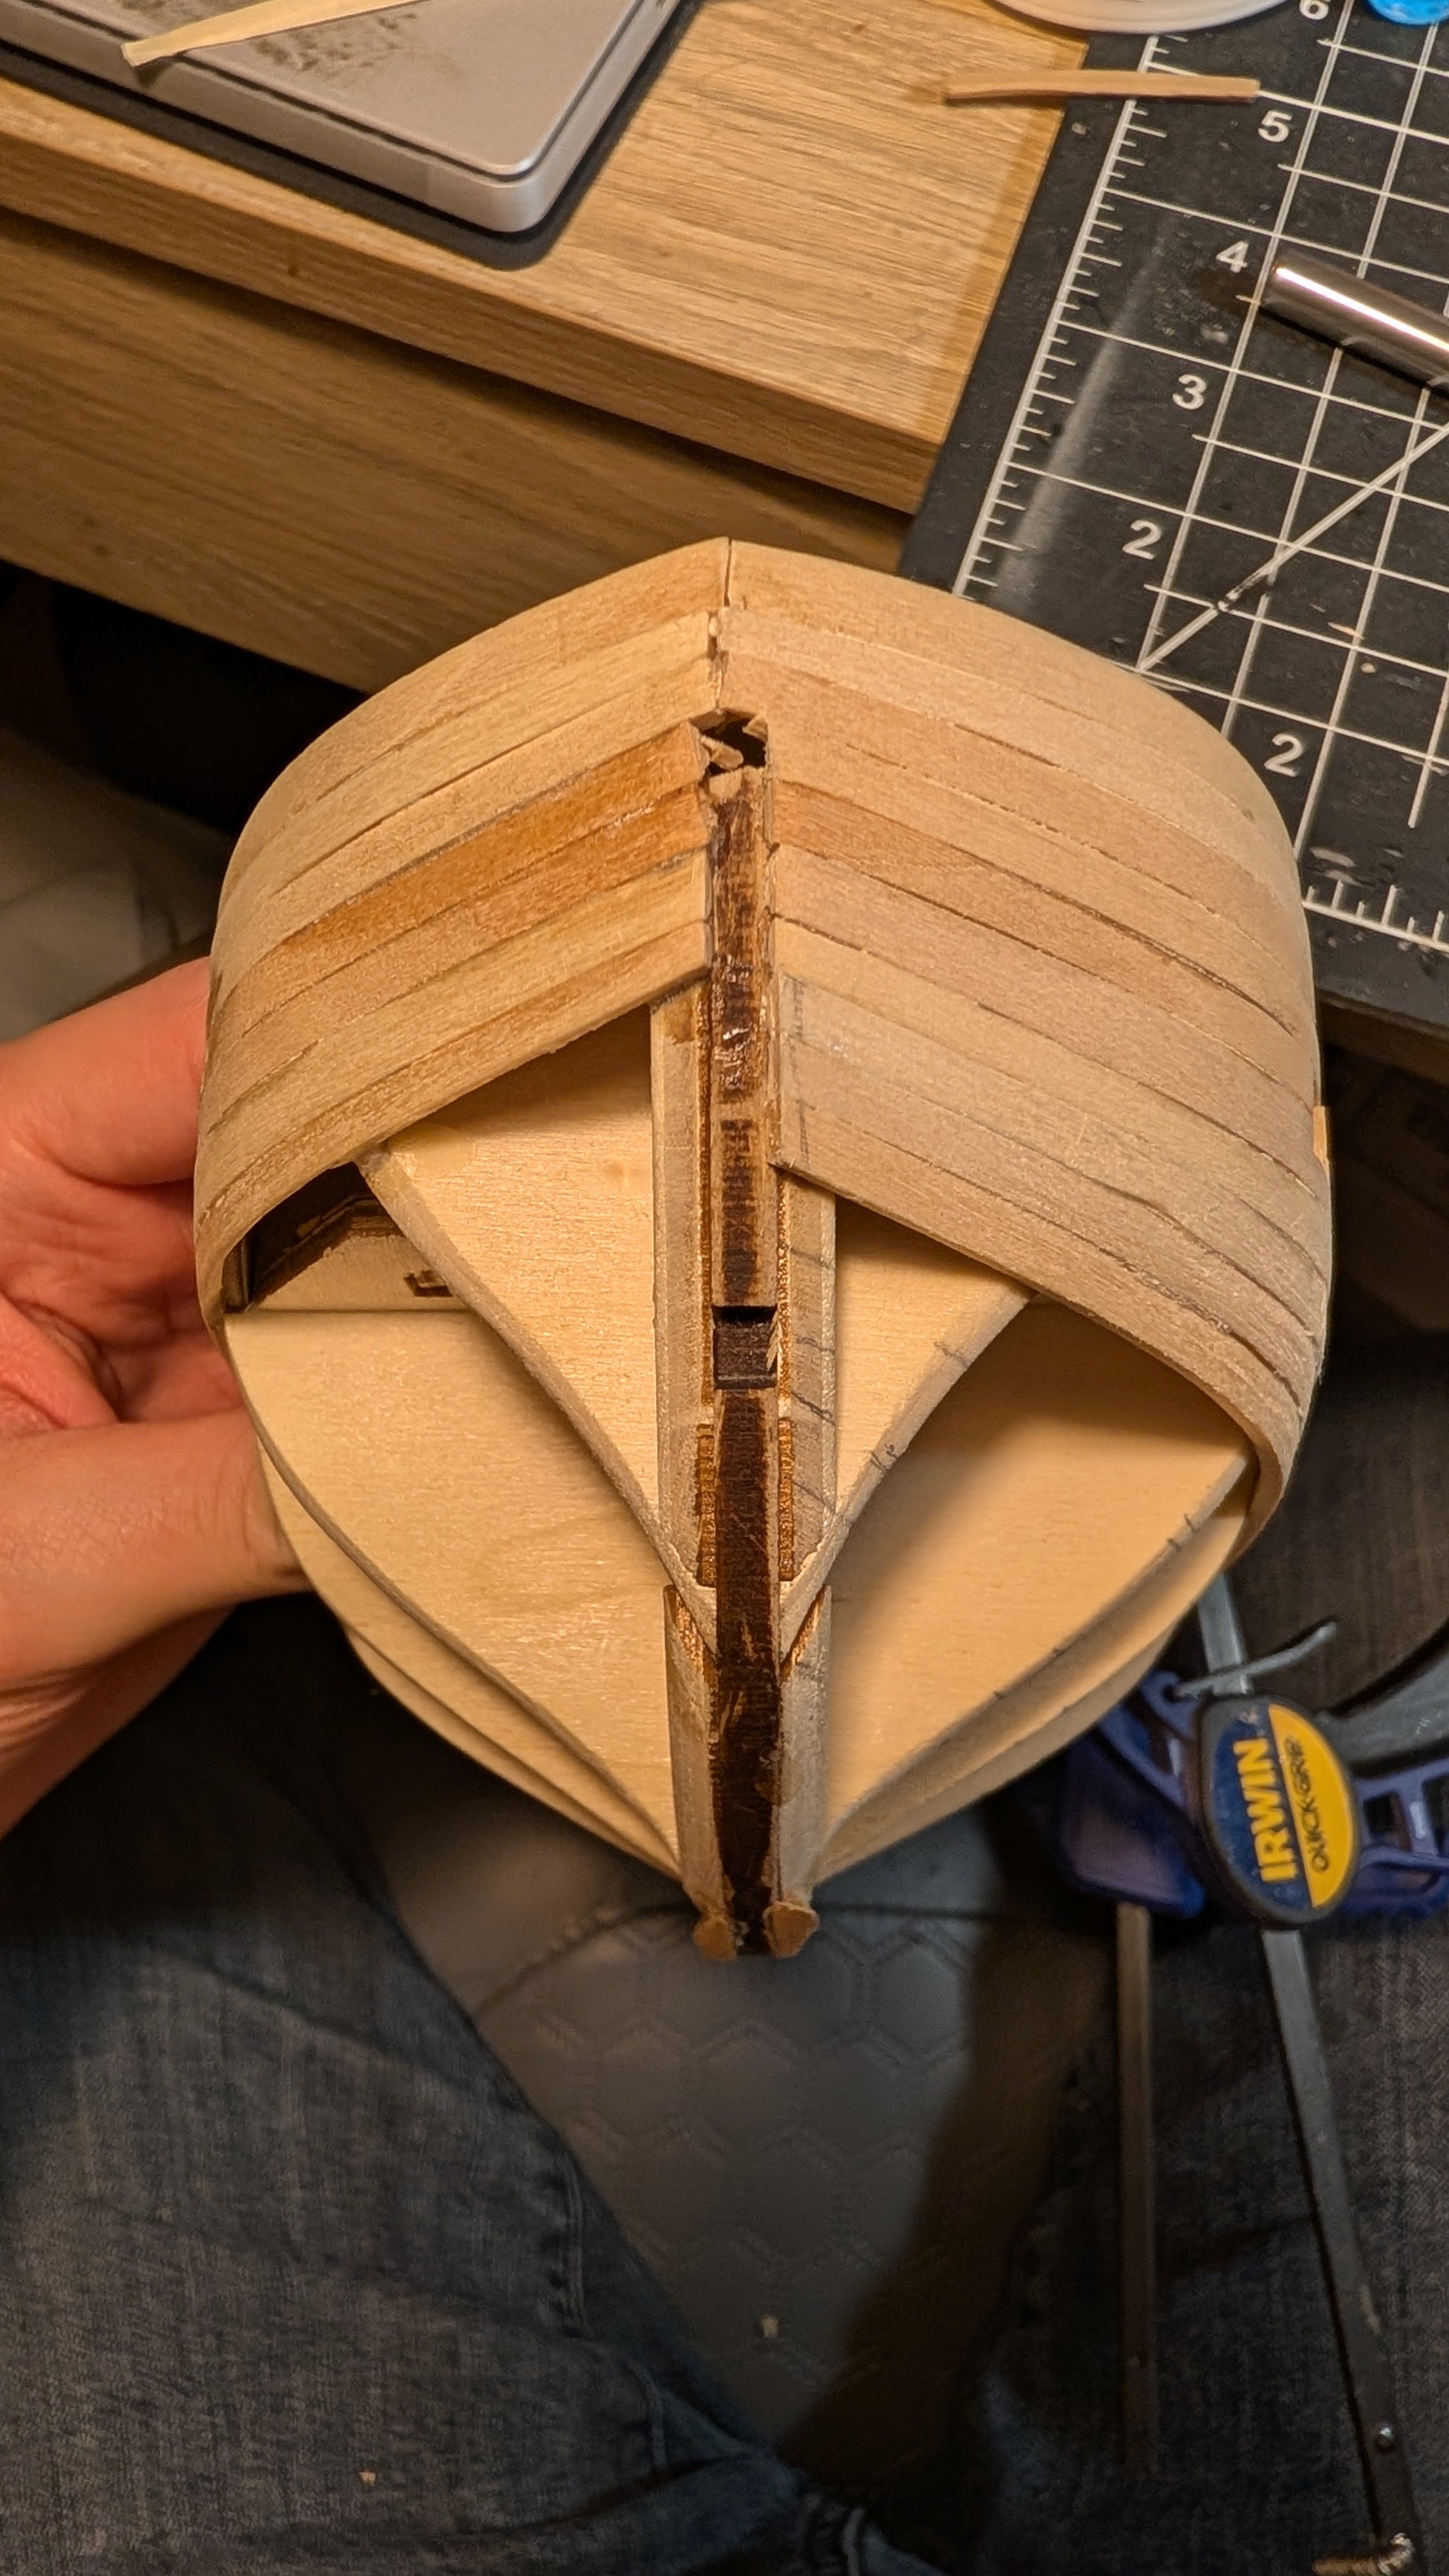
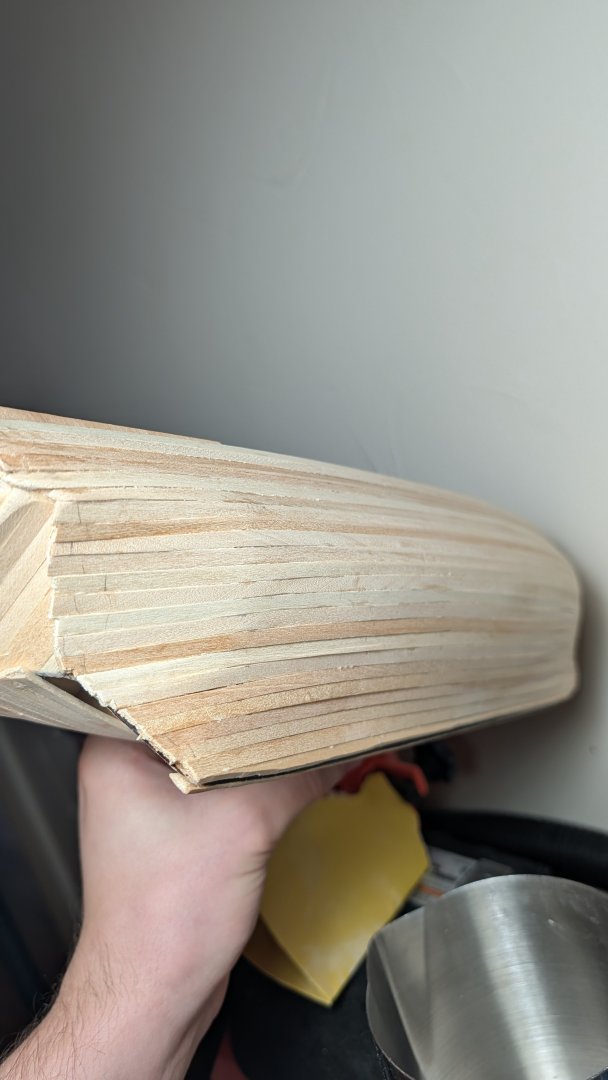
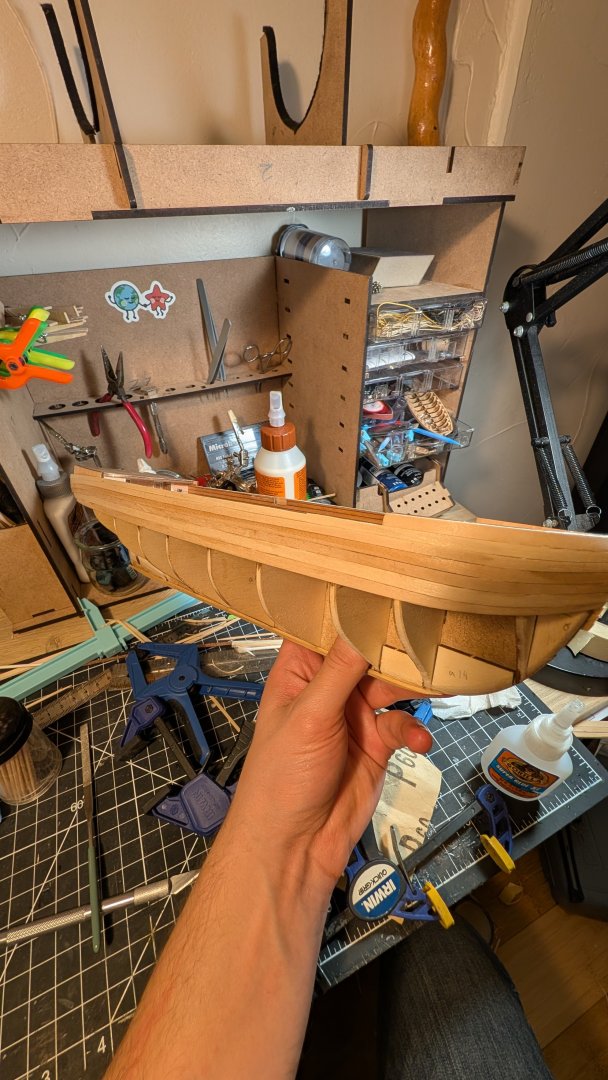
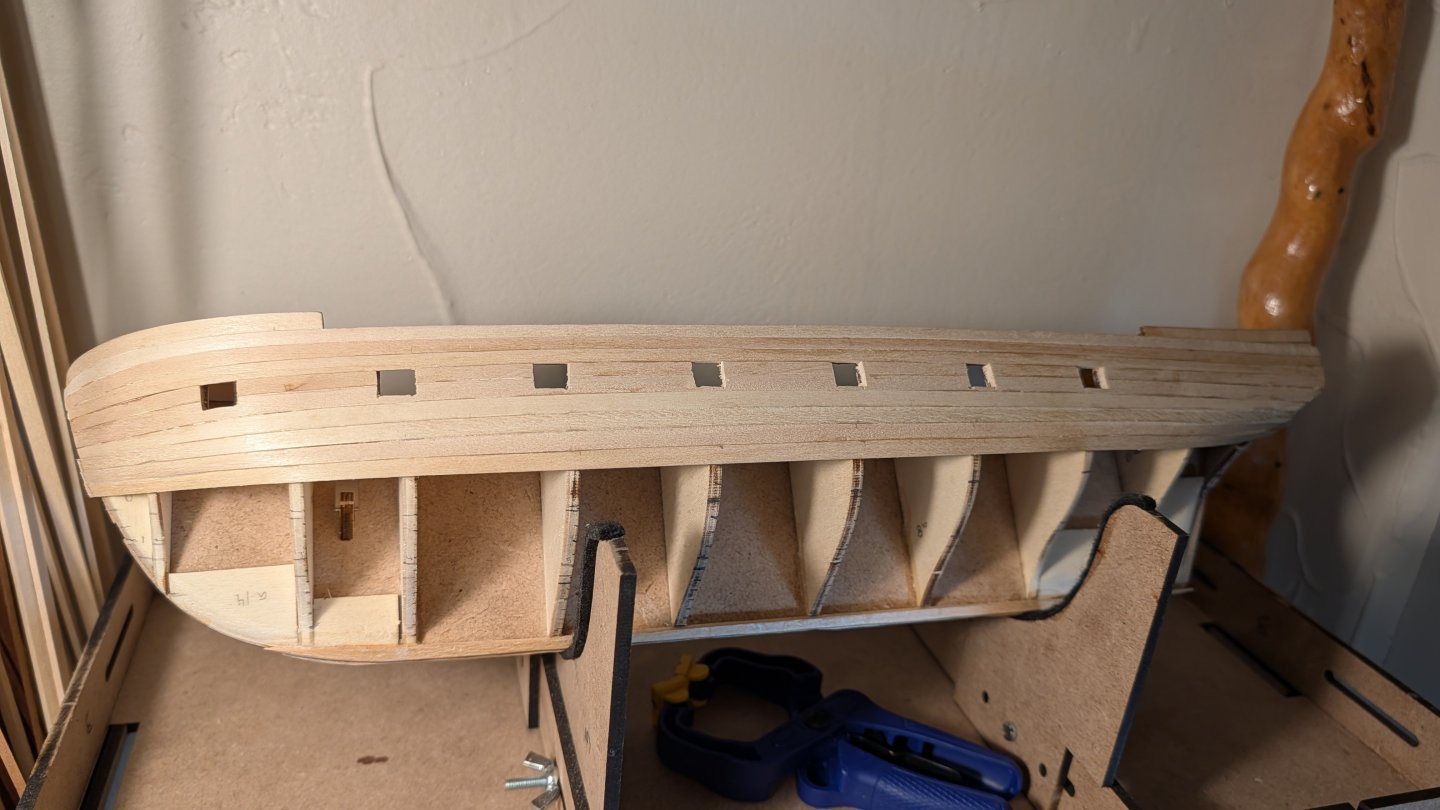
Yo ho all, I wanted to hop on and give a quick update on the planking before I take a trip to Seattle to be with my sister! I'm excited to see all the nautical museums and ship-watch as much as possible:) Let me know if you have any recommendations. Starboard Planking: Nothing is sanded yet. Overall I'm proud of how my first bow to stern planking is going so far. I do wish I had added the keel and a rabbet, but I'll add the keel at least for the second layer so everything can be nice and flush. I hope the port side ends up looking about the same, I may or may not finish before my flight. This has been great practice for the second layer:) Fair winds, James
-
thibaultron reacted to a post in a topic:
Billy 1938 by Keith Black - FINISHED - 1:120 Scale - Homemade Sternwheeler
-
Admiral Rick reacted to a post in a topic:
Let me introduce myself
-
Congratulations on a fantastic build Keith, you've done this unique ship justice, Engle would be proud and probably drunk. It was a pleasure to follow along looking forward to the next already.
- 407 replies
-
- 5
-
-
-
- Billy
- sternwheeler
- (and 1 more)
-
Welcome Remus!
-
Excited to follow along:) looks like a lovely kit.
-
You talk too poorly of your build, it looks fantastic:) and I'm just connecting the dots, I've been following your entertaining Indefatigable log with excitement, it's off to a great start. Glad you decided to do a build log for it. Thank you for this warning, I have heard others mention this and will have to keep it in mind when setting up the pins. Thank you for your offer of suggestions I will definitely take you up on that when I get past the planking:)
-
Hello Embojo! Thank you for the kind words:) Being my first model of an actual ship rather than a "typical" ship, I have been enjoying having detailed references like the Anatomy of a Ship book. The amount of details you could put in are endless, I hope to capture some of the big ones like the wider wale plank. I am lucky to had Lucien and usedtosail (and others) build logs as reference. So many great ideas. I will keep an eye out for your build log when you start your Beagle:) Thank you so much Mowzer, I really appreciate hearing that. I have read a few deck debates and was second guessing my wood choice. But dang the cherry wood looks great, I'm glad I went that route. Congratulations on finishing your model, do you have a build log for it?
-
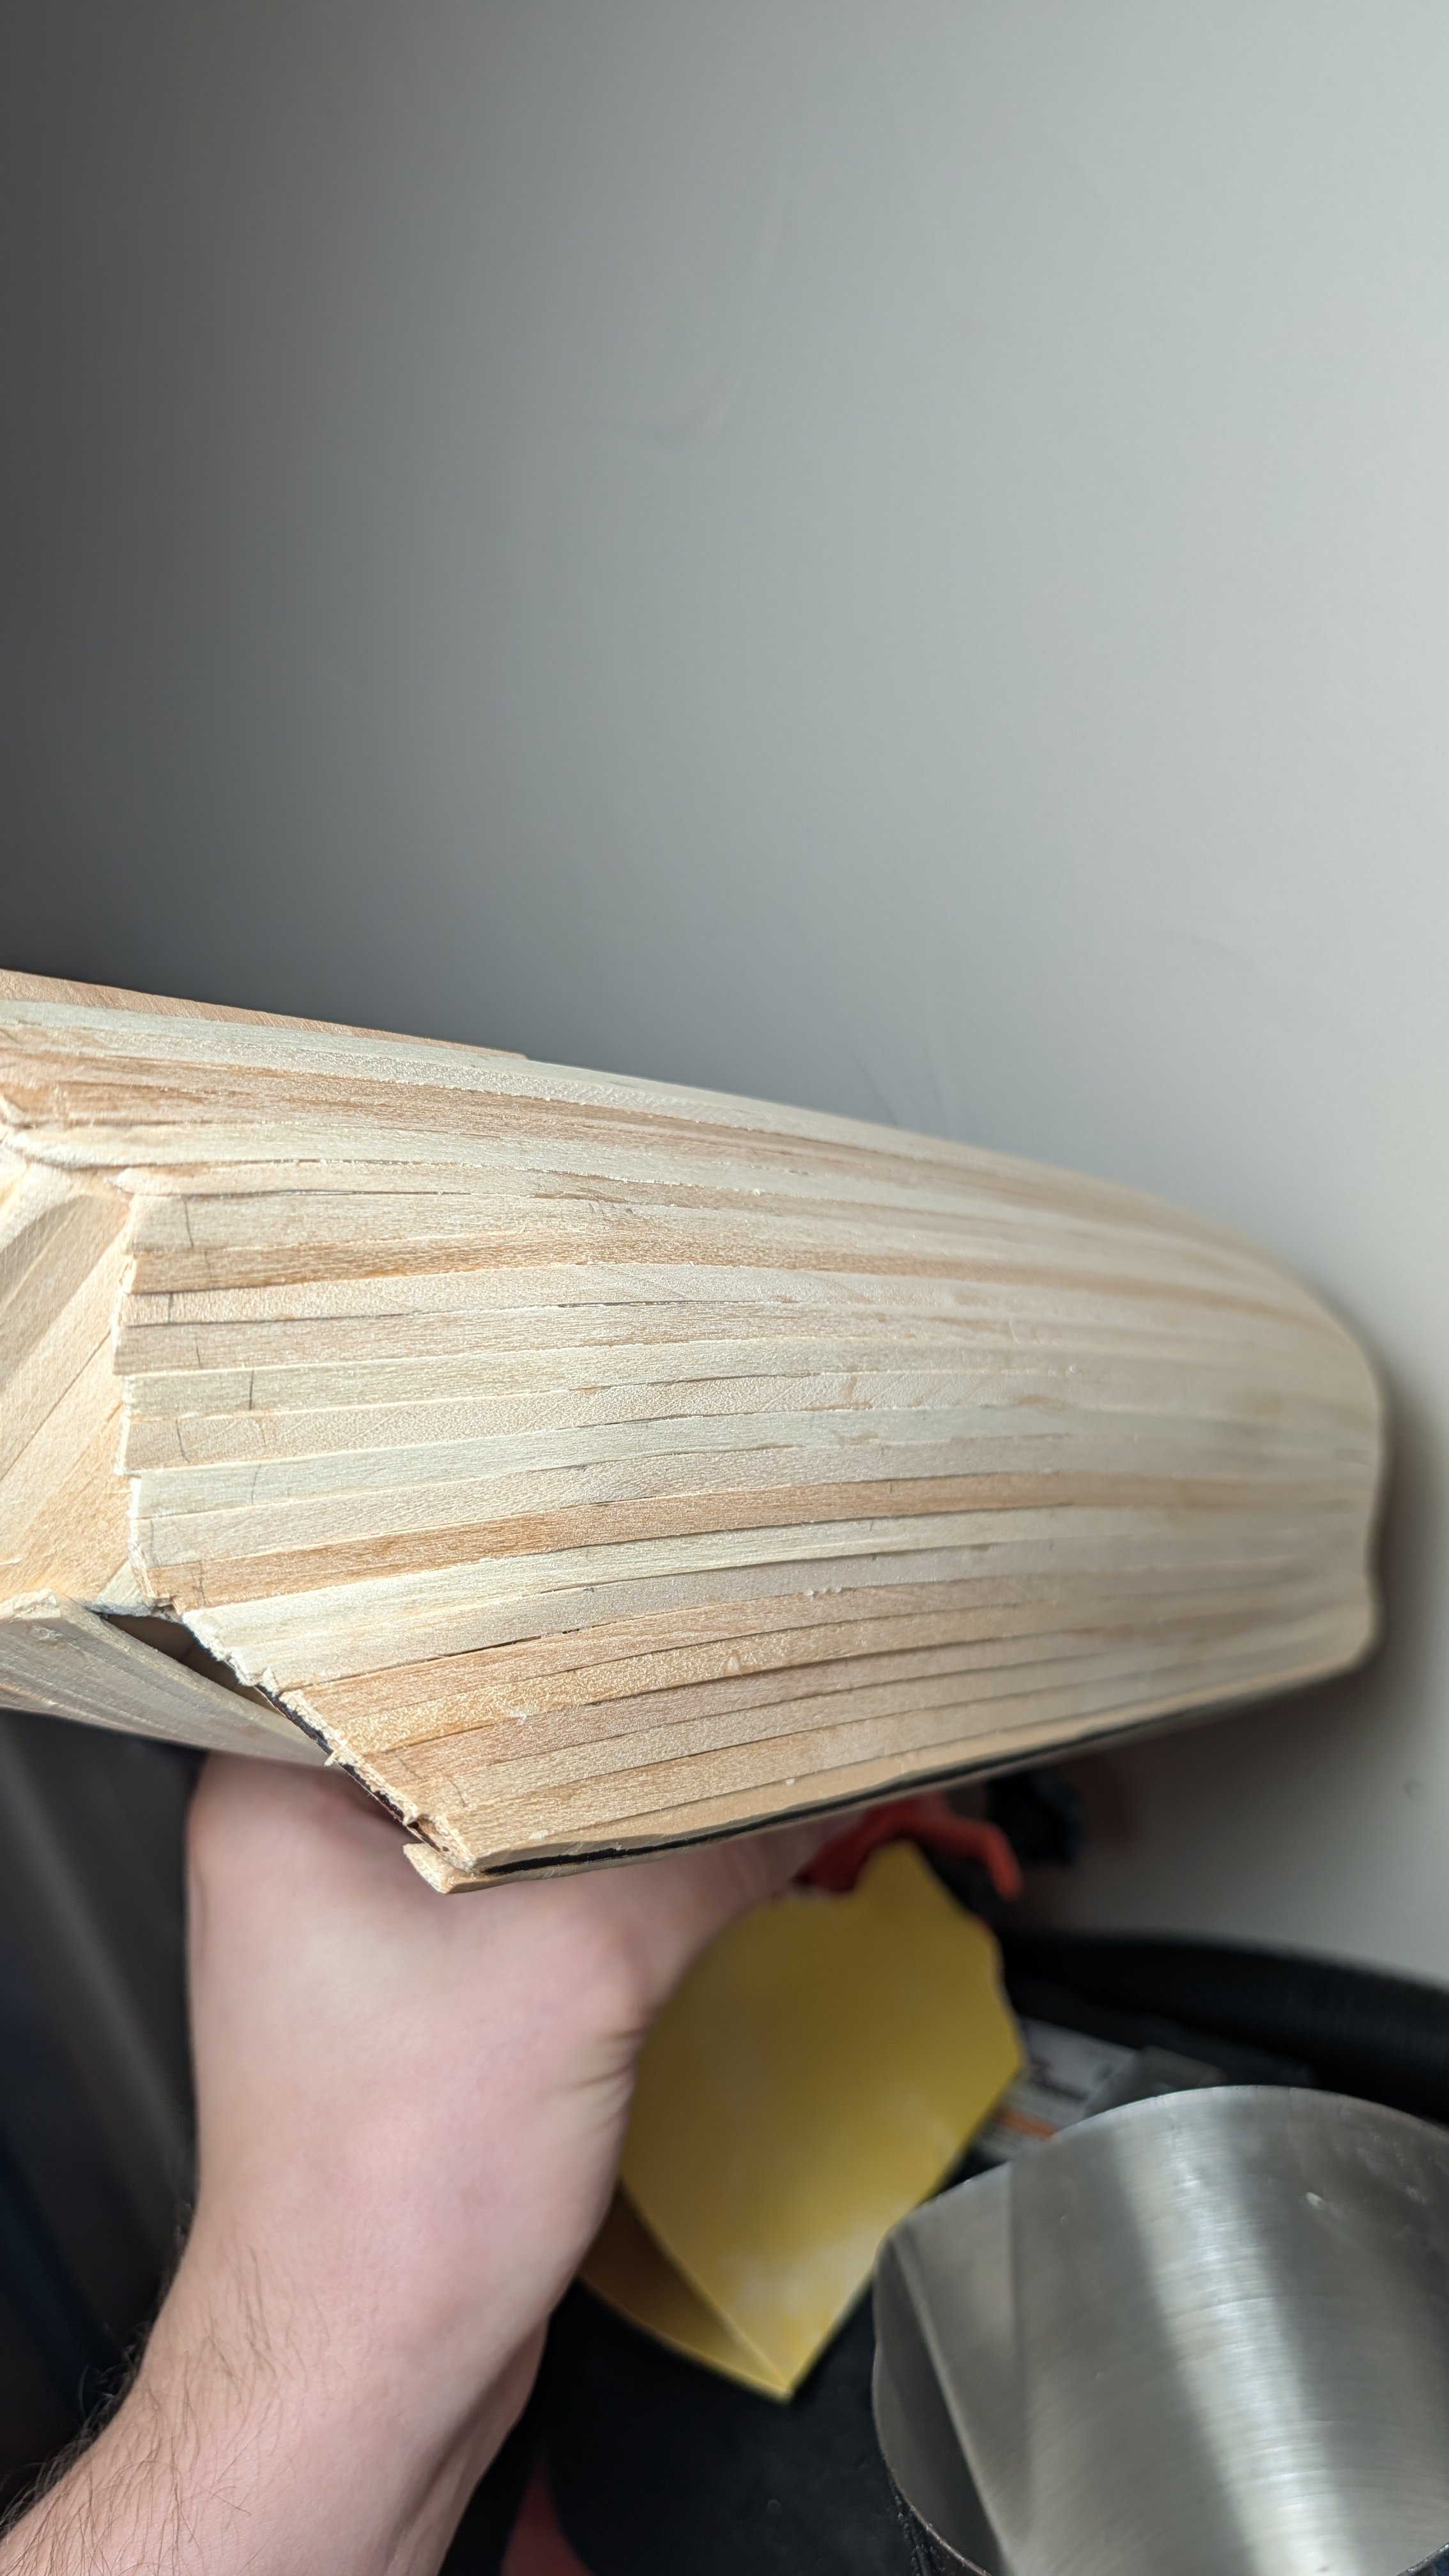
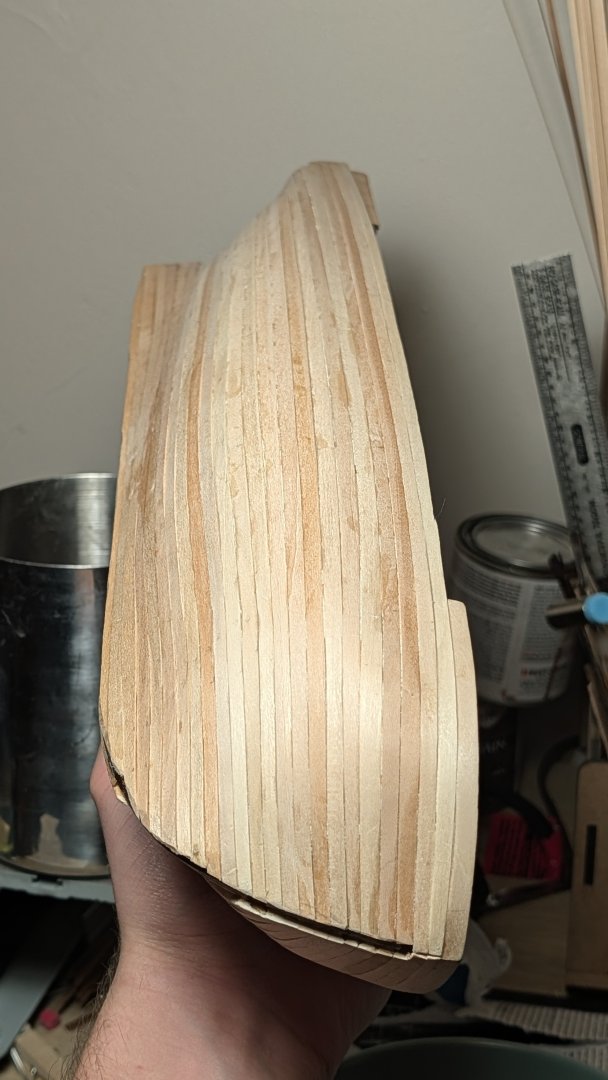
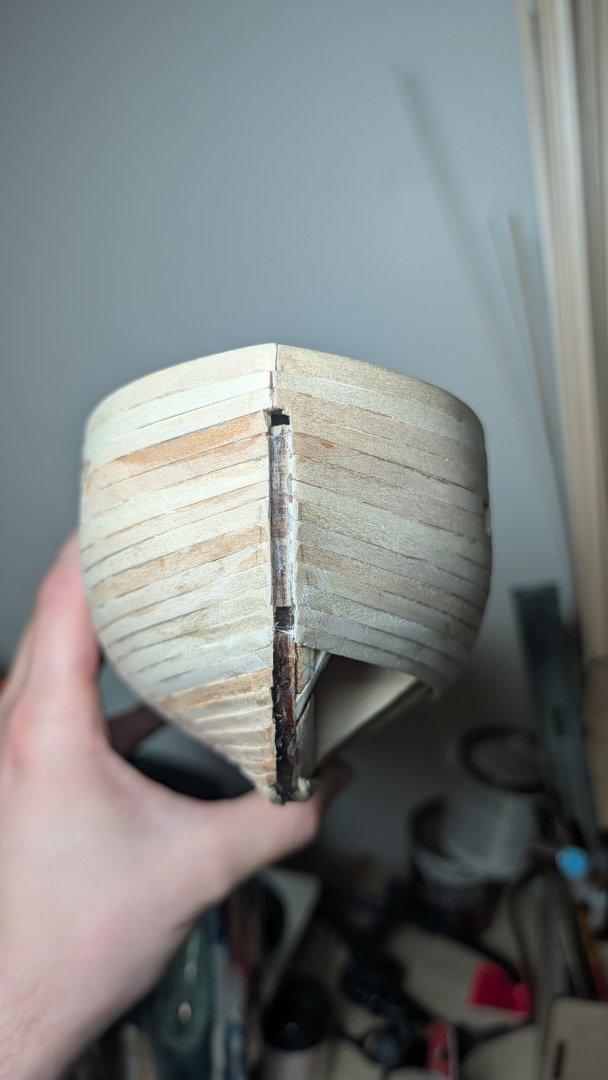
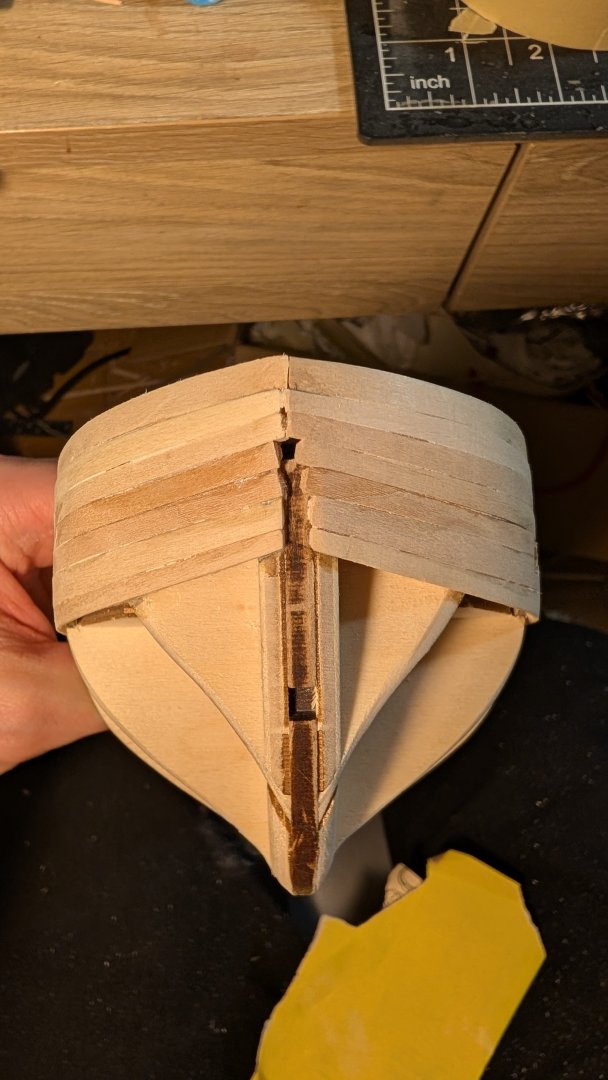
Ahoy all, It feels like its been ages since the last post but I just checked and it was actually only a week ago. Time is moving very weird lately, and I feel all out of wack. I haven't gotten much done, but have been thoroughly planning out the hull planking and reviewing tutorials. I think I'm getting the hang of it? We'll see. Bulwarks I have (mostly) finished the outer bulwarks. Gun ports on the starboard side still need to be cut. Hull Planking: I tick-marked the hull to the best of my abilities, and have finally begun planking the hull! 3 careful planks on the port side and the garboard strakes are all I have so far. Not much but it's a good start:) Installing the garboard strake is quite challenging, I do hope it is easier on the next boat whatever that may be. Still a sad shipyard here, but things are getting a bit better. Work time: 71:10:12 Best and well wishes, James

-
In which offense is taken (or, "hey! I resemble that remark")
vvvjames replied to Cena's topic in New member Introductions
Welcome Cena! Definitely start a build log, I'll be on the lookout for it! -
HMS Beagle by Tecko - OcCre - 1:60
vvvjames replied to Tecko's topic in - Kit build logs for subjects built from 1801 - 1850
Get well soon Peter! -
Stunning work Keith. I saved one of your pictures and put a black and white filter over it, I gotta say It looks quite close to the original. Can't wait to see it with the weathering.
- 407 replies
-
- 3
-
-
-
- Billy
- sternwheeler
- (and 1 more)
-
Very impressive, the waterline planking looked so challenging but I love how it ended up.
- 148 replies
-
- 2
-
-
-
- Christiania
- Vanguard Models
- (and 1 more)