


Mike Y
-
Posts
1,513 -
Joined
-
Last visited
Reputation Activity
-

 Mike Y reacted to Greg Davis in Santos Dumont No. 18 Hydroplane 1907 by Greg Davis - FINISHED - Scale 1:16
Decades of amateur bicycle racing and countless hours of watching pro-cycling finally became useful on this build!
-
 Mike Y reacted to Greg Davis in Santos Dumont No. 18 Hydroplane 1907 by Greg Davis - FINISHED - Scale 1:16
A couple days of work on the steering wheel has gotten me to here:
First I cut and milled a piece of brass to serve as the spokes of the wheel together with a rim. Two pieces of C Boxwood with a circle cut out were used to sandwich the brass piece - all attached with epoxy. Then the exterior was sanded to about the correct diameter. Sanding the wheel to a round cross-section then followed. A few more details to add, but this is what I'm trying to mimic:
I feel that I am getting close - probably as close as my skills will allow!
-
Mike Y reacted to Greg Davis in Santos Dumont No. 18 Hydroplane 1907 by Greg Davis - FINISHED - Scale 1:16
I made a small jig to bend the hydrofoil shape into the brass. I added a brass rod to the jig so that the tubes in the attachments would be in the same fore-aft location after being bent.
The four attachments are getting close to their final shapes now - just a bit more adjustment mostly to correct 'spring back' from the initial bending. Here I'm taking a look at how they fit to the hydrofoils when mounted on the boat. I've added all the subcomponents I have finished for this picture as I was curious on how the whole piece of work was coming together.
-
 Mike Y got a reaction from matiz in LA CREOLE/ LA GUADELOUPE by matiz - 1:48 - by Tiziano Mainardi from Boudriot plans
I love your building jig! Looks like a loom from some angles
-
Mike Y reacted to Greg Davis in Santos Dumont No. 18 Hydroplane 1907 by Greg Davis - FINISHED - Scale 1:16
Thank you Craig for all the help you are providing!
I looked more at pictures of the boat and decided that the pontoon harness should be lighter in color than the blue/grey pontoon and nacelles. So I've gone more toward the grey tone with a touch of blue.
I looked though all the blue and grey offerings in the Vallejo Model Air lineup and went to the local Hobby Town and picked up a variety of possible colors. Did some tests on brass tubes to see what they looked like as well as how they matched up with the other materials used in the model. Finally decided on using Vallejo Model Air Grey Blue:
Here's what it looks like now:
I think this looks much better than when it was blackened.
-
 Mike Y got a reaction from Keith Black in LA CREOLE/ LA GUADELOUPE by matiz - 1:48 - by Tiziano Mainardi from Boudriot plans
I love your building jig! Looks like a loom from some angles
-
Mike Y reacted to matiz in LA CREOLE/ LA GUADELOUPE by matiz - 1:48 - by Tiziano Mainardi from Boudriot plans
Ciao ☺️
nothing is glued:
-
Mike Y reacted to matiz in LA CREOLE/ LA GUADELOUPE by matiz - 1:48 - by Tiziano Mainardi from Boudriot plans
Good morning
nothing is glued, just fitted together, for later processing:
-

 Mike Y got a reaction from Tobias in LE ROCHEFORT 1787 by Tobias - 1:36 - Harbor Yacht from ANCRE monograph
Now that is "painting with wood" taken literally, well executed!
-
 Mike Y got a reaction from No Idea in Beavers Prize 1777 by Mike Y - 1:48 - POF - Hahn style
Experimenting with different woods for the Pillars in the Hold.
Thought it might be a good opportunity to use Pink Ivory that I had in the stash for some reason.
It is a very beautiful wood with pink shavings, indeed!
A simple jig really helps to hold these tiny pieces when shaping. Scraping is a great way to get a smooth surface with a clean edge!
Completed test pieces. The one with a tenon was finished with Osmo Polyx and the one on the left (with no tenon) has no finish.
For colour comparison I made a photo on top of some pear parts (one finished and one - a rough sheet cutoff)
Pink Ivory has a clearly pronounced grain resembling walnut, clearly out of scale. Though pillars in the hold definitely have a rough life I might still go with it, it might add an interesting accent deep in inside the hull when viewed from the side:
As most of such woods it would likely loose its beautiful colour when exposed to UV, and would likely become brown-ish. I left these test pieces exposed on the table and will check them in a couple of months. Does anyone have any experience with this wood?
What do think on the colour? I don't want my model to look like a clown car, but a bit of variety might not hurt
-
Mike Y reacted to Waldemar in Bateau de Lanvéoc by JacquesCousteau - Scale 1:32 - From Ancre Plans
Rightly so. Resistance to side loads and minimal runout are critical features of these rotary tools, as indeed with all devices of this type, so that drill bits would not make cones in the air, making it nearly impossible to start the hole in the right spot (can be checked if buying personally in a local shop, best at highest speeds). Not to be overlooked are the numerous accessories that Proxxon offers for its rotary tools (e.g. drills presses of different types, router bases, etc., also of good quality straight away from the box or only after a small/easy adjustment).
However, there is a detail, probably usually unnoticed or underestimated, for which I additionally appreciate Proxxon's rotary tools, namely the metal (i.e. rigid) neck in the shape of a perfect cylinder with a diameter of 20 mm, which is standard on their entire range of miniature drills. This makes it very easy to make various holders for Proxxon rotary tools yourself, while keeping decent geometry of the whole setup (parallelism/perpendicularity). Below is one of my self-made holders, which in the attached photo is in turn mounted in a lathe toolholder, but can also be mounted in vices, adapted to various accessories (including by other manufacturers), etc.
-
Mike Y reacted to JacquesCousteau in Bateau de Lanvéoc by JacquesCousteau - Scale 1:32 - From Ancre Plans
I've seen that on some plans, especially near the bow and stern of some coasters in Souvenirs de Marine, it definitely threw me for a moment before I figured it out. The Bateau doesn't have any tumblehome, though, they apparently just decided to draw the top-down view at wale level.
After arranging all the frame templates, I felt very relieved to see that I can get all the frames out of a single sheet, leaving an entire extra 5x24-inch sheet for any do-overs.
Sawing all these pieces by hand is a bit tedious, so I'll be doing it in portions at a time in the carpentry workshop in between working on a full-scale tv stand. What seems to be working for now is to first saw across the wood sheet cutting the tips of each frame (which I'm leaving long for now). Getting the frames out is then a simple matter of cutting to one edge and then the other. I've also realized that cutting from one side and then the other, meeting in the middle as in the photo below, seems to really reduce the chances of the wood snapping because the frame is only held in place at one of the tips. (Probably an obvious point, but one I hadn't had a chance to learn until this build.)
After a while, I had a pair of rough-cut frames (obviously not glued yet), and a few floors and other parts, all ready for final shaping. Given that it will be another week until I'm back in the carpentry workshop and can cut out probably a similar number of frame parts, it's pretty clear that this will be a very slow project.
-
Mike Y reacted to ChrisLBren in La Renommee 1744 by ChrisLBren - 1/48 - 2025
Thanks everyone for your comments. This week was negative progress...
I was up to 20 frames and decided to test fit all of the notches with scrap wood - 4.5mm for the inner slot and 7mm for the outer. I should have done this during construction. Some of the first frames were off by almost .5mm which is a big gap in this sort of construction. So 10 frames ended up in the trash can and 10 remain.
Moving forward not only am I using an optivisor while milling, I am doing my best to cut halfway into the lines. The good news is I have plenty of Pear wood and I am in no hurry to complete this one. I really want to take my time to get this right rather than use any flawed part and pay for it later in construction.
Huge tip I figured out - always use a backing piece of plywood while milling parts. Im getting perfect cuts with no tear out.
-
 Mike Y reacted to Tobias in LE ROCHEFORT 1787 by Tobias - 1:36 - Harbor Yacht from ANCRE monograph
Hello everyone,
Time flies, and I rarely get to the workshop these days. I'm about to start on the outer planks, and I'd like to incorporate the color scheme from the drawing into the monograph. Since I'm not a good painter, I'm trying to achieve this with wood. First, I want to pick up the black color of the waterline. To do this, I first marked the waterline with a laser and am starting to attach the first boards.
-
Mike Y reacted to usedtosail in Chris Watton and Vanguard Models news and updates Volume 2
That's exactly what I say every time you release a new kit. Congratulations on the new machine.
-
 Mike Y got a reaction from Paul Le Wol in Looking for ideas for work area
As always strongly recommend to buy an electrical lifting table, they are quite affordable nowadays with many companies on the market (including IKEA that sells frames separately). Replace a flimsy office tabletop with a sturdy solid wooden one - and you will end up with a fantastic build table that allows you to find a perfect height for any operation. I added an inset vise and peg holes into mine, the possibilities are endless.
It is a relatively new "accessory" that is often overlooked, well worth the cost.
I would avoid hammering mortise joint with a chisel on such a table, so it is not a full replacement for a workbench if you do a normal woodworking. But more than sturdy for all the modelling needs.
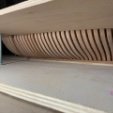
Some examples of my setup (IKEA table frame, solid top cut to size of the working area, Veritas inset vise), very easy to customize it for your space.
-
 Mike Y got a reaction from Gregor in La Belle 1684 by Gregor – Finished - 1:64 scale
Such a beautiful scale! Very charming model.
-
 Mike Y got a reaction from CiscoH in Looking for ideas for work area
As always strongly recommend to buy an electrical lifting table, they are quite affordable nowadays with many companies on the market (including IKEA that sells frames separately). Replace a flimsy office tabletop with a sturdy solid wooden one - and you will end up with a fantastic build table that allows you to find a perfect height for any operation. I added an inset vise and peg holes into mine, the possibilities are endless.
It is a relatively new "accessory" that is often overlooked, well worth the cost.
I would avoid hammering mortise joint with a chisel on such a table, so it is not a full replacement for a workbench if you do a normal woodworking. But more than sturdy for all the modelling needs.
Some examples of my setup (IKEA table frame, solid top cut to size of the working area, Veritas inset vise), very easy to customize it for your space.
-
Mike Y reacted to Desertanimal in Looking for ideas for work area
That is an excellent idea that I completely missed out on!
The funniest part is I have a desk like that in my office!
That will definitely be added to the room. That makes a lot of sense as assembly, light woodworking table.
Chris
-
 Mike Y got a reaction from Nirvana in Looking for ideas for work area
As always strongly recommend to buy an electrical lifting table, they are quite affordable nowadays with many companies on the market (including IKEA that sells frames separately). Replace a flimsy office tabletop with a sturdy solid wooden one - and you will end up with a fantastic build table that allows you to find a perfect height for any operation. I added an inset vise and peg holes into mine, the possibilities are endless.
It is a relatively new "accessory" that is often overlooked, well worth the cost.
I would avoid hammering mortise joint with a chisel on such a table, so it is not a full replacement for a workbench if you do a normal woodworking. But more than sturdy for all the modelling needs.
Some examples of my setup (IKEA table frame, solid top cut to size of the working area, Veritas inset vise), very easy to customize it for your space.
-
 Mike Y got a reaction from Desertanimal in Looking for ideas for work area
As always strongly recommend to buy an electrical lifting table, they are quite affordable nowadays with many companies on the market (including IKEA that sells frames separately). Replace a flimsy office tabletop with a sturdy solid wooden one - and you will end up with a fantastic build table that allows you to find a perfect height for any operation. I added an inset vise and peg holes into mine, the possibilities are endless.
It is a relatively new "accessory" that is often overlooked, well worth the cost.
I would avoid hammering mortise joint with a chisel on such a table, so it is not a full replacement for a workbench if you do a normal woodworking. But more than sturdy for all the modelling needs.
Some examples of my setup (IKEA table frame, solid top cut to size of the working area, Veritas inset vise), very easy to customize it for your space.
-
 Mike Y got a reaction from Jack12477 in Looking for ideas for work area
As always strongly recommend to buy an electrical lifting table, they are quite affordable nowadays with many companies on the market (including IKEA that sells frames separately). Replace a flimsy office tabletop with a sturdy solid wooden one - and you will end up with a fantastic build table that allows you to find a perfect height for any operation. I added an inset vise and peg holes into mine, the possibilities are endless.
It is a relatively new "accessory" that is often overlooked, well worth the cost.
I would avoid hammering mortise joint with a chisel on such a table, so it is not a full replacement for a workbench if you do a normal woodworking. But more than sturdy for all the modelling needs.
Some examples of my setup (IKEA table frame, solid top cut to size of the working area, Veritas inset vise), very easy to customize it for your space.
-
 Mike Y got a reaction from cotrecerf in Looking for ideas for work area
As always strongly recommend to buy an electrical lifting table, they are quite affordable nowadays with many companies on the market (including IKEA that sells frames separately). Replace a flimsy office tabletop with a sturdy solid wooden one - and you will end up with a fantastic build table that allows you to find a perfect height for any operation. I added an inset vise and peg holes into mine, the possibilities are endless.
It is a relatively new "accessory" that is often overlooked, well worth the cost.
I would avoid hammering mortise joint with a chisel on such a table, so it is not a full replacement for a workbench if you do a normal woodworking. But more than sturdy for all the modelling needs.
Some examples of my setup (IKEA table frame, solid top cut to size of the working area, Veritas inset vise), very easy to customize it for your space.
-
Mike Y reacted to Gregor in La Belle 1684 by Gregor – Finished - 1:64 scale
Thank you @fmartins for your kind feedback.
As for craftsmanship, I'm not so sure. Look what happened recently: La Belle fell out of my hands...
Luckily, all is well again.
I made a small binnacle. My La Belle will now be able to find her way to her final resting place in the Gulf of Mexico.
Cheers,
Gregor
-
Mike Y reacted to Gregor in La Belle 1684 by Gregor – Finished - 1:64 scale
Only a small update: the galion, inspired by Boudriot and much simplified.
I hope to find some time to do the deadeyes on starboard and the rudder.
Cheers,
Gregor