bhermann
-
Posts
549 -
Joined
-
Last visited
Content Type
Profiles
Forums
Gallery
Events
Everything posted by bhermann
-
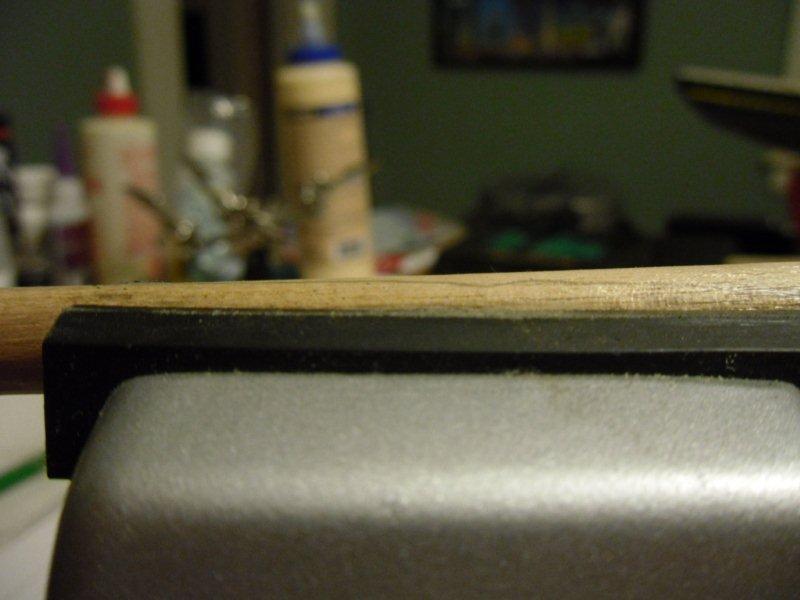
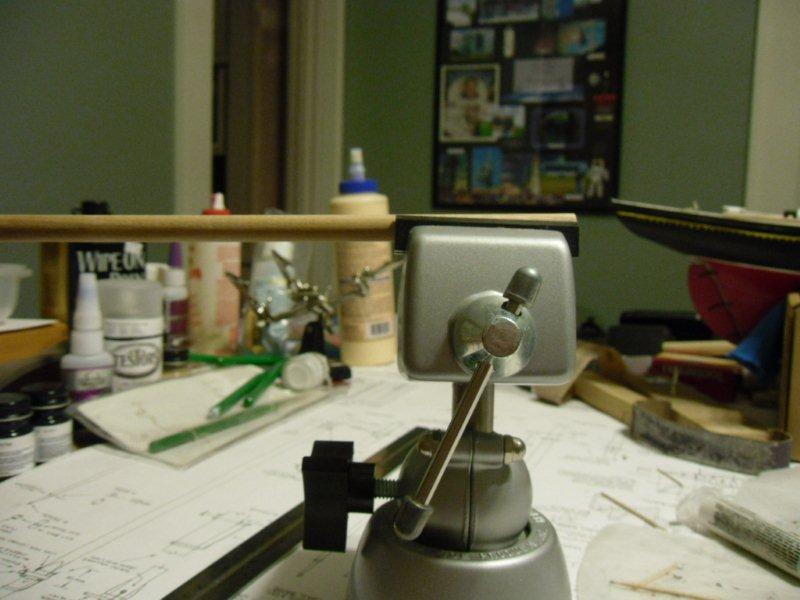
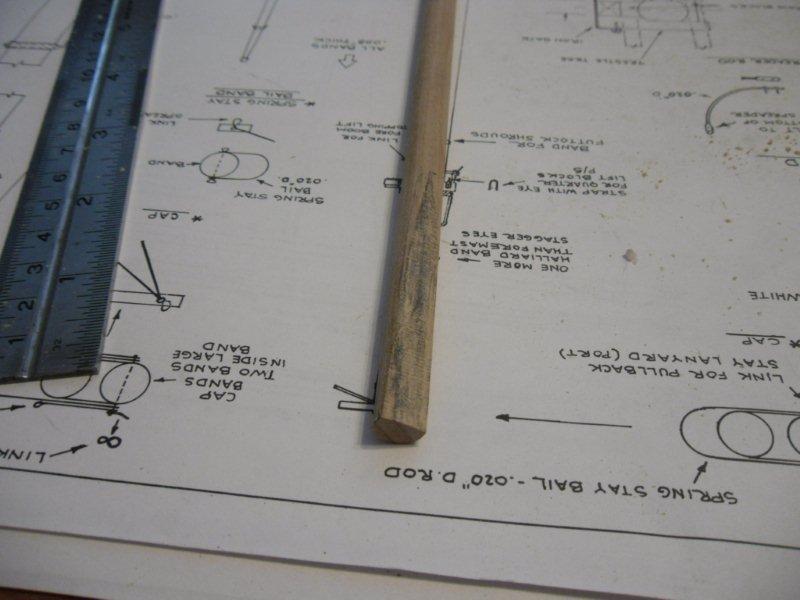
JP - I'm glad to be of service - it is one of my "big 3" reasons for doing a log. Thanks for stopping by, Elia. I find that I am rediscovering things as I look back through the old photos. Dave - yeah, those sails are scaring the crap out of me. I have two different piles of cloth in the corner of the room waiting their turn... it's coming soon. I look forward to seeing your success story... And now a word on tapering spars. Bluenose has two different types of tapering going on... the traditional symmetrical, taper to a point type that is done on the topmasts, and an asymmetric, one side stays straight while the other narrows that is used on the lower masts, the gaffs, booms, and bowsprit. I am going to start with the second type. I am showing the mainmast, but I used the same process for all of these. First I lay the dowel on the plan and mark the final width at the end of the dowel and the spot on the dowel where the taper starts. Then I put the dowel into the vice with the section to be removed rising above the jaws. Once that is positioned, I sand everything off that is above the jaws until I am left with a flat side that gets wider at the end of the dowel. After this is done I carefully sand the flattened section until it is round all the way up the dowel again, taking care not to remove any material from the side that has no taper. The finished product for the main and foremasts looks like this: The masts just have a taper at one end. The other spars are tapered at both end (so they have a bowed profile when viewed from the side). This is done by applying the same technique on both ends, one after the other. Bob

-
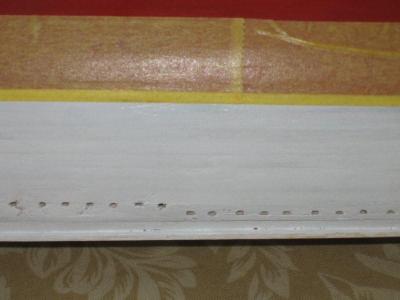
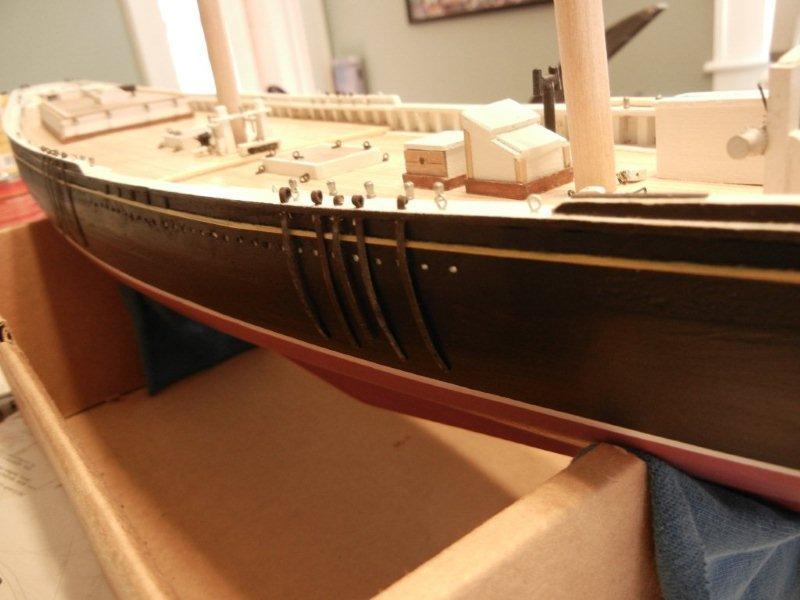
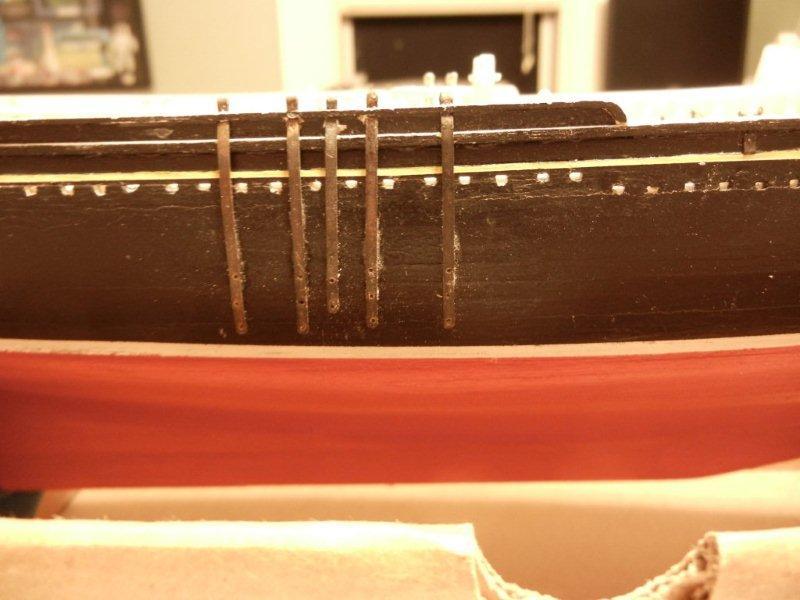
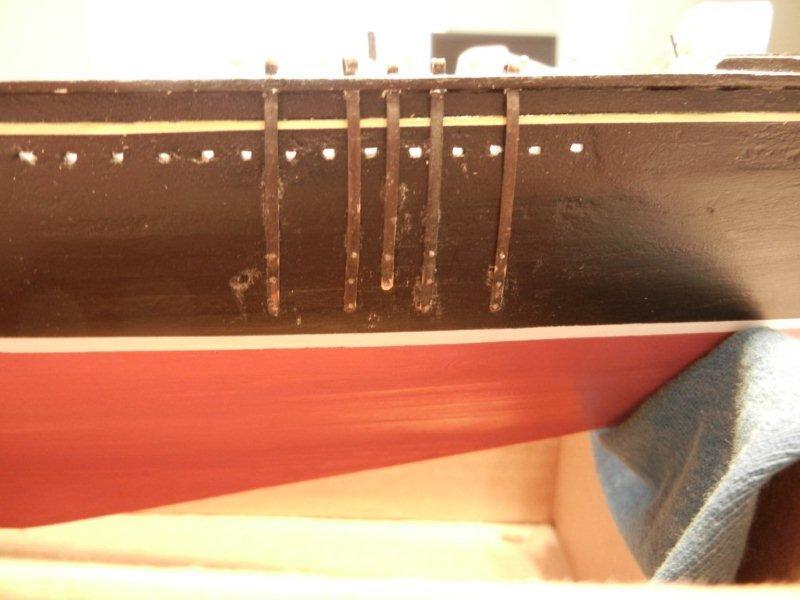
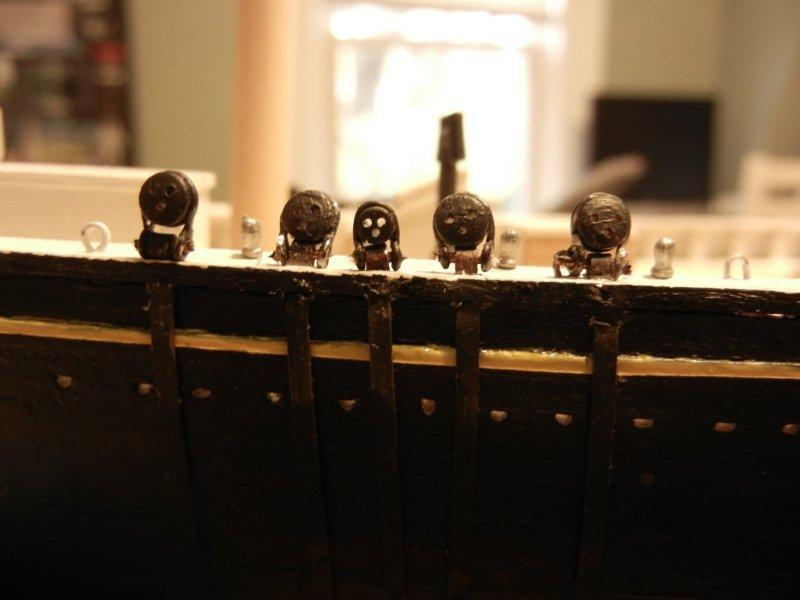
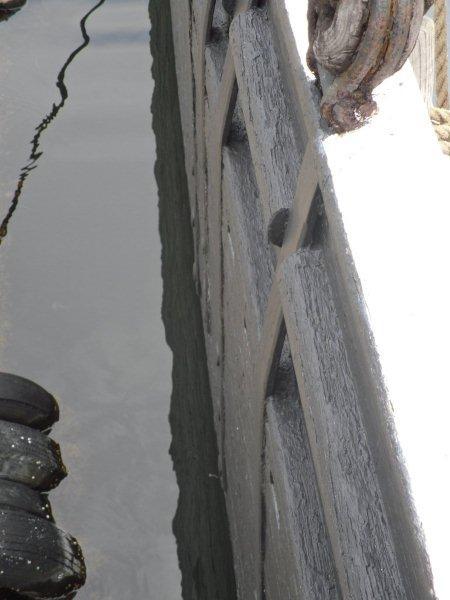
Dave - Unfortunately only the photos survived - I am making up the posts as I go. Gerty - trying to do my part to keep up the site Now that the chainplates and shackles are made, it's time to install them on the ship. I borrowed the tools from Davids Sharpie Schooner log (has anyone seen David?). A pin vise and a pushing tool made from the brass strip material and filed to a point. First pushing through a test piece. Then it's time to make a jig. A piece of wood is marked with the locations where the chainplates go through the rail and holes are drilled along the line. Then the push tool is used to open them up and one of the plates is test fitted through it. The template is taped to the rail and holes are drilled through the rail, being careful to make sure the drill exits the bottom of the rail on the outside of the hull. The pointed tool is pushed carefully through followed by the chainplates then they are carefully bent to roughly match the hull contour. Next the plates are glued to the hull, the "bolts" (wire) are glued in, then they are trimmed and filed. The deadeyes and shackles are then glued in, and a coat of paint over all. And all deadeyes and chainplates are installed.


-
Bleaching your wood
bhermann replied to JPett's topic in Building, Framing, Planking and plating a ships hull and deck
When I stain a soft wood - or any wood that I expect to be rather blotchy - I use a pre-stain wood conditioner and then stain. When I get to the point in my log reconstruction where I show the masts, you'll be able to see my results. I'm not sure if this is quite on-topic, but it seems like it might be headed that way. Bob -
It's interesting to think about this. I consider the Internet to be the "Wild West" - when I put something out there, I lose control of it and what happens to it from there, so I don't put out things that I don't want the whole world to know about. I like the idea of license statement up front, but I suspect there would be no enforcement (nor would I expect any) so it would have more symbolic value than any practical purpose. Bob
- 20 replies
-
- 1
-

-
- IPR
- right of use
- (and 1 more)
-
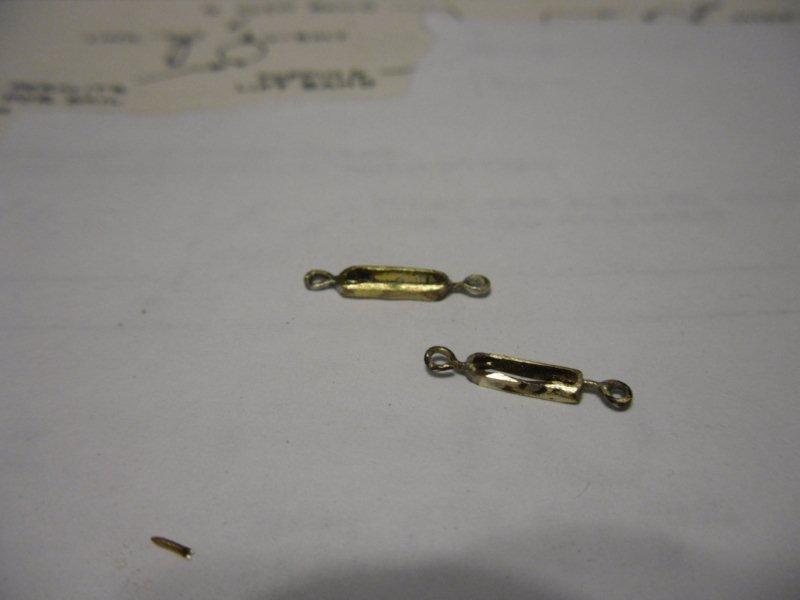
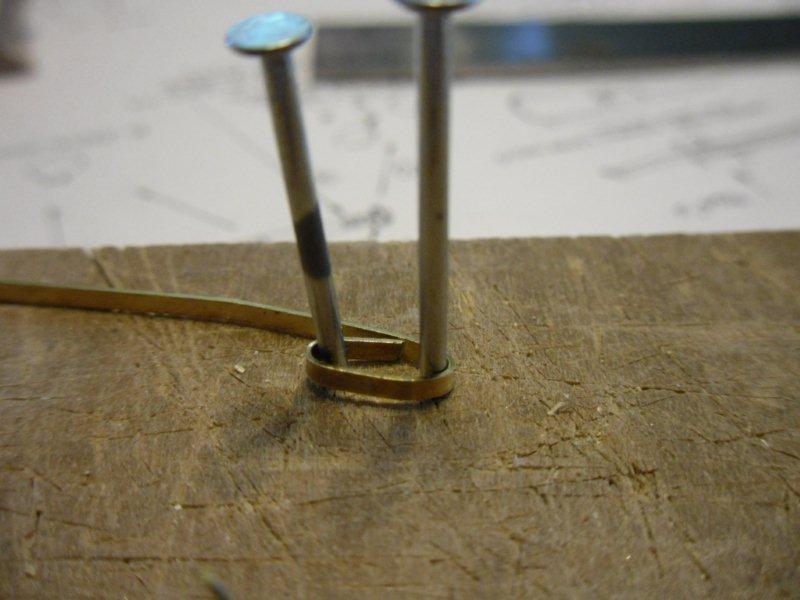
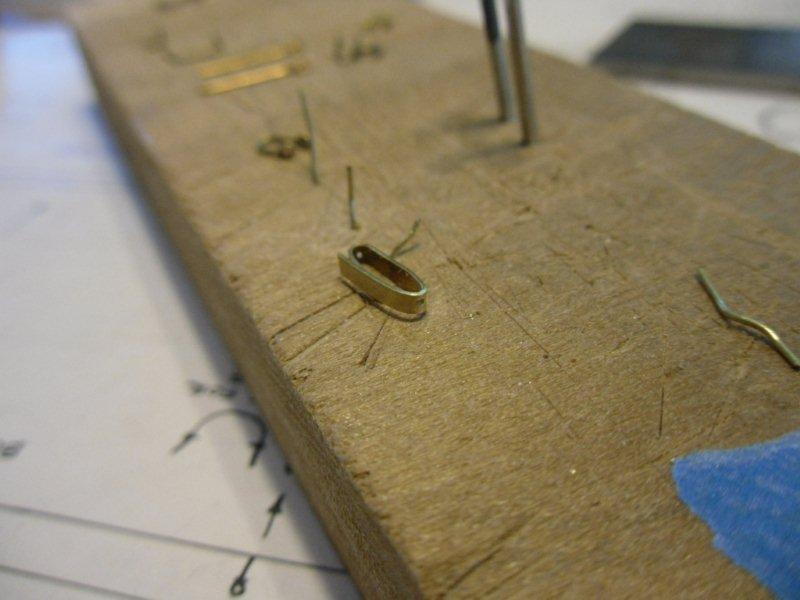
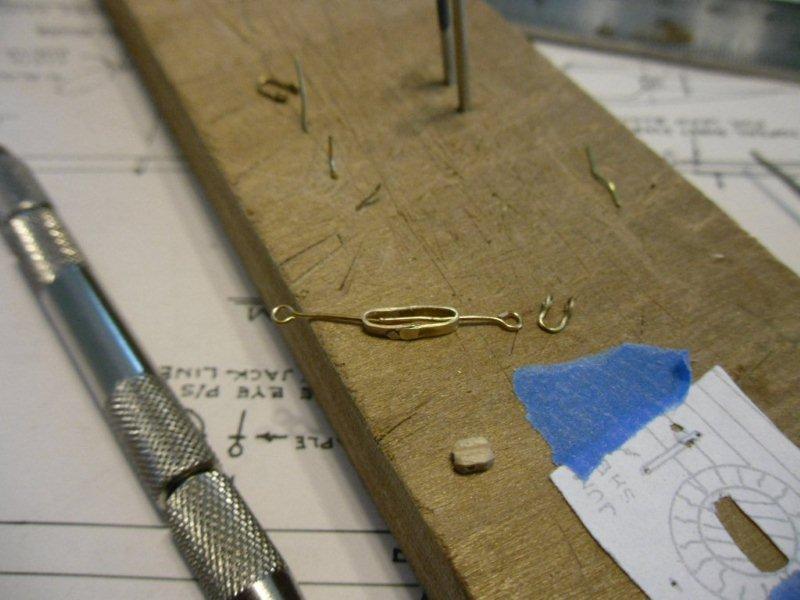
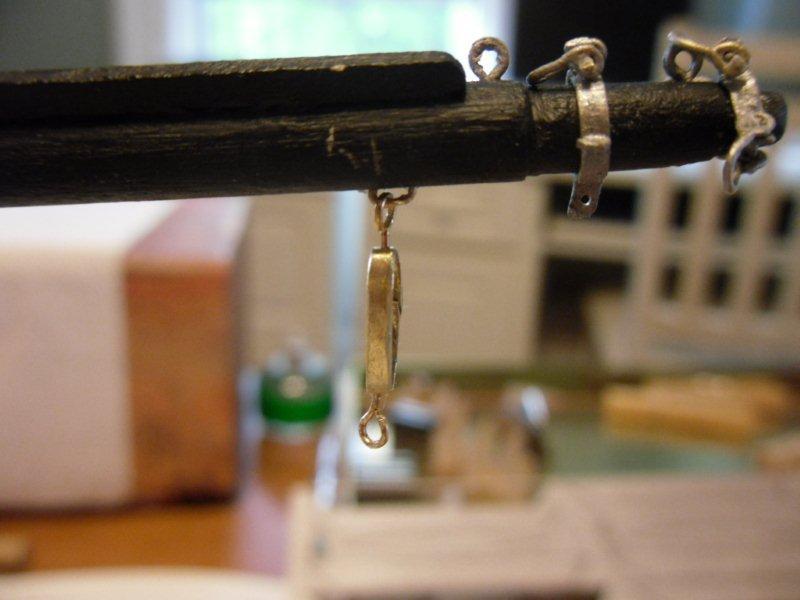
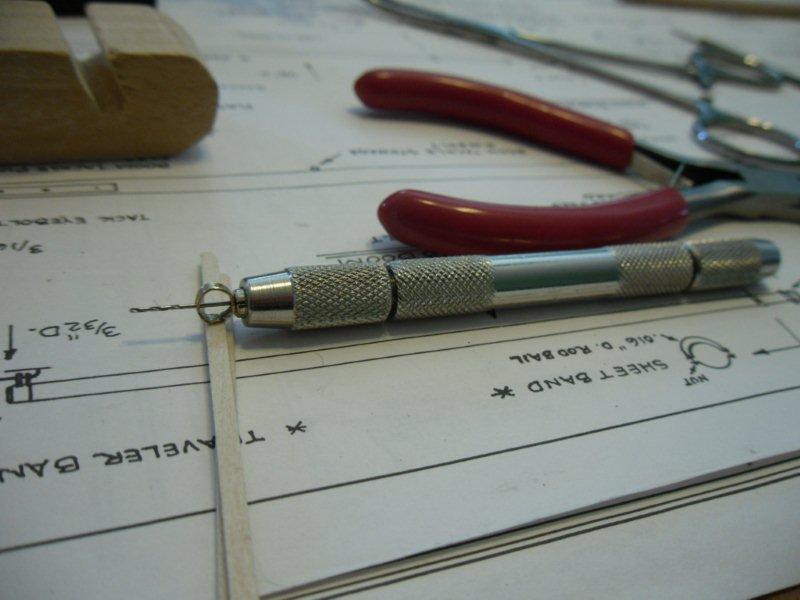
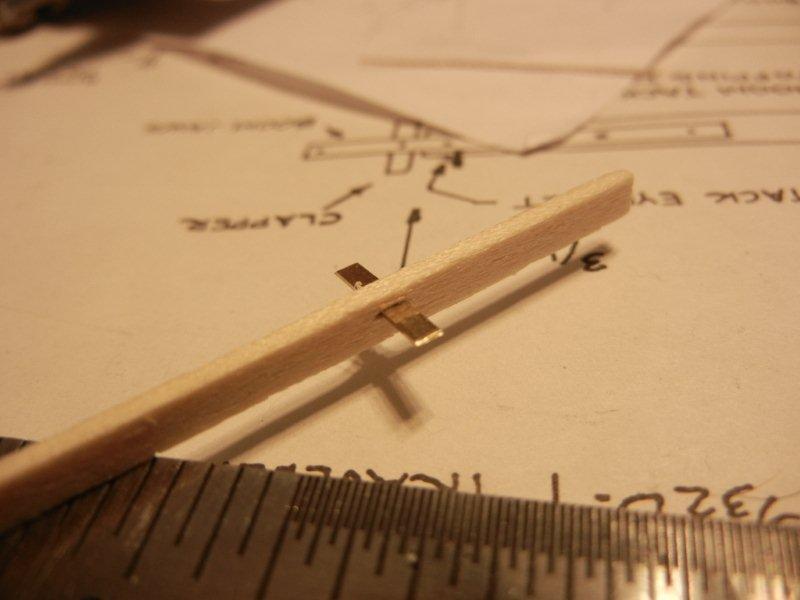
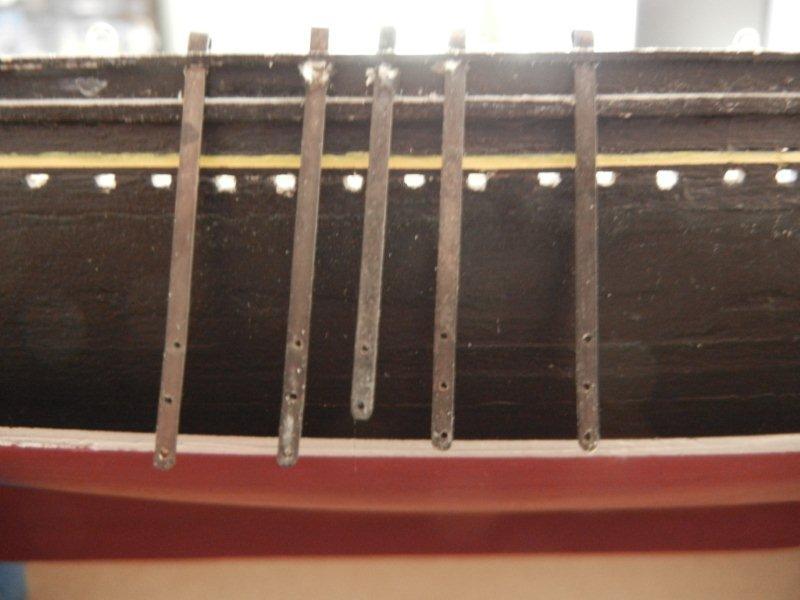
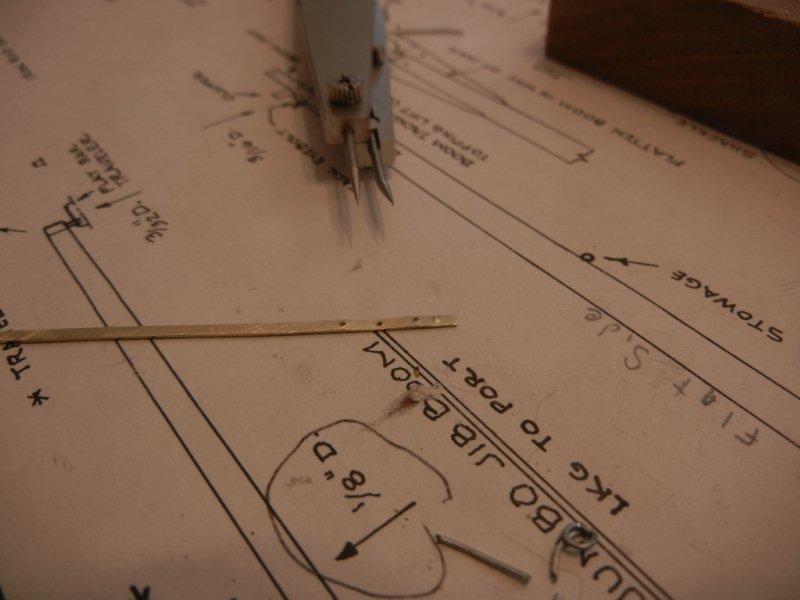
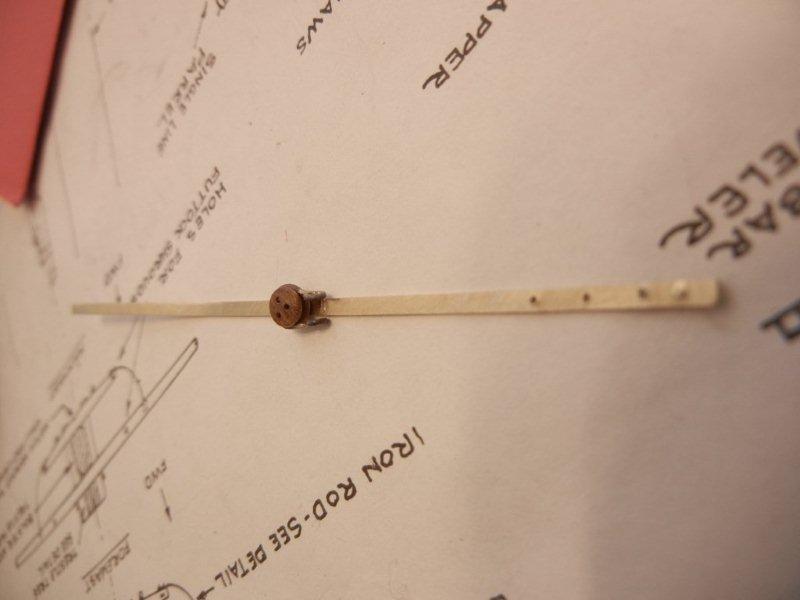
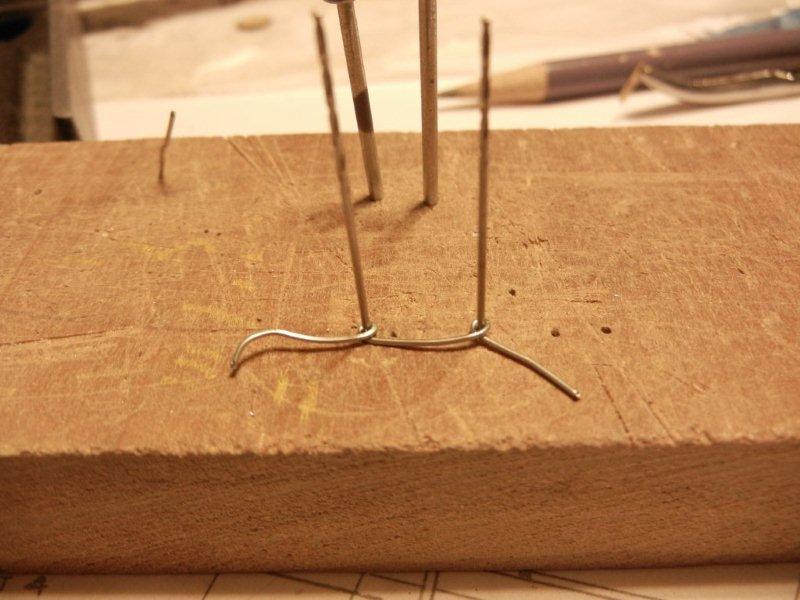
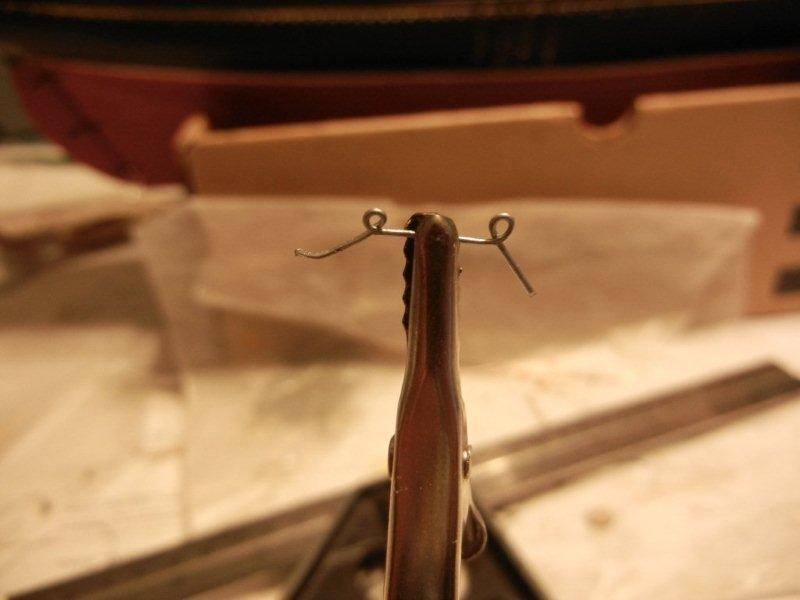
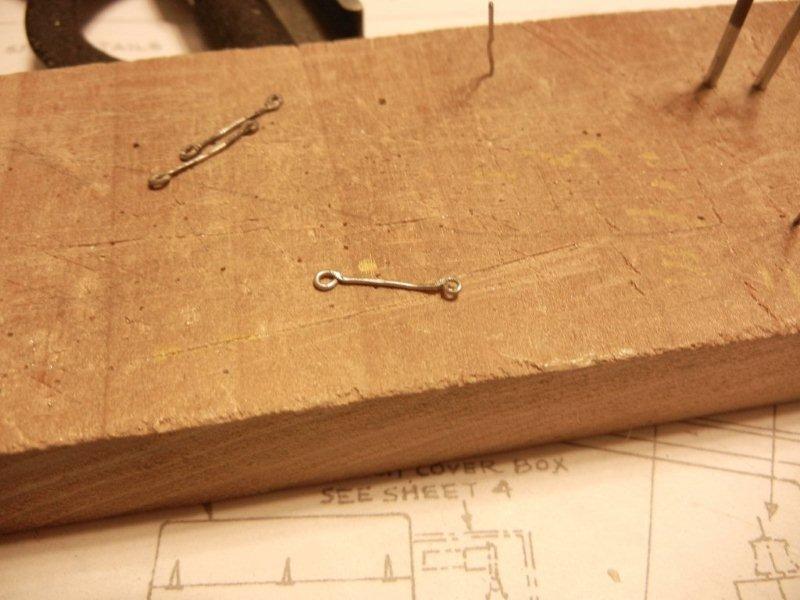
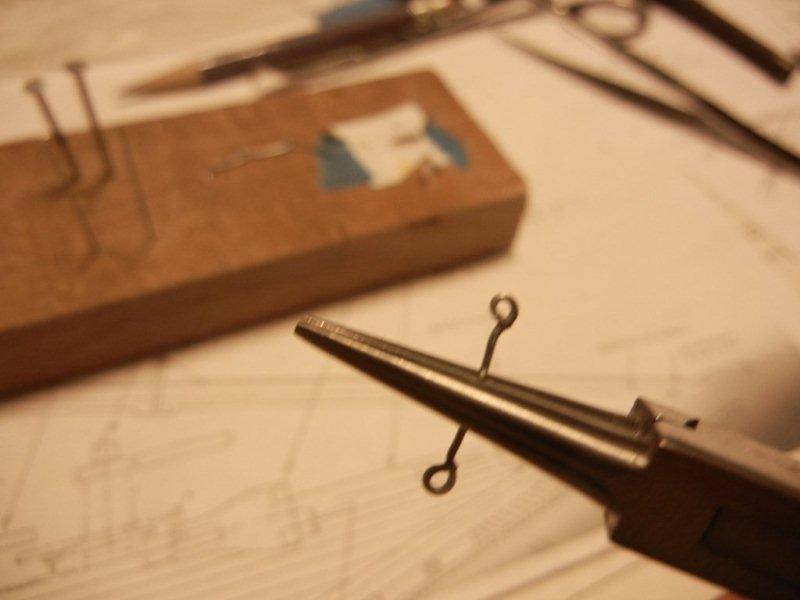
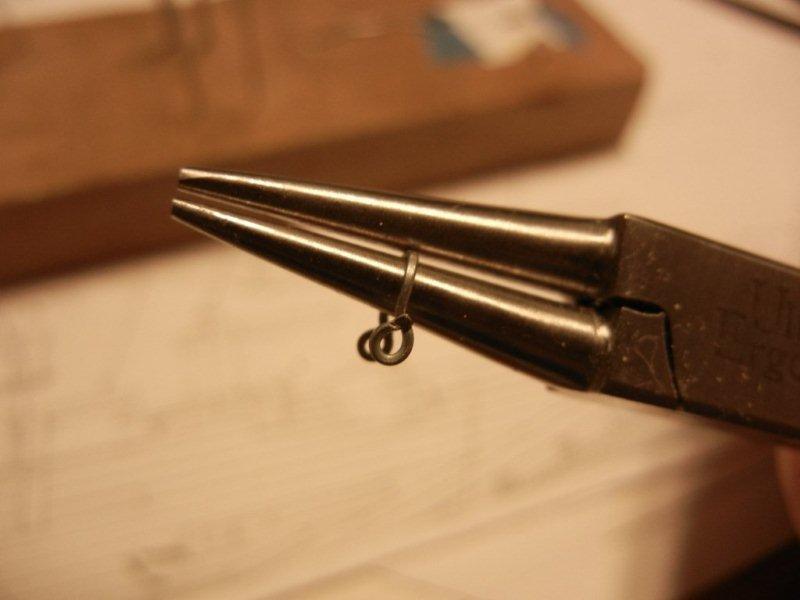
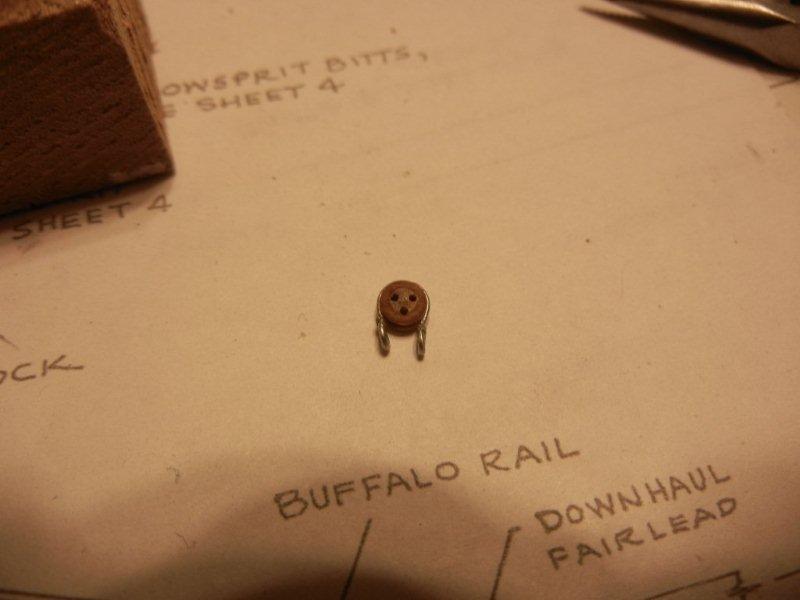
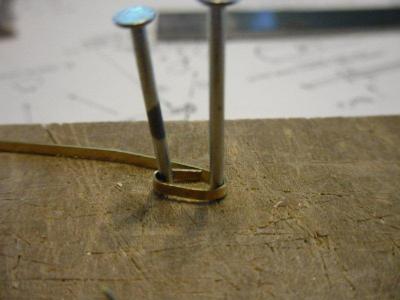
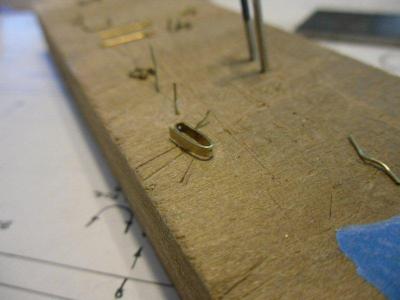
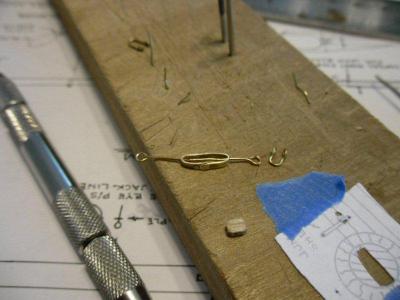
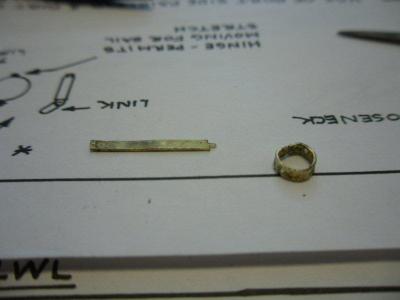
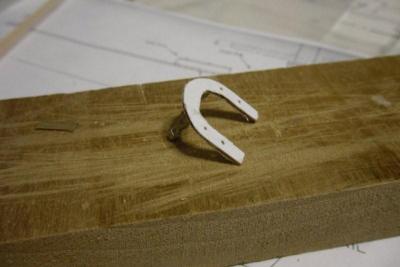
Let's start by drilling holes in the ends of the chainplates for the "bolts". Then checking the fit of the deadeyes The ends of the chainplates are rolled over a drill bit - #73, I think. Then the end is soldered closed. Here are a mess of chainplates. Time to make some shackles for the deadeyes. First the jig to make sure all shackles are the same size. Put it into the third hand and solder the loops And here after straightening. Into the roundnose pliers for bending And wrapped around the deadeye. Next will be attaching the chainplates to the ship. Bob

-
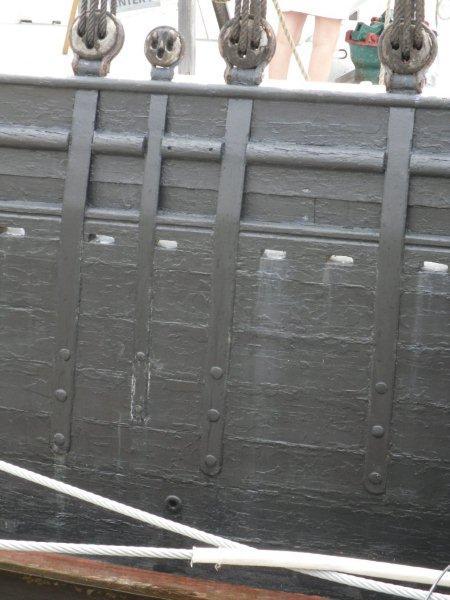
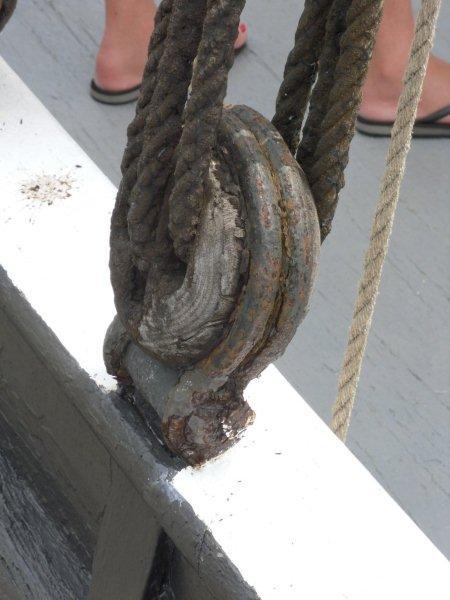
My next topic will be the deadeyes. To research this I took a trip to Mystic and studied the L. A. Dunton, an American fishing schooner from the same era as Bluenose. I didn't set the chainplates on Bluenose flush with the hull. If I had it to do over again, I would make that attempt by adding material inside the hull while planking. Months after I did the chainplates, I saw the note on the plans that described the chainplates as being flush with the hull! I did OK with the shackles and shackle pins, and getting the chainplates through the top rail, but not setting them flush was a definite miss. Bob
-
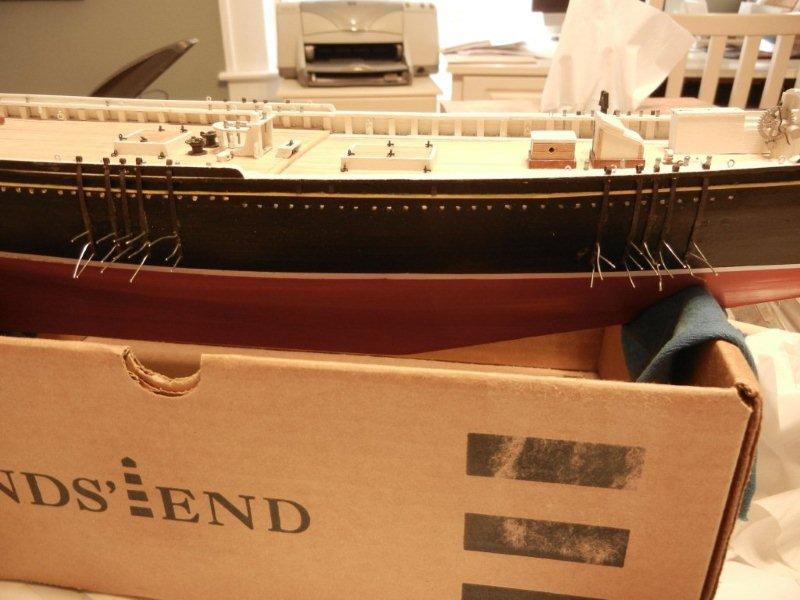
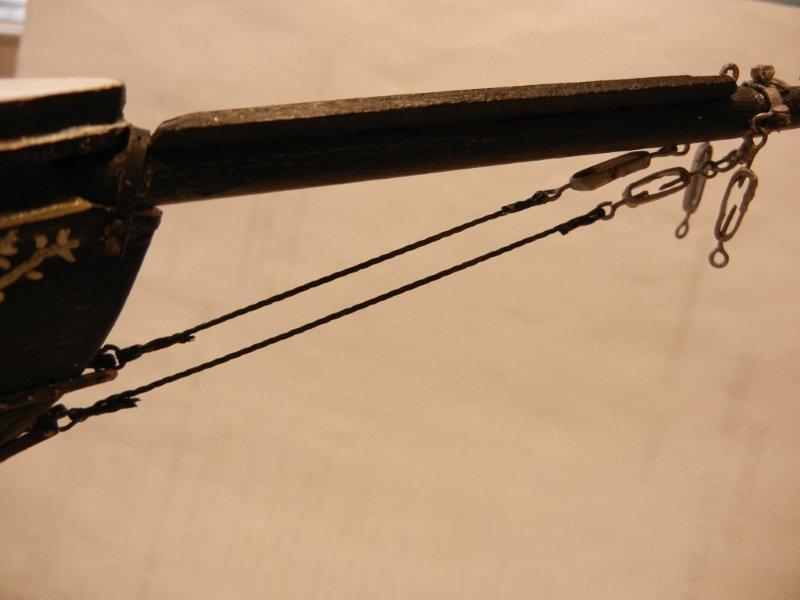
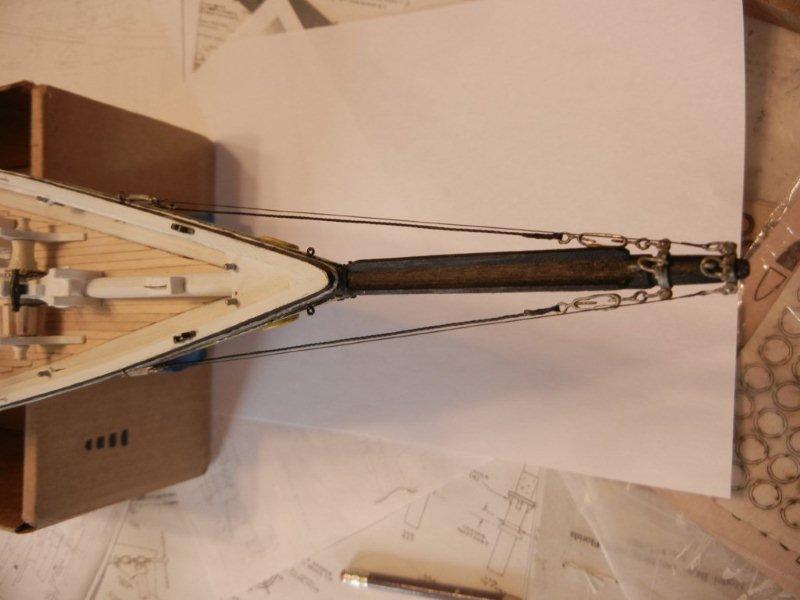
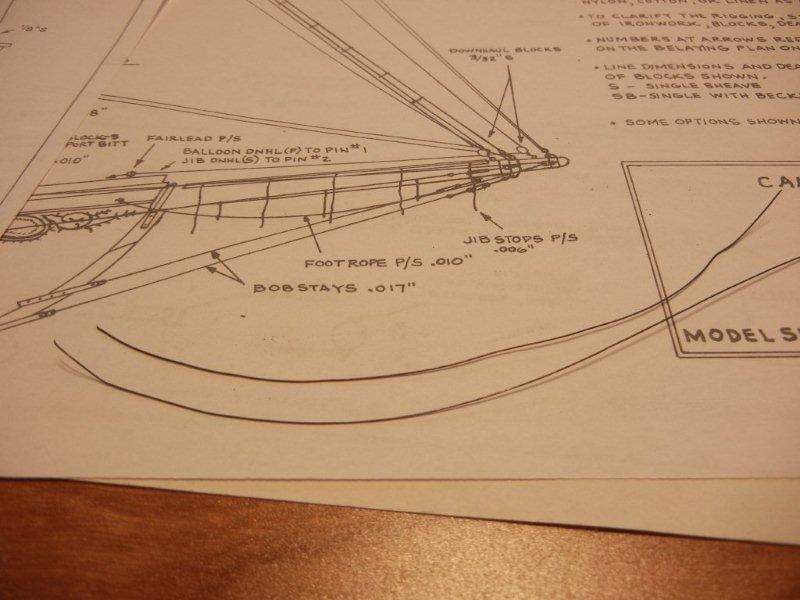
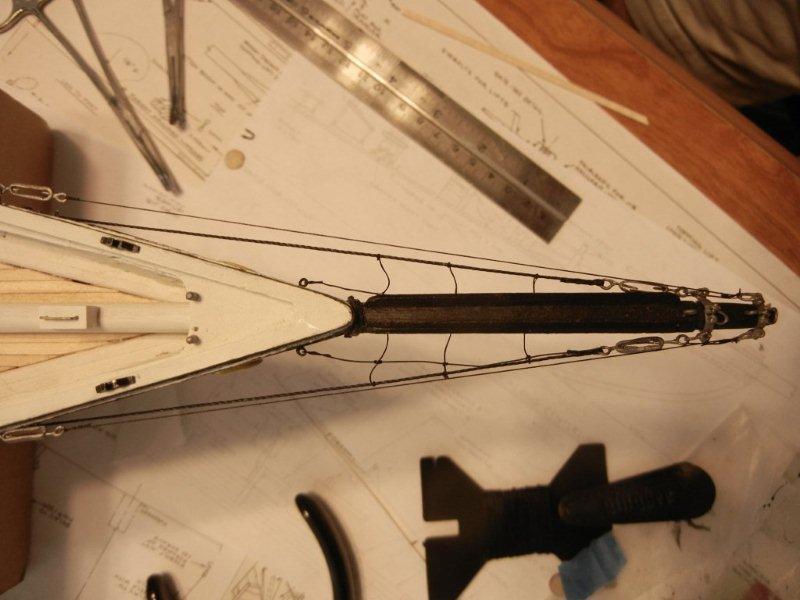
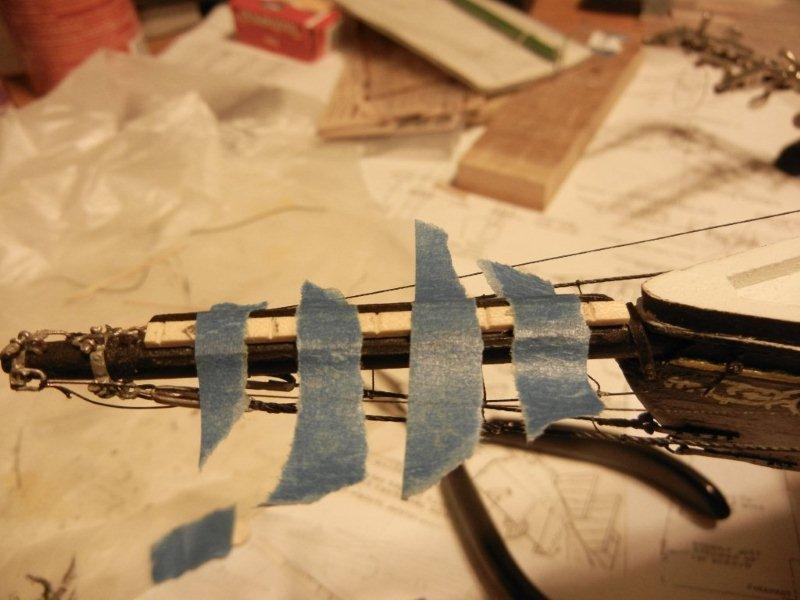
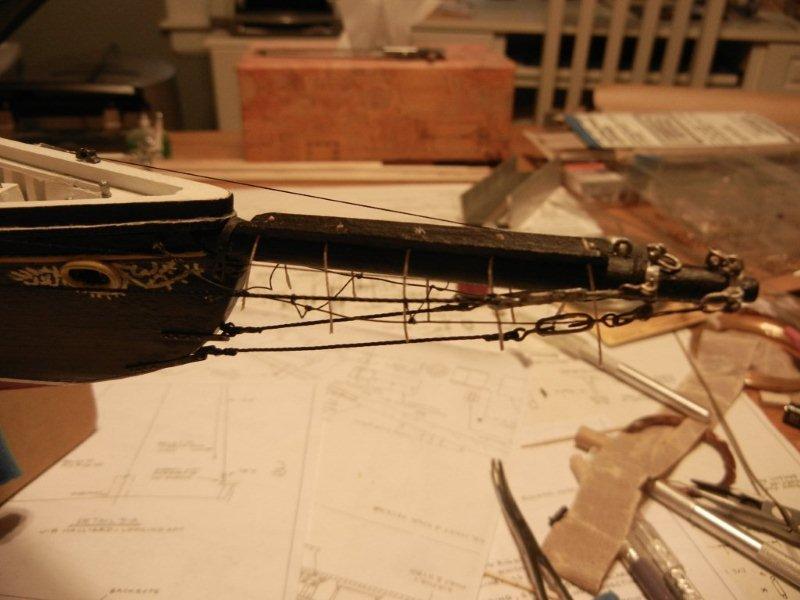
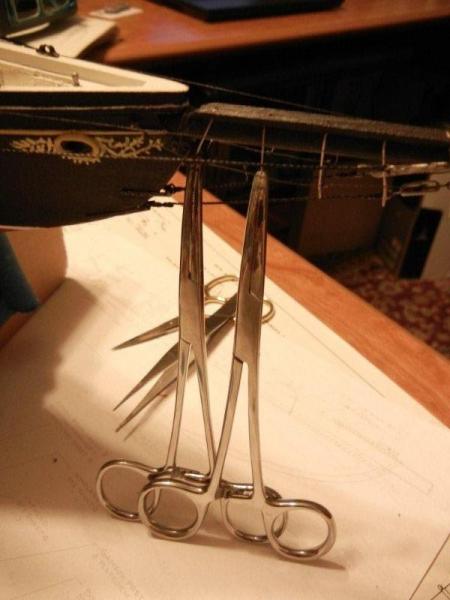
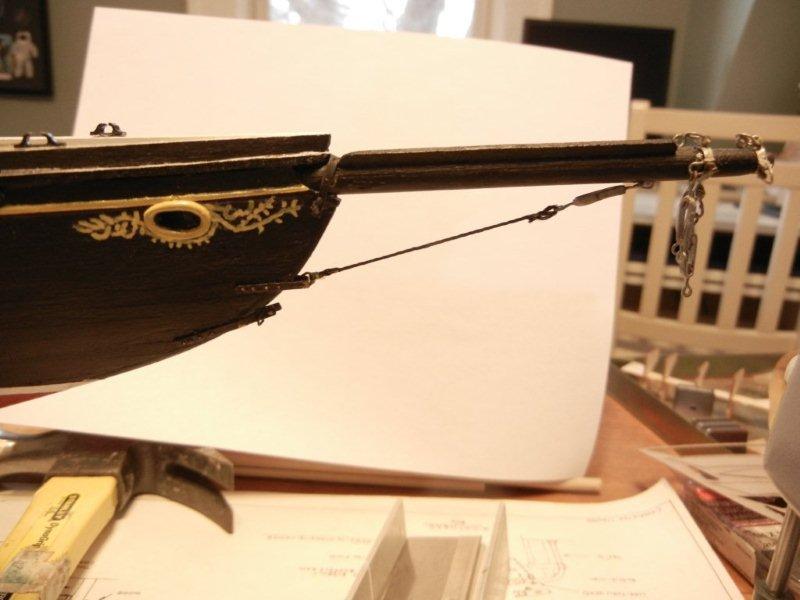
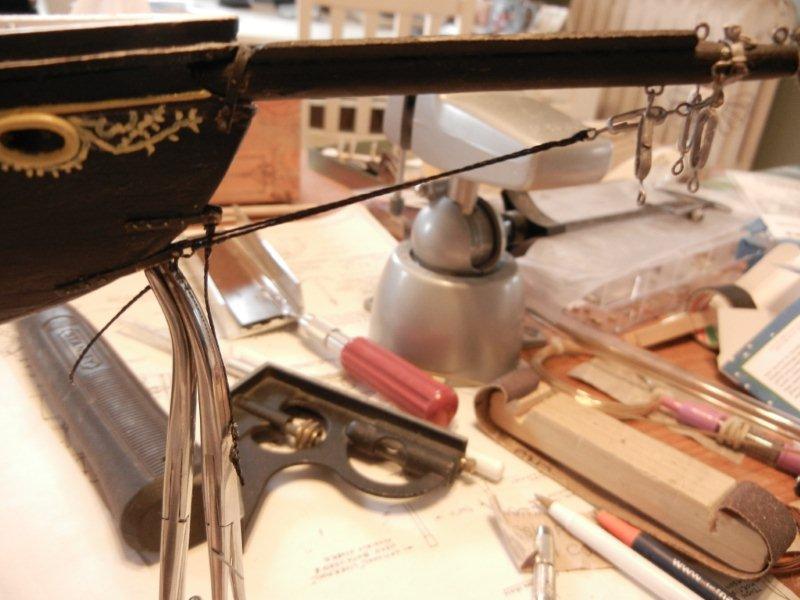
Next up - bowsprit continuation. First shot shows the two bobstays complete, I cleaned up the ends by trimming them closer and gluing the loose ends to the line after this picture was taken. The guys were rigged in the same fashion. I used strands of speaker wire to simulate the footropes. Painted black and roughly shaped. Attached the footropes - Oh look, I cut the upper guy! Starting the stirrups - and my first experience with clove hitches. All the stirrups tied on. I used this "jig" to mark where to drill the holes for the jib stops. A couple of jib stops being placed and given a "natural" hanging look. The completed bowsprit rig. Bob

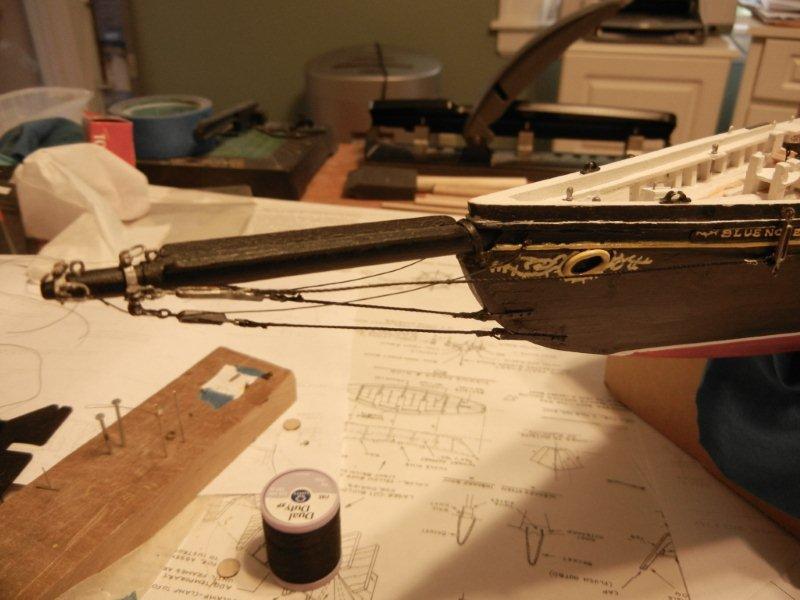
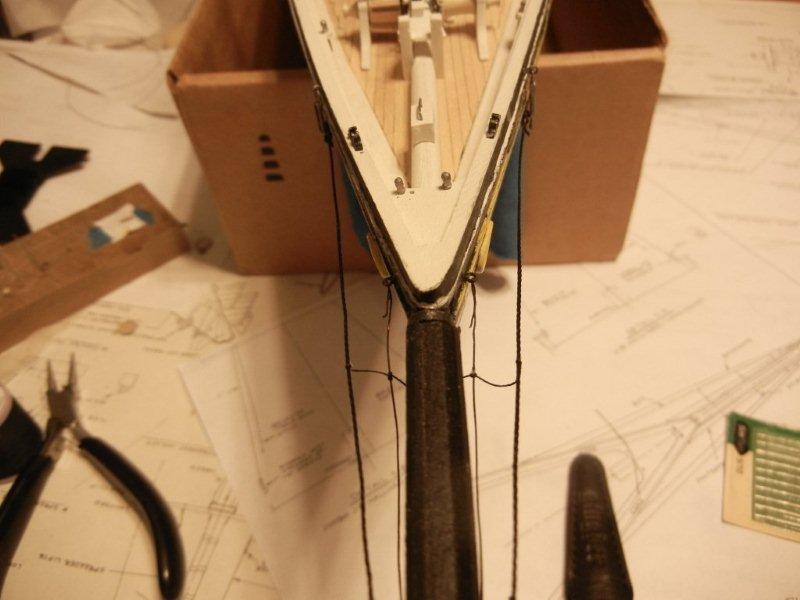
-
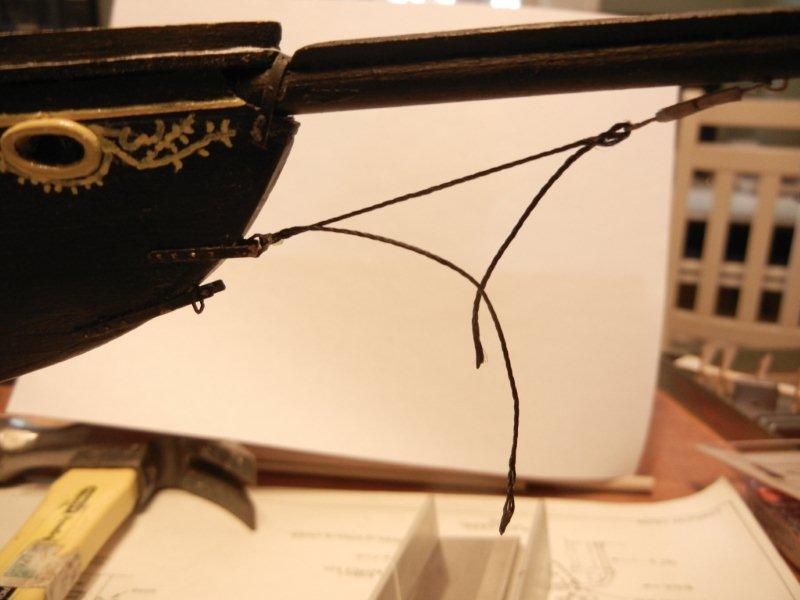
Hi, Rob - it's good to see you over here in our new home. I'm looking forward to your build moving forward. I don't consider it cutting corners with metal work. I suspect that paper bands are much better in scale than the brass strips I am using - I just get a little anal from time to time that metal parts should be modeled in metal - but not always. For example I am not using wire for the rigging, although I suspect Bluenose actually used wire. About the log, as I look back at the photos I have saved, I see that I really start to go all over the place with a little of this, some of that, then back to the first section, or something entirely different. Rather than recreate my order in detail, I am going to try to post things in a more logical fashion than I actually build them. In the real world at the moment I am adding hooks to blocks and attaching them to the gaffs with mousing. In the log recreation, I am going to list the rest of the bowsprit work next. First, the upper bobstay. I used the method Gil Middleton described in his Victory log to form splices. By using a blunt needle to probe the three strands in the rope, the end can be fed through the rope without splitting it. Then the thread end is passed through two more times to complete the splice, A spot of dilute PVA on the splice and let it dry. First shot is with the untrimmed ends still in place. The lower end is spliced and glued, the upper end has not been snugged up yet. The inner bobstay after trimming. The I moved on to the lower bobstay. These pictures show the flow a little better. The first shot shows the lower end spliced, glued and clamped while the glue dries. The next shot shows the upper end spliced and glued. The loose end of the rope is fed back through the lower eye and weighted with the hemostat while the glue dries on the upper end. If you look closely you will also see that I accidentally cut the inner bobstay. Ouch! I still don't have this splicing thing down yet. I'm hoping it will get better as I do more of it. Bob
-
Dave - thanks for the tip on drilling the deadeyes. I think you should do the same thing with the seizings that you do with the lanyards. If you leave the lanyards natural, leave the seizing natural too. I have to laugh about your ADD comment. I am getting to the point in my log recreation where I either have to follow the order I did things in, or put the rest of the steps in some sort of logical order. We do tend to get all over the place from time to time Bob
-
Thanks, Dave. I misread the post about size to be referring to the cathead, not the anchor. I need to be more careful. Bob
-
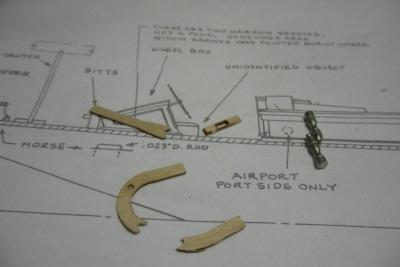
Hi Dave - I do have something that resembles a cathead in my bag - along with a couple of anchors, navigation lights, and what I think are a couple of bitts. At least it has the correct angle bent into it. About the size compared to the plan detail - most of the plan details are drawn 2x normal size so the actual piece should be smaller than the detail. In any case, I'd say you found the cathead - or at least one of them Bob
-
Dave - I think you found it. When I get near the kit again - probably Monday - I'll take a look to verify. There is definitely no bilge pump handle. I haven't done anything with the cat yet, but I was thinking I'd probably wind up scratching it. That chain link size looks pretty good to me... maybe a touch on the large size but pretty close. Bob
-
Hi Jamie. It's good to see you back. I think your approach will work fine and I am looking forward to you getting back under way. Bob
-
Wayne - Emma Berry looks like an interesting subject, one that I have been eyeing off and on for the past couple of years. I think it was Maurys who had an great build log on the old MSW. You may want to PM him if he doesn't chime in here for his opinion of the kit. As Adam says, those Model Expo sales seem to run in cycles so if you miss it this time, it should come around again. Bob
-
That's some nice looking work, Dave. I like the figure and think he adds interests. is he trimming the peak halliard? Bob
-
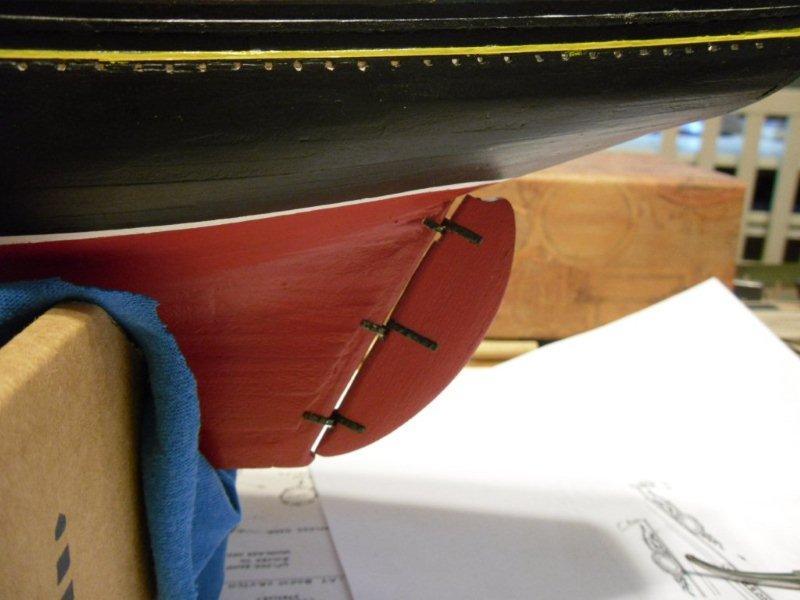
Next I attached the rudder and the bobstay plates. To simulate the bolts for this I simply drilled holes through the brass strips and into the wood, then glued brass wire into the holes, cut it off, and filed it down. The upper plate has its wire inserted and trimmed, the bottom plate is in progress. A view from the bow with the links that will anchor the bobstays. BTW a coat of paint goes over the work after everything is set up. A couple of more turnbuckles ready to go. Bob


-
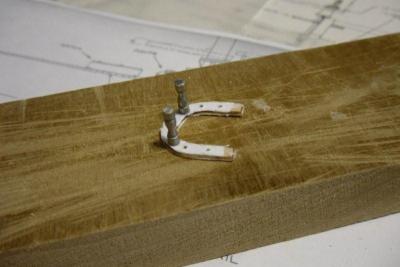
After adding all these lugs and bands, I had to make up some turnbuckles to attach to them. It all starts with this jig to help make them a consistent size. The band is soldered closed, filed narrower, and holes are drilled in both ends. Eyes are then soldered into either end after being cut to length. Here is a turnbuckle attached to its staple. Bob
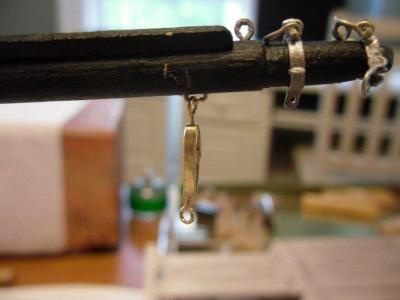
-
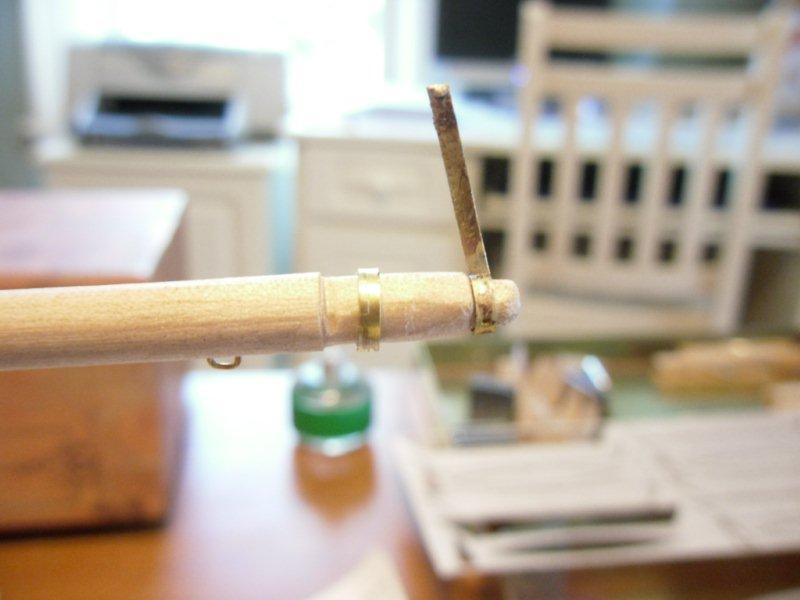
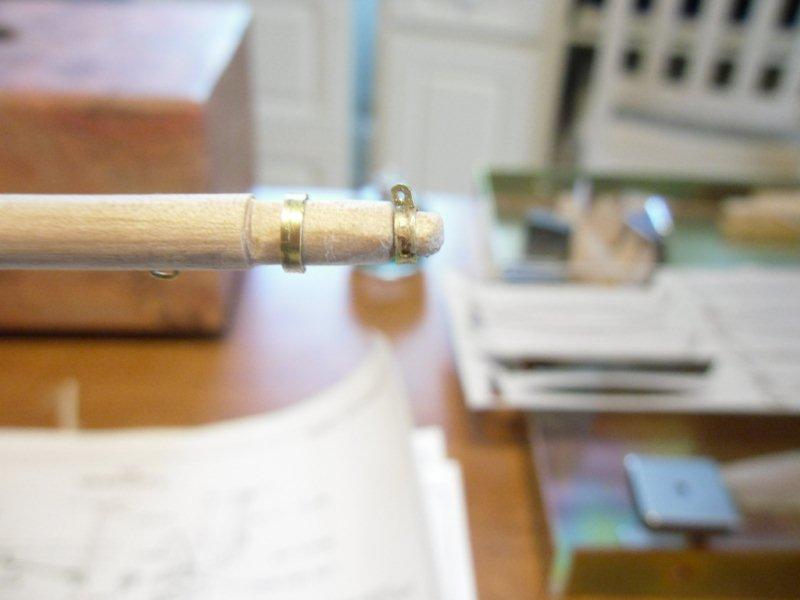
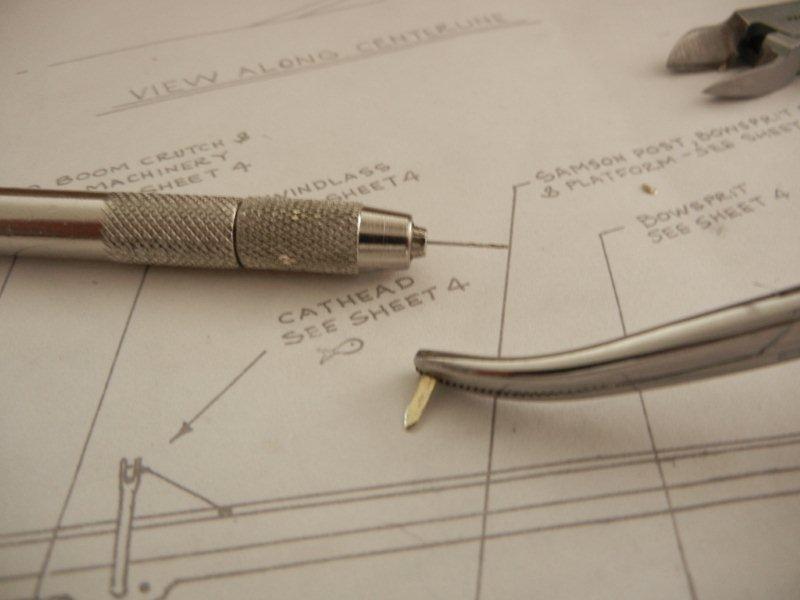
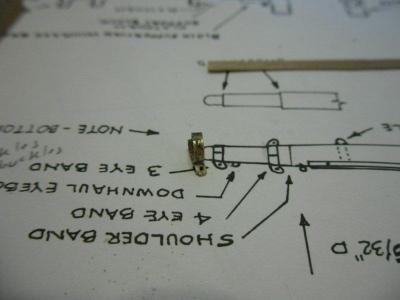
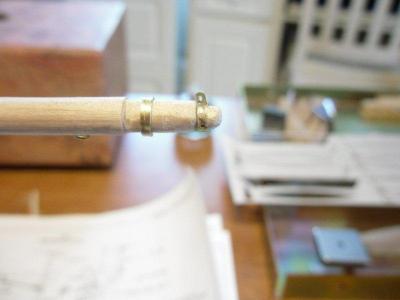
Hi Floyd - hopefully this will be useful to folks, and they won't have to wade through all those posts to see information they can use. Next up was the bowsprit - and my introduction to silver soldering. Russ's tutorial on the subject was my starting point, and Russ was willing to answer all the questions I had along the way. First pic - drilling holes in a band for the lugs that will go there. Then a "pin" is filed into the end of a brass strip to be inserted into the hole. The completed pin is then placed into the hole ready for applying a dab of solder paste Here is a band with some of it's lugs filed and with holes drilled for their attachments - cound be a turnbuckle or a shackle. One band with one lug attached test fit on the Bowsprit. Bob


-
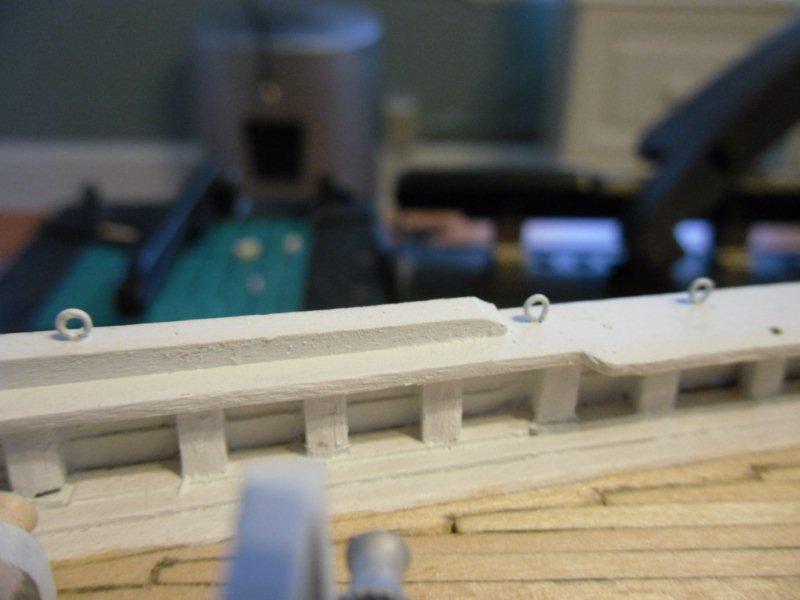
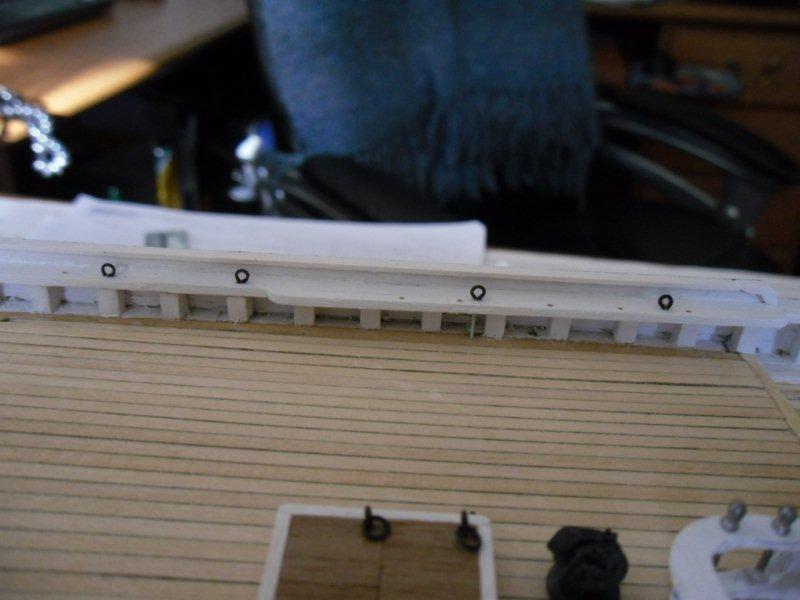
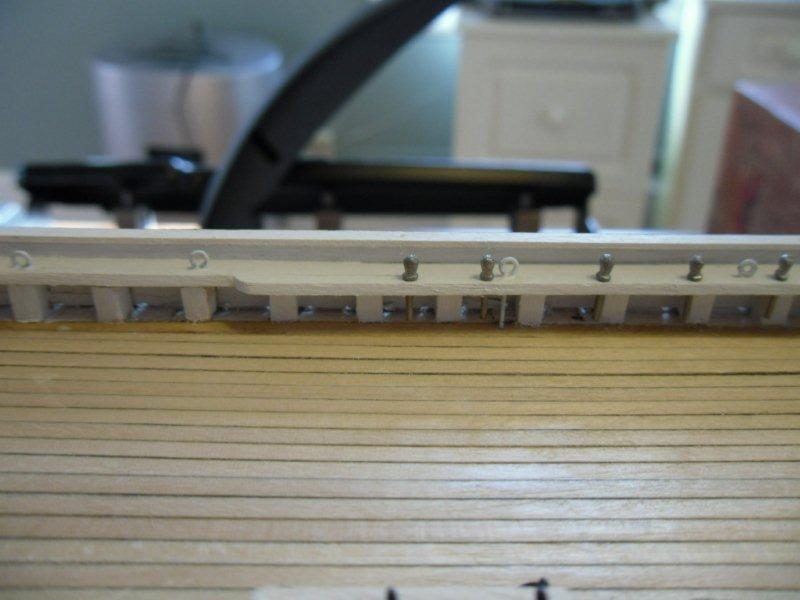
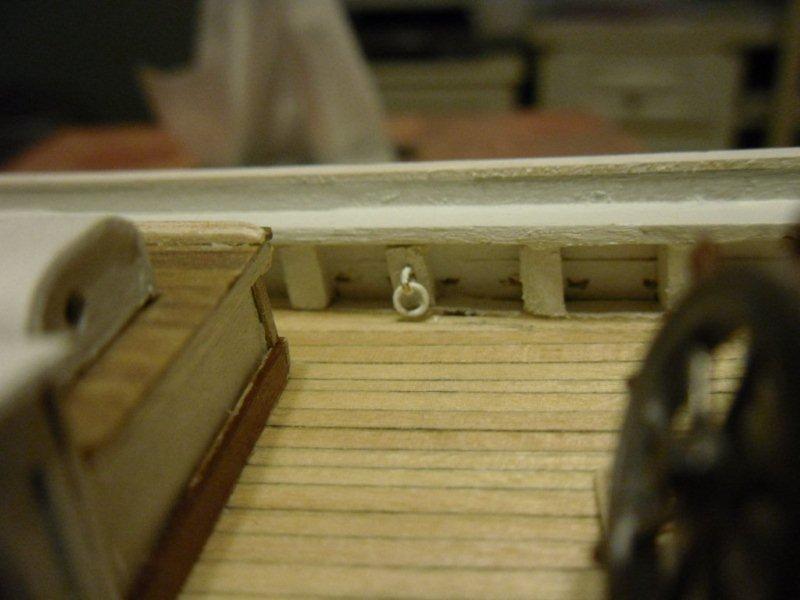
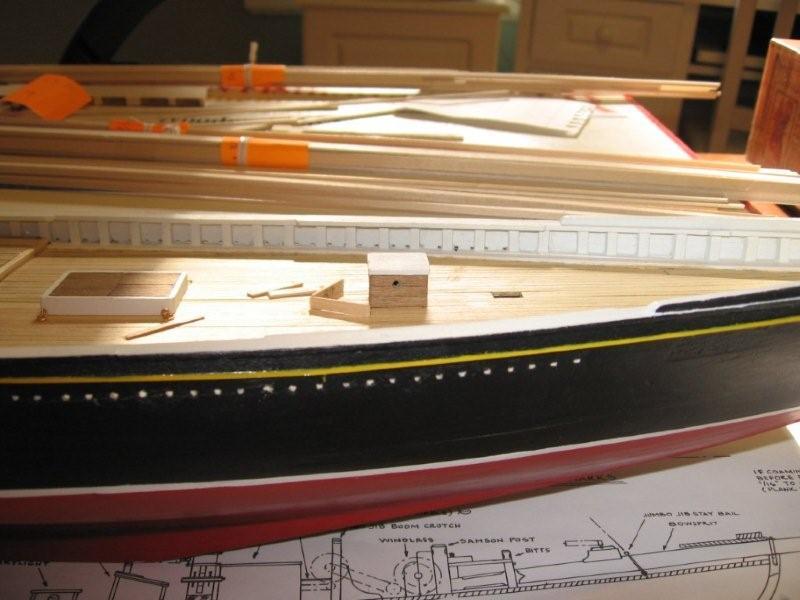
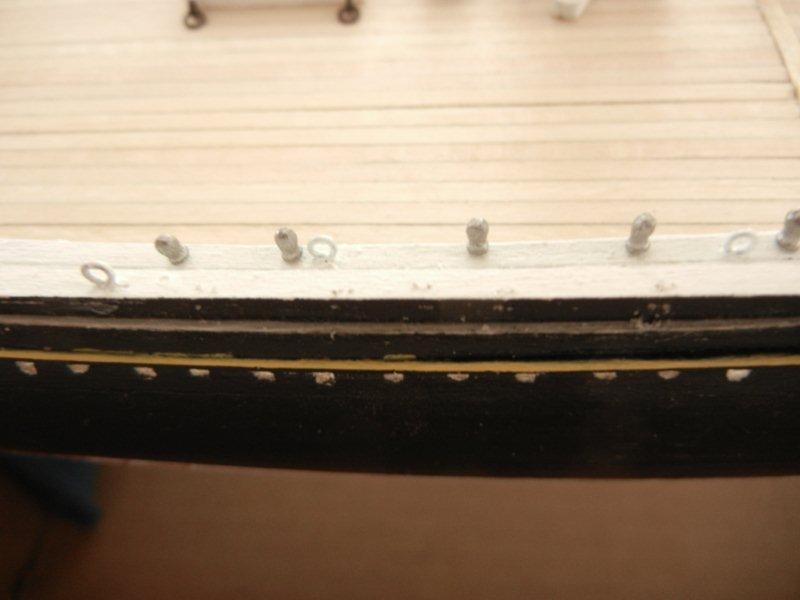
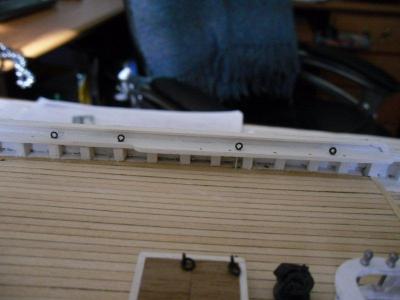
Next up was adding various eye-bolts, fair-leads, blocks, belaying pins and rings along the rails and stanchions. If I had it to do again, I would have done this before adding all the deck furniture. Here are a few representative photos: You'll note that the eyes were originally black. After looking at photos of the real thing, I changed them to white. Bob


-
Thanks for providing this, Danny. I'm sure it will help a lot of folks. In step 3, in the dialog box that pops up, it is possible to select multiple pictures for uploading in one pass, either a list of sequential files by clicking the first file in the list, them pressing the Shift key while clicking on the last file in the list, or by holding the Ctrl button and clicking on individual files in the list. I don't know what the limit is, I have done as many as 6 in one pass. This is one more advancement of the new MSW over the old, and I like it a lot! Bob
-
One other tip I received was about using paper to repair broken wood parts. Several of the "experts" told me about this possibility. While trying to fit one of the cast stanchions onto the main fiferail, I snapped the rail right at the pre-drilled hole for the stanchion. I glued the two pieces back together, then glued a piece of paper onto the top and another to the bottom of the assembly. Then reattached the stanchion and here is the assembly being trial fitted on deck. After painting the whole thing white, the paper became invisible and it is impossible to see in the finished product. There is a photo in my previous post that shows how it finished up. Bob
-
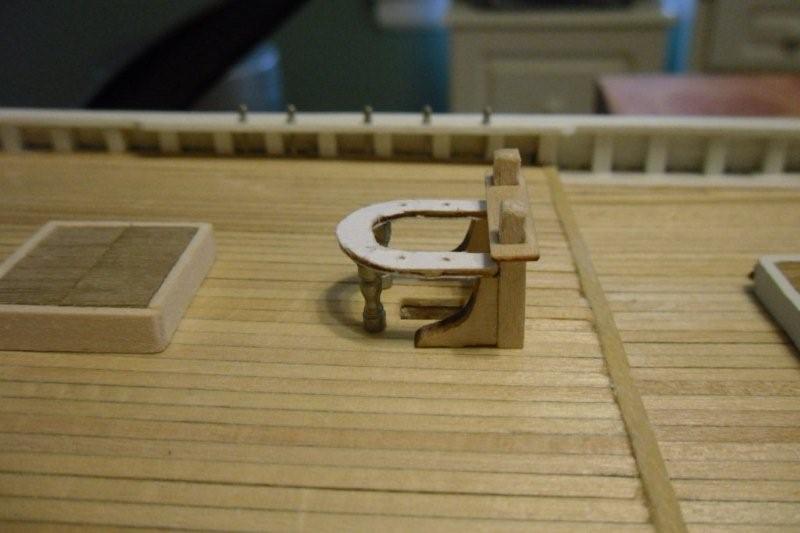
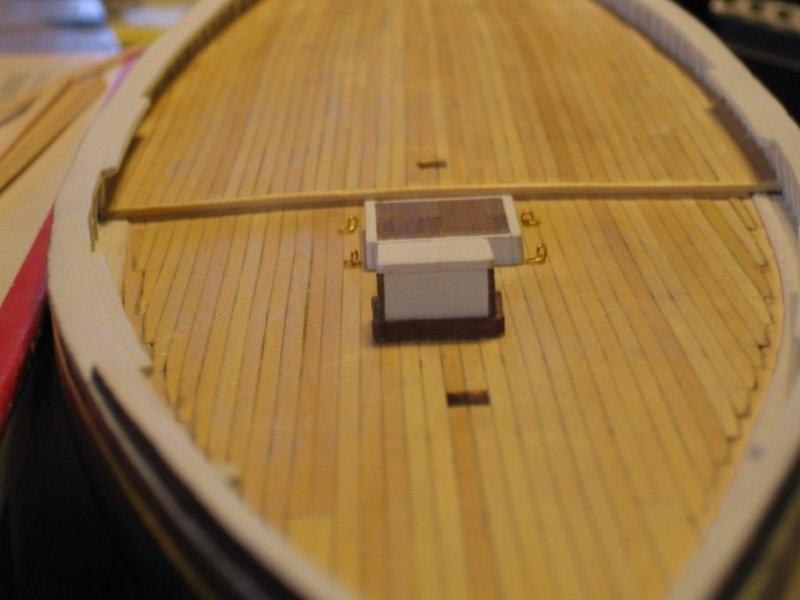
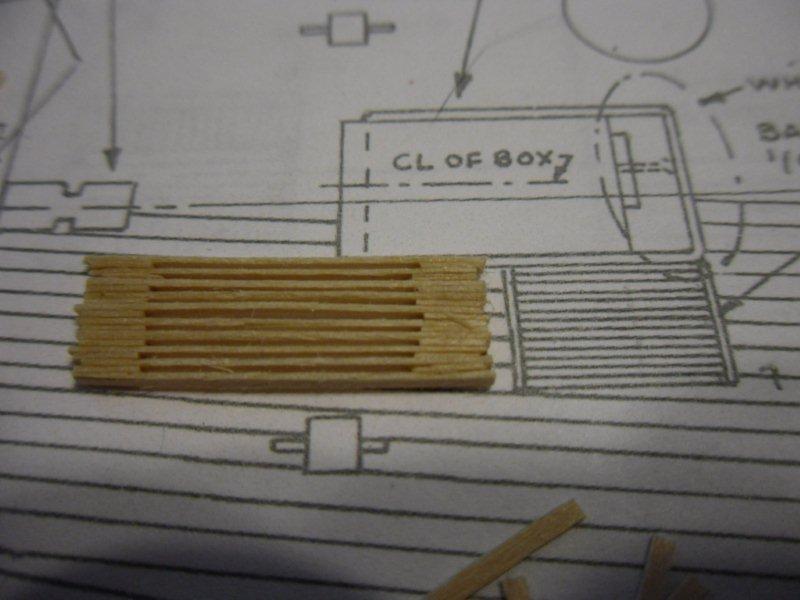
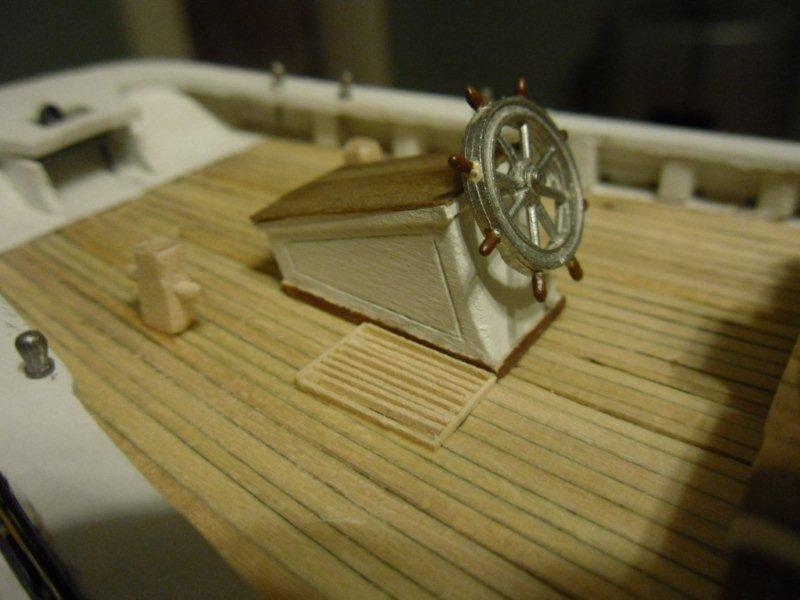
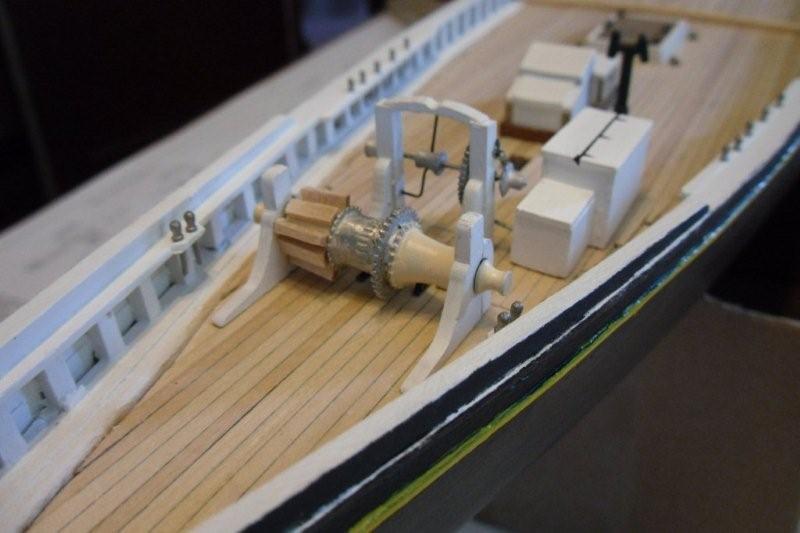
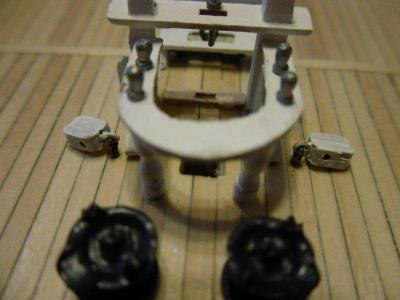
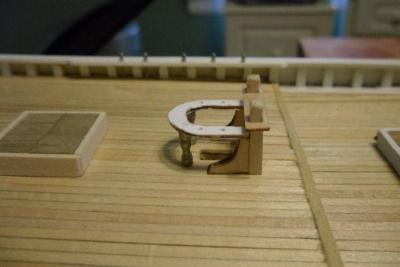
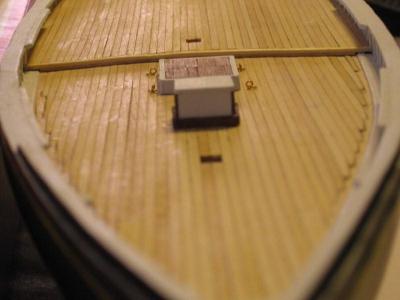
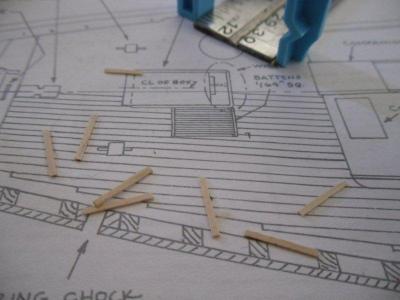
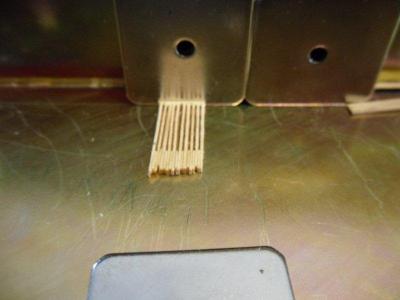
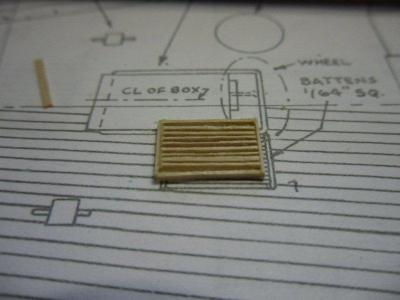
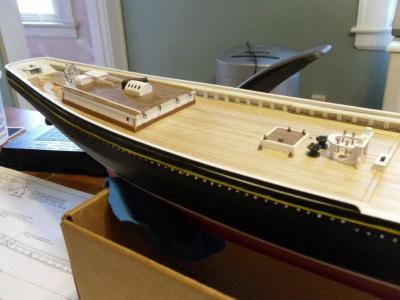
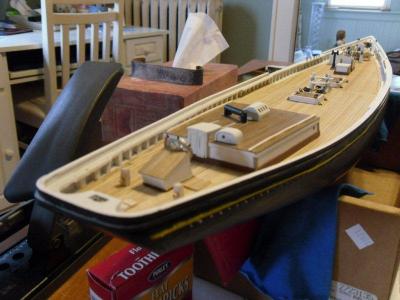
Thanks, Russ and Jim, for stopping by and for your kind words. The decal issue appears to be fairly common - I have been able to help out a few people with it based on my experience. Next thing up was building deck furniture. I started at the bow and worked my way back. I think things got better as I went. If I had it to do over again, I would have a more uniform approach to the various assemblies - it was a learn as you go sort of thing. One of the things I learned is that a hair blowdryer can be used to loosen PVA. Here are the first and second attempts to attach the fore skylight. What can I say, I counted the wrong number of planks from the CL when I did the first attempt I got a great tip from Jim Lad on building the grate the helmsman stands on to steer the ship. On Bluenose there are no crossing slats, just parallel ones. Here is the raw material for the job. 1/64" pieces cut longer than the final product. Take all pieces and glue spacers between the end. Then cut one end off and glue a piece across the top. Cut the other end and glue a cross-piece there. The piece installed beside the wheelbox. Overall shots of the Foredeck, the Quarterdeck, and end-to-end.


-
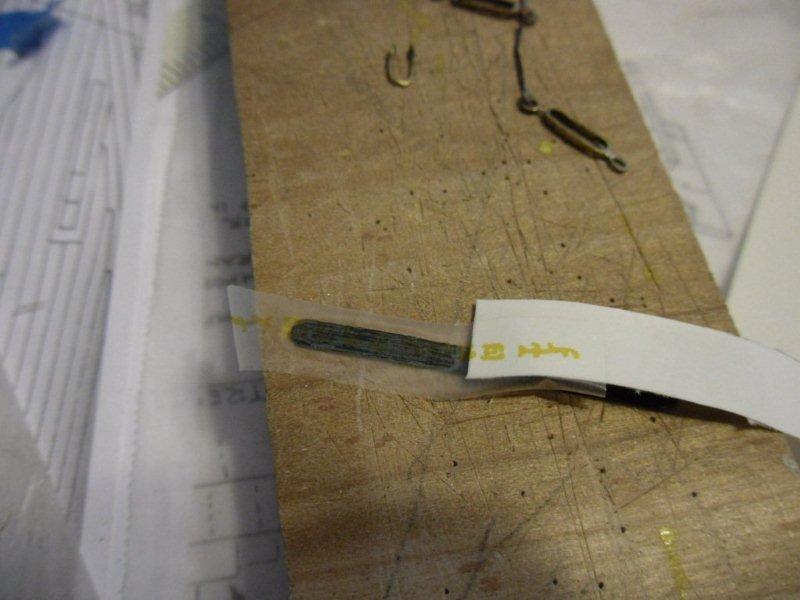
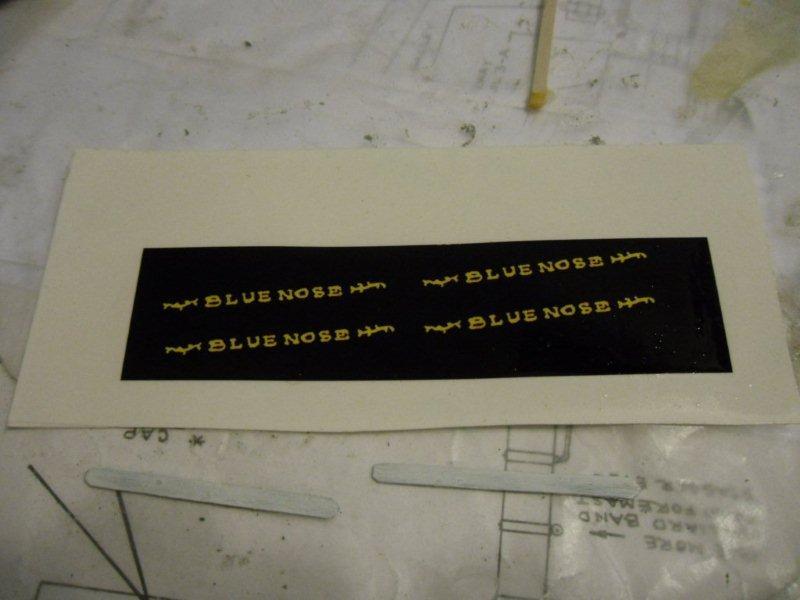
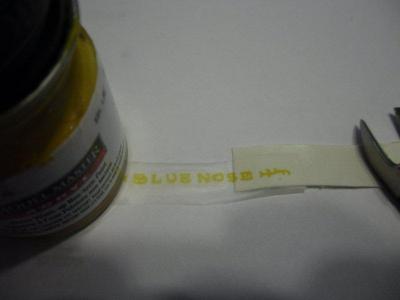
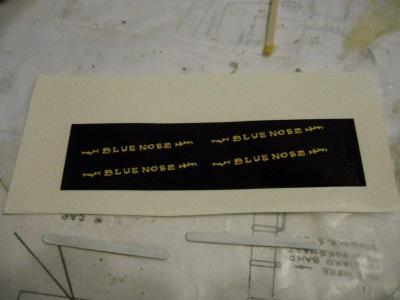
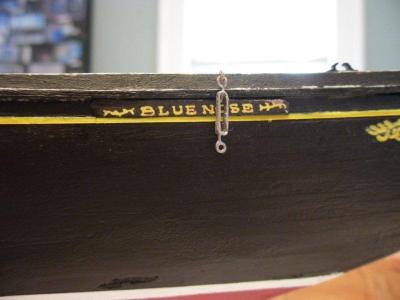
Next up "logically" would be the nameboards. I printed up some decals by scanning the detail from the plan, changing the color from black to yellow in MS Paint, then printing them on clear inkjet decal paper. The only problem is that when the decal gets applied to the black background, the yellow disappeared completely. Try #2 - thanks to advice from Floyd - was to reprint the decal with a black background and apply that onto a piece of wood that is painted white. Here is the final result glued in place. Bob

-
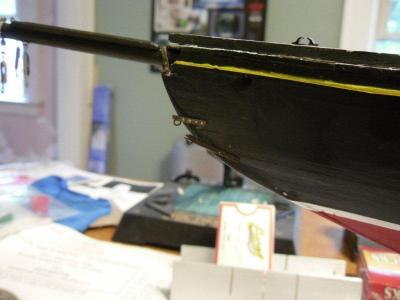
I am going to go out of order for the next two entries. If I approached this build in a logical manner, this would have been next. However I spent time over the next couple of years fretting over these details before I was ready to move on. Here is the process for adding the scrollwork at the bow - an abbreviated version as I don't seem to have a lot of photos. I scanned the section of the plan that showed the detail. I taped a piece of white trasfer paper to the back the design and then attached both pieces to the hull in the correct place. I then traced over the drawing to transfer the white marking to the hull. Then the tracing was removed and I used a yellow artists marker to draw the design by hand on the hull. Bob


-
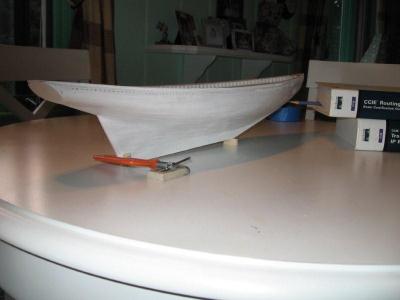
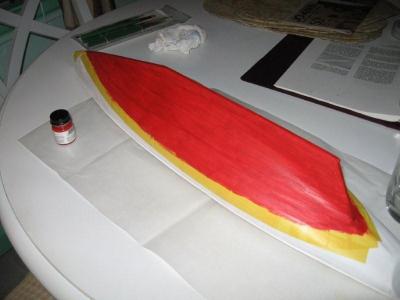
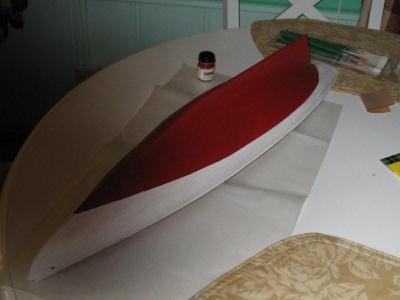
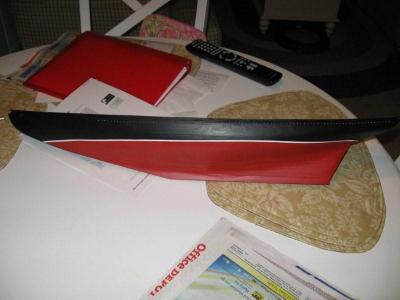
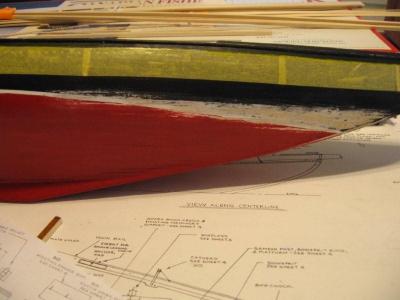
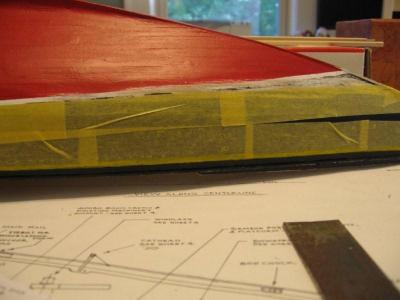
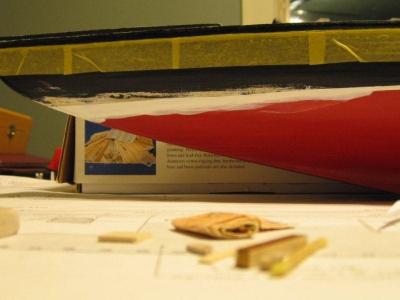
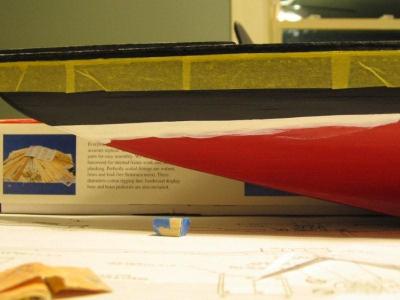
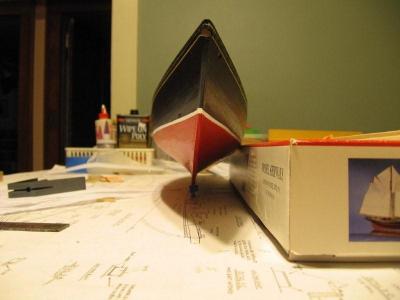
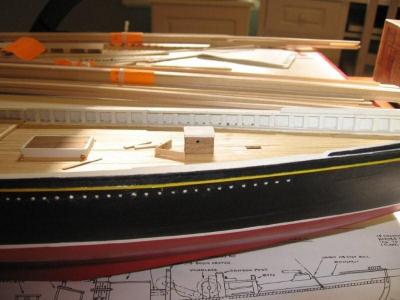
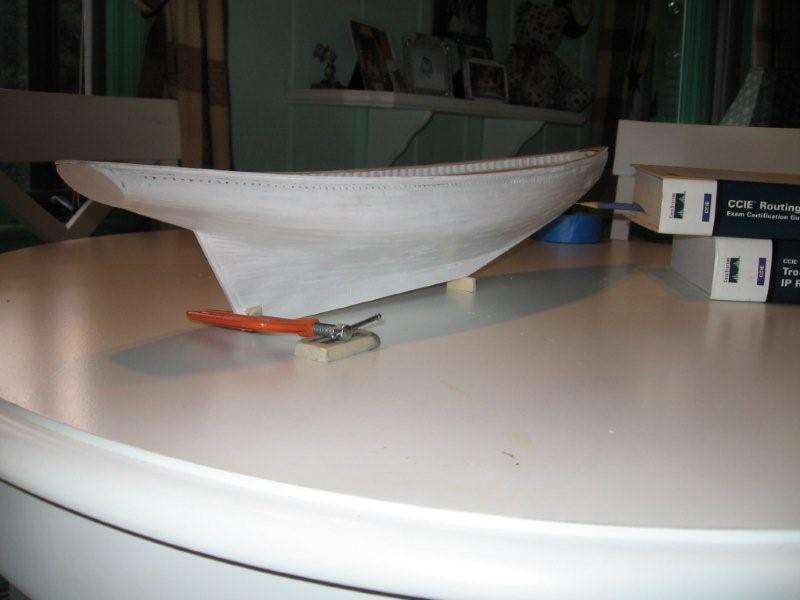
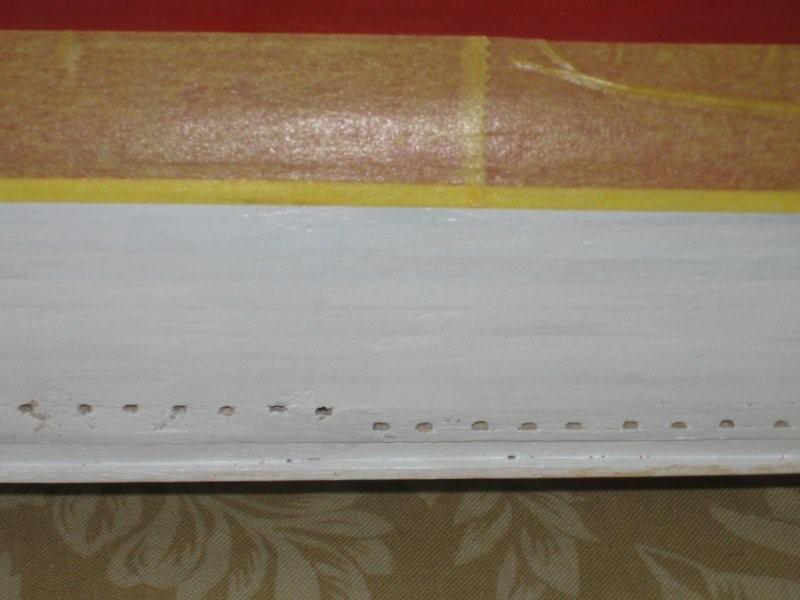
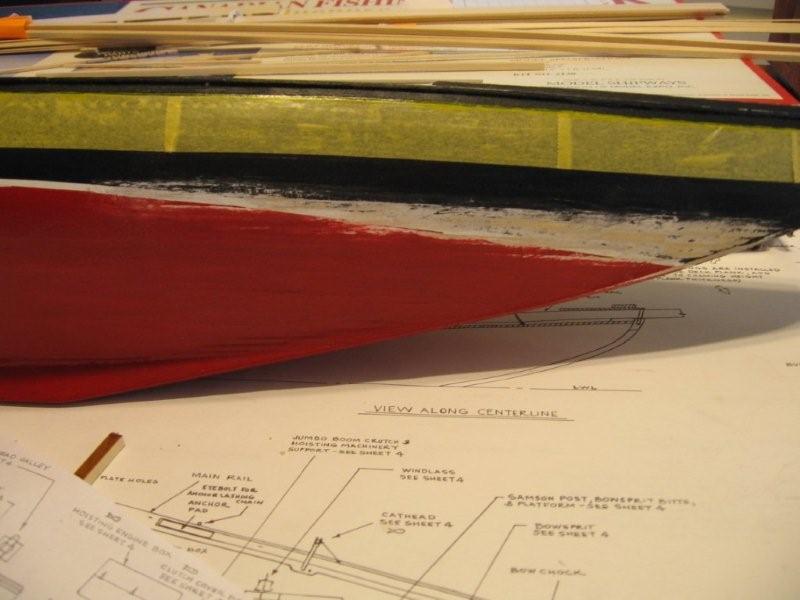
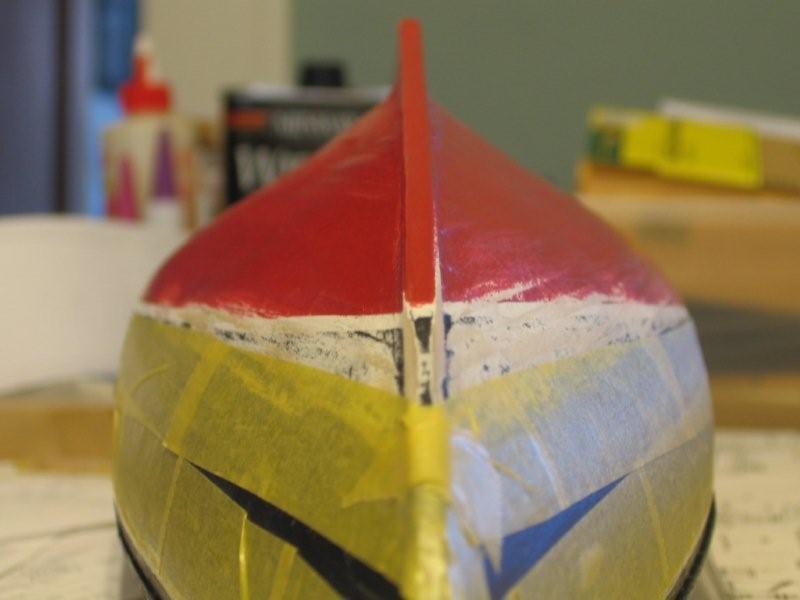
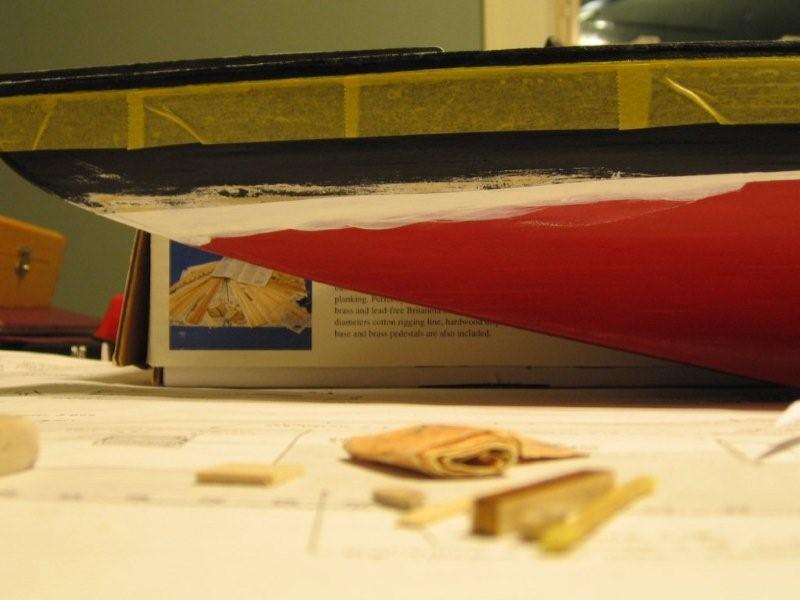
Now on to painting the hull. First step is to prime the whole thing and draw on the waterline. My waterline marker did not work very well. Those heavy Cisco study guides did a terrible job of holding the pencil steady. (I've seen tips since that talk about poking a pencil through both sides of a styrofoam cup - I imagine that would work much better.) Then mask the top side of the waterline using my favorite tape - Tamiya tape. Then paint the red - it took about six light coats, sanding between coats and using a brush. Then mask the bottom the hull, overlapping the white a little to provide the stripe at the waterline. I painted the top side of the hull black, although I have since read that "midnight blue" might be more accurate. After taking a closer look at the last photo and staring at the hull for a couple of days I decided that the waterline dropped at the bow and needed to be fixed so... I sanded the bow area of the waterline back some, them masked to put in the white stripe (the tape higher up on the hull is for the yellow stripe that is at the level of the cove). and the white is painted. Following that, the black was masked and painted, then the red. By the way, the yellow stripe for the cove took about 10 coats to cover over the black. Since then I have received advice to put a coat or two of grey primer down first to reduce the number of coats needed overall. The next photo is out of sequence but shows the yellow stripe. Bob