bhermann
-
Posts
549 -
Joined
-
Last visited
Content Type
Profiles
Forums
Gallery
Events
Everything posted by bhermann
-
So far I've just taken a file to the corners of the blocks to make them more oval than square. Of course the number of blocks in my current build is around 100, it'd be a different story if I were doing Victory! Bob
-
Thanks for sharing, Jay. The belaying pin coils look like the way I was taught to do it, a couple of turns around the pin flipping the last one to lock it, coil the rope in front of the pin, then pull the working end through the coil with a twist and loop it over the pin, forming a hanger. Isn't it amazing how many jigs start with "put a nail (or two nails) in a block... Bob
-
Russ - that is a very nice jig for doing the deadeyes. If you'd like a little more work to do, maybe you'd considering opening a topic on it in the "Wooden Tips and Tricks and Making Jigs" forum I'm sure a wider audience would appreciate it. Bob
-
David Ah yes, the chainplates... I remember stealing your technique for getting them through the rub rail to get mine through the top rail. Thanks for taking the time to re-post this finished build. Now it's time to get cracking on Sultana! Bob
-
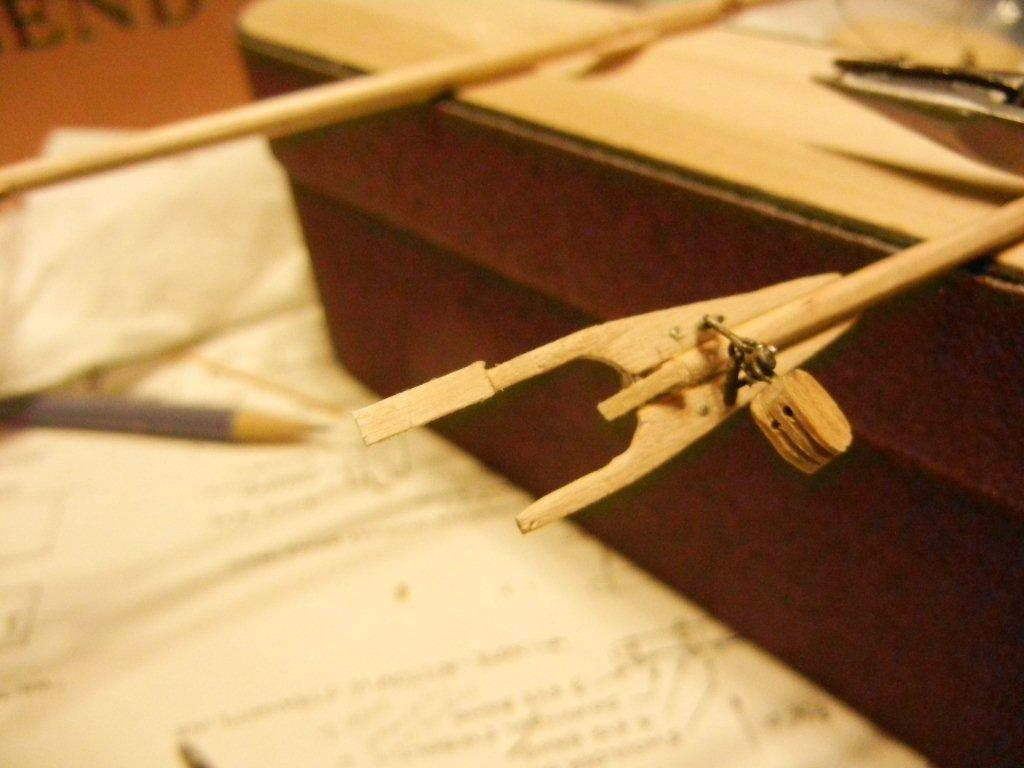
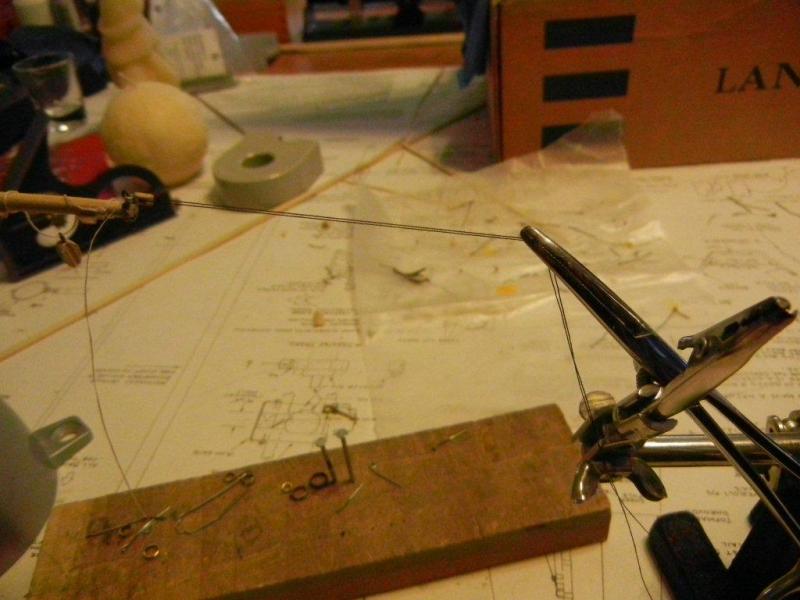
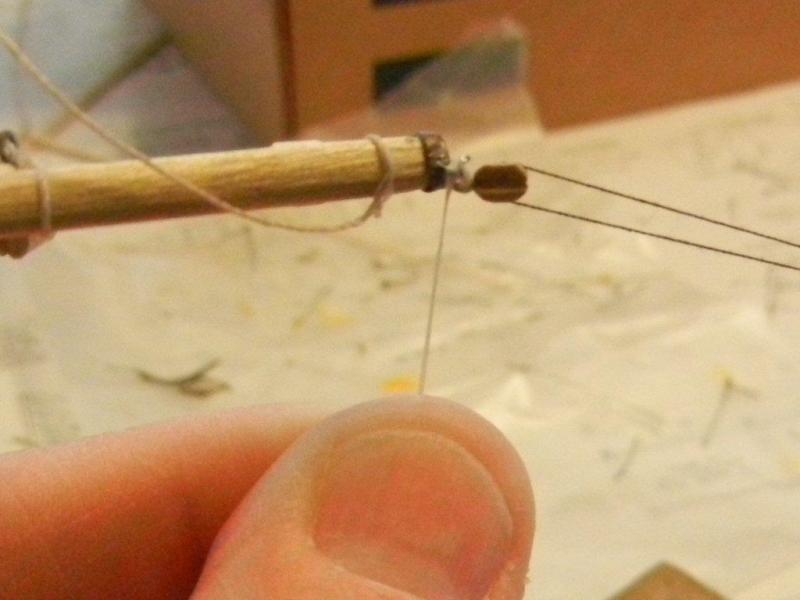
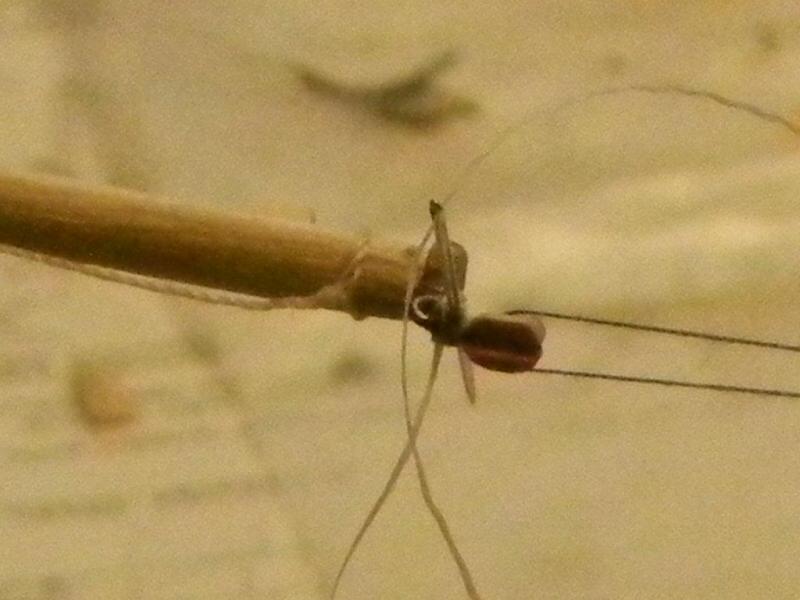
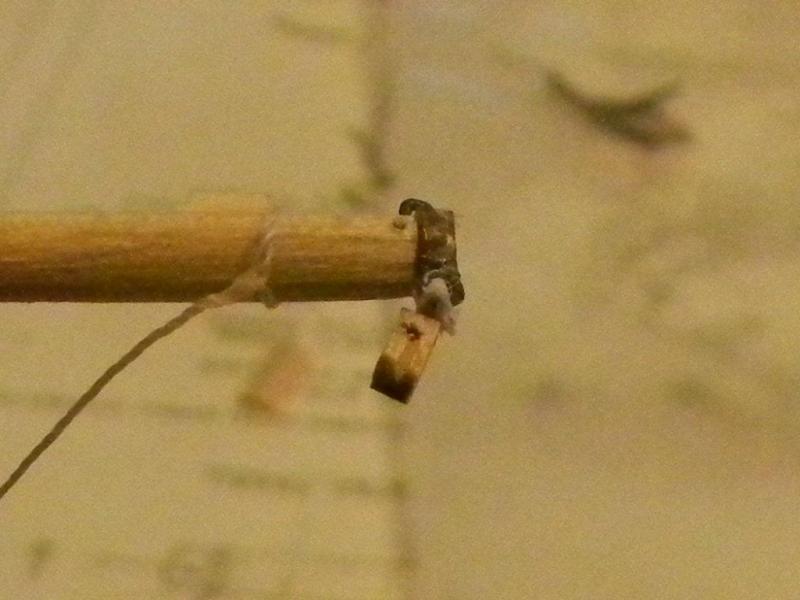
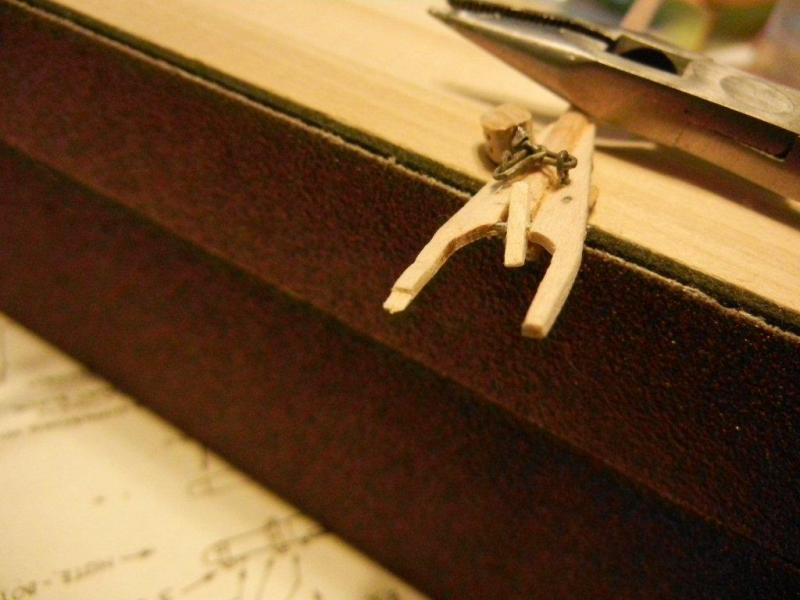
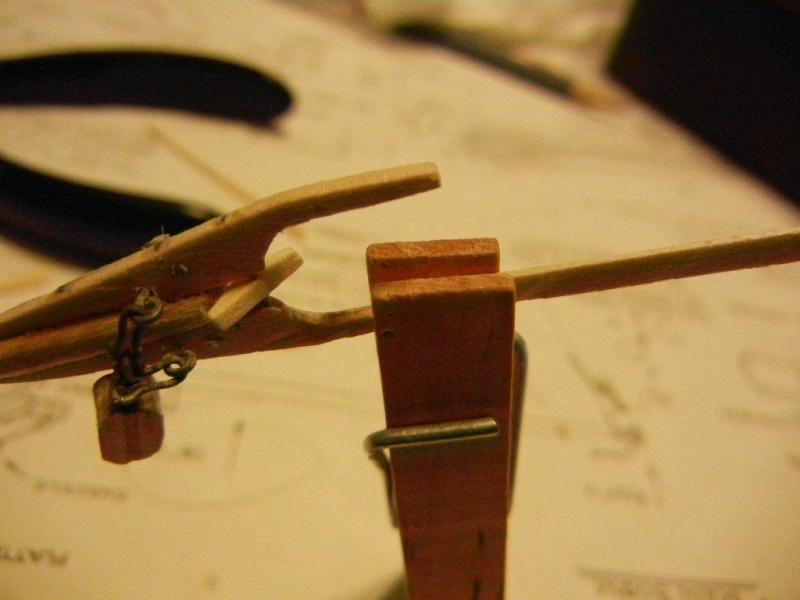
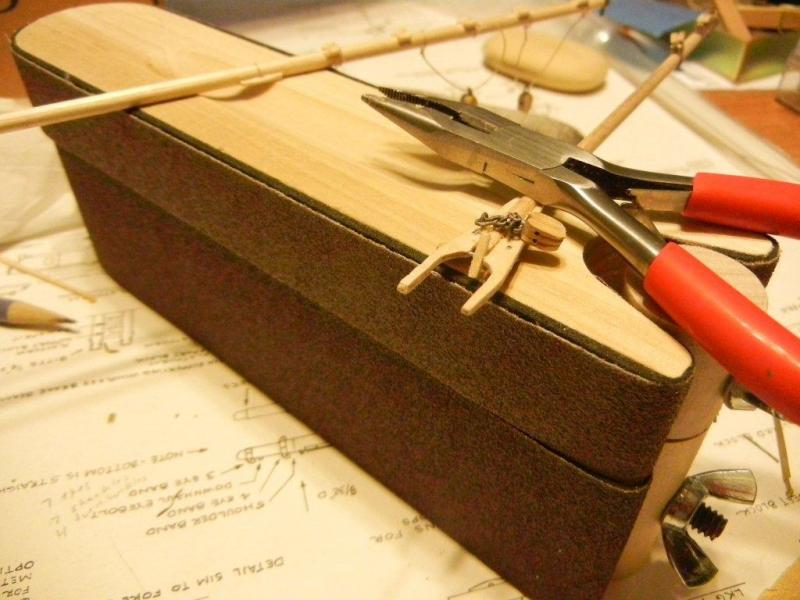
In case I haven't shown this before (in this incarnation of the log) here is the setup I use for mousing hooks. The secret for me is keeping the connection being moused under tension so I can have both hands free to do the work. In this case that means putting a thread through the block being moused and clamping the end in a hemostat that is draped over the third hand so gravity will keep the line tight. The spar is clamped into the Panavise. Before setting up I tie the mousing line on the hook. The knot winds up hidden inside the wrapping. The business end of the previous photo I then dab a little CA onto the hook, give it a couple of wraps and hold it in place for a minute or so. Then I take the working end of the thread and put it back through the mouse with a needle and dab with CA again. After trimming the excess thread, this is the result. The hook will slide around the eyebolt but it doesn't come off. There - the block for the main topsail sheet is now attached securely. Bob

-
Nice clean and precise work Russ. I hope you are going to get some of the false stanchions installed real soon, so we can all breathe a little easier. That looks scary, particularly the section where the scuppers are! Bob
-
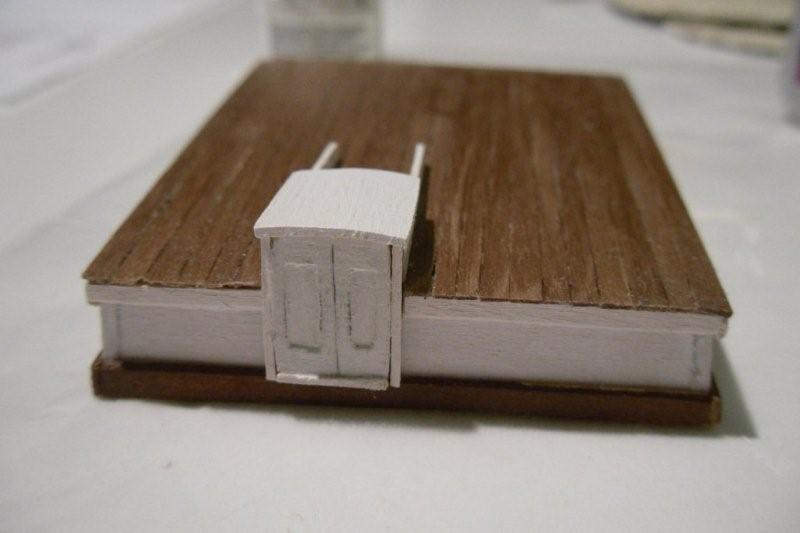
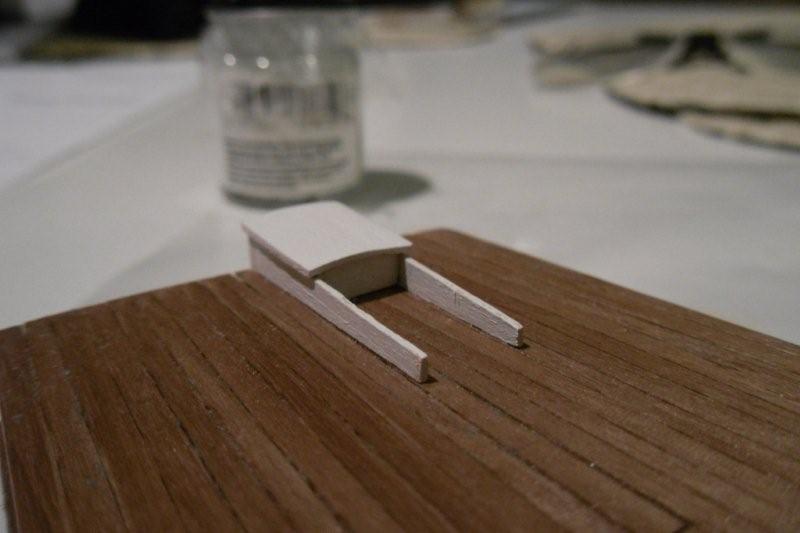
That photo of the samson post looks pretty good from here. All I can say on that one is practice, practice, practice. The structure with the slide-out panel is a hatchway to belowdecks. The top of it either lifts up on a hinge or slides toward the fore end of the cabin. The slide-out piece is then removed and you can step over the cabin wall to go below. You really need at least one more angle to get the full picture. Bluenose has a side view in the plans labeled "View at Center-line" that shows this. I am including photos of the analogous object from my build. It has a door instead of a sliding panel and the hatch cover is a slider. It isn't an exact match but it might help clarify the usage somewhat. Bob
-
Thanks Russ, Elia, Brian and Harvey. I am happy I didn't have to execute on anything more drastic. I agree that people spend more time on repairs than they like to report - me, I've got nothing to lose so I just let it all out there. Hopefully someone will benefit from it, as I have benefited from the many fine tips and logs on MSW. I put a link to the repair into the "Oops" topic Danny started so those who don't spend a lot of time looking at 20th century fishing schooner logs might have a chance at finding the fix - maybe I'll edit that post with a photo of the damage. It looks like I'll have to think about building up a little stock of something harder than kit-supplied basswood in the future. My next build is at 1:96, so those small bits are about to get even smaller. I'll have to trawl the LHS for some boxwood next time I'm there! Bob
-
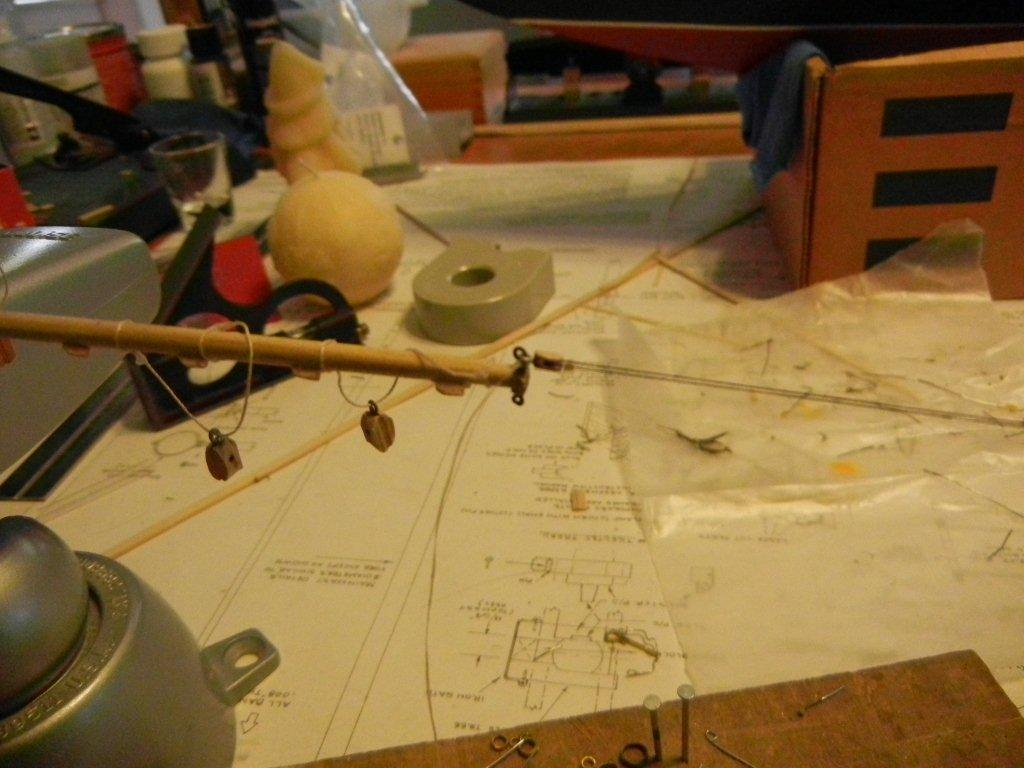
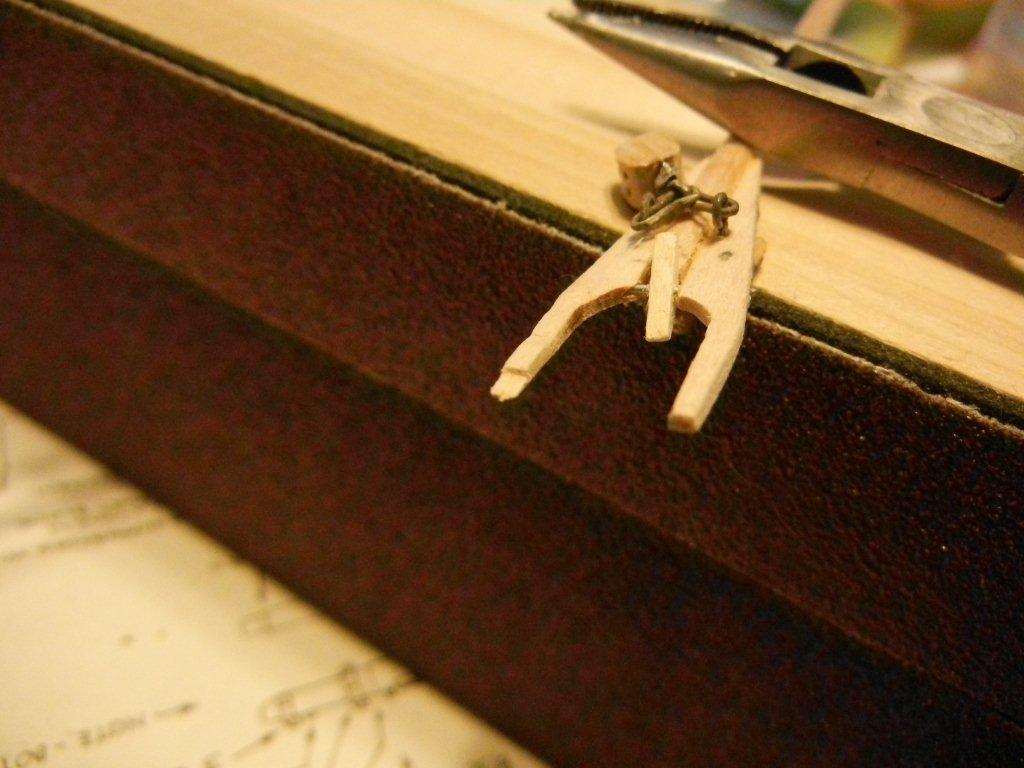
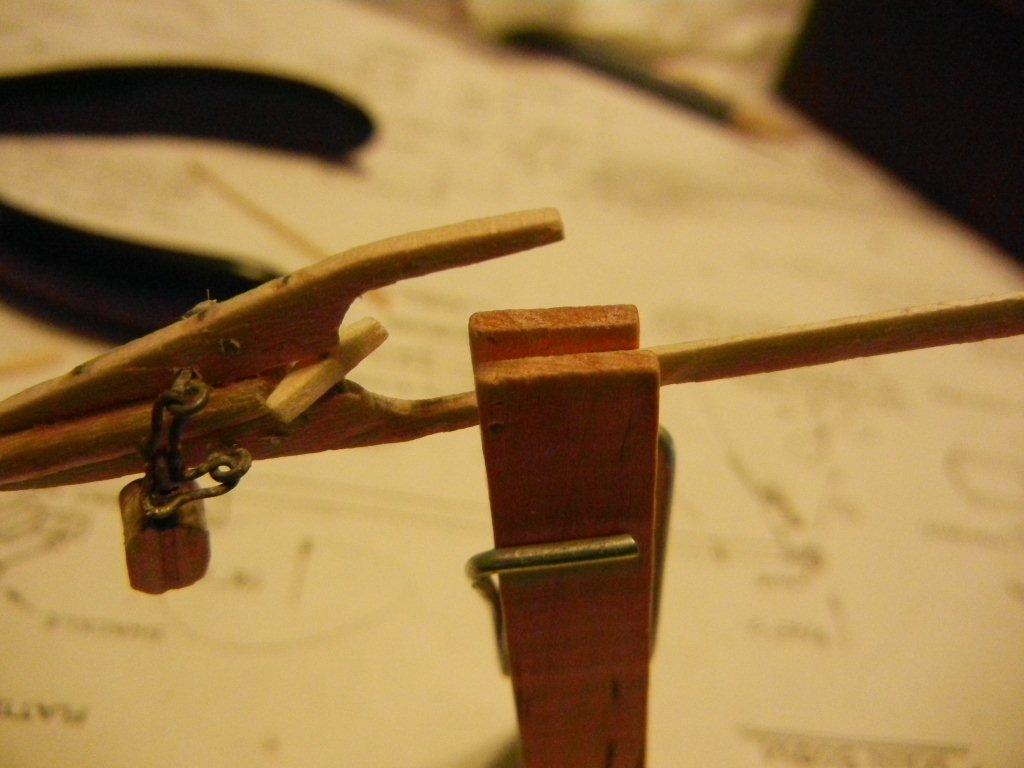
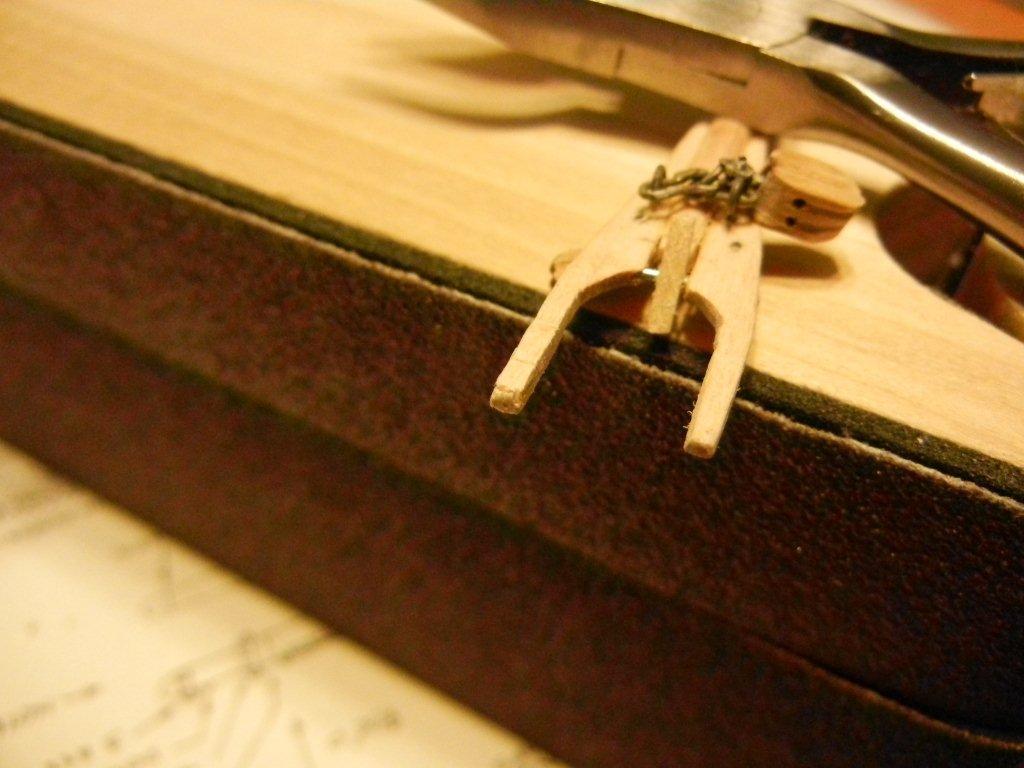
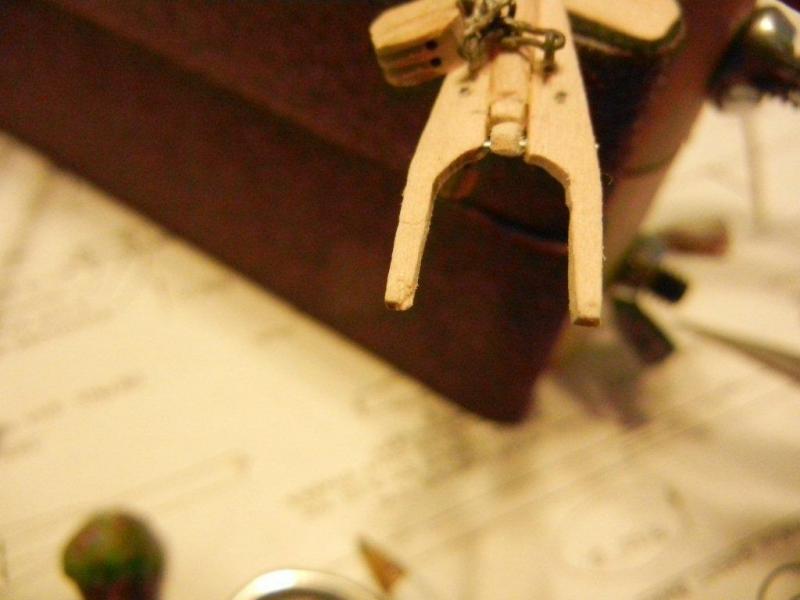
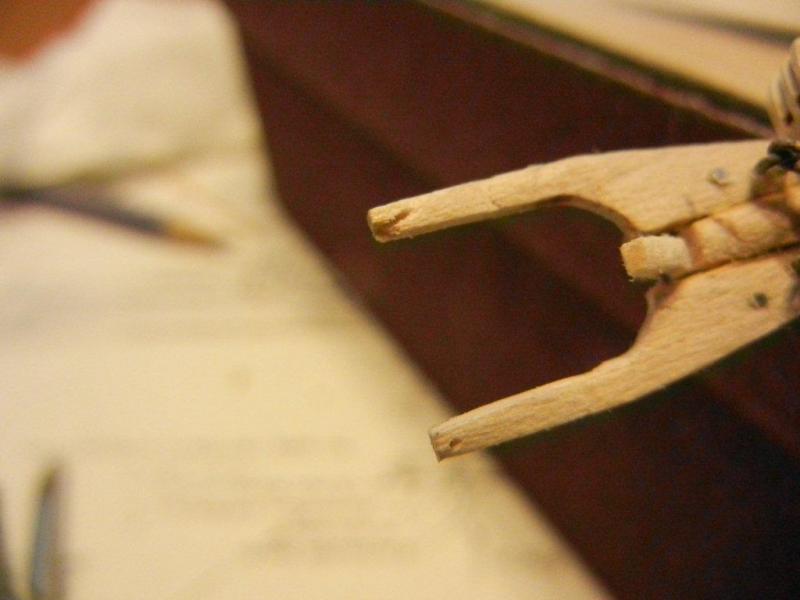
Thanks for the response, Alfons. I was too impatient to wait until I had a chance to get to the LHS, so I used the medium CA I have on hand. It worked OK, I just had to redrill the holes a little. For the first attempt at a repair, I filed away half the broken end of the jaw Then glued a piece of stripwood onto the cut and clamped it overnight. Then I filed away the overhanging parts and was left with this. It was a bit thin for my taste so I glued and clamped another piece, then filed away the excess. This is what I was left with Once that was done, I drilled the hole, applied CA to the end of the piece, and redrilled. I put some line through the hole and gave it a few good tugs. It feels much more secure than the original, so I won't be moving on to attempt number 2 or 3. Number 2 would have been to cut the end of the jaw flat and dowel on some fresh stock. Number 3 was removing the entire jaw, which probably would have led to number 4 - rebuilding the entire gaff - whew! Thanks for all the suggestions and for sticking with this. Bob


-
She is coming along nicely. About that "this depends on this, which requires that..." - you have discovered the true joy of model ship building - this is a theme you will repeat over and over again through almost every phase of the build! Bob
-
Floyd - isn't that walnut a pain in the butt to work with! It splinters, or splits along the grain, or just doesn't play well. Nice save, I'm sure it was frustrating to have to wait overnight - twice! About the cropping. I see all the way to the end of the stem piece when looking at the first two photos. I'm not sure how much more there should be Bob
-
Since John has no update, I'll stay over on this topic for just a moment. I believe one of the ancient bases for all this is Imbolc, If you Google it, you can find references to Irish, Roman, Pagan, and Wiccan festivities to name a few. As an amateur astronomer, I am interested that it falls half way between the Winter Solstice (Northern Hemisphere) and the vernal equinox. It seems that it was originally one of those "we really hope Spring is coming soon" events invented by people suffering from SAD. Now, John, please get us back on track Bob
-
Bob - thanks for bringing us a fine example of a build we don't get to see too much of. I love the details that you were able to include at this scale and the realism it adds to the build. Well done! Bob
- 103 replies
-
- 1
-

-
- picket boat
- model shipways
- (and 1 more)
-
Gosh Daniel, I look away for a few minutes, and you're done! I love the details you are able to include and to suggest while working in such a small scale. Congratulations on a job well done! Bob
-
Brian - that's an interesting way to do the waterway and planksheer. Are you test fitting to the model as you go in addition to checking against the plans? I must say, you've gotten this ship looking like a ship faster than anyone else I have been watching. BTW, I love your avatar - is that the plan for your next build? Bob
-
For those who work exclusively by hand (or those of us not to be trusted with power tools ), I included a brief description of some of my tapering methods in my log. http://modelshipworld.com/index.php?/topic/217-bluenose-by-bhermann-model-shipways-2130-164/page-3 Check posts #33 and 34 for the details. Bob
-
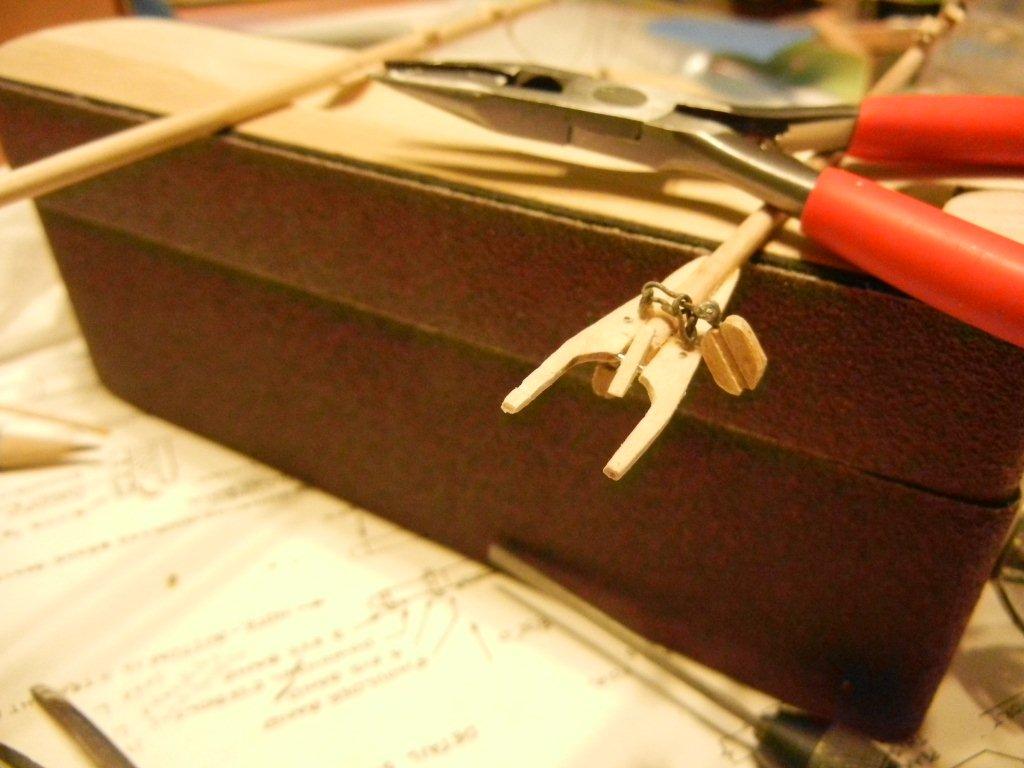
Thanks for the ideas, guys. There are some interesting alternatives here. Russ - I am going to hold removing and rebuilding the jaw as a last resort. I'm sure that the basswoods softness was a contributor to the failure. Looking at the damage it also appears the hole was not centered very well, which gave the thread less wood to pull through. Alfons - I assume you are referring to thin CA for soaking the wood. I only have medium thickness on hand and may need to get some thin, if that is the case. I will probably hit the other side and the other jaws (two additional sets) with CA - applying from the end of the jaws where the wood grain is open. Floyd, thanks for the reinforcement on this approach. Dave - interesting that you have experienced the same thing. I can't recall reading of this in any log, but it must be a more common occurrence than I realized. JP - nope, no painting planned here, so I'll just have to be careful with whatever I do. I am starting to form some additional ideas as well and may try something a little different as a first attempt. I'll document my process (or processes if I need more than one) and we'll see where it goes. Thanks, Bob
-
Looking for tips on creating sail seams by pencil
bhermann replied to bhermann's topic in Masting, rigging and sails
Thanks for the responses. I will roll all this information into my consideration process. For those using pencil for the seams, is that pencil on cloth, pencil on silkspan, or some other material I haven't thought about yet? Thanks, Bob -
Kester - what are you waiting for? Your public awaits! Bob
-
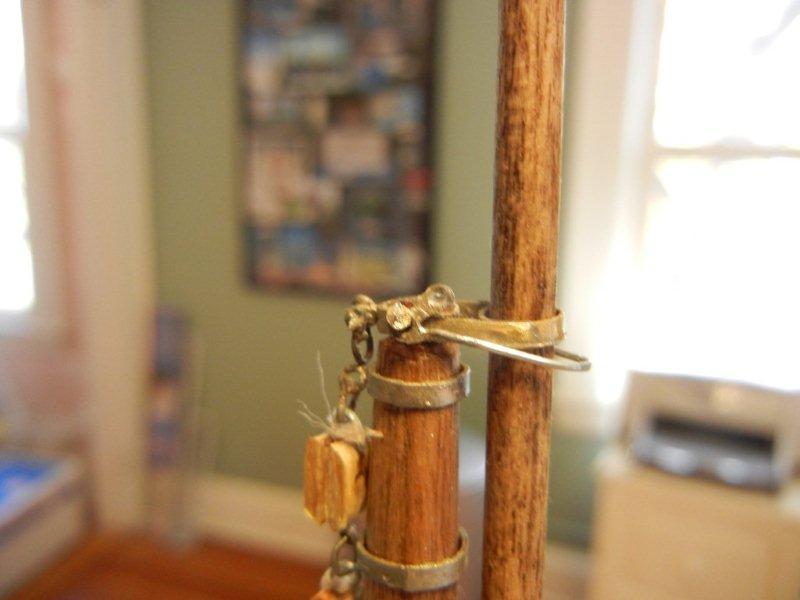
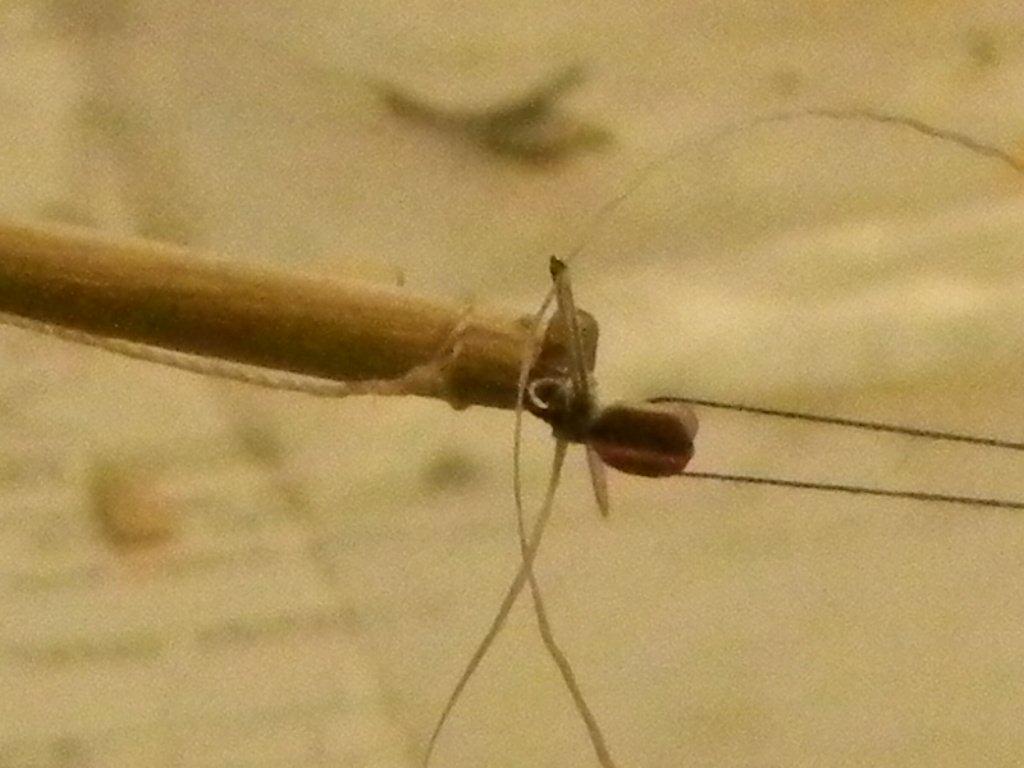
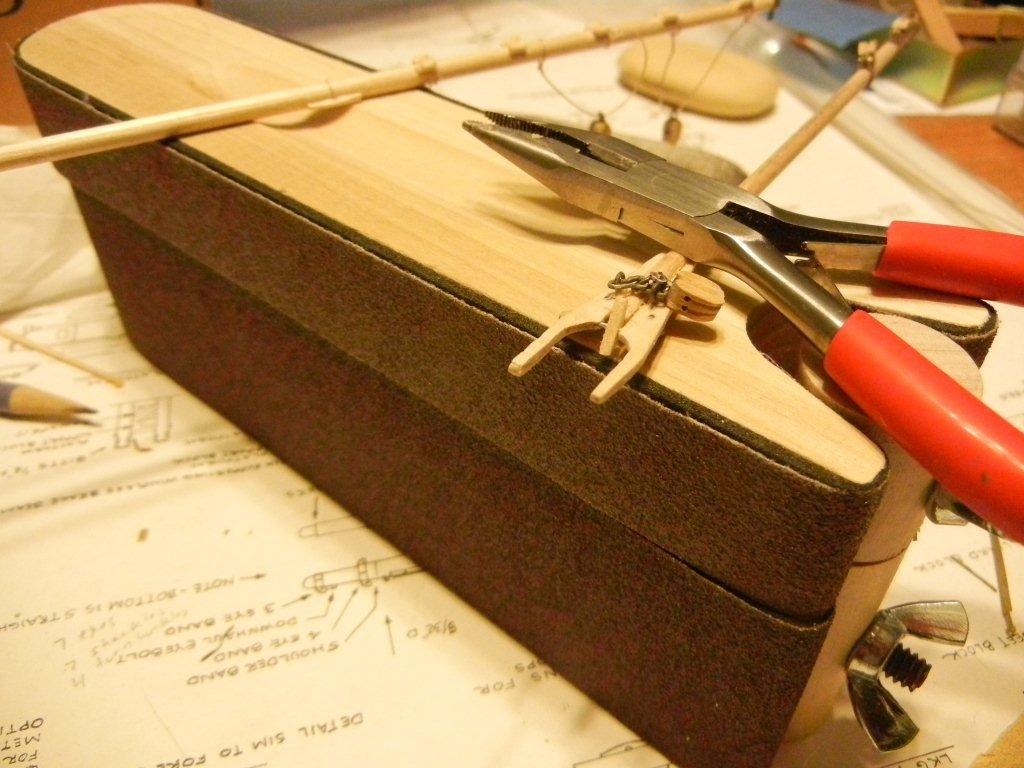
Houston, we have a problem... while attaching blocks to the fore gaff I noticed the rope with the parrel beads hanging loose. Upon closer inspection I discovered that one side had pulled right through the gaff jaw and I now have a repair to make. I'm at a bit of a loss how to handle this. I thought of gluing a toothpick in there, sanding, then re-drilling the hole. I am also considering filing off a larger chunk, gluing and clamping some replacement wood, sanding that down, and re-drilling. I am concerned about the strength of the wood - the section is about 1/16" square and I'm not sure how much abuse it can take. Any thoughts and ideas are welcome! Bob
-
I am approaching the time when I am going to have to make a decision on how to set up the sails on Bluenose. I had bookmarked a number of topics on MSW 1.0, but unfortunately did not download any of them Sewing the seams and edges of the sails feels like it would be out of scale, so I am hoping that those who have used pencil, seam tape, other alternatives to the sewing machine, can step in here and provide their tips, techniques, things to watch out for, etc. I will be most grateful for any information our members can provide. Thanks, Bob
-
Pier44 - thanks for the positive feedback. Sharing my issues and techniques is one of the main drivers behind doing the log for me. As a first time builder, it is nice to be able to give back something as well as benefiting from all the great information shared on MSW. Brian - I agree that Bluenose is indeed a lovely vessel. One of my favorite experiences over the past few years was taking a windjammer cruise on a gaff-rigged schooner where the passengers were able to share in the work of hauling anchor, setting and furling the sails, and taking a turn at the helm. I learned more about sailing over that week than I thought possible. Working on Bluenose brings back memories of that time and the amazing feel of been out on the water running under wind power. I took a look at your Niagara log - it appears you have some good ideas to share. I will be following along with interest. When you get back to Bluenose, I'd love to see some photos of your work there too. Bob
-
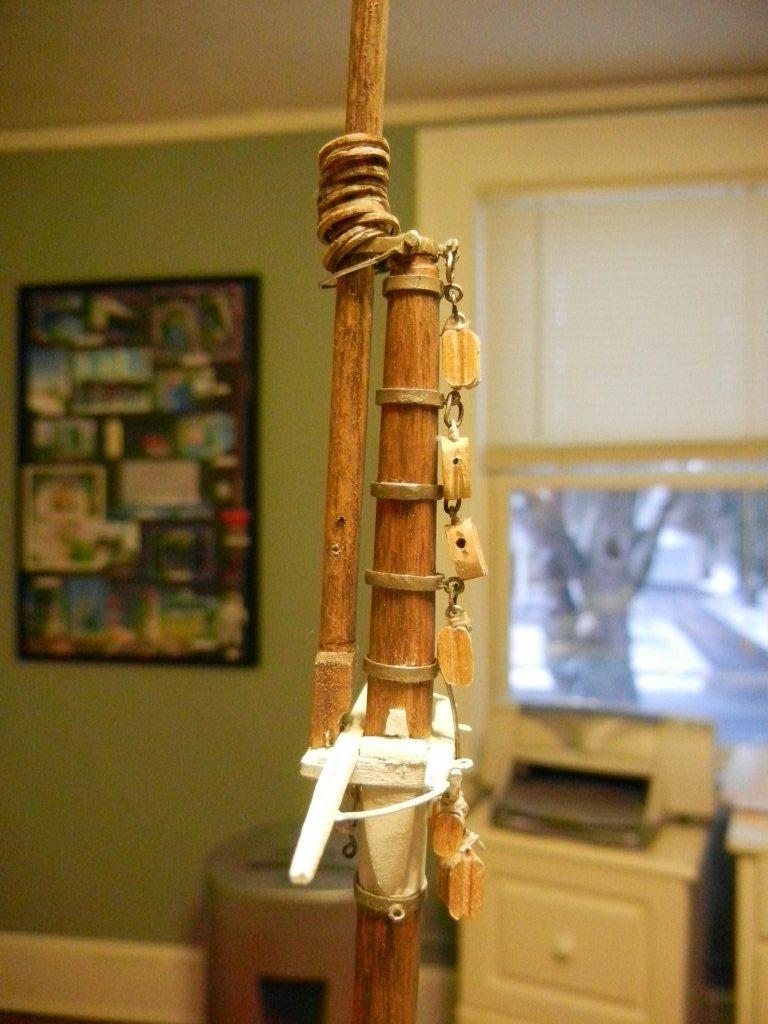
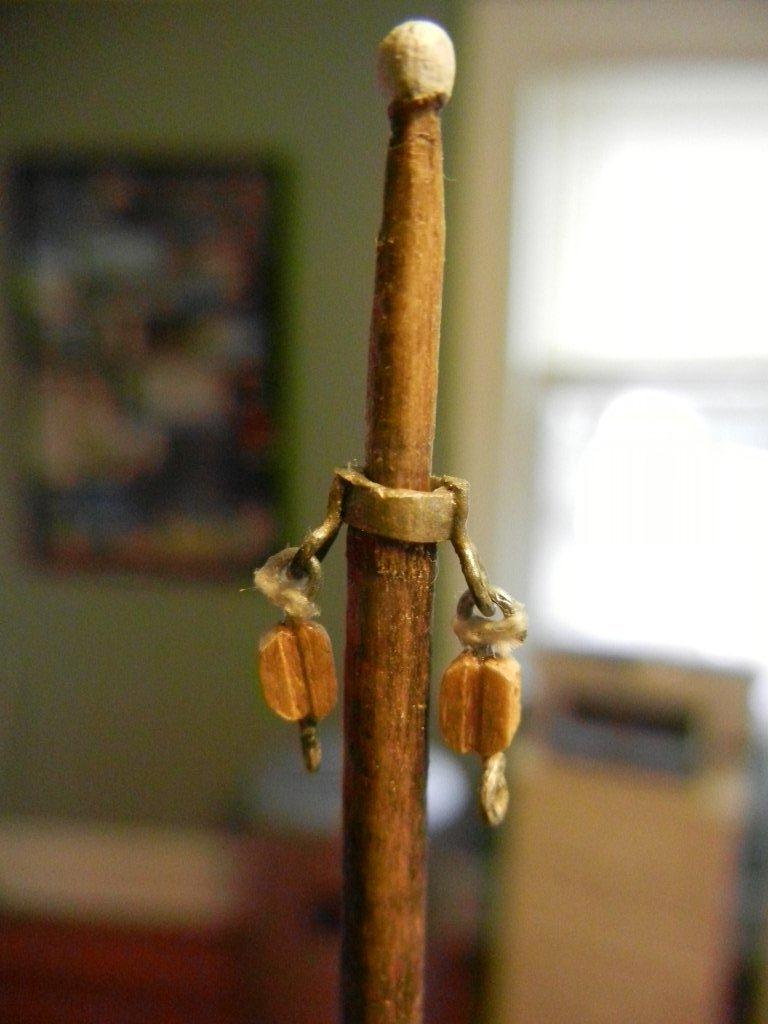
This pretty much catches me up to date. if there is anything I missed from the old log that you would like to see, please let me know. Here are some shots of the mast detail. If you look closely you will see holes drilled for "mast sheaves" in the topmasts. I don't know what they were used for - my best guess is that they had something to do with stepping and unstepping the topmasts. Main mast top Fore mast top Main topmast detail Fore topmast detail Thanks for all the support and encouragement over the past few years - now to move forward! Bob


-
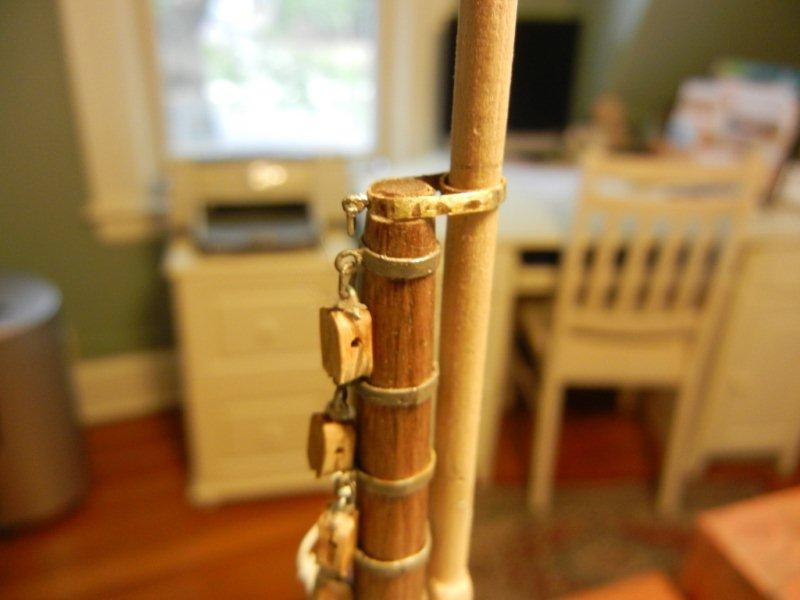
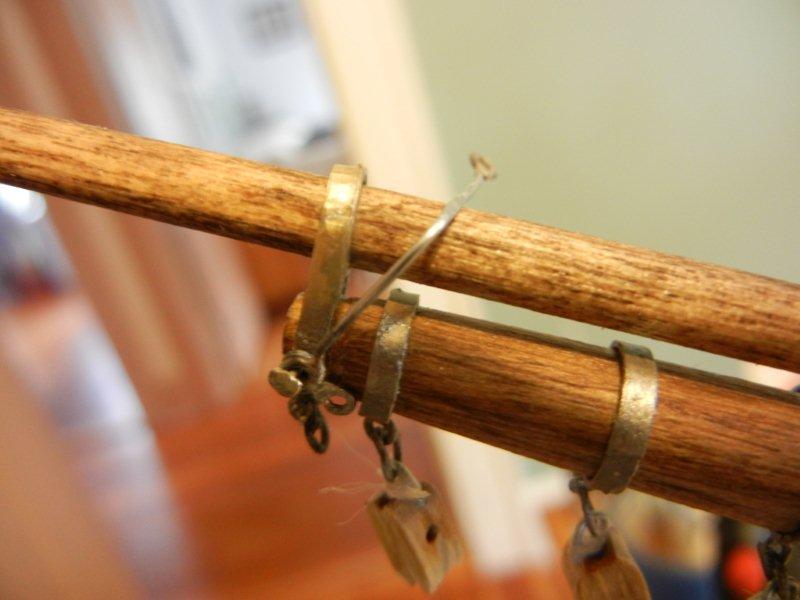
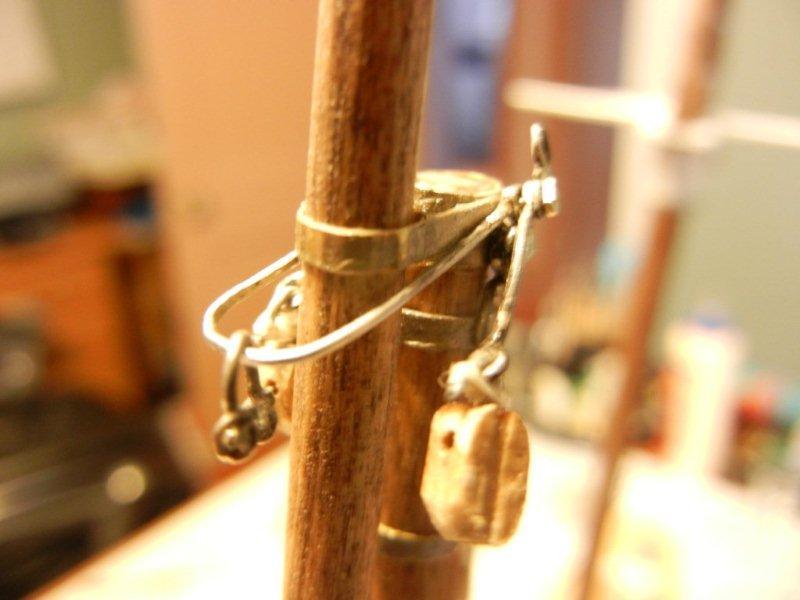
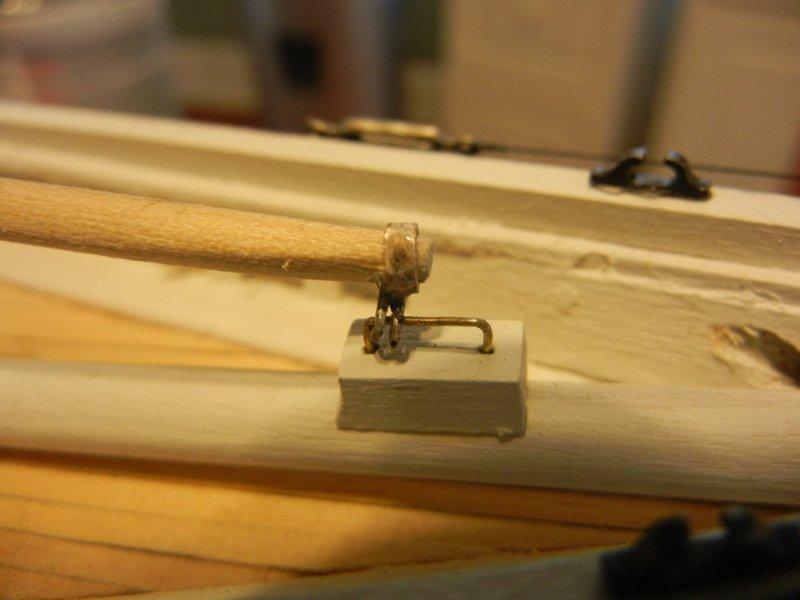
The foremast gets bails for the jib stay and the main topmast stay, and a couple of links with blocks for jib halliards. ready to install - the cross-locking tweezers come in handy again. And installed I did up a fitting for the jumbo jib boom And here it is test-fitted. Bob
-
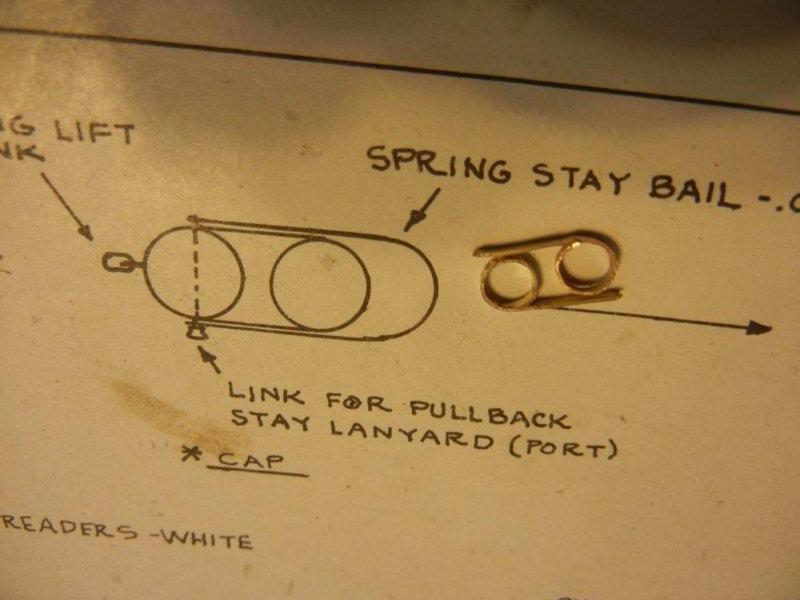
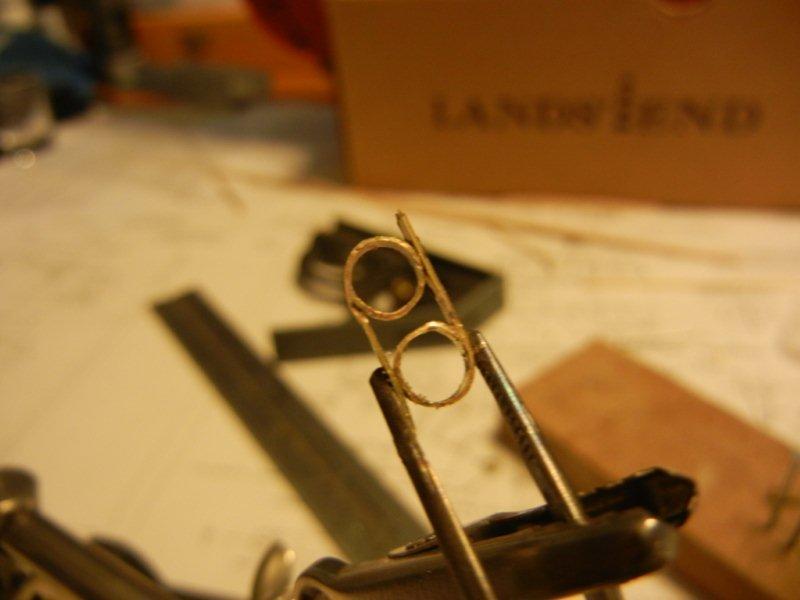
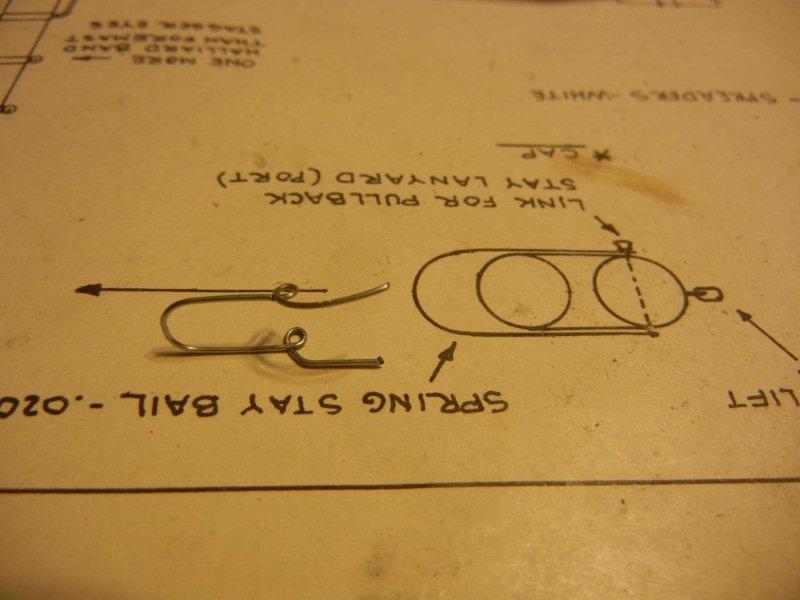
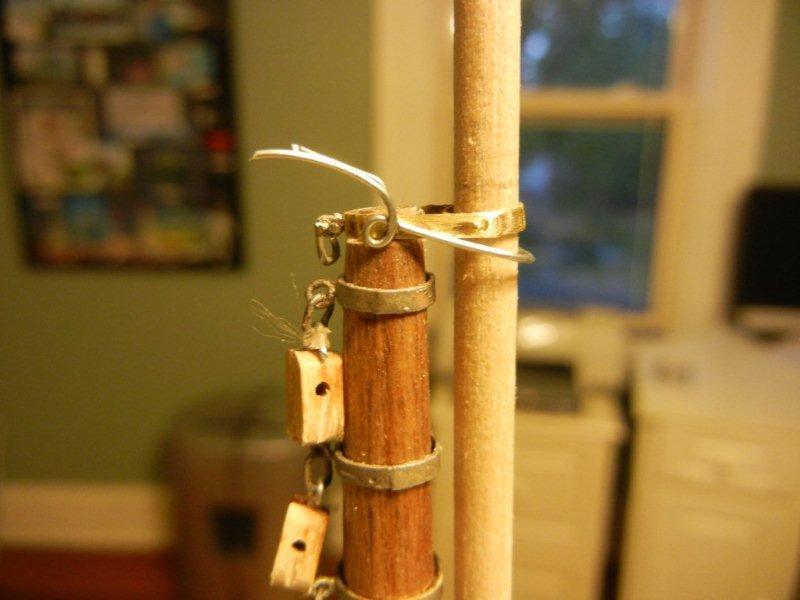
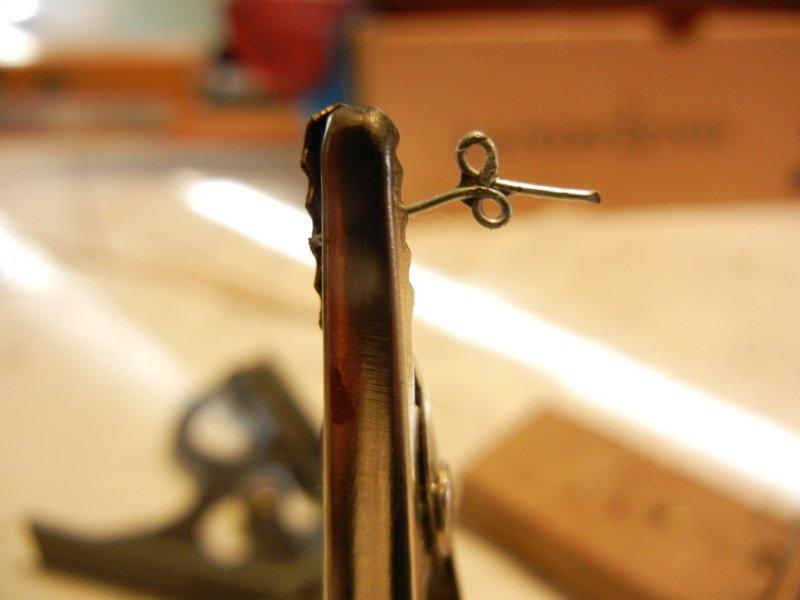
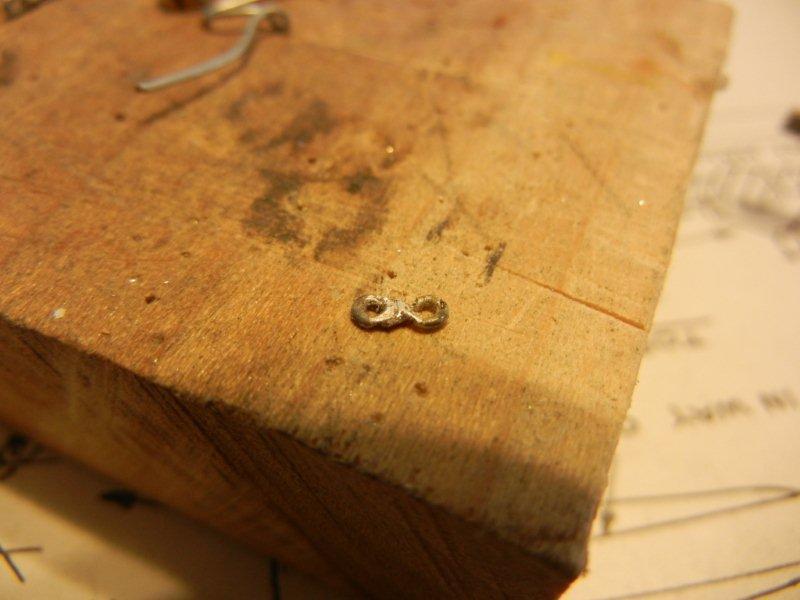
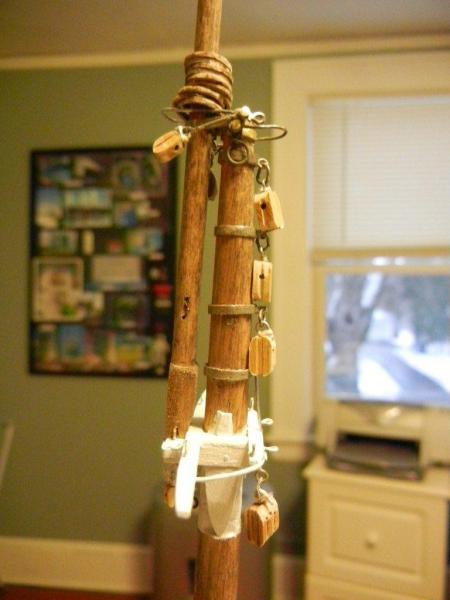
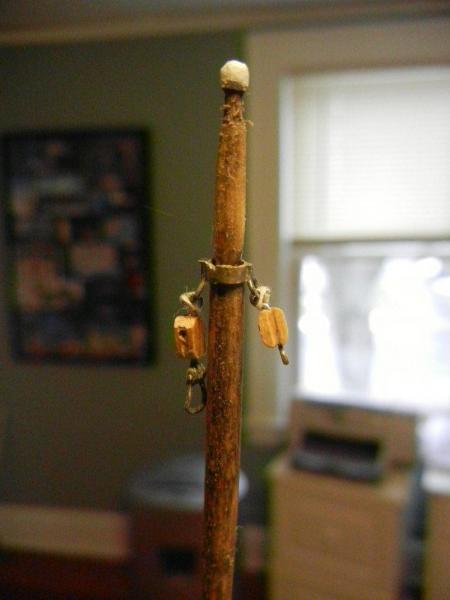
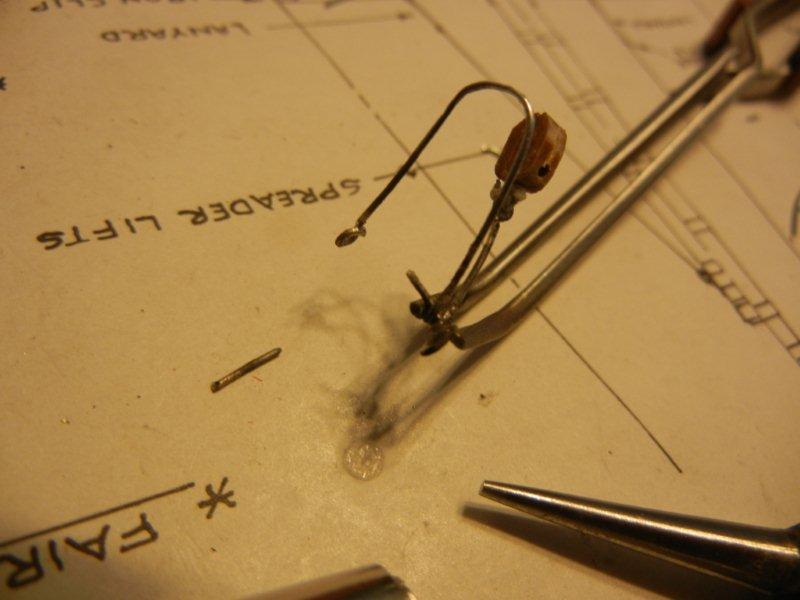
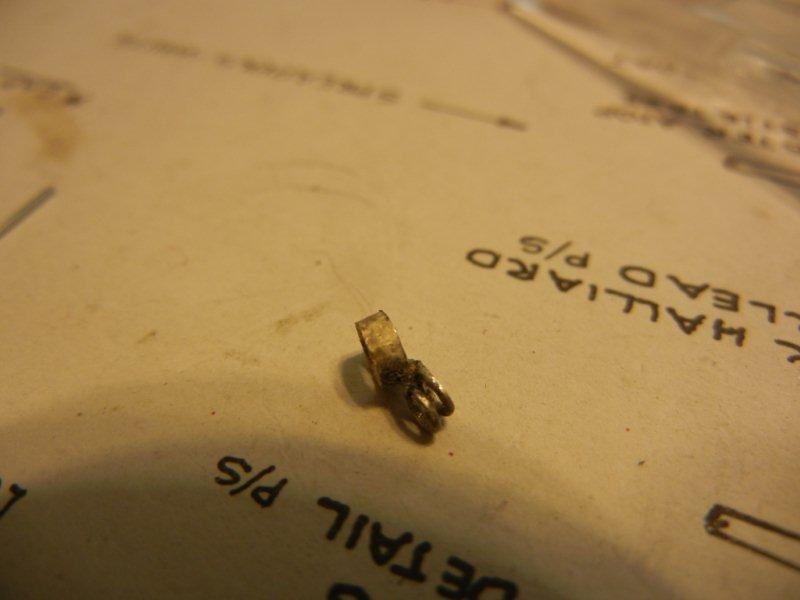
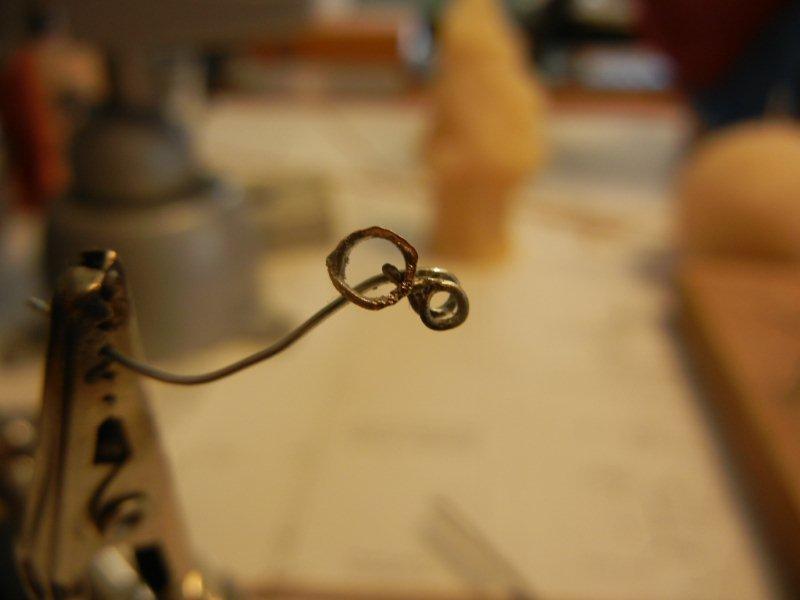
After the topmasts were prepared, the mast caps needed to be made and lots of hardware attached. I start by making a couple of bands with tails. The pieces are then soldered together to finish the cap. The mast top gets a shoulder filed and the cap is test fitted. Various links and bails are fabricated and attached to the the mast caps, First the spring stay bail: and a link to attach the pullback stay The starboard side is attached first. And the completed hardware for the mainmast. Bob