
Eddie
-
Posts
441 -
Joined
-
Last visited
Content Type
Profiles
Forums
Gallery
Events
Everything posted by Eddie
-
 Hey howya goin Don mate, thanks for the advise mate, happy to have you aboard mate.
 -
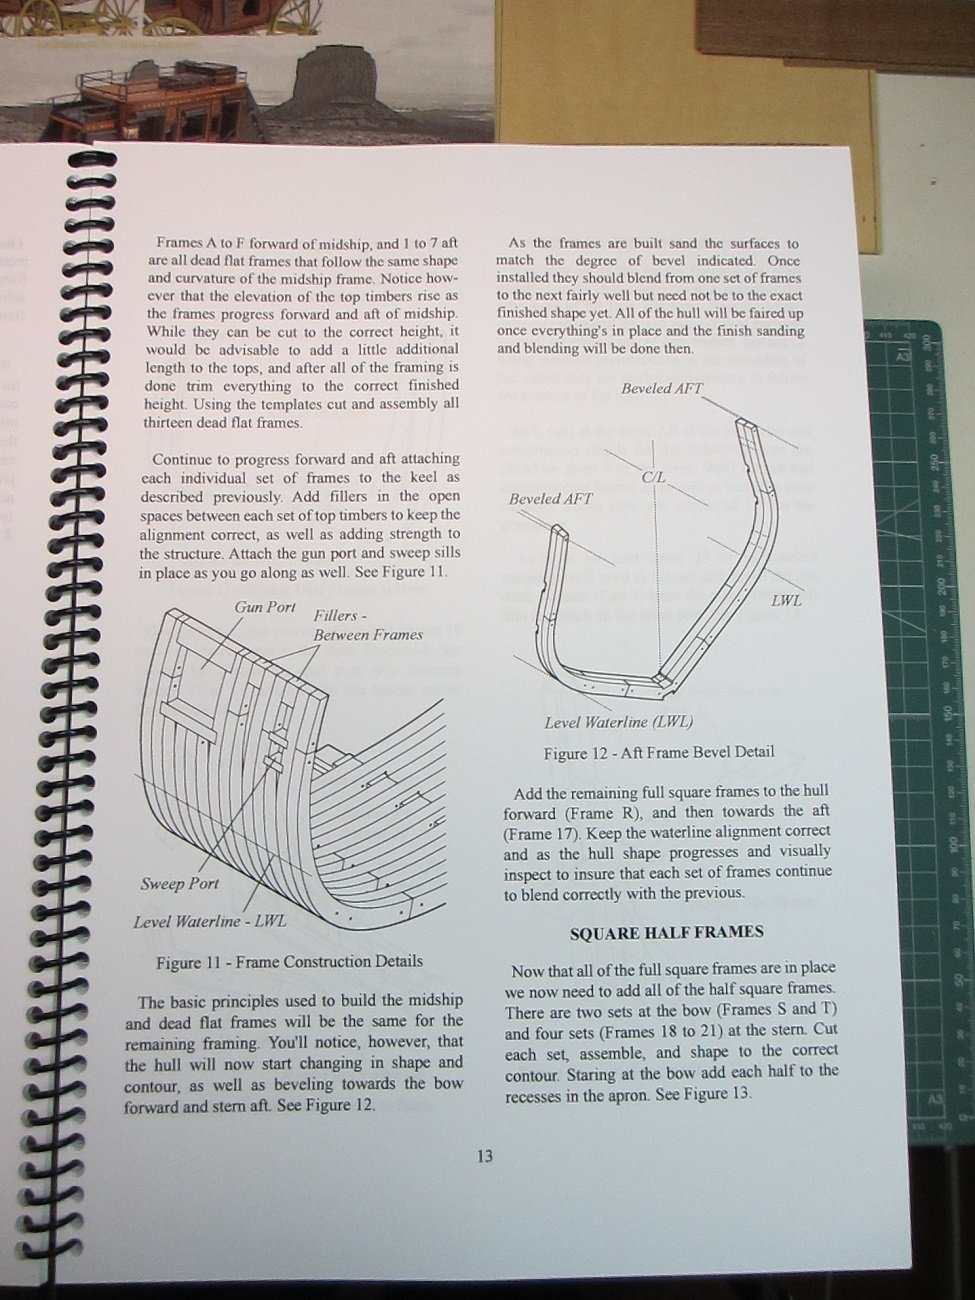
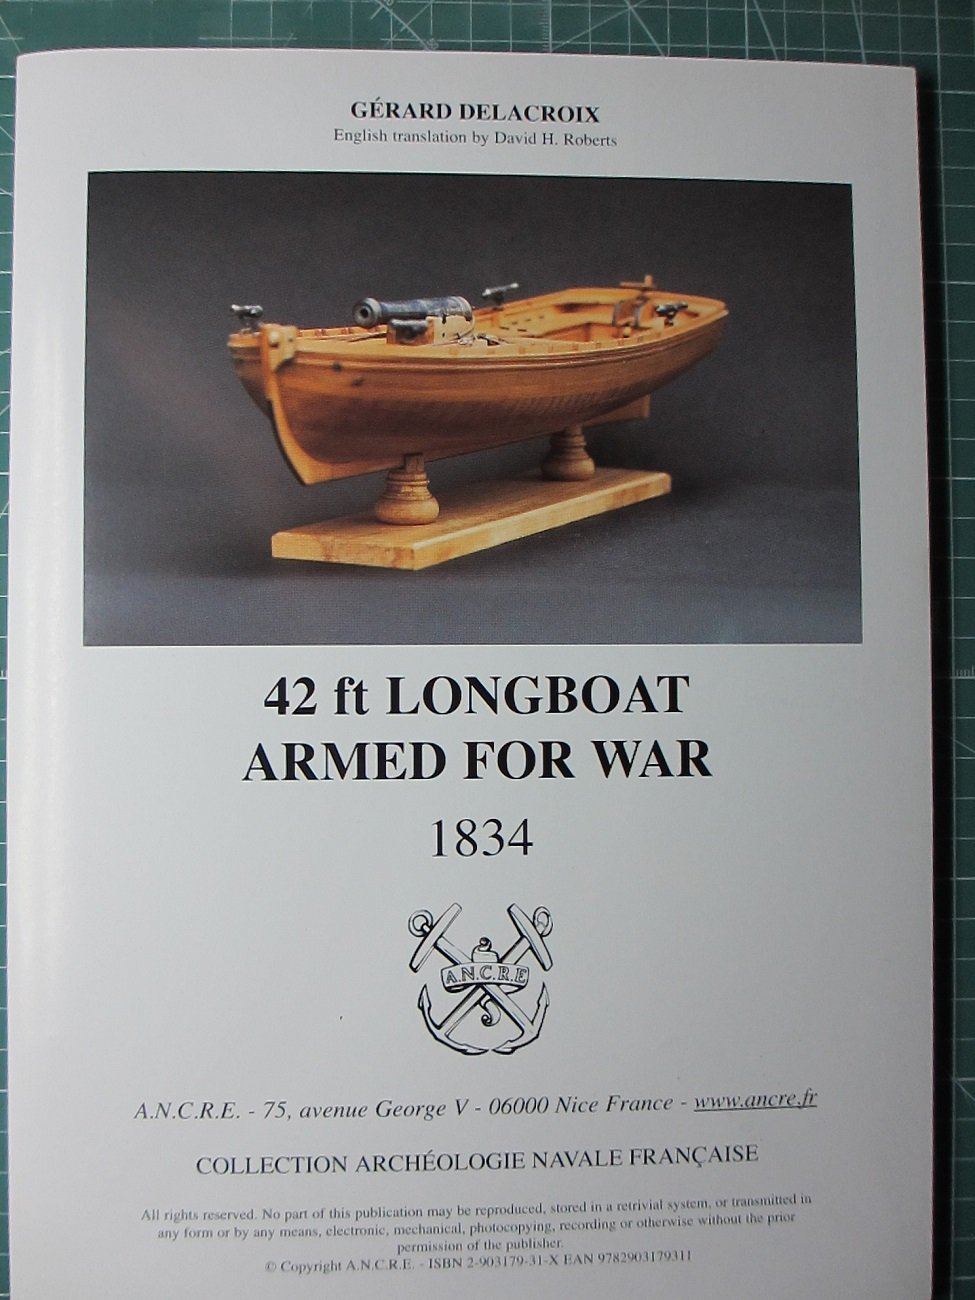
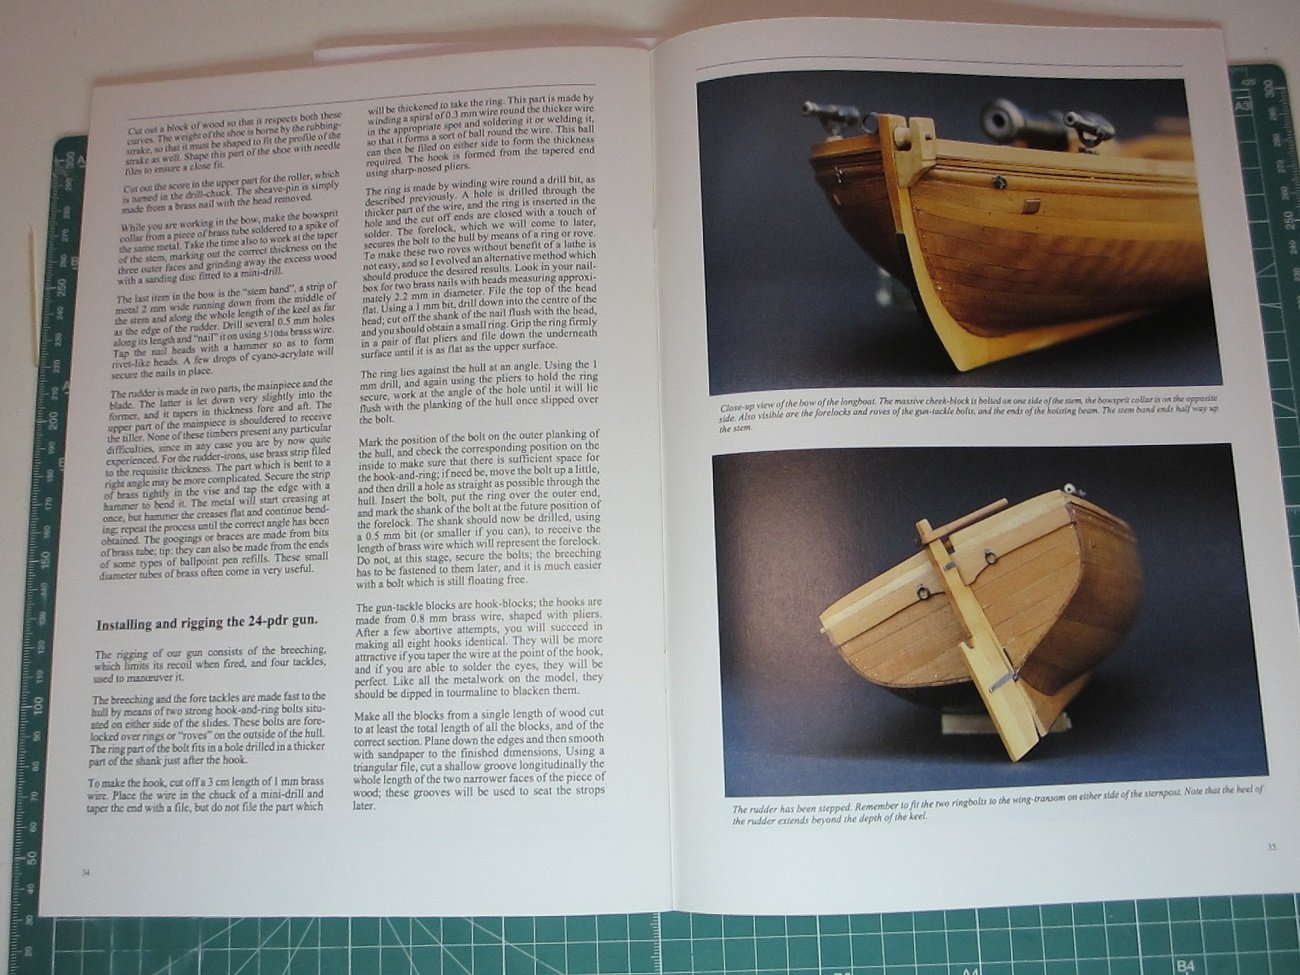
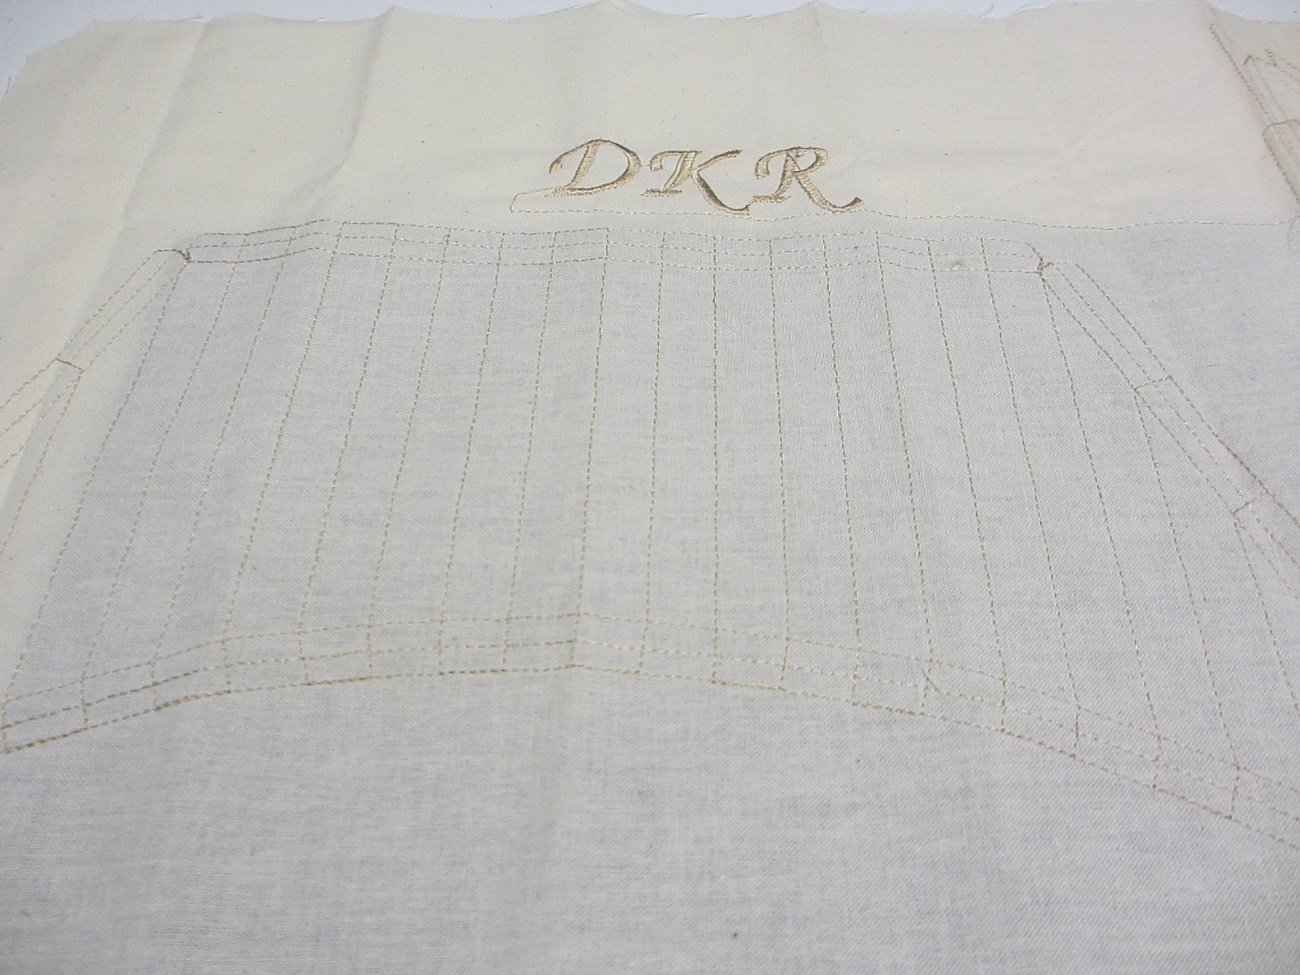
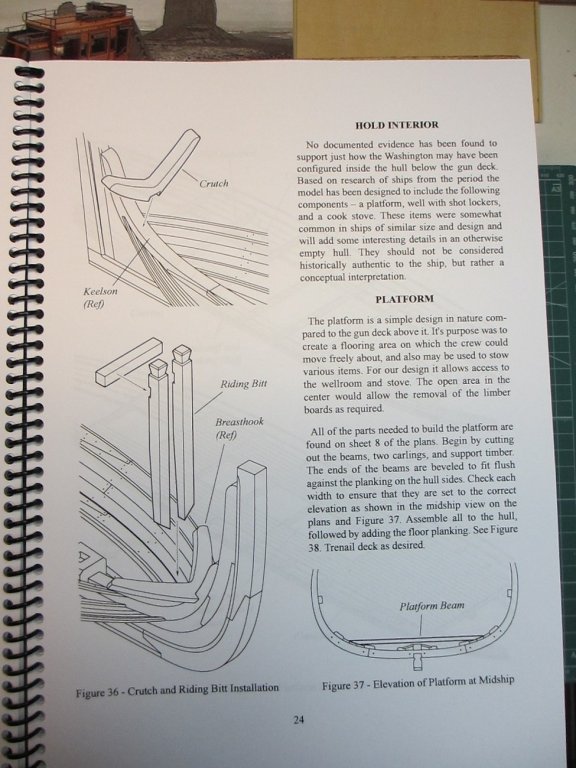
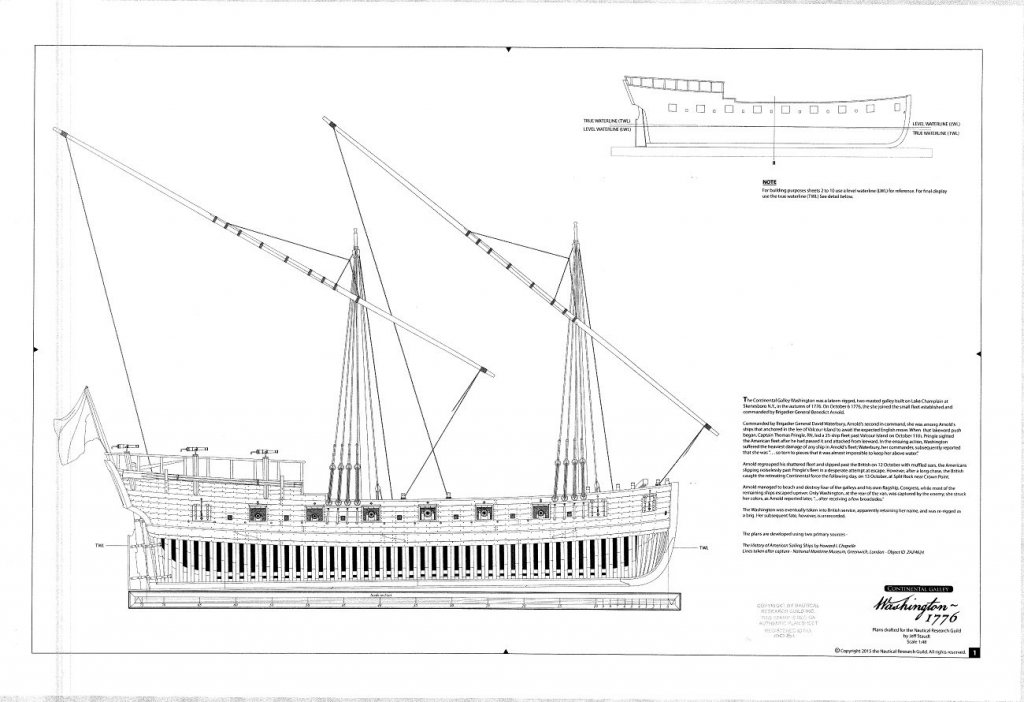
Oh I forgot to add this, I've already download the monograph printed it a had it bound into a book. Here a couple of pics.


-
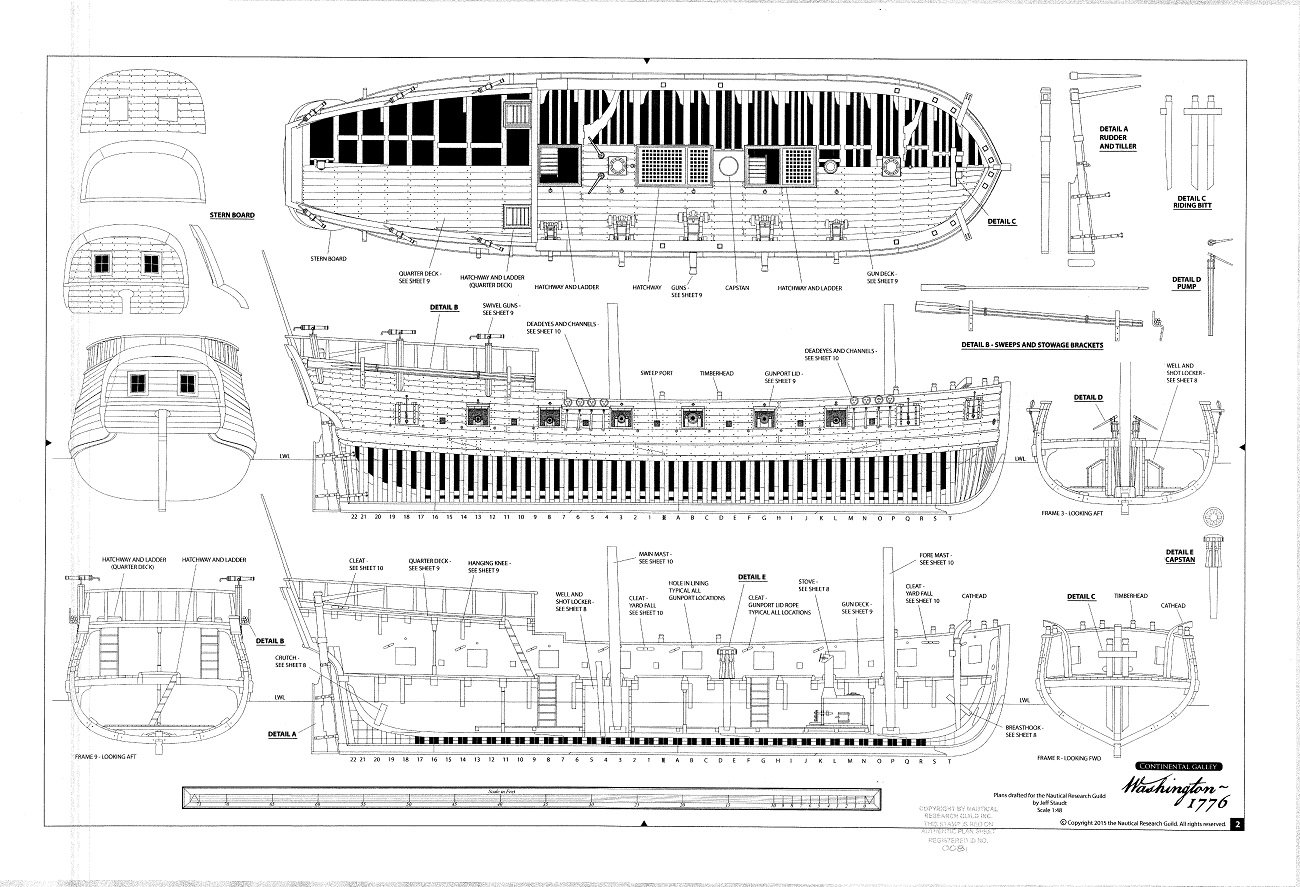
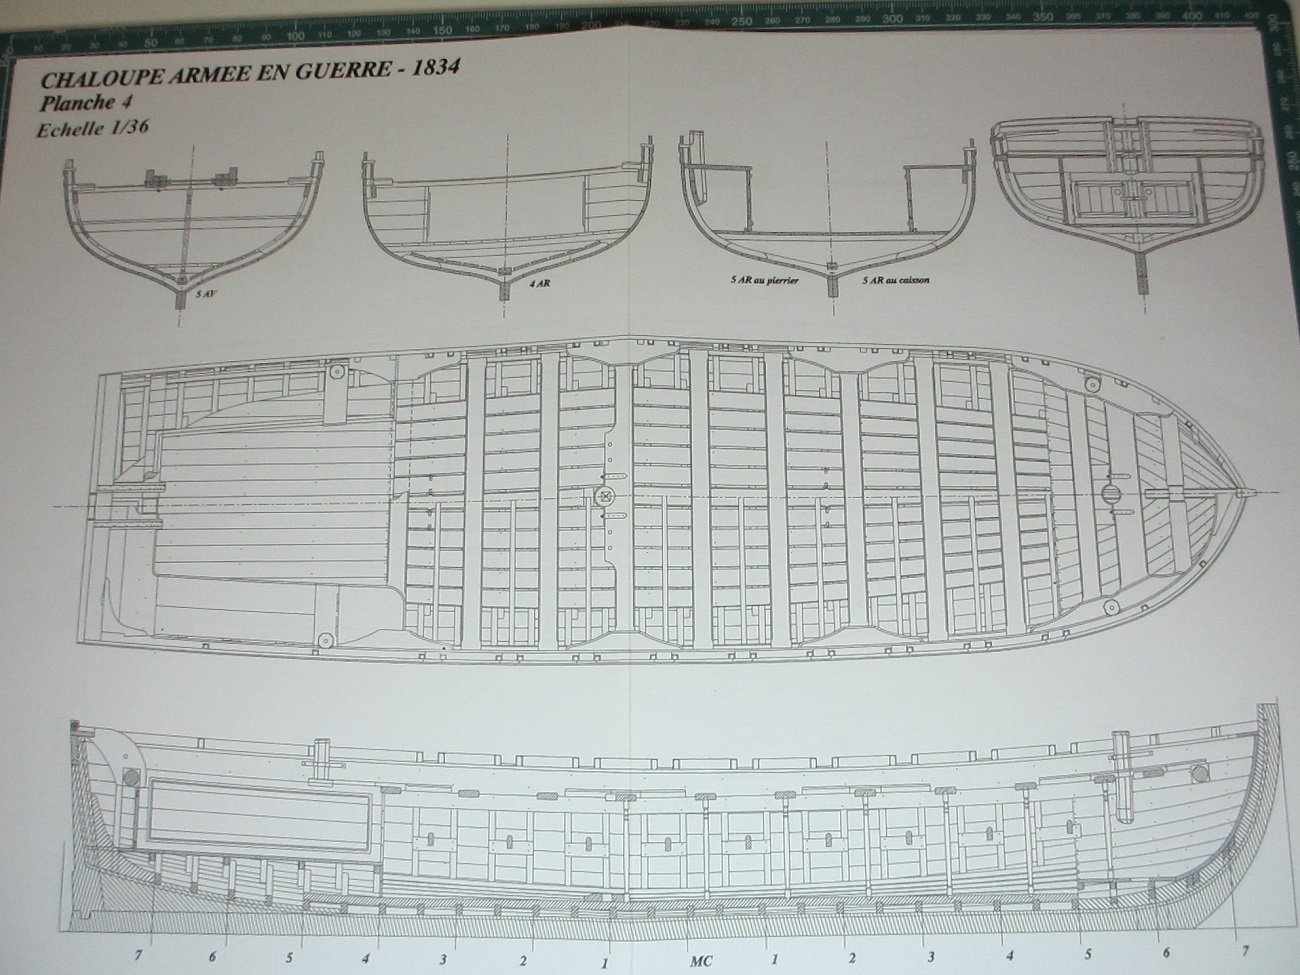
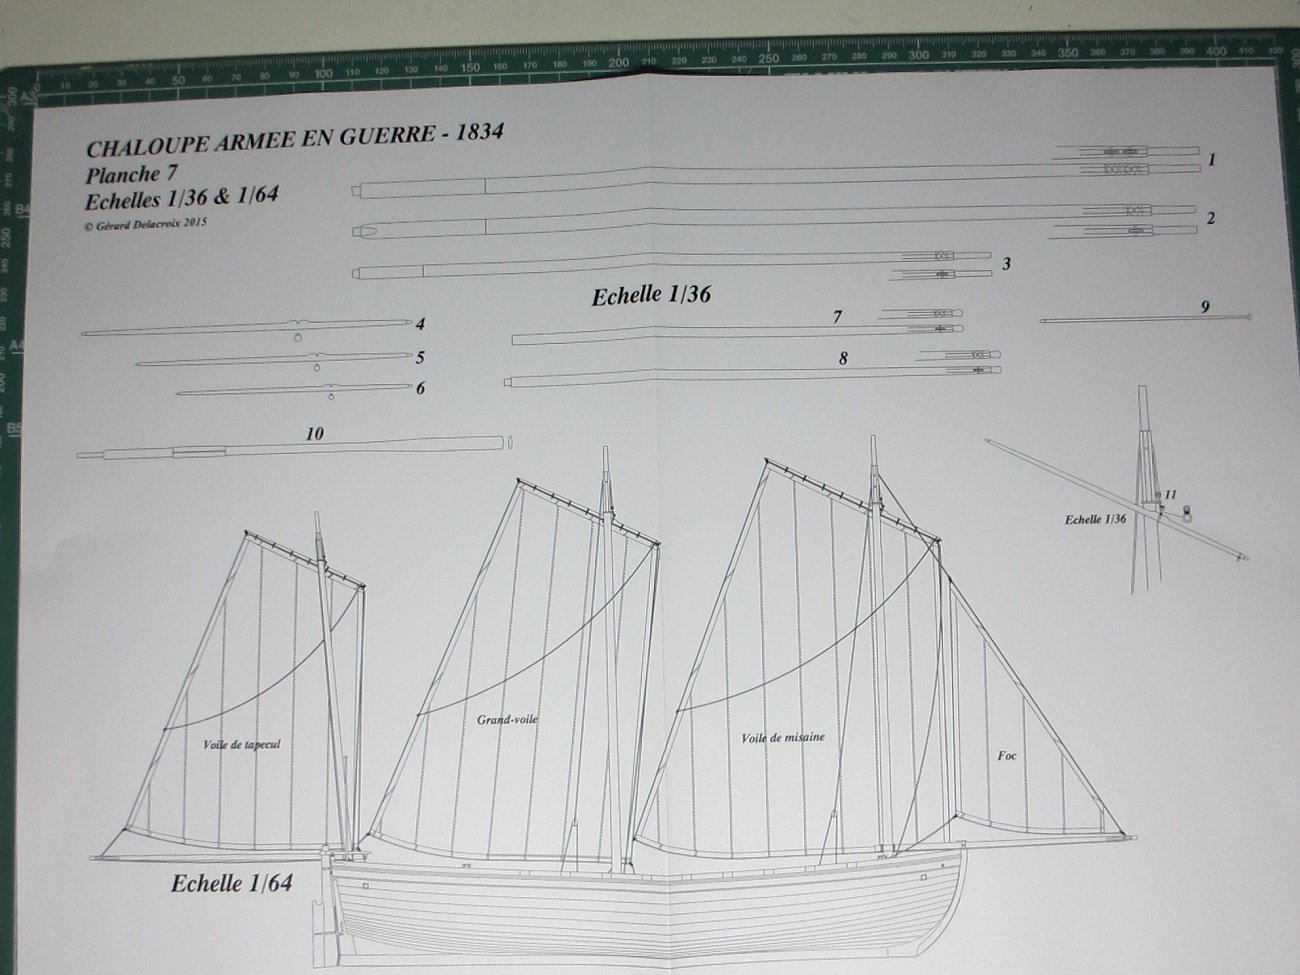
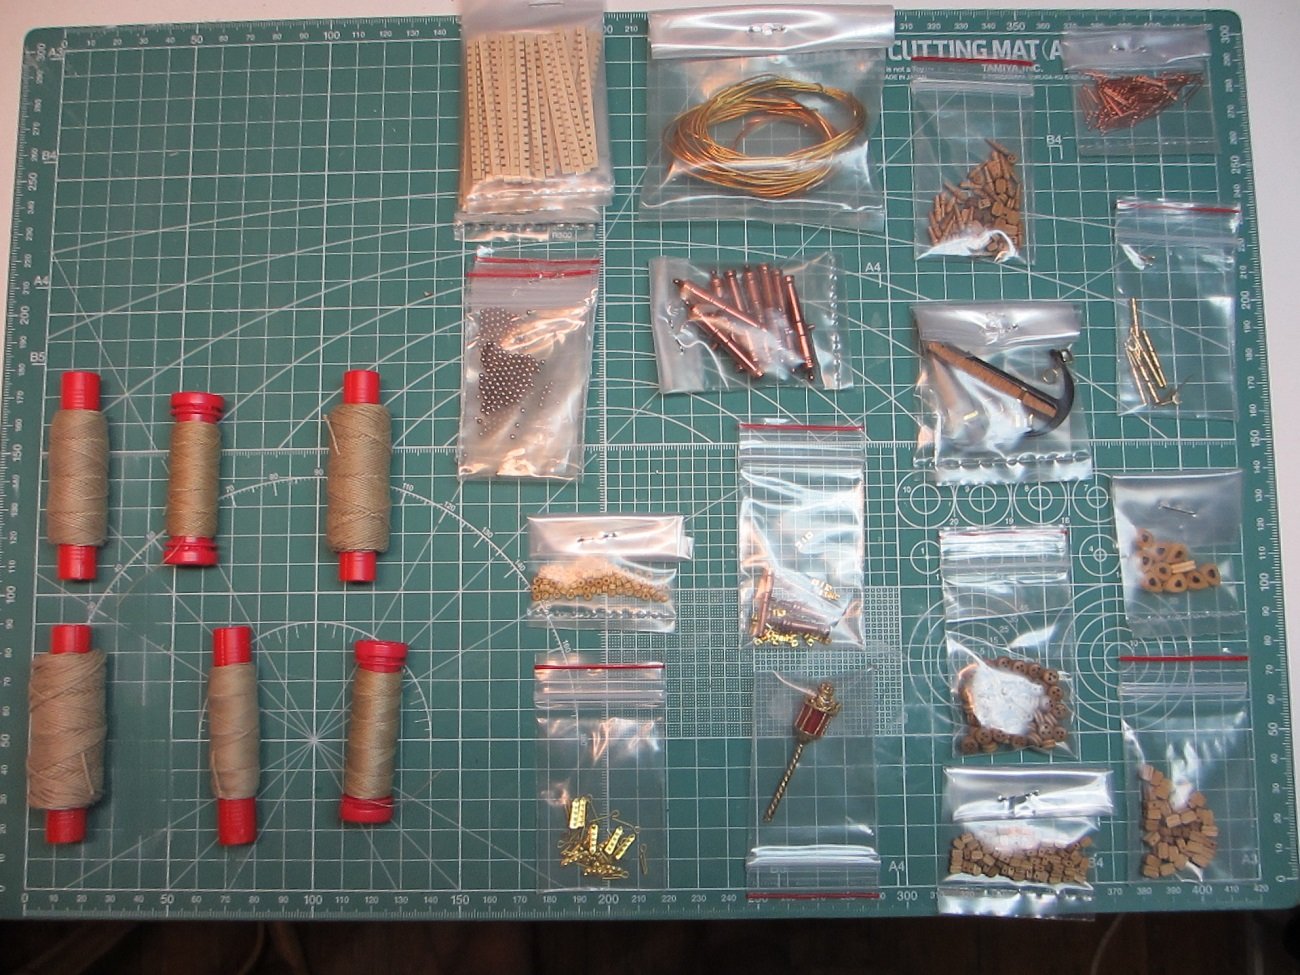
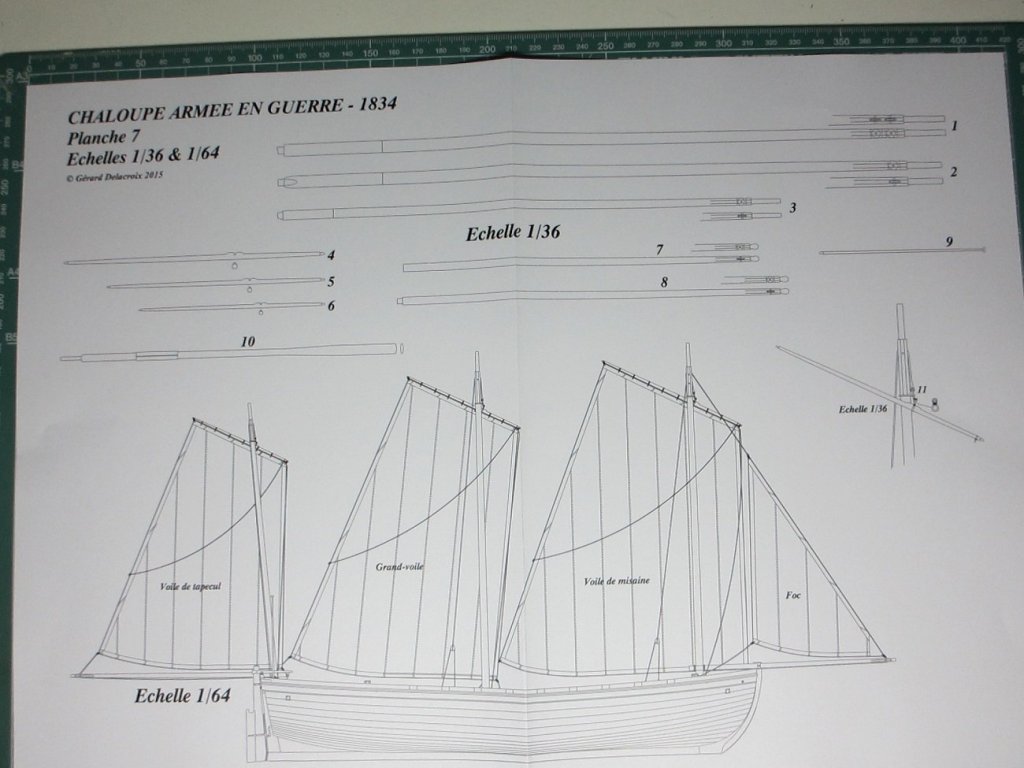
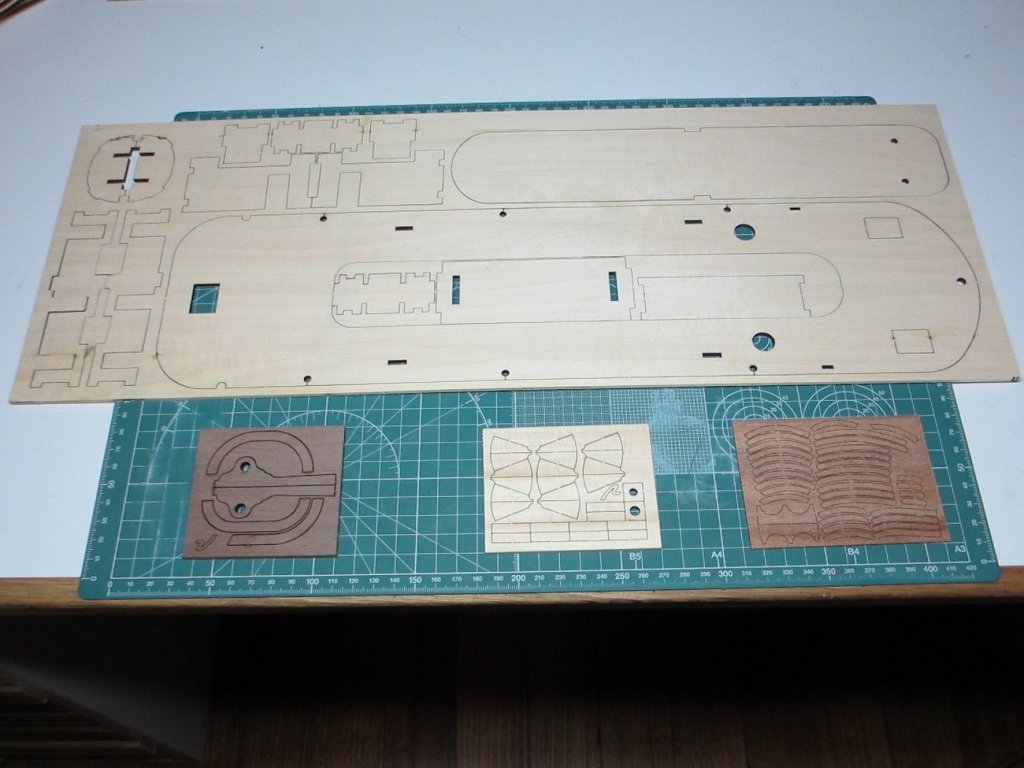
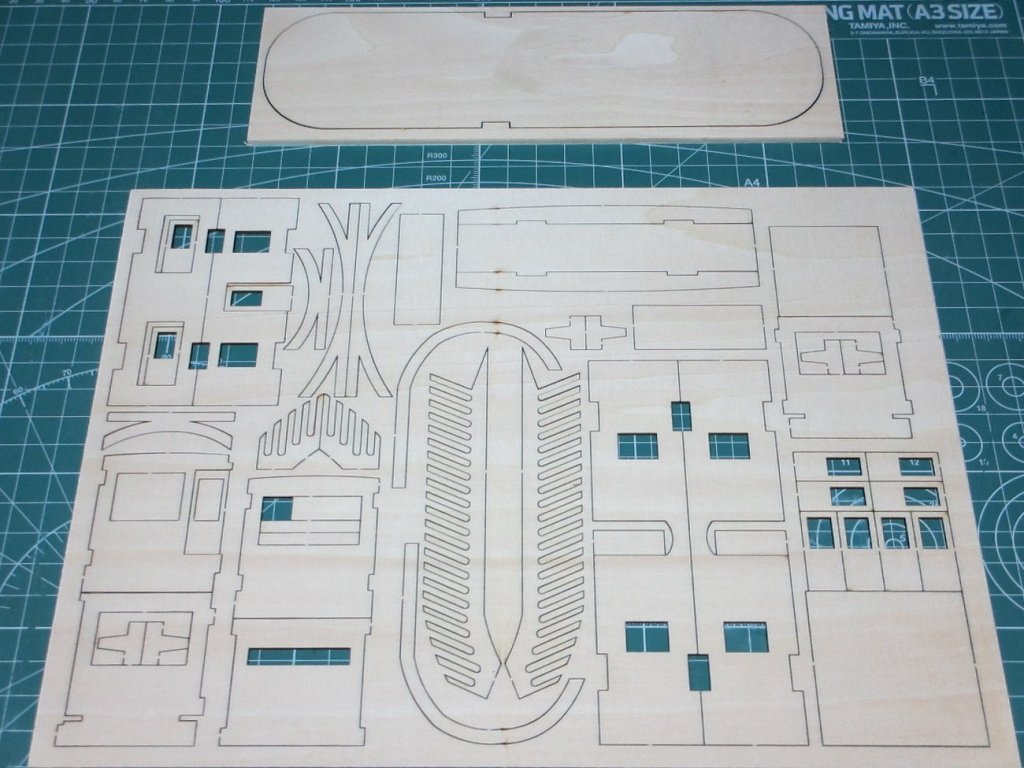
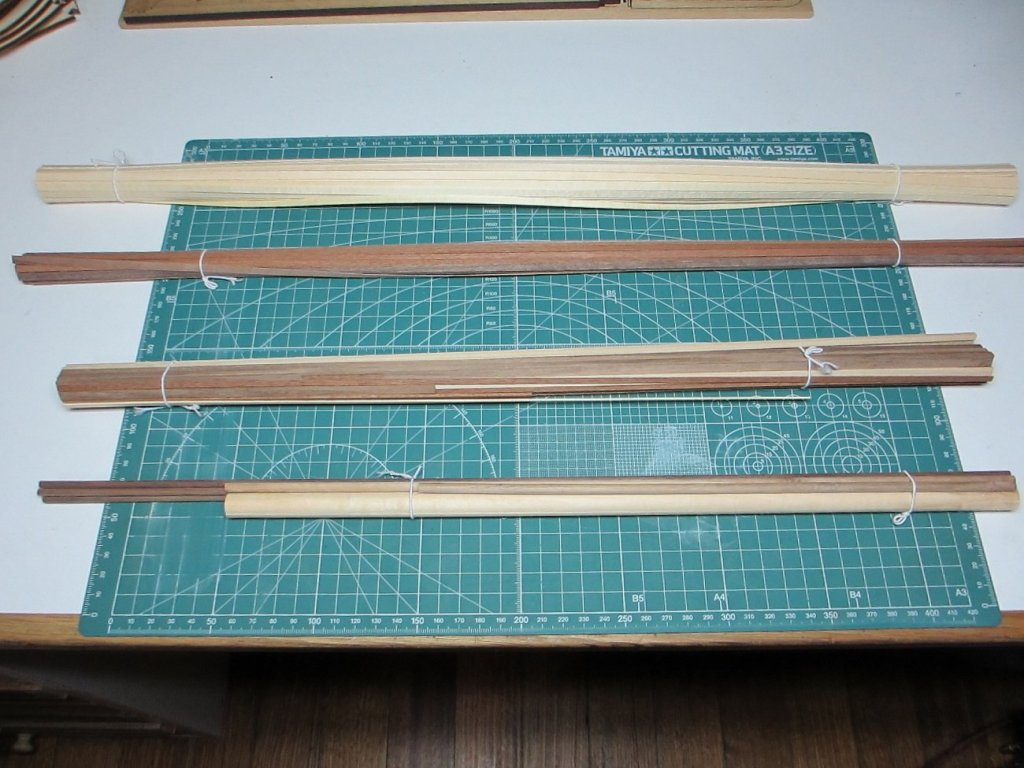
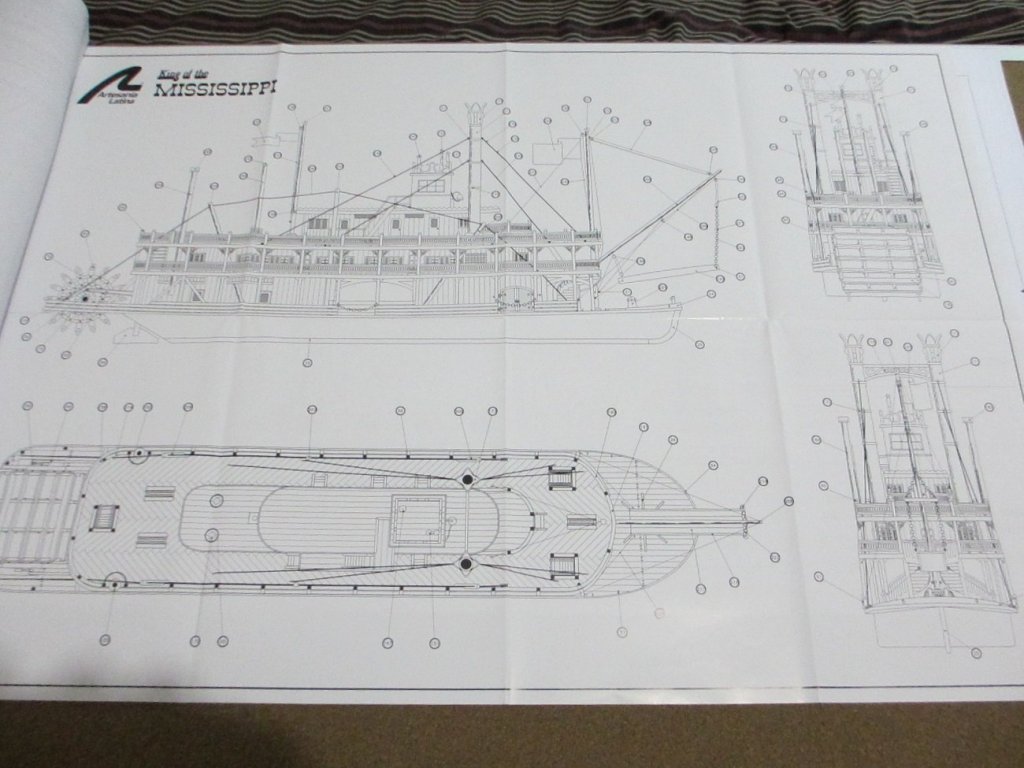
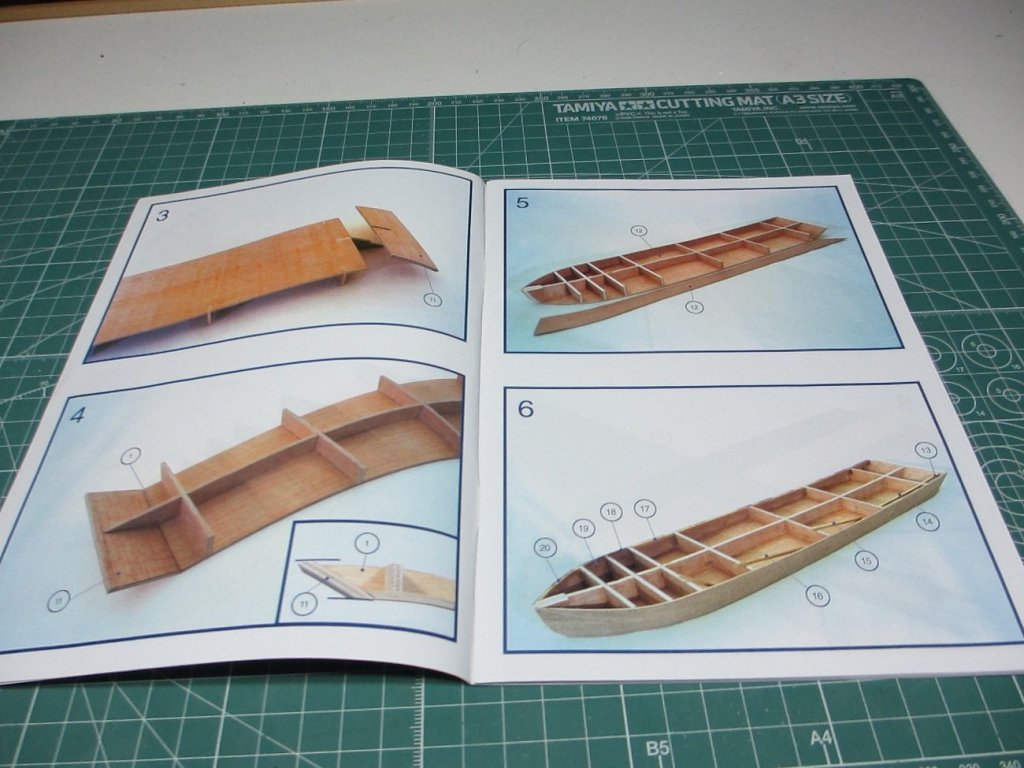
Hey howya goin all, this will be my forth build log of a ship. I bought these plan from NRG's website <--- Click here, I got this to help support the site and give me my first try at scratch building. It is a good first scratch build ship to cut your teeth on, I do recommend it, it's not to expensive aswell, you get 10 sheets of plans with all the frames already worked out for you, you can download the timber list and a monograph on how to build her. I will be building this ship just after I start my longboats, one thing good about getting this from NRG is the timber list is already done for you, all I have to do is decide what kind of timber I want to use and I've been thinking about this alot, Iv'e decided to use Castello Boxwood for most of it, and ebony wales and railing, don't know yet what to use for the decking maybe holly. LIST OF ILLUSTRATIONS just a few things you will find in the monograph Figure 1 - Building Board 9 Figure 2 - Keel Construction 10 Figure 3 - Finishing the Keel 10 Figure 4 - Bow Construction 10 Figure 5 - Stern Construction Figure 6 - Placing Keel on Building Board 11 Figure 7 - Alignment Fixture at Bow 11 Figure 8 - Square Frame Detail 12 Figure 9 - Placement of Midship Frame 12 Figure 10 - Frame Alignment Procedure 12 Figure 11 - Frame Construction Detail 13 Figure 12 - Aft Frame Bevel Detail 13 Figure 13 - Square Half Frames at Bow 14 Figure 14 - Square Half Frames at Stern 14 Figure 15 - Installation of Gun Deck Transom 14 Figure 16 - Installation of Cant Frames 15 Figure 17 - Installation of Counter Timbers 15 Figure 18 - Installation of Transom Beam 15 Figure 19 - Installation of Quarter Deck Transom Figure 20 - Stern Transom Completed Figure 21 - Bow Cant Frame Installation 17 and Filling Pieces 16 Figure 22 - Hawse Piece Installation 17 Figure 23 - Bow Completed 17 Figure 24 - Keelson at Bow 18 Figure 25 - Keelson at Stern 18 Figure 26 - Keelson at Midship 18 Figure 27 - Hull Framing and Deck Clamps 19 Figure 28 - Main Mast Step Installation 19 Figure 29 - Mast and Capstan Step Locations 20 Figure 30 - Limber Passage at Midship 20 Figure 31 - Limber Strake and Board Figure 32 - Limber Strake and Board Figure 33 - Thickstuff and Planking at Midship 22 Installation 21 Installation at Stern 22 Figure 34 - Thickstuff and Planking Figure 35 - Breasthook Installation 23 Figure 36 - Crutch and Riding Bitt Installation 24 Installation 23 Figure 37 - Elevation of Platform at Midship 24 Figure 38 - Platform Installation 25 Figure 39 - Well Assembly 26 Figure 40 - Well Installation 26 Figure 41 - Shot Locker Assembly and Installation 27 Figure 42 - Stove Assembly 27 Figure 43 - Stove Assembly and Installation 28 Figure 44 - Hold Components Completed 28 Figure 45 - Gun Deck 29 Figure 46 - Deck Beam 29 Figure 47 - Gun Deck at Well Location 30 INTRODUCTION The Continental Galley Washington was a lateen-rigged, two-masted row galley built in the autumn of 1776 on Lake Champlain at Skenesboro N.Y. On October 6 1776, she joined the small fleet established and commanded by Brigadier General Benedict Arnold. The fleet consisted of schooners Royal Savage, Revenge and Liberty. Also the sloop Enterprise, and 8 gundalows outfitted as gunboats: New Haven, Providence, Boston, Spitfire, Philadelphia, Connecticut, Jersey, New York, and the cutter Lee. Washington was among three row galleys built, the others being the Congress and Trumbull. During the Battle Arnold commanded the fleet from the galley Congress. A couple of pics of the plans.

-
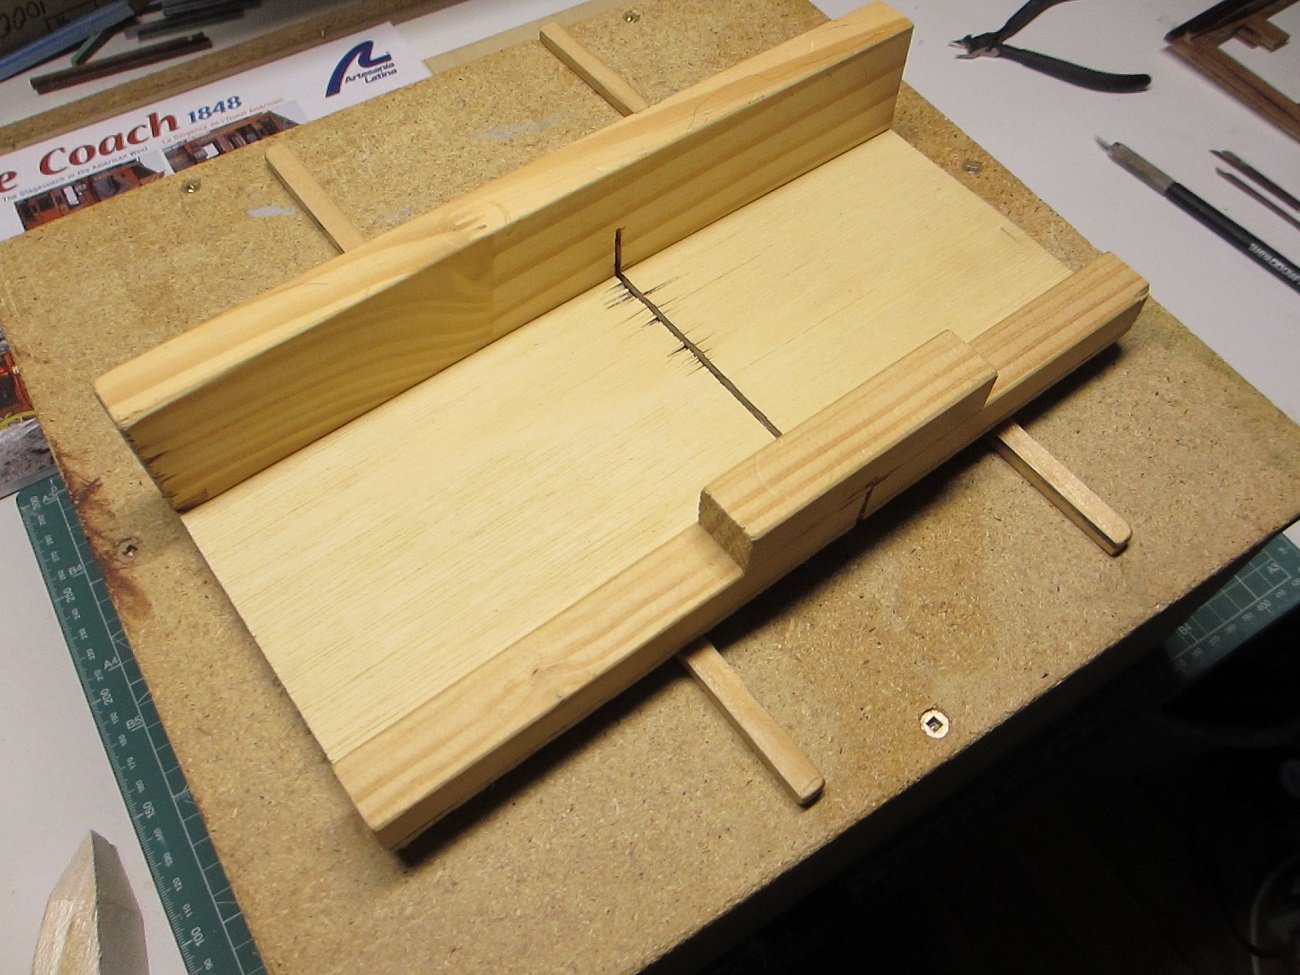
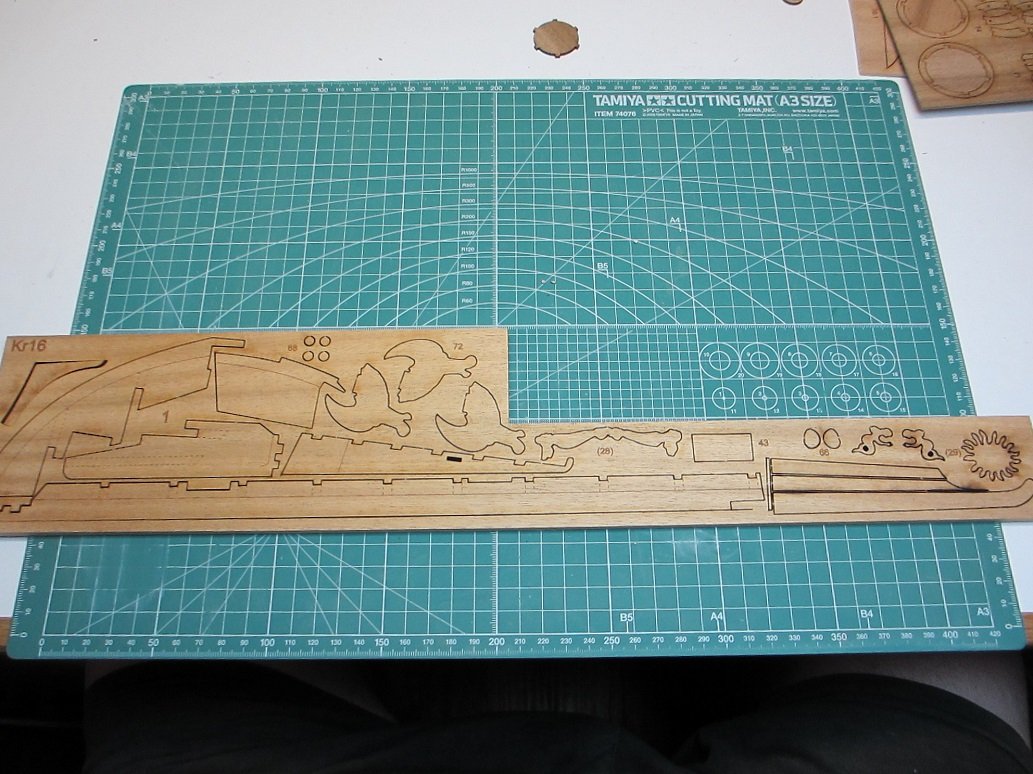
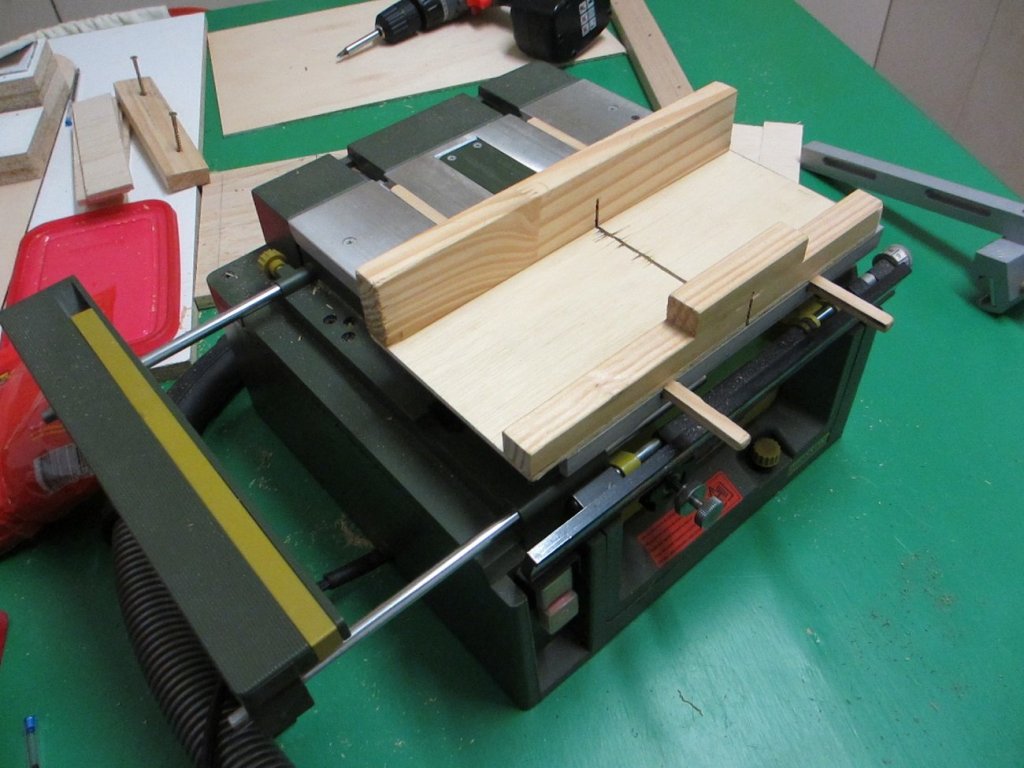
Hey howya goin all, Iv'e started to cut the moulds for the frame work, after I riped the ply I realize that the strips of ply won't fit into my cross cut sled so I have to make a bigger one tomorrow. As I'm making two boats I decided to make 2 moulds. I have to print 24 plans so cut out the individual shapes and stick them to the ply pieces instead to shape the moulds. Heres alittle trick for some of you for when you are making scratch build frames instead of printing out the frames on plain paper, print them out on A4 size postage labels that already have one sticky side that way you don't have to put glue on the frames and when you go to pull the paper off have to deal with all that glue to sand off.


-
Hey howya goin Aviaamator mate, thank mate, I just edited in more info on the boats if you like to read it. Hey howya goin Joe mate, thanks for joining in I hope you got the beer, I just edited in more info on the boats if you like to read it.
-
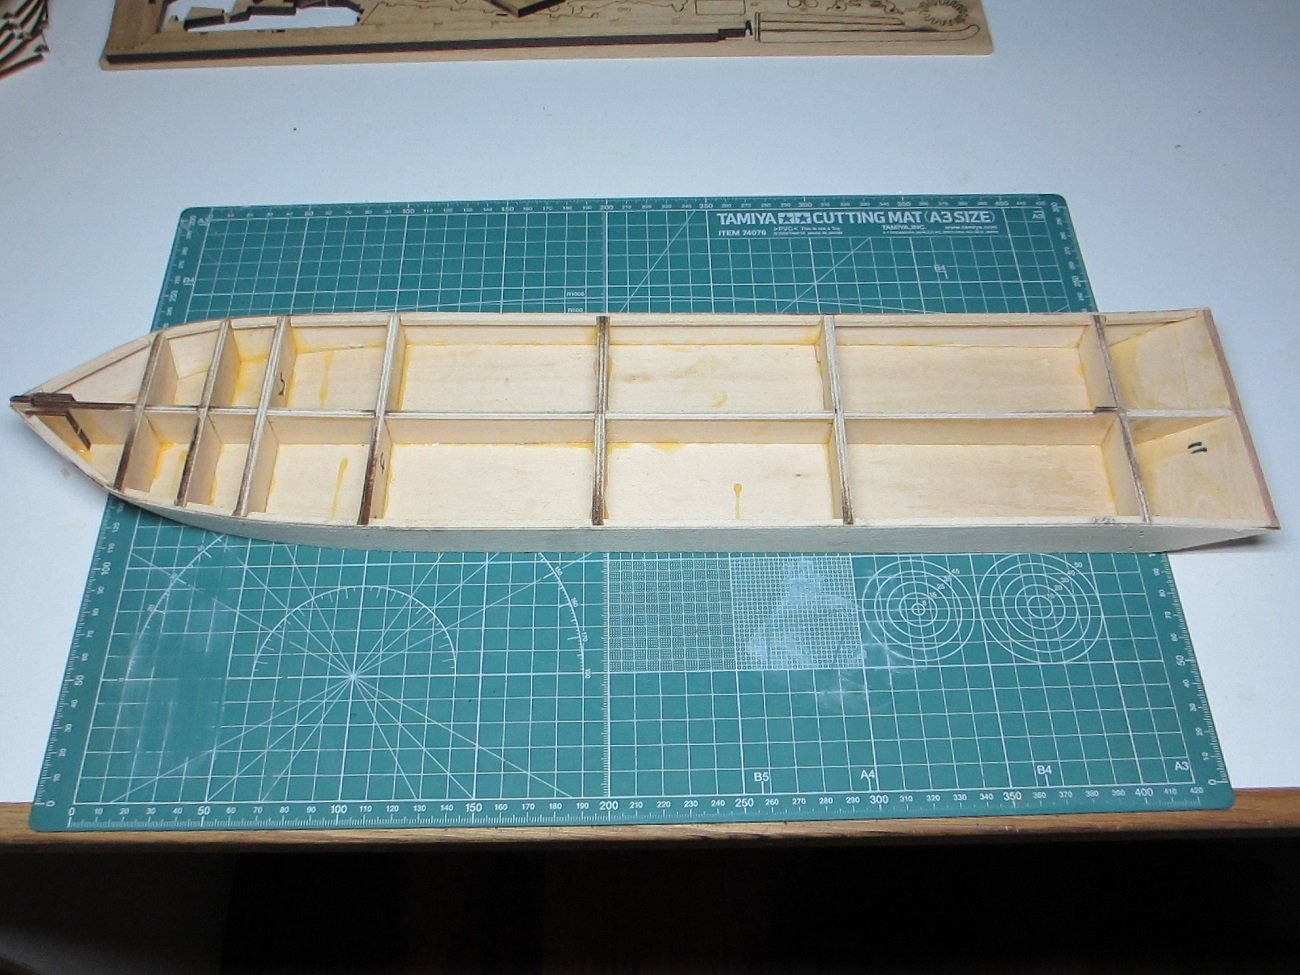
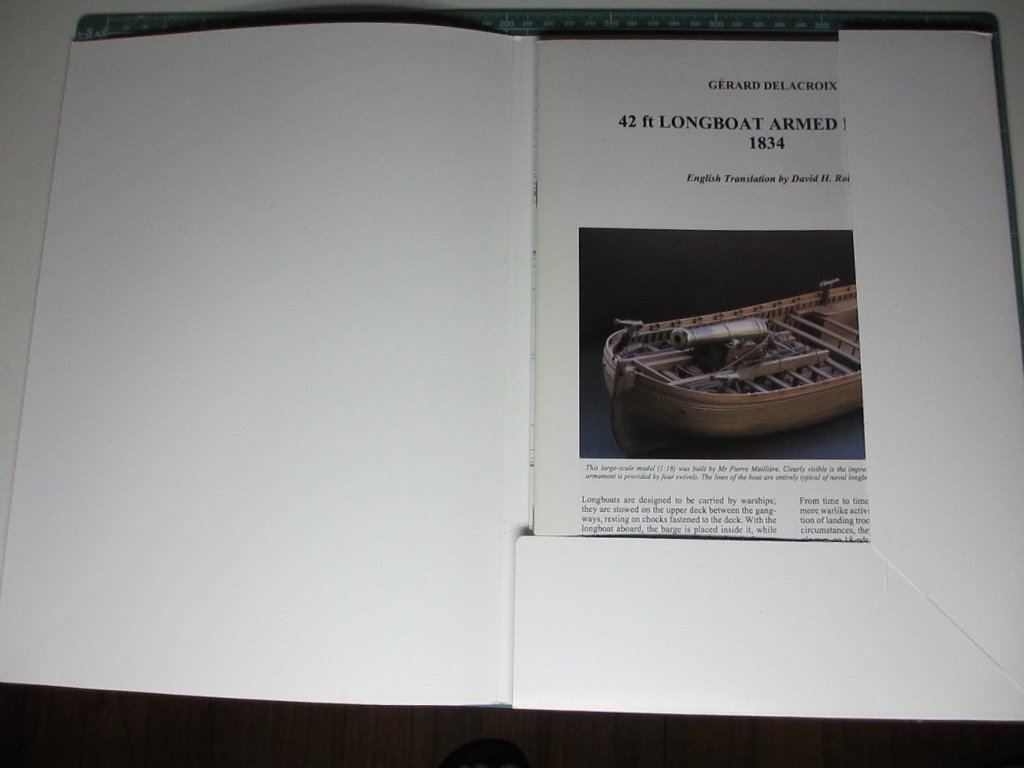
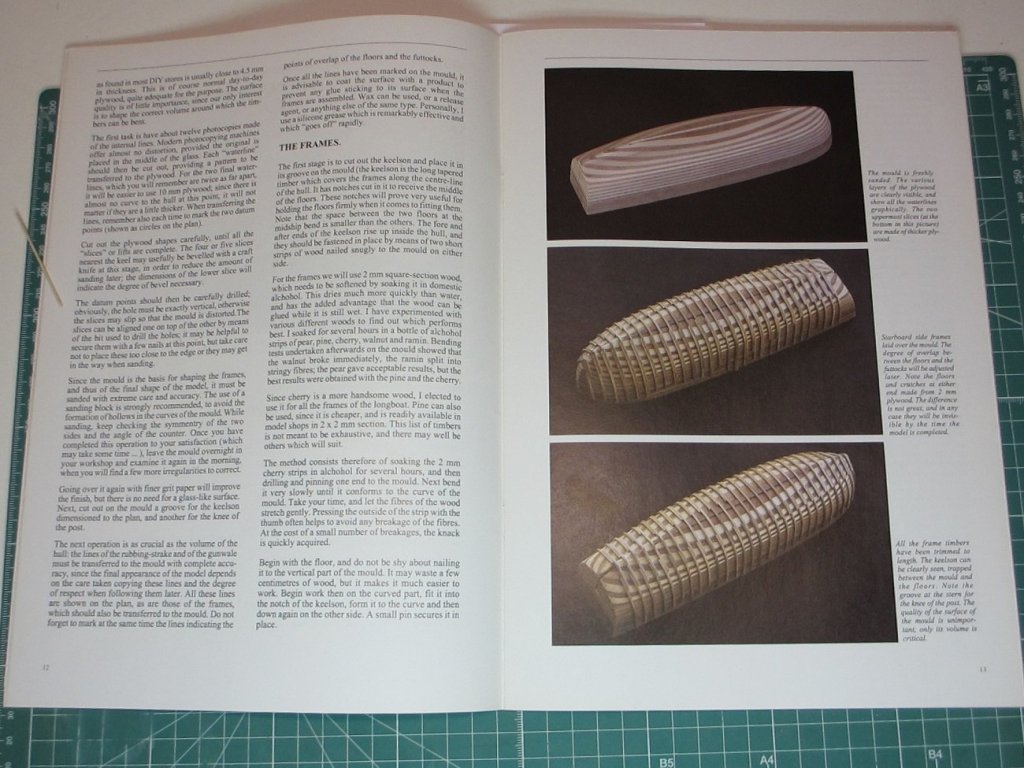
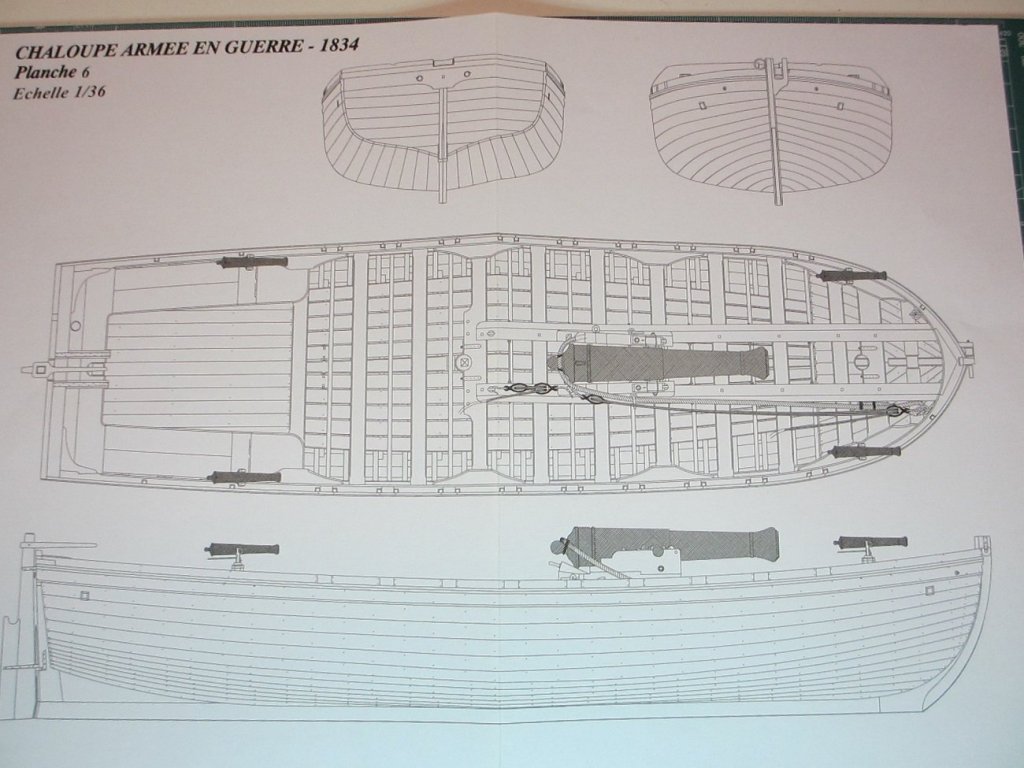
Hey howya goin all, this will be my third build log of a ship and will be my first scratch build of a boat. I will be starting this build when I get my scroll saw which will be nere the end of june and the timber not to long after that if I stop been lazy and finish the list of timber I need, I was thinking of using Walnut , I plan on making two of these one with the cannon on it and one with sails on it. Longboats are designed to be carried by warships; they are stowed on the upper deck between the gangways, resting on chocks fastened to the deck. With the longboat aboard, the barge is placed inside it, while inside the bargeis the cutter. The longboat's thwarts are removable, allowing the barge to be stowed more snugly. Longboats are the ship's boats most commonly used in the Navy for transport of the heavier loads so frequently required by the warships. Their broad, generous lines are suitable for the diverse tasks which they are called upon to perform: carrying the anchors, a common task when mooring, shore duties, watering parties, carrying stores when the ship is in service. From time to time however they may participate in more warlike activities: harbour defense or the protection of landing troops and raiding parties. Under these circumstances, they are sometimes armed with a single gun, an 18-pdr, 24-pdr or even a 36-pdr. It is then that they are described as "armed boats", and it is this arrangement which is to be seen in this model. It should be noted that there is a distinction to be drawn between armed boats and gunboats: despite the large gun carried by the former on the thwarts, it remains a classic ship's boat, whereas gunboats are larger in size, are frequently decked, and may carry several guns. So heres what I got so far. The one with the sails I'm making I had to order the plans for the sails separately as they don't come in English like the other plans I will be scanning the French language manual into my computer mybe a PDF file and copy and paste it to Google translate to translate them to English.


-
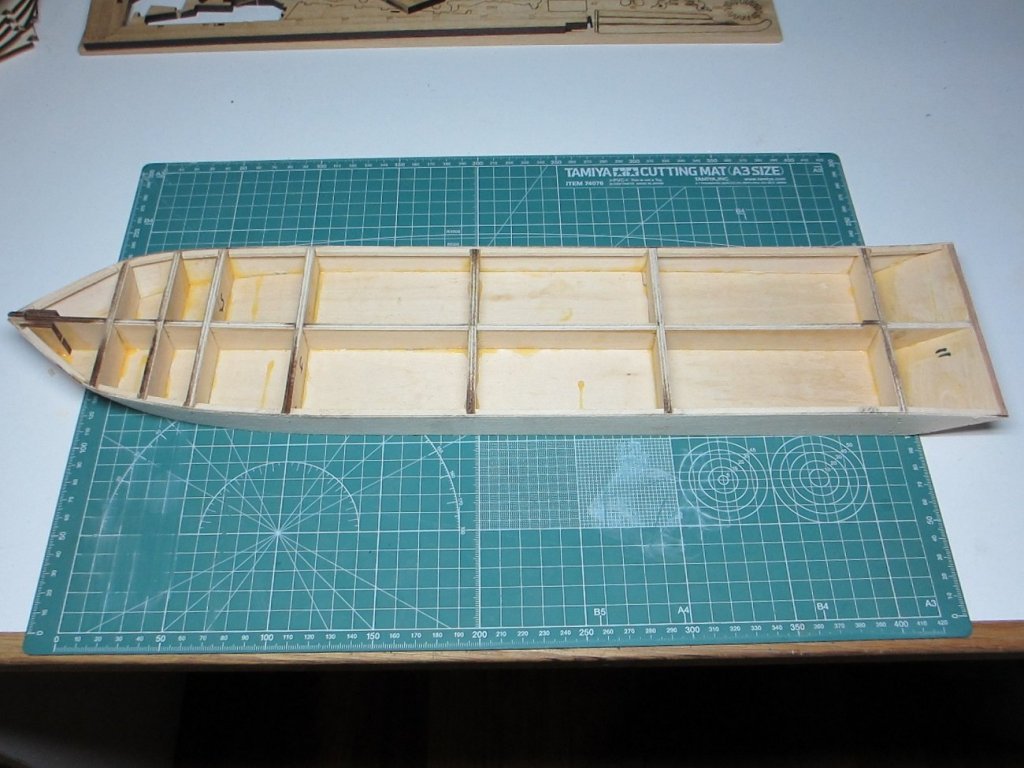
Hey howya goin all, started on the hull. I was a little drunk here and I numbered the pieces the wrong numbers so it took me a little to work out why the pieces wasn't fitting but I got it in the end. Now that the hull is made I was going to start to line her but as I counted the pieces there wasn't enough to do the hull in the instruction manual it says part No 24, Hull lining Strakes, quant 30, 0'6x6x600, African Walnut, the pieces are in fact 0.6x5x600 and they short changed me to on a couple of strips, I could have just bought a few pieces from here but the Walnut we have is not African Walnut, so I had to contact the shop where I got it from and have them order some from the manufacturer which can take a couple of months to get replacements for.

-
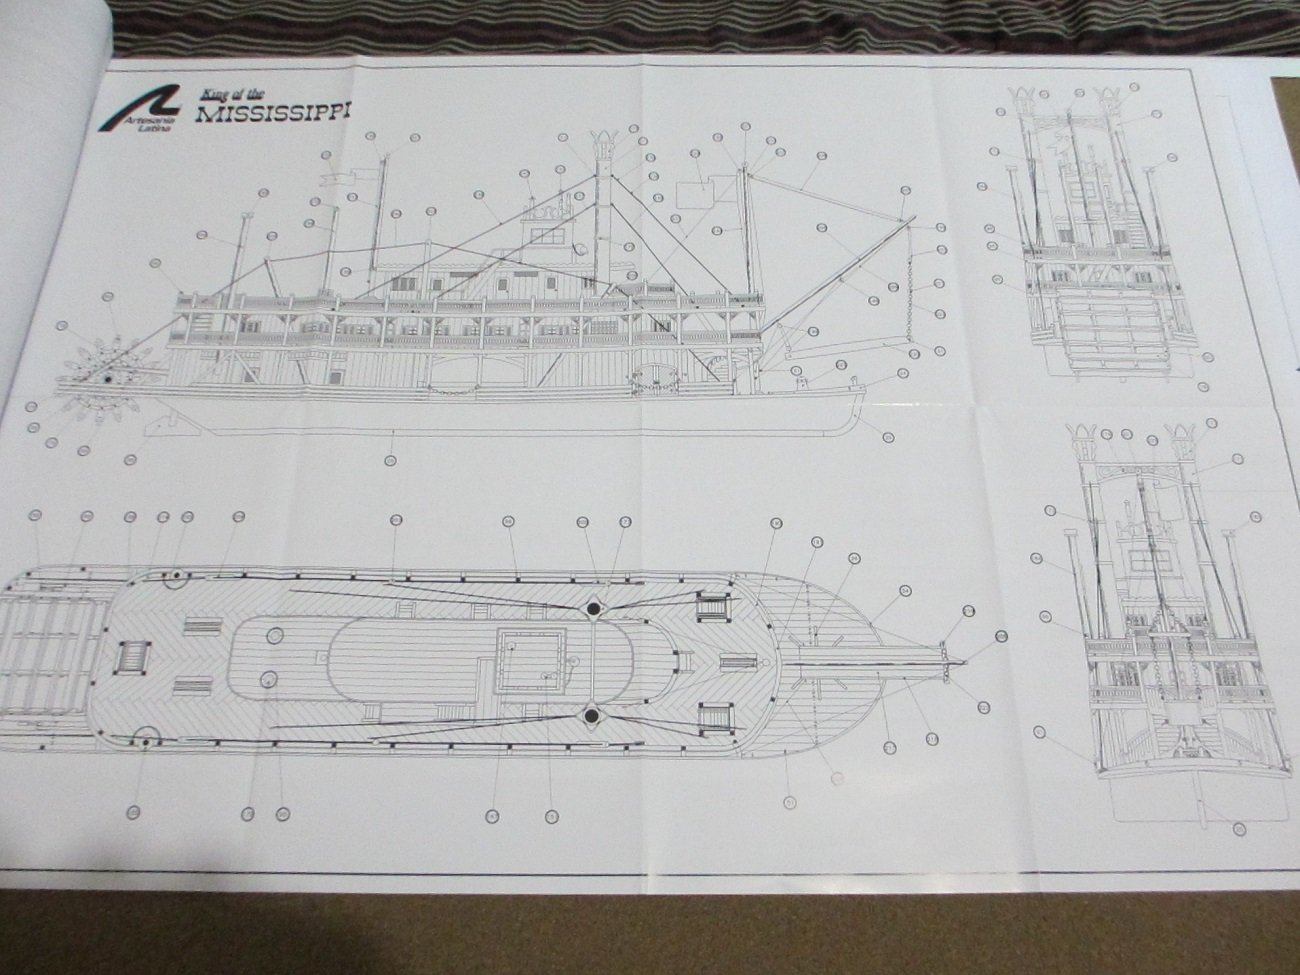
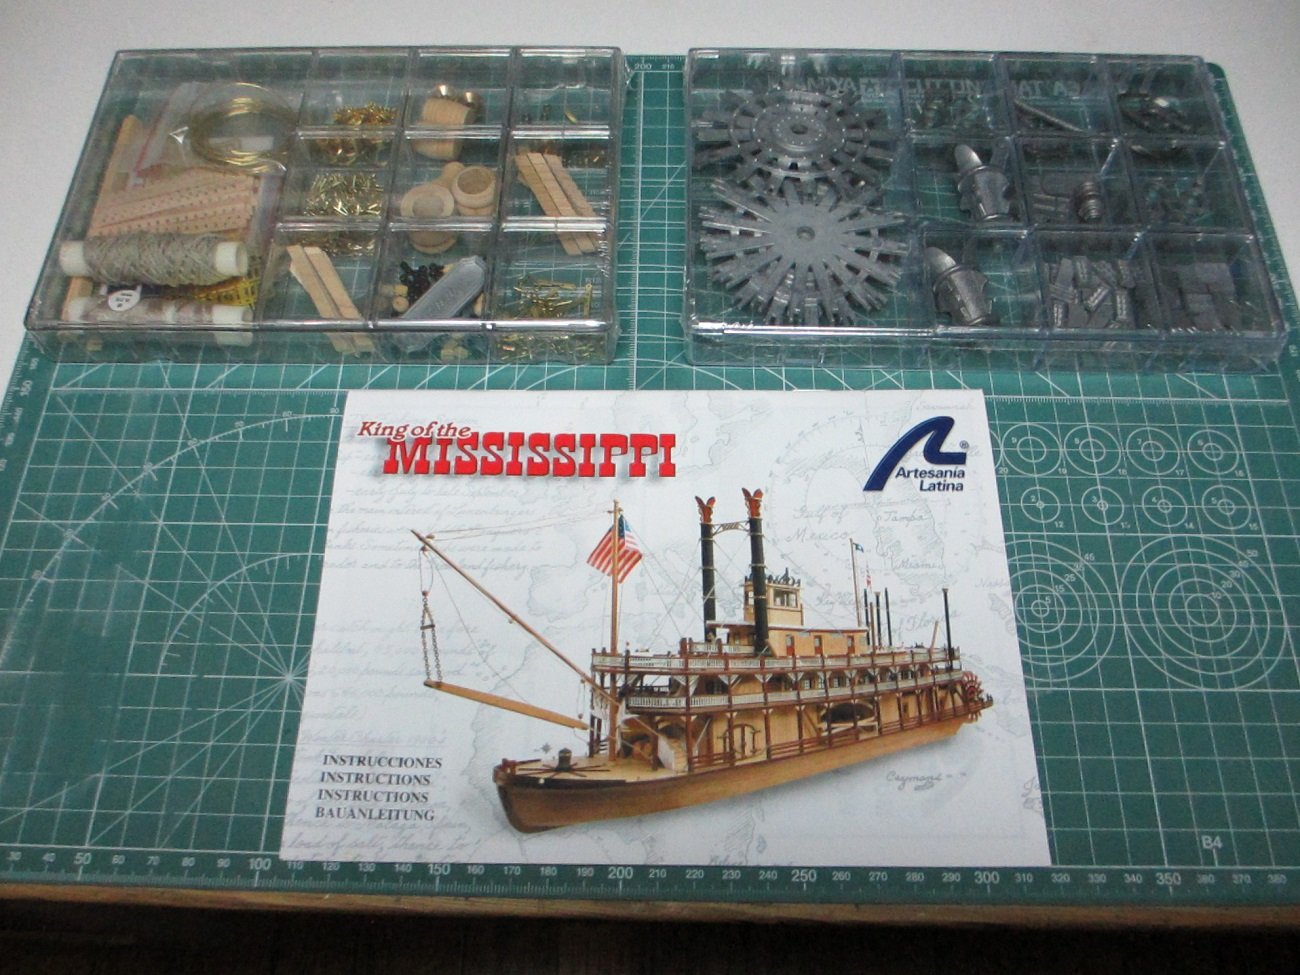
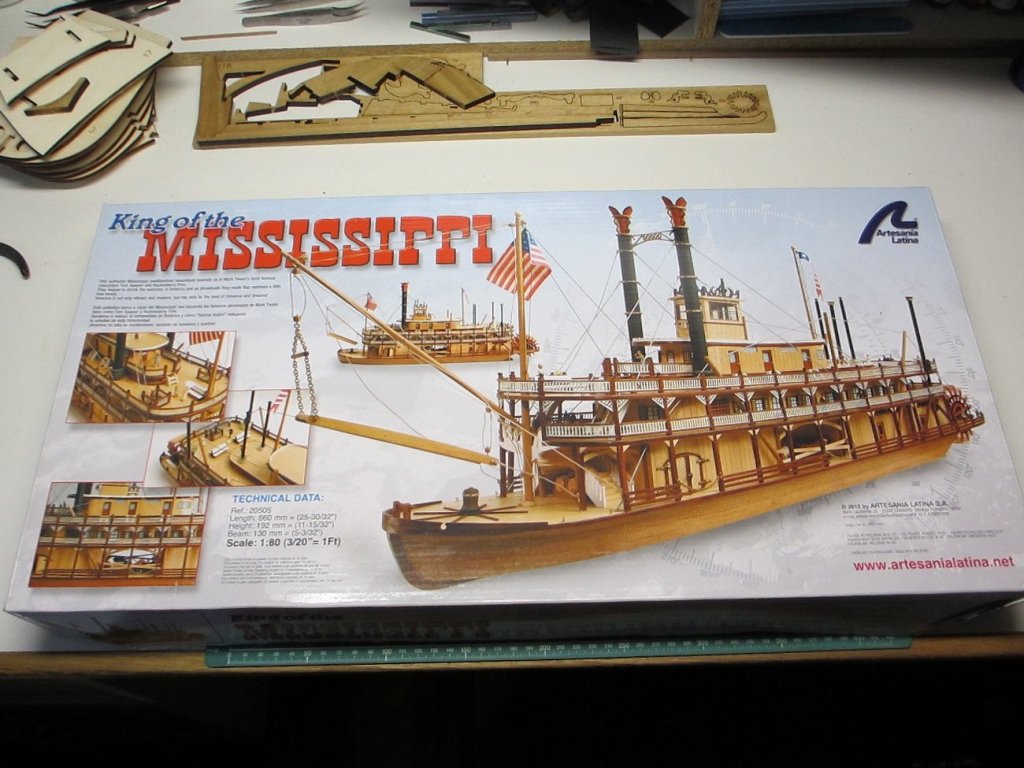
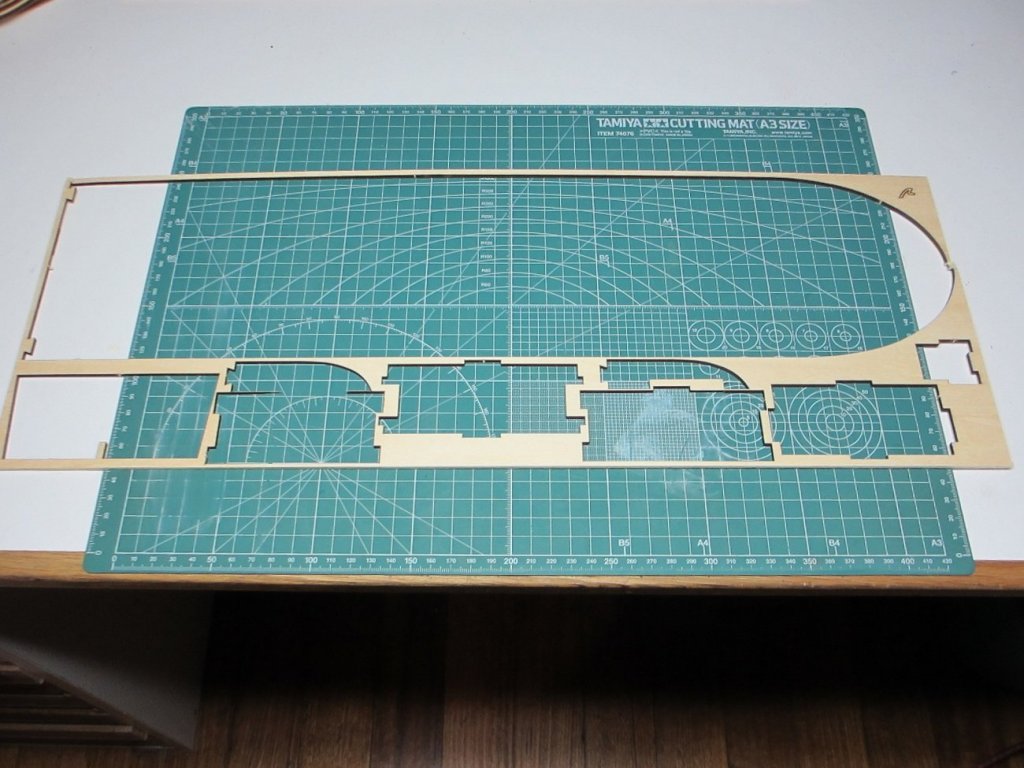
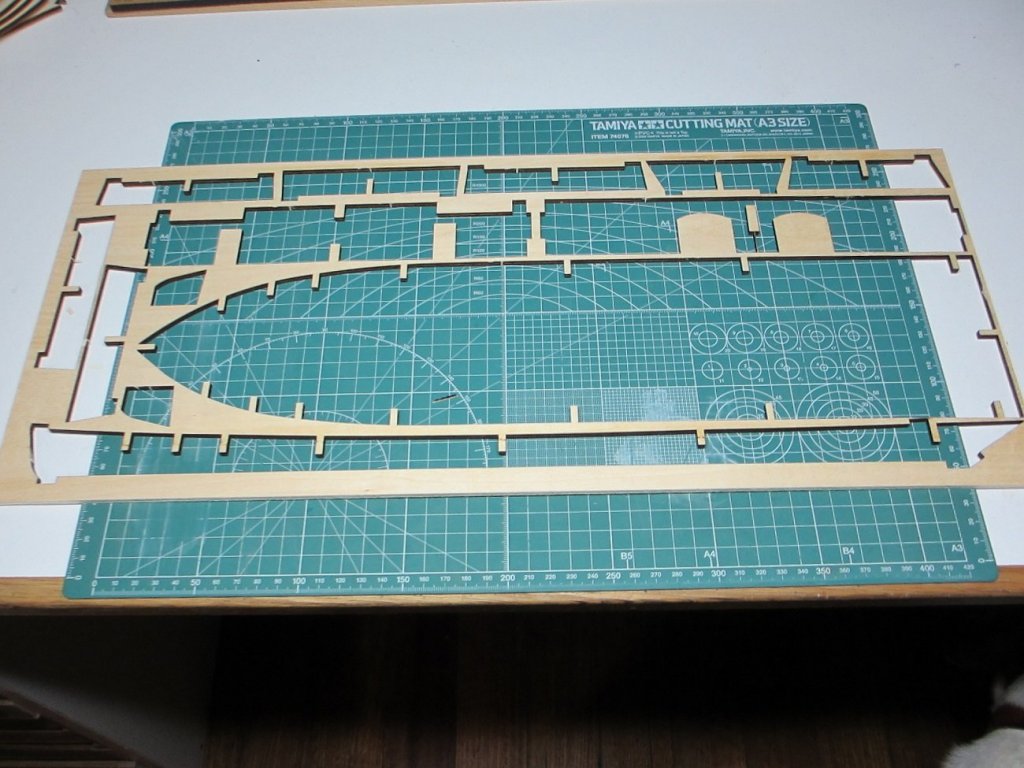
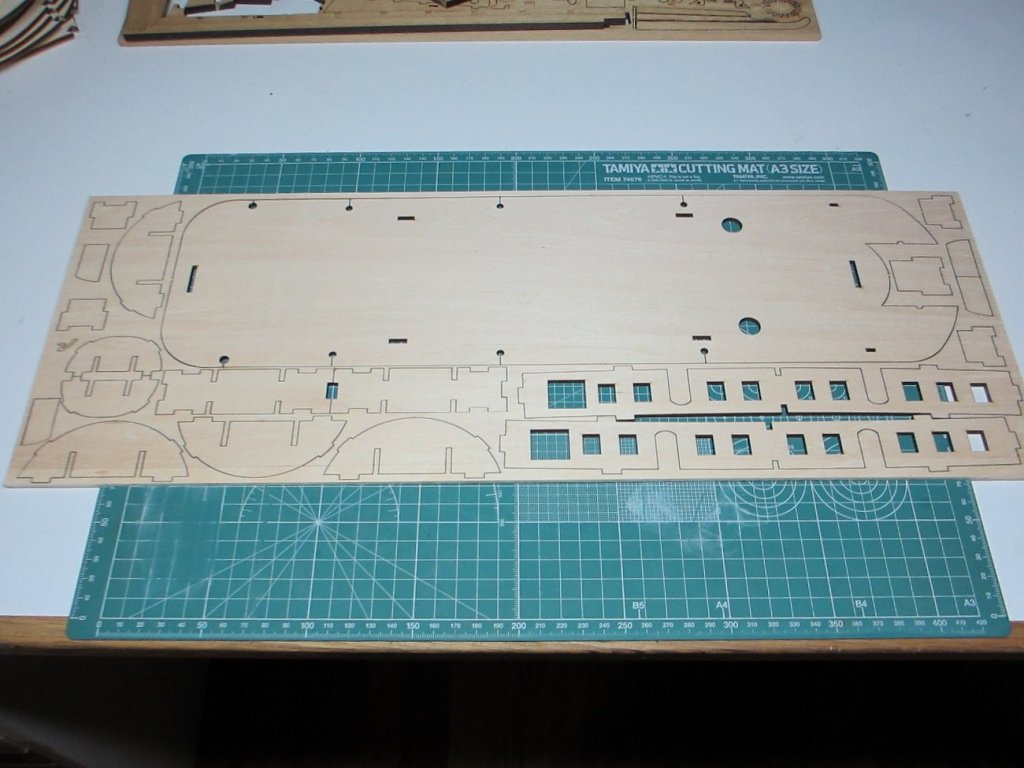
Hey howya goin all, this is my second build log of a ship. Length: 660mm = (25-30/32") Height: 192mm = (11-15/32") Beam: 130mm = (5-3/32") Scale: 1:80 (3/20" = 1Ft) Heres a look at whats inside. I got a little impatient and started to build her before I took pics.


-
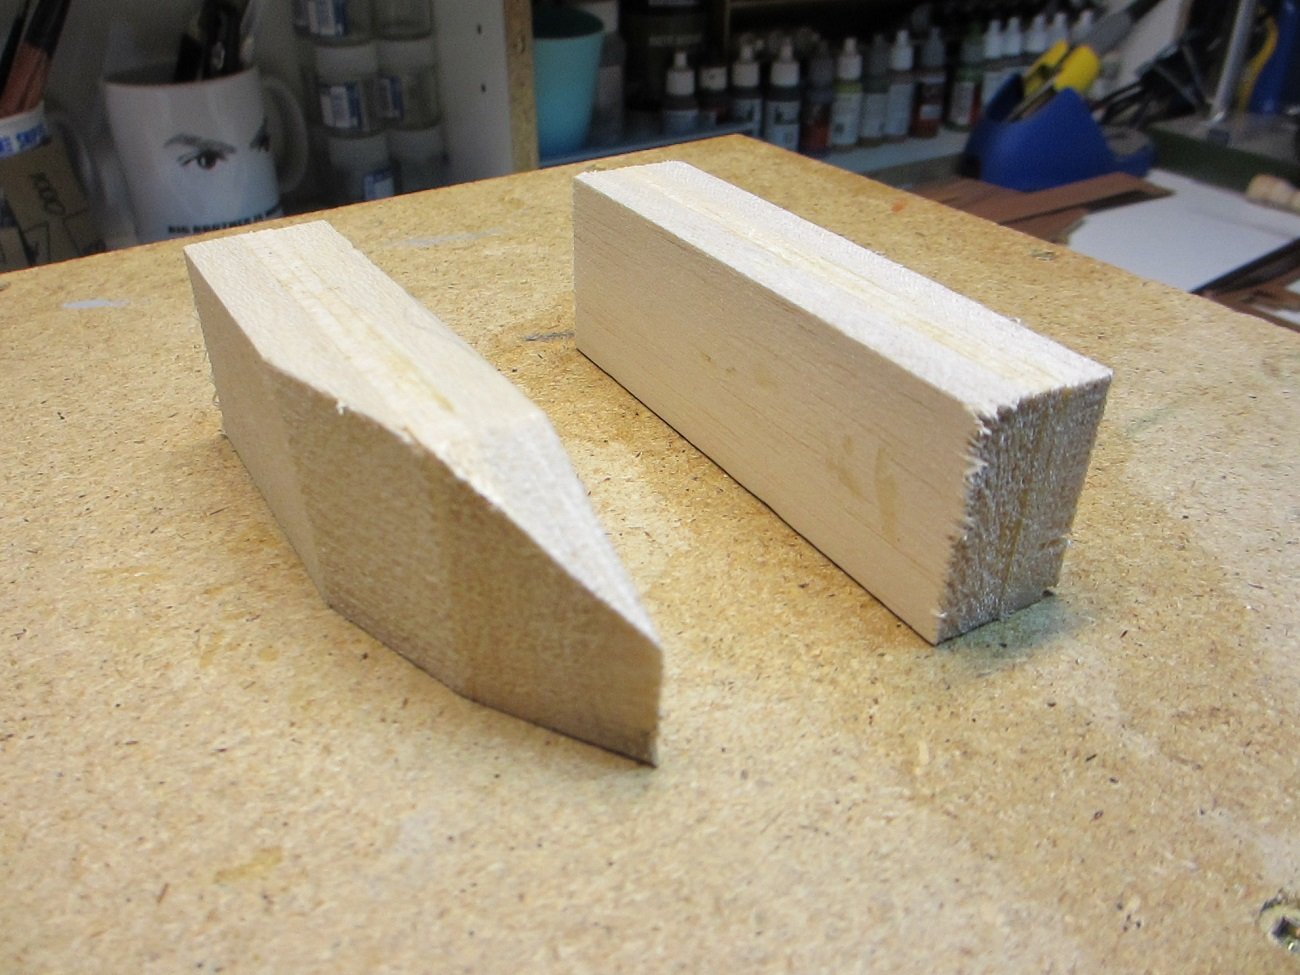
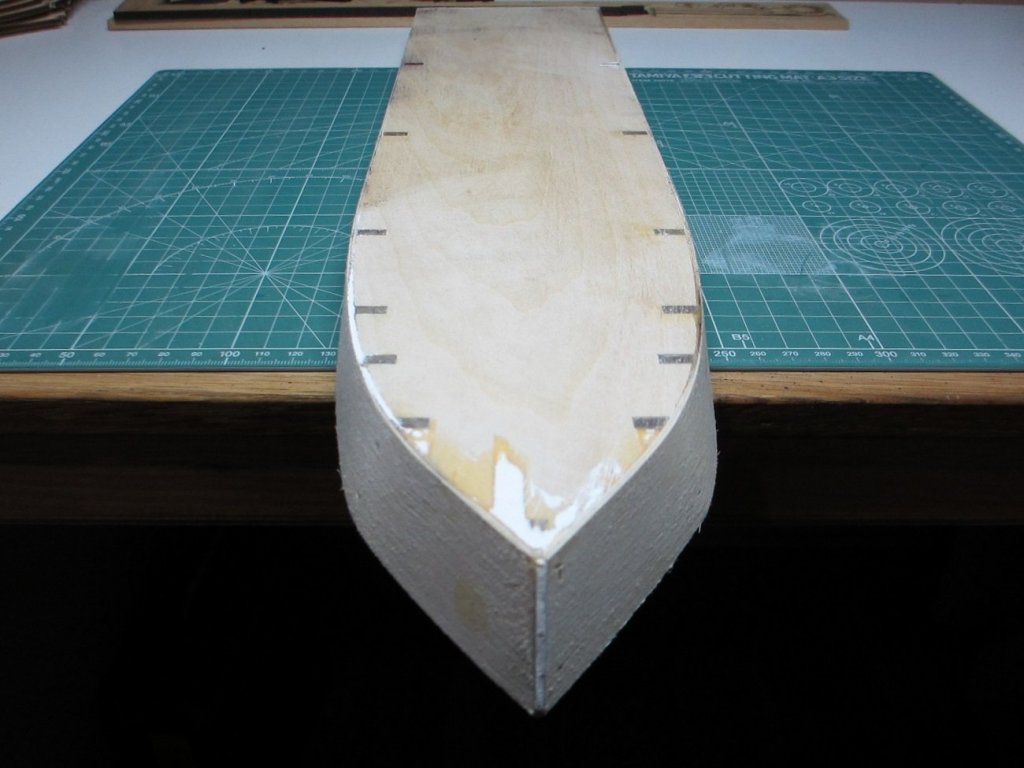
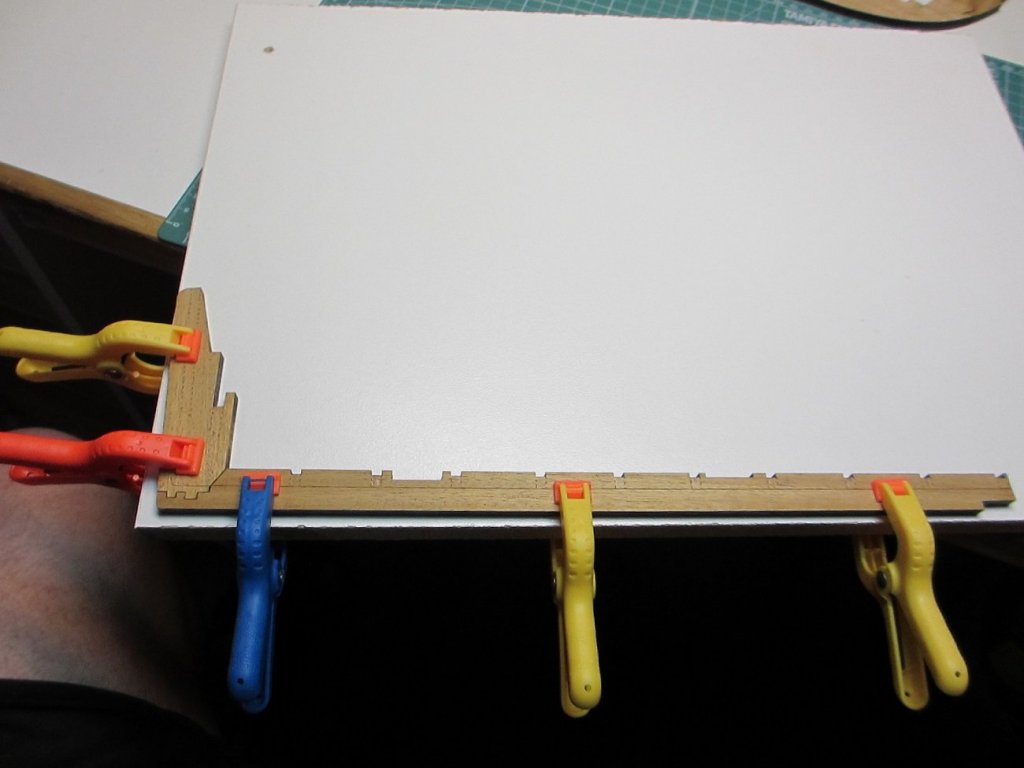
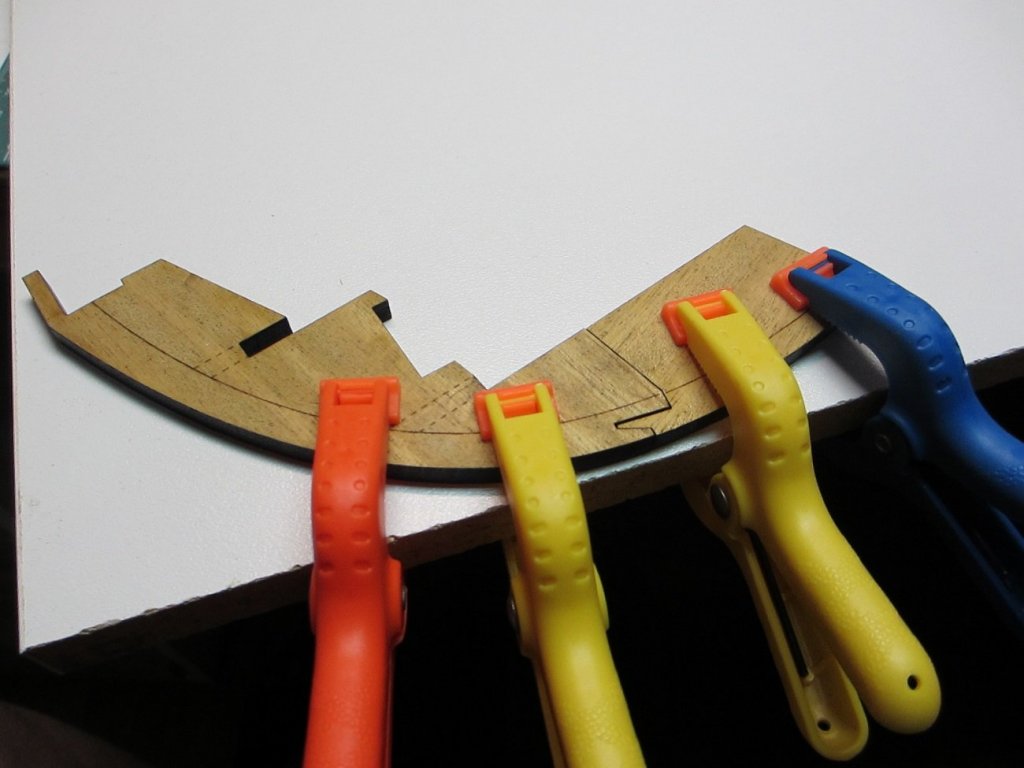
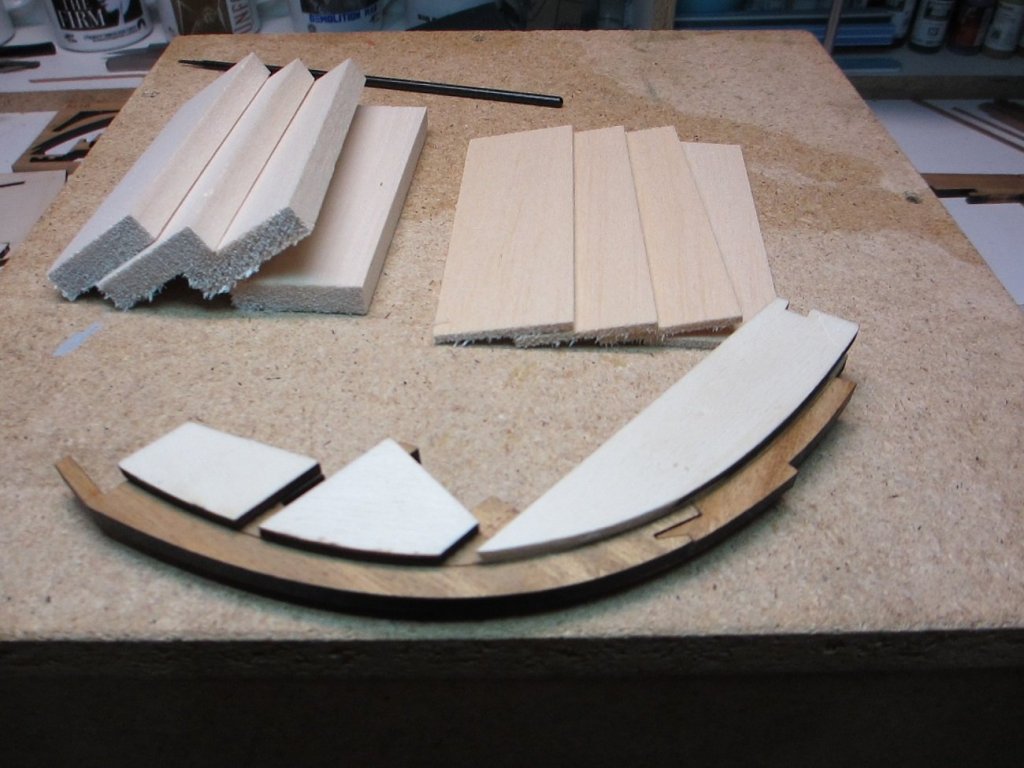
Hey howya goin all, I've started first by glueing up the keel parts and adding in the filler pieces and I've started cutting the filler block for the bow of the ships so the planking can follow a nice curve. Iv'e cut away some of the material so there isn't much to sand to shape them when I glue them on. I still haven't cut the rabbet yet been a bit lazy.


-
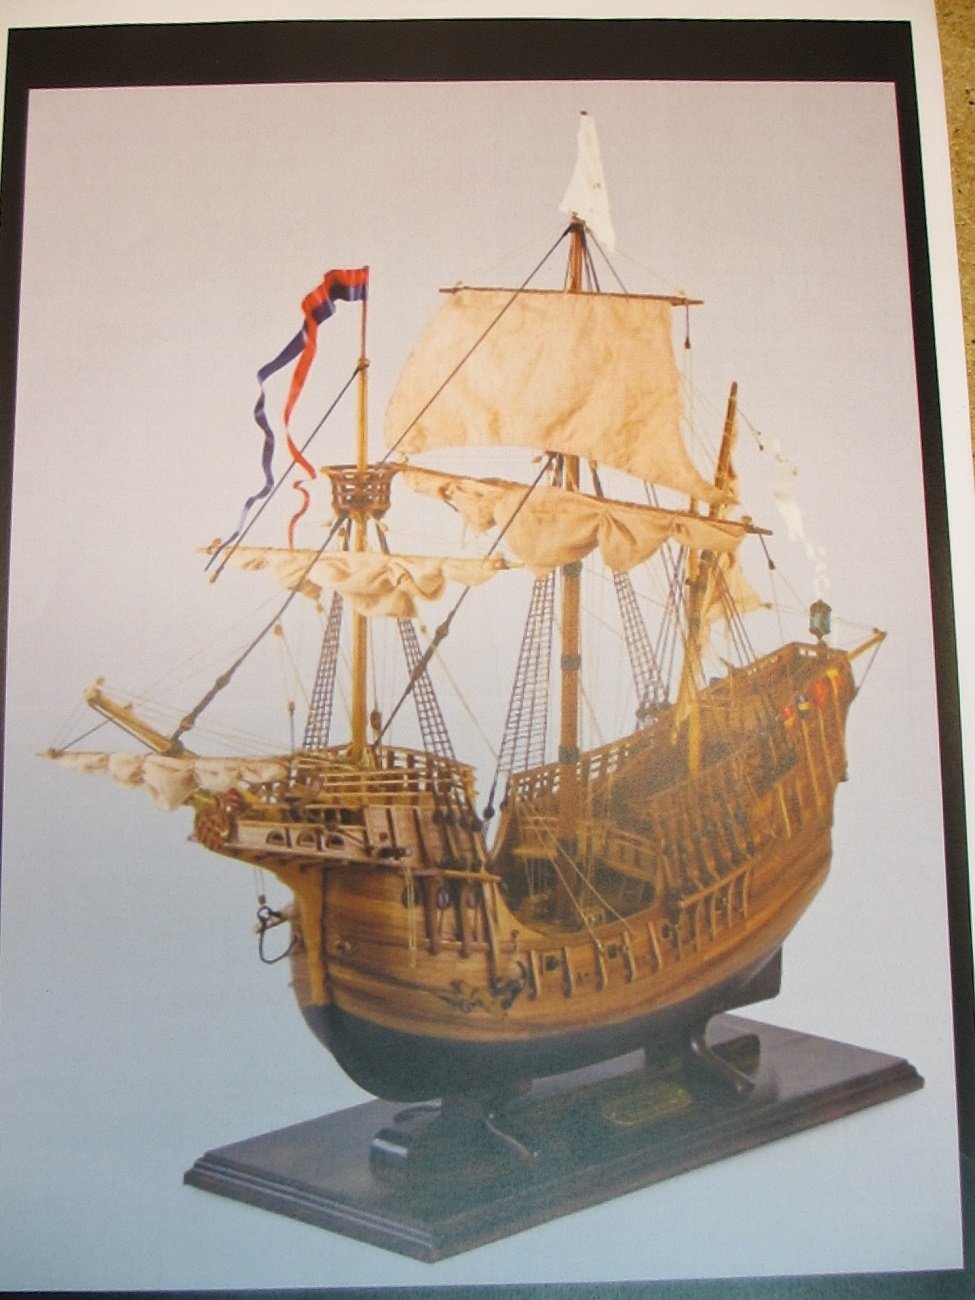
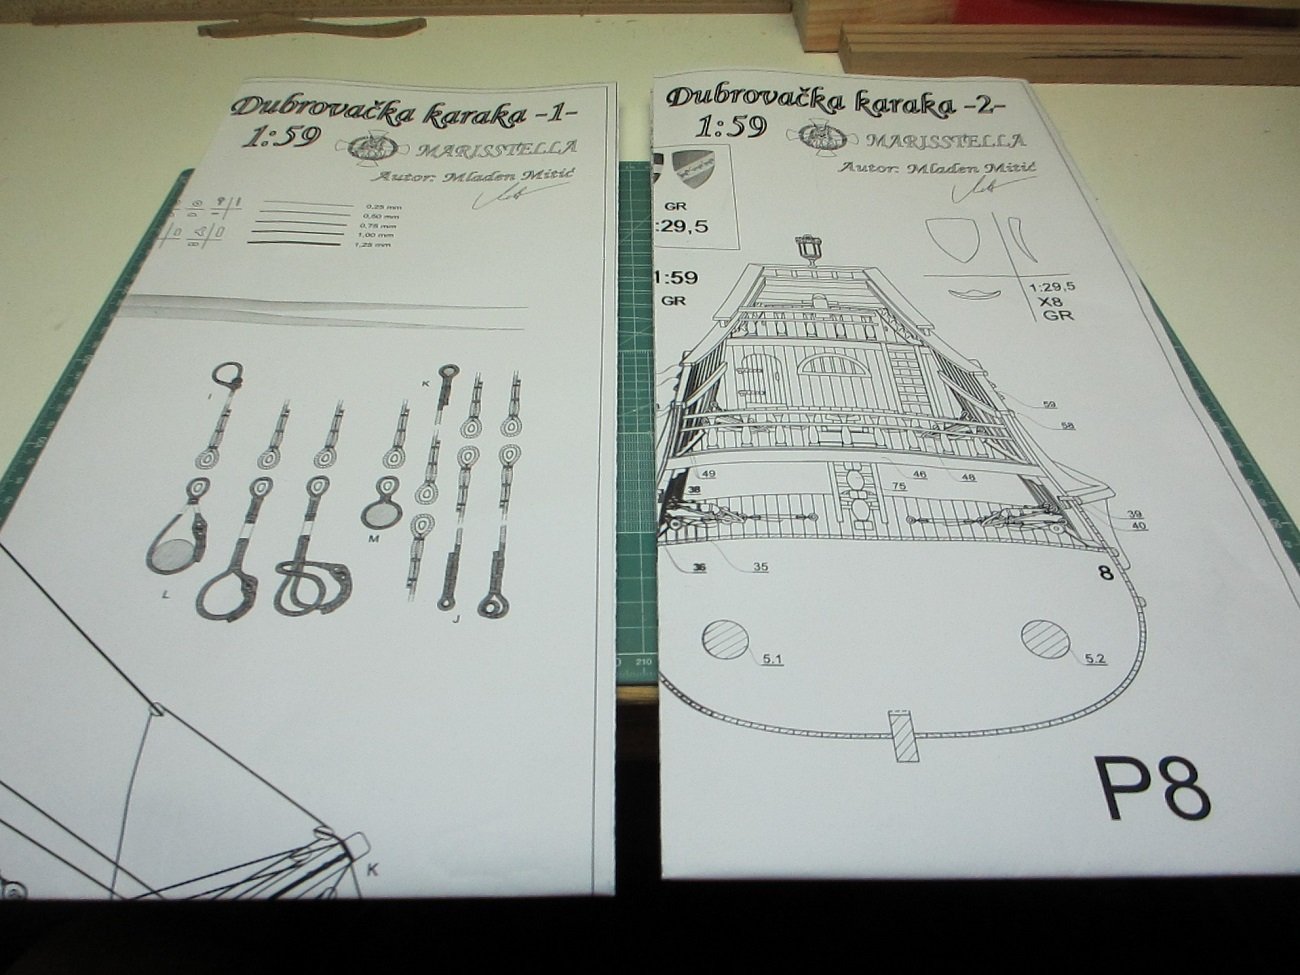
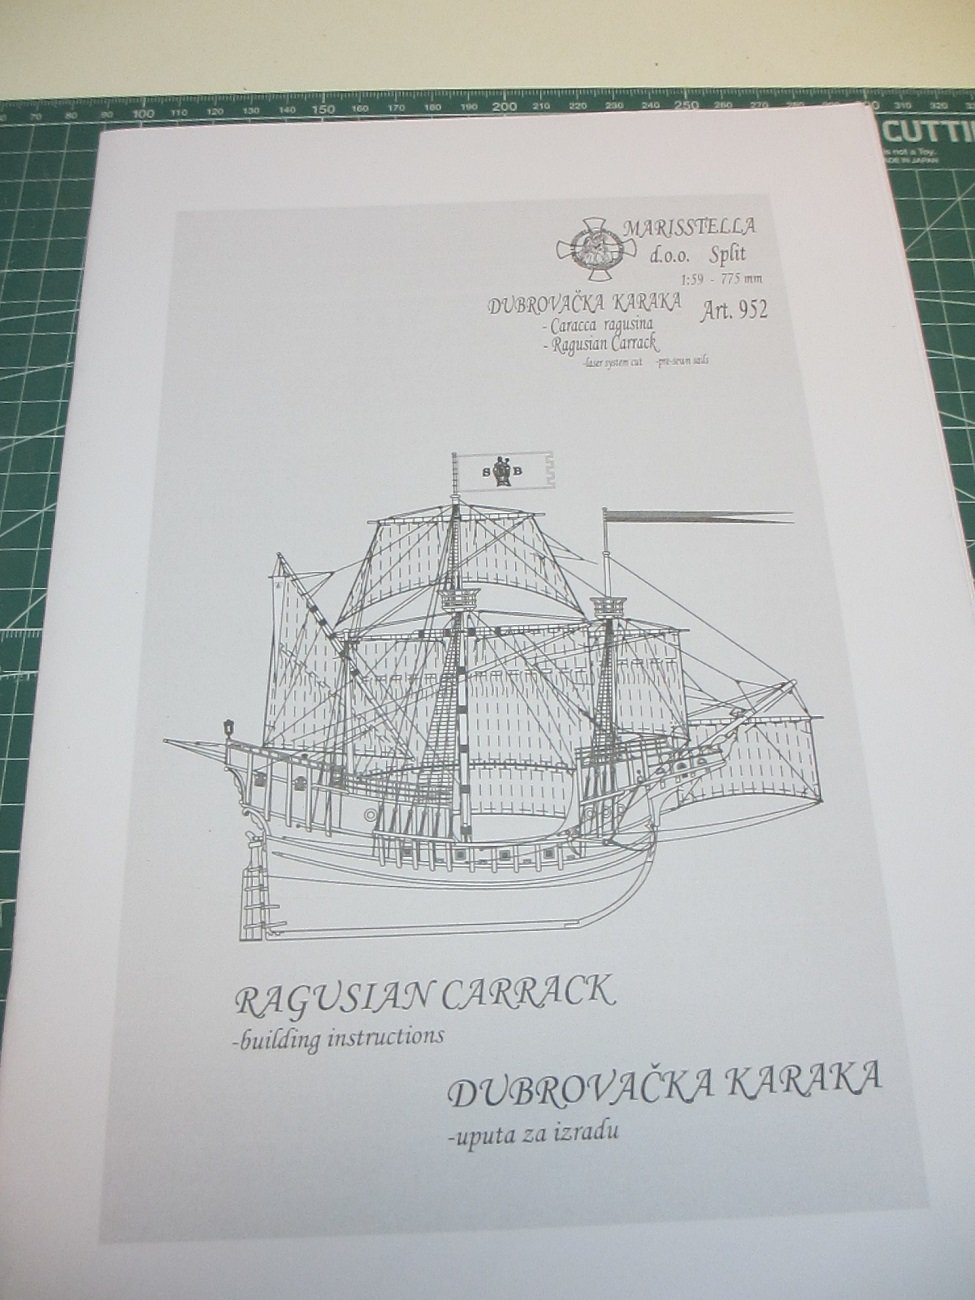
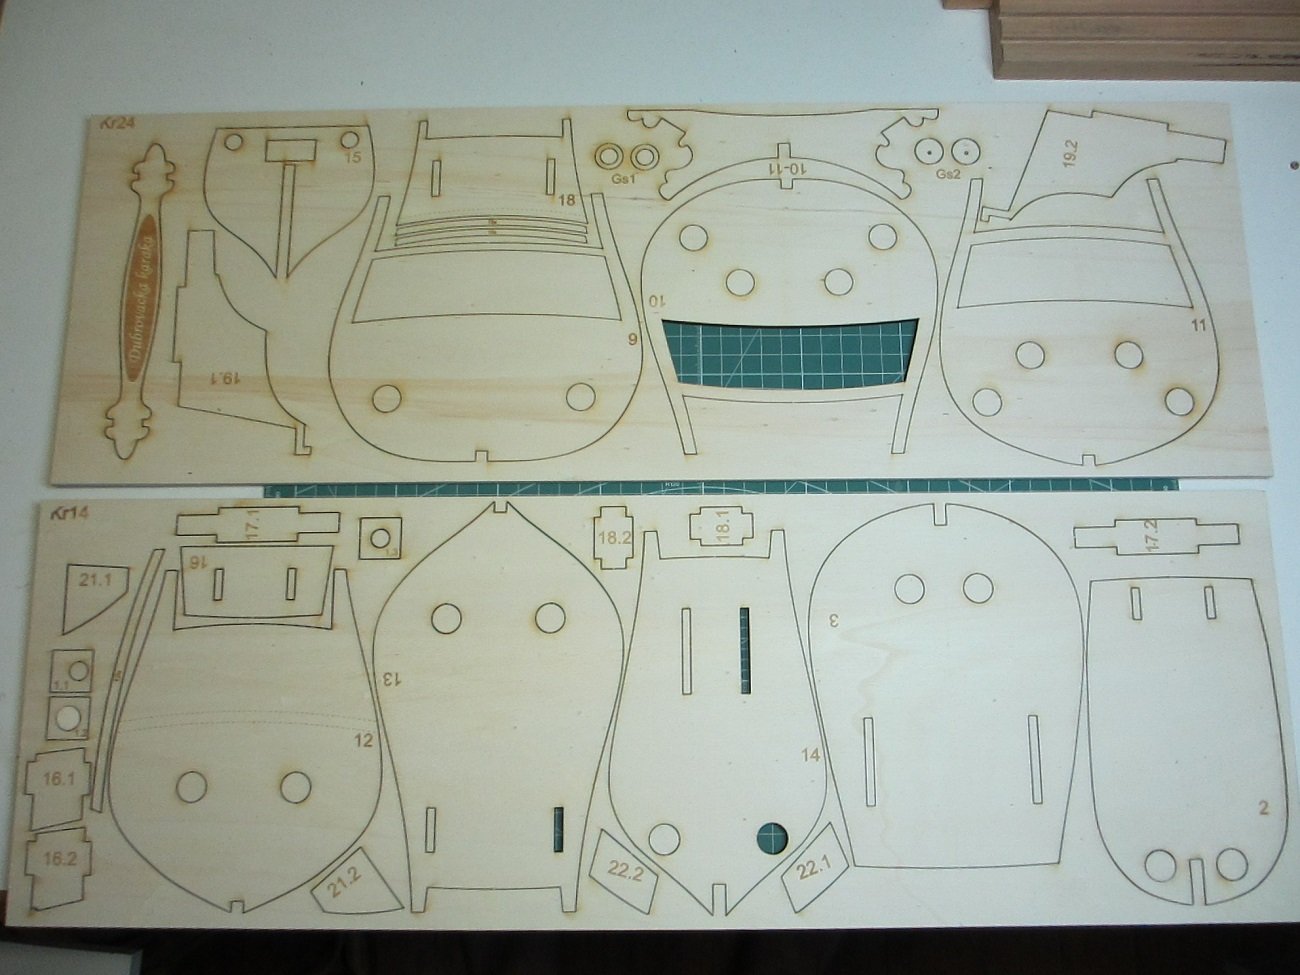
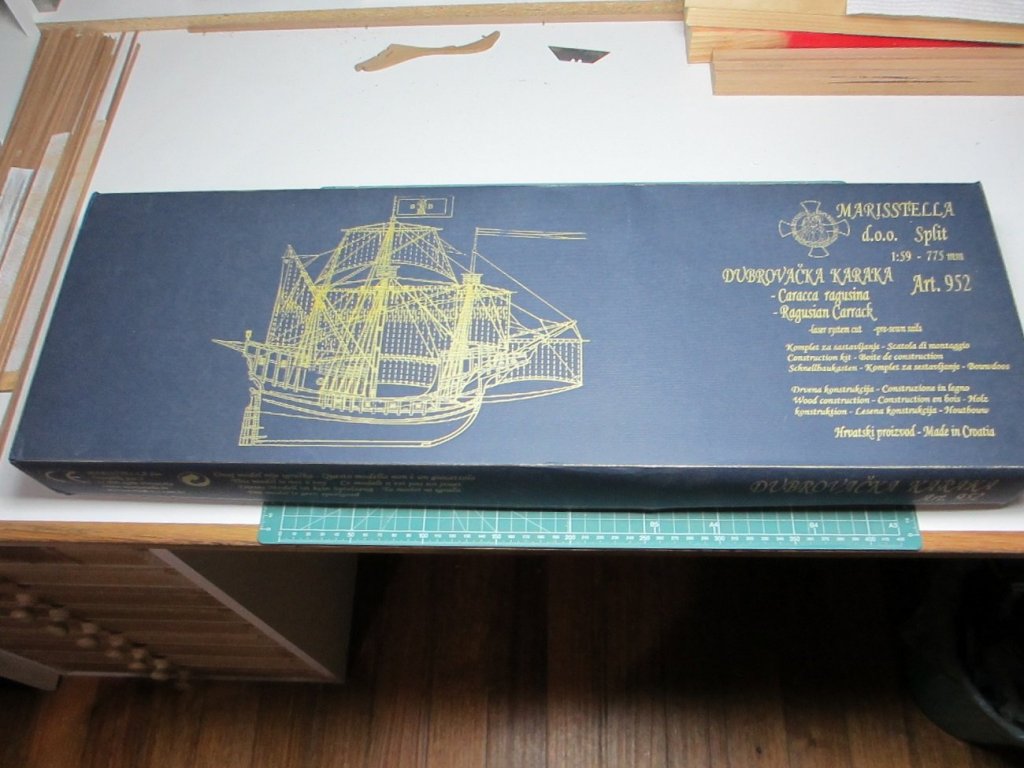
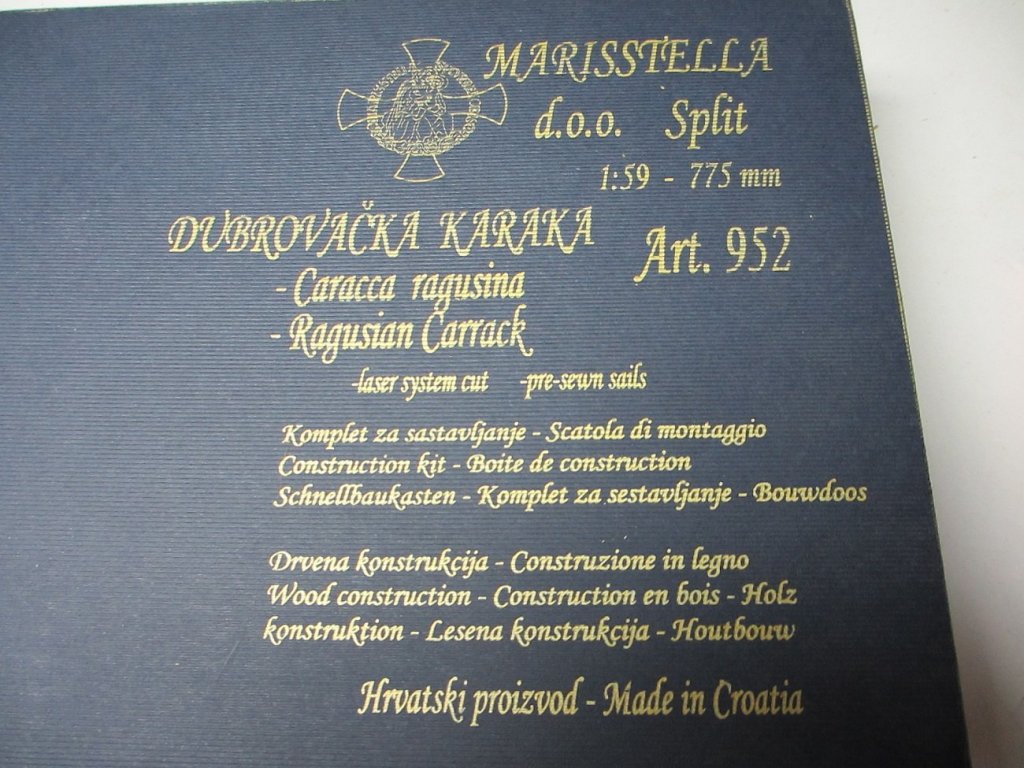
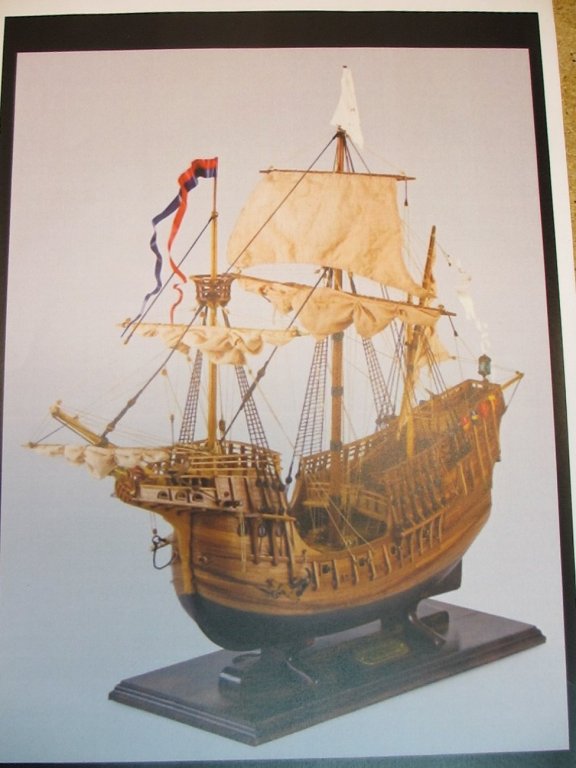
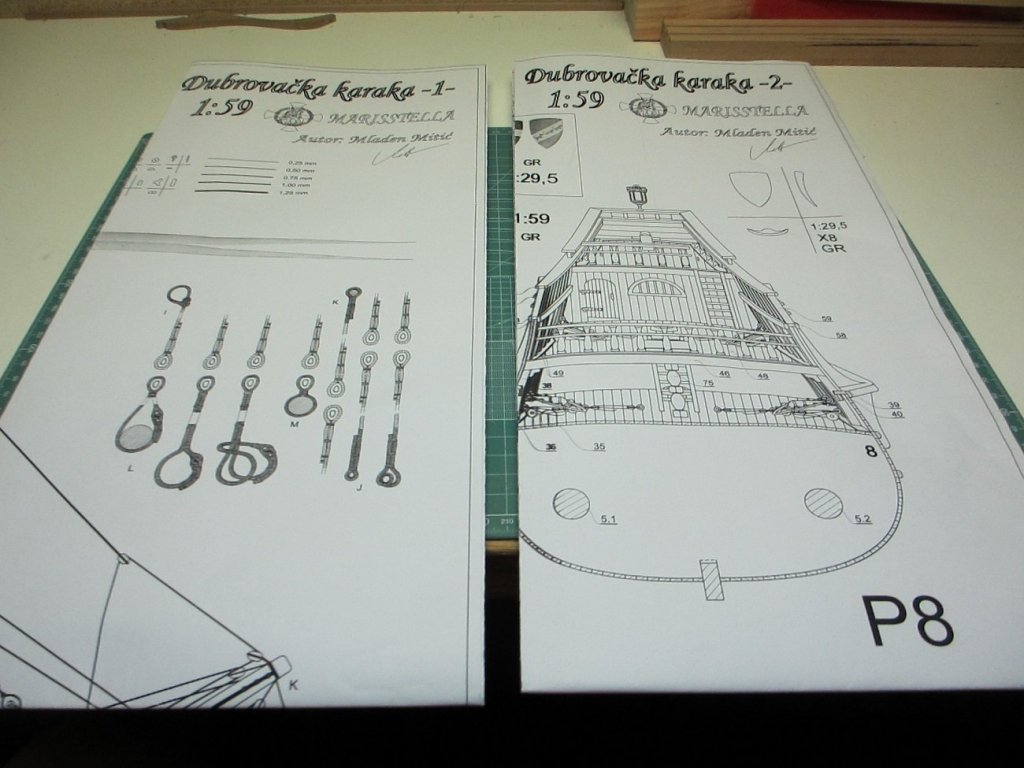
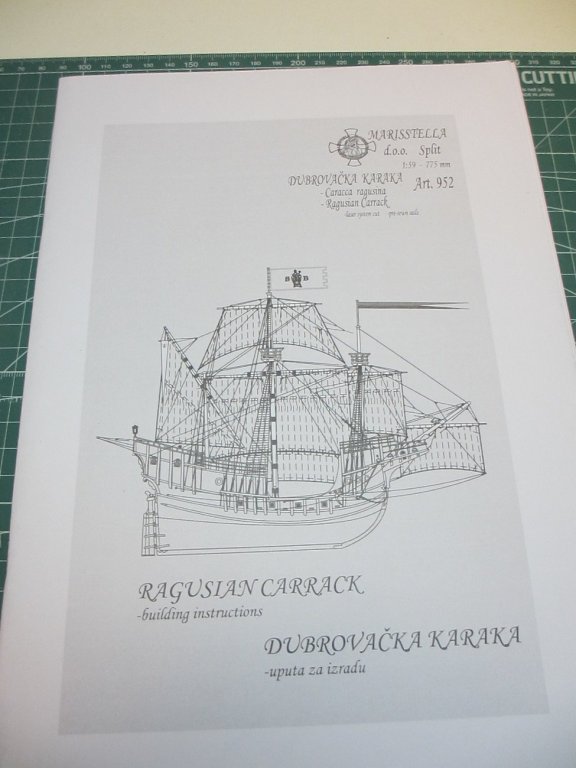
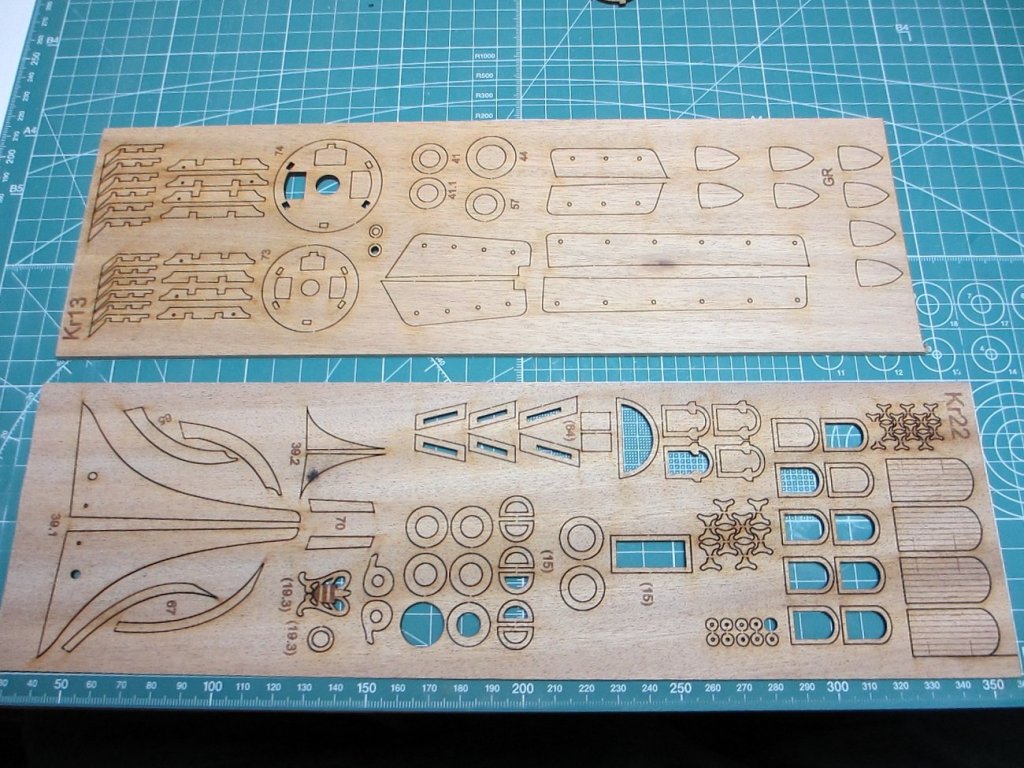
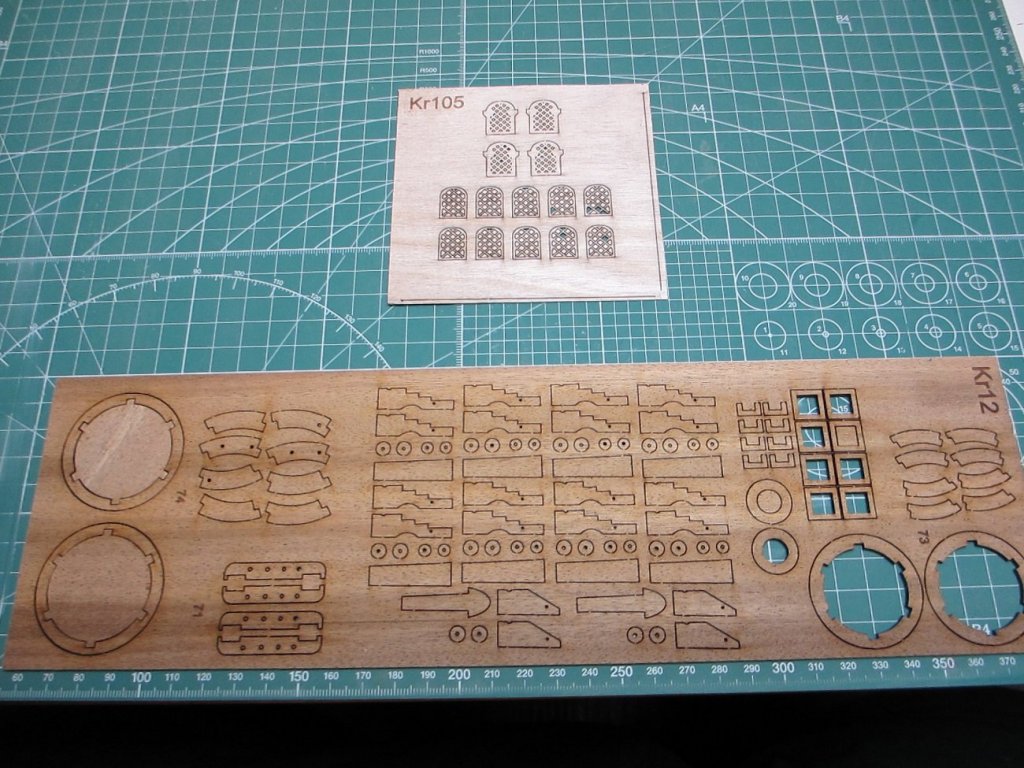
Hey howya goin all, this is my first build log of a ship but not my first ship that I've built. Carrack probably took her name from Arabic word karraka, which means light boat (Carack, carraque, kraeck, Carraca). this is a big sailing ship in use from 14th to the 17th century, designed for transporting goods. Carrack appeared in Venice in the early 14th century, but almostat the same time began to be built in the city of Dubrovnik (Ragusa) as the largest cargo ships in the Adriatic. In the 15th century Carrack has spread from Adriatic, the Mediterranean Sea and at the end of the 15th century, the Atlantic Ocean. Then they were built by the Spanish, Portuguese, French abd Dutch. In the 16th century Durovnik's Carrrack were among the world's largest ships and sailed to England. the large and spacious Carrack is called argosies, mane that derives from ragusies, the adjective of Ragusa. How popular were the Carrack od Dubrovnik is the best proof that the English have created for them the literary expression the Argosy ship. Here's a look at whats in the kit. This is what the ship will look like when it is finished.


-
You know Vivian, your one of the few people who know when I say, "hey howya goin" what it means I ring companys in the US or other countries to ask them about there product after I say hey howya goin there is silence on the phone for about 10 seconds they don't know what to say hahaha. Here in Aussie land they know what it means. Where abouts in Australia you thinking of moving to? I'm in Victoria.
-
Thanks for stopping by Vivian.
-
Hey howya goin Vivian Galad mate, I'll be happy to follow along with this one good luck with her.
-
Hey howya goin Danny mate, wow your building yours faster then I'm building mine your making me feel so OLD.
-
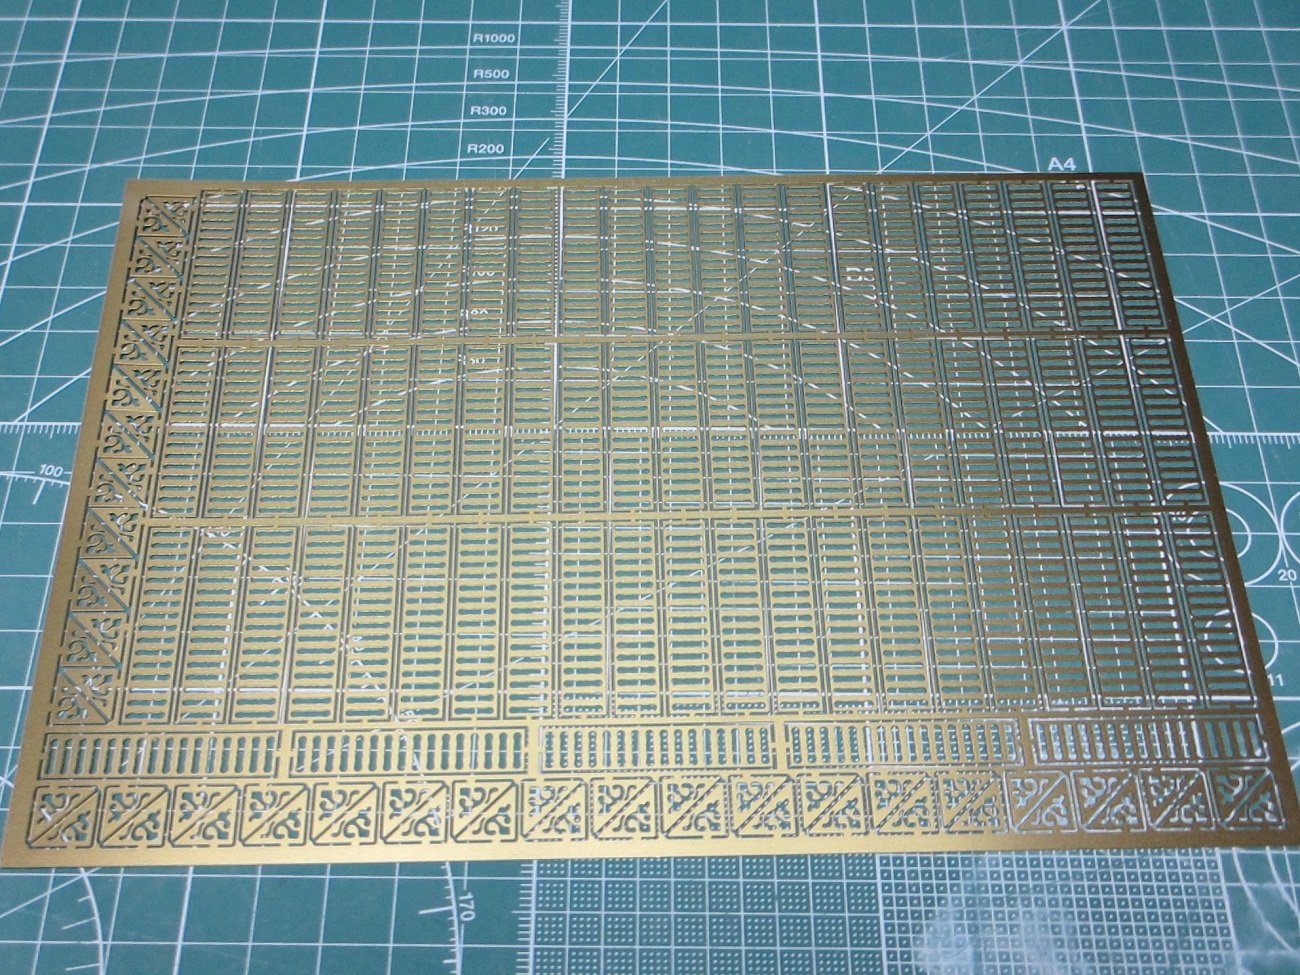
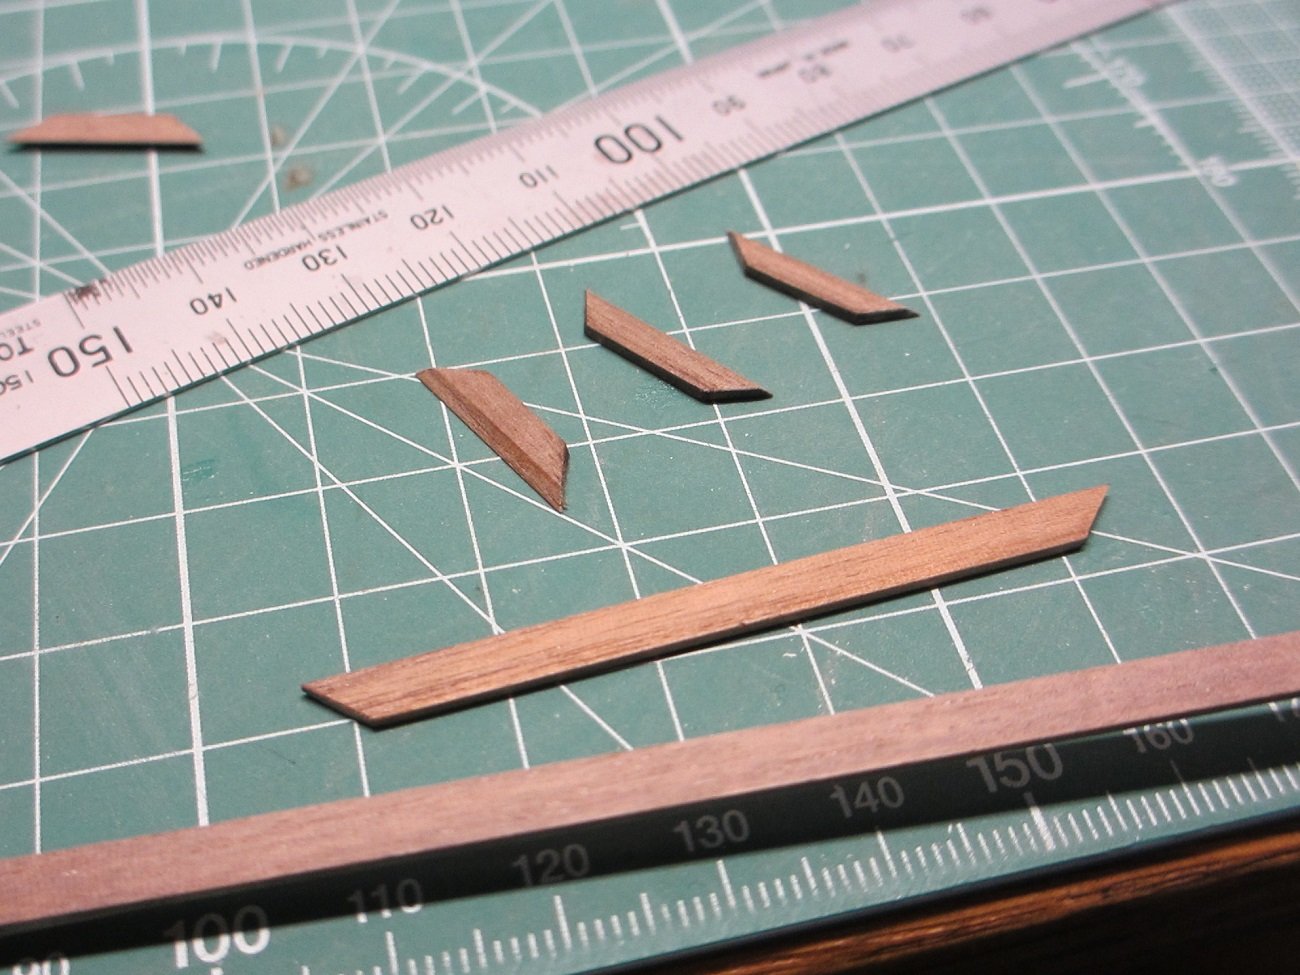
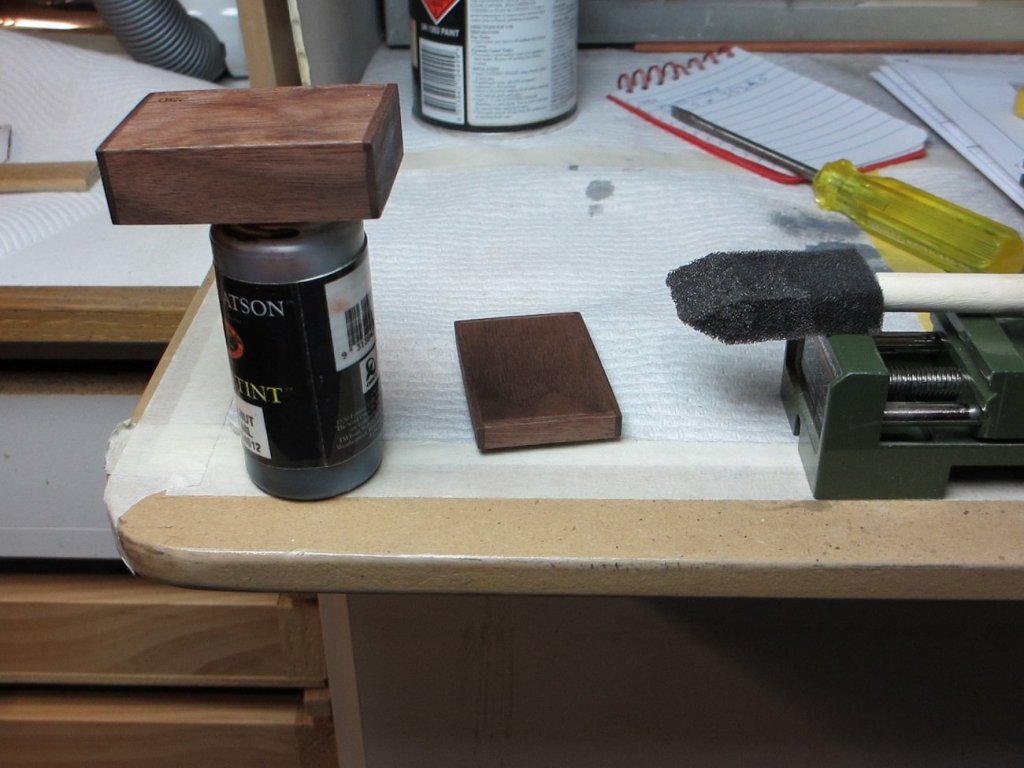
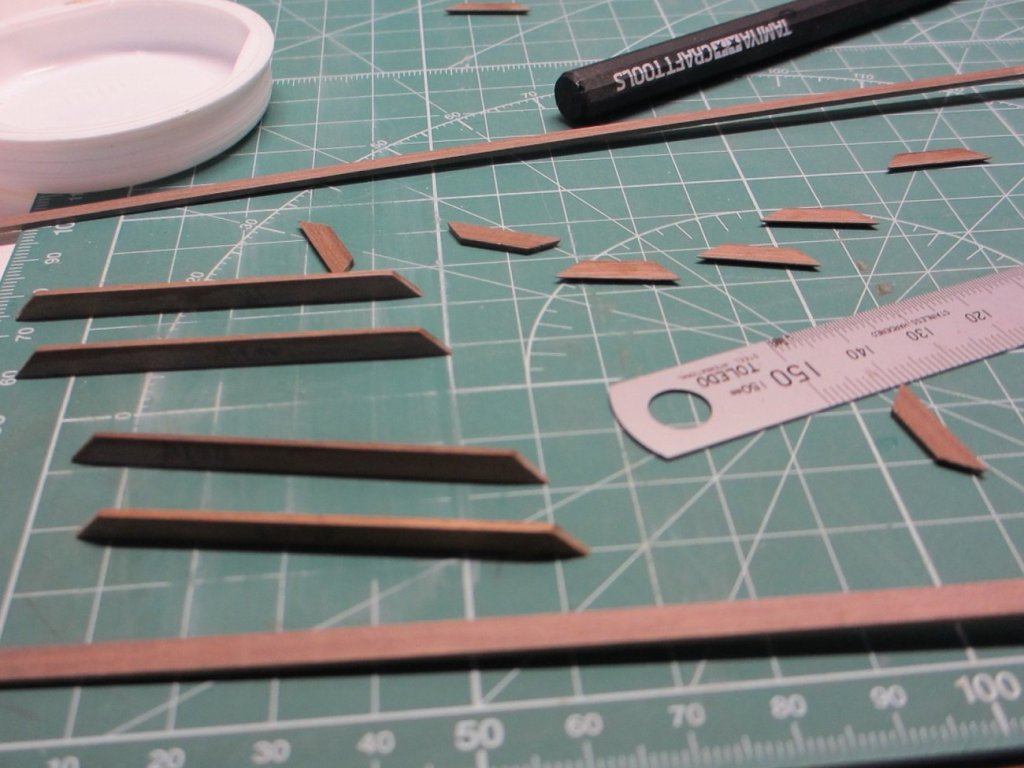
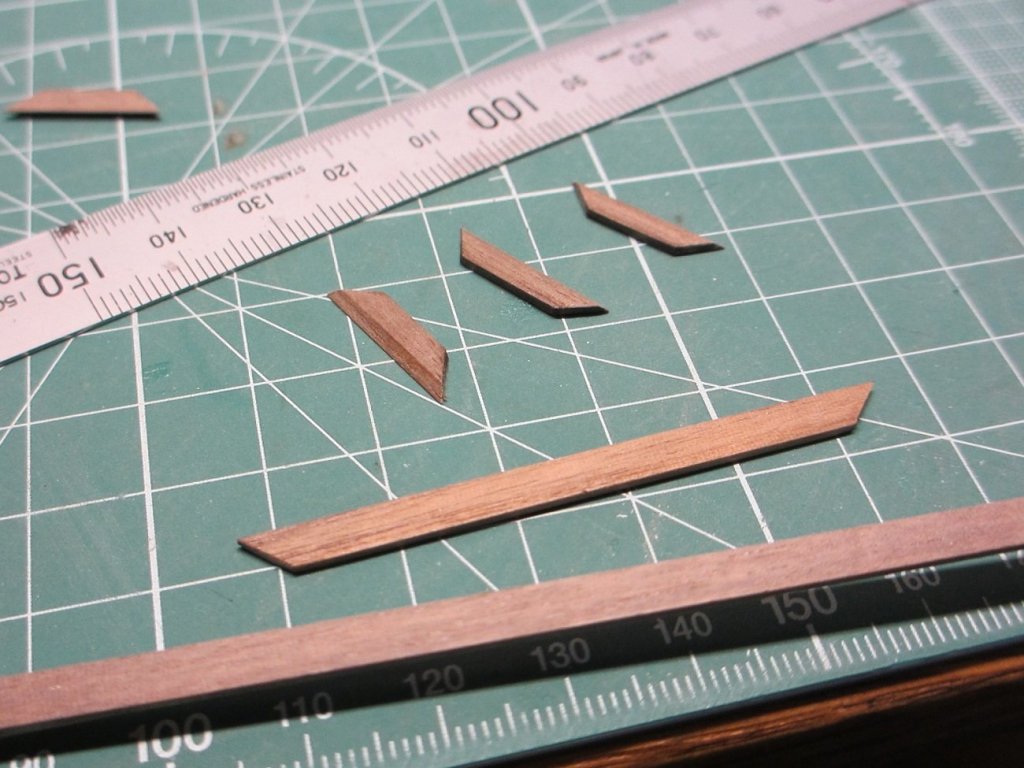
Hey howya goin all, here I've just started to put sanding seal on the trunk. In the instructions manual they show you just butting the pieces of wood together to me that looks crap here I've mitered all the timber Here is a macro look at the small pieces with 45 degree angle on them all hand cut.
- 91 replies
-
- 10
-

-
Hey howya goin Danny mate, great work you doing there can't wait to see the finished coach.
-
Hey howya goin Danny mate, wow card good luck with her.
-
Hey howya goin Slog mate, wow is what you made all card stock?
-
HAHAHA thats the one place I forgot to look at I buy most of my modelling stuff from them if I'm not getting it from Japan. https://www.bnamodelworld.com/model-ships-boats-aftermarket-parts-for-ship-1:200?page=2
-
Hey howya goin Danny mate, you may have to use US google.com not AU google.com.au to get more US search results to get to google.com just type in google.com and click Enter a search result for Google might come up or not if it does just click on it and at the bottm right corner of the page you will see (Use Google.com) click on it and you will goto US Google.com then you can search for 1/200 PE rails if the link to Google does not come up look at the bottom right corner of the page and (Use Google.com) should be there. Hope you can understand what I typed. If not PM me and I'll give you my phone number or you can not be so lazy and move down here to Vic. I often you other countrys google to get better results in that country like google.co.uk once in that countrys google or even Aussies google after typeing in something in the search engine under that search engine bar I click on Tools the click on Any Counrty then click on Country UK or for Aussie google Country Austarlia.
-
Hey howya goin Danny mate, here go through this site pages they all have different kinds of railings. http://freetimehobbies.com/free-time-hobbies/ship-store/1-200-scale/ship-accessories/rails/#/?Category0=Model+Kits&Customfieldscale=1%2F200&search_return=all and these pages https://www.eduard.com/store/Ships-and-submarines/?cur=2#nextproducts and here on Ebay http://www.ebay.com/sch/i.html?_from=R40&_trksid=p2047675.m570.l1313.TR0.TRC0.H0.X1%2F200+PE+railing.TRS0&_nkw=1%2F200+PE+railing&_sacat=0 Some are 2 or 3 railings and some are posts where you run wire or brass rods through them.
-
Hey howya goin Danny, when you buy something from Cornwall Model Boat you don't have to set up an account. Just go through there checkout as normal when you get to the fill out you payment page the part you put in your credit card info that page is secure it safe.
-
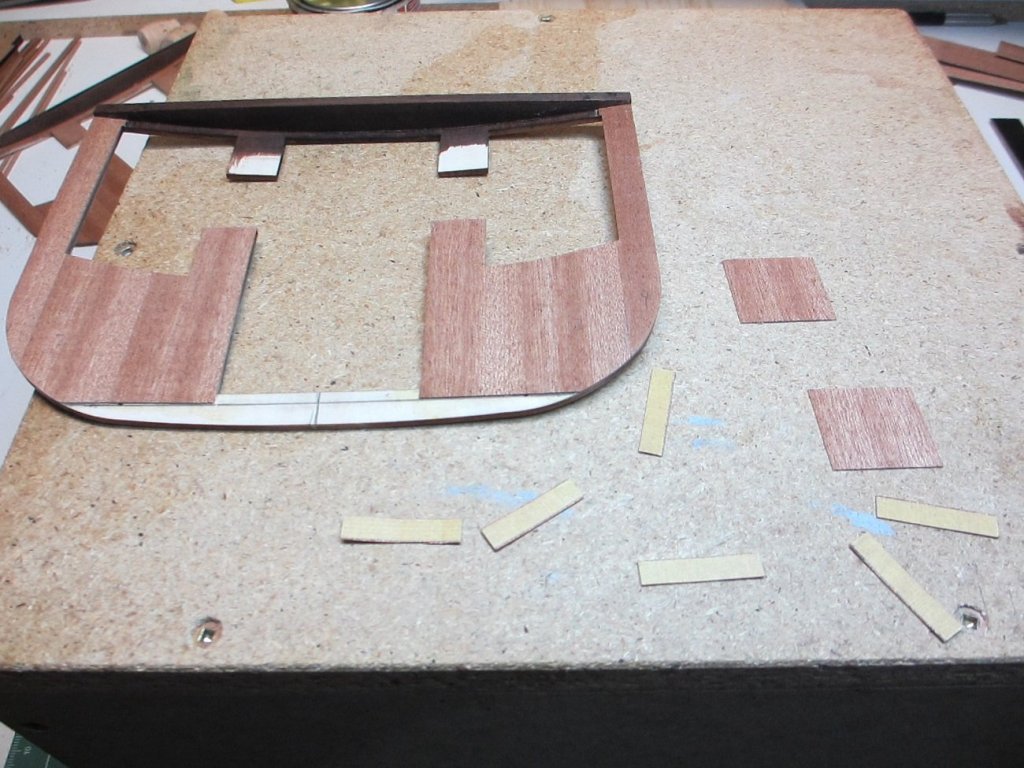
Hey howya goin all, forgot to put this part in before, you can see I used tamiya tape on the small parts of the veneer to hold it together because the company that kit comes from was to lazy to put a backing paper on the veneer. Here I have applied the second coat of sanding sealer. While I wait for the sanding seal to dry, I have start on the trunk where I will be putting the on/off switch for the lights the trunk has working hinges so it will be easy to get to, while waiting for these to dry I'll be starting on the roof where I'll run the wires under the timber I'll cut a grove in the ply for the wires to run along. I've ordered 2 types of switch off of Ebay I haven't decided what ones I'll use yet they were only a couples of bucks from china. Its a shame they laser cut the part numbers in the wood.
-
Fokker Dr.I by Torbogdan - FINISHED - Model Airways
Eddie replied to Torbogdan's topic in Non-ship/categorised builds
Hey howya goin Torbogdan mate, great build so far mate. -
Oh one more thing JP mate start a build log if you can mate with pics more pics more more more pics.