HOLIDAY DONATION DRIVE - SUPPORT MSW - DO YOUR PART TO KEEP THIS GREAT FORUM GOING! (Only 24 donations so far out of 49,000 members - C'mon guys!)
×


cookster
-
Posts
416 -
Joined
-
Last visited
Content Type
Profiles
Forums
Gallery
Events
Everything posted by cookster
-
My birthday present arrived!!! Yee Haw!!!

-
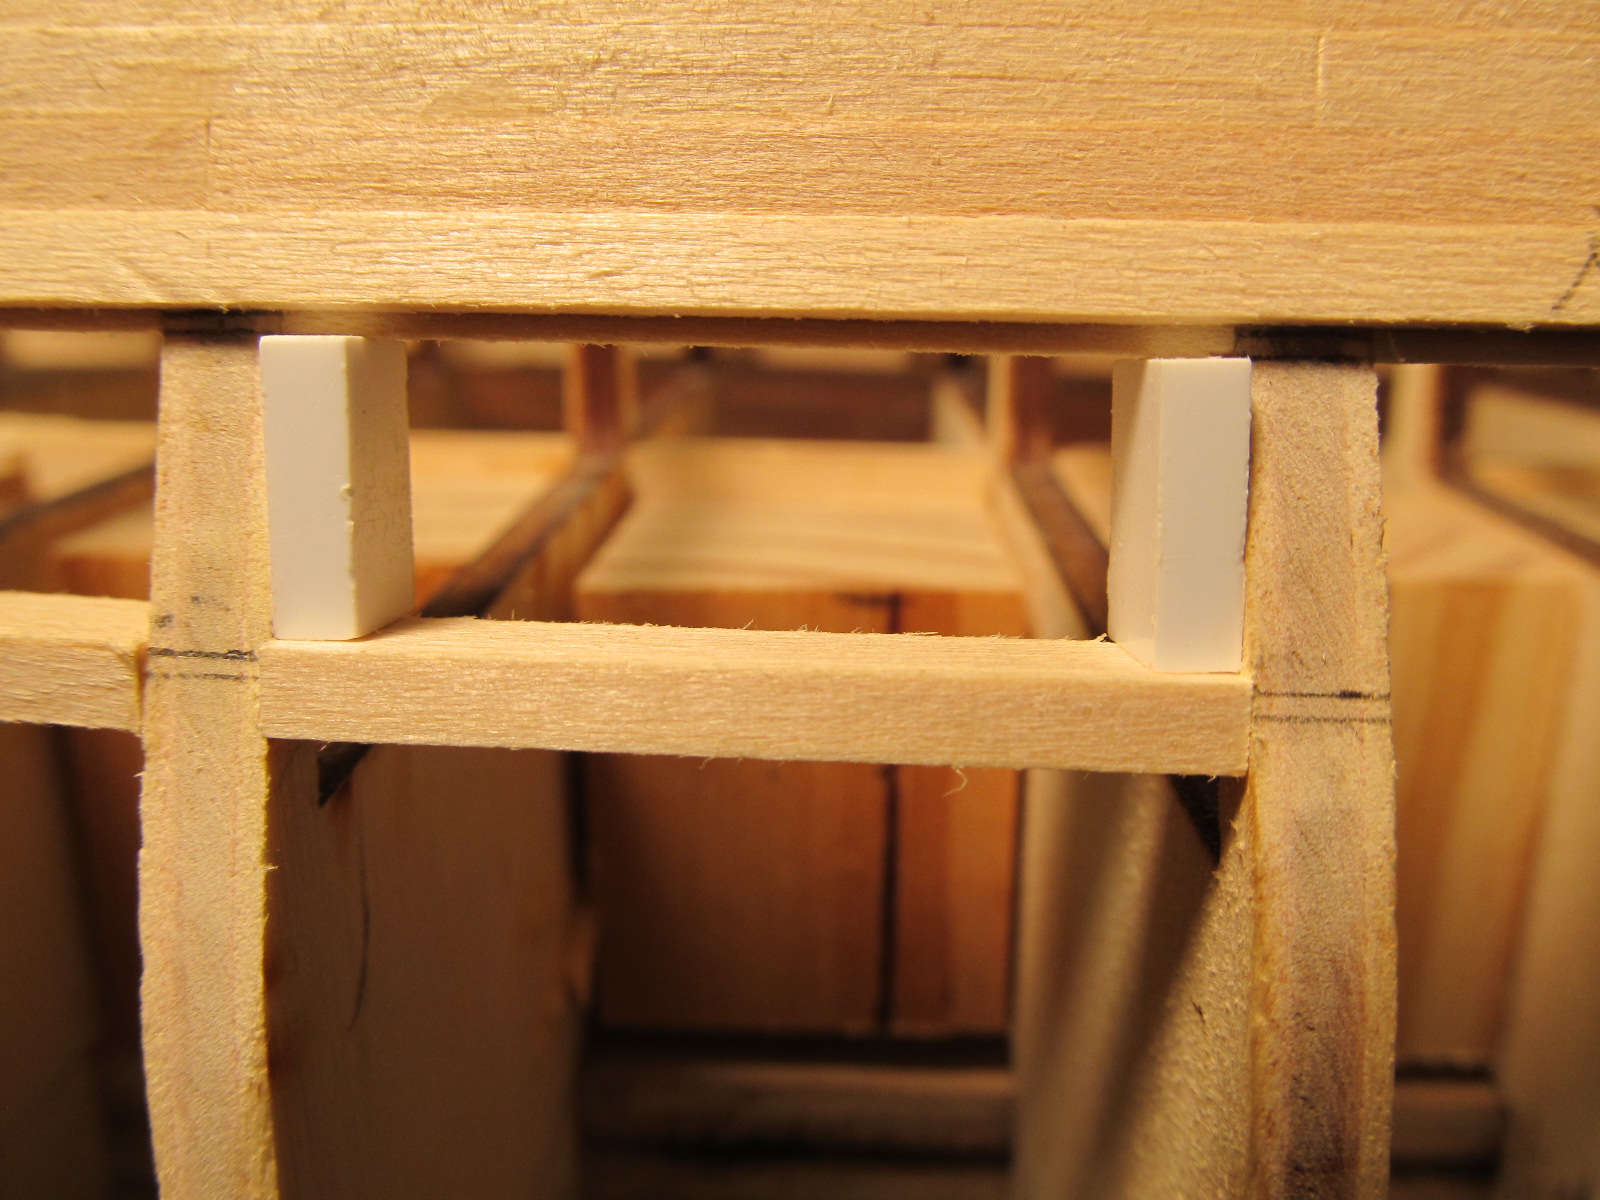
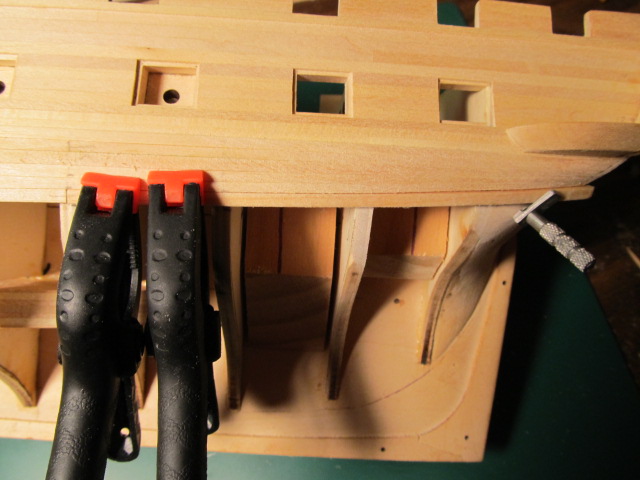
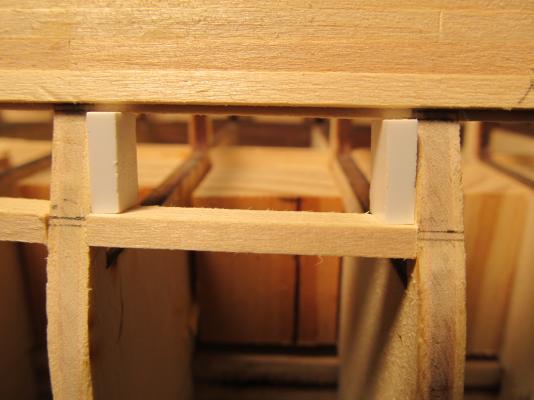
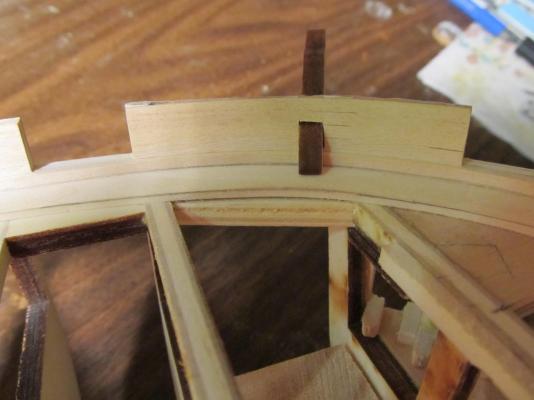
Gun port lip? I assume you mean the 1/32 lip around the gunports. I mentioned in earlier posts how tedious I found the gun ports to be, that was in part due to trying to keep the ports consistent. By the time I started planking around the gunports I had learned to measure the widths of all the planks with a pair of calipers (due to the plank widths varying by as much as 10 thousandths) to keep planks on the same row the same width. Butting a .125 plank to a .130 (for example) causes a gap in the next row and throws off the run of the plank (shear line? ) Stuff like that drives me crazy! Anyway, I did I pretty much like Bob Hunts practicum describes. Instead of measuring down 1/2", I pre-selected, then used the actual planks to get this measurement. Then added 1/32 for the bottom of the lintel which forms the upper lip. Then I cut 2 pieces of styrene to use as a gauge for the lower sill, after I again used the actual planks and subtracted 1/32 to get the length. This also meant I had to mark and keep track of what plank went where. Tedious? yes... You can probably see some pencil marking on planks here and there, that's why. For the sides of the ports I installed the first side as per plans, then measured over for the location of the other side. When planking I used the gun port lids for the final fit of each plank. I cut each plank a little long then sanded to final length with a sanding block, which also trued up the plank ends. Very tedious and time consuming, and I know of a couple ports that aren't as good as I'd like, but i'm not telling which ones! In all I think they came out OK. Hope this answers your question. Here's the styrene gauges.
-
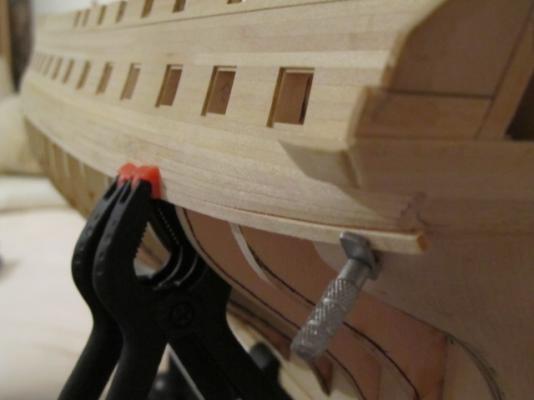
Planking the port Wales. I bought some of these metal plank clamps and haven't used them yet. Finally found a use, drilling a hole into the filler block is not as bad as drilling into the bulkheads. They make clamping the wet plank around a compound curve easy. I clamped the counter planks in place and let them dry, then removed the clamps, final shaped the plank and glued it on (without the clamp of course)


-
I bought the Constitution ATOS book, and it is loaded with drawings. It has several takes on possible stern details from different years. So, I revised my plan to more match the Corne painting. Again it's not a historic match, but does get the idea across. Now I gotta build a mockup... Oh and I realize I have to add\modify the taffrail (guess that's the right term) but that won't be too bad.
-
Jim Byrnes Model Machines
cookster replied to Mahuna's topic in Modeling tools and Workshop Equipment
"No lathes or mills"? Darn.... Jim, I just ordered your thickness sander, I think Donna is shipping it this week. Can't wait to try it out! I either want your saw or a mill next, I keep flip-flopping on which one to get. -
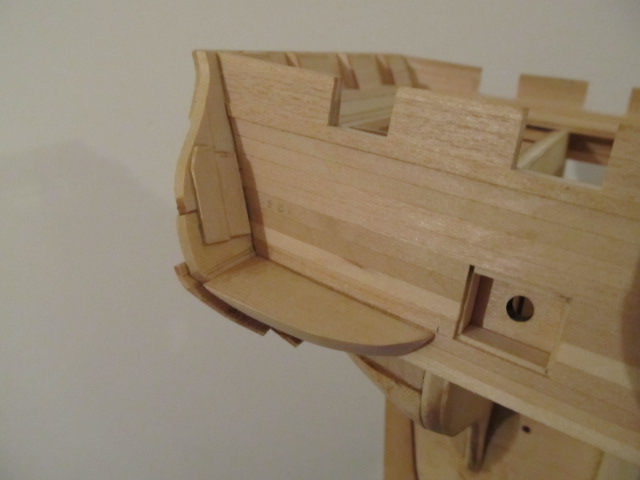
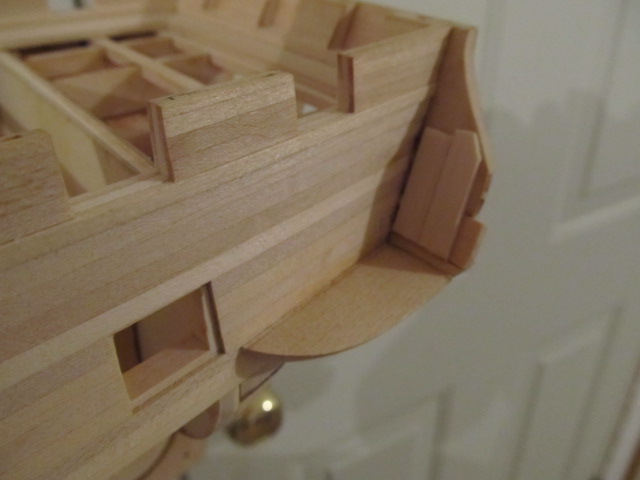
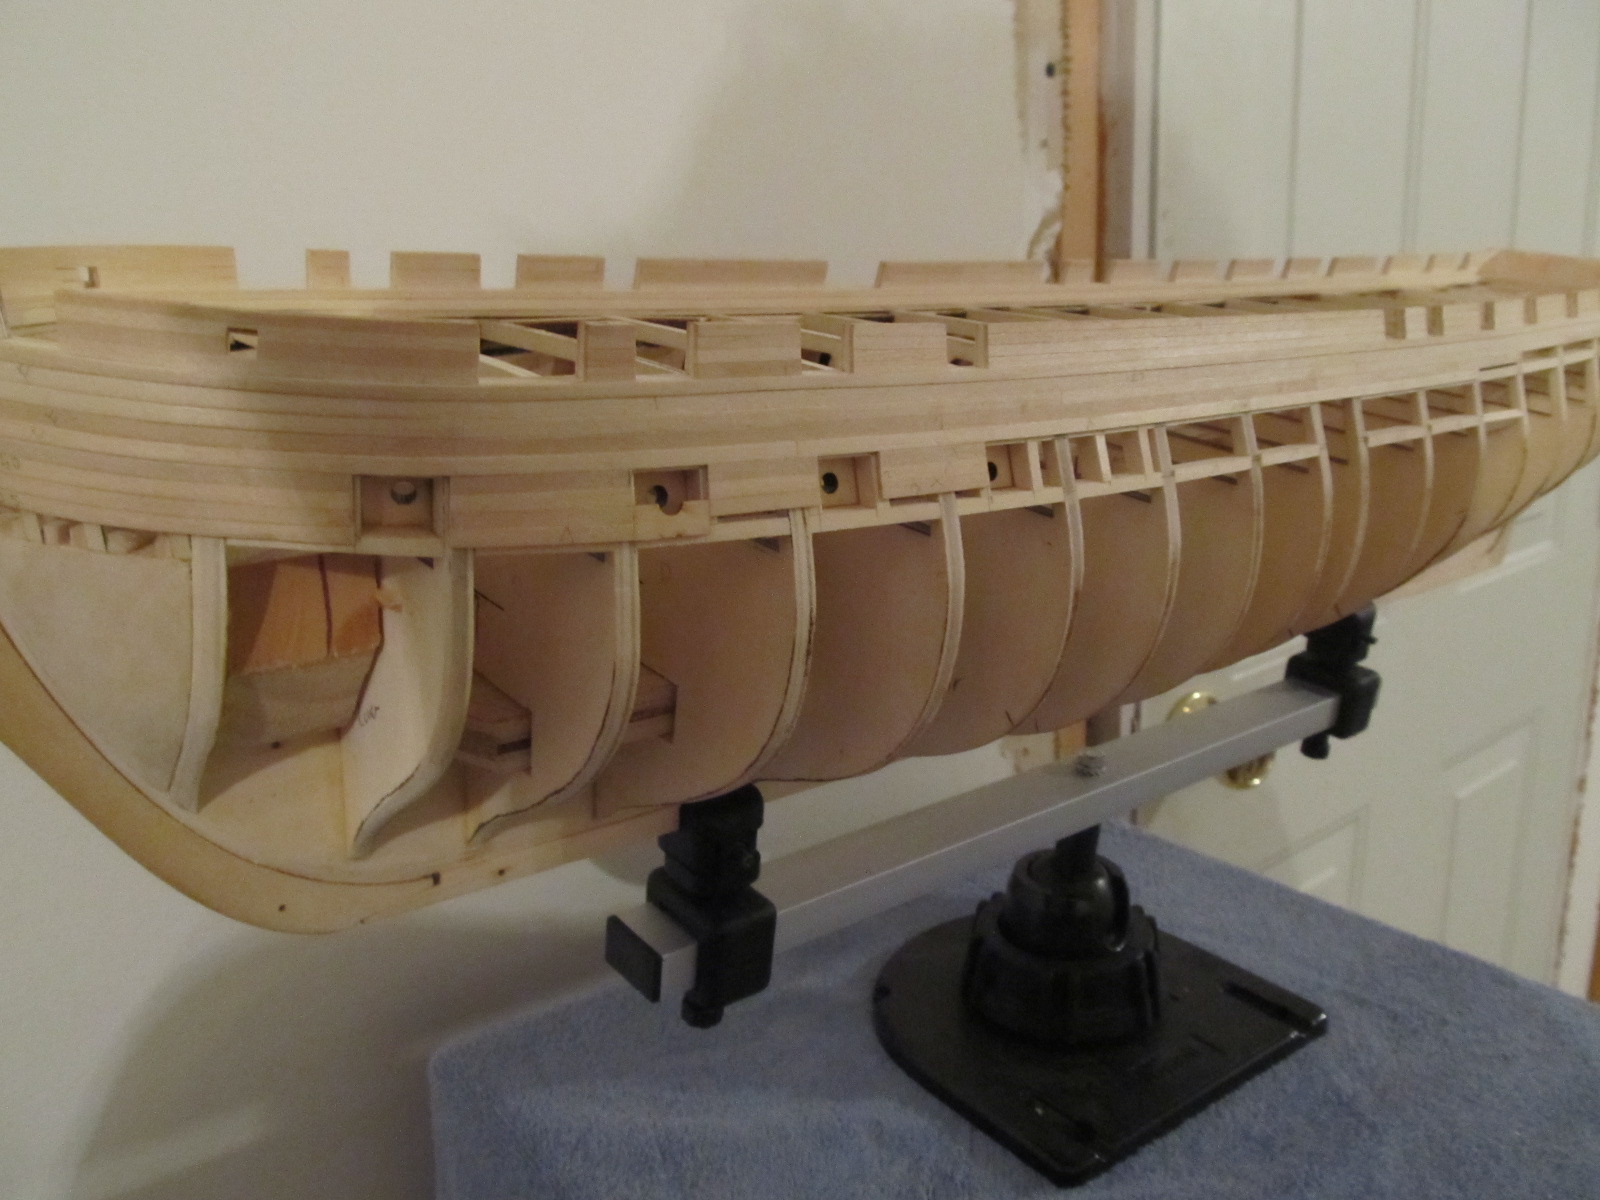
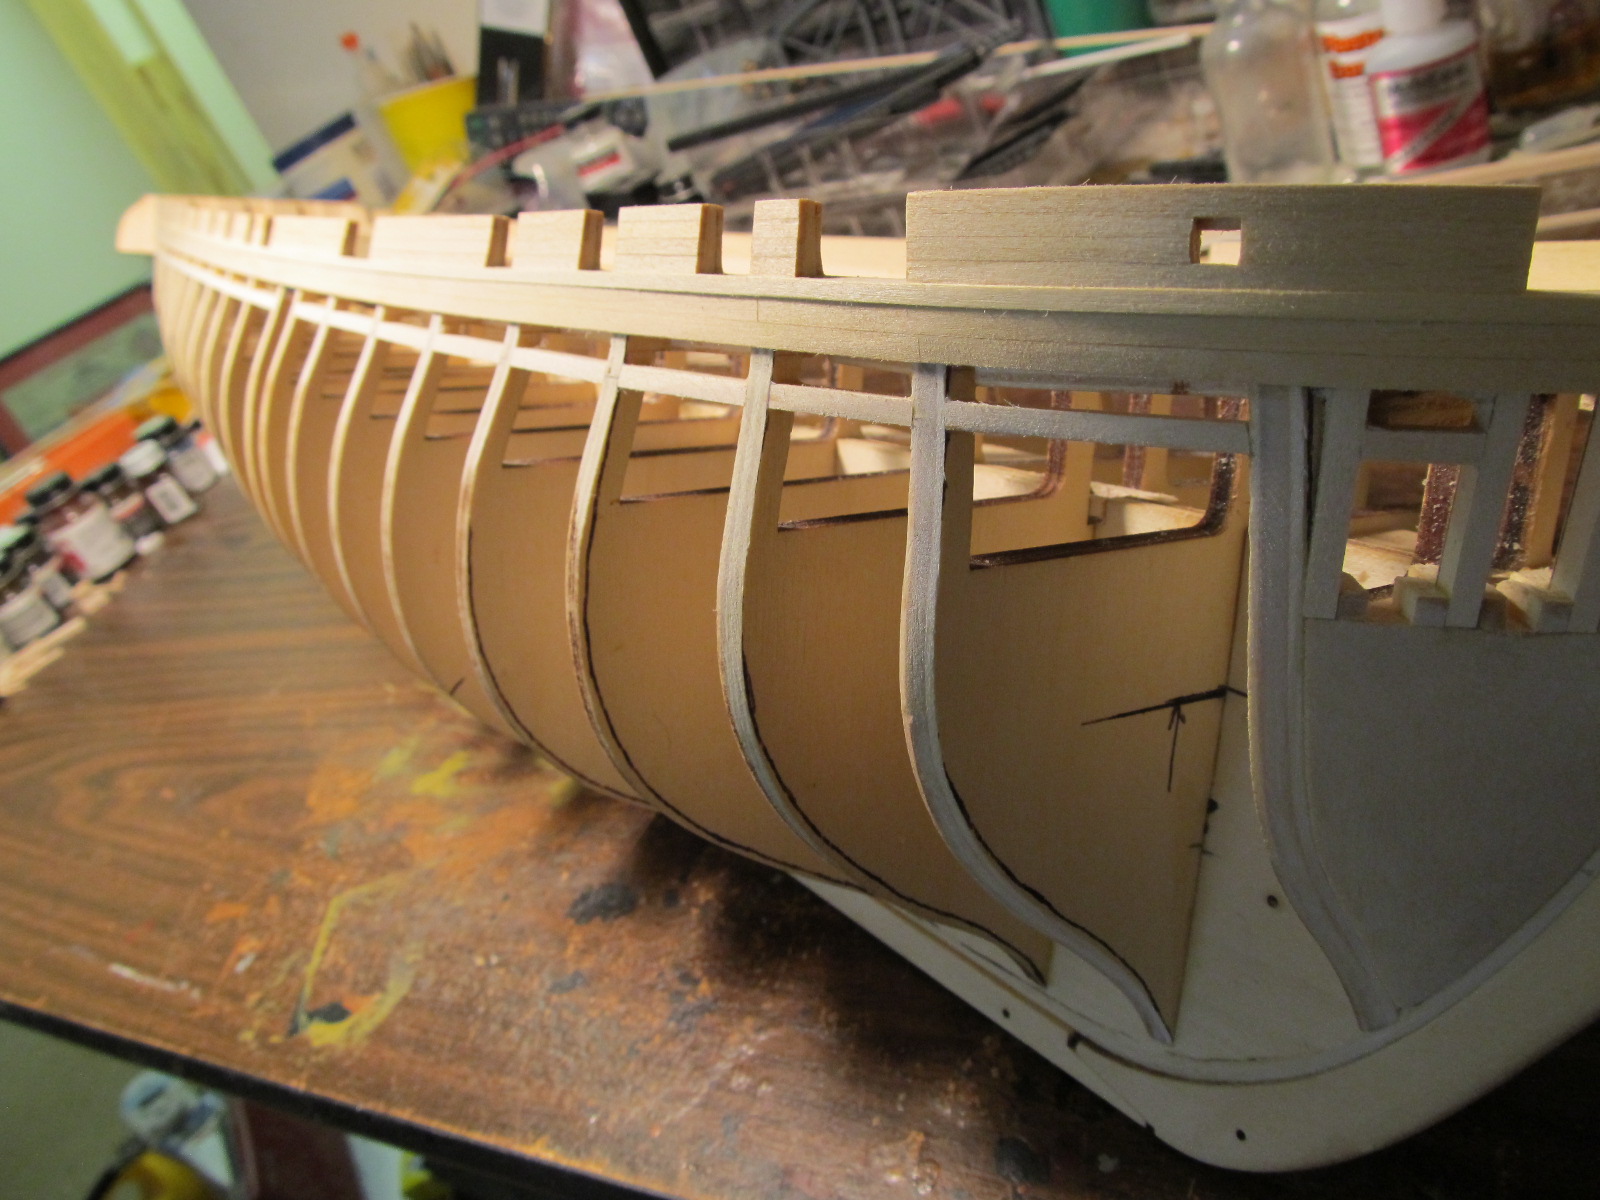
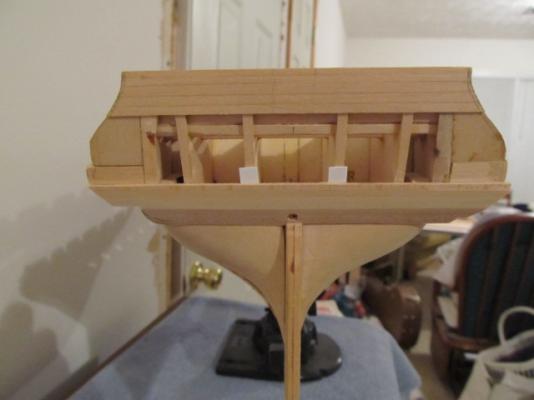
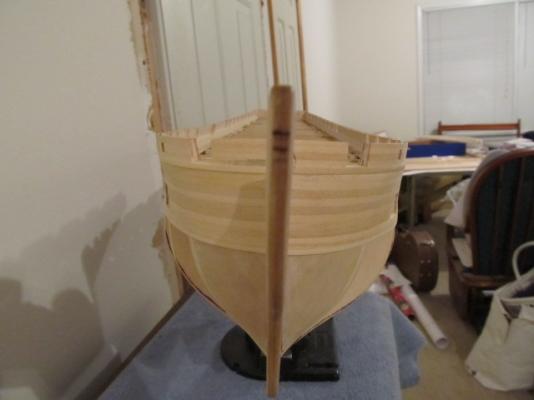
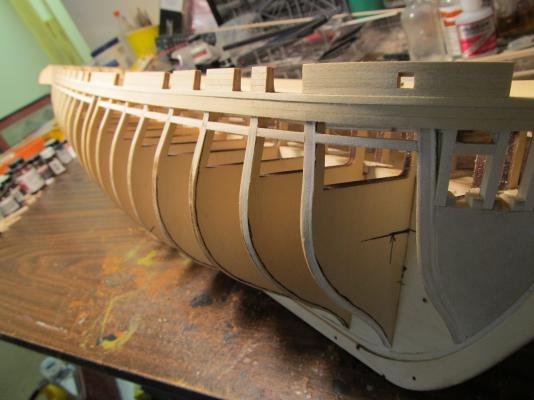
On to the transom. I'm still figuring out how I want to build the transom, but I am able to go ahead and start planking and fixing my errors on the transom extensions. Front view before I started planking the wales.

-
Bob, I'll be following along. I too am interested in this kit. Good luck on your build!
-
Way to go Augie! I ordered my kit a few days ago, hope Expo gets it to me in about a month. Looking forward to seeing your progress!
- 2,191 replies
-
- 1
-

-
- confederacy
- Model Shipways
- (and 1 more)
-
Thanks Steve for the great info. I've seen "ATOS" mentioned quite a lot on here and didn't know it was that book until now. I think I'll order me a copy. Thanks again!
-
Steve, found your build log, good luck on your Conny! I too am attempting to model the 1812ish transom, with a little builders license thrown in... The book you showed in an earlier post looks interesting, how is it? Would you recommend it? I need something that details that period. Thanks and good luck! BTW, your ship's boat(s) build are a build log in themselves...
-
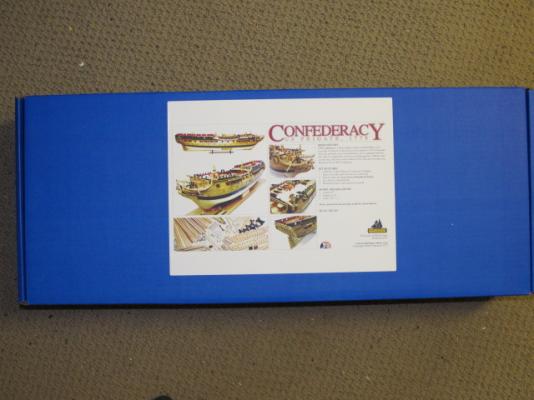
Last week was my 50th Birthday and I'm still trying to decide which kit I want as my "gift to me". I know I don't *need* another kit, but heck you only turn 50 once, right! I've been waffling between the Confederacy and the Essex. I really want the Essex, but Expo hasn't offered a discount yet and I missed the pre-order , and Confed has a nice discount right now that's really tempting. I honestly don't need both, but since when has that stopped me? As the Confed build logs pop up and I see what folks are doing with it, plus it's larger scale, it's starting to pull me in. I already see a few things I'd like to do a tad differently that might interest you folks. I think I'm gonna bite the bullet and order it now. Then, get the Essex for Christmas. Hopefully by then Sam will be well on his way with the masting plan for her. Then my next 5+ years of ship modeling will be mapped out... Until Sam or Chuck comes out with something else... I will need an English vessel(s) for my US Navy fleet to shoot at after all!
-
Thanks Sport!
-
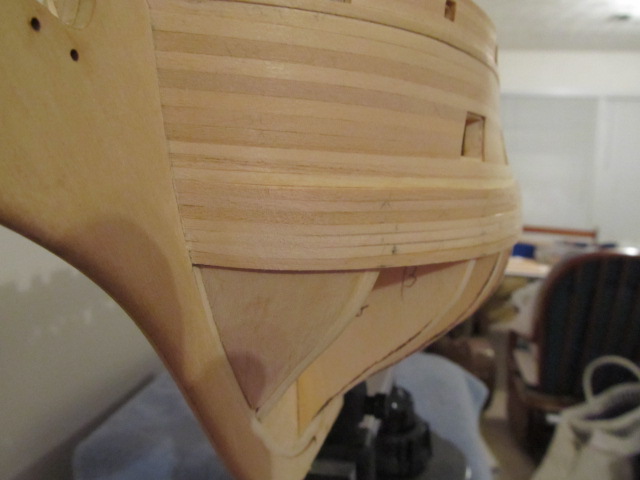
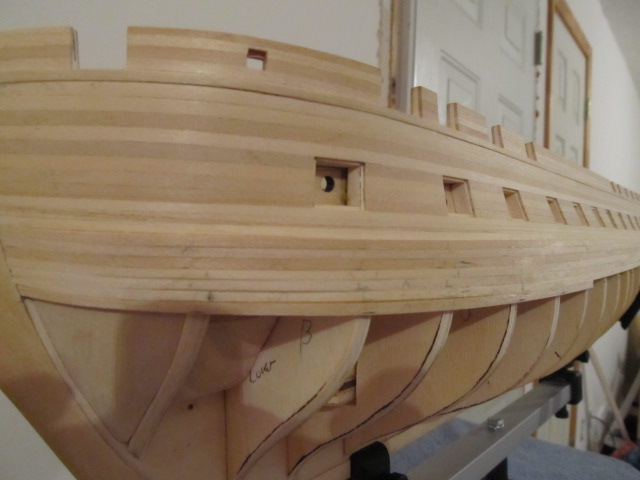
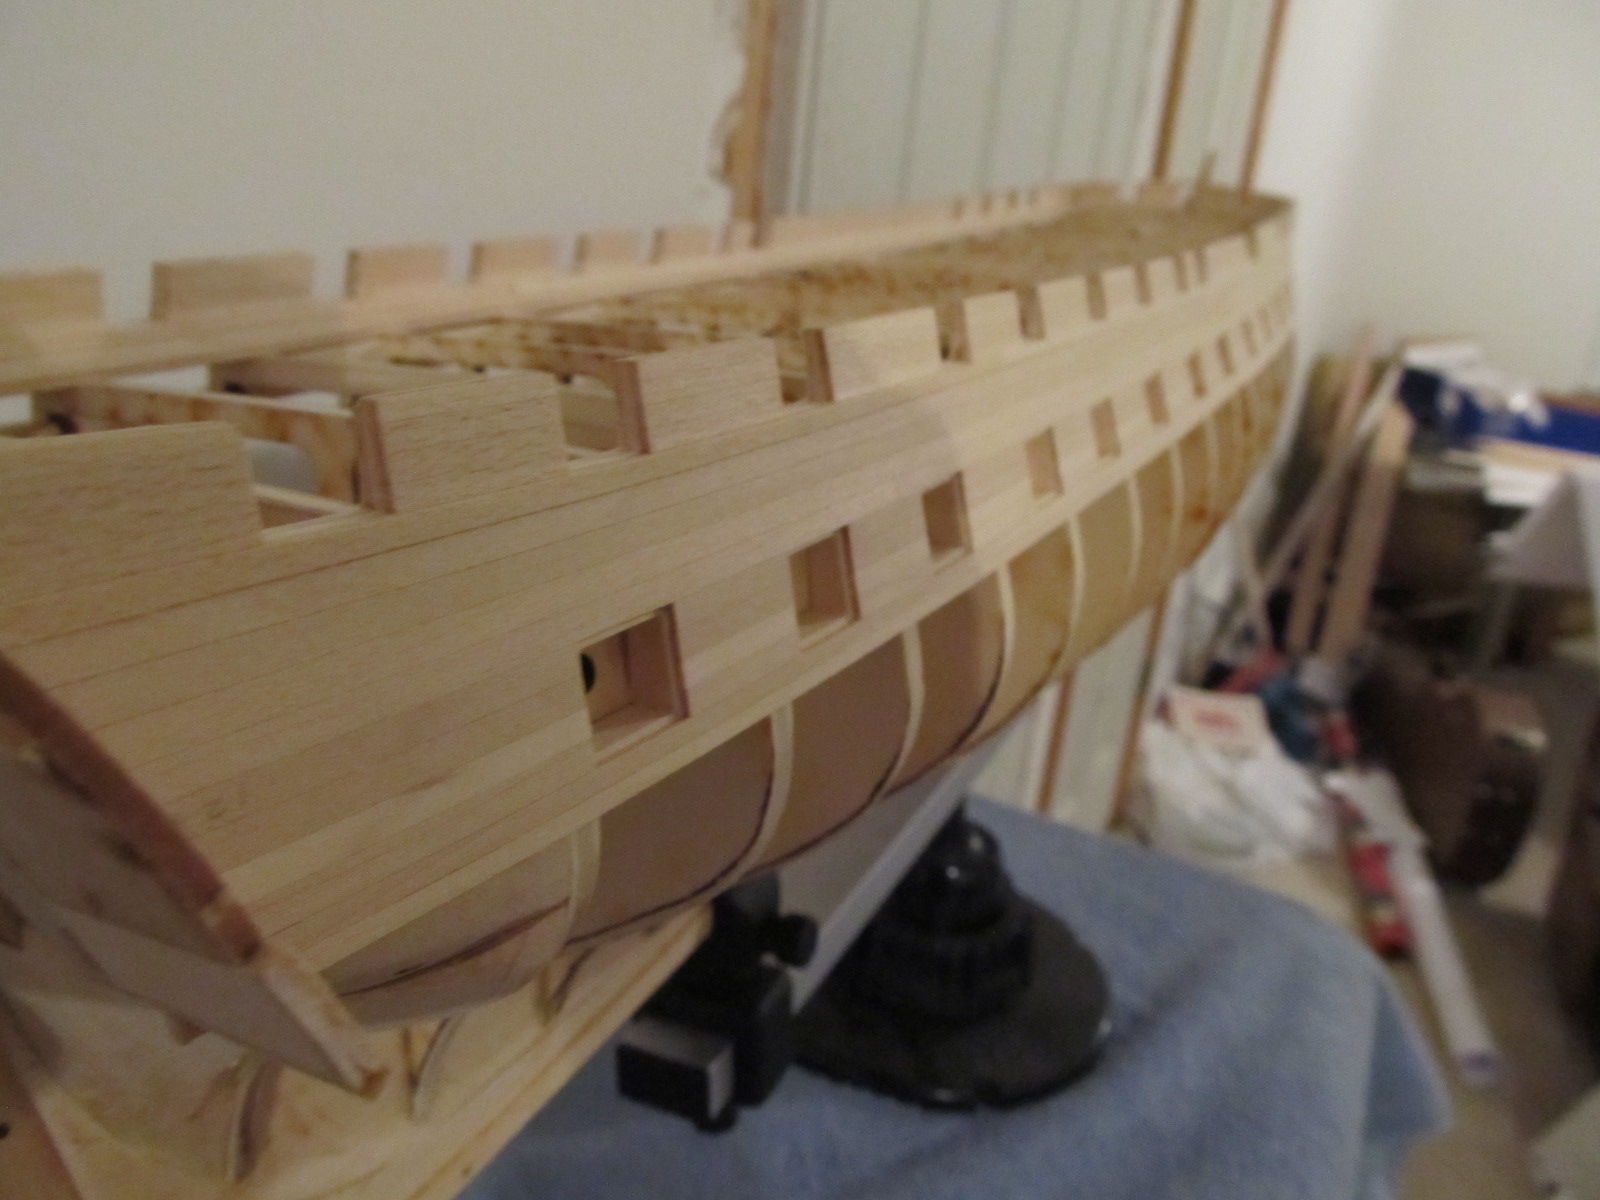
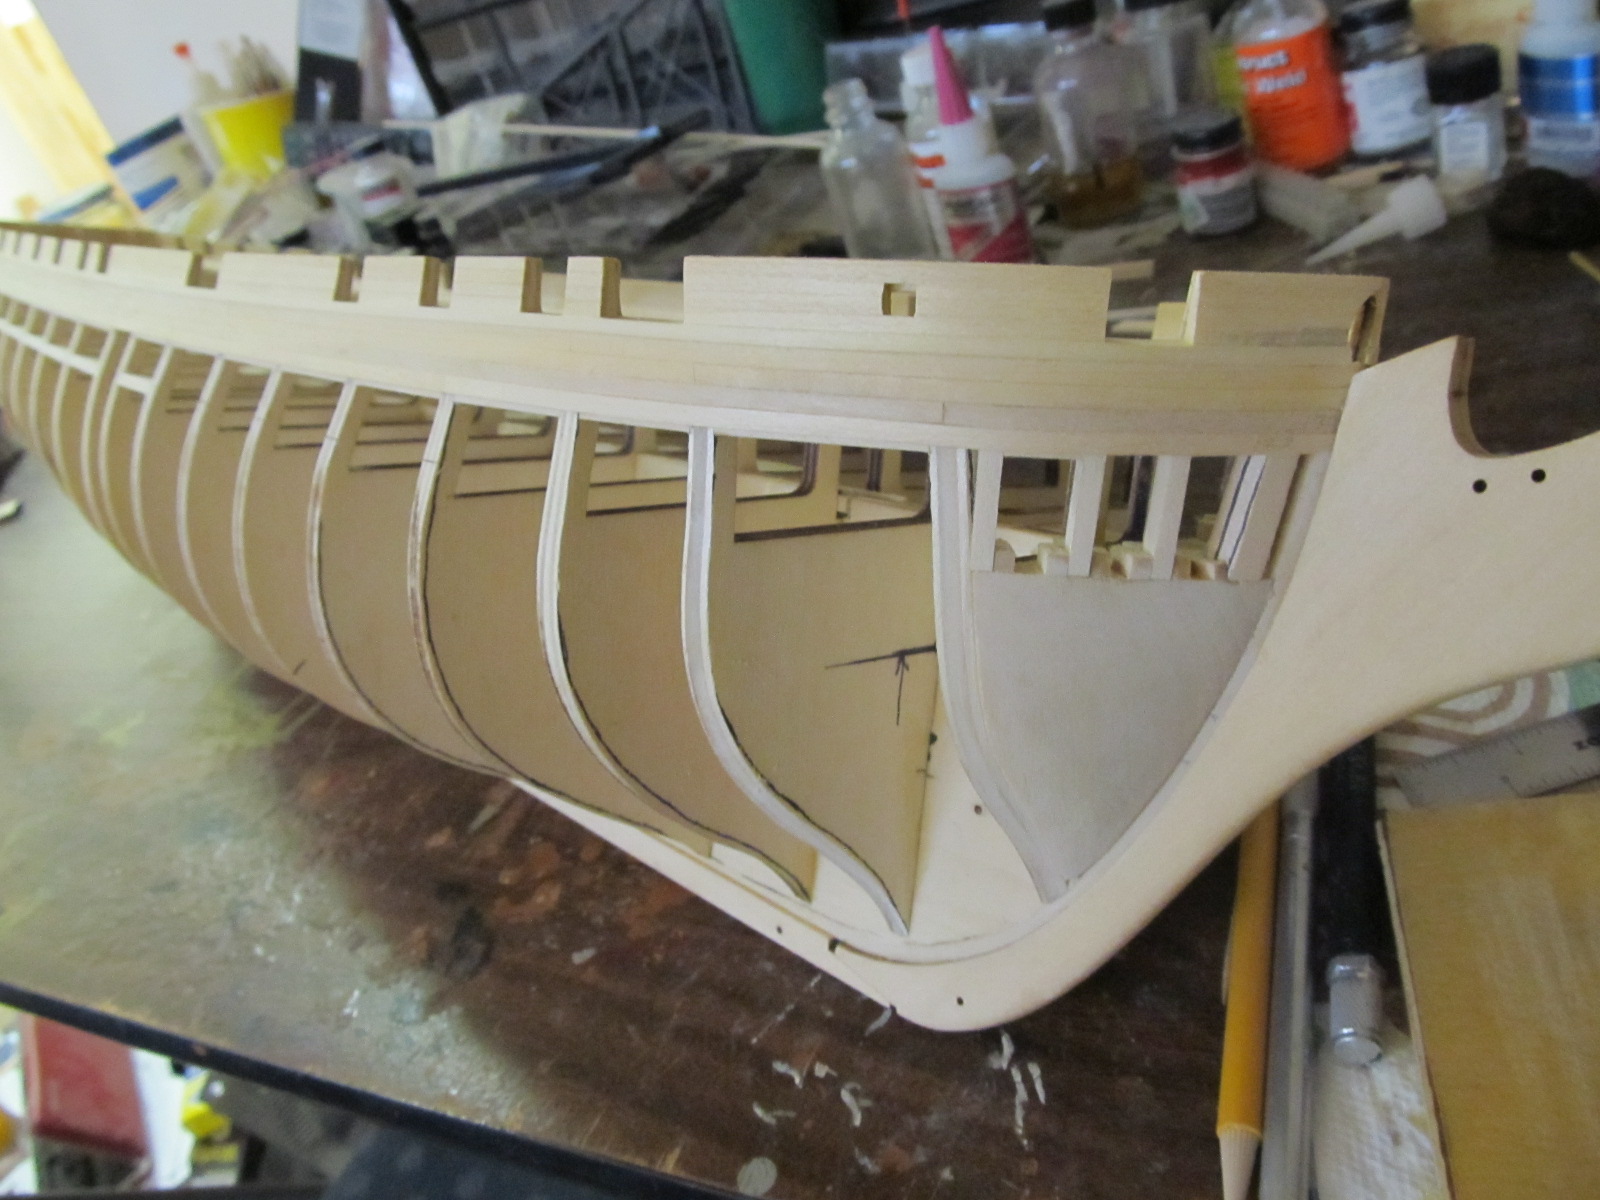
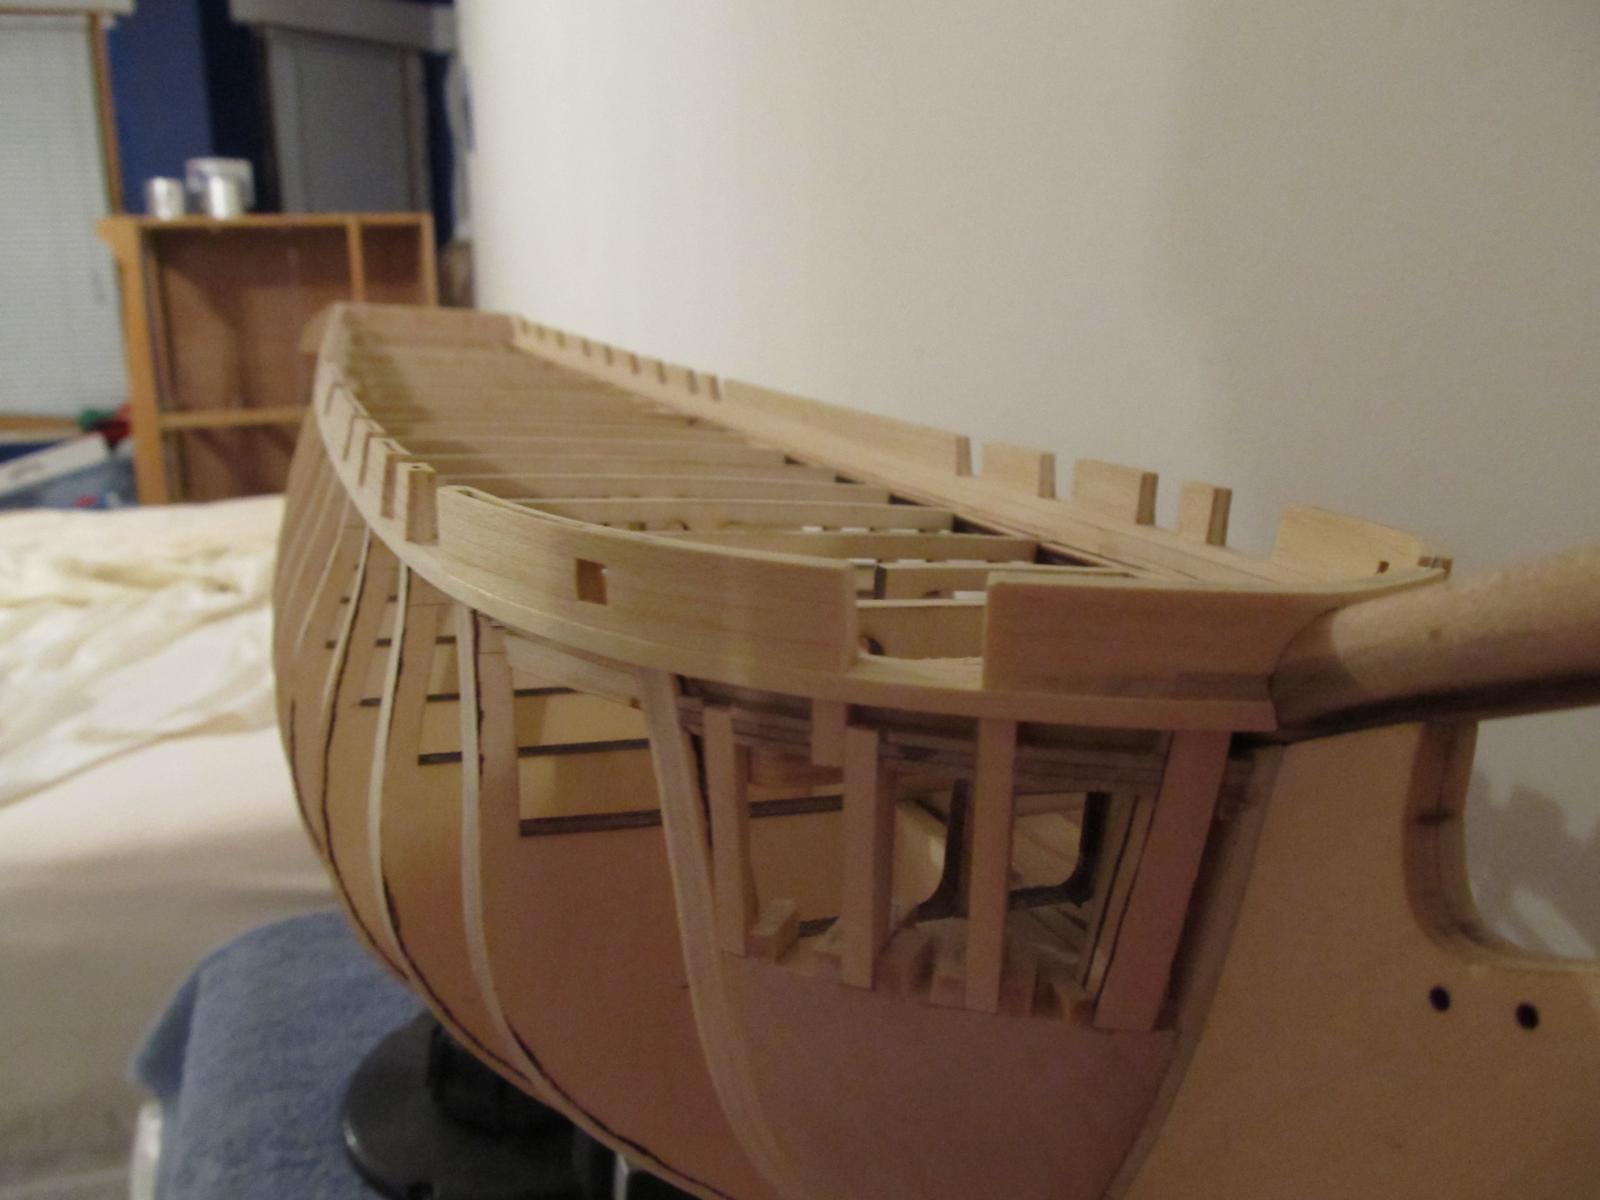
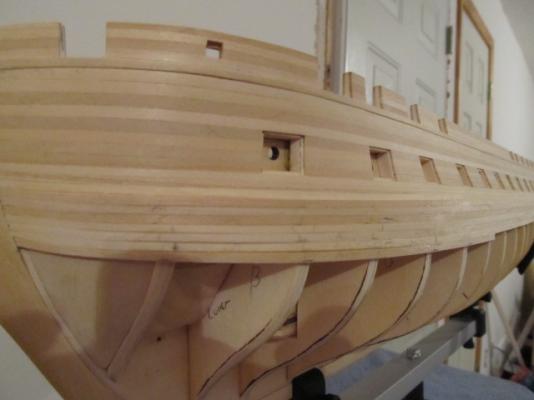
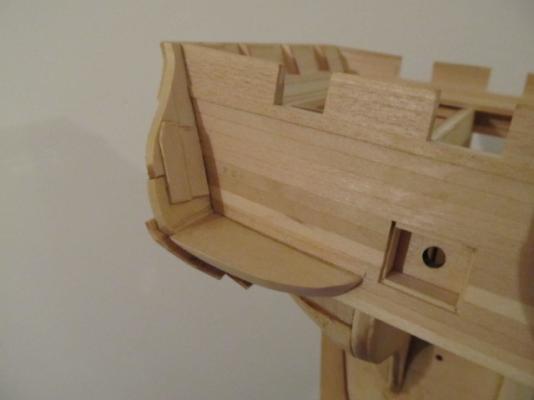
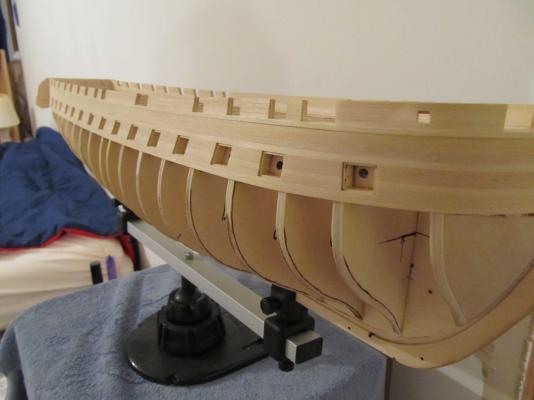
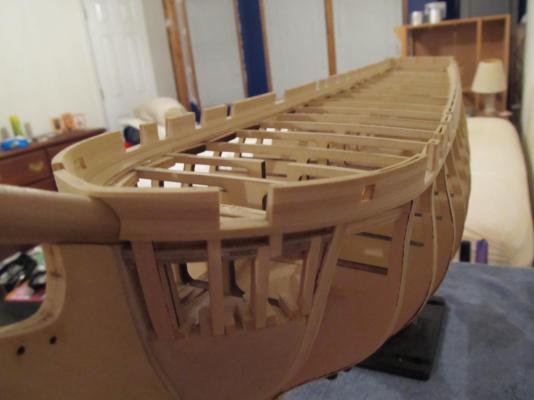
Been installing and planking down to the lower gunport sills. I found out during this I put the transom extension in the wrong location! I looked at this before I installed it more times than I care to count and I STILL put it in the wrong place ARGH!!... So I just glued a filler piece in and will reshape it. Anyway, here's my method for installing the gunport sill. I cut 2 pieces of styrene to use as gauges. Wood wouldn't have stood up to repeated use. It also helps to set sill parallel to the lintel. Starboard side planked and sanded. I may sand some more before I start finishing. Also, I'm really glad I'm painting this as leaving the basswood natural (or stained) would bug me big time. The color variations are so extreme! It's tedious enough sorting for size, but adding in color also would make me pull my hair out... Still working on the port side. Really getting tired of building and planking gun ports. Ready to move onto something else!


-
Hi Augie, congrats on the Confed. Can't wait to watch your progress.
- 2,191 replies
-
- 1
-
-
- confederacy
- Model Shipways
- (and 1 more)
-
Thank you Anja!
-
Thanks Geoff, I use Model Master as well, did you brush full strength? Thanks Jeff!
-
I guess my next decision is whether to cut in the bridle ports or not. They didn't exist until after Isacc Hull turned over command after the 1812 battle against Guirrerre, So I guess my logic could be my model represents the era pre-1812 retrofit. Which is probably mostly true. Also, I need to credit Force9 and his build http://modelshipworld.com/index.php?/topic/270-uss-constitution-by-force9-revell-plastic-revisiting-the-classic-196-kit/ for supplying a lot of wonderful historical info.
-
Thanks Geoff. I know I'm sticking my neck out, as someone more knowledgeable than me is bound to come along and point out my errors. But hey, I said it was in the "spirit" of 1812, right? Been watching your build, hope I can get mine look as good as yours. Might as well ask, what black paint did you use, enamel or acryic? I'm partial to enamels, seems most everyone on here likes acryilcs. And my favorite paint, Floquil, is going away. Darn....
-
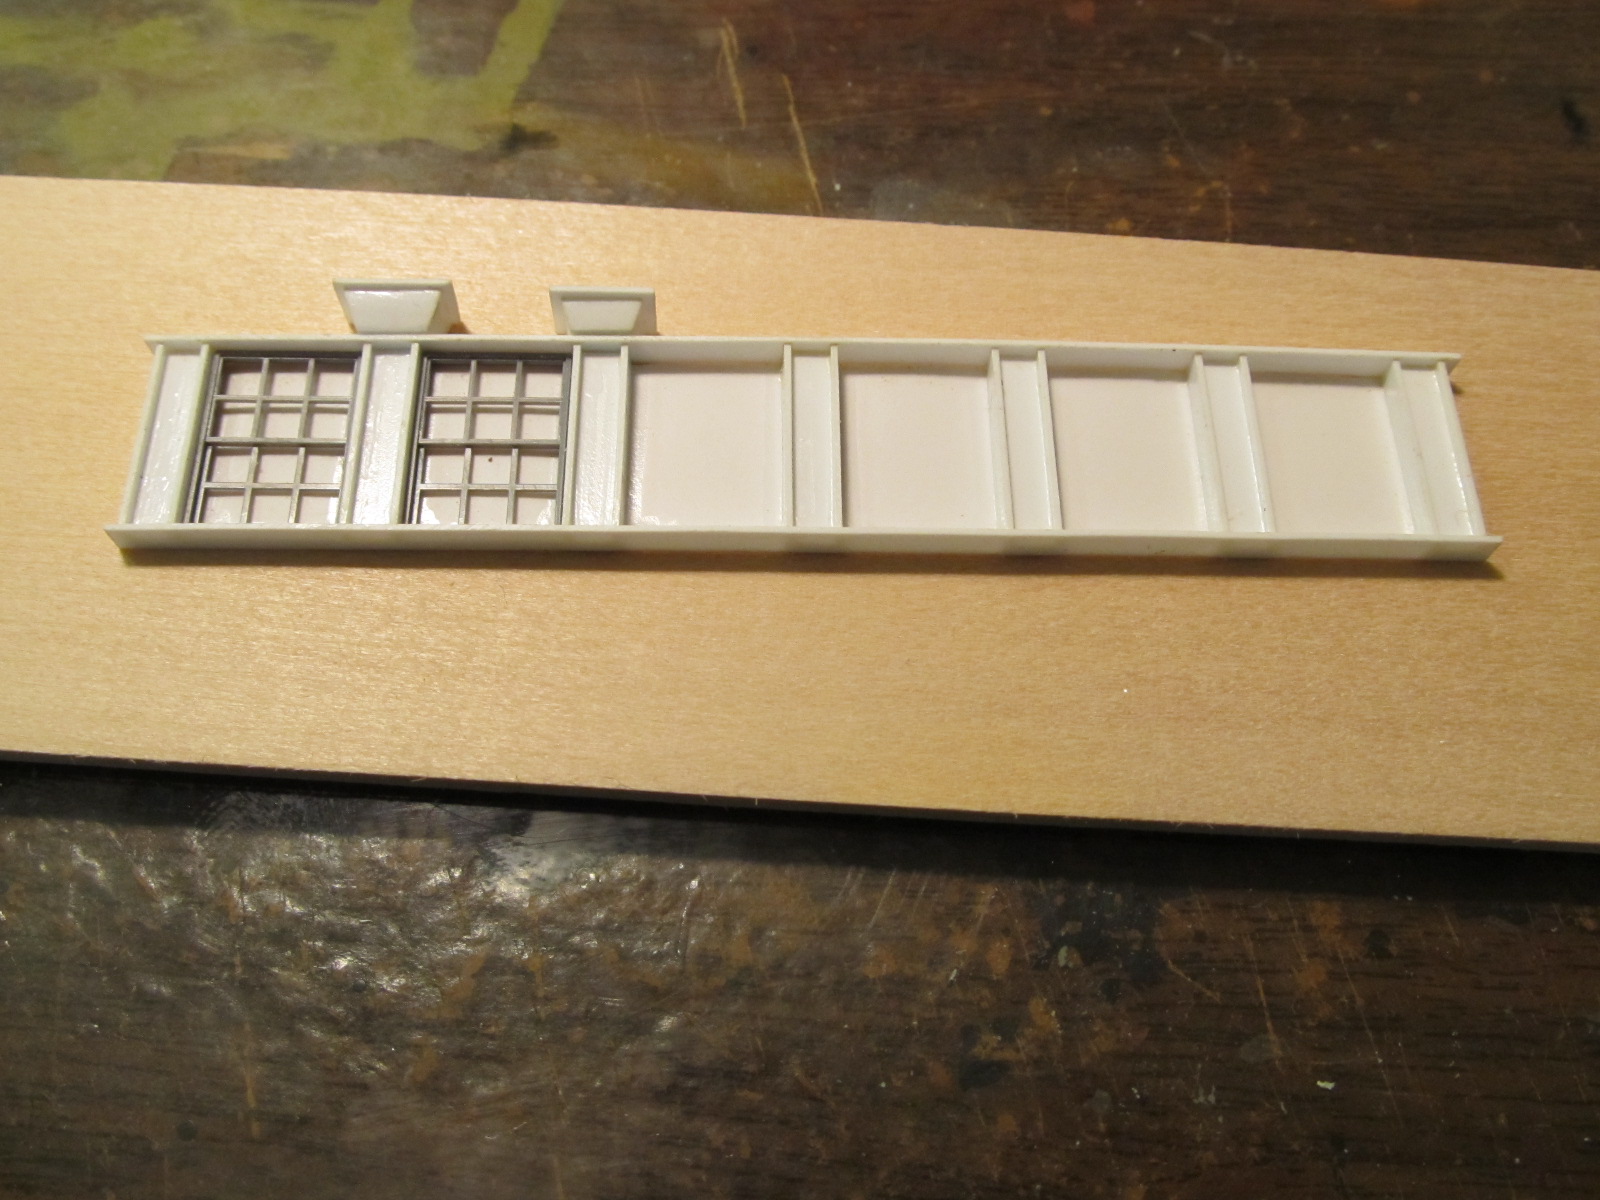
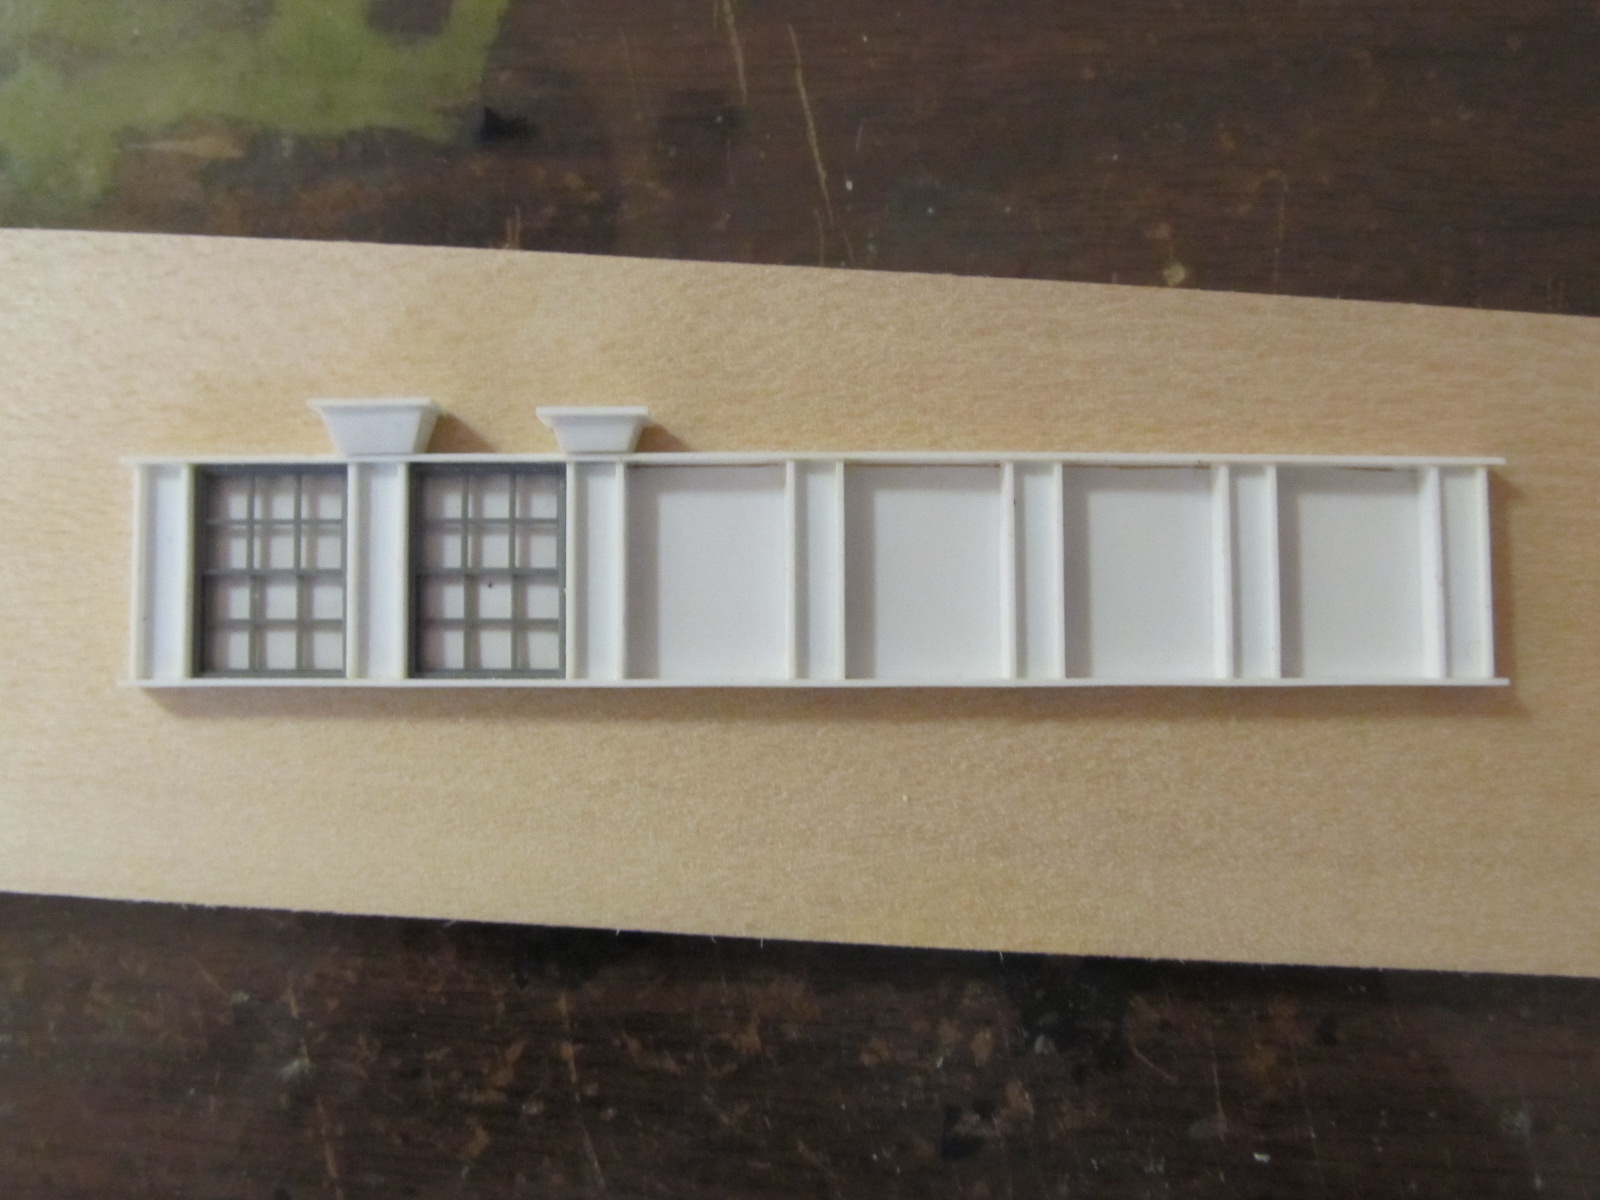
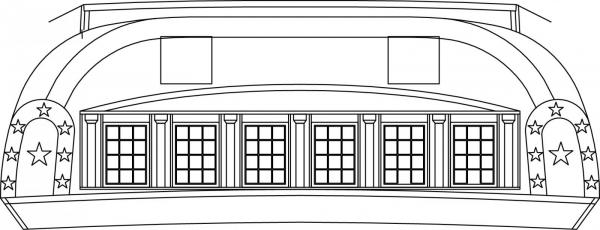
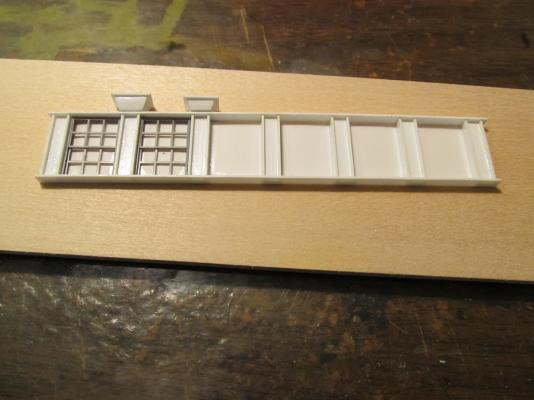
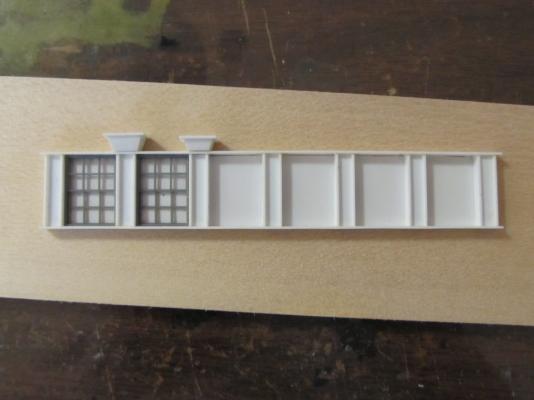
Couple picks of my transom mockup. I had planned for this to be a test, but I may actually wind up using this one. I am going to cast the column caps though, they're a pain to make and i need 7 of them. I made two sizes, the big one was too big so I made a smaller one and I think it's about right. I also wound up using 6 over 6 windows, the 6 lite windows I tried didn't work out like I wanted. These of course are not painted. I'm going to black out inside the windows.
-
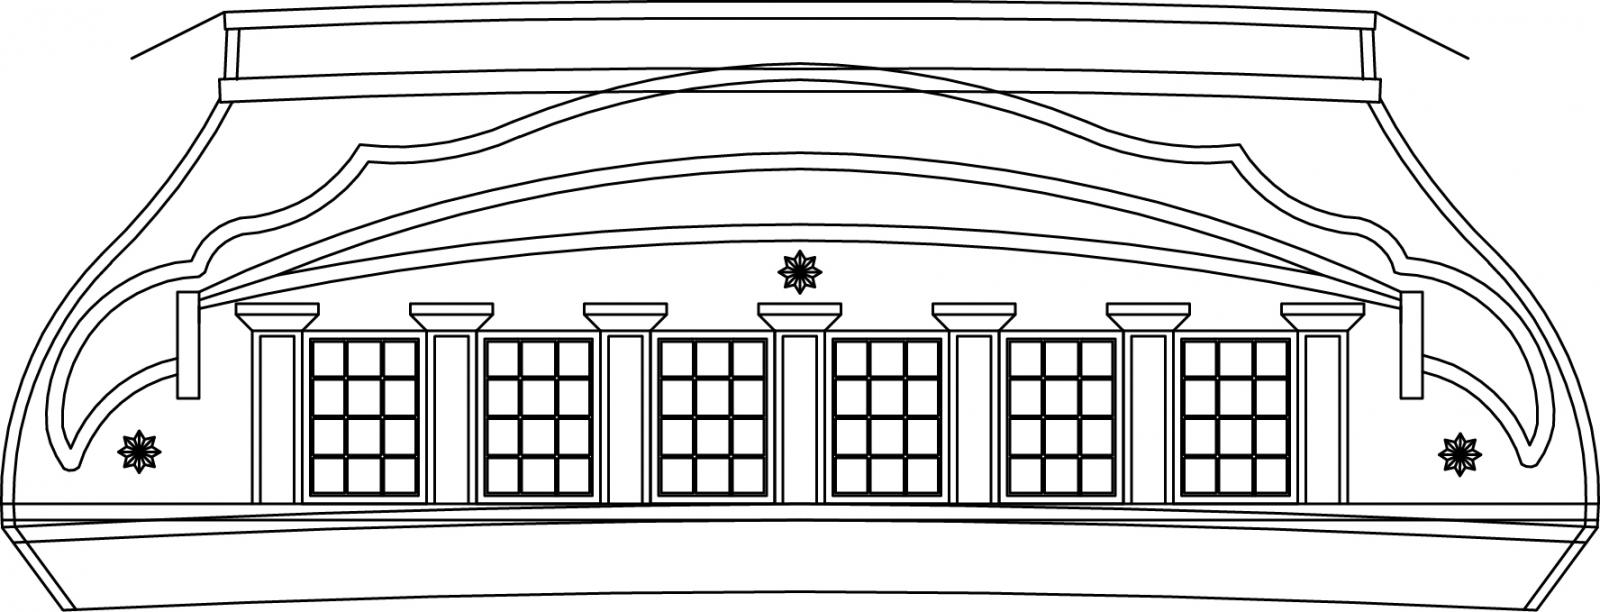
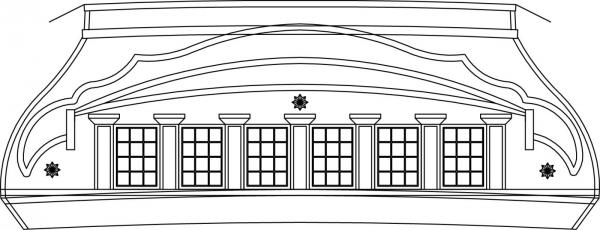
OK, here's goes nothing. I'm going to attempt to model the 1812'ish transom. I have the Revell Conny 1/96 model that I'm using as a reference. I don't have any plans of the 1812 Conny transom, not even sure if any exist? I realize this WILL NOT be a faithful historic reproduction but it should represent the "spirit" of the look of the 1812 transom. The Corne painting shows 6 light transom windows instead of the 4 light in the Revell model, which from what I've read is based on the Isacc Hull model. But, I like the 6 light version better myself. I've made a dwg based on the Revell transom, modified to fit the transom of the MS kit and I think in spirt it is close. All the details aren't there, just enough to get the idea. I plan on building the windows out of styrene. I already have the 6 light windows and am building a test mockup now. When I have something worth showing I will.
-
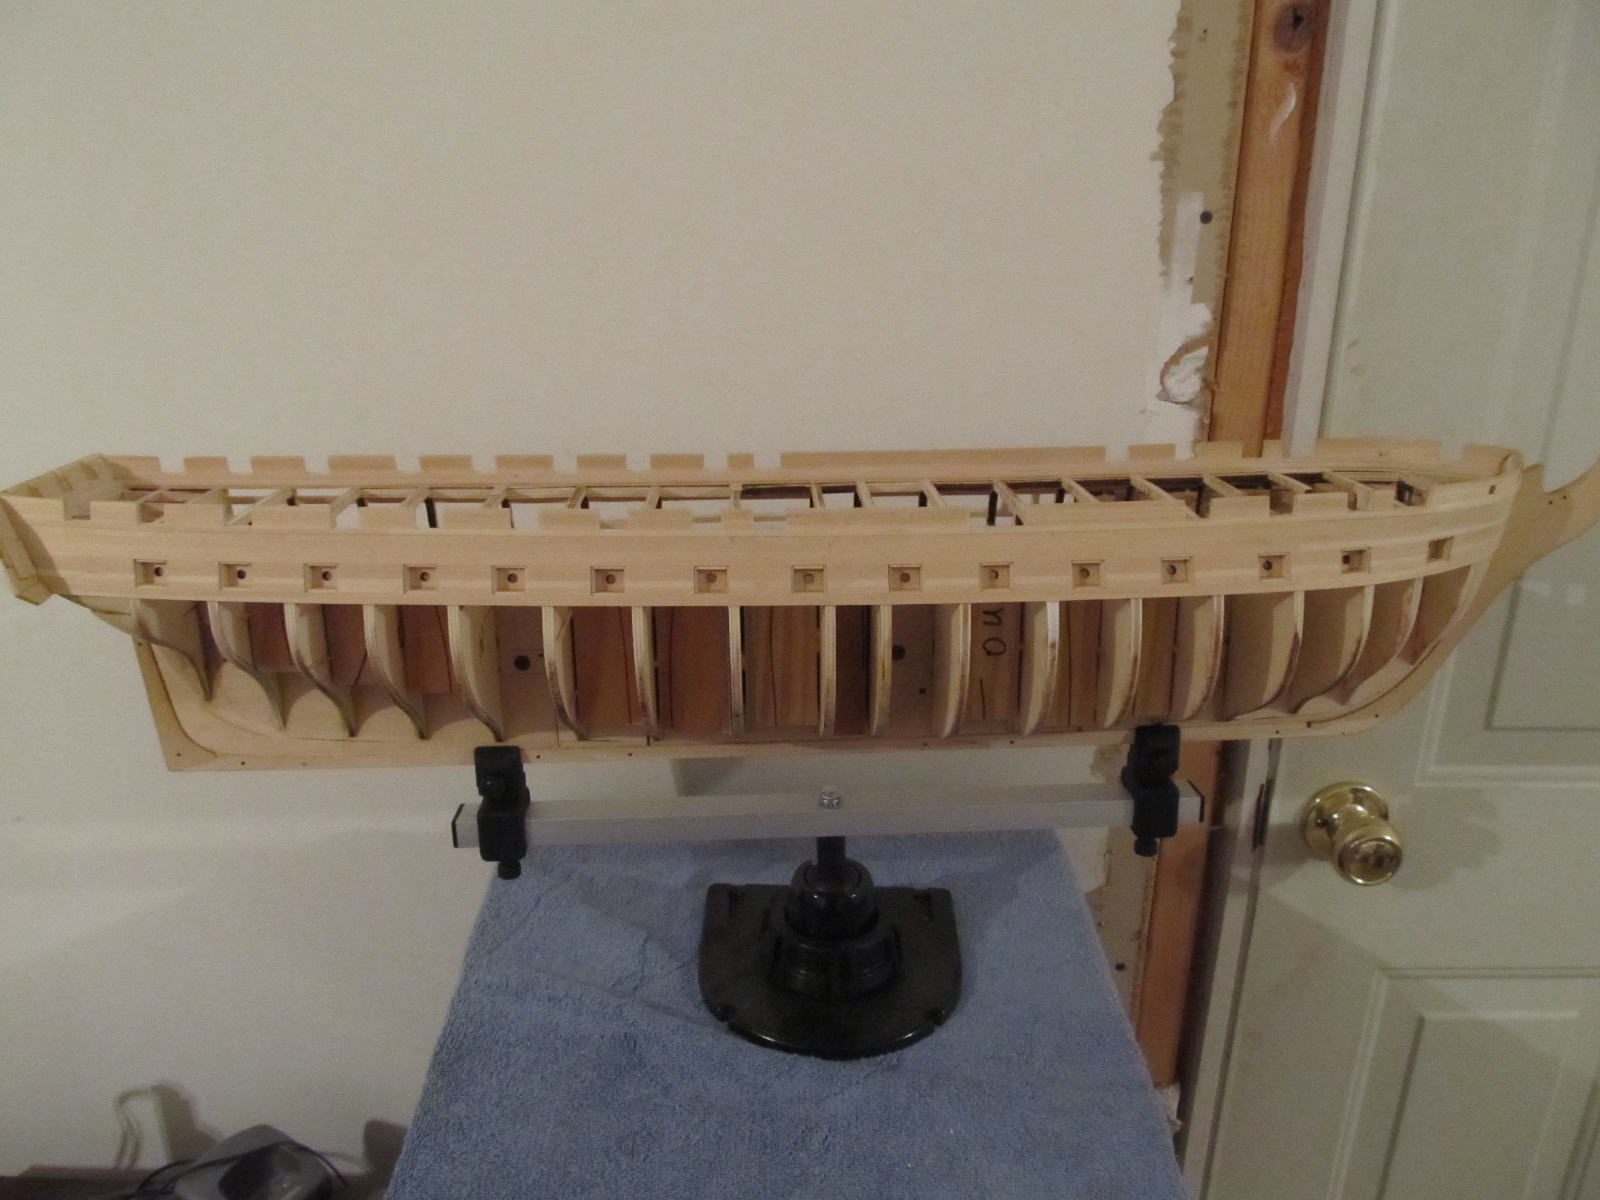
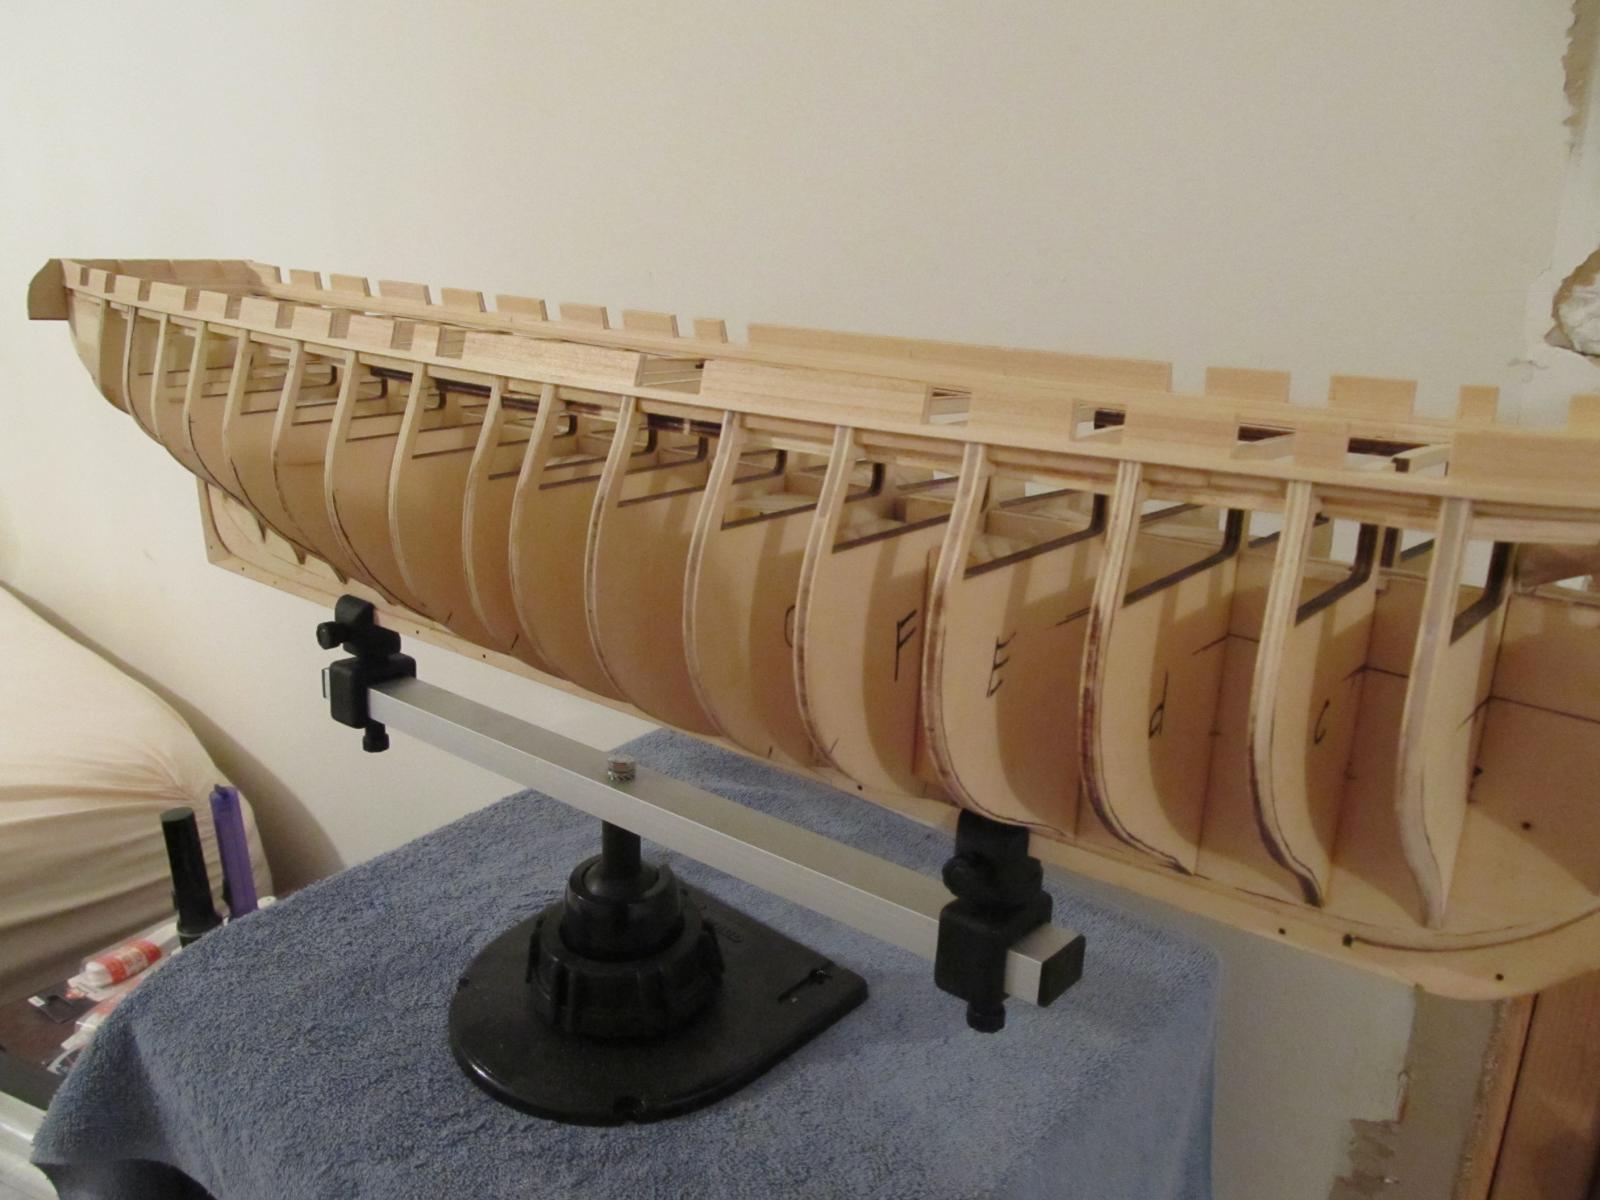
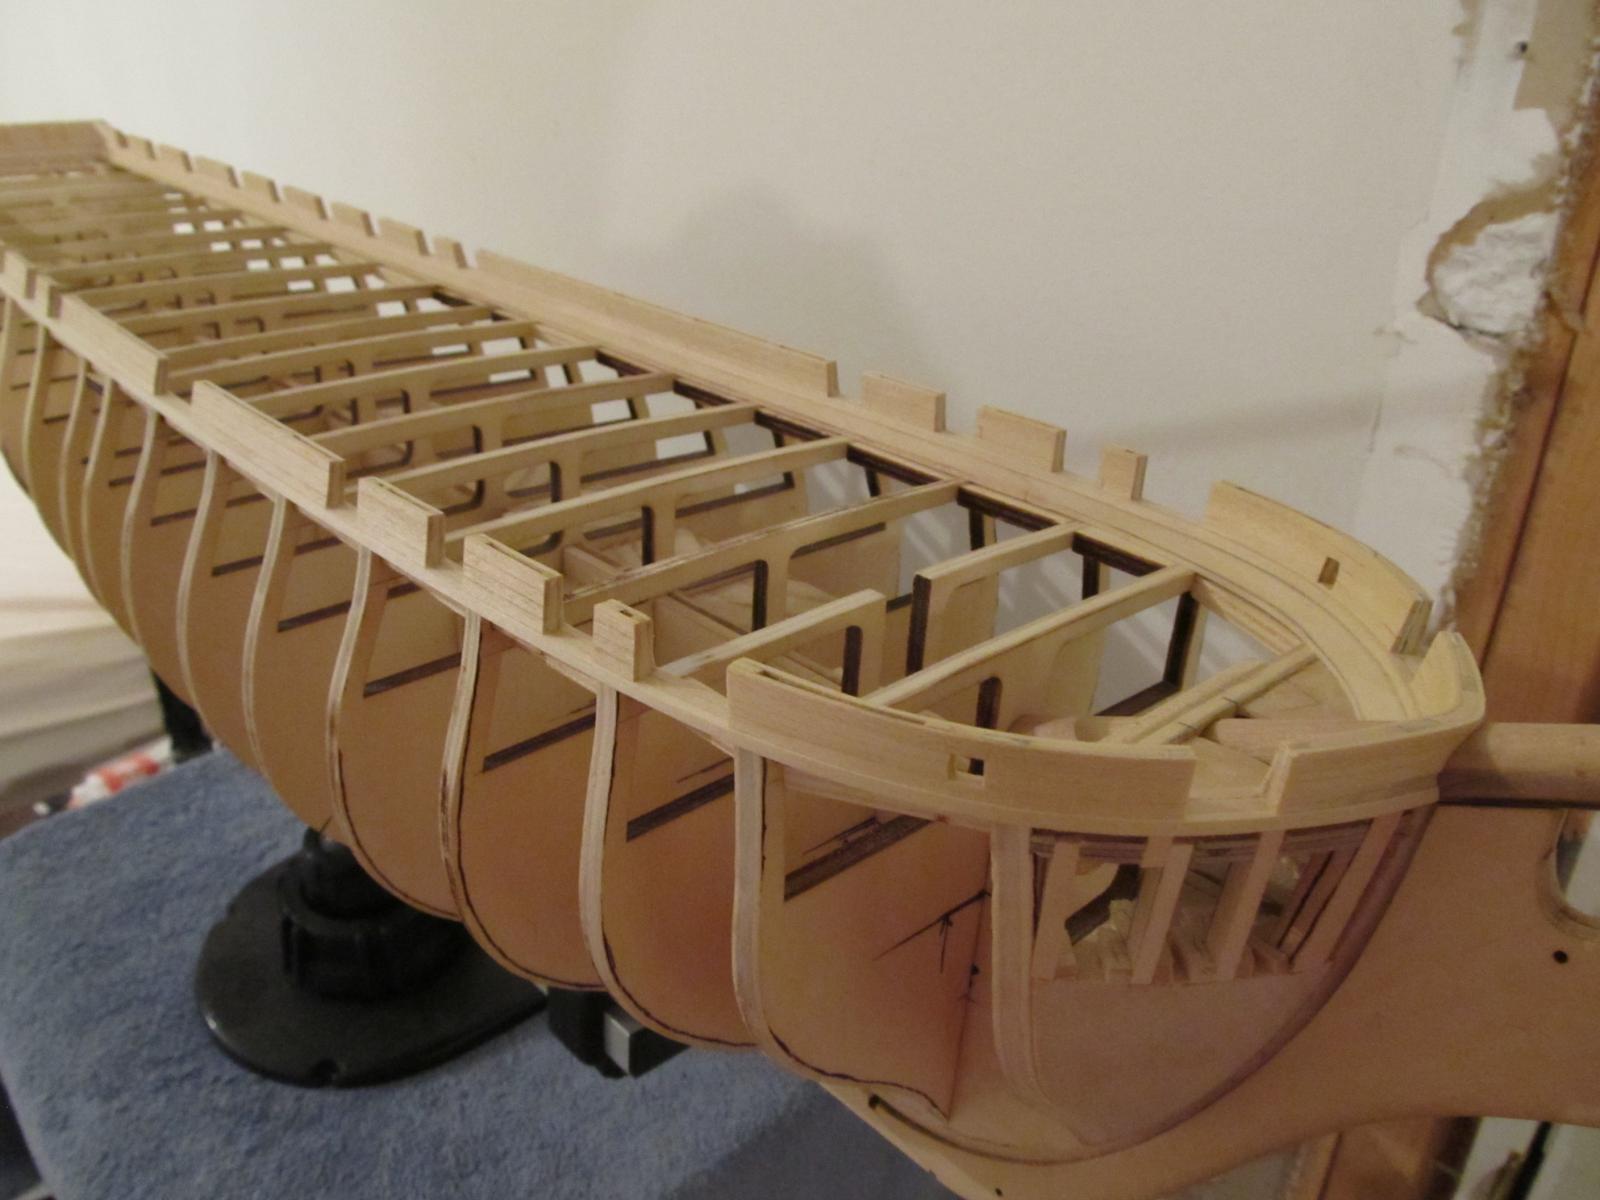
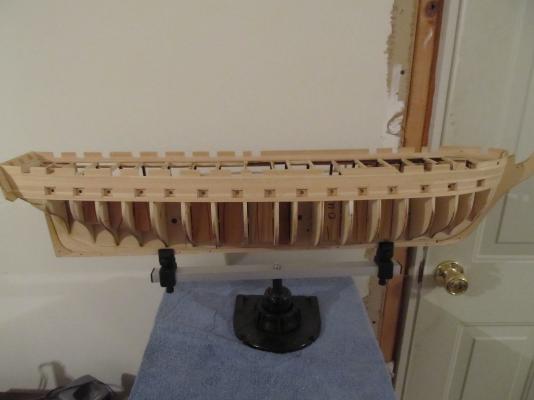
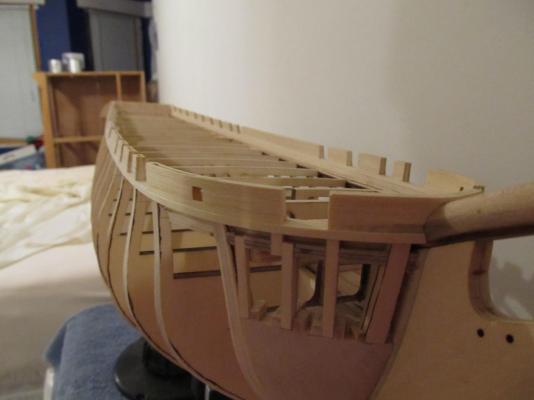
Upper gunport sills in place Planking down to upper gunport sill and installing lower gunport sills Starting to frame the lower gunports


-
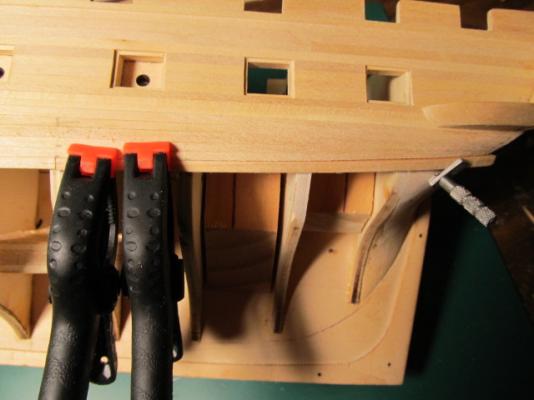
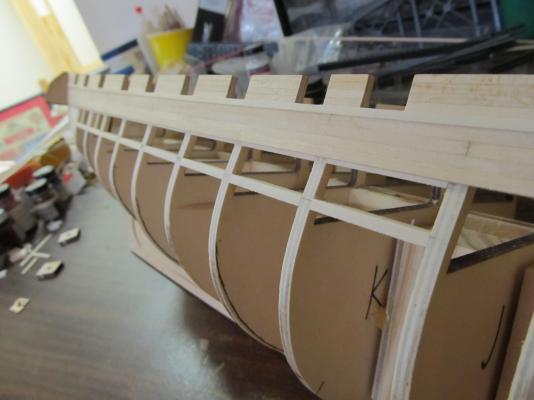
OK, continuing on. Planking the upper gunports: Fitting the Cathead


-
Hi Bob, nice job! Congrats on the sander, I'm close to getting the Byrnes thickness sander. Do you happen to have that? I've read nice things about their stuff...
-
Thanks Bob! I'll never reach the quality of your build but I'm trying! Reached a milestone last night. All the upper gunports are finished. Glad to be done with that. I had to correct a couple of my errors and make a few judgement calls, so I hope everything is right! I just need to sand a little more and I'll post a few pics. Then on to the lower gun ports. I was looking at some of the the other Conny logs and the yellow stripe keeps coming up. I actually like that over the white, I kind'a want to go that route, but I know it won't be historically accurate. But, that's not why I'm building this either. I'm building for the challange, and the fun. My finished model will be not be 100% historically accurate, I know that. So should I let that bother me? Trying not to... This certainly is not going to be a museum piece depicting the moment in time when "whatever" happened. I wish it could, but it won't.
-
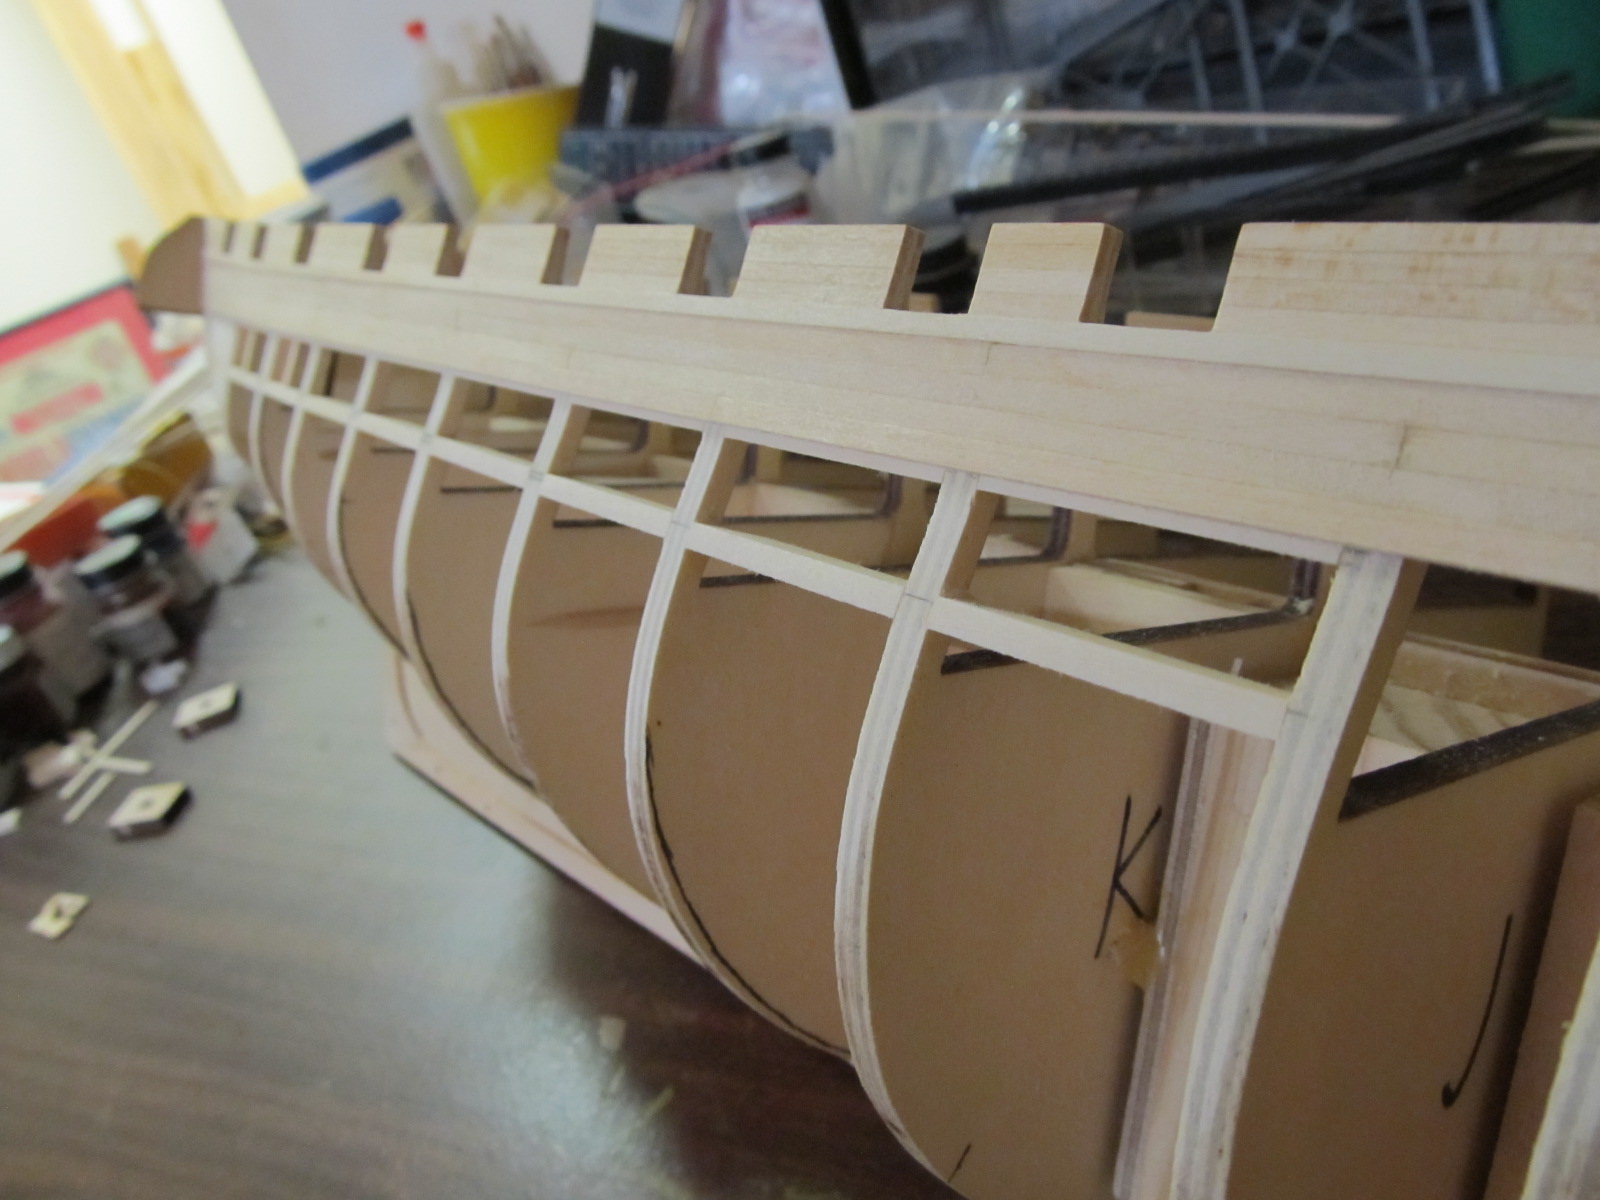
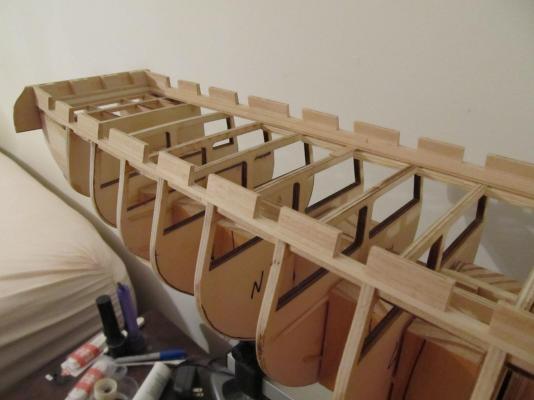
Been a couple weeks with no modeling, but will be back to it again this weekend. One thing that has become painfully obvious is the lack of consistency in the widths of the planks for the bulwarks. I first noticed this when planking the inner bulwarks. (sorry no pics yet). At the bow I wound up with slight gaps between a couple rows of planks. I first though this was my error, but after checking and analyzing I realized this was caused by differing width planks laid end to end. When the next row is added this differing width causes gaps. This became more of a problem when I realized the heights of the inner and outer bulwarks were different. Again, caused by differing plank widths. At least the inside was to high, so I can sand that down to match the outer. I've begun using calipers to check all plank widths now to try and match widths on all end to end planks. Maybe all you experienced guys do that and it's just my rookie mistake, but it did bite me in the butt. I also have quite a few planks with severe chatter marks on the edges that I'm going to have to call Model Shipways and get replacements for. Everyone on here has said they are great about doing that so I should have no problem (I hope!) I"ll post a few pics when I get time to take them, although I really hate showing pics of my stupid mistakes. Honest errors are OK I guess, but I should have known better on this issue. But, I guess that's what this group is all about, helping the next guy avoid my mistakes!