HOLIDAY DONATION DRIVE - SUPPORT MSW - DO YOUR PART TO KEEP THIS GREAT FORUM GOING! (Only 24 donations so far out of 49,000 members - C'mon guys!)
×


cookster
-
Posts
416 -
Joined
-
Last visited
Content Type
Profiles
Forums
Gallery
Events
Everything posted by cookster
-
Rich, good luck on your gunports. As far as sanding planks, I sand in belts of 4 or 5. Add a belt (4 or 5 rows), then sand it. With basswood I sand with 80 to level things out, then 150, then 180. It's only sanded to 180 so far, I'll sand further before the finish. With a hardwood and a lot of material to remove (such as tapering the wales) you might need to start with something coarser.
-
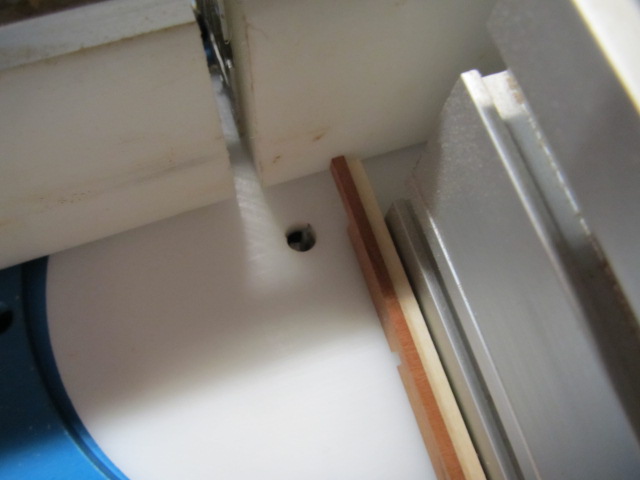
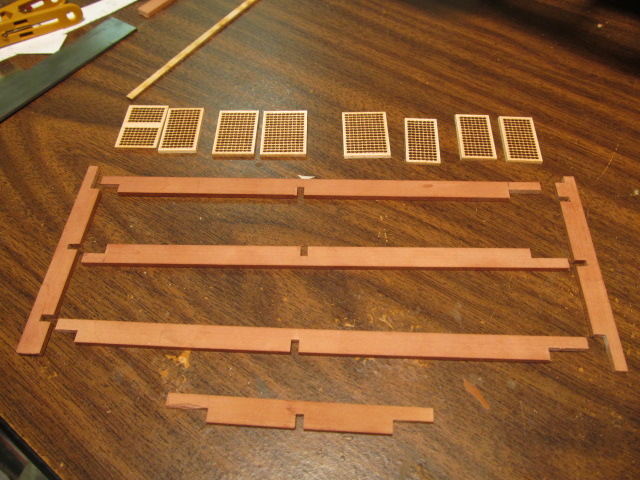
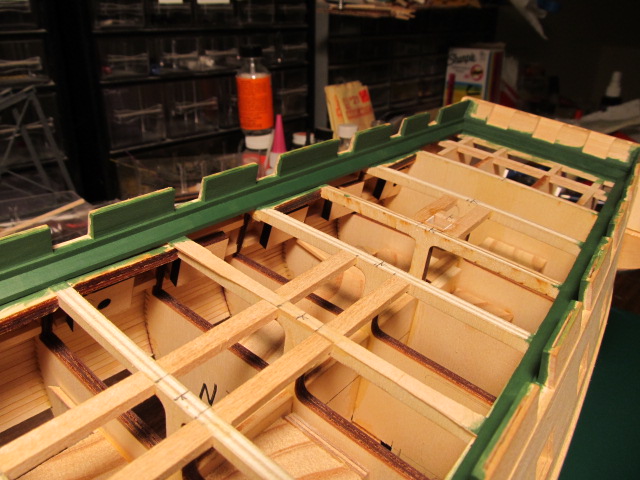
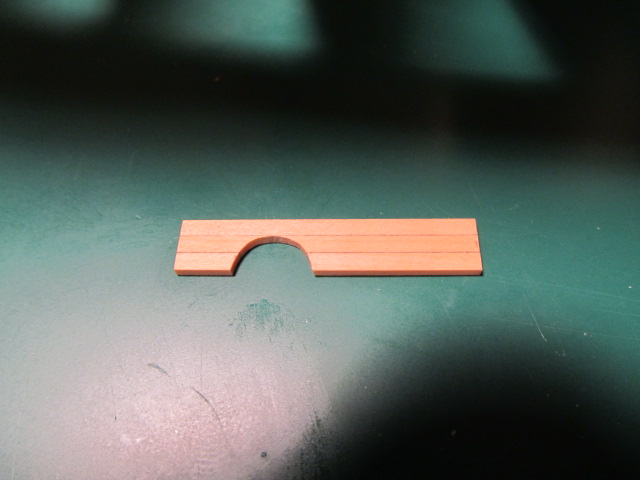
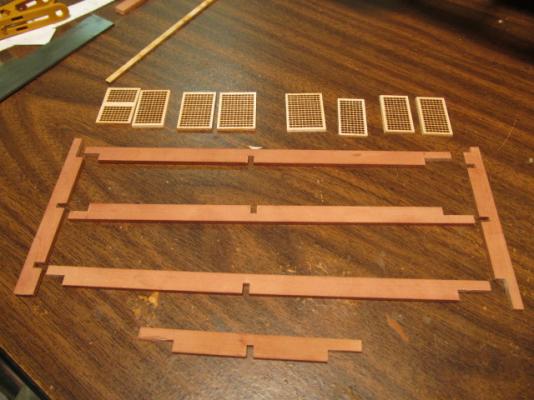
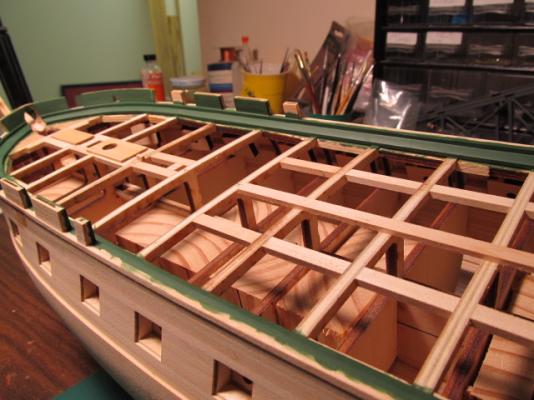
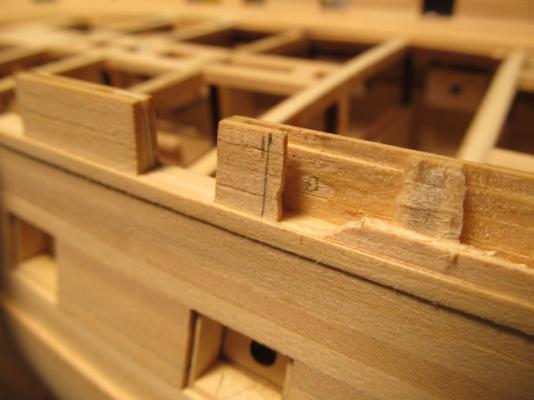
While waiting on the coats of green paint to dry I started on the main hatch coaming. I cut the half lap joints on the router table. Always use a sacrificial strip when cutting through dadoes to avoid chip out. The ends were cut long as on the other coamings so I can trim them down flush later. I also had to split the hatch gratings into their individual pieces. I forgot to take a pic, but the main hatch grate comes as one big piece intended to be framed with only 4 sides, but I wanted to build the coaming with individual frames. (This is how Bob Hunt did it also). I decided to only half lap the end and center frame, as half lapping all of them would require A LOT of setup time and trial and error to not screw up, so I will butt joint the rest. This won't cause a problem although it won't look as good, but in this case it's worth not doing it. I'm now adding the inner supports for the grates. More pics to come...


-
Nice Augie! Can't believe how fast your moving...
- 2,191 replies
-
- 1
-

-
- confederacy
- Model Shipways
- (and 1 more)
-
Looking good Harvey! I somehow missed your build log until now, will be following along. Good luck on your rigging!
-
Thanks all!! Augie, the green could be a shade or 2 yellower and lighter, but, I think it will work, and once I add the deck that will help tone the green down some.. If I were in bright sunshine it look just right as is! Bob, coming from you that's a real compliment! Harvey, being a first time builder I could not have done this without Bob Hunt's practicum. I know Bob H has issues, and I've experienced them as well, but there's no need to go into that here. I've done a lot of things differently than Bob as anyone who's seen my build can tell, but it's a great guide for the inexperienced (like me). Somehow I missed your build log, just found it, will be following along. She's looking good!
-
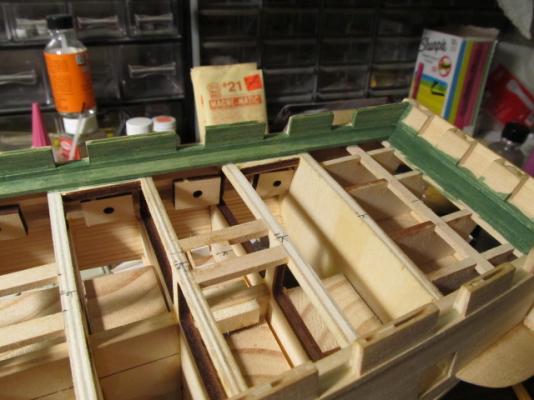
Spent the last week painting the bullwarks. I want to paint them before I plank the deck. I'm using Floquil Southern Green. It looks a little dark in the pics, it's actually not quite this dark. First 2 coats, thinned about 60%. I wanted to avoid brush marks. It's been quite the struggle to get it like I want it, but I think I'm almost there. I wanted to try Chuck's acrylic method, but I already had this paint the color I wanted and didn't want to have to mix it from scratch. I'm planning on testing acrylic for the gun carriages.... After 5 coats, the last 2 at full strength. I think I may add one more before the poly. As soon as I get the bullwark finish where I want I will will resume deck planking...

-
Very nice Augie... Moving along in record time!
-
Rich, some folks use a heat gun or hair dryer to force drying and add extra heat to the wet plank to increase it's flexibility. I've never done it and can't remember the names of folks that have. You might want to experiment to see if this could speed up the drying time.
-
Nice work Bob, planking looks really good! Good luck on the other side....
-
Augie said... "Of course I already hold the patent rights on the 86 degree right angle. Old habits die hard" Well Augie, if you cut the matching angle to 94 degrees, your go to go!! I trued up most of my hull planking ends by hand with a sanding block. I tried to keep the joints in line with the bulkheads so that meant in a lot of cases the angle wasn't 90 degrees, so some trial and error was involved. Maybe I should invest in your of your 86 degree angle guess-ti-mators? The neat thing about the true sander is the way the aluminum sanding block is made. The surface the sandpaper sticks to is milled down slightly from the rubbing rail that rides against the fence. That way you always have firm contact against the rubbing rail but the sandpaper never touches it. And, there's 4 sides to the block so you can have 4 different grits on the block at once if you want! It's an ingenious little design... I love this simple little tool.
-
Darn, I gave away one of my secrets.... I use this for ANYTHING that needs a true edge. On this build that's pretty much everything!! Cut it close, then sand true. Look at my coamings for example, I ran the edges long on purpose - then trued them up with the true sander. NWSL (Northwest Shortline) makes some great modeling tools. I've probably had this 10 years, if not more http://www.nwsl.com/ A JimDiskSander would be the powertool version of this but I'll keep using this for a now. The JimSaw comes first! I googled it and several places sell it - http://www.modelexpo-online.com/product.asp?ITEMNO=NW57-4 Also look for the Chopper (or Chopper II) http://www.amazon.com/Northwest-Short-Line-The-Chopper/dp/B000YDIMZS Patrick, thanks!! I haven't seen any other MSW Connys kitbashed to include the steps, but the Revell Conny Model has them, the Hull model has them, so I'm taking a leap of faith that they are appropriate to 1812. At least they are on my version...
-
Thanks for the info Danny! I will try some Liver of Sulfer...
-
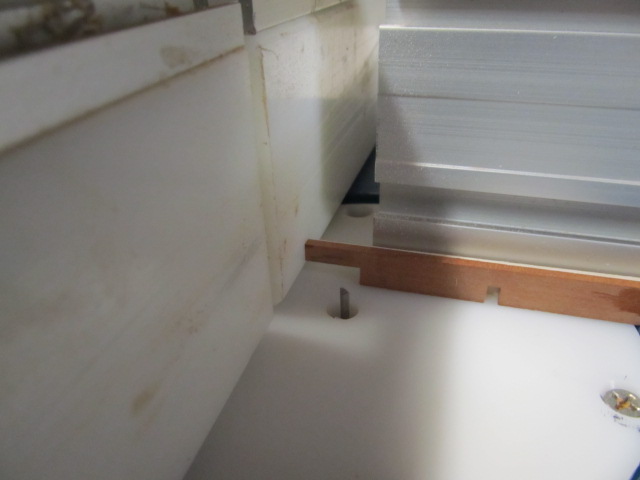
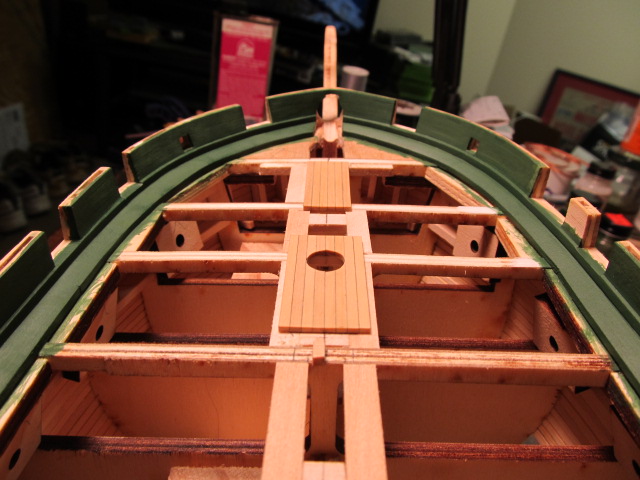
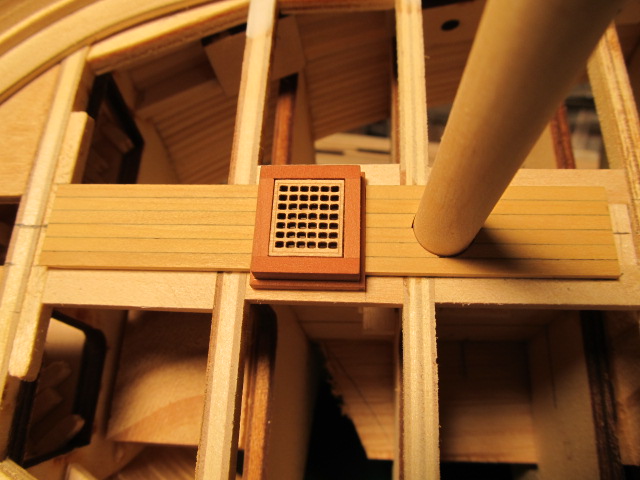
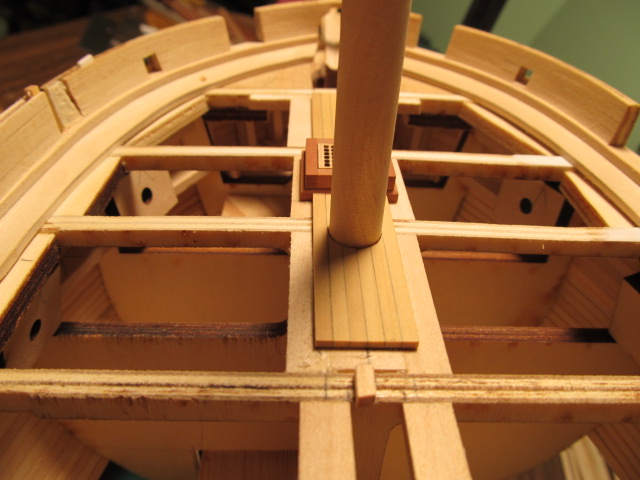
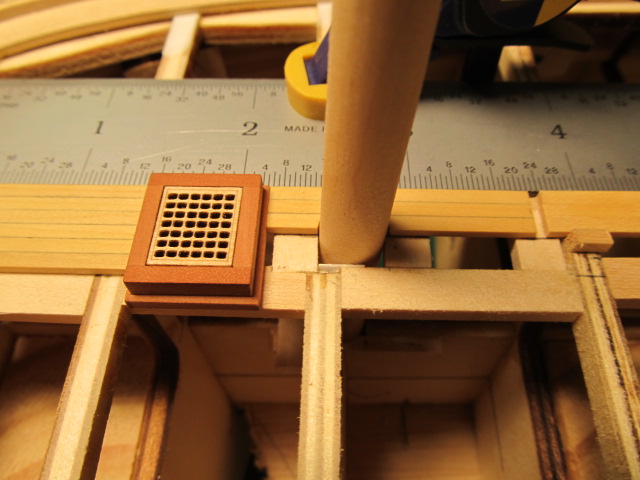
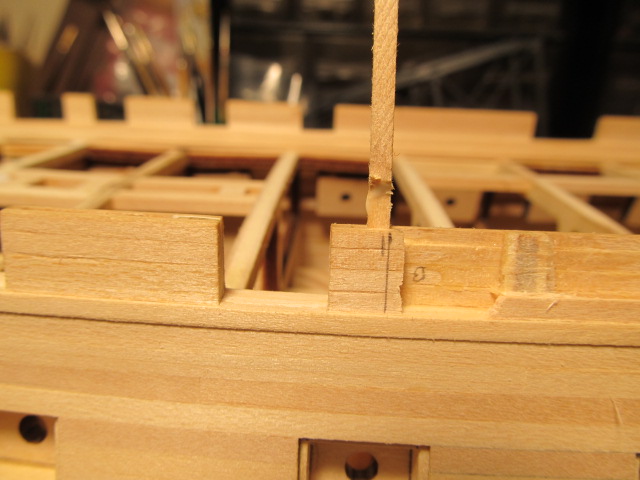
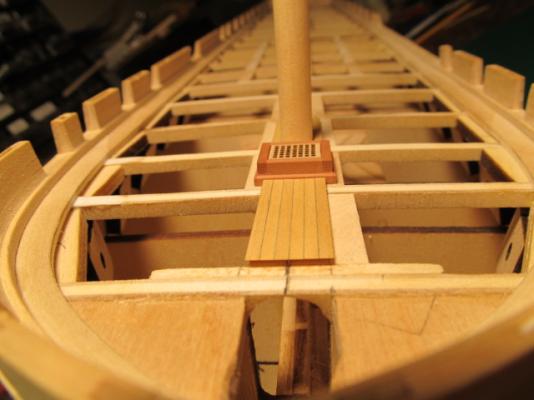
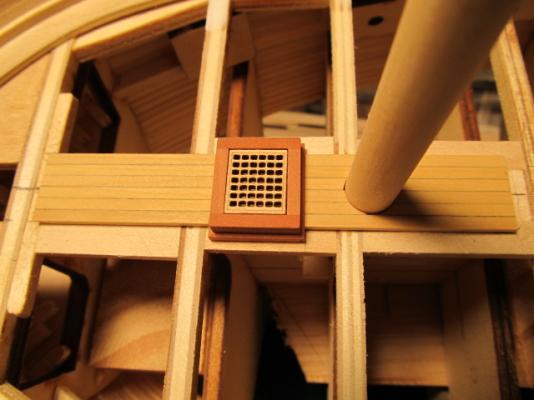
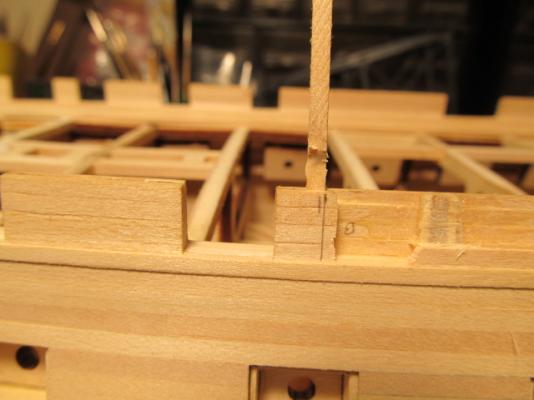
Glued in place (but not the caoming!) The slight gap around the mast will be covered up with the mast boot.
-
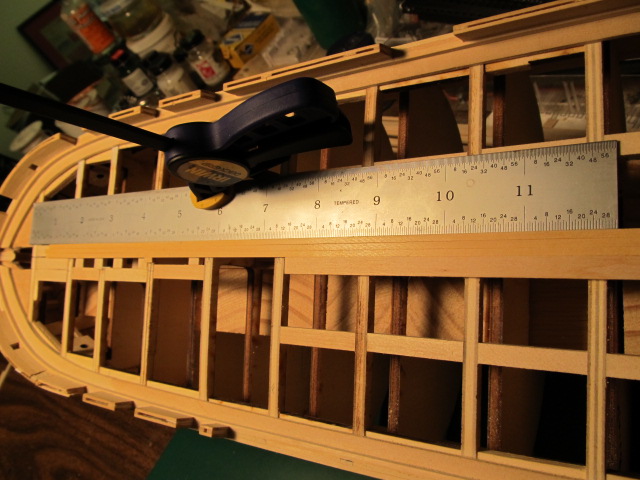
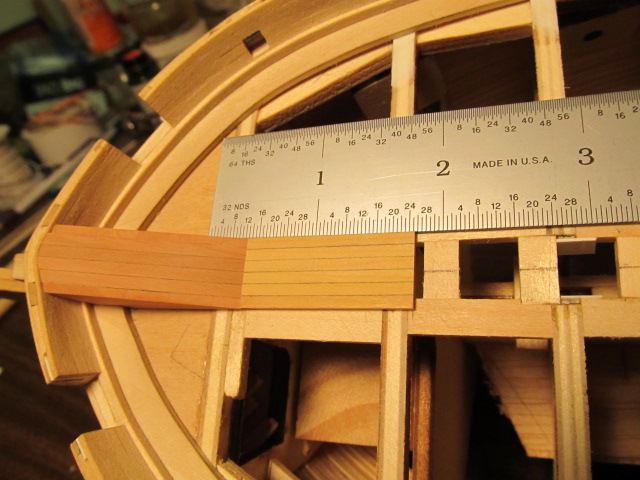
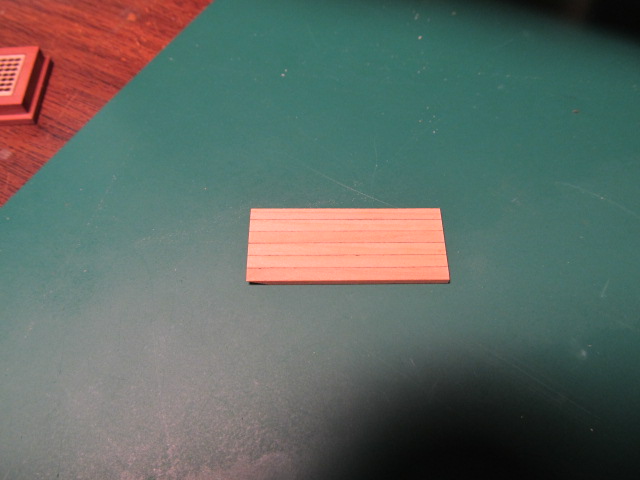
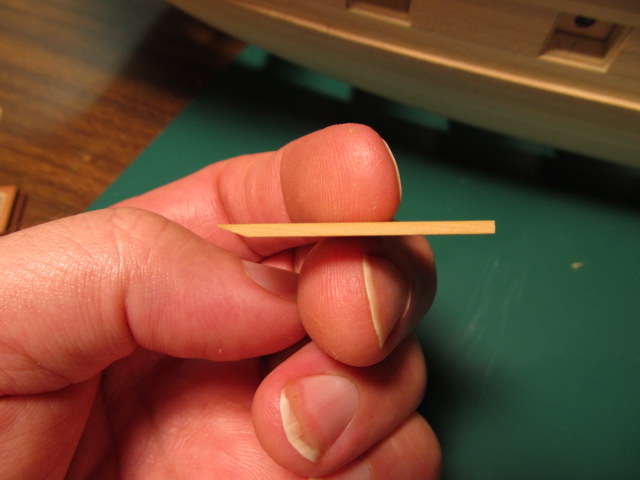
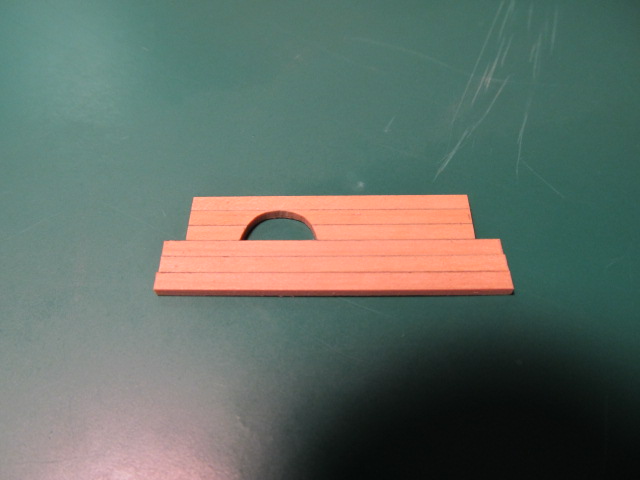
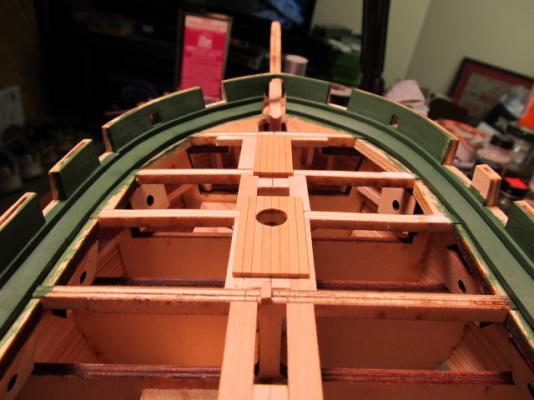
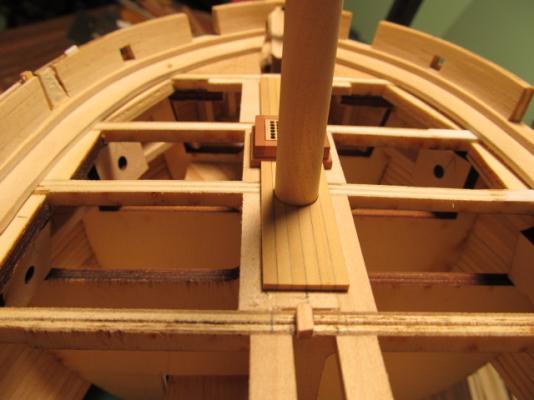
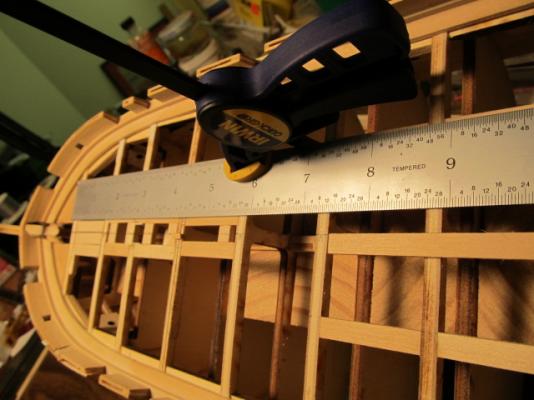
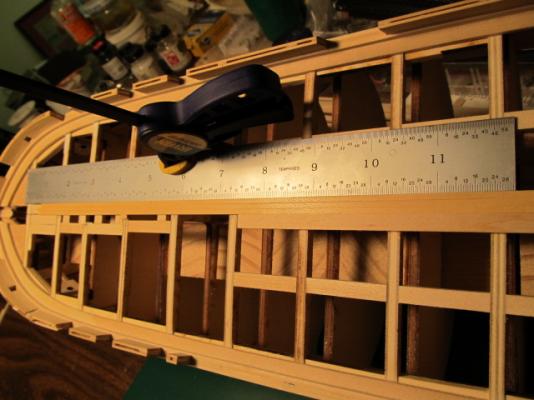
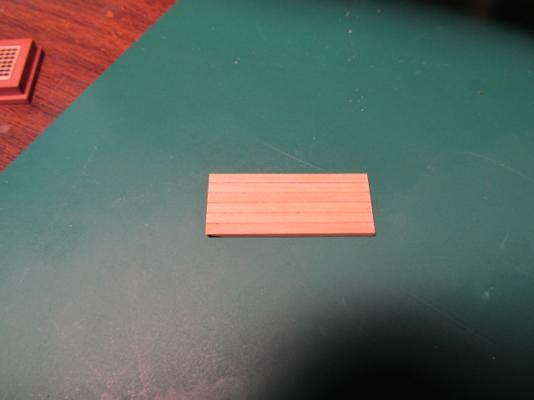
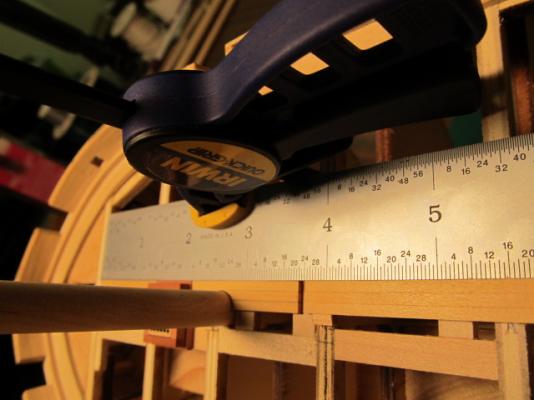
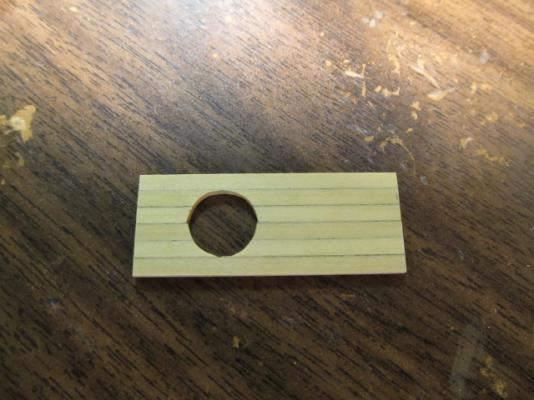
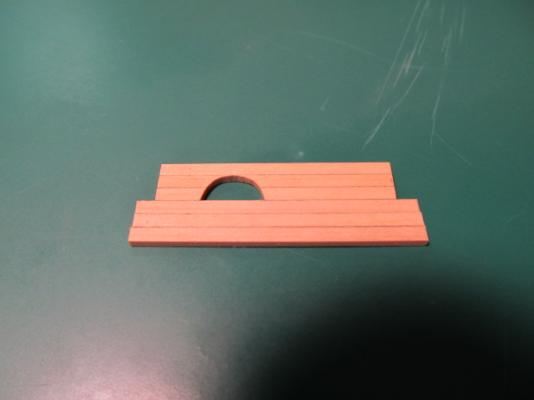
Started on the deck planking using boxwood from HobbyMill. I used a #2 pencil to shade the plank edges to simulate caulking. I'm using Bob Hunt's practicum method of planking around the coamings. I think this is a good method, but since I'm cutting the planks around the coamings I have to be absolutely sure the planks are aligned. To do this I found and marked the centerline with 1/4" tape (thanks Chuck P.!!) and glued temporary guides on the bulkheads on the centerline, and used a steel rule as a guide for the planks. I offset 3 planks to get the edge of the steps over the bowsprit. These first planks set the baseline for all the planking so they must me accurate! I glued this section of planking off the model so I could straighten the edges with my true sander and bevel the edge that fits over the steps. Fitted in place. The next section around the mast was first glued as three planks, trued up, and then cut the opening for the mast Glued on the other three planks then finished the mast opening. BTW, I realized the green cutting mat is messing up the color in my pics so I need to avoid that!


-
Danny, I have been silently watching you build for awhile now. Awesome work!! A quick question if you don't mind... When you blacken your brass parts such as nails or bolts, do you blacken before you insert in the wood or after? I'm wondering if I can insert the brass pin, file/sand it down flush, then blacken it without affecting the color of the surrounding wood? Thanks for your help and again, you have a wonderful build going!!
-
There you go Augie, mini-shipwrights strike again!
- 2,191 replies
-
- 1
-
-
- confederacy
- Model Shipways
- (and 1 more)
-
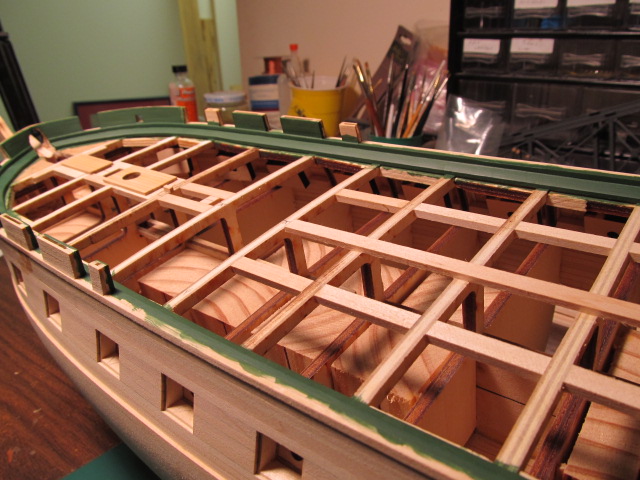
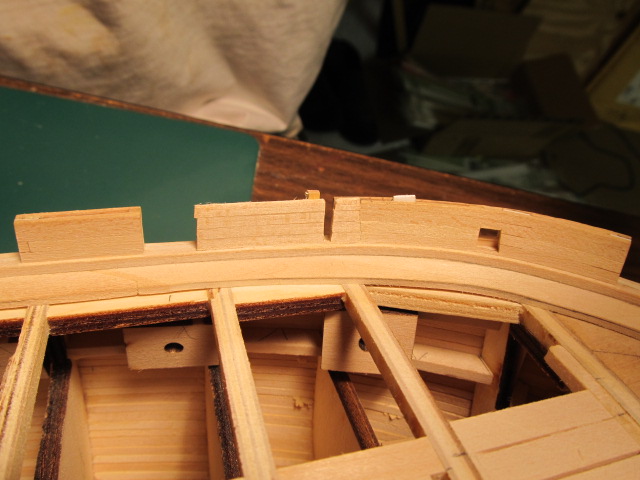
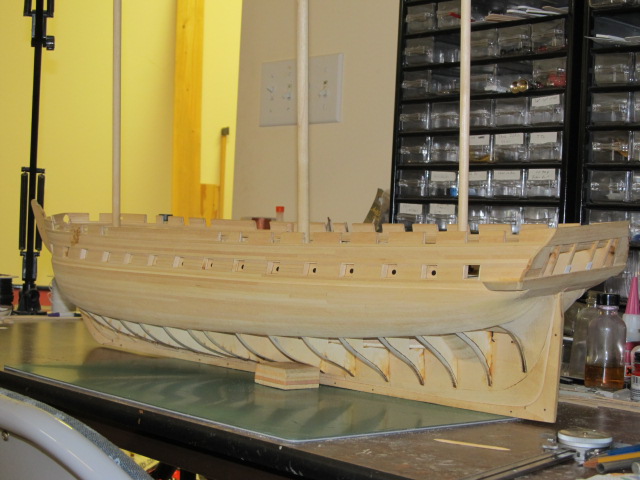
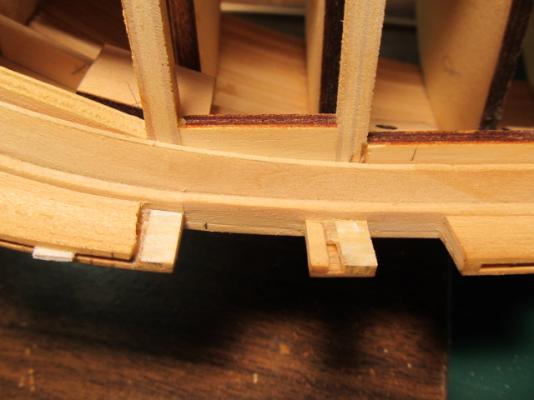
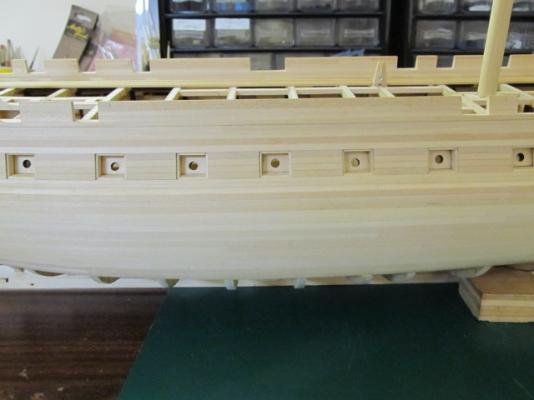
Removal of the waist bullwark. Cut out the old planking and installed a new frame on the front opening. The rear opening has a bulkhead in the correct place so will use that as the frame, Finished it up. Looks much better like this I think... Now just have to repeat on the starboard side...

-
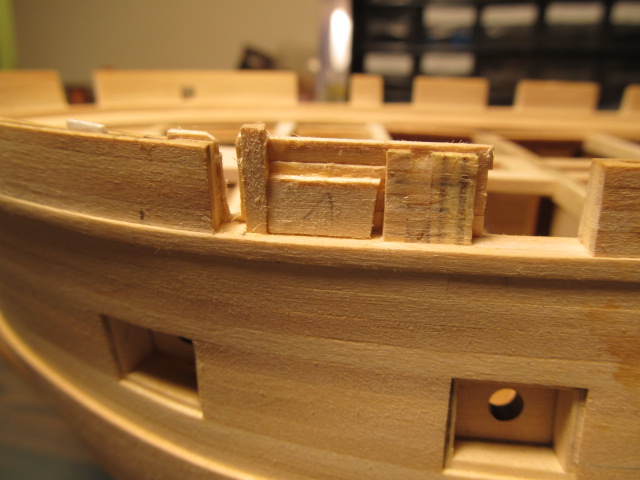
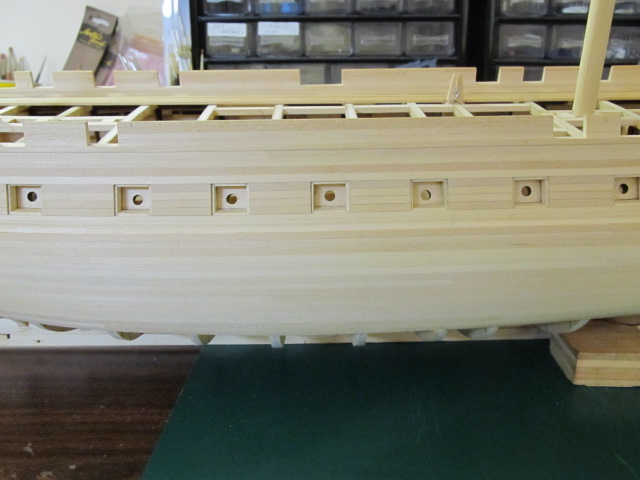
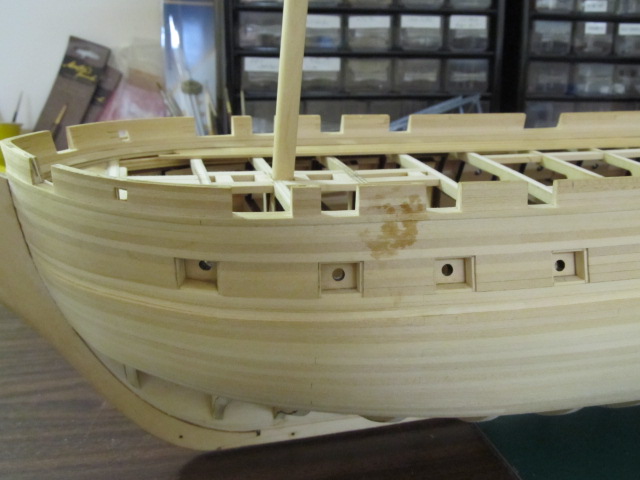
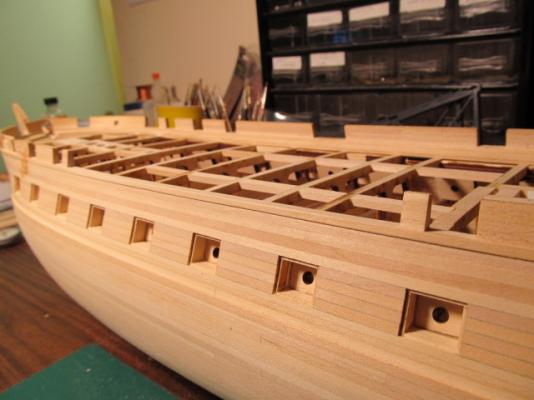
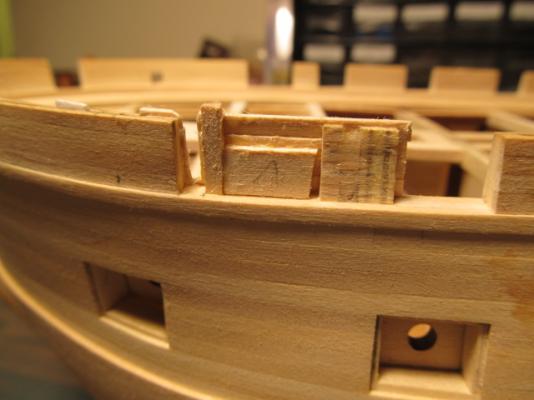
Working on the former anchor port. Cut out the inner planking. Installed new planking ran long to give me something to attach to. Cut out the outer planking and Installed a new gunport frame and braced it Now working on the outer planking

-
Thanks Augie! As far as the planking, I've been working with wood my entire life in some form or another, just never a wooden ship model until this. So working with wood is natural to me. It never entered my mind to not try and make sure there were no gaps between any planks,or not to sand it good and smooth. I shaped every plank in some way, whether back beveling, thinning, tapering - whatever it took. Was it tedious? You bet, but I enjoy the satisfaction I got from it. And to my benefit (or detriment) I have those images of Chuck's Syren and Winchelsea perfect planking burned in my mind... So maybe I took planking a little too seriously, but hey, I'm happy with it! And I really do appreciate everyone's compliments on my planking, I hope the rest of my build continues that trend!
-
Robbyn, I've spent several days reading your entire build log. I must say all the things you've been through during this build have been quite the experience. From knife injuries, CA allergies, teaching and of course getting married you've been through a lot. I'm looking forward to seeing you finish the SFII, will check in on your long boat build, and be waiting until you start the Syren. I think you're gonna love that one! Best wishes!!
- 773 replies
-
- 1
-
-
- san francisco ii
- artesania latina
- (and 1 more)
-
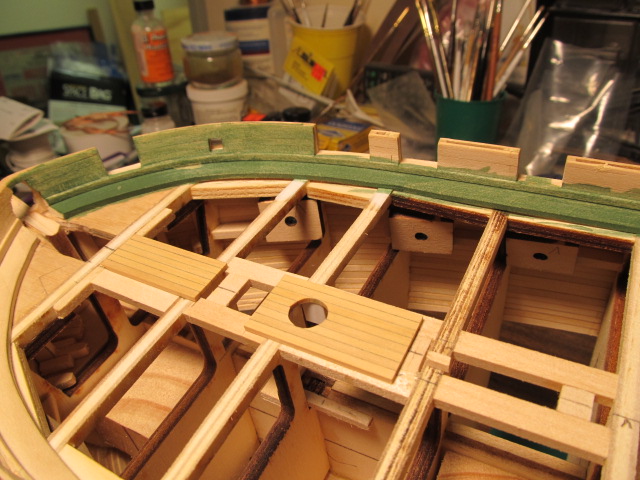
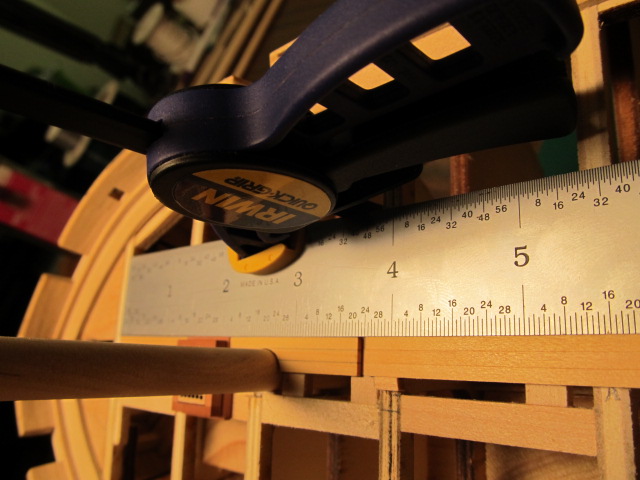
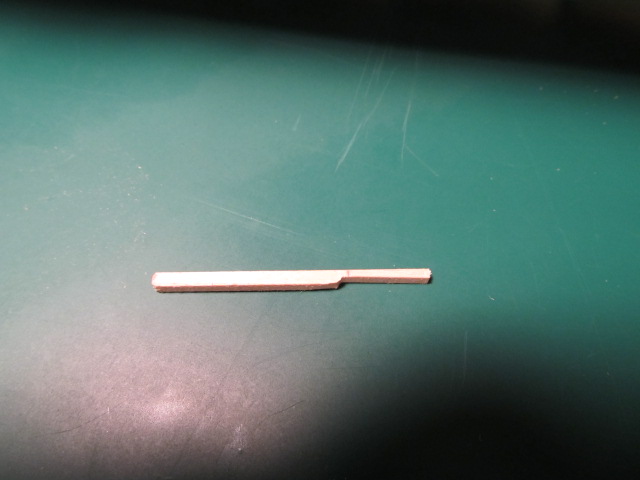
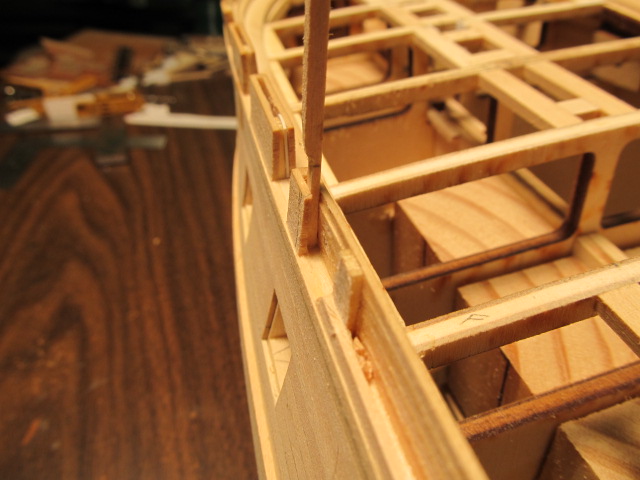
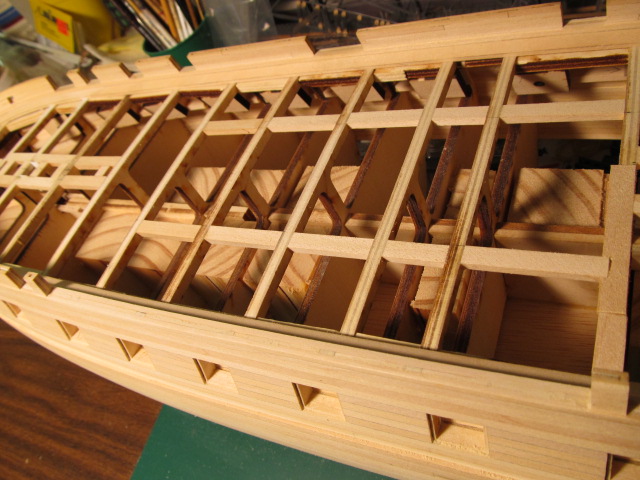
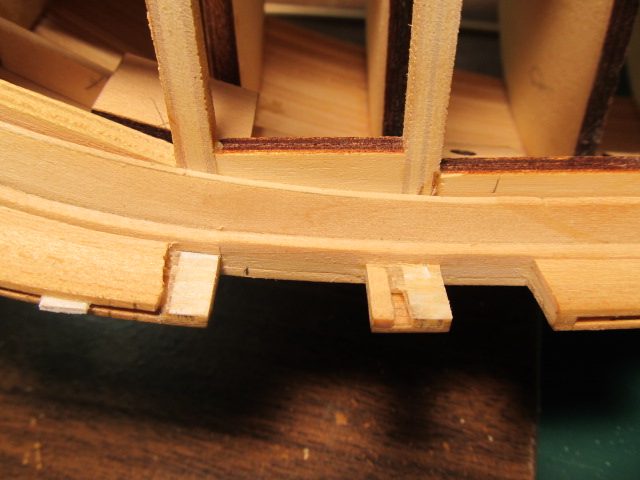
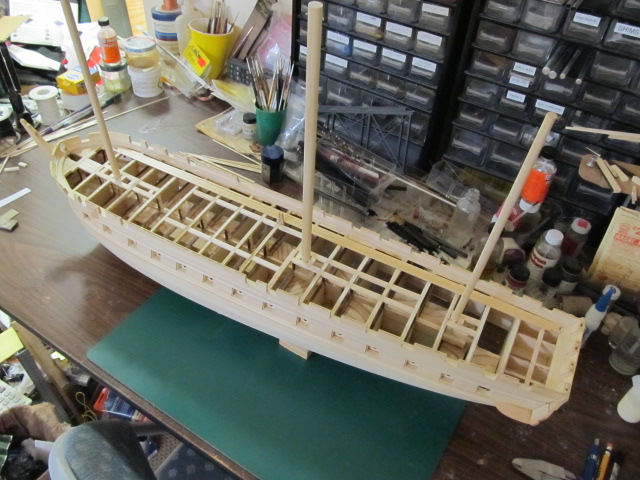
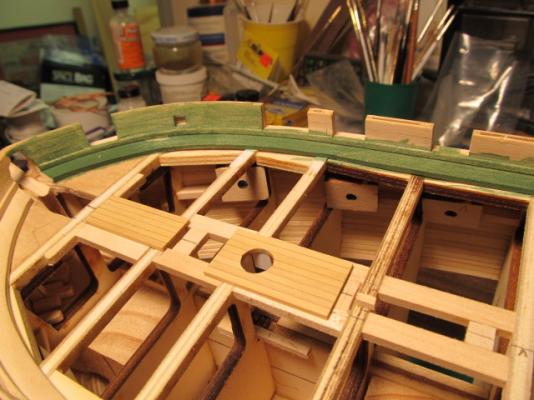
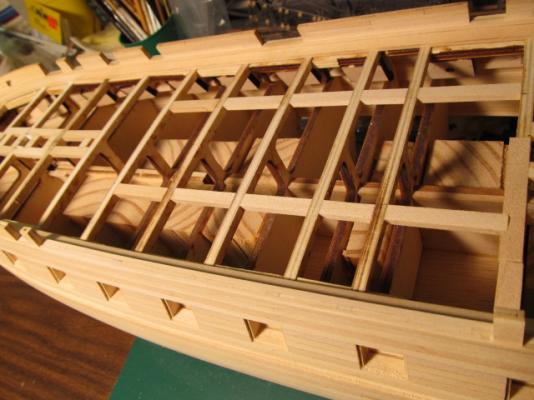
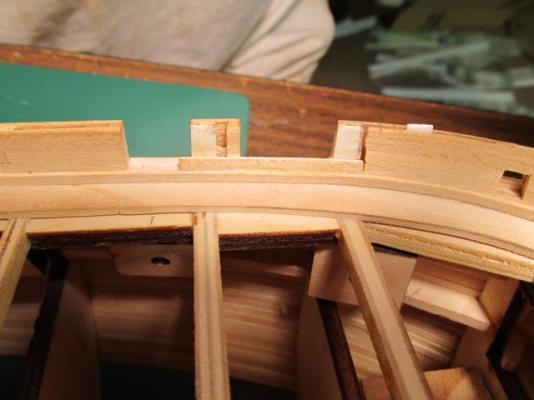
Quick update as the weekend starts.... Got the mast and deck coming supports in place to prepare for deck planking. This weekend I plan to correct a couple more things that will get her back to her 1812 configuration... The the front gunport which on this version is called an anchor port, but should be a gunport. It's the wrong size and in the wrong location. Also cut out the bullwarks amidships, there should be an open waist here... I've been looking ahead to the carronades, and once again there's a lot of info to digest. The version of carronade on the MS model with the 4 carriage wheels is apparently wrong. The carriage should as be the version on the Revell model with the front center pivot on the gunport. If any of you have info on this I'd love to see it... Thanks again for looking in and following along!!


-
Dang Augie, you got little mini shipwrights working with you there? You're "sailing" right along... Sorry, I had to make at least one ship pun somewhere!
- 2,191 replies
-
- 2
-
-
- confederacy
- Model Shipways
- (and 1 more)
-
Geoff, makes perfect sense.... Can't wait to follow your results with the ropewalk! You may just've talked me into it (not to hard to do though when it comes to tools)
-
No problem Geoff. You're process of making your own rope is very interesting, but I must admit I'm considering just buying rope from Chuck... Do you think there's cost savings when you consider purchasing the rope walk vs just buying quality rope? I do have to rig 3 ships (at least) so I assume at some point I would save a few bucks... (Im)patiently waiting for you rigging to start...
-
Hi Geoff, you might want to check out Andy's (realworkingsailor) log, he use's matte medium from scenic express. I have some Woodland Scenic's scenic cement, which I think is the same thing. I've used this on model railroads (I still have some) but never on ship rigging, but I plan to. Andy swears by it! And of course his serving machine... And GS Hypo cement... http://modelshipworld.com/index.php?/topic/24-hms-pegasus-by-realworkingsailor-victory-models/page-39#entry59245